Blog

  • Cheesy Meatball Subs That’ll Melt Your Heart & Crave More!

    Cheesy Meatball Subs That’ll Melt Your Heart & Crave More!

    Cheesy Meatball Subs That'll Melt Your Heart & Crave More!

    Cheesy Meatball Subs have become my ultimate comfort food obsession this winter. There’s something magical about biting into a warm, toasted roll filled with tender, juicy meatballs smothered in marinara and blanketed with melty cheese. I discovered this recipe during a snowstorm last year when I was craving something hearty that would fill our home with delicious aromas. The way the cheese bubbles and browns under the broiler creates the most satisfying stretch when you take that first bite. If you love Italian-inspired comfort food like my Buffalo Chicken Mozzarella Sticks, these subs will absolutely steal your heart.

    Recipe

    Why You’ll Love These Cheesy Meatball Subs

    Perfect Comfort Food Balance

    These cheesy meatball subs strike that perfect balance between indulgent and satisfying without being overly complicated. The combination of savory meatballs, tangy marinara, and gooey cheese creates layers of flavor that make your taste buds dance. I love how the edges of the bread get slightly crispy while the inside stays soft and absorbs just enough sauce. There’s something deeply nostalgic about this meal – it reminds me of Sunday family dinners at my grandmother’s house, where the aroma of simmering sauce would greet us at the door.

    Versatile for Any Occasion

    What makes these meatball subs truly special is how adaptable they are for different scenarios. They’re perfect for casual weeknight dinners when you need something hearty but don’t want to spend hours in the kitchen. But they also shine as crowd-pleasers for game day gatherings or casual entertaining. I’ve served these at my son’s birthday party, cutting them into smaller portions, and they disappeared within minutes! The combination of familiar flavors with that impressive cheese pull makes them irresistible to both kids and adults alike.

    Essential Tips & Tricks

    Mastering the Perfect Meatball

    The heart of any great meatball sub is, of course, the meatballs themselves. For the juiciest results, use a mixture of ground beef and Italian sausage (about 70/30 ratio). Don’t overwork the meat mixture – gentle mixing preserves tenderness. My secret ingredient? A tablespoon of ricotta cheese mixed into the meat adds incredible moisture. Bake the meatballs instead of pan-frying to maintain their round shape and allow excess fat to drain away. This method gives you perfectly cooked meatballs that won’t fall apart in your Creamy Parmesan Baked Caesar Chicken or these delicious subs.

    The Cheese Strategy

    When it comes to creating that perfect cheese pull, strategy matters! I recommend using a combination of mozzarella for stretch and provolone for flavor. Shred the mozzarella yourself rather than using pre-shredded – it melts much more smoothly without those anti-caking agents. Layer some cheese on the bottom of your split roll before adding meatballs, then top with more cheese. This sandwich architecture ensures cheese in every bite. For the ultimate golden brown finish, broil for just 1-2 minutes at the end, watching carefully to prevent burning.

    Serving Ideas & Creative Variations

    Perfect Pairings

    These cheesy meatball subs shine brightest with thoughtfully chosen sides. A simple arugula salad with lemon vinaigrette provides a perfect peppery contrast to cut through the richness. Crispy baked zucchini fries offer a lighter alternative to traditional potato sides while still providing that satisfying crunch factor. For a complete Italian-inspired spread, serve alongside a small bowl of additional warm marinara for dipping those inevitable cheese-covered bites that fall out of your sandwich. During cooler months, I love pairing these subs with a cup of Creamy Tuscan Marry Me Butter Beans for a truly cozy meal.

    Exciting Flavor Twists

    While the classic version is undeniably delicious, these meatball subs welcome creative variations. Try a Mexican-inspired version with chipotle-spiced meatballs, pepper jack cheese, and avocado slices. For a Greek twist, use lamb meatballs seasoned with oregano and mint, topped with feta cheese and tzatziki sauce. My family’s current favorite is a buffalo-style sub with chicken meatballs tossed in buffalo sauce, blue cheese crumbles, and a drizzle of ranch. Don’t be afraid to experiment with different breads too – ciabatta rolls offer a rustic texture while pretzel rolls add a delightful chewiness.

    Storage & Troubleshooting Guide

    Make-Ahead and Storage Solutions

    These cheesy meatball subs can be partially prepped ahead to make weeknight meals a breeze. The meatballs freeze beautifully – I often make a double batch and freeze half for future meals. Cool completely before storing in airtight containers or freezer bags for up to 3 months. For leftover assembled subs (though we rarely have any!), wrap tightly in foil and refrigerate for up to 2 days. To reheat, remove the foil and warm in a 350°F oven until the cheese melts again. The microwave works in a pinch but will make the bread softer rather than maintaining that desirable crisp exterior.

    Solving Common Challenges

    The most frequent issue with meatball subs is the dreaded “soggy bread syndrome.” Combat this by lightly toasting your sub rolls before adding any ingredients. Another trick is creating a cheese barrier – lay provolone slices on the bottom half of your roll to create a protective layer between the bread and sauce. If your meatballs are crumbling, they might be too lean or overworked. Adding an extra egg or breadcrumbs can help bind them together. For sauce that’s too watery, simmer it uncovered for 10-15 minutes to reduce and thicken before assembling your subs.

    Frequently Asked Questions

    Can I make these Cheesy Meatball Subs ahead of time?

    Yes! Prepare the meatballs and sauce up to 3 days ahead. Store separately in the refrigerator. Assemble and broil just before serving for the freshest results.

    What’s the best bread for meatball subs?

    Hoagie or sub rolls with a slightly crusty exterior and soft interior work best. They should be sturdy enough to hold the meatballs without falling apart when sauce is added.

    Can I use frozen meatballs instead of homemade?

    Absolutely! Quality frozen meatballs can be a great time-saver. Thaw completely and warm in the marinara sauce before assembling your subs.

    How do I prevent my subs from getting soggy?

    Toast the bread lightly before assembly and create a cheese barrier on the bottom half. Serve immediately after preparing for best results.

    What cheese alternatives work well for dairy-sensitive guests?

    Plant-based mozzarella alternatives melt reasonably well. Nutritional yeast mixed into the sauce can add a cheesy flavor without actual cheese.

    Final Thoughts

    These Cheesy Meatball Subs have become a staple in my recipe rotation because they deliver maximum comfort with minimal fuss. There’s something almost magical about the way the melty cheese pulls, the meatballs remain tender, and the sauce brings everything together in perfect harmony. I love watching faces light up when I set these on the table – food that creates joy is always worth making. For more delicious comfort food inspiration, check out my other recipes on Pinterest where I’m constantly sharing new favorites!

  • Cajun Meatball Stew Recipe: Irresistibly Spicy Comfort in a Bowl

    Cajun Meatball Stew Recipe: Irresistibly Spicy Comfort in a Bowl

    Cajun Meatball Stew Recipe: Irresistibly Spicy Comfort in a Bowl

    Cajun Meatball Stew brings the heart and soul of Louisiana straight to your dinner table. There’s something magical about the way those tender, spiced meatballs swim in a rich, roux-darkened broth alongside bell peppers, celery, and onions. I first fell in love with this hearty one-pot wonder during a rainy weekend when comfort food was calling my name. The kitchen filled with aromas of paprika, thyme, and that distinctive Cajun seasoning that makes your nose tingle with anticipation. If you’re craving something that warms you from the inside out, this stew delivers that perfect balance of spice, substance, and Southern charm.

    Recipe

    Why You’ll Love This Cajun Meatball Stew

    A Perfect Balance of Flavors and Textures

    The beauty of Cajun Meatball Stew lies in its remarkable depth of flavor. Each spoonful delivers the perfect harmony between savory meatballs and the slightly spicy, robust broth. The meatballs themselves stay incredibly tender while soaking up all those amazing Cajun spices. Meanwhile, the stew base transforms into this velvety, rich sauce that clings to every bite. I love how the vegetables maintain just enough bite to provide textural contrast against the softness of the meatballs. It’s that magical combination that makes you close your eyes with each spoonful, letting the warmth spread through your entire body.

    A One-Pot Wonder for Busy Weeknights

    There’s something deeply satisfying about a meal that dirties just one pot but delivers restaurant-quality flavor. This Cajun Meatball Stew is exactly that kind of kitchen miracle. I’ve made this on hectic Wednesdays when the last thing I wanted was a sink full of dishes, and it never disappoints. The beauty is in the layering of flavors – starting with browning those meatballs to create a foundation of flavor, then building the stew around them. Everything melds together in a single Dutch oven or heavy pot, meaning less cleanup and more time to actually enjoy your meal. Plus, it reheats beautifully, making tomorrow’s lunch something to look forward to.

    Essential Tips & Tricks

    Perfecting Your Meatball Technique

    The secret to stellar meatballs in this stew is all about gentle handling and proper seasoning. I learned the hard way that overworking the meat mixture leads to tough, dense results. Instead, combine your ingredients with a light touch, almost folding rather than kneading. For the juiciest meatballs, use a mixture of ground meats – I find beef and pork create the perfect balance. And here’s my non-negotiable tip: chill your formed meatballs for 15 minutes before browning them. This helps them hold their shape and creates that beautiful caramelized exterior that adds so much flavor to the Cajun Chicken Alfredo or any stew.

    Mastering the Roux for Authentic Flavor

    A proper Cajun stew begins with a good roux, which is the foundation of authentic flavor. The key is patience – don’t rush this step! I start with equal parts oil and flour in the same pot where I’ve browned the meatballs, stirring constantly until it reaches that beautiful amber color (about 5-7 minutes). This develops the nutty, complex flavor that defines Cajun cooking. Watch carefully, as it can go from perfect to burnt in seconds. Once you’ve achieved that ideal color, immediately add your trinity (onions, celery, bell peppers) to stop the cooking process. This technique creates that distinctive silky texture and depth that makes people ask for your recipe.

    Serving Ideas & Creative Variations

    Perfect Pairings for a Complete Meal

    Cajun Meatball Stew shines brightest when served with the right accompaniments. My absolute favorite pairing is a scoop of fluffy white rice that soaks up all that incredible sauce – there’s something magical about how the grains capture those flavors. For a true Louisiana experience, serve with warm, crusty French bread for dipping into that rich broth. When I’m feeling extra, I’ll whip up a simple side salad with a vinaigrette dressing to cut through the richness. For special occasions, consider starting with Blueberry Brie Jalapeno Poppers for an unexpected but delightful appetizer that complements the Cajun flavors beautifully.

    Regional Twists to Make It Your Own

    The beauty of Cajun cuisine is how adaptable it can be while still honoring its roots. For a coastal twist, add peeled shrimp during the last 5 minutes of cooking – they’ll absorb the flavors while remaining tender. If you’re feeding spice-lovers, increase the cayenne and add sliced andouille sausage alongside the meatballs for an extra kick and smoky depth. For a more Creole interpretation, stir in a can of diced tomatoes and a splash of Worcestershire sauce. My family’s favorite variation includes okra added about 20 minutes before serving – it thickens the stew naturally and adds that distinctive Southern touch.

    Storage & Troubleshooting Guide

    Keeping Your Stew Fresh and Delicious

    Like many stews, Cajun Meatball Stew actually improves with time as the flavors meld together. Store leftovers in an airtight container in the refrigerator for up to 4 days. When reheating, add a splash of chicken broth if it’s thickened too much. For longer storage, this stew freezes beautifully – portion it into freezer-safe containers and freeze for up to 3 months. I often make a double batch specifically to freeze half for busy weeknights. Just thaw overnight in the refrigerator and gently reheat on the stovetop. The meatballs maintain their texture surprisingly well, though the vegetables might soften a bit more upon reheating.

    Fixing Common Stew Problems

    Even experienced cooks encounter issues with stews, but most are easily fixable. If your stew is too thin, create a slurry by mixing 1 tablespoon cornstarch with 2 tablespoons cold water and stir it into the simmering stew. For a stew that’s too thick, simply add more broth until you reach your desired consistency. If you find your meatballs falling apart, they likely needed more binding – next time, add an extra egg or breadcrumbs to hold them together. And if you accidentally over-spiced your stew, don’t panic! Add a tablespoon of brown sugar or a splash of cream to balance the heat without compromising those beautiful Cajun flavors.

    Frequently Asked Questions

    Can I make Cajun Meatball Stew in a slow cooker?

    Absolutely! Brown the meatballs and make the roux on the stovetop first, then transfer everything to your slow cooker. Cook on low for 6-7 hours or high for 3-4 hours until meatballs are tender and flavors have melded.

    What’s the best meat to use for Cajun meatballs?

    A mixture of 70% ground beef and 30% ground pork creates the perfect balance of flavor and juiciness. For leaner options, turkey works well too, but add a tablespoon of olive oil to prevent dryness.

    How spicy is Cajun Meatball Stew typically?

    Traditional Cajun Meatball Stew has a moderate heat that builds pleasantly. Adjust the cayenne pepper to your preference – start with 1/4 teaspoon for mild, or go up to 1 teaspoon for a significant kick.

    Can this stew be made ahead for parties?

    Yes! Cajun Meatball Stew actually improves after a day in the refrigerator as flavors develop. Make it up to 2 days ahead, refrigerate, then gently reheat before serving, adding fresh herbs as garnish.

    What vegetables can I add to my stew?

    Beyond the traditional trinity (onions, celery, bell peppers), okra, corn, diced tomatoes, and even sweet potatoes work beautifully. Add hearty vegetables earlier in cooking and delicate ones in the final 30 minutes.

    Final Thoughts

    This Cajun Meatball Stew has become my go-to recipe when I want to impress without stressing in the kitchen. There’s something deeply satisfying about watching family and friends savor each spoonful, their expressions softening as that first bite of tender meatball and rich sauce hits their palate. The beauty of Cajun cooking lies in its soulful simplicity – humble ingredients transformed through technique and time into something truly extraordinary. I hope this stew brings as much warmth and comfort to your table as it has to mine. For more cozy recipes, visit our Pinterest board where comfort food reigns supreme.

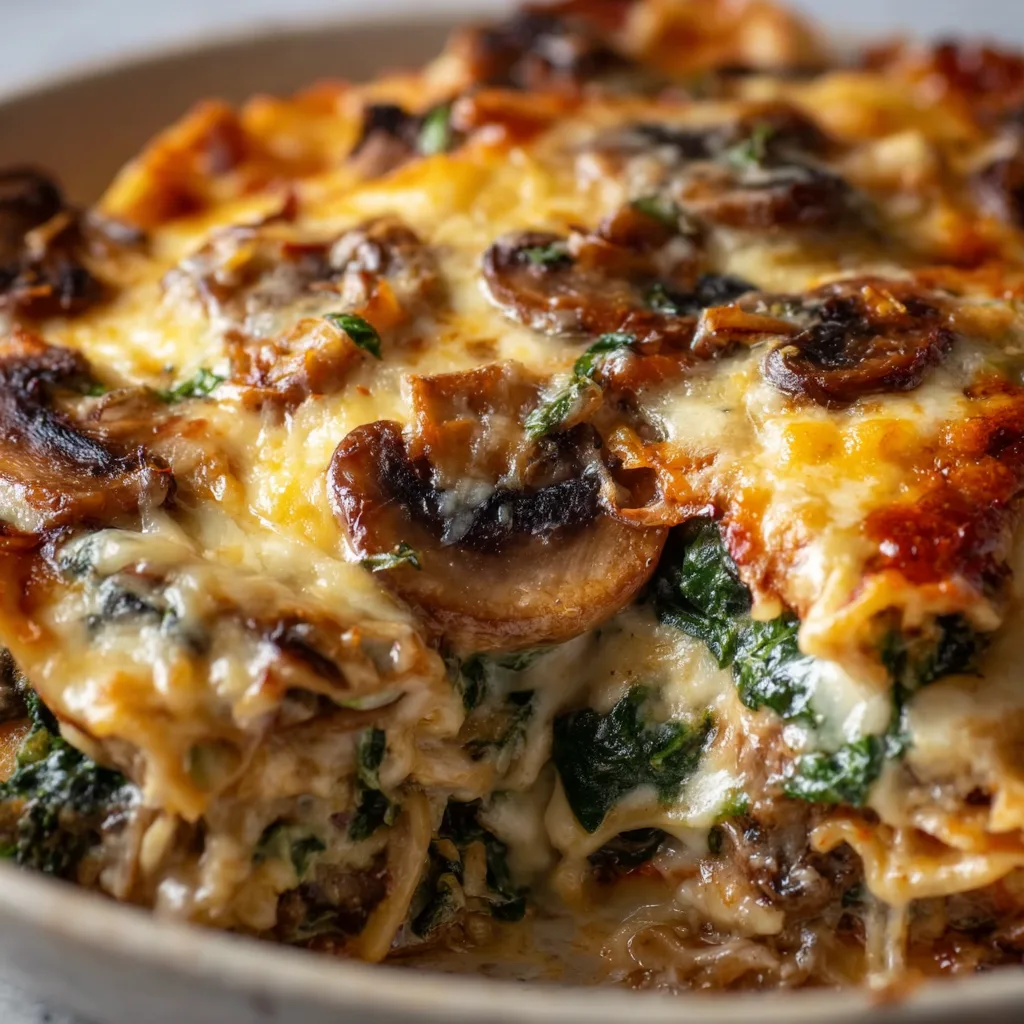
  • Mushroom and Spinach Lasagna That Will Melt Your Heart Instantly

    Mushroom and Spinach Lasagna That Will Melt Your Heart Instantly

    Mushroom and Spinach Lasagna That Will Melt Your Heart Instantly

    Mushroom and Spinach Lasagna is the ultimate comfort food that transforms ordinary ingredients into something extraordinary. The magical combination of earthy mushrooms, vibrant spinach, and creamy cheese creates layers of flavor that will make your taste buds dance. I discovered this recipe during a rainy weekend when I was craving something both nourishing and indulgent. The rich aroma that filled my kitchen as it baked instantly transported me to my grandmother’s Italian kitchen. This vegetarian wonder is perfect for family dinners, special occasions, or when you simply need a hug in food form. Trust me, this lasagna recipe will become your new go-to comfort meal.

    Recipe

    Why You’ll Love This Mushroom and Spinach Lasagna

    A Perfect Balance of Flavors and Textures

    The beauty of this Mushroom and Spinach Lasagna lies in its perfect harmony of flavors. The earthy mushrooms provide a meaty texture and umami depth that satisfies even dedicated carnivores. When I first served this to my brother (a confirmed meat-lover), he didn’t miss the meat at all! The spinach adds a fresh, slightly sweet note while the creamy ricotta and sharp Parmesan create that irresistible cheese pull we all crave. Each bite delivers a different sensation – from the tender pasta to the silky sauce and the slight chew of the mushrooms. It’s a textural symphony that keeps you coming back for more.

    Make-Ahead Friendly for Busy Weeknights

    As someone who juggles work deadlines and family commitments, I adore recipes that work with my schedule. This Mushroom and Spinach Lasagna is wonderfully make-ahead friendly. You can assemble it the night before, refrigerate, and simply pop it in the oven when you’re ready to eat. The flavors actually develop beautifully as it rests overnight! I often make a double batch on Sunday and freeze one for those inevitable crazy weeks. The components can also be prepped separately – sauté the mushrooms and spinach during weekend meal prep, and assembly becomes a breeze on busy weeknights. It’s versatile cooking at its finest.

    Essential Tips & Tricks

    Mastering the Mushroom Mixture

    The secret to exceptional Mushroom and Spinach Lasagna is getting the mushroom mixture just right. Start by thoroughly drying your mushrooms after washing – excess moisture is the enemy of rich flavor and proper texture. I learned this the hard way after one soggy batch! Sauté them in batches rather than crowding the pan, which allows them to brown properly instead of steaming. Add a splash of white wine or sherry to deglaze the pan, scraping up those flavorful brown bits. For depth, I mix varieties – cremini for earthiness, shiitake for meatiness, and a few dried porcini (rehydrated) for intense umami. This multi-layered approach creates a complex flavor profile.

    Perfecting Your Pasta Layers

    The foundation of great lasagna lies in properly prepared pasta sheets. Whether using dried or fresh, the pasta texture makes all the difference. For dried lasagna noodles, cook them about 2 minutes less than the package instructions – they’ll continue cooking in the oven. If using no-boil noodles, I recommend soaking them in hot water for just 3-4 minutes to start the softening process. This prevents them from absorbing too much sauce during baking. When layering, slightly overlap the noodles and ensure each sheet is completely covered with sauce to prevent dry edges. Always finish with a generous layer of sauce and cheese on top to create that irresistible golden, bubbly crust that makes everyone fight for the corner piece.

    Serving Ideas & Creative Variations

    Perfect Pairings for a Complete Meal

    Serve this Mushroom and Spinach Lasagna with thoughtfully chosen sides to create a memorable dining experience. A crisp arugula salad with lemon vinaigrette provides the perfect acidic contrast to the rich lasagna. For bread, nothing beats garlic-rubbed ciabatta or focaccia to soak up the delicious sauce. When I’m hosting dinner parties, I often pair this lasagna with roasted asparagus or broccolini tossed with olive oil, garlic, and red pepper flakes. For wine, reach for a medium-bodied red like Chianti or Sangiovese that complements the earthiness of the mushrooms without overwhelming the delicate spinach. These pairings elevate the meal from simple comfort food to an impressive dinner worthy of special occasions.

    Exciting Twists on the Classic Recipe

    Don’t be afraid to put your personal stamp on this Mushroom and Spinach Lasagna with creative variations. For a protein boost, add crumbled tempeh or plant-based Italian sausage to the mushroom mixture. Dairy-free? Replace traditional cheeses with cashew ricotta and nutritional yeast for a surprisingly authentic flavor. I love swapping in seasonal vegetables – spring peas and asparagus in warmer months or butternut squash and kale in fall. For a Mediterranean twist, add olives, sun-dried tomatoes, and a sprinkle of za’atar between layers. Feeling indulgent? Drizzle truffle oil over the finished lasagna for an elegant touch. These variations keep this recipe exciting year-round while maintaining its comforting essence.

    Storage & Troubleshooting Guide

    Proper Storage for Maximum Freshness

    Proper storage ensures your Mushroom and Spinach Lasagna remains delicious for days. Once cooled completely, cover leftovers tightly with plastic wrap or transfer to airtight containers and refrigerate for up to 4 days. For longer storage, freeze individual portions wrapped in parchment paper, then aluminum foil – this prevents freezer burn while making it easy to grab single servings. Label with the date and use within 3 months. When reheating refrigerated portions, add a tablespoon of water before covering with foil and heating at 350°F until the center reaches 165°F. For frozen portions, thaw overnight in the refrigerator before reheating, or use the microwave’s defrost function followed by regular heating for quick meals.

    Solving Common Lasagna Problems

    Even experienced cooks occasionally encounter lasagna challenges, but these simple fixes ensure perfect results every time. If your lasagna turns out watery, the culprit is likely excess moisture in the vegetables. Next time, cook mushrooms and spinach until all liquid evaporates and drain spinach thoroughly. Too dry? Cover with foil for most of the baking time, removing only for the final 15 minutes to brown the top. If noodles are crunchy at the edges, ensure they’re completely covered with sauce and consider adding more liquid to your recipe. For uneven cooking, rotate the dish halfway through baking. And if cheese isn’t browning properly, a quick 2-minute broil (watching carefully!) creates that perfect golden finish we all crave.

    Frequently Asked Questions

    Can I make Mushroom and Spinach Lasagna ahead of time?

    Absolutely! Assemble up to 24 hours in advance, cover tightly with plastic wrap, and refrigerate. Add 10-15 minutes to the baking time when cooking from cold. The flavors actually improve with a little rest time.

    What’s the best cheese combination for this lasagna?

    I recommend a mixture of whole milk ricotta, mozzarella, and Parmesan. The ricotta provides creaminess, mozzarella delivers that essential cheese pull, and Parmesan adds sharp, salty depth to balance the earthy mushrooms.

    How can I make this lasagna vegan?

    Replace dairy cheeses with cashew ricotta (soaked cashews blended with nutritional yeast, lemon juice, and garlic) and vegan mozzarella shreds. Use plant milk in your béchamel sauce and ensure your pasta is egg-free.

    Why is my Mushroom and Spinach Lasagna soggy?

    Excess moisture is likely the culprit. Be sure to thoroughly cook mushrooms until all liquid evaporates, squeeze spinach completely dry, and don’t oversauce your layers. Let the lasagna rest 15-20 minutes before serving.

    Can I use no-boil noodles in this recipe?

    Yes! No-boil noodles work perfectly in this mushroom and spinach lasagna. Just ensure your sauce is slightly thinner, as these noodles absorb more liquid during baking. Cover tightly with foil for the first 25 minutes of baking.

    Final Thoughts

    This Mushroom and Spinach Lasagna has become my go-to recipe when I want to impress without stress. There’s something magical about pulling a bubbling, golden-topped dish from the oven that brings everyone to the table with anticipation. The layers of flavor create a memorable experience that satisfies on multiple levels – comforting yet sophisticated, hearty yet not heavy. I hope you’ll make this recipe your own, perhaps starting a new tradition in your home as it has in mine. Don’t forget to check out more vegetarian comfort food ideas on our Pinterest for endless inspiration. Happy cooking!

  • Slow Cooker Chicken Spaghetti: Comfort Food That Warms Your Soul

    Slow Cooker Chicken Spaghetti: Comfort Food That Warms Your Soul

    Slow Cooker Chicken Spaghetti: Comfort Food That Warms Your Soul

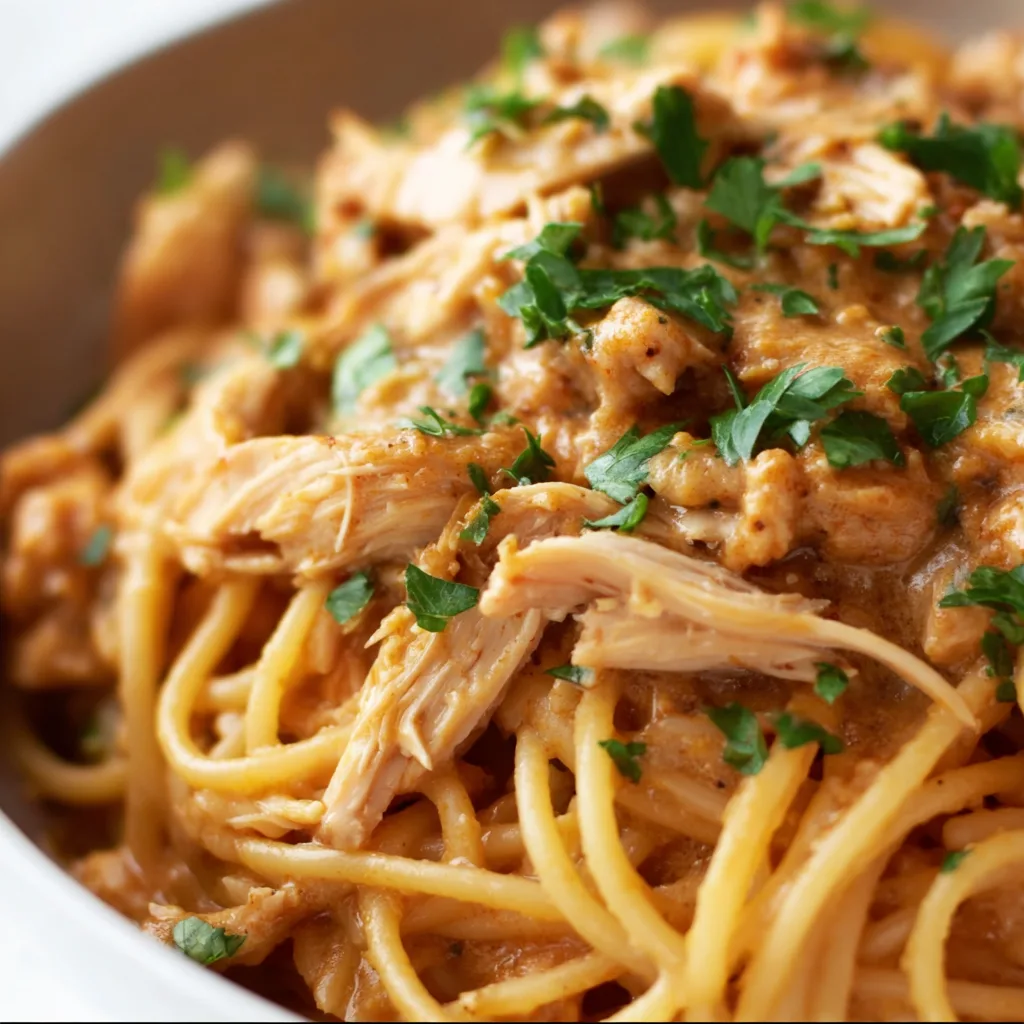
    Slow Cooker Chicken Spaghetti is the ultimate comfort food that practically makes itself! I discovered this recipe during a particularly hectic week when I needed something that would be ready when we walked through the door. The aroma that greeted us was pure magic—tender chicken, melty cheese, and pasta all mingling together in a creamy sauce. It’s become our family’s most requested meal on busy weeknights, and for good reason! This set-it-and-forget-it dish delivers restaurant-quality flavors with minimal effort. Perfect for those evenings when you want something hearty and homemade without the fuss of standing over the stove.

    Recipe

    Why You’ll Love This Slow Cooker Chicken Spaghetti

    Perfect for Busy Weeknights

    There’s something incredibly satisfying about knowing dinner is practically making itself while you’re tackling the day’s to-do list. This Slow Cooker Chicken Spaghetti recipe has saved me countless times when soccer practice runs late or work deadlines pile up. Simply toss everything in before heading out the door, and return to a kitchen filled with mouthwatering aromas. The chicken becomes fall-apart tender, soaking up all those savory flavors while you’re away. No more 5 PM panic about what to feed your hungry family—this dish delivers comfort and convenience in equal measure.

    Crowd-Pleasing Comfort Food

    Every time I serve this Slow Cooker Chicken Spaghetti, bowls are emptied in record time. The creamy sauce with its velvety texture coats each strand of pasta perfectly, while the tender chicken adds satisfying protein. My picky nephew who “doesn’t like casseroles” helped himself to seconds last time he visited! There’s something nostalgic about the combination of pasta, chicken, and cheese that speaks to everyone’s comfort food cravings. I’ve yet to meet someone who can resist the gooey, cheesy goodness—it’s like a warm hug in a bowl on even the chilliest evenings.

    Essential Tips & Tricks

    Ingredient Secrets

    The magic of this dish lies in a few key ingredients that elevate it from good to absolutely crave-worthy. Always opt for chicken thighs instead of breasts—they stay juicier and more flavorful during the long cooking process. Another game-changer is using a combination of cheeses: sharp cheddar for flavor and monterey jack for that perfect melt factor. Don’t skip the cream of chicken soup—it creates that silky base that brings everything together. For an extra flavor boost, add a tablespoon of ranch seasoning mix to the sauce. These simple swaps make all the difference in creating a dish that tastes like you spent hours in the kitchen, not minutes.

    Technique Matters

    The difference between good and great Slow Cooker Chicken Spaghetti comes down to a few simple techniques. First, never overcook the pasta—add it during only the last 30 minutes of cooking time to maintain that perfect al dente texture. Second, shred your own cheese rather than using pre-shredded bags (which contain anti-caking agents that prevent proper melting). When adding the pasta, stir gently to prevent breaking the strands while ensuring even coating. For an extra layer of flavor, consider searing the chicken briefly before adding it to the slow cooker—those caramelized bits make all the difference!

    Serving Ideas & Creative Variations

    Perfect Pairings

    Elevate your Slow Cooker Chicken Spaghetti with thoughtfully chosen sides that complement without overwhelming. A crisp garden salad with a light vinaigrette creates the perfect fresh counterpoint to the rich, creamy pasta. Garlic bread is non-negotiable in my household—those buttery, herb-flecked slices are perfect for sopping up every last bit of sauce. For a complete meal that still feels light, roasted asparagus or broccoli adds color and nutrition. I love setting everything out family-style, creating a cozy dinner table where everyone can help themselves to seconds (and they always do!).

    Delicious Twists

    The beauty of this recipe is how easily it adapts to different flavor profiles and dietary needs. For a Tex-Mex version, add a can of diced green chilies, black beans, and top with crushed tortilla chips. Going low-carb? Substitute the pasta with spiralized zucchini added during the final 10 minutes. For a more sophisticated flavor, incorporate sundried tomatoes, artichoke hearts, and a splash of white wine into the sauce. Vegetarian guests? Replace the chicken with hearty mushrooms and chickpeas. I’ve even created a buffalo version by stirring in hot sauce and blue cheese crumbles that disappeared faster than I could serve it!

    Storage & Troubleshooting Guide

    Keeping It Fresh

    This Slow Cooker Chicken Spaghetti makes fantastic leftovers that might taste even better the next day as the flavors continue to meld. Store in airtight containers in the refrigerator for up to 4 days—perfect for meal prep or quick lunches. For freezing, portion into freezer-safe containers and store for up to 3 months. The key to reheating without drying out is adding a splash of chicken broth or milk before warming gently on the stovetop or microwave. I like to make a double batch specifically to freeze individual portions for those nights when cooking feels impossible.

    Fixing Common Issues

    Even the most foolproof recipes sometimes need troubleshooting. If your sauce seems too thin, remove the lid during the last 30 minutes of cooking to allow excess moisture to evaporate. Conversely, if it’s too thick, stir in a little warm chicken broth to reach your desired consistency. Pasta overcooked? Next time, try a heartier pasta shape like penne that stands up better to slow cooking. If your cheese sauce breaks or looks grainy, lower the heat and gradually stir in a mixture of 1 tablespoon cornstarch dissolved in 2 tablespoons cold water to help re-emulsify everything into creamy perfection.

    Frequently Asked Questions

    Can I use frozen chicken for Slow Cooker Chicken Spaghetti?

    For food safety reasons, it’s best to thaw chicken completely before adding to your slow cooker. Frozen chicken may spend too long in the temperature danger zone, increasing bacteria risk.

    How do I prevent the pasta from getting mushy?

    Add the pasta during only the last 30-45 minutes of cooking time, and choose a sturdier pasta shape like rotini or penne rather than thin spaghetti.

    Can I make this recipe dairy-free?

    Yes! Substitute the cheese with dairy-free alternatives and use coconut cream instead of cream soup. Add nutritional yeast for that cheesy flavor without the dairy.

    What’s the best slow cooker setting for this recipe?

    Cook on low for 6-7 hours or high for 3-4 hours, adding the pasta during the final 30 minutes of cooking time regardless of setting.

    How can I make my Slow Cooker Chicken Spaghetti more flavorful?

    Boost flavor by adding Italian seasoning, red pepper flakes, or fresh herbs like basil and oregano. Sautéing onions and garlic before adding them also intensifies the taste.

    Final Thoughts

    This Slow Cooker Chicken Spaghetti has become more than just a recipe in my household—it’s a reliable friend on hectic days when cooking feels impossible. There’s something deeply satisfying about creating a homemade meal with minimal effort that still brings everyone to the table with excited anticipation. I hope this comfort food classic finds its way into your regular rotation and creates as many happy moments around your table as it has around mine. Don’t forget to check out more slow cooker inspiration on Pinterest for your next culinary adventure!

  • Spinach Artichoke Pizza: Irresistibly Creamy & Delicious!

    Spinach Artichoke Pizza: Irresistibly Creamy & Delicious!

    Spinach Artichoke Pizza: Irresistibly Creamy & Delicious!

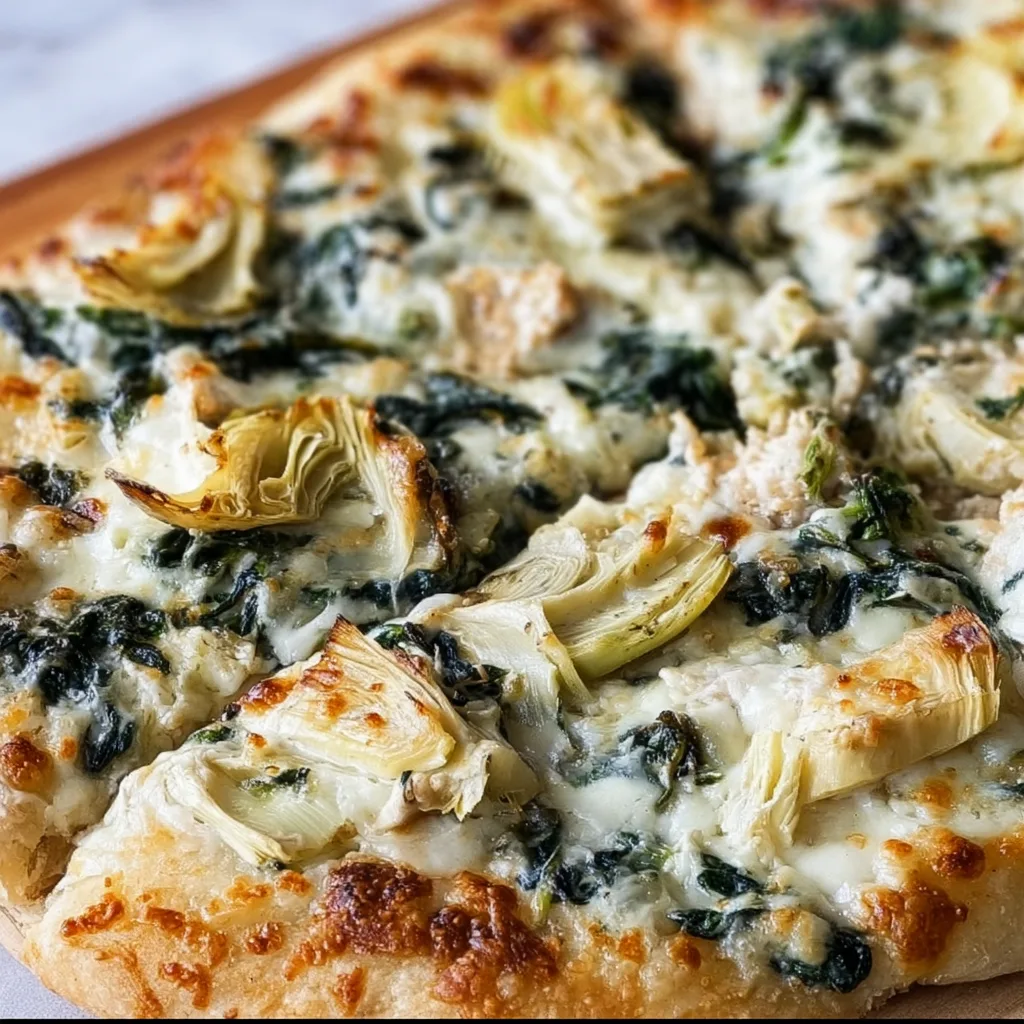
    This Spinach Artichoke Pizza transforms everyone’s favorite creamy dip into an irresistible pizza that’ll have you reaching for seconds before you’ve finished your first slice! The combination of gooey cheese, tender spinach, and tangy artichoke hearts creates a symphony of flavors that dance across your taste buds with each bite. I first created this recipe during a rainy Sunday when I was craving both comfort food and something a bit more sophisticated than my usual pepperoni standby. The moment that first slice hit my plate, with cheese stretching in perfect strings, I knew I’d stumbled onto something magical that I just had to share with you all.

    Recipe

    Why You’ll Love This Spinach Artichoke Pizza

    A Perfect Balance of Flavors and Textures

    There’s something almost magical about the way the creamy white sauce creates the perfect canvas for the slightly bitter spinach and briny artichoke hearts. Each bite delivers a beautiful contrast between the crispy crust and the velvety toppings. I love how the garlic infuses the entire pizza with its aromatic essence, while the combination of mozzarella and parmesan creates that perfect cheese pull we all secretly judge a good pizza by. The first time my neighbor tried this, she declared it “restaurant quality” – which might be the highest compliment a home cook can receive!

    Quick Weeknight Dinner Solution

    This spinach artichoke pizza comes together in just about 30 minutes, making it perfect for those evenings when you want something homemade but hassle-free. Most of the ingredients are pantry and freezer staples in my house – I always keep frozen spinach and a jar of artichoke hearts on hand specifically for this recipe. The dough can be store-bought to save time or made ahead on the weekend. I’ve served this on busy Thursdays after work and for impromptu gatherings when friends drop by unexpectedly, and it’s always met with delight and requests for the recipe.

    Essential Tips & Tricks

    Perfecting Your Pizza Dough

    The foundation of any great pizza is its crust, and this spinach artichoke version deserves the best base possible. For a crispy bottom with a chewy interior, preheat your pizza stone or sheet pan in the oven before adding the dough. I learned this trick from my Italian neighbor, and it makes all the difference! Make sure to thoroughly drain and squeeze dry your spinach – excess moisture is the enemy of crispy pizza. If you’re using fresh spinach instead of frozen, sauté it briefly with a touch of olive oil and garlic before adding it to your pizza for the best flavor development.

    Creating the Ideal Creamy Base

    The white sauce for this spinach artichoke pizza needs to be thick enough to stay put but still spreadable. I recommend making it slightly thicker than you might think necessary, as it will thin out slightly during baking. For the richest flavor, use a combination of cream cheese and sour cream as your base, then enhance it with freshly grated parmesan – never the pre-grated stuff! Adding a pinch of red pepper flakes creates a subtle heat that balances the richness perfectly. For an extra layer of flavor, try roasting your garlic before adding it to the sauce.

    Serving Ideas & Creative Variations

    Perfect Pairings for Your Pizza Night

    This spinach artichoke pizza pairs beautifully with a simple arugula salad dressed with lemon and olive oil – the peppery greens and bright acidity cut through the richness perfectly. For drinks, a crisp Pinot Grigio or a light lager complements without overwhelming the delicate flavors. If you’re hosting a pizza night, consider setting up a DIY pizza station with this as the star, alongside a simpler option like a classic margherita. I love to finish the meal with something light and fruity, like a sorbet or fresh berries, to cleanse the palate after all that delicious creaminess.

    Exciting Twists on the Classic Recipe

    Don’t be afraid to make this recipe your own! Try adding caramelized onions for sweetness, sun-dried tomatoes for tanginess, or even some crumbled bacon for a smoky element. For a seafood twist, top with some cooked shrimp or crabmeat just before serving – it’s reminiscent of my popular crab rangoon pizza but with a different flavor profile. You can also play with different cheeses – smoked gouda adds depth, while a sprinkle of feta brings a salty punch. For a vegan version, use plant-based cream cheese and mozzarella – you’ll be surprised how delicious it still is!

    Storage & Troubleshooting Guide

    Keeping Your Pizza Fresh

    Like most pizzas, spinach artichoke pizza is best enjoyed fresh from the oven when the cheese is perfectly melty and bubbly. However, leftovers can be stored in an airtight container in the refrigerator for up to 3 days. To reheat, avoid the microwave which will make the crust soggy. Instead, place slices on a baking sheet in a 350°F oven for 5-7 minutes, or use a skillet over medium-low heat with a lid to create steam that will remelt the cheese while keeping the crust crispy. If you want to prep ahead, you can make the white sauce up to 2 days in advance.

    Solving Common Pizza Problems

    If your crust turns out soggy, the most likely culprit is excess moisture from the spinach or artichokes. Make sure to thoroughly drain both before adding them to your pizza. Another tip is to par-bake your crust for 3-4 minutes before adding toppings. If your cheese is browning too quickly before the crust is done, try positioning your rack lower in the oven or covering the top loosely with foil for part of the baking time. For those who find their crust too pale, brush the edges with olive oil mixed with a touch of honey for that perfect golden-brown color.

    Frequently Asked Questions

    Can I use fresh spinach instead of frozen for spinach artichoke pizza?

    Absolutely! Just sauté about 6 cups of fresh spinach until wilted, then drain well and chop. Fresh spinach adds a vibrant color and slightly different texture that many people prefer.

    How do I prevent my pizza from getting soggy?

    Ensure all toppings are well-drained and pat dry with paper towels. Pre-baking the crust for 3-4 minutes before adding toppings also creates a barrier against moisture.

    What cheese works best for this recipe?

    A combination of mozzarella for stretch, parmesan for flavor, and cream cheese in the base creates the perfect balance. For extra indulgence, add a sprinkle of fontina or gruyère.

    Can I make this pizza ahead of time?

    Yes! Prepare the components separately and assemble just before baking. Alternatively, par-bake the crust, add toppings, refrigerate, and finish baking when ready to serve.

    Is there a gluten-free option for spinach artichoke pizza?

    Definitely! Use your favorite gluten-free pizza crust or try a cauliflower crust for a lower-carb option. The toppings work beautifully with alternative crusts.

    Final Thoughts

    This spinach artichoke pizza has become my go-to recipe when I want to impress without spending hours in the kitchen. The combination of creamy sauce, tender vegetables, and melty cheese creates something far greater than the sum of its parts. I love seeing friends’ faces light up with that first bite – it’s the ultimate satisfaction for any home cook. Don’t forget to check out more of my pizza creations on Pinterest for endless inspiration. Whether you’re cooking for a crowd or treating yourself to a special dinner, this spinach artichoke pizza delivers comfort and elegance in every slice.

  • Coconut Cheesecake Bread Pudding That Will Blow Your Mind!

    Coconut Cheesecake Bread Pudding That Will Blow Your Mind!

    Coconut Cheesecake Bread Pudding That Will Blow Your Mind!

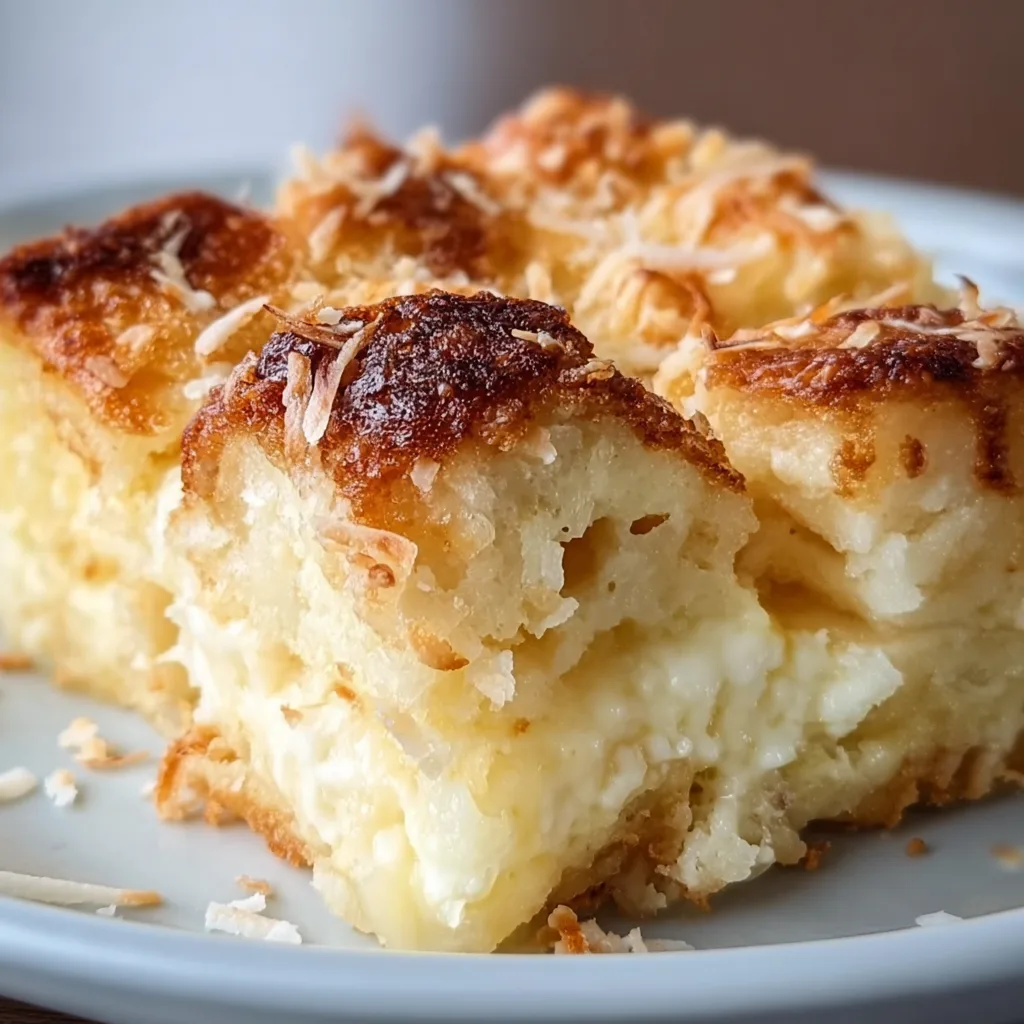
    Coconut Cheesecake Bread Pudding combines two beloved desserts into one heavenly creation that’s both comforting and indulgent. The first time I made this for my family, the kitchen filled with the sweet aroma of toasted coconut and vanilla, instantly transporting us to a tropical paradise. There’s something magical about the way the creamy cheesecake swirls melt into soft, custard-soaked bread, creating pockets of velvety sweetness in every bite. If you’re craving something that feels like a warm hug in dessert form, this recipe is about to become your new favorite.

    Recipe

    Why You’ll Love This Coconut Cheesecake Bread Pudding

    Perfect Balance of Flavors and Textures

    This dessert is a textural wonderland that satisfies all your cravings at once. The bread soaks up the rich custard while maintaining just enough structure, creating that perfect bread pudding base. But it’s the contrast between the creamy cheesecake pockets and the slightly crisp, toasted coconut topping that makes this truly special. I love how the subtle tang from the cream cheese balances the sweetness, while the coconut adds a tropical note that elevates the entire dessert. The first forkful delivers that perfect combination of soft, creamy, and just a touch of crunch.

    Make-Ahead Friendly for Effortless Entertaining

    One thing I absolutely adore about this Coconut Cheesecake Bread Pudding is how entertaining-friendly it is. You can assemble it the night before, letting the bread fully absorb all those luscious flavors overnight. This not only saves you precious time when hosting but actually improves the final result! The bread has more time to soak up the custard, and the cheesecake mixture melds beautifully with the other ingredients. I’ve served this at countless brunches and dinner parties, and guests always think I’ve spent hours in the kitchen that morning.

    Essential Tips & Tricks

    Choosing the Right Bread

    The foundation of any great bread pudding is, of course, the bread itself. For this Coconut Cheesecake Bread Pudding, I recommend using slightly stale brioche or challah for their buttery richness and ability to hold structure. Day-old bread works perfectly because it absorbs the custard without becoming too soggy. If you only have fresh bread, don’t worry! Just cube it, spread it on a baking sheet, and dry in a 275°F oven for about 10 minutes. This simple step ensures your pudding has that perfect texture—custardy inside with slightly crisp edges, just like in my pecan bourbon bread pudding.

    Perfecting the Cheesecake Swirl

    The cheesecake element is what makes this bread pudding truly special, but it requires a gentle touch. Make sure your cream cheese is completely softened to avoid lumps—I leave mine out for at least an hour before mixing. When swirling the cheesecake mixture into the soaked bread, use a light hand and don’t overmix. You want distinct pockets of cheesecake throughout rather than a uniform mixture. My favorite technique is using the back of a spoon to create little divots in the bread mixture, filling them with the cheesecake batter, then lightly swirling with a knife.

    Serving Ideas & Creative Variations

    Warm vs. Chilled Presentations

    While traditionally served warm, this Coconut Cheesecake Bread Pudding offers delightful versatility in how you can present it. For a cozy winter dessert, serve it warm from the oven with a scoop of vanilla ice cream that melts into all the nooks and crannies. In summer months, I actually prefer it chilled—the flavors concentrate and the texture becomes more like a traditional cheesecake. For an elegant brunch option, try serving individual portions in ramekins topped with fresh berries and a light dusting of powdered sugar. The contrast of the bright fruit against the creamy pudding is both visually stunning and delicious.

    Flavor Variations to Try

    The beauty of this recipe is how easily it adapts to different flavor profiles while maintaining its creamy essence. For a tropical twist, add diced mango or pineapple to the mixture before baking. Chocolate lovers can fold in white or dark chocolate chips for melty pockets of goodness throughout. During fall, I love adding cinnamon, nutmeg, and diced apples for a seasonal variation that reminds me of my blueberry cheesecake cookies but in warm pudding form. For an adult version, try soaking the bread in rum-infused custard—the alcohol cooks off, leaving behind a complex caramel-like flavor.

    Storage & Troubleshooting Guide

    Proper Storage for Maximum Freshness

    To maintain the perfect texture of your Coconut Cheesecake Bread Pudding, proper storage is essential. For leftovers (if you’re lucky enough to have any!), cool the pudding completely before covering with plastic wrap directly touching the surface—this prevents a skin from forming. Refrigerate for up to 4 days. When ready to enjoy again, reheat individual portions in the microwave for 30-45 seconds, or place the whole dish, covered with foil, in a 325°F oven for about 15 minutes. The bread pudding actually develops deeper flavors after a day in the refrigerator, making it perfect for meal prep.

    Fixing Common Issues

    Even experienced bakers can encounter texture troubles with bread pudding. If your pudding seems too dry, it likely needed more custard or less baking time. Next time, ensure your bread is properly soaked, and check for doneness earlier. For a pudding that’s too soggy in the center, it needed more baking time—remember that it should be set but still have a slight jiggle in the center. If your cheesecake swirls sink to the bottom, try chilling the cheesecake mixture before swirling, or dollop it on top during the last 15 minutes of baking for a beautiful marbled effect.

    Frequently Asked Questions

    Can I make Coconut Cheesecake Bread Pudding ahead of time?

    Absolutely! Assemble it up to 24 hours in advance and refrigerate unbaked. Let it sit at room temperature for 30 minutes before baking, or add 10-15 minutes to the baking time if cooking directly from the refrigerator.

    What type of coconut works best in this recipe?

    Use sweetened shredded coconut for the custard mixture and toasted unsweetened coconut flakes for topping. This combination provides the perfect balance of sweetness and texture without becoming overpowering.

    Can I freeze leftover bread pudding?

    Yes! Portion it into individual servings, wrap tightly in plastic wrap and foil, then freeze for up to 3 months. Thaw overnight in the refrigerator and reheat gently for best results.

    What can I substitute for cream cheese?

    Mascarpone makes a luxurious substitute with a milder flavor. For a lighter version, try Greek yogurt cream cheese, though the texture will be slightly different.

    Why did my Coconut Cheesecake Bread Pudding come out soggy?

    This usually happens when the bread-to-custard ratio is off. Make sure your bread is slightly stale and that you’ve allowed enough time (at least 30 minutes) for the bread to absorb the liquid before baking.

    Final Thoughts

    This Coconut Cheesecake Bread Pudding represents everything I love about comfort food with a creative twist. It’s the dessert I turn to when I want to impress without spending hours in the kitchen, and the one friends always request for gatherings. The combination of tropical coconut, creamy cheesecake swirls, and custardy bread creates something truly magical that works year-round. I hope you’ll try it and experience the joy of watching someone take that first bite and close their eyes in pure dessert bliss. Don’t forget to check out more of my favorite dessert creations on Pinterest!

  • Dark Chocolate Bread Pudding: Irresistibly Decadent & Comforting Treat

    Dark Chocolate Bread Pudding: Irresistibly Decadent & Comforting Treat

    Dark Chocolate Bread Pudding: Irresistibly Decadent & Comforting Treat

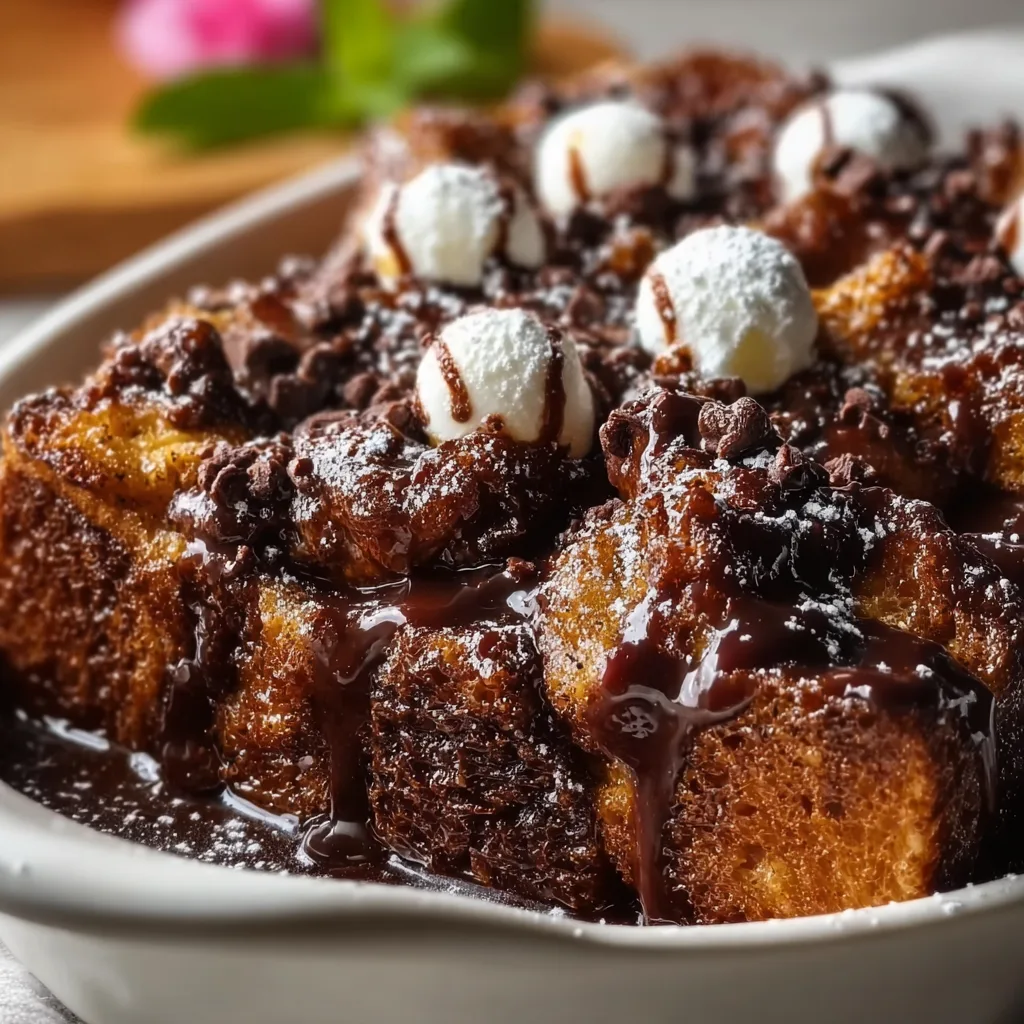
    Dark Chocolate Bread Pudding transforms humble ingredients into pure magic—rich, velvety, and utterly indulgent. I discovered this recipe during a rainy Sunday when nothing but chocolate would cure my blues. The moment the warm, intoxicating aroma filled my kitchen, I knew this would become my go-to comfort dessert. There’s something about the way the dark chocolate melts between layers of custard-soaked bread that feels like a warm hug from the inside. Trust me, this isn’t just dessert—it’s therapy in a baking dish that’ll have everyone asking for seconds.

    Recipe

    Why You’ll Love This Dark Chocolate Bread Pudding

    A Perfect Balance of Textures

    The contrasting textures are what make this dark chocolate bread pudding truly special. The crispy, caramelized top gives way to a pillowy center that’s somehow both light and decadent. I love how the edges become slightly chewy while the middle stays deliciously moist. The bread soaks up the custard like a dream, creating pockets of melted chocolate throughout. It’s this beautiful dance between soft and firm that makes each bite an adventure. When warm, the chocolate stays slightly molten, creating that perfect spoonable consistency that’s impossible to resist.

    Rich Flavor Without Overwhelming Sweetness

    Unlike many desserts that leave you with sugar overload, this dark chocolate bread pudding offers complex flavor depth that’s sophisticated yet comforting. The bittersweet notes of high-quality dark chocolate balance perfectly with the subtle vanilla-infused custard. I’ve carefully calibrated the sweetness so the chocolate’s natural character shines through. There’s a hint of warmth from cinnamon and a whisper of salt that elevates the entire experience. It’s indulgent without being cloying—the kind of dessert that satisfies your craving without sending you into a sugar coma.

    Essential Tips & Tricks

    Choosing the Right Bread

    The foundation of exceptional dark chocolate bread pudding is, unsurprisingly, the bread itself. I’ve experimented extensively and found that slightly stale brioche or challah creates the perfect structure—rich enough to stand up to the custard but tender enough to meld beautifully with the chocolate. Day-old bread works wonders as it absorbs more custard without falling apart. Avoid pre-sliced sandwich bread which tends to disintegrate. Instead, tear rustic bread into irregular chunks for more interesting texture variation. This approach creates those delightful crispy peaks and custardy valleys that make bread pudding with vanilla sauce so irresistible.

    Perfecting Your Custard Base

    The custard is where the magic happens, so don’t rush this step! For silky-smooth results, warm your milk and cream mixture just until steaming—never boiling. This gentle approach prevents the eggs from scrambling when combined. I always whisk my eggs with sugar until slightly pale before slowly incorporating the warm dairy. Adding a splash of espresso (optional but recommended) intensifies the chocolate flavor without making it taste like coffee. Let the bread soak for at least 30 minutes, occasionally pressing down gently to ensure even absorption. This patience pays off with a perfectly unified texture throughout.

    Serving Ideas & Creative Variations

    Elegant Presentation Options

    Elevate your dark chocolate bread pudding from homey comfort food to dinner party showstopper with thoughtful presentation. Individual ramekins create a sophisticated plated dessert—try dusting with cocoa powder and adding a small gold leaf for special occasions. For family-style serving, a drizzle of warm ganache creates dramatic flair as it cascades down each portion. Fresh raspberries or pomegranate seeds provide beautiful color contrast and bright flavor balance. Mint leaves add a pop of green and aromatic freshness. For height, consider a delicate chocolate curl or pirouette cookie standing upright in a dollop of whipped cream.

    Creative Flavor Combinations

    While classic dark chocolate bread pudding is divine, experimenting with complementary flavors takes it to new heights. Try adding orange zest to the custard for a chocolate-orange variation that’s reminiscent of those holiday chocolate balls. Cinnamon and cayenne create a Mexican chocolate profile with gentle warmth. For something truly decadent, fold in crushed butter toffee pretzels for salty-sweet crunch. White chocolate chunks create beautiful marbling and flavor contrast. During fall, pumpkin purée and warming spices transform this into a seasonal treat. My personal favorite: adding a layer of peanut butter between the bread for a nostalgic twist.

    Storage & Troubleshooting Guide

    Proper Storage for Maximum Freshness

    To maintain the perfect texture of your dark chocolate bread pudding, proper storage is crucial. Once completely cooled, cover tightly with plastic wrap directly touching the surface to prevent a skin from forming. Refrigerate for up to 3 days—though it rarely lasts that long in my house! For reheating, individual portions warm beautifully in the microwave for 20-30 seconds. For whole puddings, cover with foil and warm in a 300°F oven for about 15 minutes. If freezing (yes, you can!), wrap tightly in plastic, then foil, and freeze for up to 1 month. Thaw overnight in the refrigerator before reheating.

    Troubleshooting Common Issues

    Even experienced bakers encounter challenges with bread pudding. If your pudding seems too soggy in the center, it likely needs more baking time—cover with foil to prevent over-browning while the center sets. Conversely, if it’s dry, you may have used too little custard or overbaked. Next time, ensure bread is fully submerged and check earlier. For uneven chocolate distribution, try layering half the bread, then chocolate, then remaining bread before pouring custard. If your pudding puffed dramatically then collapsed, don’t worry—this is normal! A water bath can help prevent this if it bothers you aesthetically.

    Frequently Asked Questions

    Can I make dark chocolate bread pudding ahead of time?

    Absolutely! Prepare it up to 24 hours in advance, refrigerate unbaked, then bring to room temperature for 30 minutes before baking. The extra soaking time actually improves the texture.

    What’s the best dark chocolate to use?

    Use chocolate with 60-70% cacao content for the perfect balance. Chips work, but chopped bar chocolate melts more evenly and creates better pockets of chocolate throughout.

    Can I make this recipe gluten-free?

    Yes! Substitute gluten-free brioche or challah, ensuring it’s slightly stale. The structure may be slightly different, but the flavor remains delicious.

    How do I know when my bread pudding is done?

    The pudding is ready when the center reaches 160°F or a knife inserted comes out mostly clean with a few moist crumbs. The top should be set but still have slight jiggle.

    Can I reduce the sugar in this dark chocolate bread pudding?

    You can reduce sugar by up to 25% without affecting texture. Consider using a slightly less bitter chocolate (around 55% cacao) to maintain balance.

    Final Thoughts

    This dark chocolate bread pudding has been my secret weapon for years—whether I’m nursing a broken heart or celebrating life’s victories. There’s something profoundly satisfying about transforming simple ingredients into something so extraordinarily comforting. The beauty lies in its adaptability and forgiving nature, perfect for both novice bakers and seasoned pros. I hope this recipe brings the same joy to your kitchen as it has to mine. Don’t forget to check out more indulgent desserts on Pinterest for your next baking adventure!

  • Hot Sausage Feta Honey Pizza: Irresistibly Bold Flavor Explosion!

    Hot Sausage Feta Honey Pizza: Irresistibly Bold Flavor Explosion!

    Hot Sausage Feta Honey Pizza: Irresistibly Bold Flavor Explosion!

    Hot Sausage Feta Honey Pizza combines all my favorite flavor dimensions in one irresistible bite—spicy Italian sausage, creamy feta, and that drizzle of honey that transforms everything it touches. The first time I made this for my Friday night gathering, my friend Mia actually gasped when she took her first bite. “Sweet, spicy, salty—how is this so perfect?” she whispered. That’s the magic of this pizza! The contrast between the heat of the sausage and the sweet honey creates an experience that’s both comforting and exciting. If you’re looking to elevate your homemade pizza game, this recipe is about to become your new obsession.

    Recipe

    Why You’ll Love This Hot Sausage Feta Honey Pizza

    A Symphony of Contrasting Flavors

    The beauty of this Hot Sausage Feta Honey Pizza lies in its perfect balance of opposing flavors. The spicy kick from the hot Italian sausage wakes up your taste buds while the creamy, tangy feta cools things down just enough. Then comes that golden drizzle of honey—transforming each bite into something magical. I love watching people’s expressions when they taste these flavors together for the first time. It’s like witnessing someone discover a new favorite song! The subtle sweetness cuts through the richness, creating a pizza experience that feels both familiar and entirely new at the same time.

    Quick and Impressive for Any Occasion

    This pizza might taste like it came from a fancy wood-fired restaurant, but it’s surprisingly simple to pull together. The prep time is minimal, especially if you use store-bought dough (I keep some in my freezer for pizza emergencies). You can have this ready in about 30 minutes, making it perfect for impromptu gatherings or those nights when you want something special without the fuss. I’ve made this for casual movie nights and more formal dinner parties alike—it always earns rave reviews. The combination looks stunning with minimal effort, which is my favorite kind of recipe!

    Essential Tips & Tricks

    Perfecting Your Pizza Dough

    Getting your dough right makes all the difference with this Hot Sausage Feta Honey Pizza. I recommend letting store-bought dough come to room temperature for at least 30 minutes before stretching—cold dough fights back! For the best texture, pre-bake your crust for 3-4 minutes before adding toppings. This prevents the dreaded soggy middle that can happen with juicy toppings like sausage. If you’re feeling adventurous, try a garlic-infused crust by brushing the edges with olive oil and minced garlic before baking. That extra step creates an aromatic experience that elevates the entire pizza.

    Balancing Your Toppings

    The key to this pizza’s success is restraint—resist the urge to pile on too many toppings! A light touch works best, especially with strong flavors like hot sausage and feta. I pre-cook my sausage until it’s just done, draining excess fat to prevent a greasy pizza. Crumble the feta rather than using thick chunks for better distribution of flavor. For the honey drizzle, wait until the pizza comes out of the oven—drizzling before baking will just burn the honey. I keep a special hot honey infused with chili flakes for this recipe, adding another dimension to the flavor profile.

    Serving Ideas & Creative Variations

    Perfect Pairings for Your Pizza Night

    This Hot Sausage Feta Honey Pizza deserves accompaniments that complement without overwhelming its complex flavors. A simple arugula salad with lemon vinaigrette makes the perfect counterpoint—the peppery greens and bright acidity balance the richness of the pizza. For drinks, try a crisp Pinot Grigio or a light IPA that won’t compete with the spice. I love serving this pizza as part of a casual spread with Mediterranean Spinach Feta Crisps for a themed night. For dessert, something light and refreshing works best—think berry sorbet or a simple affogato to cleanse the palate.

    Exciting Twists on the Classic Recipe

    Don’t be afraid to play with this versatile recipe! Swap the hot Italian sausage for nduja (spreadable spicy pork) for an even more intense flavor experience. For a Mediterranean twist, add thinly sliced preserved lemons and a sprinkle of za’atar after baking. Vegetarians can substitute spicy roasted mushrooms or plant-based sausage—the honey and feta still create that magical flavor combination. My friend with a fig tree inspired my favorite variation: adding thinly sliced fresh figs alongside the feta for a seasonal treat that elevates the honey notes. The beauty of this pizza is its adaptability while maintaining that sweet-spicy-salty balance.

    Storage & Troubleshooting Guide

    Keeping Your Pizza Fresh

    While this Hot Sausage Feta Honey Pizza is best enjoyed fresh from the oven, leftovers can still be delicious with proper storage. Allow pizza to cool completely before refrigerating to prevent condensation that leads to sogginess. Store slices in an airtight container with parchment paper between layers for up to 3 days. For reheating, skip the microwave! Instead, use a skillet over medium-low heat with a lid until the cheese melts, or a 350°F oven for 5-7 minutes. The crust crisps back up beautifully this way. If you’re meal prepping, consider baking the crust and storing toppings separately, then assembling just before serving.

    Solving Common Pizza Problems

    Even experienced home cooks encounter pizza challenges! If your crust is sticking to the pan, try a generous dusting of cornmeal or semolina flour before placing the dough. For overly soggy pizza, pre-cooking wet ingredients like sausage is crucial. If your edges are burning while the center remains undercooked, create a foil shield for the perimeter during the final minutes of baking. Finding your honey burning? Add it after baking, while the pizza is still hot but out of the oven. And if your feta isn’t melting as expected—that’s actually normal! Feta retains its shape when heated, which provides that delightful textural contrast against the melty mozzarella base.

    Frequently Asked Questions

    Can I make Hot Sausage Feta Honey Pizza ahead of time?

    Yes! Pre-bake the crust for 5 minutes, cool completely, then add toppings except honey. Refrigerate for up to 24 hours, then bake and add honey just before serving.

    What’s the best cheese combination for this pizza?

    I recommend a base of low-moisture mozzarella for meltability, topped with crumbled feta. The mozzarella provides stretch while feta adds tangy flavor contrast.

    Can I freeze leftover pizza?

    Absolutely! Wrap individual slices in plastic wrap, then foil, and freeze for up to 2 months. Reheat from frozen in a 375°F oven until hot.

    Is there a vegetarian alternative for the sausage?

    Try spicy roasted chickpeas or plant-based Italian sausage. The key is maintaining that spicy element to balance the sweet honey.

    How do I prevent my Hot Sausage Feta Honey Pizza from getting soggy?

    Pre-cook and drain the sausage thoroughly, use low-moisture mozzarella, and consider pre-baking your crust for 3-4 minutes before adding toppings.

    Final Thoughts

    This Hot Sausage Feta Honey Pizza has become my go-to recipe whenever I want to impress without spending hours in the kitchen. There’s something magical about the combination of spicy sausage, tangy feta, and sweet honey that keeps everyone coming back for another slice. I’ve watched this pizza turn skeptics into believers with just one bite—that moment when the flavors all come together is pure culinary joy. Whether you’re cooking for a crowd or treating yourself to something special, this pizza delivers an experience that feels both indulgent and accessible. Find more inspiration for your next cooking adventure on Pinterest!