Blog

  • Chocolate Mousse Brownies: Decadent Bliss You Can’t Resist!

    Chocolate Mousse Brownies: Decadent Bliss You Can’t Resist!

    Chocolate Mousse Brownies: Decadent Bliss You Can’t Resist!

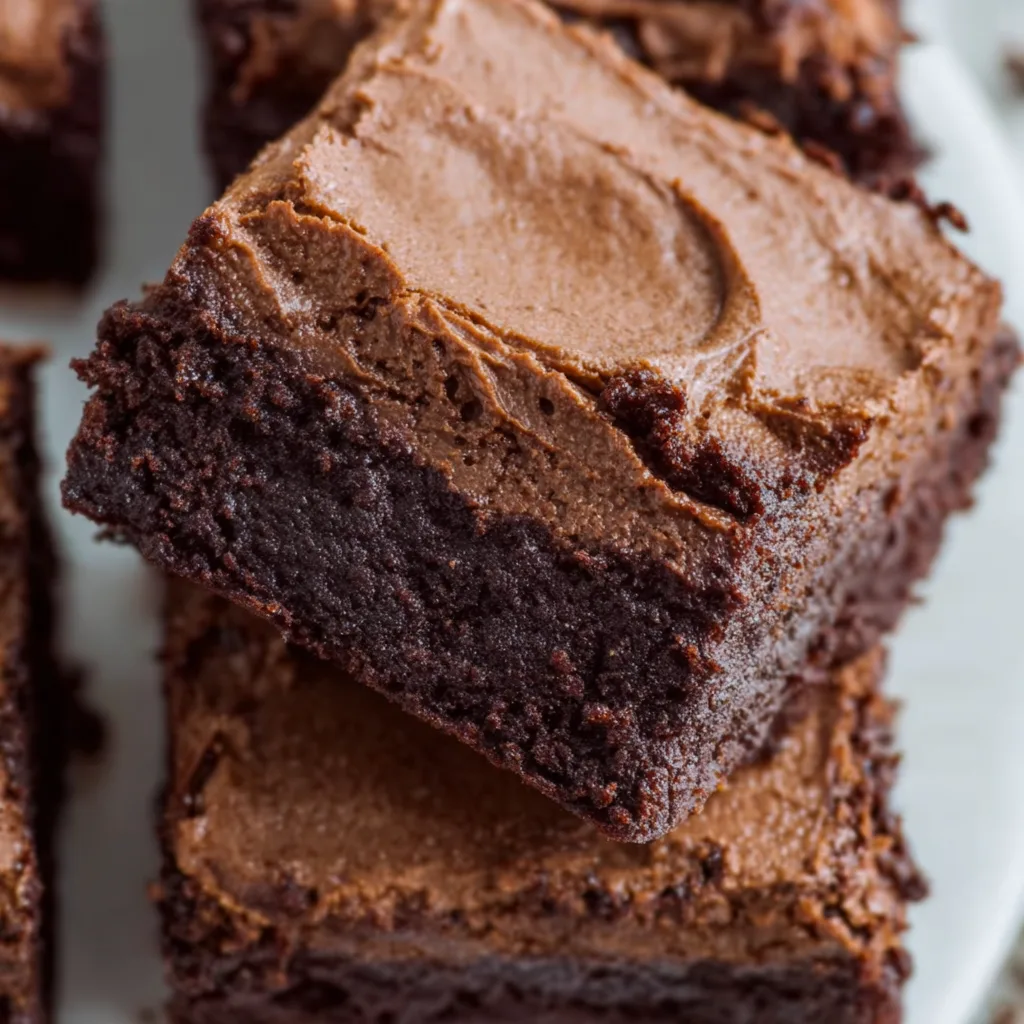
    Chocolate Mousse Brownies are the ultimate indulgence that combines two of my favorite desserts into one irresistible treat. The fudgy brownie base provides the perfect foundation for the silky, cloud-like chocolate mousse layer that practically melts in your mouth. I first created these for my sister’s birthday gathering, and the way everyone’s eyes widened at first bite told me everything I needed to know. There’s something magical about that textural contrast between dense, rich brownies and airy mousse that makes this dessert absolutely unforgettable. If you love my easy strawberry cake mix brownies, you’ll adore this chocolate-on-chocolate masterpiece.

    Recipe

    Why You’ll Love These Chocolate Mousse Brownies

    Perfect Texture Combination

    The textural contrast is what makes chocolate mousse brownies truly special. The bottom layer delivers that chewy, fudgy brownie experience with slightly crisp edges that chocolate lovers crave. Meanwhile, the top layer offers a silky, light-as-air chocolate mousse that feels like velvet on your tongue. I’ve spent years perfecting this recipe, adjusting ingredients and techniques until the mousse achieves that perfect balance of richness and fluffiness. When you take a bite with both layers together, it’s like experiencing two distinct desserts that somehow complement each other perfectly.

    Make-Ahead Convenience

    One thing I absolutely adore about these chocolate mousse brownies is their make-ahead potential. They actually improve after sitting in the refrigerator overnight, as the flavors deepen and meld together beautifully. This makes them perfect for entertaining—I often prepare them the day before guests arrive, which eliminates day-of stress. The mousse sets up perfectly during refrigeration, creating clean slices that look stunning on dessert plates. Plus, they maintain their gorgeous texture for up to three days, making them ideal for busy weekends when you want something special without the last-minute rush.

    Essential Tips & Tricks

    Brownie Layer Perfection

    The foundation of great chocolate mousse brownies is a perfectly baked brownie layer. For ultimate fudginess, remove your brownies from the oven when they’re just set but still slightly underdone—a toothpick should come out with a few moist crumbs. I’ve learned the hard way that overbaking results in dry brownies that don’t complement the mousse. Using high-quality chocolate makes a noticeable difference in flavor depth. Let the brownie layer cool completely before adding the mousse—I sometimes speed this up by placing the pan in the refrigerator for 30 minutes after it’s reached room temperature.

    Mousse Mastery

    Creating silky chocolate mousse requires attention to detail. Temperature control is crucial—chocolate should be melted and cooled just enough that it won’t seize when mixed with other ingredients or melt the whipped cream. I recommend whipping the cream to medium-firm peaks, not stiff peaks, which keeps the mousse light and spreadable. Folding technique matters too—use a large rubber spatula and gentle, sweeping motions to preserve the air bubbles that give mousse its characteristic texture. For special occasions, try my chocolate cherry dump cake for another decadent chocolate option.

    Serving Ideas & Creative Variations

    Elegant Presentation Options

    Transform your chocolate mousse brownies into an impressive dessert worthy of any celebration with thoughtful presentation. Try cutting them into perfect squares and placing each on a dessert plate with a light dusting of cocoa powder or powdered sugar. A fresh raspberry or mint leaf adds a pop of color. For dinner parties, I love creating individual brownie trifles—cube the brownies, layer them in glasses with extra mousse, and top with whipped cream and chocolate shavings. The vertical presentation shows off both layers beautifully and never fails to impress guests.

    Flavor Twists

    While classic chocolate mousse brownies are divine, experimenting with flavor variations keeps this dessert exciting. Try adding orange zest to the brownie batter and a splash of Grand Marnier to the mousse for a sophisticated chocolate-orange combination. Coffee lovers will appreciate espresso powder added to both layers for a mocha version. My personal favorite is adding a thin layer of raspberry jam between the brownie and mousse, creating a chocolate-raspberry masterpiece. For more dessert inspiration, check out these cheesecake brownie bites that offer another delicious brownie variation.

    Storage & Troubleshooting Guide

    Proper Storage Methods

    Storing chocolate mousse brownies properly ensures they remain fresh and delicious for days. Always refrigerate these brownies due to the mousse component—they’ll keep for up to 4 days in an airtight container. For the best texture, let them sit at room temperature for 15-20 minutes before serving. If you need to make them further in advance, they freeze beautifully for up to a month. I recommend slicing before freezing, then wrapping individual portions in plastic wrap and aluminum foil. Thaw overnight in the refrigerator for the best texture preservation.

    Common Problems & Solutions

    Even experienced bakers encounter challenges with layered desserts like chocolate mousse brownies. If your mousse seems too runny, it likely needs more chilling time or the cream wasn’t whipped enough before folding. For mousse that’s too firm or grainy, the chocolate might have been too hot when combined with other ingredients. When brownies crack during cutting, try warming your knife under hot water and wiping it clean between slices. If the brownie layer is too dense, you might have overmixed the batter—remember that gentle folding preserves the perfect texture in both layers.

    Frequently Asked Questions

    Can I make chocolate mousse brownies ahead of time?

    Absolutely! These brownies actually improve after 24 hours in the refrigerator as flavors meld together. They’ll keep well for up to 4 days when properly stored in an airtight container.

    How do I achieve clean cuts when slicing?

    Use a sharp knife dipped in hot water and wiped clean between each cut. Allow the brownies to chill completely—at least 4 hours or overnight—before attempting to slice them.

    Can I freeze chocolate mousse brownies?

    Yes! Wrap individual slices in plastic wrap and then foil, or place in airtight containers. They freeze well for up to one month. Thaw overnight in the refrigerator before serving.

    What’s the secret to perfectly fluffy chocolate mousse?

    Proper temperature management is key. Ensure your melted chocolate has cooled slightly and fold it gently into medium-firm whipped cream using a large spatula to preserve air bubbles.

    Why did my brownie layer turn out dry?

    Overbaking is usually the culprit. For perfect chocolate mousse brownies, remove the brownie layer from the oven when a toothpick inserted comes out with a few moist crumbs still attached.

    Final Thoughts

    These chocolate mousse brownies have become my signature dessert for good reason—they deliver an unforgettable combination of textures and deep chocolate flavor that keeps everyone coming back for more. I love watching friends’ faces light up when they take that first bite and discover the perfect harmony between fudgy brownie and silky mousse. Whether for special occasions or weekend treats, these brownies strike that perfect balance between impressive and achievable. For more delicious inspiration, follow me on Pinterest where I share my latest chocolate mousse brownies creations and other decadent desserts.
  • Crockpot Crack Chicken Recipe – Irresistibly Cheesy & Easy!

    Crockpot Crack Chicken Recipe – Irresistibly Cheesy & Easy!

    Crockpot Crack Chicken Recipe – Irresistibly Cheesy & Easy!

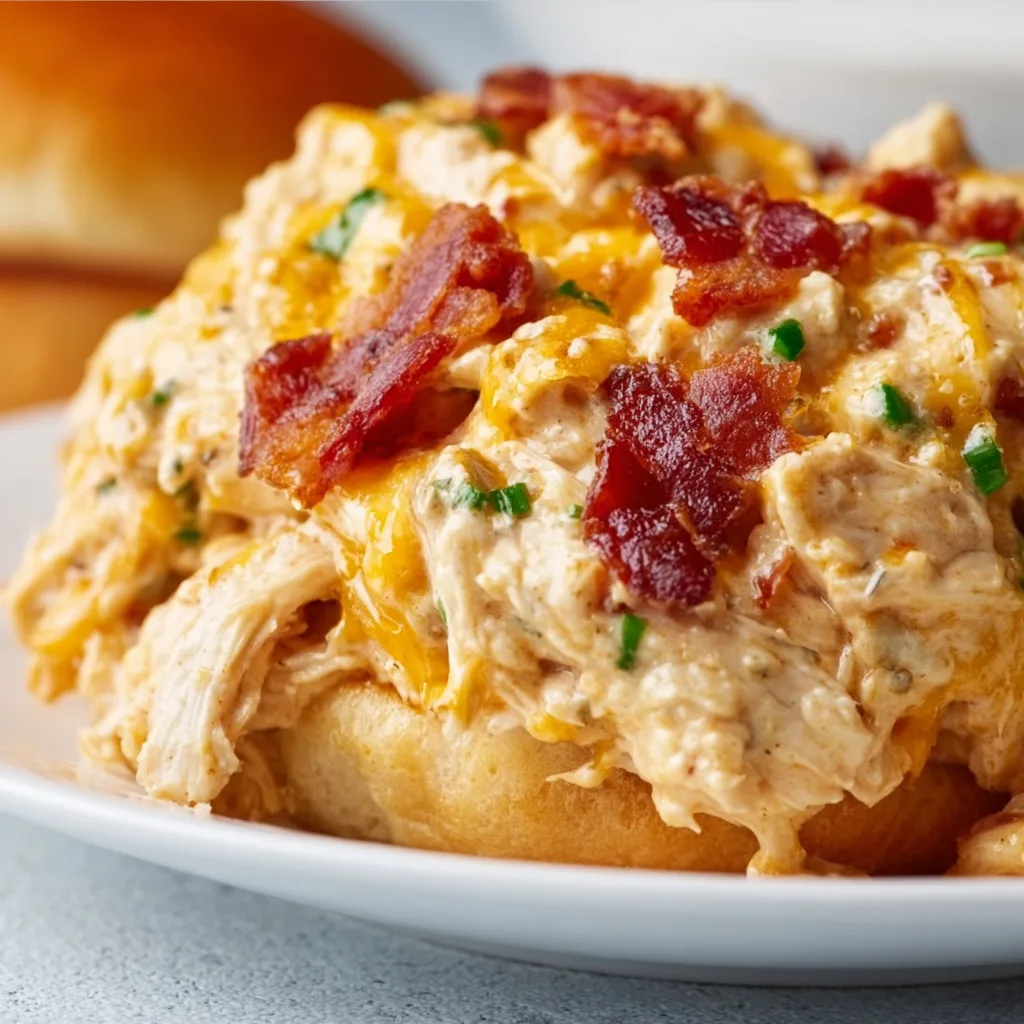
    Mouthwatering Crockpot Crack Chicken is the ultimate comfort food that practically makes itself! I’ll never forget the first time I made this creamy, cheesy masterpiece—my kitchen filled with an irresistible aroma that had my family hovering around the slow cooker like moths to a flame. There’s something magical about the combination of tender chicken, cream cheese, crispy bacon, and ranch seasoning that creates a dish so addictive it earned its playful “crack” nickname. If you’re looking for a fuss-free dinner that delivers big on flavor, this recipe needs to be in your regular rotation!

    Recipe

    Why You’ll Love This Mouthwatering Crockpot Crack Chicken

    Perfect for Busy Weeknights

    This recipe is a true lifesaver when your schedule is packed but you still want something homemade and delicious. Just spend 5 minutes in the morning tossing everything into your slow cooker, and by dinnertime, you’ll have a meal that tastes like you’ve been cooking all day. The hands-off cooking method gives you freedom to tackle your to-do list while dinner practically makes itself. I love how the chicken becomes incredibly tender after simmering in those creamy, savory flavors for hours. It’s the definition of “set it and forget it” cooking at its finest!

    Crowd-Pleasing Versatility

    The beauty of Crockpot Crack Chicken lies in its incredible versatility. This creamy, shredded chicken mixture works beautifully as a sandwich filling, stuffed in baked potatoes, wrapped in tortillas, or served over rice or pasta. Kids and adults alike go crazy for the creamy, cheesy goodness with that perfect hint of ranch flavor. When I serve this at gatherings, everyone asks for the recipe—it’s that good! The combination of tender chicken, tangy cream cheese, and savory bacon creates a flavor profile that’s universally appealing.

    Essential Tips & Tricks

    Perfecting the Texture

    The key to truly mouthwatering Crack Chicken is nailing the texture. I recommend using boneless, skinless chicken breasts or thighs—both work beautifully, though thighs tend to stay a bit more moist. Don’t shred the chicken until the last 30 minutes of cooking, then return it to the sauce to absorb all those amazing flavors. For the creamiest result, make sure your cream cheese is at room temperature before adding it, or cube it small so it melts evenly. And remember that a quick stir halfway through cooking helps everything blend perfectly!

    Flavor Boosting Secrets

    Take your Crockpot Crack Chicken from good to absolutely unforgettable by incorporating a few flavor-enhancing tricks. I like to add a splash of chicken broth for extra savory depth, and a tablespoon of minced garlic makes everything more aromatic. For a touch of brightness, squeeze in some fresh lemon juice just before serving. Consider mixing in some diced jalapeños for a spicy kick or a handful of sun-dried tomatoes for sweet-tangy notes. Remember that bacon added at the end stays crispier than if cooked the entire time!

    Serving Ideas & Creative Variations

    Family-Friendly Serving Options

    Transform your Crockpot Crack Chicken into a complete meal with minimal effort. My family’s favorite way to enjoy it is piled high on toasted brioche buns with extra cheese melted on top and a sprinkle of green onions. For a lighter option, serve it in lettuce wraps with avocado slices and cherry tomatoes. It’s also delicious stuffed in baked sweet potatoes or spooned over cauliflower rice for a lower-carb dinner. Kids especially love it mixed with pasta shells or stuffed inside crescent roll dough and baked until golden!

    Exciting Flavor Twists

    Keep this recipe in your regular rotation by trying these creative variations that transform the basic recipe. For a Southwestern twist, add a can of diced green chiles, corn kernels, and a sprinkle of taco seasoning. Or go Buffalo-style by stirring in hot sauce and serving with blue cheese crumbles. For Italian flair, mix in some pesto and sun-dried tomatoes before serving. My personal favorite variation includes a handful of chopped spinach and artichoke hearts folded in during the final minutes—it adds color, nutrition, and amazing flavor!

    Storage & Troubleshooting Guide

    Proper Storage Solutions

    Leftover Crockpot Crack Chicken is a meal-prep dream, possibly tasting even better the next day as the flavors continue to meld. Store cooled leftovers in airtight containers in the refrigerator for up to 4 days. For longer storage, freeze portions in freezer-safe bags with the air pressed out for up to 3 months. When reheating, add a splash of milk or chicken broth to maintain creaminess, as the mixture tends to thicken when chilled. I like to portion leftovers into individual containers for quick grab-and-go lunches!

    Fixing Common Issues

    Even experienced cooks occasionally encounter texture troubles with cream cheese recipes. If your mixture looks curdled or separated, don’t panic! Simply whisk vigorously with a fork or use an immersion blender for a few seconds to re-emulsify everything. If your final dish seems too thin, mix a tablespoon of cornstarch with cold water and stir it in during the last 30 minutes with the lid off. Too thick? Add a splash of milk or broth. And if you accidentally overcooked the chicken, just shred it finer and mix thoroughly with the sauce.

    Frequently Asked Questions

    Can I make Mouthwatering Crockpot Crack Chicken in an Instant Pot?

    Absolutely! Use the pressure cook setting for 12 minutes with a quick release. Shred the chicken, then switch to sauté mode to thicken the sauce if needed.

    Is this recipe keto-friendly?

    Yes! The base recipe is naturally low-carb and keto-friendly. Just be careful with your serving method—choose lettuce wraps or cauliflower rice instead of buns or pasta.

    Can I use frozen chicken breasts?

    For food safety reasons, I recommend thawing chicken first. If using frozen, increase cooking time by 1-2 hours and ensure it reaches 165°F internally.

    How spicy is this dish?

    The standard recipe isn’t spicy at all, making it perfect for families. Add diced jalapeños, hot sauce, or red pepper flakes if you prefer some heat!

    What can I substitute for ranch seasoning?

    Make your own with dried dill, garlic powder, onion powder, dried parsley, salt, and pepper. Or try Italian seasoning for a different but delicious flavor profile.

    Final Thoughts

    This Mouthwatering Crockpot Crack Chicken has become a cornerstone recipe in my household for good reason. It strikes that perfect balance between effortless preparation and impressive results—exactly what we all need in our cooking arsenal. The way it transforms simple ingredients into something truly crave-worthy feels like kitchen magic. Whether you’re feeding a hungry family, meal prepping for the week ahead, or looking for a crowd-pleasing potluck dish, this recipe delivers every time. I’d love to see your versions on Pinterest!

  • Thai Drunken Noodles Recipe | 20-Minutes to Bold, Spicy Bliss!

    Thai Drunken Noodles Recipe | 20-Minutes to Bold, Spicy Bliss!

    Thai Drunken Noodles Recipe | 20-Minutes to Bold, Spicy Bliss!

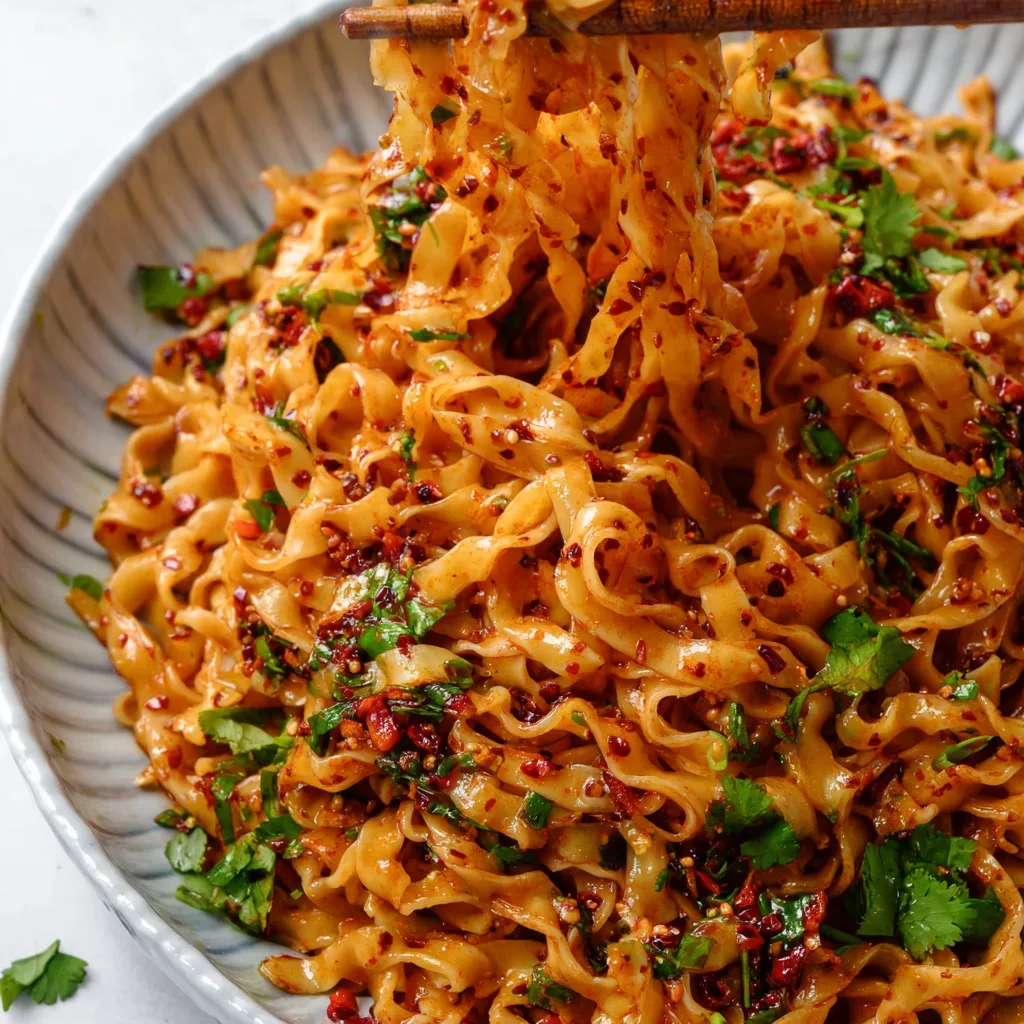
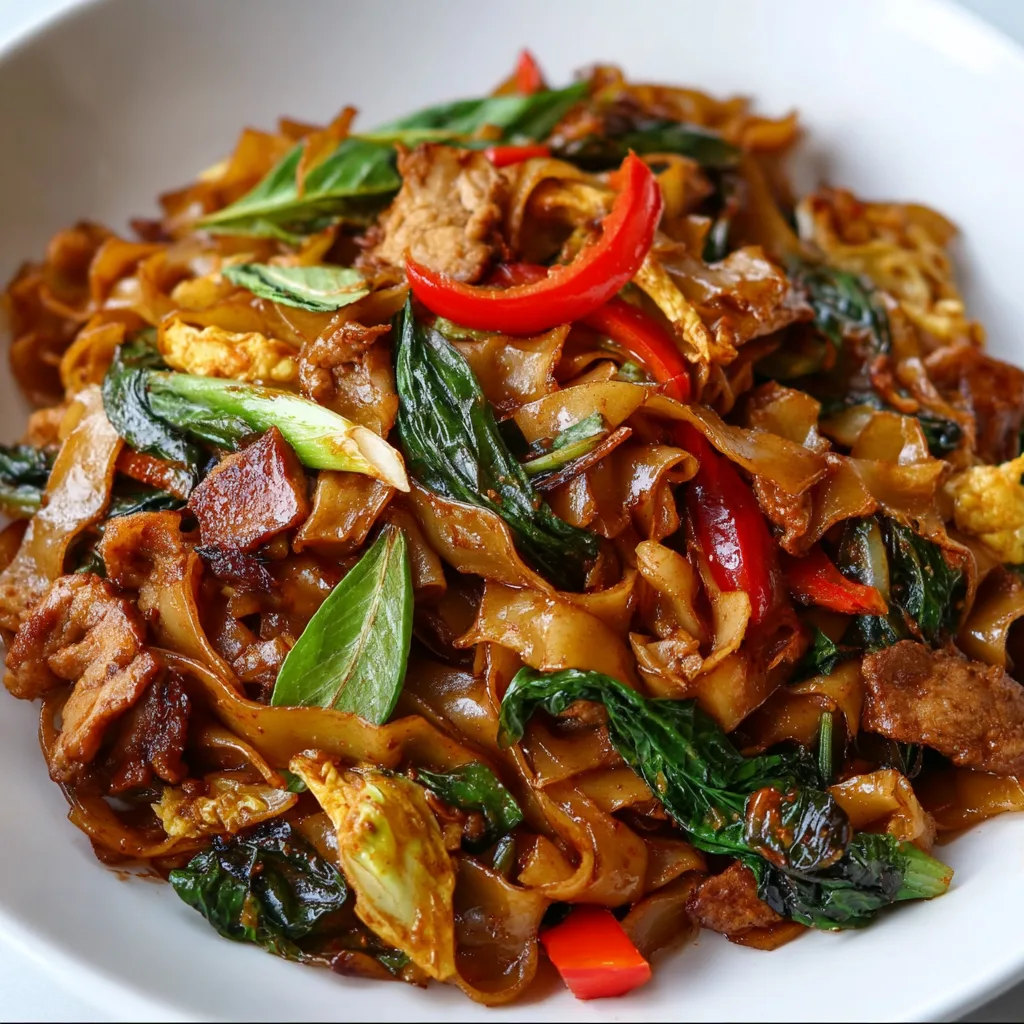
    20-min. Thai Drunken Noodles (Pad Kee Mao) has been my weeknight savior more times than I can count. There’s something magical about the way those wide rice noodles soak up the umami-rich sauce, creating a dance of sweet, spicy, and savory flavors that transport me straight to the bustling streets of Bangkok. The first time I made this dish, my kitchen filled with the intoxicating aroma of basil and chili, and I knew I’d found a recipe worth keeping in my regular rotation. Trust me, once you try these noodles, takeout will become a distant memory.

    Recipe

    Why You’ll Love This 20-min. Thai Drunken Noodles (Pad Kee Mao)

    Quick & Convenient for Busy Weeknights

    If you’re anything like me, finding recipes that deliver maximum flavor with minimum effort is the holy grail of weeknight cooking. These Thai Drunken Noodles come together in just 20 minutes flat, making them perfect for those evenings when you’re tempted to order delivery. The beauty lies in the simplicity—once you’ve prepped your ingredients, the actual cooking process is lightning-fast. I’ve made this dish countless times while simultaneously helping my daughter with homework, proving it’s truly manageable even on the busiest of nights.

    Authentic Flavors Without Hard-to-Find Ingredients

    What I adore about this Pad Kee Mao recipe is how it captures authentic Thai flavors without sending you on a wild goose chase for obscure ingredients. Everything you need can be found at most well-stocked grocery stores, with perhaps just a quick detour to the international aisle. The holy trinity of Thai cooking—garlic, chili, and basil—forms the aromatic backbone, while oyster sauce, soy sauce, and fish sauce create that perfect umami depth that makes you close your eyes with each bite. It’s a little taste of Thailand that doesn’t require a specialty market run.

    Essential Tips & Tricks

    Noodle Perfection Every Time

    The key to perfect drunken noodles lies in how you handle those wide rice noodles. Instead of boiling them as you might with Italian pasta, soak them in hot water until they’re just pliable but still firm—they’ll finish cooking in the wok. This prevents the dreaded mushy noodle syndrome that can ruin the dish. I learned this the hard way after one particularly disappointing batch where my noodles clumped into a gummy mess. Also, keep them moving constantly once they hit the hot wok to prevent sticking and ensure even sauce distribution.

    Building Layers of Flavor

    The magic of Thai cooking lies in balancing flavors, and these drunken noodles are no exception. Start by searing your protein until just golden to develop those delicious caramelized edges. Then, give your aromatics (garlic, chili, onions) enough time to release their fragrance before adding the vegetables. This layering approach ensures every component contributes its distinctive flavor. If you’re looking for another dish that masters this balance, check out my 10-min. Garlic Chili Oil Noodles for a similar but different flavor experience.

    Serving Ideas & Creative Variations

    Perfect Pairings to Complete Your Meal

    These spicy drunken noodles shine as a main dish but can be elevated with thoughtful sides. I love serving them with a simple cucumber salad dressed with rice vinegar and a touch of sugar to provide a cooling counterpoint to the heat. For a more substantial spread, add some crispy spring rolls or a bowl of Tom Kha soup. The versatility of this dish means it works beautifully for everything from solo dinners to impressive date nights. My husband always gives that knowing smile when he smells these noodles cooking—he knows he’s in for a treat!

    Protein & Vegetable Swap Ideas

    One of the reasons I return to this recipe again and again is its incredible adaptability. While I often use chicken, you can easily substitute shrimp, tofu, or beef with equally delicious results. For a seafood version that’s equally satisfying, you might enjoy my One-Pot Shrimp and Sausage Jambalaya which uses a similar quick-cooking approach. As for vegetables, bell peppers and Thai basil are traditional, but don’t be afraid to toss in whatever needs using up—broccoli, snap peas, or baby corn all work wonderfully. Just remember to add harder vegetables earlier and delicate ones later.

    Storage & Troubleshooting Guide

    Keeping Leftovers Fresh

    While these Thai Drunken Noodles are best enjoyed fresh from the wok, leftovers can still make a delicious next-day meal with proper storage. Transfer completely cooled noodles to an airtight container and refrigerate for up to 3 days. When reheating, add a splash of water or chicken broth to revive the sauce, and heat gently in a wok or microwave. I find that a quick minute in a hot pan works wonders to bring back some of the original texture, especially if you add a fresh handful of basil leaves at the end.

    Fixing Common Pad Kee Mao Problems

    Even experienced cooks occasionally run into issues with this dish. If your noodles are sticking together, you likely either oversoaked them initially or didn’t use enough oil in your wok. The solution is a hot wok and constant movement. If your dish lacks punch, don’t be shy about adjusting the sauce components—more fish sauce for umami, more chili for heat, or a squeeze of lime for brightness. Remember that authentic Thai cooking is about finding your perfect balance of sweet, sour, salty, and spicy. Trust your taste buds and adjust accordingly.

    Frequently Asked Questions

    What does “Drunken Noodles” mean? Is there alcohol in the recipe?

    Despite the name, traditional 20-min. Thai Drunken Noodles (Pad Kee Mao) contain no alcohol. The name likely comes from how spicy the dish is (perfect for soaking up alcohol) or how the noodles appear “drunk” as they soak up the flavorful sauce.

    Can I make this dish vegetarian?

    Absolutely! Substitute the fish sauce with soy sauce or vegetarian “fish” sauce, use vegetable broth, and replace the protein with tofu, tempeh, or extra vegetables. The flavor profile remains deliciously authentic.

    How spicy should authentic Pad Kee Mao be?

    Traditional drunken noodles are quite spicy, but you can easily adjust to your preference. Start with fewer chilies if you’re heat-sensitive, or remove the seeds for milder flavor while still getting the aromatic benefits.

    Can I prepare any components ahead of time?

    Yes! Chop vegetables, mix the sauce, and prepare your protein up to 24 hours ahead. Store everything separately in the refrigerator. The actual cooking should be done just before serving for best texture and flavor.

    What’s the difference between Pad Kee Mao and Pad Thai?

    Pad Kee Mao uses wider rice noodles, has a darker soy-based sauce, and features Thai basil and more chili heat. Pad Thai uses thinner noodles with a sweeter tamarind-based sauce, typically garnished with peanuts and bean sprouts.

    Final Thoughts

    This 20-min. Thai Drunken Noodles (Pad Kee Mao) recipe has earned its place in my regular rotation because it delivers restaurant-quality results with minimal fuss. There’s something deeply satisfying about creating such bold, complex flavors in your own kitchen, especially when it takes less time than waiting for delivery. I’d love to see your versions of this dish—tag me on Pinterest with your creations! Whether you’re cooking for one or feeding a family, these noodles bring a taste of Thailand to your table in the most delicious way possible.

  • 10-Min Garlic Chili Oil Noodles | Spicy, Quick & Irresistible!

    10-Min Garlic Chili Oil Noodles | Spicy, Quick & Irresistible!

    10-Min Garlic Chili Oil Noodles | Spicy, Quick & Irresistible!

    10-min. Garlic Chili Oil Noodles are my absolute lifesaver on those evenings when hunger strikes but energy doesn’t. The first time I made these, I was skeptical that something so quick could deliver such complex flavors. But that first twirl of noodles, glistening with aromatic garlic-infused oil and carrying that perfect hint of chili heat, convinced me this would become a staple in my kitchen. The beauty lies in its simplicity – a few pantry ingredients transform into a crave-worthy meal faster than delivery could ever arrive. If you love quick, satisfying meals with bold flavors, this one’s about to become your new favorite at Recipes Darleen.

    Recipe

    Why You’ll Love This 10-min. Garlic Chili Oil Noodles

    Minimal Ingredients, Maximum Flavor

    These noodles require surprisingly few ingredients while delivering restaurant-quality taste. All you need is your favorite noodles (ramen, udon, or even spaghetti works!), garlic, chili flakes, a neutral oil, soy sauce, and a splash of vinegar. The magic happens when the garlic slowly infuses the oil, releasing its aromatic compounds while the chili flakes bloom, creating that signature crimson oil that coats every strand. I keep these ingredients stocked specifically for nights when cooking feels impossible but takeout isn’t an option. The flavor-to-effort ratio is honestly unmatched!

    Perfect for Any Skill Level

    Whether you’re a kitchen novice or seasoned chef, this recipe welcomes all. The technique couldn’t be simpler – boil noodles, make a quick chili oil, toss together. There’s no precision chopping, no complicated timing, just straightforward steps anyone can master. I taught my college-aged nephew this recipe, and he texted me a photo of his perfect noodles the very next day! The forgiving nature of this dish means you can adjust heat levels, garlic intensity, and noodle type to suit your preferences. It’s practically impossible to mess up, making it the ideal confidence-builder in the kitchen.

    Essential Tips & Tricks

    Perfecting Your Chili Oil

    The heart of this dish is the garlic chili oil, and a few simple techniques elevate it from good to extraordinary. First, use medium-low heat when infusing the oil – too hot and the garlic burns bitter, too cool and it won’t release its flavors. Watch for that moment when the garlic turns golden and the chili flakes begin to bubble slightly. That’s your signal! I learned this the hard way after scorching my first batch and filling my kitchen with smoke. Add a pinch of sugar to balance the heat and bring out the garlic’s natural sweetness. For extra umami depth, try adding a dash of mushroom powder or MSG if you have it.

    Choosing and Preparing Your Noodles

    Not all noodles are created equal for this dish. Look for ones with texture that can grip the oil – ramen, lo mein, or udon are my top choices. Always cook them slightly underdone (about 1 minute less than package directions) since they’ll continue cooking when tossed with the hot oil. Reserve a few tablespoons of starchy cooking water before draining – this secret ingredient helps the sauce cling to every strand. Never rinse your noodles for this recipe! That starch is your friend, creating the silky texture that makes restaurant noodles so irresistible. I keep a variety of noodles in my pantry specifically for quick-fix meals like this.

    Serving Ideas & Creative Variations

    Perfect Pairings

    These noodles shine as both main dish and side. For a complete meal, top with a fried egg with that perfect runny yolk that creates an instant sauce when broken. Add protein with shredded rotisserie chicken, pan-seared shrimp, or crispy tofu cubes. On the vegetable front, thinly sliced bell peppers, snap peas, or baby bok choy add color and nutrition without extending your cook time. I love serving these alongside crispy air fryer bang bang shrimp for a quick Asian-inspired feast. The contrast between the spicy, slurpable noodles and crisp shrimp creates a restaurant-worthy experience in minutes.

    Flavor Variations to Try

    The basic recipe is just your canvas! Create a sesame variation by finishing with toasted sesame oil and seeds. For a Thai-inspired twist, add a spoonful of creamy peanut butter to the hot oil (it melts beautifully) and finish with lime juice and chopped cilantro. Craving something tangy? Add pickled vegetables or kimchi on top. My personal favorite variation includes a splash of black vinegar and a handful of chopped scallions for brightness. For extra umami, try mixing in miso paste or oyster sauce. These simple additions transform your basic garlic chili noodles into an entirely new experience each time.

    Storage & Troubleshooting Guide

    Storing and Reviving Leftovers

    These noodles store surprisingly well despite their simplicity. Keep leftovers in an airtight container in the refrigerator for up to 3 days. They will firm up as the oil solidifies, but don’t worry! To revive, add a splash of water and microwave for 1-2 minutes, stirring halfway through. The steam rehydrates the noodles beautifully. Alternatively, a quick toss in a hot skillet works wonders, creating slightly crispy edges for a different but equally delicious experience. I often make a double batch intentionally for lunch the next day – the flavors deepen overnight, making day-two noodles sometimes even better than fresh!

    Fixing Common Issues

    If your noodles turn out too dry, add a splash of the reserved cooking water or a drizzle of additional oil. Too spicy? Balance with a touch of honey or a spoonful of Greek yogurt served alongside. If the garlic tastes bitter, you likely overcooked it – next time, remove the pan from heat sooner. For gummy noodles, be sure to cook them al dente and toss immediately with the oil rather than letting them sit. If your chili oil isn’t red enough, try using Korean gochugaru or paprika for more vibrant color. Remember that this dish is forgiving – almost any issue can be remedied with simple adjustments.

    Frequently Asked Questions

    Can I make 10-min. Garlic Chili Oil Noodles ahead of time?

    Yes! Prepare the chili oil up to a week ahead and store in the refrigerator. When ready to eat, just cook fresh noodles and toss with the reheated oil for a truly 5-minute meal.

    What’s the best type of oil to use?

    Neutral oils like vegetable, canola, or peanut work best as they let the garlic and chili flavors shine. Avoid olive oil as its flavor can compete with the other ingredients.

    Can I make this dish less spicy?

    Absolutely! Reduce the chili flakes by half or substitute with gochugaru (Korean chili powder) which provides color and mild heat without overwhelming spiciness.

    How can I add protein to make it a complete meal?

    Top with a fried egg, shredded rotisserie chicken, sautéed shrimp, or tofu cubes. For a vegetarian protein boost, add edamame or a sprinkle of hemp hearts.

    Is there a gluten-free version of this recipe?

    Yes! Use rice noodles or 100% buckwheat soba and substitute tamari for soy sauce. The flavor profile remains delicious with these simple swaps.

    Final Thoughts

    These 10-min. Garlic Chili Oil Noodles have saved countless evenings in my kitchen, proving that delicious doesn’t have to mean complicated or time-consuming. The beauty of this dish lies in its adaptability – make it your own with whatever ingredients you have on hand. I hope this becomes your go-to recipe on busy weeknights or whenever you need a comforting bowl of noodles without the fuss. For more quick and satisfying recipes, follow me on Pinterest where I’m always sharing new favorites!

  • Homemade Baked Chicken Tenders That Will Blow Your Taste Buds!

    Homemade Baked Chicken Tenders That Will Blow Your Taste Buds!

    Homemade Baked Chicken Tenders That Will Blow Your Taste Buds!

    Homemade Baked Chicken Tenders are my absolute go-to when I need a dinner that satisfies everyone at my table. There’s something magical about the golden, crispy coating giving way to juicy, tender chicken inside—all without the mess and hassle of deep-frying! I discovered this recipe years ago when my nephew declared he would only eat “chicken fingers” for an entire month. Now it’s become our Friday night tradition, with the aroma of herbs and panko filling my kitchen as we gather around for movie night. These chicken tenders deliver that perfect crunch factor while being so much healthier than takeout.

    Recipe

    Why You’ll Love These Homemade Baked Chicken Tenders

    Perfect Texture Without Deep Frying

    The secret to these irresistibly crispy tenders is all in the technique. By using panko breadcrumbs instead of regular ones, you get that distinctive crunch that mimics deep-fried chicken without all the oil. I brush the tenders with a little melted butter before baking, which helps the coating brown beautifully in the oven. The high temperature baking method ensures the outside gets golden while the inside stays incredibly moist. My family can never believe these aren’t fried when I serve them—that’s how perfectly the texture turns out!

    Kid-Friendly Yet Sophisticated

    These chicken tenders bridge the gap between kid food and grown-up satisfaction. Children absolutely devour them without complaints (a miracle in my household!), while adults appreciate the upgraded flavors from herbs and seasonings. I often make a double batch—a milder version with simple seasoning for the little ones, and a more robust version with added spices for the adults. The versatility is what makes this recipe a permanent fixture in my meal rotation. Plus, they’re substantial enough to feel like a proper dinner rather than just a quick snack.

    Essential Tips & Tricks

    Breading That Actually Sticks

    Nothing’s more frustrating than breading that slides right off your chicken as soon as you bite in. My foolproof method involves a crucial three-step process: dry the chicken thoroughly with paper towels first (moisture is the enemy of crispiness!), then dredge in flour, dip in beaten egg, and finally coat in seasoned panko. For extra insurance, I let the breaded tenders rest for about 10 minutes before baking. This allows the coating to adhere better. Press firmly when applying the breadcrumbs to ensure they stick to every surface of the chicken.

    Temperature and Timing Secrets

    The key to perfectly cooked homemade baked chicken tenders is getting your oven temperature just right. Preheat to 425°F for at least 15 minutes before baking—this high heat immediately seals the exterior. Always use a wire rack set on a baking sheet, which allows hot air to circulate completely around the tenders for even browning. For timing, smaller tenders need about 15 minutes, while larger ones might require 20. The internal temperature should reach 165°F, but be careful not to overcook or they’ll dry out. If you’re making a buffalo chicken variation, you might need to adjust accordingly.

    Serving Ideas & Creative Variations

    Perfect Pairing Partners

    These homemade baked chicken tenders are wonderfully versatile when it comes to side dishes. My family’s favorite pairings include sweet potato fries, a crisp apple slaw, or a bright green salad with vinaigrette. For a more substantial meal, I’ll serve them alongside roasted vegetables or creamy mashed potatoes. The tenders also make excellent toppers for grain bowls—try them with quinoa, avocado, and a drizzle of tahini sauce for a nutritious dinner. The neutral flavor profile means they complement nearly anything, from Mediterranean-inspired sides to classic comfort foods.

    Flavor Variations To Try

    Don’t feel limited to just one version of these tenders! I love creating different flavor profiles by adjusting the seasonings in the breadcrumb mixture. For Italian-style tenders, mix in dried oregano, basil, and grated parmesan. For a Southwest kick, add chili powder, cumin, and a pinch of cayenne. Lemon pepper seasoning creates a bright, zesty version that pairs beautifully with salads. You can even go Asian-inspired with five-spice powder and sesame seeds. The coating holds herbs and spices wonderfully, making each batch a new culinary adventure while keeping that perfect crispy texture.

    Storage & Troubleshooting Guide

    Make-Ahead and Reheating Tips

    These homemade baked chicken tenders maintain their quality surprisingly well when stored properly. For make-ahead convenience, you can bread the tenders and refrigerate them uncooked for up to 8 hours before baking. Already baked tenders will keep in an airtight container in the refrigerator for 3-4 days. To reheat without losing that precious crispiness, avoid the microwave! Instead, place them on a wire rack in a 375°F oven for about 10 minutes. For freezing, flash-freeze the cooked tenders on a baking sheet first, then transfer to a freezer bag where they’ll keep for up to 3 months.

    Solving Common Problems

    Even experienced cooks sometimes encounter issues with chicken tenders. If your breading isn’t getting crispy enough, check that your oven is properly calibrated—an oven thermometer can help verify the temperature. Pale tenders usually mean the oven wasn’t hot enough or they were placed too low in the oven. If the coating falls off during baking, you likely didn’t press it firmly enough onto the chicken or skipped the crucial resting period after breading. For tenders that seem dry, they’ve probably been overcooked; next time, reduce the baking time by 2-3 minutes or use a meat thermometer to nail the perfect doneness.

    Frequently Asked Questions

    Can I make homemade baked chicken tenders gluten-free?

    Absolutely! Substitute regular flour with rice flour and use gluten-free panko breadcrumbs. The texture remains crispy, and most people can’t tell the difference. Just ensure your seasonings are also gluten-free.

    How do I know when my chicken tenders are fully cooked?

    The safest method is using a meat thermometer—chicken is done at 165°F. Visually, the breading should be golden brown, and when cut, the meat should be white throughout with clear juices.

    Can I use chicken breasts instead of tenders?

    Yes! Slice boneless, skinless chicken breasts into 1-inch strips. You may need to adjust cooking time slightly as homemade strips might be thicker than natural tenders.

    What dipping sauces work best with these tenders?

    Honey mustard, ranch, BBQ, and buffalo are classics. For something different, try a sriracha mayo, avocado lime dip, or Greek yogurt with herbs.

    How can I make these homemade baked chicken tenders even crispier?

    Spray or lightly brush the breaded tenders with olive oil before baking. Using convection setting if available, or increasing oven temperature by 25°F can also enhance crispiness.

    Final Thoughts

    These homemade baked chicken tenders have become more than just a recipe in my household—they’re a reliable solution for busy weeknights, picky eaters, and anyone craving comfort food without the guilt. The beauty lies in their simplicity and adaptability. Whether you’re serving them to toddlers or dinner guests, these crispy, juicy tenders deliver restaurant quality with minimal effort. I hope they become a beloved staple in your cooking repertoire too! Don’t forget to check out more family-friendly recipes on Pinterest.

  • Easy Strawberry Cake Mix Brownies: Irresistibly Soft & Delicious!

    Easy Strawberry Cake Mix Brownies: Irresistibly Soft & Delicious!

    Easy Strawberry Cake Mix Brownies: Irresistibly Soft & Delicious!

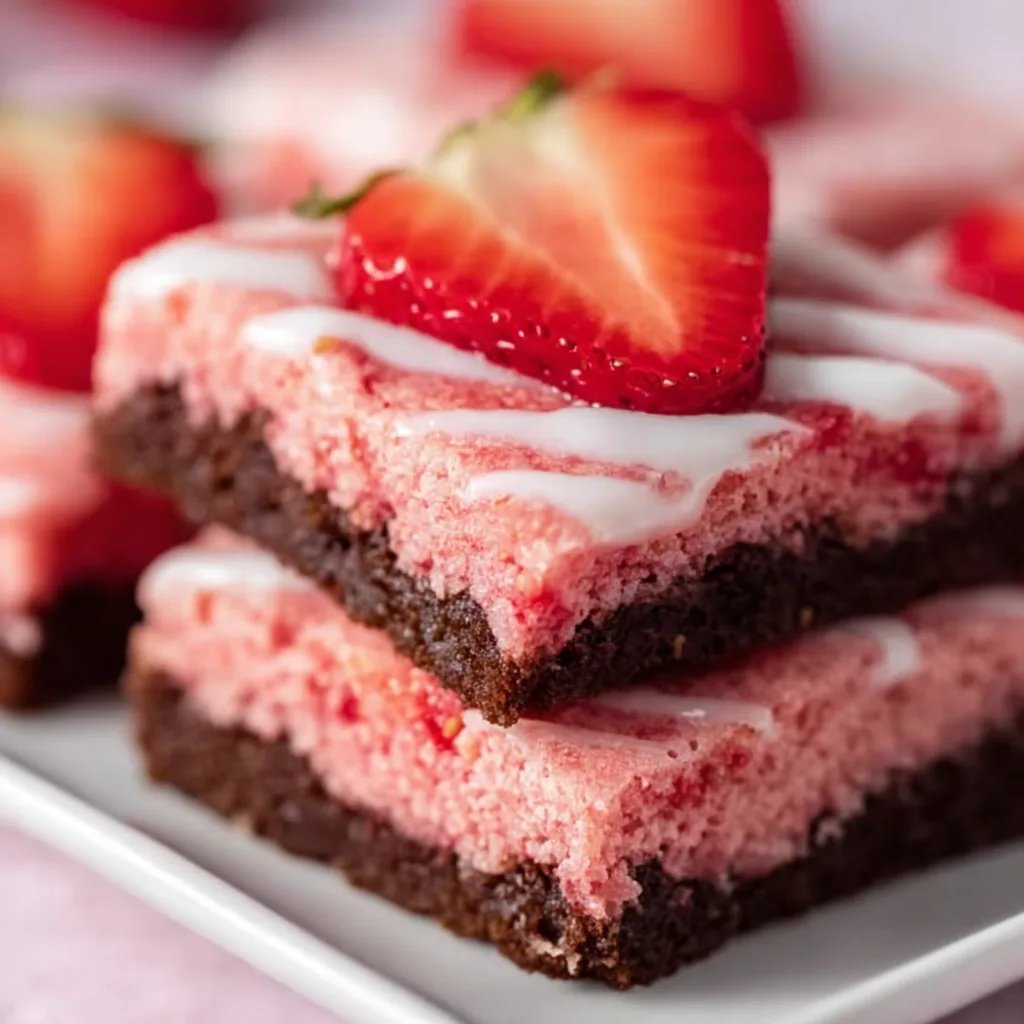
    Easy Strawberry Cake Mix Brownies are the perfect solution for those moments when you’re craving something sweet but don’t want to spend hours in the kitchen. I discovered this recipe last summer when my niece came over unexpectedly, and I needed a quick treat that would make her eyes light up. The vibrant pink swirls against rich chocolate create a dessert that’s as beautiful as it is delicious. With just a handful of ingredients and minimal prep time, these fudgy, fruity squares have become my go-to for impromptu gatherings and late-night cravings. Trust me, these brownies from Recipes Darleen will have everyone asking for seconds!

    Recipe

    Why You’ll Love These Easy Strawberry Cake Mix Brownies

    Perfect for Beginners and Busy Bakers

    If you’ve ever felt intimidated by baking, these brownies will change everything. Using boxed mixes as your base means consistent results every time with minimal measuring. The simple swirl technique creates a gorgeous marbled effect that looks professional but requires zero artistic skill. I love making these on busy weeknights when I need a baking win without the fuss. The strawberry-chocolate combination delivers that perfect balance of fruity sweetness and rich cocoa that satisfies multiple cravings at once. Plus, the pretty pink color makes them Instagram-worthy with absolutely no food coloring needed!

    Customizable for Any Occasion

    These versatile treats can transform from casual snacks to elegant desserts with just a few tweaks. For everyday treats, simply cut them into squares and enjoy. For special occasions, try cutting them with heart-shaped cookie cutters for Valentine’s Day or adding white chocolate drizzle for birthday celebrations. I served these at my sister’s baby shower with fresh strawberry slices on top, and guests couldn’t believe they came from box mixes! The vibrant pink swirls make them perfect for gender reveals, bridal showers, or anytime you want to add a pop of color to your dessert table.

    Essential Tips & Tricks

    Mastering the Perfect Swirl

    Creating those beautiful strawberry swirls isn’t just about aesthetics—it’s about flavor distribution. The key is not overmixing! After pouring your chocolate batter into the pan, drop spoonfuls of strawberry batter on top, spacing them evenly. Then take a butter knife and gently make figure-eight motions, dragging just the tip through both batters. Stop when you see distinct swirls forming—about 5-6 passes maximum. I learned this the hard way after turning my first batch into a muddy pink-brown mess! For extra visual impact, reserve a tablespoon of strawberry batter to add as final dollops on top before baking.

    Achieving the Ideal Texture

    The difference between dry, cakey brownies and perfectly fudgy ones often comes down to baking time. Start checking these brownies about 5 minutes before the recipe suggests—they’re done when a toothpick inserted in the center comes out with a few moist crumbs (not wet batter). For extra richness, add 2 tablespoons of sour cream to your chocolate batter. If you prefer a more intense strawberry flavor, mix 1-2 tablespoons of freeze-dried strawberry powder into your strawberry batter. Check out these Cheesecake Brownie Bites for more inspiration on creating perfect brownie texture!

    Serving Ideas & Creative Variations

    Elegant Dessert Presentations

    Transform these simple brownies into showstopping desserts with a few easy additions. Try serving warm brownies with a scoop of vanilla bean ice cream and fresh strawberry slices for an elevated dessert experience. For dinner parties, cut brownies into small squares, place on dessert plates with a drizzle of white chocolate ganache and a mint leaf for a restaurant-worthy presentation. I once created a stunning dessert tower by alternating brownie squares with layers of whipped mascarpone and fresh berries—it disappeared in minutes! The contrast between warm brownies and cold toppings creates a sensory experience that makes guests feel truly special.

    Fun Flavor Twists

    While the classic recipe is delicious, experimenting with flavors takes these brownies to new heights. Try adding orange zest to the strawberry batter for a citrus kick, or mix mini white chocolate chips into the brownie batter for extra texture. For a sophisticated version, add 1-2 tablespoons of balsamic reduction to the strawberry mixture—the acidity enhances the berry flavor beautifully. Feeling adventurous? Try a version with Banana Pudding Brownies inspiration by adding banana extract to the chocolate batter for a chocolate-covered strawberry banana split effect that tastes like summer in every bite!

    Storage & Troubleshooting Guide

    Keeping Brownies Fresh

    To maintain that perfect fudgy texture, store completely cooled brownies in an airtight container at room temperature for up to 3 days. Place parchment paper between layers to prevent sticking. For longer storage, refrigerate for up to a week—just bring to room temperature before serving to restore that soft texture. If you need to freeze them, wrap individual brownies tightly in plastic wrap, then aluminum foil, and place in a freezer bag for up to 3 months. I always make a double batch specifically to freeze—there’s nothing better than discovering a forgotten brownie treasure during a late-night sweet craving!

    Fixing Common Baking Issues

    Even experienced bakers encounter problems sometimes! If your brownies come out too dry, they were likely overbaked—next time, check earlier and remember they continue cooking slightly after removal. For brownies that sink in the middle, your oven was probably too hot—invest in an oven thermometer for accuracy. If your swirls disappeared, you likely mixed too aggressively—use a lighter touch next time. For brownies that stick to the pan, try lining with parchment paper with overhanging edges to create handles for easy removal. I once saved slightly overbaked brownies by turning them into delicious milkshake mix-ins—kitchen disasters can lead to delicious discoveries!

    Frequently Asked Questions

    Can I use a different flavor of cake mix instead of strawberry?

    Absolutely! Cherry, raspberry, or even lemon cake mix works beautifully with the chocolate brownie base. Just follow the same swirling technique for equally stunning results.

    How do I know when my strawberry cake mix brownies are done baking?

    Insert a toothpick in the center—it should come out with a few moist crumbs, not wet batter. The edges will be set while the center remains slightly soft.

    Can I make these brownies ahead for a party?

    Yes! These brownies actually taste better the next day as the flavors meld. Store in an airtight container and add any fresh toppings just before serving.

    Will these work with gluten-free cake and brownie mixes?

    They do! I’ve tested with several gluten-free mixes with excellent results. Just note that some gluten-free batters may be slightly thicker, requiring gentler swirling.

    What makes Easy Strawberry Cake Mix Brownies better than regular brownies?

    The contrast between rich chocolate and sweet strawberry creates more complex flavors, while the vibrant pink swirls make them visually stunning with minimal effort.

    Final Thoughts

    These Easy Strawberry Cake Mix Brownies have saved me countless times when I needed something special without the fuss. There’s something magical about the way the fruity strawberry complements the deep chocolate—it’s like having two desserts in one! I keep the ingredients on hand for last-minute gatherings or whenever I need a reliable baking win. Whether you’re a novice baker or just short on time, these brownies deliver impressive results that look and taste like you spent hours in the kitchen. Find more delicious inspiration on our Pinterest page!

  • One Pot Homemade Hamburger Helper Recipe That Will Wow Your Family!

    One Pot Homemade Hamburger Helper Recipe That Will Wow Your Family!

    One Pot Homemade Hamburger Helper Recipe That Will Wow Your Family!

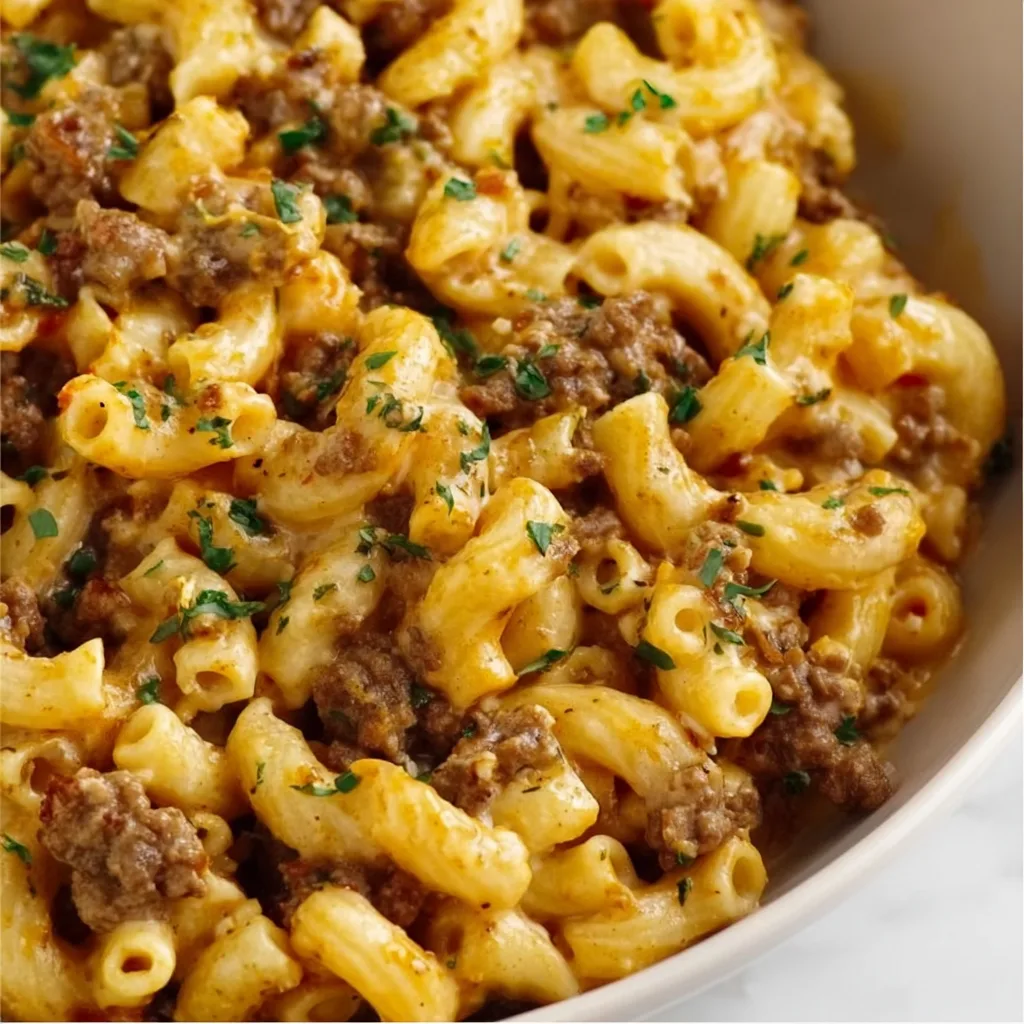
    There’s something deeply comforting about a steaming bowl of One Pot Homemade Hamburger Helper that takes me right back to childhood, but with a grown-up twist that’s infinitely better than the boxed version. The rich, beefy sauce coating every strand of pasta, melded with gooey cheese and savory seasonings – it’s the ultimate weeknight comfort food that comes together in just 30 minutes. I discovered the magic of making this from scratch during my first apartment days when budget was tight but cravings were real. Now it’s my go-to when I need a hug in food form that the whole family devours without complaint. Ready to ditch the box and discover true comfort food bliss?

    Recipe

    Why You’ll Love This One Pot Homemade Hamburger Helper

    Better Flavor, Better Ingredients

    Making Hamburger Helper from scratch means real ingredients and authentic flavors without the mysterious powder packets. I use freshly grated cheddar instead of powdered cheese product, and the difference is mind-blowing. The depth of flavor comes from building layers – starting with caramelized onions, browning the beef properly, and using beef broth instead of water. My husband, who claimed to hate Hamburger Helper, actually went back for seconds and sheepishly asked if there was more. The best part? You control the sodium and avoid preservatives while creating something that tastes like it took hours.

    Quick Cleanup Magic

    The “one pot” in One Pot Homemade Hamburger Helper isn’t just a catchy phrase – it’s the kitchen salvation you need after a long day. Everything cooks in a single dutch oven or deep skillet, including the pasta, which absorbs all those savory flavors while releasing starch that naturally thickens the sauce. I still remember the first time I made this and stood in amazement at my nearly empty sink afterward. No colander, no separate sauce pan, no multiple measuring cups – just one pot to wash. For a busy weeknight when you’re juggling homework help and tomorrow’s lunches, this cleanup simplicity feels like an absolute gift.

    Essential Tips & Tricks

    Perfecting the Pasta Texture

    The trickiest part of any one-pot pasta dish is getting the pasta consistency just right. For perfect One Pot Homemade Hamburger Helper, use slightly less liquid than you think you need – you can always add more. I prefer medium shells or elbow macaroni as they cook evenly and trap the sauce beautifully. Keep the lid off and stir frequently to monitor absorption. The pasta should finish cooking right as the sauce reaches your desired thickness. My personal trick? Pull it from the heat when it’s slightly firmer than you want, as it will continue absorbing sauce as it sits and cools slightly.

    Flavor Boosting Secrets

    The difference between good and incredible One Pot Homemade Hamburger Helper lies in the flavor foundations. Start by properly browning your beef – don’t stir constantly, let it develop a deep crust first. Deglaze with a splash of red wine or even beer before adding your broth for complexity. A tablespoon of Worcestershire sauce adds umami depth, while a teaspoon of dijon mustard brightens everything. I learned from my grandmother to add a pinch of nutmeg to beef dishes – it’s subtle but makes people wonder what your secret ingredient is. These small additions take minimal extra time but maximum flavor impact.

    Serving Ideas & Creative Variations

    Family-Friendly Customizations

    One Pot Homemade Hamburger Helper becomes a crowd-pleaser when you set up a simple topping bar. My kids go crazy for diced avocado, extra cheese, crispy bacon bits, and sliced green onions sprinkled on top. For spice lovers, offer hot sauce or red pepper flakes. The dish itself can be customized too – try ground turkey for a lighter version or plant-based crumbles for vegetarian guests. I’ve found that adding a cup of frozen peas or corn in the last two minutes of cooking adds color, nutrition, and sweetness that balances the savory elements beautifully. Everyone gets exactly what they want without extra cooking.

    Elevated Entertaining Options

    While Hamburger Helper might seem casual, this homemade version can be surprisingly sophisticated for casual entertaining. Serve it in individual crocks topped with toasted panko and broiled for a crispy top. For a fusion twist, add chorizo with the beef and stir in some smoked paprika for Spanish flair. My favorite upgrade is adding sautéed mushrooms and a drizzle of truffle oil for an umami explosion. I once served this at a potluck labeled as “Truffled Beef and Pasta Gratin” and no one guessed its humble origins! Pair with a simple arugula salad and good bread for a cozy dinner party that won’t break your budget.

    Storage & Troubleshooting Guide

    Meal Prep & Leftovers Magic

    One Pot Homemade Hamburger Helper is meal prep perfection since it actually improves with a day in the refrigerator as flavors meld. Store in airtight containers for up to 4 days. When reheating, add a splash of milk or broth to revive the creamy texture, as the pasta will have absorbed more liquid. For freezing, slightly undercook the pasta, cool completely, then portion into freezer containers. Thaw overnight in the refrigerator before reheating. I often make a double batch on Sunday, serving half for dinner and transforming the rest into stuffed peppers or a quick pasta bake later in the week.

    Fixing Common Issues

    Even experienced cooks can encounter texture troubles with one-pot pasta dishes. If your One Pot Homemade Hamburger Helper is too soupy, remove the lid and increase the heat to reduce quickly, or stir in a handful of additional cheese to thicken. Too dry? Add broth or milk a few tablespoons at a time until it reaches your desired consistency. If your pasta isn’t cooking evenly, your heat might be too high – lower it and give a good stir. For gritty cheese sauce, always remove from heat before adding cheese and use freshly grated cheese (pre-shredded contains anti-caking agents that prevent smooth melting).

    Frequently Asked Questions

    Can I make One Pot Homemade Hamburger Helper ahead of time?

    Yes! Prepare up to 2 days ahead, slightly undercooking the pasta. Refrigerate and reheat with a splash of milk or broth to restore creaminess. The flavors actually improve overnight.

    What pasta shapes work best for this recipe?

    Medium shells, elbow macaroni, or rotini work perfectly. They cook evenly and have nooks to capture the sauce. Avoid long pasta like spaghetti or delicate shapes that might overcook.

    How can I make this recipe gluten-free?

    Substitute gluten-free pasta and ensure your broth and Worcestershire sauce are certified gluten-free. Cook the pasta for slightly less time as gluten-free varieties can become mushy quickly.

    What’s the best cheese to use?

    Sharp cheddar provides classic flavor, but a mix with Monterey Jack or Colby adds creaminess. Freshly grate your cheese—pre-shredded contains anti-caking agents that prevent smooth melting.

    Can I double this One Pot Homemade Hamburger Helper recipe?

    Absolutely! Use a larger pot with plenty of surface area. You may need to increase cooking time slightly, and be extra vigilant about stirring to ensure even cooking.

    Final Thoughts

    This One Pot Homemade Hamburger Helper has become more than just a recipe in my household—it’s a solution for hectic weeknights, a nostalgic comfort, and proof that homemade always trumps packaged convenience foods. The beauty lies in its simplicity and adaptability, whether you’re feeding picky children or impressing dinner guests. I hope this becomes your new go-to when you need something satisfying, quick, and made with love. Don’t forget to check out more comfort food inspiration on Pinterest and let me know your favorite variation!

  • Dutch Oven No Knead Crusty Bread – Irresistibly Easy & Crispy!

    Dutch Oven No Knead Crusty Bread – Irresistibly Easy & Crispy!

    Dutch Oven No Knead Crusty Bread – Irresistibly Easy & Crispy!

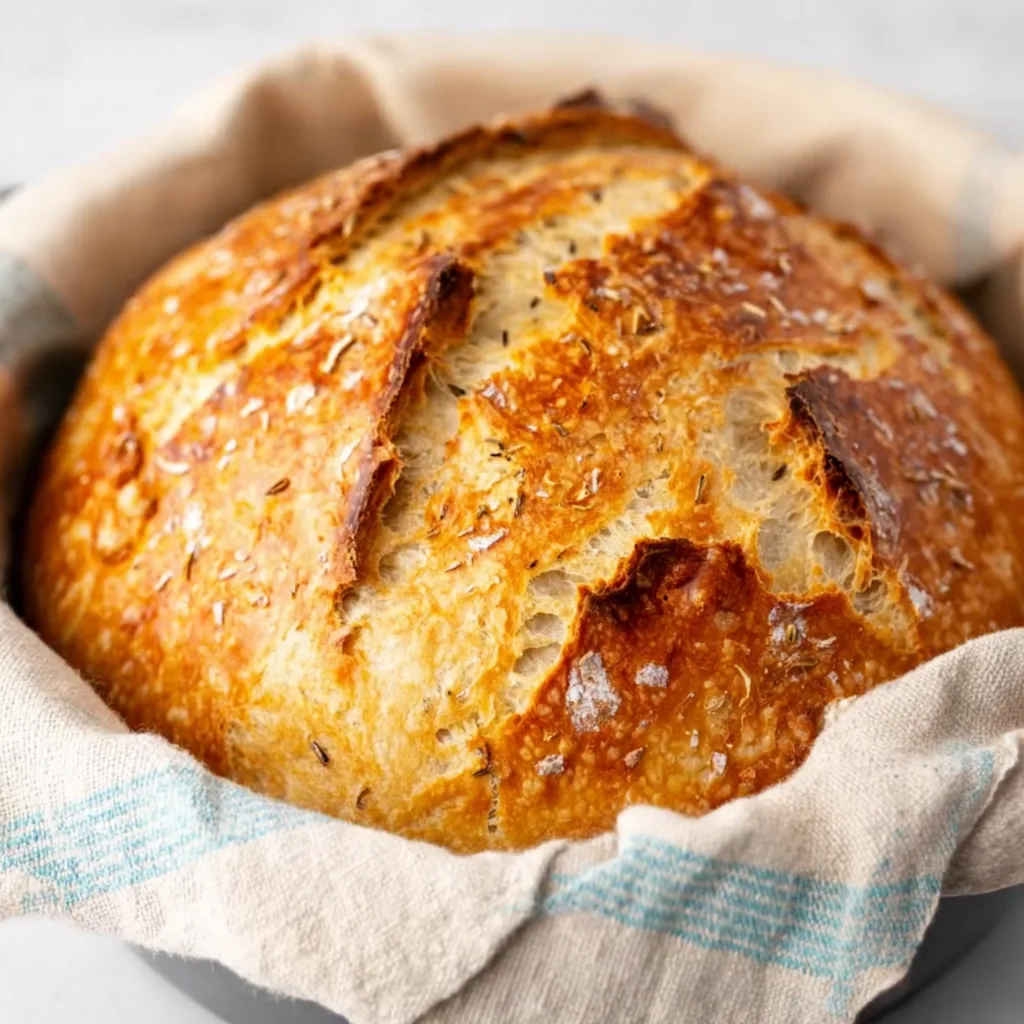
    Dutch Oven No Knead Crusty Bread has completely transformed my home baking game. There’s something almost magical about the way such simple ingredients—flour, water, salt, and a tiny bit of yeast—can create a loaf with a crackly crust and tender, airy interior that rivals any artisanal bakery. The first time I pulled one of these golden loaves from my oven, the satisfying tap-tap-tap of my knuckles against that crisp exterior nearly brought tears to my eyes. If you’ve been intimidated by bread baking, this foolproof method is your gateway to fresh-baked bliss. Trust me, your kitchen will never smell more inviting.

    Recipe

    Why You’ll Love This Dutch Oven No Knead Crusty Bread

    Effortless Technique for Bakery-Quality Results

    The beauty of this Dutch oven no knead bread lies in its hands-off approach. Unlike traditional bread recipes that demand vigorous kneading and precise timing, this method lets time do the hard work. Just mix the ingredients until shaggy, let the dough rest overnight (or up to 18 hours!), and the slow fermentation develops complex flavors and that perfect texture. I still remember my skepticism the first time I tried it—how could something so simple taste so good? But that initial bite of warm, chewy bread with a swipe of butter convinced me this would become a weekend ritual in my home.

    Perfect for Beginners and Busy Bakers

    If you’ve ever felt intimidated by bread baking, this recipe will change everything. With minimal ingredients and equipment, it’s practically foolproof. The long rise forgives minor measuring mistakes, and the Dutch oven creates the perfect environment for that professional crust. I often mix the dough before bed on Friday night, then shape and bake it Saturday afternoon while tackling weekend chores. The hands-on time is less than 15 minutes total, making it ideal for busy schedules. Even my friend who claims to “kill everything in the kitchen” mastered this on her first try!

    Essential Tips & Tricks

    Mastering the Dutch Oven Method

    Using a Dutch oven is the secret weapon for achieving that bakery-worthy crust. The heavy, covered pot traps steam during the initial baking phase, creating the perfect environment for crust development. Preheat your Dutch oven for at least 30 minutes at 450°F before adding the dough—this intense heat immediately sets the exterior. I learned the hard way that skipping the preheat results in a pale, chewy crust! Remove the lid for the final 15-20 minutes of baking to allow the crust to develop that gorgeous golden color and crackly texture that makes homemade bread so satisfying.

    Perfecting Your Dough Consistency

    Getting the right dough consistency is crucial for that perfect crumb structure. Aim for a wet, shaggy dough that looks almost too sticky—this high hydration creates those beautiful air pockets inside. If your dough seems dry, add water a tablespoon at a time until it’s properly sticky. Remember that humidity affects flour absorption, so adjustments are normal. During winter, my kitchen is drier, and I often need an extra 2-3 tablespoons of water. Use a rubber spatula for mixing to keep your hands clean, and dust your work surface generously with flour when shaping to prevent sticking.

    Serving Ideas & Creative Variations

    Elevate Your Meals with Freshly Baked Bread

    There’s nothing quite like tearing into warm, crusty bread as the centerpiece of a meal. Serve thick slices alongside creamy tomato cannellini bean soup for a comforting dinner, or create an impressive bread board for gatherings with quality olive oil, flaky salt, and fresh herbs. On lazy weekend mornings, I love toasting slices until golden, then topping with smashed avocado, a squeeze of lemon, and red pepper flakes. For an elevated sandwich experience, layer thinly sliced bread with prosciutto, arugula, and fig jam—the contrast between the crusty exterior and soft interior creates the perfect bite.

    Flavor Variations to Keep Things Interesting

    Once you’ve mastered the basic recipe, the flavor possibilities are endless. Add 2-3 tablespoons of fresh herbs like rosemary, thyme, or dill to the initial dough for an aromatic loaf. For a Mediterranean twist, fold in ½ cup of chopped olives and 2 tablespoons of lemon zest during the shaping stage. My personal favorite variation includes 1 cup of shredded sharp cheddar and 2 tablespoons of cracked black pepper—it makes the most incredible grilled cheese you’ve ever tasted! Sweet variations work beautifully too; try adding dried cranberries and chopped walnuts for a breakfast loaf that’s perfect with a smear of honey butter.

    Storage & Troubleshooting Guide

    Keeping Your Bread Fresh

    Store your Dutch oven no knead bread properly to maintain that perfect texture as long as possible. For short-term storage (1-2 days), simply place the cut side down on a cutting board or wrap loosely in a clean kitchen towel. Avoid plastic bags, which trap moisture and soften that beautiful crust! For longer storage, slice the entire loaf once completely cooled, then freeze in a zip-top bag with as much air removed as possible. Frozen slices can go directly into the toaster for an almost-fresh experience. I keep a loaf in the freezer at all times for those evenings when I need something special to elevate a simple dinner.

    Solving Common Baking Issues

    If your bread isn’t turning out perfectly, a few simple adjustments can make all the difference. For a denser-than-desired loaf, your dough might be too dry or your fermentation time too short—try adding a bit more water next time and extending the rise. If your crust isn’t crackling crisp, make sure your Dutch oven is thoroughly preheated and check your oven temperature with an independent thermometer. Pale crust usually means your oven temperature is too low or you didn’t bake long enough. Remember that seasonal changes affect flour absorption—I find I need slightly less water in humid summer months and more in dry winter air.

    Frequently Asked Questions

    Can I use all-purpose flour instead of bread flour for Dutch oven no knead crusty bread?

    Yes! All-purpose flour works beautifully, though bread flour gives a slightly chewier texture. The long fermentation helps develop gluten even with all-purpose flour, creating excellent structure and flavor.

    How do I know when my bread is fully baked?

    The bread should be deeply golden brown and sound hollow when tapped on the bottom. For extra certainty, an internal temperature of 205-210°F indicates it’s perfectly done.

    Can I make this bread without a Dutch oven?

    While a Dutch oven creates the best crust, alternatives include a heavy covered pot, a pizza stone with a metal bowl as a dome, or even a preheated cast iron skillet with a metal bowl cover.

    Why did my dough spread out instead of rising up?

    This typically happens when the dough is too wet or wasn’t properly shaped to create tension. Try using slightly less water next time and practice creating a tighter surface during shaping.

    How long should I let the bread cool before slicing?

    Allow your bread to cool at least 30 minutes before slicing. This resting period completes the baking process internally and prevents a gummy texture.

    Final Thoughts

    Creating Dutch oven no knead crusty bread has become more than just a recipe in my kitchen—it’s a ritual that grounds me and fills my home with comfort. The minimal effort for such spectacular results makes this technique something I return to again and again. There’s profound satisfaction in transforming basic ingredients into something so nourishing and beautiful. Whether you’re a baking novice or experienced bread maker, this method deserves a permanent place in your culinary repertoire. I hope your kitchen soon fills with the intoxicating aroma of freshly baked bread and the joy of that first perfect bite. Happy baking! Find more inspiration on Pinterest.