Blog

  • Dill Yogurt Cucumber Salad: Refreshing, Creamy & Perfectly Tangy!

    Dill Yogurt Cucumber Salad: Refreshing, Creamy & Perfectly Tangy!

    Dill Yogurt Cucumber Salad: Refreshing, Creamy & Perfectly Tangy!

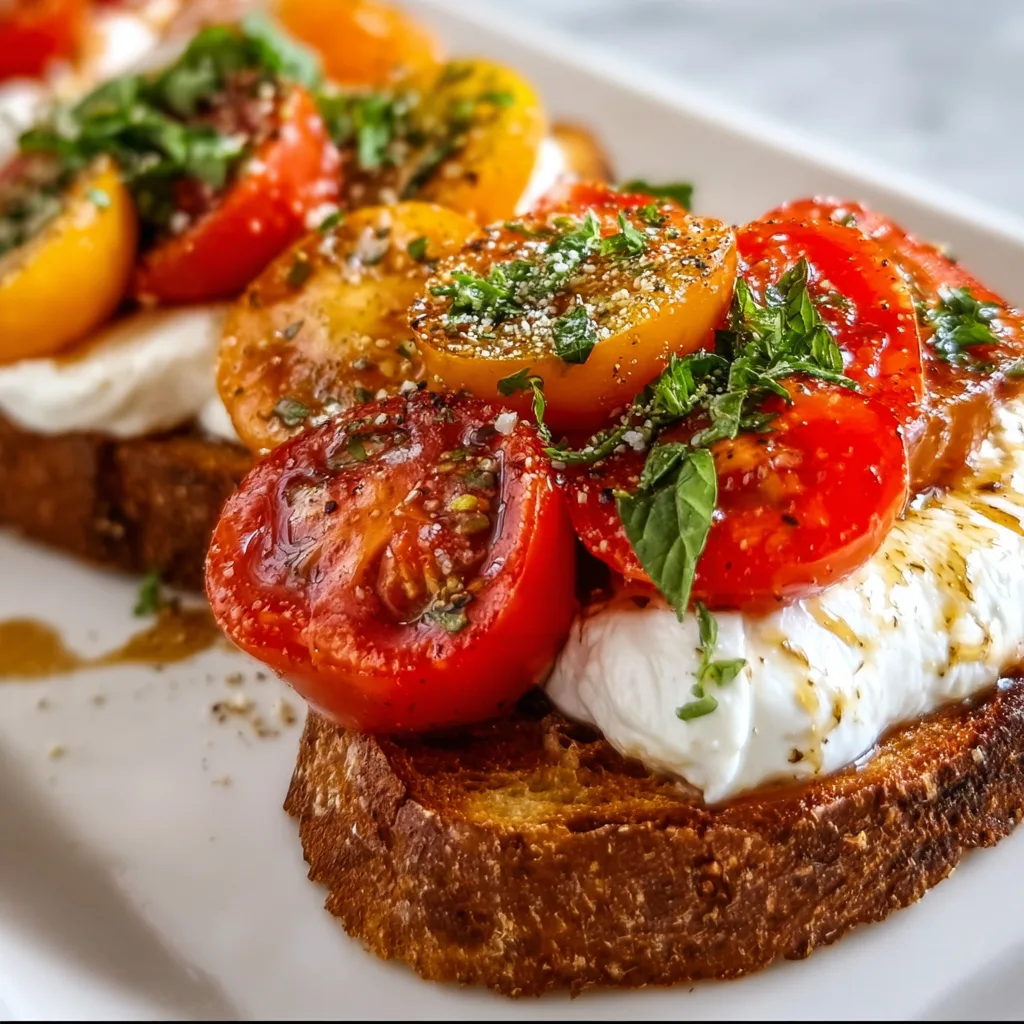
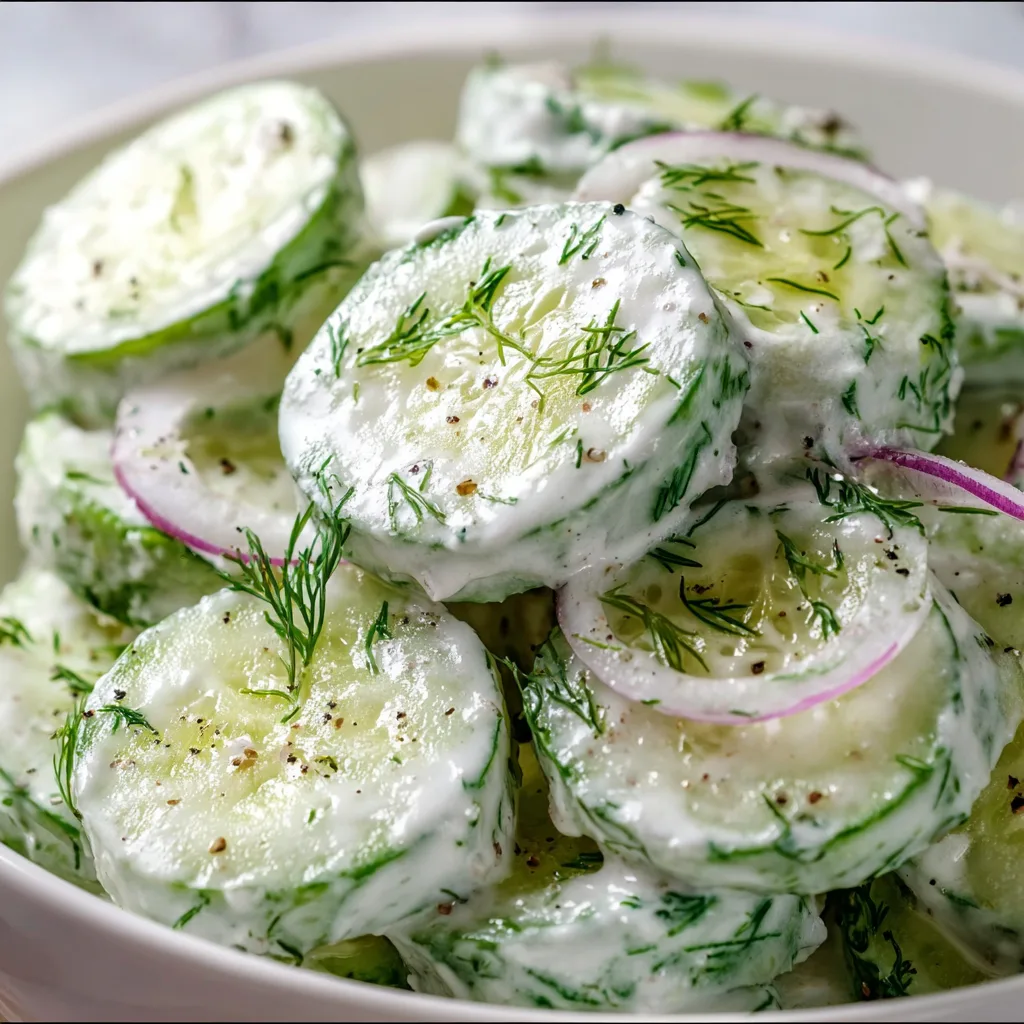
    This Dill Yogurt Cucumber Salad might just be the most refreshing side dish you’ll make all summer. The first time I served it at a backyard barbecue, my neighbor practically chased me around with her plate asking for the recipe! There’s something magical about the combination of cool, crisp cucumbers with tangy yogurt and fragrant dill that makes this salad irresistible. It’s become my go-to for everything from quick lunches to fancy dinner parties, and like my Tomato Burrata Toast, it’s a simple recipe that feels special every time.

    Recipe

    Why You’ll Love This Dill Yogurt Cucumber Salad

    Perfect Balance of Flavors and Textures

    This salad is all about contrasting elements working in perfect harmony. The cool crunch of fresh cucumbers against the creamy yogurt creates a texture paradise in your mouth. I love how the tangy yogurt base gets brightened with lemon juice and deepened with garlic, while fresh dill adds that distinctive herbal note that makes everything taste like summer. The first time I made this, I couldn’t stop sneaking spoonfuls straight from the mixing bowl! It’s light enough for hot days but satisfying enough to feel like a proper side dish.

    Quick Prep with Maximum Impact

    You won’t believe how much flavor comes from just 10 minutes of effort. This is my secret weapon recipe when I need something impressive but don’t have hours to spend in the kitchen. Simply slice cucumbers, whisk together the yogurt dressing, combine, and chill! The hardest part is waiting for the flavors to meld in the refrigerator. I’ve made this countless times when unexpected guests drop by, and it always earns rave reviews despite the minimal effort. Perfect for busy weeknights when you want something fresh alongside your main dish.

    Essential Tips & Tricks

    Cucumber Selection and Preparation

    The foundation of this salad is choosing the right cucumbers. English or Persian varieties work best as they have thinner skins and fewer seeds. I like to partially peel mine in stripes—it keeps some of that gorgeous green color while removing any bitter notes. For the crispest texture, salt your cucumber slices and let them drain in a colander for 15-20 minutes before patting dry. This simple step draws out excess moisture and concentrates the cucumber flavor, preventing that dreaded soggy salad situation we’ve all experienced!

    Yogurt Matters More Than You Think

    Don’t underestimate how much your yogurt choice impacts the final dish! I always reach for full-fat Greek yogurt for its luxurious creaminess and tang. The thicker consistency creates the perfect coating for cucumber slices without becoming watery. For a lighter version, 2% works well too, but avoid non-fat varieties as they often contain additives and lack richness. If you’re feeling adventurous, try making your own yogurt for an extra special touch—the difference is remarkable and adds a homemade quality that store-bought can’t match.

    Serving Ideas & Creative Variations

    Perfect Pairing Partners

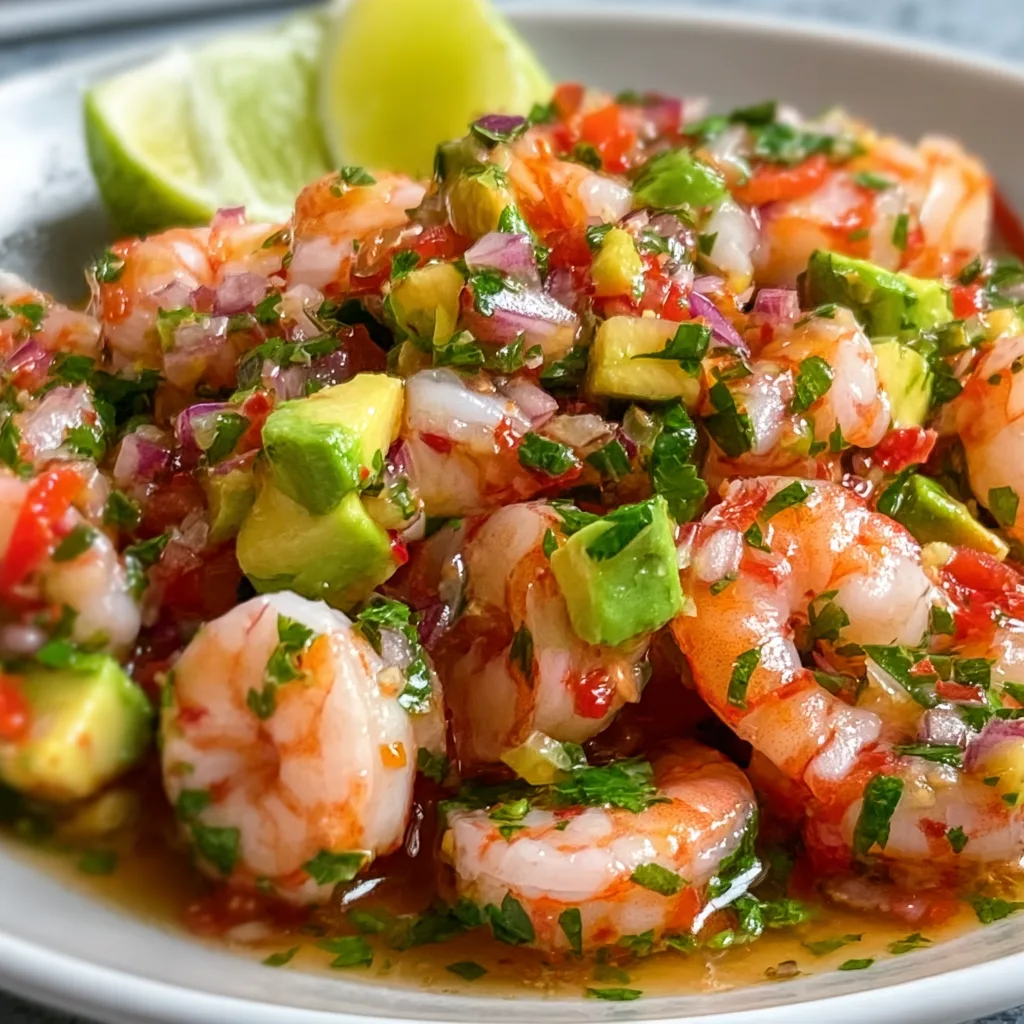
    This Dill Yogurt Cucumber Salad shines alongside grilled proteins like lemon chicken, salmon, or lamb kebabs. The cool, creamy texture provides beautiful contrast to anything charred or spicy. I love serving it with Mediterranean-inspired meals—it’s particularly divine with falafel or alongside hummus and warm pita. For a complete summer spread, pair it with my Chili Lime Shrimp Ceviche and watch your guests go wild! The salad also makes a wonderful sandwich topping or pita filling for lunch the next day.

    Exciting Flavor Twists

    While the classic version is perfect, this salad welcomes creative adaptations. Add thinly sliced red onion for peppery bite, or mix in halved cherry tomatoes for juicy pops of color. I sometimes toss in crumbled feta cheese or toasted pine nuts for extra texture and richness. For a Middle Eastern twist, sprinkle with za’atar and a drizzle of olive oil before serving. My personal favorite variation includes diced avocado and a pinch of red pepper flakes—the creamy, spicy combination is absolutely addictive and transforms this side into a light meal.

    Storage & Troubleshooting Guide

    Keeping It Fresh

    The key to maintaining crispness is proper storage. This salad is best enjoyed within 24 hours of making, but will keep for up to 3 days in an airtight container. If preparing ahead for a party, I recommend keeping the cucumber mixture and yogurt dressing separate until about an hour before serving. This prevents the cucumbers from releasing too much water and diluting that gorgeous creamy dressing. Always give it a quick stir before serving, and if it seems watery after storage, simply drain off excess liquid.

    Fixing Common Issues

    Even the simplest recipes can sometimes need troubleshooting. If your salad turns out too watery, drain the excess liquid and add a bit more yogurt to restore creaminess. Too bland? A pinch of salt, extra lemon zest, or more fresh herbs will perk it up instantly. If the garlic flavor is overwhelming, balance it with additional yogurt and a touch of honey. Remember that flavors intensify as the salad sits, so what might taste perfectly seasoned initially could become stronger overnight. Trust your taste buds and adjust accordingly!

    Frequently Asked Questions

    Can I use dried dill instead of fresh?

    Yes, but use only 1 teaspoon of dried dill as it’s more concentrated. Fresh dill provides brighter flavor, but dried works in a pinch. Rehydrate dried dill in a little lemon juice before adding.

    How do I prevent my Dill Yogurt Cucumber Salad from becoming watery?

    Salt and drain cucumber slices for 20 minutes before mixing. Pat them dry with paper towels, then combine with the yogurt dressing just before serving for best results.

    What can I substitute for Greek yogurt?

    Sour cream, labneh, or dairy-free yogurt alternatives work well. Each offers a different tanginess level, so adjust seasonings accordingly. Coconut yogurt adds a subtle sweetness.

    Is this recipe keto-friendly?

    Yes! Cucumbers are low-carb vegetables, and full-fat Greek yogurt fits keto macros. Check yogurt labels for hidden sugars and use herbs generously for maximum flavor without carbs.

    Can I make this salad ahead for meal prep?

    Absolutely! Prepare components separately—slice cucumbers and mix dressing—then combine portions as needed throughout the week for maximum freshness and texture.

    Final Thoughts

    This Dill Yogurt Cucumber Salad has become my summer signature dish for good reason. There’s something magical about how a few simple ingredients transform into something so refreshing and satisfying. I love watching friends’ faces light up with that first cool, creamy bite—it’s the ultimate warm-weather comfort food that never feels heavy. Whether you’re serving it alongside grilled meats or enjoying it straight from the fridge on a hot afternoon, this salad delivers big flavor with minimal effort. Don’t forget to check out more refreshing ideas on our Pinterest for summer inspiration!


  • Creamy Fruit Salad Rollups: Irresistibly Delicious & Easy Snack!

    Creamy Fruit Salad Rollups: Irresistibly Delicious & Easy Snack!

    Creamy Fruit Salad Rollups: Irresistibly Delicious & Easy Snack!

    Creamy Fruit Salad Rollups are my latest obsession, combining the refreshing sweetness of fresh fruits with velvety cream cheese in a portable, picnic-perfect package. I discovered this delightful treat during a summer gathering when my neighbor brought something similar, and I’ve been tweaking the recipe ever since. The tender tortillas wrap around a luscious filling that balances tangy cream cheese with honey-kissed fruits for a bite that’s both satisfying and light. Perfect for breakfast on-the-go or a sweet afternoon snack, these rollups have become a staple in my kitchen, especially when I’m craving something like my Easy Banana Cream Pie but want something more portable.

    Recipe

    Why You’ll Love These Creamy Fruit Salad Rollups

    Perfect Balance of Flavors and Textures

    There’s something magical about the way the creamy filling contrasts with the fresh fruit in these rollups. Each bite delivers a perfect harmony of smooth cream cheese, juicy berries, and tender tortilla. I love how the slight tanginess of the cream cheese balances the natural sweetness of ripe strawberries and blueberries. The honey drizzle adds just enough sweetness without overwhelming the fresh fruit flavors. And that moment when you bite through the soft tortilla into the cool, creamy center? Pure bliss! These rollups satisfy both sweet cravings and hunger in a way that feels indulgent yet light.

    Quick and Customizable for Any Occasion

    What I adore most about these Creamy Fruit Salad Rollups is their versatility and ease. You can whip these up in under 15 minutes when unexpected guests arrive or prep them the night before for a grab-and-go breakfast. Switch up the fruits based on what’s in season – peaches in summer, apples in fall, or citrus in winter. The filling can be adjusted to suit different dietary needs too. Need dairy-free? Use coconut cream cheese. Want extra protein? Add a sprinkle of chopped nuts. I’ve even made a savory version with herbs and cucumber that disappeared at a baby shower faster than my Creamy Cheese and Potato Pie.

    Essential Tips & Tricks

    Mastering the Perfect Filling Consistency

    The secret to success with these rollups lies in the cream cheese texture. I learned this the hard way after creating a too-runny filling that escaped from every end! Let your cream cheese come to room temperature before mixing, but don’t let it get too soft. Beat it just until smooth and spreadable – think frosting consistency. Pat your fruit dry with paper towels to remove excess moisture that could make your rollups soggy. For extra stability, I sometimes add a tablespoon of Greek yogurt which adds tanginess while helping the filling stay put. This creates that perfect creamy base that holds everything together.

    Rolling Technique for Picture-Perfect Results

    Trust me, there’s definitely a technique to creating beautiful rollups without filling squishing out everywhere. Start with room temperature tortillas – cold ones will crack! Spread the filling evenly, leaving a half-inch border around the edges. Don’t overfill; a thin, even layer works best. Place larger fruit pieces in a line about one-third from the bottom edge, then fold the bottom over the fruit and roll tightly. For clean slices, refrigerate the rolled tortillas for at least 30 minutes before cutting with a sharp knife. I sometimes use a bit of honey at the final edge as “glue” to keep everything sealed.

    Serving Ideas & Creative Variations

    Elegant Presentation for Gatherings

    Transform these simple rollups into party-worthy treats with minimal effort. For brunch gatherings, I arrange the colorful slices in a spiral on a white platter, sprinkle with mint leaves, and place a small bowl of honey or maple syrup in the center for dipping. For kids’ parties, I cut them into smaller “sushi” bites and provide colorful toothpicks. Create a stunning dessert board by pairing these rollups with my Marshmallow Fruit Dip and an assortment of fresh berries. The vibrant colors make for Instagram-worthy photos while the handheld format means less mess for guests.

    Sweet and Savory Flavor Combinations

    Don’t limit yourself to just sweet versions! The flavor possibilities are endless when you start experimenting. My tropical variation with mango, pineapple and coconut-infused cream cheese transports me to vacation mode instantly. For a fall twist, try apple-cinnamon with a sprinkle of granola for crunch. Chocolate lovers in my family go crazy for banana-Nutella rollups drizzled with peanut butter. On the savory side, cucumber-dill cream cheese with thin strawberry slices creates an unexpectedly refreshing appetizer. I’ve even created a “dessert taco” version by using cinnamon tortillas and a cheesecake-inspired filling that rivals my favorite Fluffy Yogurt Cloud Dessert.

    Storage & Troubleshooting Guide

    Keeping Rollups Fresh and Preventing Sogginess

    The biggest challenge with these Creamy Fruit Salad Rollups is maintaining that perfect texture over time. Store them in an airtight container lined with paper towels to absorb excess moisture. They’ll keep in the refrigerator for up to 2 days, though they’re best enjoyed within 24 hours. If making ahead for a party, consider wrapping the whole rolled tortillas in plastic wrap without slicing until serving time. For lunchboxes, wrap individual slices in parchment paper before placing in containers. If your rollups do get slightly soggy, a quick 10 seconds in the microwave can help revive the tortilla texture.

    Rescuing Common Rollup Mishaps

    Even I have rollup disasters sometimes! If your filling is too runny, fold in 1-2 tablespoons of whipped cream cheese to thicken it up. Tortilla cracked while rolling? Warm it for 10 seconds in the microwave to make it more pliable. If your rollups unravel when cutting, try chilling them longer or securing with toothpicks before slicing. Filling oozing out the sides? You likely overfilled – scrape some out and start again. For fruit that’s too juicy, toss it with a teaspoon of cornstarch before adding to the filling. Remember that even “ugly” rollups taste delicious, so don’t stress too much about appearance!

    Frequently Asked Questions

    Can I make Creamy Fruit Salad Rollups ahead of time?

    Yes! Prepare them up to 24 hours in advance. Store whole unsliced rolls wrapped in plastic wrap in the refrigerator, and slice just before serving for the freshest results.

    What’s the best tortilla to use for fruit rollups?

    Flour tortillas in the 8-inch size work best. Choose soft, fresh ones labeled “burrito style” for easier rolling. Flavored varieties like spinach or sun-dried tomato can add interesting flavor dimensions.

    Can I freeze these rollups?

    I don’t recommend freezing as the fruit will release moisture when thawed, making the tortillas soggy. These are best enjoyed fresh within 1-2 days of preparation.

    How do I prevent my Creamy Fruit Salad Rollups from getting soggy?

    Pat fruits dry thoroughly before adding them to the cream cheese mixture. Also, create a moisture barrier by spreading a thin layer of cream cheese on the tortilla before adding juicier fruits.

    What are good substitutes for cream cheese in this recipe?

    Mascarpone offers a richer, sweeter alternative. Greek yogurt cream cheese provides more protein. For dairy-free options, try almond-based or coconut-based cream cheese alternatives.

    Final Thoughts

    These Creamy Fruit Salad Rollups have become my go-to for everything from rushed weekday breakfasts to elegant brunches with friends. There’s something wonderfully satisfying about transforming simple ingredients into something that feels special yet requires minimal effort. The joy on people’s faces when they bite into these colorful spirals makes all the difference. Whether you stick to classic strawberry-banana or venture into exotic flavor territories, these rollups offer endless possibilities for customization. I hope these Creamy Fruit Salad Rollups bring as much happiness to your kitchen as they have to mine! Find more inspiration for fruity treats on my Pinterest board.

  • Çılbır Eggs Benedict Fusion: Irresistibly Creamy & Viral Delight!

    Çılbır Eggs Benedict Fusion: Irresistibly Creamy & Viral Delight!

    Çılbır Eggs Benedict Fusion: Irresistibly Creamy & Viral Delight!

    Çılbır Eggs Benedict Fusion brings two beloved breakfast classics together in one extraordinary dish. This Turkish-meets-Western creation combines the creamy yogurt and spiced butter of traditional çılbır with the elegant structure of eggs Benedict. I first experimented with this fusion on a rainy Sunday morning when I craved something comforting yet impressive. The moment that silky poached egg broke over the garlicky yogurt base, sending ribbons of golden yolk cascading down, I knew I’d found breakfast magic. The contrasting temperatures and textures create a sensory symphony that will transform your brunch game forever.

    Recipe

    Why You’ll Love This Çılbır Eggs Benedict Fusion

    A Perfect Balance of Flavors

    This dish delivers an incredible flavor harmony that traditional eggs Benedict can’t match. The tangy, garlicky yogurt base cuts through the richness of the hollandaise, while the aleppo pepper butter adds a subtle warmth that dances on your palate. I love how the English muffin soaks up all those magnificent sauces. My neighbor Kate actually gasped when she first tasted it at our block party brunch—that perfect bite where the yogurt, egg yolk, and spiced butter all mingle together is truly unforgettable. It’s complex yet comforting in all the right ways.

    Impressive Yet Approachable

    Don’t let the fancy name intimidate you—this Çılbır Eggs Benedict Fusion is surprisingly doable for home cooks. While traditional hollandaise sauce can be finicky, this recipe offers more forgiveness. The yogurt base can be prepared ahead of time, and the spiced butter comes together in minutes. I used to avoid making eggs Benedict at home until I discovered this version. The components can be tackled one at a time, making it manageable even for a casual weekend breakfast. Your guests will think you’ve been taking secret culinary classes!

    Essential Tips & Tricks

    Mastering the Perfect Poached Egg

    The soul of this dish lies in that perfectly poached egg with its gloriously runny yolk. Use the freshest eggs possible—they hold their shape better during poaching. Add a splash of vinegar to your simmering water and create a gentle vortex before sliding in your egg. I learned the hard way that boiling water is too aggressive; aim for tiny bubbles just breaking the surface. Set a timer for exactly 3 minutes for that ideal consistency where the whites are set but the yolk remains luxuriously molten. Practicing this technique will elevate all your breakfast creations.

    Balancing the Yogurt Base

    The yogurt foundation requires thoughtful preparation to achieve the right consistency and flavor profile. Use full-fat Greek yogurt for the creamiest result, bringing it to room temperature before serving. Whisk in minced garlic, a pinch of salt, and a squeeze of lemon juice to brighten the flavors. I like to let this mixture sit for at least 15 minutes so the garlic can infuse throughout. If it’s too thick, loosen with a tablespoon of milk or water. The yogurt should be spoonable but not runny—it needs to support your poached egg without pooling excessively on the plate.

    Serving Ideas & Creative Variations

    Seasonal Adaptations

    This versatile fusion dish welcomes seasonal tweaks that keep it exciting year-round. In summer, try adding fresh herbs like dill or chives to the yogurt, or top with quick-pickled radishes for a crisp contrast. Fall calls for a sprinkle of za’atar or sumac over the finished dish. Winter versions shine with roasted garlic in the yogurt base and a heartier bread foundation. Last spring, I added finely chopped preserved lemon to the yogurt and it was a revelation—bright, complex, and utterly addictive. These small adjustments keep the core concept fresh while honoring the changing seasons.

    Global Inspirations

    Take your Çılbır Eggs Benedict Fusion on a worldwide tour by incorporating international flavors. Try a Mediterranean spin with olive tapenade and feta crumbles, or go Japanese with a dash of furikake and a drizzle of sesame oil. For a Mexican-inspired version, swap the aleppo butter for chipotle butter and add sliced avocado. I once served an Indian-inspired variation with curry-infused butter and cilantro-mint chutney that had my brunch guests raving for weeks. The core elements—bread, yogurt, egg—provide a perfect canvas for creative experimentation while maintaining the dish’s soul.

    Storage & Troubleshooting Guide

    Component Preparation

    For stress-free assembly, prep strategically by breaking down this dish into manageable components. The spiced butter can be made up to a week ahead and stored in the refrigerator—just rewarm gently before serving. Yogurt can be seasoned the night before and kept covered in the fridge. English muffins can be toasted slightly ahead and kept warm in a low oven. I’ve found that having everything ready except the eggs makes the final cooking process much more enjoyable. Just remember: poached eggs wait for no one, so time that final step to coincide with your guests being ready to eat.

    Fixing Common Issues

    Even experienced cooks encounter challenges with this fusion dish. If your hollandaise breaks, whisk in a teaspoon of hot water until it comes back together. Overcooked eggs with firm yolks? Quickly poach fresh ones—it takes just minutes. Yogurt too runny? Strain through cheesecloth for 30 minutes. When my butter separated once during melting, I added a splash of cold cream and whisked vigorously to re-emulsify. For make-ahead situations, consider soft-boiled eggs instead of poached—they reheat more gracefully while maintaining that essential runny yolk that makes this dish so special.

    Frequently Asked Questions

    What is Çılbır Eggs Benedict Fusion exactly?

    It’s a creative combination of Turkish çılbır (poached eggs with yogurt and spiced butter) and classic eggs Benedict, featuring an English muffin base, garlicky yogurt, poached eggs, and aleppo pepper butter instead of traditional hollandaise.

    Can I make components of this dish ahead of time?

    Absolutely! The spiced butter can be prepared days ahead, and the yogurt mixture can be made the night before. Only the poached eggs and final assembly should be done just before serving.

    Is there a vegetarian version of this recipe?

    Yes! The recipe is already vegetarian. For a vegan adaptation, substitute plant-based yogurt and use silken tofu “eggs” seasoned with black salt for an eggy flavor.

    What’s the best bread to use for the base?

    Traditional English muffins work beautifully, but sourdough, Turkish simit, or even pita bread can create interesting variations with different textures and flavors.

    How spicy is the Çılbır Eggs Benedict Fusion?

    The heat level is customizable. Traditional aleppo pepper provides a mild, sweet warmth. Increase or decrease the pepper amount to suit your preference, or substitute paprika for a milder version.

    Final Thoughts

    This Çılbır Eggs Benedict Fusion represents everything I love about modern cooking—respecting traditions while playfully combining elements to create something fresh and exciting. The marriage of creamy yogurt, perfectly poached eggs, and aromatic spiced butter creates a memorable breakfast experience that feels both familiar and novel. Whether you’re cooking for yourself on a lazy weekend or hosting a special brunch, this dish strikes that perfect balance between impressive and approachable. I hope you’ll experiment with your own variations of this Turkish-Western fusion and discover new flavor combinations to love. Find more inspiration for your breakfast adventures on Pinterest.

  • Sourdough Cheez-Its Crackers: Irresistibly Crispy Snack Bliss!

    Sourdough Cheez-Its Crackers: Irresistibly Crispy Snack Bliss!

    Sourdough Cheez-Its Crackers: Irresistibly Crispy Snack Bliss!

    Sourdough Cheez-Its Snack Crackers are the perfect way to transform your discard into something magical. There’s nothing quite like the tangy zip of homemade cheese crackers that put the store-bought version to shame! I discovered this recipe during a rainy weekend when my sourdough starter was bubbling over, and I couldn’t bear to waste another drop. The combination of sharp cheddar and that signature sourdough tang creates irresistible little squares that disappear faster than I can bake them. If you’re looking for a snack that’s both impressive and addictive, you’ve found it at Recipes Darleen.

    Recipe

    Why You’ll Love This Sourdough Cheez-Its Snack Crackers

    The Perfect Sourdough Discard Solution

    Let’s be honest—finding creative ways to use sourdough discard can feel like a part-time job. These crackers have become my go-to solution because they’re ridiculously simple yet taste like you spent hours perfecting them. The discard adds a complex tanginess that perfectly complements the sharp cheddar, creating a depth of flavor you simply can’t get from regular crackers. Plus, there’s something deeply satisfying about transforming what would have been waste into the star ingredient of a snack everyone fights over. No more guilt-tossing that precious discard!

    Better Than Store-Bought Taste

    The difference between these homemade Sourdough Cheez-Its and the boxed version is like comparing fresh-baked bread to a factory loaf—there’s simply no competition. The crackers emerge from your oven with a gorgeous golden hue and that perfect crisp-yet-tender texture that makes them dangerously poppable. I’ve watched guests who claimed they “weren’t hungry” demolish an entire batch while chatting. The real cheese flavor shines through with none of those artificial ingredients, and the sourdough adds a complexity that makes these truly special.

    Essential Tips & Tricks

    Perfecting Your Dough Consistency

    Getting the right dough consistency is crucial for perfectly crispy Sourdough Cheez-Its. Your dough should be firm but pliable—think play-dough that holds its shape when rolled. If it’s too sticky, don’t panic! Simply dust your work surface with a bit more flour and fold it in gently. For the sharpest flavor, use extra-sharp or aged cheddar cheese and make sure it’s finely grated. I’ve found that chilling the dough for 30 minutes before rolling makes it much easier to work with and helps the crackers hold their shape during baking.

    Rolling and Cutting Techniques

    The secret to professional-looking Sourdough Cheez-Its lies in how you roll and cut them. Aim for uniform thickness—about 1/8 inch is perfect for that ideal crisp texture. I use a pasta roller for super-even crackers, but a regular rolling pin works beautifully too. For that classic look, a fluted pastry wheel creates perfect zigzag edges, while a pizza cutter makes quick work of straight lines. Don’t forget the signature hole in the middle! A wooden skewer or toothpick works perfectly to create that authentic look while helping the crackers bake evenly. Check out these Easy Jalapeno Popper Crescent Rolls for another quick snack idea!

    Serving Ideas & Creative Variations

    Perfect Pairings for Any Occasion

    These Sourdough Cheez-Its elevate any snack board to impressive heights. I love serving them alongside a creamy dip like whipped feta or herb-flecked cream cheese for a simple yet sophisticated appetizer. They’re sturdy enough to scoop up hummus but delicate enough to enjoy on their own. For wine nights, pair them with a bold red that complements the tangy cheese flavor. They’re also perfect tucked into lunchboxes or set out for after-school snacks—my nephew calls them “the fancy orange crackers” and requests them every visit.

    Flavor Variations to Try

    The beauty of homemade Sourdough Cheez-Its is how easily you can customize them! My spicy version with a pinch of cayenne and smoked paprika disappears fastest at parties. For an herb-lovers version, try adding dried rosemary and thyme to the dough. Everything bagel seasoning sprinkled on top before baking creates an irresistible savory crunch. For a more complex cheese flavor, substitute half the cheddar with parmesan or gruyère. These variations pair perfectly with Easy Spinach Stuffed Chicken Breast for a complete meal!

    Storage & Troubleshooting Guide

    Keeping Your Crackers Crispy

    The enemy of crispy crackers is moisture, so proper storage is essential. Once your Sourdough Cheez-Its have completely cooled, store them in an airtight container with a small silica gel packet (save these from vitamin bottles or new shoes). This keeps them perfectly crisp for up to a week. For longer storage, they freeze beautifully for up to three months—just thaw at room temperature and refresh in a 300°F oven for 5 minutes if needed. I’ve found that glass containers maintain crispness better than plastic, but either works in a pinch.

    Troubleshooting Common Issues

    If your crackers aren’t as crispy as you’d like, they likely need a bit more baking time. The color should be a deep golden brown—don’t be afraid to push the baking time a bit longer for maximum crispness. If they’re browning too quickly without crisping, your oven may be running hot. Try reducing the temperature by 25 degrees and baking a bit longer. Uneven thickness is the most common culprit behind inconsistent results, so take your time rolling the dough evenly. For crackers that puff too much, make sure you’re poking enough holes in each piece.

    Frequently Asked Questions

    Can I use fresh sourdough starter instead of discard?

    Yes! Active starter works beautifully, though the crackers may have a stronger sourdough flavor. You might need slightly more flour since active starter is usually more liquid than discard.

    How do I know when my Sourdough Cheez-Its Snack Crackers are perfectly done?

    Look for even golden-brown color and a firm texture when pressed gently. The edges should be slightly darker, and the crackers should feel dry to the touch.

    Can I make these crackers without a food processor?

    Absolutely! Mix the dough by hand using a pastry cutter or two knives to incorporate the butter, then mix in the remaining ingredients until combined.

    Are these crackers suitable for freezing?

    Yes! Freeze them in an airtight container for up to 3 months. Thaw at room temperature and reheat at 300°F for 5 minutes to restore crispness.

    What cheese substitutions work best?

    Any hard, flavorful cheese works well. Try gruyère, gouda, or parmesan. Avoid soft cheeses like mozzarella as they contain too much moisture.

    Final Thoughts

    These Sourdough Cheez-Its Snack Crackers have become a staple in my baking rotation—not just because they use up discard, but because they’re genuinely delicious. There’s something magical about transforming simple ingredients into these perfectly crisp, tangy bites that make everyone think you’re a culinary genius. They’ve saved many last-minute gatherings and quiet afternoons alike. I’d love to see your creations on Pinterest! Whether you stick to the classic recipe or experiment with flavors, these crackers are bound to become your new favorite sourdough discard project.

  • Peach Fluff Recipe That’s Irresistibly Light & Creamy!

    Peach Fluff Recipe That’s Irresistibly Light & Creamy!

    Peach Fluff Recipe That’s Irresistibly Light & Creamy!

    Peach Fluff is summer’s dreamiest no-bake dessert that combines juicy peaches, fluffy whipped topping, and just the right amount of sweetness. Every spoonful feels like capturing sunshine in a bowl! I first made this for a backyard gathering when the temperature hit 95°F, and nobody wanted to turn on the oven. The creamy texture and bright peach flavor had everyone asking for the recipe before they’d even finished their first serving. This effortless treat takes just minutes to prepare but delivers the kind of satisfaction that makes people think you spent hours in the kitchen. Perfect for those days when you crave something sweet but don’t want to fuss with complicated techniques or hot ovens.

    Recipe

    Why You’ll Love This Peach Fluff

    Perfect Balance of Flavors and Textures

    There’s something magical about the way the tangy peaches mingle with the cloud-like whipped topping in this dessert. Each bite delivers a perfect balance of fruity brightness and creamy indulgence that dances on your tongue. The subtle vanilla notes complement the natural sweetness of the peaches without overwhelming them. I love how the tiny bursts of fruit pieces create textural interest against the pillowy fluff base. It’s like eating a peach-flavored cloud that somehow manages to be both substantial and light as air at the same time.

    Quick Preparation for Maximum Impact

    This Peach Fluff requires just 5 minutes of active preparation time, making it the ultimate last-minute dessert hero. On busy weeknights when the kids are demanding something sweet or when unexpected guests arrive, this recipe has saved me countless times. The simple folding technique requires no special skills or equipment beyond a mixing bowl and spoon. I love watching people’s expressions when they taste something so delicious and then learn how ridiculously easy it was to make. Sometimes the simplest recipes truly deliver the most satisfaction.

    Essential Tips & Tricks

    Choosing and Preparing Your Peaches

    The quality of your peaches makes all the difference in this dessert. During peak season (July through September), fresh ripe peaches will give you the most vibrant flavor. Look for fruits that yield slightly to gentle pressure and have a sweet fragrance. For the best texture, peel them before dicing—the easiest method is to score an X at the bottom, blanch for 30 seconds in boiling water, then transfer to an ice bath. The skins will slip right off! If fresh peaches aren’t available, well-drained canned peaches or thawed frozen peaches work beautifully as convenient alternatives.

    Achieving the Perfect Consistency

    The secret to irresistible Peach Fluff lies in its airy texture. Start with well-chilled ingredients—even your mixing bowl can be placed in the freezer for 10 minutes beforehand. When folding ingredients together, use a gentle hand with a spatula rather than aggressive stirring to maintain maximum fluffiness. If your mixture seems too thick, add a tablespoon of peach juice. Too thin? Fold in additional whipped topping or a few tablespoons of instant vanilla pudding mix. Allow the finished fluff to chill for at least one hour before serving to let the flavors meld perfectly.

    Serving Ideas & Creative Variations

    Elegant Presentation Options

    Transform this simple Peach Fluff into an impressive dessert worthy of special occasions by thinking beyond the basic serving bowl. Layer it in clear glass trifle dishes or stemmed glasses to showcase the beautiful peachy color. Add visual appeal with a sprinkle of crushed graham crackers, toasted coconut, or finely chopped pistachios on top. For individual servings that wow, pipe the fluff into dessert shells, hollowed strawberries, or mini phyllo cups. A fresh mint leaf or edible flower adds a professional finishing touch that elevates this humble dessert to restaurant quality.

    Flavor Twists and Add-ins

    While perfect in its classic form, Peach Fluff welcomes creative variations to suit your taste preferences. For a tropical twist, fold in diced mango or pineapple alongside the peaches. Craving something more decadent? Add white chocolate chips or crushed shortbread cookies for delightful pops of sweetness and texture. Spice lovers can incorporate a pinch of cardamom, ginger, or cinnamon. For a more substantial dessert, layer the fluff with angel food cake cubes or ladyfingers. My personal favorite variation includes a handful of fresh blueberries for a color contrast that’s as beautiful as it is delicious.

    Storage & Troubleshooting Guide

    Proper Storage for Maximum Freshness

    Keep your Peach Fluff at its best quality by storing it properly. Always use an airtight container to prevent it from absorbing refrigerator odors or forming a skin on top. The dessert will maintain optimal texture and flavor for up to 3 days when refrigerated. If you notice slight separation after storage, simply give it a gentle stir before serving. While technically safe to eat beyond three days, the texture begins to deteriorate as the whipped topping starts to deflate. For the freshest presentation at parties, prepare the base up to 24 hours ahead, then fold in the fruit just before serving.

    Fixing Common Issues

    Even the simplest recipes can sometimes present challenges, but most Peach Fluff problems have easy solutions. If your mixture turns out too runny, refrigerate for 30 minutes, then fold in 2-3 tablespoons of instant pudding mix. For a fluff that’s too firm, incorporate additional peach juice one tablespoon at a time. Discoloration from oxidizing peaches? Add a teaspoon of lemon juice to brighten both color and flavor. If the sweetness level isn’t right, adjust with a touch of honey (for more sweetness) or a pinch of salt (to tone down sweetness). Remember that the flavor develops after chilling, so taste again before making major adjustments.

    Frequently Asked Questions

    Can I make Peach Fluff with canned peaches?

    Absolutely! Drain canned peaches well and pat dry with paper towels to remove excess moisture. The convenient option works perfectly year-round when fresh peaches aren’t in season.

    How far in advance can I prepare Peach Fluff?

    For best results, prepare up to 24 hours ahead. The texture remains perfect, and the flavors actually improve after a few hours of chilling time.

    Is there a dairy-free option for making Peach Fluff?

    Yes! Substitute coconut cream whipped with a tablespoon of powdered sugar for the traditional whipped topping. The slight coconut flavor pairs beautifully with peaches.

    Can I freeze leftover Peach Fluff?

    I don’t recommend freezing this dessert as it will separate and become watery upon thawing. It’s best enjoyed fresh within 3 days.

    What makes Peach Fluff different from regular fruit salad?

    Peach Fluff has a creamy, mousse-like consistency thanks to the whipped topping base, while fruit salad typically features fresh fruit pieces in juice or light syrup.

    Final Thoughts

    This Peach Fluff has become my summer signature dessert—the one friends request by name when they know I’m bringing something sweet. There’s something deeply satisfying about creating something so delicious with so little effort. The bright, sunny flavor captures everything wonderful about peach season in a dessert that feels both nostalgic and fresh. Whether you’re serving it at a backyard barbecue or enjoying a quiet weeknight treat, this versatile recipe delivers pure joy in every spoonful. Find more delicious inspiration on Pinterest and discover why Peach Fluff deserves a permanent place in your dessert rotation.

  • Tomato Burrata Toast That Will Make Your Taste Buds Explode!

    Tomato Burrata Toast That Will Make Your Taste Buds Explode!

    Tomato Burrata Toast That Will Make Your Taste Buds Explode!

    This Tomato Burrata Toast brings together the perfect combination of creamy burrata, juicy tomatoes, and crusty bread for a simple yet elegant dish that’s ready in minutes. I first fell in love with this combination at a little café in Italy, and I’ve been recreating it at home ever since. The contrast between the warm, toasted bread and the cool, milky cheese creates a sensory experience that’s hard to beat. It’s my go-to when I need something quick but impressive, whether for a light lunch or an appetizer when friends drop by unexpectedly.

    Recipe

    Why You’ll Love This Tomato Burrata Toast

    Perfect Balance of Flavors and Textures

    There’s something magical about the way the creamy burrata melts slightly into the warm toast, creating pockets of richness that complement the acidity of fresh tomatoes. Each bite delivers a perfect balance – the crunch of toasted bread, the silkiness of the cheese, and the juicy burst of tomatoes. I love adding a drizzle of high-quality olive oil that pools in the little crevices, carrying the flavor of fresh basil throughout each bite. This simple combination creates a dish that feels both rustic and sophisticated at the same time.

    Quick and Impressive Appetizer

    When I need to pull together something beautiful in under 10 minutes, this Tomato Burrata Toast is my secret weapon. It requires minimal ingredients but delivers maximum impact. Last summer, I served this at an impromptu gathering, and my friends couldn’t stop raving about it. The key is using the best ingredients you can find – a good sourdough bread, perfectly ripe tomatoes, and fresh burrata that’s still cool from the refrigerator. The contrast of temperatures and textures makes this simple dish feel special enough for entertaining.

    Essential Tips & Tricks

    Selecting the Perfect Ingredients

    The quality of your ingredients makes all the difference in this simple recipe. Look for artisanal bread with a chewy interior and crisp crust – sourdough or ciabatta work beautifully. For tomatoes, seek out varieties that are fragrant and yield slightly to pressure. I prefer a mix of heirloom tomatoes for their varied colors and flavors. The burrata should be fresh and stored properly – when you cut into it, the cream should slowly ooze out. Finishing with flaky sea salt adds a crucial textural element that elevates the entire dish, similar to how salt enhances the creamy Mediterranean quesadillas on my site.

    Perfecting the Assembly Process

    Timing is everything when making tomato burrata toast. Toast your bread until it’s golden brown but still has some give when pressed – you want it sturdy enough to hold the toppings but not so hard it’s difficult to bite. Let the toast cool for just a minute before adding the burrata to prevent it from melting completely. Tear the cheese rather than cutting it for a more rustic presentation. Add tomatoes last, then immediately drizzle with olive oil and sprinkle with herbs so their flavors infuse the warm ingredients. Serve immediately for the best temperature contrast.

    Serving Ideas & Creative Variations

    Seasonal Adaptations

    The beauty of tomato burrata toast is how it evolves with the seasons. In summer, I use a rainbow of heirloom tomatoes with fresh basil and a drizzle of balsamic glaze. Come fall, I’ll add roasted grape tomatoes with thyme and a touch of honey. Winter calls for slow-roasted tomatoes with rosemary and a hint of garlic infused oil. Spring brings delicate cherry tomatoes with mint and lemon zest. This adaptability makes it a year-round favorite that never feels repetitive, much like my crispy garlic parmesan green beans that change with seasonal herbs.

    Complementary Pairings

    Elevate your tomato burrata toast from a simple appetizer to part of a memorable meal with thoughtful pairings. For brunch, serve alongside scrambled eggs with chives and a light arugula salad. As an appetizer, pair with a crisp white wine like Pinot Grigio or Sauvignon Blanc. For a light dinner, add prosciutto or serrano ham for saltiness and protein. I love setting up a toast bar where guests can customize their own creations with various toppings like roasted peppers, olives, capers, and different herbs. The interactive element makes it perfect for casual entertaining.

    Storage & Troubleshooting Guide

    Preventing Soggy Toast

    Nothing ruins tomato burrata toast faster than sogginess. To prevent this common issue, toast your bread thoroughly and let it cool slightly before assembling. Consider brushing the bread with olive oil before toasting to create a moisture barrier. If preparing components ahead for a party, store everything separately and assemble just before serving. For tomatoes that release a lot of juice, I like to slice them, place in a colander, sprinkle with salt, and let them drain for 10 minutes. This concentrates their flavor while removing excess moisture that could make your toast soggy.

    Rescuing Common Issues

    Even with careful preparation, things don’t always go as planned. If your burrata is too cold and firm, let it sit at room temperature for 15-20 minutes before serving. For toast that’s gotten soft, a quick 1-2 minute reheat in a 350°F oven can restore crispness without further browning. If your tomatoes aren’t as flavorful as hoped, a light sprinkle of good sea salt and a few drops of balsamic vinegar can enhance their natural sweetness. And if you accidentally overtoasted your bread, lightly scrape off the burnt parts with a serrated knife and brush with additional olive oil.

    Frequently Asked Questions

    What’s the difference between burrata and mozzarella for tomato burrata toast?

    Burrata has a solid mozzarella exterior with a creamy, stracciatella cheese center that creates a luxurious texture. Mozzarella is firmer throughout and won’t provide the same creamy experience, though it can substitute in a pinch.

    Can I make tomato burrata toast ahead of time?

    For best results, prepare components separately up to 4 hours ahead. Toast the bread, slice tomatoes, and keep burrata refrigerated. Assemble just before serving to maintain optimal textures and temperature contrast.

    What bread works best for tomato burrata toast?

    Crusty artisan breads like sourdough, ciabatta, or baguette work best as they provide necessary structure. Avoid very soft breads that may become soggy under the weight of the toppings.

    How can I make my tomato burrata toast more substantial?

    Add protein like prosciutto, smoked salmon, or a fried egg. Include avocado for healthy fats or white beans for fiber. These additions transform it from an appetizer into a satisfying meal.

    What’s the best way to serve tomato burrata toast at a party?

    Create a DIY toast bar with pre-toasted bread slices, burrata portions, and various toppings. This interactive approach lets guests customize their toast while ensuring everything stays fresh and crisp.

    Final Thoughts

    Tomato Burrata Toast exemplifies how simple ingredients, thoughtfully combined, can create something truly special. The contrast of textures and temperatures—crisp toast, creamy cheese, juicy tomatoes—makes each bite a sensory delight. What I love most is its versatility; it can be a quick lunch, elegant appetizer, or the star of a summer dinner party. Don’t overthink this recipe—its beauty lies in simplicity and quality ingredients. Visit my Pinterest for more inspiration on beautiful, approachable recipes that celebrate fresh ingredients.

  • Italian Easter Cookies: Irresistible Treats You’ll Crave This Spring!

    Italian Easter Cookies: Irresistible Treats You’ll Crave This Spring!

    Italian Easter Cookies: Irresistible Treats You’ll Crave This Spring!

    Italian Easter Cookies bring the perfect blend of sweet tradition and springtime celebration to your holiday table. These delicate, anise-flavored treats dusted with colorful sprinkles have been part of my family’s Easter celebration for generations. I still remember standing on a kitchen stool beside my grandmother, eagerly waiting to add rainbow nonpareils to the freshly glazed cookies. The subtle sweetness paired with that distinctive licorice-like flavor creates a truly authentic Italian experience that signals spring has officially arrived. Let me show you how to create these beloved treats that will become your new Easter tradition.

    Recipe

    Why You’ll Love These Italian Easter Cookies

    Perfect Balance of Flavors and Texture

    These Italian Easter Cookies offer the most delightful combination of tender and cake-like texture with just the right amount of sweetness. The anise extract provides that distinctive flavor that’s both sophisticated and nostalgic. What I adore most is how these cookies strike the perfect balance—not too sweet, which makes them ideal for breakfast with coffee or as an afternoon treat. The thin glaze creates a slight crispness on the outside while maintaining that pillowy interior that practically melts in your mouth. Every bite delivers subtle complexity that store-bought cookies simply can’t match.

    Quick to Make with Pantry Staples

    One of the best things about these Italian Easter Cookies is that they require ingredients you likely already have in your pantry. No special shopping trip needed! The simple preparation means you can whip up a batch in under an hour, making them perfect for last-minute gatherings or when the cookie craving strikes. I’ve made these countless times when unexpected guests were on their way, and they always come together beautifully. The straightforward mixing method is also wonderfully forgiving, making this recipe accessible even to novice bakers who want to create something special for the holiday.

    Essential Tips & Tricks

    Mastering the Dough Consistency

    Getting the dough consistency right is crucial for perfect Italian Easter Cookies. It should feel soft and pliable but not sticky enough to cling to your hands. If your dough seems too wet, add flour one tablespoon at a time until it reaches that perfect texture. I’ve found that letting the dough rest for 10-15 minutes before shaping makes a world of difference in handling. Room temperature eggs and butter create the ideal base, so plan ahead by taking these ingredients out about an hour before you start baking. This small step results in a much more cohesive dough that’s a dream to work with.

    Perfecting the Glaze and Decoration

    The glaze is what transforms these cookies from good to spectacular! For best results, make sure your cookies are completely cool before glazing, otherwise it will run right off. I like to create a slightly thick consistency that coats the back of a spoon—this ensures the perfect coverage without becoming transparent. Work quickly to add sprinkles while the glaze is still wet, as this helps them adhere properly. For a fun Easter twist, try using pastel-colored nonpareils or even tiny sugar eggs. Check out these beautiful Easter egg cheesecake jars for more spring dessert inspiration!

    Serving Ideas & Creative Variations

    Elegant Easter Presentation Options

    Transform your Italian Easter Cookies into a stunning centerpiece by arranging them on a tiered cake stand with fresh spring flowers between the layers. The visual impact of these colorful cookies makes them perfect for holiday tables. I love creating small cellophane bags tied with pastel ribbons as take-home treats for guests. For brunch gatherings, try serving them alongside a selection of fresh berries and whipped mascarpone for an elegant touch. These cookies pair beautifully with coffee, tea, or even a glass of sweet dessert wine like Vin Santo for the adults at your celebration.

    Flavor Twists on the Traditional Recipe

    While anise is traditional, these versatile cookies welcome creative flavor adaptations. Try substituting almond or lemon extract for a bright, citrusy variation that’s especially refreshing for spring. Adding orange or lemon zest to the dough creates beautiful flecks of color and bursts of flavor. For chocolate lovers, fold mini chocolate chips into the dough or drizzle the glazed cookies with melted chocolate. I’ve even created a version with crushed pistachios and a touch of rosewater that was a huge hit at our family’s Easter celebration last year! For more Easter inspiration, check out these delicious Easter Bunny Coconut Tails.

    Storage & Troubleshooting Guide

    Keeping Cookies Fresh for Days

    These Italian Easter Cookies stay wonderfully fresh when stored properly. Place them in an airtight container with parchment paper between layers to prevent sticking and preserve that perfect texture. At room temperature, they’ll maintain their quality for up to 5 days, though they rarely last that long in my house! For longer storage, these cookies freeze beautifully for up to 3 months—just thaw them at room temperature for about an hour before serving. I recommend freezing them before adding the glaze and decorations for best results, then finishing them after thawing.

    Solving Common Baking Challenges

    If your cookies spread too much during baking, your dough may be too warm. Chilling the shaped cookies for 15 minutes before baking can help them maintain their form. For cookies that turn out too dry, you likely over-measured the flour—try using the spoon and level method rather than scooping directly with your measuring cup. If your glaze appears too runny, add powdered sugar a tablespoon at a time until it reaches the right consistency. Conversely, if it’s too thick, thin it with small amounts of milk or lemon juice until it’s just pourable but not watery.

    Frequently Asked Questions

    Can I make Italian Easter Cookies without anise flavor?

    Absolutely! Substitute vanilla, almond, or lemon extract in equal amounts. Each creates a different but equally delicious cookie that maintains the traditional texture while offering a flavor that might appeal to those who don’t enjoy anise.

    How far in advance can I make these cookies for Easter?

    You can make these cookies up to 5 days ahead when stored in an airtight container. Alternatively, freeze the unglazed cookies for up to 3 months, then thaw and decorate the day before serving.

    Why did my Italian Easter Cookies turn out dry?

    Over-measuring flour is typically the culprit. Use the spoon-and-level method for accurate measurements, and make sure not to overbake them—they should remain pale with just slight golden edges.

    Can I make these cookies with gluten-free flour?

    Yes! Use a 1:1 gluten-free flour blend with xanthan gum. The texture may be slightly different, but they’ll still be delicious. Add an extra egg yolk for moisture if the dough seems dry.

    How do I know when Italian Easter Cookies are done baking?

    Look for barely golden edges while the tops remain pale. They should feel set but still slightly soft when gently pressed. Overbaking will result in dry cookies, so err on the side of underbaking.

    Final Thoughts

    These Italian Easter Cookies represent the perfect marriage of tradition and celebration, bringing a touch of authentic Italian heritage to your holiday table. The joy of sharing these colorful, anise-scented treats with loved ones creates memories that last far beyond the Easter season. I find myself making these cookies throughout spring, as their light flavor and festive appearance brighten any gathering. Whether you’re honoring old family traditions or starting new ones, these cookies offer a delicious way to welcome the renewal that spring brings. Find more inspiration at Pinterest.

  • Chili Lime Shrimp Ceviche: Irresistibly Tangy & Fresh Delight!

    Chili Lime Shrimp Ceviche: Irresistibly Tangy & Fresh Delight!

    Chili Lime Shrimp Ceviche: Irresistibly Tangy & Fresh Delight!

    Chili Lime Shrimp Ceviche brings the perfect balance of zesty citrus, gentle heat, and oceanic freshness to your table in one vibrant dish. I discovered this recipe during a coastal vacation where the tang of lime and subtle kick of chili transformed the day’s catch into something magical. There’s something deeply satisfying about watching raw shrimp “cook” in citrus juices, turning from translucent to perfectly opaque. The first time I served this at a summer gathering, friends couldn’t believe I’d made it myself! This no-cook wonder combines simplicity with impressive presentation, making it perfect for both casual weeknight dinners and elegant entertaining. Let me show you how to create this refreshing delight that tastes like vacation in every bite.

    Recipe

    Why You’ll Love This Chili Lime Shrimp Ceviche

    Perfect Balance of Flavors

    The magic of Chili Lime Shrimp Ceviche lies in its harmonious flavor profile. The bright acidity from fresh lime juice “cooks” the shrimp while infusing it with citrusy goodness. Meanwhile, the chili brings just enough heat to wake up your taste buds without overwhelming them. I love how the sweetness of the shrimp shines through, complemented by crisp cucumber, juicy tomato, and herbaceous cilantro. The hint of garlic and splash of orange juice add depth that makes each bite interesting. This dish proves that sometimes the simplest combinations create the most memorable flavors.

    Quick Preparation, Impressive Results

    Despite its restaurant-worthy presentation, this ceviche requires minimal effort. Simply chop, mix, and let the citrus work its magic! I often prepare it in the morning before work, allowing the flavors to meld in the refrigerator throughout the day. When dinner rolls around, I have a gourmet appetizer ready to go with zero cooking time. The vibrant colors create an Instagram-worthy dish that looks like you spent hours in the kitchen. It’s my go-to recipe when I want to impress guests without breaking a sweat in the kitchen.

    Essential Tips & Tricks

    Selecting and Preparing the Shrimp

    Start with the freshest shrimp possible—this is non-negotiable for ceviche. I prefer medium-sized (21-25 count) shrimp for the perfect bite-size pieces. Always purchase shrimp that’s been previously frozen, as this kills potential parasites. Devein thoroughly and remove all shells before marinating. Slice each shrimp in half lengthwise for maximum citrus penetration. The lime juice needs to fully “cook” the shrimp, transforming it from translucent to opaque and slightly firm to the touch. This typically takes 20-30 minutes, but never more than 4 hours to prevent rubbery texture.

    Balancing Acidity and Heat

    The key to perfect Chili Lime Shrimp Ceviche lies in balancing the citrus marinade with heat elements. I recommend starting with 3/4 cup fresh-squeezed lime juice (about 6-8 limes) and 2 tablespoons orange juice for sweetness. For the chili component, finely dice 1-2 jalapeños (removing seeds for milder heat) or substitute with 1-2 teaspoons of crushed red pepper flakes. Taste and adjust as you go—everyone’s preference for acidity and spice differs. If your ceviche tastes too tart, add a teaspoon of honey or a bit more orange juice. For a creamier variation, incorporate diced avocado just before serving.

    Serving Ideas & Creative Variations

    Presentation Options

    Elevate your Chili Lime Shrimp Ceviche with thoughtful presentation. My favorite method is serving it in martini glasses for an elegant appetizer that showcases the vibrant colors. For casual gatherings, hollow out small watermelons or pineapples to create edible serving bowls with tropical flair. Individual serving spoons arranged on a platter make perfect bite-sized portions for cocktail parties. Don’t forget the garnishes—a sprinkle of microgreens, thinly sliced radishes, or a few edible flowers add visual impact. Always chill your serving dishes beforehand to keep the ceviche refreshingly cool throughout your meal.

    Fusion Variations

    While traditional ceviche is delicious, experimenting with fusion elements creates exciting new flavor profiles. Try adding diced mango or pineapple for tropical sweetness that beautifully complements the chili and lime. For an Asian-inspired twist, incorporate ginger, a splash of sesame oil, and black sesame seeds. Mediterranean flavors work surprisingly well—try adding diced olives, capers, and a sprinkle of feta cheese. For a heartier version, mix in cooked quinoa or rice for a complete meal. My latest obsession is adding pomegranate seeds for unexpected bursts of sweetness and gorgeous ruby-red color contrast.

    Storage & Troubleshooting Guide

    Proper Storage Techniques

    Chili Lime Shrimp Ceviche is best enjoyed fresh, ideally within 24 hours of preparation. Store leftovers in an airtight glass container—never use metal, as the acidic lime juice can react with it. Keep refrigerated at 40°F or below at all times. I recommend placing the container on a bed of ice in the refrigerator for optimal freshness. If serving at a party, nest your serving bowl in a larger bowl filled with ice to maintain safe temperature. Remember that the lime juice continues to “cook” the shrimp, so texture may change slightly during storage. For food safety, never leave ceviche at room temperature for more than 2 hours.

    Common Issues and Solutions

    Even experienced cooks encounter challenges with ceviche. If your shrimp remains translucent after marinating, it needs more time in the lime juice—give it another 15-20 minutes. Conversely, rubbery shrimp indicates over-marination; next time, reduce the acid contact time. Too watery? Drain excess liquid before serving or add more finely diced vegetables to absorb moisture. If flavors seem flat, brighten with additional lime zest, a pinch of salt, or a dash of hot sauce. Bitter taste usually means you’ve included too much pith from the citrus—use a microplane for zesting to avoid this issue.

    Frequently Asked Questions

    Is Chili Lime Shrimp Ceviche safe to eat?

    Yes, when prepared properly. The citric acid in lime juice denatures proteins in the shrimp (similar to cooking with heat). Always use previously frozen shrimp to eliminate parasite risk, and keep chilled below 40°F.

    Can I make this ceviche ahead of time?

    You can prepare components ahead of time, but I recommend marinating the shrimp no more than 4 hours before serving for optimal texture and flavor.

    What can I substitute for cilantro?

    Fresh parsley or a combination of mint and basil make excellent alternatives if you dislike cilantro. Adjust quantities to taste as these herbs have different potency levels.

    Can I use frozen shrimp?

    Absolutely! Thaw completely in the refrigerator overnight, then pat dry thoroughly before proceeding with the recipe to prevent excess water diluting your flavors.

    How spicy is Chili Lime Shrimp Ceviche?

    The spice level is customizable. For mild ceviche, remove all seeds from chilies. For medium heat, leave some seeds. For spicy ceviche, include all seeds or add hot sauce to taste.

    Final Thoughts

    Chili Lime Shrimp Ceviche represents everything I love about summer cooking—vibrant flavors, minimal effort, and ingredients that shine in their natural state. There’s something magical about transforming simple ingredients into a dish that feels both refreshing and sophisticated. Whether you’re serving it as an appetizer at your next gathering or enjoying it as a light meal on a warm evening, this ceviche delivers a perfect balance of zesty, spicy, and fresh elements. I hope you’ll experience the same joy I feel when watching friends take their first bite and seeing their eyes light up with surprise and delight. Enjoy exploring this versatile recipe and making it your own!

    Check out more delicious seafood recipes on our Pinterest board.