Blog

  • Apple Butter Muffins: Irresistibly Soft, Cozy & Perfectly Spiced!

    Apple Butter Muffins: Irresistibly Soft, Cozy & Perfectly Spiced!

    Apple Butter Muffins: Irresistibly Soft, Cozy & Perfectly Spiced!

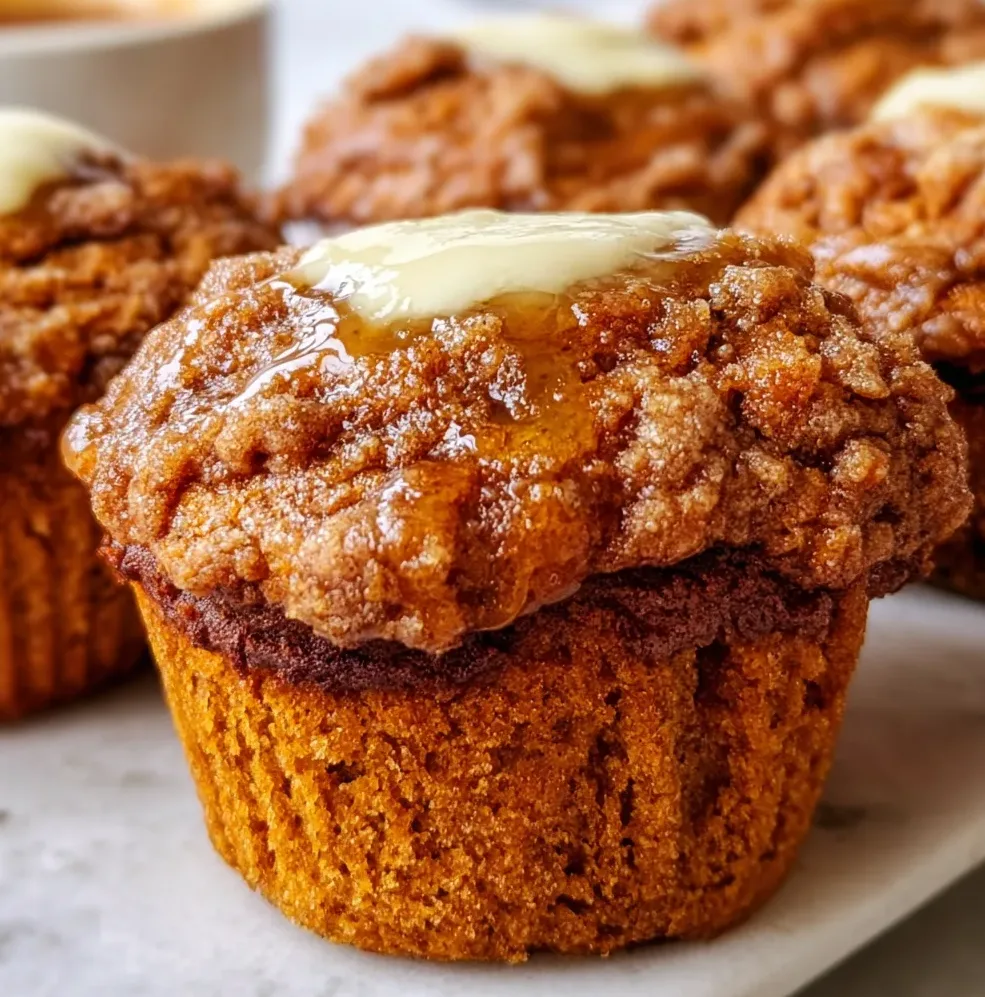
    These Apple Butter Muffins are autumn’s answer to your breakfast prayers! There’s something magical about that first bite—tender crumb infused with warm spices and the concentrated sweetness of apple butter swirled throughout. I discovered this recipe during my annual apple orchard visit last fall, and it’s become my go-to for cozy weekend mornings. The rich aroma that fills your kitchen while these bake is worth the effort alone! Perfect with a steaming cup of coffee, these muffins capture everything wonderful about fall baking in one perfect little package. Let me show you how to make these seasonal treasures that my family now requests weekly.

    Recipe

    Why You’ll Love These Apple Butter Muffins

    Perfect Texture & Flavor Balance

    These muffins achieve that elusive bakery-quality texture—incredibly moist inside with slightly crisp, sugar-dusted tops. The apple butter does double duty here, adding moisture while infusing every bite with concentrated apple flavor and warm spices. Unlike regular applesauce, apple butter’s reduced water content and caramelized sugars create a deeper, more complex flavor profile. I love how the cinnamon and nutmeg complement without overwhelming. When you pull these from the oven, the aroma alone will have your family gathering in the kitchen, asking when they’ll be cool enough to eat!

    Quick & Simple Preparation

    Despite their impressive taste, these muffins come together in just 15 minutes of prep time. The beauty lies in the simplicity—no peeling or chopping apples required! The apple butter does all the heavy lifting, infusing flavor and moisture without extra steps. I always keep a jar in my pantry specifically for baking emergencies. You’ll appreciate how this recipe uses standard pantry ingredients and just one mixing bowl. Even on busy mornings, I can have these in the oven before my coffee finishes brewing. Perfect for last-minute breakfast guests or weekend brunch spreads.

    Essential Tips & Tricks

    Ingredient Selection Matters

    The quality of your apple butter dramatically impacts the final result—look for one with visible spices and a deep brown color. Store-bought works perfectly, but homemade elevates these muffins to spectacular. Room temperature ingredients create a smoother batter that rises more evenly. For the flour, measure by spooning into your measuring cup rather than scooping directly from the bag to prevent dense muffins. I learned this the hard way after wondering why my first batch turned out heavy! The oil keeps these muffins moist for days, but melted butter can substitute for a richer flavor profile.

    Technique Tips for Perfect Results

    Don’t overmix the batter—this is the secret to tender muffins! Stop stirring as soon as the dry ingredients disappear. Those tiny lumps? They’re your friends! Fill your muffin cups about ¾ full for the perfect dome. I like using an ice cream scoop for consistent sizing. The initial high baking temperature (425°F for 5 minutes, then reducing to 350°F) creates that beautiful bakery-style muffin top. For an extra touch, sprinkle cinnamon sugar on top before baking for a delightful crunch that reminds me of my grandmother’s Italian Easter Cookies with its perfect sweet finish.

    Serving Ideas & Creative Variations

    Perfect Pairings & Presentation

    Serve these muffins slightly warm with a swirl of salted butter that melts into all the nooks and crannies. For brunch gatherings, I arrange them on a rustic wooden board with honey butter and apple slices for an Instagram-worthy spread. They pair beautifully with hot apple cider or a frothy cinnamon latte on chilly mornings. For dessert, warm a muffin and top with vanilla bean ice cream and a drizzle of caramel sauce—pure heaven! These also make thoughtful gifts—wrap in parchment paper, tie with twine, and deliver to neighbors or teachers for an autumn surprise.

    Delicious Flavor Adaptations

    The versatility of this recipe makes it a year-round favorite. Add chopped walnuts or pecans for delightful texture contrast. Fold in dried cranberries or golden raisins for fruity bursts. For a decadent twist, press a cube of cream cheese into each muffin before baking—the melty center is divine! Apple chunks create pockets of juicy goodness, while a streusel topping adds irresistible crunch. My personal favorite variation includes a tablespoon of maple syrup and diced crystallized ginger folded into the batter. The subtle heat complements the apple butter’s sweetness perfectly.

    Storage & Troubleshooting Guide

    Keeping Muffins Fresh

    These Apple Butter Muffins stay remarkably moist for days when stored properly. Cool completely before storing to prevent condensation and sogginess. Keep at room temperature in an airtight container lined with paper towels for 3-4 days. The paper towels absorb excess moisture, maintaining that perfect texture. For longer storage, freeze in a single layer until solid, then transfer to freezer bags. They’ll keep for up to 3 months! I always make a double batch specifically for freezing. To refresh, microwave a frozen muffin for 20-30 seconds or thaw overnight and warm in a 300°F oven for 5-7 minutes.

    Common Issues & Solutions

    If your muffins didn’t rise properly, your baking powder might be expired—it loses potency after 6-9 months. For flat-topped muffins instead of domed ones, your oven temperature might be too low—invest in an oven thermometer for accuracy. Tough, rubbery texture usually indicates overmixing; remember to fold gently just until ingredients are incorporated. If muffins stick to the pan, try using parchment liners or a better-quality non-stick pan. For pale muffins, brush tops with milk before baking and don’t forget that initial high-temperature bake to achieve golden perfection.

    Frequently Asked Questions

    Can I substitute homemade applesauce for the apple butter?

    No, apple butter is more concentrated and flavorful. If using applesauce, reduce it by simmering with spices until thick and caramelized, or your muffins will be too wet.

    How can I make these Apple Butter Muffins healthier?

    Substitute whole wheat flour for half the all-purpose flour, reduce sugar by ¼ cup, and use Greek yogurt instead of oil. The apple butter provides natural sweetness.

    Can I make this recipe dairy-free?

    Absolutely! Use plant-based milk and replace butter with coconut oil or vegan butter. The texture remains moist and delicious with these substitutions.

    Why did my muffins sink in the middle?

    Opening the oven door too early disrupts rising. Wait until at least 15 minutes into baking before checking, and ensure your baking powder is fresh.

    How do I know when the muffins are done?

    Insert a toothpick into the center—it should come out with a few moist crumbs but no wet batter. The tops should spring back when lightly touched.

    Final Thoughts

    These Apple Butter Muffins have become my signature fall recipe, requested at every family gathering and neighborhood potluck. The way they fill your home with warming spices while baking is almost as delightful as that first tender bite. I love how they transform simple ingredients into something truly special. Whether enjoyed with your morning coffee or as an afternoon treat with tea, these muffins capture autumn’s essence in the most delicious way. Don’t forget to share your creations on Pinterest and tag us—I’d love to see your version of these seasonal favorites!
  • Chilaquiles Bacon Eggs Cheese: Irresistibly Cheesy Breakfast Bliss!

    Chilaquiles Bacon Eggs Cheese: Irresistibly Cheesy Breakfast Bliss!

    Chilaquiles Bacon Eggs Cheese: Irresistibly Cheesy Breakfast Bliss!

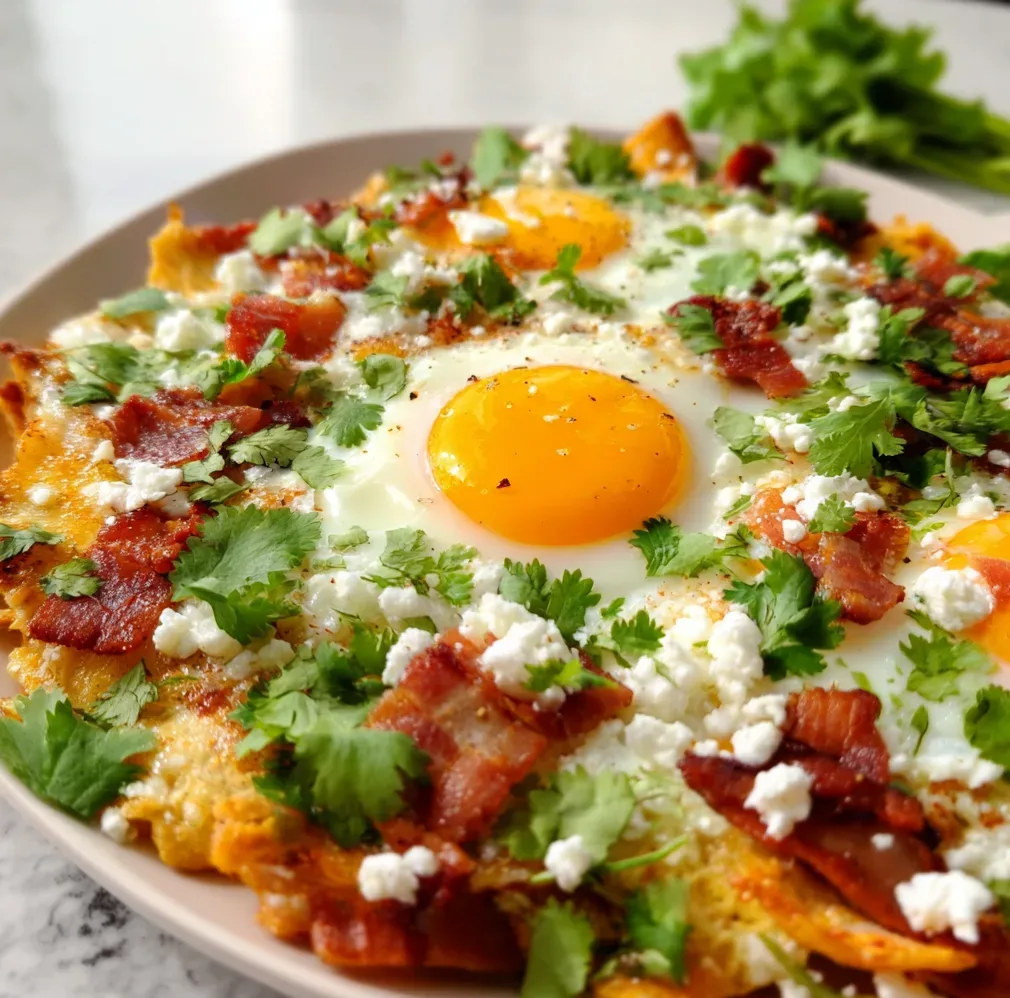
    Chilaquiles with bacon, eggs, and cheese has become my weekend obsession lately! There’s something magical about those crispy tortilla chips soaking up spicy sauce, topped with runny eggs, crispy bacon, and melty cheese that just speaks to my soul. I discovered this Mexican breakfast dish during a trip to San Diego last year, and I’ve been perfecting my homemade version ever since. The beautiful chaos of textures and flavors creates the most satisfying comfort food that works for breakfast, brunch, or even dinner! If you’re looking for a dish that transforms simple ingredients into something extraordinary, this is the one.

    Recipe

    Why You’ll Love This Chilaquiles Bacon Eggs Cheese

    Perfect Balance of Textures

    There’s something utterly irresistible about the textural symphony happening in this dish. The tortilla chips maintain just enough crunch while soaking up the flavorful sauce, creating that perfect not-too-soggy, not-too-crunchy bite. Then comes the crispy bacon adding its smoky crunch, the gooey melted cheese pulling everything together, and those perfectly runny egg yolks creating a silky sauce that coats every bite. I still remember the first time I nailed this recipe—standing in my kitchen on a Sunday morning, that first perfect forkful had me doing a little happy dance!

    Quick Yet Impressive Meal

    What I adore about chilaquiles with bacon, eggs and cheese is how it transforms humble ingredients into something that looks and tastes restaurant-worthy in just 20 minutes! It’s my go-to when friends stay over unexpectedly or when I want to elevate a regular weekend morning. The vibrant colors and textures create an impressive presentation that belies how simple it is to throw together. Plus, it’s incredibly versatile—you can use store-bought tortilla chips and sauce when you’re in a hurry or make everything from scratch when you have more time.

    Essential Tips & Tricks

    Choosing the Right Ingredients

    The soul of great chilaquiles lies in using the right components. For tortilla chips, thicker restaurant-style varieties hold up best against the sauce. When it comes to the sauce, don’t be afraid to go bold—I love using a mixture of red and green salsas for complexity. For the bacon, thick-cut delivers the best texture contrast against the softer elements. The eggs should be fresh and cooked just until the whites set but the yolks remain runny. And for cheese, opt for a good melting variety like Oaxaca or Monterey Jack, similar to what I use in my cilbir eggs benedict fusion for that perfect pull.

    Perfecting the Assembly

    The assembly sequence makes all the difference between soggy disappointment and chilaquiles perfection. Start by lightly toasting your tortilla chips in the oven for 3-5 minutes if they’re not super fresh—this helps them stand up to the sauce. Add your sauce to the chips just 2-3 minutes before serving, tossing gently to coat without crushing. Cook your bacon until crisp, then drain on paper towels. Fry your eggs sunny-side up or over-easy just before serving. Layer everything in individual shallow bowls rather than one large serving dish to maintain the perfect texture in each portion.

    Serving Ideas & Creative Variations

    Complementary Side Dishes

    Chilaquiles with bacon, eggs and cheese pairs beautifully with fresh accompaniments that balance its richness. My favorite sides include sliced avocado drizzled with lime, a simple cucumber salad with a touch of chile, or pickled red onions for a tangy contrast. For a more substantial meal, add a side of refried beans sprinkled with cotija cheese. When I’m feeling fancy, I serve it alongside my creamy ranch turkey veggie skillet for a complete brunch spread that always impresses guests. The cool, fresh sides create the perfect counterpoint to the warm, spicy chilaquiles.

    Exciting Flavor Twists

    Don’t be afraid to put your personal spin on this versatile dish! For a smoky variation, add chipotle peppers in adobo to your sauce. Craving something green? Use tomatillo salsa and top with fresh cilantro and lime. For meat lovers, substitute the bacon with chorizo or carnitas. Vegetarian? Skip the meat and add black beans and grilled corn. My latest obsession is adding pickled jalapeños and a drizzle of Mexican crema just before serving. You can even create a fusion version with Italian flavors using marinara sauce and mozzarella instead of traditional Mexican ingredients.

    Storage & Troubleshooting Guide

    Keeping It Fresh

    While chilaquiles with bacon, eggs and cheese is best enjoyed immediately after preparation, there are ways to manage leftovers or prep ahead. If you know you’ll have leftovers, keep the components separate—store the sauce, cooked bacon, and toppings individually in airtight containers in the refrigerator for up to 3 days. For meal prep, prepare your sauce and toppings ahead of time, but always cook the eggs fresh and assemble just before eating. If you absolutely must store assembled chilaquiles, reheat gently in a covered skillet with a splash of water to rehydrate.

    Solving Common Problems

    The most common chilaquiles challenge is the texture balance—too soggy or too dry. If your chilaquiles are turning to mush, you’re likely using too much sauce or letting it sit too long before serving. Try using sturdier chips or reducing sauce quantity. For dry chilaquiles, warm your sauce before adding it to the chips and don’t be afraid to add a bit more. If your eggs are overcooked, try removing the pan from heat a little earlier—residual heat will continue cooking them. And if your cheese isn’t melting properly, cover the dish for a minute to trap heat and encourage melting.

    Frequently Asked Questions

    What’s the best type of tortilla chips for chilaquiles?

    Thick, sturdy restaurant-style tortilla chips work best as they hold up to the sauce without getting soggy too quickly. Homemade chips from stale tortillas are traditional and extra sturdy if you have time to make them.

    Can I make chilaquiles with bacon, eggs and cheese ahead of time?

    Prepare components separately (sauce, bacon, toppings) up to 3 days ahead, but assemble with chips and cook eggs just before serving for the best texture and flavor.

    What’s the difference between chilaquiles and migas?

    Chilaquiles use tortilla chips simmered in sauce, while migas incorporate tortilla pieces directly into scrambled eggs. Chilaquiles typically feature whole eggs on top rather than scrambled.

    Is there a vegetarian version of this dish?

    Absolutely! Skip the bacon and add black beans, grilled vegetables, or plant-based chorizo. The eggs and cheese still provide plenty of protein and flavor.

    What sauce works best for authentic chilaquiles?

    Traditional chilaquiles use either red sauce (salsa roja) or green sauce (salsa verde). Both work beautifully—choose based on your preference or use half of each for a “divorciados” style.

    Final Thoughts

    There’s something deeply satisfying about mastering chilaquiles with bacon, eggs and cheese—it’s that perfect dish that straddles the line between casual comfort food and impressive culinary creation. I love how it transforms humble ingredients into something truly special, bringing a touch of Mexican breakfast tradition to my table any time of day. Whether you’re cooking for yourself on a lazy weekend morning or hosting a brunch gathering, this adaptable dish never disappoints. The combination of crispy, creamy, spicy, and savory elements creates a meal that’s greater than the sum of its parts. Check out my Pinterest for more inspiring breakfast ideas!

  • Cottage Cheese Parmesan Firecracker Chicken | Irresistibly Spicy!

    Cottage Cheese Parmesan Firecracker Chicken | Irresistibly Spicy!

    Cottage Cheese Parmesan Firecracker Chicken | Irresistibly Spicy!

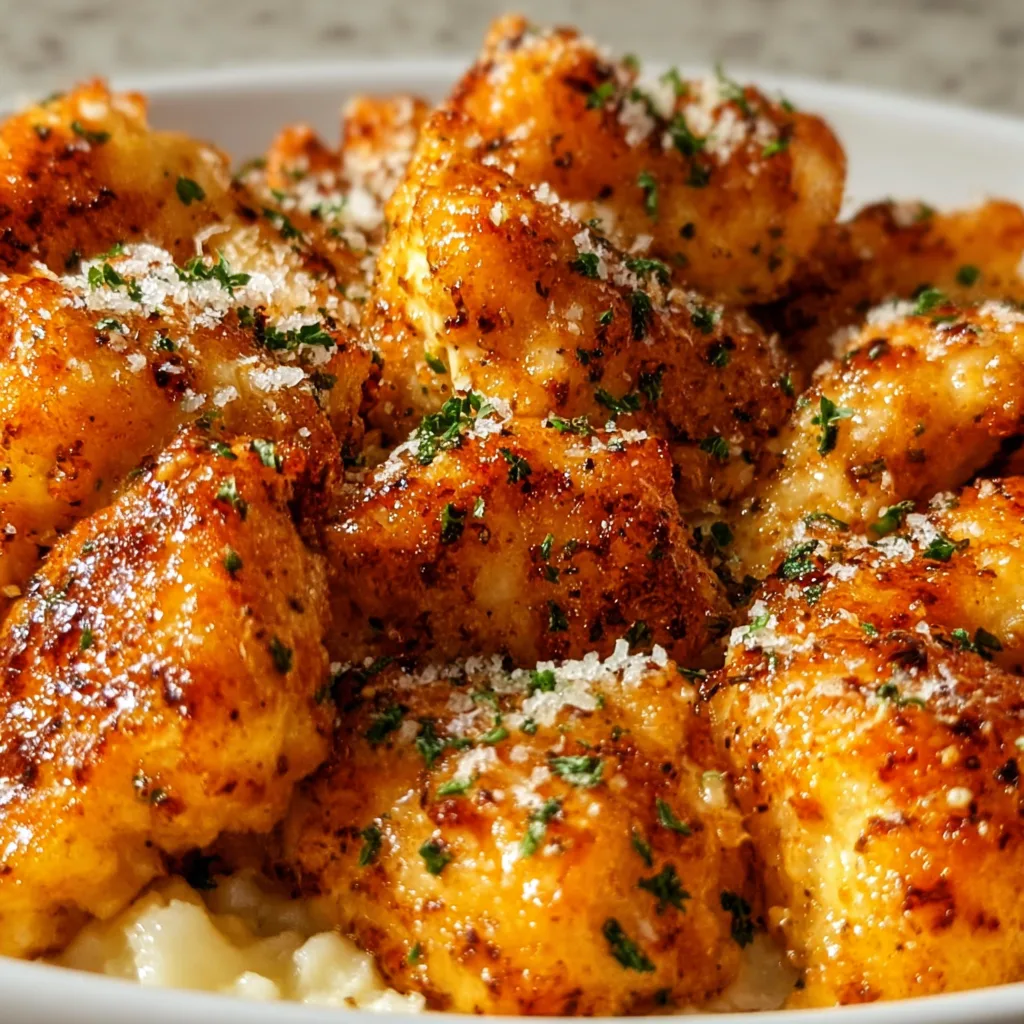
    Cottage Cheese Parmesan Firecracker Chicken delivers that perfect balance of creamy, crispy, and spicy that’ll make your taste buds dance! When I first experimented with this recipe, I was skeptical about mixing cottage cheese with Parmesan, but the result was nothing short of magical. The cottage cheese creates an incredibly moist interior while the Parmesan forms a golden, crispy crust that shatters with each bite. Plus, that firecracker sauce brings just enough heat to wake up your palate without overwhelming it. If you’re looking for a protein-packed dinner that delivers on flavor, this dish deserves a spot in your weekly rotation.

    Recipe

    Why You’ll Love This Cottage Cheese Parmesan Firecracker Chicken

    Perfect Texture Combination

    The secret magic of this recipe lies in its contrasting textures. The cottage cheese keeps the chicken incredibly tender and juicy on the inside, while the Parmesan creates that coveted crispy exterior we all crave. I still remember my husband’s face when he took his first bite – pure disbelief that something so creamy could also be so crispy! The firecracker sauce adds another dimension with its sticky-sweet heat that clings to every bite. It’s that perfect balance between comfort food and exciting flavors that makes this dish impossible to resist.

    Quick & Nutritious Weeknight Wonder

    This dish has become my go-to for those evenings when I want something impressive but don’t have hours to spend in the kitchen. From start to finish, you’re looking at about 35 minutes, with most of that being hands-off oven time. The protein powerhouse combination of chicken breast and cottage cheese delivers roughly 40g of protein per serving, making it perfect for post-workout dinners or when you need sustained energy. Plus, it’s naturally lower in carbs while still delivering that satisfying, indulgent taste that makes dinner something to look forward to.

    Essential Tips & Tricks

    Perfecting Your Chicken Preparation

    The foundation of amazing firecracker chicken starts with proper chicken preparation. Always pat the chicken dry before coating it – this ensures the cottage cheese mixture adheres properly and helps achieve that golden crust. I learned this the hard way after one soggy-bottomed attempt! For even cooking, pound chicken breasts to an even thickness of about ½ inch. If you’re short on time, you can butterfly thicker breasts instead. Allow the coated chicken to rest for 5-10 minutes before baking to help the coating set up properly.

    Mastering the Firecracker Sauce

    The firecracker sauce is where this dish gets its personality! For the perfect balance, start with less hot sauce than you think you need – you can always add more after tasting. The key is achieving harmony between sweet, spicy, and tangy notes. I like to reserve about ¼ cup of sauce to brush on during the last 5 minutes of cooking, which creates a beautiful glaze without burning. For a thicker sauce, simmer it for 2-3 extra minutes before using. This sauce also works beautifully with crispy garlic parmesan green beans as a side dish.

    Serving Ideas & Creative Variations

    Complementary Side Dishes

    This firecracker chicken pairs beautifully with sides that can balance its bold flavors. My favorite combination is with a cooling dill yogurt cucumber salad that tempers the heat while adding refreshing crunch. For a heartier meal, serve it over cilantro-lime rice or cauliflower rice if you’re keeping things low-carb. Roasted broccoli or asparagus makes an excellent vegetable companion, especially when finished with a squeeze of lemon to brighten everything up. For family gatherings, I’ve found that a simple side of garlic butter noodles is always a crowd-pleaser.

    Exciting Recipe Adaptations

    Don’t be afraid to make this recipe your own! For a Mediterranean twist, add sun-dried tomatoes and olives to the cottage cheese mixture and swap the firecracker sauce for a lemon-herb drizzle. If you’re feeding little ones with sensitive palates, you can create a milder version by using honey-garlic sauce instead of the spicy firecracker sauce. For meal prep convenience, prepare the chicken and freeze it uncooked – just thaw overnight and bake when needed. The cottage cheese mixture also works wonderfully with fish like salmon or cod for a lighter option.

    Storage & Troubleshooting Guide

    Proper Storage Solutions

    To maintain the optimal texture, store leftover chicken in an airtight container in the refrigerator for up to 3 days. I recommend keeping any unused sauce separate to prevent the chicken from becoming soggy. When reheating, the air fryer works wonders at restoring the crispy exterior – just 3-4 minutes at 350°F does the trick! If you’re using a microwave, place a damp paper towel over the chicken and heat in 30-second intervals to prevent it from drying out. For freezing, wrap individual portions tightly and freeze for up to 2 months.

    Common Issues & Quick Fixes

    If your coating isn’t crisping up properly, try placing the chicken on a wire rack while baking to allow air circulation underneath. For chicken that’s browning too quickly but not cooking through, simply lower the oven temperature by 25 degrees and cover loosely with foil. If your sauce separates or becomes too thick, whisk in a tablespoon of warm water to bring it back together. And if you accidentally over-spiced your sauce, balance it with a tablespoon of honey or brown sugar and a squeeze of fresh lime juice to tame the heat while adding complexity.

    Frequently Asked Questions

    Can I use regular cottage cheese or does it need to be low-fat?

    Either works great! Full-fat cottage cheese creates a richer coating, while low-fat provides fewer calories. I prefer 2% for the perfect balance of creaminess and nutrition.

    How spicy is cottage cheese Parmesan firecracker chicken?

    The spice level is customizable! Start with 1-2 tablespoons of hot sauce for mild heat, or up to ¼ cup for true firecracker status. You control the burn!

    Can I make this recipe ahead of time?

    Absolutely! Prepare the chicken and sauce up to 24 hours ahead, storing separately in the refrigerator. Bake just before serving for the freshest results.

    Is there a good substitute for Parmesan cheese?

    Pecorino Romano or Asiago make excellent substitutes, offering similar saltiness and crisping properties. For a milder flavor, try Grana Padano instead.

    How can I make this recipe gluten-free?

    Simply ensure your hot sauce is gluten-free and use gluten-free breadcrumbs if you’re adding them to the Parmesan coating. The cottage cheese is naturally gluten-free!

    Final Thoughts

    This cottage cheese Parmesan firecracker chicken has become one of my signature dishes for good reason—it transforms simple ingredients into something truly special. The contrast between the creamy cottage cheese, crispy Parmesan crust, and that sweet-spicy firecracker sauce creates a memorable meal that feels indulgent while still being nutritious. I love seeing the surprised looks when people discover cottage cheese is the secret ingredient! For more delicious recipes that balance flavor and nutrition, check out my Pinterest board for weekly inspiration.

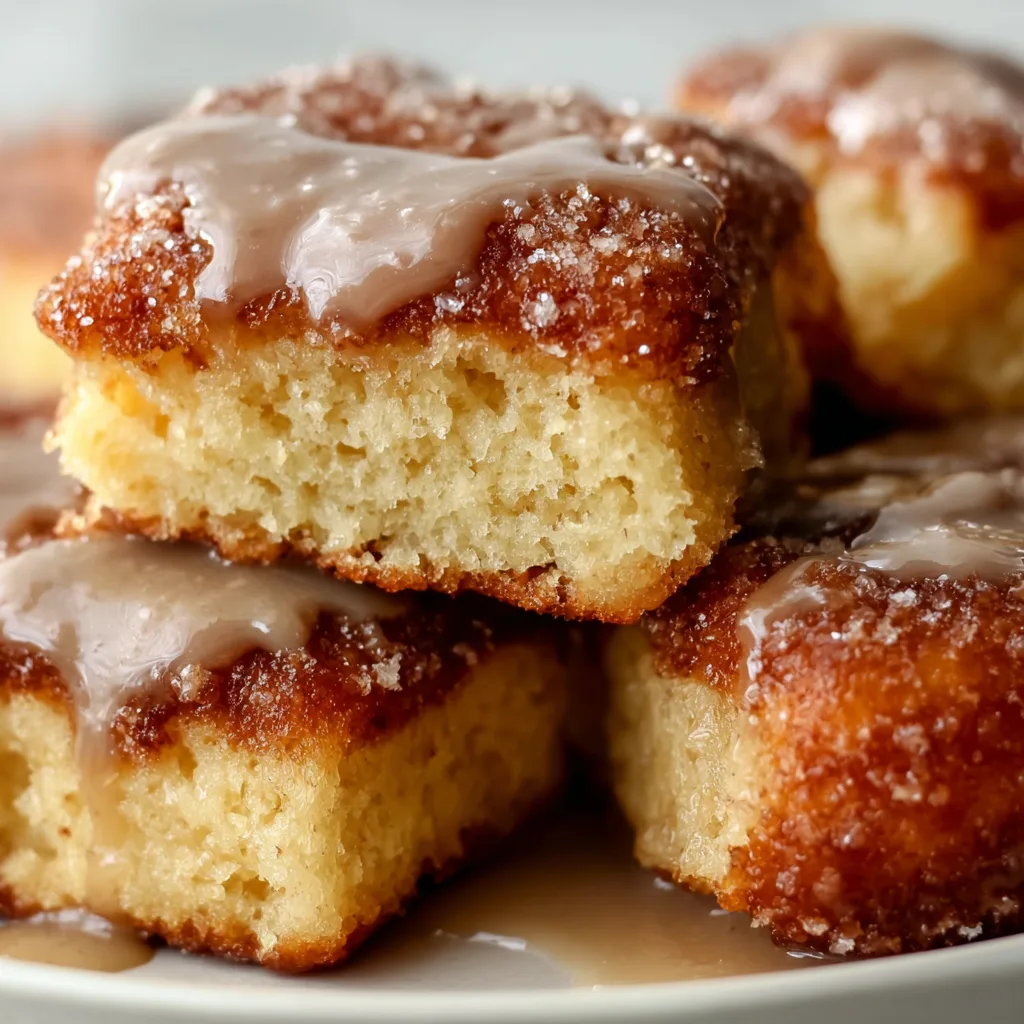
  • Brown Butter Maple Donut Bars That’ll Blow Your Mind!

    Brown Butter Maple Donut Bars That’ll Blow Your Mind!

    Brown Butter Maple Donut Bars That’ll Blow Your Mind!

    Brown Butter Maple Donut Bars have completely transformed my weekend baking routine. The first time I made these, my kitchen filled with the most intoxicating aroma—nutty brown butter mingling with sweet maple—and I knew I’d stumbled upon something special. These bars capture everything you love about maple donuts but in an easy-to-make bar form that’s perfect for sharing (or not, I won’t judge!). With their tender crumb, caramelized edges, and glossy maple glaze, these treats strike the perfect balance between comforting and sophisticated.

    Recipe

    Why You’ll Love These Brown Butter Maple Donut Bars

    Perfect Balance of Flavors

    The magic of these Brown Butter Maple Donut Bars lies in their complex flavor profile. Brown butter creates a nutty, almost caramelized base that elevates these bars beyond ordinary treats. I discovered this recipe during a rainy Sunday when I craved maple donuts but didn’t want to leave the house. The maple flavor comes through in two ways—in the batter and in the glaze—creating depth that makes each bite more satisfying than the last. The subtle hints of vanilla and cinnamon round everything out, making these bars impossible to resist.

    Quick and Easy Preparation

    Unlike traditional donuts that require frying and special equipment, these Brown Butter Maple Donut Bars come together in about 15 minutes of active prep time. One bowl for the batter, one for the glaze—that’s it! I love that I can satisfy my donut cravings without dealing with hot oil or complicated techniques. The hardest part is waiting for them to cool before adding the glaze, but trust me, that patience pays off. Even my baking-averse partner can make these without breaking a sweat.

    Essential Tips & Tricks

    Perfecting the Brown Butter

    The foundation of these bars is perfectly browned butter, which requires a bit of attention but is worth every second. Use a light-colored pan so you can monitor the color change as the milk solids toast. I once walked away for just a minute and returned to nearly blackened butter—lesson learned! Swirl the pan frequently and watch for that moment when the butter turns amber and smells like toasted hazelnuts. Remove it from heat immediately, as it continues cooking in the hot pan.

    Achieving the Ideal Texture

    For the perfect tender-yet-sturdy texture in your Brown Butter Maple Donut Bars, don’t overmix the batter. Fold the ingredients just until combined—those few streaks of flour will disappear during baking. For bakery-quality bars, let the brown butter cool slightly before adding it to your sugar mixture. I’ve found that room temperature eggs make a noticeable difference in how evenly the batter comes together. Test for doneness with a toothpick; it should come out with a few moist crumbs, not wet batter.

    Serving Ideas & Creative Variations

    Perfect Pairings

    These Brown Butter Maple Donut Bars shine when served alongside the right beverages. A mug of strong coffee creates a delightful contrast to the sweet maple notes. Last fall, I served these at a brunch gathering with spiced apple cider, and guests couldn’t stop raving about the combination. For an indulgent weekend treat, try them slightly warmed with a scoop of vanilla ice cream. The bars’ firm texture holds up well, making them perfect for breakfast on the go or tucking into lunch boxes.

    Seasonal and Dietary Adaptations

    These versatile bars welcome creative adaptations to suit any occasion or dietary need. For autumn gatherings, add 1/2 teaspoon of pumpkin spice to the batter for a seasonal twist. I’ve successfully made these with gluten-free flour blends—just add 1/4 teaspoon xanthan gum if your blend doesn’t include it. For a dairy-free version, use coconut oil instead of butter (though you’ll miss the brown butter flavor). During maple sugaring season, splurge on grade B maple syrup for an intensified maple experience.

    Storage & Troubleshooting Guide

    Keeping Them Fresh

    Brown Butter Maple Donut Bars stay fresh for up to five days when stored properly. Keep them in an airtight container at room temperature, with parchment paper between layers to prevent sticking. I’ve found that placing a slice of bread in the container helps maintain moisture—a trick my grandmother taught me. These bars also freeze beautifully for up to three months; just thaw at room temperature when you’re ready to enjoy. The glaze may lose some shine after freezing, but the flavor remains delicious.

    Fixing Common Issues

    Even experienced bakers encounter challenges, but most Brown Butter Maple Donut Bar issues have simple solutions. If your bars seem too dense, you likely overmixed the batter—next time, use a gentle hand when combining ingredients. Bars that sink in the middle indicate underbaking or opening the oven door too early. For glaze that’s too runny, add more powdered sugar a tablespoon at a time. Too thick? A few drops of milk will thin it to the perfect consistency.

    Frequently Asked Questions

    Can I substitute the maple syrup with honey or another sweetener?

    Yes, but it will change the signature flavor. If substituting, use an equal amount of honey or agave, but reduce other liquids slightly as these alternatives are more moisture-rich than maple syrup.

    Why did my Brown Butter Maple Donut Bars turn out dry?

    Overbaking is usually the culprit. Check them 5 minutes before the recipe suggests and remember they continue cooking slightly after removal from the oven.

    Can I make these ahead for a special event?

    Absolutely! Bake them up to 2 days ahead and store unglazed. Add the fresh maple glaze 1-2 hours before serving for the best appearance and flavor.

    What’s the best way to achieve clean cuts?

    Use a sharp knife wiped clean between cuts. For professional-looking bars, chill them for 30 minutes after glazing before cutting.

    How can I intensify the maple flavor in my Brown Butter Maple Donut Bars?

    Use grade B or dark maple syrup and add 1/2 teaspoon of maple extract to both the batter and glaze for an extra maple punch.

    Final Thoughts

    Brown Butter Maple Donut Bars have become my signature bring-along for gatherings, earning requests from friends and family alike. There’s something magical about how the nutty brown butter amplifies the warm maple notes, creating a treat that’s both familiar and special. I hope these bars bring the same joy to your kitchen as they have to mine. Whether you’re a seasoned baker or just starting out, this recipe delivers reliable results with extraordinary flavor. Find more delicious inspiration on our Pinterest page!

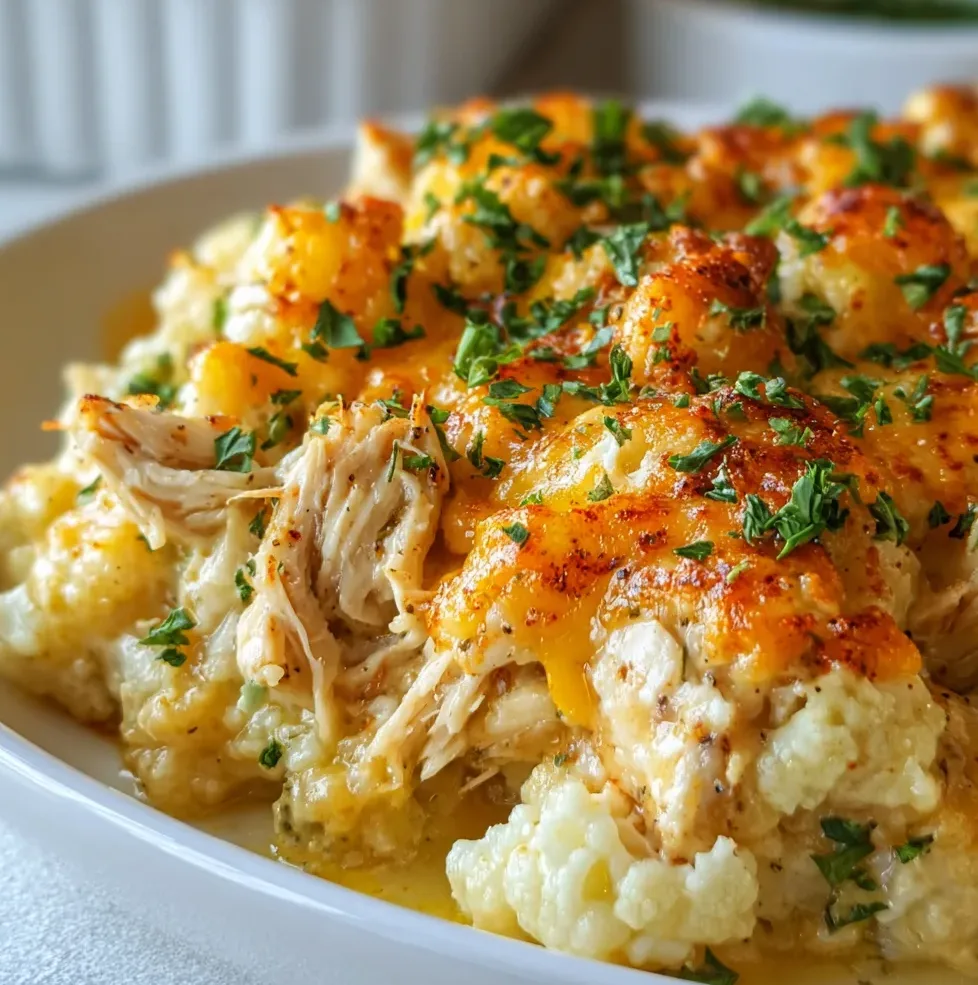
  • Healthy Chicken Cauliflower Casserole Recipe That Will WOW You!

    Healthy Chicken Cauliflower Casserole Recipe That Will WOW You!

    Healthy Chicken Cauliflower Casserole Recipe That Will WOW You!

    This Healthy Chicken Cauliflower Casserole is my absolute lifesaver on busy weeknights when I crave something nourishing yet comforting. The first time I made this, my kitchen filled with the most inviting aroma of herbs and roasted cauliflower that had my husband wandering in from his home office asking, “What smells so amazing?” The tender chicken, creamy sauce, and perfectly roasted cauliflower create a flavor symphony that feels indulgent while actually being packed with protein and vegetables. It’s become my go-to recipe when I want something that satisfies my comfort food cravings without the guilt. Check out my collection of family-friendly casseroles for more inspiration!

    Recipe

    Why You’ll Love This Healthy Chicken Cauliflower Casserole

    Perfect Balance of Flavor and Nutrition

    This casserole hits that sweet spot between wholesome and delicious that can be so elusive in healthy cooking. The cauliflower roasts to a gorgeous golden perfection, developing a nutty flavor that pairs beautifully with the savory chicken. I’ve carefully balanced the seasonings so you get that soul-satisfying taste without relying on heavy cream or excessive cheese. My sister-in-law, who typically wrinkles her nose at “healthy versions” of comfort foods, actually asked for seconds! The protein-packed chicken keeps you full, while the cauliflower provides fiber and nutrients without weighing you down.

    Quick Prep with Impressive Results

    One night when I was particularly exhausted after work, I threw this together in about 15 minutes of active time and was amazed at how elegant and delicious the results were. The beauty of this casserole is that while it bakes, you’re free to help with homework, tidy up, or simply enjoy a moment to yourself. I love recipes that work hard for me instead of the other way around! The hands-off cooking time gives the flavors a chance to meld together beautifully, creating something that tastes like you spent hours in the kitchen when really, you just popped it in the oven.

    Essential Tips & Tricks

    Perfect Cauliflower Prep

    The key to this casserole is getting the cauliflower perfectly roasted without becoming mushy. I learned this the hard way after one soggy attempt! Cut your cauliflower into even-sized florets (about 1.5 inches) to ensure they cook uniformly. Pat them thoroughly dry after washing to promote browning. For extra flavor, toss the cauliflower with a tablespoon of olive oil, a pinch of salt, and a sprinkle of garlic powder before adding to the casserole. This simple step elevates the entire dish and creates those irresistible crispy edges that my family fights over. Try this technique with my Dill Yogurt Cucumber Salad for a complete meal.

    Foolproof Chicken Techniques

    For the juiciest chicken possible, I recommend using thighs rather than breasts if you’re concerned about dryness. However, if you prefer breasts, try this foolproof method: brine them in salt water for just 15 minutes before cooking. This simple step was a game-changer for my casseroles! Season your chicken generously with herbs like thyme and rosemary, which complement the cauliflower beautifully. For a time-saving hack, use rotisserie chicken or leftover roasted chicken. Just fold it in during the last 15 minutes of baking to prevent it from drying out.

    Serving Ideas & Creative Variations

    Perfect Pairings

    This Healthy Chicken Cauliflower Casserole stands beautifully on its own, but I love serving it with simple sides that complement without competing. A bright green salad with a lemon vinaigrette cuts through the richness perfectly. When I’m feeding my hungry teenagers, I’ll add a side of quinoa or brown rice to make it more filling. For special occasions, try pairing with roasted asparagus drizzled with balsamic glaze – the slight sweetness is magical with the savory casserole. If you’re looking for another protein-packed option to serve alongside, my Creamy Ranch Turkey Veggie Skillet makes a wonderful addition.

    Exciting Flavor Twists

    Don’t be afraid to make this recipe your own with some creative variations! My Mediterranean version with olives, feta, and a squeeze of lemon juice was a huge hit at last month’s family gathering. For a Mexican-inspired twist, add a teaspoon of cumin, some diced bell peppers, and top with pepper jack cheese instead of mozzarella. When fall arrives, I love incorporating seasonal herbs like sage and rosemary with a sprinkle of dried cranberries. For spice lovers in your family, add a diced jalapeño or a sprinkle of red pepper flakes to give the dish a pleasant heat.

    Storage & Troubleshooting Guide

    Make-Ahead and Freezer Tips

    This casserole is a meal-prep champion that actually tastes better the next day as the flavors continue to develop. You can assemble the entire casserole up to 24 hours ahead and keep it covered in the refrigerator until you’re ready to bake. For freezing, I recommend slightly undercooking the cauliflower as it will continue to soften when reheated. Cool completely before covering tightly with foil and freezing for up to 3 months. My favorite method is to portion individual servings in glass containers for quick grab-and-go lunches. Just thaw overnight in the refrigerator and reheat at 350°F until bubbling.

    Fixing Common Issues

    If your casserole turns out too watery, there’s an easy fix! Cauliflower naturally releases moisture during cooking. Next time, try roasting the cauliflower separately for 15 minutes before adding it to the casserole. For a creamier texture without adding extra dairy, puree a cup of the cauliflower with a bit of broth and fold it back into the mixture. If your top isn’t browning nicely, switch to the broiler for the last 2-3 minutes, watching carefully to prevent burning. And if you find the flavor needs a boost, a splash of white wine or a teaspoon of Dijon mustard works wonders.

    Frequently Asked Questions

    Can I make this Healthy Chicken Cauliflower Casserole vegetarian?

    Absolutely! Replace chicken with chickpeas or white beans for protein. Add extra vegetables like mushrooms or bell peppers for more texture and flavor. The casserole remains satisfying and nutritious.

    How do I prevent my cauliflower from becoming mushy?

    Don’t overcook it initially. Cut florets uniformly, pat them dry before roasting, and consider pre-roasting them for 10-15 minutes before adding to the casserole mixture.

    Can I use frozen cauliflower instead of fresh?

    Yes, but thaw and drain it thoroughly first. Pat it very dry with paper towels to remove excess moisture. It won’t get quite as crispy but will still taste delicious.

    What’s the best cheese to use in this recipe?

    A combination works best – sharp cheddar for flavor and mozzarella for that stretchy texture. Gruyère or fontina add wonderful depth if you’re feeling fancy!

    How can I increase the protein in this dish?

    Add a can of drained white beans, mix in some quinoa, or increase the chicken amount. Greek yogurt in the sauce also boosts protein while adding creaminess.

    Final Thoughts

    This Healthy Chicken Cauliflower Casserole has become more than just a recipe in my household—it’s a reliable friend that shows up when we need nourishment without sacrificing flavor. The way it transforms simple ingredients into something truly special reminds me why I fell in love with cooking in the first place. I hope it brings the same cozy comfort to your table that it has to mine. Remember to make it your own with the variations that speak to your family’s tastes. For more delicious, wholesome recipes, follow me on Pinterest where I’m always sharing new inspiration!

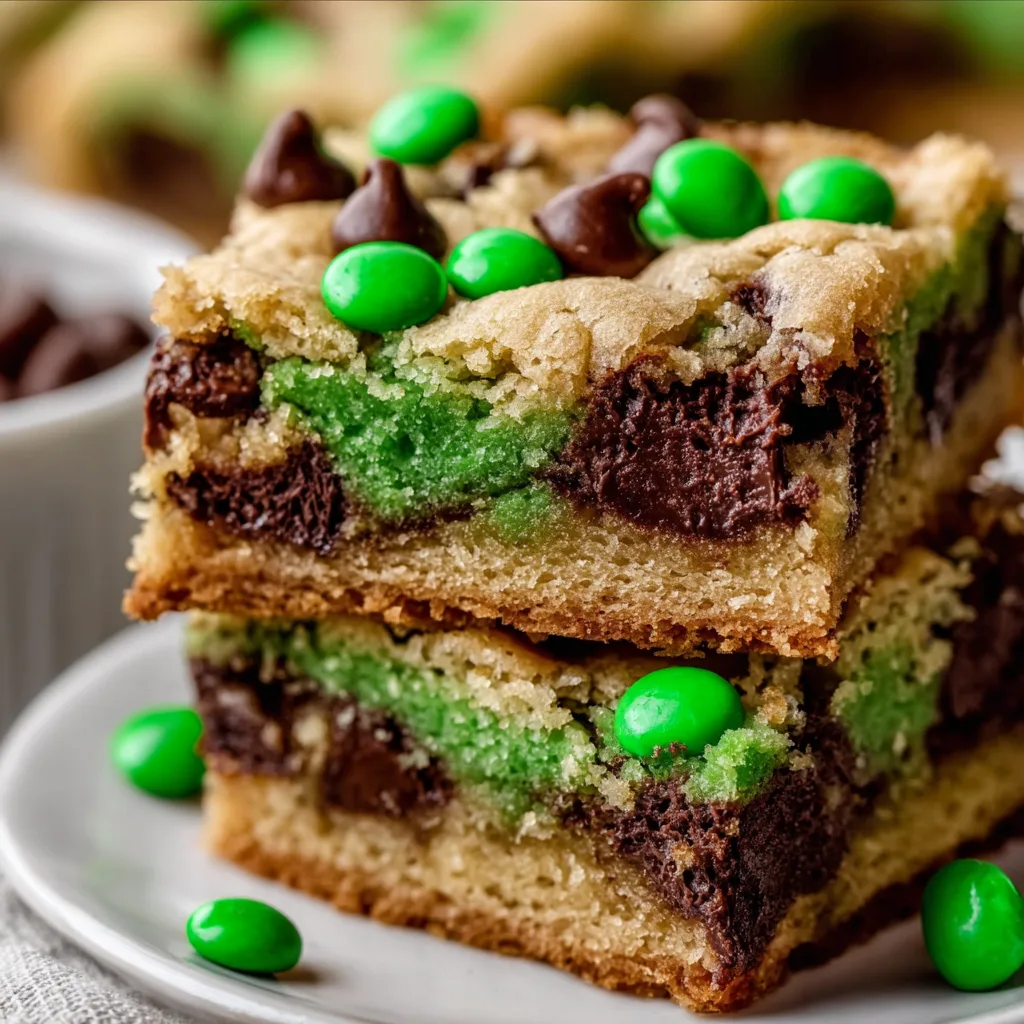
  • St. Patrick’s Day Chocolate Chip Cookie Bars Everyone Craves!

    St. Patrick’s Day Chocolate Chip Cookie Bars Everyone Craves!

    St. Patrick’s Day Chocolate Chip Cookie Bars Everyone Craves!

    St. Patrick’s Day Chocolate Chip Cookie Bars bring festive cheer to your March celebrations with their perfect balance of chewy, buttery goodness and holiday spirit. As someone who’s always looking for that special treat to mark the occasion, I’ve found these vibrant green-tinted bars to be an absolute crowd-pleaser. The familiar comfort of chocolate chip cookies transformed into an easy-to-serve bar format means less fuss and more time enjoying the festivities. Trust me, the rich vanilla aroma filling your kitchen as these bake will have everyone asking for the recipe before they even take their first bite. Let’s create some magical St. Patrick’s Day memories together!

    Recipe

    Perfect Balance of Festive Fun and Classic Flavor

    These cookie bars strike that magical balance between holiday novelty and classic comfort food. The vibrant green color catches the eye and sets a festive tone, while the familiar chocolate chip cookie flavor grounds the experience in something deliciously recognizable. I remember bringing these to my daughter’s school party last year—the way children’s eyes lit up at the sight of these emerald treats was priceless! Yet it was the parents who kept coming back for seconds, drawn by the nostalgic flavor of perfectly baked cookie bars with crisp edges and soft centers that simply melt in your mouth.

    Quick and Easy One-Bowl Wonder

    Let’s be honest—holiday baking shouldn’t mean spending hours in the kitchen! These bars come together in just one bowl with minimal measuring and fuss. The dough mixes up in about 10 minutes, spreads easily in the pan, and the hardest part is waiting for them to bake. Last St. Patrick’s Day, I was running late for a neighborhood potluck and still managed to whip these up while simultaneously helping my son with homework. The simplicity of bar cookies means no scooping individual portions or multiple baking batches—just spread, bake, cool, and cut into perfect squares that transport beautifully.

    Essential Tips & Tricks

    Getting That Perfect Green Hue

    The secret to these festive bars is achieving that perfect shade of green without affecting the flavor. I’ve found that gel food coloring works significantly better than liquid drops—you’ll need less product for more vibrant color, which means no artificial taste. Start with just a small amount on a toothpick and gradually add more until you reach your desired shade. Remember that the color will lighten slightly during baking. For a natural approach, try matcha powder which adds a subtle earthiness that pairs beautifully with the chocolate chips and creates a more sophisticated, muted green perfect for adult gatherings.

    Texture Secrets for Bakery-Quality Bars

    The difference between good and great cookie bars often comes down to texture. For that perfect chewy-yet-tender consistency, underbake slightly by removing from the oven when the center still looks slightly underdone but the edges are set and golden. The residual heat will continue cooking them to perfection. Another game-changer: chill your dough for 30 minutes before baking. This might seem like an unnecessary step when you’re in a hurry, but it allows the butter to firm up, preventing over-spreading and creating that desirable dense, fudgy texture that makes people reach for seconds.

    Serving Ideas & Creative Variations

    Festive Presentation Options

    Elevate your St. Patrick’s Day Chocolate Chip Cookie Bars with thoughtful presentation that enhances their holiday appeal. Try cutting them into shamrock shapes using cookie cutters for an extra festive touch—just be sure to do this while they’re still slightly warm for clean edges. For an elegant dessert table, dust with powdered sugar through a shamrock stencil or arrange on a platter with fresh mint leaves. Last year, I served these alongside vanilla ice cream with a drizzle of Bailey’s-infused caramel sauce for the adults, and it became the most talked-about dessert of our annual St. Patrick’s Day gathering!

    Mix-in Magic for Customized Creations

    While the classic recipe is delicious, customizing your cookie bars makes them truly special. Try swapping regular chocolate chips for mint chocolate chips for a refreshing twist that complements the holiday theme. White chocolate chips with dried cranberries add beautiful color contrast against the green background. For texture variety, incorporate 1/2 cup of chopped pistachios or walnuts. My personal favorite variation includes a layer of cream cheese filling: simply reserve 1 cup of dough, spread the remainder in the pan, top with sweetened cream cheese, then crumble the reserved dough over top before baking.

    Storage & Troubleshooting Guide

    Keeping Fresh and Freezing Options

    These cookie bars maintain their perfect texture for 3-4 days when stored properly in an airtight container at room temperature. Place parchment paper between layers to prevent sticking. For longer storage, these bars freeze beautifully for up to 3 months! I often make a double batch and freeze half for unexpected guests or late-night cravings. To freeze, cool completely, cut into squares, then wrap individually in plastic wrap before placing in a freezer bag. Thaw at room temperature for about an hour, or microwave for 15-20 seconds for that just-baked warmth and gooey chocolate experience.

    Fixing Common Baking Issues

    Even experienced bakers encounter occasional challenges. If your bars turn out too cakey, you likely used too much flour—remember to spoon flour into measuring cups rather than scooping directly from the bag. For bars that spread too much or seem greasy, the butter was probably too warm; next time, ensure it’s softened but still cool to the touch. If the green color fades during baking, try using more concentrated food coloring or adding a drop of blue to counteract the yellowing effect from the butter and vanilla. For crumbly bars that fall apart, they likely baked too long—watch closely during the final minutes!

    Frequently Asked Questions

    Absolutely! Prepare them up to 2 days in advance and store in an airtight container. For the freshest taste, slightly underbake them initially, then warm in a 300°F oven for 5 minutes before serving.

    Look for golden edges with a slightly soft center. A toothpick inserted in the middle should come out with a few moist crumbs but no wet batter. Remember, they’ll continue cooking slightly after removal.

    Can I use natural food coloring for these bars?

    Yes! Spirulina powder, matcha, or plant-based food coloring works well. Start with 1-2 teaspoons of powder or follow package directions for liquid alternatives. The color will be more subtle.

    Semi-sweet chocolate chips provide the perfect balance, but dark chocolate creates a sophisticated flavor profile. For extra festivity, mix in green-colored candy melts or mint chips.

    Can I make these gluten-free?

    Definitely! Substitute a 1:1 gluten-free flour blend. Add 1/4 teaspoon xanthan gum if your blend doesn’t include it, and consider adding an extra egg yolk for moisture.

    Final Thoughts

    These St. Patrick’s Day Chocolate Chip Cookie Bars have become my go-to March tradition, bringing a touch of whimsy and a whole lot of flavor to celebrations both large and intimate. There’s something magical about the way they transform a simple dessert into a memorable part of the holiday. Whether you’re baking with kids or preparing for an adult gathering, these versatile treats strike the perfect balance between festive appearance and comforting taste. Share your creations on Pinterest and join our community of holiday bakers spreading joy one green-tinted treat at a time!

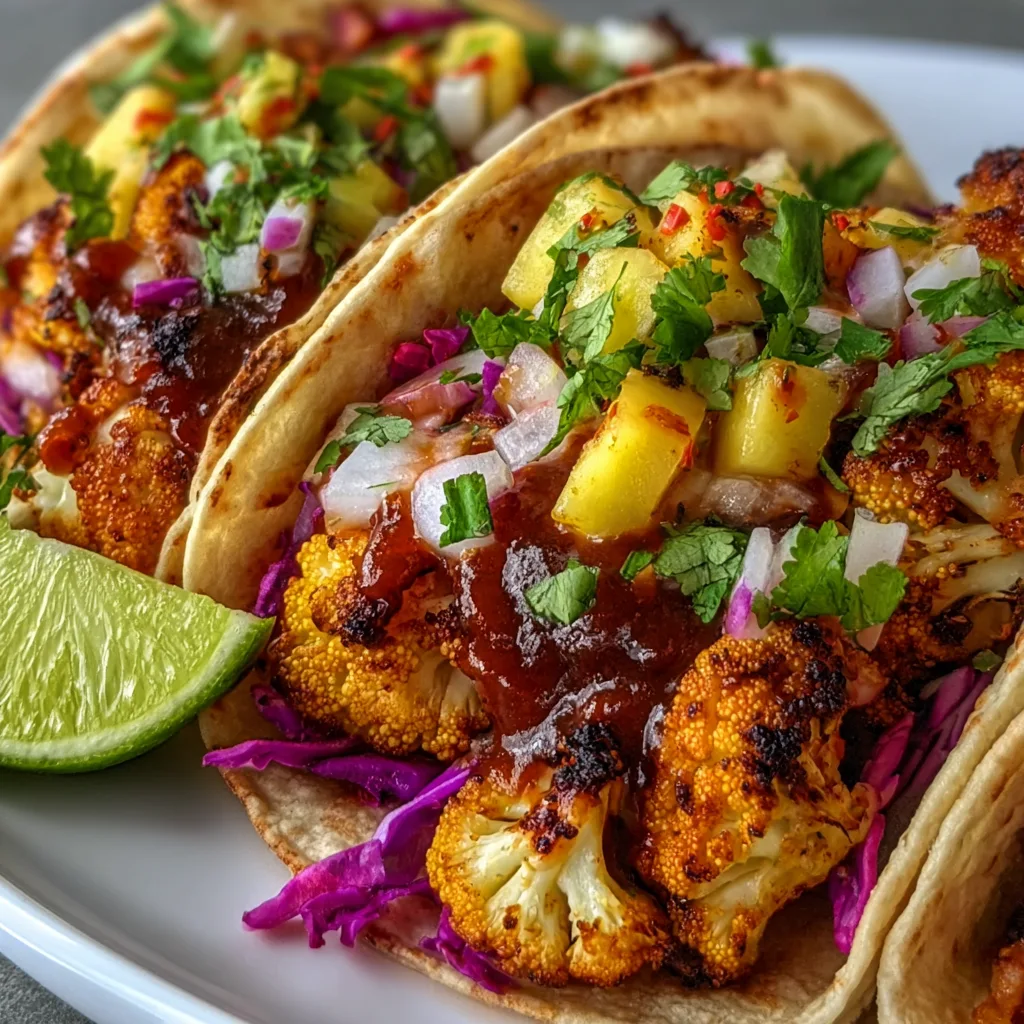
  • Vegan Smoky BBQ Cauliflower Tacos That Will Blow Your Mind!

    Vegan Smoky BBQ Cauliflower Tacos That Will Blow Your Mind!

    Vegan Smoky BBQ Cauliflower Tacos That Will Blow Your Mind!

    Vegan Smoky BBQ Cauliflower Tacos have become my absolute obsession this season! There’s something magical about that perfect balance of smoky spice and sweet tanginess that makes these plant-based tacos irresistible. Last weekend, I served these at a backyard gathering, and even my carnivore friends couldn’t stop raving about them! The tender cauliflower florets, charred to perfection and coated in that rich BBQ sauce, create a satisfying texture that rivals any meat filling. If you’re looking to add more plant-based meals to your rotation while keeping things deliciously crave-worthy, these tacos are your answer.

    Recipe

    Why You’ll Love These Vegan Smoky BBQ Cauliflower Tacos

    Perfect Texture & Flavor Balance

    The secret to these mind-blowing tacos lies in how the cauliflower transforms when roasted. Unlike soggy vegetable fillings that leave you wanting, these florets develop crispy edges while maintaining a tender bite inside. I brush them with a homemade smoky BBQ sauce that caramelizes slightly in the oven, creating complex layers of flavor. The combination of smoked paprika, chipotle powder, and maple syrup creates that authentic BBQ experience without any meat! Plus, they’re incredibly satisfying – I promise you won’t miss the traditional protein one bit in these Vegan Smoky BBQ Cauliflower Tacos.

    Quick & Customizable for Any Diet

    What I adore about these Vegan Smoky BBQ Cauliflower Tacos is how effortlessly they fit into busy weeknights. The active prep time is just 15 minutes, with the oven doing most of the work. While designed to be plant-based, you can easily adjust the spice level to suit your family’s preferences. My niece can’t handle heat, so I make a milder BBQ sauce for her portion. These tacos are naturally gluten-free when served with corn tortillas, making them perfect for gatherings with mixed dietary needs. The recipe is also budget-friendly, as cauliflower is typically less expensive than meat alternatives.

    Essential Tips & Tricks

    Achieving Perfect Cauliflower Texture

    The key to restaurant-quality tacos is properly preparing your cauliflower. Cut florets into uniform, bite-sized pieces to ensure even cooking. I like to spread them on a parchment-lined baking sheet with plenty of space between pieces – overcrowding leads to steaming instead of roasting. For that ideal texture, roast at 425°F and toss halfway through cooking. The edges should be deeply golden and slightly charred while the centers remain tender. This contrast creates that satisfying bite that makes these Vegan Smoky BBQ Cauliflower Tacos so addictive! A final broil for 2 minutes gives them that perfect finish.

    Elevating Your BBQ Sauce

    While store-bought BBQ sauce works in a pinch, taking a few minutes to enhance it makes all the difference. Start with your favorite vegan BBQ base and customize it with smoked paprika, a splash of apple cider vinegar, and a touch of maple syrup for depth. I add a tiny pinch of cinnamon for warmth and complexity – it’s my secret ingredient! Let the sauce simmer for 5-7 minutes to meld the flavors before coating your cauliflower. The sauce should be thick enough to cling to the florets without dripping off. Remember to reserve some extra sauce for drizzling just before serving.

    Serving Ideas & Creative Variations

    Building the Perfect Taco

    The magic of these Vegan Smoky BBQ Cauliflower Tacos happens in the assembly stage. Warm your tortillas directly over a gas flame or in a dry skillet until slightly charred and pliable. Layer with a thin spread of avocado or vegan sour cream as a cooling base. Add your BBQ cauliflower, then top with crunchy elements like thinly sliced red cabbage, pickled red onions, or jicama slaw for textural contrast. Fresh elements are essential – cilantro, lime wedges, and sliced jalapeños brighten everything up. For extra indulgence, add a drizzle of creamy sauce just before serving.

    Exciting Flavor Variations

    These tacos are incredibly versatile as a base recipe. For a Korean-inspired twist, substitute gochujang for part of the BBQ sauce and top with quick-pickled cucumbers and kimchi. Craving something tropical? Add pineapple chunks to roast alongside the cauliflower and finish with a mango-avocado salsa. For a Mediterranean variation, swap the BBQ sauce for harissa paste mixed with maple syrup, then top with cucumber-mint yogurt and pickled red onions. You can even transform this filling into grain bowls, wraps, or loaded nachos for completely different meals using the same core ingredients.

    Storage & Troubleshooting Guide

    Make-Ahead & Storage Solutions

    These Vegan Smoky BBQ Cauliflower Tacos are perfect for meal prep. The roasted cauliflower keeps well in an airtight container in the refrigerator for up to 4 days. Store the sauce and toppings separately to maintain their textures. When reheating, avoid the microwave which can make the cauliflower soggy. Instead, spread it on a baking sheet and heat at 375°F for 7-10 minutes until warmed through. For make-ahead entertaining, prep all components the day before, then quickly reheat the cauliflower and warm the tortillas just before guests arrive. The flavors actually develop nicely overnight!

    Solving Common Challenges

    If your cauliflower turns out soggy instead of crispy, you’re likely overcrowding the pan or your oven temperature isn’t hot enough. Make sure your florets have breathing room and your oven is fully preheated. For cauliflower that’s too dry or burnt, try reducing the cooking time or temperature for your specific oven. If your BBQ sauce isn’t sticking well, make sure to pat the cauliflower dry before coating it, and consider thickening your sauce slightly by simmering it longer. For tortillas that crack, make sure they’re properly warmed or try double-layering them for extra stability.

    Frequently Asked Questions

    Can I make these Vegan Smoky BBQ Cauliflower Tacos gluten-free?

    Absolutely! Use certified gluten-free corn tortillas and check that your BBQ sauce is gluten-free (most are, but some contain soy sauce with wheat).

    How can I make this recipe less spicy?

    Reduce or omit the chipotle powder and use a mild BBQ sauce as your base. The smoked paprika adds smoky flavor without significant heat.

    Can I prepare the cauliflower in an air fryer?

    Yes! Cook at 380°F for about 12-15 minutes, shaking halfway through. Brush with BBQ sauce during the last 5 minutes of cooking.

    What can I substitute for cauliflower?

    Firm tofu, chickpeas, or jackfruit work beautifully with the same BBQ treatment. Each offers a different texture but pairs wonderfully with the smoky sauce.

    How do I keep the tacos from getting soggy when serving?

    Serve components separately and let everyone build their own. This creates an interactive meal and prevents the tortillas from becoming soggy.

    Final Thoughts

    These Vegan Smoky BBQ Cauliflower Tacos have become a staple in my kitchen for good reason – they deliver big flavor with minimal effort. There’s something deeply satisfying about transforming humble cauliflower into such a crave-worthy meal that pleases everyone at the table. I love watching skeptics become converts after just one bite! Whether you’re a committed vegan or simply looking to incorporate more plant-based meals into your rotation, these tacos deserve a spot in your recipe collection. Don’t forget to share your creations on Pinterest – I’d love to see your versions of this versatile dish!

  • Panera Strawberry Poppyseed Salad: Irresistibly Fresh & Delicious!

    Panera Strawberry Poppyseed Salad: Irresistibly Fresh & Delicious!

    Panera Strawberry Poppyseed Salad: Irresistibly Fresh & Delicious!

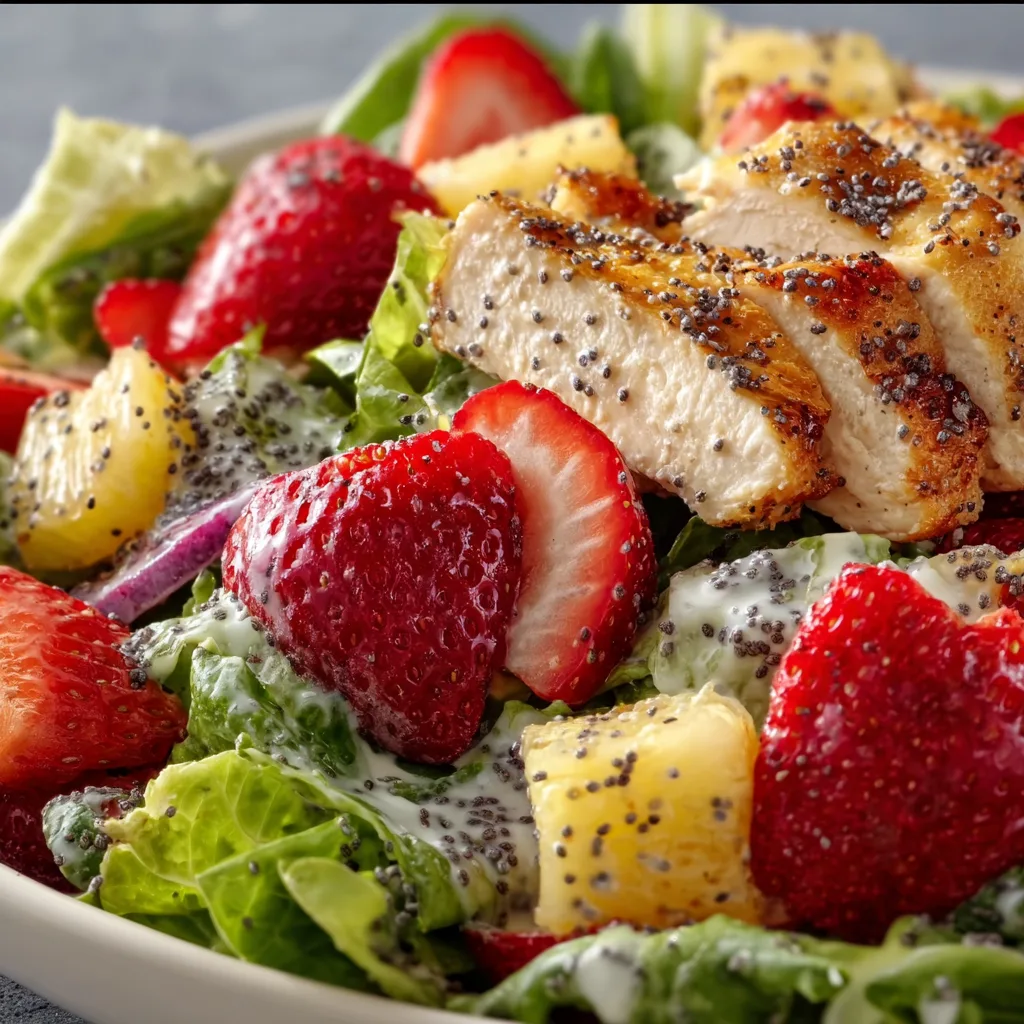
    Panera Strawberry Poppyseed Salad brings the perfect balance of sweet and tangy flavors that dance across your taste buds with every bite. The first time I recreated this beloved café classic at home, the vibrant colors of plump strawberries, juicy blueberries, and mandarin oranges against crisp romaine made my kitchen feel like a summer garden party. There’s something magical about how the poppyseed dressing coats each ingredient, creating a harmonious blend that’s both refreshing and satisfying. If you’re looking for a salad that feels like sunshine in a bowl, this Panera-inspired creation is about to become your new warm-weather staple.

    Recipe

    Why You’ll Love This Panera Strawberry Poppyseed Salad

    Perfect Balance of Flavors and Textures

    The magic of this Panera Strawberry Poppyseed Salad lies in its extraordinary balance of flavors and textures. Each forkful delivers a symphony of sweet-tart berries, crunchy pecans, and tender chicken against crisp romaine. The poppyseed dressing ties everything together with its creamy, slightly sweet profile that never overwhelms the fresh ingredients. I love how the juicy bursts from the berries complement the subtle crunch of the pecans, creating that perfect bite that keeps you coming back for more. It’s a textural playground that makes eating salad feel like an indulgence rather than an obligation.

    Quick and Customizable

    What I adore most about this Panera Strawberry Poppyseed Salad is how effortlessly it comes together while still feeling special. The entire salad assembles in under 15 minutes, making it perfect for busy weeknights when you want something fresh but lack time for complexity. The ingredient flexibility is another winning feature – swap chicken for grilled shrimp, use spinach instead of romaine, or change up the berry mix based on what looks best at the market. I’ve made this with sliced almonds when I was out of pecans, and it was equally delightful. This adaptability makes it a reliable go-to recipe regardless of season or pantry status.

    Essential Tips & Tricks

    Mastering the Dressing

    The poppyseed dressing is the crown jewel of this Panera Strawberry Poppyseed Salad, and getting it right makes all the difference. I recommend whisking it together at least an hour before serving to allow the flavors to meld. The perfect balance comes from equal parts tangy (apple cider vinegar) and sweet (honey), with just enough mayonnaise to create creaminess without heaviness. Don’t skimp on the poppyseeds – they provide that signature visual appeal and subtle nutty flavor that makes this dressing special. For an extra dimension, add a tiny pinch of dijon mustard which helps emulsify while adding complexity.

    Protein Preparation

    The chicken in this Panera Strawberry Poppyseed Salad deserves special attention to elevate the entire dish. I recommend brining boneless chicken breasts for just 30 minutes in a solution of water, salt, and a touch of honey before cooking. This ensures juicy, flavorful protein that stays tender even when chilled. For the perfect texture, slightly undercook the chicken (to about 160°F) before letting it rest, as it will continue cooking while maintaining moisture. Slice it against the grain and let it cool completely before adding to your salad. For a delicious time-saving alternative, use rotisserie chicken tossed with a squeeze of lemon juice.

    Serving Ideas & Creative Variations

    Entertaining with Elegance

    Transform this Panera Strawberry Poppyseed Salad into a showstopping entertaining option by serving it deconstructed on a large wooden board. Arrange colorful components in separate piles – the berries, mandarin segments, pecans, sliced chicken, and greens – with the dressing in a pretty jar alongside. This presentation not only creates a gorgeous focal point for summer gatherings but allows guests to build their perfect plate. For an extra touch of elegance, add small bowls of additional toppings like crumbled goat cheese, avocado chunks, or candied pecans. This serving style elevates a simple salad into an interactive experience guests will remember.

    Seasonal Adaptations

    One of the beauties of this Panera Strawberry Poppyseed Salad is how gracefully it transitions through seasons with simple swaps. In late summer, substitute blackberries for blueberries and add sliced peaches for a stone-fruit twist. Come fall, try roasted butternut squash cubes, dried cranberries, and pepitas for an autumn-inspired variation that maintains the same color appeal. Winter calls for sectioned blood oranges, pomegranate arils, and candied walnuts, while spring welcomes tender asparagus tips and fresh peas. The poppyseed dressing works beautifully with all these variations, proving that this salad concept has year-round staying power beyond its summer origins.

    Storage & Troubleshooting Guide

    Keeping Components Fresh

    The key to enjoying this Panera Strawberry Poppyseed Salad beyond its initial serving lies in smart storage of individual components. Store the washed and dried greens with a paper towel in an airtight container to absorb excess moisture, extending crispness for up to four days. Keep berries unwashed until serving day, and store them in their original containers lined with paper towels. The dressing stays fresh in a sealed jar for up to a week, while cooked chicken remains good for three days when properly refrigerated. For meal prep, portion components in divided containers but keep wet ingredients separate from dry until just before eating.

    Fixing Common Issues

    Even the most experienced cooks encounter challenges with this Panera Strawberry Poppyseed Salad, but simple fixes save the day. If your dressing separates or becomes too thick, a quick whisk and a splash of water restores perfect consistency. For soggy greens, the emergency solution is a quick ice bath followed by thorough drying in a salad spinner. If berries release too much juice and make the salad watery, toss them with a teaspoon of cornstarch before adding to absorb excess moisture. And if your chicken turns out dry, slice it thinner and toss with a tablespoon of the dressing to rehydrate before assembling the salad.

    Frequently Asked Questions

    Can I make this Panera Strawberry Poppyseed Salad ahead of time?

    Yes, but store components separately. Prepare dressing, cook chicken, and wash berries up to 2 days ahead. Assemble just before serving for optimal freshness and texture.

    What’s the best substitute for poppyseed dressing?

    A honey-mustard vinaigrette works beautifully. Alternatively, blend 2 tablespoons each of honey and apple cider vinegar with ¼ cup olive oil, 1 teaspoon Dijon mustard, and salt to taste.

    How can I make this salad more filling?

    Add quinoa, farro, or wild rice for hearty grains. Avocado provides healthy fats, while chickpeas or edamame boost protein content without adding meat.

    Is this recipe gluten-free?

    Yes, all ingredients in the traditional Panera Strawberry Poppyseed Salad are naturally gluten-free. Just verify your chicken seasoning and dressing ingredients don’t contain hidden gluten.

    Can I use frozen berries instead of fresh?

    Fresh berries provide better texture, but thawed frozen berries work in a pinch. Pat them dry thoroughly with paper towels to prevent excess moisture in your salad.

    Final Thoughts

    This Panera Strawberry Poppyseed Salad brings restaurant quality to your home kitchen with surprisingly little effort. The combination of juicy berries, tender chicken, and that irresistible poppyseed dressing creates a meal that feels both nourishing and indulgent. I find myself craving this colorful creation even when strawberries aren’t in season – it’s that good! Whether you’re serving it for a solo lunch, family dinner, or summer gathering, this salad delivers the perfect balance of healthy satisfaction and vibrant flavor. For more seasonal inspiration, check out our Pinterest collection of fresh salad ideas.