Blog

  • Edamame Salad with Cilantro Lime Dressing – Fresh, Zesty & Irresistible!

    Edamame Salad with Cilantro Lime Dressing – Fresh, Zesty & Irresistible!

    Edamame Salad with Cilantro Lime Dressing – Fresh, Zesty & Irresistible!

    The Edamame Salad with Cilantro Lime Dressing is my absolute summer salvation! When temperatures soar and the kitchen feels like a sauna, this vibrant, protein-packed salad becomes my go-to meal. The first time I made this, my family devoured it before I could even sit down! There’s something magical about the combination of tender edamame beans, crisp vegetables, and that zingy cilantro lime dressing that makes every bite feel like a little celebration. Perfect for meal prep or a quick dinner, this refreshing salad might just become your new favorite too!

    Recipe

    Why You’ll Love This Edamame Salad with Cilantro Lime Dressing

    A Nutritional Powerhouse

    This edamame salad isn’t just delicious—it’s practically bursting with nutrition! Edamame beans deliver a serious protein punch (about 17g per cup!), making this salad satisfying enough to serve as a main dish. The rainbow of vegetables adds fiber, vitamins, and minerals, while the cilantro lime dressing provides healthy fats from olive oil. I love how I can feel good about every ingredient in this bowl. When I’m trying to eat healthier but don’t want to sacrifice flavor, this vibrant salad is my secret weapon—it’s nourishing, energizing, and keeps me full for hours.

    Quick and Convenient

    One of my favorite things about this Edamame Salad with Cilantro Lime Dressing is how ridiculously easy it is to throw together. On busy weeknights when I’m tempted to order takeout, I remember I can have this ready in about 20 minutes. The edamame cooks in minutes (frozen works perfectly!), and while it’s cooling, I chop the veggies and whisk the dressing. Everything can be prepped ahead too, making it perfect for meal planning. I often make a double batch on Sunday, and I’m set with healthy lunches for days—just like my Slow Cooker Mac & Cheese Classic, it’s a time-saving lifesaver!

    Essential Tips & Tricks

    Perfecting the Dressing

    The cilantro lime dressing is truly the crown jewel of this salad, so don’t rush this part! For maximum flavor, use fresh lime juice (never bottled) and make sure your cilantro is bright green and fragrant. I like to add a tiny bit of honey to balance the acidity—just enough to round out the flavors without making it sweet. My secret weapon? A splash of toasted sesame oil that adds incredible depth. When blending, pulse rather than puree completely; those tiny flecks of cilantro create beautiful color throughout the dressing and distribute the flavor perfectly.

    Texture and Temperature Balance

    The magic of this edamame salad lies in its contrasting textures. I always make sure to cook the edamame just until tender—overcooking makes them mushy. For the crunchiest results, plunge them into ice water after cooking to stop the cooking process immediately. Let them cool completely before mixing with other ingredients to prevent wilting. I like to add a handful of toasted pepitas or sunflower seeds just before serving for extra crunch. For the best flavor experience, serve this salad slightly chilled rather than ice-cold—similar to how I serve my Crockpot Chicken Lo Mein at the perfect temperature.

    Serving Ideas & Creative Variations

    Perfect Pairings

    This Edamame Salad with Cilantro Lime Dressing works beautifully as both a standalone meal or a versatile side dish. For a complete dinner, I love serving it alongside grilled salmon or lemon garlic chicken thighs. It’s also fantastic tucked into warm pita bread with a dollop of hummus for a quick lunch wrap. When hosting, I arrange it on a large platter surrounded by sliced avocado and lime wedges—the presentation always impresses guests! The bright flavors complement heavier dishes like my Slow Cooker Beef Stroganoff, creating a perfectly balanced meal.

    Seasonal Adaptations

    One of the reasons I return to this edamame salad again and again is its incredible versatility. In summer, I add juicy cherry tomatoes, sweet corn, and cucumber. Come fall, I swap in roasted butternut squash cubes and dried cranberries. Winter calls for sectioned citrus and pomegranate seeds, while spring welcomes tender asparagus tips and radishes. The dressing works with all these variations! For a tropical twist, try adding diced mango and avocado. Need more protein? Add black beans or quinoa. Vegetarians can enjoy it as is, while meat-lovers might appreciate some grilled chicken or shrimp on top.

    Storage & Troubleshooting Guide

    Keeping It Fresh

    For maximum freshness, store this Edamame Salad with Cilantro Lime Dressing properly. I recommend keeping the dressing separate until serving time whenever possible. The salad components will stay crisp in an airtight container for 3-4 days in the refrigerator. If you’ve already dressed the salad, it’s still good the next day, though slightly less crisp. A little trick I’ve discovered: add a few drops of fresh lime juice and a sprinkle of salt to refresh leftovers. For meal prep, layer ingredients in mason jars with dressing at the bottom and delicate items at the top for grab-and-go lunches.

    Fixing Common Issues

    Even experienced cooks encounter challenges! If your dressing separates, don’t worry—just give it a quick shake or whisk before using. Finding the dressing too tangy? Add a touch more honey or a spoonful of Greek yogurt to mellow it out. If your salad seems bland, a pinch of salt often works wonders, as does a sprinkle of red pepper flakes for heat. Soggy salad? Next time, make sure your edamame is completely dry before mixing and consider adding sturdier vegetables. For watery dressing, blend in half an avocado—it creates a creamier texture while adding healthy fats.

    Frequently Asked Questions

    Can I make Edamame Salad with Cilantro Lime Dressing ahead of time?

    Absolutely! Prepare components up to 3 days ahead and store separately. Combine just before serving for the freshest texture, though fully assembled salad will keep overnight if needed.

    Is this salad gluten-free?

    Yes, this edamame salad is naturally gluten-free. Just double-check any packaged ingredients like soy sauce in the dressing, as some brands contain wheat.

    Can I substitute frozen edamame?

    Frozen edamame works perfectly! Simply follow package cooking instructions, then cool completely before adding to the salad. No need to splurge on fresh.

    What can I use instead of cilantro if I don’t like it?

    Fresh basil, mint, or a combination of both makes a delicious alternative. For cilantro-averse folks, these herbs provide similar brightness without the soapy taste some people detect.

    How can I make this salad more filling?

    Add quinoa, brown rice, or farro for extra staying power. For more protein, incorporate grilled chicken, shrimp, or tofu cubes.

    Final Thoughts

    This Edamame Salad with Cilantro Lime Dressing has become my reliable standby for everything from quick lunches to impressive dinner parties. Its versatility, nutrition profile, and vibrant flavors make it a true kitchen hero in my recipe collection. I love how it bridges the gap between healthy eating and truly satisfying food. Whether you’re a seasoned cook or kitchen newbie, this salad delivers foolproof results every time. I hope it brings as much joy to your table as it has to mine! Don’t forget to check out more of my favorite recipes on Pinterest.
  • Creamy Steak Queso Mac with Pepper Jack – Irresistibly Cheesy Comfort!

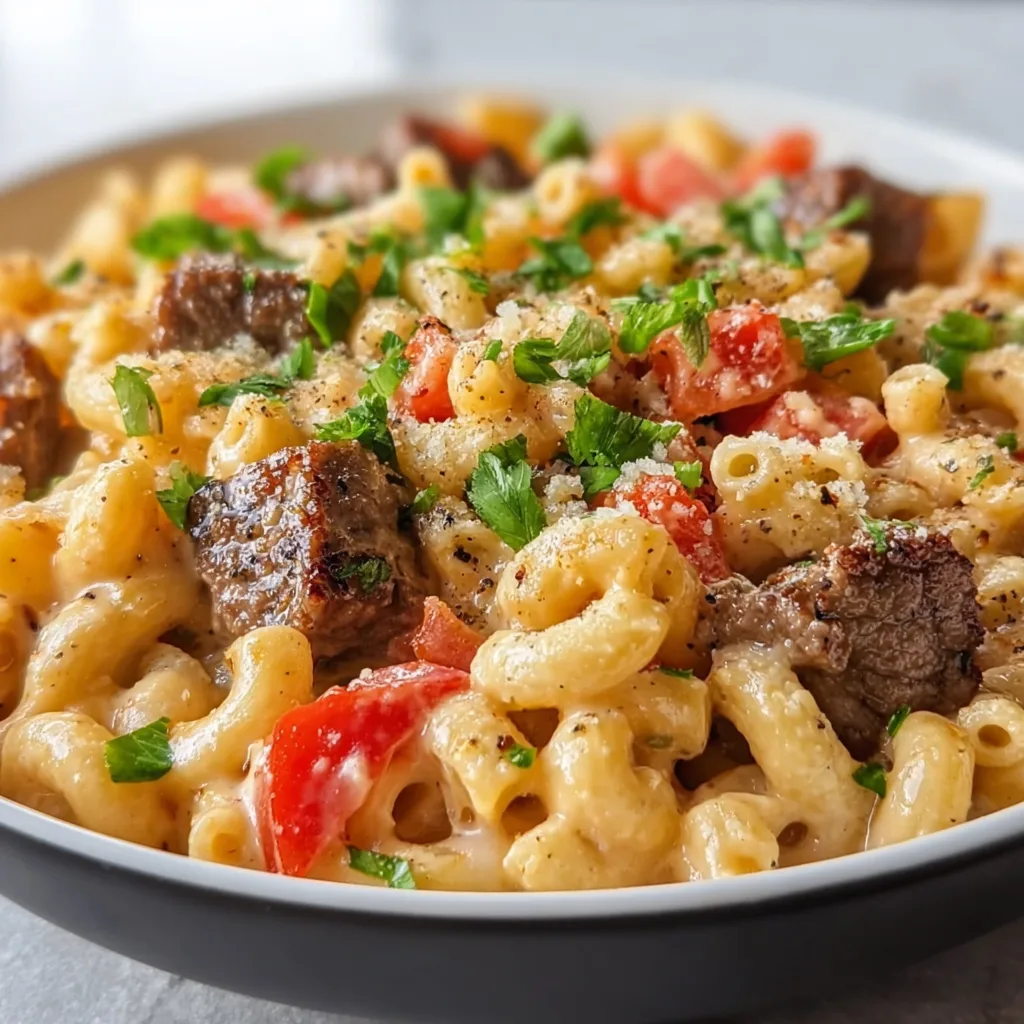
    Creamy Steak Queso Mac with Pepper Jack – Irresistibly Cheesy Comfort!

    Creamy Steak Queso Mac with Pepper Jack – Irresistibly Cheesy Comfort!

    Creamy Steak Queso Mac with Pepper Jack is the ultimate comfort food mashup that’s been stealing hearts at my dinner table lately. There’s something magical about the way tender steak pieces mingle with velvety cheese sauce and al dente pasta. The first time I made this for my family, my kitchen filled with the irresistible aroma of sizzling steak and melting pepper jack, and everyone appeared within minutes! This indulgent dish strikes the perfect balance between hearty satisfaction and cheesy decadence – perfect for those evenings when only something truly special will do. Let me show you how to create this crowd-pleaser that’s become a staple in our weekly rotation.

    Recipe

    Why You’ll Love This Creamy Steak Queso Mac with Pepper Jack

    A Perfect Balance of Flavors and Textures

    This dish delivers a sensory experience that’s hard to beat. The slight kick from the pepper jack cheese creates a beautiful counterpoint to the rich, savory steak. I love how the pasta shells cradle little pockets of the queso sauce, ensuring every bite delivers maximum flavor. The first time I served this at a family gathering, my brother-in-law (who claims to dislike “fancy” mac and cheese) went back for thirds! There’s something about the tender bites of steak nestled among the creamy pasta that transforms an ordinary weeknight into something special.

    Quick and Satisfying Comfort Food

    Despite its impressive appearance, this Creamy Steak Queso Mac with Pepper Jack comes together in about 30 minutes – perfect for those evenings when you’re craving something deeply satisfying but don’t have hours to spend in the kitchen. I often prep components ahead (like cooking the pasta or slicing the steak) when I know we’ll have a busy evening. The rich, velvety sauce coats every piece of pasta and creates that wonderful cheese-pull effect that makes everyone at the table smile. It’s the kind of meal that feels like a warm hug after a long day.

    Essential Tips & Tricks

    Perfecting Your Cheese Sauce

    The secret to a silky-smooth queso sauce is low, gentle heat and constant attention. I learned this the hard way after scorching my first attempt! Remove the pan from heat before adding your cheese and return it to very low heat only if necessary. Using freshly grated pepper jack (rather than pre-shredded) makes a world of difference – those anti-caking agents in packaged cheese can make your sauce grainy. For extra flavor depth, I like to add a splash of the pasta cooking water – that starchy goodness helps bind everything together beautifully. This technique has improved all my cheese sauces, including my Slow Cooker Mac & Cheese Classic.

    Steak Selection and Preparation

    For the best Creamy Steak Queso Mac with Pepper Jack, choose a well-marbled cut like ribeye or strip steak. The fat content adds incredible flavor to the final dish. Always let your steak rest at room temperature for 20-30 minutes before cooking – this ensures more even cooking. I like to season generously with salt and pepper, then sear quickly over high heat to develop a beautiful crust while maintaining a juicy interior. Thinly slicing against the grain after cooking makes each bite tender and easy to incorporate with the pasta. Remember that carryover cooking continues after removing from heat!

    Serving Ideas & Creative Variations

    Perfect Pairings and Presentation

    Serve your Creamy Steak Queso Mac with Pepper Jack in wide, shallow bowls to showcase those beautiful caramelized steak pieces and creamy sauce. I love adding a sprinkle of crispy fried onions or toasted panko on top for textural contrast. A simple side salad with a bright vinaigrette helps cut through the richness – think arugula with lemon dressing or a tomato-cucumber mix. For special occasions, I serve this alongside my Glazed Carrots for a colorful complement that balances the plate. The vibrant orange against the creamy mac creates an Instagram-worthy presentation!

    Delicious Twists on the Classic

    Don’t be afraid to make this recipe your own! Swap the steak for smoked brisket or pulled pork for an incredible barbecue-inspired version. Vegetarian guests? Replace meat with roasted portobello mushrooms for a similarly satisfying umami experience. For extra heat, stir in diced jalapeños or a few dashes of your favorite hot sauce. My family loves when I add a southwestern twist with black beans, corn, and a squeeze of lime juice. You could even use different pasta shapes – cavatappi holds the sauce beautifully, while bow ties add an elegant touch to the presentation.

    Storage & Troubleshooting Guide

    Proper Storage and Reheating Methods

    Store leftover Creamy Steak Queso Mac with Pepper Jack in an airtight container in the refrigerator for up to 3 days. When reheating, add a splash of milk or cream to restore the sauce’s silky texture – microwave in 30-second intervals, stirring between each. For best results, I prefer gentle reheating on the stovetop over medium-low heat. The pasta will absorb some sauce overnight, so don’t be afraid to add a little extra moisture when warming. I don’t recommend freezing this dish, as the texture of the cheese sauce can become grainy when thawed.

    Fixing Common Issues

    If your sauce breaks or becomes grainy, don’t panic! Remove from heat immediately and whisk in a tablespoon of lemon juice or a splash of cream. This often helps re-emulsify the sauce. Too thick? Add warm milk a tablespoon at a time until you reach your desired consistency. If your sauce is too thin, a slurry of cornstarch and cold water can help thicken it – just be sure to let it simmer briefly after adding. For underseasoned sauce, try adding a pinch of smoked paprika or garlic powder rather than more salt, which can enhance flavors without increasing sodium.

    Frequently Asked Questions

    Can I make Creamy Steak Queso Mac with Pepper Jack ahead of time?

    Yes! Prepare the components separately – cook pasta al dente, prepare the cheese sauce, and sear the steak. Store separately in the refrigerator, then combine and reheat gently when ready to serve. Add a splash of cream when reheating.

    What’s the best pasta shape for this dish?

    Medium shells or cavatappi work wonderfully as they capture the creamy queso sauce in their ridges and hollows. Elbow macaroni is classic, but any short pasta with texture works well.

    Can I substitute the pepper jack cheese?

    Absolutely! Monterey jack provides a milder flavor, while cheddar offers classic comfort. For extra kick, try habanero jack or mix cheeses for complex flavor. Always use freshly grated cheese.

    How do I prevent my sauce from becoming grainy?

    Use freshly grated cheese (pre-shredded contains anti-caking agents), remove the pan from heat before adding cheese, and stir constantly. Add cheese gradually and ensure your base isn’t too hot.

    What sides pair well with this dish?

    A crisp green salad with vinaigrette balances the richness perfectly. Roasted vegetables, garlic bread, or simple steamed broccoli also complement the Creamy Steak Queso Mac with Pepper Jack beautifully.

    Final Thoughts

    This Creamy Steak Queso Mac with Pepper Jack has become my go-to dish when I want to impress without spending hours in the kitchen. There’s something magical about the combination of tender steak, creamy queso, and perfectly cooked pasta that satisfies on a soul-deep level. The way the pepper jack adds just enough heat without overwhelming the dish makes it accessible for everyone at your table. I’d love to see your creations if you try this recipe – tag me on Pinterest with your delicious results! Remember, cooking is about making something that brings joy to your table.

  • Marinated Cilantro Lime Bean Salad: Fresh, Zesty & Irresistible!

    Marinated Cilantro Lime Bean Salad: Fresh, Zesty & Irresistible!

    Marinated Cilantro Lime Bean Salad: Fresh, Zesty & Irresistible!

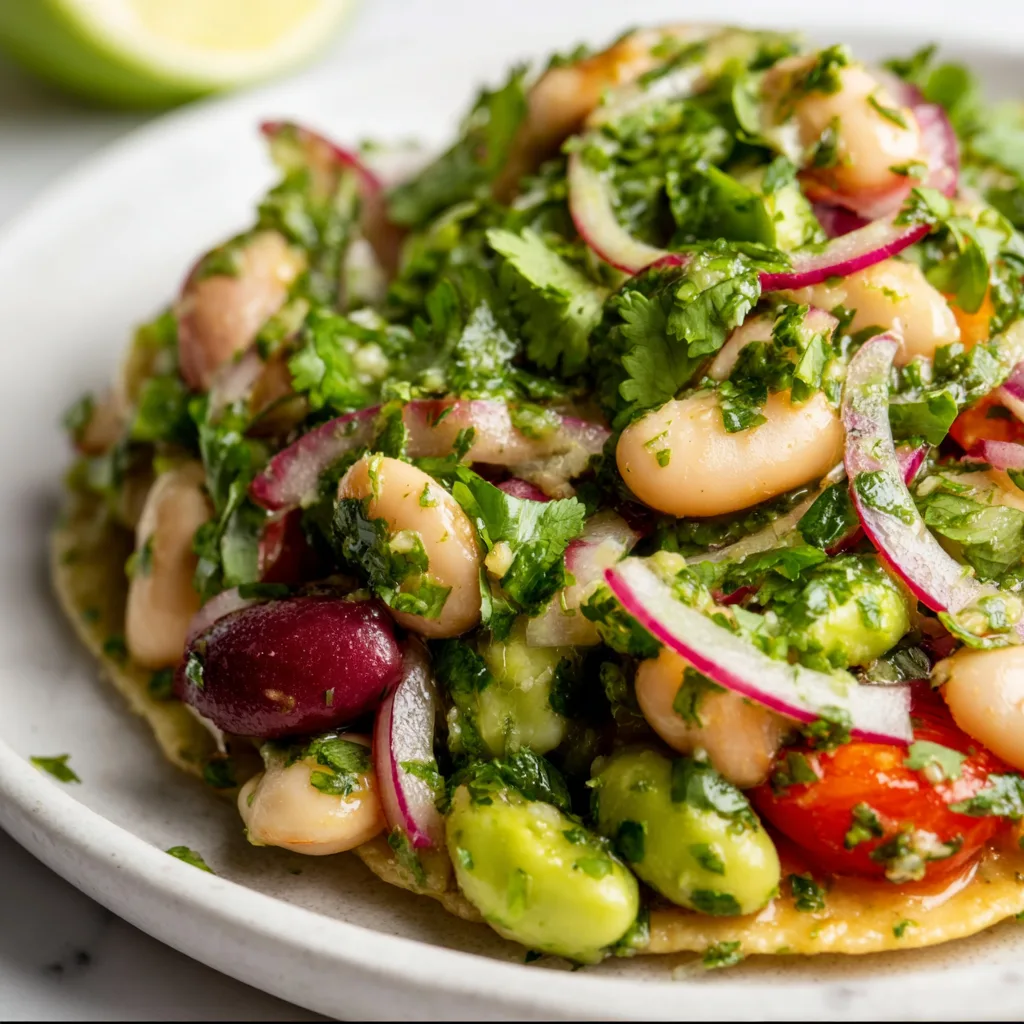
    The aroma of fresh cilantro and zesty lime fills my kitchen as I toss together my favorite Marinated Cilantro Lime Bean Salad. There’s something magical about how these bright flavors transform humble beans into a dish that’s both refreshing and satisfying. I discovered this recipe during a scorching summer when I needed something that could sit out during a backyard gathering without wilting. Now it’s my go-to for everything from quick lunches to potluck contributions at neighborhood gatherings. The best part? It gets even better as it sits!

    Recipe

    Why You’ll Love This Marinated Cilantro Lime Bean Salad

    Perfect Make-Ahead Solution

    This bean salad is a true kitchen hero that improves with time. The longer those beans bathe in the cilantro-lime marinade, the more flavor they absorb! I often make mine the night before serving, which not only intensifies the taste but also saves me precious time on busy days. The bright acidity from the lime juice gently “cooks” the red onions, mellowing their sharpness while the beans soak up all that glorious dressing. Plus, having a ready-to-go nutritious option in the fridge has saved me from countless unhealthy snack decisions when hunger strikes unexpectedly.

    Nutritional Powerhouse with Flavor

    Don’t let the simplicity fool you – this salad packs a serious nutritional punch. The combination of beans provides plant-based protein and fiber that keeps you feeling full for hours. I love how the fresh cilantro adds not just vibrant color and flavor but also beneficial antioxidants. The lime juice delivers vitamin C while the olive oil offers healthy fats. It’s rare to find something this delicious that’s also genuinely good for you! My family initially approached it with skepticism (beans aren’t usually met with excitement), but now they request it regularly – even my picky nephew asks for seconds.

    Essential Tips & Tricks

    Choosing and Preparing Your Beans

    For the best texture and flavor balance, I recommend using a variety of beans rather than just one type. My favorite combination includes black beans, kidney beans, and chickpeas – each bringing different textures and nutritional profiles. Whether using canned or home-cooked beans, thorough rinsing is crucial to remove excess starch and sodium. Let them drain completely before adding the dressing to prevent dilution. For an extra texture boost, try adding some edamame or black-eyed peas. When I’m feeling particularly fancy, I’ll use heirloom varieties that add beautiful color variation to the finished dish.

    Perfecting the Marinade

    The secret to an unforgettable marinade lies in balancing the acid-to-oil ratio perfectly. I use approximately 1 part lime juice to 2 parts olive oil, which creates a dressing that’s tangy but not overwhelmingly sour. Fresh lime juice is non-negotiable here – the bottled stuff simply won’t deliver the same bright flavor. When chopping cilantro, include some of the tender stems for added flavor depth. A touch of honey or agave helps balance the acidity while enhancing the natural flavors of the beans. Don’t skimp on resting time – at least 30 minutes, but ideally 2+ hours in the refrigerator allows the flavors to properly meld.

    Serving Ideas & Creative Variations

    Beyond the Basic Bowl

    This versatile salad shines in so many presentations beyond the standard side dish. Serve it tucked into warm tortillas with avocado slices for impromptu tacos, or pile it onto crisp lettuce leaves for a refreshing wrap. One of my favorite discoveries was using it as a topping for baked sweet potatoes – the contrast of sweet and tangy is absolutely divine! It also makes a fantastic base for grain bowls with quinoa or brown rice. For an impressive appetizer, serve it as a dip with blue corn tortilla chips. When hosting summer gatherings, I often set it alongside my Slow Cooker Mac & Cheese Classic for a crowd-pleasing combination.

    Customization Options

    The beauty of this recipe is how easily it adapts to different flavor profiles and dietary needs. For a Mediterranean twist, add feta cheese, diced cucumber, and kalamata olives. Craving something spicier? Incorporate diced jalapeños or a dash of cayenne pepper. Make it heartier by adding cooked quinoa or farro. For a tropical variation, mix in diced mango or pineapple – the sweetness pairs surprisingly well with the lime and cilantro. Avocado adds wonderful creaminess, though I recommend adding it just before serving to prevent browning. For those who aren’t cilantro fans (I know you exist!), substitute fresh parsley or a mixture of herbs.

    Storage & Troubleshooting Guide

    Maximizing Freshness

    This salad stays at its peak quality in the refrigerator for up to 5 days when stored properly. Always use an airtight container to prevent the salad from absorbing other flavors in your fridge. If you’re planning to make it several days ahead, consider adding delicate ingredients like avocado, tomatoes, or fresh corn just before serving. The acid in the lime juice acts as a natural preservative, but the salad will gradually soften over time. For the freshest presentation at potlucks or picnics, I like to bring along a small container of extra chopped cilantro and a lime wedge to brighten it up with a final garnish just before serving.

    Common Issues & Solutions

    Even this foolproof recipe can sometimes need troubleshooting. If your salad tastes too acidic, balance it with a drizzle of honey or a sprinkle of sugar. Conversely, if it lacks brightness, add more fresh lime juice or a splash of rice vinegar. Beans too firm? Let the salad marinate longer. Too soft? Next time, reduce marinating time or cook your beans more al dente. If the cilantro wilts significantly, don’t worry about the appearance – the flavor remains! For reviving a day-old salad that seems dry, a splash of olive oil and fresh squeeze of lime juice works wonders. Remember that flavors mellow overnight, so what might taste perfect today may need adjustment tomorrow.

    Frequently Asked Questions

    Can I make Marinated Cilantro Lime Bean Salad without cilantro?

    Absolutely! While cilantro provides the signature flavor, you can substitute with fresh parsley, mint, or basil. Each herb creates a different but equally delicious profile. The lime will still provide that essential brightness.

    How long should I marinate the beans?

    For best results, marinate for at least 30 minutes, but 2-4 hours is ideal. The salad can be made up to 24 hours ahead, with flavors continuing to develop and improve overnight.

    Can I use dried beans instead of canned?

    Yes! Cooked dried beans often have better texture and flavor. Cook them until just tender (not mushy), cool completely, then proceed with the recipe as written.

    Is this recipe suitable for meal prep?

    This is an excellent meal prep option! It stays fresh for up to 5 days refrigerated and actually improves with time as flavors meld together.

    What can I add to make my Marinated Cilantro Lime Bean Salad more filling?

    Add cooked quinoa, farro, or rice for a heartier dish. Diced avocado, grilled chicken, or shrimp also make excellent protein-rich additions for a complete meal.

    Final Thoughts

    This Marinated Cilantro Lime Bean Salad has become my kitchen MVP – versatile enough for any occasion yet special enough to earn compliments whenever I serve it. The way the beans absorb the bright, herby marinade creates something far greater than the sum of its humble parts. I love how it bridges the gap between healthy and craveable, proving that nutritious food can be genuinely exciting. Whether you’re looking for a make-ahead lunch option or a reliable potluck contribution, this recipe delivers both convenience and flavor. I hope it becomes a staple in your kitchen too! Find more inspiring recipes on Pinterest.

  • Crack Chicken Chili Soup: Irresistibly Cozy & Flavor-Packed!

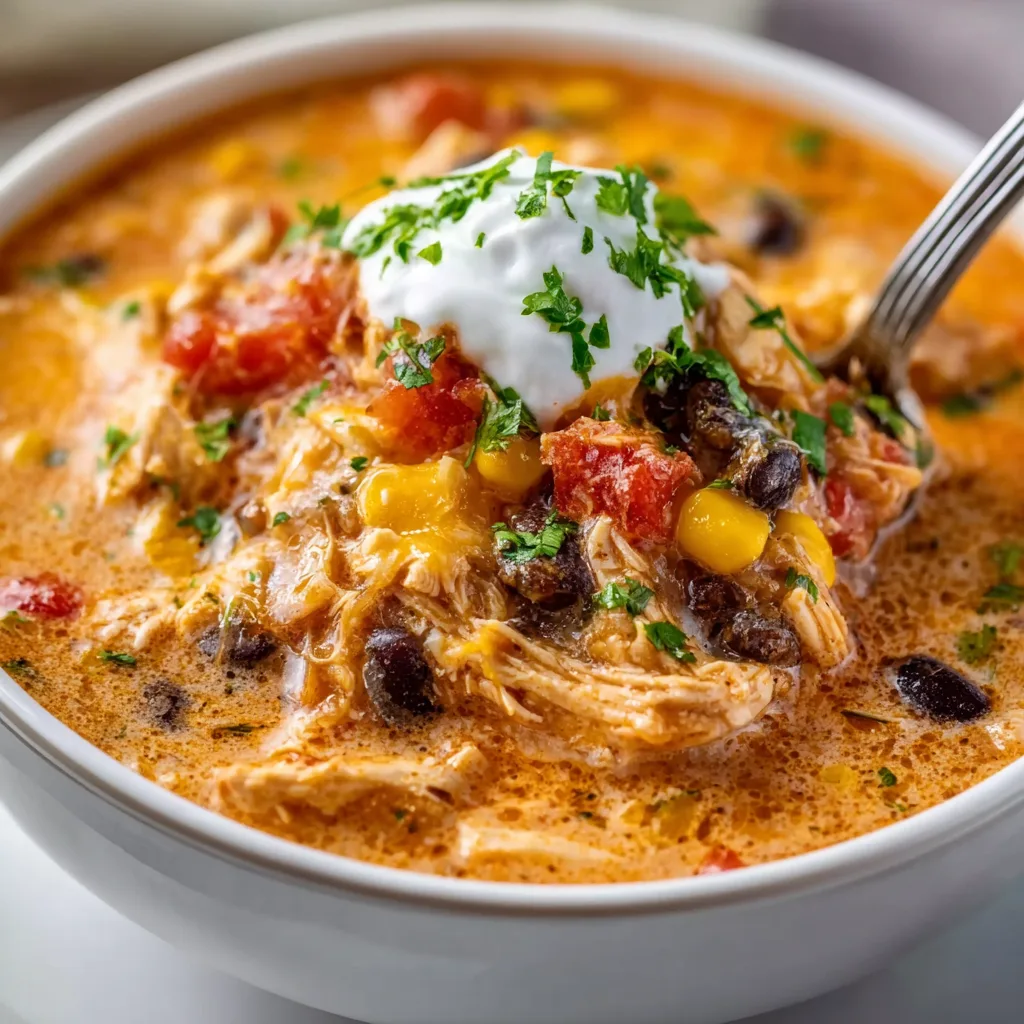
    Crack Chicken Chili Soup: Irresistibly Cozy & Flavor-Packed!

    Crack Chicken Chili Soup: Irresistibly Cozy & Flavor-Packed!

    This crack chicken chili soup is what comfort food dreams are made of, friends. On those evenings when the wind howls outside and all you want is something that warms you from the inside out, this is your answer. I discovered this recipe during a particularly brutal winter in Minnesota, and it’s been my go-to ever since. The combination of tender chicken, creamy cheese, crispy bacon, and hearty beans creates a soul-satisfying bowl that’s both indulgent and nourishing. Trust me, the rich, velvety texture paired with that slight ranch kick will have everyone asking for seconds!

    Recipe

    Why You’ll Love This Crack Chicken Chili Soup

    Perfect Comfort Food Balance

    This soup strikes that magical balance between hearty and creamy without being too heavy. The first time I made it, my kitchen filled with the most intoxicating aroma of bacon and ranch seasonings melding together. I love how the cream cheese melts into the broth, creating this silky texture that coats each spoonful. The ranch seasoning adds depth without overpowering, while the bacon brings that smoky note that makes you close your eyes with each bite. It’s the kind of recipe that feels like a warm hug on a cold day.

    Quick and Adaptable for Busy Days

    What makes this crack chicken chili soup a true weeknight hero is how wonderfully adaptable it is to your schedule. I’ve made it on busy Thursdays when I only had 30 minutes before heading out to my son’s basketball game, and I’ve let it simmer all day in the slow cooker when time was more forgiving. You can use rotisserie chicken to save time or cook chicken breasts from scratch if you prefer. The beauty lies in how it bends to fit your life while still delivering that incredible flavor that tastes like you’ve been cooking all day.

    Essential Tips & Tricks

    Achieving the Perfect Consistency

    The secret to that velvety texture we all crave comes down to how you incorporate the cream cheese. Rather than dropping it in cold, I always let it sit at room temperature for about 30 minutes before adding it. Then, I whisk it separately with a ladle of hot broth before stirring it back into the pot. This prevents those frustrating little lumps and creates a perfectly smooth soup. For an even richer result, try using a hand blender to partially blend some of the beans – it creates a naturally thicker base without adding extra ingredients.

    Flavor-Building Strategies

    The depth of flavor in this crack chicken noodle soup crockpot version comes from layering ingredients at the right time. Always start by cooking your bacon until crisp, then use that flavorful fat to sauté your onions and garlic – this simple step infuses everything with that smoky essence. If you’re using a slow cooker, still take those five minutes to do this step separately before transferring everything. For an extra flavor boost, add a tablespoon of better-than-bouillon chicken base along with your regular broth – it’s my secret weapon for restaurant-quality depth.

    Serving Ideas & Creative Variations

    Toppings That Elevate Each Bowl

    The right toppings transform this crack chicken chili soup from delicious to absolutely memorable. My family has a whole topping bar when I serve this: extra crispy bacon bits, freshly shredded cheddar that melts into little strings, thinly sliced green onions for brightness, and a dollop of sour cream that slowly melts into the hot soup. For a bit of texture contrast, try crushed tortilla chips or even Fritos. My personal favorite? A few slices of fresh avocado and a squeeze of lime that cuts through the richness and brightens every spoonful.

    Creative Twists on the Classic

    This soup is the perfect canvas for making it uniquely yours. For a southwestern twist, add a can of fire-roasted tomatoes and a small can of diced green chiles. Need more vegetables? Diced bell peppers, corn, or even some finely chopped kale fold in beautifully. For a spicier version that my husband adores, I add a tablespoon of chipotle in adobo sauce and a dash of smoked paprika. You can even swap the chicken for ground turkey or beef if that’s what you have on hand – the flavor foundation remains irresistible.

    Storage & Troubleshooting Guide

    Proper Storage for Maximum Flavor

    This soup actually gets even better the next day as the flavors continue to meld. Store it in airtight containers in the refrigerator for up to 4 days. When reheating, do it gently over medium-low heat, stirring occasionally to prevent the dairy from separating. If you’re planning to freeze portions, I recommend doing so before adding the cream cheese, then incorporating it fresh when you reheat. If you do freeze the completed soup, expect some texture changes – a quick hit with an immersion blender when reheating can help restore that creamy consistency.

    Fixing Common Issues

    If your soup ends up thinner than you’d like, don’t panic! The easiest fix is to make a quick cornstarch slurry – mix 1 tablespoon cornstarch with 2 tablespoons cold water, then stir it into the simmering soup until it thickens. If your cream cheese creates unwanted lumps, remove the soup from heat and whisk vigorously, or use that immersion blender I mentioned. For soup that’s too thick, simply add more chicken broth until you reach your desired consistency. And if the flavor seems a bit flat, a splash of vinegar or fresh lemon juice can brighten everything up.

    Frequently Asked Questions

    Can I make crack chicken chili soup in an Instant Pot?

    Absolutely! Use the sauté function for the bacon and vegetables first, then add remaining ingredients except cream cheese. Pressure cook on high for 10 minutes, quick release, then stir in softened cream cheese until melted.

    Is this soup gluten-free?

    Yes, as long as you verify your ranch seasoning and broth are gluten-free. Always check labels as ingredients can vary by brand.

    Can I use frozen chicken?

    Yes! If using a slow cooker, add 1-2 hours to the cooking time. For stovetop, thaw first for even cooking.

    How can I make this soup lower in calories?

    Use light cream cheese, turkey bacon, and reduced-fat cheese. You can also increase the beans and vegetables while slightly reducing the meat portion.

    What’s the best way to thicken the soup if it’s too thin?

    A cornstarch slurry works wonderfully. Mix 1 tablespoon cornstarch with 2 tablespoons cold water, then stir into simmering soup until it reaches your desired thickness.

    Final Thoughts

    This crack chicken chili soup has become more than just a recipe in my household—it’s a tradition that signals comfort and togetherness. The way it fills our home with those irresistible aromas of bacon, ranch, and simmering goodness never fails to bring everyone to the table with eager anticipation. I hope it brings the same warmth and joy to your family table as it has to mine. For more cozy comfort food inspiration, be sure to check out my Pinterest collection where I’m always adding new seasonal favorites!

  • High Protein Chicken Street Corn Salad – Fresh, Creamy & Guilt-Free!

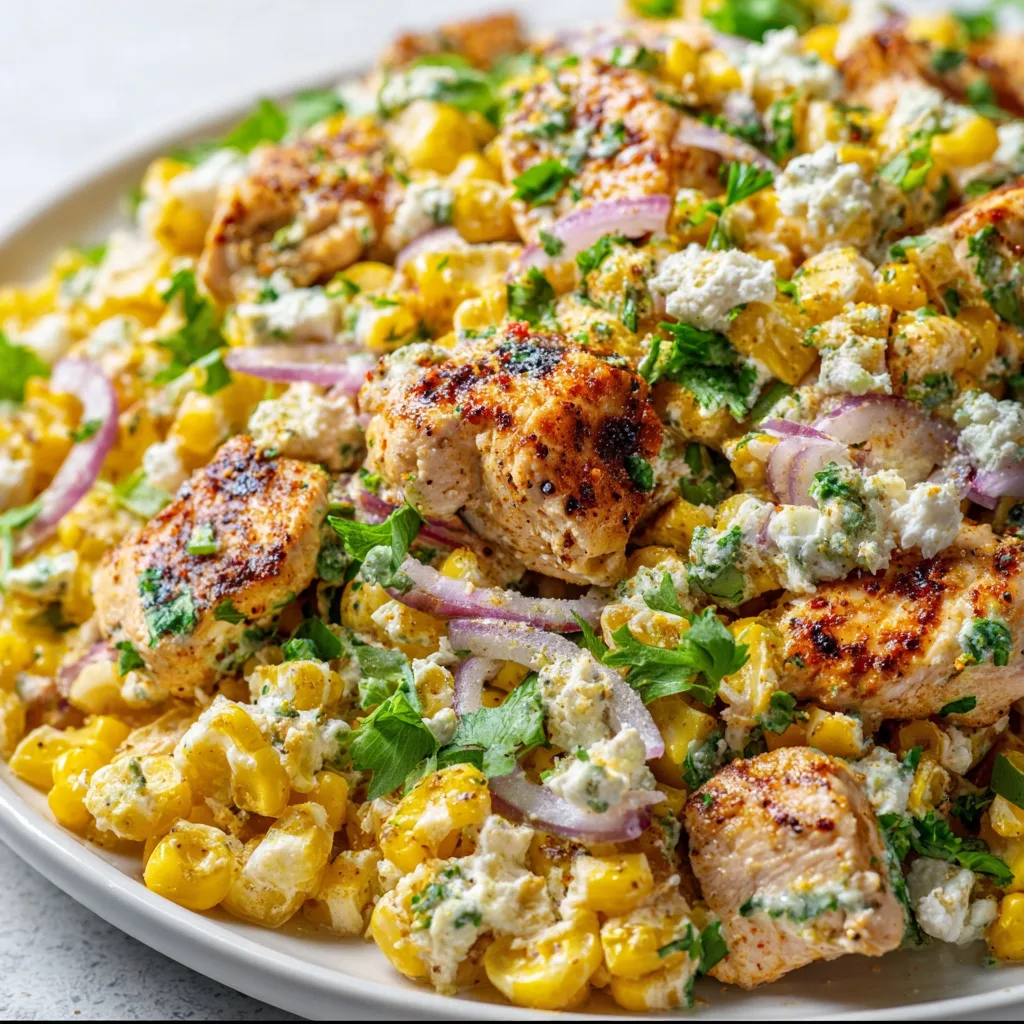
    High Protein Chicken Street Corn Salad – Fresh, Creamy & Guilt-Free!

    High Protein Chicken Street Corn Salad – Fresh, Creamy & Guilt-Free!

    This High Protein Chicken Street Corn Salad is my summer salvation on those scorching afternoons when I crave something fresh and creamy without the calorie guilt. The first time I made it, I was standing in my kitchen with sweat beading on my forehead, desperate for something cooling but substantial. The combination of charred corn, tender chicken, and that zingy lime dressing hit every note perfectly. It’s become my go-to when I want something that feels indulgent but keeps me energized for hours—like when I’m prepping for family gatherings or just need a quick weeknight dinner.

    Recipe

    Why You’ll Love This High Protein Chicken Street Corn Salad Fresh Creamy Low Calorie

    Perfect Balance of Flavor and Nutrition

    This salad is a nutritional powerhouse disguised as comfort food. Each bite delivers juicy chicken breast packed with lean protein (about 25g per serving!) alongside the sweet pop of corn kernels. The creamy element comes from Greek yogurt rather than mayo, slashing calories while maintaining that indulgent mouthfeel. I love how the lime juice brightens everything, cutting through the richness with its zippy acidity. It’s that rare dish where your taste buds and your fitness goals are perfectly aligned—satisfying without that heavy feeling afterward.

    Quick and Versatile for Any Occasion

    From lazy Sunday meal prep to last-minute dinner solutions, this salad fits seamlessly into any scenario. It takes just 15 minutes to throw together if you use rotisserie chicken (my secret weapon on busy days). The ingredients are straightforward—things I usually have on hand anyway. Last week, I served it for an impromptu lunch with my sister, and she couldn’t believe it wasn’t from that expensive salad place downtown. The best part? It works as a main dish, side, or even tucked into a wrap for lunch the next day.

    Essential Tips & Tricks

    Mastering the Perfect Char

    The soul of street corn is in that beautiful charred flavor, and getting it right transforms this salad completely. I recommend using a cast-iron skillet over high heat—it creates those caramelized edges that make all the difference. Let the corn sit undisturbed for 2-3 minutes before stirring to develop those gorgeous brown spots. If fresh corn isn’t available, frozen works surprisingly well—just make sure to pat it dry thoroughly first. The slight smokiness from properly charred corn creates depth that elevates this from a simple salad to something truly craveable, like my Crack Chicken Noodle Soup does with its rich flavors.

    Balancing the Creamy Dressing

    The dressing is where the magic happens, striking that perfect balance between creamy indulgence and fresh tanginess. For the creamiest yet lightest result, use 2% Greek yogurt rather than non-fat—it makes a noticeable difference in texture without significantly increasing calories. Whisk the lime juice in gradually, tasting as you go. The acid from the lime actually helps the protein in the chicken stay tender and juicy. If you’re meal prepping, store the dressing separately and combine just before eating to maintain the perfect texture.

    Serving Ideas & Creative Variations

    Elegant Entertaining Options

    Transform this humble salad into a showstopper for guests with thoughtful presentation. Serve it in individual portions nestled in butter lettuce cups for an elegant appetizer, or create a dramatic serving platter with the salad mounded in the center surrounded by colorful veggie dippers. For summer gatherings, I love setting up a DIY bar where guests can customize with toppings like toasted pepitas, crumbled queso fresco, or extra cilantro. The vibrant colors make it as beautiful as it is delicious, reminiscent of how visually appealing the Slow Cooker Mac & Cheese Classic looks when served at potlucks.

    Seasonal and Dietary Adaptations

    This recipe flexes beautifully to accommodate different needs and seasons. For a fall twist, substitute roasted sweet potato cubes for some of the corn and add warming spices like cumin. Make it vegetarian by swapping the chicken for black beans or crispy tofu—you’ll still get that protein punch. For keto followers, replace the corn with diced bell peppers and jicama for crunch. I’ve even made a dairy-free version using avocado as the creamy element, which adds healthy fats while maintaining that luscious mouthfeel everyone craves.

    Storage & Troubleshooting Guide

    Keeping It Fresh for Meal Prep

    This salad is a meal prep champion when handled correctly. Store components separately—chicken in one container, corn mixture in another, and dressing in a small jar. This prevents sogginess and keeps everything tasting freshly made. The prepped ingredients last 3-4 days refrigerated, though the herbs might lose some brightness by day 3. A pro tip I discovered by accident: adding a small piece of paper towel to the herb container absorbs excess moisture and extends freshness. Just assemble your portion when you’re ready to eat!

    Rescuing Common Mishaps

    Even the best cooks encounter hiccups, but most salad issues have simple fixes. If your salad seems too dry after refrigeration, a splash of lime juice or olive oil refreshes it instantly. For a salad that’s turned out too spicy (it happens when jalapeños vary in heat!), add extra Greek yogurt to tame the fire. If your corn didn’t char properly and lacks flavor, a tiny pinch of smoked paprika creates that roasted essence without starting over. Remember that warm components should always cool completely before combining to prevent wilting.

    Frequently Asked Questions

    Is this High Protein Chicken Street Corn Salad suitable for meal prep?

    Absolutely! Prepare components separately and store in airtight containers. The salad components last 3-4 days refrigerated when kept separate, making it perfect for weekly meal planning.

    Can I make this recipe vegetarian?

    Yes! Substitute the chicken with black beans, chickpeas, or grilled tofu. You’ll still get plenty of protein while keeping that fresh, creamy texture everyone loves.

    How can I increase the protein content even further?

    Add a hard-boiled egg, mix in some quinoa, or sprinkle with hemp seeds. These additions complement the flavors while boosting the protein content without significantly increasing calories.

    What’s the best way to char corn if I don’t have a grill?

    A cast-iron skillet works beautifully. Heat it until very hot, add corn kernels in a single layer, and let them sit undisturbed for 2-3 minutes before stirring to develop char marks.

    Can I make this salad ahead for a party?

    Yes! Prepare all components up to 24 hours ahead and store separately. Assemble just before serving for the freshest taste and best texture.

    Final Thoughts

    This High Protein Chicken Street Corn Salad has become my reliable companion through busy workdays and casual gatherings alike. Its perfect balance of fresh ingredients, creamy texture, and satisfying protein makes it so much more than just another salad. I love how it adapts to whatever life throws my way—whether I’m counting calories, feeding a crowd, or just craving something that tastes like sunshine. For more inspiration and variations, check out my Pinterest board where I share new twists on this recipe regularly!

  • Golden Gluten-Free Sourdough Loaf: Irresistibly Crispy & Healthy!

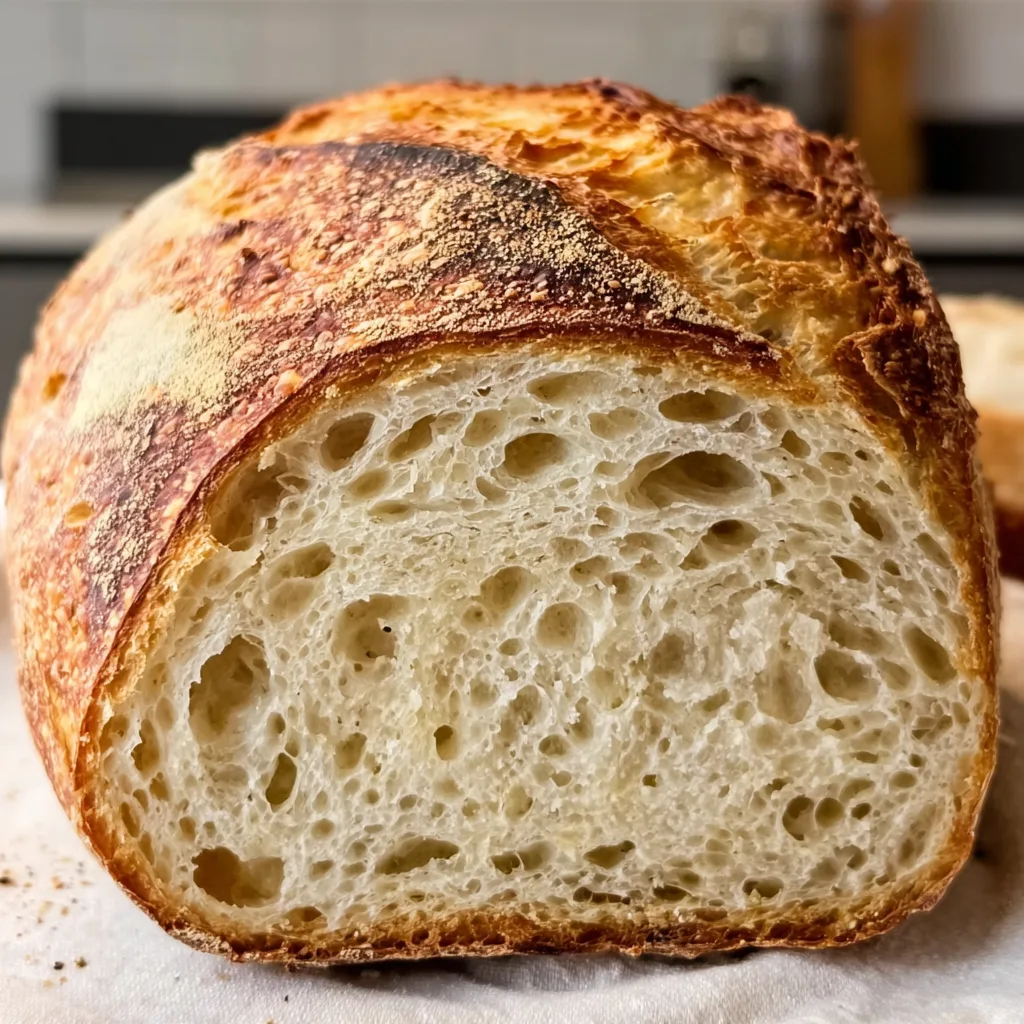
    Golden Gluten-Free Sourdough Loaf: Irresistibly Crispy & Healthy!

    There’s something truly magical about the aroma of a freshly baked Golden Gluten-Free Sourdough Loaf filling your kitchen. As someone who struggled for years to perfect gluten-free bread, discovering this recipe felt like finding hidden treasure. The crisp, golden crust gives way to a tender, slightly tangy interior that rivals any traditional sourdough. I’ve spent countless Sunday mornings perfecting this recipe, and now my kitchen windows fog up with the steamy promise of bread that’s both nourishing and indulgent. If you’re craving that authentic sourdough experience without the gluten, this recipe will become your new weekend ritual, just as it has become mine at Recipes Darleen.

    Recipe

    Why You’ll Love This Golden Gluten-Free Sourdough Loaf

    Perfect Texture & Flavor Balance

    The holy grail of gluten-free baking is achieving that perfect chewy-yet-tender crumb, and this recipe delivers spectacularly. I’ve combined a precise blend of rice flour, tapioca starch, and psyllium husk to create structure without heaviness. The slow fermentation process develops complex flavors that dance between nutty, tangy, and slightly sweet notes. My neighbor actually knocked on my door last weekend, drawn by the aroma wafting through our shared wall! The golden crust shatters delightfully when sliced, revealing an interior with those coveted irregular air pockets that capture melting butter perfectly.

    Simple Ingredients, Impressive Results

    Despite its artisanal appearance, this loaf requires surprisingly basic ingredients you likely already have in your gluten-free pantry. The active starter does most of the heavy lifting, transforming simple flours into something extraordinary. I love that there’s no need for obscure additives or complicated techniques—just good, honest ingredients working their magic over time. The dough is forgiving for beginners, too. My first attempt wasn’t perfect, but even that “learning loaf” disappeared quickly, slathered with salted butter and honey. Each subsequent bake has gotten better, with that gorgeous golden color developing more consistently.

    Essential Tips & Tricks

    Mastering Your Starter

    The heart of any sourdough is its starter, and gluten-free versions require special attention. Keep your starter at room temperature for at least three feedings before baking day to ensure maximum vitality. I’ve found that equal parts brown rice flour and sorghum flour create a starter with the perfect balance of activity and flavor development. Watch for the telltale signs of readiness: a pleasant yogurt-like tanginess, visible bubbles throughout, and doubling in volume within 4-6 hours after feeding. My starter, affectionately named Bubbles, took about two weeks to become truly reliable—patience here pays delicious dividends.

    Perfecting Your Technique

    The bulk fermentation phase is where the magic happens. Unlike traditional sourdough, our gluten-free version won’t develop strength through stretching and folding. Instead, focus on temperature control—I maintain a consistent 75°F environment by placing my dough near (not on) my slightly warm oven. Use a digital thermometer to monitor your dough’s internal temperature for best results. The final proof in a banneton basket lined with heavily floured rice flour-dusted linen creates that beautiful spiral pattern and supports the dough’s shape. I’ve learned that scoring the loaf with a sharp lame at a 45-degree angle just before baking creates that signature “ear” that makes it look professionally crafted.

    Serving Ideas & Creative Variations

    Perfect Pairings

    This versatile loaf shines in countless serving scenarios. For breakfast, thick-cut slices toasted and topped with avocado and a sprinkle of everything bagel seasoning create a satisfying start to the day. For lunch, the slight tang complements the richness of grilled cheese made with sharp cheddar and caramelized onions. My personal favorite evening indulgence is serving warm slices alongside a bowl of Creamy Tortellini Soup for dipping—the contrast between the crisp crust and velvety soup is absolutely divine. The bread also makes exceptional croutons when cubed, tossed with olive oil and herbs, then toasted until golden.

    Flavor Variations

    Don’t be afraid to customize your loaf with delicious add-ins. Folding in toasted seeds (pumpkin, sunflower, and flax make a wonderful trio) creates a nutrient-rich loaf with delightful texture contrast. For a Mediterranean twist, incorporate chopped olives, rosemary, and a splash of olive oil during the final mix. My autumn favorite features dried cranberries, chopped walnuts, and orange zest—perfect for holiday tables. The dough also adapts beautifully to different flours; substituting 20% of the rice flour with buckwheat creates a more rustic, earthy profile that pairs wonderfully with hearty soups and stews. Each variation maintains that gorgeous golden exterior while offering new flavor dimensions.

    Storage & Troubleshooting Guide

    Keeping Your Loaf Fresh

    Unlike many gluten-free breads that stale quickly, this Golden Gluten-Free Sourdough Loaf maintains its quality remarkably well. For optimal freshness, allow the bread to cool completely on a wire rack before storing—rushing this step leads to soggy crust. Once cooled, store cut-side down on a wooden cutting board for the first day, which preserves the crust integrity while protecting the crumb. For longer storage, wrap in a clean cotton cloth then place in a paper bag at room temperature for up to three days. Avoid plastic bags, which trap moisture and accelerate mold growth. For extending shelf life, slice the entire loaf once cool, freeze individual slices, and toast directly from frozen for nearly fresh-baked taste.

    Troubleshooting Common Issues

    Even experienced bakers encounter challenges, so don’t be discouraged by initial setbacks. If your loaf spreads rather than rises, your hydration level may be too high for your specific flour blend—reduce water by 15g in your next attempt. Dense, gummy interiors usually indicate underbaking; invest in an instant-read thermometer and aim for an internal temperature of 205-210°F. Pale crust typically results from insufficient steam during baking—place an oven-safe dish with boiling water on the bottom rack while preheating, then remove it when you load your bread. If your loaf cracks unpredictably rather than at your score lines, your dough likely needed more surface tension during shaping or a longer final proof.

    Frequently Asked Questions

    Can I make this Golden Gluten-Free Sourdough Loaf without a Dutch oven?

    Yes! While a Dutch oven creates ideal steam, you can use a preheated baking stone or sheet with a heat-safe bowl inverted over the loaf for the first 20 minutes. Remove the bowl for the final baking phase to develop the golden crust.

    How can I tell if my starter is ready to use?

    Your starter is ready when it doubles in size 4-6 hours after feeding, has a pleasant tangy smell, and passes the float test—a small spoonful should float in a glass of water.

    Can I use commercial yeast instead of sourdough starter?

    No, commercial yeast won’t provide the same flavor complexity or texture. The slow fermentation of sourdough is essential for breaking down the grains properly and developing the distinctive taste.

    Why did my bread collapse after baking?

    Collapsing usually indicates either underbaking or too much moisture. Ensure you’re reaching the proper internal temperature and consider reducing hydration slightly in your next batch.

    How do I achieve that beautiful golden color on my gluten-free sourdough?

    For the perfect golden crust, brush the loaf with a mixture of egg white and 1 teaspoon water before baking, and ensure your oven is fully preheated to 450°F with good steam during the initial baking phase.

    Final Thoughts

    This Golden Gluten-Free Sourdough Loaf has transformed my relationship with gluten-free baking from one of compromise to one of genuine joy. There’s something deeply satisfying about creating a loaf that doesn’t merely imitate “regular” bread but stands proudly in its own right—beautiful, delicious, and worthy of centerpiece status. I find myself looking forward to my weekend baking ritual, appreciating how the slow process forces me to be present and patient. I hope this recipe brings the same satisfaction to your kitchen, and that your home fills with the incomparable aroma of freshly baked sourdough. Happy baking, friends! Don’t forget to share your beautiful loaves on Pinterest.

  • Thai Chicken Meatballs in Coconut Curry: Irresistibly Creamy & Spicy!

    Thai Chicken Meatballs in Coconut Curry: Irresistibly Creamy & Spicy!

    Thai Chicken Meatballs in Coconut Curry: Irresistibly Creamy & Spicy!

    Thai Chicken Meatballs in Coconut Curry has become my ultimate comfort food revelation this season. There’s something magical about those tender, aromatic meatballs swimming in a velvety coconut sauce that makes even the dreariest evenings feel special. I discovered this recipe during a rainy weekend when I was craving something with depth and warmth. The first spoonful transported me straight to the bustling streets of Bangkok—fragrant, complex, and utterly satisfying. If you’re looking to elevate your weeknight dinner rotation with minimal effort but maximum flavor, this dish from Recipes Darleen deserves your immediate attention.

    Recipe

    Why You’ll Love This Thai Chicken Meatballs in Coconut Curry

    Perfect Balance of Flavors and Textures

    These Thai chicken meatballs deliver that perfect harmony of sweet, spicy, savory, and tangy notes that makes Thai cuisine so irresistible. The lemongrass and ginger-infused meatballs remain incredibly juicy while developing a beautiful caramelized exterior. I love how they soak up the rich coconut curry while still maintaining their distinct texture. The sauce itself is silky yet complex—coconut milk creates the luscious base while red curry paste, fish sauce, and lime provide layers of flavor that unfold with each bite. It’s the kind of dish that makes you close your eyes with that first spoonful.

    Quick Yet Impressive Weeknight Solution

    Despite its complex flavor profile, this dish comes together in under 40 minutes, making it perfect for busy weeknights when you still want something special. The meatballs can be prepped ahead and refrigerated, which cuts your active cooking time even further. I’ve served this to impromptu dinner guests who were convinced I’d spent hours in the kitchen! The visual impact of those golden meatballs nestled in a vibrant curry sauce creates an impressive presentation that belies its simple preparation. It’s my secret weapon recipe that makes me look like a culinary genius with minimal effort.

    Essential Tips & Tricks

    Meatball Mastery for Maximum Flavor

    The key to exceptional meatballs lies in two critical steps: proper seasoning and gentle handling. I mix finely minced lemongrass, fresh ginger, garlic, and cilantro stems directly into the ground chicken for flavor that permeates every bite. A tip I learned from a Thai cooking class: add a tablespoon of fish sauce to the meat mixture—it won’t taste fishy but adds incredible umami depth. When forming the meatballs, wet your hands slightly to prevent sticking and use a light touch. Overworking the meat makes them tough! For extra flavor insurance, I let the formed meatballs rest in the refrigerator for 15 minutes before cooking to allow the flavors to meld.

    Creating the Perfect Curry Base

    The curry sauce deserves as much attention as the meatballs themselves. Start by sautéing aromatics (shallots, garlic, ginger) until fragrant before adding the curry paste—this “blooms” the spices and releases their essential oils. When adding coconut milk, I always opt for full-fat for that luxurious mouthfeel that makes this dish restaurant-quality. My secret ingredient? A teaspoon of brown sugar to balance the heat and acidity. For an authentic touch that elevates the entire dish, finish with a handful of Thai basil leaves (not regular basil!) and a squeeze of fresh lime just before serving. These bright, fresh additions cut through the richness beautifully, as I learned from my Cilbir Eggs Benedict Fusion experiments.

    Serving Ideas & Creative Variations

    Perfect Pairings for a Complete Meal

    Serve these fragrant meatballs over jasmine rice to soak up every drop of that precious curry sauce—I like to make a little well in the center of each rice portion to cradle extra sauce. For a lighter option, cauliflower rice works beautifully while still absorbing the flavors. Add a side of quick-pickled cucumbers for a refreshing contrast to the rich curry—just toss cucumber slices with rice vinegar, a pinch of sugar, and salt 15 minutes before serving. For a complete Thai-inspired feast, consider starting with my Crunchy Asian Ramen Noodle Salad for a textural contrast that complements the creamy curry perfectly.

    Exciting Twists on the Classic Recipe

    This versatile recipe welcomes creative adaptations while maintaining its soul. For a seafood version, substitute the chicken with shrimp or a firm white fish formed into delicate dumplings. Vegetarians can enjoy this dish with tofu “meatballs” or simply with roasted vegetables like sweet potatoes, bell peppers, and zucchini bathed in the luscious curry. For extra texture, sprinkle toasted cashews or peanuts over the finished dish. My favorite variation includes adding a handful of snow peas and halved cherry tomatoes during the last five minutes of cooking—they maintain their vibrant color and provide fresh pops of flavor against the rich sauce.

    Storage & Troubleshooting Guide

    Proper Storage for Leftovers

    These Thai meatballs actually improve overnight as the flavors continue to develop, making them perfect for meal prep. Store leftovers in an airtight container in the refrigerator for up to 3 days. When reheating, add a splash of coconut milk or chicken broth to revive the sauce, as it tends to thicken when chilled. For longer storage, freeze the meatballs and sauce separately—the meatballs for up to 3 months, the sauce for about 1 month (dairy-free coconut sauces freeze better than cream-based ones). Thaw overnight in the refrigerator before gently reheating on the stovetop, adding fresh herbs just before serving.

    Fixing Common Curry Challenges

    If your curry sauce separates or looks grainy, don’t panic! Lower the heat immediately and whisk gently until it comes back together. For a sauce that’s too thin, simmer uncovered for a few extra minutes or add a cornstarch slurry (1 teaspoon cornstarch mixed with 1 tablespoon water). If it’s too thick, thin with additional coconut milk or chicken broth. For meatballs that fall apart during cooking, the mixture was likely too wet—next time, add a tablespoon of panko breadcrumbs to absorb excess moisture. Adjusting seasoning is simple: too spicy? Add more coconut milk and a touch of brown sugar. Not flavorful enough? Fish sauce and lime juice will brighten everything up.

    Frequently Asked Questions

    Can I make Thai Chicken Meatballs in Coconut Curry ahead of time?

    Absolutely! Prepare the meatballs up to 24 hours ahead and refrigerate uncooked. The curry sauce can also be made a day ahead. Reheat gently and combine just before serving for a quick meal with developed flavors.

    What’s the best substitute for red curry paste?

    Yellow or green curry paste works well, though each offers different flavor profiles. In a pinch, combine 1 teaspoon each of cumin, coriander, and paprika with minced garlic, ginger, and a pinch of cayenne for a homemade alternative.

    How can I make this dish less spicy?

    Reduce the curry paste by half and increase coconut milk slightly. Add a teaspoon of brown sugar to balance heat. Serve with cooling sides like cucumber salad or extra rice to temper the spice.

    Can I use a different protein for the meatballs?

    Ground turkey, pork, or a mixture works beautifully. For vegetarian options, try firm tofu crumbled and mixed with breadcrumbs and the same seasonings, or use plant-based meat substitutes.

    How do I know when the Thai Chicken Meatballs are fully cooked?

    The meatballs should be golden brown on the outside and reach an internal temperature of 165°F (74°C). When cut, they should show no pink and the juices should run clear.

    Final Thoughts

    Thai Chicken Meatballs in Coconut Curry has become my go-to recipe when I want to impress without stress. There’s something incredibly satisfying about creating such complex flavors with relatively simple ingredients and techniques. The way the aromatic meatballs complement the velvety curry sauce creates a dish that feels both comforting and sophisticated. I find myself returning to this recipe whenever I need a reliable dinner win—whether for family weeknights or casual entertaining. For more inspiration and creative recipes, check out my collections on Pinterest. This dish proves that extraordinary meals don’t require extraordinary effort—just thoughtful preparation and quality ingredients.

  • Bomboloni – Irresistible Italian Doughnuts You Can’t Resist!

    Bomboloni – Irresistible Italian Doughnuts You Can’t Resist!

    Bomboloni - Irresistible Italian Doughnuts You Can’t Resist!

    Bomboloni – Italian Doughnuts are pure joy in pastry form, little pillows of fried dough that transport me straight to the streets of Florence with each bite. The first time I made these cloudlike treats, my kitchen filled with the intoxicating scent of vanilla and yeast, and I knew I’d found a recipe worth treasuring. There’s something magical about watching the dough puff up in hot oil, transforming into golden-brown perfection that’s just waiting to be filled with luscious custard or jam. If you’re craving a dessert that balances simplicity and indulgence, these Italian doughnuts are exactly what your weekend needs.

    Recipe

    Why You’ll Love This Bomboloni – Italian Doughnuts

    Texture & Flavor Perfection

    These Bomboloni deliver an irresistible combination of textures that make them utterly addictive. The exterior develops a delicate crispness while the interior remains impossibly fluffy and tender. What makes these Italian doughnuts special is their subtle sweetness—they’re not cloying like some American counterparts. The dough itself carries hints of vanilla and a gentle yeasty complexity that pairs beautifully with whatever filling you choose. I love how they’re substantial enough to satisfy but light enough that you’ll definitely reach for a second (or third!). The contrast between the warm dough and cool filling creates a sensory experience that’s simply divine.

    Versatility & Crowd-Pleasing Appeal

    One of my favorite things about Bomboloni is their incredible versatility. These Italian doughnuts work beautifully as a special breakfast treat, afternoon pick-me-up, or elegant dessert. They’re perfect for everything from casual weekend brunches to holiday celebrations. Everyone from kids to grandparents lights up when these appear on the table—there’s something universally appealing about a freshly made doughnut. You can customize the fillings based on what you love or what’s in season: classic custard, Nutella, fruit preserves, or even lemon curd. The possibilities are endless, making them perfect for pleasing a crowd with varying preferences.

    Essential Tips & Tricks

    Dough Development & Rising

    The secret to perfect Bomboloni lies in giving the dough enough time to develop properly. Don’t rush the rising process—this is what creates that ethereal, light texture that makes Italian doughnuts so special. I’ve found that letting the dough rise in a slightly warm spot (around 75°F) yields the best results. My favorite trick is to place the covered bowl near (not on) a preheating oven. Watch for visual cues rather than strict timing; the dough should double in size and feel pillowy when gently poked. If your kitchen is cool, it might take longer than recipes suggest, and that’s perfectly fine! Patience here translates directly to texture in the finished bomboloni.

    Frying Technique & Temperature Control

    Maintaining the right oil temperature is absolutely crucial for perfect Bomboloni. Too hot, and they’ll brown before cooking through; too cool, and they’ll absorb excess oil. Invest in a candy thermometer to keep your oil steady between 340-350°F—this sweet spot ensures golden exteriors and fully cooked centers. Work in small batches to prevent overcrowding, which drops the oil temperature dramatically. I learned this the hard way during my first attempt! Allow plenty of space for the doughnuts to float and expand. After frying, let them drain on paper towels before rolling in sugar, similar to how I prepare my Italian Easter Cookies for the perfect finish.

    Serving Ideas & Creative Variations

    Filling Options & Techniques

    The filling is where you can really make these Bomboloni your own personal masterpiece. Traditional pastry cream offers classic appeal, but don’t stop there! Nutella, lemon curd, raspberry jam, or even mascarpone whipped with a touch of honey all make spectacular fillings. For the neatest results, use a piping bag with a long narrow tip inserted from the side or bottom of the doughnut. My pro tip: chill your fillings slightly before piping—they’ll set up better inside the warm doughnuts. For a fun twist, try creating a sampler platter with different fillings, similar to my approach with Fluffy Yogurt Cloud Dessert where contrasting flavors create an exciting tasting experience.

    Seasonal & Special Occasion Adaptations

    Bomboloni can easily be adapted for different seasons and celebrations, making them a versatile addition to your baking repertoire. For summer, fill with fresh berry compote and dust with powdered sugar. Fall calls for apple butter or pumpkin spice pastry cream. During the holidays, try eggnog custard or gingerbread-spiced fillings. For an elegant dinner party finale, serve warm bomboloni alongside small bowls of different fillings and toppings, letting guests customize their own. I once served these at a New Year’s brunch with prosecco, and the combination was absolutely magical—the slight acidity of the bubbles perfectly balanced the sweet doughnuts.

    Storage & Troubleshooting Guide

    Keeping Bomboloni Fresh

    Bomboloni are at their absolute best when freshly made, but with proper storage, you can enjoy them for a day or two after baking. For unfilled bomboloni, store at room temperature in an airtight container for up to 24 hours. Once filled, refrigeration becomes necessary—store in a single layer to prevent squishing, and consume within 48 hours. If you need to refresh day-old bomboloni, a quick 5-10 seconds in the microwave works wonders to restore their softness. For longer storage, freeze unfilled bomboloni after they’ve completely cooled, then thaw at room temperature and warm slightly before filling and serving.

    Troubleshooting Common Issues

    If your Bomboloni aren’t turning out perfectly, a few simple adjustments can make all the difference. Dense doughnuts typically indicate under-proofing—next time, allow more rising time before frying. If they’re collapsing or deflating, you might be over-proofing or your oil temperature could be too low. Oil-soaked bomboloni usually mean your frying temperature is too cool—aim for that 340-350°F sweet spot. For filling problems, make sure your pastry cream or other fillings are thick enough to hold their shape but still pipeable. If your dough feels too sticky during handling, resist adding too much flour—instead, chill it briefly to make it more manageable.

    Frequently Asked Questions

    What makes Bomboloni different from regular doughnuts?

    Bomboloni are Italian doughnuts made with a richer, yeasted dough that’s typically filled rather than having a hole. They’re less sweet than American doughnuts and have a distinctively light, airy texture with a subtle yeasty flavor.

    Can I make the dough ahead of time?

    Absolutely! Prepare the dough and let it rise once, then refrigerate overnight. The slow, cold fermentation actually improves flavor. Bring to room temperature for 30-45 minutes before shaping and proceeding with the second rise.

    What’s the best oil for frying Bomboloni?

    Use a neutral oil with a high smoke point like vegetable, canola, or peanut oil. These won’t impart strong flavors and can withstand the temperatures needed for perfect frying.

    Can I bake Bomboloni instead of frying them?

    While traditional Bomboloni are fried, you can bake them at 375°F for 12-15 minutes. They’ll be less authentic with a different texture, but still delicious with less mess and oil.

    How do I know when the oil is at the right temperature without a thermometer?

    Drop a small piece of dough into the oil—it should sizzle gently and float to the surface within a few seconds. If it browns immediately, the oil is too hot; if it sits at the bottom, it’s too cool.

    Final Thoughts

    These Bomboloni – Italian Doughnuts have become one of my most treasured recipes, bringing a touch of Italian pastry magic into my home. There’s something deeply satisfying about creating these pillowy delights from scratch—watching the dough transform through rising, frying, and filling. The joy on people’s faces when they bite into a warm, freshly made bomboloni makes every step worthwhile. Whether you’re a seasoned baker or trying your hand at homemade doughnuts for the first time, I hope you’ll give these a try and discover why they’ve been beloved in Italy for generations. Don’t forget to check out more delicious inspiration on Pinterest!