Blog

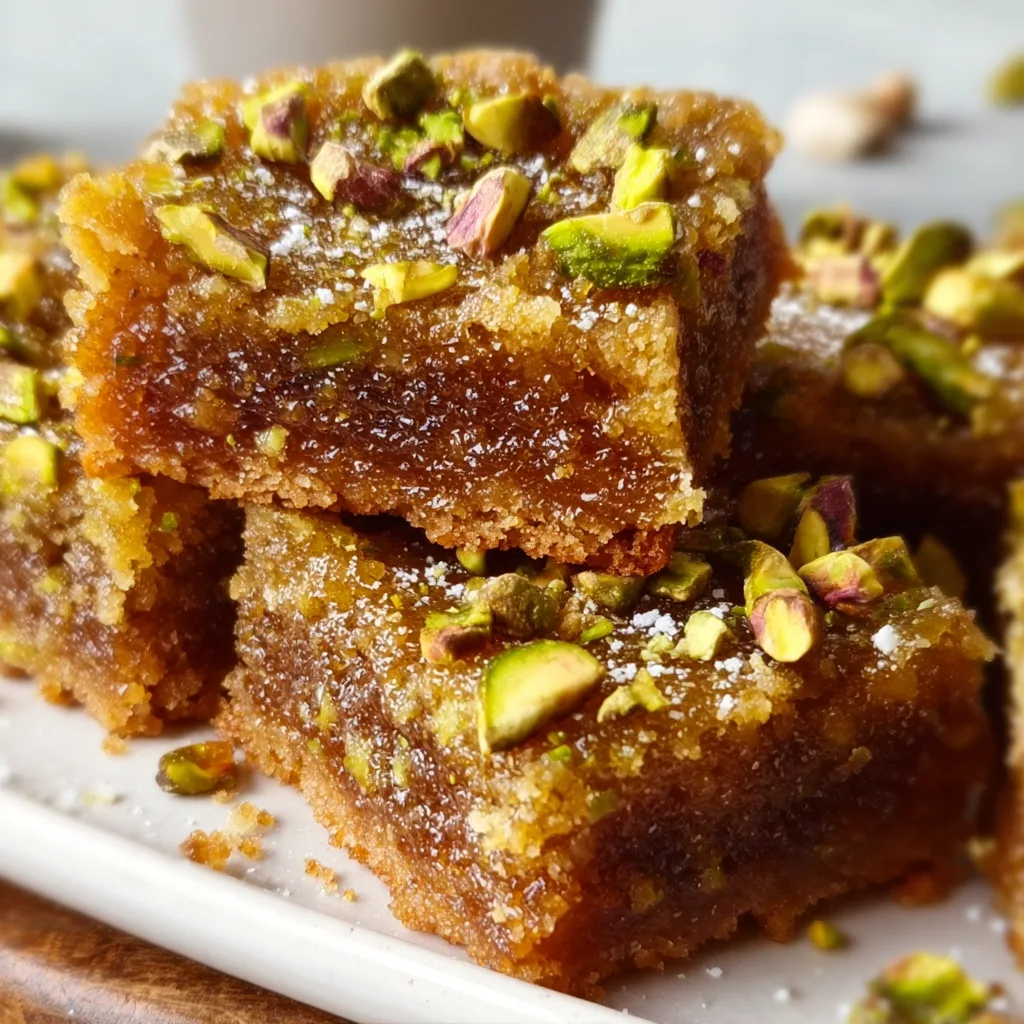
  • Brown Butter Honey Pistachio Bars: Irresistibly Nutty & Gooey!

    Brown Butter Honey Pistachio Bars: Irresistibly Nutty & Gooey!

    Brown Butter Honey Pistachio Bars: Irresistibly Nutty & Gooey!

    Brown Butter Honey Pistachio Bars are what happens when buttery shortbread meets golden honey and toasty pistachios. The first time I made these for my sister’s birthday gathering, the pan was empty before I could even snap a photo! There’s something magical about the nutty aroma of brown butter that fills your kitchen as these bake. The combination of textures—crisp base, chewy center, and crunchy pistachios—creates an irresistible treat that’s sophisticated yet comforting. Perfect for holiday gatherings or simply paired with afternoon tea.

    Recipe

    Why You’ll Love These Brown Butter Honey Pistachio Bars

    A Symphony of Flavors

    The brown butter is the star of the show here, lending a complex, nutty flavor that elevates these bars from good to unforgettable. I still remember the first time I discovered brown butter—standing in my grandmother’s kitchen, watching the magical transformation as the butter sizzled and turned golden. The honey adds a floral sweetness that balances perfectly with the slight saltiness of the pistachios. Each bite delivers a perfect harmony of sweet, salty, nutty, and buttery notes that dance across your palate.

    Make-Ahead Convenience

    These bars are a busy host’s dream! You can prepare the shortbread base up to three days ahead and store it in the refrigerator. The honey-pistachio topping comes together in minutes when you’re ready to bake. I’ve even frozen the fully baked bars for up to a month with excellent results—just thaw overnight in the refrigerator. The flavors actually deepen after a day, making these perfect for advance preparation before gatherings. Your future self will thank you when you pull these out for unexpected guests!

    Essential Tips & Tricks

    Mastering the Brown Butter

    Browning butter requires patience and attention—but it’s worth every minute. Use a light-colored pan so you can monitor the color changes. The butter will foam, then the milk solids will sink and gradually turn golden brown. The nutty aroma is your cue it’s ready! Remove it immediately from heat to prevent burning. I once got distracted by a phone call and ended up with black butter—lesson learned! Let it cool slightly before adding to your mixture for the best texture and to avoid cooking your eggs.

    The Perfect Texture Balance

    For the ideal texture, underbake slightly rather than overbake. The center should be set but with a slight jiggle—it will continue cooking as it cools. Allow the bars to cool completely before cutting for clean edges. I recommend chilling them for at least two hours, then using a sharp knife dipped in hot water (and wiped dry) between cuts. This technique gives you those picture-perfect edges that make these bars look as professional as they taste.

    Serving Ideas & Creative Variations

    Elegant Presentation Options

    Transform these bars into a showstopping dessert by serving them slightly warm with a small scoop of vanilla bean ice cream or a dollop of lightly sweetened whipped cream. For dinner parties, I cut them into smaller diamonds instead of squares and dust with a whisper of powdered sugar. The contrast of the golden bars against a white serving plate makes for a beautiful presentation. Add a small sprig of fresh mint or a few additional chopped pistachios on top for a professional touch.

    Seasonal Adaptations

    These versatile bars welcome seasonal twists! In summer, add lemon zest to the shortbread base for brightness. For fall, incorporate a teaspoon of pumpkin spice and swap half the pistachios for pecans. Winter holidays call for a dash of cardamom and dried cranberries. Spring? Try adding dried apricots and a hint of orange blossom water. My personal favorite variation includes a thin layer of dark chocolate between the shortbread and honey-pistachio topping—the chocolate adds another dimension of flavor that pairs beautifully with the brown butter.

    Storage & Troubleshooting Guide

    Keeping Them Fresh

    Store your Brown Butter Honey Pistachio Bars in an airtight container at room temperature for up to 3 days or refrigerate for up to a week. Place parchment paper between layers to prevent sticking. For longer storage, wrap individual bars in plastic wrap, then aluminum foil, and freeze for up to 3 months. I’ve found that the flavor actually deepens after the first day as the honey has time to fully infuse the bars—making them ideal for make-ahead treats.

    Fixing Common Issues

    If your shortbread base crumbles when cutting, it likely needed more time to chill thoroughly before baking. Next time, refrigerate the dough for at least 30 minutes before baking. For a topping that’s too soft, an extra 5 minutes in the oven should help set it properly. If your brown butter has small dark specks, don’t worry! Those are caramelized milk solids and add wonderful flavor. However, if it smells burnt rather than nutty, it’s best to start over—the bitter taste will permeate your bars.

    Frequently Asked Questions

    Can I use salted butter for Brown Butter Honey Pistachio Bars?

    Yes, but reduce any additional salt in the recipe. The nutty flavor of brown butter works beautifully with a touch of salt, enhancing the contrast with the sweet honey.

    How do I know when my brown butter is ready?

    Watch for a golden amber color and a nutty, toasty aroma. The milk solids at the bottom should be light brown, not black.

    Can I substitute another nut for pistachios?

    Absolutely! Pecans, walnuts, or hazelnuts work wonderfully. Each brings its unique flavor profile while maintaining the delightful texture contrast.

    Are these bars gluten-free?

    Not as written, but you can substitute a 1:1 gluten-free flour blend in the shortbread base with good results.

    How do I achieve clean cuts on my Brown Butter Honey Pistachio Bars?

    Chill completely first, then use a sharp knife dipped in hot water and wiped dry between each cut for professional-looking edges.

    Final Thoughts

    These Brown Butter Honey Pistachio Bars have become my signature dessert for good reason. They strike that perfect balance between sophisticated and comforting, impressive yet approachable. The brown butter adds depth that elevates them beyond ordinary bar cookies, while the honey-pistachio combination creates a memorable flavor profile that guests always request again. Whether for holiday gatherings, potlucks, or simply as a special treat for yourself, these bars bring a moment of sweet indulgence to any occasion. Find more delicious recipes on Pinterest.
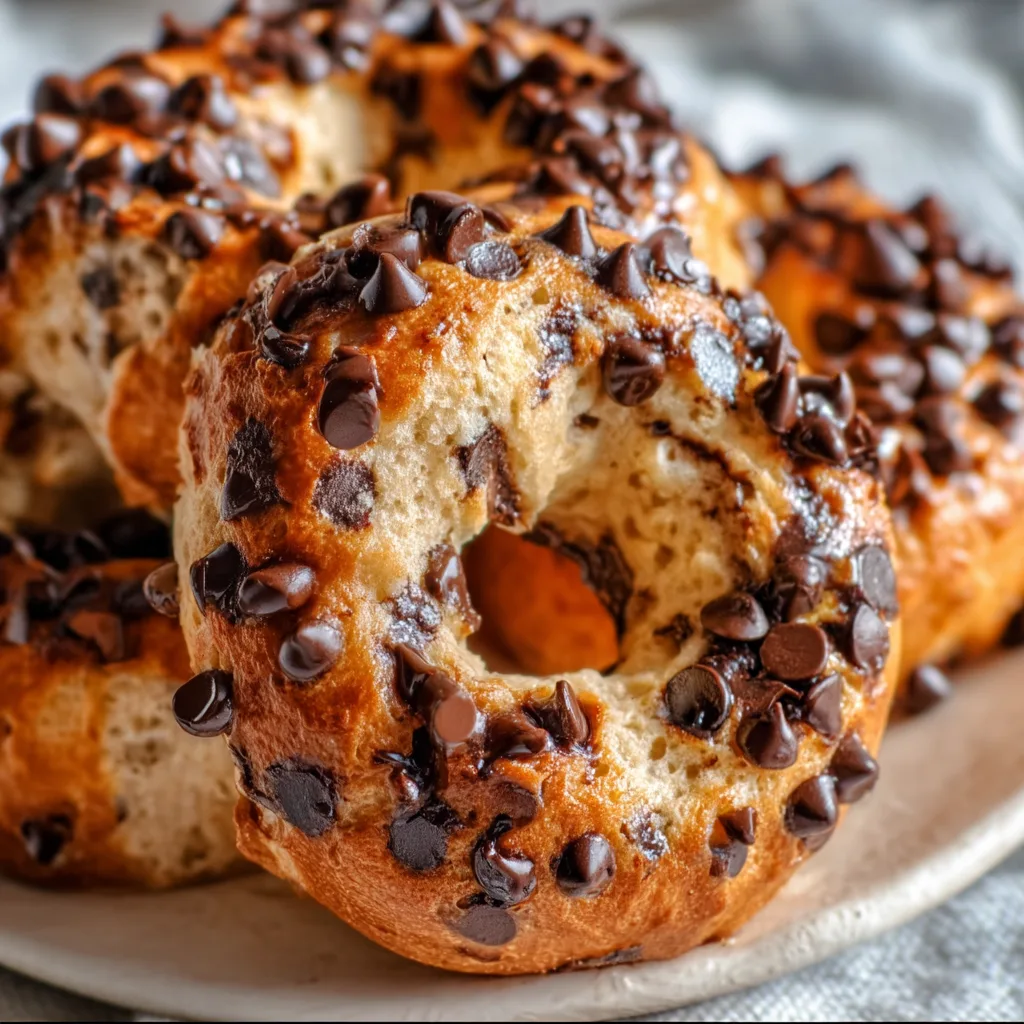

  • Chocolate Chip Protein Bagels: Irresistibly Delicious & Power-Packed!

    Chocolate Chip Protein Bagels: Irresistibly Delicious & Power-Packed!

    Chocolate Chip Protein Bagels: Irresistibly Delicious & Power-Packed!

    These Chocolate Chip Protein Bagels are about to become your new breakfast obsession! Soft, chewy, and packed with melty chocolate chips, they deliver that classic bagel texture you crave with a protein boost that keeps you satisfied until lunch. I discovered this recipe during my postpartum journey when I needed quick, nourishing breakfasts that wouldn’t leave me hungry an hour later. The first time I bit into one, still warm from the oven with a smear of cream cheese, I knew I’d found my perfect morning companion for busy days at home.

    Recipe

    Why You’ll Love These Chocolate Chip Protein Bagels

    Perfect Balance of Flavor and Nutrition

    These aren’t your average bagels! Made with Greek yogurt and protein powder, each bagel packs around 15g of protein while still tasting like a treat. The chocolate chips melt into little pockets of sweetness that make these feel indulgent even though they’re actually good for you. I love how they satisfy my sweet tooth without the sugar crash that comes from regular pastries. Plus, they’re surprisingly easy to make—no boiling required like traditional bagels!

    Quick and Customizable for Busy Mornings

    From mixing bowl to table in under 30 minutes, these protein bagels are perfect for meal prep Sundays. I make a batch on weekends and enjoy stress-free breakfasts all week. The beauty of this recipe is its flexibility—swap chocolate chips for blueberries, add cinnamon for warmth, or mix in some nuts for extra crunch. My husband prefers his with extra chocolate chips while I sometimes add orange zest for a citrusy twist that pairs beautifully with my morning coffee.

    Essential Tips & Tricks

    Perfecting Your Dough Consistency

    The secret to perfect protein bagels lies in the dough texture. It should feel slightly tacky but not sticky enough to cling to your fingers. If it’s too wet, add a tablespoon of flour at a time; if too dry, a splash of almond milk works wonders. When I first started making these, my dough was too sticky and the bagels spread while baking. I’ve learned that a quick 5-minute rest after mixing allows the protein powder to fully absorb the moisture, resulting in that perfect chewy bagel texture we all crave.

    Baking Techniques for Perfect Results

    For that authentic bagel shine and texture, brush the tops with a beaten egg before baking and sprinkle with everything bagel seasoning or extra chocolate chips. Bake at 375°F for exactly 20 minutes for the perfect balance of golden exterior and soft interior. My game-changing discovery was placing a small oven-safe dish of water on the bottom rack while baking—this creates steam that gives your bagels that professional bakery chewiness, similar to the technique I use for my Dutch Oven No-Knead Crusty Bread.

    Serving Ideas & Creative Variations

    Sweet and Savory Topping Combinations

    These protein bagels are incredibly versatile! For a decadent breakfast, try topping with whipped cream cheese, sliced strawberries, and a drizzle of honey. When I’m craving something more substantial, I’ll add smashed avocado, a fried egg, and everything bagel seasoning. The chocolate chips actually pair surprisingly well with savory toppings—the sweet-salty combination is addictive! My daughter’s favorite weekend treat is a chocolate chip protein bagel topped with peanut butter and banana slices, which keeps her energized through morning soccer practice.

    Meal Prep and Freezer-Friendly Options

    Transform these bagels into grab-and-go breakfast sandwiches by adding egg whites and turkey bacon—perfect for busy mornings! I often make a double batch specifically for freezing. Simply slice before freezing, then toast directly from frozen for an instant breakfast. These protein bagels also make excellent bases for mini pizzas for quick lunches, similar to my Crispy Chicken Parmesan Zucchini Boats but in a handheld form that my kids absolutely love. The protein content makes them much more satisfying than regular bagels.

    Storage & Troubleshooting Guide

    Keeping Your Bagels Fresh

    Store your chocolate chip protein bagels in an airtight container at room temperature for up to 3 days. For longer storage, refrigerate for up to a week or freeze for up to 3 months. I’ve found that slicing them before freezing makes it easier to grab just what you need. The microwave works for quick reheating, but for that fresh-baked texture, pop them in a toaster or air fryer for 2-3 minutes. A light spritz of water before reheating helps restore moisture if they’ve dried out a bit.

    Fixing Common Recipe Issues

    If your bagels turned out dense, you likely overmixed the dough. Gentle folding is key—mix just until ingredients are combined. For flat bagels, check your baking powder’s freshness (it should fizz vigorously when added to hot water). Sometimes protein powder can absorb moisture differently based on the brand—I’ve found that whey-casein blends produce the best texture. If your bagels crack while baking, your dough was likely too dry or the oven too hot—next time, add a tablespoon more yogurt.

    Frequently Asked Questions

    Can I make these Chocolate Chip Protein Bagels gluten-free?

    Yes! Substitute the all-purpose flour with a 1:1 gluten-free baking flour. Add 1/2 teaspoon xanthan gum if your blend doesn’t include it for the proper chewy texture.

    How many grams of protein are in each bagel?

    Each chocolate chip protein bagel contains approximately 12-15g of protein, depending on the specific protein powder and Greek yogurt brands you use.

    Can I use plant-based protein powder?

    Absolutely! Pea protein works best for texture. You may need to adjust the liquid slightly as plant proteins absorb moisture differently than whey.

    How do I prevent the chocolate chips from sinking?

    Toss your chocolate chips in 1 teaspoon of flour before folding them into the dough. This creates a light coating that helps them stay suspended.

    Can I make mini Chocolate Chip Protein Bagels instead?

    Yes! Divide the dough into 12 portions instead of 6. Reduce baking time to 15-17 minutes and check for doneness with a toothpick.

    Final Thoughts

    These Chocolate Chip Protein Bagels have revolutionized my morning routine by combining nutrition with indulgence in one convenient package. They’ve become a family favorite that satisfies both my fitness goals and my children’s picky palates. The best part? They’re endlessly customizable to suit any taste preference or dietary need. For more protein-packed breakfast ideas, follow me on Pinterest where I share new recipes weekly. Your mornings deserve this perfect balance of wholesome and delicious!

  • Mahi Mahi with Mango Lime Butter: Irresistibly Zesty & Fresh!

    Mahi Mahi with Mango Lime Butter: Irresistibly Zesty & Fresh!

    Mahi Mahi with Mango Lime Butter: Irresistibly Zesty & Fresh!

    Mahi Mahi with Mango Lime Butter is one of those magical dishes that transports you straight to a beachside restaurant with just one bite. I discovered this recipe during a coastal vacation where the chef combined buttery, flaky fish with tropical fruit in a way that made me swoon. The bright citrus notes paired with sweet mango create this incredible sauce that elevates the mild fish to something extraordinary. Trust me when I say this dish will become your new favorite way to enjoy seafood at home—restaurant quality with surprisingly little effort!

    Recipe

    Why You’ll Love This Mahi Mahi with Mango Lime Butter

    Perfect Balance of Flavors

    There’s something absolutely magical about the combination of buttery mahi mahi and tropical mango. The fish itself has this wonderful mild flavor that absorbs whatever you pair it with, making it the perfect canvas for the sweet-tart mango lime butter. I love how the lime zest adds this bright pop that cuts through the richness. The first time I made this for my family, my husband (who typically reaches for the hot sauce with fish) actually put his phone down mid-meal—that’s when I knew this recipe was special!

    Quick and Impressive Dinner Option

    This dish looks like you spent hours in the kitchen, but it’s our little secret that it comes together in under 30 minutes! The mango lime butter can be made ahead of time, which means when dinner rush hits, you’re just a quick sear away from an impressive meal. I keep portions of the butter in my freezer for those nights when I need something special without the fuss. It’s become my go-to for last-minute dinner guests when I want to seem effortlessly fancy without breaking a sweat.

    Essential Tips & Tricks

    Selecting and Preparing the Fish

    Always look for mahi mahi fillets that have firm flesh and a clean ocean smell—nothing fishy! I prefer fillets that are about 1-inch thick for the perfect cooking time. Pat them completely dry before seasoning; this is non-negotiable if you want that beautiful golden crust. Season generously with salt and pepper right before cooking, not minutes before. I learned this the hard way when I pre-seasoned too early once and ended up with fish that released too much moisture during cooking. For even more flavor, try a quick 15-minute marinade with olive oil and lime juice.

    Perfecting the Mango Lime Butter

    The secret to extraordinary mango lime butter is using perfectly ripe mangoes—they should give slightly when gently pressed. I dice mine into tiny cubes for better distribution throughout the butter. Let your butter come to room temperature before mixing; cold butter just doesn’t incorporate as smoothly. For extra zing, add a tiny pinch of cayenne pepper—it won’t make it spicy but will enhance all the other flavors. This butter is also incredible on grilled chicken or even spread on warm bread, so consider making a double batch!

    Serving Ideas & Creative Variations

    Complementary Side Dishes

    Mahi mahi with mango lime butter pairs beautifully with sides that complement its tropical flair. I love serving it with coconut rice that soaks up all that delicious butter sauce—just replace half the water with coconut milk when cooking your rice. Grilled asparagus or a simple arugula salad with avocado provides the perfect fresh contrast. For a complete tropical experience, add some crispy garlic parmesan green beans with a squeeze of lime. When entertaining, I arrange everything on a large platter with extra lime wedges and fresh cilantro for guests to add as they please.

    Exciting Recipe Variations

    While the classic version is divine, don’t be afraid to play with this flexible recipe! Try blackening the mahi mahi with Cajun seasoning for a spicier kick that still works beautifully with the sweet mango butter. For a Southeast Asian twist, add a teaspoon of green curry paste and some finely chopped lemongrass to the butter mixture. You can also substitute the mango with pineapple or papaya depending on what’s in season. I’ve even made this with other firm white fish like halibut or sea bass when mahi mahi wasn’t available, and it’s always delicious.

    Storage & Troubleshooting Guide

    Proper Storage Techniques

    Fish dishes are best enjoyed fresh, but if you have leftovers, store them properly to maintain quality. Place cooled mahi mahi in an airtight container and refrigerate for up to 2 days. Store extra mango lime butter separately in the refrigerator for up to a week, or freeze it in an ice cube tray for up to 3 months. When reheating the fish, do it gently in a covered skillet with a splash of water to create steam, or use a microwave at 50% power with a damp paper towel covering the fish to prevent it from drying out.

    Troubleshooting Common Issues

    If your mahi mahi turns out tough, you’ve likely overcooked it. Remember that fish continues cooking for a minute or two after removing from heat. For perfectly tender results, cook just until it flakes easily with a fork but still looks slightly translucent in the center. If your mango butter separates or looks curdled, it probably means the mango was too juicy. Fix this by adding a bit more softened butter and a sprinkle of cornstarch to stabilize it. If the butter melts too quickly on the hot fish, try freezing butter pats for 10 minutes before serving.

    Frequently Asked Questions

    How do I know when Mahi Mahi with Mango Lime Butter is perfectly cooked?

    Mahi mahi is done when it flakes easily with a fork but still looks moist. It should reach an internal temperature of 137°F and have an opaque appearance. The entire process usually takes 3-4 minutes per side for a 1-inch thick fillet.

    Can I make the mango lime butter ahead of time?

    Absolutely! The butter can be made up to 3 days ahead and refrigerated. You can also form it into a log using plastic wrap, freeze it, and slice off medallions as needed for up to 3 months.

    What’s the best way to select fresh mahi mahi?

    Look for firm flesh with a clean ocean scent. Fresh mahi mahi should have a pinkish-tan color without any browning. If buying frozen, ensure there’s no freezer burn or excessive ice crystals.

    Can I substitute another fish if mahi mahi isn’t available?

    Yes! Halibut, sea bass, or even salmon work well with this recipe. Just adjust cooking times accordingly—thinner fillets will cook faster than thick mahi mahi steaks.

    What wine pairs well with this dish?

    A crisp Sauvignon Blanc or unoaked Chardonnay complements the tropical flavors perfectly. For something different, try a dry Riesling which balances the richness of the butter sauce.

    Final Thoughts

    This Mahi Mahi with Mango Lime Butter has become one of my signature dishes for both weeknight dinners and special occasions. There’s something so satisfying about creating a restaurant-quality meal that celebrates simple, quality ingredients with minimal fuss. The vibrant colors and flavors make it feel like a vacation on a plate, even on the dreariest winter evening. I hope you’ll try this recipe and experience the little moment of joy that comes with that first perfect bite. For more seafood inspiration, check out my Pinterest board where I’m always adding new favorites!

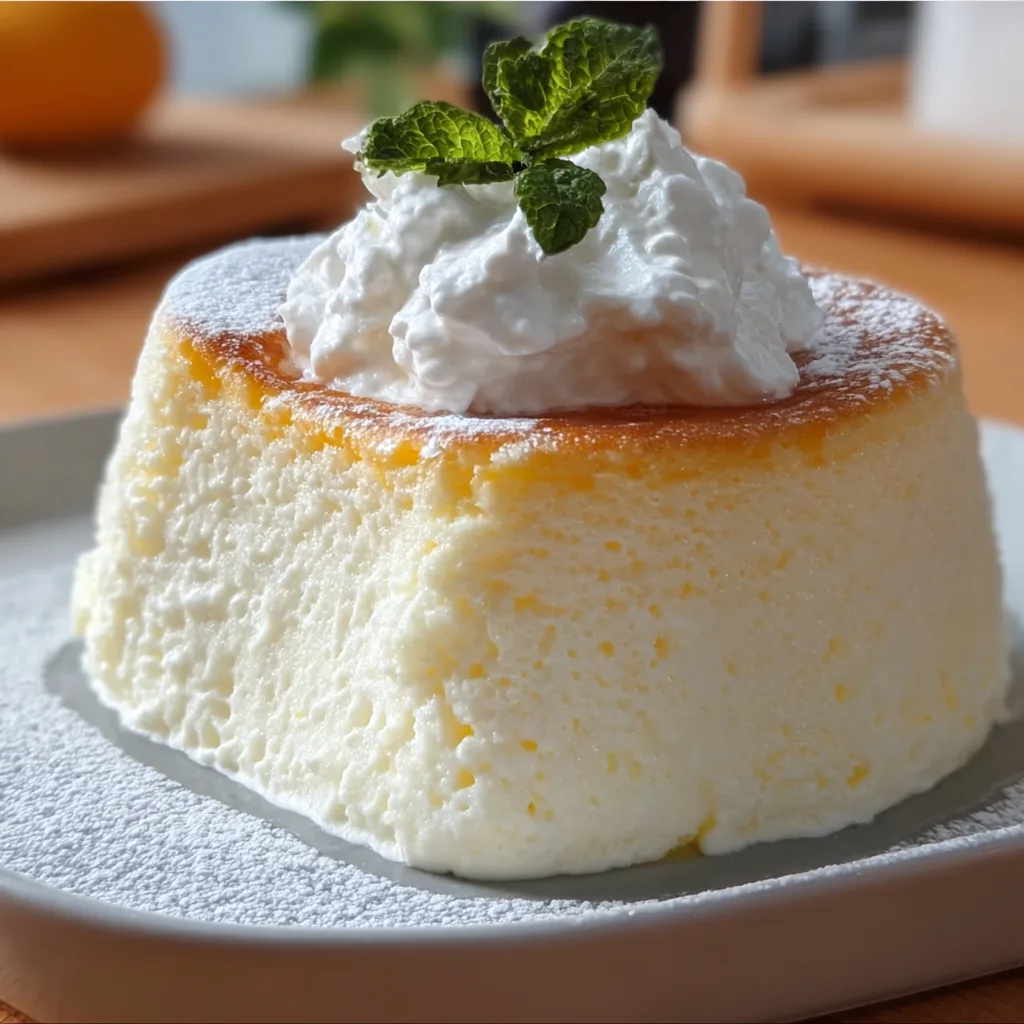
  • Fluffy Yogurt Cloud Dessert: Irresistibly Light & Heavenly Treat!

    Fluffy Yogurt Cloud Dessert: Irresistibly Light & Heavenly Treat!

    Fluffy Yogurt Cloud Dessert: Irresistibly Light & Heavenly Treat!

    This Fluffy Yogurt Cloud Dessert is what dreams are made of—light as air, delicately sweet, and impossibly creamy. I discovered this heavenly treat last summer when I needed something cool and refreshing that wouldn’t weigh me down after a backyard barbecue. The first spoonful transported me to dessert nirvana! The contrast between the billowy yogurt clouds and fresh berries creates a perfect balance that’s both satisfying and gentle on your sweet tooth. If you love no-bake treats, this ethereal dessert will become your new go-to for effortless entertaining.

    Recipe

    Why You’ll Love This Fluffy Yogurt Cloud Dessert

    Perfect Balance of Light & Decadent

    The magic of this Fluffy Yogurt Cloud Dessert lies in its contradictions—it’s somehow both substantial and weightless at the same time. The Greek yogurt base provides a velvety richness while whipped cream lightens everything to cloud-like perfection. I love how it satisfies my dessert cravings without that heavy feeling afterward. The tanginess from the yogurt balances the sweetness, creating a sophisticated flavor profile that even dessert snobs will appreciate. It’s become my secret weapon for dinner parties where I want to impress without spending hours in the kitchen.

    Make-Ahead Convenience

    One of the greatest joys of this Fluffy Yogurt Cloud Dessert is its make-ahead potential. I’ve prepared it up to 24 hours before serving with spectacular results—the flavors actually deepen and meld together beautifully. This has saved me countless times when hosting, allowing me to focus on other dishes or simply enjoying my guests. The texture holds remarkably well in the refrigerator, maintaining those beautiful, distinct layers without becoming watery or deflated. For busy weeknights or unexpected visitors, having this ready to go feels like giving yourself a gift.

    Essential Tips & Tricks

    Achieving the Perfect Texture

    The key to cloud-like perfection lies in how you handle the ingredients. Always use well-chilled cream and cold metal bowls for whipping—I even pop mine in the freezer for 15 minutes beforehand. Whip the cream just until firm peaks form; overwhipping creates a grainy texture that ruins the cloud-like effect. When folding the whipped cream into the yogurt, use a gentle hand with a silicone spatula, maintaining a light touch with figure-eight motions. This preserves the air bubbles that give this dessert its signature fluffiness and ensures each spoonful melts in your mouth.

    Flavor Customization Secrets

    The beauty of this Fluffy Yogurt Cloud Dessert lies in its versatility. Start with a foundation of high-quality Greek yogurt—I prefer full-fat for richness, but 2% works beautifully too. For natural sweeteners, try honey, maple syrup, or berry compote for distinct flavor profiles. Extract choices dramatically change the character—vanilla creates a classic foundation, while almond, lemon, or orange blossom transform it into something extraordinary. My personal favorite combination is honey with a touch of cardamom and vanilla, which creates an exotic yet comforting profile.

    Serving Ideas & Creative Variations

    Elegant Presentation Options

    Transform this humble dessert into a showstopper with thoughtful presentation. Layer in clear glass vessels—parfait glasses, champagne flutes, or mason jars all work beautifully—to showcase the cloud-like layers. For dinner parties, individual servings in vintage teacups create an unexpected elegant touch. Create a dramatic centerpiece by assembling in a trifle dish with alternating layers of fruit, granola, and crushed cookies. A dusting of cocoa powder, cinnamon, or finely grated chocolate adds professional flair. I once served this at a baby shower in miniature flower pots with edible flower garnishes—the guests still talk about it!

    Seasonal Adaptations

    This Fluffy Yogurt Cloud Dessert transforms effortlessly with the seasons. In summer, fold in fresh berries and lemon zest for brightness. Fall calls for warming spices—cinnamon, nutmeg, and cloves—with caramelized apples or pears. Winter versions shine with chocolate shavings, peppermint extract, and crushed candy canes. Spring begs for floral notes like lavender honey or rose water with pistachios. The holiday season is perfect for cranberry-orange variations with candied pecans. My family’s Thanksgiving tradition now includes a pumpkin spice version with maple-glazed pecans that pairs perfectly with our easy caramel toffee crunch cake.

    Storage & Troubleshooting Guide

    Proper Storage Methods

    To maintain the cloud-like texture of your dessert, proper storage is essential. Always keep it in an airtight container to prevent it from absorbing refrigerator odors or forming a skin on top. If preparing in advance, consider adding toppings like fresh fruit, nuts, or chocolate just before serving to maintain their texture. This dessert stays at peak quality for up to 3 days in the refrigerator, though the texture is most ethereal within the first 24-48 hours. Never freeze this dessert—the delicate structure will collapse upon thawing, resulting in a watery, separated mixture.

    Fixing Common Problems

    Even experienced cooks encounter issues with this delicate dessert. If your mixture becomes too runny, it’s likely due to overworked yogurt releasing whey. Fix this by straining the yogurt through cheesecloth for 30 minutes before proceeding. For a dessert that’s too firm, gently fold in 2-3 tablespoons of milk or cream. If the flavor lacks brightness, a pinch of salt and a squeeze of fresh lemon juice work wonders to enhance the taste without adding more sugar. For grainy texture issues, ensure you’re using room temperature sweeteners—cold honey or sugar can crystallize in cold yogurt.

    Frequently Asked Questions

    Can I make Fluffy Yogurt Cloud Dessert with non-dairy ingredients?

    Absolutely! Substitute coconut cream for heavy cream and use almond, coconut, or cashew yogurt alternatives. The texture may be slightly different but still delightfully cloud-like.

    Why did my Fluffy Yogurt Cloud Dessert become watery overnight?

    This typically happens when using regular yogurt instead of Greek. Always drain regular yogurt in cheesecloth for 2-3 hours before using, or stick with thick Greek yogurt.

    Can I use frozen fruits in this dessert?

    Yes, but thaw and drain them thoroughly first. Pat dry with paper towels to remove excess moisture that could make your dessert runny.

    Is this dessert suitable for diabetics?

    With modifications, yes. Use stevia or monk fruit sweetener instead of sugar and focus on low-glycemic berries like strawberries and blackberries for toppings.

    How can I make this dessert more protein-rich?

    Increase the protein content by using higher-protein Greek yogurt (2:1 ratio with whipped cream) and adding crushed nuts or a sprinkle of hemp seeds.

    Final Thoughts

    This Fluffy Yogurt Cloud Dessert has become my signature offering—the one friends request by name when they visit. There’s something magical about transforming simple ingredients into something that feels so special and ethereal. I love watching people’s expressions as they take their first bite, that moment of surprise when they discover how something so light can deliver such satisfaction. Whether you’re entertaining guests or simply treating yourself after a long day, these billowy clouds of yogurt goodness never disappoint. Create your own version today and watch it become a beloved part of your recipe collection.

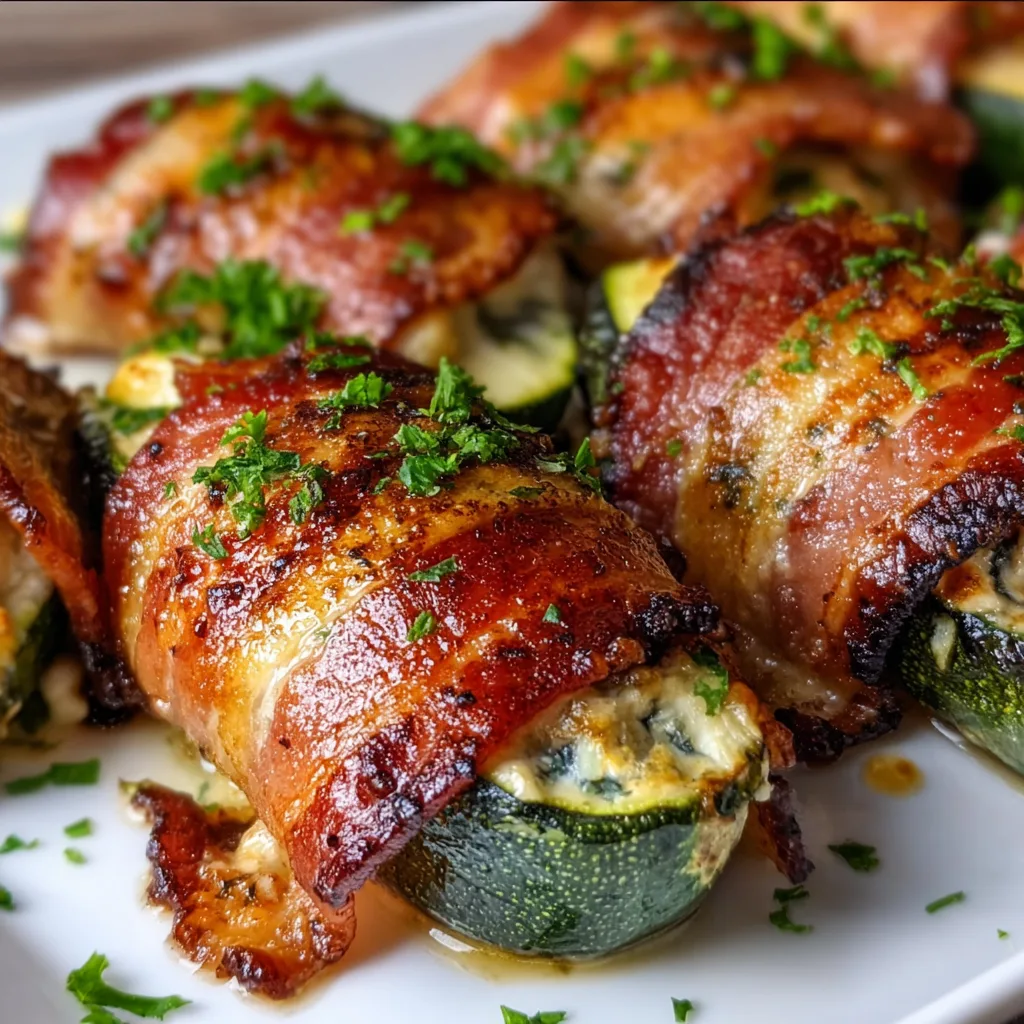
  • Keto Bacon-Wrapped Zucchini Boats: Irresistibly Crispy & Delicious!

    Keto Bacon-Wrapped Zucchini Boats: Irresistibly Crispy & Delicious!

    Keto Bacon-Wrapped Zucchini Boats: Irresistibly Crispy & Delicious!

    Keto Bacon-Wrapped Zucchini Boats are the perfect low-carb solution when you’re craving something savory, cheesy, and utterly satisfying. I discovered this recipe during my own keto journey when I desperately needed comfort food without the carbs. The combination of tender zucchini, crispy bacon, and melty cheese creates a flavor explosion that makes you forget you’re eating healthy. These little boats of joy have become my go-to dinner party appetizer because they disappear within minutes! Even my carb-loving friends can’t resist reaching for seconds. Let’s dive into this keto-friendly delight that’s as beautiful as it is delicious.

    Recipe

    Why You’ll Love This Keto Bacon-Wrapped Zucchini Boats

    Perfect Macros for Keto Success

    These zucchini boats are a keto dream come true with their ideal fat-to-carb ratio. Each boat contains just 3-4g net carbs while delivering satisfying fats from the cheese and bacon. I remember serving these at my sister’s birthday gathering—even my dad, who typically scoffs at “diet food,” couldn’t stop raving about them! The zucchini provides essential nutrients while the bacon adds that indulgent flavor we all crave. They’re substantial enough to serve as a main course alongside a simple salad, yet portable enough for meal prep containers. Your keto macros will thank you!

    Quick and Simple Preparation

    One thing I absolutely adore about these Keto Bacon-Wrapped Zucchini Boats is how effortlessly they come together. The entire process takes about 30 minutes from start to finish—perfect for those busy weeknights when cooking feels overwhelming. I’ve made these countless times after long workdays when takeout was tempting me. The prep is straightforward: scoop, fill, wrap, and bake! You can even prepare them ahead of time and pop them in the oven when guests arrive. The smell of bacon crisping in the oven creates an irresistible aroma that fills your kitchen with cozy anticipation.

    Essential Tips & Tricks

    Selecting and Preparing Your Zucchini

    Choosing the right zucchini makes all the difference in this recipe. Look for medium-sized zucchini that are firm and have unblemished skin. Too small, and you won’t have enough room for filling; too large, and they’ll release too much water. When scooping out the centers, leave about ¼-inch thickness around the edges to maintain structural integrity. I learned this the hard way when my first attempt resulted in floppy boats that couldn’t hold their filling! Pat the hollowed zucchini dry with paper towels to remove excess moisture—this prevents soggy results and helps the bacon crisp up beautifully. For extra flavor, try these crispy garlic parmesan green beans as a side dish!

    Bacon Selection and Wrapping Technique

    Not all bacon is created equal for these keto boats! I recommend using thin-cut bacon that crisps easily without requiring excessive cooking time. Thick-cut bacon often remains chewy while the zucchini overcooks. When wrapping, slightly stretch the bacon strip before securing it around the zucchini—this helps it shrink evenly during baking. Start from one end and spiral around, slightly overlapping each turn. Secure with toothpicks if needed, but remember to remove them before serving! I’ve found that pre-cooking the bacon for about 2 minutes helps achieve that perfect crispy exterior while keeping the zucchini tender rather than mushy.

    Serving Ideas & Creative Variations

    Complementary Side Dishes

    These Keto Bacon-Wrapped Zucchini Boats pair beautifully with simple sides that won’t overshadow their flavor. I love serving them alongside a peppery arugula salad dressed with lemon and olive oil—the brightness cuts through the richness perfectly. For family dinners, I’ll add creamy cauliflower mash or roasted radishes as low-carb alternatives to potatoes. When entertaining, I arrange the boats on a wooden board surrounded by olives, cheese cubes, and keto-friendly crackers. The presentation always impresses guests! For an extra special touch, sprinkle everything with fresh herbs just before serving—the pop of green adds visual appeal and freshness.

    Flavor Variations to Try

    While the classic version is divine, experimenting with flavors keeps this recipe exciting meal after meal. My personal favorite variation includes Mediterranean-inspired ingredients—sun-dried tomatoes, feta cheese, and oregano mixed into the filling. For spice lovers, add jalapeños and pepper jack cheese with a sprinkle of taco seasoning. Italian night? Try an Italian sausage filling with ricotta and basil. The possibilities are endless! I once made Buffalo chicken zucchini boats with shredded rotisserie chicken, hot sauce, and blue cheese that disappeared in minutes at a game day gathering. Don’t be afraid to customize based on what’s in your fridge—these boats are forgiving and adaptable.

    Storage & Troubleshooting Guide

    Proper Storage and Reheating

    These Keto Bacon-Wrapped Zucchini Boats store surprisingly well, making them perfect for meal prepping. Once cooled, place them in an airtight container and refrigerate for up to 3 days. For reheating, avoid the microwave which will make the bacon soggy. Instead, place them in a 350°F oven for 10-15 minutes until heated through. The bacon will re-crisp beautifully this way! I often make a double batch on Sundays, enjoying some for dinner and saving the rest for quick lunches. If you want to freeze them, I recommend freezing before the final baking step, then baking from frozen with an extra 10-15 minutes added to the time.

    Common Issues and Solutions

    The most frequent challenge with zucchini boats is excess moisture. If your boats turn out watery, try salting the hollowed zucchini and letting them sit for 10 minutes before patting dry—this draws out moisture before baking. If your bacon isn’t crisping, position the boats higher in the oven or finish with a quick broil (watching carefully to prevent burning). For filling that falls out during baking, make sure you’re not overfilling the boats and consider creating a deeper channel in the zucchini. I once salvaged a batch that was falling apart by transferring everything to a casserole dish and baking it as a deconstructed version—it was different but equally delicious!

    Frequently Asked Questions

    Can I make Keto Bacon-Wrapped Zucchini Boats ahead of time?

    Yes! Prepare them up to 24 hours ahead, store covered in the refrigerator, and bake when ready. For best results, bring them to room temperature for 15 minutes before baking to ensure even cooking.

    What’s the best cheese to use in Keto Bacon-Wrapped Zucchini Boats?

    Sharp cheddar provides the best flavor and meltability, but any keto-friendly cheese works well. Try combinations like mozzarella with parmesan or pepper jack for extra spice.

    How do I prevent my zucchini from becoming mushy?

    Don’t overbake! Cook just until the zucchini is tender-crisp (about 20-25 minutes). Also, removing excess moisture before baking by salting and patting dry helps maintain texture.

    Can I use yellow summer squash instead of zucchini?

    Absolutely! Yellow squash works beautifully as a substitute and offers a slightly sweeter flavor profile. The cooking time and technique remain exactly the same.

    Are these suitable for meal prep?

    These Keto Bacon-Wrapped Zucchini Boats are ideal for meal prep. They reheat well in the oven and maintain their texture for 2-3 days when stored properly in the refrigerator.

    Final Thoughts

    These Keto Bacon-Wrapped Zucchini Boats have become a staple in my low-carb kitchen arsenal. They represent everything I love about keto cooking—simple ingredients transformed into something extraordinarily satisfying. The way the bacon crisps around the tender zucchini while the cheese bubbles to golden perfection never fails to make my mouth water. I’ve served these at casual family dinners and elegant gatherings alike, always to rave reviews. Whether you’re strictly keto or just looking for a delicious way to incorporate more vegetables into your diet, these boats deliver on both flavor and nutrition. Find more inspiration for your keto journey on my Pinterest boards!

  • Creamy Ranch Turkey & Veggie Skillet: Easy, Comfort Food Bliss!

    Creamy Ranch Turkey & Veggie Skillet: Easy, Comfort Food Bliss!

    Creamy Ranch Turkey & Veggie Skillet: Easy, Comfort Food Bliss!

    This Creamy Ranch Turkey & Veggie Skillet has become my weeknight salvation when I’m craving something hearty yet nutritious. There’s something magical about the way the tender turkey mingles with crisp vegetables in that velvety ranch sauce. I discovered this recipe during a particularly hectic week when I needed to use up leftover turkey, and it’s been on regular rotation ever since. The aroma that fills my kitchen—garlic, herbs, and that unmistakable ranch tang—never fails to make my mouth water. If you’re looking for a quick dinner solution, this skillet has your name all over it.

    Recipe

    Why You’ll Love This Creamy Ranch Turkey & Veggie Skillet

    Perfect Balance of Flavor and Nutrition

    This skillet dish strikes that elusive balance between comfort food and healthy eating. The lean turkey provides ample protein while the colorful medley of vegetables adds essential vitamins and fiber. I love how the creamy ranch sauce coats everything with just enough indulgence without overwhelming the dish. My husband, who typically raises an eyebrow at “healthier” recipes, asks for seconds every time. The flavors meld together beautifully, creating a dish that satisfies cravings while keeping nutritional goals in check—a true weeknight victory.

    Quick and Adaptable for Busy Days

    One of the greatest strengths of this Creamy Ranch Turkey & Veggie Skillet is how incredibly versatile it is. I’ve made this on chaotic weeknights when I had just 25 minutes to get dinner on the table. The basic formula—protein, veggies, creamy sauce—allows you to swap ingredients based on what’s in your fridge. Have chicken instead of turkey? Perfect! Bell peppers looking sad? Use zucchini! The cooking process is straightforward enough that I can help with homework while stirring occasionally. It’s become my secret weapon for those “I don’t know what to make” evenings.

    Essential Tips & Tricks

    Mastering the Perfect Texture

    The key to an exceptional Creamy Ranch Turkey & Veggie Skillet lies in the cooking sequence. Always start by sautéing your aromatics (onions and garlic) until fragrant, then add the turkey to brown properly before introducing vegetables. I’ve learned through trial and error to add firmer vegetables like carrots first, followed by quicker-cooking ones like bell peppers. This prevents the dreaded mushy veggie syndrome! For the creamiest texture, reduce your heat to medium-low when adding the ranch elements and let it simmer gently. This patience results in a sauce that’s velvety smooth rather than broken or grainy.

    Flavor-Building Secrets

    The difference between a good skillet and an unforgettable one comes down to layering flavors. I always deglaze the pan with a splash of chicken broth after browning the turkey, scraping up those golden bits (fond) that contain concentrated flavor. For an extra dimension, add dried herbs early in the cooking process, but save fresh herbs for the final minutes. My secret weapon? A teaspoon of Dijon mustard whisked into the ranch mixture—it adds a subtle tang that balances the richness. Don’t forget that final touch of freshly ground black pepper just before serving to wake up all the flavors.

    Serving Ideas & Creative Variations

    Perfect Pairings for Every Occasion

    This Creamy Ranch Turkey & Veggie Skillet shines as a standalone dish, but it truly excels when thoughtfully paired. For everyday dinners, I serve it over fluffy rice or quinoa to soak up that delicious sauce. When entertaining, I’ve spooned it over baked potatoes with a sprinkle of extra cheese for a crowd-pleasing presentation. For lighter meals, try it alongside a simple green salad dressed with lemon vinaigrette—the brightness cuts through the creamy richness beautifully. When I’m feeling extra, I serve it with crusty homemade bread for dipping into that irresistible sauce.

    Exciting Flavor Twists

    Don’t be afraid to put your personal stamp on this Creamy Ranch Turkey & Veggie Skillet with some creative adaptations. For a Southwestern spin, add a diced jalapeño, swap the ranch for a chipotle ranch, and finish with cilantro and lime. Mediterranean lovers can incorporate artichoke hearts, olives, and sun-dried tomatoes, finishing with crumbled feta. I once made an Asian-inspired version using snow peas, water chestnuts, and a touch of ginger in the sauce. For a lower-carb option, serve the mixture over cauliflower rice or zucchini noodles. Each variation maintains the comforting essence while offering a new flavor adventure.

    Storage & Troubleshooting Guide

    Proper Storage for Maximum Freshness

    This Creamy Ranch Turkey & Veggie Skillet makes excellent leftovers when stored properly. Allow the dish to cool completely before transferring to airtight containers—I prefer glass containers to prevent staining and odor absorption. In the refrigerator, it maintains peak quality for 3-4 days. For longer storage, portion the cooled skillet into freezer-safe containers, leaving some headspace for expansion. When reheating from frozen, thaw overnight in the refrigerator for best results. I find that adding a splash of milk or broth when reheating prevents the sauce from becoming too thick or separating.

    Fixing Common Cooking Challenges

    Even experienced cooks encounter hiccups with creamy skillet dishes. If your sauce looks curdled or separated, lower the heat immediately and whisk in a tablespoon of cold cream cheese to re-emulsify. For a sauce that’s too thin, create a slurry with a teaspoon of cornstarch dissolved in cold water and simmer until thickened. Too thick? A splash of broth or milk will adjust the consistency. If vegetables release too much water, making your sauce watery, try roasting them separately before adding to the skillet. For bland results, a squeeze of lemon juice or dash of hot sauce can brighten all the flavors.

    Frequently Asked Questions

    Can I use ground turkey instead of turkey breast in this Creamy Ranch Turkey & Veggie Skillet?

    Absolutely! Ground turkey works wonderfully and often cooks faster. Just be sure to drain any excess fat after browning before adding your vegetables and sauce components.

    What vegetables work best in this recipe?

    The most reliable performers are bell peppers, zucchini, carrots, broccoli, and mushrooms. Choose vegetables with similar cooking times or add them in stages based on firmness.

    Can I make this dairy-free?

    Yes! Substitute coconut cream for heavy cream and use a dairy-free ranch seasoning blend. Nutritional yeast can provide that cheesy flavor without actual cheese.

    Is this recipe meal-prep friendly?

    Definitely! It reheats beautifully and tastes even better the next day as flavors continue to develop. Portion into individual containers for grab-and-go lunches.

    How can I make this spicier?

    Add red pepper flakes when sautéing the aromatics, use pepper jack instead of regular cheese, or stir in a tablespoon of hot sauce when adding the ranch components.

    Final Thoughts

    This Creamy Ranch Turkey & Veggie Skillet has earned its place in my recipe collection by consistently delivering comfort, nutrition, and flavor without complicated techniques or hard-to-find ingredients. The way the creamy sauce brings everything together creates a dish that feels special enough for company yet simple enough for Monday nights. I love how it transforms ordinary ingredients into something truly crave-worthy. Whether you follow the recipe exactly or use it as a template for your own creative variations, this skillet is bound to become a family favorite. For more delicious dinner ideas, check out my Pinterest collection of comforting weeknight meals!

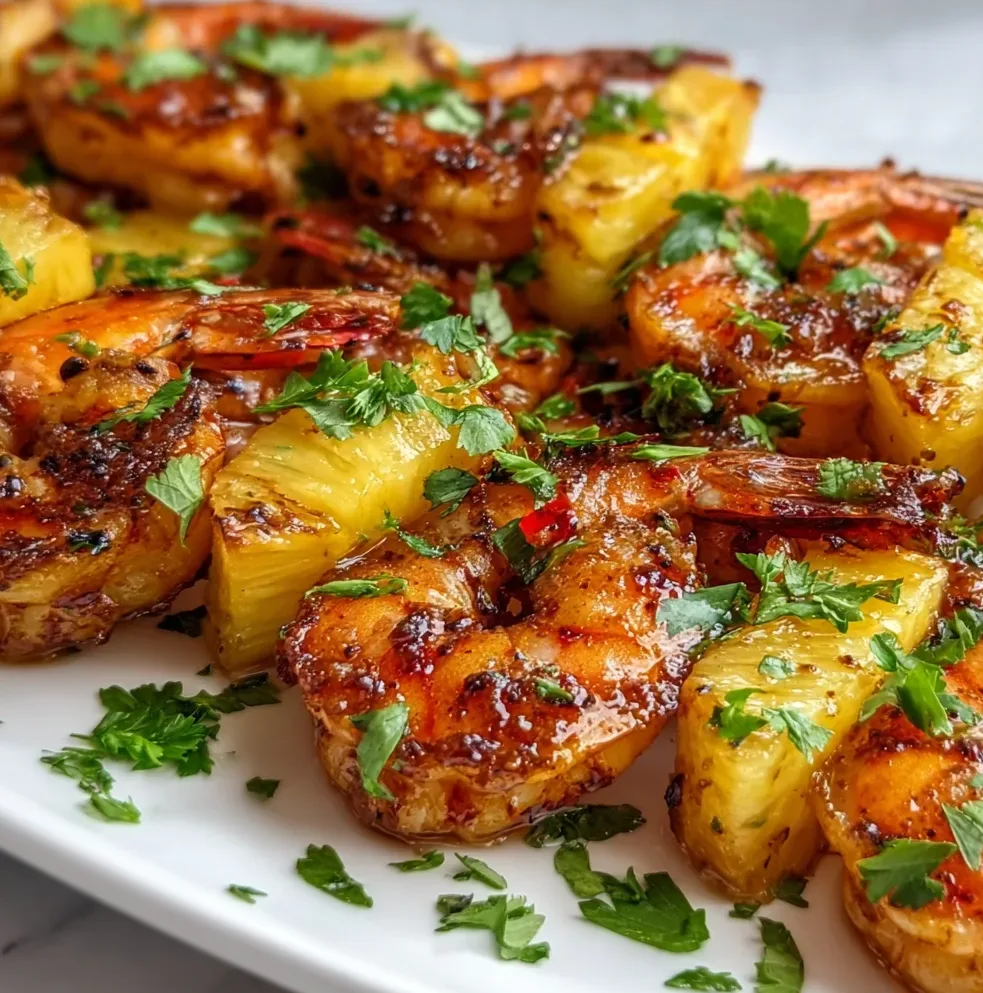
  • Grilled Shrimp Pineapple Skewers That Will Wow Your Taste Buds!

    Grilled Shrimp Pineapple Skewers That Will Wow Your Taste Buds!

    Grilled Shrimp Pineapple Skewers That Will Wow Your Taste Buds!

    Grilled Shrimp Pineapple Skewers are the ultimate summer treat that brings together succulent seafood and sweet tropical fruit in perfect harmony. There’s something magical about the way the shrimp caramelizes on the grill while the pineapple chunks release their juicy sweetness. I discovered this recipe during a beachside cookout last summer, and it’s become my go-to for outdoor entertaining. The vibrant colors alone make these skewers a showstopper, but it’s the flavor combination that will have your guests reaching for seconds. Trust me, these skewers are about to become your new summer obsession!

    Recipe

    Why You’ll Love These Grilled Shrimp Pineapple Skewers

    Perfect Balance of Flavors

    The sweet-savory magic that happens when pineapple meets shrimp is truly something special. The natural sugars in the pineapple caramelize beautifully on the grill, creating a delightful contrast with the tender, slightly smoky shrimp. I love how the pineapple juices seep into the shrimp as they cook, infusing them with tropical flavor. This combination hits all the right notes – sweet, savory, smoky, and just a hint of char from the grill. It’s a flavor profile that feels sophisticated yet completely approachable for any backyard gathering.

    Quick and Impressive

    These skewers are my secret weapon for entertaining because they’re deceptively simple yet look absolutely stunning. From start to finish, you can have these ready in under 30 minutes, making them perfect for impromptu gatherings. The vibrant yellow pineapple against the pink shrimp creates a visual feast that looks like you spent hours preparing. I’ve served these at everything from casual pool parties to more elegant dinner gatherings, and they’re always met with wide eyes and excitement. Sometimes the simplest dishes make the biggest impression!

    Essential Tips & Tricks

    Perfecting Your Marinade

    Creating the ideal marinade is the foundation of amazing skewers. I recommend a simple blend of olive oil, lime juice, garlic, and a touch of honey to enhance the natural sweetness of the pineapple. Let your shrimp marinate for 15-20 minutes – any longer and the acidity can start cooking the shrimp prematurely. For an extra flavor boost, add a sprinkle of smoked paprika or a dash of sriracha to the marinade. Remember to reserve some marinade before adding the raw shrimp to use for basting during grilling.

    Mastering the Grill

    The perfect char comes from proper grill management. Preheat your grill to medium-high heat (about 375-400°F) and lightly oil the grates to prevent sticking. When arranging your skewers, leave small spaces between each piece to ensure even cooking. Shrimp cook quickly – about 2-3 minutes per side until they turn pink and opaque. Watch carefully to avoid overcooking, which can make them rubbery. I like to place pineapple chunks between each shrimp to act as natural spacers and flavor enhancers.

    Serving Ideas & Creative Variations

    Perfect Pairings

    These tropical skewers shine brightest when served with complementary sides. I love pairing them with coconut rice, which soaks up all the delicious juices, or a light cucumber-avocado salad for freshness. For a complete meal, consider serving alongside grilled vegetables or a citrusy coleslaw. A sprinkle of fresh cilantro or mint just before serving adds a pop of color and freshness. And don’t forget a final squeeze of lime juice right before serving – that bright acidity really makes all the flavors sing!

    Flavor Twists

    While the classic version is divine, these skewers are incredibly versatile. Try a teriyaki glaze for Asian-inspired skewers, or add bell peppers and red onion for more color and texture. For a spicy kick, incorporate jalapeño slices between the shrimp and pineapple. Bacon lovers can wrap small pieces of bacon around each shrimp before skewering for an indulgent twist. I recently served a Caribbean version with a rum glaze that disappeared within minutes at my sister’s birthday gathering!

    Storage & Troubleshooting Guide

    Proper Storage

    For the freshest experience, these skewers are best enjoyed immediately after grilling, but leftovers can be stored properly. Allow any leftover skewers to cool completely before refrigerating in an airtight container for up to 2 days. To reheat, wrap loosely in foil and warm in a 300°F oven for 5-7 minutes – avoid microwaving as this can make the shrimp tough. I sometimes remove leftover shrimp and pineapple from the skewers and add them to salads or grain bowls for a delicious next-day meal.

    Common Challenges

    The most common issue with skewers is uneven cooking. If your shrimp are curling too much, make sure you’re threading them through both ends to keep them straight on the skewer. If your pineapple is burning before the shrimp are done, cut the pineapple pieces slightly larger than the shrimp. For wooden skewers, prevent burning by soaking them in water for at least 30 minutes before use. If your shrimp stick to the grill, remember to oil both the grates and brush a little oil on the skewers themselves.

    Frequently Asked Questions

    What size shrimp works best for Grilled Shrimp Pineapple Skewers?

    Large shrimp (16-20 count per pound) work best as they’re substantial enough to withstand grilling without overcooking. They also balance nicely with pineapple chunks size-wise.

    Can I make these skewers ahead of time?

    You can prepare the skewers up to 4 hours ahead and refrigerate. I recommend marinating separately and assembling just before refrigerating to prevent the pineapple acids from “cooking” the shrimp.

    What’s the best pineapple to use?

    Fresh pineapple is ideal for its juiciness and flavor. Choose one that smells sweet at the stem end and has golden color showing at the base. Canned pineapple chunks can work in a pinch.

    How do I know when the shrimp are perfectly cooked?

    Perfectly cooked shrimp turn from translucent gray to opaque pink with a slight curve. They should feel firm to touch but still have a slight spring – about 2-3 minutes per side.

    Can I make these in the oven instead of grilling?

    Absolutely! Broil the skewers for 3-4 minutes per side on a foil-lined baking sheet. You’ll miss some smoky flavor but still get delicious caramelization.

    Final Thoughts

    These Grilled Shrimp Pineapple Skewers represent everything I love about summer cooking – fresh ingredients, minimal preparation, and spectacular results. There’s something almost magical about the way the sweetness of pineapple complements the succulence of grilled shrimp. Whether you’re hosting a backyard BBQ or looking for a quick weeknight dinner with tropical vibes, these skewers deliver every time. I’d love to see your creations on Pinterest if you give them a try! The beauty of these skewers is in their simplicity – proof that sometimes the most memorable dishes are the ones that let quality ingredients shine.

  • S’mores Swiss Roll: Irresistibly Gooey Delight You Can’t Miss!

    S’mores Swiss Roll: Irresistibly Gooey Delight You Can’t Miss!

    S’mores Swiss Roll: Irresistibly Gooey Delight You Can’t Miss!

    This S’mores Swiss Roll combines everything magical about campfire s’mores with the elegant swirl of a classic Swiss roll cake. The pillowy chocolate sponge cradles a cloud of marshmallow fluff and graham cracker crumbles, all drizzled with rich chocolate ganache. I first created this showstopper for my niece’s birthday when she requested “something with s’mores but fancy,” and it’s been a family favorite ever since. The best part? You get all those nostalgic flavors without needing a campfire—though I won’t judge if you toast the top with a kitchen torch for that extra authentic touch!

    Recipe

    Why You’ll Love This S’mores Swiss Roll

    Perfect Balance of Textures and Flavors

    The magic of this S’mores Swiss Roll lies in its contrasting textures. The light, springy chocolate sponge provides the perfect backdrop for the gooey marshmallow filling that somehow stays put instead of oozing everywhere (kitchen victory!). I’ve added crushed graham crackers both inside the filling and sprinkled on top for that essential crunch that makes s’mores so satisfying. The chocolate ganache drizzle adds a final touch of richness that ties everything together. Every bite delivers that perfect balance of soft, crunchy, and melt-in-your-mouth delicious.

    Impressive Yet Achievable

    Don’t let the spiral pattern intimidate you—this S’mores Swiss Roll is actually quite forgiving to make! I used to panic about cake cracks until I realized they’re easily hidden under toppings or filling. The marshmallow fluff filling is particularly helpful here, as it’s sticky enough to hold everything together even if your cake isn’t rolled perfectly. Plus, the rustic nature of s’mores means that a few imperfections only add to its charm! When friends ask how I made something so fancy, I just smile knowing it took half the effort it appears to have required.

    Essential Tips & Tricks

    Mastering the Perfect Roll

    The key to a crack-free S’mores Swiss Roll is all in the timing and technique. Bake your chocolate sponge just until it springs back slightly when touched—overbaking leads to cracks. While still warm (not hot!), dust with a light coating of powdered sugar and roll it up in a clean kitchen towel. This “muscle memory” training helps the cake remember its shape. Let it cool completely rolled up before unrolling to add filling. I learned this the hard way after three failed attempts when I tried to rush the process! Take your time and you’ll be rewarded with that perfect spiral. Check out these no-bake desserts for more easy treats!

    Filling and Assembly Secrets

    The marshmallow filling can be a sticky challenge, but I’ve discovered a few game-changing tricks. Chill your mixing bowl before whipping the marshmallow fluff with a bit of cream cheese—this stabilizes it beautifully. Spread the filling evenly but leave a 1/2-inch border around the edges to prevent overflow. For the graham cracker element, crush some finely to mix into the filling and keep some chunkier for texture. When rolling, use the kitchen towel to guide the cake, applying gentle even pressure. If any cracks appear, don’t panic—they’ll be hidden by the ganache drizzle!

    Serving Ideas & Creative Variations

    Seasonal Adaptations

    This S’mores Swiss Roll welcomes seasonal twists that keep it exciting year-round. In summer, fold fresh raspberries into the filling for a fruity contrast, or add a splash of orange extract during fall for a subtle citrus note. Winter holidays call for a peppermint version—just swirl some crushed candy canes into the filling! My family went wild for the spring variation where I added a thin layer of strawberry cheesecake dip beneath the marshmallow fluff. Don’t be afraid to experiment with flavors that complement the chocolate-graham-marshmallow trinity!

    Presentation Upgrades

    Elevate your S’mores Swiss Roll with simple decorative touches that make it dinner-party worthy. A dusting of cocoa powder through a paper doily creates an elegant pattern, while chocolate curls add sophistication. For birthdays, I’ve pressed mini chocolate chips around the outside and topped with candles. My favorite presentation trick is serving slices on a pool of warm chocolate sauce with a tiny scoop of vanilla ice cream. For outdoor gatherings, I sometimes bring my kitchen torch to give each slice a freshly toasted marshmallow crown right before serving!

    Storage & Troubleshooting Guide

    Keeping It Fresh

    This S’mores Swiss Roll maintains its best texture when stored properly. Keep it in an airtight container in the refrigerator for up to 3 days—any longer and the graham crackers begin to soften too much. For the freshest experience, I recommend bringing slices to room temperature for about 15 minutes before serving. If you need to make it ahead for an event, consider freezing the unfilled roll, then thawing, filling, and finishing it the day before. The ganache topping actually helps seal in moisture, keeping your cake from drying out too quickly.

    Fixing Common Issues

    Even experienced bakers encounter challenges with Swiss rolls, but most problems have simple solutions. If your cake cracks during rolling, use extra filling as “glue” to hold it together—the marshmallow fluff is perfect for this repair job! For a roll that’s too dense, your batter might have been overmixed; next time, fold ingredients gently until just combined. If your filling squishes out the sides, chill the roll for 30 minutes before slicing with a warm, clean knife. I once salvaged a completely broken roll by turning it into a trifle with layers of the cake pieces, filling, and extra graham crackers!

    Frequently Asked Questions

    Can I make this S’mores Swiss Roll ahead of time?

    Yes! You can prepare it up to 2 days in advance. Store in the refrigerator in an airtight container, but bring to room temperature for 15-20 minutes before serving for the best texture and flavor.

    What if I don’t have marshmallow fluff?

    You can make your own by melting 2 cups of mini marshmallows with 2 tablespoons of corn syrup in the microwave, then beating until fluffy. Alternatively, use stabilized whipped cream folded with mini marshmallows.

    Can I freeze leftover slices?

    Absolutely! Wrap individual slices in plastic wrap, then foil, and freeze for up to 1 month. Thaw in the refrigerator overnight before enjoying.

    How do I prevent the cake from cracking?

    Don’t overbake the cake, roll it while still warm, and use a kitchen towel dusted with powdered sugar. The warmth makes the cake pliable and less likely to crack during rolling.

    What’s the best chocolate for the ganache topping?

    Semi-sweet chocolate chips work perfectly for the S’mores Swiss Roll ganache, but you can use milk chocolate for a sweeter result or dark chocolate (60-70% cacao) for a more intense flavor.

    Final Thoughts

    This S’mores Swiss Roll has become my go-to dessert when I want to impress without spending hours in the kitchen. There’s something magical about transforming a beloved campfire treat into an elegant swirled creation that makes everyone feel both nostalgic and fancy at the same time. The combination of chocolate sponge, marshmallow filling, and graham cracker crunch creates a dessert that’s greater than the sum of its parts. I hope this recipe brings as much joy to your table as it has to mine! For more delicious inspiration, follow me on Pinterest.