Blog

  • One Pot Cajun Chicken Orzo: Irresistibly Flavorful & Easy Meal!

    One Pot Cajun Chicken Orzo: Irresistibly Flavorful & Easy Meal!

    One Pot Cajun Chicken Orzo: Irresistibly Flavorful & Easy Meal!

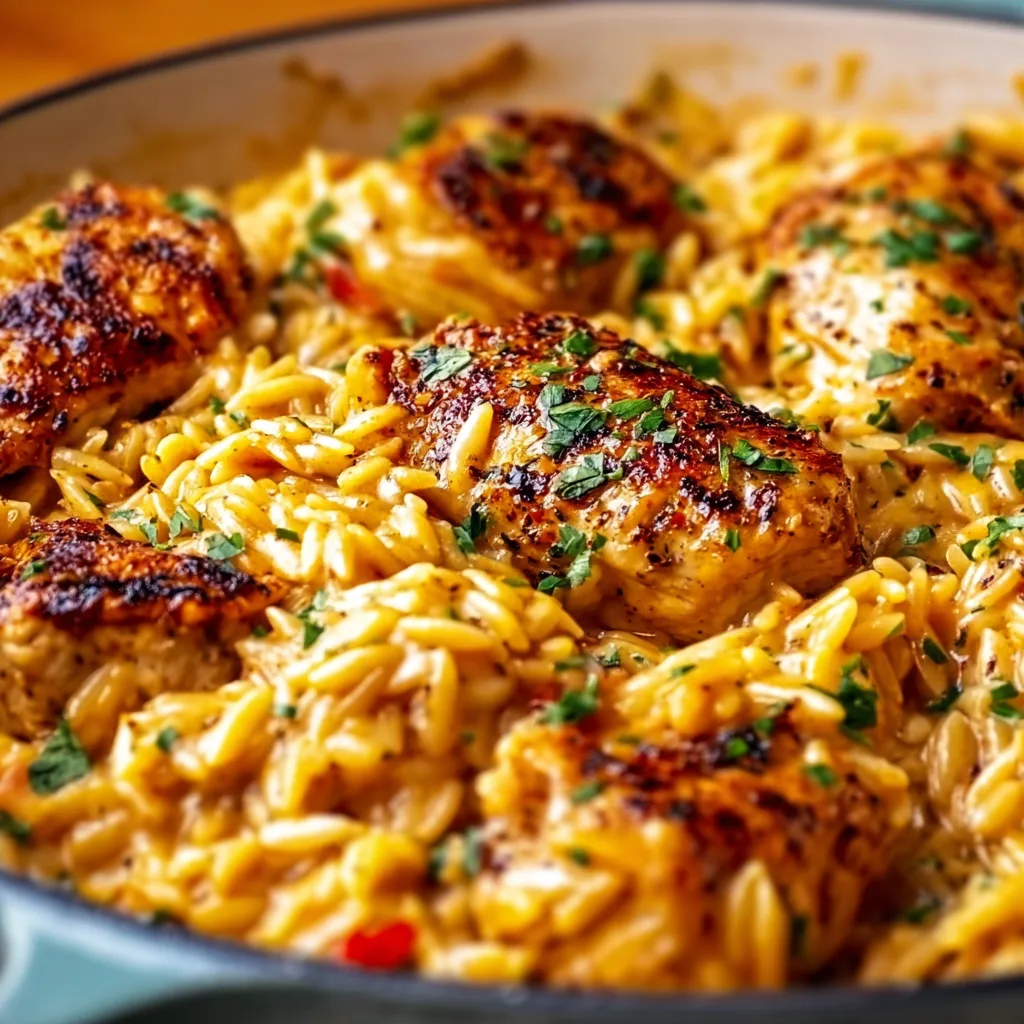
    One Pot Cajun Chicken Orzo brings together everything I love about comfort food – creamy texture, bold spices, and minimal cleanup. The first time I made this dish, my kitchen filled with aromas that transported me straight to New Orleans. There’s something magical about watching simple ingredients transform into a rich, flavorful meal that hugs you from the inside out. If you’re craving a dinner that delivers maximum flavor with minimum effort, this creamy tortellini soup might be your next favorite, but today’s Cajun chicken orzo deserves the spotlight.

    Recipe

    Why You’ll Love This One Pot Cajun Chicken Orzo

    Perfect Weeknight Savior

    This dish has rescued countless hectic evenings in my home. The one-pot method eliminates the usual dinner chaos, letting you create something truly special in about 30 minutes. I still remember the relief I felt discovering this recipe during a particularly busy week – it was like finding a culinary life raft! The orzo cooks directly in the flavorful broth, absorbing every bit of seasoning while releasing its starches to create that dreamy creamy texture without heavy cream. You’ll appreciate how this meal delivers restaurant-quality flavor with minimal effort.

    Balanced Flavor Profile

    The Cajun seasoning brings a perfect harmony of heat and depth without overwhelming your palate. What makes this dish special is how the spices bloom in the oil, releasing their essential oils before the chicken soaks them up. The orzo’s starchy goodness mellows the heat just enough, while bell peppers add sweetness and fresh herbs brighten everything. I love watching guests take their first bite – that moment when their eyes widen with surprise at how the flavors dance together. It’s complex enough for food enthusiasts but approachable for everyone.

    Essential Tips & Tricks

    Mastering the One-Pot Technique

    The secret to one-pot perfection lies in proper timing and heat management. Start with a heavy-bottomed Dutch oven or deep skillet that distributes heat evenly. When searing the chicken, resist the urge to move it too soon – those golden bits are flavor gold! I learned this the hard way after countless pale, underwhelming attempts. Allow the orzo to toast slightly before adding liquid for a nuttier flavor. Keep the heat at a gentle simmer once the liquid is added, stirring occasionally to prevent sticking. This creates that perfect creamy texture without turning mushy.

    Ingredient Substitutions

    The beauty of this recipe lies in its flexibility with ingredients. No orzo? Pearl couscous works beautifully. Chicken thighs can replace breasts for more richness, and turkey is a leaner alternative. For the vegetable base, the holy trinity (onions, celery, bell peppers) is traditional, but I’ve successfully used what I had on hand – zucchini, mushrooms, or even spinach folded in at the end. When I discovered my Cajun seasoning had expired one night, I quickly mixed paprika, garlic powder, oregano, thyme, cayenne, salt, and pepper. The dish was different but equally delicious!

    Serving Ideas & Creative Variations

    Perfect Pairings

    This one-pot wonder truly shines when served with simple, complementary sides. A crisp green salad with vinaigrette cuts through the richness perfectly. I love serving it with garlic bread for soaking up every last drop of that velvety sauce. For a complete Southern-inspired meal, pair with collard greens or okra. The dish is hearty enough to stand alone, but I’ve found that a cold glass of sweet tea or a crisp white wine elevates the experience. For special occasions, I serve it alongside my slow cooker cajun potato soup for an impressive Cajun feast.

    Seasonal Adaptations

    The versatility of this dish makes it perfect for year-round enjoyment with seasonal tweaks. Summer brings opportunities for adding fresh corn kernels, cherry tomatoes, and finishing with abundant fresh herbs. In fall, I love incorporating diced butternut squash for sweetness. Winter versions benefit from heartier additions like kale or spinach stirred in at the end. Spring calls for asparagus tips and fresh peas. During crawfish season, I sometimes substitute them for chicken – my Louisiana friends approve! The core flavors remain consistent while seasonal produce keeps the dish feeling fresh and exciting no matter when you make it.

    Storage & Troubleshooting Guide

    Proper Storage Solutions

    This dish maintains its quality beautifully when stored correctly. Allow leftovers to cool completely before transferring to airtight containers – I prefer glass containers to prevent staining from the tomatoes. Refrigerate for up to 4 days. When reheating, add a splash of broth or water as the orzo continues absorbing liquid. For freezing, portion into individual servings and freeze for up to 3 months. I’ve found that thawing overnight in the refrigerator yields the best texture upon reheating. The flavors often deepen overnight, making this an excellent meal prep option.

    Common Issues & Fixes

    The most frequent challenge with this recipe is texture management. If your orzo becomes too thick, simply add warm broth or water a tablespoon at a time until reaching your desired consistency. Conversely, if it’s too soupy, simmer uncovered for a few extra minutes. For overly spicy batches, stir in a dollop of sour cream or Greek yogurt to mellow the heat. If the chicken turns out dry, next time try cutting pieces more uniformly or reducing the cooking time. I once salvaged slightly overcooked chicken by shredding it and mixing it back into the orzo – nobody noticed!

    Frequently Asked Questions

    Can I make One Pot Cajun Chicken Orzo in advance?

    Yes! Prepare it up to 2 days ahead, but undercook the orzo slightly. When reheating, add a splash of broth as it will thicken in the refrigerator. The flavors actually improve with time.

    Is this dish very spicy?

    The spice level is customizable. Start with half the Cajun seasoning if you’re sensitive to heat, then adjust to taste. You can always add more spice, but you can’t take it away!

    Can I use different proteins in this recipe?

    Absolutely! Shrimp works beautifully (add in the last 3-4 minutes of cooking), as does andouille sausage or even tofu for a vegetarian version.

    How do I know when the orzo is perfectly cooked?

    Test a few pieces – they should be tender but still have a slight firmness (al dente). The mixture will continue thickening as it stands, so err on the side of slightly underdone.

    What makes One Pot Cajun Chicken Orzo different from regular pasta dishes?

    The one-pot method allows the orzo to absorb all the flavors while releasing starches that create a naturally creamy sauce. The Cajun seasoning provides distinctive depth without requiring numerous ingredients.

    Final Thoughts

    This One Pot Cajun Chicken Orzo has become my go-to recommendation for friends seeking impressive yet approachable recipes. There’s something magical about creating a dish that balances bold flavors with comforting textures, all while keeping cleanup to a minimum. I find myself returning to it whenever I need a reliable dinner win that still feels special. The way it transforms humble ingredients into something extraordinary reminds me why cooking is such a joy. Don’t forget to check out more comfort food inspirations on Pinterest for your next culinary adventure!

  • Raw Carrot Salad Recipe That Will Boost Your Health Instantly!

    Raw Carrot Salad Recipe That Will Boost Your Health Instantly!

    Raw Carrot Salad Recipe That Will Boost Your Health Instantly!

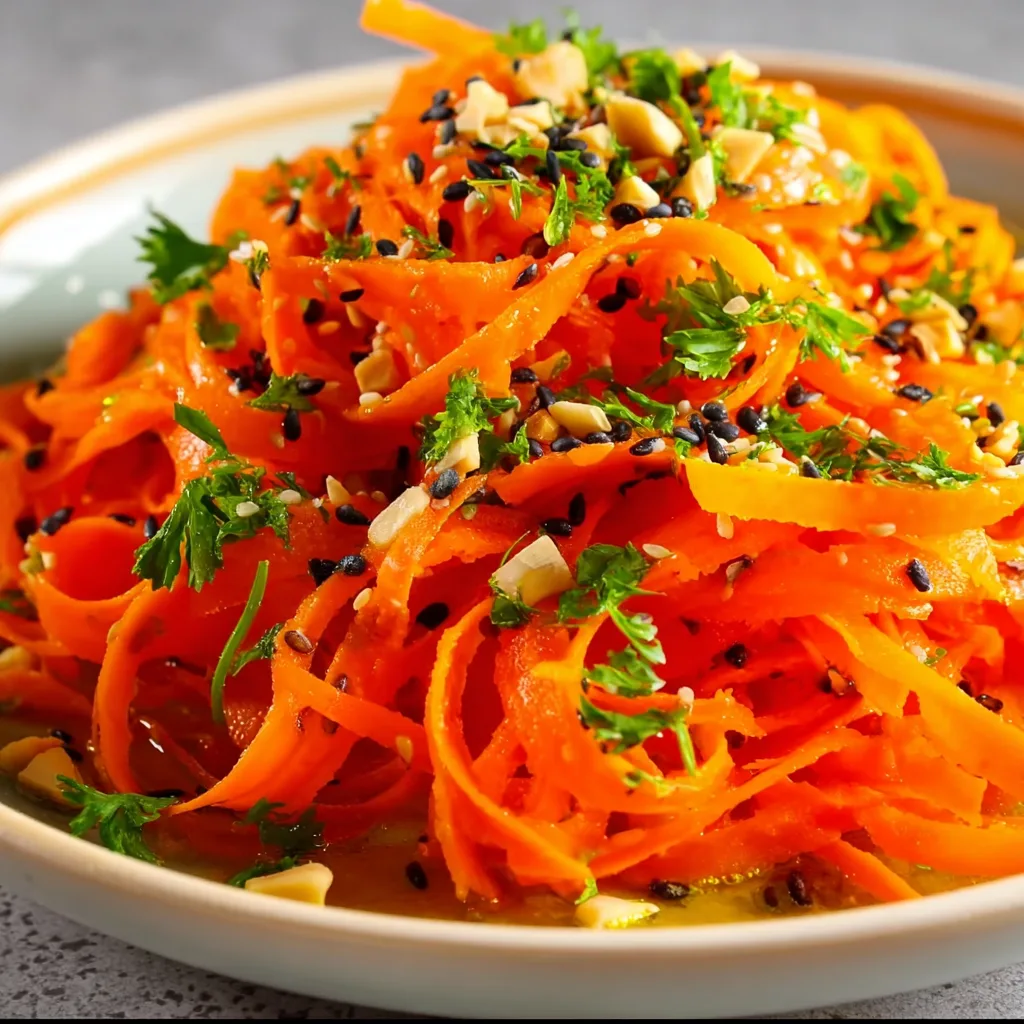
    This raw carrot salad has become my absolute go-to when I need something fresh, vibrant, and nourishing. The first time I made it, the bright colors and crisp texture instantly lifted my mood on a gloomy afternoon. There’s something magical about the combination of sweet carrots, tangy dressing, and aromatic herbs that creates a perfect harmony of flavors. Whether you’re looking for a quick side dish or a light lunch option, this versatile salad delivers both nutrition and satisfaction without any fuss. It pairs beautifully with everything from grilled chicken to hearty soups, making it an essential recipe in my weekly rotation.

    Recipe

    Why You’ll Love This Raw Carrot Salad

    A Nutritional Powerhouse

    This raw carrot salad isn’t just delicious—it’s packed with essential nutrients that nourish your body from the inside out. Carrots are loaded with beta-carotene, which supports eye health and immune function, while the healthy fats from olive oil help your body absorb those fat-soluble vitamins. I love how energized I feel after enjoying this colorful dish! The combination of fiber from the carrots and protein from the optional nuts creates a satisfying crunch that keeps hunger at bay. Plus, the raw preparation preserves all those vital enzymes and nutrients that can be diminished through cooking.

    Quick & Effortless Preparation

    One of my favorite things about this raw carrot salad is how quickly it comes together. On busy weeknights when cooking feels overwhelming, I can have this ready in under 15 minutes. Simply grate the carrots (I use my food processor with the grater attachment to make it even faster), whisk together the dressing ingredients, and toss everything together. The minimal prep work delivers maximum flavor, especially if you let it sit for a few minutes before serving to allow the flavors to meld. I’ve made this countless times while multitasking—it’s that simple!

    Essential Tips & Tricks

    Selecting & Preparing Carrots

    For the best raw carrot salad, start with fresh, firm carrots with vibrant orange color. I prefer organic carrots with the tops still attached—they tend to be fresher and more flavorful. Give them a good scrub rather than peeling to preserve the nutrients concentrated just beneath the skin. When grating, try different techniques for varied texture: use the large holes on your grater for a heartier bite or the fine side for a more delicate salad. I discovered that a mix of both creates the most interesting texture! For maximum crispness, grate your carrots just before serving or soak them briefly in ice water.

    Balancing Your Dressing Perfectly

    The secret to an unforgettable raw carrot salad lies in the perfect dressing balance. I aim for the magic ratio of 3 parts oil to 1 part acid (lemon juice or vinegar), plus a touch of sweetness from honey or maple syrup to complement the carrots’ natural sweetness. Don’t skimp on the salt—it brings out all the flavors! My personal touch is adding a tiny pinch of cinnamon, which enhances the carrots’ natural sweetness without tasting obviously spiced. For extra flavor dimension, try infusing your dressing with garlic by letting a smashed clove sit in the oil for 30 minutes before removing.

    Serving Ideas & Creative Variations

    Perfect Pairings & Occasions

    This versatile raw carrot salad shines as both a weeknight side and a potluck star. I love serving it alongside grilled proteins for a light dinner or packing it for lunch—it actually improves after sitting for a few hours as the flavors develop. For entertaining, serve it in a beautiful shallow bowl with fresh herbs scattered on top for an impressive yet effortless presentation. The bright colors make it particularly festive during holiday gatherings! It’s become my signature contribution to summer barbecues, where its refreshing crunch provides the perfect counterpoint to rich, slow-cooked meats. The best part? It never wilts, even on hot days.

    Creative Mix-ins & Variations

    Transform your basic raw carrot salad into countless exciting variations with thoughtful mix-ins. For a Mediterranean twist, add crumbled feta, chopped Kalamata olives, and fresh mint. My favorite version includes toasted cumin seeds, cilantro, and a squeeze of lime for a Moroccan-inspired flavor profile. For added protein and texture, try adding chickpeas, sunflower seeds, or chopped pistachios. Dried fruits like cranberries or apricots introduce delightful sweet-tart pops throughout the salad. When apple season arrives, I love adding julienned crisp apples and a sprinkle of cinnamon for an autumn variation that never fails to impress guests.

    Storage & Troubleshooting Guide

    Keeping It Fresh

    To maintain the optimal crispness of your raw carrot salad, store it in an airtight container in the refrigerator for up to 3 days. I’ve found that keeping the dressing separate until serving time helps preserve the carrots’ texture if you’re prepping ahead. If you’ve already dressed the salad, no worries—it actually develops more flavor overnight! For meal prep, I often grate a big batch of carrots on Sunday and portion them into containers with a small container of dressing on the side. This simple strategy ensures I have fresh, vibrant salad ready to enjoy throughout the busy week.

    Fixing Common Issues

    If your raw carrot salad seems too watery, try patting the grated carrots with paper towels before adding the dressing. Carrots naturally release moisture, especially when salted. For salad that’s too dry, simply whisk together a little extra dressing to refresh it. If the flavor seems flat, a squeeze of fresh lemon juice and an extra pinch of salt work wonders to brighten everything up. Sometimes I find the texture becomes softer after a day in the fridge—when this happens, I add a handful of freshly grated carrot or some toasted nuts to reintroduce that satisfying crunch that makes this salad so special.

    Frequently Asked Questions

    Can I make raw carrot salad ahead of time?

    Absolutely! It actually improves with a little time as flavors meld. Prepare it up to 24 hours ahead and store in the refrigerator in an airtight container for best results.

    What’s the best way to grate carrots for this salad?

    A food processor with a grating attachment is fastest, but a box grater works perfectly too. For varied texture, try using different-sized grating surfaces.

    Is raw carrot salad healthy?

    Yes! It’s packed with vitamins, fiber, and antioxidants. The raw preparation preserves nutrients that might be reduced through cooking, making it an excellent nutritional choice.

    Can I substitute the oil in the dressing?

    Certainly! While I prefer olive oil, avocado oil or walnut oil make wonderful alternatives with different flavor profiles.

    How can I make my raw carrot salad more filling?

    Add protein sources like chickpeas, quinoa, sunflower seeds, or feta cheese. These additions transform it from a side dish into a complete meal.

    Final Thoughts

    This raw carrot salad has become my reliable kitchen companion—simple enough for everyday meals yet special enough for sharing with loved ones. There’s something deeply satisfying about transforming humble carrots into something so vibrant and flavorful. I hope you’ll experiment with different variations to make this recipe your own! The beauty of this salad lies in its adaptability and how it welcomes your personal touch. For more seasonal inspiration and creative recipes, visit our Pinterest page where we’re always sharing fresh ideas for your table.

  • Dill Pickle Ranch Smash Chicken Tacos with Crispy Cheese Lace – Flavor Bomb!

    Dill Pickle Ranch Smash Chicken Tacos with Crispy Cheese Lace – Flavor Bomb!

    Dill Pickle Ranch Smash Chicken Tacos with Crispy Cheese Lace - Flavor Bomb!

    Dill Pickle Ranch Smash Chicken Tacos with Crispy Cheese Lace are the perfect fusion of tangy, creamy, and crunchy all wrapped up in one irresistible package. I stumbled upon this recipe during a rainy Saturday when I was craving something with a little zing but didn’t want to leave the house. The combination of dill pickle-infused ranch with tender smashed chicken and that dramatic cheese lace that shatters with each bite? Pure magic! These tacos have become a staple in my weeknight rotation, and I can’t wait to share all my tips for making them perfectly crispy every time.

    Recipe

    Why You’ll Love This Dill Pickle Ranch Smash Chicken Tacos with Crispy Cheese Lace

    The Perfect Flavor Combination

    There’s something absolutely magical about how the tangy dill pickle juice infuses the ranch seasoning, creating a flavor profile that’s both familiar and excitingly different. The chicken soaks up all these flavors while getting that perfect crispy-on-the-outside, tender-on-the-inside texture from the smashing technique. I love how the pickle brine tenderizes the meat while adding that signature pucker that makes your taste buds dance. When you take that first bite with the cool ranch drizzle cutting through the warm chicken, it’s a sensory experience that’ll have you making these tacos on repeat!

    That Irresistible Crispy Cheese Lace

    Let’s talk about the showstopper element: that crispy cheese lace that forms around the edges of your taco. When shredded cheese hits the hot pan and begins to bubble and brown, it transforms into a delicate, crispy web that adds the most satisfying crunch. The first time I made these, my daughter’s eyes went wide at the dramatic cheese “skirt” hanging off the edges of her taco. The contrast between the crunchy, nutty cheese lace and the soft tortilla creates a textural experience that elevates these from ordinary tacos to something truly special. It’s like having the best part of a grilled cheese sandwich wrapped around your taco!

    Essential Tips & Tricks

    Mastering the Smash Technique

    The key to perfect smashed chicken is starting with even thickness. I pound chicken breasts to about ½-inch thick before marinating them in the pickle-ranch mixture. When it’s time to cook, press down firmly with a spatula during the first 30 seconds of cooking to create maximum surface contact with the hot pan. This ensures you get that beautiful golden crust while keeping the inside juicy. Don’t crowd the pan! Work in batches if needed – giving each piece room allows for better browning and prevents steaming. The sizzle should be consistent but not too aggressive – medium-high heat is your friend here.

    Creating the Perfect Cheese Lace

    The cheese-to-tortilla ratio is crucial for achieving that Instagram-worthy crispy lace. I’ve found that about 2-3 tablespoons of finely shredded cheese (a mix of cheddar and monterey jack works beautifully) spread in a circle slightly larger than your tortilla creates the perfect lace. Heat your pan first, then add the cheese, and place the tortilla on top immediately. Wait until the edges turn golden brown before flipping – usually about 45-60 seconds. If you’re looking for more comforting cheese recipes, my Slow Cooker Mac & Cheese Classic has that same satisfying cheesy goodness in a different form.

    Serving Ideas & Creative Variations

    Build-Your-Own Taco Bar

    Transform taco night into an interactive experience with a build-your-own station! I set out bowls of diced avocado, fresh cilantro, pickled red onions, sliced jalapeños, and extra pickle spears. The cool, creamy elements balance the warm, crispy components perfectly. For a fun twist, offer both flour and corn tortillas – the corn ones create an even crispier cheese lace! My favorite touch is serving different hot sauces so everyone can customize their heat level. This setup is perfect for casual entertaining and has been a hit at our family gatherings where everyone from kids to grandparents can create their perfect taco.

    Unexpected Twists on the Classic

    Don’t be afraid to experiment with this versatile recipe! Swap chicken for smashed chickpeas for a vegetarian option that still delivers on texture and flavor. The pickle brine works surprisingly well with the beans! For a breakfast variation, use the same technique but add a fried egg on top – the runny yolk creates a decadent sauce. If you’re feeling adventurous, try adding kimchi instead of pickles for a Korean-inspired version. For more creative comfort food ideas, check out my Dill Pickle Parmesan Chicken that uses similar flavors in a completely different presentation.

    Storage & Troubleshooting Guide

    Make-Ahead and Leftover Solutions

    These tacos are at their absolute best when freshly made, but you can prep components ahead of time. Marinate the chicken up to 24 hours in advance for even more flavor infusion. The pickle ranch sauce keeps well in the fridge for up to 5 days in an airtight container. For leftovers, store the chicken separately from the tortillas and cheese – reheat the chicken in a skillet to maintain crispiness, then assemble fresh tacos with newly made cheese lace. The chicken is also delicious cold, sliced over a salad with extra pickle ranch drizzled on top!

    Fixing Common Issues

    If your cheese lace isn’t getting crispy, your pan likely isn’t hot enough. Preheat it thoroughly before adding cheese. On the flip side, if the cheese is burning before the tortilla warms, your heat is too high. Finding that sweet spot is key! For soggy tacos, make sure you’re patting the pickle-brined chicken dry before cooking – excess moisture is the enemy of crispiness. If your chicken is sticking to the pan during the smash, your pan needs more oil or you’re trying to flip it too soon. Wait until it naturally releases from the pan, which signals that beautiful crust has formed.

    Frequently Asked Questions

    Can I use pre-cooked rotisserie chicken for these Dill Pickle Ranch Smash Chicken Tacos with Crispy Cheese Lace?

    You can, but you’ll miss the flavor infusion from marinating raw chicken. If using rotisserie, shred it and toss with the pickle ranch mixture, then crisp it in a hot pan before assembling tacos.

    How do I prevent the cheese lace from sticking to the pan?

    Use a well-seasoned cast iron or non-stick pan. Ensure it’s properly heated before adding cheese, and don’t try to flip until the edges are golden and naturally releasing from the surface.

    Can I make these gluten-free?

    Absolutely! Use certified gluten-free corn tortillas and check that your ranch seasoning is gluten-free. The cheese lace actually works better with corn tortillas!

    What’s the best cheese for the crispy lace?

    A mix of cheddar and monterey jack creates the perfect melt and crispness. Avoid pre-shredded cheese with anti-caking agents as it doesn’t melt as smoothly.

    Can I make the pickle ranch sauce less tangy?

    Yes, adjust by using less pickle juice and more regular buttermilk or sour cream in the ranch mixture. Start with half the pickle juice and taste as you go.

    Final Thoughts

    These Dill Pickle Ranch Smash Chicken Tacos with Crispy Cheese Lace have become my go-to recipe when I want to impress without spending hours in the kitchen. There’s something so satisfying about the contrast between the tangy chicken, creamy sauce, and that dramatic, crispy cheese lace that makes dinner feel special. I hope you’ll give these tacos a try and share your creations with me on Pinterest! The beauty of this recipe is in its adaptability—make it your own and enjoy the delicious results.

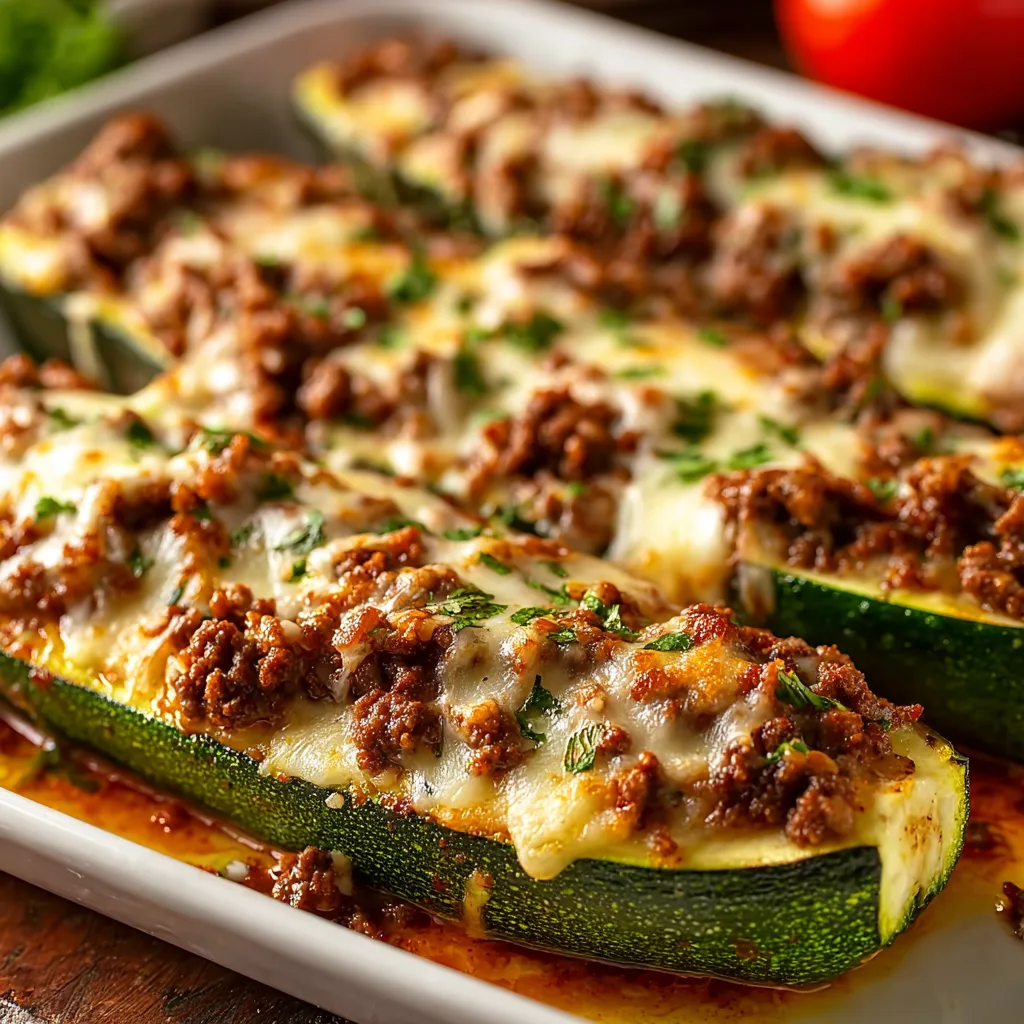
  • Stuffed Zucchini Boats with Ground Beef: Flavor Explosion You’ll Love!

    Stuffed Zucchini Boats with Ground Beef: Flavor Explosion You’ll Love!

    Stuffed Zucchini Boats with Ground Beef: Flavor Explosion You’ll Love!

    Stuffed Zucchini Boats with Ground Beef have become my absolute go-to dinner when I want something that feels indulgent but won’t leave me in a food coma. The first time I made these for my family, my kitchen filled with the most mouthwatering aroma of sizzling beef and Italian herbs. There’s something magical about how the tender zucchini cradles that savory filling, creating the perfect bite every time. If you’re looking for a low-carb option that doesn’t sacrifice flavor, these boats will sail straight into your regular rotation! They’re similar to my Crack Chicken Noodle Soup in comfort level but with a fresher summer vibe.

    Recipe

    Why You’ll Love This Stuffed Zucchini Boats with Ground Beef

    Perfect Balance of Healthy and Satisfying

    These stuffed zucchini boats hit that sweet spot between nutritious and delicious that can be so hard to find. The zucchini provides a tender-crisp vessel that’s low in calories but high in nutrients, while the ground beef delivers that satisfying protein punch we all crave. I love how the slight sweetness of the zucchini complements the savory beef mixture. When my daughter (who typically avoids anything green) asked for seconds, I knew this recipe was a keeper! The melted cheese on top creates that irresistible golden crust that makes everyone at the table reach for more.

    Versatile and Customizable for Any Diet

    What makes these ground beef zucchini boats truly special is how easily they adapt to different dietary needs. Keto? Skip the breadcrumbs. Dairy-free? Use your favorite plant-based cheese or omit it entirely. I’ve made these with ground turkey, chicken, and even plant-based crumbles for vegetarian friends. The basic template stays the same, but you can adjust the seasonings to create Italian, Mexican, or even Greek-inspired versions. Last month when my pantry was nearly empty, I still pulled these off with just a few basics and they were still absolutely delicious!

    Essential Tips & Tricks

    Selecting and Preparing the Perfect Zucchini

    The foundation of amazing stuffed zucchini boats starts with selecting the right zucchini. Look for medium-sized ones with firm, glossy skin – about 7-8 inches long is ideal. Too small and they won’t hold enough filling; too large and they can be watery and bitter. When hollowing them out, leave about ¼-inch thickness around the edges to maintain structure. I learned the hard way (soggy zucchini disaster!) that pre-baking the empty boats for 10 minutes creates a sturdier vessel and removes excess moisture. This simple step makes all the difference between soggy disappointment and perfectly tender boats.

    Mastering the Flavorful Filling

    The secret to crave-worthy ground beef zucchini boats lies in building layers of flavor. Start by properly browning your beef – don’t just gray it! Those caramelized bits are flavor gold. I always add the onions after the meat has browned to prevent them from steaming. Another game-changer: use the scooped zucchini flesh in your filling! Chop it finely, sauté it with the onions, and it adds moisture and nutrition without changing the texture. For an extra flavor boost, try adding a splash of Slow Cooker Mac & Cheese sauce to create an incredible creamy element.

    Serving Ideas & Creative Variations

    Complementary Side Dishes

    These stuffed zucchini boats with ground beef shine as the star of your meal, but the right sides can elevate the experience. For lighter fare, I love pairing them with a crisp green salad dressed with lemon vinaigrette – the acidity cuts through the richness beautifully. When feeding hungrier appetites, a side of garlic bread or fluffy quinoa soaks up all those delicious juices. My personal favorite is serving them alongside roasted cherry tomatoes that burst with sweetness. The contrast between the juicy tomatoes and the savory boats creates a perfect harmony that my family requests weekly during zucchini season!

    International Flavor Variations

    Transform your basic zucchini boats recipe with global-inspired variations that keep this dish exciting week after week. For Mexican flair, swap the Italian seasonings for taco seasoning, black beans, corn, and top with pepper jack cheese and avocado. Mediterranean-style boats with ground lamb, feta, olives and a squeeze of lemon bring vacation vibes to your table. I once made Asian-inspired boats with ginger, garlic, soy sauce and water chestnuts that were absolutely divine! For a cozy winter option, try my Creamy Tortellini Soup flavors adapted into a filling – creamy, herby perfection.

    Storage & Troubleshooting Guide

    Proper Storage and Reheating

    Stuffed zucchini boats maintain their deliciousness as leftovers when stored properly. Allow them to cool completely before transferring to airtight containers – this prevents condensation that leads to sogginess. They’ll keep in the refrigerator for 3-4 days. For reheating, the oven at 350°F for 15 minutes yields the best results, maintaining that wonderful texture contrast. Microwaving works in a pinch, but the zucchini may become softer. I’ve found that sprinkling a little fresh cheese on top before reheating brings them back to life beautifully! For meal prep, you can assemble them entirely, refrigerate, and bake when ready.

    Fixing Common Issues

    Even experienced cooks encounter challenges with zucchini boats. If your boats are coming out watery, try salting the hollowed zucchini and letting them sit for 10 minutes before patting dry – this draws out moisture. For filling that won’t stay put, create a flatter bottom by slicing a thin strip from the rounded side so they sit stably. If the zucchini is undercooked but the topping is browning too quickly, cover with foil for the first part of baking. And my personal save: if the boats crack or break, simply transfer everything to a casserole dish, mix it up, add extra cheese, and rebrand it as a “zucchini boat casserole” – no one will know the difference!

    Frequently Asked Questions

    Can I make stuffed zucchini boats with ground beef ahead of time?

    Absolutely! Prepare everything up to 24 hours ahead, cover and refrigerate. Add an extra 5-10 minutes to the baking time if cooking straight from the refrigerator. The flavors actually develop beautifully overnight.

    What’s the best cheese to use for zucchini boats?

    Mozzarella provides that classic stretch, while parmesan adds sharpness. My favorite is a combination of both. For more flavor complexity, try provolone or fontina which melt beautifully.

    How do I prevent my zucchini boats from becoming soggy?

    Pre-bake the hollowed zucchini for 10 minutes before filling. Also, be sure to salt the inside of the zucchini and let it sit for 10 minutes, then pat dry to draw out excess moisture.

    Can I freeze stuffed zucchini boats?

    Yes, but freeze them before baking. Wrap individually in plastic wrap, then foil. Thaw overnight in the refrigerator before baking. The texture may change slightly but the flavor remains delicious.

    Are stuffed zucchini boats with ground beef keto-friendly?

    Yes! They’re naturally low-carb. Just omit breadcrumbs in the filling and use a keto-friendly marinara sauce. With high protein and healthy fats, they’re perfect for keto meal plans.

    Final Thoughts

    These stuffed zucchini boats with ground beef have become my secret weapon for transforming simple ingredients into something truly special. The way the zucchini softens while maintaining just enough bite, cradling that savory filling and melted cheese – it’s pure comfort food magic without the guilt. I’ve watched these boats convert vegetable skeptics and please picky eaters alike. Don’t forget to check out more of my veggie-forward recipes on Pinterest for year-round inspiration. Your kitchen is about to become everyone’s favorite restaurant!

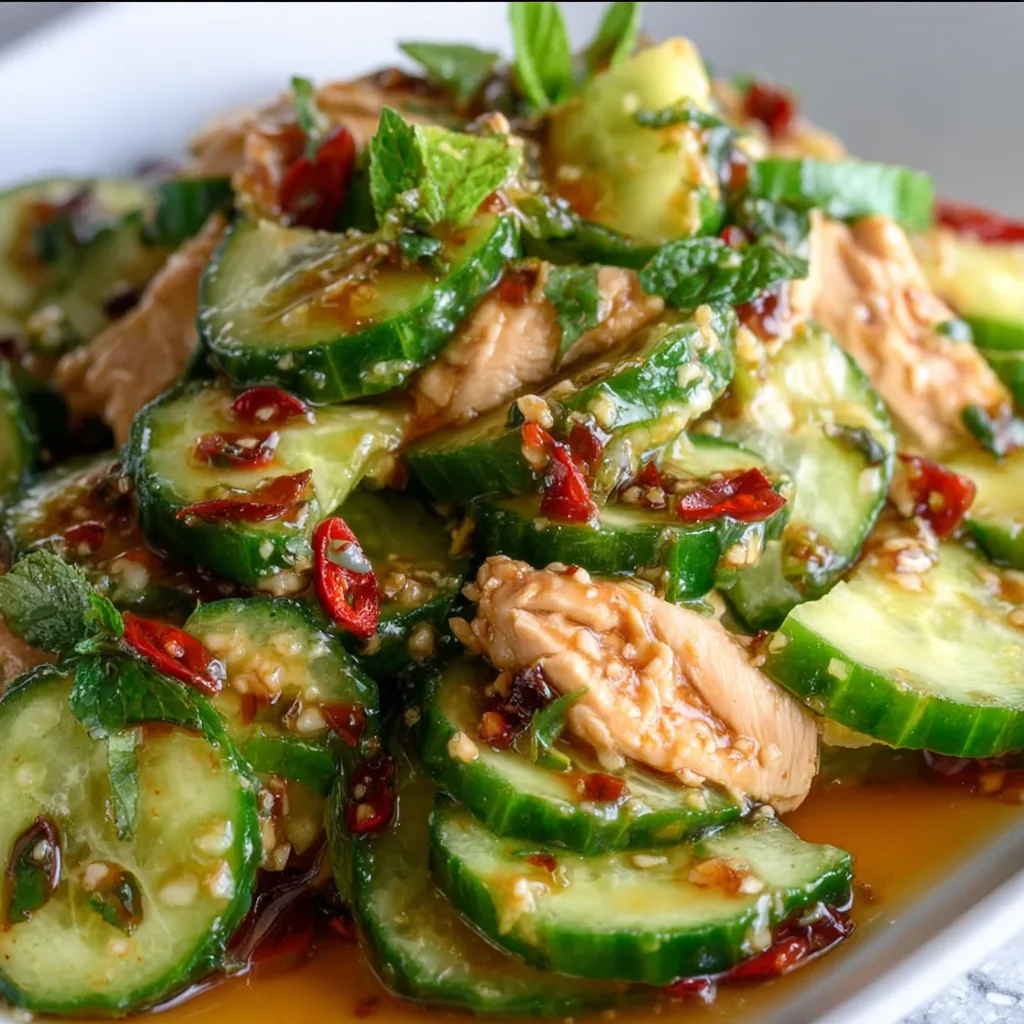
  • Thai Cucumber Salad with Chicken: Fresh, Crunchy & Irresistible!

    Thai Cucumber Salad with Chicken: Fresh, Crunchy & Irresistible!

    Thai Cucumber Salad with Chicken: Fresh, Crunchy & Irresistible!

    This Thai Cucumber Salad with Chicken combines crisp, cooling cucumbers with tender chicken and a zingy dressing that dances between sweet, sour, and spicy notes. The first time I made this, my kitchen filled with the aromatic blend of lime, fish sauce, and fresh herbs that instantly transported me to my favorite Thai restaurant. What I love most about this refreshing dish is how it manages to be both satisfyingly light and deeply flavorful at once. Perfect for warm evenings when you crave something vibrant yet substantial enough to be a complete meal. Let me show you how to bring these delicious Thai flavors to your table!

    Recipe

    Why You’ll Love This Thai Cucumber Salad with Chicken

    A Perfect Balance of Flavors and Textures

    This salad is a symphony of contrasts that somehow work in perfect harmony. The cool crunch of fresh cucumbers against warm, seasoned chicken creates a textural wonderland in every bite. I’m obsessed with how the tangy lime dressing with its hint of fish sauce creates that authentic Thai flavor profile that’s simultaneously sour, sweet, salty, and spicy. When the weather turned unbearably hot last summer, this became my go-to dinner – substantial enough to satisfy but light enough that I didn’t feel weighed down. The fresh herbs add bright pops of flavor that make each forkful slightly different from the last.

    Quick and Adaptable for Any Occasion

    One of the things I appreciate most about this Thai Cucumber Salad with Chicken is how incredibly versatile it is. You can prepare most components ahead of time, making it perfect for busy weeknights or meal prep. I’ve served this at casual lunches and dressed it up for dinner parties by arranging it beautifully on a platter. The recipe easily scales up for gatherings or down for a solo meal. My neighbor even adapted it for her gluten-free guests by ensuring all sauce ingredients were certified gluten-free. The chicken can be grilled, poached, or even substituted with tofu for a vegetarian version without losing that essential Thai essence.

    Essential Tips & Tricks

    Perfecting Your Cucumber Technique

    The secret to an exceptional Thai Cucumber Salad with Chicken starts with how you prepare the cucumbers. I recommend using English or Persian cucumbers for their thinner skins and fewer seeds. Rather than simply slicing them, try the “smashing” technique: place the cucumber on a cutting board, gently smash with the flat side of a knife, then roughly chop. This creates irregular surfaces that catch more of that delicious dressing! For extra crispness, salt your cucumber pieces and let them sit in a colander for 15-20 minutes before patting dry. This draws out excess moisture and intensifies the refreshing crunch that makes this salad so satisfying against the tender chicken.

    Creating the Perfect Dressing Balance

    The dressing is truly the heart of this Thai Cucumber Salad with Chicken, bringing everything together with its complex flavor profile. For the most authentic taste, don’t skip the fish sauce – it provides that distinctive umami depth that’s hard to replicate. If you’re new to fish sauce, start with less and adjust to taste. I learned from a Thai cooking class that the perfect dressing should hit all four flavor notes: sour (lime), sweet (sugar or honey), salty (fish sauce), and spicy (chili). Keep tasting and adjusting until it makes your taste buds dance! For extra brightness, add a touch of fresh lime zest along with the juice.

    This dressing also works beautifully with my Slow Cooker Chicken Korma for fusion flavors.

    Serving Ideas & Creative Variations

    Presentation Matters: Serving Suggestions

    Turn your Thai Cucumber Salad with Chicken into a showstopping dish by thinking about presentation. I love serving it in a large, shallow bowl that showcases all the vibrant colors and textures. Garnish with extra herbs, thinly sliced red chilies, and crushed peanuts just before serving for visual appeal and textural contrast. For a beautiful dinner party presentation, try serving individual portions in lettuce cups or on banana leaves if you can find them. When I hosted my sister’s birthday dinner, I arranged the salad on a platter with the components slightly separated – sliced chicken, cucumber mixture, and herbs – allowing guests to build their perfect bite. The colors were stunning against my blue ceramic serving dish!

    Creative Twists on the Classic

    While the traditional Thai Cucumber Salad with Chicken is perfect as is, I’ve discovered some delicious variations over time. For a heartier meal, add cooked rice noodles or serve over jasmine rice. When mangoes are in season, I add thin slices for a sweet contrast to the tangy dressing. For extra protein and texture, try adding crushed roasted peanuts or cashews on top. My personal favorite twist is adding thinly sliced green papaya when I can find it, which adds another layer of crunch and subtle sweetness. For a seafood version, substitute the chicken with grilled shrimp or even crab meat – I tried this with leftovers from my Creamy Crab Casserole and it was divine!

    Storage & Troubleshooting Guide

    Keeping It Fresh: Storage Solutions

    To maintain the crisp texture that makes this Thai Cucumber Salad with Chicken so delightful, proper storage is essential. Store the components separately when possible – keep the dressed cucumber mixture in one container, the cooked chicken in another, and any garnishes in a third. This prevents everything from getting soggy. If you’re meal prepping, I recommend waiting to add the dressing until just before serving. When I need to store leftovers, I place a paper towel in the container to absorb excess moisture. Properly stored, the cucumber mixture will last 1-2 days in the refrigerator, while the cooked chicken can be kept for 3-4 days. Just refresh with a squeeze of lime juice and additional herbs before serving.

    Troubleshooting Common Issues

    Even experienced cooks occasionally encounter challenges with Thai Cucumber Salad with Chicken. If your salad becomes too watery, it’s likely because the cucumbers released moisture after being dressed. Try salting and draining them first, or simply toss everything together right before serving. If the dressing tastes too sour or too salty, balance it with a touch more sugar or honey. Too spicy? Add a bit more lime juice and sugar to tame the heat. When I accidentally over-salted my dressing once, I added more cucumber and a splash of coconut milk to dilute it. For chicken that turns out dry, thinly slice it and let it sit in the dressing for 5-10 minutes to absorb moisture and flavor.

    Frequently Asked Questions

    Can I make Thai Cucumber Salad with Chicken ahead of time?

    Yes, but store components separately. Prepare the chicken and dressing up to 2 days ahead, and cut cucumbers the day of serving. Combine everything just before serving to maintain the perfect texture and freshness.

    What’s a good substitute for fish sauce in this recipe?

    Try a mixture of soy sauce and a touch of anchovy paste or even Worcestershire sauce. While not identical to fish sauce, this combination provides similar umami depth and saltiness to maintain the authentic Thai flavor profile.

    Is Thai Cucumber Salad with Chicken spicy?

    The spice level is completely adjustable. Traditional versions have some heat from Thai chilies, but you can reduce or omit them entirely. Start with less and add more to taste if you’re sensitive to spice.

    Can I use rotisserie chicken for this recipe?

    Absolutely! Rotisserie chicken is a fantastic time-saver that works perfectly in this salad. Shred or dice the meat and toss with a little dressing to infuse it with Thai flavors before combining with other ingredients.

    How do I prevent my cucumber salad from becoming watery?

    Salt your sliced cucumbers and let them sit in a colander for 15-20 minutes, then pat dry before mixing with other ingredients. This draws out excess moisture and helps maintain that desirable crunch.

    Final Thoughts

    This Thai Cucumber Salad with Chicken has become one of my most treasured recipes for its perfect balance of flavors, textures, and ease of preparation. I find myself craving its bright, zingy flavors whenever I need something refreshing yet satisfying. Don’t be afraid to make it your own – adjust the heat level, try different proteins, or add your favorite vegetables. The beauty of this dish lies in its adaptability while still maintaining that essential Thai character. I’d love to see how your version turns out – share your creations on Pinterest and tag me! Your Thai Cucumber Salad with Chicken might just inspire someone else’s dinner tonight.

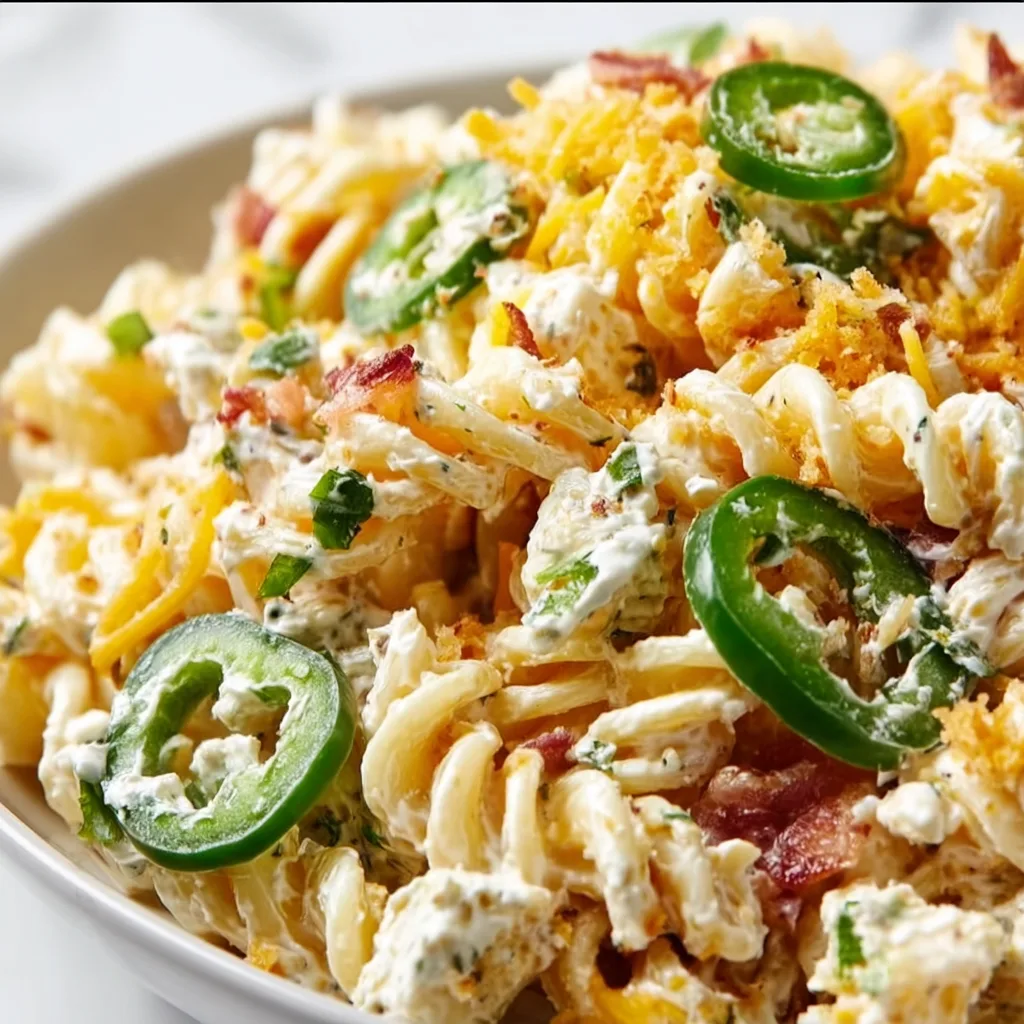
  • Jalapeño Popper Pasta Salad Recipe That Will Wow Your Taste Buds!

    Jalapeño Popper Pasta Salad Recipe That Will Wow Your Taste Buds!

    Jalapeño Popper Pasta Salad Recipe That Will Wow Your Taste Buds!

    Jalapeño Popper Pasta Salad combines everything I love about summer entertaining – creamy, spicy, crunchy, and utterly addictive! The first time I made this for a backyard barbecue, my neighbor literally asked for the recipe before she’d even finished her first bite. There’s something magical about the way the creamy cheese sauce coats each pasta twist, with pops of jalapeño heat and crispy bacon adding that irresistible texture contrast. If you’re looking for a dish that disappears faster than you can say “seconds,” this pasta salad is your new secret weapon.

    Recipe

    Why You’ll Love This Jalapeño Popper Pasta Salad

    Perfect Balance of Flavors

    The beauty of this Jalapeño Popper Pasta Salad lies in its perfect harmony of flavors. Each bite delivers the familiar comfort of the classic appetizer we all crave – that creamy-spicy combination that’s utterly irresistible. The rich cream cheese mixture creates a velvety coating that clings to every pasta curve, while the jalapeños provide just enough heat to wake up your taste buds without overwhelming them. I’ve carefully balanced the spice level so it’s customizable for any crowd. My husband (who reaches for hot sauce with everything) and my spice-cautious mother-in-law both devoured this at our last gathering!

    Make-Ahead Convenience

    One of my favorite things about this Jalapeño Popper Pasta Salad is how it actually gets better overnight in the fridge. The flavors meld together beautifully, allowing the pasta to absorb all those incredible seasonings. This makes it the ultimate prep-ahead dish for busy hosts. I often make it the evening before a gathering, which leaves me free to focus on other details the day of the event. The convenience factor alone makes this recipe a regular in my rotation, especially during those hectic summer months when I’m juggling work, kids, and entertaining all at once.

    Essential Tips & Tricks

    Perfecting the Pasta

    The foundation of any great pasta salad is properly cooked pasta. For Jalapeño Popper Pasta Salad, I recommend cooking your pasta just slightly past al dente. This slight overcooking ensures the pasta stays tender even after refrigeration, when pasta naturally firms up. Always rinse your pasta in cold water immediately after cooking to stop the cooking process and remove excess starch. This prevents clumping and helps the creamy dressing adhere better. My secret trick? Toss the still-warm pasta with a tiny drizzle of olive oil before adding the dressing – it creates the perfect base for all those amazing flavors to cling to.

    Managing the Heat Level

    The jalapeños are the star of this show, but managing their heat is key to a crowd-pleasing Jalapeño Popper Pasta Salad. For a milder version, remove all seeds and membranes from your jalapeños – that’s where most of the heat resides. For medium heat, leave some seeds in, and for spice lovers, keep most of them. I always taste-test a tiny piece of each jalapeño before adding it, as their heat can vary dramatically. If you’re serving a diverse crowd, consider keeping some additional diced jalapeños on the side as an optional topping. This approach works beautifully for my Crack Chicken Noodle Soup too – customizable heat is always appreciated!

    Serving Ideas & Creative Variations

    Perfect Pairings

    Jalapeño Popper Pasta Salad shines as a versatile side dish that pairs beautifully with almost anything from the grill. The creamy, spicy notes complement smoky barbecue flavors perfectly, making it ideal alongside pulled pork, grilled chicken, or juicy burgers. For a complete meal, I love serving it with a simple green salad and some crusty bread. The pasta salad also makes a stunning addition to potluck spreads – I place it in a beautiful bowl garnished with fresh cilantro and extra bacon bits. The vibrant colors always draw people in, and the empty bowl I bring home tells the whole story about how much everyone enjoyed it!

    Creative Twists

    Don’t be afraid to put your own spin on this Jalapeño Popper Pasta Salad! One of my favorite variations is adding roasted corn kernels for a sweet contrast to the spicy jalapeños. The caramelized flavor adds incredible depth. You could also swap the bacon for chorizo crumbles for a Mexican-inspired twist, or add diced avocado just before serving for extra creaminess. For a heartier version that works as a main dish, fold in some diced rotisserie chicken. This adaptable recipe plays well with so many flavors, similar to my Slow Cooker Mac & Cheese which also welcomes creative additions while maintaining its comfort food status.

    Storage & Troubleshooting Guide

    Proper Storage Methods

    To keep your Jalapeño Popper Pasta Salad at its best, store it in an airtight container in the refrigerator for up to 4 days. The flavors actually develop and improve after the first 24 hours! If you’re making it ahead for an event, I recommend reserving a small portion of the bacon and green onions to sprinkle on top just before serving – this maintains their perfect texture and gives the dish a fresh appearance. For food safety, never leave the pasta salad at room temperature for more than 2 hours, especially on hot summer days. I learned this lesson the hard way at my first outdoor gathering when the summer heat affected the creamy dressing faster than expected!

    Quick Fixes for Common Issues

    If your Jalapeño Popper Pasta Salad seems dry after refrigeration, don’t worry – this is completely normal and easily fixed! Simply stir in a splash of milk or a tablespoon of mayo to restore its creamy consistency. For pasta that’s absorbed too much of the dressing and become sticky, a drizzle of olive oil works wonders to separate the strands. If you accidentally made it too spicy, fold in some additional cream cheese or even a dollop of sour cream to temper the heat. And if the flavors seem muted, a squeeze of fresh lime juice and an extra pinch of salt can instantly brighten everything up.

    Frequently Asked Questions

    Can I make Jalapeño Popper Pasta Salad ahead of time?

    Absolutely! It actually tastes better made 1-2 days ahead as the flavors meld together beautifully. Just reserve some bacon and green onions to sprinkle on top before serving for the best texture.

    How spicy is this Jalapeño Popper Pasta Salad?

    The spice level is customizable. Remove all seeds and membranes from jalapeños for mild heat, leave some in for medium, or keep most for a spicy kick. You control the heat!

    What pasta shape works best for this recipe?

    Medium shapes with ridges or curves like rotini, cavatappi, or farfalle work perfectly. They hold the creamy dressing in all their nooks and crannies for maximum flavor in every bite.

    Can I make this vegetarian?

    Yes! Simply omit the bacon or substitute with smoked paprika for that smoky flavor. You could also add roasted mushrooms for a meaty texture without the meat.

    How do I keep the pasta from absorbing all the dressing?

    Slightly undercook the pasta (just past al dente), rinse it in cold water immediately, and toss with a tiny bit of olive oil before adding the dressing. This creates a barrier that slows absorption.

    Final Thoughts

    This Jalapeño Popper Pasta Salad has become my signature potluck dish for good reason – it consistently earns rave reviews and recipe requests. The perfect balance of creamy, spicy, and crunchy elements creates an irresistible combination that elevates any meal from ordinary to memorable. What I love most is how versatile it is – dress it up for special occasions or keep it casual for weeknight dinners. Either way, this pasta salad delivers big on flavor with minimal effort. Don’t be surprised when friends start requesting “that amazing jalapeño pasta thing” at every gathering! Find more inspiration for your next gathering on my Pinterest board.

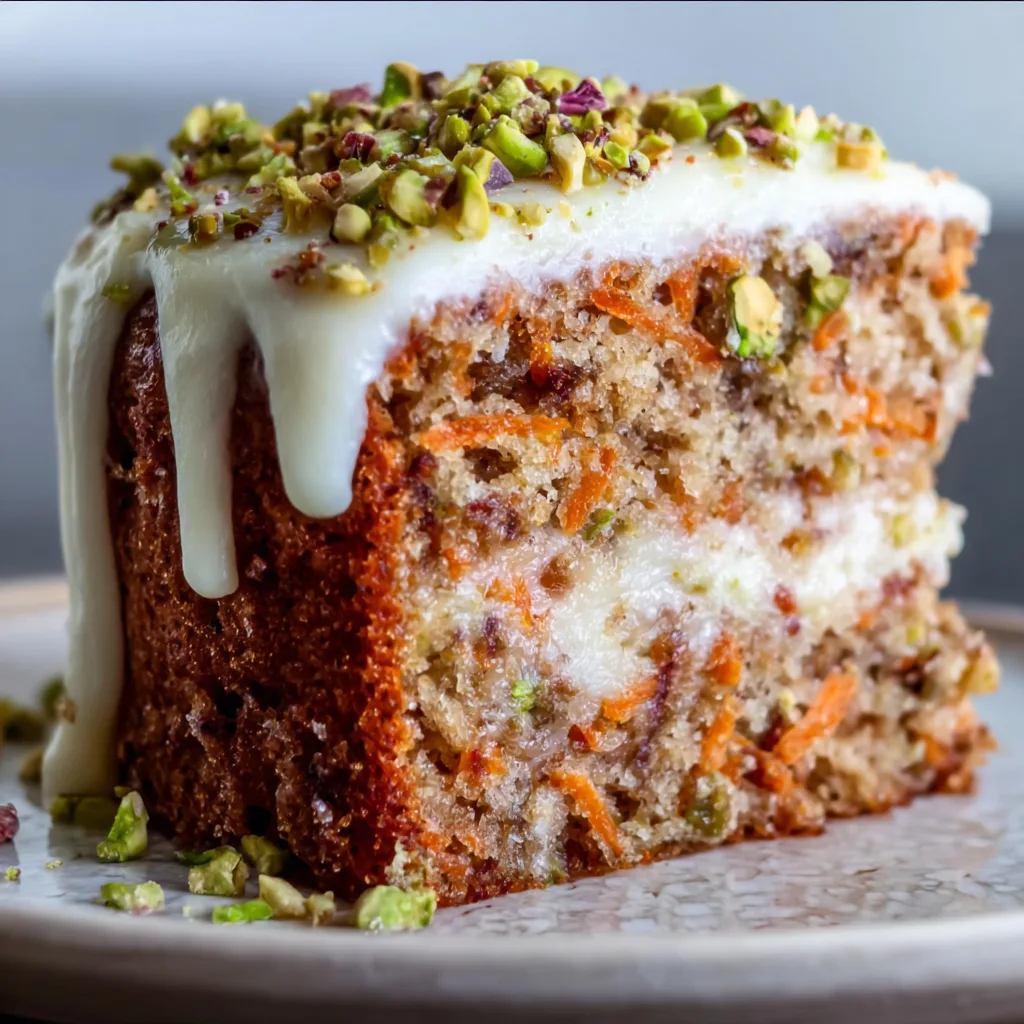
  • Carrot Pistachio Spring Cake That Will Melt Your Heart!

    Carrot Pistachio Spring Cake That Will Melt Your Heart!

    Carrot Pistachio Spring Cake That Will Melt Your Heart!

    There’s something magical about a carrot pistachio spring cake that captures the essence of the season. The vibrant orange flecks nestled within a moist, tender crumb, topped with velvety cream cheese frosting and crunchy pistachios – it’s pure bliss on a plate! I discovered this recipe during a particularly rainy April weekend when I craved something that would brighten our kitchen with springtime energy. The warm spices and nutty pistachios create a perfect harmony that’s become my family’s most requested dessert when the daffodils start blooming.

    Recipe

    Why You’ll Love This Carrot Pistachio Spring Cake

    A Perfect Balance of Flavors and Textures

    The beauty of this carrot pistachio spring cake lies in its exquisite balance. Sweet carrots meld with aromatic cinnamon and nutmeg, while pistachios add a delightful earthiness that elevates this beyond your standard carrot cake. Each bite delivers moisture from the carrots, warmth from the spices, and that distinctive crunch from the nuts. I love how the natural sweetness of the carrots means we can use less sugar without sacrificing flavor. The pistachios bring a subtle sophistication that makes this cake feel special enough for Easter brunch or Mother’s Day celebrations.

    Make-Ahead Convenience for Busy Schedules

    One of my favorite things about this cake is how the flavors actually improve overnight, making it the perfect make-ahead dessert. I often bake it the day before serving, which not only saves time but allows the spices to fully bloom and the moisture to distribute evenly throughout the cake. The cream cheese frosting sets beautifully in the refrigerator, creating clean slices when you’re ready to serve. This has saved me countless times when hosting spring gatherings – I can focus on other preparations while knowing my showstopping dessert is already perfected and waiting.

    Essential Tips & Tricks

    Properly Preparing Your Carrots and Pistachios

    The secret to the perfect texture starts with how you prepare the key ingredients. Always finely grate your carrots – I prefer using the small holes on a box grater for the perfect consistency. Too coarse, and they won’t cook properly; too fine (like in a food processor), and you’ll lose the lovely specks of color. For pistachios, toast them lightly before chopping to enhance their flavor, but let them cool completely before folding into the batter. Reserve some whole pistachios for garnishing the top – the vibrant green against the creamy frosting creates a stunning visual that hints at the flavors waiting inside.

    Achieving the Perfect Moisture Balance

    The trickiest part of any carrot cake is nailing the moisture level without ending up with a soggy bottom. I’ve found that squeezing excess moisture from the grated carrots with a clean kitchen towel works wonders. Don’t skip this step! Another game-changer is using brown sugar rather than all white sugar – it adds caramel notes while helping retain moisture. For the oil component, a neutral option like canola works well, but for special occasions, I’ll use half melted butter for richness. Check out my Gluten-Free Cinnamon Coffee Cake for more moisture-balancing techniques.

    Serving Ideas & Creative Variations

    Seasonal Pairings That Elevate Your Cake

    This carrot pistachio spring cake shines when paired with complementary flavors. Serve alongside a citrus-infused whipped cream or a scoop of honey ice cream to highlight the cake’s warm spices. For brunch settings, I love offering it with a pitcher of orange blossom iced tea or a sparkling elderflower drink. The cake’s earthy sweetness also pairs beautifully with spring fruits like strawberries or poached pears. When I’m feeling extra fancy, I’ll add a drizzle of honey and a sprinkle of orange zest just before serving to brighten the flavors and add visual appeal.

    Inventive Twists on the Classic Recipe

    While the classic recipe is divine, don’t be afraid to experiment! Try adding orange zest to the batter for a citrusy punch or swap half the pistachios for toasted walnuts for textural contrast. For a tropical twist, fold in some crushed pineapple (well-drained!) and top with coconut flakes. If you’re a chocolate lover like me, mini chocolate chips make a delicious addition – the slight bitterness balances the sweet carrots perfectly. For inspiration on creative dessert variations, check out my Sugar Cookie Truffles that use similar flavor-layering techniques.

    Storage & Troubleshooting Guide

    Keeping Your Cake Fresh for Days

    To maintain optimal freshness, store your frosted carrot pistachio spring cake in an airtight container in the refrigerator for up to 5 days. The cream cheese frosting requires refrigeration, but I recommend bringing slices to room temperature for about 20 minutes before serving to enhance the flavors and soften the texture. If you need to make it further ahead, the unfrosted cake freezes beautifully – wrap it tightly in plastic wrap and then foil, and it will keep for up to 3 months. Thaw overnight in the refrigerator and frost just before serving for that freshly-baked taste.

    Solving Common Baking Challenges

    If your cake sinks in the middle, your oven temperature might be too high – invest in an oven thermometer for accuracy. For a cake that’s too moist or gummy, you likely didn’t squeeze enough moisture from the carrots or your measurements were off. Use the spoon-and-level method for flour rather than scooping directly from the bag. If your pistachios sink to the bottom, try tossing them in a tablespoon of flour before folding into the batter. And for frosting that’s too soft, refrigerate it for 15-20 minutes before spreading, or add a bit more powdered sugar to achieve the perfect consistency.

    Frequently Asked Questions

    Can I make this carrot pistachio spring cake gluten-free?

    Absolutely! Substitute a 1:1 gluten-free flour blend with xanthan gum. The moisture from the carrots helps maintain tenderness, making this cake ideal for gluten-free adaptation.

    How do I prevent the cream cheese frosting from becoming runny?

    Use cold cream cheese straight from the refrigerator and softened (not melted) butter. Beat until just combined – overbeating incorporates air that can make the frosting too soft.

    Can I substitute walnuts for the pistachios?

    Yes! Walnuts work beautifully as a substitute. Toast them lightly first to enhance their flavor. You can also do a 50/50 mix of pistachios and walnuts.

    How far in advance can I make this cake?

    The unfrosted cake layers can be made 2 days ahead and kept at room temperature, well-wrapped. Once frosted, the cake keeps in the refrigerator for up to 5 days.

    Why did my carrots turn green in the cake?

    This happens when the carrots react with baking soda. Reduce the amount of baking soda slightly or add a teaspoon of lemon juice to the batter to prevent this reaction.

    Final Thoughts

    This carrot pistachio spring cake has become my signature springtime dessert, bringing together the earthy sweetness of carrots with the luxurious crunch of pistachios. What makes it truly special is how it bridges the gap between comfort food and elegant dessert – rustic enough for family gatherings yet sophisticated enough for special celebrations. The vibrant colors and flavors capture the essence of the season, making each slice a little celebration of spring. For more seasonal inspiration, visit our Pinterest board where we share our favorite springtime recipes!

  • Creamy Queso Chicken Enchiladas: Irresistibly Cheesy & Easy Recipe!

    Creamy Queso Chicken Enchiladas: Irresistibly Cheesy & Easy Recipe!

    Creamy Queso Chicken Enchiladas: Irresistibly Cheesy & Easy Recipe!

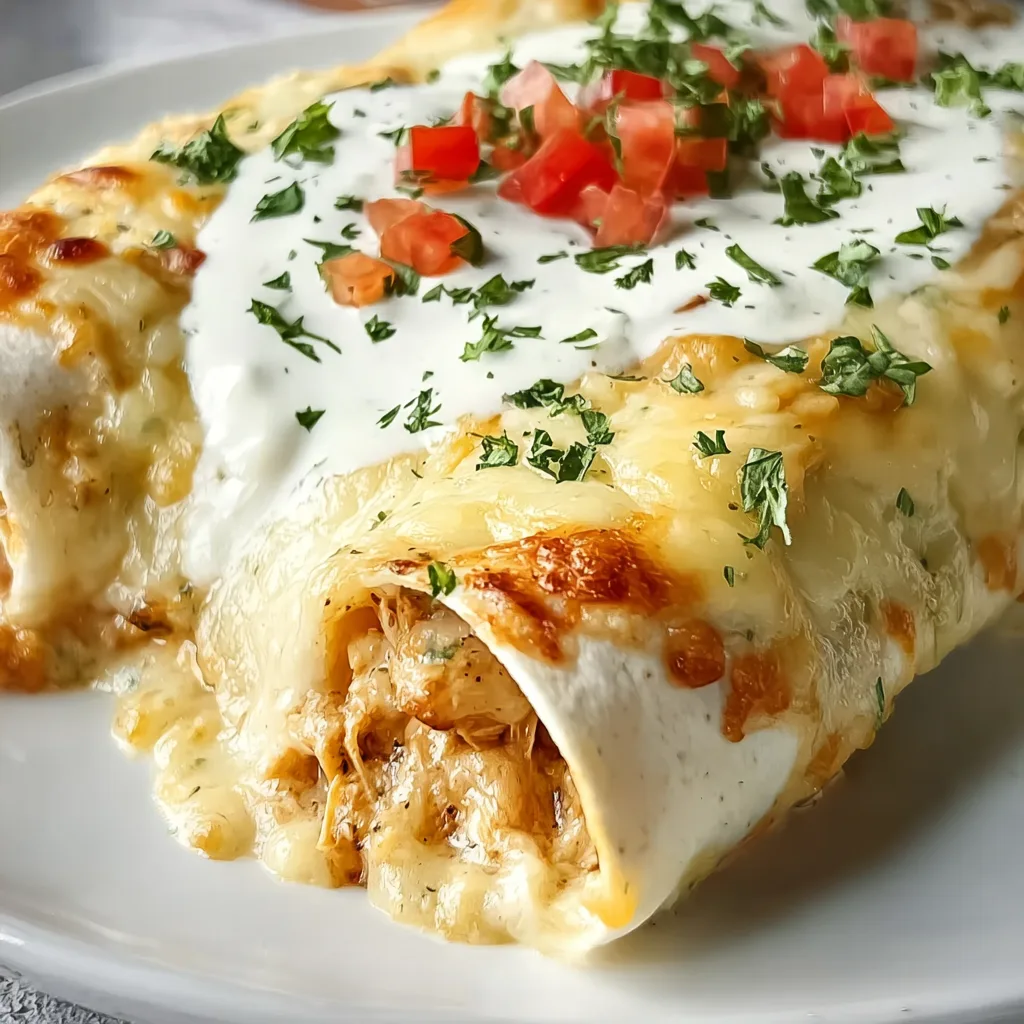
    Creamy Queso Chicken Enchiladas have become my absolute weeknight hero dish! The first time I pulled these cheesy, sauce-drenched beauties from the oven, the aroma of melted cheese and spices filled my kitchen, and I knew I’d found something special. There’s something magical about that moment when the queso sauce bubbles around the edges of corn tortillas packed with tender shredded chicken. Every bite delivers that perfect balance of creaminess, spice, and comfort that makes you close your eyes and savor. If you’re looking for a meal that brings the restaurant experience home, this enchilada recipe deserves a permanent spot in your rotation.

    Recipe

    Why You’ll Love These Creamy Queso Chicken Enchiladas

    Perfect Balance of Flavors and Textures

    There’s something utterly satisfying about the way these enchiladas hit all the right notes. The corn tortillas soften in the oven while maintaining just enough structure to hold the filling. Inside, tender shredded chicken mingles with sautéed peppers and onions, creating pockets of flavor in every bite. But the real star is that velvety queso sauce that blankets everything—creamy, slightly tangy, with just enough kick to wake up your taste buds without overwhelming them. I love watching my family’s faces light up when they cut into these enchiladas and see that perfect cheese pull stretching between their plate and fork.

    Make-Ahead Friendly for Busy Nights

    As someone who juggles work and family commitments, I treasure recipes that can be prepped in advance. These enchiladas are my secret weapon for hosting or busy weeknights. You can assemble the entire dish up to 24 hours ahead, cover it tightly, and refrigerate. The flavors actually deepen overnight! Just pop them in the oven when you’re ready to eat. I’ve even frozen these beauties in individual portions for quick lunches. There’s nothing quite like having a homemade enchilada waiting for you after a hectic morning, ready to be microwaved to melty perfection in minutes.

    Essential Tips & Tricks

    Mastering the Queso Sauce

    The heart and soul of these enchiladas is the queso sauce, and getting it right makes all the difference. Start with a roux (equal parts butter and flour) and cook it until it smells slightly nutty but hasn’t browned. This creates the perfect base for a silky-smooth sauce. When adding cheese, remove the pan from heat first and stir in handfuls gradually—this prevents the sauce from breaking or becoming grainy. For extra flavor depth, I like to add a spoonful of Slow Cooker Mac & Cheese Classic sauce if I have leftovers. The secret ingredient? A splash of pickle juice adds brightness that cuts through the richness beautifully.

    Perfect Tortilla Technique

    Nothing ruins enchiladas faster than cracked, dry tortillas that fall apart when rolled. My foolproof method: warm a small skillet over medium heat, then quickly heat each corn tortilla for 10-15 seconds per side. Don’t skip this step! The heat makes them perfectly pliable without becoming soggy. Keep warmed tortillas covered with a clean kitchen towel as you work. When filling, place the chicken mixture slightly off-center in a line, then roll tightly but gently. Place each enchilada seam-side down in your baking dish to prevent unraveling during baking. This simple technique ensures picture-perfect enchiladas every time.

    Serving Ideas & Creative Variations

    Complementary Side Dishes

    These enchiladas shine brightest when paired with the right supporting cast. My go-to sides include a bright, citrusy cilantro-lime rice that soaks up extra sauce beautifully, and a simple black bean salad with corn, red onion, and avocado. For a lighter option, a crisp jicama slaw with lime dressing provides refreshing contrast to the rich enchiladas. When I’m feeling extra indulgent, I’ll whip up some Creamy Tortellini Soup as a starter—the flavors complement each other surprisingly well! Don’t forget a sprinkle of fresh cilantro, diced avocado, and a dollop of sour cream on top of each serving.

    Exciting Flavor Twists

    While the classic version is unbeatable, these enchiladas welcome creative variations. For a smoky twist, add a tablespoon of chipotle peppers in adobo sauce to your queso. Vegetarian guests? Replace chicken with a hearty mixture of roasted sweet potatoes, black beans, and corn. Seafood lovers might enjoy substituting the chicken with sautéed shrimp and crabmeat for luxurious seafood enchiladas. My personal favorite variation is adding spinach and mushrooms to the filling for an earthy dimension. You can also experiment with different cheeses—pepper jack adds heat, while a sprinkle of cotija on top provides authentic Mexican flair.

    Storage & Troubleshooting Guide

    Proper Storage for Maximum Freshness

    To keep your enchiladas tasting their best, proper storage is key. Leftover enchiladas will stay fresh in an airtight container in the refrigerator for up to 3 days. When reheating, sprinkle a few drops of water over the top before covering with a microwave-safe lid—this creates steam that prevents the tortillas from drying out. For freezing, I recommend slightly underbaking the enchiladas, cooling completely, then wrapping individual portions in plastic wrap followed by foil. Label with the date and freeze for up to 2 months. Thaw overnight in the refrigerator before reheating in a 350°F oven until hot throughout.

    Fixing Common Enchilada Problems

    Even experienced cooks occasionally encounter enchilada issues. If your sauce breaks or looks curdled, whisk in a tablespoon of warm water or milk over low heat until smooth again. Dealing with soggy enchiladas? Try toasting the tortillas slightly longer before filling, and don’t oversaturate with sauce before baking. If your enchiladas are too dry, the culprit might be overbaking—cover with foil for most of the baking time, removing only for the last 10 minutes to brown the top. For bland filling, brighten flavors with a squeeze of lime juice and adjust salt levels. Remember, enchiladas should be moist but not swimming in sauce.

    Frequently Asked Questions

    Can I use flour tortillas instead of corn for Creamy Queso Chicken Enchiladas?

    Yes, flour tortillas work well but provide a different texture. They’re less traditional but hold up better when filled. If using flour tortillas, you won’t need to pre-warm them as they’re naturally more pliable.

    How can I make these enchiladas spicier?

    Add diced jalapeños or serrano peppers to your filling. You can also mix cayenne pepper into your queso sauce or top with hot sauce before serving. Pepper jack cheese is another great way to increase heat.

    Can I prepare these enchiladas without an oven?

    Yes! Assemble in a microwave-safe dish and heat on medium power until hot throughout (about 5-7 minutes). The texture won’t be identical to baked, but they’ll still be delicious in a pinch.

    What’s the best chicken to use for enchiladas?

    Rotisserie chicken provides the best flavor and convenience. Alternatively, poach chicken breasts with Mexican spices until tender, then shred. Dark meat (thighs) offers more moisture and flavor than breast meat.

    How do I prevent my enchiladas from getting soggy on the bottom?

    Spread a thin layer of sauce on the bottom of your baking dish first. Also, don’t over-sauce before baking—you can always serve additional warm queso sauce on the side.

    Final Thoughts

    These Creamy Queso Chicken Enchiladas have become more than just a recipe in my household—they’re a celebration on a plate. There’s something deeply satisfying about creating a dish that brings everyone to the table with eager anticipation. The rich, velvety queso sauce transforming simple ingredients into something extraordinary reminds me why I love cooking in the first place. Whether you’re serving these for a casual family dinner or a special gathering, they deliver that perfect combination of comfort and excitement that great food should provide. I’d love to see your enchilada creations on Pinterest—tag me when you make them!