Blog

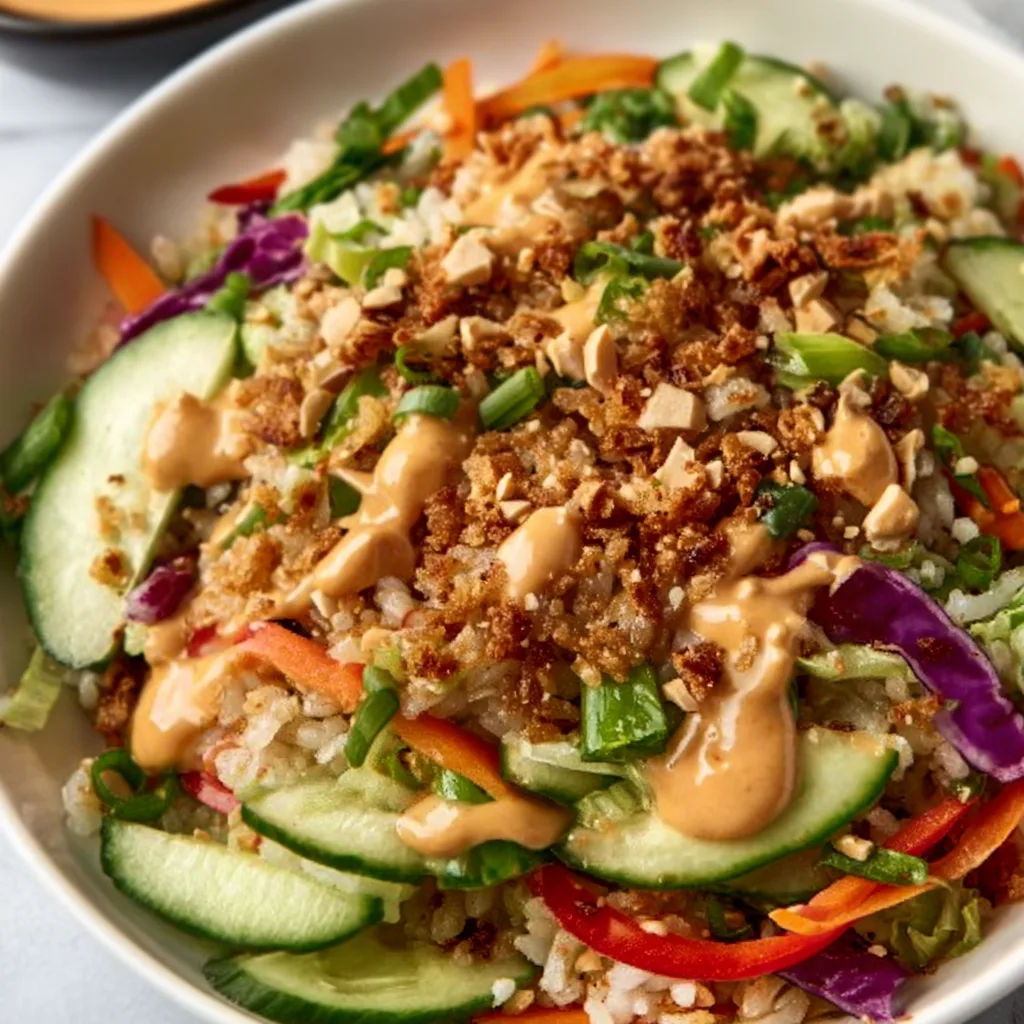
  • Crispy Rice Salad with Peanut Sesame Dressing That Will Wow You!

    Crispy Rice Salad with Peanut Sesame Dressing That Will Wow You!

    Crispy Rice Salad with Peanut Sesame Dressing That Will Wow You!

    Crispy Rice Salad with Peanut Sesame Dressing is my absolute go-to when I want something that hits all the right notes – crunchy, savory, and utterly satisfying. The first time I made this, my kitchen filled with the most intoxicating aroma of toasted rice and sesame that transported me back to my favorite Thai restaurant. There’s something magical about how the nutty, slightly sweet dressing clings to every grain of crispy rice, creating little flavor bombs in each bite. If you’re looking for a dish that brings excitement to your table, this is it! It’s refreshingly different from my usual Slow Cooker Mac & Cheese rotation.

    Recipe

    Why You’ll Love This Crispy Rice Salad with Peanut Sesame Dressing

    Perfect Texture Contrast

    The crispy rice is the star of this show – achieving that perfect golden crunch that contrasts beautifully with the tender vegetables. I learned the secret is using day-old rice (freshly cooked rice tends to get soggy) and spreading it thinly in a hot pan with a good glug of oil. The magic happens when you let it sit undisturbed until the bottom layer forms that irresistible crust. When I first heard the satisfying sizzle as the rice hit my cast iron pan, I knew I was onto something special. The texture is so addictive you’ll find yourself picking at the crispy bits!

    Irresistible Peanut Sesame Dressing

    This peanut sesame dressing is liquid gold – creamy, nutty, with the perfect balance of sweet, salty, and tangy notes. The combination of toasted sesame oil, smooth peanut butter, lime juice, and a touch of maple syrup creates a dressing that’s spoonable by itself (I’ve definitely been caught licking the spoon!). What makes this dressing special is how it thickens slightly when tossed with the warm rice, coating every grain with flavor. The gentle heat from fresh ginger and a hint of garlic transforms this from good to absolutely crave-worthy.

    Essential Tips & Tricks

    Perfecting Your Crispy Rice

    The key to perfect crispy rice is patience and high heat. I learned this lesson the hard way after anxiously stirring too soon and ending up with broken rice instead of those beautiful crispy sheets. Use a wide, heavy-bottomed pan (cast iron works beautifully) and don’t overcrowd it – work in batches if needed. The oil should be shimmering hot before adding your rice. Then – and this is crucial – resist the urge to stir for at least 3-4 minutes. You’ll know it’s ready when the bottom layer turns golden and makes a crackling sound when you gently scrape it. My favorite trick is to drizzle a bit of soy sauce around the edges during the last minute for extra umami flavor.

    Balancing Your Dressing Flavors

    Getting your peanut sesame dressing just right is about tasting and adjusting as you go. Start with equal parts peanut butter and sesame oil as your base, then add lime juice, soy sauce, and sweetener gradually. The consistency should be pourable but not watery – similar to heavy cream. If it’s too thick, a splash of warm water works wonders. My personal touch is adding a teaspoon of chili crisp for heat and texture. Remember that cold ingredients mute flavors, so make your dressing slightly more pronounced than you think necessary, especially if you’re serving the salad chilled. Trust your palate – it rarely steers you wrong!

    Serving Ideas & Creative Variations

    Perfect Pairings & Occasions

    This Crispy Rice Salad makes a stunning centerpiece for casual gatherings or potlucks where you want to impress without hours of preparation. I love serving it alongside grilled lemongrass chicken or simple seared salmon for a complete meal. It’s also perfect for meal prep – the flavors actually improve overnight as they meld together. For a beautiful presentation, serve it on a large platter topped with fresh herbs, sliced chilies, and lime wedges. The vibrant colors and textures make it Instagram-worthy! This has become my go-to for summer dinner parties, especially when paired with my Creamy Tortellini Soup for guests who prefer something warm.

    Exciting Flavor Variations

    The beauty of this salad is how adaptable it is to different flavor profiles. For a Thai-inspired version, add shredded green papaya, crushed peanuts, and fish sauce to the dressing. Going Japanese? Swap the peanut butter for miso paste and add furikake seasoning and edamame. My family’s favorite variation includes diced mango and avocado for a tropical twist – the sweetness plays beautifully against the nutty rice. For a heartier meal, add protein like crispy tofu, shredded rotisserie chicken, or quick-seared shrimp. Vegetable-wise, anything crunchy works wonderfully – try watermelon radish, snap peas, or shaved Brussels sprouts for unexpected delights!

    Storage & Troubleshooting Guide

    Keeping It Fresh

    For optimal freshness, store the components separately when possible. The crispy rice can be kept in an airtight container at room temperature for up to 2 days – any longer and it loses its signature crunch. The dressing stays good in the refrigerator for up to a week in a jar with a tight-fitting lid. If you’ve already dressed the salad, it will keep in the refrigerator for 2-3 days, though the rice will soften over time. To revive leftover salad, spread it on a baking sheet and pop it under the broiler for 1-2 minutes – this brings back some of the crispiness. I find that adding fresh herbs and a squeeze of lime just before serving refreshes the entire dish.

    Fixing Common Issues

    If your rice isn’t getting crispy enough, the most common culprit is too much moisture. Make sure your cooked rice has cooled completely and even consider refrigerating it uncovered for an hour to dry it out further. Another trick is to add a tablespoon of cornstarch to the rice before frying – it creates an extra crispy exterior. If your dressing breaks or seems too thin, a quick whisk with an additional tablespoon of peanut butter usually brings it back together. For a dressing that’s too thick, gradually add warm water, a teaspoon at a time. And if you accidentally over-salt, a touch more maple syrup or a squeeze of fresh lime can help balance the flavors.

    Frequently Asked Questions

    Can I make Crispy Rice Salad with Peanut Sesame Dressing ahead of time?

    Yes! Prepare the components separately – crispy rice, chopped vegetables, and dressing – up to 2 days ahead. Store separately in airtight containers and assemble just before serving to maintain the perfect texture contrast.

    What’s the best rice to use for crispy rice?

    Medium or long-grain white rice works best. Jasmine or basmati are my favorites because they crisp up beautifully without becoming too hard. Day-old refrigerated rice is ideal as it has less moisture.

    Can I make this recipe gluten-free?

    Absolutely! Just substitute tamari for soy sauce in the dressing. All other ingredients are naturally gluten-free, making this an excellent option for those with gluten sensitivities.

    How spicy is this dish?

    The base recipe is mildly spicy from the ginger and garlic. You can adjust the heat level by adding sriracha, chili oil, or fresh sliced chilies to taste.

    What vegetables work best in this salad?

    Crunchy vegetables like bell peppers, cucumbers, carrots, and snap peas complement the crispy rice perfectly. Soft herbs like cilantro, mint, and basil add freshness and aroma.

    Final Thoughts

    This Crispy Rice Salad with Peanut Sesame Dressing has become one of my signature dishes for good reason – it’s that rare combination of impressive yet accessible. There’s something deeply satisfying about transforming humble rice into something so texturally exciting. The way the nutty dressing clings to each crispy grain creates a dish that’s greater than the sum of its parts. I hope you’ll give yourself the gift of making this recipe and experiencing that magical moment when the rice begins to crisp and the kitchen fills with toasty aromas. For more inspiration, check out my Pinterest collection where I share all my favorite Asian-inspired recipes!

  • Hawaiian Cheesecake Salad Recipe That Will Wow Your Taste Buds!

    Hawaiian Cheesecake Salad Recipe That Will Wow Your Taste Buds!

    Hawaiian Cheesecake Salad Recipe That Will Wow Your Taste Buds!

    Hawaiian Cheesecake Salad brings tropical paradise right to your kitchen table with its perfect blend of creamy, tangy, and sweet flavors. I discovered this delightful treat during a family gathering in Hawaii, and I’ve been obsessed ever since! The luscious cream cheese mixture gently coats chunks of juicy pineapple, sweet mandarin oranges, and ripe bananas, creating a dreamy texture that’s both refreshing and indulgent. It’s become my go-to for potlucks and summer barbecues, always disappearing within minutes. If you love dessert-style fruit salads that balance sweetness with tropical flair, this recipe will become your new favorite too!

    Recipe

    Why You’ll Love This Hawaiian Cheesecake Salad

    Perfect Balance of Flavors and Textures

    The magic of Hawaiian Cheesecake Salad lies in its incredible textural contrast. Each bite delivers a harmonious blend of velvety cream cheese mixture against juicy fruit chunks that burst with tropical sweetness. I adore how the tangy cream cheese base gets naturally sweetened by the fruit juices that release as everything mingles together. The subtle vanilla notes and hint of coconut transport me straight to a beachside luau. When you take your first spoonful, you’ll experience that perfect moment when creamy richness meets refreshing fruit—it’s absolutely heavenly!

    Quick and Stress-Free Preparation

    One of my favorite things about this Hawaiian Cheesecake Salad is how effortlessly it comes together. In just 15 minutes, you’ll have a show-stopping dish that looks like you spent hours in the kitchen. I often prepare the cream cheese mixture while my kids chop the fruit—it’s become our little tradition! The no-bake aspect makes it perfect for hot summer days when turning on the oven feels like torture. Plus, you can make it ahead and let those flavors develop in the refrigerator, which is a lifesaver when hosting gatherings like I did for my sister’s baby shower last month.

    Essential Tips & Tricks

    Selecting and Preparing the Perfect Fruits

    Choosing the right fruits makes all the difference in your Hawaiian Cheesecake Salad. Look for pineapples with fragrant bottoms and a slight give when pressed—this indicates peak ripeness. For bananas, select ones that are yellow with light brown speckles for the perfect sweetness. I always drain canned fruits thoroughly and pat them dry with paper towels to prevent excess liquid from thinning the creamy mixture. Cutting fruits into uniform, bite-sized pieces ensures every spoonful has the perfect balance of cream and fruit. My secret touch? Adding a splash of fresh lime juice to the bananas prevents browning and adds a subtle zing!

    Perfecting the Creamy Base

    The luscious base of Hawaiian Cheesecake Salad deserves special attention. Always use room temperature cream cheese to achieve that silky-smooth texture without lumps. I learned this the hard way after rushing through a batch for a neighborhood potluck! Whip it thoroughly with an electric mixer before adding other ingredients. For extra richness, fold in a cup of freshly whipped cream rather than using store-bought whipped topping. Adding a teaspoon of coconut extract alongside the vanilla creates an authentic tropical flavor that transports you straight to the islands. Remember to taste as you go—sometimes fruit sweetness varies, requiring slight adjustments.

    Serving Ideas & Creative Variations

    Presentation Techniques That Wow

    Elevate your Hawaiian Cheesecake Salad with thoughtful presentation touches. Serve it in a hollowed pineapple bowl for a stunning tropical centerpiece that always gets compliments at my summer gatherings. For individual servings, try clear parfait glasses with alternating layers of the creamy mixture and fruit for a beautiful visual effect. A sprinkle of toasted coconut flakes or crushed graham crackers adds delightful texture and appearance. For an extra special touch, garnish with edible flowers like pansies or violets—I did this for my daughter’s graduation party, and guests couldn’t stop taking photos! This beautiful salad pairs wonderfully with my Slow Cooker Mac & Cheese Classic for a complete meal.

    Creative Flavor Variations to Try

    While the classic Hawaiian Cheesecake Salad is divine, experimenting with variations keeps it exciting! Try adding fresh berries like strawberries and blueberries for a red-white-and-blue version perfect for summer holidays. For a tropical twist, incorporate diced mango, kiwi, and a sprinkle of crystallized ginger. My family goes crazy for the “Island Delight” version with added coconut cream in the base and topped with macadamia nuts and toasted coconut. For a lighter option, substitute Greek yogurt for half the cream cheese. During fall gatherings, I create an autumn version with apples, pears, and a hint of cinnamon that pairs beautifully with the creamy base.

    Storage & Troubleshooting Guide

    Proper Storage for Maximum Freshness

    Hawaiian Cheesecake Salad tastes best when the flavors have had time to meld, but proper storage is crucial. Keep it in an airtight container in the refrigerator for up to 24 hours for optimal taste and texture. I find that glass containers maintain freshness better than plastic ones. If you’re preparing components ahead, store the creamy base separately from cut fruits until about 2 hours before serving. Bananas and apples should always be added last to prevent browning. For potlucks, I keep my salad chilled with a clever trick—placing the serving bowl inside a larger bowl filled with ice, which maintains that perfect cool temperature even during outdoor summer gatherings.

    Solving Common Texture Issues

    Even experienced cooks occasionally encounter texture challenges with Hawaiian Cheesecake Salad. If your mixture becomes too thin, fold in additional cream cheese or a tablespoon of Greek yogurt to thicken it back up. For a runny salad caused by juicy fruits, drain the fruit thoroughly and pat dry before mixing, or add a tablespoon of instant pudding mix to stabilize the cream. If your salad develops a watery bottom after sitting, simply drain off excess liquid and gently fold everything together again. To revive day-old salad that’s lost its texture, whip a small amount of fresh cream cheese mixture and fold it through to refresh the entire dish.

    Frequently Asked Questions

    Can I make Hawaiian Cheesecake Salad ahead of time?

    Yes, but with some precautions! Prepare the cream cheese mixture up to 24 hours ahead and store separately. Add fruits 2-3 hours before serving, saving bananas for last to prevent browning. This maintains the perfect texture and freshness.

    What can I substitute for cream cheese?

    Greek yogurt works wonderfully as a lighter alternative. Use equal parts or a 50/50 blend with cream cheese. Mascarpone cheese creates a richer version, while dairy-free cream cheese offers a great vegan option.

    How do I prevent my Hawaiian Cheesecake Salad from becoming watery?

    Thoroughly drain all canned fruits and pat dry with paper towels. Add a tablespoon of instant vanilla pudding mix to stabilize the mixture. Always serve chilled and avoid letting it sit out for more than 2 hours.

    Can I freeze leftover Hawaiian Cheesecake Salad?

    I don’t recommend freezing this salad as the fruits will release water when thawed, creating a soggy texture. The cream cheese mixture also separates after freezing, significantly affecting the quality and appearance.

    What fruits work best in this recipe?

    Traditional Hawaiian Cheesecake Salad uses pineapple, mandarin oranges, and bananas. However, strawberries, grapes, kiwi, mango, and peaches also work beautifully. Avoid watery fruits like watermelon that dilute the creamy texture.

    Final Thoughts

    Hawaiian Cheesecake Salad has become my signature dish for good reason—it’s that perfect balance of simplicity and wow-factor that makes everyone feel special. There’s something magical about watching friends take their first bite and seeing their eyes light up with surprise and delight. Whether you’re serving it at a backyard barbecue or bringing tropical vibes to a winter potluck, this versatile treat bridges seasons and occasions with its creamy, fruit-filled goodness. I hope you’ll create your own special memories around this beloved recipe and share your Hawaiian Cheesecake Salad creations on Pinterest for others to enjoy!

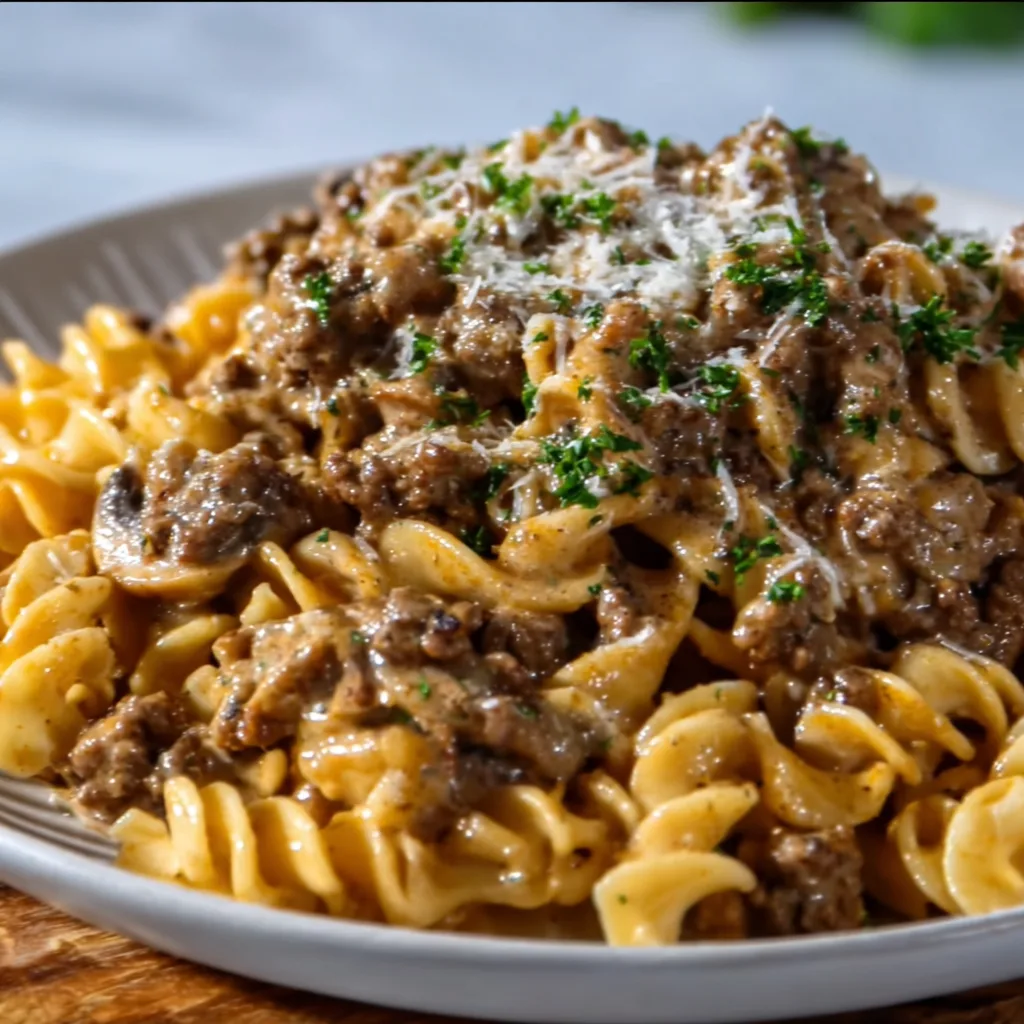
  • Creamy One-Pot Ground Beef Stroganoff: Easy, Comfort Food Bliss!

    Creamy One-Pot Ground Beef Stroganoff: Easy, Comfort Food Bliss!

    Creamy One-Pot Ground Beef Stroganoff: Easy, Comfort Food Bliss!

    Creamy One-Pot Ground Beef Stroganoff has been my secret weapon on those nights when everyone’s hungry, time is short, and I still want to serve something that feels like a warm hug in a bowl. The rich, velvety sauce coating tender beef and noodles creates pure comfort food magic that my family requests at least twice a month. There’s something so satisfying about watching simple ingredients transform into a restaurant-worthy dish while only dirtying one pot. I first discovered this recipe during a particularly chaotic week, and it’s been my reliable go-to ever since. If you love dishes that combine ease with incredible flavor, this stroganoff recipe deserves a permanent spot in your rotation.

    Recipe

    Why You’ll Love This Creamy One-Pot Ground Beef Stroganoff

    Perfect Weeknight Time-Saver

    When life gets hectic, this creamy one-pot ground beef stroganoff becomes your dinnertime hero. The entire meal comes together in under 30 minutes, making it perfect for busy weeknights when you’re juggling homework help, after-school activities, and your own exhaustion. I love that everything cooks in a single pot—the beef browns, the mushrooms sauté, the noodles simmer, and the sauce develops all in the same place. This means minimal cleanup afterward, which might be my favorite part! The hands-on time is surprisingly short, yet the flavors develop as though you’ve been cooking all day.

    Rich, Comforting Flavors

    There’s something magical about the combination of savory beef, earthy mushrooms, and that silky sour cream sauce that makes this dish irresistible. The first time I served this stroganoff, my youngest asked if we could have it every night for a week! The umami richness from the beef and mushrooms gets balanced perfectly by the tangy sour cream, while subtle notes of garlic and thyme add complexity without overwhelming. What I appreciate most is how this dish manages to feel indulgent while still being made from simple, wholesome ingredients. It’s the kind of meal that has everyone scraping their plates clean.

    Essential Tips & Tricks

    Perfecting the Beef & Mushroom Base

    The foundation of an exceptional stroganoff starts with properly browning the ground beef and mushrooms. I always make sure my pan is hot before adding the beef to develop those flavorful caramelized bits that will later infuse the sauce. Breaking the meat into smaller crumbles as it cooks gives better texture throughout the dish. For mushrooms, don’t overcrowd the pan—they need space to release moisture and brown rather than steam. This step takes patience but makes all the difference in flavor development. I’ve found that baby bella mushrooms offer more depth than white button varieties, but either works beautifully in this creamy tortellini soup or stroganoff.

    Creating the Silkiest Sauce

    The signature creamy sauce is what transforms this dish from ordinary to extraordinary. The key is tempering the sour cream before adding it to the hot mixture—this prevents curdling and ensures that silky-smooth texture we’re after. I do this by mixing a few tablespoons of the hot cooking liquid with the sour cream before incorporating it into the pot. Another game-changer is adding the flour before the broth, allowing it to coat the beef and vegetables to create a natural thickening agent. For extra richness, I sometimes stir in a tablespoon of Dijon mustard, which adds a subtle tang that complements the earthiness of the mushrooms beautifully.

    Serving Ideas & Creative Variations

    Perfect Pairings & Sides

    While this creamy one-pot ground beef stroganoff is certainly satisfying on its own, pairing it with the right sides elevates the entire meal. A simple green salad with vinaigrette provides a refreshing contrast to the rich, creamy main dish. For a more substantial dinner, I love serving it with roasted asparagus or steamed broccoli that can catch extra sauce. Warm, crusty bread is non-negotiable at our house—it’s perfect for sopping up every last bit of that delicious sauce! For a special touch, try a side of quick-pickled cucumbers; the acidity cuts through the richness beautifully, similar to how they complement my slow cooker mac and cheese.

    Exciting Twists on the Classic

    This versatile recipe welcomes creative adaptations to suit your preferences or pantry inventory. For a lighter version, swap the sour cream for Greek yogurt and use lean ground turkey instead of beef. Vegetarians can substitute mushroom varieties like portobello and shiitake for the meat, creating an equally satisfying meal. Add color and nutrition by stirring in frozen peas or spinach during the last few minutes of cooking. For a gourmet upgrade, deglaze the pan with a splash of red wine before adding the broth, or finish the dish with fresh herbs like dill or chives. My family loves when I add a sprinkle of smoked paprika for a subtle smoky dimension.

    Storage & Troubleshooting Guide

    Proper Storage & Reheating

    One of the best features of this creamy one-pot ground beef stroganoff is how well it keeps for leftovers. Store any remaining stroganoff in airtight containers in the refrigerator for up to 3 days. The flavors actually continue to develop overnight, making day-two stroganoff sometimes even better than the first serving! When reheating, add a splash of milk or broth to maintain creaminess, as the noodles tend to absorb sauce during storage. For best results, reheat gently on the stovetop over medium-low heat rather than using the microwave, which can make the sauce separate. If freezing, I recommend doing so before adding the noodles, as they can become mushy when thawed.

    Troubleshooting Common Issues

    Even experienced cooks occasionally encounter challenges with creamy sauces. If your sauce appears too thin, create a quick slurry with equal parts cornstarch and cold water, then stir it into the simmering sauce until it reaches your desired thickness. Conversely, if the sauce becomes too thick (especially after refrigeration), simply thin it with additional broth or milk. Should your sauce curdle—which can happen if sour cream is added too quickly to hot liquid—don’t panic! Lower the heat immediately and whisk vigorously until smooth. In the future, prevent this by tempering the sour cream with a few tablespoons of the hot cooking liquid before adding it to the pot.

    Frequently Asked Questions

    Can I make creamy one-pot ground beef stroganoff ahead of time?

    Yes! Prepare everything except the noodles and sour cream. Store the beef mixture refrigerated for up to 2 days, then reheat, cook the noodles directly in the sauce, and stir in sour cream just before serving.

    What can I substitute for sour cream?

    Greek yogurt makes an excellent substitute for a lighter version. Full-fat coconut milk (for dairy-free) or cream cheese thinned with a bit of milk also work well in a pinch.

    How can I make this recipe gluten-free?

    Simply swap regular egg noodles for gluten-free pasta and use cornstarch instead of flour as your thickener. Ensure your beef broth is also certified gluten-free.

    Why did my sauce curdle?

    This typically happens when adding cold sour cream to hot liquid too quickly. Always temper sour cream by mixing it with a little of the warm sauce first, then incorporate gradually.

    Can I use something other than ground beef?

    Absolutely! Ground turkey, chicken, or even plant-based meat alternatives work beautifully. For a more traditional approach, try thinly sliced beef sirloin.

    Final Thoughts

    This creamy one-pot ground beef stroganoff has saved countless dinners at my house, combining convenience with the kind of flavor that makes everyone think you spent hours in the kitchen. There’s something magical about transforming simple ingredients into such a satisfying meal with minimal effort and cleanup. I’d love to see how you make this recipe your own—share your creations on Pinterest or tag me in your photos! Whether you’re cooking for a busy weeknight or wanting to impress weekend guests, this stroganoff delivers comfort in every bite.

  • Juicy Mediterranean Orzo Pasta Salad That Will WOW Your Tastebuds!

    Juicy Mediterranean Orzo Pasta Salad That Will WOW Your Tastebuds!

    Juicy Mediterranean Orzo Pasta Salad That Will WOW Your Tastebuds!

    The Juicy Mediterranean Orzo Pasta Salad of your dreams is finally here! I’ve spent years perfecting this recipe, combining tender orzo pasta with sun-kissed tomatoes, crisp cucumbers, and briny olives that transport you straight to a seaside taverna. Every forkful delivers a perfect balance of tangy feta, fresh herbs, and zesty lemon dressing that makes your taste buds dance. This vibrant dish has become my go-to for everything from casual lunches to impressive dinner parties. Trust me, once you try this Mediterranean masterpiece, you’ll be adding it to your regular rotation at RecipesDarleen.

    Recipe

    Why You’ll Love This Juicy Mediterranean Orzo Pasta Salad

    Perfect Balance of Flavors and Textures

    There’s something magical about how the pearl-shaped orzo absorbs the lemony dressing while still maintaining its delightful chew. I adore how the juicy cherry tomatoes burst with sweetness against the salty olives and feta. The cucumbers add that refreshing crunch that keeps you coming back for more. Just last weekend, I served this at a family gathering, and my nephew (who typically avoids anything resembling a vegetable) went back for thirds! The Mediterranean flavor profile is bold enough to satisfy serious food lovers but accessible enough for even picky eaters.

    Make-Ahead Convenience

    One of the best things about this Juicy Mediterranean Orzo Pasta Salad is how it actually improves with time. Unlike leafy salads that wilt, this hearty dish develops deeper flavors as it sits. I often make a big batch on Sunday for meal prep and enjoy it throughout the week for quick lunches. The orzo soaks up all those Mediterranean flavors, becoming more delicious by the day. This make-ahead wonder has saved me countless times when unexpected guests drop by or when I need a reliable dish for potlucks that won’t wilt under pressure.

    Essential Tips & Tricks

    Perfect Orzo Cooking Method

    The foundation of an exceptional Mediterranean orzo salad starts with perfectly cooked pasta. I always salt the water generously (it should taste like the Mediterranean Sea!) and cook the orzo just until al dente, about 7-8 minutes. Then comes my secret step: after draining, I toss the hot orzo with a splash of olive oil and a squeeze of lemon juice. This prevents clumping and begins the flavor-building process immediately. For an extra flavor boost, try toasting the dry orzo in a skillet for 2-3 minutes before boiling—it adds a nutty dimension that elevates the entire salad.

    Ingredient Selection and Prep

    The quality of ingredients makes all the difference in this Juicy Mediterranean Orzo Pasta Salad. I recommend using Persian cucumbers for their crisp texture and minimal seeds. When it comes to tomatoes, cherry or grape varieties offer the perfect sweet-tart balance and hold their shape beautifully. For the olives, a mix of kalamata and green provides interesting flavor contrast. Don’t skip the fresh herbs—mint and parsley bring brightness that dried versions simply can’t match. This attention to ingredient quality reminds me of my approach to Slow Cooker Mac & Cheese Classic, where selecting the right cheeses transforms a simple dish into something spectacular.

    Serving Ideas & Creative Variations

    Protein Additions and Pairings

    Transform this Juicy Mediterranean Orzo Pasta Salad from side dish to showstopping main by adding protein. My favorite additions include grilled shrimp that’s been kissed with lemon and herbs, or chunks of rotisserie chicken for convenience. For a vegetarian option, add chickpeas or white beans for hearty protein. This versatile salad pairs beautifully with grilled fish, lamb chops, or even a simple roasted chicken. For an impressive spread, serve alongside Sugar Cookie Truffles for a sweet finish that complements the Mediterranean flavors without overwhelming them.

    Seasonal Adaptations

    One of the joys of this recipe is how easily it adapts to what’s fresh and available. In summer, I add sweet corn cut straight from the cob and juicy peaches for unexpected sweetness. Fall brings opportunities for roasted butternut squash and pomegranate arils that pop with color and flavor. Winter versions might include roasted red peppers and preserved lemons. Spring calls for tender asparagus tips and fresh peas. The Mediterranean flavor profile works beautifully year-round, making this orzo salad a chameleon that changes with the seasons while maintaining its essential character.

    Storage & Troubleshooting Guide

    Proper Storage Techniques

    To keep your Juicy Mediterranean Orzo Pasta Salad at its best, store it in an airtight container in the refrigerator for up to 5 days. If you’re making it ahead for an event, I recommend adding the more delicate ingredients like fresh herbs, cucumber, and feta just before serving. The dressing can be stored separately for up to a week. For meal prep, try layering components in mason jars with dressing at the bottom and delicate ingredients on top. This storage method keeps everything fresh and prevents the disappointment of soggy salad when lunchtime rolls around.

    Reviving and Troubleshooting

    Even the best Mediterranean orzo salad might need a little refresh after sitting in the refrigerator. If your salad seems dry, drizzle with additional olive oil and a squeeze of fresh lemon juice, then toss gently to revive. For orzo that’s clumped together, use a fork to gently separate the grains before adding a splash of olive oil. If your salad lacks punch after storage, try adding more fresh herbs, a pinch of red pepper flakes, or an extra sprinkle of feta cheese. These simple fixes can transform day-old salad back to its vibrant best.

    Frequently Asked Questions

    Can I make Juicy Mediterranean Orzo Pasta Salad gluten-free?

    Absolutely! Simply substitute regular orzo with gluten-free orzo or another small gluten-free pasta shape like rice-based orzo. Just be sure to adjust cooking times according to package directions as gluten-free pastas often cook differently.

    How far in advance can I prepare this salad?

    You can prepare most components up to 2 days ahead. For best results, combine the orzo, dressing, and sturdy vegetables, then add delicate ingredients like herbs and feta just before serving.

    What’s the best substitute for feta cheese?

    Goat cheese provides similar creaminess with a milder flavor. For a dairy-free option, try firm tofu marinated in lemon juice, olive oil, and herbs, then crumbled to mimic feta’s texture.

    Can I freeze this orzo pasta salad?

    I don’t recommend freezing this salad as the vegetables will become mushy and the texture will suffer significantly. It’s best enjoyed fresh or refrigerated for up to 5 days.

    How can I make this salad more filling?

    Add protein like grilled chicken, shrimp, or chickpeas. You can also increase the healthy fat content with additional olive oil, avocado chunks, or toasted pine nuts for more staying power.

    Final Thoughts

    This Juicy Mediterranean Orzo Pasta Salad has become my signature dish for good reason. It brings together the sun-drenched flavors of the Mediterranean in a way that’s both accessible and impressive. The beauty of this recipe lies in its versatility—make it exactly as written or use it as a canvas for your own culinary creativity. I’d love to see your versions on Pinterest! Whether you’re serving it at a summer barbecue or enjoying it as a packable lunch, this orzo salad delivers Mediterranean magic in every bite.

  • Slow Cooker French Dip Sandwiches | Gooey Melted Provolone Bliss

    Slow Cooker French Dip Sandwiches | Gooey Melted Provolone Bliss

    Slow Cooker French Dip Sandwiches | Gooey Melted Provolone Bliss

    Slow Cooker French Dip Sandwiches with Melted Provolone are the ultimate comfort food that practically makes itself. I discovered this recipe during a particularly hectic week when I needed something that would welcome us home with minimal effort. The rich aroma of beef slowly simmering in savory broth filled our kitchen, and that first bite—tender meat on crusty bread with gooey cheese and warm au jus for dipping—instantly became a family favorite. These sandwiches strike that perfect balance between effortless preparation and impressive results, making them ideal for both busy weeknights and casual entertaining.

    Recipe

    Why You’ll Love This Slow Cooker French Dip Sandwiches with Melted Provolone

    Perfect Make-Ahead Meal for Busy Days

    There’s something magical about walking through the door after a long day to the savory aroma of beef that’s been slowly cooking for hours. These French dip sandwiches require just 15 minutes of morning prep, then your slow cooker handles the rest. The fork-tender beef practically shreds itself after 8 hours of gentle cooking, absorbing all those incredible flavors from the broth, onions, and seasonings. I love how the meat develops that melt-in-your-mouth quality that you’d expect from a high-end restaurant, yet it’s so simple to achieve at home with minimal effort.

    Restaurant-Quality Results with Simple Ingredients

    The beauty of these sandwiches lies in their simplicity—basic ingredients that transform into something extraordinary. The chuck roast becomes incredibly tender, while the umami-rich au jus develops complex flavors that taste like they’ve been carefully crafted by a chef. When you layer that perfectly seasoned beef onto crusty rolls, add provolone that melts into all the nooks and crannies, and serve with a side of warm dipping broth, you’ve got a restaurant-worthy meal that costs a fraction of dining out. My family actually prefers these to any French dip we’ve had at restaurants!

    Essential Tips & Tricks

    Selecting and Preparing the Perfect Cut of Beef

    Choose a well-marbled chuck roast for the most flavorful results—those streaks of fat will render down during cooking, creating incredibly tender meat. Before adding it to your slow cooker, take five minutes to sear the roast on all sides in a hot skillet. This extra step creates a beautiful crust and locks in juices while developing deeper flavor compounds that will infuse the entire dish. I learned this trick years ago and it makes a noticeable difference! For even more flavor development, try my Slow Cooker Mac & Cheese Classic technique of adding aromatics first to create a flavor base.

    Perfecting the Au Jus and Assembly Process

    The magical element that elevates these sandwiches is the rich au jus that develops during cooking. For the best flavor, use beef broth rather than water as your cooking liquid, and add Worcestershire sauce for depth. Strain the finished broth through a fine-mesh sieve to remove any solids for a silky-smooth dipping experience. When assembling, lightly toast your rolls first to prevent sogginess, then add the beef and broil with provolone just until bubbly and golden—about 2-3 minutes. Serve immediately with warm au jus in individual ramekins for the perfect dipping experience.

    Serving Ideas & Creative Variations

    Complementary Side Dishes That Enhance the Meal

    These hearty sandwiches pair beautifully with sides that balance their richness. I love serving them with a crisp green salad dressed simply with vinaigrette to cut through the savory flavors. Crispy french fries or sweet potato fries make excellent dippers for extra au jus, while pickled vegetables add a tangy contrast. For a complete meal that will impress guests, consider adding a side of Creamy Tortellini Soup for a cozy restaurant-inspired experience. The combination of the warm sandwich with something fresh and crunchy creates the perfect balance on your plate.

    Creative Twists on the Classic Recipe

    While the traditional version is perfection, don’t be afraid to make it your own! For a flavor boost, try adding sliced mushrooms to the slow cooker during the last hour of cooking. They’ll absorb the rich broth and add earthy depth. Experiment with different cheeses—smoked provolone, Swiss, or pepper jack all work beautifully. For a spicy kick, add pepperoncini peppers to the slow cooker and include a few on each sandwich. You can even transform leftovers into a breakfast hash by chopping the meat and potatoes, crisping them in a skillet, and topping with a fried egg.

    Storage & Troubleshooting Guide

    Proper Storage and Reheating Methods

    These sandwiches are perfect for meal prep because the components store beautifully. Keep the shredded beef and au jus separately in airtight containers in the refrigerator for up to 4 days. For longer storage, freeze portions in freezer-safe bags for up to 3 months. The key to reheating is keeping everything moist—warm the beef gently in a saucepan with a splash of the au jus to prevent drying out. Heat the au jus separately until steaming. Assemble fresh sandwiches with the reheated components and broil just until the cheese melts for that fresh-made experience.

    Solving Common Problems for Perfect Results

    If your beef isn’t as tender as expected after cooking, it likely needs more time—tough meat is simply undercooked when using the slow method. Return it to the slow cooker for another 30-60 minutes until it shreds effortlessly with two forks. For au jus that’s too thin, reduce it on the stovetop until it reaches your desired consistency. If it’s too salty, add a peeled, quartered potato to the liquid and simmer for 15 minutes—the potato will absorb excess salt. For soggy bread, try toasting both sides of your rolls before adding toppings, or serve the au jus strictly on the side.

    Frequently Asked Questions

    Can I use a different cut of beef for Slow Cooker French Dip Sandwiches with Melted Provolone?

    Yes! While chuck roast is ideal, you can substitute brisket, round roast, or rump roast. Cooking times may vary slightly, but the slow cooker will tenderize any of these cuts beautifully.

    How can I make this recipe gluten-free?

    Simply use gluten-free rolls and ensure your beef broth and Worcestershire sauce are certified gluten-free. The rest of the ingredients are naturally gluten-free.

    Can I make this in an Instant Pot instead?

    Absolutely! Use the sauté function to sear the meat, then pressure cook on high for 60 minutes with natural release. You’ll achieve similar tender results in much less time.

    What’s the best way to slice the meat?

    For the most tender result, let the meat cool slightly, then shred it using two forks rather than slicing. This creates more surface area to absorb the flavorful juices.

    How do I prevent the bread from getting too soggy?

    Toast your rolls before adding the beef and cheese, and serve the au jus on the side in individual dipping bowls rather than pouring it over the sandwiches.

    Final Thoughts

    These Slow Cooker French Dip Sandwiches with Melted Provolone have become a staple in my kitchen for good reason—they deliver maximum flavor with minimal effort. There’s something deeply satisfying about transforming simple ingredients into a meal that brings everyone to the table with anticipation. Whether you’re feeding a hungry family or entertaining friends, these sandwiches never disappoint. I’d love to see your creations on Pinterest if you give them a try! The combination of tender beef, melty cheese, and that incredible dipping broth creates a memorable meal experience that will have everyone asking for seconds.

  • Mango Slaw Recipe: Refreshing, Tangy, & Perfectly Crunchy!

    Mango Slaw Recipe: Refreshing, Tangy, & Perfectly Crunchy!

    Mango Slaw Recipe: Refreshing, Tangy, & Perfectly Crunchy!

    Mango Slaw brings a tropical twist to traditional coleslaw with its vibrant colors and refreshing flavors. The sweet, juicy mangoes blend perfectly with crisp cabbage and tangy dressing, creating a sensory explosion in every bite. I first discovered this delightful dish during a beachside cookout where it completely stole the show from the main course! It’s become my go-to side for everything from backyard barbecues to cozy winter comfort meals. The beauty of this recipe lies in its versatility and how it brightens up even the simplest meal with its sunshine-in-a-bowl vibe.

    Recipe

    Why You’ll Love This Mango Slaw

    Perfect Balance of Flavors and Textures

    The magic of Mango Slaw lies in its harmonious blend of sweet, tangy, and savory notes that dance on your palate. Ripe mangoes provide natural sweetness that pairs beautifully with the crisp crunch of fresh cabbage. I love how the creamy dressing with just a hint of lime brings everything together, while the occasional bite of red onion adds a welcome sharpness. My neighbor once described it as “summer in a bowl,” and I couldn’t agree more! The contrasting textures make each forkful interesting – soft mango chunks against crunchy vegetables create that perfect mouthfeel that keeps you coming back for more.

    Quick and Make-Ahead Friendly

    One of my favorite things about this Mango Slaw is how it fits into my busy life without sacrificing flavor. It comes together in just 15 minutes of active time, making it perfect for last-minute gatherings. The ingredients are straightforward pantry and produce staples, nothing fancy required! I often prep all the components the night before, storing them separately, then toss everything together just before serving. This actually works in your favor – the flavors have time to meld and develop, making the slaw even more delicious. For busy weeknights, this time-saving strategy has been my secret weapon.

    Essential Tips & Tricks

    Selecting and Preparing the Perfect Mangoes

    The heart and soul of any great Mango Slaw is, unsurprisingly, the mangoes themselves. Look for fruits that yield slightly to gentle pressure – they should feel soft but firm, not mushy. I’ve found that Ataulfo (also called champagne or honey) mangoes work beautifully with their smooth, fiber-free flesh, but Kent or Tommy Atkins varieties are excellent too. To prep, stand the mango on its end and slice down along both sides of the flat pit. Score the flesh in a grid pattern without cutting through the skin, then invert and slice off the cubes. For the perfect texture in your slaw, aim for 1/2-inch pieces that hold their shape but are easy to eat.

    Dressing Secrets for Maximum Flavor

    The dressing is what transforms simple ingredients into an unforgettable Mango Slaw. I always start with a base of good quality mayonnaise lightened with yogurt for the perfect creamy-tangy balance. A splash of lime juice brightens everything while a touch of honey enhances the mango’s natural sweetness. My secret ingredient? A pinch of toasted cumin that adds warmth without overwhelming. Whisk all dressing ingredients together before adding to the vegetables and fruit – this ensures even distribution. For the best flavor marriage, toss the slaw gently but thoroughly, then let it rest for at least 15 minutes before serving. It pairs beautifully with Slow Cooker Mongolian Beef for a complete meal.

    Serving Ideas & Creative Variations

    Perfect Pairings for Every Occasion

    Mango Slaw shines as both a side dish and a creative topping for various mains. Serve it alongside grilled fish tacos where the tropical flavors complement the smoky char perfectly. It’s also divine with jerk chicken, adding a cooling counterpoint to the spice. For summer potlucks, I place it next to traditional potato salad for a refreshing alternative that always disappears first! The vibrant colors make it a standout on any buffet table. For an elegant dinner, serve small portions in lettuce cups as a starter. The versatility extends to casual lunches too – try it piled high on a Dill Pickle Parmesan Chicken sandwich for a gourmet touch.

    Exciting Flavor Variations to Try

    The classic Mango Slaw is just the beginning – this recipe welcomes creative adaptations! For a Thai-inspired version, add chopped peanuts, fresh cilantro, and a splash of fish sauce to the dressing. Craving something spicier? Incorporate finely diced jalapeño or a drizzle of sriracha into the mix. When stone fruits are in season, try swapping half the mango for ripe peaches or nectarines for a delightful twist. For added protein and staying power, toss in some black beans or edamame. I recently made a tropical variation with shredded coconut and pineapple chunks that transported my family straight to vacation mode – even on a regular Tuesday dinner!

    Storage & Troubleshooting Guide

    Keeping Your Slaw Fresh and Crisp

    To maintain the perfect texture of your Mango Slaw, proper storage is key. Always keep it refrigerated in an airtight container to preserve freshness and prevent it from absorbing other food odors. The slaw will stay crisp for up to 2 days, though the vegetables may soften slightly over time. If you’re planning ahead, consider storing the dressing separately from the vegetables and fruit, combining them just before serving. For maximum crispness, I sometimes sprinkle a little extra lime juice over leftover slaw before serving it again – the acidity helps revive the flavors and texture. Remember that mangoes continue to ripen after cutting, so the slaw might become sweeter on day two.

    Solving Common Mango Slaw Challenges

    Even the simplest recipes can sometimes present challenges, but they’re easily overcome. If your slaw becomes too watery after sitting, simply drain off the excess liquid or add more fresh cabbage to absorb it. Finding mangoes that aren’t quite ripe? Place them in a paper bag with a banana overnight to speed ripening, or substitute with frozen mango chunks in a pinch – just thaw and pat dry before adding. If the dressing seems too thick, thin it with a splash of lime juice or a teaspoon of water.

    For a slaw that’s too sweet, balance it with an extra pinch of salt or a bit more lime juice. Remember that flavors meld and develop over time, so what seems unbalanced at first might be perfect after resting.

    Frequently Asked Questions

    Can I make Mango Slaw ahead of time?

    Yes! You can prepare all components 1-2 days ahead and store separately. Combine them 15-30 minutes before serving for the best texture and flavor balance. The slight resting time actually improves the taste as flavors meld.

    What’s the best cabbage to use for Mango Slaw?

    I recommend a mix of green and purple cabbage for color and texture variation. Pre-shredded coleslaw mix works perfectly for convenience, or you can finely shred your own for a fresher crunch.

    How can I make this Mango Slaw dairy-free?

    Simply substitute the yogurt with dairy-free yogurt or additional mayonnaise. For a completely vegan version, use plant-based mayo and sweeten with maple syrup instead of honey.

    Are there any protein options to make Mango Slaw a complete meal?

    Absolutely! Add grilled chicken, shrimp, or tofu for a protein boost. Black beans, chickpeas, or quinoa work wonderfully for vegetarian options, making the slaw hearty enough for a main dish.

    How long does Mango Slaw stay fresh in the refrigerator?

    Mango Slaw remains at its best for up to 2 days when stored in an airtight container in the refrigerator. The texture may soften slightly, but the flavors often improve after the first day.

    Final Thoughts

    Mango Slaw brings a bright, tropical energy to any meal with its perfect balance of sweet, tangy and crunchy elements. It’s one of those versatile recipes that feels special enough for company yet simple enough for everyday enjoyment. I love how it transforms ordinary meals into something memorable with minimal effort. Whether you’re serving it alongside grilled meats, tucking it into tacos, or enjoying it as a refreshing lunch, this colorful dish never disappoints. The next time you’re looking to add a little sunshine to your table, give this Mango Slaw a try – your taste buds will thank you! Find more colorful inspiration on our Pinterest board.

  • Moroccan Chicken & Rice Recipe That Will Wow Your Taste Buds!

    Moroccan Chicken & Rice Recipe That Will Wow Your Taste Buds!

    Moroccan Chicken & Rice Recipe That Will Wow Your Taste Buds!

    Moroccan Chicken & Rice brings a symphony of warm spices, tender meat, and fluffy rice together in one unforgettable dish. The first time I made this recipe, the aroma of cinnamon, cumin, and ginger transformed my kitchen into a Marrakech marketplace. There’s something magical about how these fragrant spices bloom in the pan, wrapping around tender chicken pieces and infusing every grain of rice with their essence. Whether you’re looking to expand your weeknight dinner rotation or impress guests with something special, this dish delivers both comfort and excitement in every bite.

    Recipe

    Why You’ll Love This Moroccan Chicken & Rice

    A Perfect Balance of Flavors and Textures

    The beauty of Moroccan Chicken & Rice lies in its harmonious blend of sweet and savory notes. Cinnamon and dried fruit provide gentle sweetness that balances perfectly against the earthy cumin and paprika. The chicken thighs become incredibly tender, practically melting into the rice, while toasted almonds add a delightful crunch. I love how the rice soaks up all those amazing flavors, becoming infused with the essence of the spices and the rich chicken broth. Each forkful delivers a complex yet comforting taste that feels both exotic and familiar.

    A One-Pot Wonder for Busy Weeknights

    As much as I adore complex cooking projects, there’s something deeply satisfying about a complete meal in one pot. This Moroccan Chicken & Rice recipe has saved me countless times when I’m craving something special but don’t have the energy for multiple dishes. The active prep time is minimal—just some chopping and measuring—while the cooking process builds layers of flavor without requiring constant attention. I can start this dish, help my daughter with homework, and return to a kitchen filled with mouthwatering aromas and a dinner that feels like it took much more effort than it actually did.

    Essential Tips & Tricks

    Choosing the Right Ingredients

    The quality of your spices makes all the difference in this dish. I recommend using freshly ground spices whenever possible, as they contain more aromatic oils and deliver a more vibrant flavor. For the chicken, thighs are preferable to breasts as they remain juicy and tender throughout the cooking process. When selecting rice, basmati or jasmine varieties work beautifully, their natural fragrance complementing the Moroccan spices. If you’re looking for another flavorful rice-based dish, my Slow Cooker Chicken Burrito Bowls offer a completely different but equally delicious flavor profile.

    Mastering the Cooking Technique

    The key to perfect Moroccan Chicken & Rice is layering the flavors methodically. Begin by toasting the spices in oil until they become fragrant—this blooms their essential oils and deepens their flavor. Next, brown the chicken properly; don’t rush this step as it develops a rich foundation. When adding liquid, scrape the bottom of the pan to incorporate all those caramelized bits—they’re pure gold for flavor development. Allow the rice to rest for 5-10 minutes after cooking; this final step lets the moisture distribute evenly, resulting in perfectly fluffy grains rather than mushy rice.

    Serving Ideas & Creative Variations

    Complementary Side Dishes

    Moroccan Chicken & Rice can stand alone as a complete meal, but I love serving it with a few simple accompaniments to enhance the experience. A cooling cucumber-yogurt salad provides a refreshing contrast to the warm spices. For something green, try a simple arugula salad dressed with lemon and olive oil—its peppery bite complements the dish beautifully. Warm flatbread is perfect for scooping up every last morsel. If you’re looking for another comforting dish to pair with this, my Creamy Tortellini Soup Crockpot recipe makes a wonderful starter for a more elaborate meal.

    Regional Variations to Explore

    The beauty of Moroccan cuisine lies in its regional diversity and adaptability. For a coastal variation, add preserved lemon and green olives during the last 15 minutes of cooking for a tangy brightness. If you prefer a spicier dish, incorporate harissa paste or a pinch of cayenne. For a vegetarian version, substitute chickpeas and roasted butternut squash for the chicken, using vegetable broth as the cooking liquid. During summer months, I sometimes add fresh herbs like mint and cilantro just before serving, which brings a wonderful freshness to the warm spices.

    Storage & Troubleshooting Guide

    Proper Storage and Reheating

    Moroccan Chicken & Rice actually improves with time as the flavors continue to meld, making it perfect for meal prep. Store leftovers in airtight containers in the refrigerator for up to 4 days. When reheating, add a splash of chicken broth or water to prevent the rice from drying out. For the best texture, reheat gently on the stovetop over medium-low heat, stirring occasionally. This dish also freezes beautifully—portion it into freezer-safe containers and store for up to 3 months. Thaw overnight in the refrigerator before reheating for the best results.

    Troubleshooting Common Issues

    If your rice turns out too mushy, it’s likely that there was too much liquid or the heat was too high. The perfect rice-to-liquid ratio is essential—generally 1:1.5 for basmati rice. If your dish lacks flavor, don’t be afraid to adjust the seasoning at the end. A squeeze of lemon juice can brighten all the flavors, while a drizzle of honey balances any overwhelming spices. For undercooked rice with fully cooked chicken, remove the chicken pieces, add a small amount of hot broth to the rice, cover, and continue cooking on low heat until the rice reaches your desired tenderness.

    Frequently Asked Questions

    Can I use chicken breasts instead of thighs for Moroccan Chicken & Rice?

    Yes, though they cook faster and can dry out. If using breasts, reduce cooking time by about 5-7 minutes and consider brining them first for added moisture and flavor.

    What can I substitute for dried apricots?

    Golden raisins, dried cranberries, or chopped dates work beautifully. Each brings a different sweetness profile that pairs wonderfully with the Moroccan spices.

    Is Moroccan Chicken & Rice gluten-free?

    Yes, traditional Moroccan Chicken & Rice is naturally gluten-free, assuming you use pure spices without additives and a certified gluten-free broth.

    How can I make this dish vegetarian?

    Replace chicken with chickpeas and roasted vegetables like butternut squash, eggplant, or cauliflower. Use vegetable broth and increase the olive oil slightly for richness.

    Can I prepare Moroccan Chicken & Rice in advance for a dinner party?

    Absolutely! Make it up to a day ahead, refrigerate, then reheat gently with a splash of broth. Garnish with fresh herbs and toasted nuts just before serving for optimal presentation.

    Final Thoughts

    Moroccan Chicken & Rice has become one of my most treasured recipes, not just for its incredible flavors but for how it transforms an ordinary evening into something special. The way the kitchen fills with those aromatic spices creates an instant sense of warmth and anticipation. I hope this dish brings the same joy to your table that it has to mine. Remember that cooking is about exploration and making each recipe your own. For more inspiration and delicious recipes, visit our Pinterest page where you’ll find endless culinary adventures waiting.

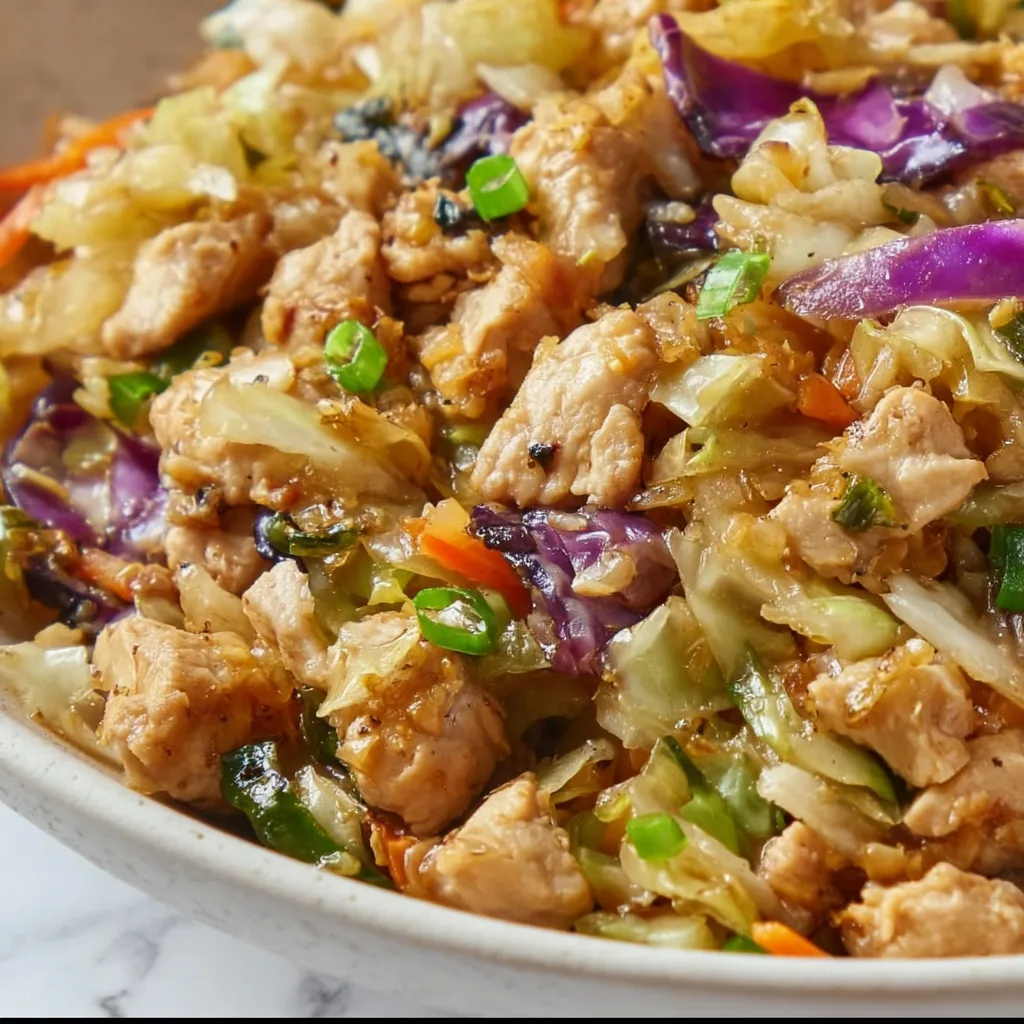
  • Egg Roll Bowls with Chicken & Cabbage: Irresistibly Easy & Delicious!

    Egg Roll Bowls with Chicken & Cabbage: Irresistibly Easy & Delicious!

    Egg Roll Bowls with Chicken & Cabbage: Irresistibly Easy & Delicious!

    Egg Roll Bowls with Chicken & Cabbage bring all the flavors you love about traditional egg rolls without the fuss of wrapping and frying. The first time I made this dish, my kitchen filled with the aromatic blend of ginger and garlic that instantly transported me back to my favorite takeout spot. There’s something magical about the crisp cabbage and tender chicken coated in that savory sauce that makes this a weeknight winner. Perfect for busy evenings when you’re craving something satisfying but don’t want to order in from our favorite Asian-inspired recipes.

    Recipe

    Why You’ll Love This Egg Roll Bowls with Chicken & Cabbage

    A Healthier Take on Takeout

    These deconstructed egg roll bowls deliver all the incredible flavor of traditional egg rolls while cutting back on calories and carbs. By skipping the deep-fried wrapper, you’re getting a nutrient-dense meal that’s packed with protein and vegetables. I love how the cabbage maintains a slight crunch, giving you that textural contrast without the oil. The savory umami sauce coats every bite with that authentic Asian-inspired flavor that satisfies cravings without leaving you feeling heavy afterward. It’s comfort food that actually makes your body feel good!

    Quick and Budget-Friendly

    From chopping to serving, these Egg Roll Bowls with Chicken & Cabbage come together in about 20 minutes, making them perfect for hectic weeknights. The ingredients are pantry staples that won’t break the bank—chicken, cabbage, carrots, and a few Asian condiments you probably already have. I’ve made this on countless Monday evenings when time and energy are in short supply but we still want something delicious. The best part? One head of cabbage goes a long way, stretching your grocery dollars while filling everyone’s bowls with colorful, flavorful goodness.

    Essential Tips & Tricks

    Perfecting the Texture

    The key to exceptional Egg Roll Bowls with Chicken & Cabbage lies in the cooking sequence. Always start by browning your ground chicken thoroughly—those crispy bits add incredible flavor. Then, when adding the cabbage, resist the urge to overcook it! A quick 3-4 minute sauté preserves that signature egg roll crunch we all love. I learned this the hard way after turning my first attempt into soggy cabbage soup. For extra texture contrast, consider adding water chestnuts or a sprinkle of wonton strips on top. These small touches elevate the dish from simple to sensational, similar to how I layer flavors in my Slow Cooker Mongolian Beef.

    Balancing the Flavors

    Creating that authentic egg roll flavor profile requires balancing sweet, savory, and umami elements. The foundation comes from equal parts soy sauce and hoisin, with a splash of rice vinegar for brightness. Don’t skip the sesame oil—even a teaspoon transforms the entire dish with its nutty depth. My secret ingredient? A tablespoon of sriracha that adds warmth without overwhelming heat. Taste as you go and adjust; sometimes I add a teaspoon of honey if the sauce tastes too sharp. Remember that cabbage will release water as it cooks, which will dilute your sauce, so season a bit more boldly than you think necessary.

    Serving Ideas & Creative Variations

    Perfect Pairings

    Egg Roll Bowls with Chicken & Cabbage shine as a complete one-bowl meal, but thoughtful sides can elevate the experience. Steamed rice makes an excellent base, soaking up all that delicious sauce, while cauliflower rice keeps things lighter. For a fun presentation, serve with a side of crispy wonton chips for scooping. When I’m feeling extra, I’ll whip up a quick cucumber salad with rice vinegar and sesame seeds for a cooling contrast. For a cozy winter meal, pair these bowls with my Creamy Tortellini Soup for an Asian-Italian fusion dinner that surprisingly works!

    Exciting Variations

    The beauty of Egg Roll Bowls with Chicken & Cabbage lies in their versatility. Swap ground chicken for ground turkey, pork, or even crumbled tofu for a vegetarian version. The vegetable base is equally adaptable—try adding shredded brussels sprouts, bok choy, or bell peppers for different textures and nutrients. For a spicy kick, incorporate kimchi or a drizzle of chili oil. My family loves the “breakfast bowl” variation with scrambled eggs and a splash of maple syrup in the sauce. You can even transform leftovers into lettuce wraps or stuff them into actual egg roll wrappers for a fun twist the next day.

    Storage & Troubleshooting Guide

    Meal Prep & Storage Solutions

    Egg Roll Bowls with Chicken & Cabbage make excellent meal prep options that maintain their flavor and texture for days. Store cooled portions in airtight containers in the refrigerator for up to 4 days. The flavors actually develop overnight, making day-two bowls even more delicious! For freezing, I recommend slightly undercooking the cabbage, as it will soften during reheating. Portion into freezer-safe containers, leaving room for expansion, and freeze for up to 2 months. When reheating, a quick minute in the microwave works, but for best texture, reheat in a skillet with a splash of water to rejuvenate the sauce.

    Common Problems & Solutions

    If your Egg Roll Bowls with Chicken & Cabbage turn out too watery, the culprit is usually overcrowded cabbage releasing excess moisture. The fix? Use a larger pan and cook in batches if needed, or drain excess liquid before adding sauce. For bowls that lack flavor, umami boosters like a splash of fish sauce or extra garlic can work wonders. If the texture is too soft, try adding a handful of bean sprouts or shredded carrots in the final minute of cooking. And if your sauce is too salty, balance it with a squeeze of lime juice and a drizzle of honey to round out the flavors without diluting.

    Frequently Asked Questions

    Can I make Egg Roll Bowls with Chicken & Cabbage vegetarian?

    Absolutely! Substitute the chicken with crumbled tofu, tempeh, or a plant-based ground meat alternative. Add an extra tablespoon of soy sauce to enhance the umami flavor that meat typically provides.

    What’s the best type of cabbage to use?

    Green cabbage works best for its crisp texture and mild flavor. Napa cabbage is a good alternative for a softer result, while purple cabbage adds beautiful color but has a stronger flavor.

    How can I make this dish spicier?

    Add sriracha, sambal oelek, or red pepper flakes to taste. For deeper heat, include a minced Thai chili or two when sautéing the garlic and ginger.

    Can I prepare components ahead of time?

    Yes! Chop all vegetables and mix the sauce up to 2 days ahead. Store separately in the refrigerator. The actual cooking takes just minutes when your prep is done.

    How do I know when my Egg Roll Bowls with Chicken & Cabbage are done cooking?

    The chicken should be completely browned with no pink remaining, and the cabbage should be slightly wilted but still have some crunch—typically 3-4 minutes after adding it to the pan.

    Final Thoughts

    These Egg Roll Bowls with Chicken & Cabbage have become a staple in my kitchen for good reason—they deliver big on flavor while keeping preparation simple. There’s something deeply satisfying about creating a healthier version of a takeout favorite that actually tastes amazing. I hope this recipe brings the same joy to your table that it has to mine! Don’t forget to check out more Asian-inspired recipes on Pinterest for your next cooking adventure.