Blog

  • Quick High Protein Greek Pasta Salad Recipe – Delicious & Energizing!

    Quick High Protein Greek Pasta Salad Recipe – Delicious & Energizing!

    Quick High Protein Greek Pasta Salad Recipe – Delicious & Energizing!

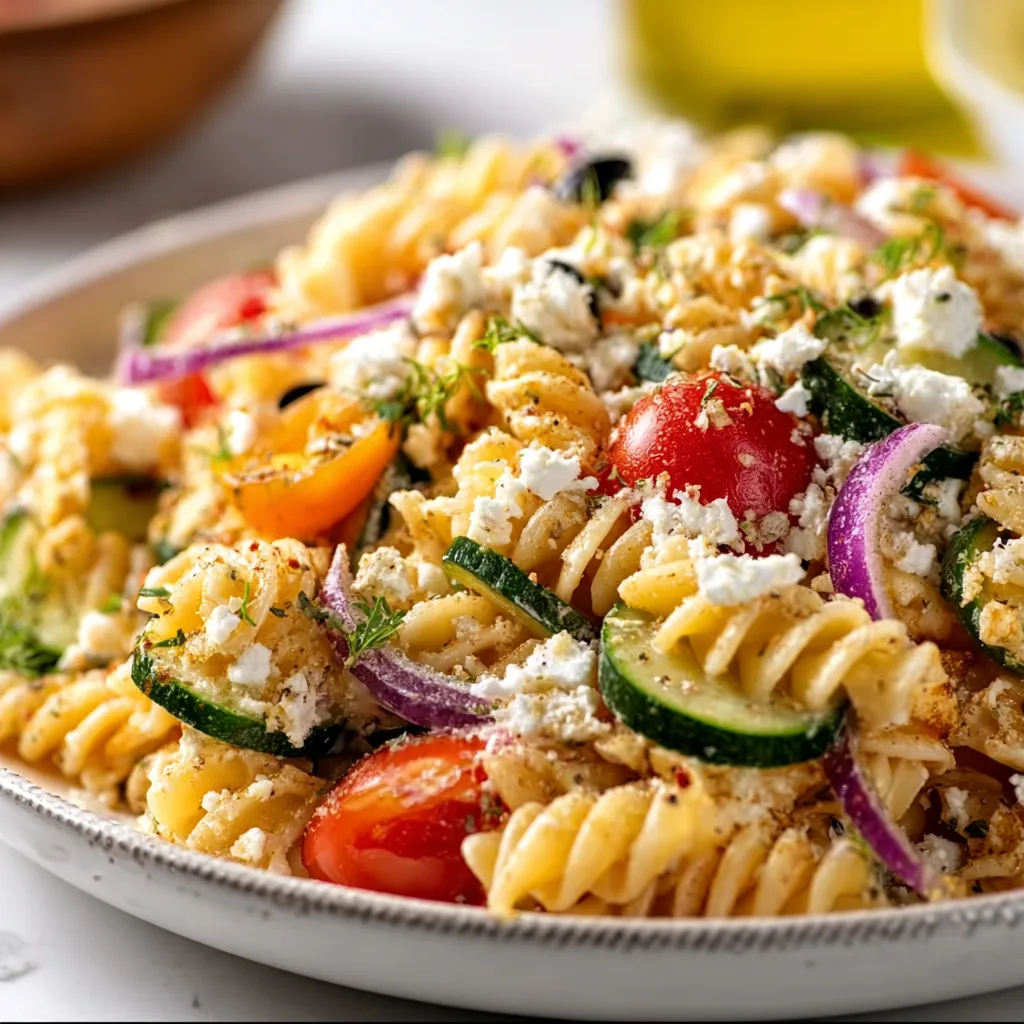
    This Quick High Protein Greek Pasta Salad has become my go-to lunch solution on busy days when I need something substantial but refuse to sacrifice flavor. The first time I made it, I was rushing between Zoom calls and needed something that would keep me energized through the afternoon slump. The combination of al dente pasta, tangy feta, crisp vegetables, and protein-packed chickpeas created such a perfect balance that I’ve been making variations ever since. What I love most is how the Mediterranean flavors transport me to sunnier places, even when I’m eating at my desk. This refreshing pasta salad combines convenience with nutrition in the most delicious way possible.

    Recipe

    Why You’ll Love This Quick High Protein Greek Pasta Salad

    Perfect Balance of Flavors and Textures

    There’s something magical about the way the briny olives and tangy feta play against the fresh cucumber and juicy tomatoes. Each forkful delivers a different experience – sometimes you get the herbal pop of oregano, other times the creamy bite of cheese. The protein comes from a perfect trio: chickpeas, feta, and a sprinkle of hemp hearts that add a subtle nutty flavor. I love how the pasta soaks up the lemony dressing while still maintaining its perfect bite. The textures range from crisp to creamy to chewy, creating a satisfying meal that keeps you coming back for another bite.

    Ready in 20 Minutes Flat

    On days when time feels like sand slipping through my fingers, this salad has saved me countless times. The quick preparation is honestly its superpower – I can have it ready in just 20 minutes. While the pasta cooks, I chop the vegetables and whisk together the simple olive oil and lemon dressing. Everything comes together in one bowl, meaning minimal cleanup afterward. The best part? Unlike delicate green salads, this hearty creation actually improves with a little time in the fridge, making it perfect for meal prep. When life gets chaotic, having this protein-packed option ready to grab is pure kitchen magic.

    Essential Tips & Tricks

    Perfecting Your Pasta Game

    The foundation of this salad is getting the pasta just right – aim for true al dente texture since it will continue softening slightly in the dressing. I always cook it about one minute less than the package suggests, then immediately rinse under cold water to stop the cooking process. For the best protein boost, choose legume-based pastas like chickpea or lentil varieties that can double or even triple the protein content. Another game-changer is seasoning your pasta water generously with salt – it should taste like the Mediterranean Sea! This simple step elevates the entire dish and is something I learned from my Slow Cooker Mac & Cheese Classic recipe that makes all the difference.

    Dressing Secrets for Maximum Flavor

    The zingy dressing is what transforms this from a basic pasta salad to something crave-worthy. I whisk together extra virgin olive oil, fresh lemon juice, a touch of red wine vinegar, and plenty of minced garlic. The key is to add a pinch of dried oregano and let it infuse for a few minutes before pouring over the salad – this releases the essential oils in the herbs. For extra depth, I sometimes add a teaspoon of Dijon mustard which helps emulsify the dressing and adds a subtle tang. Don’t skimp on the black pepper either; those little specks carry so much flavor that brightens all the other ingredients.

    Serving Ideas & Creative Variations

    Perfect Pairing Suggestions

    This versatile salad works beautifully as both a standalone meal or a companion to other Mediterranean favorites. For dinner parties, I love serving it alongside grilled chicken skewers or baked salmon with lemon and herbs. The cool, tangy flavors complement anything charred or roasted perfectly. For a more substantial spread, pair with warm pita bread and a side of hummus or tzatziki for dipping. When I’m hosting friends for a casual lunch, I often create a Mediterranean grazing board with this salad as the centerpiece, surrounded by olives, roasted red peppers, and Creamy Tortellini Soup for those wanting something warm alongside their salad.

    Seasonal Adaptations Worth Trying

    The beauty of this salad lies in its flexible foundation that welcomes seasonal produce all year round. In summer, I add charred corn kernels and zucchini ribbons for sweetness and extra texture. Fall brings opportunities for roasted butternut squash cubes or pomegranate seeds that burst with tart juice against the feta. Winter variations might include roasted red peppers and sun-dried tomatoes when fresh ones aren’t at their peak. My spring favorite includes blanched asparagus tips and fresh dill. You can also switch up the protein – grilled chicken, seared shrimp, or even smoked tofu work wonderfully for those wanting to boost the protein content even further.

    Storage & Troubleshooting Guide

    Keeping It Fresh for Days

    This pasta salad actually improves with a little time, making it perfect for meal prepping. Store it in an airtight container in the refrigerator for up to four days. The flavors meld together beautifully as it sits, though the vegetables will soften slightly. If you know you’ll be storing it for several days, consider keeping delicate ingredients like cucumber separate and adding them just before serving. Another pro tip: reserve a small portion of the dressing to refresh the salad just before eating – a quick drizzle and toss brings everything back to life. For maximum freshness, store in glass containers rather than plastic, which can sometimes affect the delicate flavors.

    Solving Common Pasta Salad Problems

    The most frequent issue with pasta salad is texture degradation – either mushy pasta or dry, bland results after refrigeration. If your pasta has become too soft, add fresh elements like extra cucumber or bell pepper to bring back the crunch factor. For salads that seem to have absorbed all the dressing, simply whisk together a small amount of olive oil and lemon juice to revive it. If the flavors seem muted after storage, don’t just add salt – instead, try a splash of vinegar or lemon zest to brighten everything up. Remember that cold temperatures dull flavors, so a room-temperature pasta salad will always taste more vibrant than one straight from the refrigerator.

    Frequently Asked Questions

    Can I make this Quick High Protein Greek Pasta Salad ahead of time?

    Absolutely! It actually improves after a few hours in the refrigerator as flavors meld together. Make it up to 24 hours ahead, but reserve some fresh herbs to sprinkle just before serving for optimal flavor and presentation.

    What’s the best pasta shape to use?

    Short shapes like rotini, fusilli, or bow ties work best because they capture more dressing in their crevices. These shapes also mix more evenly with the other ingredients, ensuring perfect bites with multiple components.

    How can I boost the protein content even more?

    Add grilled chicken, canned tuna, hard-boiled eggs, or additional beans like white beans or edamame. For vegetarian options, consider adding cubed tempeh or a sprinkle of nutritional yeast.

    Can I make this recipe gluten-free?

    Yes! Simply substitute regular pasta with your favorite gluten-free variety. Chickpea, lentil, or brown rice pastas work particularly well and add extra protein and fiber.

    Will this salad work for potlucks or picnics?

    It’s perfect for gatherings since it doesn’t contain mayo or other ingredients that spoil quickly. Just keep it chilled in a cooler and give it a quick toss before serving.

    Final Thoughts

    This Quick High Protein Greek Pasta Salad has become more than just a recipe in my kitchen—it’s a solution for busy days, a crowd-pleaser for gatherings, and a nutritional powerhouse disguised as comfort food. What I appreciate most is how it adapts to whatever life throws my way, whether that’s unexpected guests or hectic workweeks. The Mediterranean flavors bring a moment of sunshine to ordinary meals, proving that healthy eating doesn’t require sacrifice. I’d love to see your versions of this versatile dish—share your creations on Pinterest and tag me so I can admire your personal spin!

  • High Protein Chicken Salad Recipe That Will Boost Your Energy Fast!

    High Protein Chicken Salad Recipe That Will Boost Your Energy Fast!

    High Protein Chicken Salad Recipe That Will Boost Your Energy Fast!

    Looking for a high protein chicken salad recipe that’s both delicious and satisfying? You’ve just found your new favorite meal prep staple! There’s something magical about the perfect chicken salad – creamy, crunchy, savory, and protein-packed all in one bite. I discovered this recipe during my post-workout hunger panics, when I needed something substantial that wouldn’t undo my morning efforts at the gym. This protein-powered version has become my go-to lunch option that keeps me fueled through busy afternoons without the mid-day slump. Check out more protein-packed recipes at Recipes Darleen for your weekly meal inspiration!

    Recipe

    Why You’ll Love This High Protein Chicken Salad Recipe

    Perfect Balance of Nutrition and Flavor

    This isn’t your ordinary chicken salad! With over 25 grams of protein per serving, this recipe hits all the right nutritional notes while delivering incredible taste. I’ve carefully balanced the protein-rich chicken with Greek yogurt (instead of all mayo) to amp up the protein content even further. The crisp celery and sweet grapes provide the perfect textural contrast against the tender chicken chunks. What I love most is how the tangy Dijon mustard and fresh herbs create layers of flavor that make each bite exciting. You’ll never feel like you’re eating “health food” – just deliciously satisfying chicken salad!

    Quick Prep for Busy Lifestyles

    One of my favorite things about this high protein chicken salad is how quickly it comes together. On Sunday evenings when I’m planning my week, I can whip this up in under 20 minutes and have lunches ready for days. The beauty is in its simplicity – rotisserie chicken saves incredible time (though poaching your own works beautifully too). I’ve found that spending just a few minutes chopping ingredients pays off enormously throughout the week. There’s something deeply satisfying about opening the fridge at lunchtime and having this protein-packed goodness waiting for you. No more rushed decisions or expensive takeout!

    Essential Tips & Tricks

    Choosing and Preparing Your Chicken

    The foundation of any great chicken salad is, of course, the chicken itself! For maximum protein and flavor, I recommend using breast meat, which provides the leanest protein source. When I have time, I poach chicken breasts with aromatics like bay leaves and peppercorns for extra flavor infusion. The gentle cooking keeps the meat juicy and tender. For busy days, a good quality rotisserie chicken works beautifully – just remove the skin to keep it lighter. Always let your chicken cool completely before mixing to prevent a soggy salad. Chop your chicken into consistent, bite-sized pieces (about ½-inch cubes) for the perfect texture in every bite.

    Balancing Creamy and Crunchy Elements

    The magic of this high protein chicken salad happens when you nail the textural balance. I combine Greek yogurt with just enough mayo to create a creamy, protein-rich dressing without heaviness. For the perfect crunch factor, dice celery finely and consider adding toasted nuts like slivered almonds or walnuts for extra protein and satisfying texture. I love including something sweet – grapes, diced apples, or dried cranberries all work beautifully. Just like my Crack Chicken Noodle Soup Crockpot, it’s these thoughtful combinations that elevate a simple recipe to something truly crave-worthy.

    Serving Ideas & Creative Variations

    Beyond the Sandwich

    While a classic sandwich is always delicious, this protein-packed chicken salad deserves creative serving options! My favorite weekend lunch is scooping it onto a bed of peppery arugula with sliced avocado for healthy fats. For a party-worthy presentation, hollow out cucumber rounds or cherry tomatoes and fill them with tiny scoops for elegant, low-carb appetizers. When I’m craving something warm, I stuff it into halved bell peppers and broil them for a few minutes until slightly charred. For a satisfying work lunch, pack it with whole grain crackers and fresh vegetable sticks. The protein content keeps you full while the varied serving methods prevent meal fatigue.

    Global Flavor Inspirations

    Transform your basic chicken salad into a culinary adventure by drawing inspiration from global cuisines! For a Mediterranean twist, add chopped olives, feta cheese, and fresh oregano – it pairs beautifully with Slow Cooker Mac & Cheese Classic for a comfort food dinner. My current obsession is curry chicken salad with a touch of yellow curry powder, diced mango, and toasted coconut flakes. For a Southwest version, incorporate black beans, corn, cilantro, and a squeeze of lime juice. Asian-inspired? Try adding water chestnuts, mandarin oranges, and a splash of sesame oil. These variations keep your meal prep exciting while maintaining that crucial high-protein profile.

    Storage & Troubleshooting Guide

    Maximizing Freshness and Longevity

    To keep your high protein chicken salad at its best, proper storage is essential. Store it in an airtight container in the refrigerator for up to 4 days. I’ve found that glass containers maintain freshness better than plastic ones. If your recipe includes watery vegetables like cucumber or tomatoes, add them just before serving to prevent excess moisture. For meal prep, consider preparing the chicken and dressing separately, then combining them the night before you plan to eat. Never freeze chicken salad – the mayonnaise and yogurt will separate, and the vegetables will become mushy. A quick stir before serving refreshes the consistency for the perfect bite every time.

    Fixing Common Chicken Salad Problems

    Even experienced cooks occasionally encounter chicken salad issues! If your salad seems too dry, add small amounts of Greek yogurt until you reach your desired consistency. For a salad that’s too wet (often from watery vegetables), drain excess liquid and fold in a tablespoon of chia seeds to absorb moisture. If the flavor seems bland, brighten it with a splash of lemon juice, extra Dijon mustard, or fresh herbs. Experiencing a texture that’s too mushy? Add finely diced celery, water chestnuts, or toasted nuts to reintroduce crunch. Remember that chicken salad often tastes better after flavors have melded for a few hours, so taste again before adjusting seasoning.

    Frequently Asked Questions

    How much protein is in this chicken salad recipe?

    This high protein chicken salad delivers approximately 25-30 grams of protein per serving, depending on your chicken quantity and whether you use Greek yogurt in the dressing. It’s perfect for post-workout recovery or a satisfying lunch.

    Can I use canned chicken instead of fresh?

    Yes! While fresh or rotisserie chicken provides the best texture, canned chicken works in a pinch. Drain thoroughly and flake gently with a fork rather than chopping to maintain the best possible texture.

    How can I make this recipe dairy-free?

    Replace the Greek yogurt with dairy-free yogurt alternatives made from coconut or almond milk. You can also use avocado-based mayonnaise for creaminess without compromising on protein content.

    Is this recipe keto-friendly?

    With minor adjustments, yes! Skip the grapes or sweet add-ins and focus on low-carb mix-ins like celery, nuts, and herbs. Use full-fat mayo instead of Greek yogurt for proper keto macros.

    How long will this chicken salad last in the refrigerator?

    When properly stored in an airtight container, this chicken salad remains fresh for 3-4 days. For best quality, consume within the first 2 days when flavors are at their peak.

    Final Thoughts

    This high protein chicken salad recipe has become my kitchen MVP for good reason – it’s nutritious, versatile, and absolutely delicious. I love how it adapts to whatever ingredients I have on hand while always delivering that crucial protein boost that keeps me going through busy days. The combination of lean chicken, Greek yogurt, and crunchy vegetables creates a perfect balance of nutrition and satisfaction. Whether enjoyed as a post-workout meal, packed for lunch, or served at gatherings, this protein-rich chicken salad never disappoints. Find more protein-packed inspiration on Pinterest and elevate your meal prep game!

  • Broccoli Ground Turkey Alfredo Pasta: Creamy Comfort in 30 Mins!

    Broccoli Ground Turkey Alfredo Pasta: Creamy Comfort in 30 Mins!

    Broccoli Ground Turkey Alfredo Pasta: Creamy Comfort in 30 Mins!

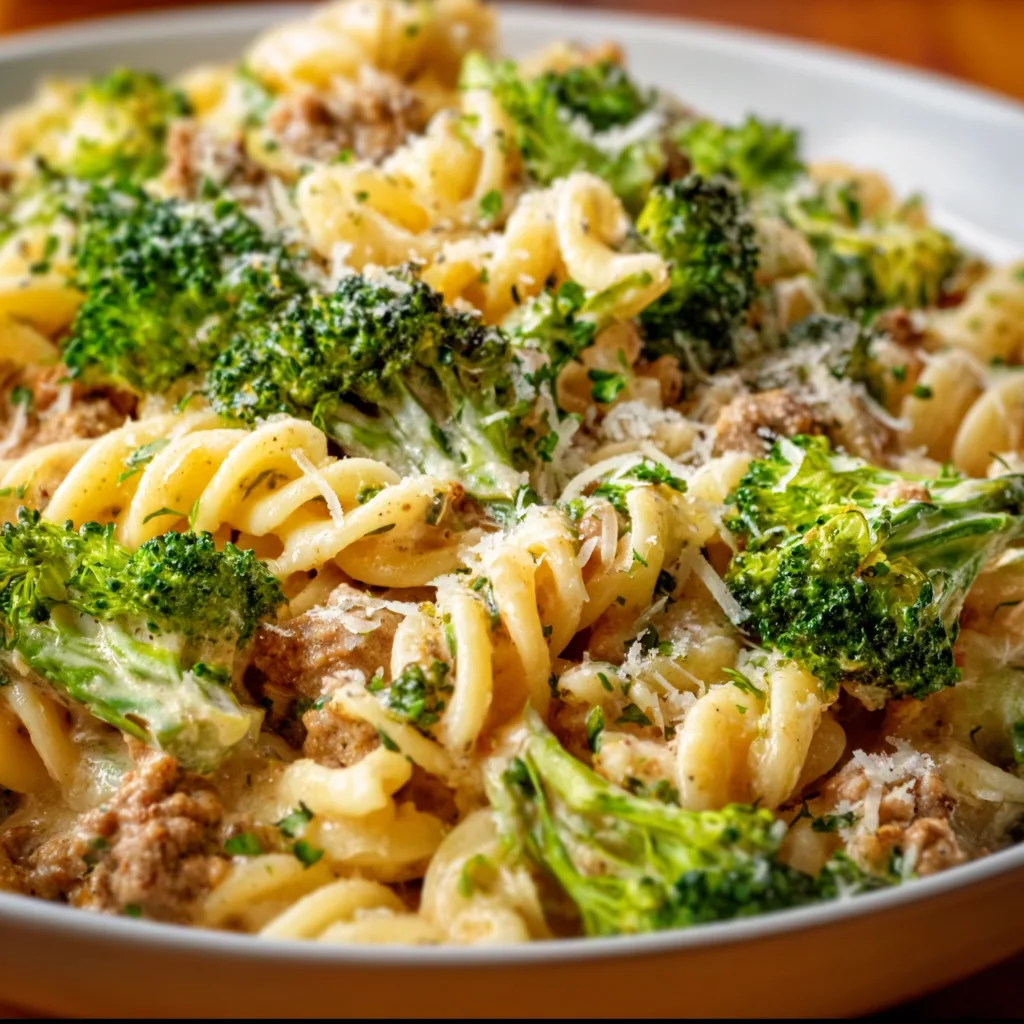
    Broccoli Ground Turkey Alfredo Pasta has become my absolute go-to for those evenings when comfort food calls but I still want something nourishing. The first time I made this dish, my kitchen filled with the rich aroma of garlic and parmesan that had my family hovering around the stove before I could even set the table. There’s something magical about the way the creamy alfredo sauce clings to every spiral of pasta, surrounding tender bites of ground turkey and vibrant broccoli florets. This dish reminds me of the pasta my grandmother used to make, but with my own healthier spin that doesn’t sacrifice an ounce of flavor.

    Recipe

    Why You’ll Love This Broccoli Ground Turkey Alfredo Pasta

    Perfect Balance of Flavor and Nutrition

    This dish strikes that elusive sweet spot between indulgent comfort and wholesome goodness. The lean ground turkey provides protein without the heaviness of beef, while the broccoli adds a fresh, earthy note that cuts through the richness of the alfredo sauce. I love how the florets catch little pockets of the creamy sauce in their tiny tree-like tops! The combination creates a satisfying mouthfeel that hits all the right notes—creamy, savory, with just enough texture from the perfectly cooked broccoli to keep every bite interesting. It’s the kind of meal that leaves you feeling nourished rather than weighed down.

    Quick and Adaptable for Busy Weeknights

    On those nights when I’ve got soccer practice drop-offs and homework help competing for my attention, this 30-minute wonder saves dinner time. The components cook simultaneously—pasta boiling, turkey browning, and sauce coming together—making efficient use of precious evening minutes. I’ve made this with whole wheat pasta when I’m feeling extra virtuous, gluten-free pasta when my sister visits, and classic fettuccine when I’m craving that traditional alfredo experience. The recipe forgives substitutions beautifully, which means you can adapt based on what’s already in your pantry without an emergency grocery run.

    Essential Tips & Tricks

    Perfecting Your Alfredo Sauce

    The heart of this dish is undeniably the silky alfredo sauce that brings everything together. My secret? Room temperature cream cheese and freshly grated parmesan—never the pre-shredded stuff that contains anti-caking agents. When adding the heavy cream, do it gradually while whisking continuously to prevent any separation or graininess. A tiny pinch of nutmeg might sound strange, but it adds that je ne sais quoi that has guests wondering what makes your sauce special. For a lighter version that still maintains creaminess, you could try my Crockpot Chicken Broccoli Alfredo technique with half-and-half instead.

    Broccoli and Turkey Cooking Techniques

    Perfect broccoli texture is crucial—no one wants mushy florets that disintegrate into the sauce. I blanch mine separately for exactly 2 minutes, then shock in ice water to maintain that vibrant green color and slight crunch. For the turkey, a cast iron skillet creates the best browning, which equals flavor. Break the meat into small, even pieces as it cooks and season progressively—salt and pepper at the beginning, then garlic and Italian herbs halfway through. This layering of flavors makes the turkey anything but bland, a common complaint with ground turkey dishes.

    Serving Ideas & Creative Variations

    Complementary Side Dishes

    This pasta stands beautifully on its own, but I love serving it with a bright, acidic salad to balance the richness—think arugula with lemon vinaigrette or a simple tomato and basil side. Garlic bread is the obvious choice for soaking up extra sauce, but for something different, try roasted asparagus or zucchini spears. When I’m hosting and want to impress, I serve this alongside my Glazed Carrots for a color contrast that makes the table pop. The sweetness of the carrots provides a lovely counterpoint to the savory pasta dish.

    Fun Twists on the Classic Recipe

    The beauty of this dish lies in its versatility. Swap the turkey for Italian chicken sausage for a flavor punch, or use ground chicken if that’s what you have on hand. Vegetable variations are endless—peas, spinach, sun-dried tomatoes, or mushrooms all work beautifully. For a spicy kick, add red pepper flakes or a dollop of pesto swirled into the finished dish. My personal favorite twist is adding roasted red peppers and a handful of toasted pine nuts for texture contrast. These small adjustments keep the dish feeling fresh even when it appears on your weekly rotation.

    Storage & Troubleshooting Guide

    Proper Storage and Reheating

    This pasta reheats beautifully, making it perfect for meal prep or planned leftovers. Store in airtight containers in the refrigerator for up to 3 days. When reheating, add a splash of milk or cream to revive the sauce, as it will thicken considerably when chilled. Microwave on medium power, stirring halfway through, or gently reheat on the stovetop over low heat. The broccoli may soften further upon reheating, which some of my family members actually prefer! For freezing, portion into individual servings and thaw overnight in the refrigerator before reheating.

    Troubleshooting Common Issues

    If your sauce breaks or appears curdled, lower the heat immediately and whisk in a tablespoon of cold cream. The most common mistake is overheating the alfredo—it should never reach a full boil after the cheese is added. For too-thick sauce, thin with pasta water rather than plain water for better texture. If your broccoli turns an unappetizing olive color, you’ve likely overcooked it; next time, reduce the blanching time and remember that it will continue cooking slightly when combined with the hot pasta. For turkey that seems dry, incorporate it into the sauce earlier to allow it to absorb some moisture.

    Frequently Asked Questions

    Can I use frozen broccoli in this Broccoli Ground Turkey Alfredo Pasta?

    Yes! Thaw it first and pat dry with paper towels to remove excess moisture. Add it later in the cooking process since it’s already partially cooked, about 2 minutes before combining with the pasta.

    How can I make this recipe lighter?

    Substitute half-and-half for heavy cream, use reduced-fat cream cheese, and increase the ratio of broccoli to pasta. You could also use whole wheat pasta for added fiber.

    What’s the best pasta shape for this dish?

    Fettuccine is traditional for alfredo, but any pasta that holds sauce well works great—penne, rotini, or farfalle are excellent choices that capture sauce in their nooks and crannies.

    Can I make this dish ahead of time?

    Yes, but store the components separately if possible—pasta, sauce, and broccoli—and combine when reheating. This prevents the pasta from absorbing too much sauce and the broccoli from overcooking.

    Is there a dairy-free alternative for this recipe?

    Absolutely! Use cashew cream or coconut milk for the base, dairy-free cream cheese, and nutritional yeast instead of parmesan. The texture will be slightly different but still delicious.

    Final Thoughts

    This Broccoli Ground Turkey Alfredo Pasta has become more than just a recipe in my household—it’s a reliable friend on hectic weeknights and a crowd-pleaser when company comes calling. The balance of lean protein, vegetables, and creamy comfort makes it a dish I can feel good about serving regularly. I’d love to see your versions of this versatile pasta dish—tag me on Pinterest with your creative twists! Remember, cooking should bring joy, and there’s nothing more joyful than gathering around a steaming bowl of pasta that nourishes both body and soul.

  • Crock Pot Chicken Scarpariello Recipe That Melts Hearts Fast

    Crock Pot Chicken Scarpariello Recipe That Melts Hearts Fast

    Crock Pot Chicken Scarpariello Recipe That Melts Hearts Fast

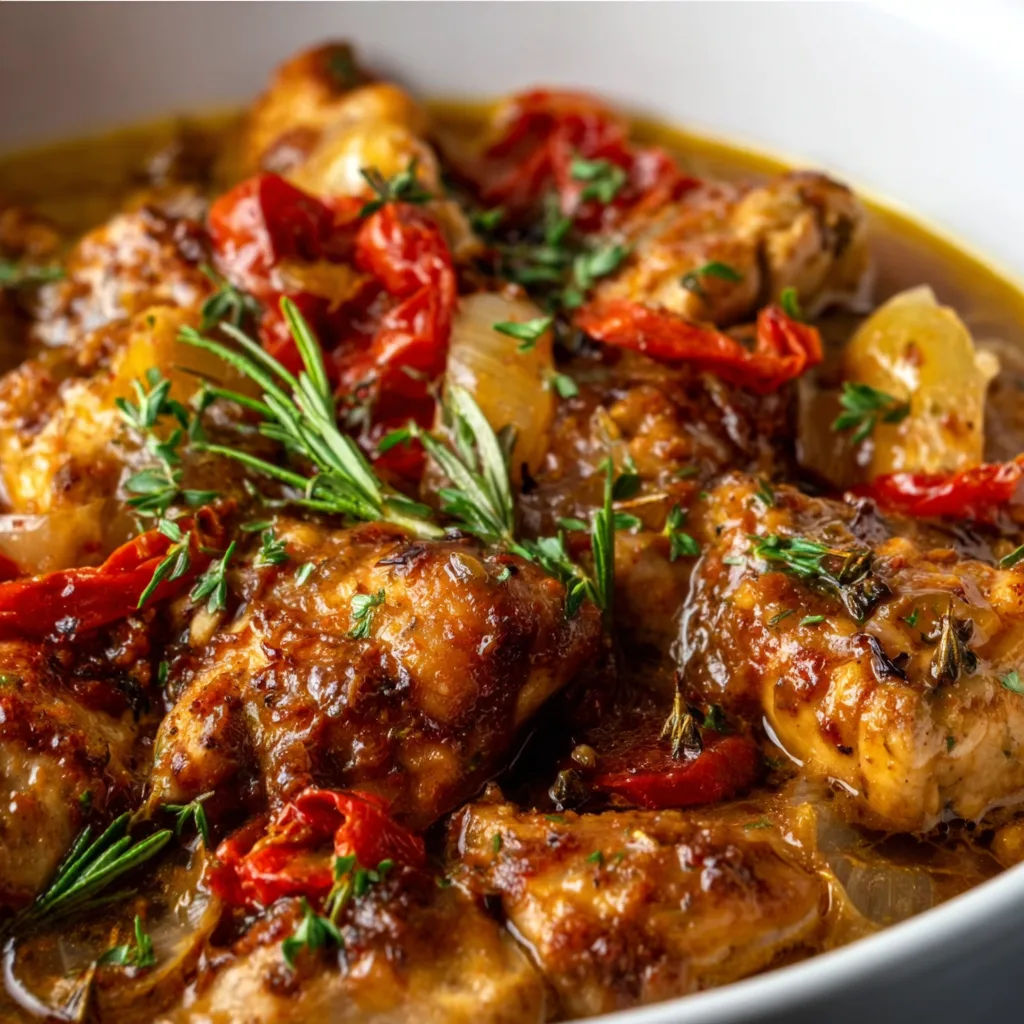
    Crock Pot Chicken Scarpariello transforms ordinary chicken into a rustic Italian masterpiece with minimal effort. This slow-cooked dish combines tender chicken thighs with sweet peppers, tangy cherry peppers, and savory Italian sausage, all bathed in a garlicky white wine sauce that will have your kitchen smelling like a Sicilian grandmother’s. I discovered this recipe during a particularly hectic holiday season, and it’s been my go-to for impressing guests without being chained to the stove. The beauty lies in its set-it-and-forget-it simplicity while delivering complex flavors that taste like you’ve been cooking all day. Let’s dive into this cozy comfort food that’s perfect for any night of the week.

    Recipe

    Why You’ll Love This Crock Pot Chicken Scarpariello

    A Flavor Explosion with Minimal Effort

    There’s something magical about the way the ingredients in Crock Pot Chicken Scarpariello meld together over low, slow heat. The tangy-sweet balance between the cherry peppers and bell peppers creates a perfect counterpoint to the rich chicken thighs and savory sausage. I love how the garlic infuses everything with its aromatic essence without overwhelming the dish. The first time I made this, my kitchen smelled so incredible that my neighbor actually texted to ask what I was cooking! Best of all, the slow cooker does the heavy lifting—just prep your ingredients, set the timer, and return to a restaurant-quality meal that tastes like you’ve been lovingly tending to it all day.

    Perfect for Busy Weeknights and Entertaining

    This Crock Pot Chicken Scarpariello has saved me countless times, both on hectic weeknights and when entertaining guests. On busy days, I can toss everything in before work and come home to a complete meal that needs nothing more than a quick side. For dinner parties, it’s my secret weapon—I can actually enjoy my guests instead of being stuck in the kitchen! The rustic presentation makes for a beautiful serving dish, especially when you transfer it to a platter with some fresh herbs sprinkled on top. I’ve served this for everything from casual family dinners to more upscale gatherings, and it always receives rave reviews from everyone at the table.

    Essential Tips & Tricks

    Ingredient Selection Matters

    When making Crock Pot Chicken Scarpariello, choosing the right ingredients elevates the dish from good to extraordinary. Always opt for bone-in chicken thighs as they stay juicier and more flavorful during the long cooking process than boneless cuts. The fat renders beautifully, enriching the sauce. For sausage, I recommend Italian hot sausage for authentic flavor, though sweet works if you’re sensitive to heat. Don’t skimp on the cherry peppers—they provide that signature tangy bite that defines Scarpariello. I once made this with regular pickled peppers in a pinch, and while still delicious, it lacked that special zing. Fresh bell peppers provide sweetness and texture, so choose firm ones in various colors for visual appeal.

    Perfecting Your Technique

    The magic of Crock Pot Chicken Scarpariello happens in the preparation steps before everything goes into the slow cooker. Always brown the chicken and sausage first—this five-minute step creates depth of flavor that makes all the difference. I learned this the hard way when I once skipped browning and ended up with a tasty but one-dimensional dish. When deglazing the pan with wine, scrape up all those flavorful brown bits (fond) and transfer everything to your slow cooker. For the perfect texture, don’t overcrowd your crock pot; a single layer works best. If making Slow Cooker Mac & Cheese Classic taught me anything, it’s that proper layering in a slow cooker ensures even cooking.

    Serving Ideas & Creative Variations

    Complementary Side Dishes

    Crock Pot Chicken Scarpariello shines when paired with sides that complement its rich, tangy sauce. My absolute favorite pairing is creamy polenta, which creates the perfect canvas for soaking up every drop of that delicious sauce. A crusty Italian bread works beautifully too—I keep a loaf of ciabatta ready for dipping. For a lighter option, consider a simple arugula salad dressed with lemon and olive oil to cut through the richness. Roasted garlic mashed potatoes make another excellent base, especially when you create a little well for the sauce to pool.

    I’ve also served this over pappardelle pasta when I wanted something more substantial, and the wide noodles catch the sauce perfectly, similar to how they work in my Angel Chicken Crock Pot recipe.

    Exciting Flavor Twists

    While traditional Crock Pot Chicken Scarpariello is already amazing, I love experimenting with variations that add personal flair. Try adding fennel bulb slices for a subtle anise flavor that complements the peppers beautifully. For a Mediterranean twist, toss in some kalamata olives and a sprinkle of oregano during the last hour of cooking. When I’m feeding spice-lovers, I add a teaspoon of red pepper flakes or a diced jalapeño to amp up the heat. For a creamier version, stir in 1/4 cup of heavy cream just before serving—this creates a luxurious sauce that’s still tangy but with a silky finish.

    You can also substitute chicken with pork shoulder for a different but equally delicious take on this Italian classic.

    Storage & Troubleshooting Guide

    Proper Storage for Maximum Flavor

    One of the beautiful things about Crock Pot Chicken Scarpariello is that it actually tastes even better the next day after the flavors have had time to meld. To store properly, allow the dish to cool completely before transferring to airtight containers. It will keep in the refrigerator for up to 4 days, making it perfect for meal prep. When reheating, add a splash of chicken broth to maintain moisture and prevent the sauce from reducing too much. This dish also freezes beautifully—portion it into freezer-safe containers and freeze for up to 3 months.

    I like to label mine with the date and contents using masking tape. For best results when freezing, slightly undercook the bell peppers initially so they don’t become mushy when reheated.

    Solving Common Challenges

    Even experienced cooks occasionally encounter issues with slow cooker recipes. If your Crock Pot Chicken Scarpariello sauce is too thin, there’s an easy fix: remove the lid during the last 30 minutes of cooking to allow some liquid to evaporate, or create a quick slurry with 1 tablespoon cornstarch mixed with 2 tablespoons cold water and stir it in. Conversely, if the sauce is too thick, add a splash of chicken broth or white wine. If your chicken isn’t as tender as you’d like, your slow cooker might run hot—next time, reduce the temperature or cooking time.

    For overly acidic sauce, add 1/2 teaspoon of honey or sugar to balance the flavors. Remember that slow cookers vary in temperature, so you might need to adjust cooking times based on your specific model.

    Frequently Asked Questions

    Can I use boneless chicken for Crock Pot Chicken Scarpariello?

    Yes, boneless thighs work, but reduce cooking time by about an hour to prevent drying out. Bone-in thighs provide more flavor and moisture, but boneless offers convenience and faster cooking.

    What can I substitute for cherry peppers?

    Pepperoncini makes the best substitute, offering similar tanginess. Banana peppers work too, though milder. If unavailable, roasted red peppers with a splash of vinegar can approximate the flavor profile.

    Can I make Crock Pot Chicken Scarpariello ahead for a party?

    Absolutely! It actually improves with time as flavors meld. Make it a day ahead, refrigerate, then reheat on low in your slow cooker for 1-2 hours before serving.

    Is this recipe gluten-free?

    Yes, traditional Crock Pot Chicken Scarpariello ingredients are naturally gluten-free. Just verify your chicken broth and sausage don’t contain hidden gluten additives.

    How do I prevent the vegetables from getting too soft?

    Add firmer vegetables like bell peppers during the last 1-2 hours of cooking instead of at the beginning. This maintains their texture while still infusing them with flavor.

    Final Thoughts

    Crock Pot Chicken Scarpariello represents everything I love about slow cooker meals—complex flavors with minimal hands-on time. The combination of tender chicken, zesty peppers, and savory sausage creates a comforting yet sophisticated dish that’s become a staple in my home. Whether you’re feeding a family on a busy weeknight or entertaining guests, this recipe delivers restaurant-quality results without the fuss. I hope you’ll give this Italian-American classic a try and discover why it’s earned a permanent spot in my recipe collection. For more slow cooker inspiration, check out my other recipes on Pinterest where I’m always sharing new comfort food favorites.

  • Healthy High Protein Pasta Salad – Fresh, Easy & Mayo-Free!

    Healthy High Protein Pasta Salad – Fresh, Easy & Mayo-Free!

    Healthy High Protein Pasta Salad – Fresh, Easy & Mayo-Free!

    Healthy high protein pasta salad with no mayo is my absolute summer savior when I need something filling yet refreshing. The first time I made this, I was hosting a backyard gathering during a scorching July afternoon, and everyone kept asking for the recipe! The combination of al dente pasta, lean proteins, and crisp vegetables tossed in a zesty vinaigrette creates a perfect balance of flavors without the heaviness of traditional mayo-based dressings. This versatile dish has become my go-to for meal prep, picnics, and potluck gatherings.

    Recipe

    Why You’ll Love This Healthy High Protein Pasta Salad No Mayo

    Perfect Balance of Nutrition and Flavor

    This pasta salad packs a serious nutritional punch while delivering incredible taste in every bite. The protein sources – think grilled chicken, chickpeas, or even tofu – keep you satisfied for hours, while the rainbow of vegetables provides essential vitamins and fiber. I love how the bright, acidic dressing brings everything together without adding unnecessary calories. The first time I brought this to my fitness group’s potluck, everyone was shocked that something so delicious could be so nutritious! The combination of textures – from the tender pasta to the crunchy veggies – creates a truly satisfying eating experience.

    Quick and Versatile for Any Occasion

    One of my favorite things about this healthy high protein pasta salad is how incredibly versatile it is. You can prepare it in under 30 minutes, making it perfect for busy weeknights or last-minute gatherings. The make-ahead quality actually improves the flavor as ingredients mingle in the refrigerator. I’ve served this at everything from casual backyard BBQs to more formal dinner parties, and it’s always a hit. The best part? You can customize it based on what you have on hand – swap proteins, change up the veggies, or experiment with different herbs and spices.

    Essential Tips & Tricks

    Pasta Selection and Preparation

    Choosing the right pasta is crucial for a successful protein pasta salad. I recommend whole grain varieties like rotini, fusilli, or bow ties that capture the dressing in their nooks and crannies. Cook the pasta about 1 minute less than package directions for that perfect al dente texture that won’t become mushy. My game-changing trick? After draining, rinse with cold water to stop the cooking process, then toss with a splash of olive oil to prevent sticking. This creates the ideal base for your creamy tortellini soup ingredients when you’re ready to assemble everything.

    Protein Selection and Preparation

    The protein component is what transforms this from a side dish into a complete meal. For maximum flavor, I marinate chicken breasts in lemon, garlic, and herbs before grilling and dicing. Plant-based options like chickpeas or white beans should be thoroughly rinsed and patted dry. My personal favorite combination is grilled chicken with edamame for textural contrast. Prepare proteins the day before for deeper flavor development. For seafood options like shrimp or tuna, add them just before serving to maintain their delicate texture and prevent any fishy aromas from overwhelming the salad.

    Serving Ideas & Creative Variations

    Seasonal Adaptations

    One of the joys of this healthy high protein pasta salad is how beautifully it transitions between seasons. In summer, I load it with garden-fresh produce like cherry tomatoes, cucumber, and bell peppers for maximum crispness and color. Come fall, I pivot to roasted sweet potatoes, dried cranberries, and pecans for a heartier version. Winter variations might include roasted Brussels sprouts and butternut squash, while spring calls for asparagus, peas, and tender herbs. The dressing can shift too – lighter lemon vinaigrettes for warmer months, and more robust balsamic-based options when the temperature drops, similar to how I adjust my slow cooker mongolian beef recipe.

    International Flavor Profiles

    Transform your basic protein pasta salad by exploring global inspirations. For Mediterranean vibes, add olives, feta, artichoke hearts, and a lemon-oregano dressing. My Asian-inspired version includes edamame, mandarin oranges, water chestnuts, and a sesame-ginger vinaigrette that’s absolutely divine. For Southwestern flair, try black beans, corn, avocado, and cilantro with a lime-cumin dressing. Italian variations work beautifully with mozzarella pearls, basil, and sun-dried tomatoes. These international twists keep the concept fresh and exciting while maintaining the healthy, no-mayo approach that makes this dish special.

    Storage & Troubleshooting Guide

    Optimal Storage Practices

    Proper storage is essential for maintaining the texture and flavor of your protein pasta salad. Store it in an airtight container in the refrigerator for up to 4 days, though it’s at its prime within the first 48 hours. I’ve found that layering ingredients strategically makes a difference – keep delicate items like avocados, fresh herbs, or soft cheeses separate until serving time. For meal prep purposes, consider assembling individual portions in mason jars with dressing at the bottom, hearty vegetables and proteins in the middle, and pasta on top. This prevents sogginess and keeps everything perfectly fresh until you’re ready to enjoy it.

    Common Issues and Solutions

    Even experienced cooks encounter challenges with protein pasta salads. If your pasta becomes too dry during storage, simply drizzle with a bit of extra dressing or a splash of olive oil before serving. For soggy vegetables, try adding them closer to serving time or opt for sturdier varieties that hold up better. If your salad lacks flavor, don’t just add salt – brighten it with a squeeze of fresh lemon juice or a splash of vinegar to wake up the taste buds. And for pasta that’s clumped together, gently separate with a fork and add a small amount of olive oil to restore the proper texture.

    Frequently Asked Questions

    How can I make my healthy high protein pasta salad no mayo even more protein-rich?

    Add a combination of protein sources like grilled chicken, chickpeas, edamame, and hard-boiled eggs. Quinoa pasta or protein-enriched varieties can also boost protein content. A sprinkle of hemp seeds or nutritional yeast adds extra protein without changing the flavor profile.

    What’s the best dressing substitute for mayo in pasta salad?

    A simple vinaigrette with olive oil, lemon juice, Dijon mustard, and herbs works beautifully. Greek yogurt-based dressings offer creaminess without the heaviness of mayo. Hummus thinned with olive oil and lemon juice creates a protein-rich, creamy alternative.

    Can I make this pasta salad ahead of time?

    Absolutely! Prepare it 1-2 days ahead, but reserve delicate ingredients like avocado and fresh herbs to add just before serving. The flavors actually improve as they meld in the refrigerator.

    Is this recipe suitable for special dietary needs?

    Yes! Use gluten-free pasta for celiac-friendly versions. For vegan options, focus on plant proteins like beans, tofu, or tempeh. The no-mayo approach already makes it dairy-free if you avoid cheese additions.

    How can I prevent the pasta from absorbing all the dressing?

    Slightly undercook the pasta (al dente), rinse with cold water after cooking, and toss with a bit of oil before adding other ingredients. Reserve some dressing to add right before serving for an instant refresh.

    Final Thoughts

    Creating a healthy high protein pasta salad with no mayo has transformed how I approach meal prep and entertaining. The vibrant flavors, satisfying textures, and nutritional benefits make it a standout dish that never feels like a compromise. I love watching people’s surprised reactions when they discover something so delicious is actually good for them! Whether you’re looking for a light lunch, a substantial side, or a potluck showstopper, this versatile recipe deserves a permanent spot in your cooking repertoire. Don’t forget to check out more protein-packed recipes on Pinterest for endless inspiration!

  • Maroulosalata: Irresistible Greek Lettuce Salad You’ll Crave Instantly!

    Maroulosalata: Irresistible Greek Lettuce Salad You’ll Crave Instantly!

    Maroulosalata: Irresistible Greek Lettuce Salad You’ll Crave Instantly!

    Maroulosalata, the quintessential Greek Lettuce Salad, brings a burst of Mediterranean sunshine to your table with just a handful of fresh ingredients. The first time I made this crisp, vibrant salad was during a sweltering summer evening when turning on the oven felt like torture. The refreshing crunch of romaine lettuce tossed with juicy tomatoes, crisp cucumbers, and tangy feta transported me straight to a seaside taverna in Santorini. What makes this salad truly special is its simple yet bold dressing – just good olive oil, lemon juice, and oregano. Perfect for busy weeknights or as a crowd-pleasing side at your next gathering, this Greek classic deserves a permanent spot in your recipe collection.

    Recipe

    Why You’ll Love This Maroulosalata (Greek Lettuce Salad)

    Fresh, Vibrant Flavors in Minutes

    There’s something magical about how a few humble ingredients transform into something extraordinary in this Maroulosalata. The crisp lettuce provides the perfect canvas for the bright lemon dressing to shine. I adore how the oregano adds that distinctive Greek flavor profile without overwhelming the delicate vegetables. What surprised me most was how quickly it comes together – literally five minutes of chopping and you’re done! The salad tastes like sunshine in a bowl, with each bite offering a perfect balance of freshness and tang that makes your taste buds dance with joy.

    A Nutritional Powerhouse

    Beyond its incredible taste, this Greek lettuce salad packs a serious nutritional punch. The combination of fresh vegetables delivers a wealth of vitamins, minerals, and antioxidants that nourish your body from the inside out. The olive oil provides heart-healthy fats while the feta adds protein and calcium. I’ve found it’s the perfect light meal that leaves me feeling satisfied without that heavy, sluggish feeling afterward. For those watching their carbs or following Mediterranean diet principles, this Maroulosalata checks all the boxes while still feeling indulgent and special.

    Essential Tips & Tricks

    Selecting the Perfect Ingredients

    The beauty of Maroulosalata lies in its simplicity, which means ingredient quality makes all the difference. Choose romaine lettuce with crisp, vibrant leaves – it provides the perfect structure to hold the dressing. For tomatoes, I find that vine-ripened varieties offer the sweetest flavor, while Persian or English cucumbers provide the ideal crunch without excess seeds. The feta deserves special attention – look for authentic Greek feta made from sheep’s milk packed in brine rather than pre-crumbled versions. And that olive oil? This is the time to use your best bottle, as its flavor will shine through in this simple dish.

    Mastering the Perfect Dressing Balance

    Creating the perfect dressing for your Maroulosalata is all about finding harmony between the olive oil and lemon juice. I start with a 3:1 ratio of oil to lemon juice, then adjust to taste. The secret is to whisk vigorously until the dressing emulsifies – this creates a silky texture that clings beautifully to each leaf. Don’t rush the oregano step; crushing dried oregano between your fingers releases its essential oils for maximum flavor. Season generously with salt and freshly ground black pepper, tasting as you go. Remember that feta adds saltiness, so you may need less salt than you think.

    Serving Ideas & Creative Variations

    Perfect Pairings for a Complete Meal

    Maroulosalata shines as both a side dish and a meal centerpiece. I love serving it alongside grilled proteins like souvlaki, lemon chicken, or simply seasoned fish for a complete Mediterranean feast. The bright, fresh flavors provide the perfect counterpoint to rich dishes like moussaka or pastitsio. For a casual lunch, pair it with warm pita bread and hummus. When hosting friends, I often serve this salad as part of a mezze spread with olives, tzatziki, and slow cooker honey mustard chicken for an impressive yet effortless spread that always garners compliments.

    Seasonal Twists and Regional Adaptations

    While traditional Maroulosalata follows a specific formula, don’t be afraid to make seasonal adaptations. In summer, I add juicy peaches or watermelon for unexpected sweetness. Spring versions shine with tender young herbs like dill and mint. For autumn, try adding pomegranate seeds for jewel-like pops of color and flavor. Regional Greek variations include additions like purslane, capers, or even oranges depending on the island. For a heartier version, toss in cooked orzo pasta or chickpeas. The versatility of this salad means it can evolve with your pantry and the seasons while maintaining its essential Greek character.

    Storage & Troubleshooting Guide

    Keeping Your Salad Fresh and Crisp

    The enemy of any lettuce salad is sogginess, but with a few tricks, your Maroulosalata can maintain its perfect texture. If preparing ahead, store components separately – keep washed and dried lettuce in a container lined with paper towels, prepare the dressing in a jar, and chop vegetables separately. Combine everything just before serving. If you must dress it ahead, omit the salt until serving time, as it draws moisture from vegetables. For leftovers (though they’re rare in my house!), store without feta, as it will continue to release salt and affect the texture.

    Rescuing Common Salad Mishaps

    Even experienced cooks encounter salad challenges, but most are easily fixed. If your Maroulosalata dressing has separated, simply re-whisk vigorously or shake in a closed container. Too tart? Add a pinch of honey or more olive oil to balance the acidity. Overdressed greens can be rescued by adding more undressed lettuce. If your salad has wilted slightly, don’t despair – a 10-minute ice bath can revive lettuce leaves. And if your feta is too salty, rinse it briefly before crumbling. Remember that this rustic Greek salad is forgiving by nature, embracing the beautiful imperfections that make homemade food special.

    Frequently Asked Questions

    What makes Maroulosalata different from other Greek salads?

    Unlike Greek salad (horiatiki) which contains no lettuce, Maroulosalata features romaine lettuce as its star ingredient. The dressing is similar, but the texture and overall experience are lighter and more refreshing.

    Can I make Maroulosalata ahead of time?

    You can prep components up to 24 hours ahead, but assemble just before serving. Store washed lettuce with paper towels, dressing separately, and add feta last to maintain optimal freshness and texture.

    Is Maroulosalata suitable for special diets?

    Yes! It’s naturally gluten-free, vegetarian, low-carb, and keto-friendly. For vegan diets, simply omit the feta or substitute with a plant-based alternative.

    What’s the best lettuce to use for authentic Maroulosalata?

    Romaine lettuce is traditional and provides the ideal crisp texture. However, you can substitute with green leaf lettuce or a mix of sturdy greens if romaine is unavailable.

    How can I turn this salad into a complete meal?

    Add protein like grilled chicken, shrimp, or chickpeas. For a heartier version, include cooked quinoa or orzo pasta while maintaining the classic Greek flavors.

    Final Thoughts

    This Maroulosalata (Greek Lettuce Salad) has become my go-to recipe when I want something that feels both special and effortless. The vibrant simplicity of fresh ingredients dressed with good olive oil and lemon juice reminds me that truly delicious food doesn’t need to be complicated. What I love most is how this humble salad connects me to centuries of Greek culinary tradition while fitting perfectly into my modern life. Whether you’re serving it alongside an elaborate feast or enjoying it as a light lunch, this Maroulosalata brings a touch of Mediterranean magic to your table. Find more Mediterranean-inspired recipes on Pinterest.

  • Fresh Italian Chopped Salad Recipe: Irresistibly Crisp & Zesty!

    Fresh Italian Chopped Salad Recipe: Irresistibly Crisp & Zesty!

    Fresh Italian Chopped Salad Recipe: Irresistibly Crisp & Zesty!

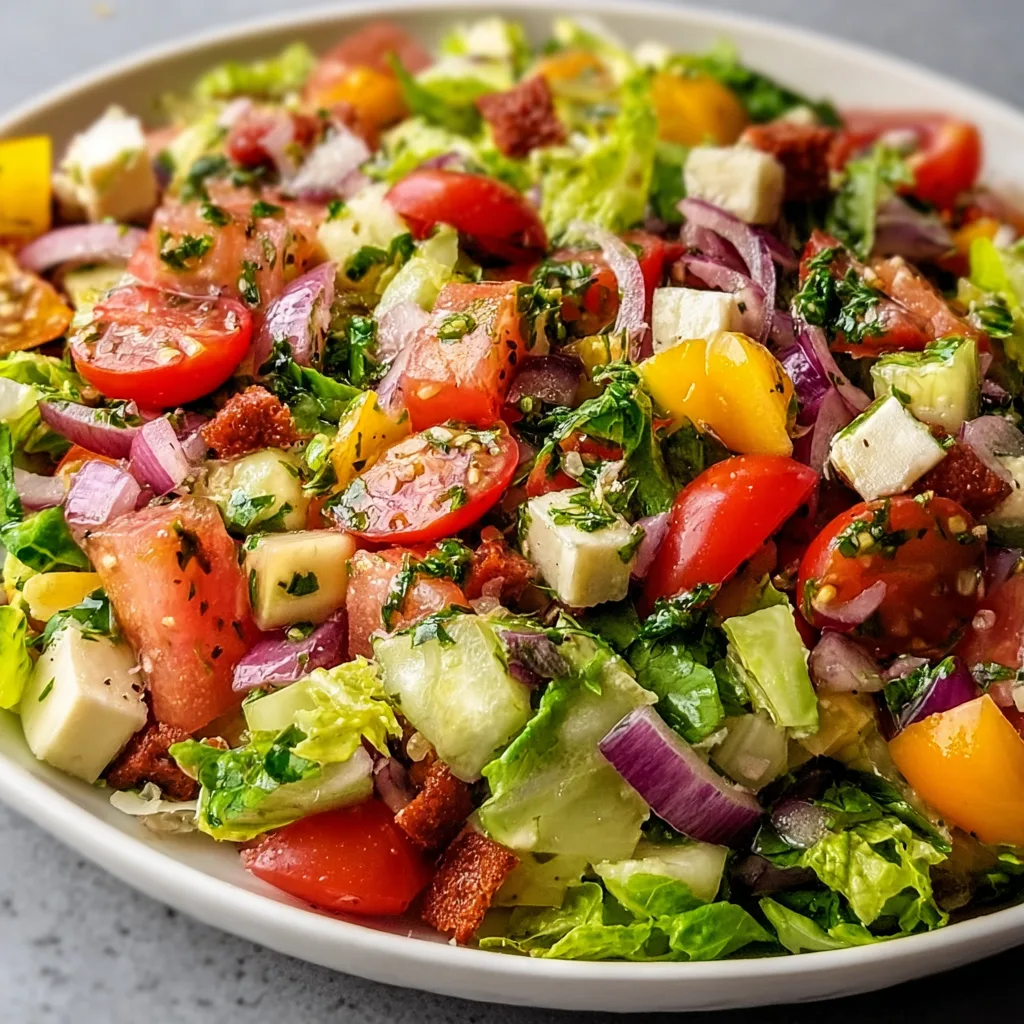
    The Fresh Italian Chopped Salad Recipe that’s been gracing my table lately has completely transformed my weeknight dinner routine. There’s something magical about the vibrant colors, crisp textures, and that perfect balance of tangy and savory flavors that makes this salad irresistible. As someone who grew up watching my grandmother meticulously chop vegetables for her famous antipasto, I’ve learned that the secret to an authentic Italian chopped salad lies in the quality of ingredients and the love you pour into each step. This refreshing dish has become my go-to when I need something quick yet impressive.

    Recipe

    Why You’ll Love This Fresh Italian Chopped Salad Recipe

    A Symphony of Textures and Flavors

    The beauty of this Fresh Italian Chopped Salad is how each bite delivers a perfect medley of crisp romaine, juicy tomatoes, and creamy mozzarella pearls. I love how the salty punch of olives and pepperoncini peppers creates a delightful contrast against the cool cucumbers. The first time I served this at a family gathering, my brother-in-law (who claims to hate salads) went back for seconds! The uniform chopping ensures you get a little taste of everything in each forkful, making this so much more satisfying than ordinary salads that leave the best bits at the bottom.

    Quick Preparation with Maximum Impact

    Even on my busiest weeknights, I can throw this vibrant salad together in under 15 minutes. The beauty lies in its simplicity—no cooking required, just chopping and tossing. I’ve found that preparing the homemade Italian dressing ahead of time (it keeps beautifully in the fridge for up to a week) makes assembly even faster. Last Tuesday, after a particularly exhausting workday, I managed to create this gorgeous salad while helping my daughter with homework. The look of delight on everyone’s faces when I placed it on the table made those few minutes of effort completely worthwhile.

    Essential Tips & Tricks

    Chopping Techniques for Perfect Texture

    The secret to an authentic Italian chopped salad is in the name—everything should be cut to a similar size for the ideal texture and flavor distribution. I use a sharp chef’s knife and aim for pieces about 1/2-inch square. For romaine, I stack the leaves, roll them tightly, then slice into thin ribbons (chiffonade). Tomatoes should be seeded first to prevent excess moisture from making your salad soggy. When dicing firmer ingredients like bell peppers and cucumbers, I’ve found that using the bridge cutting technique (curling fingers under while slicing) ensures both safety and precision.

    Dressing and Seasoning Secrets

    The dressing makes all the difference between a good salad and an unforgettable one. For my Italian vinaigrette, I combine extra virgin olive oil, red wine vinegar, Dijon mustard, and dried Italian herbs. The game-changer? Adding a splash of the pepperoncini brine for extra zing! Always dress the salad just before serving to maintain the perfect crispness. I keep a little salt and pepper grinder at the table so everyone can adjust seasoning to their preference. Remember that cold temperatures dull flavors, so I always taste and adjust the dressing one final time right before serving.

    Serving Ideas & Creative Variations

    Perfect Pairings for Any Occasion

    This Fresh Italian Chopped Salad is incredibly versatile as both a side dish and main course. For a light lunch, I serve it with warm crusty bread and a glass of crisp Pinot Grigio. When hosting dinner parties, it pairs beautifully with hearty pasta dishes or grilled chicken. Last month, I brought this to a potluck alongside some grilled Italian sausages, and the combination was spectacular! For a more substantial meal, top the salad with grilled shrimp or sliced chicken breast. The bright flavors and textures create the perfect counterpoint to richer dishes, cleansing the palate and adding a fresh element to any menu.

    Seasonal Adaptations and Creative Twists

    One of the reasons I return to this Italian salad again and again is its adaptability to seasonal produce. In summer, I add sweet corn kernels and juicy peaches for unexpected sweetness. Fall brings opportunities for roasted butternut squash or thinly sliced fennel. Winter? Try blood oranges and radicchio for a stunning color contrast. My favorite variation includes chickpeas and artichoke hearts for extra protein and Mediterranean flair. For a fun presentation at parties, I sometimes serve individual portions in mason jars, layering ingredients for a beautiful visual effect that keeps everything perfectly crisp until serving time.

    Storage & Troubleshooting Guide

    Keeping Your Salad Fresh and Crisp

    The key to maintaining the perfect texture in your chopped salad is proper storage. If preparing components ahead of time, store each ingredient separately in airtight containers lined with paper towels to absorb excess moisture. The complete salad (undressed) can be refrigerated for up to 24 hours in a sealed container with a paper towel on top. For work lunches, I layer ingredients with the heaviest at the bottom and delicate greens on top, packing dressing separately in a leak-proof container. This method has saved many of my meal-prepped salads from the dreaded soggy syndrome that can ruin even the most carefully prepared ingredients.

    Rescuing Common Salad Mishaps

    Even experienced cooks encounter salad emergencies! If your Italian chopped salad becomes overly wet from tomatoes or cucumbers, simply drain the excess liquid and add a handful of fresh greens to absorb moisture. Accidentally overdressed? Toss in more undressed vegetables or a cup of cooked, cooled pasta to balance it out. If your salad has wilted slightly in the refrigerator, a 5-minute ice water bath can revive greens remarkably well. When serving outdoors in warm weather, I place the salad bowl inside a larger bowl filled with ice to keep everything crisp. These quick fixes have saved countless salads from disappointment!

    Frequently Asked Questions

    Can I make this Fresh Italian Chopped Salad ahead of time?

    Yes! Prep all ingredients and store separately. Combine and dress just before serving for maximum freshness. If necessary, assemble without dressing up to 4 hours ahead and refrigerate covered with a damp paper towel.

    What proteins work best with this salad?

    Grilled chicken, Italian salami, shrimp, or cannellini beans are excellent additions. For vegetarian options, try fresh mozzarella pearls or crumbled feta cheese for protein and flavor.

    How do I keep the salad from getting soggy?

    Pat all ingredients dry before chopping, especially tomatoes and cucumbers. Always add dressing just before serving, and consider serving extra dressing on the side.

    Is this recipe gluten-free?

    Yes, the basic Fresh Italian Chopped Salad is naturally gluten-free. Just verify any packaged ingredients like olives or pepperoncini don’t contain gluten additives.

    Can I use a different dressing?

    Absolutely! While traditional Italian vinaigrette complements the flavors best, creamy Caesar or Greek dressing can offer delicious variations. Adjust other ingredients to match your dressing choice.

    Final Thoughts

    This Fresh Italian Chopped Salad Recipe has become my reliable kitchen companion for everything from quick family dinners to elegant entertaining. The vibrant colors, crisp textures, and bold flavors never fail to impress, while the simple preparation makes it accessible even on the busiest days. I hope you’ll make this recipe your own, experimenting with seasonal ingredients and creating memories around your table. For more inspiration and variations, check out my Pinterest collection of Italian-inspired recipes that pair beautifully with this versatile salad.

  • Black Pepper Chicken Stuffed Peppers That’ll Wow Your Tastebuds!

    Black Pepper Chicken Stuffed Peppers That’ll Wow Your Tastebuds!

    Black Pepper Chicken Stuffed Peppers That’ll Wow Your Tastebuds!

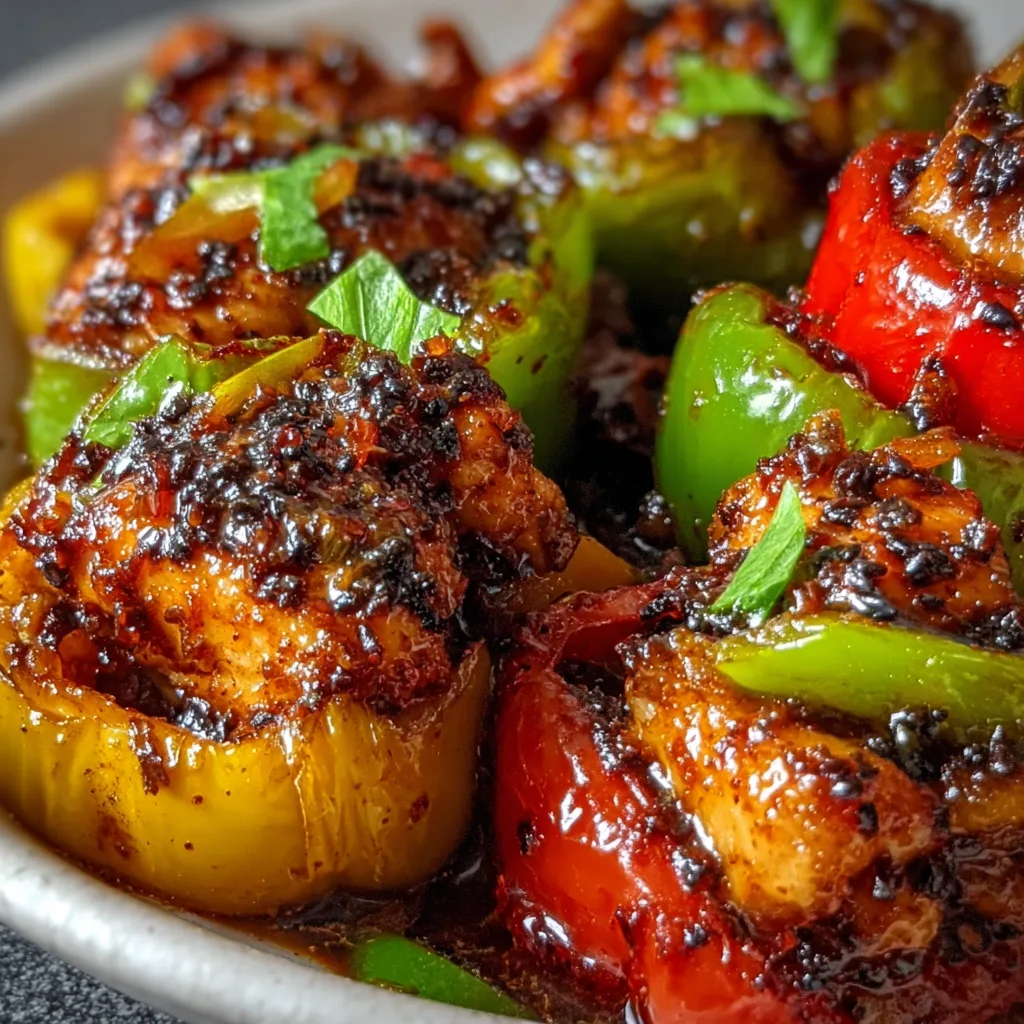
    Black Pepper Chicken Stuffed Peppers combine two of my favorite comfort foods into one irresistible dish. The bold, aromatic black pepper chicken filling nestled inside sweet bell peppers creates a perfect balance of flavors that makes my taste buds dance every time. I discovered this recipe during a rainy Sunday when I was craving something cozy but didn’t want to leave the house. The way the kitchen filled with that peppery, savory aroma as they baked had everyone wandering in asking, “What smells so amazing?” Trust me, these stuffed peppers will become your new go-to dinner when you want something impressive yet surprisingly simple.

    Recipe

    Why You’ll Love This Black Pepper Chicken Stuffed Peppers

    Perfect Balance of Flavors and Textures

    There’s something magical about the way black pepper chicken transforms inside these peppers. The slight sweetness of the bell peppers perfectly complements the savory, peppery chicken mixture. I love how the peppers soften just enough while maintaining a slight bite, creating that perfect texture contrast. The first time I made these, my husband (who claims to dislike bell peppers) went back for seconds! The filling gets this incredible depth from the black pepper that’s bold without overwhelming the other flavors. Every bite delivers that perfect harmony of spice, protein, and veggie goodness that makes this dish so satisfying.

    Quick Prep with Impressive Results

    Don’t let the gorgeous presentation fool you—these stuffed peppers come together in a flash! I can prep everything in about 15 minutes, then let the oven do the rest of the work. On busy weeknights when I need something nutritious but don’t have hours to spend in the kitchen, this recipe is my saving grace. The best part? They look so impressive when served that guests assume you’ve been cooking all day. I’ve brought these to potlucks and always return with an empty dish and requests for the recipe. They’re the perfect balance of everyday easy and special occasion worthy.

    Essential Tips & Tricks

    Perfecting Your Peppers

    Choosing the right peppers makes all the difference in this recipe. Look for firm, glossy peppers with even bottoms so they stand upright in the baking dish. I’ve found that slightly under-ripe peppers work best—they hold their shape better during baking. A little trick I learned from my grandmother: after cutting the tops and removing seeds, give the peppers a quick 3-minute blanch in boiling water before stuffing. This pre-cooking step ensures they’ll be perfectly tender (not crunchy!) when the chicken filling is done. For extra flavor, brush the insides with olive oil and a pinch of salt before filling.

    Mastering the Black Pepper Chicken Filling

    The star of this dish is undoubtedly the black pepper chicken filling. For maximum flavor, toast your black peppercorns before grinding them—this simple step releases their essential oils and creates a more complex flavor profile. When cooking the chicken, don’t rush the browning process! Those caramelized bits add incredible depth to the final dish. I like to add a splash of chicken broth to deglaze the pan, scraping up all those flavorful browned bits. For extra creaminess, fold in 2 tablespoons of cream cheese or Greek yogurt to the filling mixture just before stuffing the peppers.

    Serving Ideas & Creative Variations

    Perfect Pairings for a Complete Meal

    These Black Pepper Chicken Stuffed Peppers shine as the centerpiece of any dinner, but the right sides elevate the entire experience. I love serving them with a simple green salad dressed with lemon vinaigrette—the brightness cuts through the richness of the peppers beautifully. For heartier appetites, a side of garlic bread or buttery mashed potatoes creates a meal that satisfies even the hungriest family members. When entertaining, I arrange the stuffed peppers on a platter surrounded by roasted vegetables and sprinkle everything with fresh herbs. The colorful presentation always impresses guests before they even take a bite!

    Exciting Twist Options for Every Taste

    Don’t be afraid to make this recipe your own with creative variations! For a Mediterranean twist, mix feta cheese and olives into the chicken filling and top with tzatziki sauce before serving. Craving something spicier? Add diced jalapeños and pepper jack cheese to transform these into Mexican-inspired stuffed peppers. My family loves when I make an Asian-fusion version with ginger, garlic, and a drizzle of sweet chili sauce. For a lower-carb option, replace the rice with cauliflower rice or quinoa. The versatility of this recipe means you can enjoy it weekly with completely different flavor profiles each time.

    Storage & Troubleshooting Guide

    Proper Storage for Maximum Freshness

    These Black Pepper Chicken Stuffed Peppers are perfect for meal prep because they store beautifully. Once cooled completely, place them in airtight containers in the refrigerator for up to 4 days. The flavors actually develop and improve overnight, making leftovers something to look forward to! For longer storage, freeze individual peppers wrapped tightly in plastic wrap then foil. They’ll keep for up to 3 months. When ready to enjoy, thaw overnight in the refrigerator, then reheat covered with foil at 350°F for about 20 minutes. For lunch portions, I slice leftover peppers in half before storing—they reheat more evenly and fit better in lunchboxes.

    Solving Common Pepper Problems

    Struggling with peppers that won’t stand up straight? Create a stable base by slicing a thin piece off the bottom—just be careful not to cut through to the hollow center. If your peppers are turning out too watery, try par-baking the empty peppers for 10 minutes before adding filling. This pre-cooking step helps release excess moisture. For peppers that crack during baking, reduce your oven temperature by 25 degrees and cook a bit longer. If the tops of your peppers are browning too quickly while the filling needs more time, simply cover with foil for the remaining cook time. These simple fixes ensure perfect peppers every time.

    Frequently Asked Questions

    Can I make Black Pepper Chicken Stuffed Peppers ahead of time?

    Absolutely! Prepare and stuff the peppers up to 24 hours ahead, cover tightly with plastic wrap, and refrigerate. Add an extra 5-10 minutes to the baking time when cooking from chilled.

    What’s the best type of pepper to use for stuffed peppers?

    Bell peppers work best, with red, yellow, and orange offering sweeter flavors than green. Choose peppers with flat bottoms so they stand upright while baking.

    Can I freeze Black Pepper Chicken Stuffed Peppers?

    Yes! Cool completely, then wrap individually in plastic wrap followed by foil. Freeze for up to 3 months and thaw overnight in the refrigerator before reheating.

    How do I know when my stuffed peppers are done cooking?

    The peppers should be tender when pierced with a fork, and the filling should reach 165°F. The tops should be golden brown with slightly charred edges.

    Can I make these stuffed peppers in a slow cooker?

    Definitely! Place stuffed peppers in your slow cooker, add ¼ cup water to the bottom, and cook on low for 4-5 hours until peppers are tender and filling is hot.

    Final Thoughts

    These Black Pepper Chicken Stuffed Peppers have become my go-to recipe when I want to impress without stress. The bold flavors, beautiful presentation, and versatility make them perfect for everything from weeknight dinners to special occasions. I love how they bring together comfort and nutrition in one colorful package. Don’t forget to check out more delicious recipes on Pinterest for endless inspiration! Whether you follow the recipe exactly or create your own variation, these stuffed peppers are sure to become a favorite in your meal rotation.