Blog

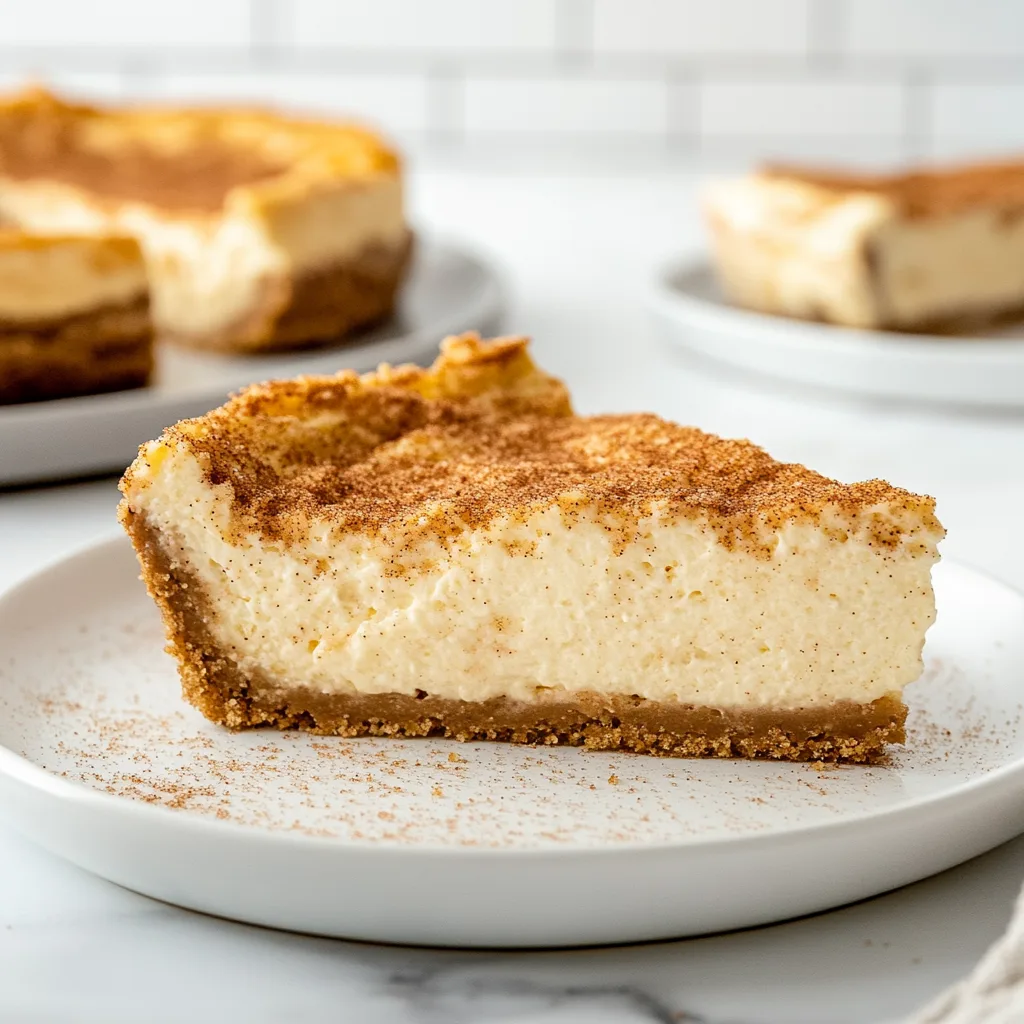
  • Snickerdoodle Cheesecake Recipe That’ll Melt Your Heart Instantly

    Snickerdoodle Cheesecake Recipe That’ll Melt Your Heart Instantly

    Snickerdoodle Cheesecake Recipe That’ll Melt Your Heart Instantly

    Snickerdoodle Cheesecake combines two beloved classics into one irresistible dessert that’ll have everyone asking for seconds. The warm cinnamon-sugar embrace of snickerdoodle cookies transforms into a velvety cheesecake that’s simply magical. I discovered this recipe during a holiday baking marathon when I was craving something different from traditional Christmas treats. The moment that first forkful hit my taste buds, I knew this would become a year-round favorite in my home—and soon, yours too!

    Recipe

    Why You’ll Love This Snickerdoodle Cheesecake

    Perfect Balance of Flavors and Textures

    This cheesecake is a textural dream with its buttery cinnamon-sugar crust, creamy center, and slightly crisp topping. The tanginess of cream cheese perfectly balances the warm sweetness of cinnamon and sugar, creating that signature snickerdoodle flavor profile we all adore. I love how each bite delivers multiple sensations—first the crunch, then the silky-smooth filling that melts on your tongue, followed by that lingering warm spice. It’s like your favorite cookie and cheesecake had the most delicious baby imaginable!

    Make-Ahead Convenience

    One thing I absolutely cherish about this Snickerdoodle Cheesecake is its make-ahead magic. I can prepare it up to three days before a gathering, which is a lifesaver during busy holiday seasons or when hosting dinner parties. The flavors actually develop and deepen as it chills, making it even more delicious on day two or three. Last Christmas, I made this two days ahead, and it was the star dessert—everyone thought I’d spent hours in the kitchen that morning, but I was relaxed and enjoying my coffee instead!

    Essential Tips & Tricks

    Room Temperature Ingredients Matter

    Always use room temperature ingredients for your cheesecake batter—especially the cream cheese, eggs, and sour cream. Cold ingredients don’t blend properly and can leave lumps in your batter (nobody wants that!). I learned this lesson the hard way after rushing a cheesecake once and ending up with cream cheese chunks throughout. Now I set everything out at least an hour before I start mixing. This simple step ensures your Snickerdoodle Cheesecake will have that dreamy, velvety texture that makes cheesecakes so irresistible.

    The Water Bath Secret

    Don’t skip the water bath step! It might seem fussy, but it’s truly the difference between a cracked, dry cheesecake and a perfectly smooth, creamy one. The gentle, moist heat helps your Snickerdoodle Cheesecake bake evenly and prevents the surface from drying out too quickly. I wrap my springform pan in three layers of heavy-duty foil before placing it in the water bath—a tip I learned after a devastating leak ruined my first attempt. That extra protection keeps water from seeping in and creating a soggy crust.

    Serving Ideas & Creative Variations

    Seasonal Garnishes

    Transform your Snickerdoodle Cheesecake for any season with thoughtful garnishes. For fall and winter, I love adding a drizzle of salted caramel sauce and a sprinkle of toasted pecans. In spring, fresh berries add a gorgeous pop of color and tangy contrast. Summer calls for a scoop of vanilla bean ice cream alongside. The cinnamon-sugar base pairs beautifully with so many flavors—I’ve even served it with a coffee-infused whipped cream that reminded me of those cozy cinnamon sugar soft pretzels from the mall.

    Flavor Twists

    The basic Snickerdoodle Cheesecake recipe is a perfect canvas for creative variations. Try adding a teaspoon of espresso powder to the filling for a cinnamon-coffee delight. Around the holidays, I love incorporating a splash of bourbon and a pinch of nutmeg for a festive twist. For chocolate lovers, fold mini chocolate chips into the batter or add a layer of chocolate ganache on top. My personal favorite is adding a thin layer of apple butter between the crust and filling—it creates an apple-cinnamon moment that’s absolutely divine.

    Storage & Troubleshooting Guide

    Perfect Preservation

    Store your Snickerdoodle Cheesecake properly to maintain its amazing texture. Keep it refrigerated in an airtight container or tightly wrapped with plastic wrap for up to 5 days. For longer storage, you can freeze individual slices—wrap each piece in plastic wrap, then foil, and freeze for up to 3 months. I like to thaw frozen slices in the refrigerator overnight rather than at room temperature, as it helps maintain that perfect creamy consistency without becoming too soft or weepy around the edges.

    Fixing Common Issues

    Don’t panic if your cheesecake develops small surface cracks—it happens to the best of us! Simply cover them with a delicious topping like whipped cream, cinnamon whipped cream, or a dusting of cinnamon sugar. If your crust seems soggy, try baking it a few minutes longer next time before adding the filling. For a cheesecake that didn’t set properly, refrigerate it longer—sometimes it just needs more chill time. I once saved an undercooked center by turning it into “Snickerdoodle Cheesecake Parfaits” layered in glasses—no one knew it wasn’t intentional!

    Frequently Asked Questions

    Can I make Snickerdoodle Cheesecake without a springform pan?

    Yes! Use a regular cake pan lined with parchment paper with long overhanging edges. After chilling, lift the entire cheesecake out using the parchment handles. It won’t be as pretty but will taste just as delicious.

    How do I know when my cheesecake is done baking?

    The edges should be set but the center should still have a slight jiggle—like Jell-O. It will continue to set as it cools. Overbaking leads to cracks and a dry texture.

    Can I use low-fat cream cheese for this recipe?

    I don’t recommend it. Full-fat cream cheese provides the rich, creamy texture that makes Snickerdoodle Cheesecake special. Low-fat versions often contain stabilizers that affect both texture and flavor.

    My cinnamon swirl sank to the bottom. What happened?

    Your swirl mixture was likely too heavy. Next time, use less butter in the swirl mixture and make sure to just barely swirl it into the top layer of the batter.

    How far in advance can I make this cheesecake?

    You can make Snickerdoodle Cheesecake up to 3 days ahead and store it covered in the refrigerator. The flavors actually improve with a day or two of chilling!

    Final Thoughts

    This Snickerdoodle Cheesecake has become my signature dessert for good reason—it never fails to impress and always disappears quickly! The warm, comforting flavors of cinnamon and sugar wrapped in creamy cheesecake perfection create something truly magical. I hope you’ll give this recipe a try and experience the joy of sharing it with people you love. Be sure to check out more delicious dessert ideas on my Pinterest page for more inspiration. Happy baking!
  • Apple Cider Braised Beef Shoulder Recipe That Melts in Your Mouth!

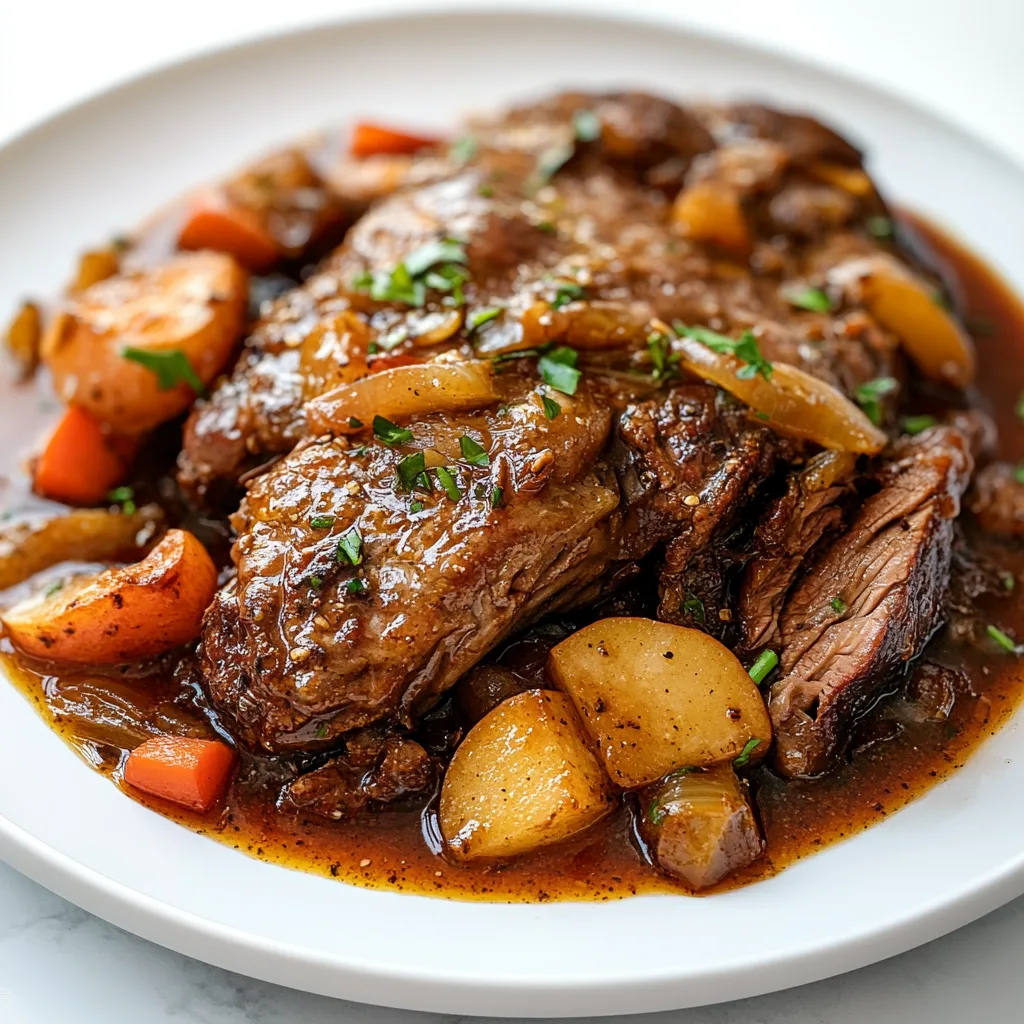
    Apple Cider Braised Beef Shoulder Recipe That Melts in Your Mouth!

    Apple Cider Braised Beef Shoulder Recipe That Melts in Your Mouth!

    There’s something magical about the transformation that happens when Apple Cider Braised Beef Shoulder emerges from a long, slow simmer. The kitchen fills with aromas of mulled cider, herbs, and that rich, savory scent of tender beef that makes everyone drift toward the kitchen asking, “What’s cooking?” I discovered this recipe during a particularly chilly autumn weekend when I needed something that would warm our home and hearts. The way the meat falls apart at the touch of a fork while soaking up all those beautiful apple cider flavors creates a comfort food masterpiece that’s both impressive and surprisingly simple to prepare. Perfect for Sunday family dinners or when you want to fill your home with irresistible aromas.

    Recipe

    Why You’ll Love This Apple Cider Braised Beef Shoulder

    Perfect For Any Season

    While I often think of this as a fall dish (apple cider season!), I’ve made this year-round comfort food with consistently amazing results. In winter, it warms you from the inside out, creating that cozy feeling we all crave when temperatures drop. During warmer months, it’s a hands-off meal that doesn’t require you to stand over a hot stove. The apple cider adds a subtle sweetness that balances the rich beef perfectly, creating a flavor profile that’s complex without being complicated. I’ve served this at everything from casual family dinners to holiday gatherings with rave reviews every time.

    Incredibly Versatile

    What I adore about this recipe is how it fits into so many meal plans. The tender beef shoulder can be served traditionally over mashed potatoes or polenta for a hearty dinner, but it transforms beautifully into next-day meals. Shred the leftovers for amazing sandwiches (think apple cider beef on crusty bread with melted cheese), toss with pasta, or layer into a rustic shepherd’s pie. The flavor actually deepens overnight in the refrigerator, making those leftovers sometimes even better than the original meal! This versatility makes it perfect for meal prep or when you’re feeding a crowd.

    Essential Tips & Tricks

    Choosing & Preparing Your Beef

    Selecting the right cut makes all the difference in this recipe. Look for a well-marbled beef shoulder with good fat distribution – this is what creates that melt-in-your-mouth texture after braising. Before cooking, bring the meat to room temperature for about 30 minutes, then pat it completely dry with paper towels. This crucial step ensures you’ll get a beautiful sear that locks in flavor. Season generously with salt and pepper on all sides. Don’t rush the initial browning process – those caramelized bits on the bottom of the pan create incredible depth of flavor in your final dish.

    Selecting The Perfect Cider

    Not all apple ciders are created equal for this recipe. I recommend using a high-quality, unfiltered cider with no added sugars or preservatives – the kind you find at farmers’ markets or in the refrigerated section. The natural sugars in the cider will concentrate during cooking, creating a beautiful glaze and depth of flavor. If you can find a local artisanal cider, even better! For an alcohol-free version, traditional apple cider works perfectly, but for special occasions, hard cider adds complexity. Avoid ciders with added spices as you’ll be adding your own aromatic elements to create a perfectly balanced flavor profile.

    Serving Ideas & Creative Variations

    Perfect Pairings

    This Apple Cider Braised Beef Shoulder creates its own incredible sauce, so I love serving it with sides that will soak up all that goodness. Creamy mashed potatoes make a classic bed for the tender meat, but don’t overlook creamy polenta or buttered egg noodles as alternatives. For vegetables, roasted root vegetables like carrots, parsnips, and turnips complement the flavors beautifully. A simple green salad with a light vinaigrette provides a fresh contrast to the rich beef. Don’t forget crusty bread to mop up every last bit of that apple-infused sauce – it’s too good to leave behind!

    Seasonal Adaptations

    One of my favorite things about this recipe is how easily it adapts to different seasons and occasions. In autumn, I enhance the cider flavors with diced apples added during the last 30 minutes of cooking. Winter holidays call for cranberries and a touch of rosemary for a festive twist. For spring, lighten things up with fresh herbs like thyme and parsley stirred in just before serving. Summer barbecues? This beef makes incredible sliders topped with a tangy slaw. You can even transform the basic recipe by adding different spice profiles – a cinnamon stick and star anise create warm notes, while chipotle adds smoky heat.

    Storage & Troubleshooting Guide

    Proper Storage Techniques

    This Apple Cider Braised Beef Shoulder actually improves with time, making it perfect for make-ahead meals. Once cooled, store the beef and sauce together in airtight containers in the refrigerator for up to 4 days. The flavors will continue to meld and deepen overnight. For longer storage, freeze portions in freezer-safe containers or heavy-duty freezer bags for up to 3 months. I recommend freezing in meal-sized portions for easy thawing. When reheating, do so gently over low heat with a splash of fresh apple cider or broth to refresh the sauce and prevent the meat from drying out.

    Troubleshooting Common Issues

    If your beef isn’t as tender as you’d like, it simply needs more time. Tough meat is almost always an indication that it hasn’t braised long enough. Return it to low heat and continue cooking, checking every 30 minutes until it shreds easily with a fork. If your sauce is too thin, remove the meat once tender and simmer the liquid uncovered until it reduces to your desired consistency. Too thick? Add a splash of fresh cider or broth. If the sauce tastes too sweet, balance it with a tablespoon of apple cider vinegar or a squeeze of lemon. For a sauce that lacks depth, try adding a teaspoon of Dijon mustard.

    Frequently Asked Questions

    Can I make Apple Cider Braised Beef Shoulder in a slow cooker?

    Absolutely! Brown the meat as directed, then transfer to your slow cooker with all ingredients. Cook on low for 8-10 hours or high for 5-6 hours until the meat is fork-tender.

    What’s the best cut of beef to use?

    Chuck roast or beef shoulder are ideal as they have the perfect amount of marbling that breaks down during slow cooking, creating tender, flavorful meat.

    Can I substitute apple juice for the cider?

    While possible, apple juice is sweeter and lacks the depth of flavor. If using juice, add 1-2 tablespoons of apple cider vinegar to balance the sweetness.

    How do I know when the beef is done?

    The meat is ready when it easily shreds with a fork and has reached an internal temperature of at least 195°F for that perfect melt-in-your-mouth texture.

    Can I prepare this dish in advance for a dinner party?

    This is an excellent make-ahead dish! The flavors actually improve overnight, making it perfect for entertaining. Simply reheat gently before serving.

    Final Thoughts

    This Apple Cider Braised Beef Shoulder has become one of my signature dishes for good reason. There’s something deeply satisfying about transforming a humble cut of meat into something so tender and flavorful that people can’t help but ask for seconds. I love how it fills my home with comforting aromas and brings everyone to the table with eager anticipation. Whether you’re cooking for family on a chilly Sunday or impressing guests at a dinner party, this recipe delivers unforgettable flavor with minimal hands-on effort. Don’t forget to check out more cozy recipes on our Pinterest page for more inspiration!

  • S’mores Roll-Ups Recipe: Irresistibly Gooey & Easy Dessert Fun!

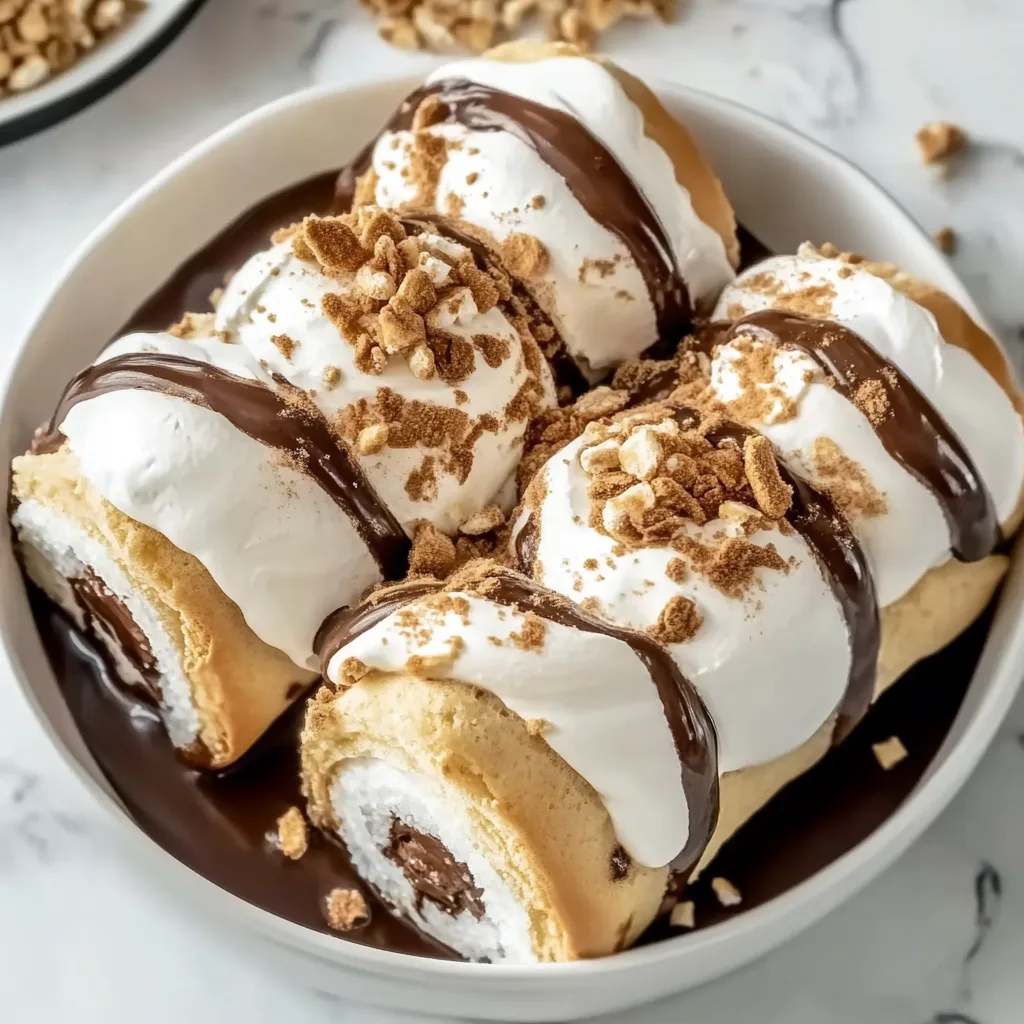
    S’mores Roll-Ups Recipe: Irresistibly Gooey & Easy Dessert Fun!

    S’mores Roll-Ups Recipe: Irresistibly Gooey & Easy Dessert Fun!

    S’mores Roll-Ups are the perfect solution when you’re craving that magical combination of graham crackers, chocolate, and marshmallows but don’t have a campfire in sight. I discovered this genius treat last summer when rain canceled our backyard bonfire, and my disappointed niece was on the verge of tears. The warm, gooey chocolate melting into pillowy marshmallows wrapped in a crispy tortilla brings all those beloved campfire flavors right to your kitchen. Trust me, the first bite will transport you straight to those cozy summer nights, minus the mosquitoes and smoky clothes!

    Recipe

    Why You’ll Love These S’mores Roll-Ups

    Quick & Easy for Any Occasion

    These S’mores Roll-Ups come together in just 10 minutes, making them perfect for impromptu dessert cravings or last-minute gatherings. Unlike traditional s’mores that require an open flame, these roll-ups need only a skillet and a few simple ingredients you probably already have in your pantry. I love that they’re incredibly versatile – equally perfect for a movie night snack, an after-school treat for hungry kids, or even dressed up on a dessert platter for guests. The familiar flavors in an unexpected package always bring smiles!

    All the Flavor Without the Fuss

    The magic combination of melty chocolate and gooey marshmallows delivers that authentic s’mores experience without having to build a campfire. The tortilla creates a crispy exterior that mimics the function of graham crackers but adds a delightful textural contrast. What I particularly adore is how the chocolate and marshmallow meld together into that perfect sweet harmony we all crave from s’mores. Plus, there’s no sticky fingers to clean up afterward! You get all the nostalgic flavor with none of the traditional mess.

    Essential Tips & Tricks

    Perfecting the Roll-Up Technique

    Getting the perfect roll is crucial for these S’mores Roll-Ups. Start by warming your tortillas slightly before filling – this makes them more pliable and less likely to crack. Spread a thin layer of chocolate hazelnut spread first (it acts as “glue”), then add your marshmallows and chocolate chips in a line slightly off-center. When rolling, fold in the sides first, then roll tightly from bottom to top. For an extra-secure seal, brush the edge with a tiny bit of water before completing the roll, similar to how I make those Cinnamon Sugar Soft Pretzels.

    Achieving the Ideal Melt

    The secret to perfection lies in the melting process. Use medium-low heat and be patient – rushing with high heat will burn the tortilla before the filling melts properly. I like to cover the pan for about 30 seconds to trap heat and help the marshmallows get extra gooey. Watch for that golden-brown exterior – it’s your signal that everything inside has reached melty perfection. For an extra touch, brush the outside with melted butter and a sprinkle of cinnamon-sugar before cooking for a more graham cracker-like flavor.

    Serving Ideas & Creative Variations

    Dress Them Up for Special Occasions

    Transform these simple S’mores Roll-Ups into showstopping desserts with a few elegant touches. Slice them diagonally and arrange on a platter with fresh berries and a dusting of powdered sugar for a beautiful presentation. For holiday gatherings, try drizzling with white chocolate and festive sprinkles. I’ve even served these at dinner parties with a scoop of vanilla ice cream and a drizzle of caramel sauce, similar to my Burnt Honey Pie – the contrast of warm roll-up and cold ice cream creates a sensational experience that guests always rave about.

    Fun Flavor Twists

    Don’t be afraid to get creative with your flavor combinations! Try using different spreads as your base – peanut butter creates a delicious Reese’s-inspired version. Add sliced strawberries or bananas for a fruity twist. White chocolate and crushed Oreos make a cookies-and-cream variation that my kids absolutely adore. For a grown-up version, try dark chocolate with a tiny sprinkle of sea salt or even a drop of orange extract for a sophisticated flavor profile. The possibilities are endless once you master the basic technique.

    Storage & Troubleshooting Guide

    Making Ahead and Storing

    While S’mores Roll-Ups are best enjoyed fresh, you can prepare them in advance for busy days. Assemble the roll-ups completely, then wrap individually in parchment paper and store in an airtight container in the refrigerator for up to 2 days. When ready to enjoy, simply reheat in a dry skillet for 1-2 minutes per side until warmed through. For a crowd, you can make a large batch and keep them warm in the oven at 200°F for up to 30 minutes. Just be careful not to stack them, as the warm filling can make them stick together.

    Fixing Common Problems

    The most common issue with S’mores Roll-Ups is filling leakage during cooking. To prevent this, don’t overfill your tortillas – about 1 tablespoon each of spread and marshmallows is perfect for a standard-sized tortilla. If you notice leaking while cooking, quickly use a spatula to press down on the seam. For tortillas that crack, try warming them slightly before rolling or switching to a more pliable brand. If your chocolate isn’t melting properly, try using smaller pieces or chocolate chips instead of larger chunks for more even distribution.

    Frequently Asked Questions

    Can I make S’mores Roll-Ups in the oven instead of a skillet?

    Yes! Arrange them seam-side down on a baking sheet and bake at 350°F for 5-7 minutes until golden and crisp. Brush with butter before baking for extra flavor and color.

    What’s the best type of tortilla to use for S’mores Roll-Ups?

    Medium-sized flour tortillas work best. Corn tortillas tend to crack, while extra-large tortillas make the roll-ups too doughy. Street taco-sized tortillas make perfect two-bite desserts.

    Can I make these S’mores Roll-Ups ahead for a party?

    Prepare them up to the rolling stage, then refrigerate for up to 24 hours. Cook just before serving for the best texture and melty filling.

    Are there any dairy-free options for S’mores Roll-Ups?

    Absolutely! Use dairy-free chocolate chips and check that your marshmallows are gelatin-free. Many chocolate hazelnut spreads now come in vegan versions too.

    How do I keep my S’mores Roll-Ups from getting soggy?

    Cook them until the tortilla is crisp and golden, then serve immediately. If making ahead, reheat in a dry skillet rather than the microwave to restore crispness.

    Final Thoughts

    These S’mores Roll-Ups have become my go-to solution for satisfying dessert cravings without a lot of fuss. There’s something magical about the way they transform simple ingredients into a treat that brings pure joy with every bite. Whether you’re making them for giggling kids or sophisticated adults, they never fail to impress. I hope you’ll give these S’mores Roll-Ups a try the next time you’re longing for those campfire flavors – and be sure to check out more creative dessert ideas on Pinterest for inspiration!

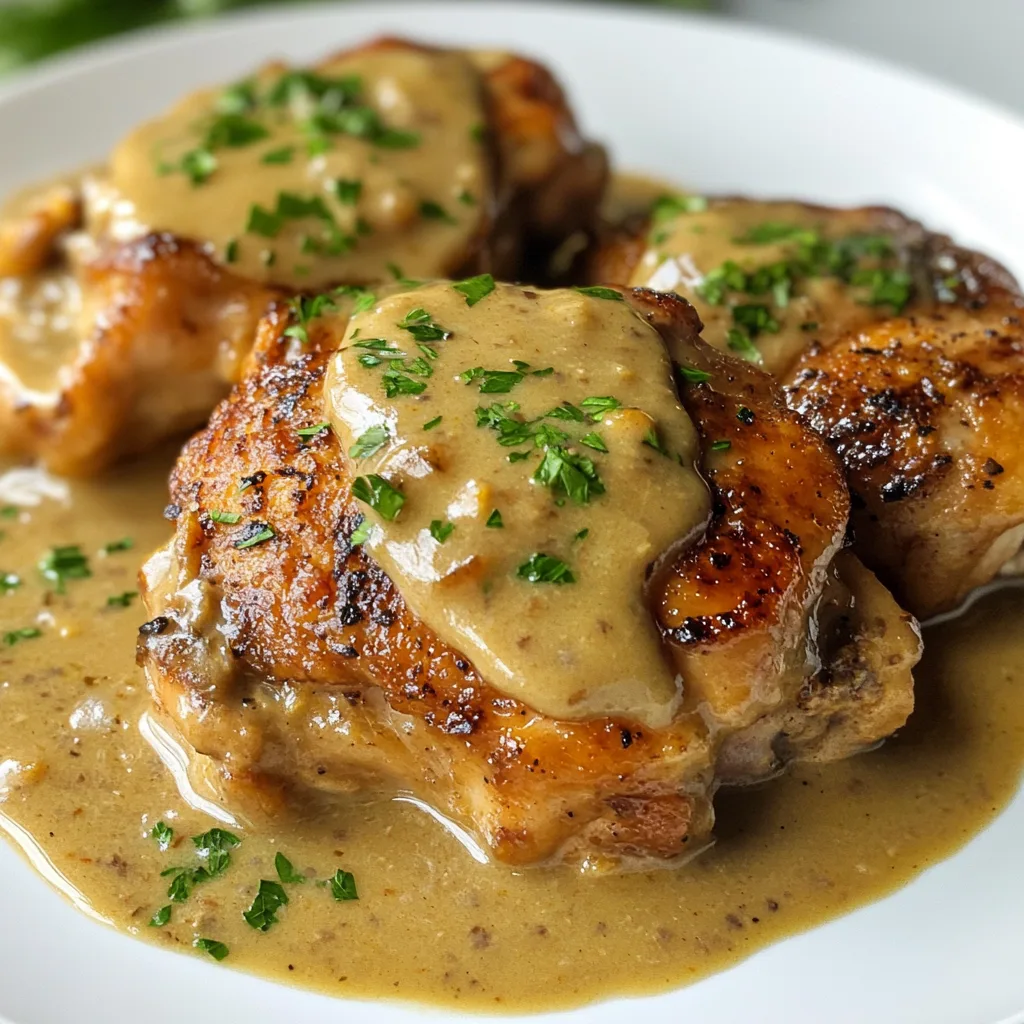
  • Smothered Chicken Thighs with Creamy Gravy That Melt Hearts

    Smothered Chicken Thighs with Creamy Gravy That Melt Hearts

    Smothered Chicken Thighs with Creamy Gravy That Melt Hearts

    Smothered Chicken Thighs with Creamy Gravy is one of those recipes that feels like a warm hug on a plate. I discovered this dish during a particularly stressful week when nothing but comfort food would do. The first time I made it, the aroma of sautéed onions and garlic filled my kitchen, and I knew I was onto something special. There’s something magical about how the chicken thighs become incredibly tender as they simmer in that velvety gravy. Trust me, this dish will quickly become a family favorite that everyone will request again and again.

    Recipe

    Why You’ll Love This Smothered Chicken Thighs with Creamy Gravy

    Perfect Comfort Food for Any Season

    There’s something undeniably cozy about fork-tender chicken bathed in rich, savory gravy. On chilly evenings, this dish brings warmth to the table, but it’s equally satisfying year-round. I love how the chicken thighs remain juicy while absorbing all those incredible flavors. The combination of herbs and seasonings creates layers of taste that develop as they simmer together. What makes this recipe special is how the chicken and gravy form a perfect partnership – neither overshadowing the other, but working together to create something truly memorable.

    Simple Ingredients, Extraordinary Results

    What amazes me about this recipe is how everyday ingredients transform into something spectacular. You’ll need bone-in chicken thighs (they have more flavor!), flour, broth, cream, and a handful of aromatics. Nothing fancy or hard to find. I remember scrambling to make dinner one night with just what I had in my pantry, and this dish saved the day! The magic happens in the cooking process, where time does the heavy lifting. The flour helps create that silky texture while the chicken releases its natural juices, enriching the gravy with incredible depth of flavor.

    Essential Tips & Tricks

    Perfecting the Sear

    The foundation of amazing Smothered Chicken Thighs with Creamy Gravy starts with a proper sear. Make sure your chicken thighs are completely pat dry before seasoning – this ensures a beautiful golden crust. I learned this lesson the hard way when I once rushed and ended up with pale, steamed chicken instead! Heat your pan until it’s properly hot before adding the chicken, skin-side down. The sizzle should be immediate but not violent. Let them cook undisturbed for 5-6 minutes until they release naturally from the pan. This initial sear locks in moisture and develops those delicious browned bits that flavor your gravy.

    Mastering the Gravy Consistency

    The perfect gravy should coat the back of a spoon – not too thin, not too thick. After adding your flour to the sautéed aromatics, let it cook for about a minute to remove the raw taste before slowly whisking in the warm broth. This prevents lumps from forming. If your gravy becomes too thick during cooking, simply add a splash more broth. Too thin? Mix a teaspoon of cornstarch with cold water and stir it in. Remember that the gravy will continue to thicken as it cools, so aim for slightly thinner than your desired final consistency. For extra richness, try my Creamy Pepperoncini Chicken Skillet technique of adding a touch of sour cream at the end.

    Serving Ideas & Creative Variations

    Perfect Pairings

    Smothered Chicken Thighs with Creamy Gravy begs for something to soak up all that delicious sauce. Fluffy mashed potatoes are my go-to, but buttered egg noodles or steamed rice work beautifully too. For vegetables, I love serving something with a bit of brightness – roasted asparagus, steamed green beans, or a simple side salad with a vinaigrette dressing. The contrast between the rich gravy and fresh vegetables creates a perfectly balanced plate. When I’m feeling extra indulgent, I’ll add a side of Crispy Bacon Honey Roasted Potatoes for an absolutely showstopping meal.

    Exciting Flavor Twists

    While the classic recipe is perfection, don’t be afraid to make it your own! Try adding mushrooms for an earthy flavor – cremini or baby bellas work wonderfully when sautéed with the onions. For a hint of brightness, stir in a tablespoon of Dijon mustard or a squeeze of lemon juice just before serving. Herbs can completely transform the dish – thyme and rosemary for a traditional approach, or tarragon for a French-inspired twist. My personal favorite variation includes a splash of white wine in the gravy and a handful of capers for a tangy surprise that cuts through the richness.

    Storage & Troubleshooting Guide

    Proper Storage for Maximum Flavor

    One of the best things about Smothered Chicken Thighs with Creamy Gravy is how the flavors deepen overnight. Allow leftovers to cool completely before transferring to airtight containers. They’ll keep in the refrigerator for up to 3 days, making this perfect for meal prep. When reheating, do so gently over medium-low heat, adding a splash of broth if the gravy has thickened too much. For freezing, I recommend separating the chicken and gravy – the gravy might split when thawed, but can be whisked back together. Label everything clearly with dates to avoid mystery containers lurking in your freezer!

    Fixing Common Gravy Issues

    Even experienced cooks occasionally encounter gravy troubles. If your gravy develops unwanted lumps, don’t panic! Simply strain it through a fine-mesh sieve or blend with an immersion blender. For gravy that’s broken or separated, whisk vigorously while adding a tablespoon of heavy cream. If your gravy lacks flavor, try adding more salt gradually (a quarter teaspoon at a time), a splash of Worcestershire sauce, or a dash of soy sauce for umami depth. Remember that gravy continues to reduce as it simmers, concentrating flavors, so taste and adjust seasonings right before serving.

    Frequently Asked Questions

    Can I use boneless chicken thighs for Smothered Chicken Thighs with Creamy Gravy?

    Absolutely! Boneless thighs work well but cook faster (about 20-25 minutes total). They won’t develop quite the same rich flavor as bone-in, but they’re perfect for weeknight cooking when time is limited.

    How do I prevent the cream from curdling in the gravy?

    Lower the heat before adding cream and never let it boil. Add cream gradually while stirring constantly. If using sour cream or yogurt, temper it first by mixing with a little warm gravy before adding to the pan.

    Can I make this recipe dairy-free?

    Yes! Substitute the cream with full-fat coconut milk or your favorite unsweetened plant-based cream alternative. The gravy won’t be quite as rich but will still be delicious.

    What’s the best way to thicken the gravy if it’s too thin?

    Make a slurry with 1 tablespoon cornstarch and 2 tablespoons cold water. Whisk into the simmering gravy and cook for 2-3 minutes until thickened.

    How do I know when the chicken thighs are fully cooked?

    Chicken thighs are done when they reach an internal temperature of 165°F (74°C) and the meat near the bone is no longer pink.

    Final Thoughts

    There’s something truly special about Smothered Chicken Thighs with Creamy Gravy that keeps me coming back to this recipe time and again. It’s the perfect balance of comfort and elegance – simple enough for a weeknight dinner but impressive enough for guests. I love seeing the look on people’s faces when they take that first bite and experience the tender chicken and velvety gravy. For more delicious comfort food inspiration, be sure to check out our Pinterest board where we share new recipe ideas weekly!

  • Cinnamon Sugar Soft Pretzels: Irresistibly Sweet & Fluffy Snack!

    Cinnamon Sugar Soft Pretzels: Irresistibly Sweet & Fluffy Snack!

    Cinnamon Sugar Soft Pretzels: Irresistibly Sweet & Fluffy Snack!

    Cinnamon Sugar Soft Pretzels have completely stolen my heart this season! There’s something magical about that first bite—the way the crisp, golden exterior gives way to a pillowy-soft inside, all wrapped in a sweet cinnamon-sugar embrace. I discovered these beauties during a rainy weekend when my kitchen became my sanctuary. The rhythmic process of rolling, twisting, and shaping the dough became my therapy. Trust me, the heavenly aroma that fills your home while these bake is worth the effort alone! If you’re craving something that bridges the gap between bread and dessert, these pretzels are your answer.

    Recipe

    Why You’ll Love These Cinnamon Sugar Soft Pretzels

    Perfect Balance of Flavors and Textures

    These pretzels hit all the right notes with their irresistible contrast of textures. The outside develops this gorgeous golden crust while the inside stays impossibly tender. I love how the cinnamon and sugar create this sweet, slightly spicy coating that clings perfectly to the buttery exterior. The first time I made these, my kitchen smelled like a fancy bakery for hours! The dough itself has just a hint of sweetness that complements—rather than competes with—the cinnamon sugar topping. It’s that perfect balance that keeps you reaching for “just one more bite.”

    Surprisingly Simple to Make

    Don’t let the twisted shape intimidate you! The dough comes together in minutes, and the shaping process is actually quite therapeutic. I find there’s something so satisfying about rolling out the ropes and twisting them into that classic pretzel shape. The baking soda bath might seem like an extra step, but it’s what gives these pretzels their distinctive chew and beautiful color. My 10-year-old niece helped me make these last weekend, and she mastered the technique after just two tries! If she can do it, I promise you can too.

    Essential Tips & Tricks

    Mastering the Dough

    Getting the dough right is your foundation for perfect pretzels. I’ve found that room temperature ingredients make all the difference—especially the butter and egg. Let them sit out for about 30 minutes before starting. When kneading, look for that smooth, slightly tacky texture that pulls away from the sides of the bowl but still feels elastic. Don’t rush the rise time! Those yeast bubbles create the pillowy interior we’re after. If your kitchen is chilly like mine often is, create a warm spot by preheating your oven to its lowest setting, then turning it off and placing the covered dough inside.

    The Secret to the Perfect Coating

    The key to that signature pretzel exterior is the baking soda bath. Don’t skip it! This quick dip creates the magical chemistry that gives pretzels their distinctive flavor and that gorgeous golden color. Make sure your water is at a gentle simmer—not a rolling boil. For the cinnamon-sugar coating, I mix mine in a shallow pie dish for easy rolling. A little trick I discovered: brush the pretzels with melted butter while they’re still warm, then immediately roll them in the cinnamon-sugar mixture. The residual heat helps the sugar adhere perfectly, creating that irresistible sparkly coating.

    Serving Ideas & Creative Variations

    Perfect Pairings

    These cinnamon sugar soft pretzels are absolutely divine with dips! My personal favorite is a simple cream cheese frosting—just softened cream cheese, powdered sugar, vanilla, and a splash of milk. The tangy cream cheese against the sweet cinnamon is pure magic. For a cozy fall morning, serve these alongside hot apple cider or a frothy pumpkin spice latte. If you’re feeling extra indulgent, try them with a scoop of vanilla ice cream while they’re still slightly warm. The contrast of hot and cold creates this incredible sensory experience that’s impossible to resist.

    Fun Flavor Twists

    While classic cinnamon sugar is amazing, don’t be afraid to play with flavor variations! Add a teaspoon of cardamom or nutmeg to your cinnamon-sugar mix for a complex spice profile. For a festive holiday version, crush some candy canes and sprinkle them over the pretzels right after the cinnamon-sugar coating. Chocolate lovers can drizzle melted chocolate over the finished pretzels—dark, milk, or white all work beautifully. My personal favorite twist is adding orange zest to both the dough and the sugar coating—the citrus brightness cuts through the sweetness and adds a refreshing dimension.

    Storage & Troubleshooting Guide

    Keeping Them Fresh

    These pretzels are at their absolute best on day one when that contrast between the crisp exterior and soft interior is most pronounced. If you have leftovers, store them in an airtight container at room temperature for up to 2 days. To revive day-old pretzels, pop them in a 300°F oven for about 5 minutes—this restores some of that fresh-baked texture. For longer storage, freeze the completely cooled pretzels in a single layer, then transfer to a freezer bag. They’ll keep for up to a month! To reheat, thaw at room temperature and warm in a 325°F oven for 5-7 minutes.

    Troubleshooting Common Issues

    If your pretzels aren’t browning properly, check your oven temperature with an oven thermometer—most home ovens run a little hot or cold. Too pale? Your baking soda bath might not have been concentrated enough. Too dark? Your oven might be running hot or they’re placed too close to the heating element. If the cinnamon sugar isn’t sticking well, make sure you’re brushing with enough butter while the pretzels are still warm. Dough not rising? Your yeast might be old or your water too hot (which kills the yeast). For the perfect rise, use water that feels like warm bathwater—not hot tea.

    Frequently Asked Questions

    Can I make the dough ahead of time?

    Absolutely! Prepare the dough, let it rise once, then refrigerate for up to 24 hours. Bring to room temperature for 30 minutes before shaping. This actually enhances the flavor development!

    Why do I need to boil the pretzels in baking soda water?

    The baking soda bath creates that distinctive pretzel flavor and chewy texture. It’s what gives the outside that beautiful golden color and slight tanginess that makes pretzels unique.

    Can I make these cinnamon sugar soft pretzels without a stand mixer?

    Definitely! Mix ingredients with a wooden spoon until combined, then knead by hand on a floured surface for 8-10 minutes until smooth and elastic. Your arms will get a workout, but it’s worth it!

    Are these suitable for freezing?

    Yes! Freeze completely cooled pretzels on a baking sheet, then transfer to freezer bags. Reheat from frozen in a 325°F oven for 10-12 minutes until warmed through.

    Can I use whole wheat flour instead of all-purpose?

    You can substitute up to half the flour with whole wheat. Using all whole wheat will make them denser, so I recommend starting with a 50/50 blend for best texture.

    Final Thoughts

    These Cinnamon Sugar Soft Pretzels have become my go-to recipe when I want to impress without spending hours in the kitchen. There’s something deeply satisfying about creating these twisted treats from scratch—watching simple ingredients transform into something so special. The hands-on process makes it a perfect weekend project, and the results are absolutely worth it. I’d love to see your pretzel creations! Share your photos with me on Pinterest and let me know which variations you tried. Happy baking!

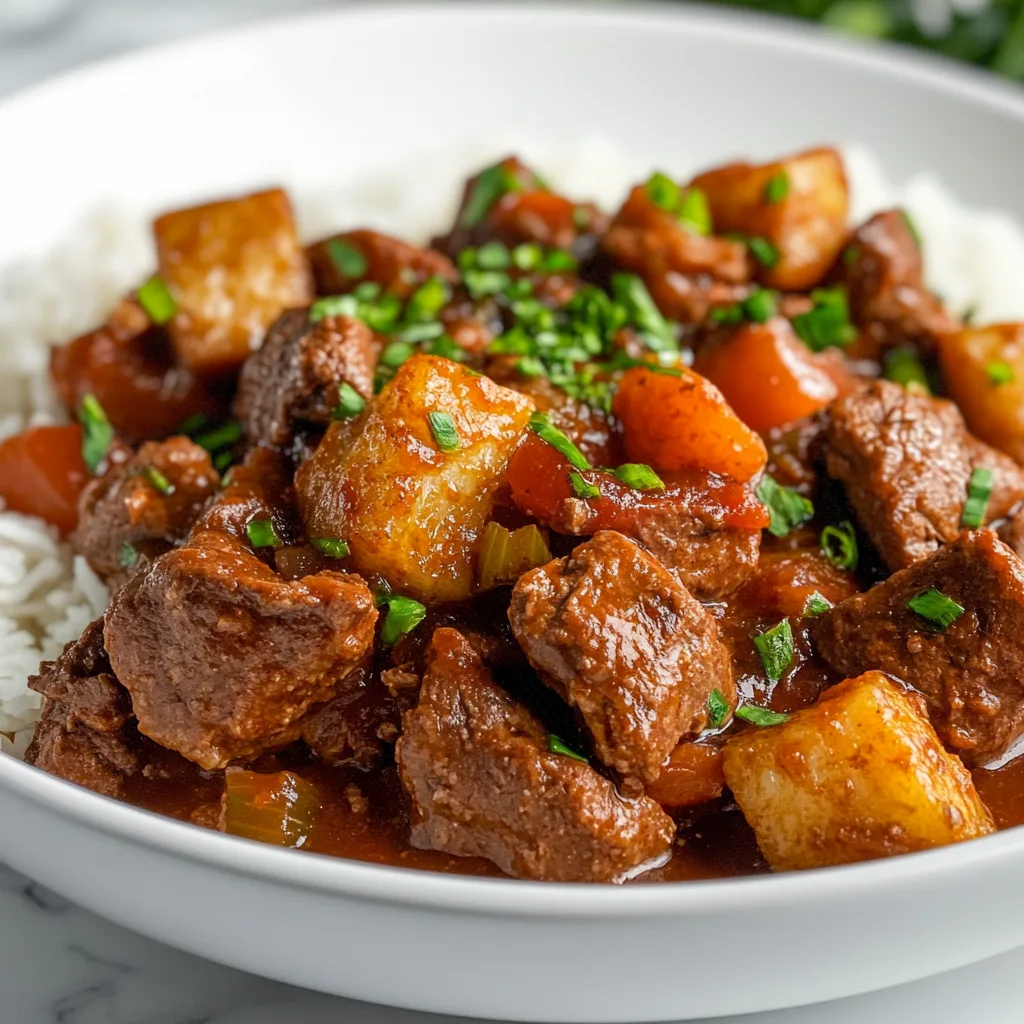
  • Carne Guisada Recipe That Will Melt Your Heart and Taste Buds!

    Carne Guisada Recipe That Will Melt Your Heart and Taste Buds!

    Carne Guisada Recipe That Will Melt Your Heart and Taste Buds!

    Carne Guisada holds a special place in my heart as the ultimate comfort food for chilly evenings. This rich, tender beef stew simmered in a savory tomato-based sauce captures the essence of traditional Tex-Mex cuisine with every spoonful. The first time I made this dish, my kitchen filled with aromas that transported me straight to my grandmother’s home in south Texas. There’s something magical about how the beef becomes fall-apart tender while absorbing all those complex flavors. If you’re craving a hearty meal that warms you from the inside out, this Carne Guisada recipe deserves a spot in your regular rotation.

    Recipe

    Why You’ll Love This Carne Guisada

    Perfect One-Pot Wonder

    This Carne Guisada is the ultimate one-pot meal that delivers maximum flavor with minimal cleanup. The beauty lies in its simplicity—cubed beef slowly simmers with onions, peppers, and tomatoes until everything melds into a rich, cohesive stew. I love how the meat becomes incredibly tender while the sauce thickens to the perfect consistency. The gradual cooking process allows the spices to bloom fully, creating layers of flavor that simply can’t be rushed. When life gets hectic, having a recipe that practically cooks itself while filling your home with mouthwatering aromas is absolutely priceless.

    Versatile Meal Prep Champion

    Carne Guisada actually improves with time, making it the perfect make-ahead dish for busy weeks. I often double the recipe on Sunday afternoons, knowing the flavors will deepen overnight in the refrigerator. The leftovers transform beautifully into multiple meals—stuffed into burritos, ladled over rice, or served alongside eggs for a hearty breakfast. The rich sauce maintains its velvety texture even after reheating, which isn’t always the case with stews. This adaptability saves me from mealtime monotony while still delivering that comforting satisfaction we all crave after long days.

    Essential Tips & Tricks

    Choosing and Preparing the Meat

    Selecting the right cut of beef makes all the difference in your Carne Guisada. I recommend chuck roast for its perfect balance of meat-to-fat ratio that becomes wonderfully tender during the slow cooking process. Cut the meat into uniform 1-inch cubes to ensure even cooking throughout. Don’t skip the initial searing step—those caramelized bits create the foundation of flavor that defines exceptional Carne Guisada. Pat the meat dry before searing to achieve that beautiful brown crust. This technique reminds me of how my One-Pan Balsamic Chicken develops such rich flavor from proper browning.

    Mastering the Sauce Consistency

    The signature thick, silky sauce is what elevates Carne Guisada from good to unforgettable. Start with a proper roux by allowing the flour to cook with the fat until it smells slightly nutty—this prevents any raw flour taste in the final dish. Add your liquid gradually while whisking to prevent lumps from forming. For an even richer texture, I sometimes stir in a tablespoon of masa harina during the last 30 minutes of cooking. If your sauce becomes too thick, thin it with beef broth; if too thin, remove the lid and allow it to reduce. Finding that perfect consistency takes practice, but the results are absolutely worth it.

    Serving Ideas & Creative Variations

    Traditional Tex-Mex Pairings

    Nothing complements Carne Guisada better than warm flour tortillas that soak up every drop of that glorious sauce. I serve mine with a side of fluffy Mexican rice and refried beans for an authentic Tex-Mex experience. For a complete feast, add fresh toppings like diced avocado, chopped cilantro, and a squeeze of lime to brighten the rich flavors. A sprinkle of queso fresco adds the perfect creamy contrast to the savory stew. This hearty combination reminds me of my Cheesy Beef and Rice Casserole—both dishes deliver that satisfying, stick-to-your-ribs comfort we all crave.

    Creative Fusion Twists

    While traditional is wonderful, don’t be afraid to give your Carne Guisada some unexpected twists. Try adding roasted poblanos for smoky depth or incorporating a cinnamon stick during simmering for subtle warmth. For a fusion approach, serve it over creamy polenta instead of rice, or use it as a filling for empanadas. I recently surprised my family by serving it as a topping for baked potatoes with all the fixings—it was an instant hit! The rich sauce also works beautifully as a base for a unique version of eggs Benedict for special brunches. These creative variations keep this classic dish exciting even when it’s in regular rotation.

    Storage & Troubleshooting Guide

    Proper Storage Techniques

    Carne Guisada is one of those rare dishes that improves with time, making it perfect for meal prep. Store leftovers in airtight containers in the refrigerator for up to 4 days—the flavors will continue to meld and deepen. For longer storage, freeze portions in freezer-safe bags with the air pressed out to prevent freezer burn. I like to freeze it in meal-sized portions for quick dinners on hectic weeknights. When reheating, do so gently over low heat, adding a splash of beef broth if needed to restore the original consistency. The meat remains tender and the sauce stays silky when treated with this careful approach.

    Fixing Common Issues

    Even experienced cooks encounter occasional challenges with Carne Guisada. If your meat turns out tough rather than tender, it likely needs more time—this cut requires patience to break down completely. Simply continue simmering until you can easily shred a piece with a fork. For sauce that’s too thin, remove the lid and allow it to reduce, or create a slurry with 1 tablespoon cornstarch mixed with cold water. If your sauce lacks depth, try adding a splash of balsamic vinegar or a spoonful of tomato paste to enhance the flavors. Remember that seasoning should be adjusted at the end, as the flavors concentrate during cooking.

    Frequently Asked Questions

    What cut of meat works best for Carne Guisada?

    Chuck roast is ideal for Carne Guisada due to its marbling and connective tissue that breaks down during slow cooking. Beef stew meat also works well, but I recommend asking your butcher to cut it into 1-inch cubes for even cooking.

    Can I make Carne Guisada in a slow cooker?

    Absolutely! Brown the meat and sauté the vegetables first, then transfer everything to your slow cooker. Cook on low for 7-8 hours or high for 4-5 hours until the meat is fork-tender.

    Is Carne Guisada the same as beef stew?

    While similar, Carne Guisada is distinctly Tex-Mex with its signature blend of cumin, oregano, and chiles. Traditional beef stew typically features different vegetables and herbs reflecting European influences.

    How can I make my Carne Guisada spicier?

    Add diced jalapeños or serranos during cooking, or stir in some chipotle peppers in adobo sauce. You can also finish with a dash of hot sauce or cayenne pepper to control the heat level.

    Can I freeze leftover Carne Guisada?

    Yes! Carne Guisada freezes beautifully for up to 3 months. Cool completely before transferring to freezer containers, leaving some headspace for expansion.

    Final Thoughts

    Carne Guisada has earned its place as a beloved comfort food classic for good reason. The combination of tender beef, rich sauce, and warming spices creates something truly greater than the sum of its parts. I find myself returning to this recipe season after season, appreciating how it brings people together around the table with minimal effort. Whether you’re serving it traditionally with warm tortillas or experimenting with creative variations, this dish never disappoints. I hope this Carne Guisada becomes a treasured recipe in your collection, bringing the same joy and satisfaction to your table that it has to mine. For more delicious inspiration, check out my Pinterest boards where I’m always sharing new ideas!

  • Burnt Honey Pie Recipe: Irresistible Sweet & Smoky Dessert Craze!

    Burnt Honey Pie Recipe: Irresistible Sweet & Smoky Dessert Craze!

    Burnt Honey Pie Recipe: Irresistible Sweet & Smoky Dessert Craze!

    Burnt Honey Pie has been my absolute obsession this season! There’s something magical about the way honey transforms when it’s carefully caramelized, creating deep amber notes that dance between sweet and almost savory. The first time I made this pie for my sister’s birthday gathering, the room fell silent as everyone took their first bites. The silky custard filling, perfumed with that distinctive burnt honey aroma, sits beautifully in a buttery crust that shatters just right with each forkful. If you’re looking for a dessert that feels both rustic and sophisticated, this is your new go-to recipe from Darleen’s kitchen.

    Recipe

    Why You’ll Love This Burnt Honey Pie

    A Symphony of Flavors and Textures

    This pie is a sensory experience unlike any other dessert. The process of burning (really, deeply caramelizing) the honey creates complex flavor notes that ordinary pies just don’t have—hints of caramel, toasted marshmallow, and even a whisper of smokiness. The contrast between the silky-smooth custard filling and the crisp, buttery crust creates that perfect textural balance we all crave. I love watching guests try to identify what makes it taste so unique! The subtle aroma that fills your kitchen as it bakes is reason enough to make this pie, even before that first heavenly bite.

    Make-Ahead Convenience

    One of my favorite things about this Burnt Honey Pie is how wonderfully it works with busy schedules. The pie actually benefits from being made a day in advance, allowing those complex flavors to develop and settle. The custard filling sets beautifully overnight in the refrigerator, making it perfect for holiday planning or dinner parties. I often make mine the evening before guests arrive, which means less stress and more time to enjoy company. Plus, serving slices straight from the refrigerator gives you that perfect cool, creamy texture that pairs beautifully with a hot cup of coffee.

    Essential Tips & Tricks

    Mastering the Burnt Honey

    The most crucial step is getting your honey to that perfect amber color without actually burning it. Use a heavy-bottomed saucepan and watch it carefully—it will bubble vigorously and then begin to darken. The difference between perfectly caramelized and bitter is just a matter of seconds! I keep a cup of hot water nearby to stop the cooking process immediately when it reaches that deep golden hue with a slight smoky aroma. Let your nose guide you; when it smells like toasted marshmallows with a hint of caramel, it’s perfect. Cool it slightly before adding to your custard mixture for the most intense flavor.

    Perfecting Your Crust

    A great Burnt Honey Pie deserves a flawless crust as its foundation. For best results, keep everything cold—your butter, your tools, even your hands if possible! I like to chill my flour in the freezer for 15 minutes before starting. When blind baking, use pie weights or dried beans to prevent shrinking, and brush the bottom with a thin layer of egg white once it’s partially baked. This creates a barrier that keeps the crust crisp even under the custard filling. For a beautiful golden edge, try brushing with egg wash before the final bake, just like I do with my Bourbon Maple Bacon Cinnamon Rolls.

    Serving Ideas & Creative Variations

    Perfect Pairings

    Burnt Honey Pie stands beautifully on its own, but a few thoughtful accompaniments can elevate it to restaurant quality. A dollop of lightly whipped cream with just a hint of vanilla makes the honey notes sing. For something more unexpected, try a small scoop of tangy crème fraîche to balance the sweetness. Fresh berries add a welcome burst of acidity—blackberries are my personal favorite with this pie. For special occasions, I’ve served thin slices alongside a small glass of bourbon or a cup of strong black tea. The contrast between the creamy pie and these bold flavors creates a memorable dessert experience.

    Seasonal Adaptations

    One thing I adore about this versatile pie is how easily it adapts to different seasons. In summer, I fold in fresh lavender or a splash of orange blossom water for a floral note. Fall calls for warming spices—try adding cinnamon and a pinch of cardamom to the custard. Winter holidays? A hint of rosemary infused into the cream creates an unexpected herbal note that pairs beautifully with the caramelized honey. For spring, I love adding lemon zest and a small amount of juice for brightness, similar to what I do in my Gluten-Free Lemon Pound Cake. The burnt honey provides a consistent base that welcomes these seasonal twists.

    Storage & Troubleshooting Guide

    Proper Storage Methods

    Burnt Honey Pie keeps beautifully when stored correctly. After it has completely cooled, cover loosely with foil rather than plastic wrap, which can make the crust soggy. The pie will keep in the refrigerator for up to four days, though the crust will soften slightly over time. If you need to store it longer, you can freeze individual slices—place them on a baking sheet until frozen solid, then wrap each piece tightly in plastic wrap and aluminum foil. Frozen slices can be thawed overnight in the refrigerator. I never recommend freezing the whole pie, as the texture of the filling may become grainy.

    Common Issues & Solutions

    If your filling isn’t setting properly, the most likely culprit is underbaking. The center should still have a slight wobble when you remove it from the oven—it will continue to set as it cools. If your honey darkens too quickly or tastes bitter, try lowering the heat next time and stirring more frequently. For a crust that shrinks during blind baking, make sure you’re chilling it adequately between steps and using enough pie weights. And if your filling cracks on top, you likely overcooked it or cooled it too quickly—next time, turn off the oven and let the pie cool gradually with the door slightly ajar.

    Frequently Asked Questions

    Can I use any type of honey for Burnt Honey Pie?

    You can use any honey, but varieties with distinct flavors like wildflower or orange blossom will give your pie more character. Avoid very dark honey like buckwheat, as it can become bitter when caramelized.

    How do I know when the honey is properly “burnt”?

    Watch for a deep amber color and a rich, caramel-like aroma. It should darken significantly but not smoke. This typically takes 3-5 minutes over medium heat.

    Can I make Burnt Honey Pie without dairy?

    Yes! Substitute coconut cream for heavy cream and use a plant-based butter in the crust. The burnt honey flavor still shines through beautifully.

    Why did my custard filling crack?

    Overbaking is usually the culprit. Remove the pie when the center still has a slight jiggle—it will continue setting as it cools.

    Can I prepare components of this pie in advance?

    Absolutely! The burnt honey can be made up to a week ahead and stored in an airtight container. The pie crust can be prepared and refrigerated for 2 days before baking.

    Final Thoughts

    This Burnt Honey Pie has become my signature dessert for good reason—it’s impressive yet approachable, with a flavor profile that keeps everyone coming back for more. There’s something deeply satisfying about transforming simple honey into something so complex and crave-worthy. The recipe rewards patience and attention to detail, but isn’t that true of all the best things in life? I hope you’ll try this Burnt Honey Pie and experience the magic for yourself. Don’t forget to share your creations on Pinterest so others can be inspired by your baking adventures!

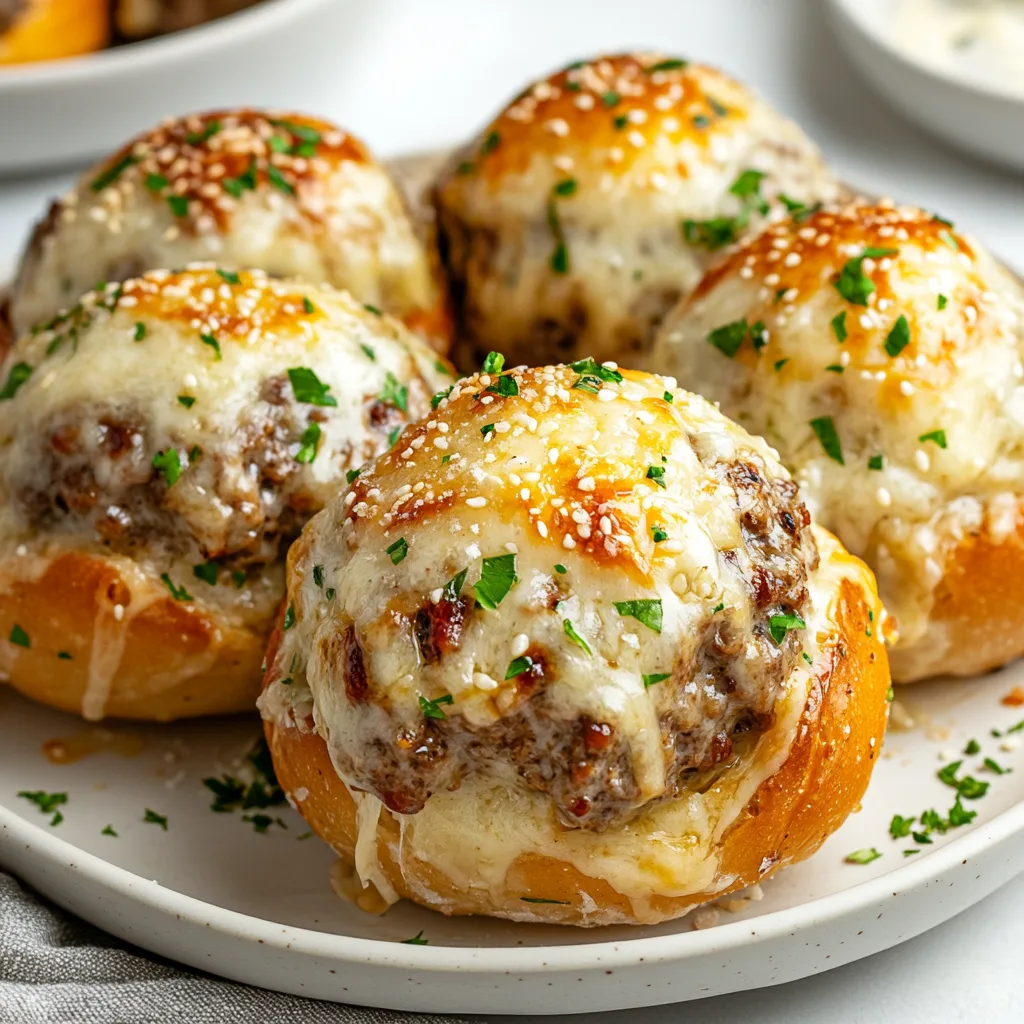
  • Garlic Parmesan Cheeseburger Bombs: Irresistible Flavor Explosion!

    Garlic Parmesan Cheeseburger Bombs: Irresistible Flavor Explosion!

    Garlic Parmesan Cheeseburger Bombs: Irresistible Flavor Explosion!

    Garlic Parmesan Cheeseburger Bombs are the ultimate comfort food mash-up that’s stolen my heart (and taste buds)! These golden-brown bundles of joy combine everything we love about cheeseburgers with the irresistible pull of fresh-baked bread and the savory punch of garlic and parmesan. I discovered these little miracles last game day when I needed something beyond the usual chips and dip, and my kitchen has never been the same. The moment you bite through that buttery, garlic-parmesan crust into the juicy, cheesy center, you’ll understand why these have become my family’s most requested treat. Trust me, these bombs are about to become your new obsession.

    Recipe

    Why You’ll Love These Garlic Parmesan Cheeseburger Bombs

    Perfect Party Food That Disappears Fast

    There’s something magical about serving food that creates an instant reaction. Every time I set down a platter of these Garlic Parmesan Cheeseburger Bombs, they’re gone in minutes! The handheld size makes them perfect for casual gatherings, and they stay remarkably warm even after sitting out. Last Super Bowl, my brother-in-law (who claims to be a food snob) ate seven of these before asking for the recipe. The combination of familiar cheeseburger flavors wrapped in that aromatic garlic-parmesan coating creates an irresistible pull that has guests circling back to the appetizer table again and again.

    Customizable For Every Taste Preference

    What I adore about these Garlic Parmesan Cheeseburger Bombs is how easily they adapt to different preferences. The basic formula stays the same, but you can switch up the filling to suit anyone’s taste. Use ground turkey for a lighter option, or plant-based meat for vegetarian friends. My daughter prefers hers with extra pickles and a touch of mustard mixed into the meat, while my husband loves adding jalapeños for heat. You can even prepare different variations in the same batch—just mark them with different garnishes on top! This flexibility makes them perfect for families with picky eaters or gatherings with diverse dietary needs.

    Essential Tips & Tricks

    Mastering The Perfect Dough Seal

    The secret to exceptional Garlic Parmesan Cheeseburger Bombs lies in creating a proper seal. After filling your dough portions, pinch the edges firmly then roll between your palms to ensure there are no openings where cheese could escape. I learned this the hard way after my first batch leaked all over the baking sheet! For extra insurance, I place each bomb seam-side down on the baking sheet. The dough should feel slightly tacky but not sticky—if it’s too dry, it won’t seal properly; too wet, and it becomes unmanageable. Let the filled bombs rest for 5-10 minutes before baking to help the dough relax and create a more secure seal.

    The Secret To That Irresistible Garlic-Parmesan Coating

    The garlicky, cheesy exterior is what transforms these from ordinary stuffed bread to crave-worthy bombs. For maximum flavor, I combine melted butter with fresh minced garlic (never the jarred stuff for this!), a touch of Italian seasoning, and finely grated parmesan—the kind that’s almost powdery works best here. Brush this mixture generously over the bombs just before they go into the oven, then again halfway through baking. This double application ensures that gorgeous golden crust with concentrated flavor in every bite. For an extra special touch, sprinkle with a bit more parmesan during the last two minutes of baking for a crispy, cheesy finish that’s simply irresistible.

    Serving Ideas & Creative Variations

    Perfect Pairings For A Complete Meal

    While Garlic Parmesan Cheeseburger Bombs are spectacular on their own, pairing them with complementary sides elevates them to a complete meal. I love serving them alongside a crisp garden salad dressed simply with vinaigrette to balance the richness. For casual gatherings, arrange them on a platter with small bowls of ketchup, mustard, and special sauce for dipping. When I’m feeling fancy, I’ll add a tomato-basil soup for dunking—the acidity cuts through the richness perfectly. For game day spreads, these bombs fit right in with sweet potato fries, coleslaw, or even a platter of roasted vegetables for a more balanced approach.

    Creative Twists On The Classic Recipe

    Don’t be afraid to experiment with different flavor profiles! My pizza bomb variation uses the same technique but swaps the burger filling for pepperoni, mozzarella, and a spoonful of marinara. The Mediterranean version with ground lamb, feta, and oregano earned rave reviews at my last book club. For breakfast bombs, try filling them with scrambled eggs, cheese, and breakfast sausage—they’re perfect for meal prep! My personal favorite twist is the Philly cheesesteak bomb with thinly sliced steak, sautéed peppers and onions, and provolone. The beauty of this recipe is its versatility—once you master the technique, you can create endless variations to suit any occasion.

    Storage & Troubleshooting Guide

    Make-Ahead And Freezer Instructions

    These Garlic Parmesan Cheeseburger Bombs are perfect for planning ahead! You can prepare them up to the point of baking, then refrigerate for 24 hours covered with plastic wrap. Just add a few extra minutes to the baking time when cooking from cold. For longer storage, freeze the unbaked bombs on a baking sheet until solid, then transfer to a freezer bag for up to 3 months. No need to thaw before baking—just place them on a baking sheet, brush with the garlic butter, and add about 5-7 minutes to the baking time. I often make a double batch specifically to freeze half, giving me a quick dinner option on hectic weeknights.

    Solving Common Cheeseburger Bomb Problems

    If your bombs are leaking cheese during baking, your seals probably need work. Make sure to pinch the dough thoroughly and roll between your palms to create a tight seal. For extra insurance, let them rest seam-side down for 10 minutes before baking. Pale, soggy bottoms usually mean your oven temperature is too low or the bombs are placed too high in the oven—try using the lower rack and checking your oven temperature with a separate thermometer. If the exterior browns too quickly while the inside stays doughy, your oven is likely too hot. Cover them loosely with foil after they reach your desired color, then continue baking until completely done.

    Frequently Asked Questions

    Can I use store-bought dough for Garlic Parmesan Cheeseburger Bombs?

    Absolutely! Refrigerated biscuit or pizza dough works perfectly. Just divide each biscuit in half or cut pizza dough into 3-inch squares. The flavor won’t be identical to homemade, but it’s a great time-saving option.

    How do I know when my cheeseburger bombs are fully cooked?

    They should be golden brown with an internal temperature of 160°F. If you don’t have a thermometer, cut one open—the dough should be cooked through with no raw spots, and the meat filling should be completely done.

    Can I make these with raw meat or should it be pre-cooked?

    Always pre-cook your meat filling. Raw meat won’t fully cook inside the dough before the exterior burns. Cook the meat with your seasonings, drain excess fat, then cool slightly before filling.

    Are Garlic Parmesan Cheeseburger Bombs spicy?

    Not unless you add spicy ingredients! The base recipe is savory but mild. Add diced jalapeños, red pepper flakes, or hot sauce to the meat mixture if you prefer heat.

    How can I make these healthier?

    Use lean ground turkey or chicken, reduced-fat cheese, and whole wheat dough. You can also brush with olive oil instead of butter and add extra vegetables to the filling.

    Final Thoughts

    Garlic Parmesan Cheeseburger Bombs have become my go-to recipe whenever I need guaranteed smiles around the table. There’s something magical about the way they combine familiar flavors into an exciting, handheld package that delights everyone from picky kids to discerning foodies. The aroma that fills your kitchen as they bake is worth making them for that alone! Whether you’re feeding a crowd or just looking for something fun to shake up your dinner routine, these bombs deliver big flavor in every bite. I hope you’ll give these Garlic Parmesan Cheeseburger Bombs a try and experience the joy they bring to any table! Find more delicious recipes on Pinterest.