Blog

  • Creamy Lemon Garlic Scallops: Irresistibly Tender & Zesty Delight

    Creamy Lemon Garlic Scallops: Irresistibly Tender & Zesty Delight

    Creamy Lemon Garlic Scallops: Irresistibly Tender & Zesty Delight

    Creamy Lemon Garlic Pan Seared Scallops are the ultimate indulgence that transforms an ordinary dinner into a restaurant-worthy experience. The first time I made these buttery, tender morsels, my kitchen filled with that intoxicating aroma of sizzling garlic and bright lemon that made my mouth water before I’d even taken a bite. There’s something magical about that perfect golden crust that forms when scallops meet a hot pan. If you’ve been intimidated by cooking seafood at home, this recipe will change everything—just like it did for me when I discovered how simple yet impressive these succulent scallops can be.

    Recipe

    Why You’ll Love This Creamy Lemon Garlic Pan Seared Scallops

    Restaurant-Quality in Minutes

    There’s nothing quite like the luxurious texture of perfectly seared scallops—crispy golden exterior giving way to that tender, almost buttery inside. What I adore about this Creamy Lemon Garlic Pan Seared Scallops recipe is how quickly it comes together. In just about 15 minutes, you’ll have a dish that looks and tastes like it came from a high-end seafood restaurant. The bright acidity from fresh lemon juice cuts through the richness of the cream, creating that perfect balance that makes your taste buds sing with every bite.

    Foolproof Technique for Perfect Results

    Even if you’ve never cooked scallops before, this recipe makes it incredibly approachable. The key is starting with dry scallops (pat them thoroughly with paper towels) and a screaming hot pan. That initial sizzle when scallops hit the surface creates that gorgeous caramelization we’re after. I used to overthink cooking seafood until I realized the secret is often in what you don’t do—don’t crowd the pan, don’t move them too soon, and don’t overcook. This method gives you restaurant-worthy results every single time.

    Essential Tips & Tricks

    Selecting and Preparing Your Scallops

    Choosing the right scallops makes all the difference in this Creamy Lemon Garlic Pan Seared Scallops recipe. Look for “dry” scallops rather than “wet” ones, which have been treated with chemicals and release too much moisture when cooking. Size matters too—I prefer sea scallops (the larger ones) for this dish. Before cooking, remove the small side muscle if still attached, and thoroughly pat them dry with paper towels. This crucial step ensures you’ll get that beautiful golden sear instead of steaming them, which is the difference between mediocre and magnificent results.

    Perfecting the Sear and Sauce

    The magic happens in a smoking-hot pan—preferably cast iron or stainless steel. Add scallops only when the oil shimmers and place them clockwise around the pan so you remember the order for flipping. Cook undisturbed for 1.5-2 minutes per side. For the sauce, the fond (those browned bits) left in the pan is liquid gold! Deglaze with white wine, then add butter, garlic, and lemon juice before finishing with cream. Similar to my Seared Scallops in Garlic Cajun Butter Sauce, the sauce should coat the back of a spoon when ready.

    Serving Ideas & Creative Variations

    Perfect Pairings for a Complete Meal

    Creamy Lemon Garlic Pan Seared Scallops shine brightest when served atop a bed of al dente pasta or creamy risotto that catches every drop of that luscious sauce. For a lighter option, I love them with roasted asparagus or a simple arugula salad dressed with lemon vinaigrette. My personal favorite is serving them alongside crusty bread for soaking up the sauce—there’s something deeply satisfying about that final swipe through the plate. For a truly special occasion, consider pairing with a crisp Sauvignon Blanc or unoaked Chardonnay to complement the citrus notes.

    Exciting Flavor Variations

    While the classic lemon-garlic combination is divine, don’t be afraid to experiment! Add a pinch of saffron to the sauce for an elegant twist, or stir in fresh herbs like tarragon or dill at the end. For something bolder, try adding a tablespoon of capers or a dash of smoked paprika. If you’re feeling adventurous, take inspiration from my Chicken Cordon Bleu Casserole and add a touch of Dijon mustard and a sprinkle of Gruyère cheese to the sauce for a French-inspired variation that’s absolutely spectacular with these tender scallops.

    Storage & Troubleshooting Guide

    Storing and Reheating

    While Creamy Lemon Garlic Pan Seared Scallops are best enjoyed immediately, sometimes you’ll have leftovers. Store them in an airtight container in the refrigerator for up to 2 days. When reheating, do so gently—microwave on 50% power in short bursts or warm in a skillet over low heat with a splash of cream to revive the sauce. Remember that scallops will continue cooking during reheating, so they may not maintain their perfect texture. I sometimes deliberately undercook a few if I know we’ll have leftovers, ensuring they won’t become rubbery when reheated.

    Solving Common Scallop Problems

    If your scallops aren’t developing that golden crust, your pan probably isn’t hot enough or the scallops were too wet. Ensure they’re thoroughly patted dry and your pan is properly preheated. If your sauce breaks or curdles, lower the heat immediately and whisk in a tablespoon of cold butter. For rubbery scallops, you’ve likely overcooked them—they need just 1.5-2 minutes per side. Remember, they continue cooking slightly after removal from heat. If your sauce is too thin, simmer a bit longer; if too thick, add a splash of stock or cream to reach that perfect silky consistency.

    Frequently Asked Questions

    How do I know when my Creamy Lemon Garlic Pan Seared Scallops are perfectly cooked?

    Perfectly cooked scallops have a golden crust, are opaque around the edges, and slightly translucent in the center—about 1.5-2 minutes per side. They should feel slightly firm but still have some give when gently pressed.

    Can I use frozen scallops for this recipe?

    Yes, but thaw them completely in the refrigerator overnight, then pat extremely dry with paper towels. Frozen scallops release more moisture, so take extra care drying them to achieve a good sear.

    What’s the best type of pan for searing scallops?

    Cast iron or stainless steel pans work best as they retain heat well and create an excellent sear. Avoid non-stick pans as they won’t produce the same golden crust or fond for the sauce.

    How can I thicken the sauce if it’s too runny?

    Simmer the sauce a bit longer to reduce it naturally. If needed, mix ½ teaspoon cornstarch with 1 tablespoon cold water and whisk into the simmering sauce until it reaches your desired consistency.

    What can I substitute for heavy cream?

    Coconut cream works beautifully for a dairy-free version. For a lighter option, try half-and-half mixed with a touch of butter, or cashew cream for a vegan-friendly alternative with similar richness.

    Final Thoughts

    Mastering Creamy Lemon Garlic Pan Seared Scallops has been one of my most rewarding culinary achievements. There’s something incredibly satisfying about transforming these delicate treasures of the sea into a dish that feels both elegant and comforting. The contrast between the caramelized exterior and the tender, sweet flesh, all bathed in that velvety lemon garlic sauce, creates a symphony of flavors that never fails to impress. Whether for a special occasion or a weeknight treat, this recipe proves that sometimes the simplest preparations yield the most extraordinary results. Find more inspiration for your table on Pinterest.
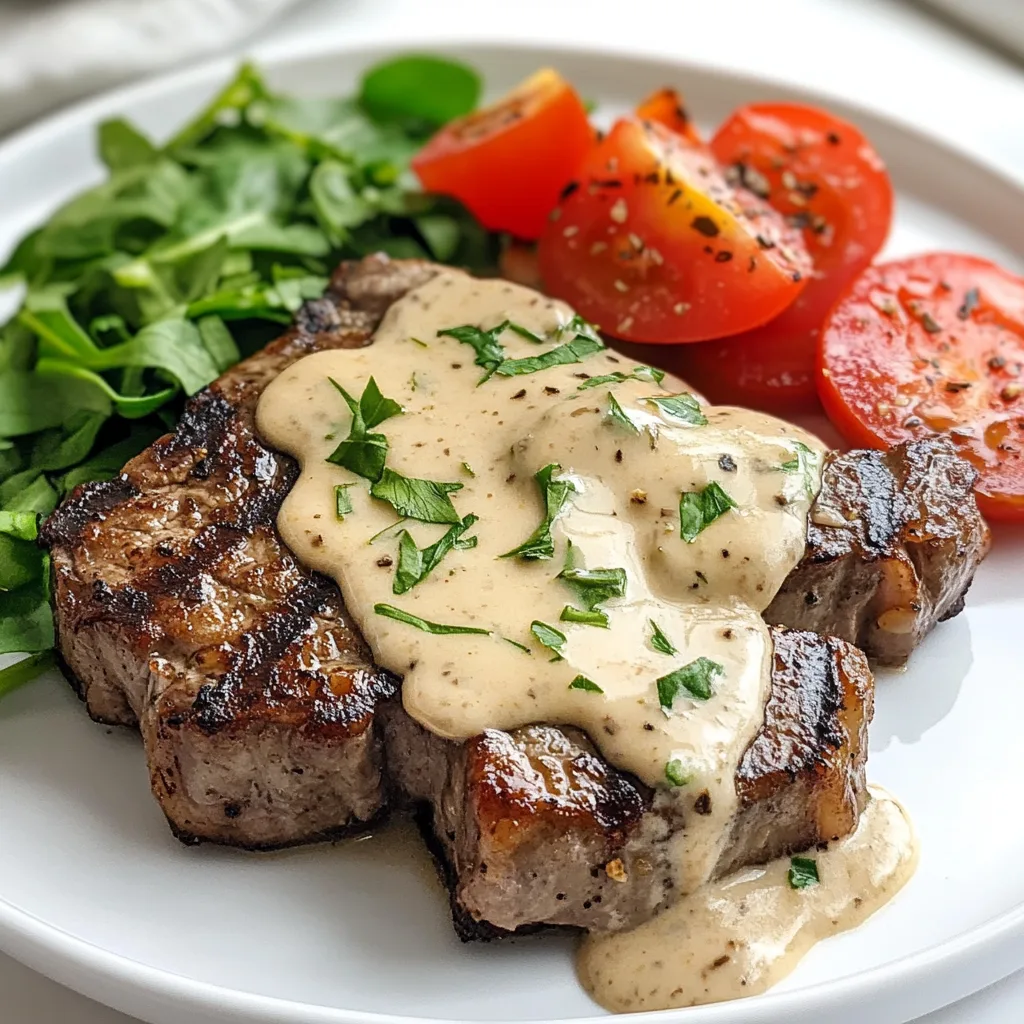

  • Garlic Butter Steak with Parmesan Cream Sauce – Irresistibly Juicy!

    Garlic Butter Steak with Parmesan Cream Sauce – Irresistibly Juicy!

    Garlic Butter Steak with Parmesan Cream Sauce – Irresistibly Juicy!

    There’s nothing quite like the sizzle of a perfectly cooked Garlic Butter Steak with Parmesan Cream Sauce hitting your plate. The moment that rich, garlicky aroma fills your kitchen, you know you’re in for something special. I still remember the first time I made this dish for my family—the way my husband’s eyes lit up as the creamy sauce pooled around that perfectly seared steak.

    This recipe combines two of my absolute favorite things: a buttery, garlic-infused steak and a velvety Parmesan cream sauce that’s honestly good enough to drink with a spoon (I’ve been tempted!). If you’re looking for a restaurant-quality meal that’s surprisingly simple to make at home, this garlic-forward recipe is about to become your new favorite.

    Recipe

    Why You’ll Love This Garlic Butter Steak with Parmesan Cream Sauce

    Perfect for Special Occasions and Weeknight Dinners

    This Garlic Butter Steak with Parmesan Cream Sauce is incredibly versatile. While it feels special enough for anniversaries or holiday dinners, it’s actually simple enough for a weeknight when you need a little extra comfort. The best part? It comes together in under 30 minutes, making it perfect for those evenings when you want something impressive without spending hours in the kitchen. I’ve made this on busy Tuesdays and for Valentine’s Day dinner—it shines in both scenarios. The combination of tender steak and creamy sauce creates a dish that feels indulgent without requiring professional chef skills.

    Restaurant-Quality Results with Simple Ingredients

    You won’t need to hunt down exotic ingredients to create this masterpiece. The magic happens with pantry staples like butter, garlic, heavy cream, and good-quality Parmesan cheese. The depth of flavor comes from properly searing the steak and letting those brown bits in the pan become the foundation of your sauce. I love how this recipe transforms everyday ingredients into something that tastes like it came from a high-end steakhouse. The sauce has that perfect balance of richness from the cream, saltiness from the Parmesan, and aromatic punch from the garlic that elevates the entire dish.

    Essential Tips & Tricks

    Selecting and Preparing the Perfect Steak

    Choose high-quality cuts like ribeye, New York strip, or filet mignon for the best results. Before cooking, bring your steaks to room temperature (about 30 minutes on the counter) and pat them completely dry with paper towels. This ensures a beautiful crust forms during searing. Season generously with salt and freshly cracked black pepper just before cooking—never earlier, as salt draws out moisture. For medium-rare perfection, use a meat thermometer to reach 130-135°F. Remember that steak continues cooking during rest time, so I always pull mine slightly under my target temperature, just like I do with my Seared Scallops in Garlic Cajun Butter Sauce.

    Creating the Ultimate Parmesan Cream Sauce

    The key to an exceptional cream sauce is patience and proper temperature control. After removing your steaks, don’t clean that pan! Those browned bits (fond) are flavor gold. Add butter and garlic to the still-hot pan, sautéing until fragrant but not brown. Slowly whisk in heavy cream, allowing it to simmer gently until slightly thickened. The freshly grated Parmesan should be added gradually off the heat, which prevents graininess. Never use pre-shredded cheese as it contains anti-caking agents that can make your sauce clumpy. Finish with a touch of fresh herbs and taste for seasoning—sometimes a squeeze of lemon brightens everything perfectly.

    Serving Ideas & Creative Variations

    Perfect Pairings for a Complete Meal

    This Garlic Butter Steak with Parmesan Cream Sauce pairs beautifully with both simple and sophisticated sides. For a classic approach, serve with creamy mashed potatoes that can soak up every drop of that precious sauce. Roasted asparagus or green beans add color and a fresh counterpoint to the richness. For a lighter option, try a crisp arugula salad with lemon vinaigrette. When I’m feeling particularly indulgent, I serve this with my Crispy Bacon Honey Roasted Potatoes for an absolutely showstopping meal that has everyone asking for seconds. Don’t forget a crusty bread to mop up that sauce!

    Exciting Twists on the Classic Recipe

    While the classic recipe is perfection, there are several delicious variations worth trying. Add sautéed mushrooms to the sauce for an earthy depth that complements the steak beautifully. For a touch of brightness, incorporate sun-dried tomatoes and fresh basil into your cream sauce. Looking for something with a kick? Add a pinch of red pepper flakes or a splash of cognac before pouring in the cream. For a surf-and-turf experience, top your steak with sautéed shrimp. My personal favorite variation is adding caramelized onions to the sauce—the sweet-savory balance creates an entirely new dimension that’s absolutely worth the extra time.

    Storage & Troubleshooting Guide

    Proper Storage and Reheating Methods

    While this dish is best enjoyed fresh, leftovers can be stored properly for the next day. Place cooled steak and sauce in separate airtight containers in the refrigerator for up to 2 days. To reheat the steak without overcooking, wrap it in foil and warm in a 275°F oven until it reaches your desired temperature (about 15-20 minutes). The cream sauce should be reheated gently in a saucepan over low heat, whisking occasionally to prevent separation. If the sauce appears too thick, whisk in a tablespoon of warm milk or cream to restore its silky texture. Never microwave your leftover steak unless you enjoy the texture of shoe leather!

    Troubleshooting Common Sauce Issues

    If your Parmesan cream sauce breaks or becomes grainy, don’t panic! This usually happens when the sauce gets too hot or when the cheese is added too quickly. To fix a broken sauce, remove it from heat immediately and whisk in a tablespoon of cold cream. For graininess, try blending the sauce with an immersion blender. If your sauce is too thin, simmer it a bit longer to reduce, or whisk in a tiny amount of cornstarch slurry (½ teaspoon cornstarch mixed with 1 tablespoon cold water). Too thick? Simply add more cream or a splash of the steak’s resting juices for extra flavor. Remember that a successful sauce requires attention—never walk away while it’s simmering.

    Frequently Asked Questions

    What’s the best cut of steak for this Garlic Butter Steak with Parmesan Cream Sauce?

    Ribeye, New York strip, and filet mignon work best due to their tenderness and marbling. For budget options, top sirloin can work well if cooked carefully to medium-rare and sliced against the grain.

    Can I make this recipe ahead of time?

    You can prepare the Parmesan cream sauce up to a day ahead and reheat gently. However, the steak should always be cooked fresh just before serving for the best texture and flavor.

    How do I prevent my cream sauce from breaking?

    Keep your sauce at a gentle simmer, never a boil. Add cheese gradually off the heat, and use room-temperature cream to prevent temperature shock when adding it to the pan.

    Can I substitute the heavy cream with something lighter?

    Half-and-half can work but will produce a thinner sauce. Avoid milk or non-dairy alternatives as they lack the fat needed for a proper emulsion and may curdle.

    What herbs work best in this recipe?

    Fresh thyme and rosemary complement the steak beautifully, while chives or parsley work wonderfully in the sauce. Dried herbs work in a pinch but use 1/3 the amount of fresh.

    Final Thoughts

    This Garlic Butter Steak with Parmesan Cream Sauce has become my go-to recipe whenever I want to make dinner feel special. There’s something magical about how a few simple ingredients can transform into something so luxurious. The garlicky butter that melts into the perfectly seared steak, combined with that velvety Parmesan sauce, creates a dish that feels like a warm hug on a plate. I’d love to see how yours turns out! Share your creations with me on Pinterest and let me know what sides you paired with this dreamy main course. Happy cooking!

  • Seared Scallops in Garlic Cajun Butter Sauce – Irresistibly Delicious!

    Seared Scallops in Garlic Cajun Butter Sauce – Irresistibly Delicious!

    Seared Scallops in Garlic Cajun Butter Sauce – Irresistibly Delicious!

    Seared Scallops In Garlic Cajun Butter Sauce has become my absolute favorite way to bring restaurant-quality seafood to my dinner table. The first time I made this dish, the aroma of sizzling butter and Cajun spices filled my kitchen, instantly transporting me to a cozy New Orleans bistro. There’s something magical about watching those plump scallops develop a golden crust while bathing in that rich, spiced butter sauce. Perfect for date nights or when you want to impress guests, this recipe strikes that perfect balance between elegant and comforting. Let me show you how to create this stunning seafood masterpiece that tastes like it came from a professional kitchen.

    Recipe

    Why You’ll Love This Seared Scallops In Garlic Cajun Butter Sauce

    A Quick Yet Impressive Meal

    Despite its fancy restaurant appearance, this Seared Scallops In Garlic Cajun Butter Sauce comes together in just about 15 minutes! The succulent scallops cook in mere minutes, while the luscious butter sauce practically makes itself in the same pan. I love having this recipe in my back pocket for those evenings when unexpected guests arrive or when I want to treat myself to something special without spending hours in the kitchen. The combination of quick cooking time and stunning presentation makes this dish a true weeknight hero with weekend-worthy flavor.

    Perfect Balance of Flavors and Textures

    What makes this dish truly special is how the Cajun spices bring warmth and depth without overwhelming the delicate sweetness of the scallops. The tender, melt-in-your-mouth interior of perfectly cooked scallops contrasts beautifully with their caramelized, slightly crispy exterior. Meanwhile, the garlic butter sauce adds richness that ties everything together. I still remember my husband closing his eyes after his first bite, declaring it better than our favorite seafood restaurant. That moment of pure food joy is exactly why cooking at home can be so rewarding.

    Essential Tips & Tricks

    Selecting and Preparing Your Scallops

    Start with dry-packed scallops whenever possible – they’ll sear much better than wet-packed ones, which release too much moisture. Before cooking, thoroughly pat them dry with paper towels to ensure that perfect golden crust. Remove the small side muscle (a rectangular tag on the side) if it’s still attached. Allow your scallops to come to room temperature for about 10 minutes before cooking. This simple step prevents them from seizing up in the hot pan. For more protein-packed dinner ideas, check out my Smothered Chicken Thighs with Creamy Gravy for another cozy option.

    Achieving the Perfect Sear

    The secret to restaurant-quality scallops is getting that caramelized crust without overcooking the delicate interior. Use a heavy-bottomed pan (cast iron works beautifully) and get it screaming hot before adding your scallops. Resist the urge to crowd the pan – work in batches if needed, giving each scallop plenty of space. The most important tip? Don’t disturb them for at least 1.5-2 minutes after they hit the pan. That undisturbed searing time is what creates that gorgeous golden crust that makes Seared Scallops In Garlic Cajun Butter Sauce so impressive.

    Serving Ideas & Creative Variations

    Elegant Plating Suggestions

    Serve these Seared Scallops In Garlic Cajun Butter Sauce over a bed of creamy risotto or buttery mashed potatoes to catch all that delicious sauce. For a lighter option, try wilted spinach or roasted asparagus. I love to place the scallops in a circular pattern, then drizzle the sauce artfully over and around them. A sprinkle of fresh herbs (parsley, chives, or thyme) adds a beautiful pop of color. For special occasions, serve alongside my Tuscan Shrimp with Spinach Artichokes for an impressive seafood feast that will have everyone reaching for seconds.

    Flavor Variations to Try

    While the classic Cajun butter sauce is divine, don’t be afraid to experiment! Try a lemon-herb version by adding fresh thyme and lemon zest to the butter sauce. For an Asian-inspired twist, replace the Cajun seasoning with a mixture of ginger, garlic, and a splash of soy sauce, finishing with sliced green onions. Love heat? Add a diced jalapeño to the butter sauce for extra kick. My personal favorite variation includes a tablespoon of bourbon added to the sauce, which adds incredible depth and a subtle sweetness that pairs beautifully with the spices.

    Storage & Troubleshooting Guide

    Proper Storage and Reheating

    Scallops are best enjoyed fresh, but if you have leftovers, store them in an airtight container with the sauce for up to 2 days in the refrigerator. To reheat, use gentle heat – either a low microwave power or a covered skillet over medium-low heat just until warmed through. Be careful not to reheat too aggressively, as scallops can quickly become rubbery. I sometimes enjoy leftover scallops cold, sliced over a salad with some of the sauce drizzled as dressing – a completely different but equally delicious way to enjoy them the next day.

    Common Problems and Solutions

    If your scallops aren’t developing that beautiful golden crust, your pan probably wasn’t hot enough or the scallops were too wet. Make sure to thoroughly pat them dry and heat your pan until it’s just smoking before adding them. Scallops turning out rubbery? You’ve likely overcooked them – they only need about 1.5-2 minutes per side. Remember that carryover cooking continues even after you remove them from heat. If your butter sauce breaks or separates, whisk in a teaspoon of cold water off the heat to help it re-emulsify into that silky texture we’re aiming for.

    Frequently Asked Questions

    How do I know when scallops are perfectly cooked?

    Perfectly cooked scallops are opaque on the outside but still slightly translucent in the center. They should feel slightly firm but still have some give when gently pressed. Total cooking time is usually just 3-4 minutes total for large sea scallops.

    Can I make Seared Scallops In Garlic Cajun Butter Sauce with frozen scallops?

    Yes, but thaw them completely in the refrigerator overnight first, then pat very dry before cooking. Frozen-then-thawed scallops won’t sear quite as well as fresh, but they’ll still be delicious.

    What’s the difference between bay scallops and sea scallops?

    Sea scallops are larger (about 1.5-2 inches in diameter) and better for searing. Bay scallops are smaller, sweeter, and cook extremely quickly, making them better for quick sautés or pasta dishes.

    What can I substitute for Cajun seasoning?

    Make your own by mixing paprika, garlic powder, onion powder, cayenne, oregano, and thyme. Alternatively, Creole seasoning or blackening seasoning work well as substitutes.

    How can I make this dish dairy-free?

    Replace the butter with a good quality olive oil or a dairy-free butter alternative. You’ll lose some richness but still get wonderful flavor from the garlic and Cajun spices.

    Final Thoughts

    Seared Scallops In Garlic Cajun Butter Sauce has become my go-to recipe when I want to create something truly special without spending hours in the kitchen. The combination of tender scallops, rich butter, and bold Cajun spices creates a dish that feels indulgent yet comes together in minutes. I hope this recipe inspires you to bring a touch of restaurant-quality cooking to your home kitchen. Don’t forget to check out more delicious recipes on Pinterest for more inspiration! Remember, cooking is about creating moments of joy – and these scallops deliver that with every bite.

  • Sourdough Discard Cinnamon Quick Bread: Irresistibly Soft & Cozy!

    Sourdough Discard Cinnamon Quick Bread: Irresistibly Soft & Cozy!

    Sourdough Discard Cinnamon Quick Bread: Irresistibly Soft & Cozy!

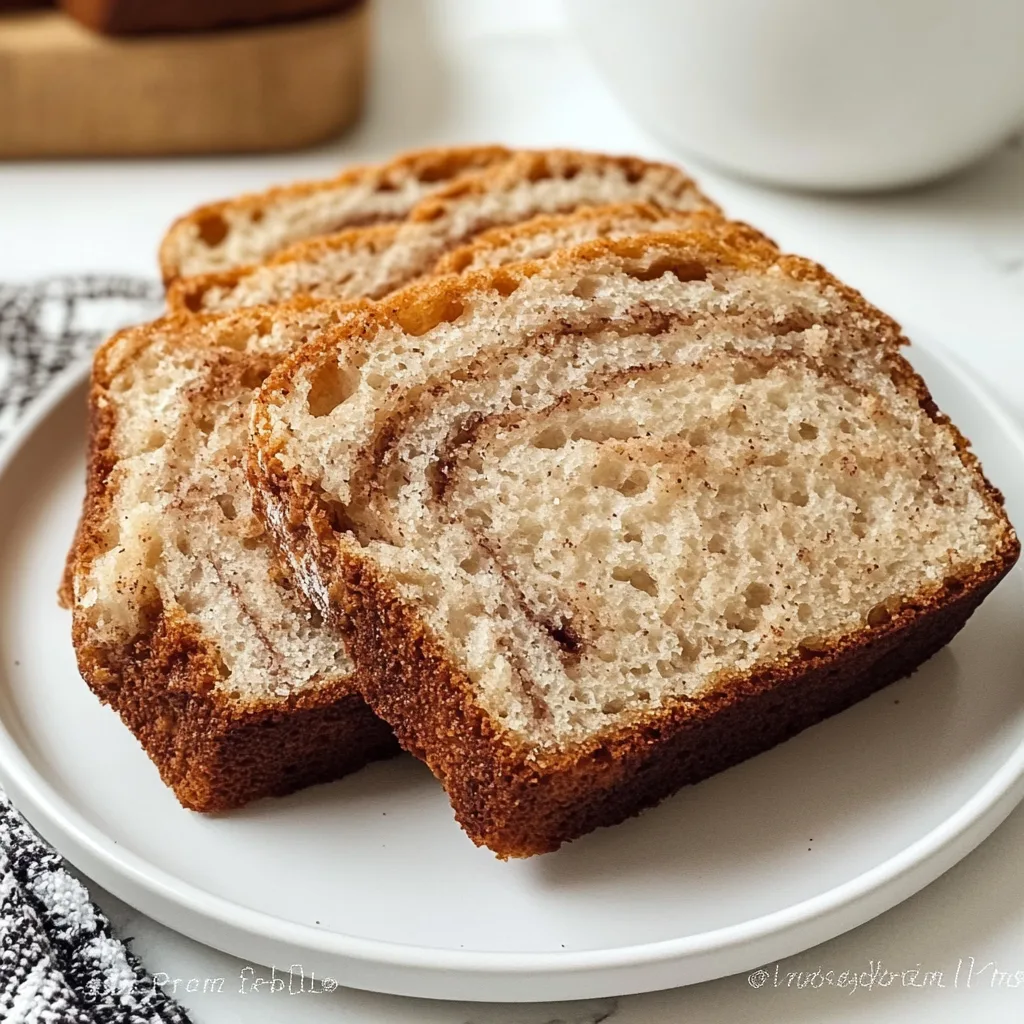
    Sourdough discard cinnamon quick bread has become my absolute salvation on those chilly mornings when I’m craving something warm and spiced but don’t have the patience for a full-on yeast bread. There’s something magical about the tangy depth that sourdough discard brings to this tender loaf, creating layers of flavor you simply can’t achieve with regular quick bread recipes. I discovered this recipe during my pandemic baking adventures when my counter was perpetually cluttered with a bubbling starter and I couldn’t bear to waste another gram of discard. The aroma that fills your kitchen as this bread bakes is nothing short of heavenly – cinnamon, vanilla, and that distinctive sourdough tang creating a symphony of cozy scents.

    Recipe

    Why You’ll Love This Sourdough Discard Cinnamon Quick Bread

    Perfect Balance of Flavors

    The beauty of this sourdough discard cinnamon quick bread lies in its perfect balance of sweet and tangy notes. The discard adds a subtle complexity that elevates this beyond your standard cinnamon bread. I love how the fermented notes play with the warm cinnamon and brown sugar, creating something that feels both familiar and excitingly different. My neighbor actually knocked on my door the first time I made this, drawn by the irresistible aroma wafting through our shared hallway! The texture strikes that ideal balance too – tender and moist with a slightly tight crumb that makes each slice perfect for toasting.

    No-Waste Baking Solution

    If you maintain a sourdough starter, you know the guilt of tossing discard. This sourdough discard cinnamon quick bread transforms that potential waste into something spectacular! I used to feel a pang of regret each time I discarded excess starter, but now I actively look forward to it. Each cup of discard becomes an opportunity rather than a burden. The acidity in the discard also helps activate the baking soda, contributing to a beautiful rise without needing buttermilk or yogurt. Plus, there’s something deeply satisfying about creating a delicious treat from something that would otherwise go straight to the compost.

    Essential Tips & Tricks

    Getting the Perfect Texture

    The key to achieving that ideal texture in your sourdough discard cinnamon quick bread is not overmixing the batter. I learned this the hard way after creating a few dense, tunnel-filled loaves! Mix just until the ingredients are combined – those few streaks of flour you see? They’ll disappear during baking. Another game-changer is using room temperature ingredients. Cold discard straight from the fridge can cause the melted butter to solidify, creating an uneven texture. I like to pull my discard out about 30 minutes before baking, similar to how I prepare for making those delicious snickerdoodle cobbler treats everyone loves.

    Enhancing the Cinnamon Flavor

    To create a truly memorable sourdough discard cinnamon quick bread, don’t skimp on quality cinnamon. I recommend using Ceylon cinnamon for its complex, warm flavor rather than the sharper cassia variety commonly found in supermarkets. For an even more pronounced cinnamon presence, try creating a swirl: mix 2 tablespoons of cinnamon with 1/4 cup of sugar, then layer it between portions of batter in your loaf pan. This creates beautiful ribbons of intense cinnamon flavor throughout the bread. For extra decadence, sprinkle turbinado sugar on top before baking for a sweet, crunchy crust that contrasts beautifully with the tender interior.

    Serving Ideas & Creative Variations

    Perfect Pairings

    Sourdough discard cinnamon quick bread shines as both a breakfast treat and afternoon snack. My favorite way to serve it is lightly toasted with a generous smear of salted butter that melts into all the nooks and crannies. For a more decadent option, try it with cream cheese or a drizzle of local honey. It pairs beautifully with coffee or tea, making it perfect for slow weekend mornings. For a special brunch, serve alongside fresh fruit and yogurt, similar to how I present my creme brulee French toast for guests – it’s always a hit and disappears quickly!

    Seasonal Adaptations

    One thing I love about this sourdough discard cinnamon quick bread is how easily it adapts to seasonal flavors. In fall, add 1/2 cup of diced apples and a handful of chopped walnuts for a harvest-inspired variation. Winter calls for orange zest and cranberries, while spring feels right with lemon zest and blueberries folded into the batter. Summer? Try adding fresh peaches and a touch of ginger. The tangy sourdough base complements all these fruits beautifully, and the cinnamon provides a warm backbone regardless of the season. Each variation feels like a completely new recipe while using the same trusted base.

    Storage & Troubleshooting Guide

    Keeping Your Bread Fresh

    To maintain that just-baked quality, store your sourdough discard cinnamon quick bread properly. Once completely cooled, wrap it tightly in plastic wrap or place in an airtight container. At room temperature, it stays fresh for 2-3 days. For longer storage, refrigeration extends freshness to about a week. The bread also freezes beautifully – I slice the entire loaf before freezing, allowing me to thaw individual portions as needed. Just wrap slices in plastic wrap, then aluminum foil, and freeze for up to 3 months. When ready to enjoy, thaw at room temperature or pop frozen slices directly in the toaster.

    Fixing Common Issues

    If your sourdough discard cinnamon quick bread isn’t turning out perfectly, a few simple adjustments can help. For a loaf that’s too dense, check your leavening agents – baking powder loses potency over time, so replace it every six months. If your bread is sinking in the middle, your oven temperature might be off (consider an oven thermometer), or you might be opening the oven door too early in the baking process. For bread that’s too dry, try reducing the baking time by 5 minutes or adding an extra tablespoon of oil to your next batch.

    Frequently Asked Questions

    Can I use fresh sourdough starter instead of discard?

    Yes, but fresh starter is more active and less acidic. Reduce the baking soda slightly (by about 1/4 teaspoon) and expect a slightly different flavor profile with less tang.

    How long will my sourdough discard cinnamon quick bread stay fresh?

    When properly stored in an airtight container, it remains fresh for 2-3 days at room temperature, up to a week refrigerated, and up to 3 months frozen.

    Can I make this recipe gluten-free?

    Absolutely! Use gluten-free sourdough discard and replace the all-purpose flour with a 1:1 gluten-free baking blend that contains xanthan gum for structure.

    What if my sourdough discard is very liquid?

    If your discard has high hydration (very runny), reduce other liquid ingredients in the recipe by 2-3 tablespoons to maintain the proper batter consistency.

    Is sourdough discard cinnamon quick bread healthier than regular quick bread?

    The fermentation process in sourdough can make nutrients more bioavailable and easier to digest, potentially making this bread somewhat easier on your digestive system than traditional quick breads.

    Final Thoughts

    This sourdough discard cinnamon quick bread has become a staple in my baking rotation, transforming what was once waste into something truly spectacular. There’s something deeply satisfying about the process – watching humble ingredients and discard combine to create something so aromatic and delicious. I hope you’ll experience the same joy as the sweet-spicy scent of cinnamon fills your kitchen and that first warm slice melts in your mouth. Be sure to share your creations on Pinterest to inspire other bakers to give their discard new life!

  • Snickerdoodle Cobbler Bliss: Irresistible Comfort in Every Bite!

    Snickerdoodle Cobbler Bliss: Irresistible Comfort in Every Bite!

    Snickerdoodle Cobbler Bliss: Irresistible Comfort in Every Bite!

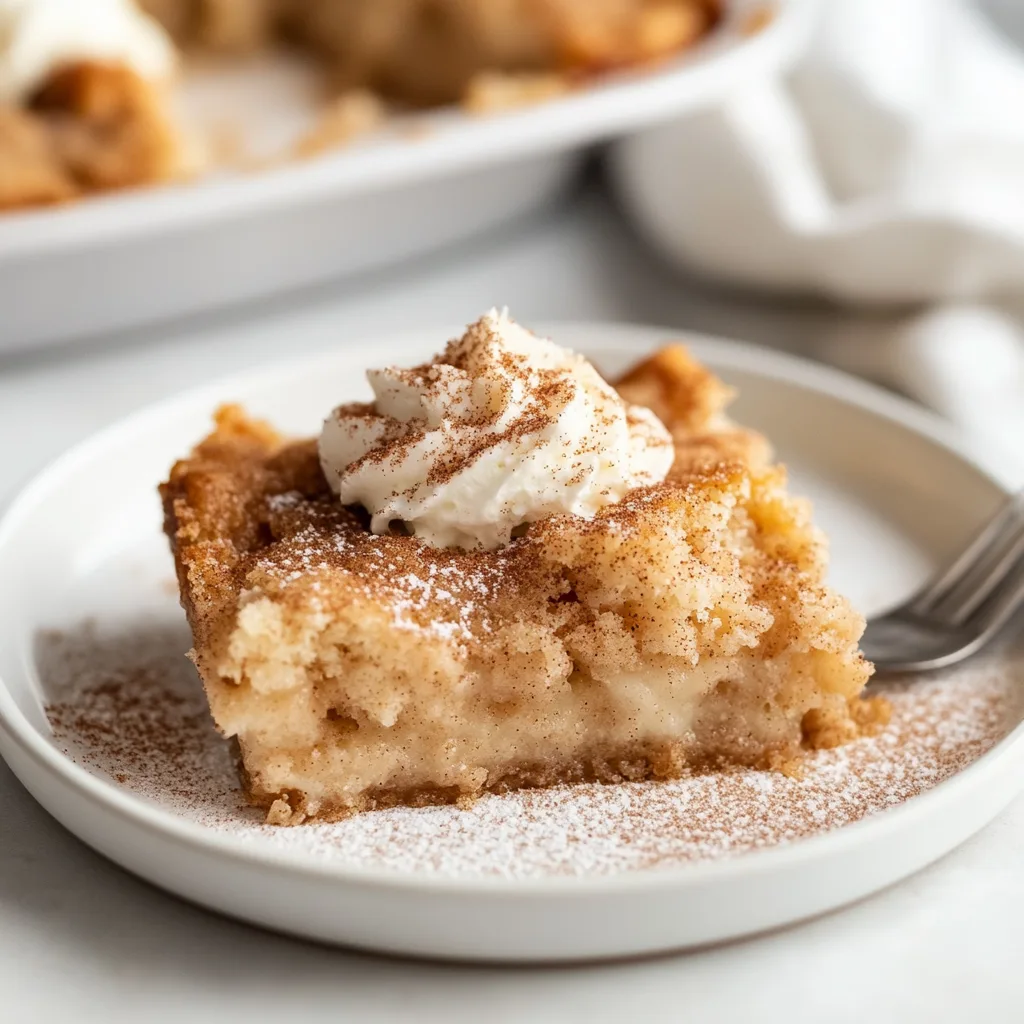
    Snickerdoodle Cobbler has become my absolute obsession this fall – imagine the perfect marriage between a buttery snickerdoodle cookie and a warm, gooey cobbler. The first time I made this for my family, we gathered around the kitchen island with spoons in hand, not even waiting for it to cool properly. That cinnamon-sugar crust that forms on top? Pure magic. It’s the dessert I turn to when I need something that feels like a warm hug, especially when paired with a scoop of vanilla ice cream that slowly melts into all those sweet crevices. If you love cinnamon sugar soft pretzels, this cobbler will absolutely steal your heart.

    Recipe

    Why You’ll Love This Snickerdoodle Cobbler

    The Perfect Balance of Textures

    There’s something utterly mesmerizing about the textural contrast in this snickerdoodle cobbler. The top layer develops this delightful crispness from the cinnamon-sugar coating that crackles under your spoon, while underneath awaits a soft, tender cake-like layer. And beneath that? Oh my goodness – a magical, warm custard that forms during baking. I still remember the first time I served this at a dinner party and watched everyone’s eyes widen with that first bite. The way the different layers create this symphony of textures is what makes this dessert so uniquely satisfying and impossible to resist.

    Simple Ingredients, Extraordinary Results

    What I adore most about this snickerdoodle cobbler is how it transforms basic pantry staples into something truly spectacular. You’ll need just flour, sugar, butter, milk, and a generous helping of cinnamon – ingredients I bet you already have on hand right now! There’s something so satisfying about creating dessert magic without a special trip to the store. Last weekend, when an unexpected snow day kept us homebound, this cobbler saved the day. The simplicity of the recipe belies the complexity of flavors that develop as it bakes, filling your home with the most intoxicating aroma of warm spices.

    Essential Tips & Tricks

    Mastering the Perfect Cinnamon-Sugar Ratio

    The heart and soul of any snickerdoodle cobbler lies in its cinnamon-sugar mixture. I’ve found that a 4:1 ratio of sugar to cinnamon creates that perfect balance – sweet with just enough spice to make your taste buds dance. Don’t skimp on quality cinnamon; it makes a noticeable difference! I once made this with some fancy Vietnamese cinnamon my sister gifted me, and the depth of flavor was absolutely incredible. For an extra dimension, try adding a tiny pinch of nutmeg or cardamom. Just remember to sprinkle the mixture evenly across the top before baking to ensure that signature snickerdoodle cobbler crust forms beautifully.

    The Pour-Over Method Secret

    The magic of this snickerdoodle cobbler happens during a step that might seem strange at first – the hot water pour-over. After assembling your batter and topping, you’ll pour hot water over the entire dish without stirring. This creates that signature gooey sauce that forms underneath while baking! I learned this technique from my grandmother, who used it for her peach cobbler. Trust the process, even if it looks soupy going into the oven. The water will transform into a luscious sauce while the top bakes into a perfect cookie-like crust. For extra richness, try using hot coffee or apple cider instead of water!

    Serving Ideas & Creative Variations

    Seasonal Pairings That Elevate Your Cobbler

    Snickerdoodle cobbler shines brightest when paired with complementary flavors that enhance its warm, cinnamon notes. In fall, I love serving it with a scoop of maple pecan ice cream or a drizzle of salted caramel sauce. During winter holidays, try adding a splash of bourbon to the batter or serving it alongside spiced apple cider. The cobbler also pairs beautifully with fresh berries in summer – the tartness creates a lovely contrast. For an extra special touch, whip up some cinnamon-infused whipped cream by adding a half teaspoon of cinnamon to your cream before whipping. It’s similar to how I finish my snickerdoodle cheesecake for that extra wow factor.

    Mix-In Ideas For Creative Twists

    While classic snickerdoodle cobbler is perfection on its own, adding mix-ins can create exciting variations. Try folding in diced apples tossed in cinnamon for an apple-snickerdoodle cobbler that tastes like fall in a dish. White chocolate chips add delightful pockets of sweetness, while chopped pecans or walnuts provide wonderful textural contrast. My personal favorite variation includes a layer of cream cheese filling in the middle – simply mix 8oz cream cheese with ¼ cup sugar and an egg, then pour it between batter layers. For a festive holiday version, add crushed candy canes on top during the last five minutes of baking for a peppermint-snickerdoodle mashup.

    Storage & Troubleshooting Guide

    Keeping Your Cobbler Fresh

    Snickerdoodle cobbler is at its absolute best when served warm from the oven, but leftovers can be stored and enjoyed for days. Cover any remaining cobbler with plastic wrap or transfer to an airtight container and refrigerate for up to 4 days. When ready to enjoy again, reheat individual portions in the microwave for 30-45 seconds until warm, or place the entire dish (if oven-safe) in a 300°F oven for about 15 minutes. The texture will change slightly – the top won’t be quite as crisp – but the flavors actually deepen overnight! For longer storage, you can freeze portions for up to 3 months in freezer-safe containers.

    Troubleshooting Common Issues

    If your snickerdoodle cobbler turned out too soupy, it likely needed more baking time. Every oven runs differently, and sometimes an extra 5-10 minutes makes all the difference. Look for a golden brown top that’s set in the center – if it jiggles too much, keep baking! Conversely, if your cobbler seems dry, you might have used too little liquid or overbaked it. Next time, try adding an extra tablespoon of butter or reducing the bake time slightly. For a cobbler that didn’t develop that signature crackly top, make sure your oven was fully preheated and consider placing the dish on a higher rack to encourage better browning.

    Frequently Asked Questions

    Can I make Snickerdoodle Cobbler ahead of time?

    Yes! You can prepare the batter up to 24 hours ahead and refrigerate it. Add the hot water pour-over just before baking. Alternatively, bake completely, refrigerate, and reheat at 300°F for 15-20 minutes before serving.

    What’s the difference between a cobbler and a crisp?

    Cobblers have a cake-like or biscuit topping, while crisps feature an oat-based streusel topping. Snickerdoodle cobbler specifically mimics the flavor profile of snickerdoodle cookies with its cinnamon-sugar crust.

    Can I make this recipe gluten-free?

    Absolutely! Simply substitute the all-purpose flour with a 1:1 gluten-free flour blend. I’ve tested this with Bob’s Red Mill Gluten-Free 1-to-1 Baking Flour with excellent results.

    Why did my cobbler separate into distinct layers?

    That’s actually perfect! Snickerdoodle cobbler naturally forms three distinct layers during baking: a cookie-like top, cake-like middle, and saucy bottom. This layering is what makes it special.

    How do I know when my Snickerdoodle Cobbler is done?

    Your cobbler is done when the top is golden brown and set (not wet or raw-looking), usually 35-40 minutes. A toothpick inserted into the cake layer should come out with moist crumbs, not wet batter.

    Final Thoughts

    This Snickerdoodle Cobbler has become my go-to dessert for everything from casual family dinners to holiday gatherings. There’s something about its warm, cinnamon embrace that makes everyone feel instantly at home. The way it fills your kitchen with that irresistible aroma as it bakes is almost as rewarding as the first delicious bite. I’d love to see your creations if you try this recipe – tag me on Pinterest so I can celebrate your baking success! Whether you stick with the classic version or try one of the variations, this snickerdoodle cobbler is bound to become a treasured recipe in your collection.

  • Chicken Cordon Bleu Casserole: Irresistible Comfort Food You’ll Love!

    Chicken Cordon Bleu Casserole: Irresistible Comfort Food You’ll Love!

    Chicken Cordon Bleu Casserole: Irresistible Comfort Food You’ll Love!

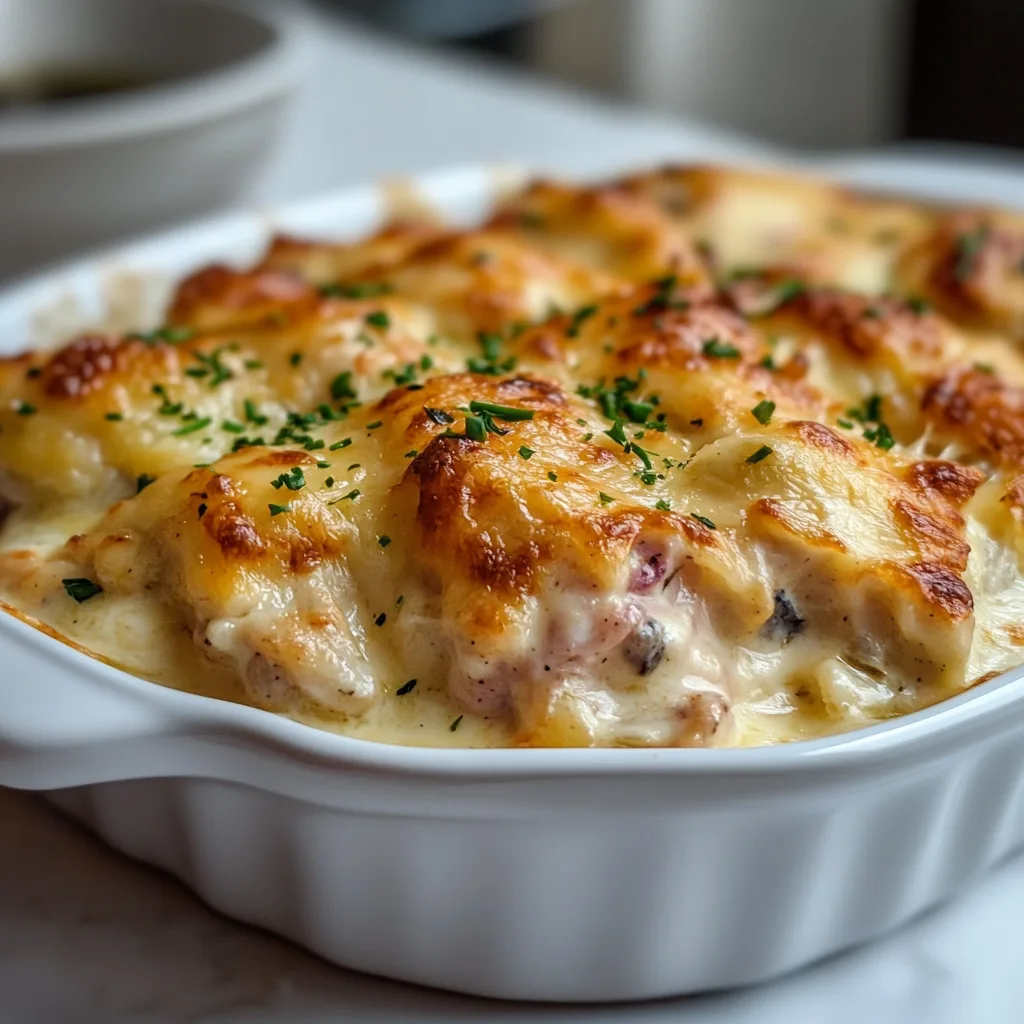
    Chicken Cordon Bleu Casserole transforms a classic French dish into a comforting, family-friendly meal that’s perfect for busy weeknights. The first time I made this creamy, cheesy casserole, my kitchen filled with the most intoxicating aroma of bubbling Swiss cheese and savory ham. There’s something magical about the way the tender chicken, smoky ham, and melty cheese come together in this dish. It’s like a warm hug on a plate! If you love comfort food with a touch of elegance, this Chicken Cordon Bleu Casserole will quickly become a staple in your dinner rotation.

    Recipe

    Why You’ll Love This Chicken Cordon Bleu Casserole

    Perfect Comfort Food With Minimal Effort

    This Chicken Cordon Bleu Casserole delivers all the classic flavors you adore without the fuss of pounding, rolling, and breading chicken breasts. I still remember the first time I served this to my family—eyes widening with that first bite, forks diving back in for more. The creamy sauce envelops tender chicken chunks and salty ham, while the golden breadcrumb topping provides that satisfying crunch you’d get from traditional cordon bleu. It’s the perfect solution for those nights when you crave something special but don’t have the energy for complicated cooking techniques.

    Make-Ahead Magic For Busy Schedules

    One of the greatest advantages of this Chicken Cordon Bleu Casserole is its flexibility for meal planning. I often assemble it the night before, cover it tightly, and refrigerate until I’m ready to bake. The flavors actually develop beautifully as they meld together overnight! You can also freeze the unbaked casserole for up to three months—just thaw overnight in the refrigerator before baking. This has saved me countless times when unexpected guests arrive or when I’m too exhausted to cook after a long day. The convenience factor alone makes this recipe worth keeping in your regular rotation.

    Essential Tips & Tricks

    Achieving The Perfect Cheese Sauce

    The heart of any great Chicken Cordon Bleu Casserole is its velvety cheese sauce. Start with a proper roux (equal parts butter and flour) and cook it until it smells slightly nutty but hasn’t browned. Warm your milk before adding it to prevent lumps, then whisk constantly as you pour it in. Let the sauce thicken before adding your cheeses—I prefer a combination of Swiss and Gruyère for authentic flavor. Remove the pan from heat before adding cheese to prevent graininess. If your sauce seems too thick, add a splash of chicken broth; if it’s too thin, let it simmer a bit longer. The perfect sauce should coat the back of a spoon beautifully.

    Elevating The Flavor Profile

    While traditional Chicken Cordon Bleu Casserole is delicious on its own, a few simple additions can take it to the next level. Adding a tablespoon of Dijon mustard to the sauce provides a subtle tanginess that balances the rich cheese. A splash of white wine deglazes the pan beautifully after sautéing your aromatics. Fresh herbs like thyme or tarragon incorporated into both the sauce and the breadcrumb topping add wonderful aromatic notes. For the breadcrumb topping, mix in a bit of grated Parmesan and a drizzle of melted butter before sprinkling over the casserole—this creates an irresistible golden crust similar to what you’d find in Smothered Chicken Thighs with Creamy Gravy.

    Serving Ideas & Creative Variations

    Perfect Pairings For A Complete Meal

    Chicken Cordon Bleu Casserole shines when paired with the right sides. A simple green salad with a light vinaigrette cuts through the richness beautifully. Steamed asparagus or roasted Brussels sprouts provide a veggie component that complements rather than competes with the casserole’s flavors. For starchier options, buttered egg noodles or fluffy mashed potatoes make excellent beds for serving this creamy delight. I love to serve crusty French bread alongside to soak up every last bit of that decadent sauce. For special occasions, a glass of crisp white wine—like a Chardonnay or Pinot Grigio—elevates the entire experience.

    Exciting Twists On The Classic Recipe

    Don’t be afraid to put your own spin on Chicken Cordon Bleu Casserole! Try substituting prosciutto for ham for a more elegant flavor profile. Experiment with different cheese combinations—smoked Gouda adds wonderful depth, while a bit of cream cheese increases creaminess. For a lighter version, use Greek yogurt in place of some of the heavy cream. Adding vegetables like sautéed mushrooms, spinach, or roasted red peppers introduces new textures and nutrients. For a fun twist that kids love, try mixing in cooked pasta to create a Chicken Cordon Bleu Mac and Cheese. The possibilities are endless!

    Storage & Troubleshooting Guide

    Proper Storage For Leftovers

    Leftover Chicken Cordon Bleu Casserole should be cooled completely before being transferred to airtight containers. Properly stored in the refrigerator, leftovers will stay delicious for 3-4 days. To reheat, cover with foil and warm in a 325°F oven until heated through (about 20 minutes), removing the foil for the last few minutes to re-crisp the top. Microwaving works in a pinch, but the texture won’t be as good. For freezing leftovers, portion into freezer-safe containers and use within 2 months. I like to label mine with the date and reheating instructions—it’s such a treat to discover these homemade “frozen dinners” on busy evenings!

    Fixing Common Casserole Problems

    If your Chicken Cordon Bleu Casserole turns out too watery, there are several potential culprits. Make sure to thoroughly drain any canned ingredients and pat chicken dry before adding it to the mix. Pre-cooking the chicken slightly can help release excess moisture. If the sauce is too thin before baking, add an extra tablespoon of flour to the roux. For a casserole that’s too dry, drizzle in some warm chicken broth or cream before serving. If your topping isn’t browning properly, switch to the broiler for the last 1-2 minutes, watching carefully to prevent burning. Remember that casseroles continue cooking slightly after removal from the oven.

    Frequently Asked Questions

    Can I use rotisserie chicken for Chicken Cordon Bleu Casserole?

    Absolutely! Rotisserie chicken saves time and adds flavor. Shred or cube about 3-4 cups of meat, discarding the skin for the best texture in your casserole.

    How do I prevent my casserole from curdling?

    Lower the oven temperature to 350°F and avoid boiling the sauce. Add cheese off-heat and use full-fat dairy products, which are more stable when baked.

    Can I make this casserole gluten-free?

    Yes! Substitute the flour with cornstarch or gluten-free flour blend, and use gluten-free breadcrumbs or crushed gluten-free crackers for the topping.

    What’s the best cheese for Chicken Cordon Bleu Casserole?

    Swiss cheese is traditional, but a combination of Swiss and Gruyère provides the most authentic flavor. Mozzarella can be added for extra meltiness.

    Can I assemble this casserole in advance?

    Definitely! Prepare the Chicken Cordon Bleu Casserole up to 24 hours ahead, refrigerate covered, and add 10-15 minutes to the baking time when cooking from cold.

    Final Thoughts

    This Chicken Cordon Bleu Casserole has become my go-to recipe when I want to impress without stress. The way it transforms simple ingredients into something that feels special makes it perfect for both weeknight dinners and entertaining guests. I love how versatile it is—adaptable to whatever ingredients I have on hand while still maintaining that classic flavor combination we all crave. Don’t forget to check out more comfort food inspirations on Pinterest for your next cooking adventure. Your family will thank you for bringing this cozy, cheesy delight to the dinner table!

  • Vanilla French Beignets: Irresistible, Fluffy Delight You’ll Crave!

    Vanilla French Beignets: Irresistible, Fluffy Delight You’ll Crave!

    Vanilla French Beignets: Irresistible, Fluffy Delight You’ll Crave!

    Vanilla French Beignets have become my kitchen obsession lately, bringing a touch of New Orleans magic into my home with every batch. These pillowy, powdered sugar-dusted treats strike the perfect balance between a donut and a cloud, with that unmistakable hint of vanilla dancing through each bite. The first time I made these, my kitchen filled with the intoxicating aroma of sweet dough and warm vanilla that had everyone wandering in, wondering what heavenly creation was in progress. If you’re looking for a weekend baking project that feels special without being overly complicated, these beignets are exactly what you need.

    Recipe

    Why You’ll Love These Vanilla French Beignets

    A Taste of New Orleans at Home

    There’s something magical about biting into a fresh, warm beignet that transports you straight to Café du Monde without the plane ticket. The vanilla-infused dough creates a depth of flavor that elevates these beyond ordinary fried dough. I still remember making these on a rainy Sunday morning, the windows fogging up as the dough fried to golden perfection. The contrast between the crisp exterior and pillowy interior creates that authentic texture you’re looking for, while the vanilla adds a warmth that makes these beignets distinctively yours.

    Surprisingly Simple to Master

    Don’t let their fancy French name intimidate you—beignets are surprisingly forgiving for home bakers. The dough comes together with basic pantry ingredients, and unlike many yeasted recipes, it’s quite resilient to slight variations in timing. What I love most is that you don’t need special equipment—just a pot, thermometer, and your hands. The most challenging part might be waiting for the dough to rise, but trust me, that patience pays off in the most delicious way when you bite into that first warm, sugar-dusted square of heaven.

    Essential Tips & Tricks

    Perfecting Your Dough

    The foundation of exceptional Vanilla French Beignets starts with properly handled dough. Temperature matters enormously here—lukewarm milk (around 110°F) activates the yeast without killing it, while room temperature eggs help everything incorporate smoothly. I’ve found that adding the vanilla directly to the wet ingredients ensures it distributes evenly throughout. Don’t rush the kneading process; those 5-7 minutes of work develop the gluten structure that gives beignets their signature chew. And remember: a slightly sticky dough is actually what you want—resist the urge to add too much flour!

    Mastering the Fry

    The difference between good and great beignets often comes down to the frying technique. Maintain your oil between 350-360°F consistently—I check with a thermometer between batches because temperature drops can lead to greasy results. Work in small batches (3-4 beignets at a time) to prevent overcrowding, which causes temperature drops and uneven cooking. My secret trick? After frying, let them drain on paper towels for just 15 seconds before immediately tossing in powdered sugar while they’re still hot. The residual heat creates a light caramelization effect with the sugar that’s absolutely divine.

    Serving Ideas & Creative Variations

    Beyond Basic Powdered Sugar

    While traditional powdered sugar is a classic finish for Vanilla French Beignets, there’s a world of possibilities to explore. Try creating a lavender-infused sugar by blending dried culinary lavender with powdered sugar for a sophisticated twist. Or serve them alongside a rich chocolate ganache dipping sauce that transforms them into an elegant dessert. My personal favorite weekend indulgence? Drizzling warm beignets with local honey and a sprinkle of flaky sea salt for that irresistible sweet-salty combination that elevates the vanilla notes and makes these truly unforgettable.

    Seasonal Inspirations

    Adapt your beignets to celebrate the changing seasons with thoughtful variations. In fall, add a teaspoon of pumpkin spice to the dough and serve with maple butter for a cozy autumn treat. For summer gatherings, fold lemon or orange zest into the dough and serve with fresh berries and whipped cream. During the holidays, a hint of nutmeg in the dough and a side of eggnog crème anglaise creates a festive moment. These seasonal adaptations maintain the essence of vanilla French beignets while creating memorable experiences that reflect the time of year.

    Storage & Troubleshooting Guide

    Keeping Beignets Fresh

    Let’s be honest—Vanilla French Beignets are at their absolute peak when eaten fresh, still warm from the fryer. However, if you find yourself with leftovers, store them in an airtight container at room temperature for up to 24 hours. To revive day-old beignets, pop them in a 300°F oven for 5 minutes to restore some of that fresh-made magic. For longer storage, freeze the plain fried beignets (before adding sugar) in a single layer, then transfer to a freezer bag for up to 1 month. Reheat from frozen in a 350°F oven and dust with fresh powdered sugar.

    Solving Common Problems

    If your beignets aren’t puffing properly, your oil temperature is likely the culprit—too hot and they brown before puffing, too cool and they absorb oil and become heavy. If your dough isn’t rising, check that your yeast is fresh and that your liquid wasn’t too hot. Dense beignets usually indicate underkneading or insufficient rising time. For beignets that deflate quickly after frying, you may have overproofed the dough. Remember that humidity affects flour absorption, so you might need slightly more or less flour depending on your kitchen environment that day.

    Frequently Asked Questions

    Can I make Vanilla French Beignets ahead of time?

    Yes! Prepare the dough the night before and let it rise slowly in the refrigerator. Bring to room temperature for 30 minutes before rolling, cutting, and frying for fresh beignets without the morning wait.

    Why are my beignets dense instead of fluffy?

    Insufficient rising time is usually the culprit. Make sure your dough doubles in size during both rises, and verify your yeast is fresh and active before starting.

    Can I bake these instead of frying?

    While traditional Vanilla French Beignets are fried, you can bake them at 375°F for 12-15 minutes. They’ll have a different texture—more like soft rolls—but still delicious with the vanilla flavor.

    What’s the best oil for frying beignets?

    Neutral oils with high smoke points work best—vegetable, canola, or peanut oil. Avoid olive oil, which imparts a strong flavor that competes with the delicate vanilla.

    How thick should I roll the dough?

    Aim for about 1/4-inch thickness. Too thin and they’ll become crisp chips; too thick and they may remain doughy inside when the outside is perfectly golden.

    Final Thoughts

    There’s something incredibly satisfying about mastering Vanilla French Beignets in your own kitchen—watching the dough transform from a simple mixture into pillowy squares of joy. The process connects us to culinary traditions while creating new memories around our own tables. Whether you’re serving these as a special breakfast, afternoon treat, or dessert, they bring an element of celebration to ordinary moments. I hope you’ll share your beignet adventures with me over on Pinterest and discover why these vanilla-scented treasures have become a beloved tradition in so many homes, including mine.

  • Italian Penicillin Soup Recipe That Warms Your Soul Instantly

    Italian Penicillin Soup Recipe That Warms Your Soul Instantly

    Italian Penicillin Soup Recipe That Warms Your Soul Instantly

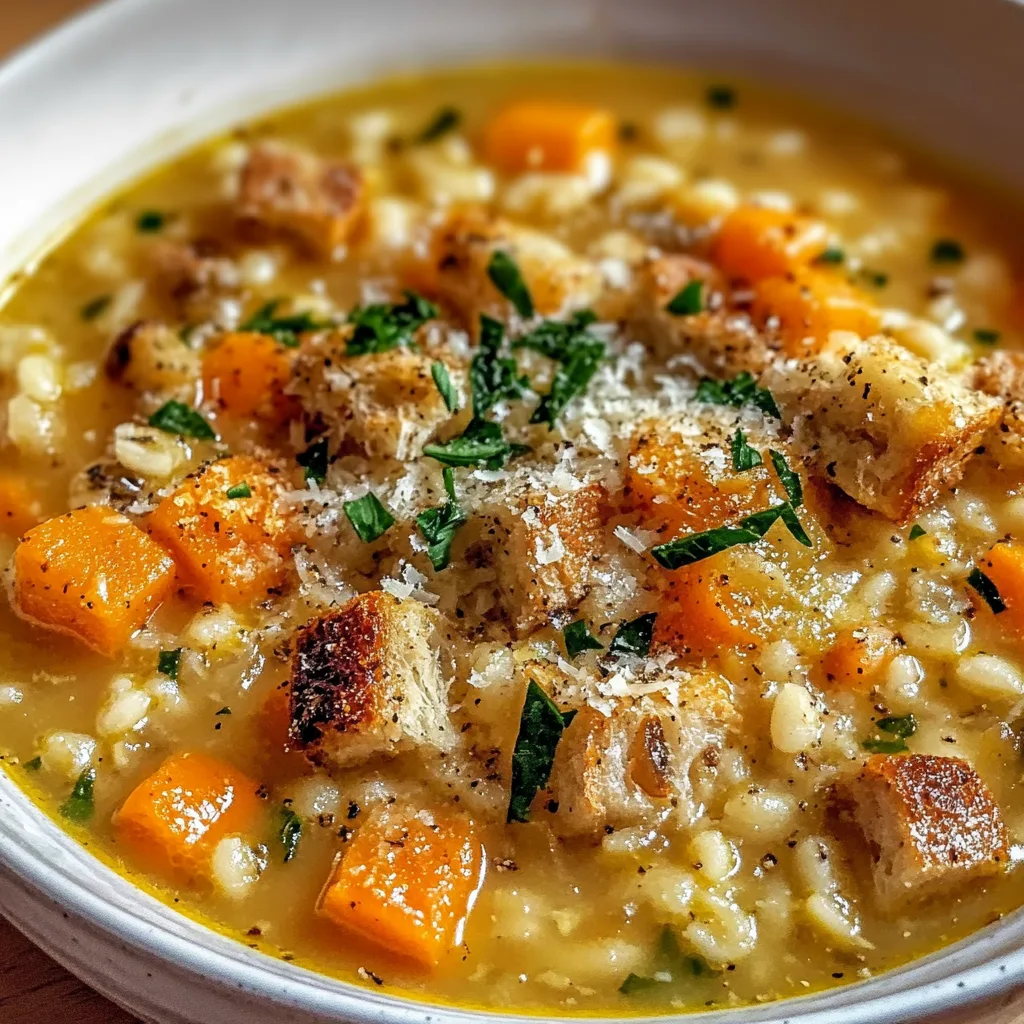
    Italian Penicillin Soup is the ultimate comfort remedy that warms you from the inside out. I discovered this magical elixir during a particularly brutal winter when my whole family was battling sniffles. One steaming pot later, we were all fighting over seconds! This isn’t just soup—it’s a hug in a bowl, combining the healing powers of Italian herbs, garlic, and nourishing broth. The perfect balance of savory and soothing, this recipe has become my go-to when anyone’s feeling under the weather or simply needs some comfort food.

    Recipe

    Why You’ll Love This Italian Penicillin Soup

    A Healing Powerhouse

    The magic of Italian Penicillin Soup lies in its immune-boosting ingredients. Fresh garlic releases allicin when crushed, a compound with powerful antimicrobial properties. Combined with vitamin-rich vegetables and herbs like rosemary and thyme, each spoonful delivers a medicinal punch that feels therapeutic. I’ve watched this soup work wonders during cold season—the steam alone helps clear congested sinuses! The rich broth coats your throat with soothing warmth while the gentle heat from red pepper flakes stimulates circulation and helps you sweat out toxins.

    Quick and Adaptable

    What I adore about this soup is how incredibly versatile it is with whatever you have on hand. No chicken? Use white beans for protein. Out of spinach? Kale works beautifully. The foundational flavor comes from the Italian herb blend and garlic-infused olive oil, which transforms even the simplest ingredients into something special. It comes together in just 30 minutes on busy weeknights, yet tastes like it’s been simmering all day. I’ve made this with frozen vegetables during pantry-cleanout days and still received compliments from my pickiest eaters!

    Essential Tips & Tricks

    Building Layers of Flavor

    The secret to exceptional Italian Penicillin Soup starts with properly sautéing your aromatics. I always let my onions, carrots, and celery sweat for a full 5-7 minutes until they’re translucent and just beginning to caramelize. This creates a sweet foundation that balances the savory elements. Another game-changer? Adding a parmesan rind to the simmering broth—it infuses everything with an umami depth that’s impossible to replicate. For maximum flavor extraction, crush your garlic and let it rest for 10 minutes before adding it to the hot oil, allowing the medicinal compounds to fully develop.

    Achieving the Perfect Texture

    The ideal soup consistency requires attention to detail. For a heartier version like my hearty beef and vegetable soup, I dice vegetables uniformly—about 1/4 inch—so they cook evenly and fit perfectly on a spoon. When adding pasta, remember it continues absorbing broth even after cooking, so I either undercook it slightly or store it separately from leftover soup. For a silkier texture, try pureeing a cup of the cooked vegetables and broth, then stirring it back in. This creates a thicker base without adding cream or flour, maintaining that clean, restorative quality.

    Serving Ideas & Creative Variations

    Perfect Pairings

    Nothing complements a steaming bowl of Italian Penicillin Soup quite like crusty garlic bread for dipping into that flavorful broth. I love serving this alongside a simple arugula salad with lemon vinaigrette—the bright acidity balances the rich, savory soup perfectly. For special occasions, I’ll make parmesan baked parsnips as an elegant side that echoes the Italian flavors. Consider setting up a toppings bar with fresh herbs, grated parmesan, chili flakes, and lemon wedges so everyone can customize their bowl. A drizzle of good olive oil just before serving adds a luxurious finish.

    Regional Inspirations

    Transform your basic soup into regional Italian variations with just a few tweaks. For a Tuscan twist, add cannellini beans, kale, and a splash of cream. Sicilian-style calls for adding fennel, orange zest, and a pinch of saffron for an unexpected brightness. My personal favorite is the Calabrian variation—I add spicy ‘nduja or Calabrian chili paste for serious heat that really clears the sinuses! For a heartier meal, try adding mini chicken meatballs seasoned with parmesan and herbs. You can even make it seafood-forward with the addition of small shrimp and a touch of white wine.

    Storage & Troubleshooting Guide

    Maximizing Leftovers

    This Italian Penicillin Soup actually improves with time as the flavors meld together. Store it in airtight containers in the refrigerator for up to 4 days, or freeze portions for up to 3 months. One trick I’ve learned: freeze individual portions in silicone muffin cups, then transfer the frozen soup “pucks” to freezer bags—perfect for single servings! If you’re planning leftovers, keep pasta separate and add it fresh when reheating to prevent it from becoming mushy. For the freshest taste when reheating, add a squeeze of lemon juice and a sprinkle of fresh herbs to brighten up the flavors.

    Fixing Common Issues

    If your soup tastes bland, don’t just reach for salt—try brightening with a splash of acid first. Lemon juice, a dash of vinegar, or even a spoonful of tomato paste can wake up the flavors. Too thin? Simmer uncovered for 10-15 minutes to reduce, or blend a portion as mentioned earlier. If it’s too thick, simply add more quality broth (homemade is best, but a good store-bought one works too). Accidentally over-salted? Add a raw, peeled potato chunk to absorb excess salt as the soup simmers, then remove before serving. Or dilute with unsalted broth and adjust seasonings.

    Frequently Asked Questions

    What makes Italian Penicillin Soup different from regular chicken soup?

    Italian Penicillin Soup includes distinctive Italian herbs (rosemary, thyme, basil), garlic, olive oil, and often parmesan cheese. These ingredients create a more aromatic, robust flavor profile compared to traditional chicken soup, with enhanced medicinal properties.

    Can I make this soup vegetarian?

    Absolutely! Substitute vegetable broth for chicken broth and add protein with white beans, chickpeas, or even cubed firm tofu. The Italian herbs and garlic still provide all the healing benefits.

    How can I make this soup more filling?

    Add more protein with shredded chicken or turkey, beans, or mini meatballs. For heartier carbs, increase pasta amounts or add diced potatoes, farro, or barley.

    What’s the best pasta shape to use?

    Small shapes like ditalini, orzo, or stelline (little stars) work best as they’re spoon-friendly and cook quickly. Avoid large shapes that make the soup awkward to eat.

    How do I know when my Italian Penicillin Soup is done cooking?

    Your soup is ready when vegetables are tender but not mushy (about 20-25 minutes of simmering), pasta is al dente, and the broth tastes rich and flavorful with all herbs fully infused.

    Final Thoughts

    Italian Penicillin Soup has earned its place as my family’s ultimate comfort remedy, whether we’re fighting off winter colds or simply craving something nourishing. The beauty of this soup lies in its simplicity and the way it brings people together around the table. I’ve shared this recipe with countless friends who now make their own versions, each adding their personal touch. Don’t forget to check out more soup inspirations on our Pinterest board for endless variations. This Italian Penicillin Soup isn’t just food—it’s care in a bowl.