Blog

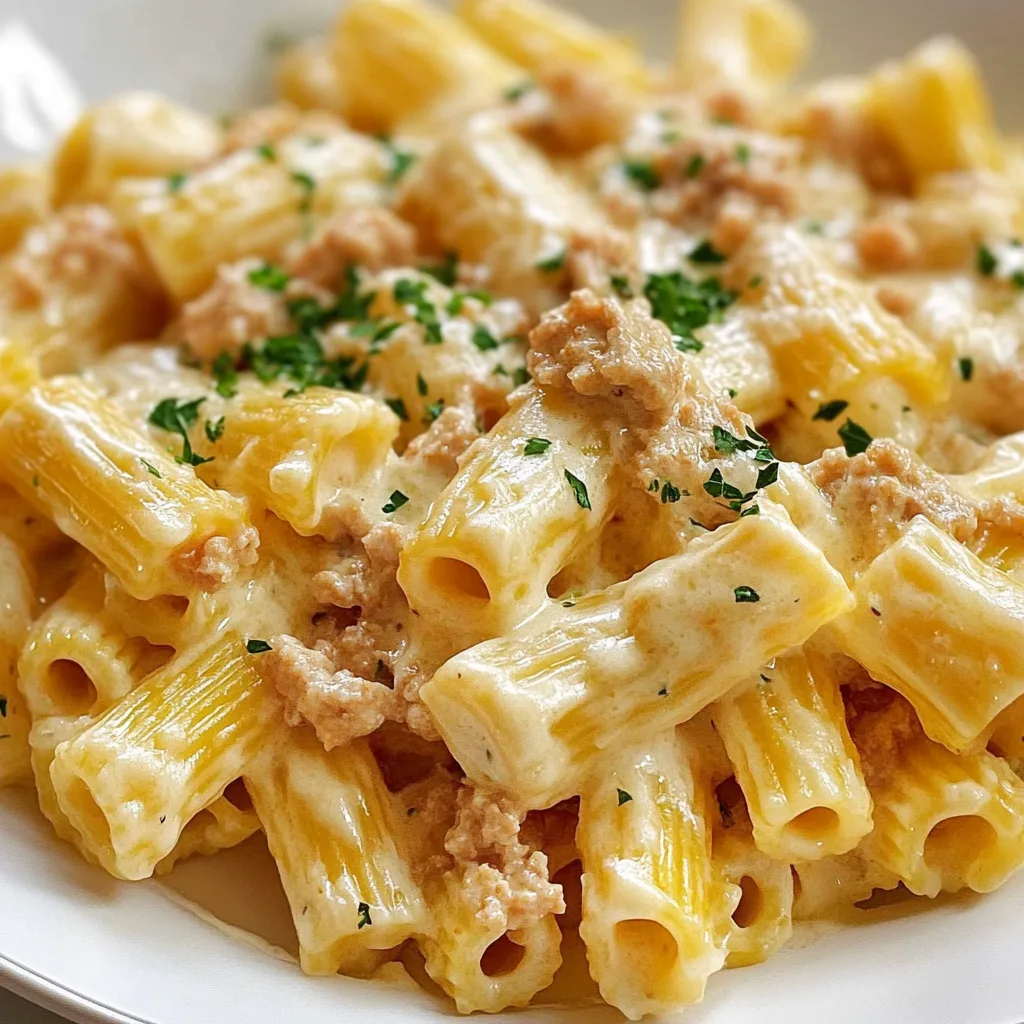
  • Creamy Rigatoni with Boursin Cheese: Irresistibly Delicious!

    Creamy Rigatoni with Boursin Cheese: Irresistibly Delicious!

    Creamy Rigatoni with Boursin Cheese: Irresistibly Delicious!

    Creamy rigatoni with Boursin cheese is my ultimate comfort food hero – a dish that transforms ordinary weeknight dinners into something truly special. The first time I made this, my kitchen filled with the most intoxicating aroma of garlic and herbs that had my teenager actually emerging from his room before being called for dinner! The velvety sauce coats each pasta tube perfectly, creating little pockets of cheesy heaven in every bite. If you love dishes that feel restaurant-worthy but are surprisingly simple, this creamy pasta recipe is about to become your new favorite.

    Recipe

    Why You’ll Love This Creamy Rigatoni with Boursin Cheese

    A Weeknight Wonder

    This dish has become my reliable weeknight savior when I need something impressive without the fuss. The Boursin cheese melts into a silky sauce that requires minimal effort but delivers maximum flavor. I still remember making this on a particularly chaotic Monday when everything seemed to go wrong – but this pasta turned the whole day around in just 25 minutes. The beauty lies in its simplicity: while the pasta boils, you can prepare the sauce, meaning dinner is ready faster than delivery would arrive. And the creamy, herb-infused result will have everyone thinking you spent hours in the kitchen.

    Ingredient Flexibility That Works

    What I adore about this creamy rigatoni is how forgiving it is with substitutions. No Boursin? Cream cheese with herbs works beautifully. Out of rigatoni? Any pasta shape that traps sauce – like penne or shells – makes a perfect stand-in. The adaptability extends to add-ins too. Sometimes I toss in leftover rotisserie chicken for protein, or sun-dried tomatoes for a tangy twist. Last week, I discovered that a handful of frozen peas added right at the end brings a lovely pop of color and sweetness. This recipe bends to your pantry’s reality while still delivering that creamy, comforting result.

    Essential Tips & Tricks

    Perfecting Your Pasta

    The key to pasta perfection lies in two simple rules I’ve learned through many (many!) pasta nights. First, salt your water generously – it should taste like the sea. This seasons the pasta from within rather than trying to add flavor later. Second, always reserve about ½ cup of that starchy pasta water before draining. This magical liquid contains starches that help the Boursin sauce cling to every ridge of your rigatoni. I once skipped this step and ended up with sauce pooling at the bottom of the dish instead of coating the pasta. That little splash of starchy water creates the silky emulsion that takes this dish from good to absolutely crave-worthy.

    Creating the Creamiest Sauce

    The secret to the dreamiest sauce lies in temperature control. Always reduce your heat to medium-low when adding the Boursin cheese – high heat can cause separation and graininess. I learned this the hard way during a dinner party when I rushed and ended up with a slightly broken sauce! Another game-changing tip is to add the cheese in small chunks rather than all at once, stirring constantly until each addition is fully melted. This gradual approach creates the smoothest texture. For extra richness, a splash of heavy cream transforms the sauce into something that could rival any restaurant’s signature pasta dish.

    Serving Ideas & Creative Variations

    Perfect Pairings

    This creamy rigatoni deserves thoughtful accompaniments to create a balanced meal. A simple arugula salad with lemon vinaigrette cuts through the richness perfectly – the peppery greens and bright acidity complement the creamy pasta. Garlic bread is another natural partner, ideal for sopping up every last bit of that luscious sauce. For wine lovers, a crisp Pinot Grigio or unoaked Chardonnay makes the herb notes in the Boursin sing. When I’m feeling extra fancy, I serve this as a side with herb-crusted chicken for Sunday dinner, and the combination never fails to impress even my pickiest guests.

    Seasonal Twists

    The versatility of this dish makes it perfect for seasonal adaptations. In summer, I fold in fresh cherry tomatoes and basil right at the end, letting them warm through without fully cooking. The burst of acidity brightens the whole dish. Come fall, roasted butternut squash cubes and crispy sage leaves transform it into a cozy autumn meal. Winter calls for caramelized mushrooms and a hint of truffle oil for something truly indulgent. My family’s springtime favorite involves tender asparagus tips and a sprinkle of lemon zest. These seasonal touches keep the basic recipe exciting year-round while honoring what’s fresh and available.

    Storage & Troubleshooting Guide

    Making Ahead & Storing

    This creamy rigatoni reheats beautifully, making it ideal for meal prep or leftovers. Store in airtight containers in the refrigerator for up to 3 days. The sauce will thicken considerably when cold – this is completely normal! When reheating, add a small splash of milk or cream and warm gently on the stovetop or microwave at 50% power, stirring frequently. I’ve found that a quick 10-second spritz of water before microwaving helps revive the pasta’s texture. For freezing, the sauce alone works best (without pasta) in freezer-safe containers for up to 2 months. Then simply thaw overnight and toss with freshly cooked pasta for a quick future meal.

    Fixing Common Issues

    Even experienced cooks encounter pasta problems! If your sauce seems too thick, don’t panic – simply add small amounts of reserved pasta water until you reach your desired consistency. Conversely, if it’s too thin, simmer gently for a few extra minutes to reduce, or add an extra tablespoon of grated parmesan to help thicken. Grainy sauce usually indicates heat was too high when adding the Boursin – fix this by removing from heat immediately and whisking in a splash of cold cream. For bland results, don’t underestimate the power of fresh-ground black pepper and an extra pinch of salt to wake up all the flavors. Remember that pasta continues absorbing sauce after cooking, so serve promptly for best results.

    Frequently Asked Questions

    Can I use a different cheese instead of Boursin?

    Yes! Cream cheese mixed with herbs works well, as does goat cheese for a tangier flavor. Add your own dried herbs like thyme, chives and dill to mimic Boursin’s flavor profile if using plain cream cheese.

    Is creamy rigatoni with Boursin cheese suitable for vegetarians?

    Absolutely! This dish is naturally vegetarian as written. Just ensure any broth you use is vegetable-based, and check that your Boursin variety doesn’t contain animal rennet (most don’t).

    Can I make this dish ahead for a dinner party?

    Yes, but I recommend making just the sauce ahead and cooking fresh pasta before serving. Reheat the sauce gently, adding a splash of cream if needed, then toss with hot pasta.

    How can I add protein to this dish?

    Grilled chicken, sautéed shrimp, or crispy bacon all work beautifully. For vegetarian options, try adding roasted chickpeas, white beans, or sautéed mushrooms for heartiness.

    What can I substitute for heavy cream to make it lighter?

    Half-and-half works well, or try evaporated milk for richness with fewer calories. For a dairy-light version, use unsweetened cashew cream or full-fat coconut milk.

    Final Thoughts

    This creamy rigatoni with Boursin cheese has become more than just a recipe in my household – it’s our comfort food cornerstone. There’s something magical about how a few simple ingredients transform into something that feels like a warm hug on a plate. The way the herbs from the Boursin perfume the kitchen, how the sauce clings to each pasta ridge, and those first creamy bites… it’s pure culinary joy. I hope this dish brings the same happiness to your table as it has to mine! For more comforting pasta inspiration, follow me on Pinterest.

  • Chocolate Marshmallow Swirl Cookies: Irresistible Sweet Treats!

    Chocolate Marshmallow Swirl Cookies: Irresistible Sweet Treats!

    Chocolate Marshmallow Swirl Cookies: Irresistible Sweet Treats!

    Chocolate Marshmallow Swirl Cookies are the ultimate indulgence for those moments when you need a little extra comfort in your life. I first made these cookies during a particularly snowy weekend when the kids were bouncing off the walls with cabin fever. The rich chocolate base with swirls of gooey marshmallow created such magic that even my pickiest eater asked for seconds! These cookies strike the perfect balance between chewy edges and soft centers with pockets of melted marshmallow that create the most satisfying pull-apart texture. If you love these, you might also enjoy my Brown Butter Skillet Chocolate Chip Cookie for another cozy treat!

    Recipe

    Why You’ll Love These Chocolate Marshmallow Swirl Cookies

    Perfect Texture Combination

    There’s something almost magical about the textural contrast in these cookies. The cookie base has that ideal chewy-crisp edge that gradually gives way to a fudgy center. When you bite into a pocket of marshmallow, it creates this delightful stretchy pull that makes my heart happy every single time. I’ve tested these cookies at least seven times to get the ratio just right—enough marshmallow to create beautiful swirls and pockets of gooey goodness, but not so much that they become overly sweet or lose their shape during baking.

    Crowd-Pleasing Appeal

    These cookies have become my secret weapon for potlucks and school bake sales. Last month, I brought them to my daughter’s soccer team celebration, and they disappeared faster than any other dessert! The visual wow factor of the marshmallow swirls makes them instantly appealing, while the rich chocolate flavor satisfies even the most discerning chocolate lovers. They’re sophisticated enough for adults but playful enough for kids, making them the ultimate crowd-pleaser for any gathering.

    Essential Tips & Tricks

    Mastering the Marshmallow Swirl

    The key to perfect swirls is all in the timing and temperature. Always use room-temperature marshmallow cream (not marshmallows) for the smoothest incorporation. After folding it into your chocolate cookie dough, resist the urge to overmix! Three or four gentle folds with a rubber spatula creates those beautiful marbled streaks without fully incorporating the marshmallow. If you mix too much, you’ll lose the distinct swirl effect that makes these cookies so special and Instagram-worthy.

    Perfecting the Bake

    Finding the sweet spot for baking these cookies took me several attempts! The marshmallow components caramelize faster than the cookie base, so watch them carefully after the 8-minute mark. Look for slightly underbaked centers with set edges—they’ll continue cooking on the hot baking sheet after removal. For extra gooey centers like in my Gluten-Free Double Chocolate Cookies, let them cool on the sheet for exactly 5 minutes before transferring to a wire rack. This prevents overbaking while ensuring they set properly.

    Serving Ideas & Creative Variations

    Transform these cookies into an unforgettable dessert by serving them warm with a scoop of vanilla ice cream on top. The contrast between the warm, gooey cookie and cold ice cream creates a sensory delight that’s simply irresistible. For dinner parties, I like to stack three smaller cookies with layers of chocolate ganache between them, then add a light dusting of cocoa powder and a few fresh raspberries. The presentation looks fancy, but it takes just minutes to assemble!

    Seasonal Adaptations

    These versatile cookies welcome creative twists throughout the year. During winter holidays, I add a drop of peppermint extract and crushed candy canes on top for a festive touch. For summer gatherings, try incorporating graham cracker pieces for a s’mores-inspired variation that pairs beautifully with my Crockpot Smores Chocolate Cake. Fall calls for cinnamon and a touch of espresso powder to enhance the chocolate’s depth, while spring welcomes white chocolate chips and dried strawberry pieces for a fruity twist.

    Storage & Troubleshooting Guide

    Keeping Cookies Fresh

    These Chocolate Marshmallow Swirl Cookies maintain their best texture when stored in an airtight container at room temperature for up to 3 days. Place a slice of bread in the container to help maintain moisture—a trick my grandmother taught me that works wonders! For longer storage, these cookies freeze beautifully for up to 2 months. I recommend freezing them in a single layer until solid, then transferring to a freezer bag with parchment between layers to prevent sticking.

    Fixing Common Issues

    If your cookies spread too much during baking, your dough was likely too warm. Pop the shaped dough balls in the refrigerator for 20 minutes before baking to help them hold their shape. For cookies that turn out too dry, you may have overbaked them or used too much flour. Remember that visual cues trump timing—look for set edges with slightly soft centers rather than relying solely on the timer. If your marshmallow disappears completely, try using larger dollops and a gentler folding technique next time.

    Frequently Asked Questions

    Can I use regular marshmallows instead of marshmallow cream?

    Regular marshmallows won’t create the same swirl effect. If you must substitute, chop mini marshmallows and fold them in at the very end, but expect a more spotted appearance rather than beautiful swirls.

    How do I know when my Chocolate Marshmallow Swirl Cookies are done?

    Look for set edges with slightly underbaked centers—about 9-11 minutes at 350°F. They’ll continue firming up as they cool but maintain that perfect chewy texture.

    Can I make the dough ahead of time?

    Absolutely! The dough can be refrigerated for up to 3 days or frozen for 3 months. Just add 1-2 minutes to the bake time if cooking from cold.

    Why did my marshmallow disappear during baking?

    If your marshmallow cream disappeared, you likely mixed it too thoroughly into the dough. Use gentle folding and larger dollops for visible swirls.

    Are these cookies gluten-free?

    The standard recipe isn’t gluten-free, but you can substitute a 1:1 gluten-free flour blend with excellent results. Just add ¼ teaspoon xanthan gum if your blend doesn’t include it.

    Final Thoughts

    These Chocolate Marshmallow Swirl Cookies have become one of my family’s most requested treats, combining rich chocolate with gooey marshmallow in perfect harmony. There’s something deeply satisfying about watching someone take their first bite—that moment when their eyes widen at the unexpected marshmallow pull. Whether you’re baking them for a special occasion or simply because it’s Tuesday, these cookies deliver a little moment of joy with every bite. Find more inspiration for your baking adventures on Pinterest!

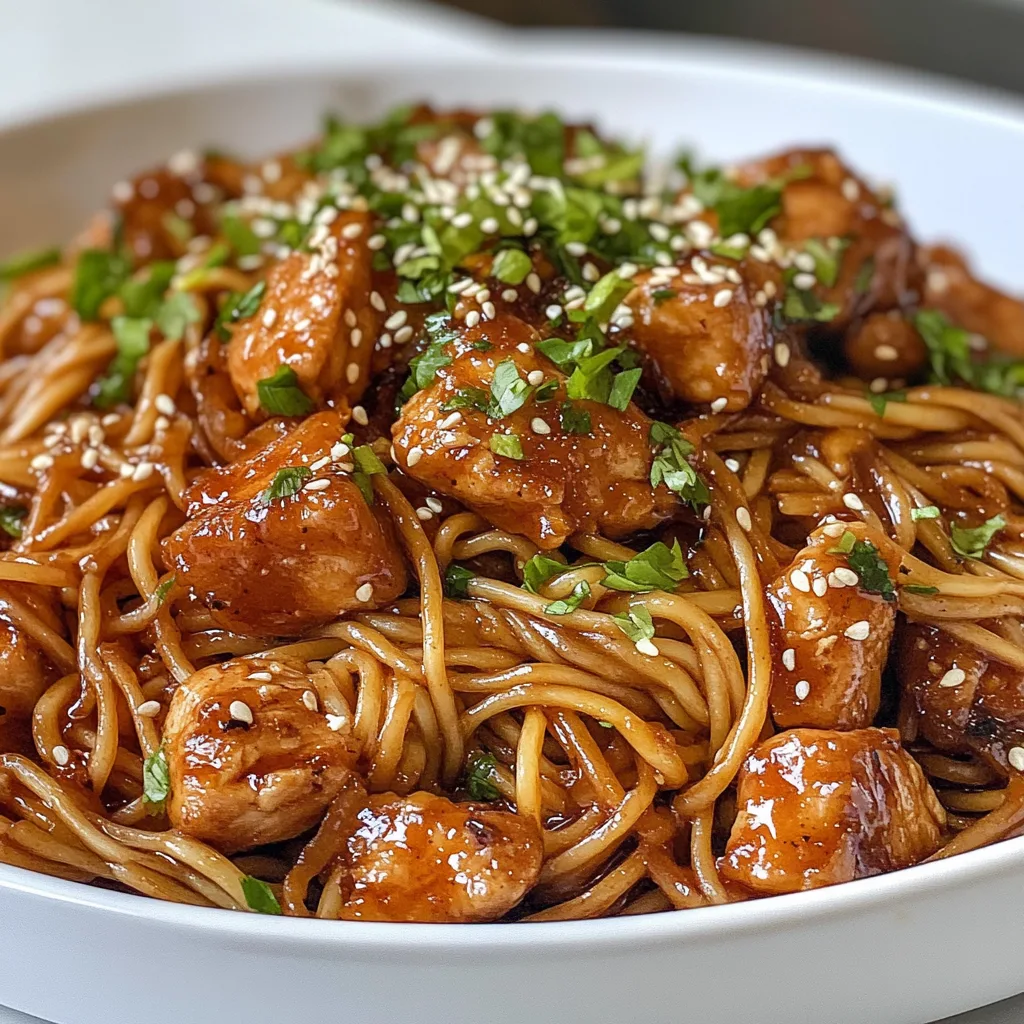
  • Sticky Garlic Chicken Noodles Recipe – Irresistibly Delicious & Easy!

    Sticky Garlic Chicken Noodles Recipe – Irresistibly Delicious & Easy!

    Sticky Garlic Chicken Noodles Recipe - Irresistibly Delicious & Easy!

    Sticky Garlic Chicken Noodles are the ultimate comfort food that combines tender chicken, slurpy noodles, and a glossy sauce that clings to every bite with perfect harmony. When I first made this dish on a rainy Sunday afternoon, the aroma of sizzling garlic filled my kitchen and instantly lifted my mood. There’s something magical about how the sauce caramelizes slightly, creating that irresistible sticky texture that makes you reach for “just one more bite.” If you love flavor-packed Asian-inspired meals that come together quickly, this recipe will soon become your new weeknight favorite.

    Recipe

    Why You’ll Love This Sticky Garlic Chicken Noodles

    Perfect Balance of Flavors

    The secret magic of these noodles lies in the perfect balance between sweet, savory, and garlicky notes. The sauce combines honey, soy sauce, and a generous amount of minced garlic that caramelizes slightly as it cooks. I love how the brown sugar creates that signature stickiness while rice vinegar adds just enough tanginess to keep it from being too sweet. When you twirl those noodles around your fork and get that perfect bite with a piece of chicken, you’ll understand why I make this recipe at least twice a month!

    Quick Weeknight Wonder

    On those evenings when cooking feels like a chore, this 30-minute meal comes to the rescue. The chicken cooks quickly in a hot pan, and while your noodles boil, you can prepare the simple sauce that transforms everything. I’ve made this after long workdays when my energy was depleted, and the minimal prep work (just some chopping and measuring) makes it manageable even when you’re tired. The impressive flavor-to-effort ratio is what makes these sticky garlic chicken noodles a permanent fixture in my dinner rotation.

    Essential Tips & Tricks

    Noodle Know-How

    Choosing the right noodles makes a significant difference in this dish. While I typically use egg noodles for their ability to hold that sticky sauce, rice noodles work beautifully for a gluten-free option. The key is not to overcook them—aim for al dente since they’ll continue cooking slightly when tossed with the hot sauce. I once made the mistake of fully cooking the noodles and then letting them sit too long, resulting in a clumpy mess. Now I time it so the noodles finish just as my sauce and chicken are ready for the grand union.

    Sauce Secrets

    The velvety texture of the sauce depends on proper thickening. I mix cornstarch with cold water before adding it to create that perfect consistency that clings to every strand of noodle. When adding the sauce to your hot pan, it will thicken quickly, so have everything ready to toss together immediately. For an extra layer of flavor, try adding a splash of chicken broth to the sauce—it adds depth without overpowering the garlic. Remember that the sauce continues to thicken as it cools, so it’s better to err on the slightly thinner side.

    Serving Ideas & Creative Variations

    Perfect Pairings

    These sticky garlic chicken noodles shine as a complete meal, but I love serving them with simple sides that complement without competing. A crisp cucumber salad with rice vinegar dressing offers a refreshing contrast to the rich noodles. For added color and nutrition, steamed broccoli or snap peas work beautifully—the sauce clings to them deliciously! When I’m hosting friends, I place the noodles in a large serving bowl and surround it with small dishes of toppings like sliced green onions, crushed peanuts, and extra chili flakes for a DIY noodle bar that always impresses.

    Exciting Flavor Twists

    Don’t be afraid to customize this versatile recipe! For a spicy kick, add sriracha or sambal oelek to the sauce—start with a teaspoon and adjust to your heat preference. Swapping chicken for shrimp creates an equally delicious variation that cooks even faster. My personal favorite twist is adding thinly sliced bell peppers and mushrooms that caramelize alongside the chicken. For a vegetarian version, replace the chicken with crispy tofu or simply double up on colorful vegetables. The sticky garlic sauce works its magic on virtually anything you pair it with.

    Storage & Troubleshooting Guide

    Keeping It Fresh

    These noodles make excellent leftovers when stored properly. Transfer cooled noodles to an airtight container and refrigerate for up to 3 days. When reheating, add a splash of water or chicken broth to loosen the sauce, as it will have thickened considerably in the fridge. I find that a quick zap in the microwave with a damp paper towel on top helps maintain moisture. For meal prep, you can store the sauce separately from the noodles and chicken, then combine when reheating for the freshest texture.

    Fixing Common Issues

    If your sauce isn’t thickening properly, the most likely culprit is heat that’s too low. The sauce needs to bubble gently to activate the cornstarch. Conversely, if your sauce becomes too thick and gloopy, simply add a tablespoon of water or broth and stir until you reach your desired consistency. For noodles that clump together, a drizzle of sesame oil tossed through immediately after draining works wonders. And if your garlic starts to burn (which can make it bitter), lower the heat immediately and add a splash of broth to cool the pan down.

    Frequently Asked Questions

    Can I make Sticky Garlic Chicken Noodles ahead of time?

    Yes! Prepare components separately and store in the refrigerator for up to 2 days. When ready to serve, reheat the chicken and sauce together, then toss with freshly cooked noodles for best texture.

    What’s the best type of noodle to use?

    Egg noodles are traditional, but rice noodles, udon, or even spaghetti work well. Choose based on your preference and dietary needs—they all beautifully capture the sticky garlic sauce.

    How can I make this recipe gluten-free?

    Use rice noodles instead of egg noodles and substitute regular soy sauce with tamari or coconut aminos. Double-check that your other sauce ingredients are certified gluten-free.

    Can I use pre-minced garlic from a jar?

    Fresh garlic provides the best flavor for Sticky Garlic Chicken Noodles, but jarred garlic works in a pinch. Use 1/2 teaspoon of jarred garlic for each clove called for in the recipe.

    How do I prevent the noodles from sticking together?

    Rinse cooked noodles briefly with cool water, then toss with a teaspoon of sesame oil. Don’t let them sit too long before adding to the sauce—timing is key!

    Final Thoughts

    There’s something incredibly satisfying about twirling these Sticky Garlic Chicken Noodles around your fork and experiencing that perfect balance of flavors in each bite. The dish has become my go-to recipe when I need comfort food that doesn’t require hours in the kitchen. I love seeing the smiles when I serve this to family and friends—it’s the kind of meal that creates memories around the table. For more delicious recipes like this one, visit our Pinterest page where you’ll find endless inspiration for your next cooking adventure.

  • Creamy Philly Cheesesteak Soup That Will Blow Your Mind!

    Creamy Philly Cheesesteak Soup That Will Blow Your Mind!

    Creamy Philly Cheesesteak Soup That Will Blow Your Mind!

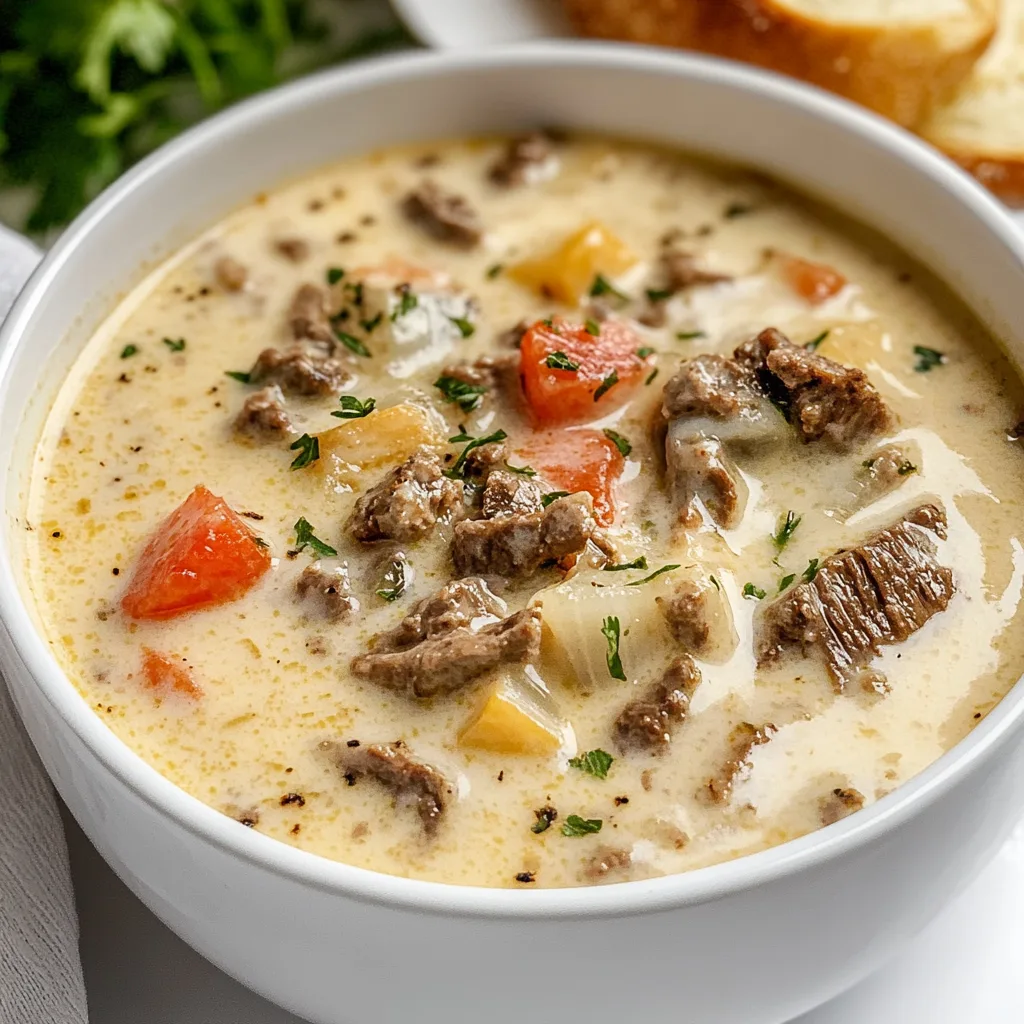
    Creamy Philly Cheesesteak Soup transforms everyone’s favorite sandwich into a bowl of pure comfort. On chilly evenings when nothing but warmth will do, this rich, indulgent soup delivers all the familiar flavors of a classic Philly cheesesteak in each velvety spoonful. I discovered this recipe during a particularly brutal winter in Chicago, and it’s been my go-to comfort meal ever since. The tender beef, caramelized onions, and melty provolone create a symphony of flavors that will transport you straight to the streets of Philadelphia—without leaving your kitchen. If you love hearty soups like my Creamy Chicken and Gnocchi Soup, this one’s about to become your new favorite.

    Recipe

    Why You’ll Love This Creamy Philly Cheesesteak Soup

    Perfect Comfort Food for Any Season

    There’s something magical about transforming a beloved sandwich into soup form. This Creamy Philly Cheesesteak Soup captures all those classic flavors—tender shaved beef, sweet caramelized onions, and green peppers—suspended in a velvety cheese-infused broth that warms you from the inside out. I love serving this on Sunday afternoons while watching football, and my family practically races to the table. The best part? It comes together in one pot, meaning less cleanup and more time to enjoy those incredible flavors that develop as it simmers away on your stovetop.

    Restaurant-Quality Results at Home

    You know those restaurant soups that seem impossible to recreate? This isn’t one of them. With simple ingredients and straightforward techniques, you’ll achieve restaurant-worthy results that will impress even the most devoted cheesesteak purists. The secret lies in taking your time with the onions and peppers, letting them caramelize slowly until they develop that signature sweetness. Then, when you add the perfectly seasoned beef and that creamy, cheese-laden broth, magic happens. I’ve had friends ask if I ordered takeout when serving this soup—it’s that good.

    Essential Tips & Tricks

    Choosing and Preparing the Beef

    The right cut of beef makes all the difference in this soup. Ribeye is traditional for Philly cheesesteaks, but top sirloin or flank steak work beautifully too—and won’t break the bank. For that authentic texture, freeze the meat for about 20 minutes before slicing it as thinly as possible against the grain. This technique creates those signature tender strips that melt in your mouth. When cooking, remember to sear the beef in batches rather than overcrowding the pot. This ensures proper browning instead of steaming, which locks in that rich beefy flavor that forms the foundation of this incredible soup.

    Creating the Perfect Creamy Base

    The velvety texture of this Creamy Philly Cheesesteak Soup comes from a carefully crafted base that balances richness with flavor. Start with a roux made from butter and flour, cooking it just until it smells nutty but hasn’t browned. This creates the perfect foundation for the broth. When adding cheese, always remove the pot from heat first and stir in the cheese gradually to prevent clumping or greasiness. For an extra layer of flavor, try my Creamy Tuscan Tortellini Soup technique of adding a splash of Worcestershire sauce—it adds that umami depth that takes this soup from good to unforgettable.

    Serving Ideas & Creative Variations

    Garnishes That Elevate Your Bowl

    The perfect bowl of Creamy Philly Cheesesteak Soup deserves thoughtful garnishes that complement its rich flavors. I love topping each serving with extra provolone or a sprinkle of white cheddar that melts into the hot soup. Crispy homemade croutons made from buttered hoagie rolls bring that authentic sandwich experience, while thinly sliced green onions add a fresh pop of color and flavor. For a bit of heat, offer small dishes of pickled jalapeños on the side. When hosting friends, I create a little garnish station so everyone can customize their bowl—it’s always a hit and makes the meal feel special even on ordinary weeknights.

    Making It Your Own

    This soup is wonderfully adaptable to different tastes and dietary needs. For a lighter version, substitute half-and-half for heavy cream and use reduced-fat cheese. Mushroom lovers can add sliced baby bellas or creminis when sautéing the peppers and onions—they add incredible umami depth. For a twist that’s reminiscent of my Hearty Beef and Vegetable Soup, try adding diced potatoes or sweet potatoes for extra heartiness. Vegetarians can even enjoy this by swapping the beef for portobello mushrooms and using vegetable broth—the creamy, cheesy flavor still shines through beautifully.

    Storage & Troubleshooting Guide

    Proper Storage for Leftovers

    Creamy soups require special attention when it comes to storage and reheating. Allow your Creamy Philly Cheesesteak Soup to cool completely before transferring to airtight containers. It will keep in the refrigerator for up to 3 days, though the texture is best within the first 48 hours. When freezing, be aware that dairy-based soups can sometimes separate upon thawing—the solution is to freeze the base without the cream and cheese, then add those fresh when reheating. Always reheat gently over low heat, stirring frequently to prevent scorching, and you may need to add a splash of broth to restore the original consistency.

    Fixing Common Issues

    Even experienced cooks occasionally encounter texture problems with creamy soups. If your soup breaks or looks curdled, don’t panic! Try whisking in a tablespoon of cornstarch mixed with cold water, then heating gently while stirring constantly. For soup that’s too thick, gradually add warm beef broth until you reach your desired consistency. Too thin? Simmer uncovered for a few minutes to reduce, or create a small amount of roux in a separate pan and whisk it in. If the cheese clumps rather than melting smoothly, try adding it off-heat next time and using a pre-shredded cheese that contains anti-caking agents.

    Frequently Asked Questions

    Can I make Creamy Philly Cheesesteak Soup ahead of time?

    Yes! Make it up to 2 days ahead, but stop before adding the cream and cheese. Refrigerate the base, then reheat gently and add dairy components just before serving for the best texture and flavor.

    What’s the best cheese to use for authentic Creamy Philly Cheesesteak Soup?

    Provolone is traditional and melts beautifully, but American cheese or white cheddar work well too. For extra richness, try a combination of provolone and cream cheese for that silky-smooth texture.

    Can I use leftover steak for this recipe?

    Absolutely! Slice it thinly and add it near the end of cooking just to heat through. This prevents overcooking and keeps the meat tender while still infusing it with all those wonderful flavors.

    Is there a way to make this soup in a slow cooker?

    Yes, but with modifications. Brown the meat and vegetables first, then transfer to a slow cooker with the broth. Cook on low for 4-5 hours, adding the dairy components during the final 30 minutes.

    How can I make this soup gluten-free?

    Simply substitute the all-purpose flour with a gluten-free 1:1 baking blend for the roux. Also ensure your beef broth is certified gluten-free, as some commercial brands contain wheat-based additives.

    Final Thoughts

    This Creamy Philly Cheesesteak Soup has become my ultimate crowd-pleaser—the dish friends request when they visit and the comfort food my family craves on chilly evenings. There’s something deeply satisfying about transforming a beloved sandwich into a luxurious soup that captures all those familiar flavors in each spoonful. Whether you’re serving it for game day, a cozy family dinner, or meal prepping for the week ahead, this soup delivers that perfect balance of comfort and indulgence. I’d love to see your versions—tag me on Pinterest when you make it!

  • Lemon Chicken Romano: Irresistibly Zesty & Crispy Flavor Explosion!

    Lemon Chicken Romano: Irresistibly Zesty & Crispy Flavor Explosion!

    Lemon Chicken Romano: Irresistibly Zesty & Crispy Flavor Explosion!

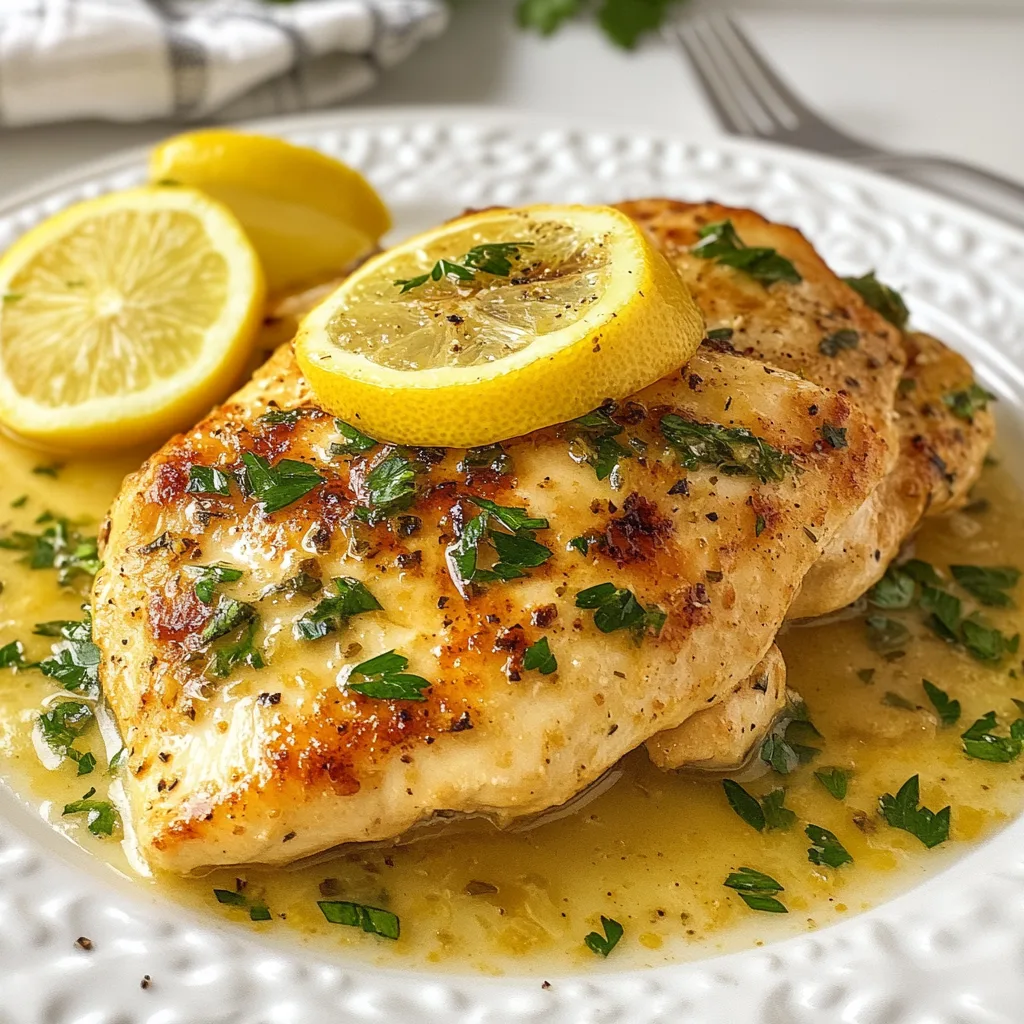
    Lemon Chicken Romano has become my absolute favorite weeknight dinner miracle! The first time I made this dish, the bright citrus aroma filled my kitchen and instantly transported me to that little Italian restaurant where my grandmother used to take me for special occasions. There’s something magical about the combination of tender chicken, zesty lemon, and that perfect Romano cheese crust that creates the most satisfying comfort food experience. If you’re looking for a dish that balances elegant flavor with simple preparation, this recipe is about to become your new go-to dinner solution.

    Recipe

    Why You’ll Love This Lemon Chicken Romano

    Perfect Balance of Flavors

    The magic of Lemon Chicken Romano lies in its perfect harmony of flavors. The bright, zesty lemon cuts through the richness of the Romano cheese, creating a dish that feels both indulgent and refreshingly light. I love how the garlic and herbs infuse the chicken as it cooks, creating layers of flavor that make every bite exciting. The slight tanginess from the lemon juice tenderizes the chicken beautifully, while the cheese forms an irresistible golden crust that adds the perfect textural contrast. It’s that rare dish that manages to feel sophisticated while using ingredients most of us already have in our kitchens.

    Quick and Impressive Results

    What makes this dish a true winner is how it delivers restaurant-quality results with minimal effort. I remember frantically searching for a dinner solution when unexpected guests announced they were stopping by in an hour. This Lemon Chicken Romano saved the day! The entire dish comes together in under 40 minutes, yet looks and tastes like something you’d spent hours preparing. The beautiful golden crust and aromatic presentation make it perfect for both casual family dinners and more formal entertaining. My guests always ask for the recipe, amazed that something so delicious could be so straightforward.

    Essential Tips & Tricks

    Perfecting the Chicken

    The foundation of exceptional Lemon Chicken Romano starts with properly prepared chicken. I’ve found that pounding the chicken breasts to an even 1/4-inch thickness ensures they cook quickly and evenly. This step makes a world of difference! For the most tender result, let your chicken sit with the lemon juice for 5-10 minutes before coating – this mini marinade works wonders. When dredging, press the cheese mixture firmly onto both sides of the chicken to create that perfect crust. And remember: high-quality Romano cheese is worth the splurge here – it’s the star ingredient that elevates this dish from good to unforgettable.

    Mastering the Cooking Process

    The secret to that perfect golden crust lies in your cooking technique. Heat your skillet until it’s properly hot before adding the chicken – you should hear a satisfying sizzle when it hits the pan. This creates that beautiful caramelized exterior while keeping the inside juicy. Resist the urge to flip the chicken too early! Let it cook undisturbed for 3-4 minutes per side. If you’re making a larger batch, like when I cook for my extended family gatherings, don’t overcrowd the pan – work in batches instead. For an extra flavor boost, try finishing with a splash of white wine in the pan to create a light, lemony sauce.

    Serving Ideas & Creative Variations

    Perfect Pairings

    This Lemon Chicken Romano pairs beautifully with both simple and sophisticated sides. My family’s favorite combination is serving it over angel hair pasta tossed with a bit of olive oil, fresh herbs, and a squeeze of lemon. The pasta catches all those delicious pan juices! For a lighter option, I love it alongside roasted asparagus or a bright arugula salad with a simple lemon vinaigrette. The dish also works wonderfully with creamy polenta or crusty bread for soaking up the sauce. When I’m feeling extra, I’ll add a side of garlic parmesan roasted potatoes that crisp up beautifully while the chicken rests.

    Exciting Flavor Twists

    While the classic recipe is perfection, I love experimenting with different variations. Try adding a tablespoon of fresh herbs like basil, oregano, or thyme to the cheese mixture for an aromatic twist. For a Mediterranean spin, mix in some finely chopped sun-dried tomatoes and olives to the cheese coating. When I’m craving something indulgent, I’ll top each piece with a slice of prosciutto before adding the cheese mixture. My spice-loving friends appreciate when I add a pinch of red pepper flakes for gentle heat. For a creamier finish, try deglazing the pan with cream instead of wine after cooking the chicken – it creates an irresistible sauce that’s perfect for drizzling.

    Storage & Troubleshooting Guide

    Proper Storage Methods

    While Lemon Chicken Romano is best enjoyed fresh from the pan, proper storage can help maintain its delicious flavor. If you have leftovers, allow the chicken to cool completely before refrigerating in an airtight container for up to 3 days. To prevent the crispy coating from becoming soggy, I place a paper towel in the container to absorb excess moisture. When reheating, avoid the microwave which can make the chicken rubbery. Instead, place it in a 325°F oven for about 10 minutes until warmed through. The texture won’t be identical to fresh-made, but it’ll still be delicious! For meal prep, you can prepare the chicken up to the coating stage and refrigerate for up to 24 hours before cooking.

    Solving Common Problems

    If your cheese coating is falling off during cooking, there are a few likely culprits. First, make sure your chicken is thoroughly patted dry before applying the egg wash – excess moisture is the enemy of a good crust. Another trick is pressing the cheese mixture firmly onto the chicken and then letting it rest for 5 minutes before cooking, which helps it adhere better.

    If your chicken is cooking unevenly, it’s usually because the pieces aren’t the same thickness – the pounding step is crucial! For chicken that’s browning too quickly on the outside while remaining undercooked inside, lower your heat and cover the pan for a minute or two. This gentle steam will help cook the interior without burning the delicious cheese coating.

    Frequently Asked Questions

    Can I use a different cheese for Lemon Chicken Romano?

    Yes! While Romano provides the authentic flavor, Parmesan makes an excellent substitute. You could also try Asiago or a mixture of hard Italian cheeses for a unique flavor profile.

    How do I know when the chicken is done cooking?

    The chicken is done when it reaches an internal temperature of 165°F. If you don’t have a thermometer, cut into the thickest part – the meat should be opaque with no pink remaining.

    Can I make Lemon Chicken Romano ahead of time for a party?

    Prepare everything up to the cooking stage, then refrigerate the coated chicken. Cook just before serving for the best texture and flavor. Alternatively, cook earlier and reheat at 325°F for 10-15 minutes.

    What’s the best way to zest a lemon for this recipe?

    Use a microplane grater and only remove the yellow outer layer. The white pith underneath is bitter. Zest the lemon before juicing it, as it’s much easier to handle.

    Can I make this recipe gluten-free?

    Absolutely! Replace regular flour with almond flour or a gluten-free all-purpose blend. The Romano cheese is naturally gluten-free, making this an easy adaptation.

    Final Thoughts

    Lemon Chicken Romano has earned its place as a staple in my dinner rotation because it perfectly balances simplicity with sophisticated flavor. There’s something truly special about watching someone take their first bite and seeing that look of surprised delight spread across their face. The bright lemony notes, tender chicken, and that irresistible cheese crust create a dish that feels like a warm hug on a plate. I hope this recipe brings the same joy to your table that it has to mine! For more delicious dinner inspiration, follow along on Pinterest.

  • Herbed Ricotta Stuffed Chicken Rolls – Irresistibly Creamy & Delicious!

    Herbed Ricotta Stuffed Chicken Rolls – Irresistibly Creamy & Delicious!

    Herbed Ricotta Stuffed Chicken Rolls - Irresistibly Creamy & Delicious!

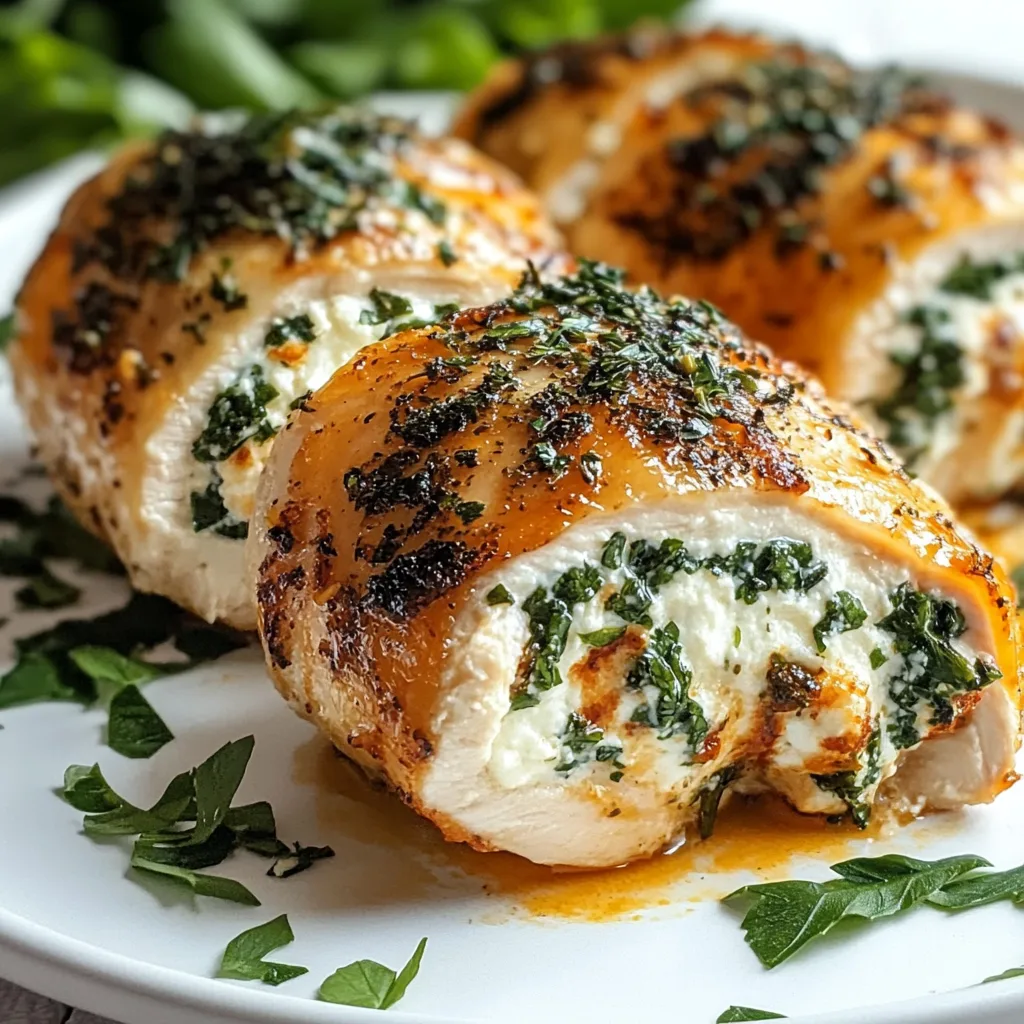
    Herbed Ricotta Stuffed Chicken Rolls have become my absolute favorite dinner party showstopper that’s actually simple enough for weeknights too! The combination of creamy, herb-flecked ricotta wrapped in tender chicken breasts creates the most incredible flavor fusion. I discovered this recipe during a rainy Sunday afternoon when I needed comfort food but wanted something more elevated than my usual chicken pot pie casserole. The moment I sliced into that first roll and watched the herbed ricotta melt onto my plate, I knew I’d found my new signature dish.

    Recipe

    Why You’ll Love This Herbed Ricotta Stuffed Chicken Rolls

    Perfect Balance of Flavors and Textures

    The magic of these Herbed Ricotta Stuffed Chicken Rolls happens when the creamy, herb-infused ricotta melts into the juicy chicken as it bakes. That first bite delivers an explosion of garlic, fresh herbs, and rich cheese that makes your taste buds dance. I love how the outside develops this gorgeous golden crust while the inside stays incredibly tender. The contrast between the crisp exterior and the velvety filling creates a textural symphony that elevates this dish beyond ordinary chicken recipes. It’s comfort food with a touch of elegance.

    Versatile and Impressive

    What I adore most about these chicken rolls is how they can transform from casual weeknight dinner to impressive entertaining fare. They’re deceptively simple yet look like you spent hours in the kitchen. I’ve served them for everything from Tuesday family dinners to holiday gatherings, and they always earn rave reviews. The presentation—those beautiful spirals with the herbed ricotta peeking out—makes them Instagram-worthy without requiring professional culinary skills. Plus, they pair beautifully with nearly any side dish, making them incredibly adaptable for any occasion.

    Essential Tips & Tricks

    Perfecting the Filling

    The secret to exceptional Herbed Ricotta Stuffed Chicken Rolls lies in the filling’s flavor profile. I recommend using whole milk ricotta for its creaminess and adding a blend of fresh herbs rather than dried. My go-to combination is basil, thyme, and chives, but rosemary and sage work beautifully in fall and winter. Don’t skip the lemon zest—it brightens everything up with a subtle citrus note that cuts through the richness. For extra flavor depth, fold in a tablespoon of grated Parmesan and a small minced garlic clove. Let this mixture sit for 15 minutes before using to allow the flavors to meld together.

    Mastering the Roll Technique

    Achieving that perfect spiral without losing your filling requires a few key techniques. Start with butterflied chicken breasts of even thickness—I place them between plastic wrap and gently pound to about ¼-inch thickness. Avoid overfilling; about 2-3 tablespoons of ricotta mixture per breast is perfect. Leave a ½-inch border around the edges to prevent spillage. After rolling, secure with toothpicks placed parallel to the roll (makes them easier to remove after cooking). For a golden exterior like you’d find in baked chicken parmesan, brush the rolls with olive oil before baking.

    Serving Ideas & Creative Variations

    Complementary Side Dishes

    These Herbed Ricotta Stuffed Chicken Rolls shine brightest when paired with sides that complement without competing. My family’s favorite combination is a bed of lemony orzo pasta that catches all those delicious juices. For a lighter option, serve with roasted asparagus or a bright arugula salad dressed with lemon vinaigrette. When I’m craving comfort food, I pair them with crispy bacon honey roasted potatoes for the ultimate indulgence. The contrast between the crispy potatoes and creamy chicken rolls creates a memorable meal. A simple pan sauce made from the cooking juices elevates everything to restaurant quality.

    Exciting Flavor Variations

    The beauty of these chicken rolls is their adaptability to different flavor profiles. For a Mediterranean twist, mix sun-dried tomatoes, feta, and olives into your ricotta. Craving something autumnal? Try adding roasted butternut squash puree, sage, and a sprinkle of nutmeg to the filling. For a decadent version, incorporate spinach and artichoke dip flavors with chopped spinach, artichoke hearts, and a touch of cream cheese. My personal favorite variation includes prosciutto layered inside with the ricotta—the saltiness creates an incredible flavor contrast. These variations keep the dish exciting even if you make it regularly.

    Storage & Troubleshooting Guide

    Proper Storage and Reheating

    Leftover Herbed Ricotta Stuffed Chicken Rolls maintain their deliciousness when stored properly. Refrigerate in an airtight container for up to 3 days. For best reheating results, avoid the microwave which can make the chicken rubbery. Instead, place them in a covered baking dish with a tablespoon of water or broth, then warm in a 325°F oven for about 15 minutes until heated through. The gentle reheating preserves the moisture while crisping the exterior slightly. These rolls also freeze beautifully—wrap individual portions tightly in plastic wrap, then foil, and freeze for up to 2 months. Thaw overnight in the refrigerator before reheating.

    Fixing Common Issues

    If your chicken rolls are unwrapping during cooking, you likely need more secure fastening. Use additional toothpicks or kitchen twine, and make sure you’re not overstuffing. For filling that leaks out, try chilling the assembled rolls for 20 minutes before cooking to firm up the ricotta mixture. If your chicken is cooking unevenly, ensure all pieces are pounded to the same thickness before rolling. Pale, unappetizing exterior? Brush with olive oil and increase oven temperature for the last 5 minutes of baking. For dry chicken, try brining the breasts for 30 minutes in saltwater solution before preparing the rolls.

    Frequently Asked Questions

    Can I prepare Herbed Ricotta Stuffed Chicken Rolls ahead of time?

    Absolutely! Assemble the rolls up to 24 hours ahead, cover tightly with plastic wrap, and refrigerate. Remove from the fridge 30 minutes before baking to take the chill off for more even cooking.

    What herbs work best in the ricotta filling?

    Fresh basil, thyme, parsley, and chives are my favorites. Rosemary and sage add wonderful depth in fall and winter. Use at least two different herbs for complexity.

    Can I use low-fat ricotta cheese?

    You can, but whole milk ricotta creates a creamier, more luxurious filling. If using low-fat, add a tablespoon of olive oil or cream cheese to maintain richness.

    How do I know when the chicken rolls are fully cooked?

    Use a meat thermometer inserted into the thickest part to reach 165°F. The juices should run clear, and the exterior should be golden brown.

    Can I make this recipe gluten-free?

    Definitely! The basic Herbed Ricotta Stuffed Chicken Rolls recipe is naturally gluten-free. Just ensure any breadcrumbs or seasonings you add are certified gluten-free.

    Final Thoughts

    These Herbed Ricotta Stuffed Chicken Rolls have earned a permanent spot in my recipe collection for good reason. They strike that perfect balance between impressive and achievable that makes cooking so rewarding. I love watching guests’ faces light up when they take their first bite and discover the creamy herbed filling inside. Whether you’re cooking for a special occasion or simply wanting to elevate your weeknight dinner game, these chicken rolls deliver restaurant-quality results from your own kitchen. Don’t forget to check out more delicious recipes on Pinterest!

  • Crispy Bacon Honey Roasted Potatoes That Will Blow Your Mind!

    Crispy Bacon Honey Roasted Potatoes That Will Blow Your Mind!

    Crispy Bacon Honey Roasted Potatoes That Will Blow Your Mind!

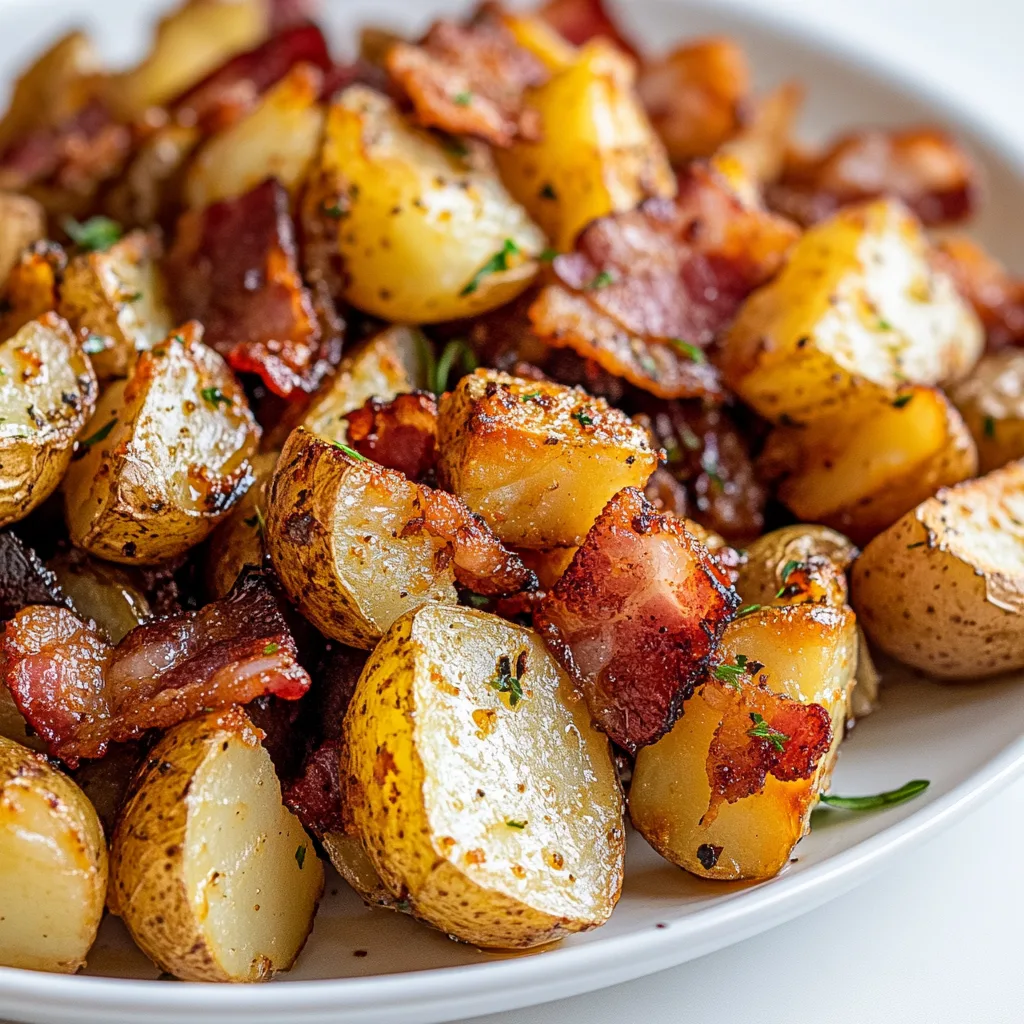
    Crispy Bacon Honey Roasted Potatoes are the ultimate comfort food that combines sweet, savory, and crunchy elements in every bite. I discovered this recipe during a cozy winter gathering at my grandmother’s farmhouse, where the aroma of caramelized honey and bacon filled the kitchen. The golden-brown potatoes with their crispy exteriors and tender centers became an instant family favorite. Whether you’re planning a Sunday dinner or need a showstopping side dish, these potatoes deliver warmth and flavor that will have everyone reaching for seconds.

    Recipe

    Why You’ll Love This Crispy Bacon Honey Roasted Potatoes

    Perfect Balance of Flavors and Textures

    There’s something magical about the sweet-savory combination that happens when honey meets bacon. The natural sugars in the honey caramelize during roasting, creating a delectable glaze that coats each potato chunk. Meanwhile, the rendered bacon fat infuses the potatoes with a smoky richness that’s simply irresistible. I love how the edges become wonderfully crisp while the centers stay fluffy and tender. This textural contrast is what makes these potatoes so satisfying—each forkful delivers that perfect crunch followed by pillowy potato goodness.

    Simple Ingredients, Extraordinary Results

    What I adore about this recipe is how it transforms everyday ingredients into something spectacular. You likely have most items already in your pantry: potatoes, honey, bacon, olive oil, and a few basic seasonings. The magic happens in how they come together. Last Thanksgiving, my brother-in-law (who claims to dislike “fancy” food) couldn’t stop eating these potatoes. The secret is in the technique—allowing the potatoes to par-boil before roasting gives them that perfect texture, while the bacon renders its fat directly onto the potatoes for maximum flavor infusion.

    Essential Tips & Tricks

    Selecting and Preparing Your Potatoes

    Choosing the right potatoes makes all the difference in this dish. I recommend Yukon Golds for their buttery flavor and perfect starch content, though russets work beautifully too. Cut them into evenly-sized chunks (about 1-inch pieces) to ensure they cook uniformly. The game-changing step is par-boiling them with a tablespoon of baking soda in the water—this creates tiny cracks on the surface that become extra crispy when roasted. I learned this trick from my culinary school friend, and it’s transformed my roast potatoes ever since. Pat them completely dry before tossing with oil to maximize crispiness.

    Bacon and Honey Techniques

    For optimal results, use thick-cut bacon cut into small pieces rather than pre-crumbled bacon bits. The freshly rendered fat creates an unmatched flavor base. When adding honey, warm it slightly first (about 15 seconds in the microwave) to help it distribute more evenly over the potatoes. For an extra flavor dimension, try mixing the honey with a teaspoon of garlic before drizzling. I discovered this combination accidentally when making my famous chicken bites, and it works wonderfully with these potatoes too. The honey should be added during the final 10-15 minutes of roasting to prevent burning.

    Serving Ideas & Creative Variations

    Perfect Pairings for Every Occasion

    These Crispy Bacon Honey Roasted Potatoes shine as both a weeknight side and a holiday showstopper. They pair beautifully with roasted chicken or a juicy steak, but are equally delicious alongside slow cooker beef stroganoff for a comforting meal. For brunch, try them topped with a fried egg and some fresh herbs. I recently served these at a family gathering with a simple green salad on the side, and the combination of warm, crispy potatoes with cool, fresh greens was absolutely perfect. The honey-bacon flavor profile complements both light and hearty main dishes.

    Exciting Flavor Twists

    While the classic recipe is divine, don’t be afraid to experiment with variations. Add rosemary and thyme during roasting for an herbaceous twist, or incorporate smoked paprika for a deeper flavor profile. For heat lovers, a pinch of red pepper flakes creates a delicious sweet-spicy contrast. My personal favorite variation includes a sprinkle of crumbled blue cheese added just before serving—the tangy, creamy cheese against the sweet-savory potatoes is absolutely magical. For a Mediterranean spin, try adding lemon zest and oregano to brighten the flavors.

    Storage & Troubleshooting Guide

    Keeping Leftovers Crispy

    While these potatoes are best enjoyed fresh from the oven, leftovers can be stored and revived with the right techniques. Allow them to cool completely before transferring to an airtight container and refrigerating for up to 3 days. The key to reheating is using dry heat—never microwave them unless you enjoy soggy potatoes! Instead, spread them on a baking sheet and reheat at 375°F for about 10 minutes. This restores much of their original crispiness. I’ve found that adding a light drizzle of olive oil before reheating helps refresh that delicious exterior crunch without drying out the centers.

    Solving Common Problems

    If your potatoes aren’t crisping properly, a few adjustments can help. First, ensure your oven is properly preheated and use the middle rack for optimal heat circulation. Overcrowding the baking sheet is a common mistake—potatoes need space to release steam and crisp up. Use two baking sheets if necessary. If the honey is burning before potatoes are done, add it later in the cooking process or reduce oven temperature slightly. For potatoes that are crisp outside but undercooked inside, try cutting them smaller next time or extending the par-boiling time by 2-3 minutes.

    Frequently Asked Questions

    Can I make Crispy Bacon Honey Roasted Potatoes ahead of time?

    Yes, you can par-boil the potatoes up to 24 hours ahead. Store them covered in the refrigerator, then proceed with the roasting steps when ready to serve. The final product is best fresh from the oven.

    What potatoes work best for this recipe?

    Yukon Golds or russets are ideal. Yukon Golds offer a buttery flavor with creamy centers, while russets become exceptionally crispy on the outside while staying fluffy inside.

    Can I substitute the bacon for a vegetarian version?

    Absolutely! Replace bacon with smoked paprika and an extra tablespoon of olive oil to mimic the smoky flavor. For umami depth, add a teaspoon of soy sauce to the honey mixture.

    How do I prevent the honey from burning?

    Add the honey during the final 10-15 minutes of roasting. If your oven runs hot, reduce temperature by 25°F and extend cooking time slightly for perfect caramelization without burning.

    What’s the secret to getting the Crispy Bacon Honey Roasted Potatoes extra crispy?

    Par-boil potatoes with a teaspoon of baking soda in the water, then thoroughly dry them before roasting. Use a preheated baking sheet and arrange potatoes in a single layer with space between pieces.

    Final Thoughts

    These Crispy Bacon Honey Roasted Potatoes have become my go-to side dish whenever I want to elevate a meal without complicated techniques. The contrast between crispy exteriors and tender centers, combined with the sweet-savory flavor profile, creates something truly special. I love watching people’s expressions when they take their first bite—that moment of surprise and delight is why I cook. Share your creations with me on Pinterest and discover how this simple side dish can transform your everyday meals into memorable experiences.

  • Gluten-Free Caramel Apple Tart That’ll Wow Your Taste Buds!

    Gluten-Free Caramel Apple Tart That’ll Wow Your Taste Buds!

    Gluten-Free Caramel Apple Tart That’ll Wow Your Taste Buds!

    The aroma of baked apples and warm caramel fills my kitchen as I pull this Gluten-Free Caramel Apple Tart with Almond Crust from the oven. There’s something magical about the way the tender apple slices nestle into that nutty, buttery crust—a perfect harmony of textures and flavors that makes my heart sing. I’ve always believed that gluten-free baking doesn’t mean compromising on indulgence, and this tart proves it beautifully. If you’re craving a dessert that balances sophisticated flavors with cozy comfort, this recipe will become your new autumn obsession.

    Recipe

    Why You’ll Love This Gluten-Free Caramel Apple Tart with Almond Crust

    Perfect Texture Combination

    The almond flour crust is the unsung hero of this dessert—crisp at the edges yet tender beneath the filling, with a subtle nuttiness that complements the apples perfectly. I discovered this crust technique during a rainy weekend experiment, and it’s become my secret weapon for impressive gluten-free desserts. The apples maintain just enough bite while becoming meltingly tender, creating that perfect contrast with the crust. And the homemade caramel? It transforms from a pourable sauce to a sticky, luscious coating that binds everything together in sweet harmony.

    Simple Yet Sophisticated

    Don’t let the elegant appearance fool you—this tart is surprisingly straightforward to make. The crust comes together in minutes with just a few ingredients, no complicated techniques required. I love how the caramel sauce can be made ahead of time (I often keep a jar in my fridge for emergency dessert situations!). The apple arrangement looks impressive but is actually quite forgiving—even my haphazard attempts turn out Instagram-worthy. This is the kind of dessert that makes guests think you spent hours in the kitchen, when really, it’s mostly hands-off baking time.

    Essential Tips & Tricks

    Perfecting the Almond Crust

    The key to a perfect crust is in the blind baking process—don’t skip this step! I learned this the hard way after one soggy-bottomed disaster. Pressing the dough firmly and evenly into your tart pan creates the sturdiest base. For extra insurance against sogginess, brush the pre-baked crust with a thin layer of beaten egg white while it’s still warm. This creates a moisture barrier that keeps everything crisp. Cold ingredients make for the flakiest texture, so I always chill my butter and work quickly with cool hands when mixing the dough.

    Apple Selection and Preparation

    Choose firm apples with a balance of sweetness and acidity—Honeycrisp, Pink Lady, or Granny Smith work beautifully here. I like to mix varieties for complexity, much like in my gluten-free blueberry muffins. Slice the apples to a consistent thickness (about ¼ inch) so they cook evenly. Tossing them with a bit of lemon juice prevents browning and adds brightness to balance the caramel’s sweetness. For the most beautiful arrangement, start from the outside and work your way in, slightly overlapping each slice for that professional look.

    Serving Ideas & Creative Variations

    Perfect Pairings

    This tart shines when served slightly warm with a scoop of vanilla bean ice cream melting into the caramel—the temperature contrast is absolutely heavenly. For special occasions, I drizzle additional warm caramel sauce over the top just before serving. A dollop of lightly whipped cream with a hint of cinnamon makes an elegant alternative. Coffee lovers will appreciate how a strong espresso cuts through the sweetness, creating a balanced dessert experience. For brunch, I’ve even served smaller slices alongside a cheese board for a sweet-savory moment.

    Seasonal Adaptations

    The beauty of this tart lies in its versatility. In summer, replace apples with fresh peaches or nectarines for a sunshine-bright variation. During the holidays, I add warming spices like cardamom and nutmeg to the filling, reminiscent of my gluten-free sticky toffee pudding. For a show-stopping autumn dessert, try mixing in cranberries with the apples and adding orange zest to the caramel. Pear and ginger make a sophisticated winter combination, while a mixed berry version celebrates spring beautifully. The almond crust provides the perfect canvas for your seasonal inspiration.

    Storage & Troubleshooting Guide

    Keeping It Fresh

    This tart maintains its texture best when stored at room temperature under a cake dome for the first day. After that, refrigerate any leftovers for up to three days. The crust may soften slightly in the refrigerator, but 10 minutes in a 300°F oven restores its crispness beautifully. For make-ahead convenience, prepare the components separately: the crust can be blind-baked and stored at room temperature for a day, the caramel keeps for two weeks refrigerated, and sliced apples (tossed with lemon juice) stay fresh for hours in the fridge.

    Fixing Common Issues

    If your caramel crystallizes, don’t panic! Add a tablespoon of hot water and gently rewarm it, stirring until smooth. For a crust that crumbles when slicing, your dough might have been too dry—next time, add an extra tablespoon of cold butter. If the bottom gets soggy despite blind baking, try placing the tart pan on a preheated baking sheet to give the bottom crust a heat boost. And if your apples release too much liquid during baking, toss them with a tablespoon of cornstarch before arranging them in the tart.

    Frequently Asked Questions

    Can I make this Gluten-Free Caramel Apple Tart with Almond Crust ahead of time?

    Yes! Bake the tart up to 24 hours ahead, store at room temperature, and warm slightly before serving. The caramel sauce can be made up to two weeks in advance and stored in the refrigerator.

    What’s the best substitute for almond flour?

    Hazelnut flour makes an excellent substitute with a different but complementary flavor profile. For nut allergies, try a gluten-free flour blend with 2 tablespoons of ground flaxseed for texture.

    Can I freeze this tart?

    Yes, though the texture is best fresh. Freeze fully baked and cooled tart for up to one month. Thaw overnight in the refrigerator and warm in a 300°F oven for 15 minutes before serving.

    How do I know when the caramel is ready?

    The caramel should reach a deep amber color and read 350°F on a candy thermometer. If you don’t have a thermometer, drop a small amount into cold water—it should form a soft, pliable ball.

    Can I use store-bought caramel sauce?

    Absolutely! While homemade offers better flavor, a good-quality store-bought caramel sauce saves time. Warm it slightly before drizzling over the apples for easier spreading.

    Final Thoughts

    This Gluten-Free Caramel Apple Tart with Almond Crust has become my signature fall dessert—the one friends request by name when they visit. There’s something deeply satisfying about creating something so beautiful and delicious that nobody would ever guess it’s gluten-free. The combination of buttery almond crust, tender spiced apples, and that rich caramel sauce creates a dessert that feels both nostalgic and special. Whether for a holiday gathering or a simple weekend treat, this tart brings a moment of sweetness that lingers long after the last bite. For more inspiration, visit our Pinterest board.