Blog

  • Baked Boursin Salmon Recipe: Irresistibly Creamy & Easy to Make!

    Baked Boursin Salmon Recipe: Irresistibly Creamy & Easy to Make!

    Baked Boursin Salmon Recipe: Irresistibly Creamy & Easy to Make!

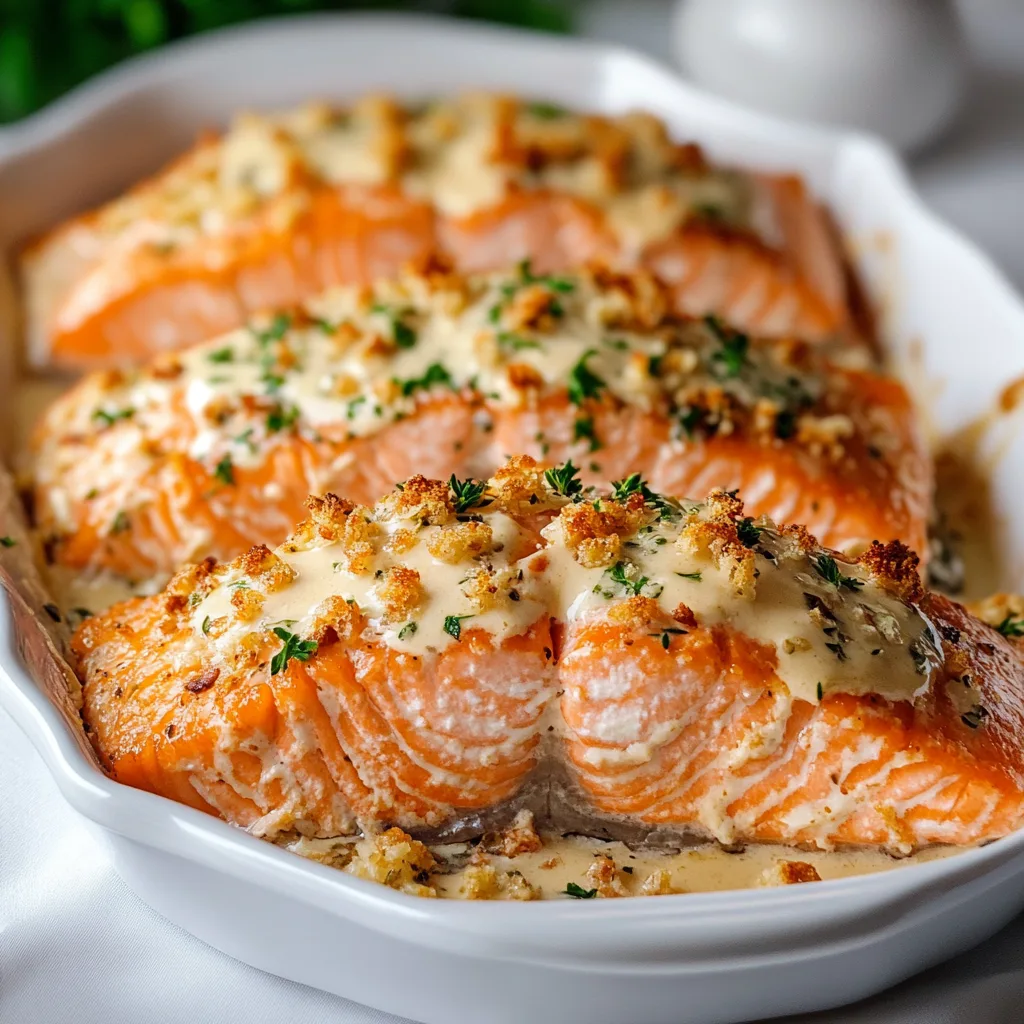
    Baked Boursin Salmon is my ultimate dinner party secret weapon. There’s something magical about the way creamy herb-infused cheese melts into tender salmon fillets, creating a dish that feels luxurious but takes minimal effort. The first time I made this for my sister’s birthday, the kitchen filled with an intoxicating aroma of herbs and butter that had everyone hovering near the oven. I love how the Boursin creates a protective blanket over the salmon, keeping it perfectly moist while infusing it with garlic and herbs. Trust me, this dish will become your new go-to when you want to impress without stress.

    Recipe

    Why You’ll Love This Baked Boursin Salmon

    Perfect Balance of Flavors and Textures

    The rich creaminess of Boursin cheese creates an incredible contrast against the delicate texture of salmon. Each bite delivers a perfect harmony of buttery fish and herb-infused cheese that melts in your mouth. I adore how the garlic notes in the Boursin complement the natural sweetness of the salmon without overpowering it. The cheese forms a light crust on top while keeping the fish underneath incredibly tender and moist. It’s that magical combination of textures—crisp exterior, velvety interior—that makes Baked Boursin Salmon so irresistibly good.

    Impressive Yet Effortless Preparation

    What I love most about this Baked Boursin Salmon is how it transforms a few simple ingredients into something that looks and tastes restaurant-worthy. The entire prep takes less than 10 minutes, yet the results look like you spent hours in the kitchen. Just spread the cheese, add a few seasonings, and let your oven do the work! I’ve made this on hectic weeknights and for special occasions alike. There’s something deeply satisfying about placing a beautifully baked salmon on the table and watching everyone’s eyes widen with anticipation.

    Essential Tips & Tricks

    Selecting and Preparing Your Salmon

    Always choose center-cut salmon fillets of uniform thickness to ensure even cooking. I learned this the hard way when I once used tail pieces that cooked too quickly! Pat the salmon completely dry before applying the Boursin—this creates better adhesion and prevents the cheese from sliding off during baking. Room temperature salmon also bakes more evenly, so I try to let mine sit out for 15-20 minutes before cooking. For an extra flavor boost, season the salmon with salt and pepper before adding the cheese layer. This simple step enhances the natural flavors of the fish beautifully.

    Perfecting the Boursin Layer

    The secret to perfect Baked Boursin Salmon lies in how you apply the cheese. Allow the Boursin to soften slightly at room temperature for about 10 minutes—this makes it much easier to spread evenly without tearing the delicate salmon. I like to mix in a splash of lemon juice and some fresh herbs to brighten the flavor profile. Spread the cheese mixture to an even thickness of about ¼ inch, leaving a small border around the edges. This prevents overflow and creates a beautiful presentation similar to the creamy lemon garlic pan-seared scallops that everyone loves.

    Serving Ideas & Creative Variations

    Complementary Side Dishes

    Baked Boursin Salmon pairs beautifully with light, fresh sides that balance its richness. My personal favorite is a simple arugula salad with lemon vinaigrette and toasted pine nuts—the peppery greens cut through the creaminess perfectly. Roasted asparagus or broccolini also make excellent partners, especially when finished with a light sprinkle of lemon zest. For a more substantial meal, consider serving with wild rice pilaf or crispy bacon honey roasted potatoes. The subtle sweetness of the potatoes creates a wonderful contrast with the savory salmon.

    Creative Flavor Variations

    While classic Baked Boursin Salmon is divine, experimenting with different flavors can create exciting new dishes. Try using different Boursin varieties like black pepper or shallot and chive for subtle flavor shifts. For a Mediterranean twist, mix in sun-dried tomatoes and capers with the Boursin before spreading. I once added a thin layer of pesto between the salmon and cheese, which created an incredible depth of flavor. For special occasions, top the Boursin with a sprinkle of panko breadcrumbs mixed with parmesan for a delightful crunchy crust.

    Storage & Troubleshooting Guide

    Proper Storage and Reheating

    Leftover Baked Boursin Salmon should be refrigerated within two hours of cooking in an airtight container. It will keep well for up to 3 days, though the texture is best when enjoyed within 24 hours. When reheating, avoid the microwave which can make the salmon rubbery. Instead, place it in a 275°F oven, covered with foil, for about 10-15 minutes until just warmed through. I also love using cold leftovers flaked over salads or stirred into pasta for a completely different meal experience the next day.

    Common Issues and Solutions

    If your Baked Boursin Salmon comes out too dry, you likely overcooked it. Remember that salmon continues cooking slightly after being removed from the oven. I aim for an internal temperature of 125°F for medium doneness, which climbs to about 130°F while resting. If the cheese browns too quickly before the salmon is cooked through, simply tent with foil for the remainder of the cooking time. For salmon that releases too much liquid during cooking, try salting it 30 minutes before baking and patting dry again before adding the Boursin.

    Frequently Asked Questions

    Can I use frozen salmon for Baked Boursin Salmon?

    Yes, but thaw it completely in the refrigerator overnight and pat it very dry before adding the Boursin. Frozen salmon often releases more moisture during cooking, so consider salting it after thawing to draw out excess water.

    What can I substitute for Boursin cheese?

    A mixture of cream cheese with fresh herbs (dill, chives, thyme) and minced garlic makes a good substitute. Goat cheese mixed with herbs also works beautifully for a tangier flavor profile.

    How do I know when the salmon is perfectly cooked?

    The salmon should flake easily with a fork but still look slightly translucent in the center. For precision, use a meat thermometer to reach 125-130°F for medium doneness.

    Can I prepare Baked Boursin Salmon ahead of time?

    You can prepare the salmon with the Boursin topping up to 4 hours ahead and refrigerate, covered. Allow it to come to room temperature for 15 minutes before baking.

    How can I make this recipe dairy-free?

    Replace the Boursin with dairy-free cream cheese mixed with olive oil, minced garlic, and fresh herbs. There are also several plant-based Boursin alternatives now available in specialty stores.

    Final Thoughts

    Baked Boursin Salmon has become my ultimate crowd-pleasing dish that strikes that perfect balance between elegant and effortless. There’s something deeply satisfying about creating a meal that looks and tastes impressive while requiring minimal time in the kitchen. The creamy herb-infused topping protects the delicate fish while infusing it with incredible flavor. Whether you’re cooking for a special occasion or elevating a weeknight dinner, this dish delivers restaurant-quality results every time. Find more inspiration for your next meal on our Pinterest page.


  • Air Fryer Salmon Tacos with Slaw That Will Blow Your Mind!

    Air Fryer Salmon Tacos with Slaw That Will Blow Your Mind!

    Air Fryer Salmon Tacos with Slaw That Will Blow Your Mind!

    Air Fryer Salmon Tacos with Slaw have become my weeknight dinner salvation! There’s something magical about that perfectly crisp salmon with its tender, flaky interior nestled in a warm tortilla and topped with crunchy, tangy slaw. The first time I made these for my family, my kitchen filled with the most mouthwatering aroma of seasoned salmon cooking to perfection in the air fryer. Within minutes, we were gathered around the table, customizing our tacos and laughing over dinner. If you’re looking for a quick, healthy meal that doesn’t sacrifice flavor, these salmon tacos might just become your new favorite too!

    Recipe

    Why You’ll Love This Air Fryer Salmon Tacos with Slaw

    Perfect Texture Combination

    The air fryer magic is real, friends! It transforms salmon into this incredible texture wonderland—crispy edges with a melt-in-your-mouth center that’s never dry. I still remember the first time I bit into these tacos; the contrast between the warm, flaky salmon and the cool, crisp slaw created this perfect harmony that had me closing my eyes in pure bliss. The slaw adds that essential crunch while the salmon delivers rich, satisfying protein. And the best part? The air fryer does all the heavy lifting, giving you restaurant-quality results without the mess or fuss of traditional frying.

    Quick and Nutritious Weeknight Solution

    These Air Fryer Salmon Tacos with Slaw come together in about 20 minutes, making them perfect for those evenings when you’re staring into your fridge wondering what to make. The nutrient-packed meal includes omega-3 fatty acids from the salmon, fresh vegetables in the slaw, and can easily be customized to fit your dietary needs. Last Tuesday, after a particularly exhausting workday, I managed to whip these up while simultaneously helping my daughter with homework—that’s how simple they are! They’re also surprisingly filling despite being light, leaving you satisfied without that heavy feeling you might get from beef tacos.

    Essential Tips & Tricks

    Perfect Salmon Every Time

    The secret to perfectly cooked salmon in your air fryer is all about temperature and timing. I’ve found that 380°F for 8-10 minutes works beautifully for most fillets. Pat your salmon dry before seasoning—this helps achieve that gorgeous crispy exterior. Don’t overcrowd your air fryer basket; give those fillets room to breathe! A light spray of olive oil before cooking makes all the difference in texture. And here’s my personal trick: let the salmon rest for 2-3 minutes after cooking before flaking it for your tacos. This little pause allows the juices to redistribute, just like with a good steak with parmesan cream sauce.

    Slaw Secrets Revealed

    The perfect taco slaw needs to hit all the right notes—crunchy, tangy, and fresh! I prefer using a mix of green and purple cabbage for color and texture, plus shredded carrots for sweetness. Make your slaw at least 30 minutes before serving to allow the flavors to meld and the cabbage to slightly soften. My go-to dressing combines mayo, lime juice, honey, and a tiny splash of apple cider vinegar. The game-changer is adding a pinch of celery seed—it brings this mysterious depth that everyone loves but can never quite identify. Keep your slaw refrigerated until the last minute for maximum crispness.

    Serving Ideas & Creative Variations

    Family-Style Taco Bar

    Transform dinner into an event by creating a DIY taco station that lets everyone build their perfect bite. I arrange warmed tortillas, flaked salmon, fresh slaw, and a variety of toppings in colorful bowls across our kitchen island. Must-have extras include diced avocado, crumbled cotija cheese, cilantro, and lime wedges. For sauce options, offer both a spicy chipotle mayo and a milder avocado crema. Last month, we hosted an impromptu dinner party and this setup was a hit—even my friend who “doesn’t like fish” went back for seconds! It pairs beautifully with a side of creamy rice pudding for dessert.

    Creative Twists and Variations

    Don’t be afraid to play with flavors when making Air Fryer Salmon Tacos with Slaw! Try a teriyaki glaze on your salmon with an Asian-inspired slaw using rice vinegar and sesame oil. Or go Mediterranean with lemon-dill salmon and a Greek yogurt slaw. For heat lovers, blackened salmon with jalapeño slaw brings wonderful spice. You can also switch up your tortillas—corn, flour, or even lettuce wraps all work beautifully. One rainy Sunday, I experimented with a mango-habanero salmon version that my husband still talks about months later. The versatility of this dish means you can enjoy it weekly without ever getting bored.

    Storage & Troubleshooting Guide

    Proper Storage Solutions

    For the best leftover experience, store your salmon, slaw, and tortillas separately. The cooked salmon will keep in an airtight container in the refrigerator for up to 3 days. The slaw actually improves overnight as flavors meld, but starts losing its crunch after about 2 days. I like to slightly undercook any salmon I plan to reheat—just by a minute or so—to prevent it from drying out when warmed up again. Tortillas should be kept at room temperature in their original packaging or wrapped in a clean kitchen towel. Never store assembled tacos unless you enjoy soggy disappointment!

    Fixing Common Problems

    If your salmon turns out too dry, the quick fix is adding a drizzle of olive oil or a squeeze of lime juice before serving. Too wet? Pat it dry and give it an extra minute in the air fryer at 380°F. For slaw that’s too watery, drain excess liquid and add fresh cabbage to absorb moisture. Too dry? A splash more dressing will revive it. If your tortillas are cracking, they need more moisture—wrap them in a damp paper towel and microwave for 20-30 seconds. I once salvaged an overcooked salmon batch by flaking it and mixing with a bit of mayo and hot sauce—no one could tell it had been too done!

    Frequently Asked Questions

    Can I use frozen salmon for Air Fryer Salmon Tacos with Slaw?

    Yes! Thaw it first for best results, or add 3-4 minutes to cooking time if cooking from frozen. Make sure it reaches 145°F internal temperature before serving.

    What’s the best type of salmon to use?

    Sockeye or coho salmon work beautifully due to their rich flavor and firm texture. Wild-caught options typically have better flavor, but farm-raised works too.

    Can I make the slaw ahead of time?

    Absolutely! Prepare it up to 24 hours in advance for even better flavor development. Store it in the refrigerator in an airtight container.

    How do I prevent my air fryer from smoking with fatty salmon?

    Add 1-2 tablespoons of water to the bottom of your air fryer drawer before cooking. This creates steam that prevents smoke while maintaining that perfect crisp.

    What can I substitute for cabbage in the slaw?

    Broccoli slaw, thinly sliced kale, or shredded brussels sprouts make excellent alternatives with different nutritional profiles and textures.

    Final Thoughts

    Air Fryer Salmon Tacos with Slaw represent everything I love about modern home cooking—they’re quick, nutritious, customizable, and absolutely delicious. The contrast between warm, flaky salmon and cool, crunchy slaw creates a perfect harmony of textures and flavors that feels special enough for company but easy enough for weeknights. I hope you’ll give these tacos a try and make them your own with personal touches that speak to your family’s preferences. Don’t forget to check out more seafood inspiration on our Pinterest board for your next culinary adventure!

  • Oven-Baked Cheesy Tacos: Irresistibly Crispy, Melty & Easy!

    Oven-Baked Cheesy Tacos: Irresistibly Crispy, Melty & Easy!

    Oven-Baked Cheesy Tacos: Irresistibly Crispy, Melty & Easy!

    Oven-Baked Cheesy Tacos have completely transformed taco night at my house! That perfect crunch when you bite into the golden, toasty shell filled with seasoned beef and melty cheese is truly irresistible. I discovered this method last winter when a sudden craving hit during a snowstorm, and I couldn’t bear the thought of standing over the stove frying individual tacos. The genius of this method is that all your tacos bake together, creating that restaurant-quality crispness while you relax. If you love comforting meals that bring everyone to the table with minimal fuss, these cheesy tacos are about to become your new weeknight hero!

    Recipe

    Why You’ll Love These Oven-Baked Cheesy Tacos

    Perfect Texture Every Time

    There’s something magical about the texture contrast in these oven-baked tacos that keeps me coming back again and again. The shells develop this incredible crispness around the edges while staying slightly tender where they cradle all that delicious filling. I love how the cheese gets just slightly browned and bubbly on top, creating those irresistible crispy cheese bits that everyone fights over. The beef stays juicy inside, and when you add that final fresh topping of lettuce and tomato, you get this beautiful temperature and texture play that makes each bite absolutely perfect.

    Easy Make-Ahead Option

    One of my favorite things about these oven-baked cheesy tacos is their meal prep potential. I often brown the taco meat mixture on Sunday afternoons while my daughter’s doing homework at the kitchen counter. The fragrant spices fill the kitchen with the most comforting aroma! Store the cooled meat mixture in the fridge, and when Tuesday’s dinner chaos hits, you can assemble and bake these tacos in just minutes. They’re also perfect for entertaining since you can prepare a whole batch at once instead of standing at the stove making individual tacos to order.

    Essential Tips & Tricks

    Preventing Soggy Shells

    The secret to perfectly crispy oven-baked cheesy tacos is managing moisture. I learned this the hard way after one sadly soggy taco night! First, drain your seasoned beef thoroughly—I even blot it with paper towels sometimes. Then, create a protective barrier by sprinkling a thin layer of shredded cheese on the bottom of each shell before adding the meat. This cheese melts during baking and forms a seal against moisture. Finally, don’t overfill your tacos, and bake them standing upright (not laying flat) to allow steam to escape rather than soften your shells.

    Cheese Selection Matters

    The right cheese blend makes all the difference in these oven-baked cheesy tacos! While pre-shredded Mexican blends work fine, I’ve found that creating my own mix produces the best flavor and melt. I like combining sharp cheddar for flavor with Monterey Jack for its incredible meltability. Freshly grated cheese also melts more evenly than pre-packaged options. For an extra-special batch, try adding a sprinkle of cotija on top after baking or mixing in some pepper jack for a subtle kick, similar to how I layer cheeses in my Greek Meatballs in Lemon Sauce.

    Serving Ideas & Creative Variations

    Build a Taco Bar

    Transform your oven-baked cheesy tacos into an interactive family feast by setting up a taco bar! After the tacos come out of the oven all golden and bubbling, I arrange them on a large platter surrounded by colorful bowls of toppings. My must-haves include diced avocado, fresh cilantro, lime wedges, sliced jalapeños, and at least two kinds of salsa. For special occasions, I’ll add quick-pickled red onions and a bowl of Mexican crema. This setup is perfect for family dinners but also works beautifully for casual entertaining, similar to my approach with Garlic Parmesan Cheeseburger Bombs.

    Creative Protein Swaps

    While traditional ground beef is delicious in these oven-baked cheesy tacos, don’t be afraid to experiment with proteins! Shredded chicken tossed with taco seasoning creates a lighter version that’s equally delicious. For a vegetarian option, I love using a mixture of black beans and roasted sweet potatoes seasoned with the same spices—the sweetness against the savory spices is incredible. Ground turkey works beautifully too, though I add a tablespoon of olive oil to keep it juicy. For special occasions, try seasoned grilled shrimp chopped into bite-sized pieces!

    Storage & Troubleshooting Guide

    Proper Storage Techniques

    The best way to store leftover oven-baked cheesy tacos is to separate the components strategically. I recommend removing any fresh toppings like lettuce and storing them separately in airtight containers. Place the filled taco shells in a single layer in a shallow container, loosely covered with foil (not airtight, which traps moisture). When reheating, use a 350°F oven for about 7-10 minutes to restore crispness. For meal prep, you can store assembled but unbaked tacos covered in the refrigerator for up to 24 hours before baking—just add an extra minute or two to the baking time.

    Fixing Common Problems

    If your oven-baked cheesy tacos aren’t turning out perfectly, a few simple adjustments can make all the difference. For shells that aren’t crisping properly, try preheating your baking sheet before adding the tacos. If your filling is too dry, mix in 2-3 tablespoons of tomato sauce or beef broth to the meat mixture before filling. For tacos that keep falling over during baking, crumple small pieces of aluminum foil to create “holders” between each taco, or invest in a taco baking rack. If cheese isn’t melting evenly, try grating it more finely and sprinkling it throughout the filling, not just on top.

    Frequently Asked Questions

    Can I make oven-baked cheesy tacos ahead of time?

    Yes! Prepare the meat filling up to 3 days ahead and refrigerate. Assemble the tacos up to 24 hours before baking, keeping them covered in the refrigerator. Add 2-3 extra minutes to the baking time if starting from cold.

    What’s the best temperature for baking tacos?

    Bake at 375°F for optimal results. This temperature creates perfectly crispy shells while melting the cheese without burning it. Your oven-baked cheesy tacos should take about 10-12 minutes to reach golden perfection.

    Can I use soft tortillas instead of hard shells?

    Absolutely! Lightly brush corn tortillas with oil, drape them over two bars of your oven rack to form a taco shape, and bake at 375°F for 7-8 minutes until crisp before filling and baking again.

    How do I keep the tacos standing upright?

    Use a specialized taco baking rack, or create your own by scrunching aluminum foil into a snake-like form and shaping it into curves to hold each taco. Alternatively, pack them tightly in a baking dish.

    What sides go well with oven-baked tacos?

    Mexican rice, refried beans, corn salad, or a simple green salad make perfect accompaniments. For a complete fiesta, add guacamole and chips or a refreshing cucumber-tomato salad with lime dressing.

    Final Thoughts

    These oven-baked cheesy tacos have earned their place in my regular dinner rotation because they deliver that perfect combination of convenience and crave-worthy flavor. There’s something so satisfying about pulling out a tray of perfectly crispy, cheese-filled tacos all at once instead of frying them individually. The way the family gathers around, customizing their toppings and diving in while everything’s still hot and bubbling, creates the kind of everyday food memories I cherish. Find more delicious recipes on my Pinterest page!

  • Apple Cider Chicken with Crisp Autumn Slaw | Irresistibly Delicious!

    Apple Cider Chicken with Crisp Autumn Slaw | Irresistibly Delicious!

    Apple Cider Chicken with Crisp Autumn Slaw | Irresistibly Delicious!

    The moment I first made this Apple Cider Chicken with Crisp Autumn Slaw, my kitchen filled with the warm, spiced aroma that defines fall cooking. There’s something magical about the way apple cider transforms into a rich, caramelized glaze that coats tender chicken while the crisp, colorful slaw provides the perfect refreshing counterpoint. This dish has become my go-to for those nights when I want something that feels special but doesn’t require hours in the kitchen. If you’re looking for a meal that captures autumn’s essence in every bite, this recipe is your answer.

    Recipe

    Why You’ll Love This Apple Cider Chicken with Crisp Autumn Slaw

    Perfect Balance of Sweet and Savory

    The magic of this Apple Cider Chicken with Crisp Autumn Slaw lies in its perfect flavor harmony. The chicken soaks up the rich cider reduction, creating caramelized edges with hints of cinnamon and thyme. I love how the natural sweetness of the cider concentrates as it cooks down, balancing beautifully with the savory elements. The first time I made this for my sister, she immediately asked for the recipe, saying it reminded her of our favorite autumn orchard trips. It’s that nostalgic quality that makes this dish so special – familiar yet elevated.

    Quick Weeknight Wonder

    Despite its impressive flavor profile, this Apple Cider Chicken with Crisp Autumn Slaw comes together in about 30 minutes, making it perfect for busy weeknights. The one-pan cooking method means less cleanup, which is always a win in my book. I often prep the slaw components ahead of time, storing them separately until ready to combine. This simple preparation step saves precious minutes when dinner time rolls around. Even on my most hectic days, this recipe feels manageable and delivers restaurant-quality results without the fuss.

    Essential Tips & Tricks

    Selecting the Right Ingredients

    For truly outstanding Apple Cider Chicken with Crisp Autumn Slaw, ingredient quality makes all the difference. Choose unfiltered apple cider (not apple juice) for its deeper, more complex flavor – I’ve found it creates a much more flavorful glaze. For the chicken, boneless thighs deliver more moisture and flavor than breasts, though both work well. The slaw shines brightest with a mix of textures – crisp cabbage, sweet apples, and crunchy nuts create that perfect bite. I learned this the hard way after making it with just cabbage the first time – good, but not great.

    Mastering the Cooking Technique

    The key to perfect Apple Cider Chicken with Crisp Autumn Slaw is getting that glaze just right. Start by thoroughly patting the chicken dry before seasoning – this ensures proper browning. Don’t rush the cider reduction process; allow it to simmer until it coats the back of a spoon for that perfect sticky-sweet consistency. If you’re finding the sauce too thin, a teaspoon of cornstarch slurry works wonders. This technique reminds me of how my grandmother would reduce her apple cider braised beef shoulder – patience yields the most flavorful results.

    Serving Ideas & Creative Variations

    Complementary Side Dishes

    Apple Cider Chicken with Crisp Autumn Slaw pairs beautifully with so many sides. My favorite combination includes roasted root vegetables tossed with herbs and a drizzle of honey. The earthiness complements the sweet-tart flavors of the chicken perfectly. For a heartier meal, serve alongside wild rice pilaf studded with dried cranberries and toasted pecans. When I’m hosting friends, I often add garlic butter steak with parmesan cream sauce to create an impressive spread that always gets rave reviews.

    Seasonal Adaptations

    While Apple Cider Chicken with Crisp Autumn Slaw shines in fall, it’s easily adapted year-round. In winter, add warming spices like star anise or cloves to the cider reduction. Spring calls for a lighter approach – try substituting half the cider with chicken broth and adding fresh herbs like tarragon. Summer versions work beautifully with peaches or nectarines added to the slaw instead of apples. I discovered this flexibility during a summer gathering when apples weren’t at their peak, and the peach version became an instant hit with my family.

    Storage & Troubleshooting Guide

    Proper Storage Solutions

    Store leftover Apple Cider Chicken with Crisp Autumn Slaw properly to maintain its delicious flavors. Keep the chicken and slaw completely separate in airtight containers in the refrigerator. The chicken stays good for up to 3 days, while the undressed slaw components last about 2 days. For meal prep, I recommend storing the slaw dressing separately and combining everything just before serving. When reheating the chicken, add a splash of apple cider or chicken broth to revive the sauce and prevent drying out.

    Common Problems & Solutions

    If your Apple Cider Chicken with Crisp Autumn Slaw isn’t turning out perfectly, a few adjustments can help. For soggy slaw, try salting your cabbage and letting it sit for 15 minutes before squeezing out excess moisture. If your cider sauce is too thin, simmer it longer or add a cornstarch slurry. Chicken not browning properly? Ensure your pan is hot enough before adding the meat and avoid overcrowding. I once served this dish with a too-watery sauce, but a quick reduction on high heat while the chicken rested transformed it into the perfect consistency.

    Frequently Asked Questions

    Can I use apple juice instead of cider for Apple Cider Chicken with Crisp Autumn Slaw?

    While possible, apple juice lacks the depth of flavor. For best results, use unfiltered apple cider which has a richer, more complex taste that creates a superior glaze.

    How do I prevent the slaw from becoming soggy?

    Dress the slaw just before serving. For make-ahead prep, store all components separately and combine at the last minute to maintain that perfect crunch.

    Can I make this recipe in advance for a dinner party?

    Yes! Prepare the chicken up to a day ahead and reheat gently with a splash of cider. Make slaw components ahead but toss together just before serving.

    What’s the best way to reheat leftovers?

    Gently warm chicken in a covered skillet with a tablespoon of water or cider. Microwave works too but may dry out the meat slightly.

    Is this recipe gluten-free?

    Most versions are naturally gluten-free, but always check your cider and seasonings for hidden gluten if serving to someone with celiac disease.

    Final Thoughts

    Apple Cider Chicken with Crisp Autumn Slaw has become a staple in my seasonal cooking rotation for good reason. It transforms simple ingredients into something truly special, capturing the essence of fall in every bite. What I love most is how it brings together contrasting elements – warm and cool, sweet and tangy, tender and crisp – in perfect harmony. Whether you’re cooking for a quiet weeknight or a special gathering, this dish delivers both comfort and elegance. Don’t forget to check out more seasonal inspiration on our Pinterest page!

  • Slow Cooker Creamy Tuscan Chicken Orzo – Irresistibly Delicious!

    Slow Cooker Creamy Tuscan Chicken Orzo – Irresistibly Delicious!

    Slow Cooker Creamy Tuscan Chicken Orzo – Irresistibly Delicious!

    Slow Cooker Creamy Tuscan Chicken Orzo is the ultimate comfort food that practically makes itself. There’s something magical about walking through the door after a long day to the aroma of garlic, herbs, and creamy goodness wafting through your home. I discovered this recipe during a particularly chaotic week when I needed something that would cook while I was away but still feel special enough for dinner with friends. The tender chicken, al dente orzo pasta, and that luscious sauce studded with sun-dried tomatoes and spinach create a restaurant-worthy meal with minimal effort. Trust me, this Italian-inspired dish will become your new favorite slow cooker staple.

    Recipe

    Why You’ll Love This Slow Cooker Creamy Tuscan Chicken Orzo

    Perfect Balance of Convenience and Flavor

    This Slow Cooker Creamy Tuscan Chicken Orzo is a time-saving miracle that doesn’t sacrifice an ounce of flavor. Unlike many dump-and-go recipes, this one develops layers of taste as it simmers throughout the day. The chicken thighs (my preference over breasts) stay incredibly juicy while absorbing the aromatic Italian herbs. The orzo gets added later, soaking up all those savory juices while maintaining its texture. I love how the sun-dried tomatoes infuse the entire dish with their intense, slightly sweet tanginess that balances perfectly with the creamy finish.

    Versatile for Any Occasion

    What makes this Slow Cooker Creamy Tuscan Chicken Orzo truly special is how it effortlessly transitions from casual weeknight dinner to impressive entertaining fare. I’ve served this at both Tuesday family dinners and Saturday dinner parties with equal success. It’s hearty enough to satisfy hungry teenagers yet elegant enough for guests who appreciate good food. The creamy texture and rich flavors feel indulgent without being heavy. Plus, it’s customizable to dietary needs—swap in gluten-free orzo, dairy-free cream, or add extra vegetables to make it your own while maintaining that signature Tuscan flavor profile.

    Essential Tips & Tricks

    Perfecting the Ingredients

    The quality of ingredients makes all the difference in this Slow Cooker Creamy Tuscan Chicken Orzo. Opt for oil-packed sun-dried tomatoes rather than dry ones—they bring more flavor and a silkier texture to the finished dish. For the chicken, boneless thighs provide the best texture and won’t dry out during the long cooking process. When it comes to the Italian seasoning, crushing it slightly between your fingers before adding releases more of the essential oils. I learned this trick from my Italian neighbor who insists this small step transforms the entire dish. The parmesan should be freshly grated for the creamiest sauce texture.

    Mastering the Technique

    The secret to perfectly cooked orzo in this slow cooker dish is all about timing. Add it during the final 30 minutes of cooking, stirring well to ensure it’s completely submerged in liquid. This prevents the pasta from becoming mushy while still allowing it to absorb the flavors. When adding the cream elements at the end, reduce the heat to low and stir gently—aggressive stirring can break the sauce. For an extra silky finish, temper the cream by mixing a few tablespoons of the hot cooking liquid with it before adding to the slow cooker. I once rushed this step and ended up with a slightly curdled sauce—a mistake I’ve never repeated!

    Serving Ideas & Creative Variations

    Complementary Side Dishes

    This Slow Cooker Creamy Tuscan Chicken Orzo pairs beautifully with simple, fresh accompaniments that balance its richness. My go-to is a bright arugula salad with lemon vinaigrette and shaved parmesan—the peppery greens and citrus cut through the creaminess perfectly. For a heartier meal, serve with garlic bread or rosemary focaccia for sopping up that incredible sauce. Roasted asparagus or broccolini also work wonderfully, adding color and a slight crunch. When entertaining, I arrange everything on a large wooden board with some olives and roasted bell peppers for an impressive Mediterranean-inspired spread that always gets compliments.

    Creative Twists on the Classic

    Don’t be afraid to put your own spin on this Slow Cooker Creamy Tuscan Chicken Orzo with these delicious variations. For a seafood twist, substitute shrimp for chicken (adding them in the last 30 minutes with the orzo). Love heat? Add crushed red pepper flakes or a dollop of calabrian chili paste. For a more substantial vegetable presence, stir in roasted mushrooms, artichoke hearts, or bell peppers along with the spinach. My family’s favorite version includes a handful of chopped crispy pancetta sprinkled on top just before serving—the textural contrast is amazing! For special occasions, a splash of white wine or a few saffron threads elevate this dish to something truly extraordinary.

    Storage & Troubleshooting Guide

    Proper Storage and Reheating

    This Slow Cooker Creamy Tuscan Chicken Orzo makes excellent leftovers when stored properly. Transfer cooled portions to airtight containers and refrigerate for up to 3 days. The orzo will continue absorbing liquid, so when reheating, add a splash of chicken broth or cream to restore the original consistency. For best results, reheat gently on the stovetop over medium-low heat rather than using the microwave, which can make the sauce separate. If freezing, do so before adding the cream components—dairy-based sauces can become grainy when frozen and thawed. I portion mine in freezer-safe containers for quick individual lunches that taste almost as good as the day they were made.

    Common Issues and Solutions

    Even experienced cooks occasionally encounter challenges with this Slow Cooker Creamy Tuscan Chicken Orzo. If your orzo turns out too firm, it likely needs more liquid—add ¼ cup hot broth and continue cooking for 10-15 minutes. Conversely, if it’s too soft, try reducing the cooking time by 5-10 minutes in future preparations. Should your sauce separate or appear curdled, lower the heat immediately and whisk in a tablespoon of cornstarch mixed with cold water. For a sauce that’s too thin, remove the lid during the final cooking stage to allow excess moisture to evaporate. I once rescued an overly thick batch by stirring in warm chicken broth, adjusting the seasonings, and nobody could tell there had been an issue!

    Frequently Asked Questions

    Can I use chicken breasts instead of thighs in this Slow Cooker Creamy Tuscan Chicken Orzo?

    Yes, boneless skinless chicken breasts work, but reduce cooking time by 30-45 minutes to prevent drying out. Thighs provide more flavor and moisture, but breasts are a leaner option if preferred.

    Is it possible to make this recipe dairy-free?

    Absolutely! Substitute coconut cream or cashew cream for heavy cream, and use nutritional yeast instead of parmesan. The flavor profile will change slightly but still delivers delicious results.

    Can I cook this on high instead of low?

    Yes, cook on high for 3-4 hours instead of 6-7 hours on low. However, low and slow cooking develops better flavor and ensures more tender chicken.

    What if I don’t have sun-dried tomatoes?

    Fresh cherry tomatoes are a good substitute—add them during the last hour of cooking. Roasted red peppers also work well, providing similar sweetness and color.

    Different slow cookers heat at varying intensities. If your orzo remains firm, add ½ cup hot broth or water, stir well, and continue cooking for 15-20 additional minutes.

    Final Thoughts

    There’s something truly special about a meal that brings comfort, elegance, and ease together in one pot. This Slow Cooker Creamy Tuscan Chicken Orzo has become my reliable companion for both everyday dinners and special gatherings. The combination of tender chicken, perfectly cooked orzo, and that velvety sauce creates a dish that feels like a warm hug at the end of a long day. I hope you’ll make this recipe your own, perhaps starting a new tradition of slow cooker Sundays or impressing guests with minimal effort. Be sure to check out more cozy recipes on Pinterest for inspiration that keeps your kitchen filled with delicious possibilities.

  • German Goulash Recipes: Hearty, Authentic Comfort Food You’ll Love

    German Goulash Recipes: Hearty, Authentic Comfort Food You’ll Love

    German Goulash Recipes: Hearty, Authentic Comfort Food You’ll Love

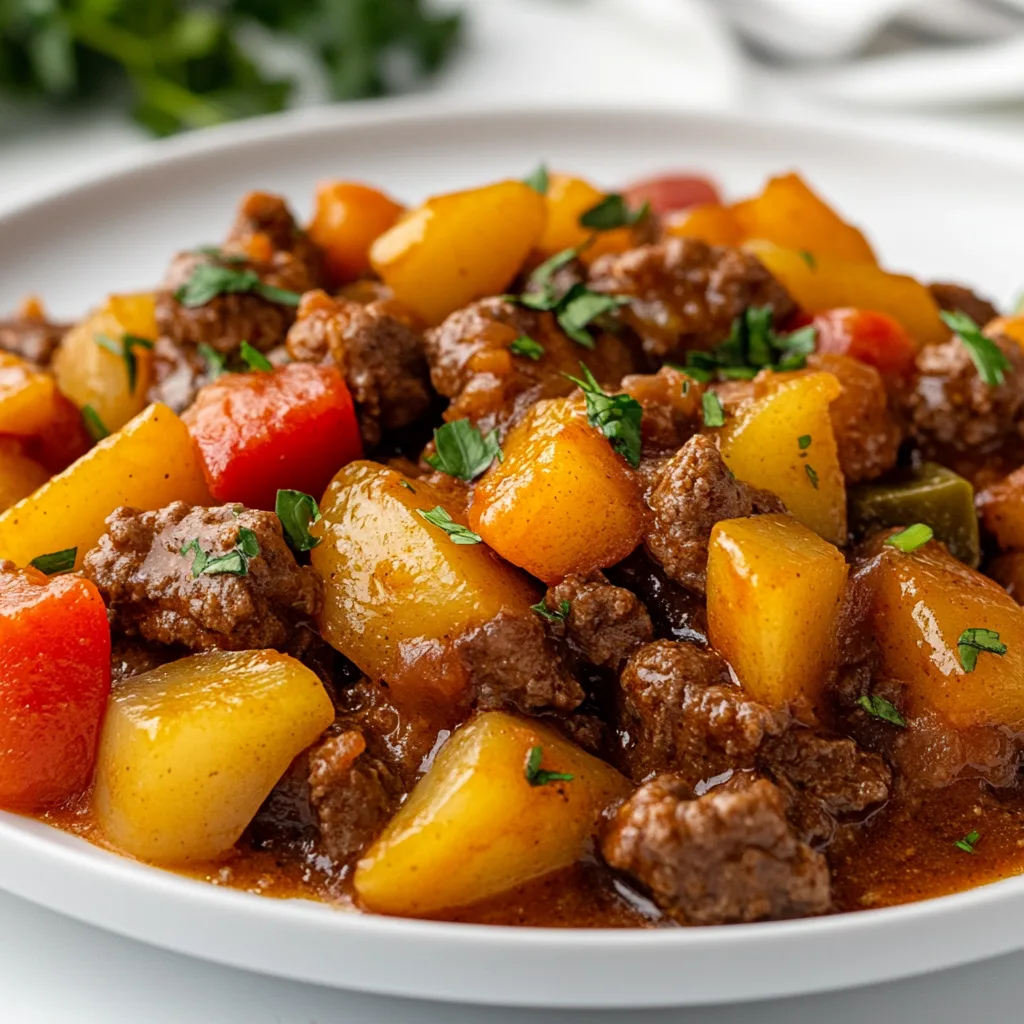
    German goulash recipes hold a special place in my heart, bringing back memories of my grandmother’s kitchen filled with the aroma of paprika, tender beef, and rich gravy. This hearty, soul-warming dish transforms simple ingredients into something magical through slow simmering. Whether you’re craving comfort food on a chilly evening or looking to impress guests with authentic European cuisine, these German goulash recipes will become your new go-to meal. Let me share my favorite versions that balance traditional techniques with modern conveniences.

    Recipe

    Why You’ll Love These German Goulash Recipes

    Perfect Comfort Food for Any Season

    There’s something undeniably comforting about a bowl of authentic German goulash that warms you from the inside out. Unlike its Hungarian cousin, German goulash typically features beef as the star, creating a rich, deeply savory stew that’s less spicy but equally flavorful. I love how it transforms throughout cooking—tough cuts of beef becoming meltingly tender as they simmer in that gorgeous paprika-infused sauce. It’s hearty enough for winter evenings but versatile enough to enjoy year-round, especially when served with traditional sides like spätzle or potato dumplings.

    Simple Ingredients, Extraordinary Flavor

    What amazes me about German goulash recipes is how they turn humble ingredients into something extraordinary. The magic happens with quality paprika (both sweet and smoked varieties), which creates that distinctive rich color and depth. Onions cooked until caramelized form the foundation, while tomato paste adds subtle acidity and body. The slow cooking process allows these simple components to develop complex flavors that taste like they took days to create. I’ve found this dish actually tastes better the next day, making it perfect for meal prep and busy weeknight dinners.

    Essential Tips & Tricks

    Mastering the Meat Selection

    Choosing the right cut of beef makes all the difference in your German goulash. I’ve learned that tougher, collagen-rich cuts like chuck, shoulder, or round transform beautifully during the long, slow cooking process. These cuts break down gradually, releasing gelatin that creates that silky, rich mouthfeel we love. Always cut the meat into uniform 1-inch cubes and pat them thoroughly dry before browning. This crucial step creates the Maillard reaction that builds flavor. Don’t rush this stage—proper browning in batches creates the foundation for an exceptional garlic butter steak with parmesan cream sauce or any meat-based stew.

    The Secret to Perfect Sauce Consistency

    The signature feature of great German goulash recipes is that velvety, cling-to-your-spoon sauce. To achieve this texture, I recommend dusting your browned meat with flour before adding liquids. This creates a natural thickener that develops during cooking. Another trick: resist the urge to add too much liquid initially—the meat and vegetables release moisture as they cook. For extra body, I sometimes add a peeled, diced potato that dissolves completely during cooking, naturally thickening the sauce. If your goulash still seems thin near the end, simmer uncovered for 15-20 minutes rather than adding cornstarch.

    Serving Ideas & Creative Variations

    Traditional German Accompaniments

    German goulash shines brightest when paired with the right sides to soak up that incredible sauce. Homemade spätzle (little German egg noodles) is my absolute favorite—their irregular shapes and chewy texture capture the sauce perfectly. Potato dumplings (kartoffelklöße) offer another authentic option, with their pillowy centers contrasting beautifully with the rich goulash. For something simpler, buttered egg noodles or mashed potatoes work wonderfully. Don’t forget the traditional accompaniment of creamy tomato basil soup as a starter, creating a complete German-inspired meal experience.

    Modern Twists on Classic German Goulash

    While I respect tradition, experimenting with German goulash recipes has led to some delicious discoveries. Try adding roasted red peppers for sweetness and color or incorporating mushrooms for earthy depth. For a lighter version, substitute half the beef with hearty vegetables like parsnips and butternut squash. I’ve even created fusion versions using beer instead of wine (try a German dunkel for amazing results) or adding a touch of balsamic vinegar at the end for brightness. For special occasions, elevate your goulash by adding a dollop of sour cream swirled with horseradish as a garnish.

    Storage & Troubleshooting Guide

    Make-Ahead and Freezer Tips

    German goulash actually improves with time, making it perfect for meal prepping. Store refrigerated goulash in airtight containers for up to 4 days—the flavors will continue developing beautifully. For freezing, cool completely before transferring to freezer-safe containers, leaving about an inch of headspace for expansion. Frozen goulash keeps well for 3 months. When reheating, thaw overnight in the refrigerator, then warm gently on the stovetop with a splash of broth to restore the perfect consistency. The collagen-rich sauce prevents the meat from drying out during reheating, maintaining that tender texture.

    Fixing Common Goulash Problems

    Even experienced cooks occasionally encounter issues with German goulash recipes. If your meat remains tough after hours of cooking, your heat might be too high—low and slow is the golden rule. For goulash that’s too thin, remove the lid and simmer to reduce, or blend a small portion and return it to the pot for natural thickening. Too thick? Add beef broth gradually until you reach your desired consistency. If your goulash lacks depth, try adding a teaspoon of tomato paste, a splash of Worcestershire sauce, or a dash of soy sauce. These umami-rich ingredients enhance flavor without overwhelming the dish’s authentic character.

    Frequently Asked Questions

    What cuts of beef work best for German goulash recipes?

    Chuck roast, beef shoulder, or round cuts work perfectly. These tougher cuts contain connective tissue that breaks down during slow cooking, creating tender meat and a rich, silky sauce.

    How is German goulash different from Hungarian goulash?

    German goulash typically uses beef (not pork or veal), less paprika, and often incorporates tomato paste. It’s generally thicker and less soup-like than Hungarian versions.

    Can I make German goulash in an Instant Pot?

    Absolutely! Brown meat using the sauté function, then pressure cook for 35 minutes with natural release. The flavor won’t be quite as developed as slow-cooked versions, but it’s delicious for weeknights.

    What’s the best way to store leftover goulash?

    Refrigerate in airtight containers for up to 4 days or freeze for 3 months. The flavors actually improve after a day in the refrigerator.

    What alcoholic substitutes work in German goulash recipes?

    If avoiding wine, use additional beef broth with a tablespoon of vinegar for acidity. Dark beer works beautifully too, adding wonderful malty notes.

    Final Thoughts

    Mastering German goulash recipes has brought me countless moments of culinary joy and connection to my heritage. There’s something magical about watching humble ingredients transform into something so profoundly satisfying. Whether you follow traditional methods or incorporate your own creative touches, the heart of this dish remains the same—comfort, flavor, and nourishment. I hope these tips inspire you to create your own German goulash memories. Don’t forget to check out more comfort food inspiration on Pinterest and share your goulash creations!

  • Greek Meatballs in Lemon Sauce That Will Wow Your Taste Buds!

    Greek Meatballs in Lemon Sauce That Will Wow Your Taste Buds!

    Greek Meatballs in Lemon Sauce That Will Wow Your Taste Buds!

    Greek Meatballs in Lemon Sauce has become my absolute comfort food obsession this winter! These tender, herb-infused meatballs bathed in a velvety lemon sauce transport me straight to a sunny Mediterranean taverna, even when snow is piling up outside my window. The first time I made these for my family, the kitchen filled with the most intoxicating aroma of fresh herbs and lemon zest. Everyone fell silent at the first bite – that perfect balance of brightness and richness is simply magical. If you’re craving something that feels both cozy and refreshing, this recipe from RecipesDarleen deserves a spot in your regular rotation.

    Recipe

    Why You’ll Love This Greek Meatballs in Lemon Sauce

    A Perfect Balance of Flavors

    These Greek Meatballs in Lemon Sauce deliver the most incredible flavor harmony you can imagine. The meatballs themselves are packed with fresh herbs – mint, oregano, and dill – that instantly transport your taste buds to the Mediterranean. I love how the bright citrus notes from the lemon sauce cut through the richness of the meat, creating this perfect balance that keeps you coming back for more. The sauce has this silky texture that clings to each meatball, with just enough tanginess to make your mouth water before you even take a bite. It’s comfort food that somehow feels light and satisfying at the same time.

    Quick Weeknight Wonder

    What makes these Greek Meatballs in Lemon Sauce a true weeknight hero is how quickly they come together. I can have these on the table in about 35 minutes, which has saved me on countless busy evenings. The make-ahead potential is another game-changer – I often prep the meatball mixture in the morning, refrigerate it, and then just shape and cook when I get home. The sauce itself requires minimal ingredients but delivers maximum impact. Plus, this dish reheats beautifully, making it perfect for meal prep. When life gets hectic, having this recipe in my back pocket feels like a little culinary security blanket.

    Essential Tips & Tricks

    Perfecting Your Meatballs

    The secret to incredibly tender Greek Meatballs in Lemon Sauce lies in how you handle the meat mixture. I’ve learned to mix gently with my fingertips rather than kneading aggressively – this keeps the texture light instead of dense. Adding a splash of milk-soaked bread (paximadia in Greek cooking) creates meatballs that practically melt in your mouth. Another game-changer? Chilling the formed meatballs for 15 minutes before cooking helps them hold their shape. And don’t skip the fresh herbs – dried just doesn’t deliver the same aromatic punch that makes these meatballs truly special.

    Mastering the Lemon Sauce

    The velvety lemon sauce is what transforms these from ordinary meatballs into something extraordinary. The key is creating a proper avgolemono base – the traditional Greek egg-lemon mixture that thickens the sauce without cream. Always temper your eggs by whisking in hot broth gradually to prevent curdling. For the brightest flavor, use both lemon juice and zest, and add them at the end of cooking. Like my Creamy Lemon Garlic Pan-Seared Scallops, the sauce should coat the back of a spoon but still flow. If it thickens too much, a splash of warm broth will bring it back to silky perfection.

    Serving Ideas & Creative Variations

    Perfect Pairings

    Greek Meatballs in Lemon Sauce shine brightest when served alongside simple, complementary sides. My family’s favorite pairing is fluffy rice pilaf that soaks up every drop of that precious sauce. A simple Greek salad with chunks of cucumber, tomato, red onion, and feta provides the perfect fresh contrast. For a more substantial meal, try serving them over orzo pasta or alongside roasted lemon potatoes. A basket of warm pita bread is non-negotiable at my table – it’s perfect for swiping through any remaining sauce. The bright flavors also pair beautifully with a crisp white wine for a dinner that feels special.

    Exciting Twists

    While the classic Greek Meatballs in Lemon Sauce is perfection, I love playing with variations. For a heartier version, I sometimes add spinach and feta to the meatball mixture, which adds incredible flavor and beautiful flecks of green. Swapping ground lamb for the traditional beef/pork mixture creates a more robust, earthy flavor profile. For a lighter option, ground turkey works beautifully – just add a touch more olive oil to keep them moist. You can even transform these into a soup by doubling the sauce and adding more broth, similar to my Italian Penicillin Soup. The possibilities are truly endless!

    Storage & Troubleshooting Guide

    Proper Storage Methods

    Greek Meatballs in Lemon Sauce store beautifully, making them perfect for meal prep. Refrigerate leftovers in an airtight container for up to 3 days – the flavors actually deepen overnight, making them even more delicious the next day. For longer storage, freeze the cooked meatballs and sauce separately. The meatballs freeze well for up to 3 months, but the lemon sauce is best made fresh as it can separate when thawed. When reheating, do so gently over low heat with a splash of water or broth to revive the sauce’s silky texture. I often make a double batch specifically to have convenient freezer meals ready to go.

    Common Issues Solved

    If your Greek Meatballs in Lemon Sauce aren’t turning out perfectly, a few simple fixes can help. Meatballs falling apart? The mixture might be too wet – add more breadcrumbs tablespoon by tablespoon until it holds together. Too dense? You’re likely overmixing or packing them too tightly. For sauce troubles, curdling usually means the heat was too high when adding the egg mixture. The fix is tempering properly and keeping the heat very low. If your sauce lacks punch, fresh lemon zest and a pinch of salt work wonders. And remember, the sauce will thicken as it cools, so it’s better to err on the slightly thinner side initially.

    Frequently Asked Questions

    Can I make Greek Meatballs in Lemon Sauce ahead of time?

    Absolutely! Prepare the meatball mixture up to 24 hours ahead and refrigerate. You can even form and cook the meatballs in advance, then make the sauce fresh before serving for the best flavor and texture.

    What’s the best meat to use for authentic Greek meatballs?

    Traditional Greek meatballs typically use a mixture of ground beef and pork for the perfect fat content and flavor. However, lamb makes a wonderful authentic variation, or turkey works well for a lighter option.

    How do I prevent the lemon sauce from curdling?

    The key is tempering – whisk some hot broth gradually into your egg-lemon mixture before adding it back to the pot. Always keep the heat low and never let the sauce boil after adding the eggs.

    Can I freeze these meatballs with the sauce?

    Freeze the meatballs and sauce separately. The meatballs freeze beautifully for up to 3 months, but the lemon sauce is best made fresh as the texture can change when frozen and thawed.

    What herbs are essential for authentic Greek Meatballs in Lemon Sauce?

    Fresh dill, mint, and oregano create the signature flavor profile. While dried herbs can work in a pinch, fresh herbs make a remarkable difference in creating that authentic Mediterranean taste.

    Final Thoughts

    Greek Meatballs in Lemon Sauce has become a cherished recipe in my kitchen, bringing brightness to even the dreariest days. There’s something magical about that first forkful – the tender meatball, the silky sauce, the burst of lemon that makes everything feel fresh and vibrant. It’s comfort food that doesn’t weigh you down but instead leaves you feeling nourished and satisfied. I hope these meatballs bring the same joy to your table as they have to mine! For more Mediterranean inspiration, check out my Pinterest board where I’m always adding new flavor combinations.

  • Baked Feta Potatoes with Lemon: Irresistibly Tangy & Crispy Delight!

    Baked Feta Potatoes with Lemon: Irresistibly Tangy & Crispy Delight!

    Baked Feta Potatoes with Lemon: Irresistibly Tangy & Crispy Delight!

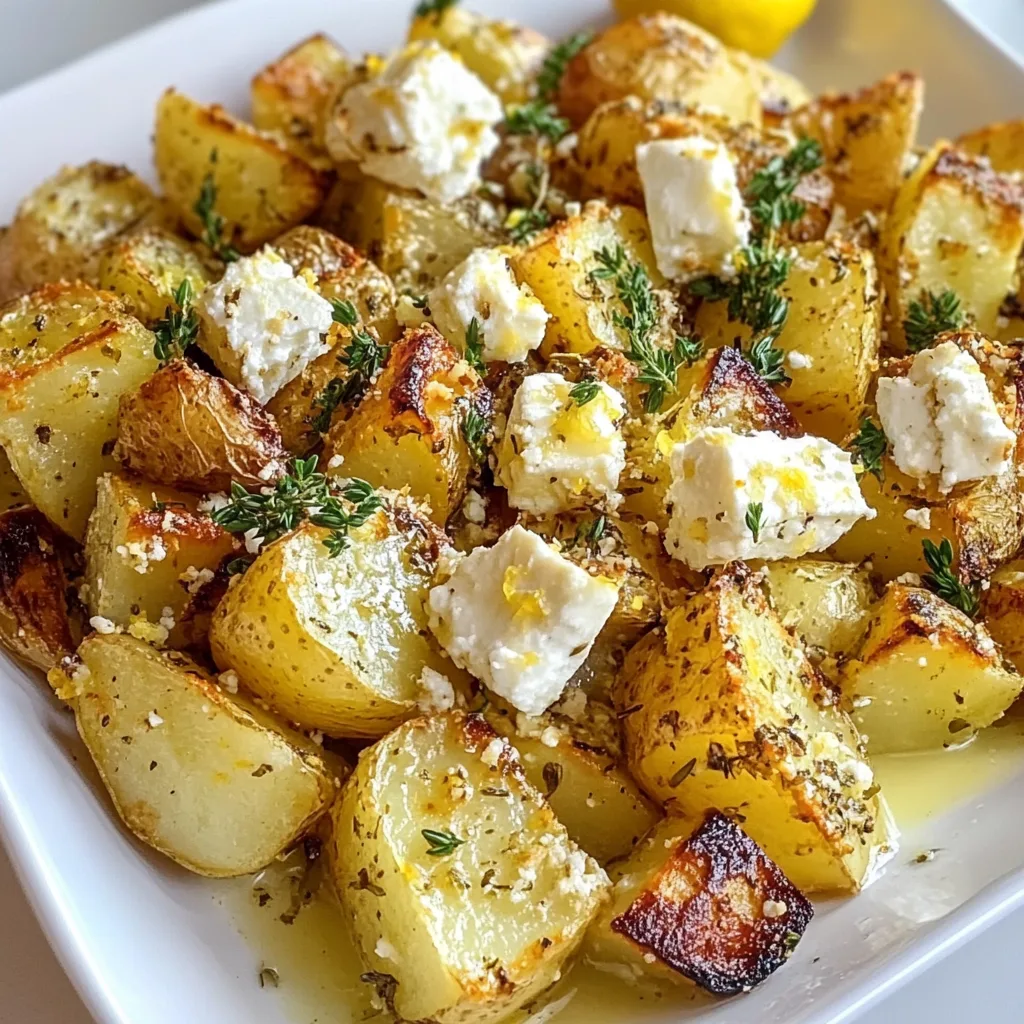
    Baked Feta Potatoes with Lemon has become my absolute comfort food obsession this season. There’s something magical about the way the tangy feta melts into those crispy-edged potatoes, while bright lemon cuts through the richness. I discovered this dish during a rainy Sunday when all I had was a block of feta about to expire and some potatoes in the pantry. What started as kitchen desperation has turned into the recipe my friends now beg me to bring to every gathering. The Mediterranean flavors transport you somewhere sunny even on the coldest days, making this simple dish a true year-round treasure.

    Recipe

    Why You’ll Love This Baked Feta Potatoes with Lemon

    Perfect Balance of Flavors and Textures

    The magic of baked feta potatoes with lemon lies in its contrasting elements that somehow create perfect harmony. The potatoes develop this incredible golden crust while staying fluffy inside, and the feta transforms from crumbly cheese to a creamy, slightly caramelized wonder. I love how the lemon zest infuses everything with brightness, while the juice adds that perfect acidic punch. The first time I served this, my neighbor literally closed her eyes with each bite, declaring it “restaurant quality.” Trust me, the aroma alone as this bakes will have everyone lingering in your kitchen!

    Simple Ingredients, Maximum Impact

    What makes baked feta potatoes with lemon truly special is how it creates extraordinary results from ordinary ingredients. You need just a few staples – potatoes, feta cheese, lemons, olive oil, and herbs. No complicated techniques or specialty items required! I keep these ingredients on hand constantly now because this dish has saved me countless times when unexpected guests arrive. The simplicity means you can focus on enjoying the process rather than stressing over complicated steps. It’s the perfect example of how Mediterranean cooking celebrates basic ingredients in their purest form.

    Essential Tips & Tricks

    Choosing the Right Potatoes

    Selecting the perfect potatoes makes all the difference in this baked feta potatoes with lemon recipe. I’ve found that waxy varieties like Yukon Golds or red potatoes hold their shape beautifully while still developing those crispy edges we crave. They also absorb the lemon and herb flavors more effectively than russets. Cut them into evenly-sized chunks (about 1-inch pieces) to ensure they cook uniformly. I learned this lesson the hard way after serving a batch with some pieces perfectly done and others undercooked! For extra flavor absorption, try parboiling them for just 5 minutes before roasting – it’s a game-changer for texture.

    The Feta Factor

    Not all feta is created equal when making baked feta potatoes with lemon! Look for traditional Greek feta made from sheep’s milk for the creamiest, most authentic result. It should come packed in brine, not the pre-crumbled dry variety. I place my feta block right in the center of the potatoes about halfway through cooking, which allows it to soften without completely melting away. This technique creates pockets of tangy creaminess throughout the dish. For an extra flavor dimension, try marinating your feta in olive oil with herbs and garlic for an hour before baking – the difference is remarkable!

    Serving Ideas & Creative Variations

    Perfect Pairings

    Baked feta potatoes with lemon works beautifully as both a side dish or main course. For a complete meal, I love serving it alongside a simple Greek salad or roasted vegetables for a vegetarian feast. When entertaining, I pair it with slow-roasted chicken or grilled fish for an impressive yet effortless spread. The lemony, herby flavors complement practically any protein! My absolute favorite pairing is with a glass of crisp white wine on my patio as the sun sets. For brunch, try topping it with a fried egg – the runny yolk creates an incredible sauce that elevates this dish to new heights.

    Seasonal Adaptations

    The beauty of baked feta potatoes with lemon is its versatility across seasons. In spring, I fold in fresh peas and mint for brightness. Summer calls for cherry tomatoes and basil added during the last 10 minutes of baking. Fall? Try adding cubed butternut squash and rosemary to the potato mix. Winter versions with caramelized onions and thyme create the ultimate comfort food. My personal favorite adaptation includes thinly sliced Meyer lemons (with peel) scattered throughout during winter months when they’re in season – the slight bitterness balances beautifully with the feta’s creaminess and creates gorgeous caramelized edges.

    Storage & Troubleshooting Guide

    Keeping Leftovers Fresh

    Storing baked feta potatoes with lemon properly ensures you’ll enjoy those delicious leftovers without sacrificing quality. Allow the dish to cool completely before transferring to an airtight container – this prevents condensation that can make the potatoes soggy. Refrigerate for up to 3 days. To reheat, avoid the microwave which can make everything rubbery. Instead, spread the potatoes on a baking sheet and warm in a 350°F oven for about 10 minutes until heated through. The feta won’t be quite as creamy as when freshly made, but the flavors actually develop beautifully overnight, making day-two potatoes sometimes even tastier!

    Fixing Common Issues

    Even experienced cooks occasionally encounter challenges with baked feta potatoes with lemon. If your potatoes aren’t crisping properly, try increasing oven temperature by 25 degrees and ensure you’re not overcrowding the pan – each potato needs space! For overly dry potatoes, toss them with a bit more olive oil before roasting or add a splash of broth halfway through cooking. If your feta is melting too quickly and disappearing, try adding it later in the cooking process or using a firmer variety. And for those who find the lemon flavor too intense, balance it with a drizzle of honey before serving – it creates a lovely sweet-tart profile.

    Frequently Asked Questions

    Can I make baked feta potatoes with lemon ahead of time?

    Yes! Prepare everything up to the baking stage, refrigerate, then bake when ready. For best results, bring to room temperature before baking and add an extra 5-7 minutes to the cooking time.

    What herbs work best with this recipe?

    Fresh oregano, thyme, and rosemary are my top choices. Dill and parsley work beautifully as finishing herbs. Use dried herbs if necessary, but reduce the amount by half.

    Can I substitute the feta cheese?

    Absolutely! Goat cheese or halloumi make excellent alternatives. Each brings a different flavor profile, with halloumi offering more structure and less melting.

    How do I prevent my potatoes from sticking to the pan?

    Ensure your baking sheet is well-oiled or lined with parchment paper. Toss potatoes thoroughly in olive oil before arranging, and don’t disturb them during the first 20 minutes of roasting.

    Why are my baked feta potatoes with lemon soggy instead of crispy?

    Overcrowding the pan is usually the culprit. Use a larger baking sheet or divide between two pans. Also, make sure your oven is fully preheated before adding the potatoes.

    Final Thoughts

    Baked Feta Potatoes with Lemon has become my go-to recipe when I want to impress without stress. There’s something truly special about how these simple ingredients transform into something extraordinary. The bright lemon, creamy feta, and crispy potatoes create a dish that feels both comforting and sophisticated. I hope you’ll make this recipe your own, experimenting with different herbs and seasonal additions. For more Mediterranean-inspired recipes, visit our Pinterest board where we’re constantly adding new flavor combinations to try!