Blog

  • Creamy Coconut Milk Chicken Recipe That Will Melt Your Heart!

    Creamy Coconut Milk Chicken Recipe That Will Melt Your Heart!

    Creamy Coconut Milk Chicken Recipe That Will Melt Your Heart!

    Creamy coconut milk chicken is the ultimate comfort food that wraps you in a blanket of rich, velvety goodness. I discovered this recipe during a rainy weekend when I craved something that felt like a warm hug in a bowl. The gentle simmer of aromatic spices mingling with silky coconut milk creates an irresistible sauce that clings perfectly to tender chicken pieces. This dish strikes that magical balance between everyday simplicity and special-occasion decadence that keeps everyone coming back for seconds. Trust me, once you master this creamy coconut delight, it’ll become a regular in your dinner rotation.

    Recipe

    Why You’ll Love This Creamy Coconut Milk Chicken

    A Symphony of Flavors and Textures

    The magic of creamy coconut milk chicken lies in its perfect harmony of flavors. The natural sweetness of coconut milk creates a luxurious base that balances beautifully with aromatic spices like ginger, garlic, and curry powder. I love how the sauce thickens just enough to coat each piece of chicken without becoming heavy. When you take that first bite, you’ll experience layers of flavor unfolding—a hint of heat from chili flakes, brightness from lime juice, and that unmistakable coconut richness that makes this dish so special. It’s comfort food that feels sophisticated yet accessible.

    Quick Weeknight Wonder

    What makes creamy coconut milk chicken a true kitchen hero is how it delivers restaurant-quality results with minimal effort. On busy evenings when I’m juggling work deadlines and household tasks, I can still pull this together in about 30 minutes. The one-pan approach means less cleanup, and the ingredients are likely already in your pantry. I love that you can prep the components ahead of time—chop the onions, slice the chicken, and measure the spices in the morning, then simply toss everything together when you’re ready to cook. It’s the perfect solution for those “what’s for dinner?” moments.

    Essential Tips & Tricks

    Selecting the Right Coconut Milk

    Not all coconut milk is created equal, and choosing the right one makes all the difference in your creamy coconut milk chicken. I always reach for full-fat coconut milk in cans rather than the refrigerated drinking variety. The drinking kind simply doesn’t have enough fat content to create that luscious sauce we’re after. Look for brands without additives or stabilizers—the ingredient list should ideally just say “coconut extract and water.” For extra richness, don’t shake the can before opening; scoop out the solid cream that rises to the top and use it to start your sauce. This technique creates a velvety base similar to my Creamy Lemon Garlic Pan-Seared Scallops.

    The Perfect Chicken Technique

    The secret to tender, flavorful chicken in this dish is all in the technique. I prefer using boneless thighs for their inherent juiciness and flavor, but breasts work beautifully too if you’re careful not to overcook them. The key step many people skip: pat the chicken completely dry before seasoning and searing. This ensures you get that gorgeous golden crust that adds depth to the final dish. Don’t crowd the pan—cook in batches if necessary—and resist the urge to constantly move the pieces. Let them develop that caramelization for 3-4 minutes per side before removing. They’ll finish cooking when returned to the coconut sauce, absorbing all those amazing flavors.

    Serving Ideas & Creative Variations

    Perfect Pairings for a Complete Meal

    Creamy coconut milk chicken shines brightest when paired with the right accompaniments. My favorite way to serve it is over a bed of fragrant jasmine rice that soaks up every drop of that luscious sauce. For a lower-carb option, cauliflower rice works surprisingly well too. Don’t forget a side of vegetables—steamed broccoli, sautéed spinach, or even a simple cucumber salad provides the perfect fresh contrast. I love adding a sprinkle of fresh herbs like cilantro or Thai basil right before serving, along with a wedge of lime for guests to squeeze over their portions. For a truly impressive spread, consider serving alongside Garlic Butter Steak with Parmesan Cream Sauce for a surf and turf inspired feast.

    Global Flavor Twists

    One of the joys of creamy coconut milk chicken is how adaptable it is to different flavor profiles. For a Thai-inspired version, add a tablespoon of red curry paste and finish with fresh Thai basil and lime leaves. Looking for Indian flavors? Incorporate garam masala, turmeric, and a touch of cardamom. I recently made a Caribbean variation by adding allspice, thyme, and a splash of rum that was absolutely divine. For heat lovers, stir in sambal oelek or sriracha to taste. You can also play with add-ins like bell peppers, snow peas, or baby corn for extra texture and nutrition. The coconut base is like a blank canvas waiting for your creative touch.

    Storage & Troubleshooting Guide

    Proper Storage for Maximum Flavor

    Creamy coconut milk chicken actually improves with time as the flavors meld together, making it perfect for meal prep. Store leftovers in airtight containers in the refrigerator for up to 3 days. When reheating, do so gently over low heat to prevent the sauce from separating. Add a splash of chicken broth or coconut milk if needed to restore the creamy consistency. This dish also freezes beautifully for up to 2 months—I portion it into individual servings for quick weeknight dinners. Just thaw overnight in the refrigerator before reheating. The texture of the chicken remains tender, though you may notice the sauce becomes slightly thinner after freezing.

    Troubleshooting Common Issues

    Even experienced cooks occasionally encounter challenges with creamy coconut milk chicken. If your sauce breaks or appears curdled, don’t panic! Lower the heat immediately and whisk in a tablespoon of cornstarch slurry (cornstarch mixed with cold water). Another common issue is sauce that’s too thin—simply simmer uncovered for a few extra minutes to reduce. If it’s too thick, add coconut milk or chicken broth a tablespoon at a time until you reach your desired consistency. For bland results, brighten with lime juice, fish sauce, or a pinch of salt. And if your chicken turned out tough, next time try the velveting technique: marinate the chicken pieces in a mixture of cornstarch and egg white for 30 minutes before cooking.

    Frequently Asked Questions

    Can I use light coconut milk instead of full-fat for creamy coconut milk chicken?

    You can, but the sauce won’t be as rich. I recommend using full-fat for the best texture and flavor, or mixing light coconut milk with a tablespoon of coconut cream to enhance creaminess.

    How do I prevent the coconut sauce from curdling?

    Keep the heat medium-low after adding coconut milk and avoid boiling. Stir gently and consistently. Adding the milk gradually while stirring also helps maintain that silky texture.

    Can I make this dish vegetarian?

    Absolutely! Substitute the chicken with firm tofu, chickpeas, or hearty vegetables like cauliflower and eggplant. The creamy coconut sauce works beautifully with these alternatives.

    Is this recipe gluten-free?

    Yes, creamy coconut milk chicken is naturally gluten-free, but always check your curry paste and other pre-packaged ingredients for hidden gluten sources.

    How can I add more vegetables to this dish?

    Bell peppers, spinach, snow peas, and zucchini all work wonderfully. Add firmer vegetables with the chicken and more delicate ones during the last 3-5 minutes of cooking.

    Final Thoughts

    This creamy coconut milk chicken has become my go-to recipe when I want to impress without stress. There’s something magical about how a few simple ingredients transform into something so luxurious. I love watching friends’ and family’s faces light up with that first bite—the moment when the creamy sauce hits their palate and all conversation briefly pauses. Whether you’re cooking for a special occasion or simply treating yourself on a Tuesday night, this dish delivers comfort and elegance in equal measure. For more inspiration, check out my Pinterest board where I share new recipe ideas weekly.
  • Southern Collard Green Potato Stew Recipe That Warms Your Soul Fast

    Southern Collard Green Potato Stew Recipe That Warms Your Soul Fast

    Southern Collard Green Potato Stew Recipe That Warms Your Soul Fast

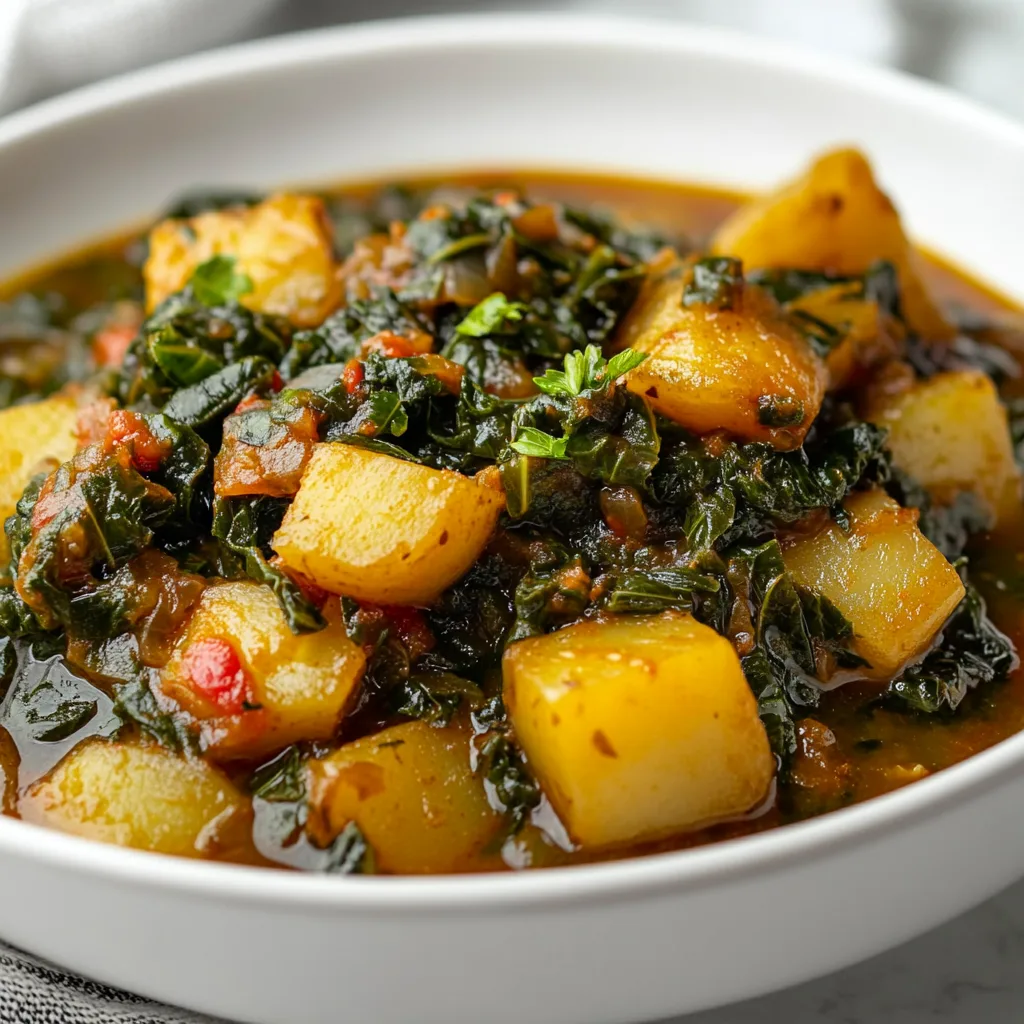
    Southern Collard Green Potato Stew is a soul-warming dish that brings together the earthy richness of collard greens with hearty potatoes in a broth that simmers with generations of Southern tradition. The first time I made this stew, the aroma filled my kitchen with memories of my grandmother’s cooking—robust, nurturing, and deeply satisfying. There’s something magical about how these humble ingredients transform into a velvety, flavor-packed meal that feels like a warm hug on a chilly evening. This nourishing one-pot wonder delivers both comfort and nutrition in every spoonful.

    Recipe

    Why You’ll Love This Southern Collard Green Potato Stew

    Perfect Balance of Flavors and Textures

    The deep earthiness of collard greens mellows beautifully as they simmer alongside creamy potatoes, creating a perfect textural contrast that makes each bite interesting. I love how the greens retain just enough bite while the potatoes become tender and begin to thicken the broth naturally. The subtle heat from red pepper flakes dances with smoky bacon notes, creating a flavor profile that’s complex without being complicated. This Southern Collard Green Potato Stew hits that sweet spot between hearty and refined—substantial enough to satisfy but with layers of flavor that keep you coming back for another spoonful.

    Nutritional Powerhouse with Southern Comfort

    This stew transforms nutrient-dense collards—packed with vitamins K, A, and C—into a crave-worthy comfort food. The bitter notes that sometimes put people off raw collards mellow dramatically during cooking, revealing their sweeter, more complex flavor profile. I’ve served this to countless “greens skeptics” who ended up requesting the recipe! The addition of potatoes provides satisfying carbohydrates while beans or ham add protein, making this Southern Collard Green Potato Stew a complete meal in one bowl. It’s soul food that actually nourishes your soul and your body—a rare combination that makes this recipe a true keeper.

    Essential Tips & Tricks

    Mastering the Collard Prep

    The key to exceptional Southern Collard Green Potato Stew starts with proper green preparation. Remove the tough stems completely—don’t just trim them—by folding each leaf in half and slicing along the stem line. Then stack several leaves, roll them tightly like a cigar, and slice into ribbons (chiffonade). This technique prevents those awkward long strands that are difficult to eat. For the most flavor development, sauté your aromatics until truly fragrant before adding the collards, and don’t rush the wilting stage. Those few extra minutes of careful preparation elevate this stew from good to memorably delicious, much like the care taken in this Crockpot Black-Eyed Peas and Collard Greens.

    Building Layers of Flavor

    The foundational flavor of authentic Southern Collard Green Potato Stew comes from a proper sofrito base—onions, celery, and bell peppers sautéed until they release their aromatic oils. For maximum depth, deglaze your pot with a splash of apple cider vinegar after sautéing your vegetables—this lifts all those caramelized bits from the bottom of the pot and adds a subtle tang that balances the richness. Don’t skip the bay leaf and thyme, which infuse the broth with earthy notes as it simmers. For vegetarians, smoked paprika and a dash of liquid smoke can replicate that traditional hamhock flavor without the meat.

    Serving Ideas & Creative Variations

    Perfect Pairings for a Complete Meal

    Serve this Southern Collard Green Potato Stew with a slice of warm cornbread for the ultimate Southern comfort meal. The slightly sweet, crumbly texture creates the perfect contrast to the savory stew. For a lighter option, a simple side salad with a vinaigrette dressing provides refreshing balance. This stew also pairs beautifully with crusty sourdough bread for sopping up every last drop of the flavorful broth. For special occasions, I serve smaller portions as a starter before a main course of Baked Cajun Salmon with Creamy Avocado Lime Sauce for a Southern-inspired feast that always impresses guests.

    Regional and Seasonal Adaptations

    Transform this classic into a coastal variation by adding shrimp during the final 5 minutes of cooking—the seafood and collards combination is a Lowcountry tradition that’s absolutely divine. For a summer version, stir in fresh corn kernels and diced tomatoes from the garden. In fall, substitute sweet potatoes for white potatoes and add a pinch of nutmeg. For a heartier winter version, incorporate smoked sausage and white beans to create a more substantial stew. These seasonal adaptations keep this Southern Collard Green Potato Stew in my regular rotation year-round, each version bringing its own special character to the table.

    Storage & Troubleshooting Guide

    Proper Storage for Maximum Flavor

    Like many soups and stews, Southern Collard Green Potato Stew actually improves overnight as the flavors meld together in the refrigerator. Store cooled stew in airtight containers for up to 4 days. For freezing, slightly undercook the potatoes, as they’ll soften more upon reheating. Portion into freezer-safe containers, leaving an inch of headspace for expansion, and freeze for up to 3 months. When reheating, add a splash of broth if the stew seems too thick. I often make a double batch specifically to freeze—having this soul-warming meal ready to go on busy weeknights feels like a gift to my future self.

    Fixing Common Issues

    If your Southern Collard Green Potato Stew tastes too bitter, add a teaspoon of brown sugar or a splash of cream to balance the flavors. For a too-thin stew, mash some of the potatoes against the side of the pot to naturally thicken the broth without adding flour. If it’s too thick, simply add more broth or water. Should you find the flavor lacking depth, a splash of Worcestershire sauce or a parmesan rind simmered in the broth works wonders. Remember that collards can vary in bitterness depending on their age and growing conditions, so taste as you go and adjust seasonings accordingly.

    Frequently Asked Questions

    Can I use frozen collard greens for Southern Collard Green Potato Stew?

    Yes! Frozen collards work well and save prep time. No need to thaw—add them directly to the pot, but reduce cooking time by about 10 minutes since they’re partially cooked before freezing.

    How do I reduce the bitterness in collard greens?

    Add a teaspoon of sugar or a splash of apple cider vinegar to balance bitterness. Proper cooking time is crucial—fully cooked collards have a much milder flavor than undercooked ones.

    Can I make this stew vegetarian?

    Absolutely! Skip the bacon/ham and use vegetable broth. Add smoked paprika and a dash of liquid smoke for that traditional smoky flavor, plus extra olive oil for richness.

    What makes Southern Collard Green Potato Stew different from regular vegetable soup?

    The slow cooking method, specific seasonings, and traditional Southern ingredients like collards create a unique, silky texture and depth of flavor that distinguishes it from ordinary vegetable soups.

    How can I make this stew in a slow cooker?

    Brown aromatics and meat on the stovetop first, then transfer everything to a slow cooker. Cook on low for 6-7 hours or high for 3-4 hours until potatoes are tender.

    Final Thoughts

    Southern Collard Green Potato Stew embodies the heart of comfort food—simple ingredients transformed through time and care into something extraordinary. This dish has carried me through countless cold evenings, family gatherings, and quiet Sundays at home. There’s a reason these traditional recipes endure through generations; they speak a universal language of nourishment and love. I hope this stew brings the same warmth to your table that it has to mine. For more Southern-inspired recipes, visit our Pinterest collection where comfort meets tradition in every bite.

  • Baked Cajun Salmon with Creamy Avocado Lime Sauce – Irresistibly Delicious!

    Baked Cajun Salmon with Creamy Avocado Lime Sauce – Irresistibly Delicious!

    Baked Cajun Salmon with Creamy Avocado Lime Sauce – Irresistibly Delicious!

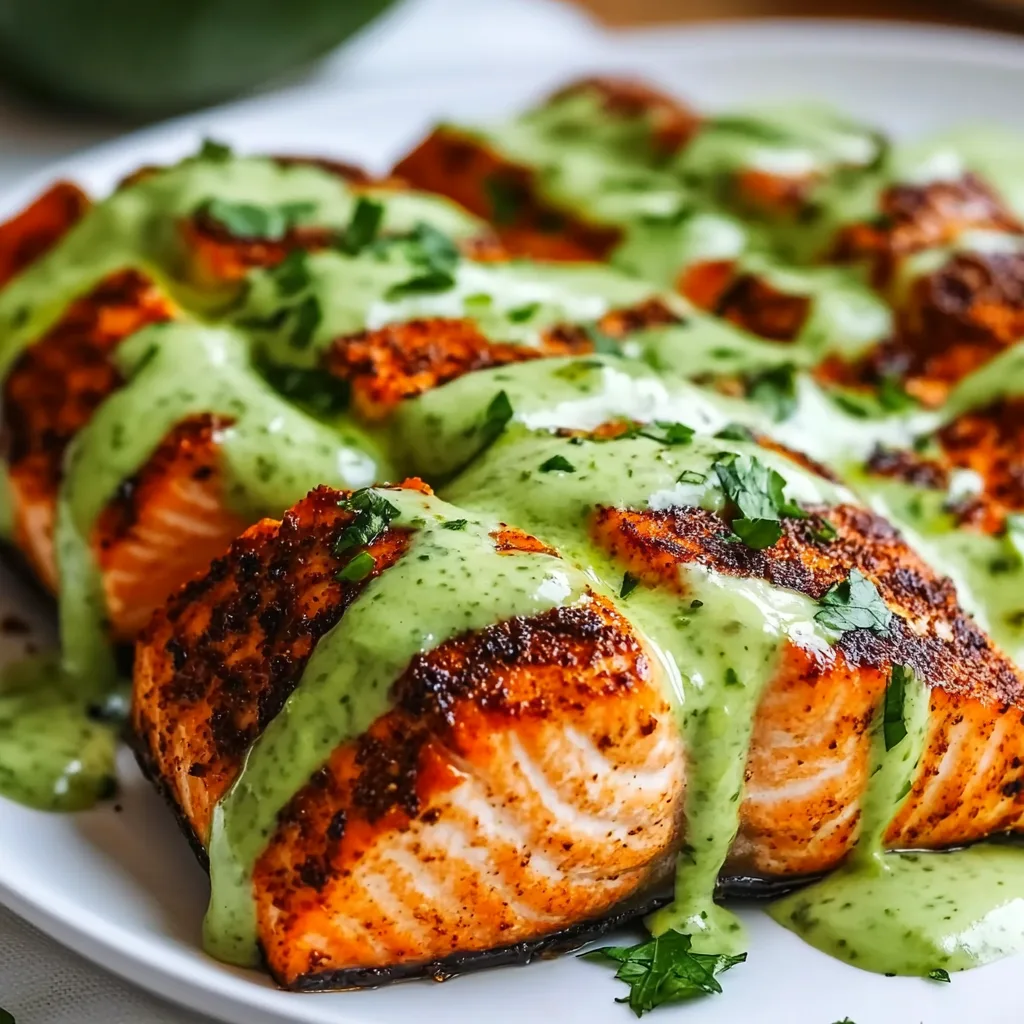
    There’s something magical about the way Baked Cajun Salmon with Creamy Avocado Lime Sauce transforms an ordinary weeknight into something special. The first time I made this dish, my kitchen filled with the aromatic blend of Cajun spices that instantly transported me to New Orleans. The contrast between the spicy, perfectly flaky salmon and the cool, creamy avocado sauce creates a symphony of flavors that dance across your palate. I’ve always believed that the best recipes balance bold flavors with creamy textures, and this one delivers that perfect harmony while being surprisingly simple to prepare. If you’re looking for a dinner that feels fancy but comes together quickly, this recipe from my collection is about to become your new favorite.

    Recipe

    Why You’ll Love This Baked Cajun Salmon with Creamy Avocado Lime Sauce

    Perfect Balance of Flavors

    The beauty of this Baked Cajun Salmon with Creamy Avocado Lime Sauce lies in its perfect flavor balance. The Cajun seasoning creates a spicy, smoky crust on the salmon that’s absolutely irresistible. I love how the heat builds gradually with each bite, warming your taste buds without overwhelming them. Meanwhile, the avocado lime sauce provides a cooling counterpoint that’s rich, tangy, and utterly refreshing. The creamy texture of the sauce complements the flaky salmon perfectly, creating that magical moment when you close your eyes and just savor the bite. It’s comfort food with a sophisticated edge.

    Quick and Nutritious Weeknight Wonder

    This dish has saved me on countless busy evenings when I wanted something nutritious but didn’t have hours to spend in the kitchen. The salmon takes just 12-15 minutes to bake while you whip up the avocado lime sauce in your blender. It’s packed with omega-3 fatty acids from the salmon, healthy fats from the avocado, and plenty of protein to keep you satisfied. I’ve found it’s one of those rare recipes that feels indulgent while actually being good for you. Even my friends who claim they “don’t like fish” have been converted after trying this dish!

    Essential Tips & Tricks

    Selecting and Preparing Your Salmon

    Choosing the right salmon makes all the difference in this Baked Cajun Salmon recipe. Look for fillets that are bright in color with firm flesh and no strong fishy odor. I prefer wild-caught salmon when possible, but good-quality farmed salmon works beautifully too. Before applying the Cajun seasoning, make sure to pat your salmon completely dry with paper towels – this ensures you’ll get that perfect spice crust rather than a steamed effect. For even cooking, try to select fillets of similar thickness, or ask your fishmonger to cut them that way. This simple preparation step is similar to what I do with my Baked Boursin Salmon for consistently perfect results.

    Perfecting Your Cajun Seasoning Blend

    While store-bought Cajun seasoning works in a pinch, I love making my own blend for this Baked Cajun Salmon with Creamy Avocado Lime Sauce. The perfect mix includes paprika, cayenne, garlic powder, onion powder, oregano, thyme, and a touch of brown sugar to balance the heat. The key is adjusting the cayenne to your heat preference – start with less if you’re sensitive to spice. When applying the seasoning, press it gently into the salmon to help it adhere. For maximum flavor, let the seasoned salmon rest for 10-15 minutes before baking, allowing the spices to penetrate the flesh and create that signature Cajun depth.

    Serving Ideas & Creative Variations

    Perfect Pairings for Your Cajun Salmon

    This Baked Cajun Salmon with Creamy Avocado Lime Sauce pairs beautifully with so many sides. My go-to combination is fluffy cilantro-lime rice and roasted asparagus, which complement the flavors without competing with them. For a lighter option, serve it over a bed of mixed greens with cherry tomatoes and cucumber for a refreshing contrast to the spicy salmon. If you’re entertaining, consider serving it alongside my Air Fryer Salmon Tacos with Slaw for a seafood-themed dinner party that will impress your guests. The versatility of this dish means it works equally well for casual family dinners or more formal occasions.

    Exciting Flavor Variations to Try

    While the classic version is divine, this recipe welcomes creative adaptations. For a tropical twist, add mango chunks to the avocado sauce for a sweet-spicy combination that’s absolutely mouthwatering. You can also experiment with the seasoning – try a blackened spice mix or even a honey-chipotle glaze for different flavor profiles. For the sauce, swapping cilantro for basil or adding roasted garlic creates entirely new dimensions. My favorite variation includes a sprinkle of toasted pepitas on top for added crunch. These simple tweaks let you enjoy the same basic recipe in countless delicious ways.

    Storage & Troubleshooting Guide

    Proper Storage and Reheating

    Storing your Baked Cajun Salmon with Creamy Avocado Lime Sauce properly ensures you can enjoy leftovers without sacrificing quality. Store the salmon and sauce separately in airtight containers in the refrigerator. The salmon will keep for up to 3 days, while the avocado sauce is best used within 24 hours (a squeeze of extra lime juice helps prevent browning). When reheating the salmon, do so gently – microwave at 50% power in short bursts or warm in a 275°F oven until just heated through. This prevents the salmon from drying out and becoming tough. I recommend bringing the sauce to room temperature rather than heating it.

    Common Issues and Easy Fixes

    If your salmon turns out too dry, it’s likely been overcooked. Remember that salmon continues cooking slightly after removing from the oven, so take it out when it reaches 135°F internal temperature. For sauce that’s too thick, simply thin it with a splash of water or extra lime juice. If the Cajun seasoning creates too much heat, increase the amount of avocado sauce or add a dollop of Greek yogurt to temper the spice. And if your sauce oxidizes and turns brown, don’t worry about the appearance – the flavor remains delicious, or you can quickly blend in more fresh avocado to revive its vibrant color.

    Frequently Asked Questions

    Can I make this Baked Cajun Salmon with Creamy Avocado Lime Sauce ahead of time?

    Yes! Season the salmon up to 8 hours ahead and refrigerate. Make the avocado sauce up to 4 hours ahead with extra lime juice to prevent browning. Bake the salmon just before serving for best results.

    What’s the best way to tell when salmon is perfectly cooked?

    Look for salmon that flakes easily with a fork but still has a slightly translucent center. For medium doneness, aim for an internal temperature of 125-130°F, which will rise to 135°F while resting.

    Can I use frozen salmon for this recipe?

    Absolutely! Thaw completely in the refrigerator overnight, then pat very dry before seasoning. You might need to increase the baking time by 2-3 minutes depending on the thickness.

    What can I substitute for avocado if I have an allergy?

    Try a sauce made with Greek yogurt, lime juice, herbs, and a touch of olive oil. You’ll still get the creamy texture and tangy flavor that complements the Cajun spices beautifully.

    How spicy is this Baked Cajun Salmon with Creamy Avocado Lime Sauce?

    The spice level is adjustable! Use less cayenne in your Cajun seasoning for a milder dish, or add a sprinkle of red pepper flakes on top for extra heat. The avocado sauce helps balance the spiciness.

    Final Thoughts

    This Baked Cajun Salmon with Creamy Avocado Lime Sauce has become my reliable go-to when I want to impress without stress. There’s something special about the way the spicy Cajun crust contrasts with the cool, creamy avocado that makes every bite feel like a little celebration. I hope this recipe brings the same joy to your kitchen that it has to mine. Don’t forget to check out more of my seafood inspirations on Pinterest and share your own creations with me! This dish proves that extraordinary flavors don’t require extraordinary effort – just quality ingredients and a little culinary creativity.

  • Smoky Black Eyed Pea Soup Recipe That Warms Your Soul

    Smoky Black Eyed Pea Soup Recipe That Warms Your Soul

    Smoky Black Eyed Pea Soup Recipe That Warms Your Soul

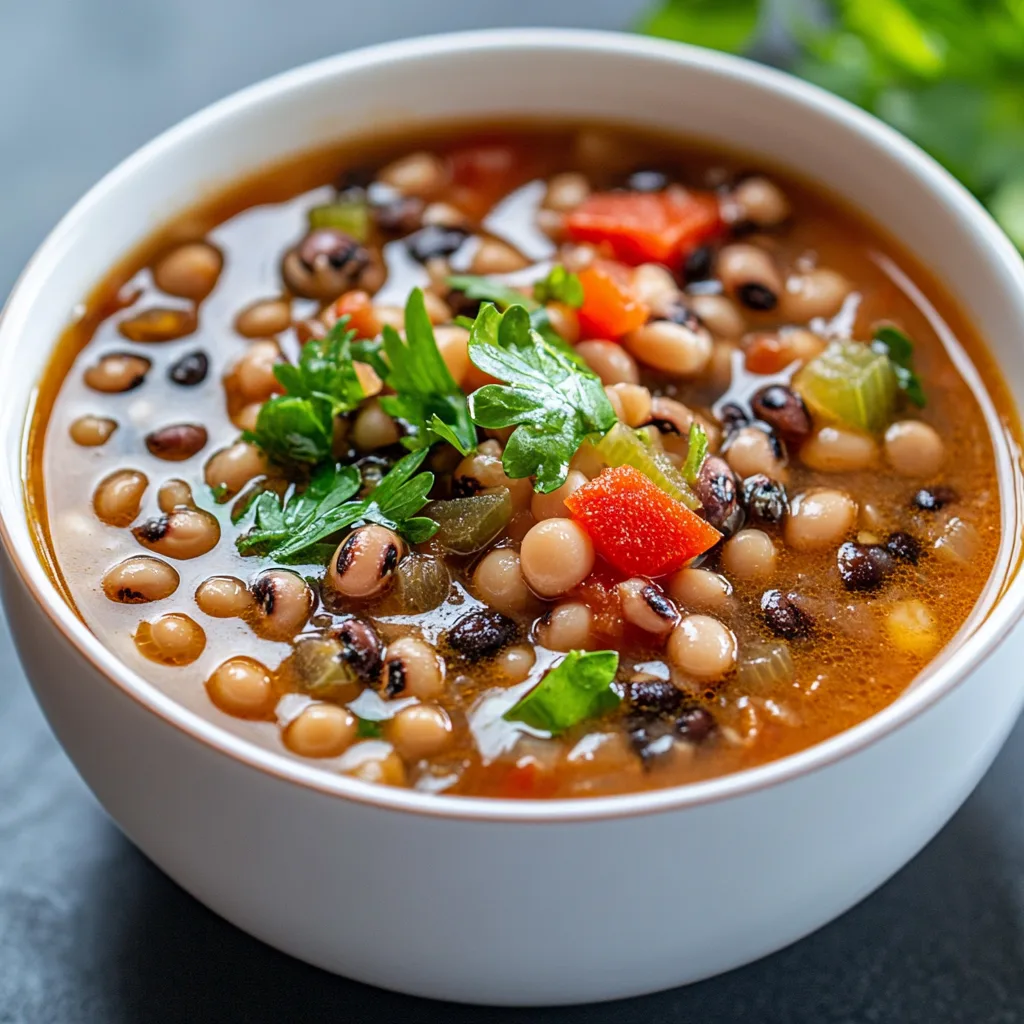
    Smoky Smoky Black Eyed Pea Soup has become my winter ritual, a pot of pure comfort that fills my kitchen with the most intoxicating aroma. There’s something magical about the way the smokiness wraps around each tender black-eyed pea, creating a bowl that’s both humble and extraordinary. I discovered this recipe during a particularly cold January when I needed something that felt like a warm hug. The depth of flavor from the smoked paprika and optional ham hock transforms these modest legumes into something that tastes like it’s been simmering for generations. This hearty soup is perfect for New Year’s traditions or any day you need soulful nourishment.

    Recipe

    Why You’ll Love This Smoky Smoky Black Eyed Pea Soup

    Rich Depth of Flavor

    The magic of this Smoky Smoky Black Eyed Pea Soup lies in its incredible depth. Each spoonful delivers layers of flavor that unfold gradually—first the earthiness of the peas, then the aromatic vegetables, and finally that distinctive smokiness that lingers pleasantly. I love adding a ham hock or smoked turkey wing for extra richness, but vegetarians can rely on smoked paprika and a dash of liquid smoke for that same captivating quality. The long, slow simmer allows every ingredient to meld together, creating a soup that tastes like it’s been perfected over generations, though it requires minimal hands-on effort from you.

    Nourishing and Satisfying

    This Smoky Smoky Black Eyed Pea Soup isn’t just delicious—it’s genuinely nourishing. Black-eyed peas pack impressive protein and fiber, making this soup incredibly filling and satisfying. On chilly evenings when I need something substantial, this soup delivers comfort without heaviness. The combination of complex carbohydrates and protein creates a balanced meal that sustains energy levels for hours. I love how versatile it is too—hearty enough to stand alone as a main dish but equally perfect alongside cornbread or a simple salad. For busy weeknights or meal prep, this soup is my dependable go-to.

    Essential Tips & Tricks

    Perfect Preparation Methods

    The foundation of exceptional Smoky Smoky Black Eyed Pea Soup begins with properly preparing the peas. While many recipes call for overnight soaking, I’ve found a quick-soak method that works beautifully when time is short: simply boil the peas for 2 minutes, then let them sit covered for an hour. This achieves nearly the same tenderness as overnight soaking. For deeper flavor, sauté your aromatics (onion, celery, garlic) until they’re genuinely caramelized—those browned bits are pure gold for flavor development. Don’t rush this step! The patience pays off in a soup with remarkable depth that will have everyone asking for your secret recipe.

    Flavor-Building Techniques

    The signature element of Smoky Smoky Black Eyed Pea Soup is, of course, the smokiness. I layer this quality using multiple ingredients: smoked paprika, bay leaves, and either a ham hock, smoked turkey wing, or bacon. For vegetarians, a combination of smoked paprika and a few drops of liquid smoke creates remarkable depth. Another game-changer is adding a Parmesan rind to the simmering soup—it slowly melts, infusing everything with umami richness. A splash of apple cider vinegar right at the end brightens all the flavors without tasting vinegary. These little touches transform a simple soup into something that tastes like it came from a heritage recipe.

    Serving Ideas & Creative Variations

    Perfect Pairings

    Smoky Smoky Black Eyed Pea Soup shines brightest with thoughtful accompaniments. My absolute favorite pairing is a wedge of warm golden cornbread with honey butter—the sweet-savory contrast is simply magical. For a complete meal, I’ll often serve it with a tangy vinegar-based coleslaw that cuts through the richness. A simple green salad with a bright citrus dressing works beautifully too. For entertaining, I set up a toppings bar with fresh herbs, diced avocado, crispy bacon bits, and hot sauce. Each guest can customize their bowl, making it an interactive experience. Don’t forget crusty sourdough for dipping—there’s something deeply satisfying about sopping up those last flavorful spoonfuls.

    Exciting Variations

    The beauty of Smoky Smoky Black Eyed Pea Soup lies in its adaptability. My Southwestern variation adds roasted poblanos, corn, and a finish of lime juice and cilantro—it’s spectacular topped with crispy tortilla strips. For a Mediterranean twist, I incorporate kale, rosemary, and finish with a swirl of good olive oil and crumbled feta. Adding collard greens creates a traditional Southern one-pot meal that’s both practical and delicious. For heartier appetites, stir in smoked sausage like kielbasa or andouille during the last 15 minutes of cooking. Each variation maintains the soul of the original while offering a fresh experience.

    Storage & Troubleshooting Guide

    Proper Storage Methods

    Smoky Smoky Black Eyed Pea Soup actually improves with time, making it perfect for meal prepping. Once completely cooled, store it in airtight containers in the refrigerator for up to 5 days. The flavors will continue to develop, creating an even more delicious soup on day two or three. For longer storage, freeze portions in freezer-safe containers or heavy-duty freezer bags for up to 3 months. I like to freeze in individual portions for quick lunches. When reheating, add a splash of broth or water as the soup thickens considerably after refrigeration. Gentle reheating on the stovetop preserves the texture of the peas better than microwaving.

    Common Issues & Solutions

    If your Smoky Smoky Black Eyed Pea Soup seems too watery, there’s a simple fix: remove about a cup of soup, blend it until smooth, then stir it back in. This natural thickening technique maintains the integrity of the dish without adding flour or cornstarch. For peas that remain firm despite long cooking, it usually means they’re older—adding ¼ teaspoon of baking soda to the cooking liquid helps soften stubborn peas. If the smokiness is too subtle, try adding a dash of smoked paprika at the end of cooking rather than just at the beginning. For a soup that lacks depth, a splash of soy sauce or Worcestershire sauce adds umami without changing the flavor profile.

    Frequently Asked Questions

    Do I need to soak the black-eyed peas before making Smoky Smoky Black Eyed Pea Soup?

    While soaking isn’t absolutely necessary, it reduces cooking time by about 30 minutes and helps the peas cook more evenly. If you forget, just extend the simmering time and add a bit more liquid as needed.

    Can I make this soup vegetarian?

    Absolutely! Skip the ham hock and use vegetable broth instead of chicken broth. The smokiness comes primarily from smoked paprika, so you’ll still get that signature flavor without meat.

    How can I make this soup thicker?

    For a thicker consistency, mash some of the peas against the side of the pot during cooking or blend about a cup of the soup and stir it back in. You can also simmer uncovered for the last 15-20 minutes.

    What’s the best way to reheat leftovers?

    Gently reheat on the stovetop over medium-low heat, adding a splash of broth if it’s too thick. Microwave works too, but stir halfway through to ensure even heating.

    Can I make this soup in a slow cooker?

    Yes! Cook on low for 7-8 hours or high for 4-5 hours. Add any greens during the last 30 minutes of cooking time to preserve their color and texture.

    Final Thoughts

    This Smoky Smoky Black Eyed Pea Soup has become more than just a recipe in my kitchen—it’s a tradition, a comfort, and a reminder of how simple ingredients can transform into something extraordinary. There’s something deeply satisfying about watching humble peas and aromatics slowly become a rich, complex soup that nourishes body and soul. Whether you’re serving it for good luck on New Year’s Day or just craving something warming on a cold evening, this soup delivers on all fronts. I hope it brings as much joy to your table as it has to mine. Don’t forget to check out more cozy recipes on Pinterest for year-round comfort food inspiration.

  • Rosca de Reyes: Celebrate Tradition with Sweet Joy & Surprise!

    Rosca de Reyes: Celebrate Tradition with Sweet Joy & Surprise!

    Rosca de Reyes: Celebrate Tradition with Sweet Joy & Surprise!

    Rosca de Reyes brings the magic of Epiphany to your kitchen with its crown-like shape and vibrant candied fruits that glitter like jewels across the top. This traditional sweet bread celebrates the arrival of the Three Kings and has been part of my family’s January 6th celebration for as long as I can remember. The moment that warm, aromatic bread comes out of the oven, my home fills with the scent of orange blossom and anise that instantly transports me back to childhood gatherings around my abuela’s table. If you’re looking for a meaningful holiday treat that’s as beautiful as it is delicious, this Rosca de Reyes recipe is your perfect winter baking project.

    Recipe

    Why You’ll Love This Rosca de Reyes

    A Bread Steeped in Tradition

    The Rosca de Reyes (Kings’ Ring) isn’t just delicious—it’s a cultural centerpiece with deep meaning. The oval shape represents a crown, while the colorful candied fruits symbolize the jewels adorning it. Hidden inside is a small baby figurine representing baby Jesus, and whoever finds it in their slice hosts the next gathering! I love how this bread connects generations through shared tradition. My grandmother would always let me help arrange the candied fruits when I was little, carefully placing each “jewel” just so. The bread’s subtle hints of orange and anise create an aroma that’s unmistakably festive.

    Perfect Balance of Flavors and Textures

    What makes Rosca de Reyes truly special is its perfect texture—soft and pillowy inside with a slightly crisp, golden exterior. The dough has a delicate sweetness enhanced by orange zest and a whisper of anise that doesn’t overwhelm. I’ve perfected this recipe through many January baking sessions, finding that balance between rich and light. The contrast between the tender bread and chewy candied fruits creates an irresistible bite every time. When you tear into a warm slice, the steam carries that intoxicating aroma that makes waiting until the bread cools completely nearly impossible!

    Essential Tips & Tricks

    Mastering the Dough

    The heart of a perfect Rosca de Reyes lies in its properly proofed dough. I’ve found that patience truly pays off here—allow at least 1-2 hours for the first rise in a warm spot until doubled in size. The texture should be soft and slightly tacky but not sticky. When kneading, look for that magical moment when the dough becomes smooth and elastic, pulling away from the bowl cleanly. I like to add the orange zest directly to the sugar before mixing, which releases the essential oils and infuses the entire dough with that bright citrus flavor that makes this holiday bread so special.

    Decorating for Maximum Impact

    The decoration is where your Rosca de Reyes truly becomes a showstopping centerpiece. Traditional toppings include strips of candied citrus, cherries, and figs, but I’ve found that dried apricots and cranberries work beautifully too. Arrange your fruits in a pattern before the second rise, gently pressing them into the dough. For that professional bakery shine, brush with egg wash twice—once before adding decorations and again just before baking. The sugar paste strips should be placed in a crisscross pattern between fruits. Don’t forget to insert the plastic baby figurine from the bottom after baking to avoid melting!

    Serving Ideas & Creative Variations

    Traditional Pairings

    Rosca de Reyes is traditionally enjoyed with hot chocolate, creating a perfect sweet-on-sweet pairing that warms you from the inside out. In my family, we make Mexican-style chocolate with cinnamon and a touch of chili for a gentle heat that complements the bread’s subtle spices. Serve slices while still slightly warm, allowing the butter to melt ever so slightly when spread on top. For a more substantial offering, I sometimes pair it with savory dishes like a simple egg frittata, creating a beautiful contrast of flavors that makes for a memorable Epiphany breakfast or brunch gathering.

    Modern Twists on Tradition

    While I respect tradition, I also love creating personal variations on classic Rosca de Reyes. Try filling the dough with cream cheese or chocolate-hazelnut spread before shaping for a delightful surprise inside. For a fragrant twist, add cardamom or star anise to the dough. I’ve experimented with a citrus glaze drizzled over the cooled bread, which adds a tangy brightness that balances the sweetness perfectly. Another favorite adaptation is adding orange blossom water to the dough for an intensified floral aroma. These small personalized touches honor the tradition while making it uniquely yours.

    Storage & Troubleshooting Guide

    Keeping Your Rosca Fresh

    To maintain your Rosca de Reyes at its best, proper storage is essential. When completely cooled, wrap it tightly in plastic wrap or store in an airtight container at room temperature for up to 3 days. The bread tends to dry out quickly, so if you won’t finish it within that time, slice and freeze portions in freezer bags for up to 3 months. To revive day-old bread, sprinkle with a few drops of water and warm in a 300°F oven for 5-10 minutes. This brings back that fresh-baked texture and reawakens the aromatic spices, making it almost as good as the first day.

    Common Issues and Solutions

    Even experienced bakers encounter challenges with Rosca de Reyes. If your dough isn’t rising properly, check that your yeast is fresh and your environment is warm enough. For a dense, heavy bread, you likely overworked the dough or added too much flour—remember that a slightly tacky dough produces the lightest texture. If your decorations fall off during baking, they weren’t pressed firmly enough into the dough before the second rise. For a bread that cracks during baking, you need deeper scoring before it goes in the oven. Don’t worry about small imperfections—they add character to your homemade creation!

    Frequently Asked Questions

    What is the significance of the baby figurine in Rosca de Reyes?

    The baby figurine represents baby Jesus in hiding from King Herod. Whoever finds it in their slice becomes the “godparent” who hosts the next celebration (Día de la Candelaria) on February 2nd with tamales and hot chocolate.

    Can I make Rosca de Reyes ahead of time?

    Yes! Prepare the dough through shaping, then refrigerate overnight for a slow rise. Bring to room temperature for 30 minutes before decorating and baking. The slow fermentation actually improves flavor.

    What if I don’t have candied fruit for my Rosca de Reyes?

    Substitute with dried fruits like apricots, cranberries, or figs. You can also use nuts, citrus zest strips, or even colorful sugar for decoration. The important element is creating a festive, crown-like appearance.

    How do I know when my Rosca is fully baked?

    A properly baked Rosca de Reyes should be golden brown with an internal temperature of 190°F. When tapped on the bottom, it should sound hollow. If browning too quickly, tent with foil.

    Can I make a gluten-free version?

    Absolutely! Use a high-quality gluten-free flour blend with xanthan gum. The texture will be slightly different, but adding an extra egg helps with binding and moisture retention.

    Final Thoughts

    Creating a Rosca de Reyes is more than baking—it’s participating in a centuries-old tradition that brings people together. The process of kneading, shaping, and decorating this special bread becomes a meditation on connection and celebration. Each time I bake one, I feel the presence of generations before me in the kitchen. Whether you’re making your first Rosca or your fifteenth, remember that the true magic happens when you share it with others. For more seasonal recipes that bring warmth to winter gatherings, visit our Pinterest collection of holiday favorites.

  • Black Eyed Pea Salad Recipe That Will Wow Your Taste Buds!

    Black Eyed Pea Salad Recipe That Will Wow Your Taste Buds!

    Black Eyed Pea Salad Recipe That Will Wow Your Taste Buds!

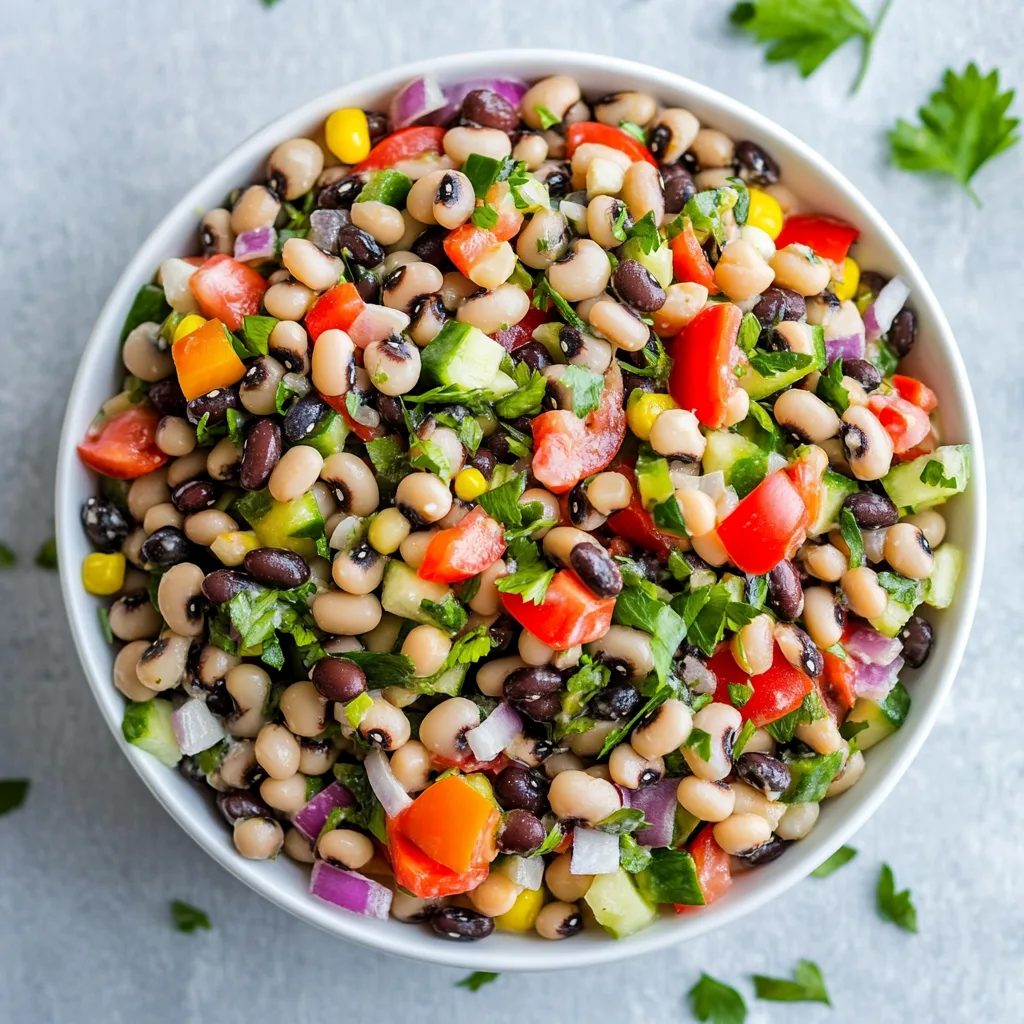
    Black Eyed Pea Salad has been my summer potluck secret weapon for years! There’s something magical about the combination of tender black-eyed peas, crunchy vegetables, and that zingy dressing that makes everyone ask for the recipe. I first discovered this gem at my aunt’s farmhouse gathering, where it sat humbly among fancier dishes yet disappeared first. The beauty of this salad is its versatility – serve it chilled on scorching days or at room temperature when the evening cools. If you’re looking for more crowd-pleasing sides, my Crockpot Black Eyed Peas and Collard Greens is another favorite that pairs beautifully with this salad.

    Recipe

    Why You’ll Love This Black Eyed Pea Salad

    Perfect Make-Ahead Solution

    This Black Eyed Pea Salad is the answer to your busy schedule prayers! I make mine the night before big gatherings, and the flavors actually improve as they mingle in the refrigerator. The peas soak up all that delicious dressing, becoming more flavorful by the hour. For meal prep enthusiasts, this is a dream come true – portion it into containers for quick lunches all week long. I’ve brought this to countless office potlucks, and it’s always a hit because it travels beautifully and doesn’t wilt like leafy salads.

    Nutritional Powerhouse

    Don’t let the delicious taste fool you – this Black Eyed Pea Salad packs serious nutritional benefits! Black-eyed peas are loaded with protein and fiber, making this salad surprisingly filling. I love how it keeps me satisfied through afternoon meetings without that heavy, sleepy feeling. The colorful bell peppers add vitamin C, while the red onions contribute antioxidants. It’s a complete meal in itself or a nutritious side dish. My sister-in-law, who’s a nutritionist, always comments on how this salad checks all the boxes for a balanced dish.

    Essential Tips & Tricks

    Perfecting Your Peas

    The foundation of an exceptional Black Eyed Pea Salad lies in properly prepared peas. I’ve learned through trial and error that canned peas work perfectly when you’re short on time – just rinse thoroughly to remove excess sodium. For the best flavor, however, I recommend cooking dried peas until they’re tender but still hold their shape. The key is to avoid overcooking, which creates a mushy texture. A splash of apple cider vinegar in the cooking water enhances their flavor and helps them maintain their firmness.

    Balancing Your Flavors

    The magic of this Black Eyed Pea Salad happens in the dressing! I always create a perfect balance between acidity, sweetness, and spice. My secret weapon is using both lemon juice and apple cider vinegar for complex acidity. A touch of honey or maple syrup counters the tanginess, while a pinch of cayenne adds subtle heat. Don’t rush this step – let the dressing sit for 5 minutes before tossing with the salad. For more dressing inspiration, check out my Apple Cider Chicken with Crisp Autumn Slaw which uses a similar flavor profile.

    Serving Ideas & Creative Variations

    Perfect Pairings

    This Black Eyed Pea Salad shines as both a side and a main dish! I love serving it alongside grilled proteins like chicken or fish for a complete meal. The tangy flavors complement smoky grilled foods beautifully. For potlucks, I place it next to heartier dishes like cornbread or Kielbasa and Sauerkraut for a delightful contrast of textures and flavors. During summer, I’ve found it’s particularly refreshing when paired with watermelon slices – something about the sweet juiciness alongside the savory salad creates magic on your palate.

    Seasonal Adaptations

    One reason I return to Black Eyed Pea Salad year-round is how easily it adapts to each season! In summer, I load it with fresh corn and juicy cherry tomatoes straight from my garden. Fall calls for diced apples and roasted sweet potatoes. Winter versions get heartier with roasted butternut squash and dried cranberries. Spring brings tender asparagus tips and fresh herbs. The base remains the same, but these seasonal switches keep the salad exciting. My family has come to expect a different version at each gathering, and guessing the variation has become a fun tradition.

    Storage & Troubleshooting Guide

    Keeping It Fresh

    Your Black Eyed Pea Salad will stay delicious for up to five days when stored properly in an airtight container in the refrigerator. I recommend giving it a good stir before serving leftovers to redistribute the dressing. If you’re planning to make it significantly ahead of time, consider keeping delicate ingredients like avocado separate until serving day. For meal prep, I store the dressing separately and combine just before eating to maintain the perfect texture. The peas actually improve with time as they absorb the flavors!

    Rescuing Common Issues

    Even experienced cooks encounter challenges with Black Eyed Pea Salad! If your salad seems too dry after refrigeration, simply add a splash of olive oil and a squeeze of fresh lemon juice to revive it. For salads that turned out too tangy, balance with a drizzle of honey or a sprinkle of finely diced sweet bell pepper. If the peas are undercooked and too firm, place the salad in a microwave-safe bowl and heat for 30 seconds – this gentle warming will soften them without cooking the fresh ingredients.

    Frequently Asked Questions

    Can I use frozen black-eyed peas for this salad?

    Absolutely! Frozen black-eyed peas work wonderfully. Thaw and cook according to package directions, then cool completely before adding to your salad. They often have better texture than canned varieties.

    How far in advance can I make Black Eyed Pea Salad?

    This salad can be prepared up to 2 days ahead. The flavors actually improve as they meld together, making it perfect for meal prep or entertaining.

    Is this recipe gluten-free?

    Yes, this Black Eyed Pea Salad is naturally gluten-free, making it perfect for guests with dietary restrictions. Just double-check any pre-made dressing ingredients if you’re not making it from scratch.

    Can I turn this into a main dish?

    Definitely! Add grilled chicken, shrimp, or feta cheese to transform it into a hearty main. I sometimes add quinoa for an extra protein boost when serving it as a complete meal.

    What’s the best way to serve this at a potluck?

    Transport the salad in a chilled container. I recommend bringing extra dressing on the side to refresh the salad just before serving, especially if it will sit out for several hours.

    Final Thoughts

    This Black Eyed Pea Salad has become more than just a recipe in my household – it’s a tradition that marks gatherings and creates memories. I love watching first-timers take a hesitant spoonful, only to return for seconds with enthusiasm! The beauty of this dish lies in its simplicity and adaptability. Whether you’re a seasoned cook or kitchen newbie, this salad welcomes your personal touch. I hope it brings as much joy to your table as it has to mine. Don’t forget to check out more recipes on Pinterest for inspiration!

  • Kielbasa and Sauerkraut: Irresistible Flavor Boost That WOWs!

    Kielbasa and Sauerkraut: Irresistible Flavor Boost That WOWs!

    Kielbasa and Sauerkraut: Irresistible Flavor Boost That WOWs!

    Kielbasa and sauerkraut is a classic comfort dish that brings together smoky sausage and tangy fermented cabbage in perfect harmony. Every time I make this hearty meal, I’m transported back to my grandmother’s kitchen, where the aromatic blend of caraway and savory kielbasa would fill the air on chilly evenings. The beauty of this dish lies in its simplicity—just a handful of ingredients that transform into something truly magical when they meld together. It’s one of those recipes that feels like a warm hug on a plate, especially when served alongside some creamy mashed potatoes.

    Recipe

    Why You’ll Love This Kielbasa and Sauerkraut

    Perfect Balance of Flavors

    There’s something utterly satisfying about the way the smoky kielbasa complements the tangy sauerkraut in this dish. The sausage releases its rich, garlicky flavors as it cooks, while the sauerkraut softens and mellows, creating a perfect balance that dances on your taste buds. I always add a touch of brown sugar to mine, which helps tame the sauerkraut’s acidity while adding a subtle sweetness that brings everything together. When those flavors meld together in the pot, the aroma is absolutely intoxicating—earthy, tangy, and deeply savory all at once.

    One-Pot Simplicity

    One of the greatest joys of making kielbasa and sauerkraut is how effortlessly it comes together in just one pot. On busy weeknights when I’m juggling work deadlines and family needs, I can still get this hearty meal on the table with minimal effort. Simply brown the kielbasa, add the sauerkraut and seasonings, and let everything simmer together until the flavors meld perfectly. The cleanup is just as easy as the cooking! This dish also reheats beautifully, making it perfect for meal prep or when you need something reliable that the whole family will devour without complaint.

    Essential Tips & Tricks

    Selecting the Best Ingredients

    Starting with high-quality kielbasa makes all the difference in this dish. I prefer Polish-style kielbasa with its robust garlic and marjoram flavors, but any smoked sausage will work wonderfully. For the sauerkraut, look for refrigerated varieties rather than canned when possible—they have a fresher, crispier texture and brighter flavor. Don’t forget to rinse and drain your sauerkraut if you prefer a milder taste, or leave it unrinsed for that full-bodied tanginess. Fresh caraway seeds are non-negotiable in my kitchen; they add that distinctive earthy flavor that makes this dish truly authentic.

    Perfect Cooking Technique

    The secret to exceptional kielbasa and sauerkraut lies in the layering of flavors. Always start by browning your sliced kielbasa in a Dutch oven to develop those delicious caramelized edges—this step adds incredible depth to the final dish. When adding your sauerkraut, don’t rush the cooking process. A low, slow simmer allows the flavors to meld beautifully while softening the cabbage to the perfect texture. For an extra layer of flavor, deglaze the pan with a splash of apple cider after browning the kielbasa. The slight sweetness balances the tanginess of the sauerkraut perfectly.

    Serving Ideas & Creative Variations

    Classic Pairings

    Kielbasa and sauerkraut shines brightest when served with hearty, comforting sides. Buttery mashed potatoes create the perfect canvas for soaking up all those delicious juices. I’ve found that a slice of dark rye bread slathered with sweet butter is absolutely non-negotiable—the earthy bread complements the tangy sauerkraut beautifully. For a complete meal that will satisfy even the heartiest appetites, add a simple side salad with a vinaigrette dressing to cut through the richness. During the cooler months, I love serving this with a dollop of whole grain mustard on the side for an extra punch of flavor.

    Modern Twists

    While I treasure the traditional preparation, sometimes I like to give my kielbasa and sauerkraut a contemporary update. Try adding diced Granny Smith apples during the last 15 minutes of cooking—their tartness and slight crunch bring a wonderful freshness to the dish. For a German-inspired variation, stir in a tablespoon of whole grain mustard and a splash of dark beer to the simmering pot. Another favorite twist in my household is adding caramelized onions and a handful of juniper berries, which introduce a subtle piney sweetness that complements the sauerkraut beautifully.

    Storage & Troubleshooting Guide

    Proper Storage Methods

    Kielbasa and sauerkraut actually improves with time as the flavors continue to develop, making it perfect for meal prepping. Once cooled completely, store leftovers in an airtight container in the refrigerator for up to 4 days. The dish reheats beautifully on the stovetop—just add a splash of chicken broth if it seems dry. For longer storage, this dish freezes exceptionally well for up to 3 months. I recommend portioning it into individual servings before freezing for easy weeknight dinners. Just thaw overnight in the refrigerator and gently reheat until steaming hot.

    Common Issues Solved

    If your kielbasa and sauerkraut turns out too tangy, don’t worry—there’s an easy fix! Add a tablespoon of brown sugar or a drizzle of honey to balance the acidity. For a dish that’s too bland, brighten it with a splash of apple cider vinegar and extra caraway seeds. If your sauerkraut seems too watery, simply remove the lid and simmer uncovered for 10-15 minutes to reduce the liquid. Conversely, if the mixture becomes too dry during cooking, add a splash of chicken broth or apple juice to create more sauce without diluting the flavors.

    Frequently Asked Questions

    Can I make kielbasa and sauerkraut in a slow cooker?

    Absolutely! Brown the kielbasa first, then combine all ingredients in your slow cooker. Cook on low for 6-7 hours or high for 3-4 hours until the flavors meld beautifully.

    What’s the best type of kielbasa to use?

    Traditional Polish smoked kielbasa works best, but any smoked sausage variety will work. The key is finding one with a good balance of garlic and spices.

    Should I rinse the sauerkraut before cooking?

    It depends on your preference. Rinsing reduces tanginess, while unrinsed sauerkraut provides more robust flavor. I usually rinse mine halfway for balanced flavor.

    How can I make my kielbasa and sauerkraut less acidic?

    Add a tablespoon of brown sugar, a drizzle of honey, or some sliced apples during cooking. These naturally balance acidity while adding subtle sweetness.

    Can I add other vegetables to my kielbasa and sauerkraut?

    Definitely! Sliced onions, diced bell peppers, carrots, or potatoes all work wonderfully. Add firmer vegetables earlier in the cooking process for proper tenderness.

    Final Thoughts

    This kielbasa and sauerkraut recipe has been my go-to comfort food for years—reliable, deeply satisfying, and bursting with flavor in every bite. There’s something magical about how a few simple ingredients transform into such a memorable meal. The way the smoky sausage complements the tangy cabbage creates a perfect harmony that keeps my family requesting it again and again. I hope this dish brings the same warmth and comfort to your table that it has to mine. For more cozy recipes, visit my Pinterest collection where I share my favorite comfort food inspirations.

  • Crockpot Black Eyed Peas & Collard Greens: Comfort in Every Bite!

    Crockpot Black Eyed Peas & Collard Greens: Comfort in Every Bite!

    Crockpot Black Eyed Peas & Collard Greens: Comfort in Every Bite!

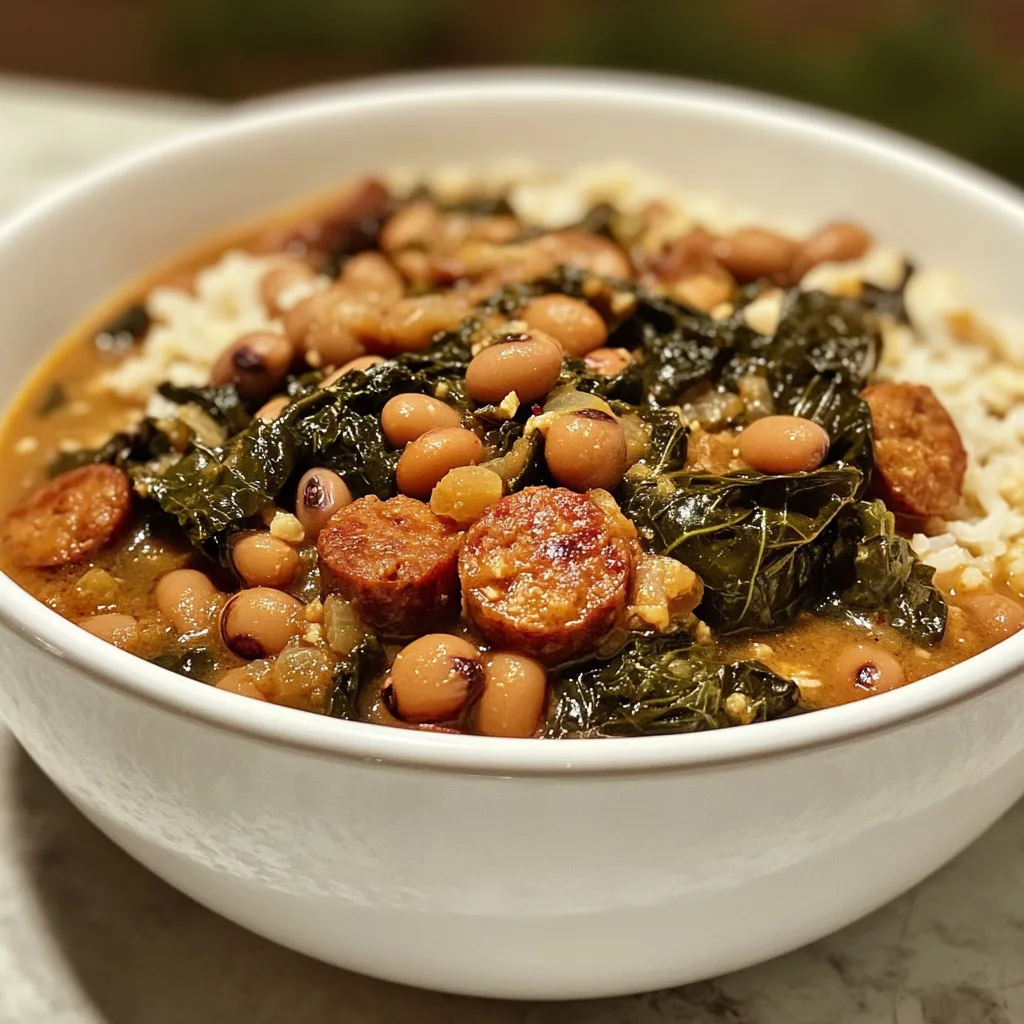
    Crockpot Black Eyed Peas and Collard Greens might just be the ultimate comfort food that speaks to my soul on chilly winter days. There’s something magical about the way these humble ingredients transform into a rich, smoky pot of goodness with barely any effort. I discovered this recipe during my first winter in the South, when my neighbor brought over a steaming container on New Year’s Day. The tender beans, silky greens, and that incredible pot liquor had me instantly hooked. This slow cooker version captures all that traditional flavor while fitting perfectly into our busy lives. Let’s dive into this cozy, hearty dish that feeds both body and spirit.

    Recipe

    Why You’ll Love This Crockpot Black Eyed Peas and Collard Greens

    Perfect Set-It-and-Forget-It Meal

    This Crockpot Black Eyed Peas and Collard Greens recipe is the definition of effortless cooking. I love throwing everything into the slow cooker in the morning and coming home to the most incredible aromas filling my kitchen. The beans become perfectly tender without any babysitting, while the collards break down into silky, flavorful bites. There’s something deeply satisfying about creating such a nourishing meal with just 10 minutes of hands-on time. Plus, it’s budget-friendly comfort food at its finest—feeding a crowd for pennies per serving.

    Packed With Nutrition and Flavor

    Don’t let the simplicity fool you—this dish delivers serious nutrition alongside incredible taste. The combination of black-eyed peas and collard greens creates a nutritional powerhouse rich in protein, fiber, vitamins A and C, and iron. I’m always amazed at how the humble ingredients transform as they simmer. The smoky notes from the ham hock (or smoked turkey) infuse everything with depth, while the greens develop a silky texture that soaks up all that savory broth. It’s soul-satisfying food that happens to be good for you too.

    Essential Tips & Tricks

    Perfect Bean Preparation

    For truly exceptional Crockpot Black Eyed Peas and Collard Greens, proper bean prep makes all the difference. While you can use canned beans in a pinch, dried beans deliver superior texture and flavor absorption. I recommend soaking dried beans overnight, which reduces cooking time and improves digestibility. No time to soak? Try the quick-soak method: boil beans for 2 minutes, then let stand covered for 1 hour. For extra flavor, replace some of the cooking water with chicken broth. This simple swap creates a richer base that transforms the entire dish, similar to how broth elevates my Slow Cooker Creamy Tuscan Chicken Orzo.

    Layering Flavors for Maximum Impact

    The secret to incredible Crockpot Black Eyed Peas and Collard Greens lies in building flavor layers. Start with a quick sauté of onions, garlic, and celery before adding to the crockpot—those caramelized aromatics make a world of difference. Don’t skip the smoked meat component (ham hock, bacon, or smoked turkey wing); it provides that signature smoky depth. For vegetarians, add a tablespoon of smoked paprika and a dash of liquid smoke instead. I always add a splash of apple cider vinegar during the last 30 minutes—that subtle acidity brightens all the flavors and cuts through the richness.

    Serving Ideas & Creative Variations

    Traditional Southern Pairings

    Serving Crockpot Black Eyed Peas and Collard Greens the traditional way creates an authentic Southern experience. Ladle this soulful dish over a scoop of fluffy white rice or alongside a piece of golden cornbread for soaking up that precious pot liquor. I love adding a splash of pepper vinegar or hot sauce at the table—that tangy heat perfectly balances the earthy flavors. For a complete meal, pair with German Goulash or simple fried chicken. Don’t forget to serve with sliced sweet onions and tomatoes on the side for a fresh contrast to the rich, slow-cooked flavors.

    Creative Modern Twists

    While traditional is delicious, don’t be afraid to give your Crockpot Black Eyed Peas and Collard Greens some creative spins. Try a Mediterranean version with olive oil, lemon zest, and crumbled feta added just before serving. For a Cajun twist, add andouille sausage, bell peppers, and a bold spice blend of cayenne, thyme, and oregano. My family loves it served unconventionally as a topping for baked sweet potatoes or stuffed into warm pita with yogurt sauce. You can even transform leftovers into an incredible soup by adding more broth, diced tomatoes, and a handful of small pasta shapes.

    Storage & Troubleshooting Guide

    Proper Storage for Maximum Freshness

    Like many slow-cooked dishes, Crockpot Black Eyed Peas and Collard Greens actually improves with time as the flavors meld. Store leftovers in airtight containers in the refrigerator for up to 4 days. The dish also freezes beautifully—portion into freezer-safe containers, leaving some headspace, and freeze for up to 3 months. I often make a double batch specifically for freezing. When reheating, add a splash of broth or water as the mixture tends to thicken considerably. For best results, thaw frozen portions overnight in the refrigerator before gently reheating on the stovetop over medium-low heat.

    Solving Common Problems

    If your Crockpot Black Eyed Peas and Collard Greens isn’t turning out perfectly, a few simple fixes can help. Beans still tough after cooking? They might be old—dried beans over a year old take significantly longer to soften. Next time, try adding ¼ teaspoon of baking soda to the cooking liquid. Dish too watery? Remove the lid for the final hour of cooking or thicken with a cornstarch slurry. If the flavor seems flat or bland, brighten with acid (vinegar or lemon juice), add more salt gradually, or stir in additional spices. Remember that salt is best adjusted at the end, as beans can toughen if salted too early.

    Frequently Asked Questions

    Can I make Crockpot Black Eyed Peas and Collard Greens vegetarian?

    Absolutely! Skip the ham hock and use vegetable broth instead of chicken broth. Add 1 tablespoon of smoked paprika, 2 tablespoons of olive oil, and a dash of liquid smoke for that savory depth without meat.

    Do I have to soak the black-eyed peas first?

    While soaking isn’t strictly necessary for black-eyed peas, it reduces cooking time and improves digestibility. For unsoaked beans, add 1-2 hours to your cooking time and possibly more liquid.

    Can I use frozen collard greens instead of fresh?

    Yes! Frozen collards work beautifully in this recipe. No need to thaw—add them directly to the crockpot about halfway through the cooking time. You’ll need approximately 2 pounds of frozen greens.

    How do I know when my Crockpot Black Eyed Peas and Collard Greens is done?

    The dish is ready when the beans are tender but still hold their shape and the greens are silky soft. This typically takes 6-8 hours on low or 3-4 hours on high, depending on your slow cooker.

    Can I cook this on the stovetop instead?

    Yes! Simmer everything in a large Dutch oven over low heat for about 2-3 hours, stirring occasionally and adding more liquid if needed. The stovetop method requires more attention but works well.

    Final Thoughts

    This Crockpot Black Eyed Peas and Collard Greens recipe has become my go-to comfort food for good reason. It transforms humble ingredients into something truly special with minimal effort. I love how it connects me to Southern traditions while fitting perfectly into modern life. Whether you’re serving it for a New Year’s Day gathering or a simple weeknight dinner, this dish delivers soul-satisfying warmth in every bite. The combination of tender beans, silky greens, and that incredible savory broth creates something greater than the sum of its parts. Find more cozy recipes at Pinterest.