Category: Lunch

Easy lunch ideas for busy days. Simple, quick recipes with fresh flavor and satisfying meals you can enjoy at home or on the go.

  • Pizza Hut Cheese Sticks: Irresistibly Cheesy & Perfectly Crispy!

    Pizza Hut Cheese Sticks: Irresistibly Cheesy & Perfectly Crispy!

    Pizza Hut Cheese Sticks: Irresistibly Cheesy & Perfectly Crispy!

    Pizza Hut Cheese Sticks have been my guilty pleasure since college, when my roommates and I would order them for late-night study sessions. That perfect combination of soft, chewy dough and stretchy, golden cheese with a garlicky crust is simply irresistible. Today, I’m sharing my copycat recipe that brings that pizzeria magic right into your kitchen. These homemade cheese sticks are surprisingly easy to make and, dare I say, even better than the original. They’re perfect for game day, movie night, or anytime you need a comforting cheesy fix like I did last weekend when the rain wouldn’t stop.

    Recipe

    Why You’ll Love This Pizza Hut Cheese Sticks Recipe

    Perfect Texture Combination

    The secret to authentic Pizza Hut cheese sticks lies in achieving that perfect balance of textures. The dough should be soft and chewy inside while maintaining a slight crispness on the bottom. I’ve tested countless dough recipes and found that adding a touch of honey helps achieve that signature Pizza Hut flavor. The cheese needs to be stretchy but not greasy, which is why a blend of mozzarella and provolone works wonderfully. When you pull apart a warm stick and watch that cheese stretch dramatically, you’ll know you’ve nailed it!

    Simple Ingredients, Restaurant Results

    What makes this recipe truly special is how it transforms basic pantry staples into something that tastes professionally made. You’ll need just flour, yeast, water, olive oil, salt, and a pinch of sugar for the dough. For the topping, mozzarella is non-negotiable, but I like adding provolone for depth. The garlic butter brush gives these sticks their iconic flavor – just melted butter, minced garlic, and Italian herbs. I love how something so simple can create such a nostalgic taste experience that immediately transports me back to those pizza parlor booths.

    Essential Tips & Tricks

    Dough Preparation Secrets

    The foundation of perfect cheese sticks is properly prepared dough. Let your dough rise in a warm spot until it doubles in size – this develops those lovely air pockets that create the chewy texture. When stretching the dough, aim for an even rectangular shape about ¼-inch thick. If the dough springs back stubbornly, let it rest for 5 minutes before trying again. This relaxes the gluten and makes shaping easier. For that authentic Pizza Hut flavor, brush the edges with garlic butter before adding cheese, creating that distinctive golden crust similar to my Garlic Herb Dutch Oven Bread.

    Cheese Selection and Application

    Using the right cheese blend makes all the difference between good and great cheese sticks. Low-moisture mozzarella is essential – fresh mozzarella contains too much water and will make your sticks soggy. Shred your cheese by hand rather than using pre-shredded varieties, which contain anti-caking agents that prevent proper melting. Apply cheese generously but evenly, leaving a half-inch border around the edges. This border puffs up during baking to create that distinctive Pizza Hut crust. For extra flavor, sprinkle a little Parmesan or Romano on top before baking.

    Serving Ideas & Creative Variations

    Dipping Sauce Pairings

    The perfect cheese sticks deserve the perfect dipping companions. Classic marinara is traditional, but don’t stop there! I love serving these with a creamy garlic aioli, ranch dressing, or even a spicy arrabbiata sauce for heat lovers. My personal favorite is a pesto-ranch blend that adds herbaceous notes to the creamy base. For a sweet-savory contrast, try a honey-sriracha dip that complements the garlic butter beautifully. Make your marinara sauce from scratch for the freshest flavor, or doctor up store-bought sauce with fresh basil and a splash of good olive oil.

    Flavor Variations to Try

    While the classic version is perfection, these cheese sticks are incredibly versatile for customization. Try adding thinly sliced pepperoni under the cheese for a pepperoni cheese stick that rivals any Homemade Hawaiian Pizza. For herb lovers, mix fresh chopped basil, oregano, and thyme into the cheese. Feeling adventurous? Add jalapeño slices and pepper jack cheese for a spicy version. My family loves when I make half classic and half “loaded” with bacon bits and green onions. The possibilities are endless, and experimenting is half the fun!

    Storage & Troubleshooting Guide

    Proper Storage Methods

    To maintain that fresh-baked quality, store leftover cheese sticks properly. Let them cool completely, then place in an airtight container with parchment paper between layers to prevent sticking. They’ll keep in the refrigerator for up to 3 days. For longer storage, freeze them individually on a baking sheet until solid, then transfer to a freezer bag where they’ll last up to 2 months. To reheat refrigerated sticks, use a 350°F oven for 5-7 minutes. For frozen sticks, add an extra 3-5 minutes, avoiding the microwave which will make them tough.

    Fixing Common Problems

    Even experienced bakers encounter challenges with cheese sticks. If your dough isn’t rising, check your yeast’s expiration date and ensure your water isn’t too hot, which kills yeast. For cheese that’s sliding off, try creating a slight rim around the edges and make sure your dough is completely cool before adding toppings. Soggy bottoms can be fixed by preheating your baking sheet or using a pizza stone. If the edges are browning too quickly but the center isn’t done, cover the perimeter with foil strips. Remember that perfection comes with practice!

    Frequently Asked Questions

    Can I make Pizza Hut Cheese Sticks without a stand mixer?

    Absolutely! While a stand mixer makes the process easier, you can mix and knead the dough by hand. You’ll need about 10 minutes of kneading to develop the gluten properly for that signature chewy texture.

    What’s the best cheese to use for authentic flavor?

    Whole-milk mozzarella is essential for authentic Pizza Hut cheese sticks. Adding a bit of provolone or Monterey Jack (about 20% of your cheese mixture) enhances the flavor and improves meltability.

    Can I prepare these cheese sticks ahead of time?

    Yes! Prepare the dough and shape it, then refrigerate for up to 24 hours. Bring to room temperature for 30 minutes before adding toppings and baking for the freshest results.

    Why aren’t my cheese sticks as stretchy as Pizza Hut’s?

    The stretchiness comes from proper cheese selection and temperature. Use whole-milk mozzarella and serve the sticks while still hot (around 160°F) for maximum cheese pull.

    How do I get that signature Pizza Hut garlic flavor?

    The signature flavor comes from brushing the dough with a mixture of melted butter, minced garlic, garlic powder, and Italian seasoning both before baking and immediately after removing from the oven.

    Final Thoughts

    These homemade Pizza Hut Cheese Sticks have become a staple in my entertaining repertoire. There’s something magical about pulling apart those golden, garlicky sticks with perfectly melted cheese that brings people together. I’ve watched countless conversations pause mid-sentence as friends reach for “just one more.” Whether you’re recreating nostalgic flavors or discovering them for the first time, these cheese sticks deliver comfort and joy in every bite. Don’t forget to check out more of my cheesy creations on Pinterest for endless inspiration!


  • Cheese Stuffed Pretzel Magic: Irresistibly Gooey & Crispy Delight!

    Cheese Stuffed Pretzel Magic: Irresistibly Gooey & Crispy Delight!

    Cheese Stuffed Pretzel Magic: Irresistibly Gooey & Crispy Delight!

    Cheese stuffed pretzels combine everything I love about comfort food – the chewy exterior of a classic pretzel with a molten, gooey center that stretches with each bite. There’s something magical about that first tear, revealing a golden stream of melted cheese hiding inside the warm, salt-dusted dough. I discovered my love for these twisted treasures during a rainy afternoon at a local farmers market, and I’ve been perfecting my homemade version ever since. The best part? These pretzels are surprisingly simple to make, requiring just a few basic ingredients and some patience. Let me show you how to create these irresistible treats that will have everyone asking for seconds.

    Recipe

    Why You’ll Love These Cheese Stuffed Pretzels

    Perfect Combination of Textures

    There’s nothing quite like biting through the chewy, glossy exterior of a freshly baked pretzel to discover the melted cheese inside. That contrast between the slightly crisp, salt-flecked crust and the soft, pillowy interior makes these pretzels absolutely irresistible. I love watching friends’ faces light up when they take their first bite and the cheese pulls away in long, beautiful strands. The alkaline bath (using baking soda) before baking is what creates that distinctive pretzel texture that we all crave – giving you that authentic pretzel shop experience right in your own kitchen.

    Customizable Cheese Options

    While traditional cheese stuffed pretzels often feature cheddar or American cheese, the beauty of making them at home is that you can experiment endlessly with different cheese combinations. Sharp provolone adds a tangy bite, while pepper jack brings a pleasant heat. My personal favorite is a mixture of mozzarella and sharp cheddar – the mozzarella provides that Instagram-worthy cheese pull, while the cheddar delivers rich flavor. For a more sophisticated twist, try smoked gouda or even a creamy brie. The key is choosing cheeses that melt well and complement the slightly salty pretzel dough.

    Essential Tips & Tricks

    Mastering the Dough

    The foundation of perfect cheese stuffed pretzels is getting the dough just right. I’ve found that allowing the dough to rest properly makes all the difference in achieving that authentic chewy texture. After mixing, let it rise in a warm spot until doubled in size – about an hour. The dough should feel elastic and smooth, not sticky. When rolling out your ropes, work on a clean, unfloured surface – a little tackiness helps you create tension as you roll, resulting in better-shaped pretzels. If the dough springs back too much, let it rest for 5 minutes before trying again. This patience-rewarding process creates the perfect base for your cheese filling.

    The Alkaline Bath Secret

    The distinctive pretzel flavor and color come from a quick dip in an alkaline solution before baking. While professional bakeries use food-grade lye, baking soda works wonderfully at home. I recommend using 1/3 cup baking soda per 8 cups of water, brought to a gentle simmer. Each pretzel only needs about 20-30 seconds in this bath – any longer and they can develop a metallic taste. After the bath, place them on a parchment-lined baking sheet, brush with egg wash for shine, and sprinkle with coarse salt. This step seems fussy but creates that characteristic mahogany crust and distinctive pretzel flavor that makes them irresistible.

    Serving Ideas & Creative Variations

    Perfect Pairings

    These cheese stuffed pretzels shine as both a snack and a meal companion. Serve them piping hot from the oven when the cheese is at its most molten and stretchy. For casual gatherings, pair with a selection of mustards – stone ground, honey mustard, and spicy brown create a delightful tasting experience. For a heartier option, serve alongside a warm bowl of beer cheese soup for double the cheesy goodness. During fall and winter months, I love offering these with hot apple cider for a cozy treat that warms from the inside out.

    Beyond Basic Pretzels

    While classic cheese stuffed pretzels are divine, experimenting with additional fillings takes them to new heights. Try adding thin slices of pepperoni alongside the cheese for mini pizza pretzels. Diced jalapeños mixed with cheddar creates a spicy version with delightful heat. For breakfast-inspired pretzels, stuff with scrambled eggs, cheese, and crumbled bacon before baking. You can even go sweet by using cream cheese mixed with cinnamon sugar, then drizzling with glaze after baking. Shape variations work beautifully too – form into pretzel bites for easier sharing, or twist into pretzel sticks for simpler stuffing.

    Storage & Troubleshooting Guide

    Keeping Pretzels Fresh

    Cheese stuffed pretzels are at their absolute best when enjoyed fresh from the oven, but proper storage can help maintain their quality. If you have leftovers, allow them to cool completely before placing in an airtight container at room temperature for up to 2 days. To reheat, wrap in foil and warm in a 350°F oven for about 5 minutes until the cheese melts again. For longer storage, freeze the baked pretzels by wrapping individually in plastic wrap, then foil, and placing in a freezer bag for up to 3 months. Thaw in the refrigerator overnight before reheating.

    Solving Common Problems

    If your cheese is leaking out during baking, you likely need to seal the edges more thoroughly when shaping. Pinch the dough firmly and roll gently to ensure no seams remain. For pretzels that aren’t browning properly, check that your alkaline bath is warm enough and that you’re using enough baking soda. Pale pretzels usually indicate insufficient time in the bath or a solution that’s too weak. If your pretzels are tough rather than chewy, you may have overworked the dough – next time, knead just until the dough comes together and becomes smooth. Remember that practice makes perfect!

    Frequently Asked Questions

    Can I make cheese stuffed pretzels ahead of time?

    Yes! Prepare them through shaping and stuffing, then refrigerate for up to 24 hours. Bring to room temperature for 30 minutes before the alkaline bath and baking for best results.

    What’s the best cheese for stuffed pretzels?

    Cheeses that melt well work best – mozzarella, cheddar, American, and provolone are excellent choices. Avoid very aged hard cheeses that won’t achieve that gooey center.

    Can I freeze unbaked cheese stuffed pretzels?

    Yes, freeze them on a baking sheet until solid, then transfer to freezer bags. When ready to bake, thaw in the refrigerator overnight before proceeding with the alkaline bath.

    Why did my pretzels deflate after baking?

    This typically happens from underbaking. Make sure to bake until deeply golden brown, about 12-15 minutes at 425°F, to ensure the structure sets properly.

    How do I get that classic pretzel shine?

    The alkaline bath is crucial for the shine, but also brush with egg wash (1 egg beaten with 1 tablespoon water) before baking for that glossy, professional finish.

    Final Thoughts

    There’s something incredibly satisfying about pulling apart a homemade cheese stuffed pretzel and watching that perfect cheese stretch. I hope this guide inspires you to try making these at home – they’re easier than they look and so much more delicious than store-bought versions. The joy of creating something this delicious with your own hands is unmatched, and the smiles they bring to friends and family make the effort worthwhile. Don’t forget to check out more delicious recipes on Pinterest for endless inspiration. Happy baking!

  • Easy Jalapeño Popper Crescent Rolls – Irresistibly Cheesy & Spicy!

    Easy Jalapeño Popper Crescent Rolls – Irresistibly Cheesy & Spicy!

    Easy Jalapeño Popper Crescent Rolls – Irresistibly Cheesy & Spicy!

    Easy Jalapeño Popper Crescent Rolls are the ultimate crowd-pleaser that combine creamy, spicy, and buttery flavors in one irresistible bite. I discovered this recipe during a game night that was quickly heading south (thanks to my terrible Pictionary skills). When I brought out these golden, cheesy crescents, the mood instantly shifted. The combination of tangy cream cheese, spicy jalapeños, crispy bacon, and flaky crescent dough creates a flavor explosion that’s impossible to resist. Perfect for everything from casual gatherings to fancy appetizer spreads, these little bundles of joy come together in minutes but disappear in seconds!

    Recipe

    Why You’ll Love This Easy Jalapeño Popper Crescent Rolls

    Quick Prep with Maximum Impact

    These jalapeño popper crescent rolls are a busy host’s dream come true. The entire prep process takes just 15 minutes before they’re ready for the oven! I love recipes that deliver major flavor without keeping me trapped in the kitchen. Simply mix the cream cheese filling, spread it on crescent dough triangles, roll them up, and bake until golden. The contrast between the crispy, buttery exterior and the creamy, spicy filling creates a texture paradise that makes everyone think you spent hours in the kitchen. Trust me, the look on people’s faces when they take that first bite is worth everything.

    Customizable Heat Level

    One thing I absolutely adore about these Easy Jalapeño Popper Crescent Rolls is how easily you can adjust the spice level to suit any crowd. For my spice-loving friends, I leave the jalapeño seeds in and even add a dash of cayenne pepper to the cream cheese mixture. When my heat-sensitive in-laws visit, I carefully remove all seeds and membranes, then balance the filling with extra cheese. You can even prepare two separate batches with different heat levels – just mark them with different garnishes on top! The versatility makes these perfect for mixed gatherings where spice preferences vary wildly.

    Essential Tips & Tricks

    Perfecting the Filling Consistency

    The secret to exceptional jalapeño popper crescent rolls lies in the filling consistency. I learned this the hard way after my first batch leaked everywhere! Make sure your cream cheese is properly softened but not melted – about 30 minutes at room temperature is perfect. When mixing, incorporate the shredded cheese and bacon bits thoroughly, creating a thick, spreadable mixture that won’t run out during baking. Leave a small border (about ¼ inch) around the edges of each crescent triangle to prevent overflow. If your filling seems too loose, add a bit more shredded cheese to thicken it up before rolling.

    Sealing and Shaping Techniques

    The way you roll and seal these crescent rolls makes all the difference between a gorgeous appetizer and a messy disaster. Start by pressing the perforations in the dough to seal any gaps before spreading your filling. When rolling, begin from the wider end and gently tuck the sides in as you go to create a secure pocket. For an extra-special touch that reminds me of those delicious caramelized onion pizzas, brush the tops with melted butter and sprinkle with everything bagel seasoning before baking. This creates a beautiful golden finish with added flavor and texture that elevates the entire experience.

    Serving Ideas & Creative Variations

    Perfect Pairings

    These Easy Jalapeño Popper Crescent Rolls shine brightest when served alongside complementary dips and accompaniments. My personal favorite pairing is a cool ranch dressing that balances the heat beautifully. For a more sophisticated spread, try serving them with a honey drizzle that creates an irresistible sweet-heat combination. They also pair wonderfully with a fresh garden salad or tomato soup for a more substantial meal. I once served these alongside my favorite garlic ranch chicken pizza for a themed appetizer night, and my friends still talk about that meal months later! The versatility of these rolls makes them perfect for everything from game days to holiday gatherings.

    Exciting Flavor Twists

    While the classic recipe is divine, experimenting with different flavor profiles keeps this recipe fresh and exciting. Try substituting pepper jack for cheddar to add another layer of spice, or incorporate buffalo sauce into the cream cheese mixture for a tangy twist. Vegetarian guests will appreciate a version with roasted red peppers or corn kernels replacing the bacon. For a breakfast variation, add scrambled eggs to the filling mixture and serve with maple syrup on the side. My personal favorite variation includes a tablespoon of ranch seasoning mixed into the cream cheese for an herby, tangy flavor that complements the jalapeños perfectly.

    Storage & Troubleshooting Guide

    Make-Ahead and Freezing Options

    These jalapeño popper crescent rolls are perfect for planning ahead! You can prepare the cream cheese filling up to two days in advance and store it in an airtight container in the refrigerator. For fully assembled rolls, place them on a baking sheet, freeze until solid, then transfer to a freezer bag for up to one month. When ready to serve, bake them directly from frozen, adding about 5-7 minutes to the original baking time. I love making a double batch – one for now and one for later – especially before busy holiday seasons when unexpected guests might drop by. Just remember to label them clearly with the date and baking instructions.

    Fixing Common Issues

    Even experienced bakers sometimes encounter challenges with these rolls. If your crescent rolls are browning too quickly but remain doughy inside, cover them loosely with aluminum foil halfway through baking. For filling that leaks during baking, try chilling the assembled rolls for 15 minutes before baking to help the dough firm up. If your rolls turn out too spicy, serve them with extra sour cream or a sweet dipping sauce to balance the heat. Too bland? Add a sprinkle of hot honey or red pepper flakes just before serving. Remember that oven temperatures vary, so keep an eye on your first batch to establish the perfect timing for your equipment.

    Frequently Asked Questions

    Can I make Easy Jalapeño Popper Crescent Rolls ahead of time?

    Yes! Prepare the filling up to 2 days ahead and refrigerate. You can also assemble the rolls, freeze them on a baking sheet, then transfer to a freezer bag for up to a month. Bake from frozen, adding 5-7 extra minutes to the baking time.

    How do I control the spice level?

    Remove all seeds and membranes from jalapeños for mild rolls. For medium heat, leave some seeds. For extra spicy rolls, include all seeds and add a pinch of cayenne pepper to the filling mixture.

    Can I use low-fat cream cheese?

    Yes, though the filling won’t be as rich and may have a slightly different texture. Full-fat cream cheese creates the creamiest, most indulgent jalapeño popper crescent rolls with better melting properties.

    What can I substitute for bacon in this recipe?

    Turkey bacon works well for a lighter option. For vegetarian versions, try crispy fried onions, sun-dried tomatoes, or even roasted mushrooms chopped finely to provide that savory element.

    How do I prevent the filling from leaking?

    Leave a ¼-inch border when spreading filling, seal perforations in the dough completely, and chill assembled rolls for 15 minutes before baking. Make sure your cream cheese is softened but not melted.

    Final Thoughts

    These Easy Jalapeño Popper Crescent Rolls have become my secret weapon for gatherings of all kinds. There’s something magical about the combination of flaky pastry, creamy cheese, and spicy jalapeños that brings people together. I’ve watched quiet dinner parties transform into lively conversations once these golden beauties hit the table. Whether you’re hosting a game night, need a potluck winner, or simply want to elevate your appetizer game, these rolls deliver every time. Don’t forget to check out more appetizer inspiration on Pinterest and prepare to collect compliments!

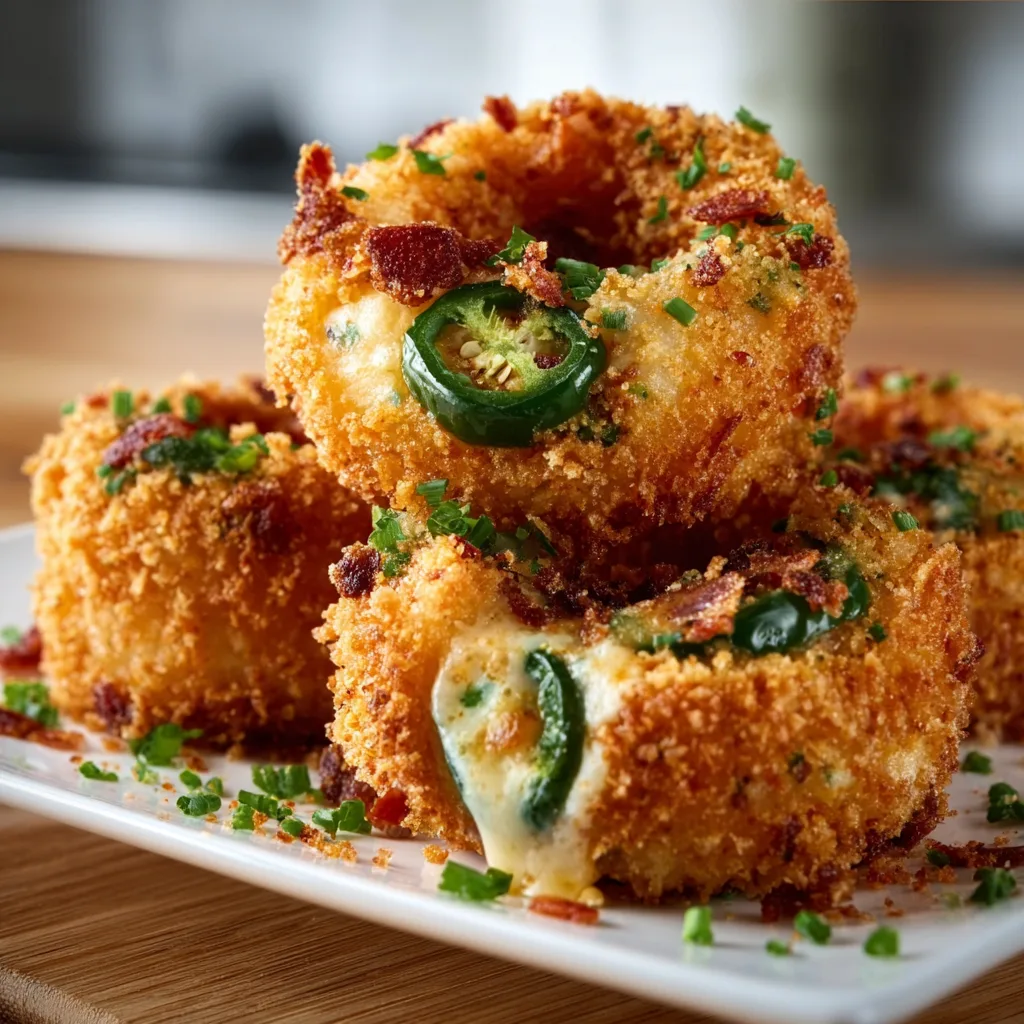
  • Jalapeño Popper Stuffed Onion Rings That Will Blow Your Mind!

    Jalapeño Popper Stuffed Onion Rings That Will Blow Your Mind!

    Jalapeño Popper Stuffed Onion Rings That Will Blow Your Mind!

    Jalapeño Popper Stuffed Onion Rings are what happen when two iconic appetizers collide in the most magnificent way possible. The first time I made these for my family game night, they disappeared faster than I could say “second batch!” There’s something magical about biting through that crispy, golden exterior into a creamy, spicy center that makes everyone’s eyes light up. I’ve perfected this recipe over countless weekend gatherings, and I’m thrilled to share my secrets for creating these irresistible two-in-one treats that combine the zesty kick of jalapeño poppers with the satisfying crunch of onion rings. Trust me, these will become your new go-to party showstopper!

    Recipe

    Why You’ll Love These Jalapeño Popper Stuffed Onion Rings

    A Perfect Balance of Flavors and Textures

    These stuffed onion rings deliver an incredible sensory experience with every bite. The sweet, tender onion creates the perfect vessel for that creamy, spicy jalapeño filling. I love how the cream cheese mellows the heat while the crispy breadcrumb coating adds that satisfying crunch we all crave. It’s like a flavor party where everyone’s invited! The contrast between the cool, tangy filling and the warm, golden exterior makes these irresistible. I’ve watched even “I don’t like spicy food” friends come back for seconds and thirds of these balanced bites.

    Make-Ahead Friendly for Stress-Free Entertaining

    One of my favorite things about this recipe is how prep-friendly it is. You can assemble these beauties hours before your guests arrive, keeping them refrigerated until you’re ready to fry. I discovered this time-saving hack when hosting my sister’s surprise birthday party—I prepped everything that morning, then quickly fried them up right before everyone arrived. The cold filling actually helps maintain the rings’ structure during cooking, ensuring they hold together beautifully. This make-ahead magic means less stress and more time enjoying your company!

    Essential Tips & Tricks

    Mastering the Assembly Process

    The key to perfect Jalapeño Popper Stuffed Onion Rings is in the assembly technique. Start with large, firm onions and cut them into thick ½-inch rings for stability. After separating the rings, I find that patting them dry with paper towels helps the filling adhere better. When piping in the cream cheese mixture, leave a small gap at the seam—this prevents overflow during cooking. My game-changing tip? Freeze the stuffed rings for 15-20 minutes before breading. This firms up the filling and makes the entire breading process significantly easier and less messy.

    The Secret to the Perfect Crispy Coating

    For that restaurant-quality crunch, a three-stage breading process is non-negotiable. Start with seasoned flour, then a rich egg wash (I add a splash of hot sauce for extra flavor!), and finish with panko breadcrumbs mixed with a bit of regular breadcrumbs for the perfect texture. The real magic happens in the temperature control—maintain your oil at a steady 350°F for that golden-brown exterior without burning. This technique reminds me of how I make my Crispy Italian Chicken Cutlets, where the same principles create that satisfying crunch we all crave.

    Serving Ideas & Creative Variations

    Perfect Pairings for Any Occasion

    These Jalapeño Popper Stuffed Onion Rings shine as the star appetizer at any gathering. I love serving them with a variety of dipping sauces—ranch, sriracha mayo, or honey mustard all complement the flavors beautifully. For game day spreads, pair them with my Loaded Dirty Fries for an indulgent feast. They also make a fantastic side dish alongside burgers or grilled chicken. My brother-in-law requests these for every family barbecue, claiming they elevate the entire meal. For a complete appetizer spread, add some fresh veggies and a light dip to balance the richness.

    Exciting Flavor Twists to Try

    Don’t be afraid to put your own spin on these customizable rings! Swap the jalapeños for milder poblanos if you’re serving heat-sensitive guests, or go the opposite direction with habaneros for brave souls. Adding crumbled bacon to the filling creates an irresistible smoky dimension. For a Mediterranean twist, mix feta cheese and sun-dried tomatoes into the cream cheese base. I once made a buffalo chicken version with shredded rotisserie chicken and buffalo sauce mixed into the filling—they were demolished in minutes! The versatility of this recipe is what keeps it in my regular rotation.

    Storage & Troubleshooting Guide

    Keeping Leftovers Fresh (If You Have Any!)

    In the rare event you have leftover rings, proper storage is key to maintaining their texture. Allow them to cool completely before placing in an airtight container with paper towels between layers to absorb excess moisture. They’ll keep in the refrigerator for up to 3 days. For reheating, avoid the microwave which makes them soggy. Instead, place them on a baking sheet in a 375°F oven for 7-10 minutes until heated through and crispy again. I learned this the hard way after microwaving a batch and ending up with a disappointing soggy mess!

    Solving Common Preparation Challenges

    The biggest challenge with these rings is keeping the filling contained during cooking. If your filling is oozing out, it’s likely too warm—return the assembled rings to the freezer for 10 minutes before continuing. If your breading isn’t sticking properly, make sure both your onion rings and hands are dry throughout the process. For rings that fall apart during frying, the oil temperature might be too low. Use a thermometer to maintain that crucial 350°F. When I first started making these, I struggled with uneven cooking until I realized the importance of maintaining consistent oil temperature.

    Frequently Asked Questions

    Can I bake these Jalapeño Popper Stuffed Onion Rings instead of frying?

    Yes! Arrange them on a parchment-lined baking sheet, spray with cooking oil, and bake at 425°F for 15-18 minutes, flipping halfway through. The texture won’t be quite as crispy but still delicious.

    How do I control the spice level?

    Remove all seeds and membranes from jalapeños for mild heat, or leave some in for more kick. You can also substitute with bell peppers for no heat or serrano peppers for extra spice.

    Can I make these gluten-free?

    Absolutely! Use your favorite gluten-free flour blend and gluten-free panko breadcrumbs. The texture remains nearly identical to the traditional version.

    What’s the best way to pipe the filling into the onion rings?

    Use a piping bag with a medium round tip, or simply cut the corner off a ziplock bag. Work slowly around the ring, filling evenly without overstuffing.

    Can I prepare Jalapeño Popper Stuffed Onion Rings in an air fryer?

    Yes! Preheat your air fryer to 375°F and cook in batches for 8-10 minutes, flipping halfway. Spray with oil before cooking for better browning.

    Final Thoughts

    These Jalapeño Popper Stuffed Onion Rings represent everything I love about creative cooking—taking familiar favorites and transforming them into something extraordinary. The combination of spicy, creamy, crunchy, and savory elements creates an irresistible bite that will have everyone asking for your recipe. Whether you’re hosting a game day gathering or simply treating yourself to something special, these rings deliver big flavor and even bigger smiles. Don’t forget to check out more creative appetizer ideas on my Pinterest for endless inspiration!
  • Crispy Potato Cheese Bombs: Irresistibly Gooey, Crunchy & Addictive!

    Crispy Potato Cheese Bombs: Irresistibly Gooey, Crunchy & Addictive!

    Crispy Potato Cheese Bombs: Irresistibly Gooey, Crunchy & Addictive!

    Crispy Potato Cheese Bombs have become my absolute obsession this winter! These golden, bite-sized morsels combine fluffy mashed potatoes with gooey melted cheese, all wrapped in a crispy panko coating that shatters perfectly with each bite. I discovered this recipe during a cozy game night with friends, and the way they disappeared from the serving plate told me everything I needed to know. The contrast between the crunchy exterior and the molten cheese center creates a sensory explosion that’s simply irresistible. If you’re looking for a crowd-pleasing appetizer that combines comfort and indulgence, these potato bites are about to become your new favorite!

    Recipe

    Why You’ll Love These Crispy Potato Cheese Bombs

    Perfect Texture Combination

    There’s something magical about the textural contrast in these potato cheese bombs. The outside forms this incredibly satisfying golden crust that makes the most delightful crunch when you bite into it. Then, you hit that creamy potato layer that’s whipped to perfection—not too dense, not too light. But the real star? That moment when you reach the molten cheese center that stretches into those Instagram-worthy cheese pulls. I’ve watched guests’ eyes light up at that first bite, and honestly, it’s one of my favorite hosting moments.

    Quick and Convenient Preparation

    What makes these crispy potato cheese bombs truly special is how meal-prep friendly they are. You can prepare the potato mixture and form the balls ahead of time, then store them in the refrigerator until you’re ready to coat and fry them. This has saved me countless times when hosting last-minute gatherings! The ingredients are also pantry staples for many of us—potatoes, cheese, breadcrumbs, and a few seasonings. I love that I can decide to make these on a whim without a special grocery trip, especially on those nights when I’m craving something comforting yet special.

    Essential Tips & Tricks

    Mastering the Perfect Potato Base

    The foundation of amazing crispy potato cheese bombs starts with properly prepared potatoes. I recommend using starchy varieties like Russets or Yukon Golds for the fluffiest interior. Always start with cold water when boiling potatoes—this ensures they cook evenly from the inside out. Once drained, let them steam dry for about 5 minutes before mashing. This removes excess moisture that could make your mixture too wet. Add butter while the potatoes are still hot, which helps it melt completely and distribute evenly throughout the mixture. This creates that luxurious texture that holds together perfectly.

    The Secret to Extra Crispy Coating

    For that irresistible crunch that makes crispy potato cheese bombs so addictive, the double-coating method is non-negotiable. First, chill your formed potato balls for at least 30 minutes—this helps them hold their shape during coating and frying. Use panko breadcrumbs rather than regular breadcrumbs for maximum crispiness. My game-changing tip? Add a tablespoon of grated Parmesan to your breadcrumbs for an extra flavor dimension. For the absolute crispiest exterior, maintain your oil at a steady 350°F (175°C) throughout frying. This temperature is the sweet spot for crispy perfection, just like with my skillet potatoes.

    Serving Ideas & Creative Variations

    Dipping Sauce Pairings

    The right dipping sauce can elevate your crispy potato cheese bombs from delicious to absolutely unforgettable. My go-to is a spicy sriracha aioli—just mix mayonnaise with sriracha, a squeeze of lime, and a pinch of garlic powder. The creamy heat perfectly complements the savory potato and cheese. For something more traditional, try a cool ranch dip or tangy sour cream with chives. When I’m feeling fancy, I make a quick truffle aioli with a drop of truffle oil that adds incredible earthiness. These dips create that perfect temperature contrast with the hot, crispy bombs that makes each bite a new experience.

    Flavor Variations to Try

    Don’t be afraid to experiment with different cheese combinations in your potato bombs! While cheddar is the classic choice, I’ve had amazing results with pepper jack for a spicy kick or smoked gouda for a deeper flavor profile. You can also incorporate mix-ins to the potato base—crispy bacon bits, caramelized onions, or fresh herbs like rosemary or thyme. My personal favorite variation includes a combination of cheeses like I use in my grilled cheese sandwiches—a mix of gouda and mozzarella creates the most spectacular cheese pulls when you break them open.

    Storage & Troubleshooting Guide

    Making Ahead and Reheating

    These crispy potato cheese bombs maintain their quality remarkably well when made ahead. You can prepare the balls up to the coating stage and refrigerate them for up to 24 hours. For longer storage, freeze the uncooked, coated bombs on a baking sheet until solid, then transfer to a freezer bag for up to 3 months. When you’re ready to enjoy them, you can fry frozen bombs directly—just add about 1-2 minutes to the cooking time. For reheating already cooked bombs, the air fryer is your best friend. Just 3-4 minutes at 350°F restores that crispy exterior without drying out the center.

    Troubleshooting Common Issues

    If your potato mixture is too sticky or wet to form into balls, add a tablespoon of flour or more breadcrumbs to absorb the excess moisture. Chilling the mixture for 30 minutes also helps firm it up. For bombs that break apart during frying, your oil might be too hot or the mixture too loose—try lowering the temperature slightly and ensuring your potato base is firm enough. If your cheese isn’t melting properly in the center, try cutting it into smaller cubes or using a cheese that melts more easily like fontina or American. Remember that patience is key—rushing the process often leads to less-than-perfect results.

    Frequently Asked Questions

    What’s the best cheese to use for Crispy Potato Cheese Bombs?

    Medium or sharp cheddar works beautifully as a base, but feel free to experiment! Mozzarella creates amazing cheese pulls, while pepper jack adds a spicy kick. For the best flavor, use a combination of two complementary cheeses.

    Can I bake these instead of frying?

    Absolutely! Preheat your oven to 425°F, spray the coated bombs with cooking spray, and bake for 20-25 minutes, turning halfway through. While the exterior won’t be quite as crispy as fried, they’ll still be delicious.

    Why are my potato bombs falling apart?

    This usually happens when the potato mixture is too wet or not chilled enough. Make sure to let your potatoes steam dry after boiling, and refrigerate the formed balls for at least 30 minutes before coating and frying.

    Can I make these gluten-free?

    Yes! Simply substitute the regular breadcrumbs with gluten-free panko or crushed gluten-free corn flakes. The texture will be slightly different but equally delicious.

    How do I prevent my Crispy Potato Cheese Bombs from becoming greasy?

    Maintain your oil at a consistent 350°F—too low and they’ll absorb oil, too high and they’ll burn before cooking through. Always drain on paper towels immediately after frying to absorb excess oil.

    Final Thoughts

    These Crispy Potato Cheese Bombs have become my secret weapon for gatherings where I want to impress without spending hours in the kitchen. There’s something almost magical about watching someone take that first bite—the crunch, followed by the moment the cheese starts to stretch. The beauty of these potato bombs lies in their versatility and crowd-pleasing nature. Whether served as an appetizer, side dish, or even main course with a salad, they never disappoint. I hope you’ll give these golden nuggets of joy a try and experience the perfect harmony of textures and flavors for yourself! Find more inspiration on my Pinterest.

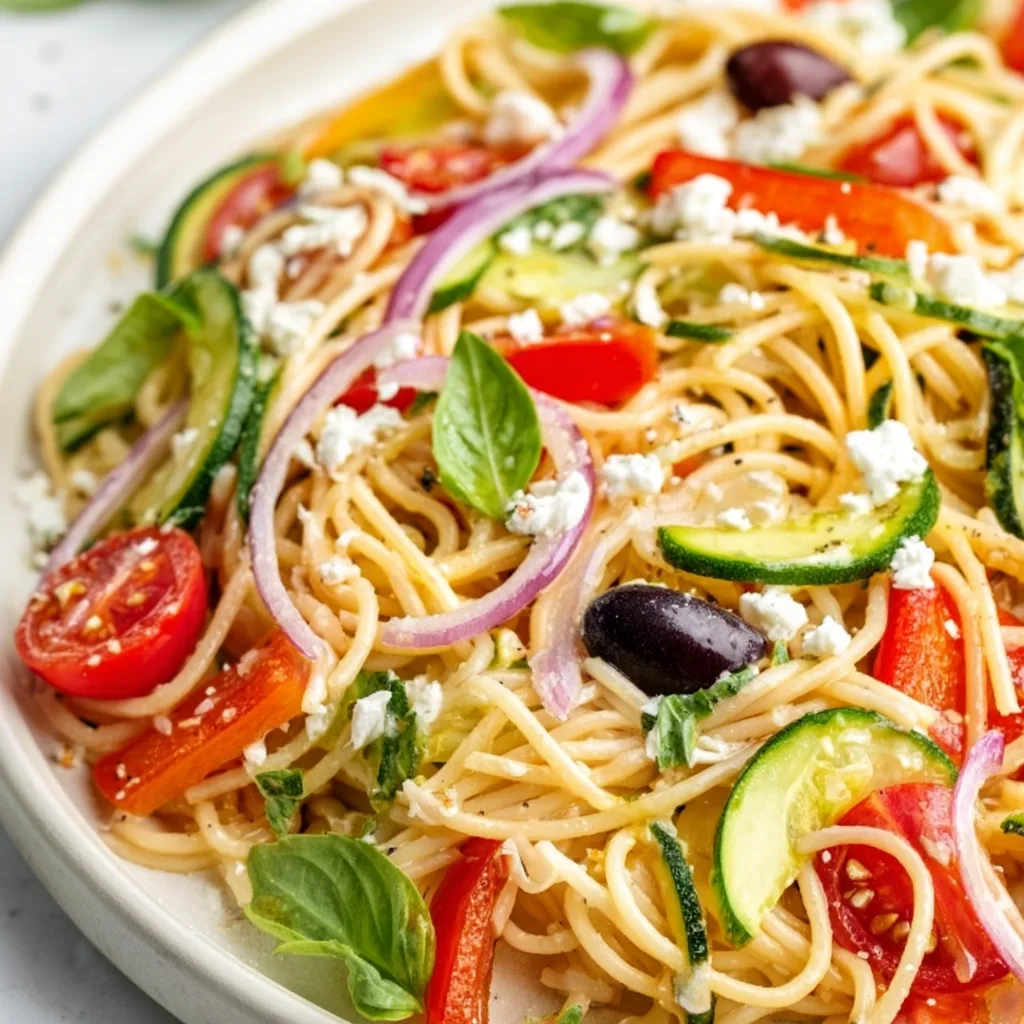
  • Cold Spaghetti Salad: Fresh Veggies & Zesty Dressing Delight!

    Cold Spaghetti Salad: Fresh Veggies & Zesty Dressing Delight!

    Cold Spaghetti Salad: Fresh Veggies & Zesty Dressing Delight!

    This Cold Spaghetti Salad with Fresh Veggies and Zesty Dressing has become my summer salvation. There’s something magical about the first bite—tender pasta coated in tangy dressing, crisp vegetables adding that satisfying crunch, and herbs that perfume each forkful. I discovered this recipe during a particularly sweltering July when turning on the oven felt like a personal betrayal. Now it’s my go-to for everything from backyard gatherings to meal prep Sundays. The beauty lies in its versatility and make-ahead convenience that actually improves with time in the fridge. If you’re craving something refreshing yet substantial, this pasta salad delivers every single time.

    Recipe

    Why You’ll Love This Cold Spaghetti Salad with Fresh Veggies and Zesty Dressing

    Perfect for Any Occasion

    This Cold Spaghetti Salad with Fresh Veggies and Zesty Dressing is the chameleon of my recipe collection. It’s elegant enough for summer dinner parties but humble enough for weekday lunches. I’ve brought it to baby showers where it disappeared in minutes and packed it for beach picnics where it stayed deliciously chilled in my cooler. The make-ahead factor is a game-changer—the flavors actually develop and deepen overnight, making this ideal for busy hosts. Plus, it’s customizable for picky eaters (my nephew only eats the pasta and cherry tomatoes, and that’s perfectly fine!).

    A Nutritional Powerhouse

    Don’t let the word “pasta” fool you—this salad packs a serious nutritional punch. The rainbow of fresh vegetables delivers fiber, vitamins, and antioxidants that make this feel as good as it tastes. I load mine with bell peppers in three colors, crisp cucumber, cherry tomatoes, and red onion for a spectrum of nutrients. The zesty dressing uses heart-healthy olive oil rather than mayo, keeping things lighter while maximizing flavor. When I’m feeling extra virtuous, I swap in whole wheat spaghetti for added fiber. It’s that rare combination—a dish that satisfies both your taste buds and your nutritional goals.

    Essential Tips & Tricks

    Perfecting Your Pasta

    The foundation of an exceptional Cold Spaghetti Salad with Fresh Veggies and Zesty Dressing starts with properly cooked pasta. Always salt your water generously—it should taste like the sea—and cook the spaghetti just until al dente. Remember it will continue absorbing dressing as it sits. My secret step? After draining, I immediately toss the hot pasta with a splash of olive oil and a squeeze of lemon juice. This prevents sticking and begins the flavor-building process. For texture perfection, break the spaghetti into thirds before cooking—this makes the final salad much easier to toss and serve. Trust me, I learned this the hard way after wrestling with full-length noodles at a family reunion!

    Dressing to Impress

    The zesty dressing is what transforms this from ordinary pasta salad to something memorable. I create a flavor base with minced garlic and shallots that I let sit in vinegar for 5-10 minutes before adding oil—this mellows their sharpness while infusing the dressing. Use a combination of red wine vinegar and fresh lemon juice for brightness that cuts through the pasta. Don’t skimp on fresh herbs! Basil, parsley, and dill create layers of flavor that dried herbs simply can’t match. For the perfect consistency, emulsify your dressing in a jar with a tight-fitting lid by shaking vigorously until it looks creamy. Check out these homemade dressing techniques for more inspiration.

    Serving Ideas & Creative Variations

    Perfect Pairings

    This Cold Spaghetti Salad with Fresh Veggies and Zesty Dressing shines as a versatile accompaniment. I’ve served it alongside grilled chicken brushed with herbs and lemon for casual weeknight dinners. It’s also stunning next to a platter of Baked Salmon and Vibrant Quinoa for something more elegant. For potlucks, I place it between platters of sliced watermelon and crusty bread—the combination is unbeatable. This salad holds its own as a vegetarian main too—just add chickpeas or white beans for protein. My favorite summer memory? Enjoying this pasta salad with friends on my deck, paired simply with chilled rosé and fresh fruit for dessert. Sometimes the simplest combinations create the most magical meals.

    Creative Twists

    Don’t be afraid to make this recipe your own with seasonal adaptations. In spring, I add blanched asparagus and fresh peas. Summer calls for sweet corn cut from the cob and juicy cherry tomatoes. Fall? Try roasted butternut squash cubes and sage. For Mediterranean flair, add kalamata olives, feta, and artichoke hearts. Going Italian? Incorporate salami, mozzarella pearls, and pepperoncini. My spice-loving friends appreciate when I add a jalapeño and swap the dressing for something with chipotle. The beauty of this Cold Spaghetti Salad with Fresh Veggies and Zesty Dressing is its ability to transform while maintaining its refreshing essence. Follow your culinary intuition and create a version that speaks to your taste preferences.

    Storage & Troubleshooting Guide

    Keeping It Fresh

    Proper storage is crucial for maintaining the vibrant flavors and textures in your Cold Spaghetti Salad with Fresh Veggies and Zesty Dressing. Store it in an airtight container in the refrigerator for up to four days. The salad actually improves after a day as the flavors meld, making it perfect for meal prep. If you’re preparing it far in advance, consider keeping delicate ingredients like fresh herbs and cucumbers separate until serving time. For potlucks or picnics, transport it in a chilled container and keep it out of direct sunlight. I like to pack a small container of extra dressing on the side to refresh the salad just before serving—a quick toss brings back that just-made vibrancy.

    Solving Common Issues

    Even the most experienced cooks encounter challenges. If your salad seems dry after refrigeration, the pasta has likely absorbed the dressing—simply drizzle with a bit more olive oil and a squeeze of lemon juice, then toss gently. Soggy vegetables? They were probably cut too small or added too early. Next time, cut them slightly larger or add water-rich veggies like cucumber and tomato just before serving. If your dressing separated, don’t panic—just whisk it vigorously or shake it in a jar until recombined. And if the flavors seem dull, a pinch of salt, fresh crack of pepper, or extra splash of vinegar will wake everything up. Remember that pasta salad is forgiving—most issues have simple solutions!

    Frequently Asked Questions

    Can I make this Cold Spaghetti Salad with Fresh Veggies and Zesty Dressing ahead of time?

    Absolutely! It actually improves after 24 hours in the refrigerator as the flavors meld. Just reserve some extra dressing to refresh it before serving, and add delicate herbs at the last minute.

    What’s the best pasta shape to use?

    While I prefer spaghetti broken into thirds, any medium pasta works well. Rotini, fusilli, and farfalle are excellent alternatives because their shapes hold dressing in their nooks and crannies.

    How can I make this salad more filling?

    Add protein! Try chickpeas, white beans, cubed cheese, salami, grilled chicken, or shrimp. For a vegetarian boost, toss in some toasted nuts or sunflower seeds for crunch and nutrition.

    Can I use bottled dressing instead of making my own?

    You can, but homemade dressing makes a world of difference. If pressed for time, doctor up a good-quality Italian dressing with fresh lemon juice and chopped herbs.

    Is this recipe suitable for gluten-free diets?

    Simply substitute your favorite gluten-free pasta! Just be sure to cook it precisely according to package directions as gluten-free varieties can become mushy if overcooked.

    Final Thoughts

    This Cold Spaghetti Salad with Fresh Veggies and Zesty Dressing has saved countless summer meals at my table, and I hope it becomes a staple in your recipe collection too. There’s something deeply satisfying about creating a dish that’s simultaneously refreshing and substantial, colorful and nutritious. I love how it bridges the gap between comfort food and fresh, vibrant eating. The next time temperatures climb or you need a reliable crowd-pleaser, remember this versatile recipe. And don’t forget to check out more seasonal inspirations on Pinterest for your next culinary adventure!

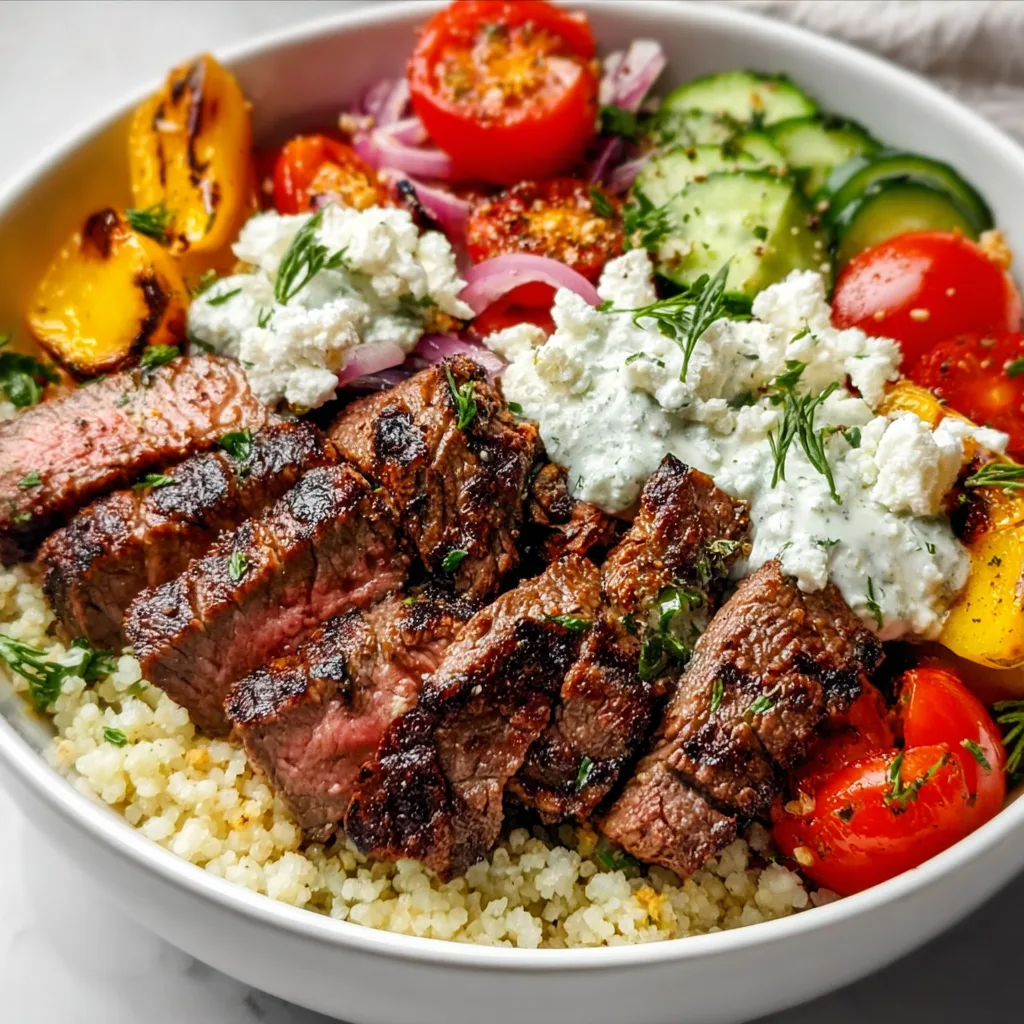
  • Mediterranean Steak Bowl Recipe: Bold Flavors You’ll Crave!

    Mediterranean Steak Bowl Recipe: Bold Flavors You’ll Crave!

    Mediterranean Steak Bowl Recipe: Bold Flavors You’ll Crave!

    This Mediterranean Steak Bowl Recipe transforms your kitchen into a coastal paradise with just a few simple ingredients. The sizzle of perfectly seasoned steak meeting a hot pan instantly transports me to sun-drenched shores, even on the dreariest days. I first created this bowl after returning from a trip to Greece, desperately trying to capture those vibrant flavors that lingered in my memory. The combination of juicy steak strips, tangy tzatziki, and colorful vegetables creates a balanced meal that’s both satisfying and nutritious. Trust me, this recipe will quickly become your go-to when you’re craving something special without hours of preparation.

    Recipe

    Why You’ll Love This Mediterranean Steak Bowl Recipe

    Perfect Balance of Flavors and Textures

    The magic of this Mediterranean Steak Bowl Recipe lies in its harmonious blend of contrasting elements. The charred steak with its smoky exterior and tender interior creates the perfect foundation. I love how the cooling tzatziki sauce provides a refreshing counterpoint to the warm meat, while the crisp vegetables add a satisfying crunch. The first time I served this to friends, they couldn’t believe how the simple combination of lemon, garlic, and herbs transformed ordinary ingredients into something extraordinary. Each bite offers a different sensation – from the creaminess of feta to the pop of juicy tomatoes.

    Quick and Nutritionally Complete

    What initially drew me to this Mediterranean Steak Bowl Recipe was how it delivers a complete meal in under 30 minutes. The lean protein from the steak pairs beautifully with fiber-rich vegetables and complex carbohydrates from the grain base. I’ve made this on countless busy weeknights when I wanted something nutritious but lacked the energy for elaborate cooking. The healthy fats from olive oil and avocado leave you satisfied without feeling heavy. My favorite part? You can prep most components ahead, making assembly lightning-fast when hunger strikes. It’s truly the perfect balance of convenience and nutrition.

    Essential Tips & Tricks

    Mastering the Steak

    The heart of any Mediterranean Steak Bowl Recipe is, of course, the steak itself. For maximum tenderness, start with room-temperature meat and pat it thoroughly dry before seasoning. I learned the hard way that cold, damp steak never achieves that beautiful sear we’re after. Let your pan get screaming hot before adding the meat, then resist the urge to move it around – that’s how you get those gorgeous caramelized edges. For medium-rare perfection, I cook about 3-4 minutes per side, then let it rest for at least 5 minutes before slicing against the grain. This resting period is non-negotiable if you want those juices redistributed!

    Building the Perfect Bowl

    The assembly order of your Mediterranean Steak Bowl Recipe makes a surprising difference in the final experience. Start with a base of warm grains like bulgur, quinoa, or couscous – they absorb the flavorful juices beautifully. Then create distinct sections for each component rather than mixing everything together. This preserves the integrity of delicate ingredients and allows for customized bites. I always place my tzatziki in a separate container if meal prepping to prevent sogginess. For the ultimate presentation, add a final drizzle of high-quality olive oil and a sprinkle of fresh herbs just before serving to wake up all those Mediterranean flavors.

    Serving Ideas & Creative Variations

    Family-Style Mediterranean Feast

    Transform this Mediterranean Steak Bowl Recipe into an interactive dining experience by serving it family-style. I arrange all components in separate colorful bowls down the center of my table, allowing everyone to build their own perfect creation. This approach has saved many dinners with picky eaters! Include some unexpected additions like marinated olives, roasted red peppers, or pickled onions to elevate the spread. For special occasions, I’ll add warm pita bread on the side for scooping up extra tzatziki. The communal nature of sharing creates a convivial atmosphere that perfectly captures the Mediterranean spirit of gathering around food.

    Seasonal and Dietary Adaptations

    One reason I return to this Mediterranean Steak Bowl Recipe throughout the year is its incredible adaptability. In summer, I incorporate garden-fresh tomatoes and cucumbers, while autumn calls for roasted sweet potatoes or butternut squash. For vegetarian guests, I simply swap the steak for grilled halloumi or hearty mushrooms marinated in the same spices. My sister follows a keto diet and enjoys this with cauliflower rice instead of grains. For a lighter lunch version, I often use the components to fill lettuce cups rather than creating a full bowl. The Mediterranean flavor profile works beautifully across these variations while maintaining its essential character.

    Storage & Troubleshooting Guide

    Meal Prep and Storage Solutions

    The Mediterranean Steak Bowl Recipe makes an ideal meal prep option with a few strategic adjustments. I recommend storing the components separately in glass containers for up to three days. Keep the tzatziki and any fresh herbs in their own containers on top to add just before eating. The steak reheats surprisingly well at 50% power in the microwave with a damp paper towel over it to retain moisture. For the freshest experience, consider prepping the marinade and chopping vegetables ahead, but cooking the steak the day you plan to eat. This approach gives you the convenience of meal prep with the quality of freshly cooked protein.

    Solving Common Challenges

    Even experienced cooks encounter issues with Mediterranean Steak Bowl Recipe execution. If your steak turns out tough, you’ve likely either overcooked it or failed to slice against the grain. For tender results, invest in an instant-read thermometer and aim for 130-135°F for medium-rare. Soggy vegetables can ruin the textural contrast – solve this by keeping watery ingredients like tomatoes and cucumbers separate until serving time. If your tzatziki sauce becomes too thin, strain your yogurt through cheesecloth before mixing in other ingredients. And for those times when the flavors seem flat, a squeeze of fresh lemon and an extra pinch of salt just before serving works wonders to brighten everything up.

    Frequently Asked Questions

    What cut of beef works best for Mediterranean Steak Bowl Recipe?

    Ribeye or sirloin steak offer the best balance of flavor and tenderness. For a budget-friendly option, flank steak works well if marinated for at least 30 minutes and sliced thinly against the grain.

    Can I make this recipe vegetarian?

    Absolutely! Substitute the steak with grilled halloumi cheese, portobello mushrooms, or even roasted chickpeas seasoned with the same Mediterranean spices for a satisfying plant-based alternative.

    How do I make authentic tzatziki sauce?

    Combine Greek yogurt with grated cucumber (squeezed dry), minced garlic, dill, olive oil, and lemon juice. Let it rest for at least 30 minutes before serving to allow flavors to meld together.

    What grains work best as the base?

    Bulgur wheat, quinoa, farro, or couscous all make excellent bases. For a lower-carb option, cauliflower rice or a bed of mixed greens works beautifully.

    Can I prepare components of this bowl ahead of time?

    Yes! Marinate and cook the steak, prepare the tzatziki, and chop vegetables up to 2-3 days in advance. Store separately and assemble just before serving for the freshest experience.

    Final Thoughts

    This Mediterranean Steak Bowl Recipe has become my culinary lifeline on days when I crave something special without the fuss. The vibrant colors, bold flavors, and nourishing ingredients never fail to uplift my mood and satisfy my hunger. I find myself returning to it season after season, tweaking components based on what’s fresh and available. There’s something deeply comforting about this perfect balance of protein, vegetables, and grains coming together in one beautiful bowl. I hope it brings the same joy to your table as it consistently does to mine! Find more inspiring bowl recipes on Pinterest.

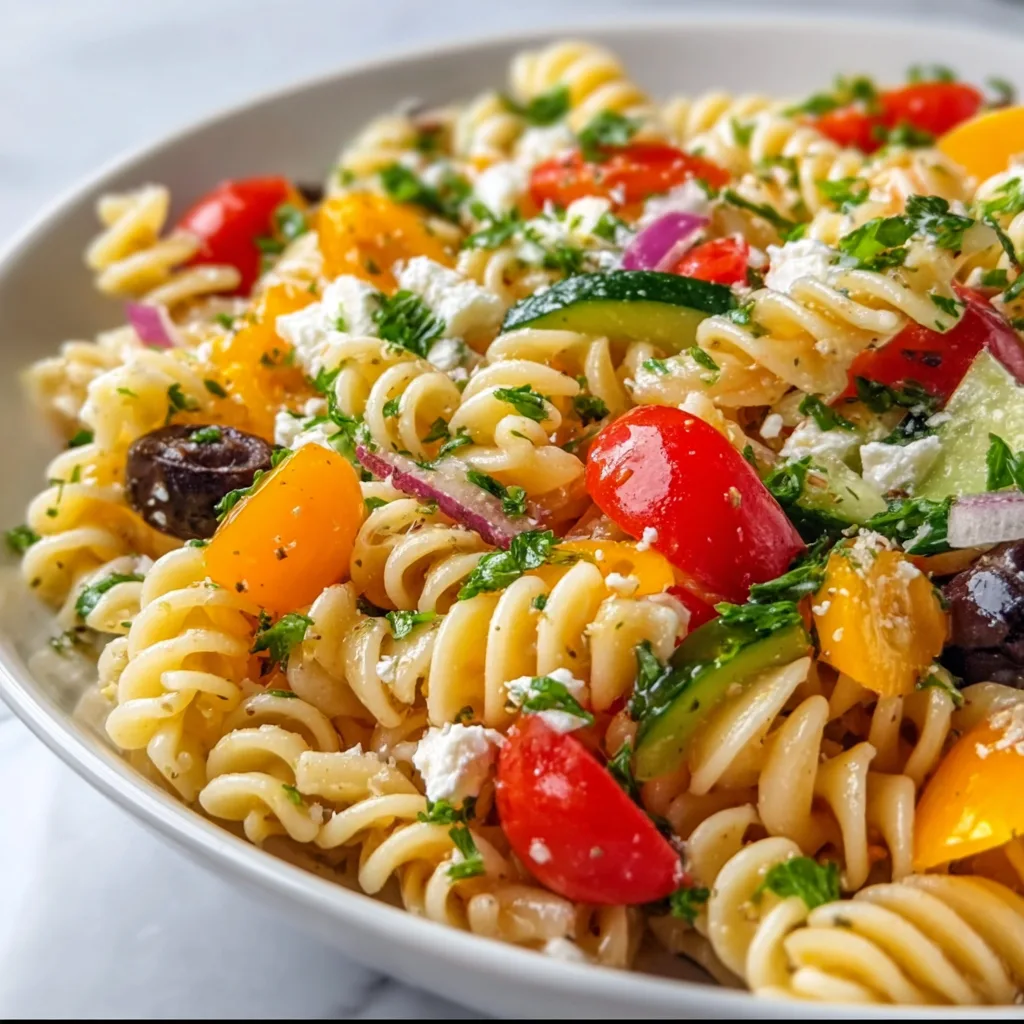
  • Fresh Pasta Salad Recipe That Will Wow Your Taste Buds!

    Fresh Pasta Salad Recipe That Will Wow Your Taste Buds!

    Fresh Pasta Salad Recipe That Will Wow Your Taste Buds!

    Fresh pasta salad recipe is my ultimate summer savior—a vibrant medley of al dente pasta, crisp vegetables, and zesty dressing that never fails to brighten up any gathering. The first time I made this for my sister’s backyard party, it disappeared faster than I could refill my own plate! There’s something magical about the way the flavors meld together, creating that perfect balance of tangy, savory, and fresh. Whether you’re planning a picnic, need a quick lunch, or craving something refreshing for dinner, this pasta salad delivers big flavor with minimal effort. Let me show you how to create this colorful bowl of happiness that’s become my go-to recipe staple.

    Recipe

    Why You’ll Love This Fresh Pasta Salad Recipe

    Perfect Make-Ahead Option

    There’s nothing quite like opening the fridge to find a ready-made meal waiting for you. This fresh pasta salad recipe actually improves with time as the flavors marry together in the refrigerator. I love making a big batch on Sunday afternoons while my favorite playlist fills the kitchen. The pasta soaks up all those incredible flavors overnight, making Monday’s lunch something to look forward to rather than dread. Plus, it’s incredibly versatile—you can add protein like grilled chicken or chickpeas to transform it from side dish to satisfying main course without any extra fuss.

    Customizable to Your Taste

    One of the greatest joys of this fresh pasta salad recipe is how easily it adapts to whatever you’re craving or whatever’s in your fridge. Those cherry tomatoes starting to wrinkle? Toss them in! Cucumber looking lonely in the produce drawer? Chop it up! The base formula remains the same—pasta, veggies, dressing—but the specifics are entirely up to you. I’ve made Mediterranean versions with feta and olives, Italian-inspired ones with mozzarella and basil, and even spicy Southwest variations with corn and black beans. Your imagination is truly the only limit here.

    Essential Tips & Tricks

    Pasta Selection and Preparation

    Choosing the right pasta makes all the difference in your fresh pasta salad recipe. I always reach for medium-sized shapes with nooks and crannies that trap the dressing—think rotini, farfalle, or fusilli rather than long spaghetti or fettuccine. Always cook your pasta al dente (with a bit of bite) since it will continue to soften slightly as it absorbs the dressing. My non-negotiable step? Rinsing the pasta in cold water immediately after cooking. This stops the cooking process and prevents your pasta from becoming a mushy mess. Plus, a drizzle of olive oil after rinsing keeps those pieces perfectly separated.

    Dressing Development

    The dressing is the heart and soul of any fresh pasta salad recipe. I like to create a balance of flavors—something acidic (lemon juice or vinegar), something sweet (honey or maple syrup), something savory (Dijon mustard), and quality oil. Whisk these elements together until emulsified before pouring over your salad. My secret weapon? Adding a splash of the pasta cooking water to the dressing. The starchy water helps the dressing cling to every piece of pasta rather than pooling at the bottom of your bowl. For extra zing, try this alongside my dill pickle pasta salad for a fun contrast of flavors!

    Serving Ideas & Creative Variations

    Perfect Pairings

    This fresh pasta salad recipe works beautifully as both supporting actor and star of the show. For summer barbecues, I love serving it alongside grilled proteins—the cool, tangy salad provides the perfect counterpoint to smoky meats. For lighter meals, a scoop alongside a crusty bread and some hummus creates a satisfying lunch. The colors alone make it a standout on any buffet table! Last weekend, I paired it with my baked salmon and vibrant quinoa for a dinner party, and my guests couldn’t stop raving about how well they complemented each other.

    Seasonal Adaptations

    One of the joys of a versatile fresh pasta salad recipe is adapting it throughout the year. In summer, I load it with garden-fresh produce—juicy tomatoes, crisp cucumbers, and handfuls of herbs straight from my windowsill pots. Come fall, I pivot to roasted butternut squash, dried cranberries, and toasted pecans. Winter calls for heartier additions like roasted red peppers and artichoke hearts, while spring brings tender asparagus and sweet peas. The pasta provides a consistent canvas, but the seasonal vegetables keep the dish feeling new and exciting all year long.

    Storage & Troubleshooting Guide

    Maximizing Freshness

    To keep your fresh pasta salad recipe at its best, store it in an airtight container in the refrigerator for up to four days. I find glass containers work better than plastic for maintaining freshness and preventing any lingering odors. If you’re making this ahead for a party, hold back a small portion of the dressing to refresh the salad just before serving—this perks up the flavors instantly. For ingredients that might wilt or get soggy (like lettuce or avocado), consider adding those elements only to the portion you’ll be eating immediately rather than mixing them into the entire batch.

    Reviving Day-Old Pasta Salad

    Even the most perfect fresh pasta salad recipe might need a little help after sitting in the refrigerator overnight. The pasta continues to absorb dressing, sometimes leaving your once-vibrant salad a bit dry. My simple fix: keep a small jar of extra dressing in the fridge alongside your pasta salad. A quick drizzle and gentle toss brings everything back to life! Another trick I’ve discovered: adding a handful of fresh ingredients like cherry tomatoes or cucumber the next day introduces new texture and moisture. A sprinkle of fresh herbs or a squeeze of lemon juice can also wake up the flavors.

    Frequently Asked Questions

    Can I make this fresh pasta salad recipe gluten-free?

    Absolutely! Simply substitute your favorite gluten-free pasta. I recommend corn-rice blends as they hold their shape better than rice-only varieties. Just be sure to check all other ingredients for hidden gluten.

    How far in advance can I make pasta salad?

    You can prepare this salad up to 3 days ahead. For maximum freshness, store the dressing separately and combine a few hours before serving to allow flavors to meld without becoming soggy.

    What’s the best way to prevent pasta from sticking together?

    Rinse cooked pasta thoroughly with cold water, then toss with a tablespoon of olive oil while still in the colander. Add dressing while pasta is still slightly warm for better absorption.

    Can I add protein to make this a complete meal?

    Definitely! Grilled chicken, canned tuna, chickpeas, or cubed cheese are excellent additions that transform this side dish into a satisfying main course with minimal effort.

    How do I fix a pasta salad that’s too dry?

    If your salad seems dry after refrigeration, whisk together a quick mixture of olive oil, vinegar, and a pinch of salt. Add gradually while gently tossing until desired moisture is restored.

    Final Thoughts

    This fresh pasta salad recipe has become my reliable kitchen companion through countless gatherings, meal preps, and impromptu dinners. Its adaptability means it never gets boring, while its make-ahead nature makes it perfect for busy lives. I love watching friends’ faces light up when they taste that perfect balance of flavors—tangy, fresh, and satisfying all at once. Whether you’re a cooking novice or seasoned chef, this versatile dish deserves a spot in your regular rotation. Don’t forget to share your creations on Pinterest for inspiration!