Category: Lunch

Easy lunch ideas for busy days. Simple, quick recipes with fresh flavor and satisfying meals you can enjoy at home or on the go.

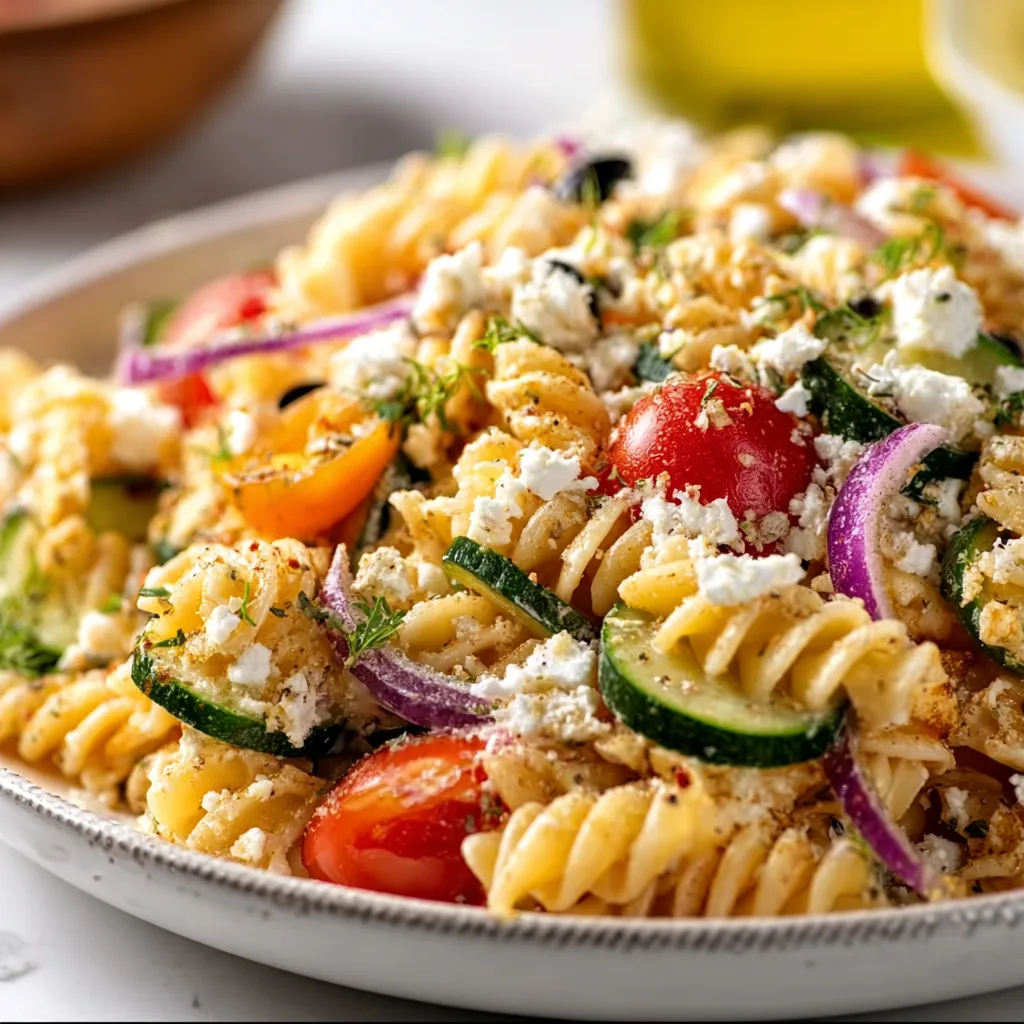
  • Healthy High Protein Pasta Salad – Fresh, Easy & Mayo-Free!

    Healthy High Protein Pasta Salad – Fresh, Easy & Mayo-Free!

    Healthy High Protein Pasta Salad – Fresh, Easy & Mayo-Free!

    Healthy high protein pasta salad with no mayo is my absolute summer savior when I need something filling yet refreshing. The first time I made this, I was hosting a backyard gathering during a scorching July afternoon, and everyone kept asking for the recipe! The combination of al dente pasta, lean proteins, and crisp vegetables tossed in a zesty vinaigrette creates a perfect balance of flavors without the heaviness of traditional mayo-based dressings. This versatile dish has become my go-to for meal prep, picnics, and potluck gatherings.

    Recipe

    Why You’ll Love This Healthy High Protein Pasta Salad No Mayo

    Perfect Balance of Nutrition and Flavor

    This pasta salad packs a serious nutritional punch while delivering incredible taste in every bite. The protein sources – think grilled chicken, chickpeas, or even tofu – keep you satisfied for hours, while the rainbow of vegetables provides essential vitamins and fiber. I love how the bright, acidic dressing brings everything together without adding unnecessary calories. The first time I brought this to my fitness group’s potluck, everyone was shocked that something so delicious could be so nutritious! The combination of textures – from the tender pasta to the crunchy veggies – creates a truly satisfying eating experience.

    Quick and Versatile for Any Occasion

    One of my favorite things about this healthy high protein pasta salad is how incredibly versatile it is. You can prepare it in under 30 minutes, making it perfect for busy weeknights or last-minute gatherings. The make-ahead quality actually improves the flavor as ingredients mingle in the refrigerator. I’ve served this at everything from casual backyard BBQs to more formal dinner parties, and it’s always a hit. The best part? You can customize it based on what you have on hand – swap proteins, change up the veggies, or experiment with different herbs and spices.

    Essential Tips & Tricks

    Pasta Selection and Preparation

    Choosing the right pasta is crucial for a successful protein pasta salad. I recommend whole grain varieties like rotini, fusilli, or bow ties that capture the dressing in their nooks and crannies. Cook the pasta about 1 minute less than package directions for that perfect al dente texture that won’t become mushy. My game-changing trick? After draining, rinse with cold water to stop the cooking process, then toss with a splash of olive oil to prevent sticking. This creates the ideal base for your creamy tortellini soup ingredients when you’re ready to assemble everything.

    Protein Selection and Preparation

    The protein component is what transforms this from a side dish into a complete meal. For maximum flavor, I marinate chicken breasts in lemon, garlic, and herbs before grilling and dicing. Plant-based options like chickpeas or white beans should be thoroughly rinsed and patted dry. My personal favorite combination is grilled chicken with edamame for textural contrast. Prepare proteins the day before for deeper flavor development. For seafood options like shrimp or tuna, add them just before serving to maintain their delicate texture and prevent any fishy aromas from overwhelming the salad.

    Serving Ideas & Creative Variations

    Seasonal Adaptations

    One of the joys of this healthy high protein pasta salad is how beautifully it transitions between seasons. In summer, I load it with garden-fresh produce like cherry tomatoes, cucumber, and bell peppers for maximum crispness and color. Come fall, I pivot to roasted sweet potatoes, dried cranberries, and pecans for a heartier version. Winter variations might include roasted Brussels sprouts and butternut squash, while spring calls for asparagus, peas, and tender herbs. The dressing can shift too – lighter lemon vinaigrettes for warmer months, and more robust balsamic-based options when the temperature drops, similar to how I adjust my slow cooker mongolian beef recipe.

    International Flavor Profiles

    Transform your basic protein pasta salad by exploring global inspirations. For Mediterranean vibes, add olives, feta, artichoke hearts, and a lemon-oregano dressing. My Asian-inspired version includes edamame, mandarin oranges, water chestnuts, and a sesame-ginger vinaigrette that’s absolutely divine. For Southwestern flair, try black beans, corn, avocado, and cilantro with a lime-cumin dressing. Italian variations work beautifully with mozzarella pearls, basil, and sun-dried tomatoes. These international twists keep the concept fresh and exciting while maintaining the healthy, no-mayo approach that makes this dish special.

    Storage & Troubleshooting Guide

    Optimal Storage Practices

    Proper storage is essential for maintaining the texture and flavor of your protein pasta salad. Store it in an airtight container in the refrigerator for up to 4 days, though it’s at its prime within the first 48 hours. I’ve found that layering ingredients strategically makes a difference – keep delicate items like avocados, fresh herbs, or soft cheeses separate until serving time. For meal prep purposes, consider assembling individual portions in mason jars with dressing at the bottom, hearty vegetables and proteins in the middle, and pasta on top. This prevents sogginess and keeps everything perfectly fresh until you’re ready to enjoy it.

    Common Issues and Solutions

    Even experienced cooks encounter challenges with protein pasta salads. If your pasta becomes too dry during storage, simply drizzle with a bit of extra dressing or a splash of olive oil before serving. For soggy vegetables, try adding them closer to serving time or opt for sturdier varieties that hold up better. If your salad lacks flavor, don’t just add salt – brighten it with a squeeze of fresh lemon juice or a splash of vinegar to wake up the taste buds. And for pasta that’s clumped together, gently separate with a fork and add a small amount of olive oil to restore the proper texture.

    Frequently Asked Questions

    How can I make my healthy high protein pasta salad no mayo even more protein-rich?

    Add a combination of protein sources like grilled chicken, chickpeas, edamame, and hard-boiled eggs. Quinoa pasta or protein-enriched varieties can also boost protein content. A sprinkle of hemp seeds or nutritional yeast adds extra protein without changing the flavor profile.

    What’s the best dressing substitute for mayo in pasta salad?

    A simple vinaigrette with olive oil, lemon juice, Dijon mustard, and herbs works beautifully. Greek yogurt-based dressings offer creaminess without the heaviness of mayo. Hummus thinned with olive oil and lemon juice creates a protein-rich, creamy alternative.

    Can I make this pasta salad ahead of time?

    Absolutely! Prepare it 1-2 days ahead, but reserve delicate ingredients like avocado and fresh herbs to add just before serving. The flavors actually improve as they meld in the refrigerator.

    Is this recipe suitable for special dietary needs?

    Yes! Use gluten-free pasta for celiac-friendly versions. For vegan options, focus on plant proteins like beans, tofu, or tempeh. The no-mayo approach already makes it dairy-free if you avoid cheese additions.

    How can I prevent the pasta from absorbing all the dressing?

    Slightly undercook the pasta (al dente), rinse with cold water after cooking, and toss with a bit of oil before adding other ingredients. Reserve some dressing to add right before serving for an instant refresh.

    Final Thoughts

    Creating a healthy high protein pasta salad with no mayo has transformed how I approach meal prep and entertaining. The vibrant flavors, satisfying textures, and nutritional benefits make it a standout dish that never feels like a compromise. I love watching people’s surprised reactions when they discover something so delicious is actually good for them! Whether you’re looking for a light lunch, a substantial side, or a potluck showstopper, this versatile recipe deserves a permanent spot in your cooking repertoire. Don’t forget to check out more protein-packed recipes on Pinterest for endless inspiration!
  • Fresh Italian Chopped Salad Recipe: Irresistibly Crisp & Zesty!

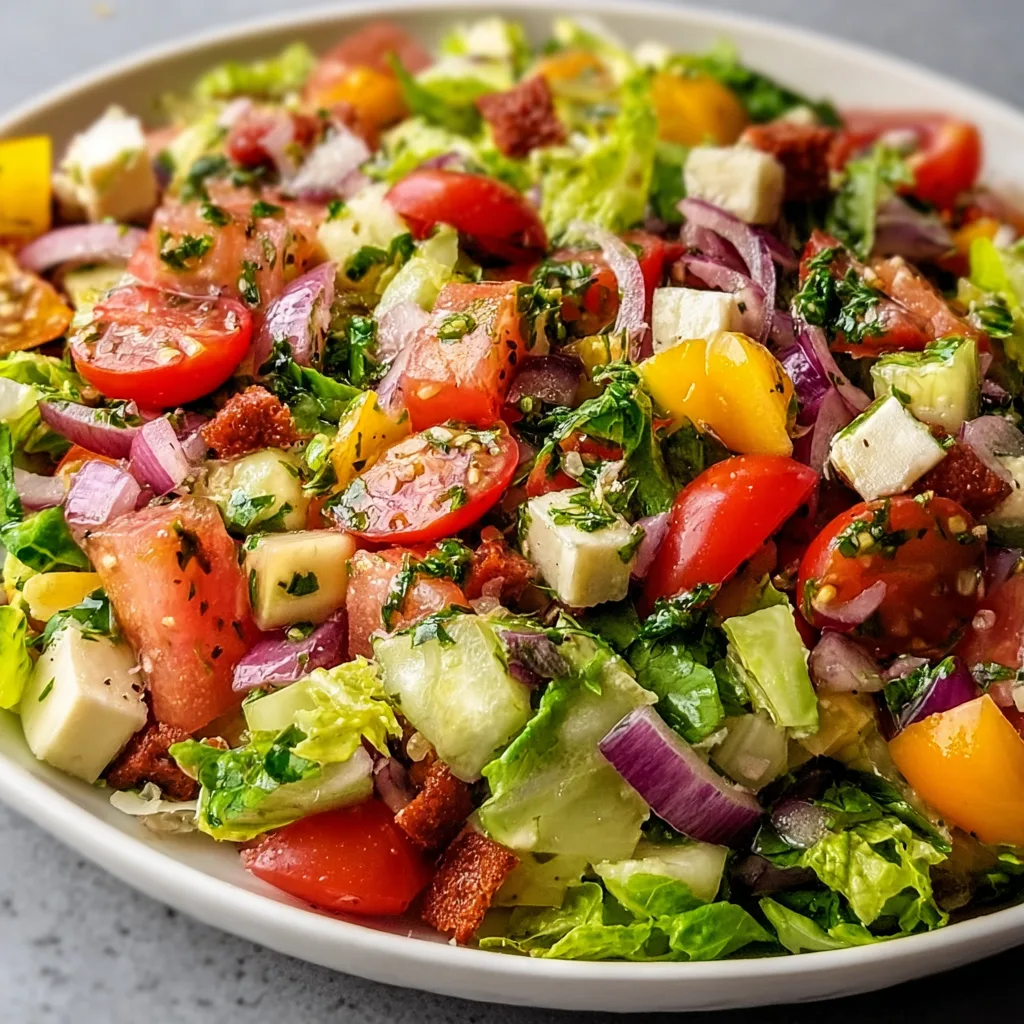
    Fresh Italian Chopped Salad Recipe: Irresistibly Crisp & Zesty!

    Fresh Italian Chopped Salad Recipe: Irresistibly Crisp & Zesty!

    The Fresh Italian Chopped Salad Recipe that’s been gracing my table lately has completely transformed my weeknight dinner routine. There’s something magical about the vibrant colors, crisp textures, and that perfect balance of tangy and savory flavors that makes this salad irresistible. As someone who grew up watching my grandmother meticulously chop vegetables for her famous antipasto, I’ve learned that the secret to an authentic Italian chopped salad lies in the quality of ingredients and the love you pour into each step. This refreshing dish has become my go-to when I need something quick yet impressive.

    Recipe

    Why You’ll Love This Fresh Italian Chopped Salad Recipe

    A Symphony of Textures and Flavors

    The beauty of this Fresh Italian Chopped Salad is how each bite delivers a perfect medley of crisp romaine, juicy tomatoes, and creamy mozzarella pearls. I love how the salty punch of olives and pepperoncini peppers creates a delightful contrast against the cool cucumbers. The first time I served this at a family gathering, my brother-in-law (who claims to hate salads) went back for seconds! The uniform chopping ensures you get a little taste of everything in each forkful, making this so much more satisfying than ordinary salads that leave the best bits at the bottom.

    Quick Preparation with Maximum Impact

    Even on my busiest weeknights, I can throw this vibrant salad together in under 15 minutes. The beauty lies in its simplicity—no cooking required, just chopping and tossing. I’ve found that preparing the homemade Italian dressing ahead of time (it keeps beautifully in the fridge for up to a week) makes assembly even faster. Last Tuesday, after a particularly exhausting workday, I managed to create this gorgeous salad while helping my daughter with homework. The look of delight on everyone’s faces when I placed it on the table made those few minutes of effort completely worthwhile.

    Essential Tips & Tricks

    Chopping Techniques for Perfect Texture

    The secret to an authentic Italian chopped salad is in the name—everything should be cut to a similar size for the ideal texture and flavor distribution. I use a sharp chef’s knife and aim for pieces about 1/2-inch square. For romaine, I stack the leaves, roll them tightly, then slice into thin ribbons (chiffonade). Tomatoes should be seeded first to prevent excess moisture from making your salad soggy. When dicing firmer ingredients like bell peppers and cucumbers, I’ve found that using the bridge cutting technique (curling fingers under while slicing) ensures both safety and precision.

    Dressing and Seasoning Secrets

    The dressing makes all the difference between a good salad and an unforgettable one. For my Italian vinaigrette, I combine extra virgin olive oil, red wine vinegar, Dijon mustard, and dried Italian herbs. The game-changer? Adding a splash of the pepperoncini brine for extra zing! Always dress the salad just before serving to maintain the perfect crispness. I keep a little salt and pepper grinder at the table so everyone can adjust seasoning to their preference. Remember that cold temperatures dull flavors, so I always taste and adjust the dressing one final time right before serving.

    Serving Ideas & Creative Variations

    Perfect Pairings for Any Occasion

    This Fresh Italian Chopped Salad is incredibly versatile as both a side dish and main course. For a light lunch, I serve it with warm crusty bread and a glass of crisp Pinot Grigio. When hosting dinner parties, it pairs beautifully with hearty pasta dishes or grilled chicken. Last month, I brought this to a potluck alongside some grilled Italian sausages, and the combination was spectacular! For a more substantial meal, top the salad with grilled shrimp or sliced chicken breast. The bright flavors and textures create the perfect counterpoint to richer dishes, cleansing the palate and adding a fresh element to any menu.

    Seasonal Adaptations and Creative Twists

    One of the reasons I return to this Italian salad again and again is its adaptability to seasonal produce. In summer, I add sweet corn kernels and juicy peaches for unexpected sweetness. Fall brings opportunities for roasted butternut squash or thinly sliced fennel. Winter? Try blood oranges and radicchio for a stunning color contrast. My favorite variation includes chickpeas and artichoke hearts for extra protein and Mediterranean flair. For a fun presentation at parties, I sometimes serve individual portions in mason jars, layering ingredients for a beautiful visual effect that keeps everything perfectly crisp until serving time.

    Storage & Troubleshooting Guide

    Keeping Your Salad Fresh and Crisp

    The key to maintaining the perfect texture in your chopped salad is proper storage. If preparing components ahead of time, store each ingredient separately in airtight containers lined with paper towels to absorb excess moisture. The complete salad (undressed) can be refrigerated for up to 24 hours in a sealed container with a paper towel on top. For work lunches, I layer ingredients with the heaviest at the bottom and delicate greens on top, packing dressing separately in a leak-proof container. This method has saved many of my meal-prepped salads from the dreaded soggy syndrome that can ruin even the most carefully prepared ingredients.

    Rescuing Common Salad Mishaps

    Even experienced cooks encounter salad emergencies! If your Italian chopped salad becomes overly wet from tomatoes or cucumbers, simply drain the excess liquid and add a handful of fresh greens to absorb moisture. Accidentally overdressed? Toss in more undressed vegetables or a cup of cooked, cooled pasta to balance it out. If your salad has wilted slightly in the refrigerator, a 5-minute ice water bath can revive greens remarkably well. When serving outdoors in warm weather, I place the salad bowl inside a larger bowl filled with ice to keep everything crisp. These quick fixes have saved countless salads from disappointment!

    Frequently Asked Questions

    Can I make this Fresh Italian Chopped Salad ahead of time?

    Yes! Prep all ingredients and store separately. Combine and dress just before serving for maximum freshness. If necessary, assemble without dressing up to 4 hours ahead and refrigerate covered with a damp paper towel.

    What proteins work best with this salad?

    Grilled chicken, Italian salami, shrimp, or cannellini beans are excellent additions. For vegetarian options, try fresh mozzarella pearls or crumbled feta cheese for protein and flavor.

    How do I keep the salad from getting soggy?

    Pat all ingredients dry before chopping, especially tomatoes and cucumbers. Always add dressing just before serving, and consider serving extra dressing on the side.

    Is this recipe gluten-free?

    Yes, the basic Fresh Italian Chopped Salad is naturally gluten-free. Just verify any packaged ingredients like olives or pepperoncini don’t contain gluten additives.

    Can I use a different dressing?

    Absolutely! While traditional Italian vinaigrette complements the flavors best, creamy Caesar or Greek dressing can offer delicious variations. Adjust other ingredients to match your dressing choice.

    Final Thoughts

    This Fresh Italian Chopped Salad Recipe has become my reliable kitchen companion for everything from quick family dinners to elegant entertaining. The vibrant colors, crisp textures, and bold flavors never fail to impress, while the simple preparation makes it accessible even on the busiest days. I hope you’ll make this recipe your own, experimenting with seasonal ingredients and creating memories around your table. For more inspiration and variations, check out my Pinterest collection of Italian-inspired recipes that pair beautifully with this versatile salad.

  • Raw Carrot Salad Recipe That Will Boost Your Health Instantly!

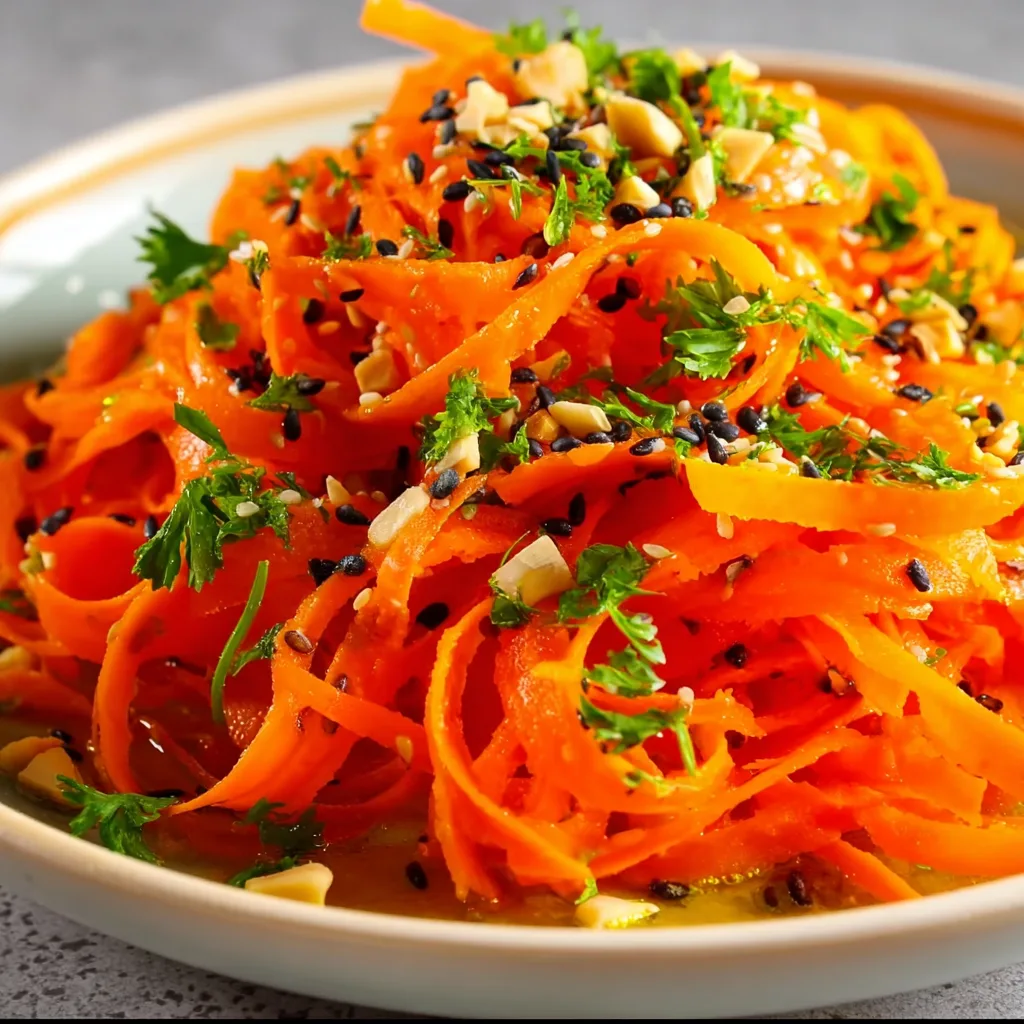
    Raw Carrot Salad Recipe That Will Boost Your Health Instantly!

    Raw Carrot Salad Recipe That Will Boost Your Health Instantly!

    This raw carrot salad has become my absolute go-to when I need something fresh, vibrant, and nourishing. The first time I made it, the bright colors and crisp texture instantly lifted my mood on a gloomy afternoon. There’s something magical about the combination of sweet carrots, tangy dressing, and aromatic herbs that creates a perfect harmony of flavors. Whether you’re looking for a quick side dish or a light lunch option, this versatile salad delivers both nutrition and satisfaction without any fuss. It pairs beautifully with everything from grilled chicken to hearty soups, making it an essential recipe in my weekly rotation.

    Recipe

    Why You’ll Love This Raw Carrot Salad

    A Nutritional Powerhouse

    This raw carrot salad isn’t just delicious—it’s packed with essential nutrients that nourish your body from the inside out. Carrots are loaded with beta-carotene, which supports eye health and immune function, while the healthy fats from olive oil help your body absorb those fat-soluble vitamins. I love how energized I feel after enjoying this colorful dish! The combination of fiber from the carrots and protein from the optional nuts creates a satisfying crunch that keeps hunger at bay. Plus, the raw preparation preserves all those vital enzymes and nutrients that can be diminished through cooking.

    Quick & Effortless Preparation

    One of my favorite things about this raw carrot salad is how quickly it comes together. On busy weeknights when cooking feels overwhelming, I can have this ready in under 15 minutes. Simply grate the carrots (I use my food processor with the grater attachment to make it even faster), whisk together the dressing ingredients, and toss everything together. The minimal prep work delivers maximum flavor, especially if you let it sit for a few minutes before serving to allow the flavors to meld. I’ve made this countless times while multitasking—it’s that simple!

    Essential Tips & Tricks

    Selecting & Preparing Carrots

    For the best raw carrot salad, start with fresh, firm carrots with vibrant orange color. I prefer organic carrots with the tops still attached—they tend to be fresher and more flavorful. Give them a good scrub rather than peeling to preserve the nutrients concentrated just beneath the skin. When grating, try different techniques for varied texture: use the large holes on your grater for a heartier bite or the fine side for a more delicate salad. I discovered that a mix of both creates the most interesting texture! For maximum crispness, grate your carrots just before serving or soak them briefly in ice water.

    Balancing Your Dressing Perfectly

    The secret to an unforgettable raw carrot salad lies in the perfect dressing balance. I aim for the magic ratio of 3 parts oil to 1 part acid (lemon juice or vinegar), plus a touch of sweetness from honey or maple syrup to complement the carrots’ natural sweetness. Don’t skimp on the salt—it brings out all the flavors! My personal touch is adding a tiny pinch of cinnamon, which enhances the carrots’ natural sweetness without tasting obviously spiced. For extra flavor dimension, try infusing your dressing with garlic by letting a smashed clove sit in the oil for 30 minutes before removing.

    Serving Ideas & Creative Variations

    Perfect Pairings & Occasions

    This versatile raw carrot salad shines as both a weeknight side and a potluck star. I love serving it alongside grilled proteins for a light dinner or packing it for lunch—it actually improves after sitting for a few hours as the flavors develop. For entertaining, serve it in a beautiful shallow bowl with fresh herbs scattered on top for an impressive yet effortless presentation. The bright colors make it particularly festive during holiday gatherings! It’s become my signature contribution to summer barbecues, where its refreshing crunch provides the perfect counterpoint to rich, slow-cooked meats. The best part? It never wilts, even on hot days.

    Creative Mix-ins & Variations

    Transform your basic raw carrot salad into countless exciting variations with thoughtful mix-ins. For a Mediterranean twist, add crumbled feta, chopped Kalamata olives, and fresh mint. My favorite version includes toasted cumin seeds, cilantro, and a squeeze of lime for a Moroccan-inspired flavor profile. For added protein and texture, try adding chickpeas, sunflower seeds, or chopped pistachios. Dried fruits like cranberries or apricots introduce delightful sweet-tart pops throughout the salad. When apple season arrives, I love adding julienned crisp apples and a sprinkle of cinnamon for an autumn variation that never fails to impress guests.

    Storage & Troubleshooting Guide

    Keeping It Fresh

    To maintain the optimal crispness of your raw carrot salad, store it in an airtight container in the refrigerator for up to 3 days. I’ve found that keeping the dressing separate until serving time helps preserve the carrots’ texture if you’re prepping ahead. If you’ve already dressed the salad, no worries—it actually develops more flavor overnight! For meal prep, I often grate a big batch of carrots on Sunday and portion them into containers with a small container of dressing on the side. This simple strategy ensures I have fresh, vibrant salad ready to enjoy throughout the busy week.

    Fixing Common Issues

    If your raw carrot salad seems too watery, try patting the grated carrots with paper towels before adding the dressing. Carrots naturally release moisture, especially when salted. For salad that’s too dry, simply whisk together a little extra dressing to refresh it. If the flavor seems flat, a squeeze of fresh lemon juice and an extra pinch of salt work wonders to brighten everything up. Sometimes I find the texture becomes softer after a day in the fridge—when this happens, I add a handful of freshly grated carrot or some toasted nuts to reintroduce that satisfying crunch that makes this salad so special.

    Frequently Asked Questions

    Can I make raw carrot salad ahead of time?

    Absolutely! It actually improves with a little time as flavors meld. Prepare it up to 24 hours ahead and store in the refrigerator in an airtight container for best results.

    What’s the best way to grate carrots for this salad?

    A food processor with a grating attachment is fastest, but a box grater works perfectly too. For varied texture, try using different-sized grating surfaces.

    Is raw carrot salad healthy?

    Yes! It’s packed with vitamins, fiber, and antioxidants. The raw preparation preserves nutrients that might be reduced through cooking, making it an excellent nutritional choice.

    Can I substitute the oil in the dressing?

    Certainly! While I prefer olive oil, avocado oil or walnut oil make wonderful alternatives with different flavor profiles.

    How can I make my raw carrot salad more filling?

    Add protein sources like chickpeas, quinoa, sunflower seeds, or feta cheese. These additions transform it from a side dish into a complete meal.

    Final Thoughts

    This raw carrot salad has become my reliable kitchen companion—simple enough for everyday meals yet special enough for sharing with loved ones. There’s something deeply satisfying about transforming humble carrots into something so vibrant and flavorful. I hope you’ll experiment with different variations to make this recipe your own! The beauty of this salad lies in its adaptability and how it welcomes your personal touch. For more seasonal inspiration and creative recipes, visit our Pinterest page where we’re always sharing fresh ideas for your table.

  • Thai Cucumber Salad with Chicken: Fresh, Crunchy & Irresistible!

    Thai Cucumber Salad with Chicken: Fresh, Crunchy & Irresistible!

    Thai Cucumber Salad with Chicken: Fresh, Crunchy & Irresistible!

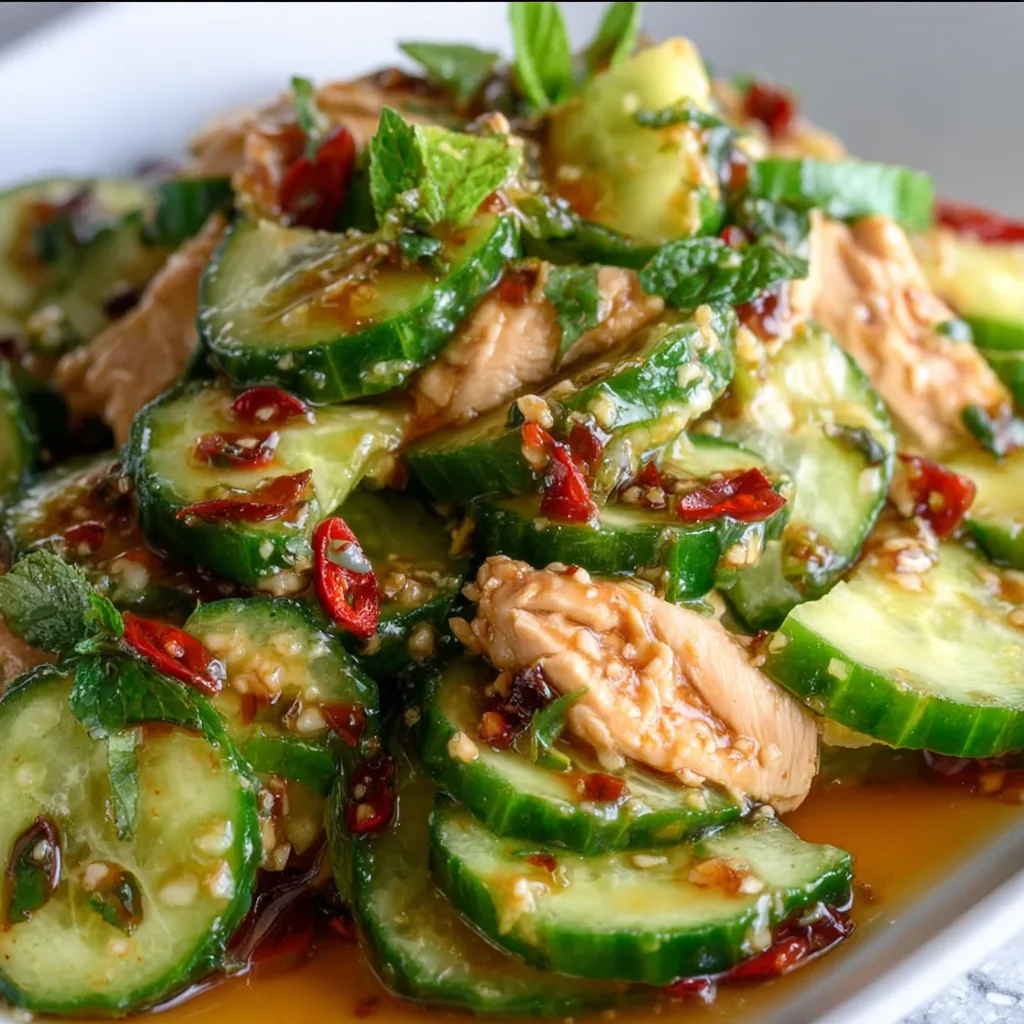
    This Thai Cucumber Salad with Chicken combines crisp, cooling cucumbers with tender chicken and a zingy dressing that dances between sweet, sour, and spicy notes. The first time I made this, my kitchen filled with the aromatic blend of lime, fish sauce, and fresh herbs that instantly transported me to my favorite Thai restaurant. What I love most about this refreshing dish is how it manages to be both satisfyingly light and deeply flavorful at once. Perfect for warm evenings when you crave something vibrant yet substantial enough to be a complete meal. Let me show you how to bring these delicious Thai flavors to your table!

    Recipe

    Why You’ll Love This Thai Cucumber Salad with Chicken

    A Perfect Balance of Flavors and Textures

    This salad is a symphony of contrasts that somehow work in perfect harmony. The cool crunch of fresh cucumbers against warm, seasoned chicken creates a textural wonderland in every bite. I’m obsessed with how the tangy lime dressing with its hint of fish sauce creates that authentic Thai flavor profile that’s simultaneously sour, sweet, salty, and spicy. When the weather turned unbearably hot last summer, this became my go-to dinner – substantial enough to satisfy but light enough that I didn’t feel weighed down. The fresh herbs add bright pops of flavor that make each forkful slightly different from the last.

    Quick and Adaptable for Any Occasion

    One of the things I appreciate most about this Thai Cucumber Salad with Chicken is how incredibly versatile it is. You can prepare most components ahead of time, making it perfect for busy weeknights or meal prep. I’ve served this at casual lunches and dressed it up for dinner parties by arranging it beautifully on a platter. The recipe easily scales up for gatherings or down for a solo meal. My neighbor even adapted it for her gluten-free guests by ensuring all sauce ingredients were certified gluten-free. The chicken can be grilled, poached, or even substituted with tofu for a vegetarian version without losing that essential Thai essence.

    Essential Tips & Tricks

    Perfecting Your Cucumber Technique

    The secret to an exceptional Thai Cucumber Salad with Chicken starts with how you prepare the cucumbers. I recommend using English or Persian cucumbers for their thinner skins and fewer seeds. Rather than simply slicing them, try the “smashing” technique: place the cucumber on a cutting board, gently smash with the flat side of a knife, then roughly chop. This creates irregular surfaces that catch more of that delicious dressing! For extra crispness, salt your cucumber pieces and let them sit in a colander for 15-20 minutes before patting dry. This draws out excess moisture and intensifies the refreshing crunch that makes this salad so satisfying against the tender chicken.

    Creating the Perfect Dressing Balance

    The dressing is truly the heart of this Thai Cucumber Salad with Chicken, bringing everything together with its complex flavor profile. For the most authentic taste, don’t skip the fish sauce – it provides that distinctive umami depth that’s hard to replicate. If you’re new to fish sauce, start with less and adjust to taste. I learned from a Thai cooking class that the perfect dressing should hit all four flavor notes: sour (lime), sweet (sugar or honey), salty (fish sauce), and spicy (chili). Keep tasting and adjusting until it makes your taste buds dance! For extra brightness, add a touch of fresh lime zest along with the juice.

    This dressing also works beautifully with my Slow Cooker Chicken Korma for fusion flavors.

    Serving Ideas & Creative Variations

    Presentation Matters: Serving Suggestions

    Turn your Thai Cucumber Salad with Chicken into a showstopping dish by thinking about presentation. I love serving it in a large, shallow bowl that showcases all the vibrant colors and textures. Garnish with extra herbs, thinly sliced red chilies, and crushed peanuts just before serving for visual appeal and textural contrast. For a beautiful dinner party presentation, try serving individual portions in lettuce cups or on banana leaves if you can find them. When I hosted my sister’s birthday dinner, I arranged the salad on a platter with the components slightly separated – sliced chicken, cucumber mixture, and herbs – allowing guests to build their perfect bite. The colors were stunning against my blue ceramic serving dish!

    Creative Twists on the Classic

    While the traditional Thai Cucumber Salad with Chicken is perfect as is, I’ve discovered some delicious variations over time. For a heartier meal, add cooked rice noodles or serve over jasmine rice. When mangoes are in season, I add thin slices for a sweet contrast to the tangy dressing. For extra protein and texture, try adding crushed roasted peanuts or cashews on top. My personal favorite twist is adding thinly sliced green papaya when I can find it, which adds another layer of crunch and subtle sweetness. For a seafood version, substitute the chicken with grilled shrimp or even crab meat – I tried this with leftovers from my Creamy Crab Casserole and it was divine!

    Storage & Troubleshooting Guide

    Keeping It Fresh: Storage Solutions

    To maintain the crisp texture that makes this Thai Cucumber Salad with Chicken so delightful, proper storage is essential. Store the components separately when possible – keep the dressed cucumber mixture in one container, the cooked chicken in another, and any garnishes in a third. This prevents everything from getting soggy. If you’re meal prepping, I recommend waiting to add the dressing until just before serving. When I need to store leftovers, I place a paper towel in the container to absorb excess moisture. Properly stored, the cucumber mixture will last 1-2 days in the refrigerator, while the cooked chicken can be kept for 3-4 days. Just refresh with a squeeze of lime juice and additional herbs before serving.

    Troubleshooting Common Issues

    Even experienced cooks occasionally encounter challenges with Thai Cucumber Salad with Chicken. If your salad becomes too watery, it’s likely because the cucumbers released moisture after being dressed. Try salting and draining them first, or simply toss everything together right before serving. If the dressing tastes too sour or too salty, balance it with a touch more sugar or honey. Too spicy? Add a bit more lime juice and sugar to tame the heat. When I accidentally over-salted my dressing once, I added more cucumber and a splash of coconut milk to dilute it. For chicken that turns out dry, thinly slice it and let it sit in the dressing for 5-10 minutes to absorb moisture and flavor.

    Frequently Asked Questions

    Can I make Thai Cucumber Salad with Chicken ahead of time?

    Yes, but store components separately. Prepare the chicken and dressing up to 2 days ahead, and cut cucumbers the day of serving. Combine everything just before serving to maintain the perfect texture and freshness.

    What’s a good substitute for fish sauce in this recipe?

    Try a mixture of soy sauce and a touch of anchovy paste or even Worcestershire sauce. While not identical to fish sauce, this combination provides similar umami depth and saltiness to maintain the authentic Thai flavor profile.

    Is Thai Cucumber Salad with Chicken spicy?

    The spice level is completely adjustable. Traditional versions have some heat from Thai chilies, but you can reduce or omit them entirely. Start with less and add more to taste if you’re sensitive to spice.

    Can I use rotisserie chicken for this recipe?

    Absolutely! Rotisserie chicken is a fantastic time-saver that works perfectly in this salad. Shred or dice the meat and toss with a little dressing to infuse it with Thai flavors before combining with other ingredients.

    How do I prevent my cucumber salad from becoming watery?

    Salt your sliced cucumbers and let them sit in a colander for 15-20 minutes, then pat dry before mixing with other ingredients. This draws out excess moisture and helps maintain that desirable crunch.

    Final Thoughts

    This Thai Cucumber Salad with Chicken has become one of my most treasured recipes for its perfect balance of flavors, textures, and ease of preparation. I find myself craving its bright, zingy flavors whenever I need something refreshing yet satisfying. Don’t be afraid to make it your own – adjust the heat level, try different proteins, or add your favorite vegetables. The beauty of this dish lies in its adaptability while still maintaining that essential Thai character. I’d love to see how your version turns out – share your creations on Pinterest and tag me! Your Thai Cucumber Salad with Chicken might just inspire someone else’s dinner tonight.

  • Jalapeño Popper Pasta Salad Recipe That Will Wow Your Taste Buds!

    Jalapeño Popper Pasta Salad Recipe That Will Wow Your Taste Buds!

    Jalapeño Popper Pasta Salad Recipe That Will Wow Your Taste Buds!

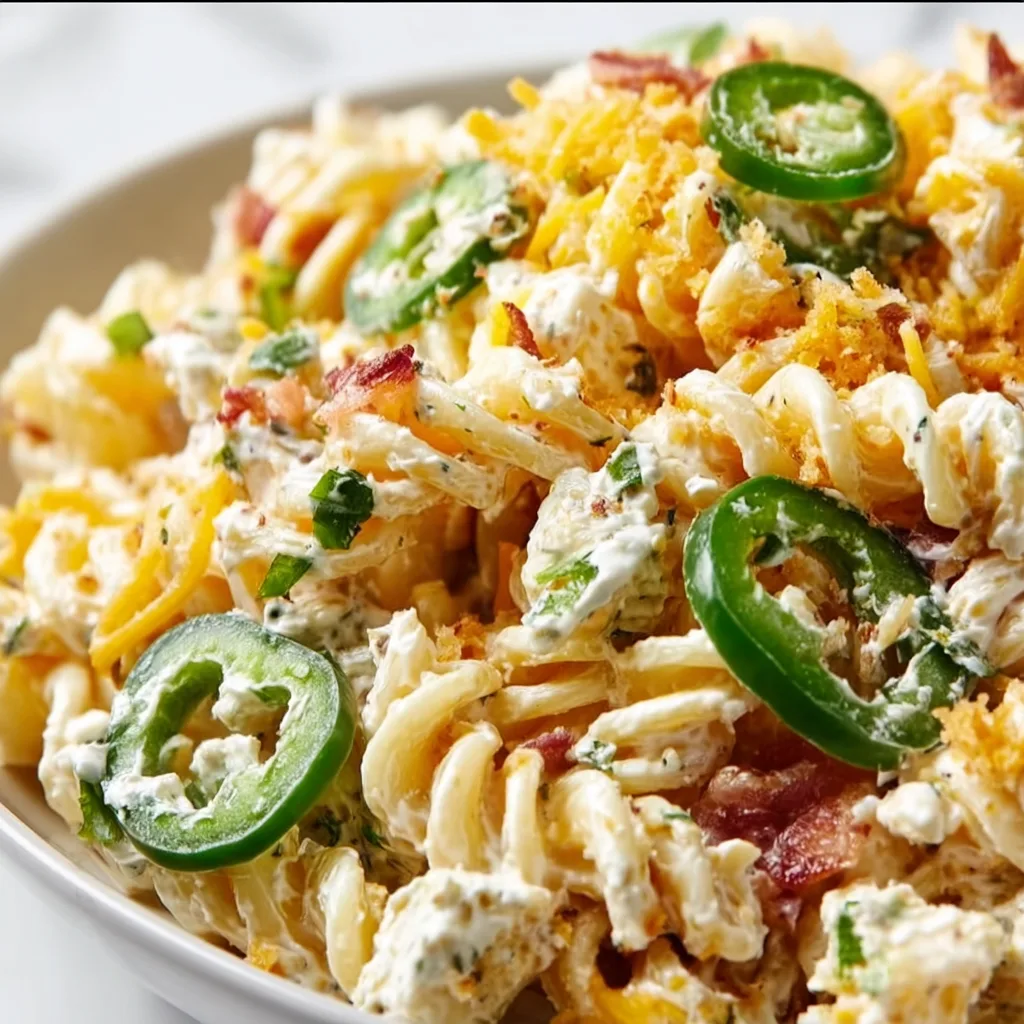
    Jalapeño Popper Pasta Salad combines everything I love about summer entertaining – creamy, spicy, crunchy, and utterly addictive! The first time I made this for a backyard barbecue, my neighbor literally asked for the recipe before she’d even finished her first bite. There’s something magical about the way the creamy cheese sauce coats each pasta twist, with pops of jalapeño heat and crispy bacon adding that irresistible texture contrast. If you’re looking for a dish that disappears faster than you can say “seconds,” this pasta salad is your new secret weapon.

    Recipe

    Why You’ll Love This Jalapeño Popper Pasta Salad

    Perfect Balance of Flavors

    The beauty of this Jalapeño Popper Pasta Salad lies in its perfect harmony of flavors. Each bite delivers the familiar comfort of the classic appetizer we all crave – that creamy-spicy combination that’s utterly irresistible. The rich cream cheese mixture creates a velvety coating that clings to every pasta curve, while the jalapeños provide just enough heat to wake up your taste buds without overwhelming them. I’ve carefully balanced the spice level so it’s customizable for any crowd. My husband (who reaches for hot sauce with everything) and my spice-cautious mother-in-law both devoured this at our last gathering!

    Make-Ahead Convenience

    One of my favorite things about this Jalapeño Popper Pasta Salad is how it actually gets better overnight in the fridge. The flavors meld together beautifully, allowing the pasta to absorb all those incredible seasonings. This makes it the ultimate prep-ahead dish for busy hosts. I often make it the evening before a gathering, which leaves me free to focus on other details the day of the event. The convenience factor alone makes this recipe a regular in my rotation, especially during those hectic summer months when I’m juggling work, kids, and entertaining all at once.

    Essential Tips & Tricks

    Perfecting the Pasta

    The foundation of any great pasta salad is properly cooked pasta. For Jalapeño Popper Pasta Salad, I recommend cooking your pasta just slightly past al dente. This slight overcooking ensures the pasta stays tender even after refrigeration, when pasta naturally firms up. Always rinse your pasta in cold water immediately after cooking to stop the cooking process and remove excess starch. This prevents clumping and helps the creamy dressing adhere better. My secret trick? Toss the still-warm pasta with a tiny drizzle of olive oil before adding the dressing – it creates the perfect base for all those amazing flavors to cling to.

    Managing the Heat Level

    The jalapeños are the star of this show, but managing their heat is key to a crowd-pleasing Jalapeño Popper Pasta Salad. For a milder version, remove all seeds and membranes from your jalapeños – that’s where most of the heat resides. For medium heat, leave some seeds in, and for spice lovers, keep most of them. I always taste-test a tiny piece of each jalapeño before adding it, as their heat can vary dramatically. If you’re serving a diverse crowd, consider keeping some additional diced jalapeños on the side as an optional topping. This approach works beautifully for my Crack Chicken Noodle Soup too – customizable heat is always appreciated!

    Serving Ideas & Creative Variations

    Perfect Pairings

    Jalapeño Popper Pasta Salad shines as a versatile side dish that pairs beautifully with almost anything from the grill. The creamy, spicy notes complement smoky barbecue flavors perfectly, making it ideal alongside pulled pork, grilled chicken, or juicy burgers. For a complete meal, I love serving it with a simple green salad and some crusty bread. The pasta salad also makes a stunning addition to potluck spreads – I place it in a beautiful bowl garnished with fresh cilantro and extra bacon bits. The vibrant colors always draw people in, and the empty bowl I bring home tells the whole story about how much everyone enjoyed it!

    Creative Twists

    Don’t be afraid to put your own spin on this Jalapeño Popper Pasta Salad! One of my favorite variations is adding roasted corn kernels for a sweet contrast to the spicy jalapeños. The caramelized flavor adds incredible depth. You could also swap the bacon for chorizo crumbles for a Mexican-inspired twist, or add diced avocado just before serving for extra creaminess. For a heartier version that works as a main dish, fold in some diced rotisserie chicken. This adaptable recipe plays well with so many flavors, similar to my Slow Cooker Mac & Cheese which also welcomes creative additions while maintaining its comfort food status.

    Storage & Troubleshooting Guide

    Proper Storage Methods

    To keep your Jalapeño Popper Pasta Salad at its best, store it in an airtight container in the refrigerator for up to 4 days. The flavors actually develop and improve after the first 24 hours! If you’re making it ahead for an event, I recommend reserving a small portion of the bacon and green onions to sprinkle on top just before serving – this maintains their perfect texture and gives the dish a fresh appearance. For food safety, never leave the pasta salad at room temperature for more than 2 hours, especially on hot summer days. I learned this lesson the hard way at my first outdoor gathering when the summer heat affected the creamy dressing faster than expected!

    Quick Fixes for Common Issues

    If your Jalapeño Popper Pasta Salad seems dry after refrigeration, don’t worry – this is completely normal and easily fixed! Simply stir in a splash of milk or a tablespoon of mayo to restore its creamy consistency. For pasta that’s absorbed too much of the dressing and become sticky, a drizzle of olive oil works wonders to separate the strands. If you accidentally made it too spicy, fold in some additional cream cheese or even a dollop of sour cream to temper the heat. And if the flavors seem muted, a squeeze of fresh lime juice and an extra pinch of salt can instantly brighten everything up.

    Frequently Asked Questions

    Can I make Jalapeño Popper Pasta Salad ahead of time?

    Absolutely! It actually tastes better made 1-2 days ahead as the flavors meld together beautifully. Just reserve some bacon and green onions to sprinkle on top before serving for the best texture.

    How spicy is this Jalapeño Popper Pasta Salad?

    The spice level is customizable. Remove all seeds and membranes from jalapeños for mild heat, leave some in for medium, or keep most for a spicy kick. You control the heat!

    What pasta shape works best for this recipe?

    Medium shapes with ridges or curves like rotini, cavatappi, or farfalle work perfectly. They hold the creamy dressing in all their nooks and crannies for maximum flavor in every bite.

    Can I make this vegetarian?

    Yes! Simply omit the bacon or substitute with smoked paprika for that smoky flavor. You could also add roasted mushrooms for a meaty texture without the meat.

    How do I keep the pasta from absorbing all the dressing?

    Slightly undercook the pasta (just past al dente), rinse it in cold water immediately, and toss with a tiny bit of olive oil before adding the dressing. This creates a barrier that slows absorption.

    Final Thoughts

    This Jalapeño Popper Pasta Salad has become my signature potluck dish for good reason – it consistently earns rave reviews and recipe requests. The perfect balance of creamy, spicy, and crunchy elements creates an irresistible combination that elevates any meal from ordinary to memorable. What I love most is how versatile it is – dress it up for special occasions or keep it casual for weeknight dinners. Either way, this pasta salad delivers big on flavor with minimal effort. Don’t be surprised when friends start requesting “that amazing jalapeño pasta thing” at every gathering! Find more inspiration for your next gathering on my Pinterest board.

  • Easy Tex-Mex Cowboy Cabbage Salad with Zesty Chipotle Dressing!

    Easy Tex-Mex Cowboy Cabbage Salad with Zesty Chipotle Dressing!

    Easy Tex-Mex Cowboy Cabbage Salad with Zesty Chipotle Dressing!

    My Easy Tex-Mex Cowboy Cabbage Salad with Chipotle Dressing brings the perfect balance of crunch, spice, and everything nice! I discovered this recipe during a family barbecue when I needed something fresh yet satisfying to complement our smoky grilled meats. The vibrant colors and bold flavors had everyone asking for seconds—and the recipe! What makes this salad special is the combination of hearty cabbage, black beans, and corn, all tied together with a smoky chipotle dressing that tingles your taste buds with every bite. It’s become my go-to for potlucks, meal prep, and those nights when I crave something wholesome yet exciting. Check out my Crack Chicken Noodle Soup for another crowd-pleaser!

    Recipe

    Why You’ll Love This Easy Tex-Mex Cowboy Cabbage Salad with Chipotle Dressing

    Perfect Balance of Flavors and Textures

    This salad is a symphony of contrasting textures that dance in your mouth—crunchy cabbage, creamy avocado, and tender black beans create an irresistible combination. The flavor profile strikes that magical balance between smoky, spicy, and fresh with the chipotle dressing adding just enough heat without overwhelming. I love how the sweetness of corn plays against the tangy lime and the earthiness of cumin. It’s one of those dishes where each forkful offers something different, keeping your taste buds engaged from the first bite to the last. Plus, it’s substantial enough to satisfy even the heartiest appetites!

    Quick Prep with Maximum Impact

    You won’t believe how much flavor impact comes from such minimal effort! This Easy Tex-Mex Cowboy Cabbage Salad comes together in under 20 minutes, making it perfect for busy weeknights when you’re tempted to order takeout. I’ve made this countless times when friends drop by unexpectedly—just chop, mix, and serve! The ingredients are pantry and refrigerator staples that I always have on hand: cabbage stays fresh for weeks, canned beans and corn are ready to go, and the dressing ingredients are simple. The visual appeal is stunning too—vibrant purple cabbage against the black beans, yellow corn, and green cilantro creates an Instagram-worthy dish with zero fuss.

    Essential Tips & Tricks

    Mastering the Chipotle Dressing

    The secret weapon in this recipe is definitely the chipotle dressing—it transforms simple ingredients into something extraordinary. For the perfect balance, start with less chipotle and add more to taste; you can always increase the heat but can’t take it away! I discovered that blending the dressing ingredients creates a creamier emulsion that clings beautifully to every ingredient. My personal touch is adding a spoonful of honey to balance the heat with a touch of sweetness. Let the dressing sit for at least 15 minutes before serving to allow the flavors to meld together. The dressing can be made up to three days ahead, making this Easy Potsticker Soup Recipe level convenient!

    Prepping Ingredients for Maximum Freshness

    The key to an exceptional cowboy cabbage salad is in how you prepare the vegetables. Slice your cabbage thinly—I aim for ribbons no thicker than ¼ inch—which allows it to better absorb the dressing without becoming soggy. For the crispest texture, soak your sliced cabbage in ice water for 10 minutes, then drain and pat dry before assembling. This extra step creates that restaurant-quality crunch! When adding avocado, toss it in at the very last minute to prevent browning, or sprinkle with a little extra lime juice as a preservative. For meal prep, keep the dressing separate and combine just before serving to maintain that perfect texture.

    Serving Ideas & Creative Variations

    Perfect Pairings for Any Occasion

    This Easy Tex-Mex Cowboy Cabbage Salad with Chipotle Dressing makes a versatile companion to so many meals! Serve it alongside grilled chicken or steak for a complete dinner that feels both satisfying and light. I’ve brought this to countless summer barbecues where it pairs beautifully with burgers and hot dogs, offering a fresh alternative to traditional coleslaw. For a vegetarian feast, serve it with my Slow Cooker Mac & Cheese Classic for the ultimate comfort food upgrade. The salad also works brilliantly as a topping for tacos or stuffed into a wrap with grilled chicken for lunch. The bright flavors cut through rich dishes, making it the perfect palate cleanser.

    Customization Options to Make It Your Own

    Don’t be afraid to put your personal stamp on this salad—it’s incredibly adaptable to what you have on hand! Swap the black beans for pinto beans or add grilled chicken for extra protein. Roasted sweet potatoes make a delicious addition for fall versions, while jicama adds wonderful crunch in summer. For a fruity twist, add diced mango or pineapple—the sweetness plays beautifully against the spicy dressing. Cheese lovers can sprinkle cotija or feta on top for a salty kick. My family loves it with crushed tortilla chips added just before serving for extra crunch. Vegetarians can add roasted peppers and extra avocado for a more substantial main dish option.

    Storage & Troubleshooting Guide

    Keeping Your Salad Fresh for Days

    The beauty of this cabbage-based salad is its impressive shelf life compared to lettuce-based options. When stored properly, the undressed base can last 3-4 days in the refrigerator. I recommend storing components separately: keep the cabbage mixture in an airtight container lined with paper towels to absorb excess moisture. Store the dressing in a jar, avocados whole until needed, and any crunchy toppings like tortilla strips in a separate bag. When ready to eat, just combine what you need! If you’re taking this to work, layer ingredients in a mason jar with dressing at the bottom, heartier ingredients next, and delicate items on top. This strategy has saved many of my meal-prepped lunches!

    Troubleshooting Common Issues

    Even the simplest recipes can sometimes present challenges, but I’ve got quick fixes for the most common issues. If your salad seems too watery after sitting, drain excess liquid and add a handful of fresh cabbage to absorb moisture. For dressing that’s too spicy, add extra lime juice, a touch more honey, or a dollop of sour cream to mellow the heat. If your avocados aren’t quite ripe, place them in a paper bag with a banana overnight to speed up ripening. Conversely, if they’re overripe, mash them into the dressing for a creamier texture. Bland salad? A pinch of salt, extra lime zest, or a splash of hot sauce can instantly wake up the flavors without starting from scratch.

    Frequently Asked Questions

    Can I make this Easy Tex-Mex Cowboy Cabbage Salad with Chipotle Dressing ahead of time?

    Yes! Prepare all components up to 24 hours ahead but keep the dressing separate. Add avocado and any crunchy toppings just before serving for the best texture and freshness.

    Is there a way to make this recipe less spicy?

    Absolutely. Reduce or omit the chipotle peppers and substitute with smoked paprika for the smoky flavor without the heat. You can also add more honey or a dollop of sour cream to mellow the spice.

    What protein would work best with this salad?

    Grilled chicken, seasoned ground beef, or blackened shrimp all pair beautifully. For vegetarian options, try roasted chickpeas or tempeh with taco seasoning for added protein and flavor.

    Can I use pre-shredded cabbage to save time?

    Yes! Bagged coleslaw mix works perfectly as a time-saver. For the best flavor, I recommend adding some fresh cilantro and an extra squeeze of lime to brighten up pre-packaged ingredients.

    How can I turn this into a complete meal?

    Transform this salad into a hearty main by adding your favorite protein, serving it in a tortilla bowl, or pairing with quinoa. The versatility of this Easy Tex-Mex Cowboy Cabbage Salad makes it adaptable to any meal format.

    Final Thoughts

    This Easy Tex-Mex Cowboy Cabbage Salad with Chipotle Dressing has become my reliable go-to when I want to impress without stress. Its vibrant colors, bold flavors, and satisfying crunch make everyday meals feel special while still being incredibly simple to prepare. I love how it bridges the gap between comfort food and healthy eating—proving you really can have it all in one bowl! Whether you’re serving it at a family dinner or packing it for lunch, this salad delivers on both flavor and nutrition. For more delicious recipes like this one, follow me on Pinterest where I’m always sharing new favorites!

  • Healthy Mediterranean Rice Bowl Recipe: Fresh, Flavorful & Easy!

    Healthy Mediterranean Rice Bowl Recipe: Fresh, Flavorful & Easy!

    Healthy Mediterranean Rice Bowl Recipe: Fresh, Flavorful & Easy!

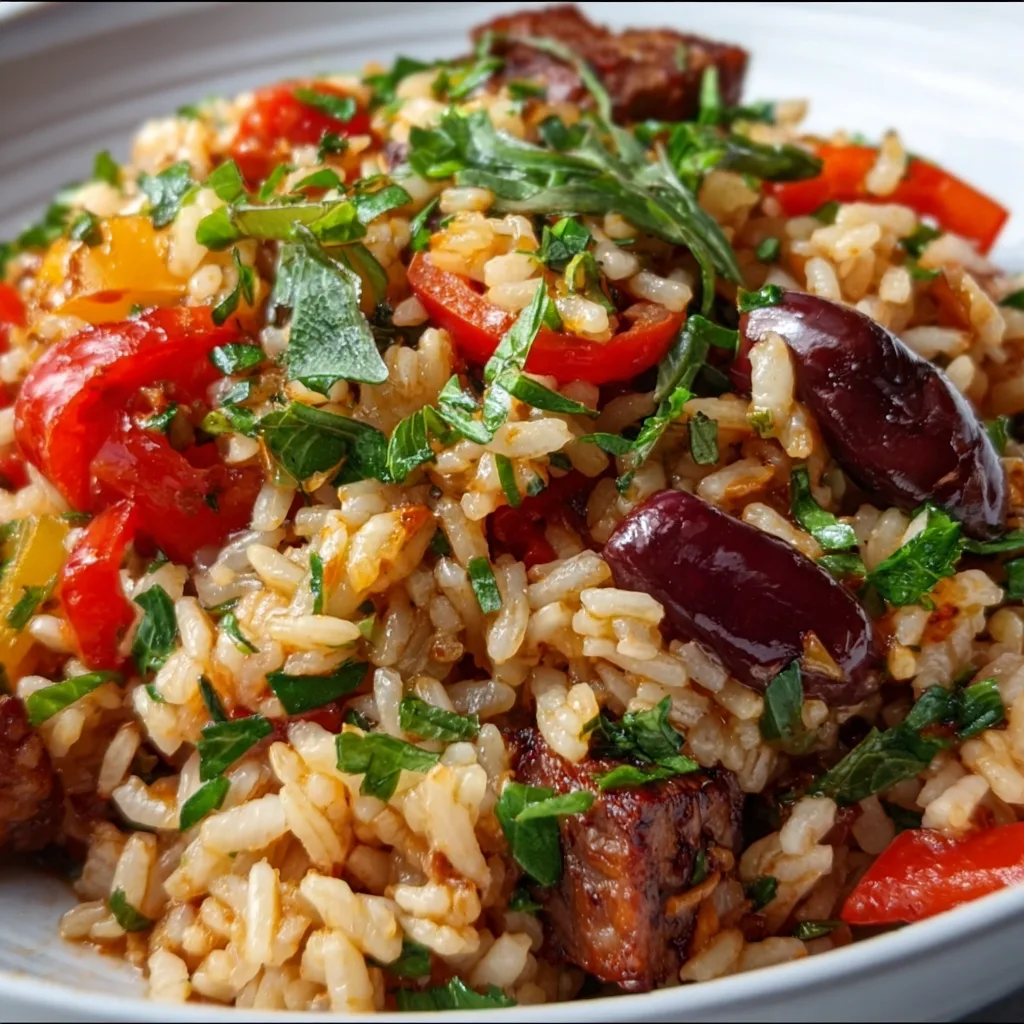
    The Healthy Mediterranean Rice Bowl Recipe that changed my weeknight dinner game still makes me smile every time I prepare it. There’s something magical about the colorful assembly of fresh vegetables, perfectly seasoned proteins, and aromatic herbs that transport me straight to a seaside café in Santorini. I discovered this recipe during a particularly hectic month when I craved something nourishing yet simple. Now it’s my go-to when I want a meal that’s both satisfying and virtuous. If you’re looking for meals that energize rather than weigh you down, this Mediterranean-inspired creation deserves a spot in your recipe collection.

    Recipe

    Why You’ll Love This Healthy Mediterranean Rice Bowl Recipe

    Perfect Balance of Flavors and Nutrition

    This Mediterranean rice bowl delivers a perfect harmony of flavors that dance on your palate with each bite. The nutty brown rice provides a hearty base, while the combination of crisp cucumbers, juicy tomatoes, and creamy feta creates layers of texture and taste. What I adore most is how it manages to be both incredibly satisfying and nutritionally dense. The lean proteins and abundance of vegetables make it a powerhouse of vitamins, minerals, and antioxidants. Plus, the olive oil delivers those heart-healthy fats that are central to the Mediterranean diet’s renowned health benefits.

    Customizable for Every Preference

    One of the greatest joys of this Healthy Mediterranean Rice Bowl Recipe is its endless adaptability. The basic formula stays the same, but you can easily swap ingredients based on what’s in season or your personal preferences. Don’t have chickpeas? Use white beans instead. Prefer salmon to chicken? Go for it! Even the grain base can be switched—quinoa, farro, or cauliflower rice all work beautifully. I’ve made this for picky eaters and food enthusiasts alike, and everyone finds their perfect combination. This flexibility makes it ideal for families with varying dietary needs or for meal prep when you want variety without starting from scratch.

    Essential Tips & Tricks

    Perfecting Your Rice Base

    The foundation of any great Mediterranean rice bowl is perfectly cooked rice with the right texture and flavor. I’ve found that rinsing brown rice before cooking removes excess starch and results in fluffier grains. For an extra flavor boost, try cooking your rice in vegetable or chicken broth instead of water, and add a bay leaf or sprig of thyme. Allow the rice to rest for 10 minutes after cooking with the lid on—this makes all the difference in achieving that ideal tender-but-not-mushy consistency. If you’re short on time, prepare a big batch on the weekend and portion it out for quick assembly during busy weeknights.

    Balancing Your Mediterranean Flavor Profile

    The magic of Mediterranean cuisine lies in its balanced flavor profile. To achieve authentic taste, invest in quality olive oil—it should be extra virgin and have a peppery finish. Fresh lemon juice brightens everything up, while herbs like oregano, dill, and mint add complexity. Don’t underestimate the importance of proper seasoning; a pinch of flaky sea salt sprinkled just before serving makes flavors pop. For an extra dimension, try adding a drizzle of tahini sauce or homemade tzatziki that complements the other components without overwhelming them.

    Serving Ideas & Creative Variations

    Family-Style Presentation Options

    Transform your Healthy Mediterranean Rice Bowl Recipe into a communal experience by serving it family-style. Arrange components in colorful bowls around a large platter of rice, creating an interactive build-your-own bowl station. This presentation not only looks stunning but encourages conversation as everyone customizes their creation. For special occasions, I serve mine with warm pita triangles and a variety of small-batch dips like hummus, baba ganoush, and olive tapenade. The visual appeal of this colorful spread always impresses guests, while the casual serving style keeps the atmosphere relaxed and inviting.

    Seasonal Adaptations Worth Trying

    The Mediterranean diet celebrates seasonal eating, making this rice bowl perfect for showcasing the best produce each season offers. In summer, add charred corn and juicy peaches for unexpected sweetness. Fall calls for roasted butternut squash and pomegranate seeds, while winter shines with roasted root vegetables and preserved lemons. Spring is perfect for tender asparagus, peas, and fresh herbs. I recently made a winter version with slow-roasted tomatoes that concentrated their flavor beautifully. Don’t be afraid to experiment with different herbs and spices that complement your seasonal ingredients—sumac in summer, za’atar in fall, harissa in winter.

    Storage & Troubleshooting Guide

    Meal Prep and Storage Solutions

    Mastering the art of prepping this Healthy Mediterranean Rice Bowl Recipe ahead of time has been a game-changer for my busy weeks. Store components separately in airtight containers—cooked grains and proteins can last 3-4 days, while chopped vegetables stay crisp for 2-3 days. Keep dressings and sauces in small jars to prevent sogginess. I’ve found that delicate ingredients like avocado and fresh herbs are best added just before serving. For ultimate convenience, assemble grab-and-go portions in mason jars by layering dressing on the bottom, followed by hearty vegetables, proteins, grains, and finally the most delicate ingredients on top.

    Fixing Common Rice Bowl Problems

    Even the most experienced cooks encounter challenges with rice bowls. If your rice turns out too mushy, try reducing the liquid by ¼ cup next time or use the absorption method instead of boiling. Bland rice bowls can be instantly improved with a squeeze of lemon, a drizzle of quality olive oil, or a sprinkle of feta cheese. If your vegetables release too much water and make everything soggy, try roasting them instead of using them raw. For proteins that seem dry, a simple yogurt-based sauce can add moisture and flavor. Remember that the beauty of this Mediterranean recipe is its forgiving nature—almost any issue can be solved with a simple adjustment.

    Frequently Asked Questions

    Is this Healthy Mediterranean Rice Bowl Recipe suitable for meal prep?

    Absolutely! Prepare components separately and store in airtight containers. Rice and proteins last 3-4 days refrigerated, while pre-chopped vegetables stay fresh for 2-3 days. Assemble just before eating for best results.

    Can I make this recipe gluten-free?

    Yes, this recipe is naturally gluten-free if you ensure your rice hasn’t been cross-contaminated. Double-check any pre-packaged seasonings or sauces for hidden gluten ingredients.

    What proteins work best in Mediterranean rice bowls?

    Grilled chicken, chickpeas, and salmon are traditional favorites. Other excellent options include shrimp, white beans, tofu, or lamb meatballs—all complement the Mediterranean flavors beautifully.

    How can I make this recipe more filling?

    Add more protein, increase healthy fats with extra avocado or nuts, or incorporate hearty vegetables like roasted sweet potatoes or eggplant for a more substantial meal.

    What’s the best rice to use for a Healthy Mediterranean Rice Bowl Recipe?

    Brown rice offers nutty flavor and nutritional benefits, but any variety works well. Try aromatic basmati, short-grain rice, or even ancient grains like farro or freekeh for interesting texture.

    Final Thoughts

    This Healthy Mediterranean Rice Bowl Recipe has become more than just a meal in my kitchen—it’s a philosophy of eating that celebrates fresh ingredients, balanced flavors, and nourishing combinations. I love how it adapts to my mood and the seasons, always delivering satisfaction without complexity. The vibrant colors, enticing aromas, and clean flavors remind me that healthy eating doesn’t require sacrifice. Whether you’re cooking for yourself or sharing with loved ones, these Mediterranean bowls invite mindful enjoyment of one of life’s simplest pleasures: good food. Find more inspiration for your Mediterranean cooking adventures on Pinterest.

  • Crispy Chicken Caesar Wrap: Irresistibly Crunchy & Loaded with Flavor!

    Crispy Chicken Caesar Wrap: Irresistibly Crunchy & Loaded with Flavor!

    Crispy Chicken Caesar Wrap: Irresistibly Crunchy & Loaded with Flavor!

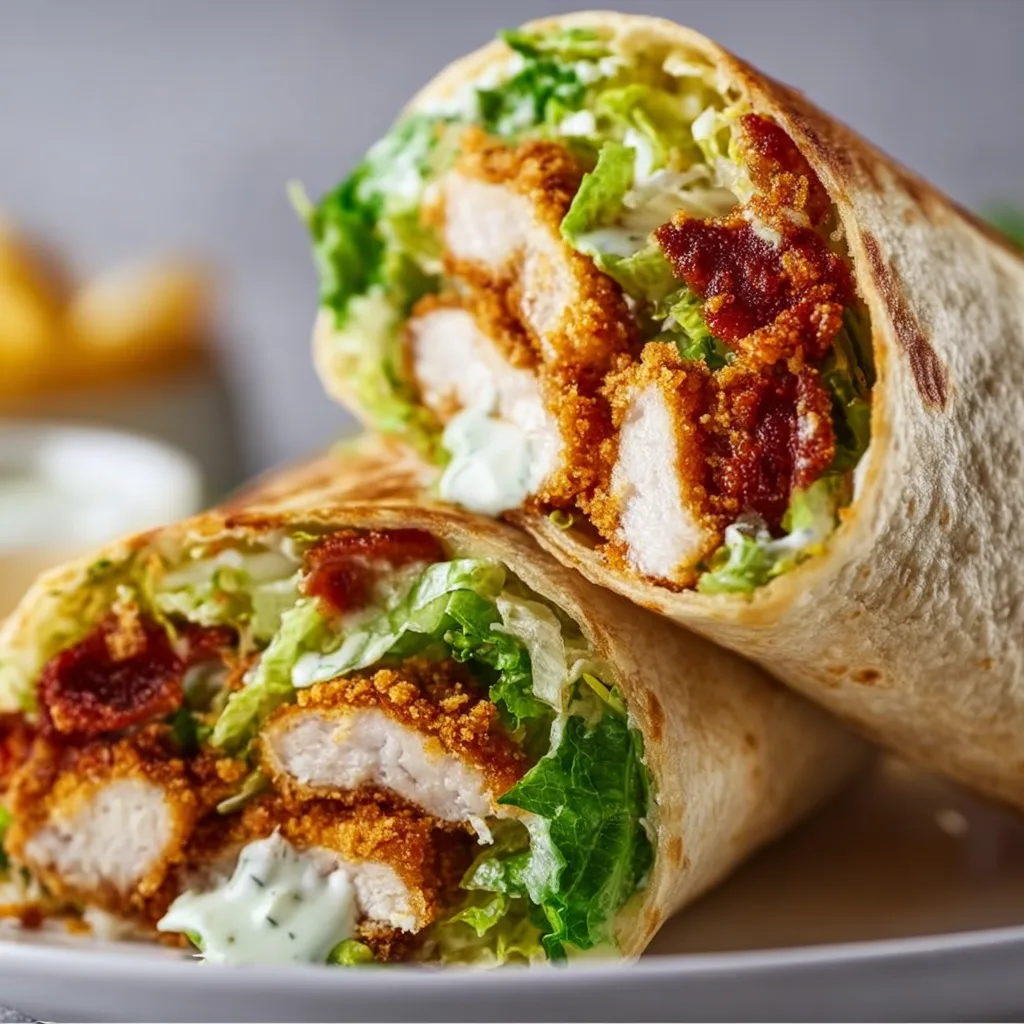
    Crispy Chicken Caesar Wrap – there’s something magical about that first bite when the warm, perfectly seasoned chicken meets cool, crisp romaine and tangy Caesar dressing, all wrapped in a toasty tortilla. I discovered my love for these wraps during my college years when I was looking for quick meals that didn’t sacrifice flavor. Now, they’re my go-to lunch when I need something satisfying that comes together in minutes. The contrast between the warm, crispy chicken and the cool, creamy dressing creates a texture paradise that makes lunchtime something to look forward to.

    Recipe

    Why You’ll Love This Crispy Chicken Caesar Wrap

    Perfect Balance of Flavors and Textures

    There’s nothing quite like the harmonious blend of flavors in this wrap. The savory, seasoned chicken with its crispy exterior provides a wonderful contrast to the cool, crunchy romaine. When that tanginess from the Caesar dressing hits your taste buds alongside the nutty Parmesan cheese, it’s pure magic. I love how each bite delivers a different sensation – from the slight chew of the tortilla to the crunch of fresh lettuce and the tender chicken pieces. It’s that perfect balance that keeps me coming back to this recipe time and again, especially on busy weekdays when I need something satisfying but quick.

    Quick and Convenient Meal Solution

    These wraps have saved me countless times when hunger strikes but time is short. The beauty lies in their incredible versatility – use leftover chicken to cut prep time in half, or cook a fresh batch in under 15 minutes. I often prepare extra chicken on Sunday evenings so I can assemble these wraps in just 5 minutes throughout the week. They’re portable too, making them perfect for lunch boxes, picnics, or eating on-the-go. Last month, these wraps were my lifesaver during a particularly hectic work week – I made a batch in the morning, wrapped them tightly in foil, and had a delicious lunch ready whenever I could steal a moment.

    Essential Tips & Tricks

    Achieving Perfectly Crispy Chicken

    The secret to truly outstanding wraps lies in that golden, crispy chicken. I’ve found that slicing chicken breasts into thin cutlets helps them cook more quickly and evenly. Season generously with garlic powder, Italian herbs, and a touch of paprika before cooking. For maximum crispiness, use a cast-iron skillet with a tablespoon of olive oil heated until it shimmers. Cook the chicken for 4-5 minutes per side until golden brown and cooked through. Let it rest for a few minutes before slicing – this helps retain those flavorful juices. The texture contrast between crispy chicken and cool Caesar elements is what makes these wraps truly special.

    Perfecting Your Wrap Technique

    After years of making these wraps, I’ve learned that assembly order matters! Start by warming your tortilla for 10-15 seconds in the microwave or in a dry skillet – this makes it more pliable and less likely to tear. Spread a thin layer of Caesar dressing on the tortilla, leaving a one-inch border around the edge. Layer romaine lettuce first, then add chicken, Parmesan, and any extras like croutons from my Slow Cooker Mac & Cheese Classic recipe (they add amazing texture). Fold in the sides, then roll from the bottom up, keeping it tight. If needed, secure with toothpicks or wrap in parchment paper to hold everything together.

    Serving Ideas & Creative Variations

    Complementary Side Dishes

    These wraps pair beautifully with so many sides, making them perfect for any meal. My favorite combination is serving them with a light cucumber salad dressed simply with lemon juice and dill – the refreshing crispness complements the savory wrap perfectly. For something heartier, try roasted sweet potato wedges with a sprinkle of Parmesan. A small cup of Creamy Tortellini Soup makes this a complete meal on chillier days. When entertaining, I arrange sliced wraps on a platter surrounded by colorful veggie sticks, olives, and a small bowl of extra Caesar dressing for dipping – it’s always a hit at casual gatherings.

    Exciting Flavor Variations

    While the classic version is delicious, experimenting with flavors keeps this recipe fresh and exciting. Try a Mediterranean twist by adding chopped sun-dried tomatoes, kalamata olives, and feta cheese instead of Parmesan. For a spicy kick, mix sriracha into your Caesar dressing and add sliced avocado for creaminess. Buffalo chicken lovers can toss the crispy chicken in buffalo sauce before assembling. My personal favorite variation came from a happy accident – I had leftover pesto and decided to spread a thin layer on the tortilla before the Caesar dressing. The herby brightness elevated the wrap to new heights! Don’t be afraid to customize based on what’s in your refrigerator.

    Storage & Troubleshooting Guide

    Proper Storage Techniques

    Keeping your wraps fresh is key to enjoying them later. For make-ahead lunches, I recommend assembling the wraps without the lettuce, then adding it just before eating to prevent sogginess. If fully assembled, wrap tightly in parchment paper, then aluminum foil, and refrigerate for up to 24 hours. For longer storage, prepare all components separately – store the cooked chicken in an airtight container for up to 3 days, and keep dressing, cheese, and washed lettuce separately. When traveling with these wraps, I keep them cool with an ice pack and find they maintain their texture best when not squished in a packed lunch bag.

    Solving Common Wrap Problems

    Even the most experienced wrap-makers encounter issues occasionally. If your wrap is falling apart while eating, you might be overfilling it or not rolling it tightly enough. Try using slightly larger tortillas or reducing fillings by about 25%. For soggy wraps, place a layer of romaine lettuce directly on the tortilla before adding other ingredients – this creates a moisture barrier. If your chicken loses its crispiness, try reheating it separately in a skillet before assembling. And for tortillas that crack while rolling, warming them slightly or choosing fresher, more pliable ones usually solves the problem. Remember that practice makes perfect with wrap-rolling technique!

    Frequently Asked Questions

    Can I make these Crispy Chicken Caesar Wraps ahead of time?

    Yes! Prepare the chicken and store separately from other ingredients. Assemble just before eating, or if making fully assembled wraps, wrap tightly in parchment paper and refrigerate for up to 24 hours.

    What’s the best way to keep the chicken crispy?

    Cook chicken until golden brown, let it rest before slicing, and if making ahead, reheat in a skillet rather than microwave to restore crispiness before assembling the wrap.

    Can I use rotisserie chicken instead?

    Absolutely! While you’ll lose some crispiness, rotisserie chicken saves time. For best results, shred it and quickly sauté in a hot skillet with a little oil and seasonings.

    How do I prevent my wrap from getting soggy?

    Create a barrier by placing lettuce directly on the tortilla before adding dressing or moist ingredients. If packing for lunch, keep wet ingredients separate until ready to eat.

    What can I substitute for Caesar dressing?

    Greek yogurt-based dressings, ranch, or a simple olive oil and lemon dressing work well. For homemade Caesar, blend Greek yogurt, garlic, lemon juice, Dijon mustard, and Parmesan.

    Final Thoughts

    The Crispy Chicken Caesar Wrap has become my reliable culinary companion through busy days and casual gatherings alike. Its perfect balance of textures and flavors never disappoints, whether I’m sticking to the classic recipe or experimenting with creative variations. I love how it transforms simple ingredients into something truly satisfying without requiring hours in the kitchen. Next time you’re craving something that hits all the right notes – crispy, creamy, fresh, and flavorful – give this wrap a try. Find more delicious recipes like this one on Pinterest and discover your new favorite meal solution!