Category: Lunch

Easy lunch ideas for busy days. Simple, quick recipes with fresh flavor and satisfying meals you can enjoy at home or on the go.

  • High-Protein Creamy Coleslaw Recipe That Will WOW Your Tastebuds!

    High-Protein Creamy Coleslaw Recipe That Will WOW Your Tastebuds!

    High-Protein Creamy Coleslaw Recipe That Will WOW Your Tastebuds!

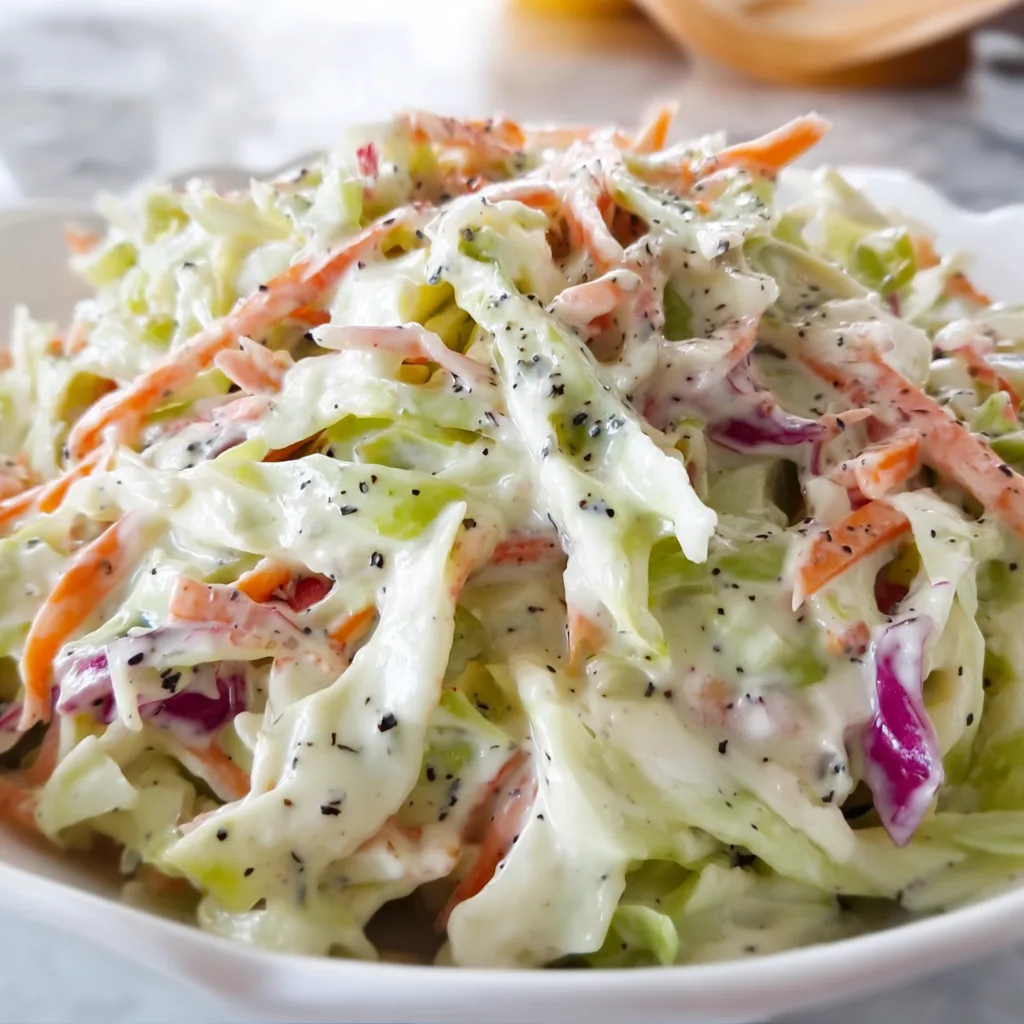
    This High-Protein Creamy Coleslaw Recipe transforms an ordinary side dish into a nutritional powerhouse that doesn’t sacrifice an ounce of flavor. When I first started experimenting with protein-rich versions of classic recipes, coleslaw seemed like the perfect candidate for a makeover. The crisp vegetables provide the perfect backdrop for creamy, protein-packed dressing that makes each bite satisfying in a way traditional coleslaw never could. Perfect for summer barbecues or as a side for your Slow Cooker Honey Mustard Chicken, this recipe delivers both nutrition and comfort in every forkful.

    Recipe

    Why You’ll Love This High-Protein Creamy Coleslaw Recipe

    Perfect Balance of Flavor and Nutrition

    The magic of this high-protein coleslaw lies in its perfect balance. I’ve swapped traditional mayonnaise with Greek yogurt, which provides that familiar creamy texture while boosting the protein content significantly. The tang from the yogurt actually enhances the classic coleslaw flavor profile, while a touch of honey balances the acidity. What I love most is how the crisp cabbage and carrots maintain their satisfying crunch against the protein-rich dressing. It’s the kind of side dish that makes you feel good about going back for seconds!

    Quick Prep with Maximum Results

    One evening when hosting an impromptu backyard dinner, this coleslaw saved me. The entire recipe comes together in under 15 minutes, making it perfect for busy weeknights or last-minute gatherings. Simply shred your vegetables, whisk together the protein-packed dressing, and combine. The hands-on time is minimal, but the flavor develops beautifully as it sits. I often prepare it a few hours before serving, allowing the flavors to meld while the cabbage maintains its delightful texture. It’s the perfect make-ahead side that actually improves with a little patience.

    Essential Tips & Tricks

    Choosing and Prepping Your Vegetables

    The foundation of exceptional coleslaw is properly prepared vegetables. I recommend using a mix of cabbages – green for structure and purple for color and antioxidants. For the crispest texture, soak your shredded cabbage in ice water for 10 minutes, then thoroughly dry before dressing. This extra step creates that restaurant-quality crunch that elevates homemade coleslaw. For carrots, use the large holes on a box grater or julienne them for the best texture. Fresh vegetables make all the difference in this recipe, so avoid pre-packaged mixes if possible – they often lack the freshness that makes this dish shine.

    Perfecting Your Protein-Rich Dressing

    The star of this recipe is undoubtedly the protein-packed dressing. For best results, use full-fat Greek yogurt with at least 15g protein per serving – the extra creaminess is worth it! When whisking your dressing, start by combining the yogurt with apple cider vinegar and a touch of Dijon mustard before adding other ingredients. This creates the smoothest emulsion. For an extra protein boost, I sometimes add a scoop of unflavored protein powder or silken tofu blended into the dressing. This works beautifully alongside hearty mains like Crockpot Chicken Broccoli Alfredo for a complete meal.

    Serving Ideas & Creative Variations

    Elevating Your Meal with Perfect Pairings

    This high-protein coleslaw shines brightest when thoughtfully paired with complementary dishes. I love serving it alongside grilled proteins like cedar-planked salmon or herb-marinated chicken thighs, where the cool creaminess balances smoky char perfectly. For a complete summer spread, pair with corn on the cob and watermelon for a refreshing meal that satisfies without weighing you down. The coleslaw also makes an incredible topping for tacos or pulled pork sandwiches, adding both nutrition and texture. The protein content makes it substantial enough to serve alongside lighter mains like Baked Lemon Garlic Tilapia for a balanced meal.

    Seasonal and Dietary Adaptations

    One of my favorite aspects of this recipe is its flexibility. In summer, I add juicy diced peaches and toasted pecans for sweetness and crunch. Fall calls for diced apples and pepitas, while winter versions shine with pomegranate seeds and walnuts. For keto-friendly coleslaw, swap the honey for a monk fruit sweetener and increase the healthy fats with avocado oil. Vegan? Replace Greek yogurt with silken tofu blended with a bit of lemon juice and nutritional yeast for that protein punch. For those avoiding dairy entirely, cashew cream makes an excellent base that maintains the protein content while delivering incredible creaminess.

    Storage & Troubleshooting Guide

    Maintaining Freshness and Texture

    The key to preserving texture in this high-protein coleslaw is proper storage. I store mine in a glass container with a tight-fitting lid, placing a paper towel between the coleslaw and lid to absorb excess moisture. This prevents the dreaded soggy coleslaw syndrome! The recipe will maintain optimal texture for up to 3 days in the refrigerator. If serving from cold storage, let it sit at room temperature for 15 minutes and give it a quick toss to redistribute the dressing. For meal prep, consider keeping the vegetables and dressing separate until the day you plan to eat it – this extends freshness significantly.

    Fixing Common Coleslaw Problems

    Even experienced cooks occasionally encounter coleslaw issues. If your coleslaw becomes too watery after sitting, don’t panic! Simply drain the excess liquid and add a fresh spoonful of Greek yogurt to restore creaminess. Too dry? A splash of apple cider vinegar and a dollop of yogurt will bring it back to life. If the flavor seems flat after refrigeration, brighten it with a squeeze of fresh lemon juice and a pinch of salt. For coleslaw that’s too tangy, balance it with a drizzle of honey or a sprinkle of finely grated carrot for natural sweetness. These simple fixes ensure your high-protein coleslaw remains delicious throughout its lifespan.

    Frequently Asked Questions

    How much protein does this coleslaw contain per serving?

    Each serving contains approximately 8-10 grams of protein, depending on your Greek yogurt brand. This makes the high-protein creamy coleslaw recipe substantially more nutritious than traditional versions that typically offer only 1-2 grams per serving.

    Can I make this recipe dairy-free while maintaining the protein content?

    Absolutely! Substitute Greek yogurt with silken tofu blended with 1 tablespoon lemon juice and 1 teaspoon nutritional yeast. This maintains the creamy texture and protein content while making it completely dairy-free.

    How far in advance can I prepare this coleslaw?

    You can prepare this coleslaw up to 24 hours in advance for optimal texture. For longer storage, keep the vegetables and dressing separate, combining them no more than 3 hours before serving.

    Will adding protein powder affect the taste?

    When using unflavored protein powder, you’ll notice minimal taste difference. Start with just 1 tablespoon per cup of dressing and adjust to your preference. Vanilla protein can work but will add sweetness.

    Can I use pre-shredded cabbage to save time?

    Pre-shredded cabbage works in a pinch but often lacks freshness. If using bagged coleslaw mix, refresh it in ice water for 5 minutes, then thoroughly dry before adding the dressing.

    Final Thoughts

    This High-Protein Creamy Coleslaw Recipe has become my go-to side dish whenever I want to add both nutrition and flavor to a meal. The beauty lies in its simplicity and adaptability – it works just as well for casual weeknight dinners as it does for special gatherings. I love how it transforms an often overlooked side dish into something truly special that supports your nutrition goals without sacrificing an ounce of flavor. Be sure to check out more protein-packed recipes on Pinterest for additional inspiration to elevate your everyday meals.
  • Golden Gluten-Free Sourdough Loaf: Irresistibly Crispy & Healthy!

    Golden Gluten-Free Sourdough Loaf: Irresistibly Crispy & Healthy!

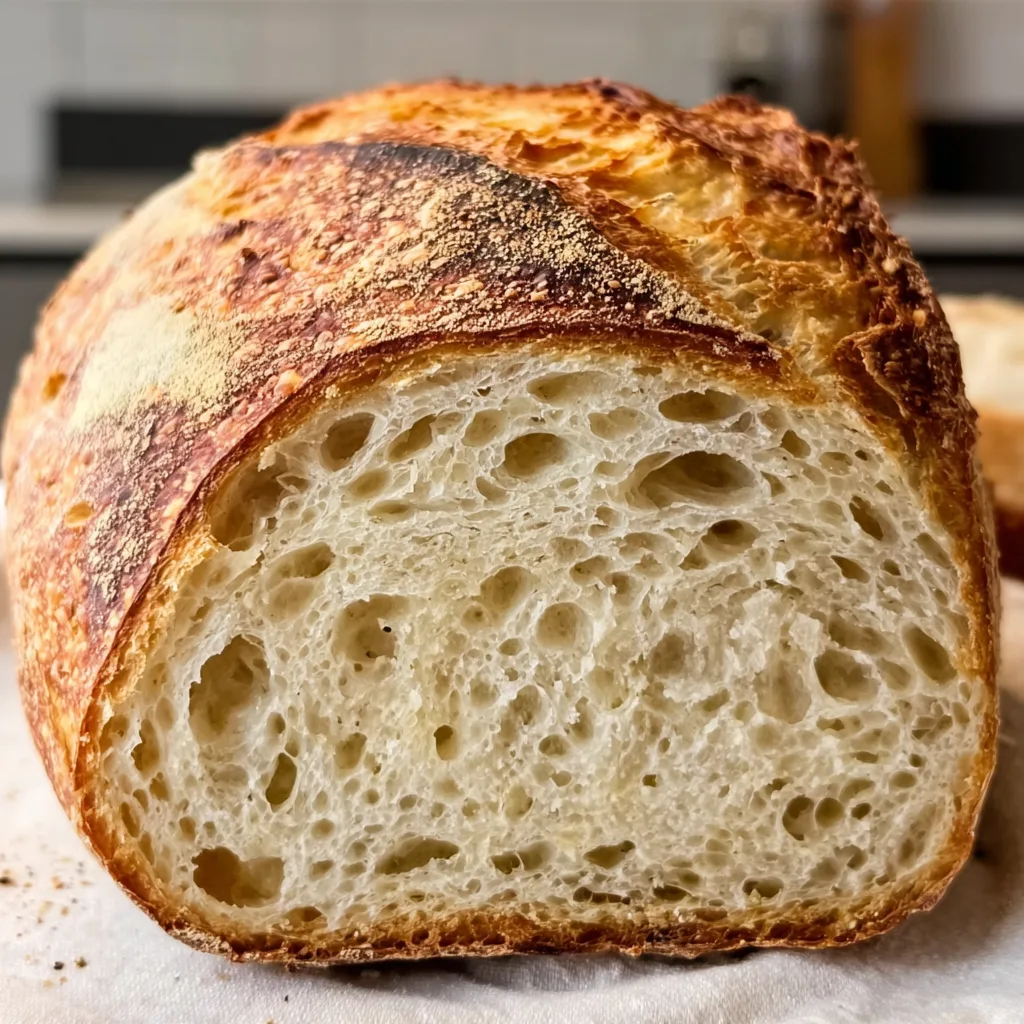
    There’s something truly magical about the aroma of a freshly baked Golden Gluten-Free Sourdough Loaf filling your kitchen. As someone who struggled for years to perfect gluten-free bread, discovering this recipe felt like finding hidden treasure. The crisp, golden crust gives way to a tender, slightly tangy interior that rivals any traditional sourdough. I’ve spent countless Sunday mornings perfecting this recipe, and now my kitchen windows fog up with the steamy promise of bread that’s both nourishing and indulgent. If you’re craving that authentic sourdough experience without the gluten, this recipe will become your new weekend ritual, just as it has become mine at Recipes Darleen.

    Recipe

    Why You’ll Love This Golden Gluten-Free Sourdough Loaf

    Perfect Texture & Flavor Balance

    The holy grail of gluten-free baking is achieving that perfect chewy-yet-tender crumb, and this recipe delivers spectacularly. I’ve combined a precise blend of rice flour, tapioca starch, and psyllium husk to create structure without heaviness. The slow fermentation process develops complex flavors that dance between nutty, tangy, and slightly sweet notes. My neighbor actually knocked on my door last weekend, drawn by the aroma wafting through our shared wall! The golden crust shatters delightfully when sliced, revealing an interior with those coveted irregular air pockets that capture melting butter perfectly.

    Simple Ingredients, Impressive Results

    Despite its artisanal appearance, this loaf requires surprisingly basic ingredients you likely already have in your gluten-free pantry. The active starter does most of the heavy lifting, transforming simple flours into something extraordinary. I love that there’s no need for obscure additives or complicated techniques—just good, honest ingredients working their magic over time. The dough is forgiving for beginners, too. My first attempt wasn’t perfect, but even that “learning loaf” disappeared quickly, slathered with salted butter and honey. Each subsequent bake has gotten better, with that gorgeous golden color developing more consistently.

    Essential Tips & Tricks

    Mastering Your Starter

    The heart of any sourdough is its starter, and gluten-free versions require special attention. Keep your starter at room temperature for at least three feedings before baking day to ensure maximum vitality. I’ve found that equal parts brown rice flour and sorghum flour create a starter with the perfect balance of activity and flavor development. Watch for the telltale signs of readiness: a pleasant yogurt-like tanginess, visible bubbles throughout, and doubling in volume within 4-6 hours after feeding. My starter, affectionately named Bubbles, took about two weeks to become truly reliable—patience here pays delicious dividends.

    Perfecting Your Technique

    The bulk fermentation phase is where the magic happens. Unlike traditional sourdough, our gluten-free version won’t develop strength through stretching and folding. Instead, focus on temperature control—I maintain a consistent 75°F environment by placing my dough near (not on) my slightly warm oven. Use a digital thermometer to monitor your dough’s internal temperature for best results. The final proof in a banneton basket lined with heavily floured rice flour-dusted linen creates that beautiful spiral pattern and supports the dough’s shape. I’ve learned that scoring the loaf with a sharp lame at a 45-degree angle just before baking creates that signature “ear” that makes it look professionally crafted.

    Serving Ideas & Creative Variations

    Perfect Pairings

    This versatile loaf shines in countless serving scenarios. For breakfast, thick-cut slices toasted and topped with avocado and a sprinkle of everything bagel seasoning create a satisfying start to the day. For lunch, the slight tang complements the richness of grilled cheese made with sharp cheddar and caramelized onions. My personal favorite evening indulgence is serving warm slices alongside a bowl of Creamy Tortellini Soup for dipping—the contrast between the crisp crust and velvety soup is absolutely divine. The bread also makes exceptional croutons when cubed, tossed with olive oil and herbs, then toasted until golden.

    Flavor Variations

    Don’t be afraid to customize your loaf with delicious add-ins. Folding in toasted seeds (pumpkin, sunflower, and flax make a wonderful trio) creates a nutrient-rich loaf with delightful texture contrast. For a Mediterranean twist, incorporate chopped olives, rosemary, and a splash of olive oil during the final mix. My autumn favorite features dried cranberries, chopped walnuts, and orange zest—perfect for holiday tables. The dough also adapts beautifully to different flours; substituting 20% of the rice flour with buckwheat creates a more rustic, earthy profile that pairs wonderfully with hearty soups and stews. Each variation maintains that gorgeous golden exterior while offering new flavor dimensions.

    Storage & Troubleshooting Guide

    Keeping Your Loaf Fresh

    Unlike many gluten-free breads that stale quickly, this Golden Gluten-Free Sourdough Loaf maintains its quality remarkably well. For optimal freshness, allow the bread to cool completely on a wire rack before storing—rushing this step leads to soggy crust. Once cooled, store cut-side down on a wooden cutting board for the first day, which preserves the crust integrity while protecting the crumb. For longer storage, wrap in a clean cotton cloth then place in a paper bag at room temperature for up to three days. Avoid plastic bags, which trap moisture and accelerate mold growth. For extending shelf life, slice the entire loaf once cool, freeze individual slices, and toast directly from frozen for nearly fresh-baked taste.

    Troubleshooting Common Issues

    Even experienced bakers encounter challenges, so don’t be discouraged by initial setbacks. If your loaf spreads rather than rises, your hydration level may be too high for your specific flour blend—reduce water by 15g in your next attempt. Dense, gummy interiors usually indicate underbaking; invest in an instant-read thermometer and aim for an internal temperature of 205-210°F. Pale crust typically results from insufficient steam during baking—place an oven-safe dish with boiling water on the bottom rack while preheating, then remove it when you load your bread. If your loaf cracks unpredictably rather than at your score lines, your dough likely needed more surface tension during shaping or a longer final proof.

    Frequently Asked Questions

    Can I make this Golden Gluten-Free Sourdough Loaf without a Dutch oven?

    Yes! While a Dutch oven creates ideal steam, you can use a preheated baking stone or sheet with a heat-safe bowl inverted over the loaf for the first 20 minutes. Remove the bowl for the final baking phase to develop the golden crust.

    How can I tell if my starter is ready to use?

    Your starter is ready when it doubles in size 4-6 hours after feeding, has a pleasant tangy smell, and passes the float test—a small spoonful should float in a glass of water.

    Can I use commercial yeast instead of sourdough starter?

    No, commercial yeast won’t provide the same flavor complexity or texture. The slow fermentation of sourdough is essential for breaking down the grains properly and developing the distinctive taste.

    Why did my bread collapse after baking?

    Collapsing usually indicates either underbaking or too much moisture. Ensure you’re reaching the proper internal temperature and consider reducing hydration slightly in your next batch.

    How do I achieve that beautiful golden color on my gluten-free sourdough?

    For the perfect golden crust, brush the loaf with a mixture of egg white and 1 teaspoon water before baking, and ensure your oven is fully preheated to 450°F with good steam during the initial baking phase.

    Final Thoughts

    This Golden Gluten-Free Sourdough Loaf has transformed my relationship with gluten-free baking from one of compromise to one of genuine joy. There’s something deeply satisfying about creating a loaf that doesn’t merely imitate “regular” bread but stands proudly in its own right—beautiful, delicious, and worthy of centerpiece status. I find myself looking forward to my weekend baking ritual, appreciating how the slow process forces me to be present and patient. I hope this recipe brings the same satisfaction to your kitchen, and that your home fills with the incomparable aroma of freshly baked sourdough. Happy baking, friends! Don’t forget to share your beautiful loaves on Pinterest.

  • Panera Strawberry Poppyseed Salad: Irresistibly Fresh & Delicious!

    Panera Strawberry Poppyseed Salad: Irresistibly Fresh & Delicious!

    Panera Strawberry Poppyseed Salad: Irresistibly Fresh & Delicious!

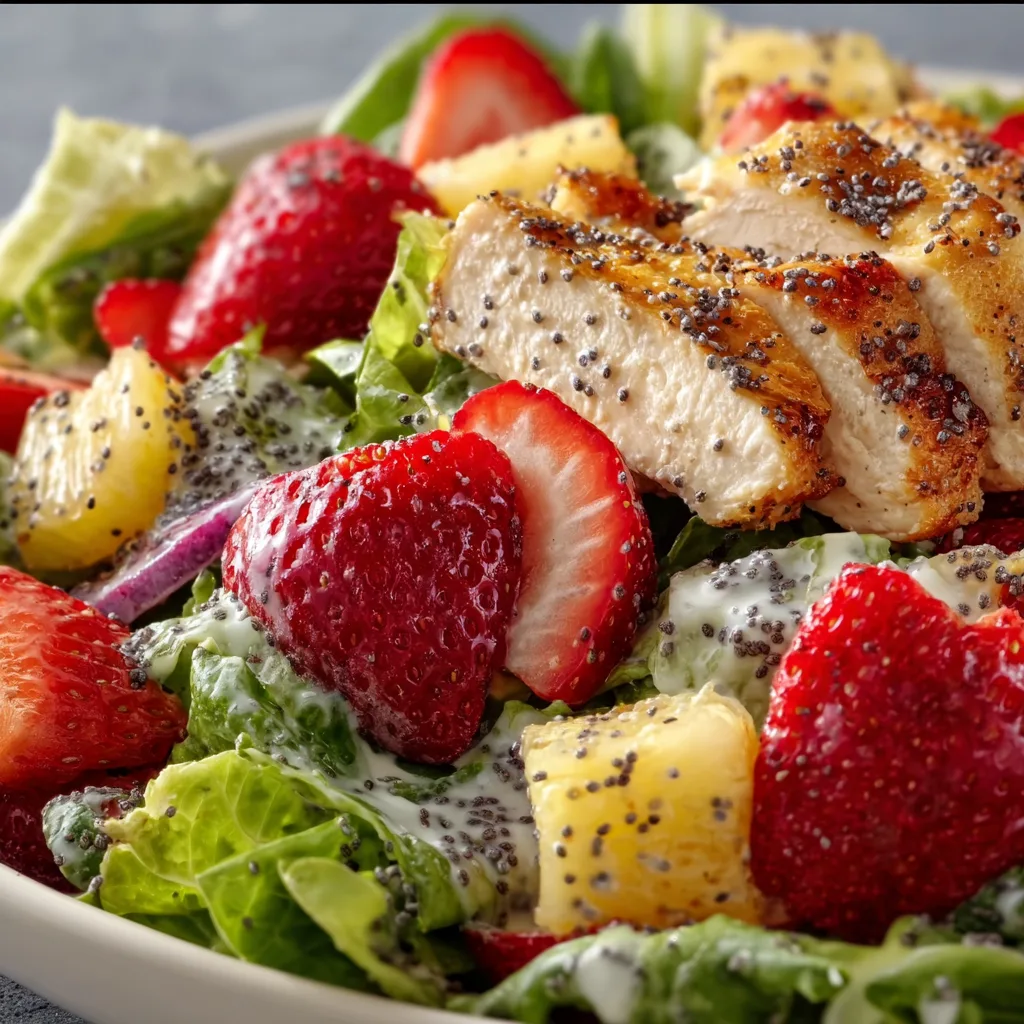
    Panera Strawberry Poppyseed Salad brings the perfect balance of sweet and tangy flavors that dance across your taste buds with every bite. The first time I recreated this beloved café classic at home, the vibrant colors of plump strawberries, juicy blueberries, and mandarin oranges against crisp romaine made my kitchen feel like a summer garden party. There’s something magical about how the poppyseed dressing coats each ingredient, creating a harmonious blend that’s both refreshing and satisfying. If you’re looking for a salad that feels like sunshine in a bowl, this Panera-inspired creation is about to become your new warm-weather staple.

    Recipe

    Why You’ll Love This Panera Strawberry Poppyseed Salad

    Perfect Balance of Flavors and Textures

    The magic of this Panera Strawberry Poppyseed Salad lies in its extraordinary balance of flavors and textures. Each forkful delivers a symphony of sweet-tart berries, crunchy pecans, and tender chicken against crisp romaine. The poppyseed dressing ties everything together with its creamy, slightly sweet profile that never overwhelms the fresh ingredients. I love how the juicy bursts from the berries complement the subtle crunch of the pecans, creating that perfect bite that keeps you coming back for more. It’s a textural playground that makes eating salad feel like an indulgence rather than an obligation.

    Quick and Customizable

    What I adore most about this Panera Strawberry Poppyseed Salad is how effortlessly it comes together while still feeling special. The entire salad assembles in under 15 minutes, making it perfect for busy weeknights when you want something fresh but lack time for complexity. The ingredient flexibility is another winning feature – swap chicken for grilled shrimp, use spinach instead of romaine, or change up the berry mix based on what looks best at the market. I’ve made this with sliced almonds when I was out of pecans, and it was equally delightful. This adaptability makes it a reliable go-to recipe regardless of season or pantry status.

    Essential Tips & Tricks

    Mastering the Dressing

    The poppyseed dressing is the crown jewel of this Panera Strawberry Poppyseed Salad, and getting it right makes all the difference. I recommend whisking it together at least an hour before serving to allow the flavors to meld. The perfect balance comes from equal parts tangy (apple cider vinegar) and sweet (honey), with just enough mayonnaise to create creaminess without heaviness. Don’t skimp on the poppyseeds – they provide that signature visual appeal and subtle nutty flavor that makes this dressing special. For an extra dimension, add a tiny pinch of dijon mustard which helps emulsify while adding complexity.

    Protein Preparation

    The chicken in this Panera Strawberry Poppyseed Salad deserves special attention to elevate the entire dish. I recommend brining boneless chicken breasts for just 30 minutes in a solution of water, salt, and a touch of honey before cooking. This ensures juicy, flavorful protein that stays tender even when chilled. For the perfect texture, slightly undercook the chicken (to about 160°F) before letting it rest, as it will continue cooking while maintaining moisture. Slice it against the grain and let it cool completely before adding to your salad. For a delicious time-saving alternative, use rotisserie chicken tossed with a squeeze of lemon juice.

    Serving Ideas & Creative Variations

    Entertaining with Elegance

    Transform this Panera Strawberry Poppyseed Salad into a showstopping entertaining option by serving it deconstructed on a large wooden board. Arrange colorful components in separate piles – the berries, mandarin segments, pecans, sliced chicken, and greens – with the dressing in a pretty jar alongside. This presentation not only creates a gorgeous focal point for summer gatherings but allows guests to build their perfect plate. For an extra touch of elegance, add small bowls of additional toppings like crumbled goat cheese, avocado chunks, or candied pecans. This serving style elevates a simple salad into an interactive experience guests will remember.

    Seasonal Adaptations

    One of the beauties of this Panera Strawberry Poppyseed Salad is how gracefully it transitions through seasons with simple swaps. In late summer, substitute blackberries for blueberries and add sliced peaches for a stone-fruit twist. Come fall, try roasted butternut squash cubes, dried cranberries, and pepitas for an autumn-inspired variation that maintains the same color appeal. Winter calls for sectioned blood oranges, pomegranate arils, and candied walnuts, while spring welcomes tender asparagus tips and fresh peas. The poppyseed dressing works beautifully with all these variations, proving that this salad concept has year-round staying power beyond its summer origins.

    Storage & Troubleshooting Guide

    Keeping Components Fresh

    The key to enjoying this Panera Strawberry Poppyseed Salad beyond its initial serving lies in smart storage of individual components. Store the washed and dried greens with a paper towel in an airtight container to absorb excess moisture, extending crispness for up to four days. Keep berries unwashed until serving day, and store them in their original containers lined with paper towels. The dressing stays fresh in a sealed jar for up to a week, while cooked chicken remains good for three days when properly refrigerated. For meal prep, portion components in divided containers but keep wet ingredients separate from dry until just before eating.

    Fixing Common Issues

    Even the most experienced cooks encounter challenges with this Panera Strawberry Poppyseed Salad, but simple fixes save the day. If your dressing separates or becomes too thick, a quick whisk and a splash of water restores perfect consistency. For soggy greens, the emergency solution is a quick ice bath followed by thorough drying in a salad spinner. If berries release too much juice and make the salad watery, toss them with a teaspoon of cornstarch before adding to absorb excess moisture. And if your chicken turns out dry, slice it thinner and toss with a tablespoon of the dressing to rehydrate before assembling the salad.

    Frequently Asked Questions

    Can I make this Panera Strawberry Poppyseed Salad ahead of time?

    Yes, but store components separately. Prepare dressing, cook chicken, and wash berries up to 2 days ahead. Assemble just before serving for optimal freshness and texture.

    What’s the best substitute for poppyseed dressing?

    A honey-mustard vinaigrette works beautifully. Alternatively, blend 2 tablespoons each of honey and apple cider vinegar with ¼ cup olive oil, 1 teaspoon Dijon mustard, and salt to taste.

    How can I make this salad more filling?

    Add quinoa, farro, or wild rice for hearty grains. Avocado provides healthy fats, while chickpeas or edamame boost protein content without adding meat.

    Is this recipe gluten-free?

    Yes, all ingredients in the traditional Panera Strawberry Poppyseed Salad are naturally gluten-free. Just verify your chicken seasoning and dressing ingredients don’t contain hidden gluten.

    Can I use frozen berries instead of fresh?

    Fresh berries provide better texture, but thawed frozen berries work in a pinch. Pat them dry thoroughly with paper towels to prevent excess moisture in your salad.

    Final Thoughts

    This Panera Strawberry Poppyseed Salad brings restaurant quality to your home kitchen with surprisingly little effort. The combination of juicy berries, tender chicken, and that irresistible poppyseed dressing creates a meal that feels both nourishing and indulgent. I find myself craving this colorful creation even when strawberries aren’t in season – it’s that good! Whether you’re serving it for a solo lunch, family dinner, or summer gathering, this salad delivers the perfect balance of healthy satisfaction and vibrant flavor. For more seasonal inspiration, check out our Pinterest collection of fresh salad ideas.

  • Dill Yogurt Cucumber Salad: Refreshing, Creamy & Perfectly Tangy!

    Dill Yogurt Cucumber Salad: Refreshing, Creamy & Perfectly Tangy!

    Dill Yogurt Cucumber Salad: Refreshing, Creamy & Perfectly Tangy!

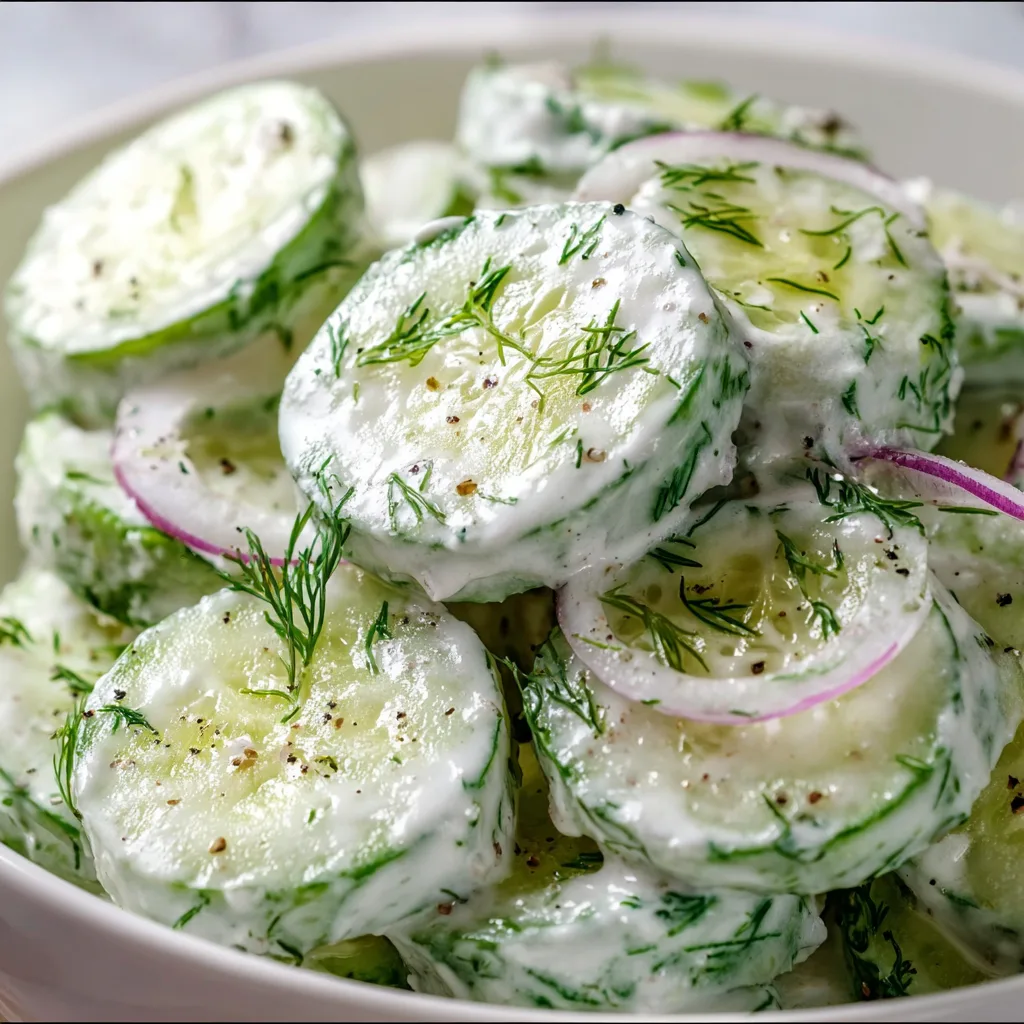
    This Dill Yogurt Cucumber Salad might just be the most refreshing side dish you’ll make all summer. The first time I served it at a backyard barbecue, my neighbor practically chased me around with her plate asking for the recipe! There’s something magical about the combination of cool, crisp cucumbers with tangy yogurt and fragrant dill that makes this salad irresistible. It’s become my go-to for everything from quick lunches to fancy dinner parties, and like my Tomato Burrata Toast, it’s a simple recipe that feels special every time.

    Recipe

    Why You’ll Love This Dill Yogurt Cucumber Salad

    Perfect Balance of Flavors and Textures

    This salad is all about contrasting elements working in perfect harmony. The cool crunch of fresh cucumbers against the creamy yogurt creates a texture paradise in your mouth. I love how the tangy yogurt base gets brightened with lemon juice and deepened with garlic, while fresh dill adds that distinctive herbal note that makes everything taste like summer. The first time I made this, I couldn’t stop sneaking spoonfuls straight from the mixing bowl! It’s light enough for hot days but satisfying enough to feel like a proper side dish.

    Quick Prep with Maximum Impact

    You won’t believe how much flavor comes from just 10 minutes of effort. This is my secret weapon recipe when I need something impressive but don’t have hours to spend in the kitchen. Simply slice cucumbers, whisk together the yogurt dressing, combine, and chill! The hardest part is waiting for the flavors to meld in the refrigerator. I’ve made this countless times when unexpected guests drop by, and it always earns rave reviews despite the minimal effort. Perfect for busy weeknights when you want something fresh alongside your main dish.

    Essential Tips & Tricks

    Cucumber Selection and Preparation

    The foundation of this salad is choosing the right cucumbers. English or Persian varieties work best as they have thinner skins and fewer seeds. I like to partially peel mine in stripes—it keeps some of that gorgeous green color while removing any bitter notes. For the crispest texture, salt your cucumber slices and let them drain in a colander for 15-20 minutes before patting dry. This simple step draws out excess moisture and concentrates the cucumber flavor, preventing that dreaded soggy salad situation we’ve all experienced!

    Yogurt Matters More Than You Think

    Don’t underestimate how much your yogurt choice impacts the final dish! I always reach for full-fat Greek yogurt for its luxurious creaminess and tang. The thicker consistency creates the perfect coating for cucumber slices without becoming watery. For a lighter version, 2% works well too, but avoid non-fat varieties as they often contain additives and lack richness. If you’re feeling adventurous, try making your own yogurt for an extra special touch—the difference is remarkable and adds a homemade quality that store-bought can’t match.

    Serving Ideas & Creative Variations

    Perfect Pairing Partners

    This Dill Yogurt Cucumber Salad shines alongside grilled proteins like lemon chicken, salmon, or lamb kebabs. The cool, creamy texture provides beautiful contrast to anything charred or spicy. I love serving it with Mediterranean-inspired meals—it’s particularly divine with falafel or alongside hummus and warm pita. For a complete summer spread, pair it with my Chili Lime Shrimp Ceviche and watch your guests go wild! The salad also makes a wonderful sandwich topping or pita filling for lunch the next day.

    Exciting Flavor Twists

    While the classic version is perfect, this salad welcomes creative adaptations. Add thinly sliced red onion for peppery bite, or mix in halved cherry tomatoes for juicy pops of color. I sometimes toss in crumbled feta cheese or toasted pine nuts for extra texture and richness. For a Middle Eastern twist, sprinkle with za’atar and a drizzle of olive oil before serving. My personal favorite variation includes diced avocado and a pinch of red pepper flakes—the creamy, spicy combination is absolutely addictive and transforms this side into a light meal.

    Storage & Troubleshooting Guide

    Keeping It Fresh

    The key to maintaining crispness is proper storage. This salad is best enjoyed within 24 hours of making, but will keep for up to 3 days in an airtight container. If preparing ahead for a party, I recommend keeping the cucumber mixture and yogurt dressing separate until about an hour before serving. This prevents the cucumbers from releasing too much water and diluting that gorgeous creamy dressing. Always give it a quick stir before serving, and if it seems watery after storage, simply drain off excess liquid.

    Fixing Common Issues

    Even the simplest recipes can sometimes need troubleshooting. If your salad turns out too watery, drain the excess liquid and add a bit more yogurt to restore creaminess. Too bland? A pinch of salt, extra lemon zest, or more fresh herbs will perk it up instantly. If the garlic flavor is overwhelming, balance it with additional yogurt and a touch of honey. Remember that flavors intensify as the salad sits, so what might taste perfectly seasoned initially could become stronger overnight. Trust your taste buds and adjust accordingly!

    Frequently Asked Questions

    Can I use dried dill instead of fresh?

    Yes, but use only 1 teaspoon of dried dill as it’s more concentrated. Fresh dill provides brighter flavor, but dried works in a pinch. Rehydrate dried dill in a little lemon juice before adding.

    How do I prevent my Dill Yogurt Cucumber Salad from becoming watery?

    Salt and drain cucumber slices for 20 minutes before mixing. Pat them dry with paper towels, then combine with the yogurt dressing just before serving for best results.

    What can I substitute for Greek yogurt?

    Sour cream, labneh, or dairy-free yogurt alternatives work well. Each offers a different tanginess level, so adjust seasonings accordingly. Coconut yogurt adds a subtle sweetness.

    Is this recipe keto-friendly?

    Yes! Cucumbers are low-carb vegetables, and full-fat Greek yogurt fits keto macros. Check yogurt labels for hidden sugars and use herbs generously for maximum flavor without carbs.

    Can I make this salad ahead for meal prep?

    Absolutely! Prepare components separately—slice cucumbers and mix dressing—then combine portions as needed throughout the week for maximum freshness and texture.

    Final Thoughts

    This Dill Yogurt Cucumber Salad has become my summer signature dish for good reason. There’s something magical about how a few simple ingredients transform into something so refreshing and satisfying. I love watching friends’ faces light up with that first cool, creamy bite—it’s the ultimate warm-weather comfort food that never feels heavy. Whether you’re serving it alongside grilled meats or enjoying it straight from the fridge on a hot afternoon, this salad delivers big flavor with minimal effort. Don’t forget to check out more refreshing ideas on our Pinterest for summer inspiration!

  • Sourdough Cheez-Its Crackers: Irresistibly Crispy Snack Bliss!

    Sourdough Cheez-Its Crackers: Irresistibly Crispy Snack Bliss!

    Sourdough Cheez-Its Crackers: Irresistibly Crispy Snack Bliss!

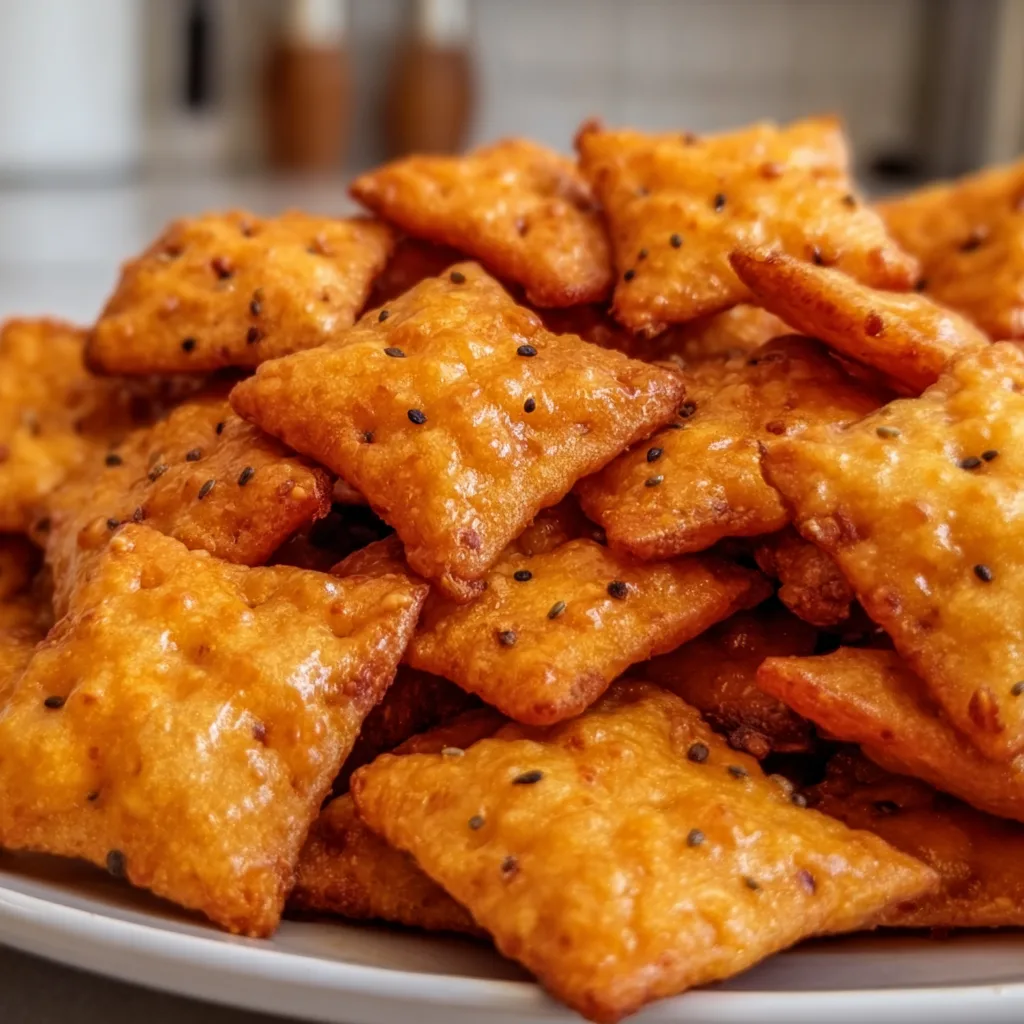
    Sourdough Cheez-Its Snack Crackers are the perfect way to transform your discard into something magical. There’s nothing quite like the tangy zip of homemade cheese crackers that put the store-bought version to shame! I discovered this recipe during a rainy weekend when my sourdough starter was bubbling over, and I couldn’t bear to waste another drop. The combination of sharp cheddar and that signature sourdough tang creates irresistible little squares that disappear faster than I can bake them. If you’re looking for a snack that’s both impressive and addictive, you’ve found it at Recipes Darleen.

    Recipe

    Why You’ll Love This Sourdough Cheez-Its Snack Crackers

    The Perfect Sourdough Discard Solution

    Let’s be honest—finding creative ways to use sourdough discard can feel like a part-time job. These crackers have become my go-to solution because they’re ridiculously simple yet taste like you spent hours perfecting them. The discard adds a complex tanginess that perfectly complements the sharp cheddar, creating a depth of flavor you simply can’t get from regular crackers. Plus, there’s something deeply satisfying about transforming what would have been waste into the star ingredient of a snack everyone fights over. No more guilt-tossing that precious discard!

    Better Than Store-Bought Taste

    The difference between these homemade Sourdough Cheez-Its and the boxed version is like comparing fresh-baked bread to a factory loaf—there’s simply no competition. The crackers emerge from your oven with a gorgeous golden hue and that perfect crisp-yet-tender texture that makes them dangerously poppable. I’ve watched guests who claimed they “weren’t hungry” demolish an entire batch while chatting. The real cheese flavor shines through with none of those artificial ingredients, and the sourdough adds a complexity that makes these truly special.

    Essential Tips & Tricks

    Perfecting Your Dough Consistency

    Getting the right dough consistency is crucial for perfectly crispy Sourdough Cheez-Its. Your dough should be firm but pliable—think play-dough that holds its shape when rolled. If it’s too sticky, don’t panic! Simply dust your work surface with a bit more flour and fold it in gently. For the sharpest flavor, use extra-sharp or aged cheddar cheese and make sure it’s finely grated. I’ve found that chilling the dough for 30 minutes before rolling makes it much easier to work with and helps the crackers hold their shape during baking.

    Rolling and Cutting Techniques

    The secret to professional-looking Sourdough Cheez-Its lies in how you roll and cut them. Aim for uniform thickness—about 1/8 inch is perfect for that ideal crisp texture. I use a pasta roller for super-even crackers, but a regular rolling pin works beautifully too. For that classic look, a fluted pastry wheel creates perfect zigzag edges, while a pizza cutter makes quick work of straight lines. Don’t forget the signature hole in the middle! A wooden skewer or toothpick works perfectly to create that authentic look while helping the crackers bake evenly. Check out these Easy Jalapeno Popper Crescent Rolls for another quick snack idea!

    Serving Ideas & Creative Variations

    Perfect Pairings for Any Occasion

    These Sourdough Cheez-Its elevate any snack board to impressive heights. I love serving them alongside a creamy dip like whipped feta or herb-flecked cream cheese for a simple yet sophisticated appetizer. They’re sturdy enough to scoop up hummus but delicate enough to enjoy on their own. For wine nights, pair them with a bold red that complements the tangy cheese flavor. They’re also perfect tucked into lunchboxes or set out for after-school snacks—my nephew calls them “the fancy orange crackers” and requests them every visit.

    Flavor Variations to Try

    The beauty of homemade Sourdough Cheez-Its is how easily you can customize them! My spicy version with a pinch of cayenne and smoked paprika disappears fastest at parties. For an herb-lovers version, try adding dried rosemary and thyme to the dough. Everything bagel seasoning sprinkled on top before baking creates an irresistible savory crunch. For a more complex cheese flavor, substitute half the cheddar with parmesan or gruyère. These variations pair perfectly with Easy Spinach Stuffed Chicken Breast for a complete meal!

    Storage & Troubleshooting Guide

    Keeping Your Crackers Crispy

    The enemy of crispy crackers is moisture, so proper storage is essential. Once your Sourdough Cheez-Its have completely cooled, store them in an airtight container with a small silica gel packet (save these from vitamin bottles or new shoes). This keeps them perfectly crisp for up to a week. For longer storage, they freeze beautifully for up to three months—just thaw at room temperature and refresh in a 300°F oven for 5 minutes if needed. I’ve found that glass containers maintain crispness better than plastic, but either works in a pinch.

    Troubleshooting Common Issues

    If your crackers aren’t as crispy as you’d like, they likely need a bit more baking time. The color should be a deep golden brown—don’t be afraid to push the baking time a bit longer for maximum crispness. If they’re browning too quickly without crisping, your oven may be running hot. Try reducing the temperature by 25 degrees and baking a bit longer. Uneven thickness is the most common culprit behind inconsistent results, so take your time rolling the dough evenly. For crackers that puff too much, make sure you’re poking enough holes in each piece.

    Frequently Asked Questions

    Can I use fresh sourdough starter instead of discard?

    Yes! Active starter works beautifully, though the crackers may have a stronger sourdough flavor. You might need slightly more flour since active starter is usually more liquid than discard.

    How do I know when my Sourdough Cheez-Its Snack Crackers are perfectly done?

    Look for even golden-brown color and a firm texture when pressed gently. The edges should be slightly darker, and the crackers should feel dry to the touch.

    Can I make these crackers without a food processor?

    Absolutely! Mix the dough by hand using a pastry cutter or two knives to incorporate the butter, then mix in the remaining ingredients until combined.

    Are these crackers suitable for freezing?

    Yes! Freeze them in an airtight container for up to 3 months. Thaw at room temperature and reheat at 300°F for 5 minutes to restore crispness.

    What cheese substitutions work best?

    Any hard, flavorful cheese works well. Try gruyère, gouda, or parmesan. Avoid soft cheeses like mozzarella as they contain too much moisture.

    Final Thoughts

    These Sourdough Cheez-Its Snack Crackers have become a staple in my baking rotation—not just because they use up discard, but because they’re genuinely delicious. There’s something magical about transforming simple ingredients into these perfectly crisp, tangy bites that make everyone think you’re a culinary genius. They’ve saved many last-minute gatherings and quiet afternoons alike. I’d love to see your creations on Pinterest! Whether you stick to the classic recipe or experiment with flavors, these crackers are bound to become your new favorite sourdough discard project.

  • Tomato Burrata Toast That Will Make Your Taste Buds Explode!

    Tomato Burrata Toast That Will Make Your Taste Buds Explode!

    Tomato Burrata Toast That Will Make Your Taste Buds Explode!

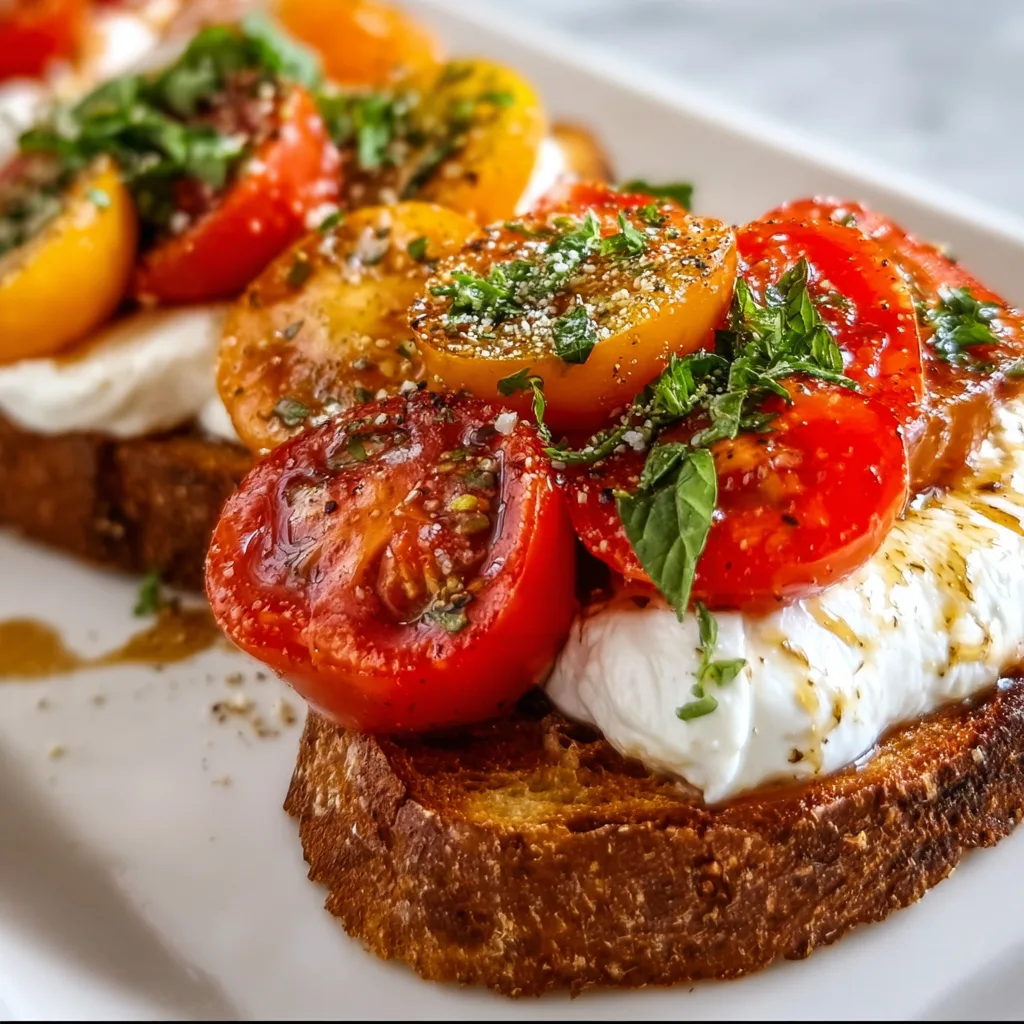
    This Tomato Burrata Toast brings together the perfect combination of creamy burrata, juicy tomatoes, and crusty bread for a simple yet elegant dish that’s ready in minutes. I first fell in love with this combination at a little café in Italy, and I’ve been recreating it at home ever since. The contrast between the warm, toasted bread and the cool, milky cheese creates a sensory experience that’s hard to beat. It’s my go-to when I need something quick but impressive, whether for a light lunch or an appetizer when friends drop by unexpectedly.

    Recipe

    Why You’ll Love This Tomato Burrata Toast

    Perfect Balance of Flavors and Textures

    There’s something magical about the way the creamy burrata melts slightly into the warm toast, creating pockets of richness that complement the acidity of fresh tomatoes. Each bite delivers a perfect balance – the crunch of toasted bread, the silkiness of the cheese, and the juicy burst of tomatoes. I love adding a drizzle of high-quality olive oil that pools in the little crevices, carrying the flavor of fresh basil throughout each bite. This simple combination creates a dish that feels both rustic and sophisticated at the same time.

    Quick and Impressive Appetizer

    When I need to pull together something beautiful in under 10 minutes, this Tomato Burrata Toast is my secret weapon. It requires minimal ingredients but delivers maximum impact. Last summer, I served this at an impromptu gathering, and my friends couldn’t stop raving about it. The key is using the best ingredients you can find – a good sourdough bread, perfectly ripe tomatoes, and fresh burrata that’s still cool from the refrigerator. The contrast of temperatures and textures makes this simple dish feel special enough for entertaining.

    Essential Tips & Tricks

    Selecting the Perfect Ingredients

    The quality of your ingredients makes all the difference in this simple recipe. Look for artisanal bread with a chewy interior and crisp crust – sourdough or ciabatta work beautifully. For tomatoes, seek out varieties that are fragrant and yield slightly to pressure. I prefer a mix of heirloom tomatoes for their varied colors and flavors. The burrata should be fresh and stored properly – when you cut into it, the cream should slowly ooze out. Finishing with flaky sea salt adds a crucial textural element that elevates the entire dish, similar to how salt enhances the creamy Mediterranean quesadillas on my site.

    Perfecting the Assembly Process

    Timing is everything when making tomato burrata toast. Toast your bread until it’s golden brown but still has some give when pressed – you want it sturdy enough to hold the toppings but not so hard it’s difficult to bite. Let the toast cool for just a minute before adding the burrata to prevent it from melting completely. Tear the cheese rather than cutting it for a more rustic presentation. Add tomatoes last, then immediately drizzle with olive oil and sprinkle with herbs so their flavors infuse the warm ingredients. Serve immediately for the best temperature contrast.

    Serving Ideas & Creative Variations

    Seasonal Adaptations

    The beauty of tomato burrata toast is how it evolves with the seasons. In summer, I use a rainbow of heirloom tomatoes with fresh basil and a drizzle of balsamic glaze. Come fall, I’ll add roasted grape tomatoes with thyme and a touch of honey. Winter calls for slow-roasted tomatoes with rosemary and a hint of garlic infused oil. Spring brings delicate cherry tomatoes with mint and lemon zest. This adaptability makes it a year-round favorite that never feels repetitive, much like my crispy garlic parmesan green beans that change with seasonal herbs.

    Complementary Pairings

    Elevate your tomato burrata toast from a simple appetizer to part of a memorable meal with thoughtful pairings. For brunch, serve alongside scrambled eggs with chives and a light arugula salad. As an appetizer, pair with a crisp white wine like Pinot Grigio or Sauvignon Blanc. For a light dinner, add prosciutto or serrano ham for saltiness and protein. I love setting up a toast bar where guests can customize their own creations with various toppings like roasted peppers, olives, capers, and different herbs. The interactive element makes it perfect for casual entertaining.

    Storage & Troubleshooting Guide

    Preventing Soggy Toast

    Nothing ruins tomato burrata toast faster than sogginess. To prevent this common issue, toast your bread thoroughly and let it cool slightly before assembling. Consider brushing the bread with olive oil before toasting to create a moisture barrier. If preparing components ahead for a party, store everything separately and assemble just before serving. For tomatoes that release a lot of juice, I like to slice them, place in a colander, sprinkle with salt, and let them drain for 10 minutes. This concentrates their flavor while removing excess moisture that could make your toast soggy.

    Rescuing Common Issues

    Even with careful preparation, things don’t always go as planned. If your burrata is too cold and firm, let it sit at room temperature for 15-20 minutes before serving. For toast that’s gotten soft, a quick 1-2 minute reheat in a 350°F oven can restore crispness without further browning. If your tomatoes aren’t as flavorful as hoped, a light sprinkle of good sea salt and a few drops of balsamic vinegar can enhance their natural sweetness. And if you accidentally overtoasted your bread, lightly scrape off the burnt parts with a serrated knife and brush with additional olive oil.

    Frequently Asked Questions

    What’s the difference between burrata and mozzarella for tomato burrata toast?

    Burrata has a solid mozzarella exterior with a creamy, stracciatella cheese center that creates a luxurious texture. Mozzarella is firmer throughout and won’t provide the same creamy experience, though it can substitute in a pinch.

    Can I make tomato burrata toast ahead of time?

    For best results, prepare components separately up to 4 hours ahead. Toast the bread, slice tomatoes, and keep burrata refrigerated. Assemble just before serving to maintain optimal textures and temperature contrast.

    What bread works best for tomato burrata toast?

    Crusty artisan breads like sourdough, ciabatta, or baguette work best as they provide necessary structure. Avoid very soft breads that may become soggy under the weight of the toppings.

    How can I make my tomato burrata toast more substantial?

    Add protein like prosciutto, smoked salmon, or a fried egg. Include avocado for healthy fats or white beans for fiber. These additions transform it from an appetizer into a satisfying meal.

    What’s the best way to serve tomato burrata toast at a party?

    Create a DIY toast bar with pre-toasted bread slices, burrata portions, and various toppings. This interactive approach lets guests customize their toast while ensuring everything stays fresh and crisp.

    Final Thoughts

    Tomato Burrata Toast exemplifies how simple ingredients, thoughtfully combined, can create something truly special. The contrast of textures and temperatures—crisp toast, creamy cheese, juicy tomatoes—makes each bite a sensory delight. What I love most is its versatility; it can be a quick lunch, elegant appetizer, or the star of a summer dinner party. Don’t overthink this recipe—its beauty lies in simplicity and quality ingredients. Visit my Pinterest for more inspiration on beautiful, approachable recipes that celebrate fresh ingredients.

  • Crispy Garlic Parmesan Green Beans That Will Blow Your Mind!

    Crispy Garlic Parmesan Green Beans That Will Blow Your Mind!

    Crispy Garlic Parmesan Green Beans That Will Blow Your Mind!

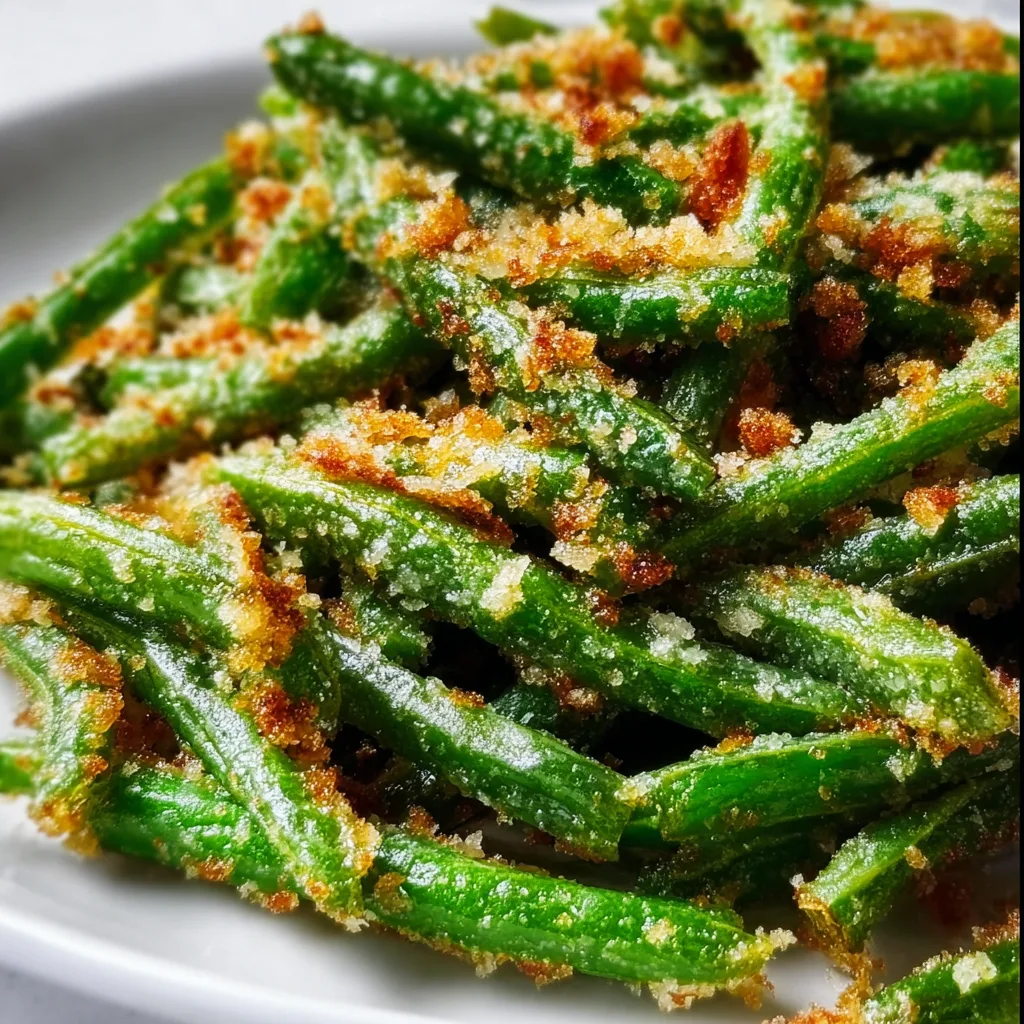
    Crispy Garlic Parmesan Green Beans have become my absolute go-to side dish when I want to transform ordinary vegetables into something extraordinary. The first time I made these, my kitchen filled with the intoxicating aroma of roasting garlic and nutty parmesan that had everyone wandering in asking “what smells so amazing?” There’s something magical about how the high heat transforms plain green beans into addictively crispy, savory bites that even vegetable skeptics can’t resist. Whether you’re looking for a quick weeknight side or an impressive holiday dish, these beans deliver big flavor with minimal effort, just like my Chicken and Dumplings with Biscuits that always disappears within minutes.

    Recipe

    Why You’ll Love This Crispy Garlic Parmesan Green Beans

    Perfect Texture Combination

    There’s nothing quite like the textural contrast these green beans deliver. The exterior develops this incredible crispness from the high-heat roasting, while the interior stays tender with just the right amount of bite. I’m obsessed with how the parmesan creates these little crispy bits that remind me of those coveted browned cheese edges on a good lasagna. The garlic gets all caramelized and sweet, losing that harsh raw bite and transforming into something mellow and nutty. When I serve these at dinner parties, I always catch people picking up the crispiest pieces with their fingers when they think no one’s looking!

    Nutritious Yet Indulgent

    These green beans somehow manage to be both virtuous and decadent simultaneously. You’re getting all the nutritional benefits of fresh green beans—fiber, vitamins K and C, folate—while enjoying a side dish that tastes like it should be much less healthy than it is! The parmesan adds protein and calcium while the olive oil provides heart-healthy fats. I love that I can feel good about serving something so nutrient-dense while still satisfying those comfort food cravings. My kids even ask for seconds, which feels like winning the vegetable lottery in my house. They’re the perfect balance of healthy and crave-worthy.

    Essential Tips & Tricks

    Perfecting Your Prep Work

    The secret to achieving that perfect crisp is making sure your green beans are completely bone-dry before roasting. After washing, I spread them on a clean kitchen towel, then roll them up gently to absorb moisture. Another game-changer is trimming both ends—not just the stem side. This allows more surface area for the seasonings to cling to and promotes even cooking. For maximum flavor absorption, toss the beans in your olive oil mixture at least 10 minutes before roasting. This mini-marinade time makes a noticeable difference in the depth of flavor, similar to how I prepare vegetables for my Moroccan Couscous with Roast Vegetables recipe.

    Temperature and Timing Mastery

    Finding that sweet spot between perfectly roasted and burnt is crucial. I’ve learned that a preheated 425°F oven gives the best results—hot enough to create crispy exteriors without turning the garlic bitter. Arrange your beans in a single layer with breathing room; crowding leads to steaming instead of roasting. For that restaurant-quality finish, toss the beans halfway through cooking and rotate your pan to account for any oven hot spots. The visual cue I look for is slight charring on about 25% of each bean, with vibrant green still visible. This usually takes 15-18 minutes, but your eyes are the best timer here.

    Serving Ideas & Creative Variations

    Complementary Pairings

    These crispy green beans are versatile enough to complement almost any main dish. They shine alongside hearty proteins like roasted chicken, grilled steak, or baked salmon, providing a lighter counterpoint to rich meats. I particularly love serving them with pasta dishes where the beans can catch little bits of sauce. For a complete meal, try pairing them with my Creamy Pesto Chicken and some crusty bread. During holiday meals, these beans hold their own against traditional sides while offering a fresher alternative. The texture contrast makes them perfect for buffet-style serving since they maintain their appeal even as they cool to room temperature.

    Flavor Adaptations

    While the classic garlic parmesan version is hard to beat, this recipe welcomes creative variations. For an Asian-inspired twist, swap the parmesan for sesame seeds and add a splash of soy sauce and ginger to the olive oil. Lemon lovers can add zest before roasting and a squeeze of fresh juice just after. For heat seekers, red pepper flakes or a drizzle of hot honey creates a sweet-spicy balance that’s irresistible. My personal favorite variation includes a handful of toasted pine nuts and a sprinkle of fresh thyme added during the last five minutes of roasting. The pine nuts add another layer of texture while the thyme brings an earthy complexity.

    Storage & Troubleshooting Guide

    Keeping Them Crispy

    Maintaining that coveted crispiness is the biggest challenge when storing these green beans. For best results, cool them completely before transferring to an airtight container lined with paper towels to absorb excess moisture. They’ll keep in the refrigerator for 3-4 days, though the crispness diminishes slightly each day. To reheat, avoid the microwave which creates steam and makes them soggy. Instead, spread them on a baking sheet and pop into a 350°F oven for 5-7 minutes. For meal prep, I sometimes undercook them slightly by 2 minutes, knowing they’ll finish cooking during reheating. This method preserves that perfect texture even days later.

    Troubleshooting Common Issues

    If your green beans aren’t crisping up, there are a few likely culprits. First, check if your oven temperature is accurate—many run cooler than the setting indicates. Excess moisture is another common problem; make sure beans are thoroughly dried and your baking sheet isn’t overcrowded. If the parmesan is burning before the beans are done, try adding it halfway through the cooking time instead of at the beginning. For beans that seem tough rather than tender-crisp, they may be past their prime. The freshest beans will always give the best results. Finally, if your garlic tastes bitter, it’s likely burned—next time, use slightly larger pieces or add them a few minutes into the cooking process.

    Frequently Asked Questions

    Can I use frozen green beans for this recipe?

    Frozen beans contain excess moisture that prevents proper crisping. For best results, always use fresh green beans. If frozen is your only option, thaw completely, pat thoroughly dry, and expect slightly less crispy results.

    How do I know when my Crispy Garlic Parmesan Green Beans are done?

    Look for slight charring on about 25% of each bean, with vibrant green still visible. The parmesan should be golden brown and the garlic should be fragrant but not burnt.

    Can I make these ahead for a dinner party?

    Yes! Prepare them up to 4 hours ahead and leave at room temperature. Reheat in a 350°F oven for 5-7 minutes just before serving to restore crispiness.

    What’s the best cheese substitute for dairy-free guests?

    Nutritional yeast provides a similar savory flavor profile. Use 2-3 tablespoons instead of parmesan and add an extra pinch of salt to compensate.

    Why are my green beans soggy instead of crispy?

    Soggy beans usually result from overcrowding the pan, insufficient drying before roasting, or too low oven temperature. Ensure beans are completely dry and arranged in a single layer.

    Final Thoughts

    These Crispy Garlic Parmesan Green Beans have earned their place as a staple in my recipe collection because they consistently deliver that perfect balance of simplicity and wow-factor. I love watching people’s expressions change from “just green beans” to genuine delight with their first bite. The magic lies in those simple, quality ingredients transformed through proper technique. Whether you’re a seasoned cook or just starting out, this recipe proves that vegetables can be the star of the meal rather than an afterthought. Find more delicious recipes on my Pinterest page to pair with these irresistible beans!

  • Southern-Style BBQ Egg Rolls: Crispy, Irresistible Flavor Bombs!

    Southern-Style BBQ Egg Rolls: Crispy, Irresistible Flavor Bombs!

    Southern-Style BBQ Egg Rolls: Crispy, Irresistible Flavor Bombs!

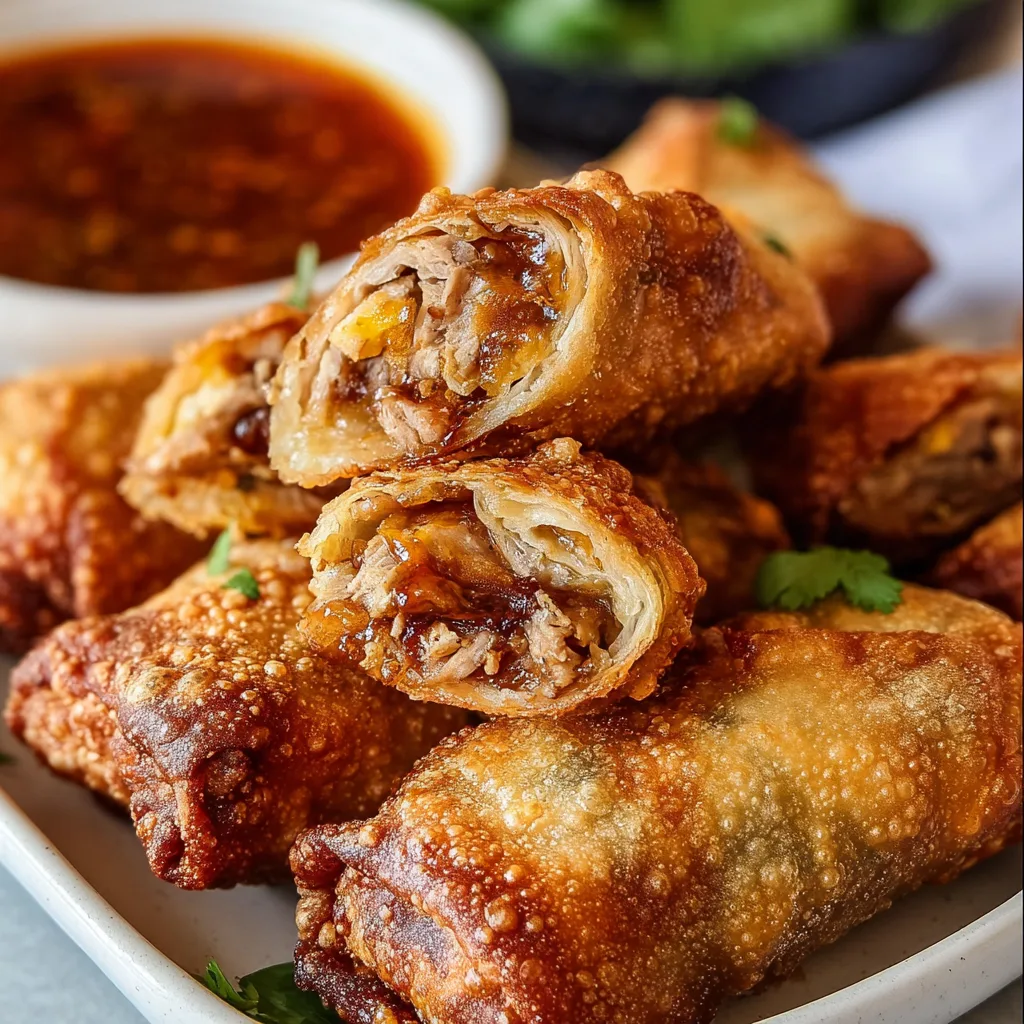
    The moment I first tasted Southern-Style BBQ Egg Rolls, I knew I’d discovered something magical. These crispy, golden parcels combine the smoky-sweet flavors of classic Southern barbecue with the satisfying crunch of egg roll wrappers. Picture tender pulled pork, tangy coleslaw, and just enough cheese to make everything melt together in perfect harmony. They’re the ultimate fusion food—bringing together Asian technique with down-home Southern comfort. When my neighbor brought these to our block party last summer, I immediately begged for the recipe, and now they’re my go-to for any gathering where I want to impress without spending hours in the kitchen.

    Recipe

    Why You’ll Love These Southern-Style BBQ Egg Rolls

    Perfect Party Food That Disappears Fast

    These egg rolls are the definition of crowd-pleasing. I’ve never seen appetizers vanish so quickly! The combination of textures—crispy exterior giving way to tender, saucy meat—creates an irresistible bite that guests can’t stop talking about. They’re substantial enough to satisfy hungry friends but still handheld and portable, making them perfect for everything from game day gatherings to casual dinner parties. Plus, they’re unexpected enough to earn you serious hosting points. I love watching people’s faces light up with that “Why didn’t I think of that?” expression after their first bite.

    Make-Ahead Friendly for Stress-Free Entertaining

    One of my favorite things about these Southern-Style BBQ Egg Rolls is how prep-friendly they are. You can assemble them hours before your guests arrive and simply fry or bake when you’re ready to serve. The filling actually benefits from a little time for the flavors to meld together. This make-ahead magic has saved me countless times, like when my in-laws announced they were “just dropping by” with friends. I pulled my pre-rolled egg rolls from the fridge, fried them up in minutes, and somehow looked like I’d planned an elaborate spread all along. Talk about a hostess victory!

    Essential Tips & Tricks

    Perfecting Your Filling Consistency

    Getting the moisture balance right is crucial for perfect egg rolls. Too wet, and you’ll end up with soggy wrappers that tear; too dry, and they’ll lack that luscious, saucy quality that makes BBQ so crave-worthy. I drain my pulled pork well before mixing with sauce, and if using coleslaw, I let it sit in a strainer for about 10 minutes. Pat ingredients with paper towels if needed. For extra insurance against sogginess, try mixing a tablespoon of cornstarch into your BBQ sauce—it helps absorb excess moisture while thickening the sauce beautifully, similar to what makes those Crispy Teriyaki Chicken Wonton Tacos so perfect.

    Rolling Technique for Leak-Proof Results

    The tight seal is your secret weapon for professional-looking egg rolls. Place your filling slightly off-center in the lower third of the wrapper, then fold the bottom up over the filling. Next, fold in both sides like you’re making an envelope, and roll upward. The key moment? That final edge needs to be sealed properly—I brush it with a beaten egg or water slurry and press firmly. Don’t overfill! About 2-3 tablespoons of filling per roll is perfect. I learned this the hard way after a spectacular blowout during frying that left my kitchen (and my favorite shirt) splattered with BBQ sauce.

    Serving Ideas & Creative Variations

    Dipping Sauces That Elevate Every Bite

    The right dipping sauce transforms these egg rolls from delicious to unforgettable. My go-to is a simple Alabama white BBQ sauce—mayonnaise-based with a hint of vinegar and horseradish that cuts through the richness perfectly. For something sweeter, try a peach-bourbon sauce with a kick of cayenne. For a tangy option, mix ranch dressing with buffalo sauce. Set up a sauce bar and let guests customize their experience. This approach works beautifully alongside Loaded BBQ Chicken Sweet Fries for a themed spread that showcases different BBQ styles from across the South.

    Regional BBQ Twists Worth Trying

    Each Southern region brings its own BBQ personality to these egg rolls. For a Carolina-style version, use vinegar-based pulled pork with a mustard slaw. Memphis-style? Go heavy on the dry rub and lighter on sauce. Texas-inspired rolls call for brisket instead of pork, with a spicier kick and no coleslaw. My personal favorite is a Kansas City approach with sweet, molasses-rich sauce and smoked gouda cheese. Don’t be afraid to experiment with different meats too—chicken, turkey, or even jackfruit for vegetarian guests. The egg roll wrapper is just your canvas for BBQ artistry.

    Storage & Troubleshooting Guide

    Freezing and Reheating for Later Enjoyment

    These Southern-Style BBQ Egg Rolls are freezer-friendly champions. To freeze uncooked rolls, arrange them in a single layer on a parchment-lined baking sheet until solid, then transfer to a freezer bag. They’ll keep for up to three months! For cooked leftovers (if you’re lucky enough to have any), refrigerate for 3-4 days or freeze for up to a month. The best reheating method is a 375°F oven for 10-15 minutes from refrigerated, or 15-20 minutes from frozen. Microwaving works in a pinch but sacrifices the crispy texture that makes these so special.

    Troubleshooting Common Egg Roll Challenges

    Even experienced cooks encounter egg roll emergencies. If your wrappers tear during rolling, don’t panic—patch with a small piece of another wrapper using egg wash as “glue.” Filling oozing during frying usually means your oil isn’t hot enough (aim for 350°F) or your seals weren’t tight. If your rolls are browning too quickly but remain raw inside, your oil is too hot. For soggy results, try double-frying: a quick first fry, rest for 5 minutes, then fry again until golden. And remember that baking at 425°F for 15-20 minutes is a fantastic alternative to frying, giving you crispy results with less mess.

    Frequently Asked Questions

    Can I make Southern-Style BBQ Egg Rolls ahead of time?

    Absolutely! Assemble up to 24 hours ahead and refrigerate covered with a damp paper towel to prevent drying. For longer storage, freeze uncooked rolls and cook directly from frozen, adding 3-5 minutes to cooking time.

    What’s the best meat to use for authentic flavor?

    Pork shoulder slow-cooked until tender gives the most authentic Southern BBQ flavor, but chicken thighs, beef brisket, or even jackfruit for vegetarians work beautifully. The key is long, slow cooking with plenty of seasoning.

    Can I bake these instead of frying?

    Yes! Brush with oil and bake at 425°F for 15-20 minutes, turning halfway through. They’ll be slightly less crispy than fried but still delicious and much lighter.

    How do I prevent my egg rolls from becoming soggy?

    Drain filling ingredients thoroughly before assembling and let rolls rest 10-15 minutes after rolling. Ensure your oil is hot enough (350°F) before frying, and never crowd the pan.

    What sides pair well with these egg rolls?

    Serve with classic Southern sides like mac and cheese, collard greens, or cornbread. For a lighter option, a tangy vinegar-based slaw or pickled vegetables provide nice contrast.

    Final Thoughts

    Southern-Style BBQ Egg Rolls represent everything I love about modern comfort food—they’re creative, approachable, and packed with familiar flavors in a surprising package. They honor traditional BBQ techniques while bringing something new to the table. Whether you’re hosting a backyard gathering or looking for a unique potluck contribution, these crispy, savory bundles deliver big flavor in every bite. Don’t forget to share your creations on Pinterest and tag me—I’m always inspired by your personal BBQ egg roll variations!