Category: Lunch

Easy lunch ideas for busy days. Simple, quick recipes with fresh flavor and satisfying meals you can enjoy at home or on the go.

  • Black Eyed Pea Salad Recipe That Will Wow Your Taste Buds!

    Black Eyed Pea Salad Recipe That Will Wow Your Taste Buds!

    Black Eyed Pea Salad Recipe That Will Wow Your Taste Buds!

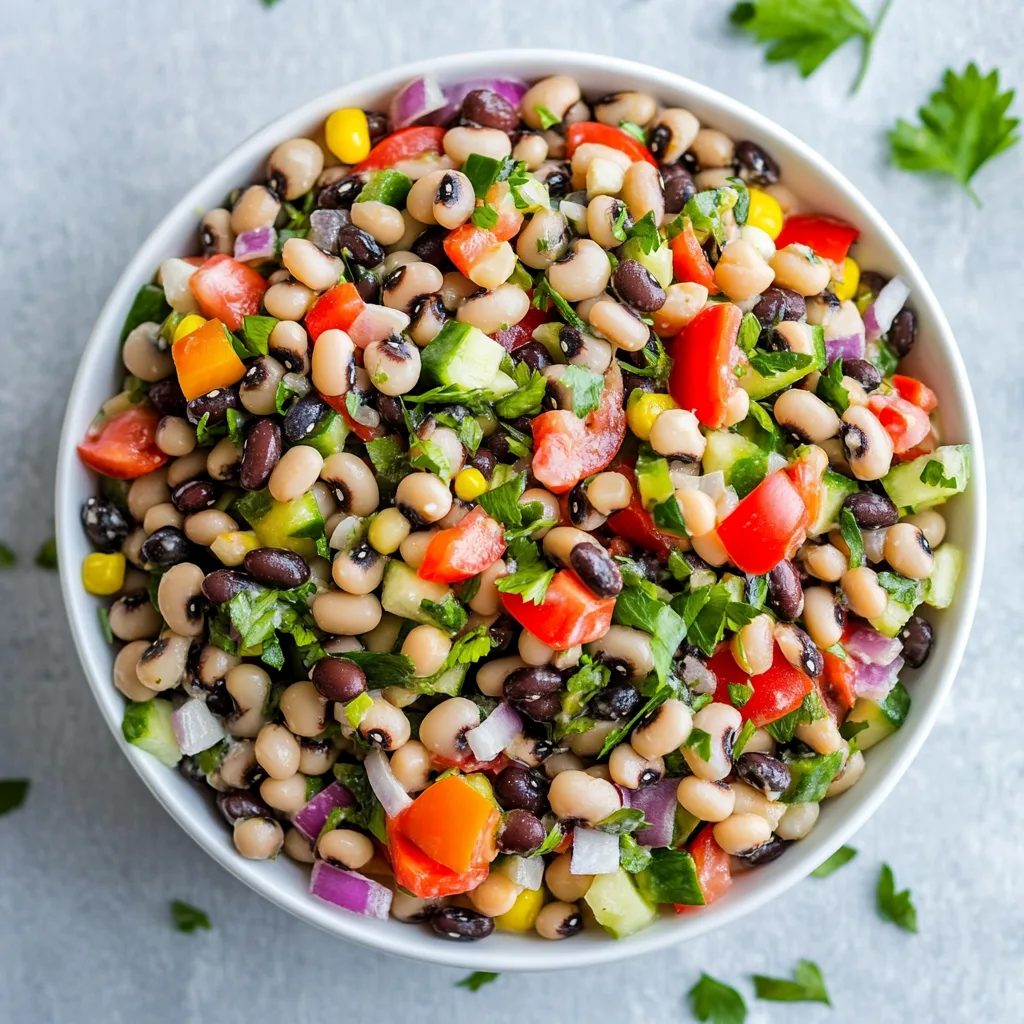
    Black Eyed Pea Salad has been my summer potluck secret weapon for years! There’s something magical about the combination of tender black-eyed peas, crunchy vegetables, and that zingy dressing that makes everyone ask for the recipe. I first discovered this gem at my aunt’s farmhouse gathering, where it sat humbly among fancier dishes yet disappeared first. The beauty of this salad is its versatility – serve it chilled on scorching days or at room temperature when the evening cools. If you’re looking for more crowd-pleasing sides, my Crockpot Black Eyed Peas and Collard Greens is another favorite that pairs beautifully with this salad.

    Recipe

    Why You’ll Love This Black Eyed Pea Salad

    Perfect Make-Ahead Solution

    This Black Eyed Pea Salad is the answer to your busy schedule prayers! I make mine the night before big gatherings, and the flavors actually improve as they mingle in the refrigerator. The peas soak up all that delicious dressing, becoming more flavorful by the hour. For meal prep enthusiasts, this is a dream come true – portion it into containers for quick lunches all week long. I’ve brought this to countless office potlucks, and it’s always a hit because it travels beautifully and doesn’t wilt like leafy salads.

    Nutritional Powerhouse

    Don’t let the delicious taste fool you – this Black Eyed Pea Salad packs serious nutritional benefits! Black-eyed peas are loaded with protein and fiber, making this salad surprisingly filling. I love how it keeps me satisfied through afternoon meetings without that heavy, sleepy feeling. The colorful bell peppers add vitamin C, while the red onions contribute antioxidants. It’s a complete meal in itself or a nutritious side dish. My sister-in-law, who’s a nutritionist, always comments on how this salad checks all the boxes for a balanced dish.

    Essential Tips & Tricks

    Perfecting Your Peas

    The foundation of an exceptional Black Eyed Pea Salad lies in properly prepared peas. I’ve learned through trial and error that canned peas work perfectly when you’re short on time – just rinse thoroughly to remove excess sodium. For the best flavor, however, I recommend cooking dried peas until they’re tender but still hold their shape. The key is to avoid overcooking, which creates a mushy texture. A splash of apple cider vinegar in the cooking water enhances their flavor and helps them maintain their firmness.

    Balancing Your Flavors

    The magic of this Black Eyed Pea Salad happens in the dressing! I always create a perfect balance between acidity, sweetness, and spice. My secret weapon is using both lemon juice and apple cider vinegar for complex acidity. A touch of honey or maple syrup counters the tanginess, while a pinch of cayenne adds subtle heat. Don’t rush this step – let the dressing sit for 5 minutes before tossing with the salad. For more dressing inspiration, check out my Apple Cider Chicken with Crisp Autumn Slaw which uses a similar flavor profile.

    Serving Ideas & Creative Variations

    Perfect Pairings

    This Black Eyed Pea Salad shines as both a side and a main dish! I love serving it alongside grilled proteins like chicken or fish for a complete meal. The tangy flavors complement smoky grilled foods beautifully. For potlucks, I place it next to heartier dishes like cornbread or Kielbasa and Sauerkraut for a delightful contrast of textures and flavors. During summer, I’ve found it’s particularly refreshing when paired with watermelon slices – something about the sweet juiciness alongside the savory salad creates magic on your palate.

    Seasonal Adaptations

    One reason I return to Black Eyed Pea Salad year-round is how easily it adapts to each season! In summer, I load it with fresh corn and juicy cherry tomatoes straight from my garden. Fall calls for diced apples and roasted sweet potatoes. Winter versions get heartier with roasted butternut squash and dried cranberries. Spring brings tender asparagus tips and fresh herbs. The base remains the same, but these seasonal switches keep the salad exciting. My family has come to expect a different version at each gathering, and guessing the variation has become a fun tradition.

    Storage & Troubleshooting Guide

    Keeping It Fresh

    Your Black Eyed Pea Salad will stay delicious for up to five days when stored properly in an airtight container in the refrigerator. I recommend giving it a good stir before serving leftovers to redistribute the dressing. If you’re planning to make it significantly ahead of time, consider keeping delicate ingredients like avocado separate until serving day. For meal prep, I store the dressing separately and combine just before eating to maintain the perfect texture. The peas actually improve with time as they absorb the flavors!

    Rescuing Common Issues

    Even experienced cooks encounter challenges with Black Eyed Pea Salad! If your salad seems too dry after refrigeration, simply add a splash of olive oil and a squeeze of fresh lemon juice to revive it. For salads that turned out too tangy, balance with a drizzle of honey or a sprinkle of finely diced sweet bell pepper. If the peas are undercooked and too firm, place the salad in a microwave-safe bowl and heat for 30 seconds – this gentle warming will soften them without cooking the fresh ingredients.

    Frequently Asked Questions

    Can I use frozen black-eyed peas for this salad?

    Absolutely! Frozen black-eyed peas work wonderfully. Thaw and cook according to package directions, then cool completely before adding to your salad. They often have better texture than canned varieties.

    How far in advance can I make Black Eyed Pea Salad?

    This salad can be prepared up to 2 days ahead. The flavors actually improve as they meld together, making it perfect for meal prep or entertaining.

    Is this recipe gluten-free?

    Yes, this Black Eyed Pea Salad is naturally gluten-free, making it perfect for guests with dietary restrictions. Just double-check any pre-made dressing ingredients if you’re not making it from scratch.

    Can I turn this into a main dish?

    Definitely! Add grilled chicken, shrimp, or feta cheese to transform it into a hearty main. I sometimes add quinoa for an extra protein boost when serving it as a complete meal.

    What’s the best way to serve this at a potluck?

    Transport the salad in a chilled container. I recommend bringing extra dressing on the side to refresh the salad just before serving, especially if it will sit out for several hours.

    Final Thoughts

    This Black Eyed Pea Salad has become more than just a recipe in my household – it’s a tradition that marks gatherings and creates memories. I love watching first-timers take a hesitant spoonful, only to return for seconds with enthusiasm! The beauty of this dish lies in its simplicity and adaptability. Whether you’re a seasoned cook or kitchen newbie, this salad welcomes your personal touch. I hope it brings as much joy to your table as it has to mine. Don’t forget to check out more recipes on Pinterest for inspiration!
  • Chicken Cordon Bleu Casserole: Irresistible Comfort Food You’ll Love!

    Chicken Cordon Bleu Casserole: Irresistible Comfort Food You’ll Love!

    Chicken Cordon Bleu Casserole: Irresistible Comfort Food You’ll Love!

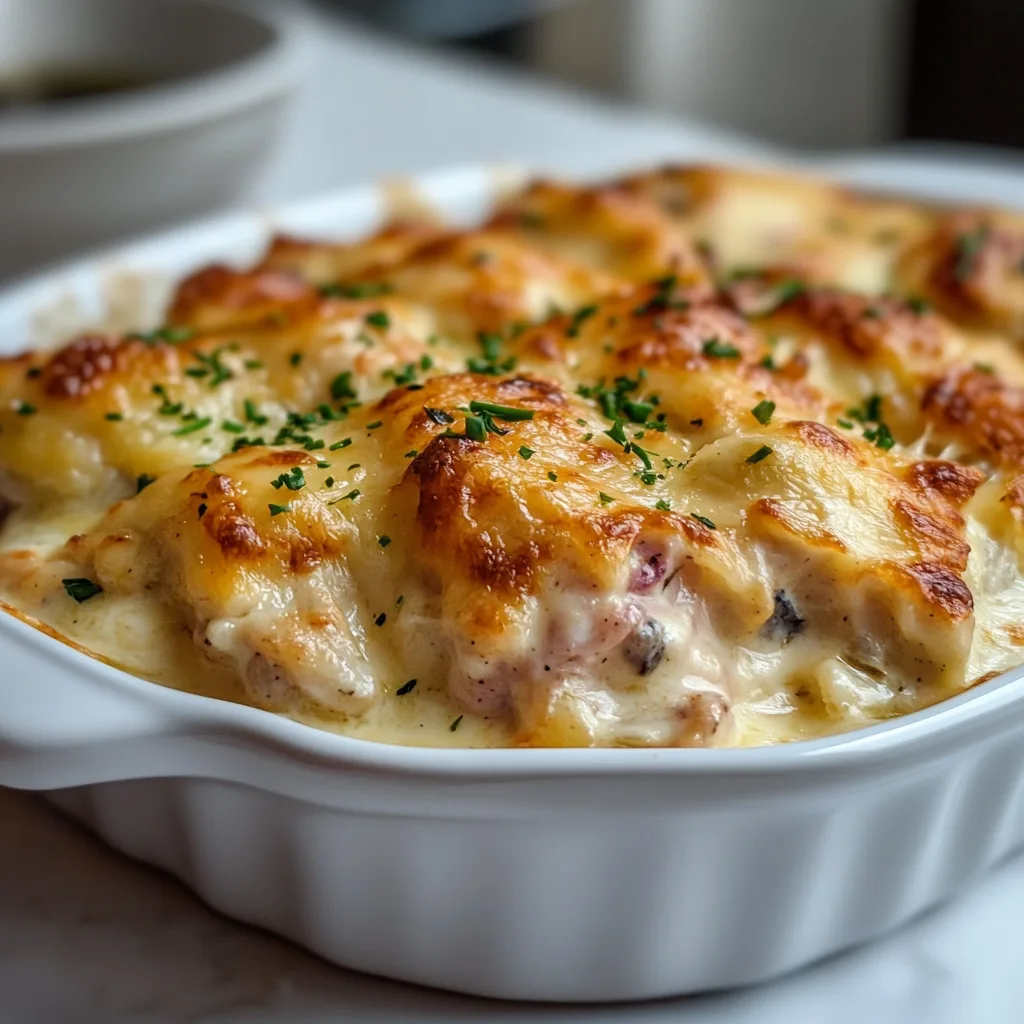
    Chicken Cordon Bleu Casserole transforms a classic French dish into a comforting, family-friendly meal that’s perfect for busy weeknights. The first time I made this creamy, cheesy casserole, my kitchen filled with the most intoxicating aroma of bubbling Swiss cheese and savory ham. There’s something magical about the way the tender chicken, smoky ham, and melty cheese come together in this dish. It’s like a warm hug on a plate! If you love comfort food with a touch of elegance, this Chicken Cordon Bleu Casserole will quickly become a staple in your dinner rotation.

    Recipe

    Why You’ll Love This Chicken Cordon Bleu Casserole

    Perfect Comfort Food With Minimal Effort

    This Chicken Cordon Bleu Casserole delivers all the classic flavors you adore without the fuss of pounding, rolling, and breading chicken breasts. I still remember the first time I served this to my family—eyes widening with that first bite, forks diving back in for more. The creamy sauce envelops tender chicken chunks and salty ham, while the golden breadcrumb topping provides that satisfying crunch you’d get from traditional cordon bleu. It’s the perfect solution for those nights when you crave something special but don’t have the energy for complicated cooking techniques.

    Make-Ahead Magic For Busy Schedules

    One of the greatest advantages of this Chicken Cordon Bleu Casserole is its flexibility for meal planning. I often assemble it the night before, cover it tightly, and refrigerate until I’m ready to bake. The flavors actually develop beautifully as they meld together overnight! You can also freeze the unbaked casserole for up to three months—just thaw overnight in the refrigerator before baking. This has saved me countless times when unexpected guests arrive or when I’m too exhausted to cook after a long day. The convenience factor alone makes this recipe worth keeping in your regular rotation.

    Essential Tips & Tricks

    Achieving The Perfect Cheese Sauce

    The heart of any great Chicken Cordon Bleu Casserole is its velvety cheese sauce. Start with a proper roux (equal parts butter and flour) and cook it until it smells slightly nutty but hasn’t browned. Warm your milk before adding it to prevent lumps, then whisk constantly as you pour it in. Let the sauce thicken before adding your cheeses—I prefer a combination of Swiss and Gruyère for authentic flavor. Remove the pan from heat before adding cheese to prevent graininess. If your sauce seems too thick, add a splash of chicken broth; if it’s too thin, let it simmer a bit longer. The perfect sauce should coat the back of a spoon beautifully.

    Elevating The Flavor Profile

    While traditional Chicken Cordon Bleu Casserole is delicious on its own, a few simple additions can take it to the next level. Adding a tablespoon of Dijon mustard to the sauce provides a subtle tanginess that balances the rich cheese. A splash of white wine deglazes the pan beautifully after sautéing your aromatics. Fresh herbs like thyme or tarragon incorporated into both the sauce and the breadcrumb topping add wonderful aromatic notes. For the breadcrumb topping, mix in a bit of grated Parmesan and a drizzle of melted butter before sprinkling over the casserole—this creates an irresistible golden crust similar to what you’d find in Smothered Chicken Thighs with Creamy Gravy.

    Serving Ideas & Creative Variations

    Perfect Pairings For A Complete Meal

    Chicken Cordon Bleu Casserole shines when paired with the right sides. A simple green salad with a light vinaigrette cuts through the richness beautifully. Steamed asparagus or roasted Brussels sprouts provide a veggie component that complements rather than competes with the casserole’s flavors. For starchier options, buttered egg noodles or fluffy mashed potatoes make excellent beds for serving this creamy delight. I love to serve crusty French bread alongside to soak up every last bit of that decadent sauce. For special occasions, a glass of crisp white wine—like a Chardonnay or Pinot Grigio—elevates the entire experience.

    Exciting Twists On The Classic Recipe

    Don’t be afraid to put your own spin on Chicken Cordon Bleu Casserole! Try substituting prosciutto for ham for a more elegant flavor profile. Experiment with different cheese combinations—smoked Gouda adds wonderful depth, while a bit of cream cheese increases creaminess. For a lighter version, use Greek yogurt in place of some of the heavy cream. Adding vegetables like sautéed mushrooms, spinach, or roasted red peppers introduces new textures and nutrients. For a fun twist that kids love, try mixing in cooked pasta to create a Chicken Cordon Bleu Mac and Cheese. The possibilities are endless!

    Storage & Troubleshooting Guide

    Proper Storage For Leftovers

    Leftover Chicken Cordon Bleu Casserole should be cooled completely before being transferred to airtight containers. Properly stored in the refrigerator, leftovers will stay delicious for 3-4 days. To reheat, cover with foil and warm in a 325°F oven until heated through (about 20 minutes), removing the foil for the last few minutes to re-crisp the top. Microwaving works in a pinch, but the texture won’t be as good. For freezing leftovers, portion into freezer-safe containers and use within 2 months. I like to label mine with the date and reheating instructions—it’s such a treat to discover these homemade “frozen dinners” on busy evenings!

    Fixing Common Casserole Problems

    If your Chicken Cordon Bleu Casserole turns out too watery, there are several potential culprits. Make sure to thoroughly drain any canned ingredients and pat chicken dry before adding it to the mix. Pre-cooking the chicken slightly can help release excess moisture. If the sauce is too thin before baking, add an extra tablespoon of flour to the roux. For a casserole that’s too dry, drizzle in some warm chicken broth or cream before serving. If your topping isn’t browning properly, switch to the broiler for the last 1-2 minutes, watching carefully to prevent burning. Remember that casseroles continue cooking slightly after removal from the oven.

    Frequently Asked Questions

    Can I use rotisserie chicken for Chicken Cordon Bleu Casserole?

    Absolutely! Rotisserie chicken saves time and adds flavor. Shred or cube about 3-4 cups of meat, discarding the skin for the best texture in your casserole.

    How do I prevent my casserole from curdling?

    Lower the oven temperature to 350°F and avoid boiling the sauce. Add cheese off-heat and use full-fat dairy products, which are more stable when baked.

    Can I make this casserole gluten-free?

    Yes! Substitute the flour with cornstarch or gluten-free flour blend, and use gluten-free breadcrumbs or crushed gluten-free crackers for the topping.

    What’s the best cheese for Chicken Cordon Bleu Casserole?

    Swiss cheese is traditional, but a combination of Swiss and Gruyère provides the most authentic flavor. Mozzarella can be added for extra meltiness.

    Can I assemble this casserole in advance?

    Definitely! Prepare the Chicken Cordon Bleu Casserole up to 24 hours ahead, refrigerate covered, and add 10-15 minutes to the baking time when cooking from cold.

    Final Thoughts

    This Chicken Cordon Bleu Casserole has become my go-to recipe when I want to impress without stress. The way it transforms simple ingredients into something that feels special makes it perfect for both weeknight dinners and entertaining guests. I love how versatile it is—adaptable to whatever ingredients I have on hand while still maintaining that classic flavor combination we all crave. Don’t forget to check out more comfort food inspirations on Pinterest for your next cooking adventure. Your family will thank you for bringing this cozy, cheesy delight to the dinner table!

  • Garlic Parmesan Cheeseburger Bombs: Irresistible Flavor Explosion!

    Garlic Parmesan Cheeseburger Bombs: Irresistible Flavor Explosion!

    Garlic Parmesan Cheeseburger Bombs: Irresistible Flavor Explosion!

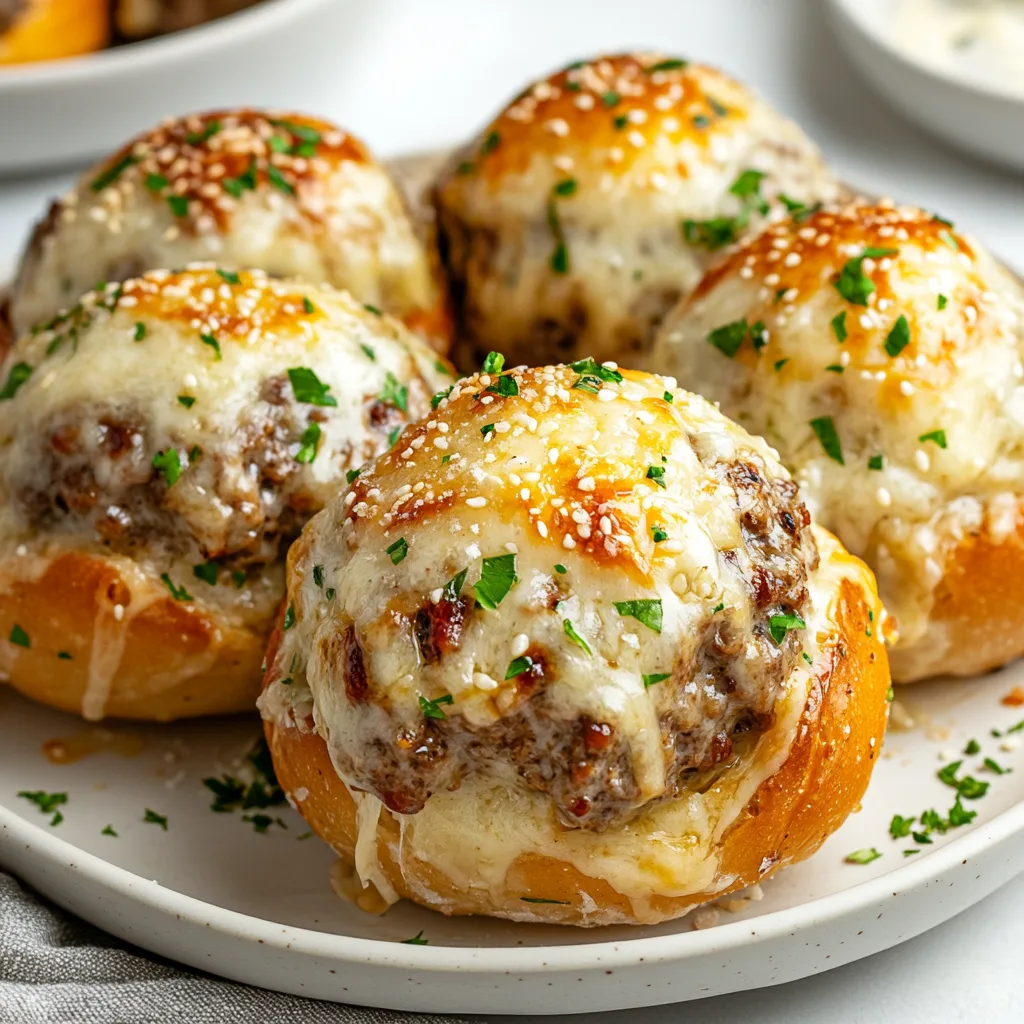
    Garlic Parmesan Cheeseburger Bombs are the ultimate comfort food mash-up that’s stolen my heart (and taste buds)! These golden-brown bundles of joy combine everything we love about cheeseburgers with the irresistible pull of fresh-baked bread and the savory punch of garlic and parmesan. I discovered these little miracles last game day when I needed something beyond the usual chips and dip, and my kitchen has never been the same. The moment you bite through that buttery, garlic-parmesan crust into the juicy, cheesy center, you’ll understand why these have become my family’s most requested treat. Trust me, these bombs are about to become your new obsession.

    Recipe

    Why You’ll Love These Garlic Parmesan Cheeseburger Bombs

    Perfect Party Food That Disappears Fast

    There’s something magical about serving food that creates an instant reaction. Every time I set down a platter of these Garlic Parmesan Cheeseburger Bombs, they’re gone in minutes! The handheld size makes them perfect for casual gatherings, and they stay remarkably warm even after sitting out. Last Super Bowl, my brother-in-law (who claims to be a food snob) ate seven of these before asking for the recipe. The combination of familiar cheeseburger flavors wrapped in that aromatic garlic-parmesan coating creates an irresistible pull that has guests circling back to the appetizer table again and again.

    Customizable For Every Taste Preference

    What I adore about these Garlic Parmesan Cheeseburger Bombs is how easily they adapt to different preferences. The basic formula stays the same, but you can switch up the filling to suit anyone’s taste. Use ground turkey for a lighter option, or plant-based meat for vegetarian friends. My daughter prefers hers with extra pickles and a touch of mustard mixed into the meat, while my husband loves adding jalapeños for heat. You can even prepare different variations in the same batch—just mark them with different garnishes on top! This flexibility makes them perfect for families with picky eaters or gatherings with diverse dietary needs.

    Essential Tips & Tricks

    Mastering The Perfect Dough Seal

    The secret to exceptional Garlic Parmesan Cheeseburger Bombs lies in creating a proper seal. After filling your dough portions, pinch the edges firmly then roll between your palms to ensure there are no openings where cheese could escape. I learned this the hard way after my first batch leaked all over the baking sheet! For extra insurance, I place each bomb seam-side down on the baking sheet. The dough should feel slightly tacky but not sticky—if it’s too dry, it won’t seal properly; too wet, and it becomes unmanageable. Let the filled bombs rest for 5-10 minutes before baking to help the dough relax and create a more secure seal.

    The Secret To That Irresistible Garlic-Parmesan Coating

    The garlicky, cheesy exterior is what transforms these from ordinary stuffed bread to crave-worthy bombs. For maximum flavor, I combine melted butter with fresh minced garlic (never the jarred stuff for this!), a touch of Italian seasoning, and finely grated parmesan—the kind that’s almost powdery works best here. Brush this mixture generously over the bombs just before they go into the oven, then again halfway through baking. This double application ensures that gorgeous golden crust with concentrated flavor in every bite. For an extra special touch, sprinkle with a bit more parmesan during the last two minutes of baking for a crispy, cheesy finish that’s simply irresistible.

    Serving Ideas & Creative Variations

    Perfect Pairings For A Complete Meal

    While Garlic Parmesan Cheeseburger Bombs are spectacular on their own, pairing them with complementary sides elevates them to a complete meal. I love serving them alongside a crisp garden salad dressed simply with vinaigrette to balance the richness. For casual gatherings, arrange them on a platter with small bowls of ketchup, mustard, and special sauce for dipping. When I’m feeling fancy, I’ll add a tomato-basil soup for dunking—the acidity cuts through the richness perfectly. For game day spreads, these bombs fit right in with sweet potato fries, coleslaw, or even a platter of roasted vegetables for a more balanced approach.

    Creative Twists On The Classic Recipe

    Don’t be afraid to experiment with different flavor profiles! My pizza bomb variation uses the same technique but swaps the burger filling for pepperoni, mozzarella, and a spoonful of marinara. The Mediterranean version with ground lamb, feta, and oregano earned rave reviews at my last book club. For breakfast bombs, try filling them with scrambled eggs, cheese, and breakfast sausage—they’re perfect for meal prep! My personal favorite twist is the Philly cheesesteak bomb with thinly sliced steak, sautéed peppers and onions, and provolone. The beauty of this recipe is its versatility—once you master the technique, you can create endless variations to suit any occasion.

    Storage & Troubleshooting Guide

    Make-Ahead And Freezer Instructions

    These Garlic Parmesan Cheeseburger Bombs are perfect for planning ahead! You can prepare them up to the point of baking, then refrigerate for 24 hours covered with plastic wrap. Just add a few extra minutes to the baking time when cooking from cold. For longer storage, freeze the unbaked bombs on a baking sheet until solid, then transfer to a freezer bag for up to 3 months. No need to thaw before baking—just place them on a baking sheet, brush with the garlic butter, and add about 5-7 minutes to the baking time. I often make a double batch specifically to freeze half, giving me a quick dinner option on hectic weeknights.

    Solving Common Cheeseburger Bomb Problems

    If your bombs are leaking cheese during baking, your seals probably need work. Make sure to pinch the dough thoroughly and roll between your palms to create a tight seal. For extra insurance, let them rest seam-side down for 10 minutes before baking. Pale, soggy bottoms usually mean your oven temperature is too low or the bombs are placed too high in the oven—try using the lower rack and checking your oven temperature with a separate thermometer. If the exterior browns too quickly while the inside stays doughy, your oven is likely too hot. Cover them loosely with foil after they reach your desired color, then continue baking until completely done.

    Frequently Asked Questions

    Can I use store-bought dough for Garlic Parmesan Cheeseburger Bombs?

    Absolutely! Refrigerated biscuit or pizza dough works perfectly. Just divide each biscuit in half or cut pizza dough into 3-inch squares. The flavor won’t be identical to homemade, but it’s a great time-saving option.

    How do I know when my cheeseburger bombs are fully cooked?

    They should be golden brown with an internal temperature of 160°F. If you don’t have a thermometer, cut one open—the dough should be cooked through with no raw spots, and the meat filling should be completely done.

    Can I make these with raw meat or should it be pre-cooked?

    Always pre-cook your meat filling. Raw meat won’t fully cook inside the dough before the exterior burns. Cook the meat with your seasonings, drain excess fat, then cool slightly before filling.

    Are Garlic Parmesan Cheeseburger Bombs spicy?

    Not unless you add spicy ingredients! The base recipe is savory but mild. Add diced jalapeños, red pepper flakes, or hot sauce to the meat mixture if you prefer heat.

    How can I make these healthier?

    Use lean ground turkey or chicken, reduced-fat cheese, and whole wheat dough. You can also brush with olive oil instead of butter and add extra vegetables to the filling.

    Final Thoughts

    Garlic Parmesan Cheeseburger Bombs have become my go-to recipe whenever I need guaranteed smiles around the table. There’s something magical about the way they combine familiar flavors into an exciting, handheld package that delights everyone from picky kids to discerning foodies. The aroma that fills your kitchen as they bake is worth making them for that alone! Whether you’re feeding a crowd or just looking for something fun to shake up your dinner routine, these bombs deliver big flavor in every bite. I hope you’ll give these Garlic Parmesan Cheeseburger Bombs a try and experience the joy they bring to any table! Find more delicious recipes on Pinterest.

  • Bourbon Maple Bacon Cinnamon Rolls That Will Blow Your Mind

    Bourbon Maple Bacon Cinnamon Rolls That Will Blow Your Mind

    Bourbon Maple Bacon Cinnamon Rolls That Will Blow Your Mind

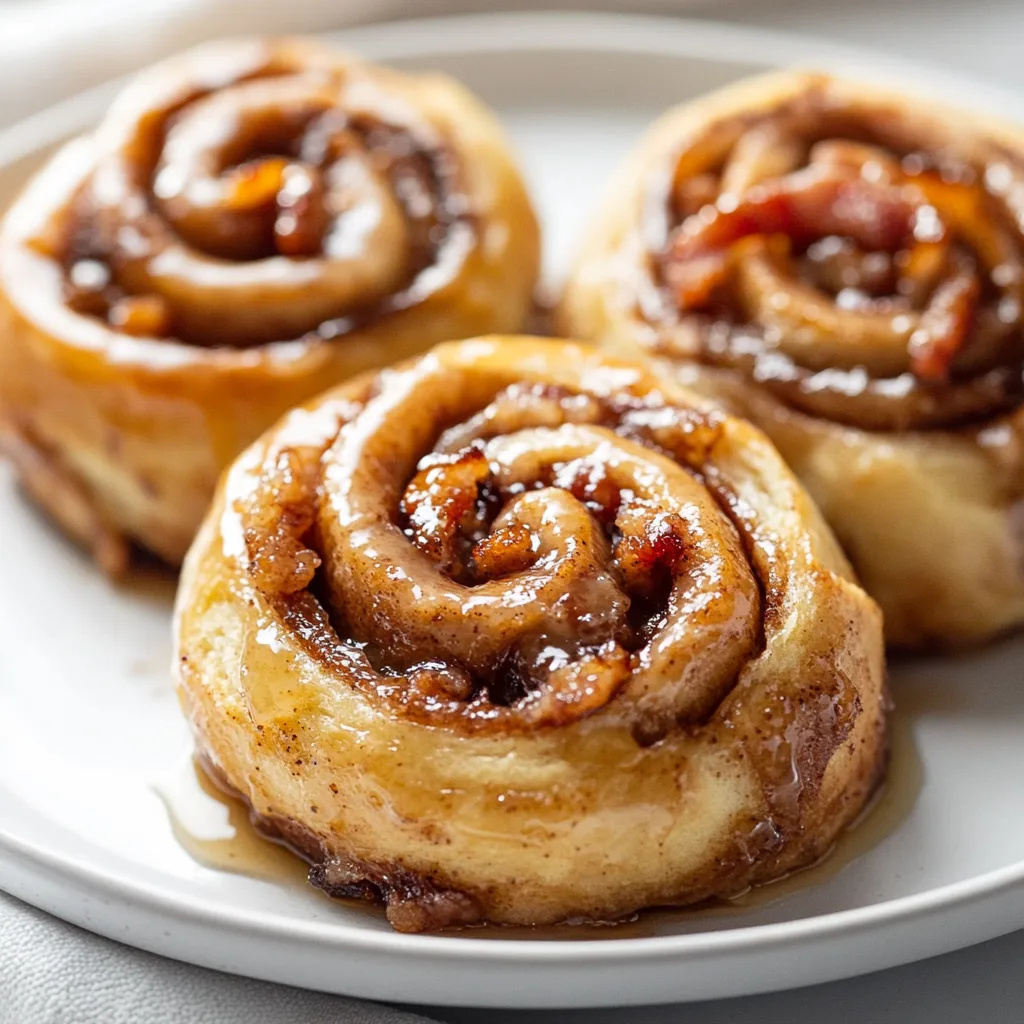
    Bourbon Maple Bacon Cinnamon Rolls have become my weekend ritual when I want to fill the house with an irresistible aroma that pulls everyone from their beds. The combination of sweet maple syrup, smoky bourbon, and crispy bacon folded into pillowy cinnamon rolls creates a flavor experience that’s both indulgent and comforting. I discovered this recipe after a trip to Vermont where maple-everything changed my baking forever. These rolls strike the perfect balance between sweet and savory, making them the ultimate brunch centerpiece that’ll have your family hovering in the kitchen, impatiently waiting for that timer to ding. Trust me, these are worth every minute of preparation!

    Why You’ll Love This Bourbon Maple Bacon Cinnamon Rolls

    The Perfect Sweet-Savory Balance

    There’s something magical that happens when maple syrup meets crispy bacon in these cinnamon rolls. The caramelized edges develop a rich amber color while the centers stay pillowy soft. I love how the bourbon adds depth without overpowering—it’s that mysterious “what makes these so good?” element. The first time I made these for my sister, she declared them better than any bakery version she’d tried. The bacon adds just enough salt to cut through the sweetness, creating that perfect balance that keeps you coming back for “just one more bite.” Your kitchen will smell like a gourmet bakery!

    Make-Ahead Convenience

    One of my favorite aspects of these Bourbon Maple Bacon Cinnamon Rolls is how prep-friendly they are. You can prepare the dough and filling the night before, let it rise slowly in the refrigerator, and bake them fresh in the morning. This means you can enjoy warm, freshly baked rolls without waking up at dawn! The slow overnight rise actually enhances the flavor, allowing the bourbon and maple to fully infuse the dough. I’ve found this method especially helpful when hosting brunches—I can focus on my guests rather than frantically measuring ingredients while they wait. The make-ahead option is a game-changer!

    Essential Tips & Tricks

    Mastering the Dough

    The foundation of exceptional Bourbon Maple Bacon Cinnamon Rolls is a perfectly elastic dough. I learned the hard way that room temperature ingredients make all the difference—cold butter and eggs can lead to a dense, heavy roll. Aim for a dough that’s tacky but not sticky; it should pull away from the bowl while remaining soft. When kneading, use the windowpane test: stretch a small piece until it’s thin enough to see light through without tearing. Don’t rush the rise times—these are crucial for developing flavor and texture. I like to place my dough in a warm (not hot) spot, like near a sunny window or on top of a preheating oven.

    The Bacon Secret

    Not all bacon methods are created equal when it comes to these rolls! For the crispiest texture that won’t get soggy inside your rolls, bake your bacon in the oven at 375°F on a parchment-lined baking sheet. Cook until just beyond chewy but not burnt—about 15-18 minutes. Drain thoroughly on paper towels and chop finely once cooled. The rendered bacon fat? Don’t you dare throw it away! I substitute a tablespoon of it for butter in the filling for an extra dimension of smoky flavor. Make sure your bacon is completely cool before sprinkling it over the filling to prevent it from melting your butter layer prematurely.

    Serving Ideas & Creative Variations

    Brunch Pairings

    These Bourbon Maple Bacon Cinnamon Rolls deserve to be the star of a memorable brunch spread. I like to serve them alongside a savory egg dish to balance the sweetness—my Spinach and Feta Egg Casserole is a perfect complement. Fresh fruit provides a refreshing contrast, particularly tart berries that cut through the richness. For beverages, skip the expected coffee and try a spiced chai tea or a bourbon-spiked hot apple cider if you’re feeling adventurous. I always slightly warm the maple syrup for drizzling tableside, allowing guests to add their desired level of sweetness. The rolls themselves should be served warm—reheat briefly if needed.

    Seasonal Twists

    One of the joys of this recipe is how adaptable it is to seasonal ingredients. During fall, I add diced apples and a pinch of cardamom to the filling—the apples become tender little pockets of flavor. Winter holidays call for orange zest and cranberries, which add brightness and color. Spring inspires me to incorporate a touch of lavender in the glaze, while summer begs for a bourbon-peach variation. You can even transform these into a dessert by serving them warm with a scoop of vanilla bean ice cream on top. The bourbon-maple-bacon trinity works beautifully as a foundation for countless creative variations that keep this recipe exciting year-round.

    Storage & Troubleshooting Guide

    Keeping Them Fresh

    To maintain the heavenly texture of your Bourbon Maple Bacon Cinnamon Rolls, proper storage is essential. For same-day enjoyment, simply cover them loosely with foil at room temperature. If storing longer, wait until they’re completely cool before placing in an airtight container—this prevents condensation that could make them soggy. They’ll keep at room temperature for 2 days, but for the best quality beyond that, refrigerate for up to 5 days. To reheat, wrap individual rolls in foil and warm in a 300°F oven for 7-10 minutes. Freezing works remarkably well too—wrap cooled rolls individually in plastic wrap then foil and freeze for up to 3 months.

    Troubleshooting Common Issues

    Even experienced bakers encounter challenges with cinnamon rolls! If your dough isn’t rising, check that your yeast is fresh and that your environment is warm enough—I place mine in an oven with just the light on for perfect rising conditions. For rolls that spread too much during baking, your butter was likely too soft in the filling—chill the assembled rolls for 15 minutes before baking. If the center rolls are undercooked while the outer ones are perfect, lower your oven temperature by 25°F and extend baking time. Glaze too runny? Add powdered sugar a tablespoon at a time. Too thick? A few drops of milk will thin it to your desired consistency.

    Frequently Asked Questions

    Can I make Bourbon Maple Bacon Cinnamon Rolls without alcohol?

    Absolutely! Replace the bourbon with vanilla extract (1 tablespoon) or apple juice (3 tablespoons). You’ll miss some complexity, but they’ll still be delicious with the maple-bacon flavor profile intact.

    How do I know when the cinnamon rolls are perfectly baked?

    Look for golden-brown tops and an internal temperature of 190°F. When gently pressed in the center, they should spring back slightly. Underbaked rolls will have a doughy center, while overbaked ones become dry.

    Can I use pre-cooked bacon bits instead of fresh bacon?

    I don’t recommend it. Store-bought bacon bits lack the texture and flavor of freshly cooked bacon. The extra step of cooking real bacon makes a significant difference in these Bourbon Maple Bacon Cinnamon Rolls.

    My dough is too sticky to roll out. What should I do?

    Chill the dough for 30 minutes to firm up the butter. When rolling, use just enough flour on your surface to prevent sticking. Too much flour will make the rolls tough.

    Can I prepare the rolls and bake them the next day?

    Yes! After shaping the rolls and placing them in the baking pan, cover with plastic wrap and refrigerate overnight. Let them sit at room temperature for 30-45 minutes before baking.

    Final Thoughts

    These Bourbon Maple Bacon Cinnamon Rolls represent everything I love about weekend baking—they’re indulgent, impressive, and bring people together around the table. There’s something deeply satisfying about watching someone take their first bite and seeing their eyes close in appreciation. The combination of sweet maple, smoky bourbon, and savory bacon creates a flavor experience that’s truly unforgettable. Whether you’re making them for a special occasion or simply because you deserve a treat, these rolls are guaranteed to become a requested favorite. Find more of my favorite breakfast indulgences on Pinterest and enjoy every sticky, delicious bite!

  • Garlic Parmesan Chicken Bites with Creamy Rotini – Irresistibly Delicious!

    Garlic Parmesan Chicken Bites with Creamy Rotini – Irresistibly Delicious!

    Garlic Parmesan Chicken Bites with Creamy Rotini - Irresistibly Delicious!

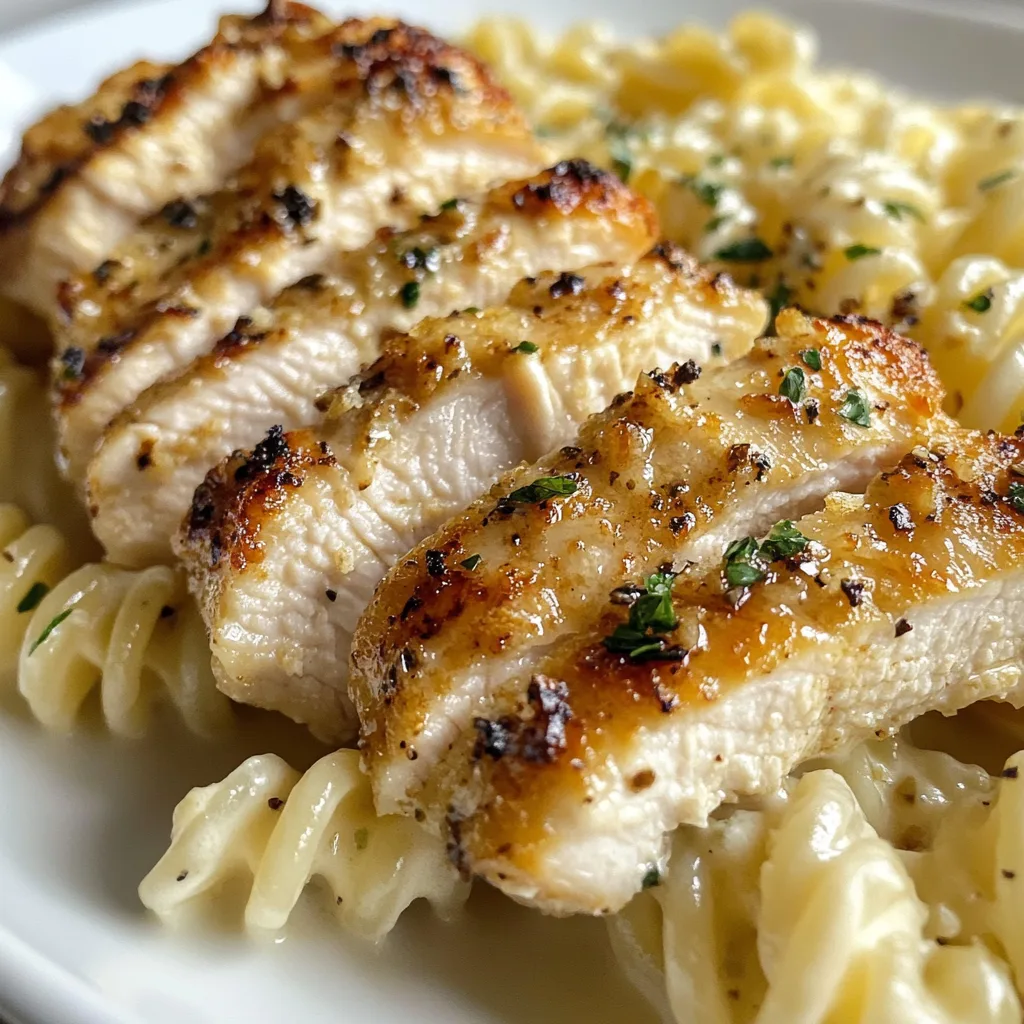
    Garlic Parmesan Chicken Bites with Creamy Rotini has become my ultimate weeknight savior when I need comfort food in a hurry. The first time I made this dish, my kitchen filled with the most intoxicating aroma of roasted garlic and nutty parmesan that had everyone wandering in asking, “What smells so good?” There’s something magical about the way these crispy, golden chicken bites pair with al dente rotini pasta coated in that silky, creamy sauce. It’s like a hug in a bowl – satisfying enough for the adults but fun enough that even picky eaters clean their plates. If you’re looking for a crowd-pleasing dinner that comes together quickly, this one’s for you!

    Recipe

    Why You’ll Love This Garlic Parmesan Chicken Bites with Creamy Rotini

    Perfect Balance of Flavors and Textures

    The magic of this dish lies in its contrasts – crispy, seasoned chicken bites against creamy, velvety pasta. The garlic adds a warm, aromatic foundation while the parmesan brings that nutty, savory depth that makes everything taste more sophisticated. I love how the sauce clings to both the chicken and pasta, ensuring every bite delivers that perfect flavor combination. The rotini’s spiral shape is particularly brilliant here, trapping little pockets of sauce in its twists. When you get that first forkful with the golden chicken, al dente pasta, and rich sauce together, it’s pure comfort food bliss!

    Quick and Approachable for Any Cook

    Don’t let the impressive results fool you – this dish is remarkably beginner-friendly! The chicken bites cook quickly and evenly, making them nearly impossible to overcook. The pasta sauce comes together while the chicken bakes, maximizing your efficiency in the kitchen. I remember making this on a particularly chaotic Tuesday when everything was going wrong, yet dinner still turned out perfect in under 40 minutes. You don’t need fancy equipment or professional techniques – just basic kitchen tools and simple ingredients. It’s the perfect recipe to build confidence if you’re new to cooking or teaching someone else kitchen basics.

    Essential Tips & Tricks

    Perfecting Your Chicken Bites

    The key to irresistible chicken bites lies in two critical steps: consistent sizing and proper coating. Cut your chicken into uniform 1-inch pieces to ensure they cook evenly – nothing ruins this dish faster than some pieces being dry while others remain undercooked. For the coating, create a station with separate plates for flour, egg wash, and the parmesan-breadcrumb mixture. Work in batches, keeping one hand for wet ingredients and one for dry to avoid the dreaded “breading fingers.” I learned this technique from my grandmother, who insisted proper breading was an art form! For extra flavor, try marinating the chicken in a bit of lemon juice and garlic for 15 minutes before coating.

    Mastering the Creamy Sauce

    The perfect sauce for this dish should coat the back of a spoon without being gloppy or too thin. Start with a proper roux (equal parts butter and flour) as your foundation, whisking constantly until it smells slightly nutty. Add your liquids gradually – cold milk works better than warm to prevent lumps. For extra creaminess without heaviness, try substituting part of the heavy cream with chicken broth like in this Creamy Pepperoncini Chicken Skillet. Let the sauce simmer gently until it reaches your desired thickness, remembering it will thicken slightly as it cools. Taste as you go, adjusting salt and pepper – the parmesan adds saltiness, so go easy initially.

    Serving Ideas & Creative Variations

    Perfect Pairings for a Complete Meal

    This versatile dish deserves thoughtful accompaniments to create a balanced meal. A simple arugula salad with lemon vinaigrette provides a bright, peppery contrast to the rich pasta. For a more substantial spread, try roasted asparagus or broccoli with a sprinkle of additional parmesan. Garlic bread is always a crowd-pleaser, perfect for soaking up extra sauce. For entertaining, I serve this family-style in a large, shallow pasta bowl with fresh herbs scattered on top – the presentation always impresses guests! If you’re looking for inspiration, check out how I pair proteins with starches in my One-Pan Creamy Garlic Butter Chicken and Rice for more ideas.

    Exciting Twists on the Classic Recipe

    Don’t be afraid to make this recipe your own with creative variations. For a Mediterranean twist, add sun-dried tomatoes, kalamata olives, and a sprinkle of oregano to the sauce. Craving something spicy? Incorporate red pepper flakes or a dash of cayenne into the chicken coating. For a lighter version, try using whole wheat rotini and replacing some cream with Greek yogurt. My family loves the “breakfast-for-dinner” variation where I add crispy bacon bits and a runny egg on top. You can even transform leftover portions into a baked pasta casserole the next day – just add extra cheese on top and bake until golden and bubbly.

    Storage & Troubleshooting Guide

    Proper Storage for Optimal Freshness

    Store any leftovers properly to maintain that wonderful texture and flavor. Allow the dish to cool completely before transferring to airtight containers, separating pasta and chicken if possible to prevent the breading from becoming soggy. Refrigerate for up to 3 days – I find glass containers work best for maintaining freshness without absorbing flavors. When reheating, add a splash of milk or chicken broth to revive the sauce that may have thickened in the refrigerator. For freezing, focus on the chicken bites alone (freeze on a baking sheet first, then transfer to freezer bags) as the pasta texture suffers when frozen with sauce.

    Common Issues and Simple Solutions

    Even experienced cooks encounter challenges with this recipe. If your sauce breaks or becomes grainy, lower the heat immediately and whisk in a tablespoon of cold cream. Soggy chicken coating usually means your oil wasn’t hot enough or you overcrowded the pan – next time, fry in smaller batches with at least an inch between pieces. If your pasta clumps together, you likely didn’t use enough water or forgot to stir occasionally during cooking. For sauce that’s too thin, simmer a few minutes longer; too thick, add small amounts of milk or pasta water until reaching desired consistency. Remember that pasta continues absorbing sauce after cooking, so serving immediately yields the best texture.

    Frequently Asked Questions

    Can I make Garlic Parmesan Chicken Bites with Creamy Rotini ahead of time?

    Yes! Prepare the chicken bites and store them uncooked (breaded) for up to 24 hours. Make the sauce separately and refrigerate. Cook pasta fresh, then combine everything just before serving for the best texture and flavor.

    What’s the best substitute for heavy cream in this recipe?

    Half-and-half mixed with 1 tablespoon melted butter works beautifully. For a lighter option, try evaporated milk or full-fat Greek yogurt whisked with a bit of milk until smooth.

    Can I use gluten-free pasta and breadcrumbs?

    Absolutely! Gluten-free rotini holds its shape well, and gluten-free panko creates a wonderfully crispy coating. Just watch cooking times as gluten-free pasta often cooks faster than traditional versions.

    How do I prevent the sauce from breaking or curdling?

    Keep your heat medium-low when adding dairy to the sauce, and never let it boil. Temper cold cream by adding a little hot sauce to it first, then gradually incorporate it while whisking constantly.

    What’s the best cheese to use if I don’t have Parmesan?

    Pecorino Romano offers similar sharpness and melting properties. Asiago works wonderfully too. For a milder flavor, try Gruyère or even a sharp white cheddar for a different but delicious twist.

    Final Thoughts

    There’s something truly special about Garlic Parmesan Chicken Bites with Creamy Rotini that keeps it in my regular dinner rotation. Beyond being delicious, it’s the perfect “choose-your-own-adventure” meal that adapts to whatever ingredients you have on hand. I love watching friends and family gather around the table, conversations flowing as easily as the creamy sauce over pasta. Whether you’re cooking for picky eaters, impressing dinner guests, or simply treating yourself to something comforting after a long day, this dish delivers every time. Don’t forget to check out more pasta inspiration on my Pinterest for your next cooking adventure!

  • BBQ Chicken Totchos: Irresistible Snack You’ll Crave Instantly!

    BBQ Chicken Totchos: Irresistible Snack You’ll Crave Instantly!

    BBQ Chicken Totchos: Irresistible Snack You’ll Crave Instantly!

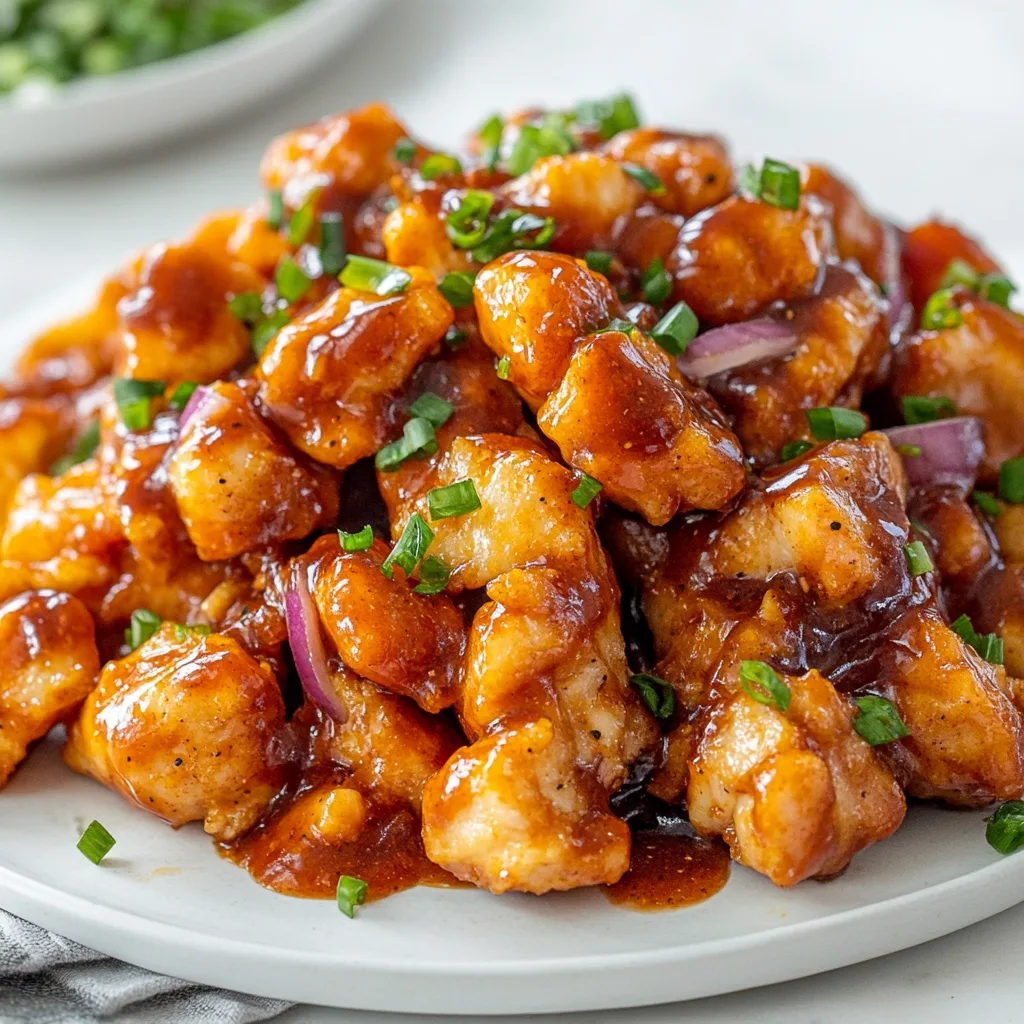
    BBQ Chicken Totchos have completely transformed my weeknight dinner game! There’s something magical about the way crispy tater tots combine with tender BBQ chicken, melty cheese, and all those colorful toppings. The first time I made these for my family, my kitchen filled with the sweet-smoky aroma of BBQ sauce, and everyone literally raced to the table! These loaded totchos strike that perfect balance between comfort food indulgence and crowd-pleasing fun. Think of them as the cooler, more exciting cousin of nachos that will have everyone reaching for seconds. They’re perfect for game day, casual gatherings, or just a fun Tuesday dinner when you need a little joy on your plate.

    Recipe

    Why You’ll Love This BBQ Chicken Totchos

    Perfect Balance of Flavors and Textures

    The magic of these BBQ Chicken Totchos lies in their incredible textural contrast. The tots start super crispy (I’ll show you my secret for getting them extra crunchy!), creating the perfect base for the tender, saucy BBQ chicken. Then comes the blanket of melted cheese that brings everything together. Each bite delivers that satisfying crunch followed by savory chicken and gooey cheese. I love adding a fresh finish with cool sour cream, zesty green onions, and if you’re feeling adventurous, a few jalapeños for heat. It’s like a flavor party where everyone’s invited – savory, sweet, spicy, and creamy all dancing together!

    Quick and Adaptable for Any Occasion

    What I adore about these totchos is how incredibly versatile they are. You can use rotisserie chicken to make this a 20-minute meal, or plan ahead with slow-cooked chicken that falls apart with just a fork. They’re perfect for using up leftover BBQ from your weekend cookout – I’ve even made a version with leftover turkey after Thanksgiving! The basic formula stays the same, but you can dress them up for game day with team colors (colored bell peppers work great) or make them more elegant for a dinner party with artisanal cheese and microgreens. My kids love customizing their own sections with their favorite toppings!

    Essential Tips & Tricks

    Getting Ultra-Crispy Tater Tots

    The foundation of amazing totchos is perfectly crispy tots. I learned this the hard way after serving my first batch with soggy potatoes (nobody wants that!). Now I always arrange them in a single layer on a baking sheet and bake them about 5 minutes longer than the package suggests. For extra crispiness, try tossing them halfway through cooking and consider using a preheated cast iron skillet instead of a baking sheet. The cast iron retains heat beautifully and gives those golden edges we all fight over. Remember: a crowded pan means steaming, not crisping – so give those tots some breathing room!

    Layering Strategy for Maximum Flavor

    The secret to exceptional totchos is all in how you build them. Start with that base of crispy tots, then add a thin layer of cheese before the BBQ chicken – this creates a protective barrier that helps prevent sogginess. Next comes your saucy BBQ chicken, followed by another generous layer of cheese to bind everything together. I’ve found that a mix of cheeses works best – sharp cheddar for flavor and monterey jack or mozzarella for that Instagram-worthy cheese pull. For the perfect finish like my favorite casseroles, add your cold toppings (sour cream, avocado, green onions) only after baking for the best temperature and texture contrast.

    Serving Ideas & Creative Variations

    Family-Style Presentation Options

    There’s something so joyful about serving these BBQ Chicken Totchos family-style that brings everyone together. My favorite method is using a large cast-iron skillet placed on a wooden board with small bowls of extra toppings surrounding it. This creates an interactive experience where everyone can customize their portion. For outdoor gatherings, I’ve served them on a large wooden board lined with parchment paper – it’s casual but looks impressive! Individual portions work beautifully too – try using mini cast iron skillets or oven-safe personal dishes for a restaurant-quality presentation that keeps portions hot longer. The sizzle when they hit the table always gets “oohs” and “aahs”!

    Exciting Flavor Variations to Try

    While classic BBQ chicken is amazing, don’t be afraid to experiment with different flavor profiles! My buffalo chicken version with blue cheese crumbles and celery has become a game day tradition in our house. For taco night vibes, try seasoned ground beef with taco seasoning, black beans, and a dollop of guacamole – it’s like my favorite taco-inspired recipes but with a totchos twist! A Mediterranean version with Greek-seasoned chicken, feta, olives, and tzatziki is unexpectedly delicious. For breakfast totchos (yes, that’s a thing!), try topping with scrambled eggs, crumbled bacon, and hollandaise sauce. Each variation brings its own personality while keeping that satisfying totchos experience.

    Storage & Troubleshooting Guide

    Make-Ahead and Leftover Strategies

    Let’s be honest – BBQ Chicken Totchos are at their absolute best when freshly made, but that doesn’t mean you can’t plan ahead! I often prep components separately: cook and shred the chicken with BBQ sauce, shred the cheese, and chop toppings up to two days ahead. Store everything separately in the refrigerator, then assemble and bake just before serving. For leftovers (if you’re lucky enough to have any!), store them in an airtight container for up to 2 days. The microwave works in a pinch, but for reviving that crispy texture, a few minutes in a 350°F oven works wonders.

    Solving Common Totchos Challenges

    The biggest challenge with totchos is keeping them from getting soggy – nobody wants that! If your tots are turning out soft, try baking them longer initially before adding toppings. Another game-changer is patting your BBQ chicken with paper towels to remove excess moisture before adding it to the tots. If your cheese isn’t melting properly, try grating it yourself instead of using pre-shredded (which contains anti-caking agents). For even melting, cover with foil for the first few minutes of baking, then remove to allow the top to get golden. And if your toppings are sliding off, try creating “valleys” in your tot arrangement to catch all that goodness!

    Frequently Asked Questions

    Can I make BBQ Chicken Totchos in advance for a party?

    Prepare components separately (crisp the tots, prepare BBQ chicken, shred cheese, chop toppings) and store separately. Assemble and bake just before serving for the best texture and flavor – takes just minutes when prepped ahead!

    What’s the best cheese to use for totchos?

    A combination works best! Sharp cheddar provides flavor while monterey jack or mozzarella gives that stretchy cheese-pull. Freshly grated melts more smoothly than pre-shredded varieties with anti-caking agents.

    Can I make these BBQ Chicken Totchos in an air fryer?

    Absolutely! Cook tots in the air fryer until extra crispy, then transfer to an oven-safe dish, add toppings, and broil until cheese melts. This creates ultra-crispy tots with perfectly melted toppings.

    How do I keep my totchos from getting soggy?

    Bake tots until extra crispy before adding toppings, create a cheese barrier between tots and saucy ingredients, and add cold toppings like sour cream and avocado only after baking.

    What sides pair well with BBQ Chicken Totchos?

    These are hearty enough to be a meal, but pair beautifully with a simple green salad, coleslaw, or corn on the cob. For appetizer portions, balance with fresh veggie sticks and dip.

    Final Thoughts

    BBQ Chicken Totchos have earned their place in my regular rotation because they bring together everything I love about comfort food – they’re customizable, crowd-pleasing, and somehow feel special even on an ordinary weeknight. There’s something magical about that combination of crispy, saucy, cheesy goodness that just makes people happy. Whether you’re feeding a hungry family or entertaining friends, these totchos strike that perfect balance between impressive and approachable. I’d love to see your creations if you make them – tag me on Pinterest with your BBQ Chicken Totchos masterpieces!

  • Cheesy Beef & Rice Casserole with Mushrooms: Comfort Food Bliss!

    Cheesy Beef & Rice Casserole with Mushrooms: Comfort Food Bliss!

    Cheesy Beef & Rice Casserole with Mushrooms: Comfort Food Bliss!

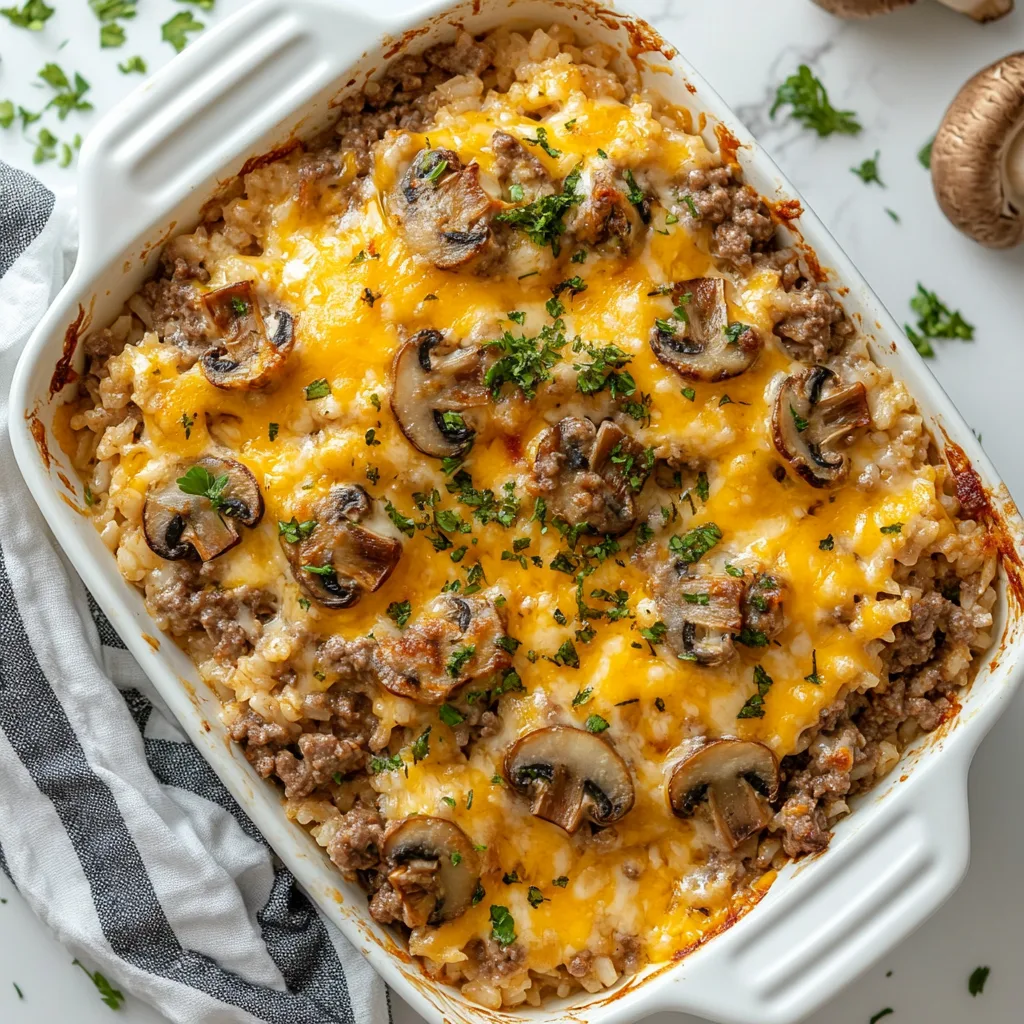
    Cheesy Beef and Rice Casserole with Mushrooms is the ultimate comfort food that wraps you in a warm hug on chilly evenings. The first time I made this dish, my kitchen filled with the rich aroma of sautéed mushrooms and beef, instantly transporting me back to Sunday dinners at my grandmother’s farmhouse. There’s something magical about the way the melted cheese pulls into perfect strings as you scoop out each serving. This hearty one-dish meal combines tender ground beef, fluffy rice, and earthy mushrooms in a creamy, cheesy embrace that’s impossible to resist. Let me show you how to create this family favorite that’s become my go-to when I need a comforting meal.

    Recipe

    Why You’ll Love This Cheesy Beef and Rice Casserole with Mushrooms

    Perfect Make-Ahead Meal Solution

    This casserole is my secret weapon for busy weeknights when I need dinner ready with minimal fuss. The beauty lies in its make-ahead flexibility – I often prepare it on Sunday afternoons, refrigerate it, and simply pop it in the oven when needed. The flavors actually deepen overnight, creating an even more delicious result! Plus, the combination of protein, carbs, and vegetables creates a complete meal in one dish, meaning fewer pots and pans to wash. When life gets hectic, having this casserole prepped and waiting feels like giving a gift to my future self.

    Crowd-Pleasing Comfort Food

    Every time I serve this casserole at gatherings, the dish returns empty with requests for the recipe. The melty cheese creates that irresistible pull that makes everyone smile, while the savory beef and mushroom combination satisfies even the pickiest eaters. I’ve watched children who “hate mushrooms” devour second helpings without complaint! The creamy texture paired with the subtle crunch of the perfectly browned cheese top creates a textural experience that feels indulgent yet homey. It’s become my signature potluck contribution that friends now specifically request.

    Essential Tips & Tricks

    Perfecting Your Rice Texture

    The secret to avoiding mushy rice in this casserole lies in the proper cooking technique. I always use long-grain rice and cook it until it’s just slightly underdone – about 2 minutes less than the package directions. This allows the rice to finish cooking in the casserole without becoming soggy. Another game-changer is rinsing the rice before cooking to remove excess starch, then letting it cool slightly before mixing with other ingredients. This simple step ensures each grain remains distinct in the finished dish, creating that perfect texture that makes this casserole stand out from others.

    Mushroom Preparation Secrets

    The difference between good and exceptional mushroom flavor comes down to how you prepare them. I always dry-sauté my mushrooms first – cooking them in a hot pan without oil until they release their moisture. This concentrates their earthy flavor before adding butter and seasonings. Slice mushrooms uniformly for even cooking, and don’t overcrowd the pan (work in batches if needed). For deeper flavor, try mixing button mushrooms with cremini or shiitake varieties. This extra attention to the mushrooms transforms them from mere ingredients into star players that infuse the entire casserole with rich umami notes.

    Serving Ideas & Creative Variations

    Perfect Pairings for a Complete Meal

    While this casserole stands beautifully on its own, I love serving it with simple sides that complement without competing. A crisp green salad with a light vinaigrette provides refreshing contrast to the rich casserole. For special occasions, I add garlic bread or buttery dinner rolls for sopping up every last bit of cheesy goodness. In summer months, roasted asparagus or steamed broccoli adds vibrant color and nutrition. The casserole’s flavors also pair wonderfully with a medium-bodied red wine like Merlot or Chianti, making it perfect for casual entertaining when you want to impress without stress.

    Exciting Flavor Variations

    One reason I return to this recipe repeatedly is its incredible adaptability. For a Southwestern twist, add a can of diced green chiles, swap the cheese for pepper jack, and sprinkle with fresh cilantro before serving. Craving Italian? Mix in Italian seasoning, replace some beef with Italian sausage, and use mozzarella and parmesan for the cheese blend. My family’s current favorite variation includes adding caramelized onions and substituting wild rice blend for standard white rice – the nutty texture creates wonderful dimension! These simple swaps transform the base recipe into something that feels brand new each time.

    Storage & Troubleshooting Guide

    Proper Storage for Leftovers

    Handling leftovers correctly ensures this casserole remains just as delicious the next day. Allow it to cool completely before transferring to airtight containers – I divide mine into individual portions for easy lunches. Refrigerated leftovers stay fresh for 3-4 days, making them perfect for meal prep. For longer storage, freeze portions for up to 3 months. The key to successful reheating is adding a tablespoon of water or broth before microwaving to restore moisture. For best results when reheating larger portions, cover with foil and warm in a 325°F oven until heated through, removing the foil for the last few minutes to re-crisp the top.

    Fixing Common Casserole Problems

    Even experienced cooks occasionally encounter casserole challenges, but most are easily fixed. If your casserole seems too watery after baking, let it rest 10-15 minutes before serving – it will naturally thicken as it stands. For casseroles that seem dry, a simple solution is stirring in ¼ cup of warm beef broth before the final cheese topping. If your cheese topping browns too quickly before the casserole is heated through, cover with foil for most of the baking time, removing only for the final 10 minutes. These simple adjustments ensure perfect results every time, even when kitchen surprises occur.

    Frequently Asked Questions

    Can I use brown rice instead of white rice in this Cheesy Beef and Rice Casserole with Mushrooms?

    Yes! Brown rice works beautifully, but requires adjustment. Pre-cook it longer (it needs more time than white rice) and add an extra ¼ cup of liquid to the casserole to prevent dryness during baking.

    Can I prepare this casserole ahead of time?

    Absolutely! Assemble the casserole up to 24 hours ahead, cover and refrigerate. When ready to bake, let it sit at room temperature for 30 minutes, then add an additional 10-15 minutes to the baking time.

    What’s the best cheese to use?

    A combination creates the best flavor and texture. I recommend equal parts sharp cheddar for flavor and mozzarella or Monterey Jack for that perfect cheese pull. Freshly grated cheese melts much better than pre-shredded varieties.

    Can I make this recipe vegetarian?

    Yes! Replace beef with 2 cups of chopped portobello mushrooms or 1 package of plant-based ground “beef.” Increase seasonings slightly and use vegetable broth instead of beef broth for full flavor.

    How can I make this casserole spicier?

    Add heat by incorporating diced jalapeños, a teaspoon of red pepper flakes, or a tablespoon of hot sauce into the beef mixture. You can also use pepper jack cheese for a spicy cheese layer.

    Final Thoughts

    This Cheesy Beef and Rice Casserole with Mushrooms has earned its place as a cornerstone recipe in my home, bringing comfort and satisfaction to countless family dinners. What makes it truly special isn’t just the delicious blend of flavors, but how it brings people together around the table. The simple ingredients transform into something greater than their parts – much like how shared meals strengthen our connections with loved ones. I hope this casserole finds its way into your recipe collection and creates as many warm memories in your home as it has in mine. For more comforting recipes, visit our Pinterest collection of family favorites!

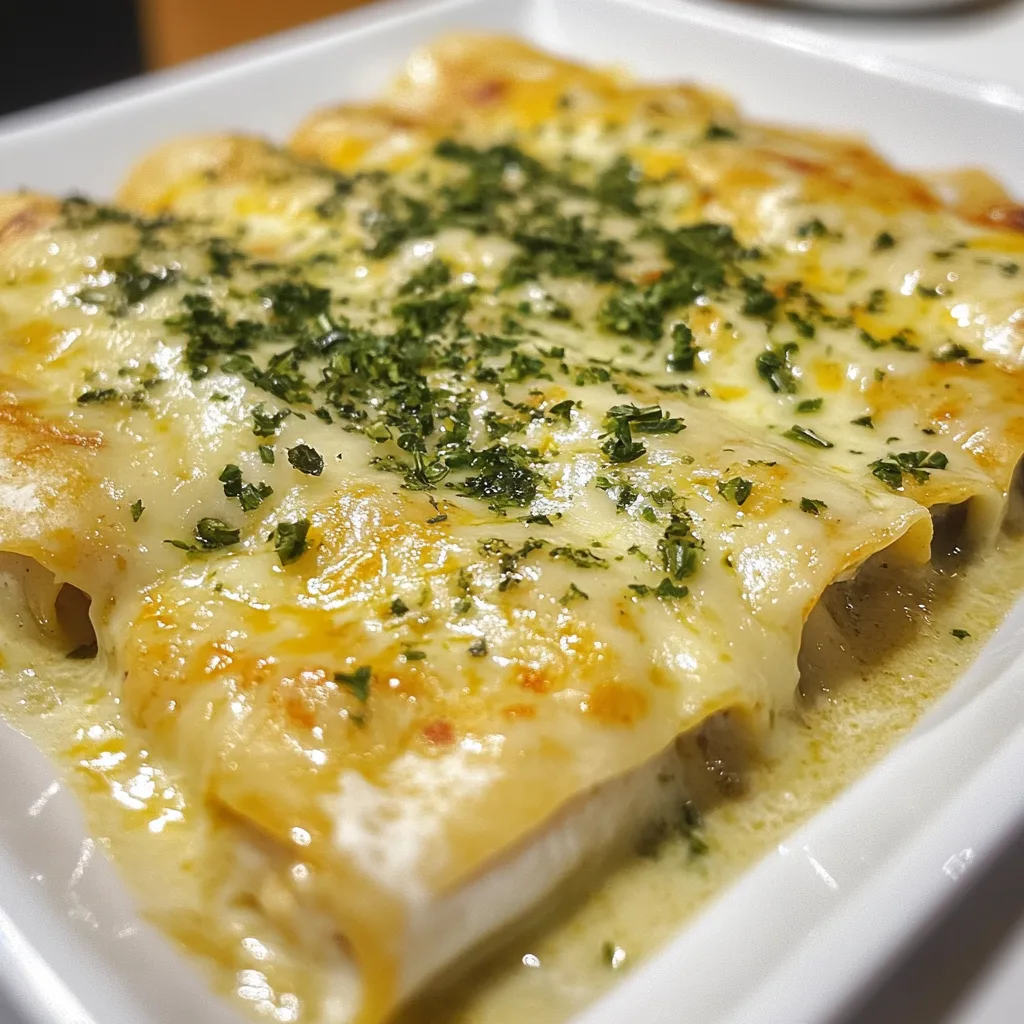
  • White Chicken Enchiladas with Creamy Sauce & Zesty Green Chiles

    White Chicken Enchiladas with Creamy Sauce & Zesty Green Chiles

    White Chicken Enchiladas with Creamy Sauce & Zesty Green Chiles

    White Chicken Enchiladas with Sour Cream Sauce and Green Chiles are my absolute comfort food obsession. There’s something magical about that first bite – tender shredded chicken wrapped in soft tortillas, all bathed in a velvety, tangy sour cream sauce with just enough kick from the green chiles. I discovered this recipe during a rainy weekend when I needed something warm and cheesy to lift my spirits. The aroma of these enchiladas baking fills my kitchen with promises of creamy, cheesy goodness that makes everyone drift toward the oven asking, “How much longer?” Let me show you how to create this crowd-pleasing dish that’s become my family’s most requested dinner.

    Recipe

    Why You’ll Love This White Chicken Enchiladas with Sour Cream Sauce and Green Chiles

    Perfect Balance of Flavors and Textures

    The magic of these enchiladas lies in their perfect balance – creamy, tangy, and just a touch spicy. The sour cream sauce creates a velvety blanket over everything, while the green chiles add a gentle warmth without overwhelming heat. I love how the tortillas soak up just enough sauce to become tender but still hold their shape. The contrast between the melty cheese topping and the soft, flavorful filling creates a texture experience that’s utterly satisfying. Every bite delivers that comfort food feeling that makes your shoulders relax and your worries melt away.

    Quick and Adaptable for Busy Weeknights

    These enchiladas are my secret weapon for busy weeks. You can use rotisserie chicken to slash prep time, and the sauce comes together in minutes. I’ve made these on hectic weeknights when I thought takeout was our only option, and they’re always faster than delivery! The recipe is wonderfully adaptable – use what you have on hand. No Monterey Jack? Cheddar works beautifully. No green chiles? Try a spoonful of salsa verde instead. The flexibility makes this dish a reliable standby when you need something delicious without a special shopping trip.

    Essential Tips & Tricks

    Perfecting Your Sour Cream Sauce

    The heart of these enchiladas is the dreamy sour cream sauce. For the smoothest results, let your sour cream come to room temperature before mixing. This prevents those little clumps that can form when cold dairy hits hot liquid. I learned this trick after one too many lumpy sauces! Whisking the flour into the melted butter before adding other ingredients creates a silky base that thickens perfectly. Don’t rush this step – let it bubble gently for about a minute to cook out the raw flour taste. For extra flavor, try adding a pinch of cumin or a squeeze of lime juice to brighten everything up.

    Assembly Secrets for Perfect Results

    The way you assemble these enchiladas makes all the difference in the final dish. First, warm your tortillas before rolling – 15 seconds in the microwave wrapped in a damp paper towel works perfectly. This prevents cracking and makes them pliable. When filling, place the chicken mixture slightly off-center and don’t overstuff (about 3 tablespoons is perfect). For the prettiest presentation, place them seam-side down in your baking dish. I like to reserve about ¼ cup of cheese to sprinkle on top during the last 5 minutes of baking for that perfect golden brown finish.

    Serving Ideas & Creative Variations

    Complementary Side Dishes

    These enchiladas pair beautifully with bright, fresh sides that balance their richness. My go-to combination includes a zesty cilantro lime rice and a simple black bean salad with corn, bell peppers, and a squeeze of lime. For something lighter, try a crisp green salad with avocado and a tangy vinaigrette. When I’m feeling extra, I serve these with homemade pico de gallo and a dollop of guacamole. The cool, fresh toppings create a wonderful contrast with the warm, creamy enchiladas. For a complete fiesta, add some slow cooker beef stroganoff for guests who prefer beef over chicken.

    Exciting Flavor Variations

    Don’t be afraid to put your own spin on these enchiladas! One of my favorite variations is adding roasted poblano peppers for a smoky depth that complements the creamy sauce perfectly. For a tex-mex twist, mix some black beans and corn into your chicken filling. Seafood lovers can substitute shrimp for chicken – just sauté them until just pink before filling the tortillas. For a vegetarian version, replace the chicken with a mixture of sautéed mushrooms, spinach, and bell peppers. The sour cream sauce works beautifully with all these variations, making this recipe incredibly versatile.

    Storage & Troubleshooting Guide

    Make-Ahead and Freezer Tips

    These enchiladas are perfect for meal prepping and freezing. To make ahead, assemble everything but don’t bake – cover tightly and refrigerate for up to 24 hours. When ready to bake, let the dish sit at room temperature for 30 minutes first. For freezing, assemble in a freezer-safe container, but keep the sauce separate in a freezer bag. Freeze for up to 3 months. When ready to enjoy, thaw both overnight in the refrigerator, pour the sauce over the enchiladas, and bake as directed, adding about 15 minutes to the baking time. The sauce may look slightly separated after freezing but will come back together when heated.

    Fixing Common Problems

    If your sauce seems too thin, don’t panic! Simply whisk in additional flour, one teaspoon at a time, until it reaches your desired thickness. For sauce that’s too thick, gradually add chicken broth until you reach the perfect consistency. If your tortillas crack during rolling, they weren’t warmed enough – quickly microwave them again. For enchiladas that seem dry after baking, serve with extra warm sauce on the side. If your cheese isn’t browning on top, switch your oven to broil for the final 1-2 minutes, watching carefully to prevent burning. Remember, perfect enchiladas come with practice!

    Frequently Asked Questions

    Can I make White Chicken Enchiladas with Sour Cream Sauce and Green Chiles ahead of time?

    Absolutely! Assemble up to 24 hours ahead and refrigerate unbaked. Add 10-15 minutes to the baking time if cooking straight from the refrigerator. The flavors actually develop nicely with a little rest time.

    What’s the best cheese to use for this recipe?

    Monterey Jack melts beautifully and has a mild flavor that complements the green chiles. For more flavor, try a mixture of Monterey Jack and sharp white cheddar, or add some crumbled queso fresco on top after baking.

    Can I use corn tortillas instead of flour?

    Yes! Corn tortillas work well but require different handling. Dip each briefly in warm chicken broth before filling to prevent cracking. They’ll give your enchiladas a more authentic Mexican flavor and texture.

    How spicy are these enchiladas?

    With standard canned green chiles, they’re mild to medium – just enough warmth without overwhelming heat. For spicier enchiladas, add diced jalapeños to the filling or choose “hot” green chiles instead of mild.

    What can I substitute for sour cream?

    Greek yogurt makes an excellent healthier substitute with a similar tangy flavor. For a dairy-free version, try coconut cream with a squeeze of lime juice to add tanginess.

    Final Thoughts

    These White Chicken Enchiladas with Sour Cream Sauce and Green Chiles have become my ultimate comfort food for good reason – they’re creamy, satisfying, and adaptable to whatever life throws your way. I love how they bring everyone to the table with smiles, whether it’s a casual family dinner or a gathering with friends. The way the sauce bubbles around the edges of the baking dish, creating those perfectly crispy bits, is pure magic. I hope these enchiladas bring as much joy to your table as they have to mine! For more delicious recipe ideas, check out my Pinterest board where I’m always adding new inspiration.