Category: Lunch

Easy lunch ideas for busy days. Simple, quick recipes with fresh flavor and satisfying meals you can enjoy at home or on the go.

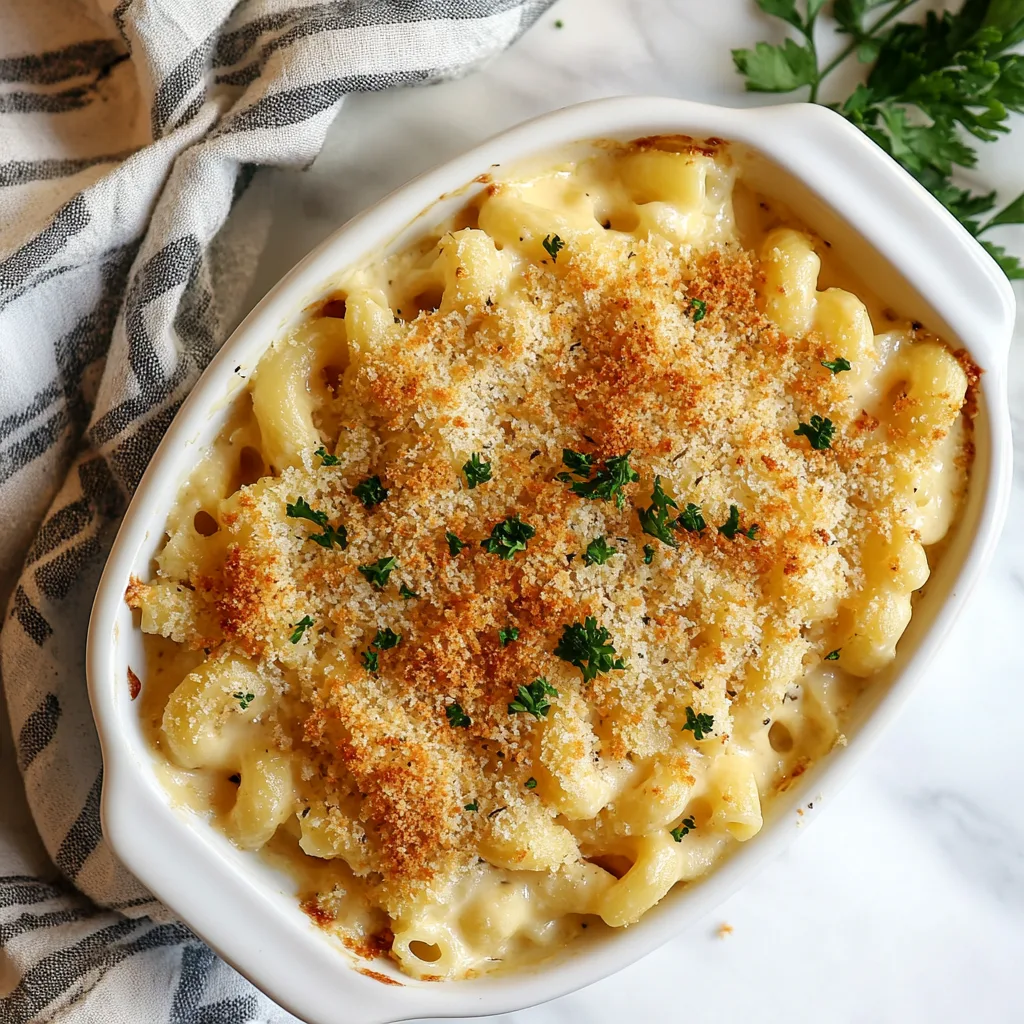
  • Baked Macaroni and Cheese with Crispy Panko Topping – Irresistibly Cheesy!

    Baked Macaroni and Cheese with Crispy Panko Topping – Irresistibly Cheesy!

    Baked Macaroni and Cheese with Crispy Panko Topping – Irresistibly Cheesy!

    The moment I pull a bubbling dish of Baked Macaroni and Cheese with Crispy Panko Topping from the oven, my kitchen transforms into a sanctuary of comfort. That golden, crunchy top giving way to creamy, cheesy pasta underneath is pure magic. I’ve spent years perfecting this recipe, testing different cheese combinations and topping techniques until I found the perfect balance. This isn’t just mac and cheese—it’s a hug in a casserole dish, the kind of meal that makes everyone at the table fall silent for those first few blissful bites. Let me show you how to create this crowd-pleasing comfort food masterpiece.

    Recipe

    Why You’ll Love This Baked Macaroni and Cheese with Crispy Panko Topping

    The Perfect Texture Contrast

    There’s something incredibly satisfying about the textural contrast in this dish. The crispy, golden panko topping shatters slightly under your fork, giving way to the creamy, velvety cheese sauce coating each pasta piece. I’ve found that toasting the panko in butter before topping the mac and cheese makes all the difference—it ensures that perfect crunch even after baking. The pasta itself stays tender but with a slight bite (never mushy!), creating that perfect mouthfeel that makes you close your eyes with each forkful.

    A Foolproof Cheese Sauce

    The heart of any great mac and cheese is the sauce, and this one is incredibly reliable. The combination of sharp cheddar for flavor and monterey jack for meltability creates the perfect cheese blend that’s both flavorful and smooth. The sauce starts with a simple roux (butter and flour) that guarantees a silky texture without graininess or separation. I’ve made this for countless dinner parties, and the sauce has never let me down—even when I’ve had to reheat it the next day. It’s rich without being heavy, coating each pasta piece perfectly.

    Essential Tips & Tricks

    Choosing the Right Pasta Shape

    Not all pasta shapes are created equal when it comes to mac and cheese. You want shapes with nooks and crannies to trap that luscious cheese sauce. Elbow macaroni is classic, but cavatappi, shells, or fusilli work beautifully too. Always cook the pasta 1-2 minutes shy of the package directions—it’ll continue cooking in the oven. I once made the mistake of fully cooking the pasta before baking, and the result was sadly mushy. The pasta should offer just a bit of resistance when you bite into it after baking, creating that perfect al dente texture.

    The Secret to Ultra-Creamy Results

    The key to achieving that restaurant-quality creaminess lies in how you prepare your cheese. Always grate it yourself rather than using pre-shredded varieties, which contain anti-caking agents that can make your sauce grainy. Another game-changing tip is adding the cheese to your béchamel off the heat, which prevents the proteins from seizing up. For extra richness, a splash of heavy cream never hurts! This approach reminds me of my Creamy Tuscan Tortellini Soup where the same principles create that velvety mouthfeel everyone loves.

    Serving Ideas & Creative Variations

    Elevate It to a Complete Meal

    Transform this side dish into a satisfying main course by adding protein and vegetables. Fold in crispy bacon bits, shredded rotisserie chicken, or sautéed mushrooms before baking. For a healthier twist, mix in steamed broccoli florets or roasted butternut squash cubes. My family particularly loves when I add caramelized onions and peas—the sweetness balances the rich cheese beautifully. Serve alongside a simple green salad with a bright vinaigrette to cut through the richness, similar to how I balance flavors in my Hearty Beef and Vegetable Soup.

    Global Flavor Inspirations

    Take your mac and cheese on a culinary world tour by incorporating international flavors. For a Mexican-inspired version, mix in chorizo, jalapeños, and top with crushed tortilla chips. Create a Mediterranean twist with sun-dried tomatoes, olives, and crumbled feta. For an Italian variation, stir in pesto and top with extra parmesan. My personal favorite is adding buffalo sauce, blue cheese crumbles, and shredded chicken for a buffalo chicken mac and cheese that disappears in minutes at potlucks. These variations keep this classic dish exciting and new every time.

    Storage & Troubleshooting Guide

    Make-Ahead and Freezing Instructions

    This Baked Macaroni and Cheese with Crispy Panko Topping is perfect for meal prepping. You can assemble it up to two days ahead, keeping the topping separate until just before baking. For freezing, prepare everything except the panko topping, cool completely, then wrap tightly in foil and freeze for up to three months. Thaw overnight in the refrigerator before baking. I often make two smaller dishes instead of one large one—we enjoy one for dinner and freeze the other for those hectic weeknights when cooking from scratch feels impossible.

    Rescuing Common Mac and Cheese Problems

    Even experienced cooks occasionally encounter issues with mac and cheese. If your sauce looks grainy, whisk in a splash of warm milk over low heat until smooth. For mac and cheese that’s too dry after baking, drizzle in warm milk or cream and gently stir before serving. If your topping isn’t browning properly, a quick blast under the broiler works wonders—just watch it closely to prevent burning. I learned this the hard way once when I got distracted by a phone call and returned to a very “well-done” topping that my family still teases me about!

    Frequently Asked Questions

    Can I use gluten-free pasta for this Baked Macaroni and Cheese with Crispy Panko Topping?

    Absolutely! Use your favorite gluten-free pasta and gluten-free panko. Reduce the initial baking time by about 5 minutes as gluten-free pasta tends to cook faster in the oven.

    What’s the best cheese combination for mac and cheese?

    A mix of sharp cheddar for flavor and a good melting cheese like monterey jack, gruyère, or fontina creates the perfect balance of taste and texture.

    Can I make this in advance?

    Yes! Prepare everything except the panko topping, refrigerate for up to 2 days, then add the topping and bake when ready to serve. Add 10-15 minutes to the baking time if coming from the refrigerator.

    My sauce is lumpy. How can I fix it?

    Remove from heat and vigorously whisk in 1-2 tablespoons of warm milk until smooth. Always add cheese gradually and stir constantly to prevent lumps.

    How do I reheat leftovers without drying them out?

    Add a splash of milk, cover with foil, and reheat at 325°F until warmed through. The extra moisture prevents the pasta from drying out.

    Final Thoughts

    This Baked Macaroni and Cheese with Crispy Panko Topping has become my signature dish for good reason. It strikes that perfect balance between sophisticated flavor and nostalgic comfort that appeals to everyone from picky kids to discerning foodies. The contrast between the crispy topping and the creamy interior creates a sensory experience that elevates it beyond ordinary mac and cheese. Whether you’re serving it as a side dish at holiday gatherings or as the star of a cozy weeknight dinner, this recipe delivers that warm, satisfied feeling that only the best comfort food can provide. Find more comfort food inspiration on our Pinterest page.
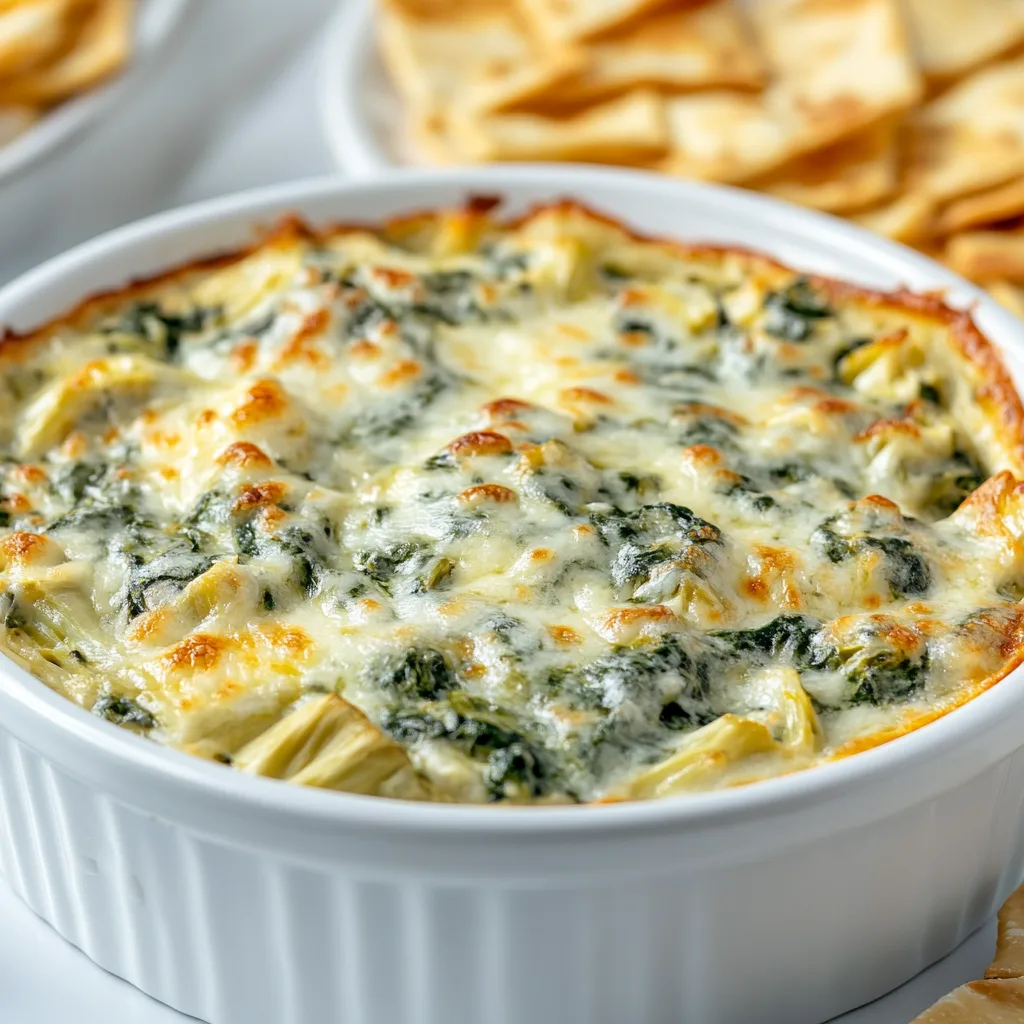
  • Spinach Artichoke Dip Recipe: Irresistibly Creamy & Crowd-Pleasing!

    Spinach Artichoke Dip Recipe: Irresistibly Creamy & Crowd-Pleasing!

    Spinach artichoke dip is the ultimate crowd-pleaser that never fails to disappear at gatherings. There’s something magical about that first scoop—the creamy, cheesy goodness with tender spinach and artichoke hearts that makes everyone hover around the appetizer table. I discovered my love for this dip years ago at my sister’s holiday party when I couldn’t stop going back for “just one more bite.” The warm, bubbling cheese pulling into perfect strings as you dip… it’s simply irresistible! This recipe strikes the perfect balance of creaminess and flavor that’ll have your guests begging for the recipe. If you enjoy this, you might also love my Creamy Tuscan Tortellini Soup for another creamy delight.

    Spinach Artichoke Dip Recipe: Irresistibly Creamy & Crowd-Pleasing!

    Recipe

    Why You’ll Love This Spinach Artichoke Dip

    Perfect Balance of Flavors and Textures

    This isn’t just any spinach artichoke dip—it’s a flavor explosion that hits all the right notes. The tanginess from cream cheese, the richness from sour cream, and the savory punch from Parmesan create the perfect backdrop for tender spinach and artichoke hearts. I’ve tested countless versions over the years, and this one consistently earns rave reviews. The texture is spot-on too—not too runny, not too thick—just perfect for scooping. Each bite delivers that satisfying mouthfeel that makes you close your eyes and savor the moment.

    Make-Ahead Convenience

    One of the best things about this dip? It’s a time-saver that actually tastes better when made ahead! Prepare it up to two days before your event, store it in the refrigerator, and the flavors will meld together beautifully. When guests arrive, simply pop it in the oven for that hot, bubbly finish that makes everyone gather around. I’ve relied on this recipe countless times when hosting, and it’s my secret weapon for stress-free entertaining. The convenience factor alone makes this recipe worth keeping in your regular rotation.

    Essential Tips & Tricks

    Ingredient Selection Matters

    The quality of ingredients makes all the difference in this dip. Always use fresh spinach if possible—frozen works in a pinch, but be sure to thoroughly drain it to avoid a watery dip. For artichokes, choose ones packed in water rather than marinated varieties which can overpower the other flavors. When it comes to cheese, freshly grated Parmesan will melt more smoothly than pre-packaged options. I learned this the hard way after a grainy disaster at a dinner party! Remember that cream cheese should be at room temperature for the smoothest incorporation.

    Perfecting the Texture

    Achieving that ideal consistency is crucial for dip success. If your mixture seems too thick during preparation, add a tablespoon of milk or cream at a time until it reaches your desired texture. Conversely, if it’s too thin, incorporate a bit more Parmesan or a sprinkle of breadcrumbs. For a golden, slightly crispy top that adds wonderful textural contrast, broil the dip for the final 1-2 minutes of baking. Just like in my Gluten-Free Taco Casserole, watching that final browning stage is key to perfection!

    Serving Ideas & Creative Variations

    Beyond the Basic Bread Bowl

    While a bread bowl is classic, there are so many creative vessels for serving this dip! Hollow out a sourdough loaf and bake the dip right inside for a showstopping presentation. For a lighter option, arrange colorful veggie sticks—bell peppers, cucumber, and jicama provide wonderful crunch and color contrast. Toasted pita triangles, pretzel crisps, or even homemade tortilla chips are fantastic for scooping. I once served this in individual ramekins at a dinner party, and guests loved having their own personal portion without fighting over the serving dish!

    Flavor Twists and Add-Ins

    The beauty of this spinach artichoke dip lies in its adaptability. Add a kick with diced jalapeños or a few dashes of hot sauce. For a smoky twist, mix in crispy bacon bits or smoked gouda in place of some of the Parmesan. Mediterranean lovers can add sun-dried tomatoes, olives, and a sprinkle of feta. For seafood enthusiasts, fold in some lump crab meat or chopped shrimp—similar to the delicious combination in my Cozy Crockpot Coconut Fish Curry. Each variation creates a whole new experience while maintaining that creamy, comforting base.

    Storage & Troubleshooting Guide

    Proper Storage for Leftovers

    If you’re lucky enough to have leftover dip (which rarely happens in my house!), proper storage ensures it remains just as delicious for days after. Transfer cooled dip to an airtight container and refrigerate for up to 4 days. When reheating, add a splash of milk or cream and stir well to restore the creamy texture. For individual portions, microwave for 30-second intervals, stirring between each. For larger amounts, cover with foil and bake at 350°F until hot throughout—usually about 15-20 minutes. The flavors often deepen after a day in the refrigerator!

    Fixing Common Issues

    Even experienced cooks occasionally encounter dip dilemmas. If your dip separates or looks oily after baking, simply stir it well while hot to re-emulsify the ingredients. For a dip that’s too watery, stir in more grated Parmesan or a sprinkle of cornstarch mixed with cold water, then briefly return to the oven. If your dip lacks flavor, brighten it with a squeeze of lemon juice, extra garlic, or a dash of hot sauce. Remember that seasoning is key—always taste before serving and adjust salt and pepper as needed.

    Frequently Asked Questions

    Can I make spinach artichoke dip in a slow cooker?

    Absolutely! Combine all ingredients in your slow cooker, stir well, and cook on low for 2-3 hours. Stir occasionally to ensure even heating and prevent burning around the edges.

    Is spinach artichoke dip gluten-free?

    The base recipe is naturally gluten-free, but always check your cheese labels as some processed varieties contain additives. Serve with gluten-free crackers or vegetables for a completely gluten-free option.

    Can I use fresh spinach instead of frozen?

    Yes! Sauté about 10 ounces of fresh spinach until wilted, cool slightly, then squeeze out excess moisture before chopping and adding to your dip mixture.

    How do I prevent my dip from being watery?

    Thoroughly drain both spinach and artichokes before adding to your mixture. For extra insurance, pat them dry with paper towels to remove excess moisture.

    Can I freeze leftover spinach artichoke dip?

    Yes, but the texture may change slightly. Freeze in an airtight container for up to 3 months and thaw overnight in the refrigerator before reheating slowly with added cream.

    Final Thoughts

    This spinach artichoke dip has been my go-to recipe for years, earning its place as the most requested appetizer among my friends and family. There’s something wonderfully comforting about watching people gather around a bubbling dish, sharing stories and laughter while enjoying something made with care. The best recipes create moments of connection, and this one never disappoints. Whether it’s for game day, holiday celebrations, or just because it’s Tuesday, this dip brings people together. I hope it becomes a beloved favorite in your home too! For more delicious recipes, check out my collection on Pinterest.

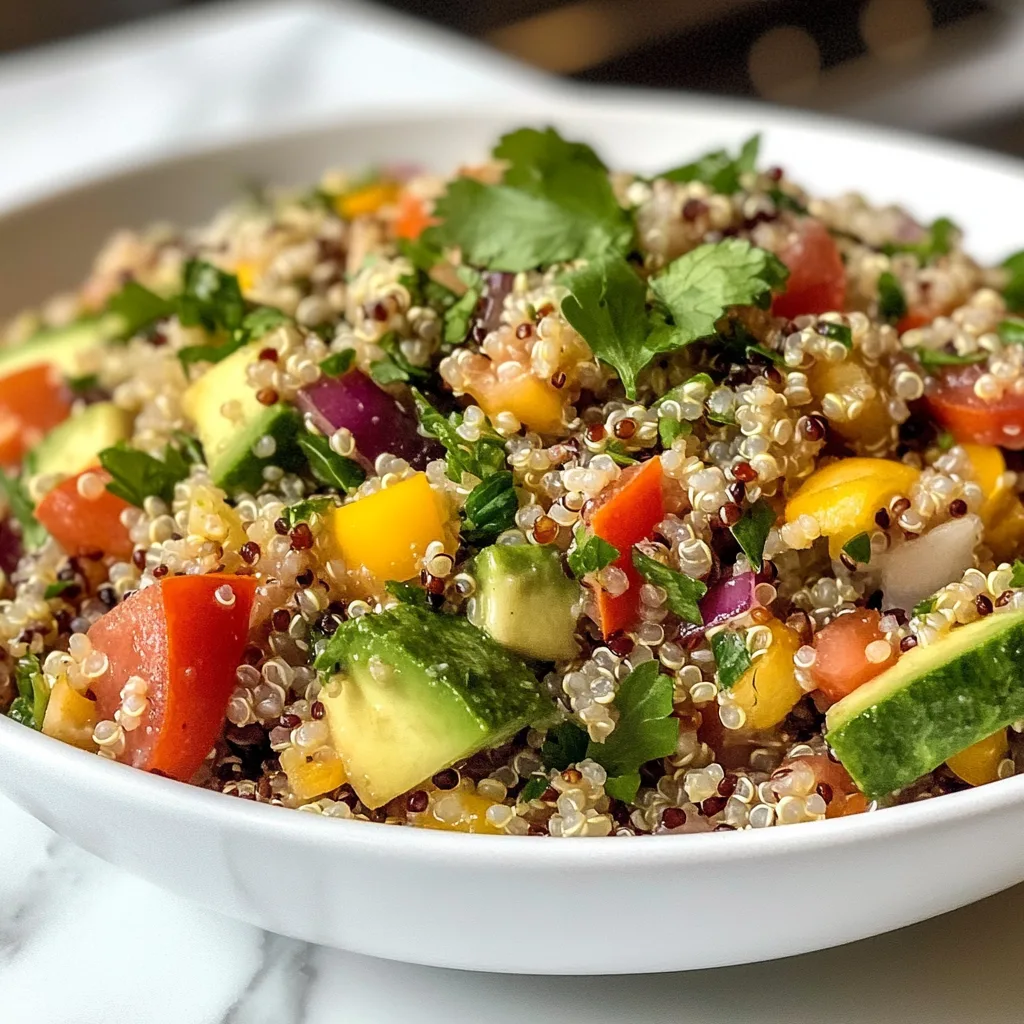
  • Quinoa Power Salad: 5 Gluten-Free Boosts for Ultimate Energy

    Quinoa Power Salad: 5 Gluten-Free Boosts for Ultimate Energy

    This Quinoa Power Salad – Gluten-Free is a game-changer for busy weeknights when you crave something nutritious yet satisfying. I discovered this recipe during my health kick last summer, and it’s been my go-to ever since. The nutty quinoa paired with crisp vegetables creates a texture paradise that’s both refreshing and filling. What I love most is how the flavors deepen overnight in the fridge, making it perfect for meal prep. If you’re looking for more gluten-free options that don’t sacrifice flavor, this colorful bowl of goodness will brighten your weekly menu rotation.

    Quinoa Power Salad: 5 Gluten-Free Boosts for Ultimate Energy

    Recipe

    Why You’ll Love This Quinoa Power Salad – Gluten-Free

    Perfect Balance of Nutrition and Flavor

    This quinoa salad isn’t just another boring health food—it’s a flavor explosion that happens to be good for you. The nutty quinoa base absorbs all the vibrant dressing while maintaining its delightful texture. I’ve watched even the most dedicated carb-lovers go back for seconds! The combination of protein-packed quinoa with fresh vegetables creates a satisfying meal that keeps you energized for hours. What makes this truly special is how customizable it is—you can adjust the vegetables based on what’s in season or what your family prefers.

    Quick and Easy Preparation

    On those nights when cooking feels like climbing a mountain, this salad is my saving grace. The entire dish comes together in under 30 minutes, with most of that time being hands-off cooking. I often prep the quinoa while catching up on my favorite podcast, then chop vegetables while it cools. The simple lemon-olive oil dressing takes seconds to whisk together but transforms everything it touches. Make a double batch on Sunday, and you’ll have effortless lunches ready for the workweek ahead—a true gift to your future hungry self.

    Essential Tips & Tricks

    Perfecting Your Quinoa

    The foundation of this power salad is properly cooked quinoa, and there’s a simple secret to achieving that perfect fluffy texture. Always rinse your quinoa thoroughly under cold water before cooking—this removes the natural bitter coating called saponin. I use a 1:2 ratio of quinoa to water, bringing it to a boil then simmering covered for 15 minutes. The game-changer? Let it rest off-heat with the lid on for 5 additional minutes, then fluff with a fork. For maximum flavor absorption, toss the quinoa with dressing while it’s still slightly warm.

    Balancing Flavors and Textures

    Creating a memorable salad is all about balancing contrasting elements. I always include something crunchy (like cucumber or bell pepper), something protein-rich (edamame or chickpeas work beautifully), and something unexpected (try pomegranate seeds in winter). The dressing should have acidity to brighten, sweetness to balance, and enough salt to make the flavors pop. Don’t be afraid to taste and adjust as you go! For inspiration on balancing flavors in other gluten-free dishes, check out this Sweet Potato Almond Curry that uses similar principles.

    Serving Ideas & Creative Variations

    Make-Ahead Meal Prep Options

    This quinoa power salad is the ultimate meal prep champion. I often prepare a large batch on Sunday, dividing it into portable containers for grab-and-go lunches. The flavors actually improve after a day in the refrigerator as everything melds together. For a complete meal prep solution, pair with pre-cooked chicken breast or hard-boiled eggs stored separately. One clever trick: layer the ingredients in a mason jar with dressing at the bottom, quinoa in the middle, and delicate greens on top. When you’re ready to eat, just shake it up! This approach keeps everything fresh until lunchtime.

    Seasonal Adaptations

    The beauty of this salad is how easily it transforms with the seasons. In summer, I load it with garden-fresh tomatoes, cucumber, and basil for a Mediterranean feel. Fall calls for roasted butternut squash, dried cranberries, and toasted pumpkin seeds. Winter versions feature citrus segments, avocado, and hearty kale that stands up to the dressing. Spring brings tender asparagus, peas, and fresh herbs. The base recipe stays the same while the add-ins celebrate what’s available. For another seasonal gluten-free option that adapts beautifully year-round, try this Cozy Gluten-Free Chicken Noodle Soup that follows the same philosophy.

    Storage & Troubleshooting Guide

    Keeping Your Salad Fresh

    To maintain that just-made freshness, store your quinoa salad in an airtight container in the refrigerator for up to 4 days. If you’re including avocado or delicate herbs, add those just before serving to prevent browning or wilting. For meal prep, I sometimes keep the dressing separate until ready to eat—this works especially well for salads containing crisp vegetables that might soften over time. If your salad seems dry after refrigeration, brighten it with a squeeze of fresh lemon juice or a drizzle of olive oil. A quick stir revitalizes all the flavors and textures.

    Solving Common Issues

    Even the simplest recipes can sometimes go sideways. If your quinoa turns out mushy, you likely used too much liquid or overcooked it—next time, try reducing the water slightly and setting a timer. For bland salads, the solution is usually as simple as more salt, acid (lemon juice or vinegar), or a handful of chopped fresh herbs. If your vegetables release too much water and make the salad soggy, try salting and draining watery vegetables like cucumber or tomatoes before adding them. And remember, a textural contrast is key—add some toasted nuts or seeds just before serving to bring back the crunch.

    Frequently Asked Questions

    Is quinoa actually gluten-free?

    Yes! Quinoa is naturally gluten-free and safe for those with celiac disease or gluten sensitivity. It’s technically a seed, not a grain, making it an excellent alternative to wheat-based sides.

    How can I add more protein to this Quinoa Power Salad?

    Add chickpeas, black beans, edamame, grilled chicken, salmon, or tofu. For a quick boost, sprinkle with hemp seeds or a hard-boiled egg on top.

    Can I freeze this quinoa salad?

    While you can freeze cooked quinoa alone, I don’t recommend freezing the complete salad as the vegetables will become mushy when thawed. Better to prep fresh components.

    What’s the best way to serve this at a party?

    Serve in a large, shallow bowl garnished with extra herbs and lemon wedges. Include small serving bowls of additional toppings like feta, nuts, and avocado for guests to customize.

    How do I make this salad more filling for dinner?

    Transform it into a complete meal by adding roasted vegetables, a protein of choice, and perhaps some avocado or olives for healthy fats. Serve warm or room temperature.

    Final Thoughts

    This Quinoa Power Salad – Gluten-Free has become my kitchen MVP—versatile enough for any season yet consistently delicious. What began as a simple weeknight solution has evolved into an endlessly adaptable template that never fails to satisfy. The combination of nutritious ingredients, vibrant flavors, and make-ahead convenience makes it worth adding to your regular rotation. I’d love to see your version of this salad! Share your creations with me on Pinterest and discover how others are making this recipe their own.

  • Sweet Potato & Almond Curry: 7 Irresistible Gluten-Free Benefits

    Sweet Potato & Almond Curry: 7 Irresistible Gluten-Free Benefits

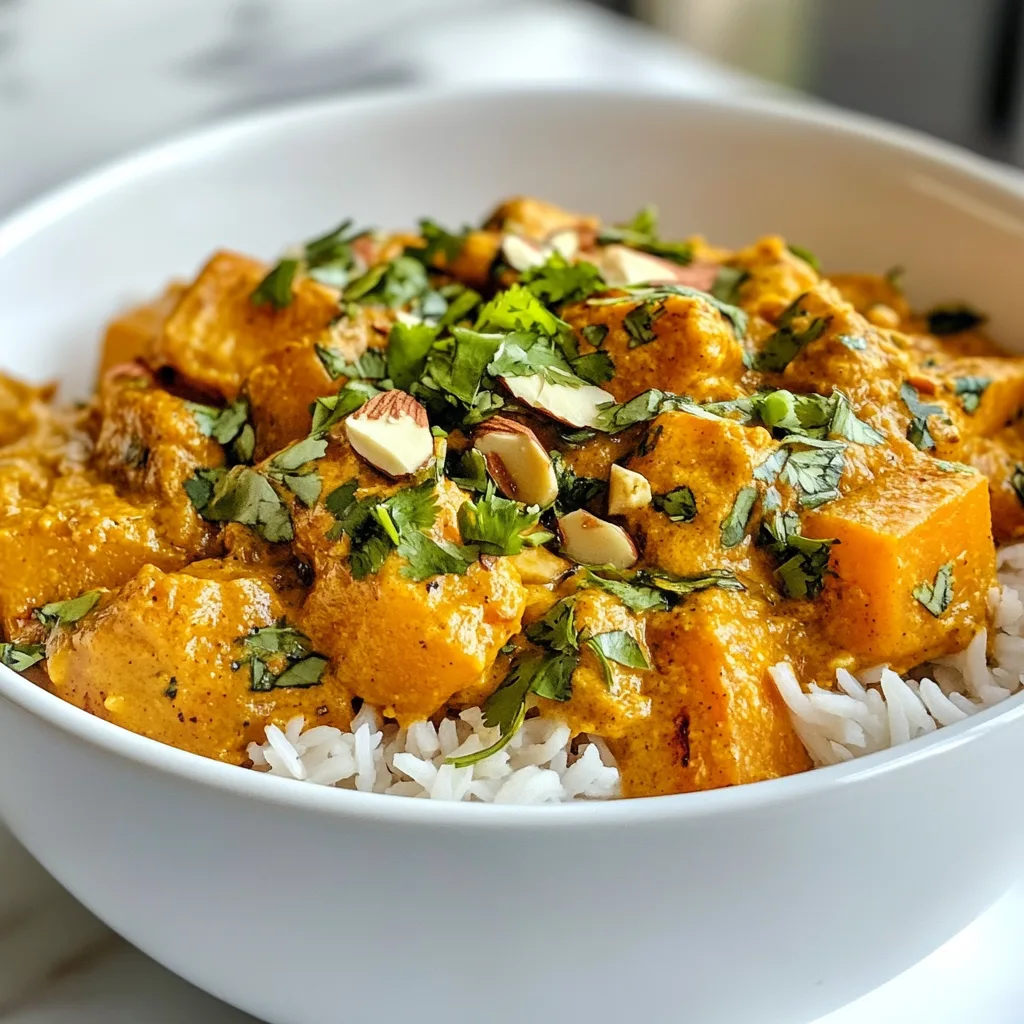
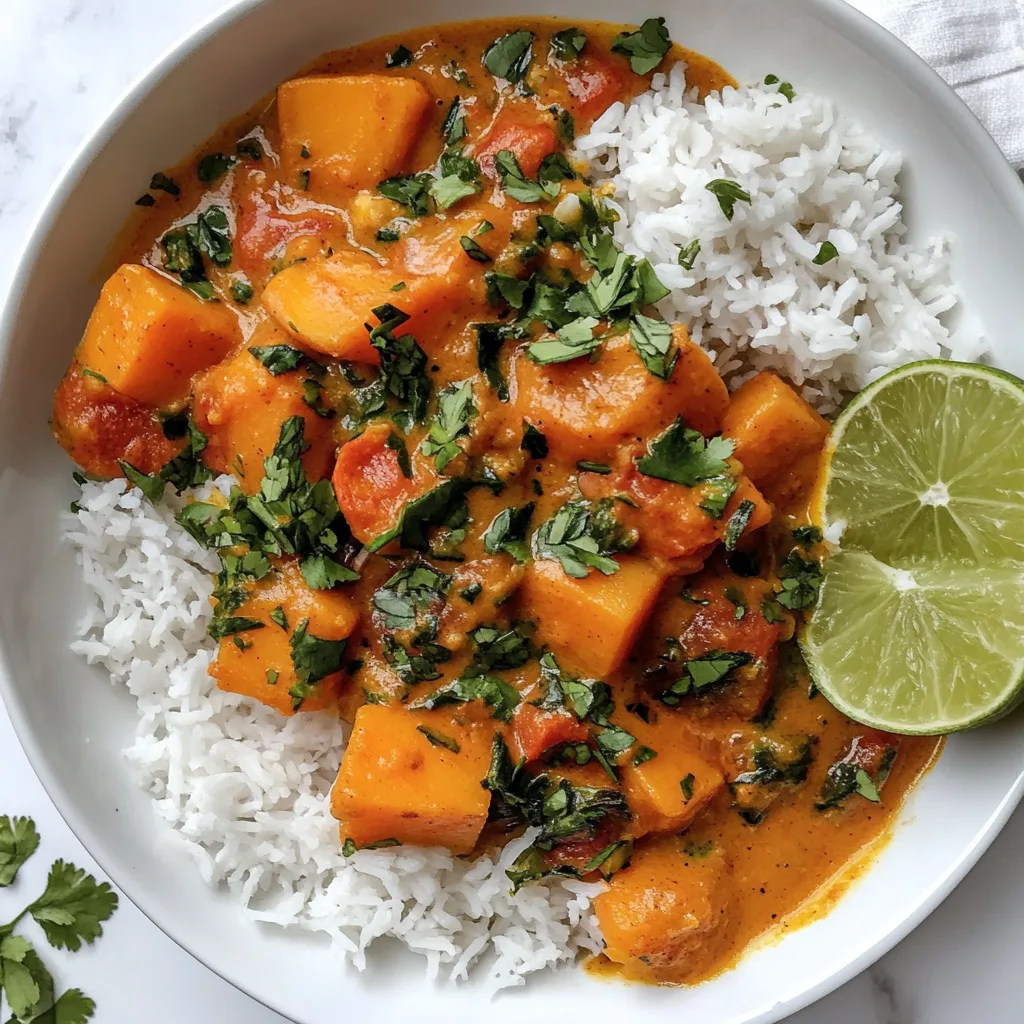
    The aroma of Sweet Potato & Almond Curry – Gluten-Free simmering on my stovetop always transforms my kitchen into a cozy sanctuary. There’s something magical about the way sweet potatoes soften and absorb the fragrant spices, creating a dish that’s both comforting and nourishing. I discovered this recipe during a rainy weekend when I craved something warming but wanted to avoid gluten. Now it’s become my go-to comfort meal that satisfies without weighing you down. If you’re looking for a gluten-free dinner option that doesn’t sacrifice flavor, this curry will become your new favorite.

    Sweet Potato & Almond Curry: 7 Irresistible Gluten-Free Benefits

    Recipe

    Why You’ll Love This Sweet Potato & Almond Curry – Gluten-Free

    Perfect Balance of Flavors and Textures

    The magic of this curry lies in its perfect harmony of flavors. Sweet potatoes provide a natural sweetness that balances beautifully against the aromatic curry spices. The ground almonds create a luxuriously thick sauce without any dairy or gluten-containing thickeners. I love how the sweet potatoes maintain their shape while becoming tender enough to melt in your mouth. The first time I served this to friends, they couldn’t believe it was gluten-free – the richness of the sauce had them convinced it contained heavy cream!

    Nutrient-Dense and Satisfying

    This curry isn’t just delicious – it’s incredibly nourishing. Sweet potatoes deliver beta-carotene and fiber, while almonds contribute healthy fats and protein. The combination creates a meal that satisfies hunger for hours without causing energy crashes. I’ve found it perfect for meal prep Sundays, as the flavors actually deepen overnight in the refrigerator. When I’m having a busy week, knowing I have this nutrient-packed curry waiting for me brings genuine comfort and helps me resist the takeout temptation.

    Essential Tips & Tricks

    Perfecting the Spice Blend

    The soul of this curry lives in its spice blend. I recommend toasting whole cumin, coriander, and mustard seeds before grinding them – it takes just a minute but dramatically enhances their flavors. If you’re sensitive to heat, start with less chili and add more to taste. One trick I discovered by accident: adding a pinch of cinnamon creates an unexpected warmth that complements the sweet potatoes beautifully. Don’t rush this step – allowing the spices to bloom in hot oil before adding other ingredients is what builds those complex flavor layers.

    Achieving the Ideal Texture

    The key to perfect texture is patience with your sweet potatoes. Cut them into uniform cubes (about 1-inch) so they cook evenly. When adding them to the curry base, stir gently to coat each piece before adding liquid. I’ve found that simmering uncovered for the last 10 minutes helps thicken the sauce naturally as the almonds release their oils. If your curry seems too thin, resist adding flour-based thickeners – instead, crush a few sweet potato pieces against the side of the pot and stir them back in.

    Serving Ideas & Creative Variations

    Complementary Side Dishes

    This curry pairs beautifully with simple basmati rice or cauliflower rice for an extra vegetable boost. I love serving it with a side of quick-pickled cucumbers for a refreshing contrast to the rich curry. For special occasions, I make gluten-free naan using chickpea flour – the nutty flavor complements the almonds in the curry perfectly. My family’s favorite way to enjoy it is with a dollop of dairy-free coconut yogurt on top, which adds a pleasant tanginess that cuts through the richness.

    Sweet Potato & Almond Curry: 7 Irresistible Gluten-Free Benefits
    Sweet Potato & Almond Curry gluten-free recipe with rich flavors, perfect for a healthy, tasty, and easy-to-make meal.

    Seasonal Adaptations

    Don’t be afraid to adapt this recipe as the seasons change. In summer, I add fresh peas and spinach during the last few minutes of cooking for bright color and extra nutrients. Fall calls for adding cubes of butternut squash alongside the sweet potatoes. Winter versions benefit from stirring in hearty kale ribbons, while spring inspires me to garnish with tender fresh herbs like cilantro and mint. The almond base remains constant, but these seasonal additions keep the dish exciting year-round.

    Storage & Troubleshooting Guide

    Proper Storage Methods

    This curry actually improves with time as the flavors meld together. Store leftovers in airtight containers in the refrigerator for up to 4 days. For freezing, I recommend cooling completely before transferring to freezer-safe containers, leaving some space for expansion. The curry will maintain its quality for about 3 months frozen. When reheating, add a splash of water or vegetable broth if it seems too thick. I like to prepare a double batch specifically to freeze individual portions for quick weeknight dinners.

    Common Issues and Solutions

    If your curry turns out too watery, simmer uncovered for 10-15 minutes longer to reduce the liquid. Conversely, if it’s too thick, add vegetable broth a quarter cup at a time until you reach your desired consistency. Should your sweet potatoes remain firm despite adequate cooking time, they might be an older variety with higher starch content – simply continue cooking until tender. If the almond flavor seems too subtle, try stirring in a tablespoon of almond butter at the end for an instant flavor boost.

    Frequently Asked Questions

    Can I substitute the almonds if I have a nut allergy?

    Absolutely! Sunflower seed butter makes an excellent substitute, providing similar creaminess. Coconut cream also works well, though it will add a slight coconut flavor to the final dish.

    How can I make this Sweet Potato & Almond Curry – Gluten-Free more protein-rich?

    Add chickpeas or lentils during cooking, or serve with a side of quinoa. For non-vegetarians, cubed chicken or shrimp can be added about 15 minutes before the curry is done.

    Will this curry work in a slow cooker?

    Yes! Sauté the aromatics and spices first, then transfer everything to your slow cooker. Cook on low for 6-7 hours or high for 3-4 hours until sweet potatoes are tender.

    Can I reduce the fat content?

    You can reduce the ground almonds by half and add a tablespoon of cornstarch mixed with water to maintain thickness. This will lower the fat while keeping the curry gluten-free.

    What’s the best way to adjust the spice level?

    Start with less chili and taste as you go. You can always add heat with red pepper flakes or hot sauce at the table, allowing everyone to customize their portion.

    Final Thoughts

    This Sweet Potato & Almond Curry – Gluten-Free has become more than just a recipe in my kitchen – it’s a reminder that dietary restrictions never need to limit flavor or satisfaction. The warm spices, creamy texture, and nourishing ingredients create a dish that’s both comforting and energizing. Whether you’re cooking for someone with gluten sensitivity or simply exploring plant-based meals, this curry delivers on both taste and nutrition. I’d love to see your versions of this recipe – share them with me on Pinterest!

  • Creamy Gluten-Free Tuna Pasta Bake: 5 Secrets for Ultimate Comfort

    Creamy Gluten-Free Tuna Pasta Bake: 5 Secrets for Ultimate Comfort

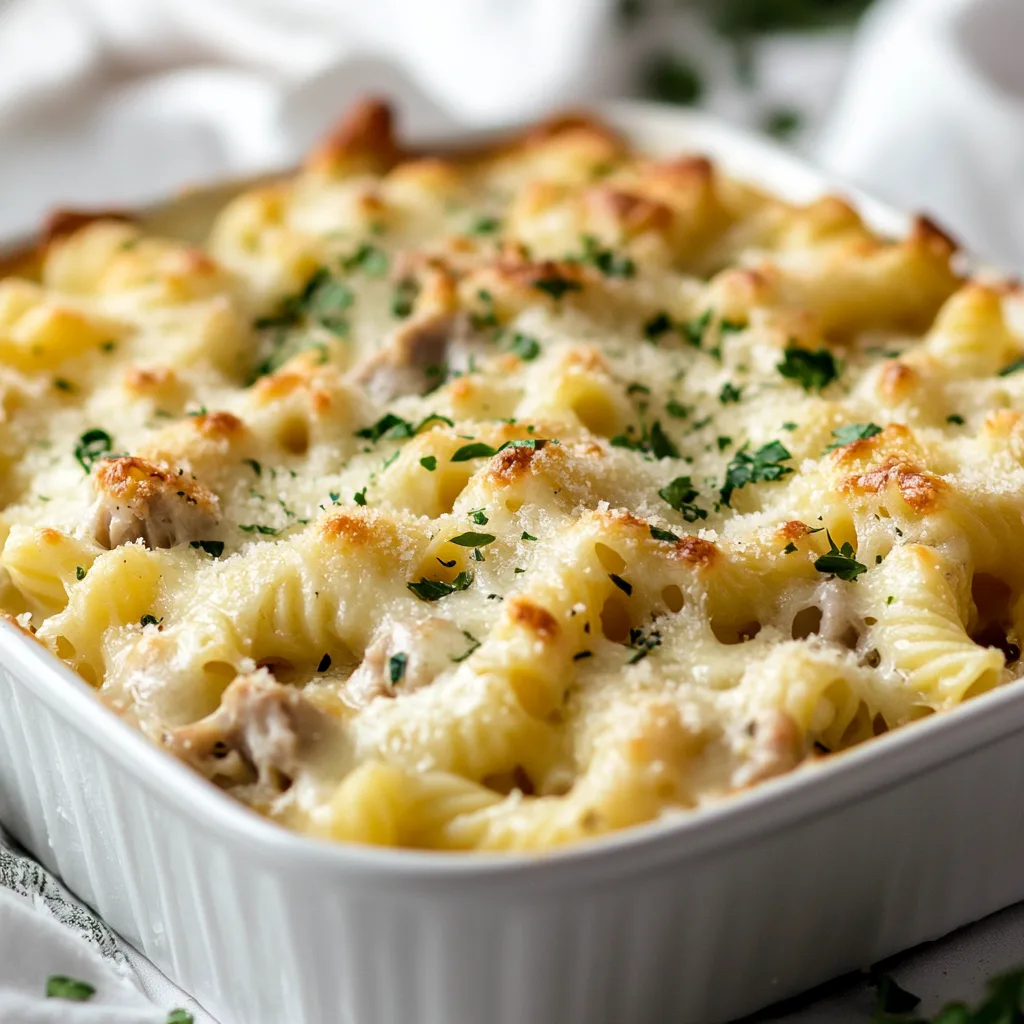
    Creamy Gluten-Free Tuna Pasta Bake is one of those comforting dishes that wraps you in warmth from the first bite. I discovered this recipe during my first winter living alone, when I was craving something that felt like home but wouldn’t upset my newly-diagnosed gluten sensitivity. The rich, velvety sauce coating tender gluten-free pasta and flaky tuna creates a dish that’s impossibly satisfying yet gentle on sensitive stomachs.

    What I love most is how it transforms simple pantry ingredients into something that feels special enough for company but easy enough for a Tuesday night. If you’ve been missing pasta bakes since going gluten-free, this recipe is about to become your new best friend. It’s the perfect balance of creamy indulgence and wholesome comfort.

    Creamy Gluten-Free Tuna Pasta Bake: 5 Secrets for Ultimate Comfort

    Recipe

    Why You’ll Love This Creamy Gluten-Free Tuna Pasta Bake

    Perfect Comfort Food Without the Gluten

    There’s something magical about pulling a bubbling pasta bake from the oven on a chilly evening. The way the cheese forms that perfect golden crust while the creamy sauce gently simmers underneath is pure kitchen alchemy. This gluten-free version sacrifices nothing in texture or flavor compared to traditional recipes. I’ve served this to friends who couldn’t believe it was gluten-free! The key is using high-quality gluten-free pasta (I prefer corn-rice blends) that holds its shape without turning mushy. The combination of tender pasta, flaky tuna, and velvety sauce creates that perfect comfort food experience that’s satisfying without the digestive distress that can come from wheat-based dishes.

    Quick and Budget-Friendly

    On those days when my energy is low but my hunger is high, this tuna pasta bake is my saving grace. It comes together in about 30 minutes of active time, making it perfect for busy weeknights when cooking feels like a mountain to climb.

    The ingredients are mostly pantry staples that won’t break the bank – canned tuna, gluten-free pasta, cheese, and a few basics for the sauce. I often make this at the end of the month when my grocery budget is tight but I’m craving something that feels special. The cost-effectiveness is a huge bonus, especially considering how many meals you can get from one batch. It’s also incredibly versatile, allowing you to use whatever vegetables are lingering in your crisper drawer.

    Essential Tips & Tricks

    Perfecting Your Gluten-Free Pasta

    Gluten-free pasta requires a slightly different approach than regular pasta. I learned this the hard way after several disappointing mushy disasters! Always cook your pasta 2 minutes less than the package instructions indicate, as it will continue cooking in the oven.

    The pasta should be very al dente – almost too firm – before it goes into your bake. Rinsing the pasta after cooking helps remove excess starch that can make your final dish gummy. Another game-changer is choosing the right shape; shorter pasta like penne, fusilli, or shells hold up better than long noodles in a bake. If you’re looking for more gluten-free pasta expertise, check out my Cozy Gluten-Free Chicken Noodle Soup for more tips on working with these special noodles.

    Creating the Perfect Creamy Sauce

    The secret to a silky-smooth sauce that doesn’t separate or become grainy is all in the technique. Start with a roux made with gluten-free flour (I prefer a rice flour blend) and butter, cooking it for at least 2 minutes to remove any raw flour taste. Add your milk gradually, whisking constantly to prevent lumps from forming.

    For extra creaminess without heaviness, I sometimes substitute part of the milk with Greek yogurt. Season your sauce while it’s cooking – the flavors meld better than adding salt at the end. My favorite addition is a tablespoon of Dijon mustard, which cuts through the richness and complements the tuna beautifully. Let the sauce thicken until it coats the back of a spoon before combining with your pasta.

    Serving Ideas & Creative Variations

    Perfect Pairings for a Complete Meal

    This creamy tuna pasta bake shines as the star of the meal, but a few thoughtful sides can elevate the experience. I love serving it with a bright, acidic salad – something with lemon vinaigrette and peppery arugula creates the perfect contrast to the rich pasta. For a heartier meal, roasted vegetables like asparagus or Brussels sprouts add wonderful texture and nutritional balance.

    A slice of gluten-free garlic bread is perfect for soaking up any extra sauce – I’ve been known to fight for those corner pieces where the sauce gets extra thick! For an elegant touch when entertaining, serve small portions as a starter before a lighter main course like my Easy Gluten-Free Baked Oregano Chicken for a Mediterranean-inspired meal that will impress any guest.

    Creamy Gluten-Free Tuna Pasta Bake: 5 Secrets for Ultimate Comfort

    Exciting Flavor Variations

    The beauty of this recipe is its adaptability to whatever flavors you’re craving. My Mediterranean version includes sun-dried tomatoes, olives, and feta instead of cheddar for a tangy twist. For a spicier kick, add diced jalapeños and substitute pepper jack cheese for the cheddar. When I’m feeling fancy, I’ll swap the tuna for hot smoked salmon and add fresh dill and capers. Vegetable variations are endless – peas are classic, but roasted red peppers, spinach, or sautéed mushrooms are delicious additions. For a more substantial meal, add a layer of sautéed ground turkey seasoned with Italian herbs. The recipe is incredibly forgiving, making it perfect for experimenting with whatever ingredients you have on hand.

    Storage & Troubleshooting Guide

    Proper Storage for Maximum Freshness

    This pasta bake is a meal-prepper’s dream as it stores beautifully and often tastes even better the next day. After cooling completely, portion the leftovers into airtight containers and refrigerate for up to 3 days. The key to maintaining the creamy texture is gentle reheating – microwave at 50% power with a damp paper towel over the top, or cover with foil and warm in a 325°F oven until heated through. For longer storage, this dish freezes surprisingly well. Freeze individual portions in freezer-safe containers for up to 2 months. Thaw overnight in the refrigerator before reheating for best results. If the sauce seems to have separated after freezing, a gentle stir while reheating usually brings it back together.

    Solving Common Problems

    Even experienced cooks occasionally encounter issues with pasta bakes. If your dish comes out too dry, the likely culprit is either overcooking the pasta initially or not having enough sauce. Next time, cook the pasta even more al dente and increase your sauce by about 25%. For a sauce that’s broken or grainy, the heat was likely too high during preparation. Keep the temperature at medium-low when making your roux and adding milk.

    If your gluten-free pasta has become mushy, try a different brand next time – some hold up better than others in baked dishes. Brown rice pasta tends to maintain its structure better than corn-only varieties. And if your cheese topping isn’t browning properly, a quick 2-minute stint under the broiler will create that perfect golden crust.

    Frequently Asked Questions

    Can I make this Creamy Gluten-Free Tuna Pasta Bake ahead of time?

    Absolutely! Assemble the entire dish up to 24 hours ahead, cover and refrigerate. Add an extra 10-15 minutes to the baking time when cooking from cold, and keep it covered for the first half of baking.

    What’s the best gluten-free pasta to use for a pasta bake?

    Corn-rice blend pastas hold their shape best in bakes. Look for shorter shapes like penne, fusilli, or shells. Brands like Jovial, Tinkyada, and Barilla Gluten Free tend to perform exceptionally well.

    Can I substitute the tuna for another protein?

    Definitely! Canned salmon, shredded chicken, or even chickpeas work beautifully. Just ensure any raw proteins are fully cooked before adding to the pasta mixture.

    Why is my gluten-free pasta mushy in the bake?

    Gluten-free pasta continues cooking longer than wheat pasta. Always undercook it by 2-3 minutes before adding to the bake, and rinse with cold water to stop the cooking process.

    How can I make this recipe dairy-free as well as gluten-free?

    Use plant-based butter, unsweetened almond or oat milk, and dairy-free cheese alternatives. Nutritional yeast adds a cheesy flavor without dairy. The texture will be slightly different but still delicious!

    Final Thoughts

    This Creamy Gluten-Free Tuna Pasta Bake has become much more than just a recipe in my kitchen – it’s a reminder that dietary restrictions don’t have to mean sacrificing comfort or flavor. There’s something profoundly satisfying about creating a dish that brings together simple ingredients in a way that feels like a warm hug on a plate. Whether you’re cooking for someone with gluten sensitivity or simply looking for a delicious, budget-friendly meal that delivers maximum comfort with minimum effort, this pasta bake delivers every time. I hope it brings as much joy to your table as it has to mine! Don’t forget to check out my Pinterest for more gluten-free comfort food inspiration that never compromises on flavor.

  • Easy Gluten-Free Baked Oregano Chicken with Roasted Potatoes | Healthy Dinner Recipe

    Easy Gluten-Free Baked Oregano Chicken with Roasted Potatoes | Healthy Dinner Recipe

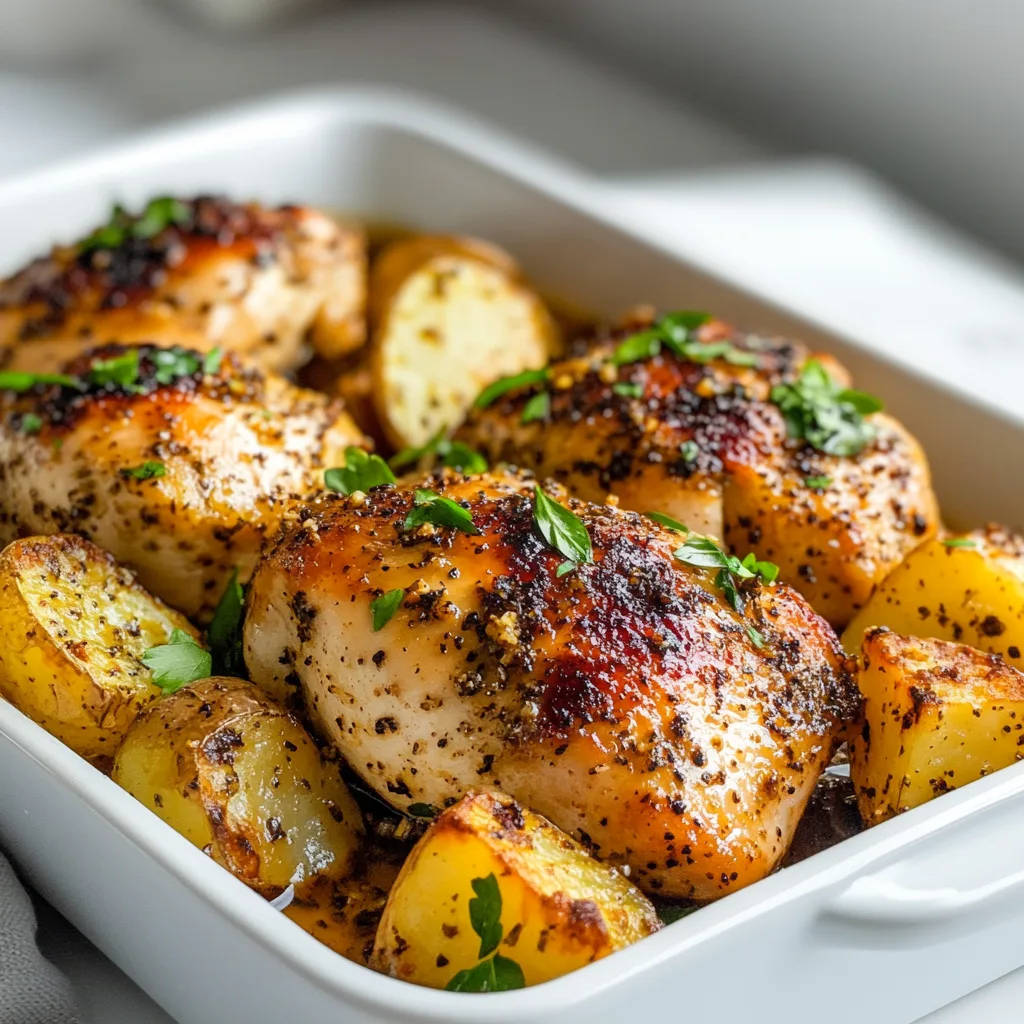
    There’s something magical about the aroma of Easy Gluten-Free Baked Oregano Chicken with Roasted Potatoes filling your kitchen on a chilly evening. I discovered this recipe during my first winter after being diagnosed with celiac disease, when I was desperately seeking comfort food that wouldn’t make me sick. The combination of fragrant oregano, tender chicken, and perfectly crispy potatoes became my go-to dinner for both weeknights and when hosting friends. What makes this dish so special is its beautiful simplicity – just a handful of ingredients transform into something truly extraordinary with minimal effort. The best part? No one will ever guess it’s gluten-free!

    Easy Gluten-Free Baked Oregano Chicken with Roasted Potatoes | Healthy Dinner Recipe

    Recipe

    Why You’ll Love This Easy Gluten-Free Baked Oregano Chicken with Roasted Potatoes

    Perfect One-Pan Simplicity

    There’s something deeply satisfying about a meal that comes together in a single baking dish. This one-pan wonder practically makes itself while you attend to other things – helping kids with homework, catching up on your favorite show, or simply enjoying a moment of peace. The magic happens when the chicken releases its juices, which then flavor the potatoes as everything roasts together. I love how the bottom layer of potatoes absorbs all those savory drippings while the top gets irresistibly crispy. For busy weeknights or lazy weekends, this dish strikes the perfect balance between minimal effort and maximum flavor.

    Naturally Gluten-Free Ingredients

    What I appreciate most about this recipe is that it’s naturally gluten-free without any specialty ingredients or complicated substitutions. The star of the show is fresh oregano, which infuses the entire dish with its distinctive Mediterranean aroma. When I first started cooking gluten-free, I gravitated toward recipes that were inherently free of gluten rather than trying to recreate wheat-based dishes. This approach led me to discover how herbs like oregano can transform simple proteins and vegetables into something extraordinary. The chicken stays incredibly juicy while developing a gorgeous golden crust, and the potatoes achieve that perfect balance of crispy exterior and fluffy interior.

    Essential Tips & Tricks

    Mastering the Marinade

    The secret to this dish’s incredible flavor is giving the chicken enough time with the marinade. I recommend at least 30 minutes, but if you can plan ahead, let it sit for 2-4 hours in the refrigerator. This allows the oregano, garlic, and lemon to penetrate deeply into the meat. One Saturday,

    I prepped the chicken before heading out for a morning hike and returned to meat that was practically vibrating with flavor! For the most intense taste experience, use fresh oregano rather than dried – it makes a world of difference. If you’re in a rush, even a quick 15-minute marinade will still yield delicious results, especially if you make a few small slits in the chicken to help the flavors penetrate.

    Potato Perfection Techniques

    The key to achieving perfectly crispy potatoes lies in three critical steps. First, cut them to a uniform size (about 1-inch chunks) to ensure even cooking. Second, pat them thoroughly dry before tossing with olive oil – excess moisture is the enemy of crispiness! Third, don’t overcrowd the pan; each potato piece needs its own space to develop that golden crust. I learned this lesson the hard way after cramming too many potatoes onto a small sheet pan, resulting in steamed rather than roasted spuds. For an extra flavor boost, try adding a sprinkle of smoked paprika to the potatoes before roasting. For more delicious potato ideas, check out these Greek Slow Cooker Lemon Chicken and Potatoes.

    Serving Ideas & Creative Variations

    Complementary Side Dishes

    While this dish is satisfying on its own, I love serving it with a few simple accompaniments to round out the meal. A crisp green salad with a lemony vinaigrette provides a refreshing contrast to the savory chicken and potatoes.

    Roasted asparagus or broccolini can be added to the same pan for the last 15 minutes of cooking – one less dish to wash! For a more substantial spread, consider adding a side of gluten-free garlic bread or a bowl of warmed olives. When I’m hosting friends, I often serve this with a chilled bottle of Pinot Grigio, which pairs beautifully with the herbaceous flavors. The bright acidity of the wine complements the oregano and cuts through the richness of the roasted potatoes.

    Creative Recipe Adaptations

    This recipe serves as a wonderful foundation for variations based on your preferences or what you have on hand. For a Greek-inspired version, add kalamata olives, cherry tomatoes, and crumbled feta during the last 10 minutes of baking. If you’re craving something with a bit more heat, incorporate red pepper flakes into the marinade. You can also swap the oregano for other herbs – rosemary and thyme work beautifully. For a complete meal in one pan, try adding hearty vegetables like carrots, parsnips, or brussels sprouts alongside the potatoes. For more one-pot meal inspiration, check out my Crockpot Creamy Garlic Chicken and Veggies – another gluten-free favorite at our house!

    Easy Gluten-Free Baked Oregano Chicken with Roasted Potatoes | Healthy Dinner Recipe

    Storage & Troubleshooting Guide

    Proper Storage Solutions

    This dish makes excellent leftovers that maintain their flavor and texture when stored properly. Allow everything to cool completely before transferring to an airtight container – I prefer glass containers as they don’t absorb flavors or stains. The chicken and potatoes will keep in the refrigerator for up to 3-4 days. For reheating, avoid the microwave if possible, as it can make the chicken rubbery and the potatoes soggy. Instead, place everything in a covered oven-safe dish and reheat at 325°F for about 15 minutes until warmed through. The chicken remains juicy, and the potatoes regain some of their crispiness this way.

    Common Problems & Solutions

    If your potatoes aren’t crisping up as expected, there are a few likely troubleshooting steps to consider. First, check your oven temperature with an oven thermometer – many home ovens run cooler than their setting indicates. Second, ensure you’re using a large enough pan so the potatoes aren’t crowded. If necessary, divide between two pans. For chicken that’s drying out, try using bone-in, skin-on pieces which naturally retain more moisture, or cover the pan with foil for part of the cooking time. If the oregano is burning before the chicken is fully cooked, place the herb sprigs underneath the chicken rather than on top, or add fresh herbs during the last 15 minutes of cooking instead.

    Frequently Asked Questions

    Can I use dried oregano instead of fresh?

    Yes, but reduce the amount to 1 tablespoon of dried oregano instead of 3 tablespoons fresh. Dried herbs are more concentrated in flavor, so you need less. Add a little extra olive oil to help distribute the flavor.

    How do I know when the Easy Gluten-Free Baked Oregano Chicken with Roasted Potatoes is done?

    The chicken should reach an internal temperature of 165°F, and the potatoes should be fork-tender with golden, crispy edges. Total cooking time is typically 35-45 minutes depending on chicken piece size.

    Can I prepare this dish ahead of time?

    Absolutely! Marinate the chicken and prep the potatoes up to 24 hours in advance. Keep them separate in the refrigerator and combine just before baking for best results.

    What potatoes work best for this recipe?

    Yukon Gold or red potatoes hold their shape well and develop a buttery interior with crispy exterior. Russets work too but tend to break down more during roasting.

    Is this recipe dairy-free as well as gluten-free?

    Yes! This recipe is naturally dairy-free, making it perfect for those with multiple dietary restrictions. For a vegan variation, substitute the chicken with cauliflower steaks or portobello mushrooms.

    Final Thoughts

    This Easy Gluten-Free Baked Oregano Chicken with Roasted Potatoes has become more than just a recipe in my household – it’s a reliable friend that shows up when we need comfort food without complications. The simplicity of ingredients allows their natural flavors to shine, while the minimal prep work makes it accessible even on the busiest days. I love how this dish proves that gluten-free eating doesn’t mean sacrificing flavor or resorting to complicated alternatives. Whether you’re cooking for someone with celiac disease or simply looking for a delicious, fuss-free dinner, this recipe delivers every time. For more gluten-free inspiration, be sure to follow me on Pinterest where I’m always sharing new discoveries!

  • Greek Slow Cooker Lemon Chicken and Potatoes Recipe | Easy Mediterranean Meal

    Greek Slow Cooker Lemon Chicken and Potatoes Recipe | Easy Mediterranean Meal

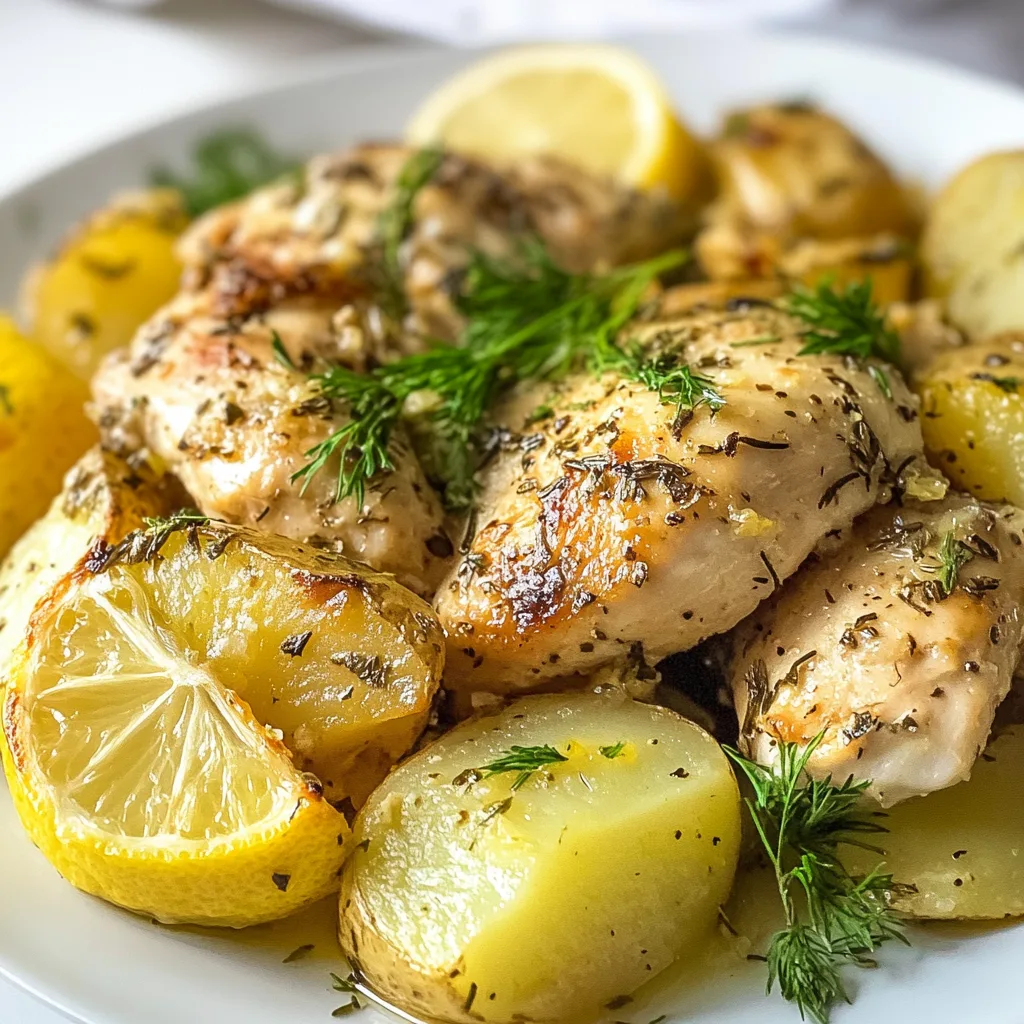
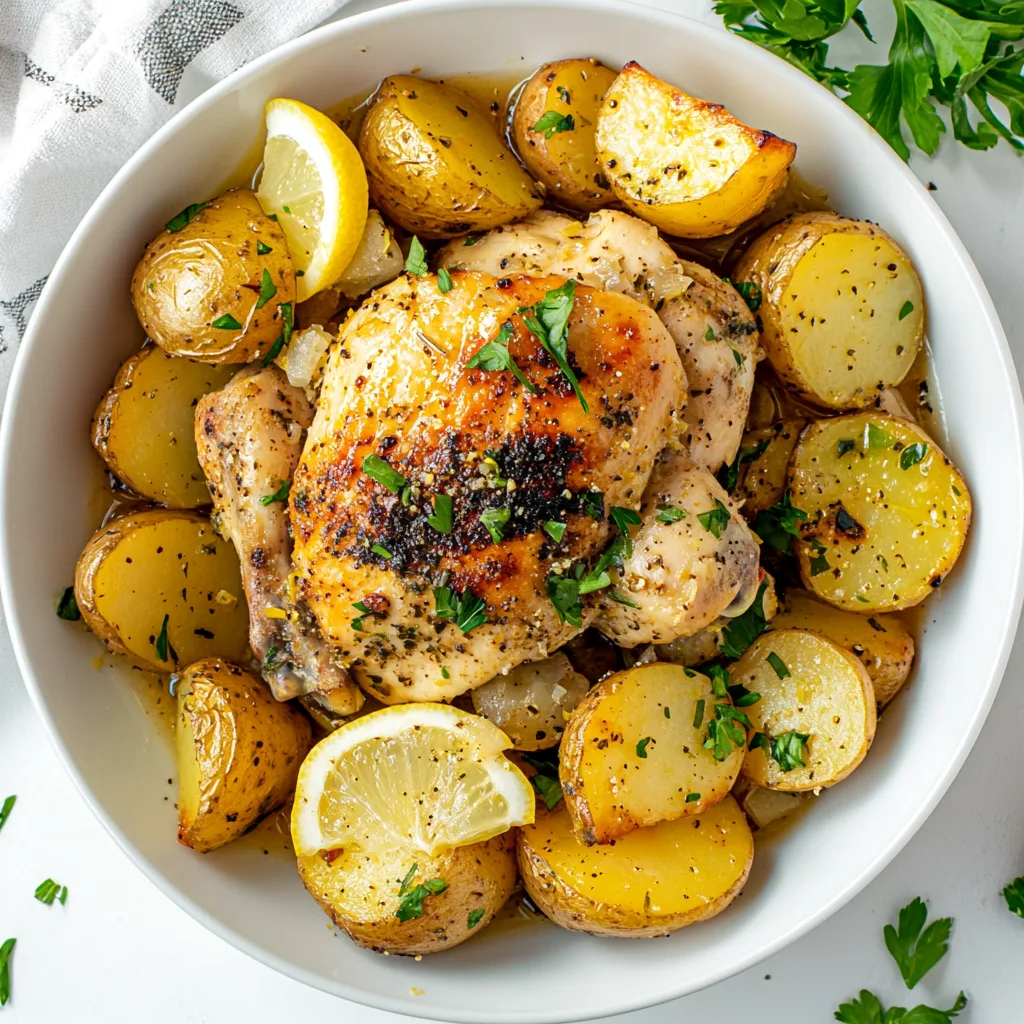
    There’s something magical about Greek Slow Cooker Lemon Chicken and Potatoes that transforms ordinary ingredients into a feast of Mediterranean flavors. The first time I made this dish, the aroma of lemon, oregano, and garlic filled my kitchen, transporting me straight to a seaside taverna in Santorini. As the chicken slowly tenderizes and the potatoes soak up all those bright, zesty flavors, something truly special happens. This set-it-and-forget-it meal delivers that perfect balance of comfort and sophistication that makes weeknight dinners feel special without the fuss. Trust me, this might become your new family favorite!

    Greek Slow Cooker Lemon Chicken and Potatoes Recipe | Easy Mediterranean Meal

    Recipe

    Why You’ll Love This Greek Slow Cooker Lemon Chicken and Potatoes

    Perfect Flavor Balance

    The beauty of this Greek Slow Cooker Lemon Chicken and Potatoes lies in its perfect harmony of flavors. Bright, zesty lemons cut through the richness of the chicken, while oregano, garlic, and olive oil create that authentic Mediterranean profile that’s both bold and comforting. I love how the slow cooking process allows the chicken to absorb every bit of flavor while remaining incredibly tender. The potatoes, nestled beneath the chicken, transform into little flavor sponges, soaking up all those amazing juices. It’s that beautiful balance of tangy and savory that makes Greek cuisine so irresistible, all achieved with minimal effort on your part.

    Make-Ahead Convenience

    As a busy mom, I’ve come to worship the time-saving magic of slow cooker recipes. This Greek chicken can be prepped in just 15 minutes in the morning, then left to work its magic while you tackle your day. All the ingredients can be prepped the night before—just slice those lemons, chop the potatoes, and measure out your seasonings. Store everything in separate containers in the fridge, then simply layer in your slow cooker when you’re ready. The hands-off cooking means you can focus on other priorities knowing dinner is taking care of itself. I’ve even assembled everything in the slow cooker insert and refrigerated overnight for truly effortless mornings.

    Essential Tips & Tricks

    Choosing the Right Ingredients

    Starting with high-quality ingredients makes all the difference in this simple recipe. Opt for bone-in, skin-on chicken thighs which stay juicier and more flavorful than breasts in the slow cooker. The fat renders beautifully, creating a self-basting effect. For potatoes, I recommend Yukon Golds for their buttery texture and ability to hold shape during long cooking. Always use fresh lemons rather than bottled juice—the oils in the zest add incredible dimension. When it comes to olive oil, this is the time to use that good bottle you’ve been saving; its fruity notes will shine through in the finished dish. Fresh oregano is wonderful if you have it, but dried works beautifully too.

    Perfect Texture Every Time

    Achieving that ideal texture can be tricky in slow cookers, but I’ve found a few foolproof techniques. Layer your potatoes on the bottom of the cooker, which elevates the chicken and allows for better heat circulation. Cut potatoes into uniform 1.5-inch chunks so they cook evenly. For extra crispy chicken skin (my favorite part!), consider a quick broil after slow cooking. Simply transfer the chicken to a baking sheet, brush with a little olive oil, and broil for 2-3 minutes until golden. This step is optional but adds that restaurant-quality finish that makes the dish truly special. Remember to rest the chicken for 5-10 minutes before serving for maximum juiciness.

    Serving Ideas & Creative Variations

    Mediterranean Inspired Sides

    Elevate your Greek Slow Cooker Lemon Chicken and Potatoes with complementary sides that enhance its Mediterranean charm. A simple Greek salad with cucumbers, tomatoes, red onions, kalamata olives, and feta cheese adds fresh crunch and vibrant color. Warm pita bread is perfect for sopping up those incredible lemon-infused juices—I’ve seen my family practically fighting over the last drops! For a lighter option, try a side of steamed green beans tossed with lemon zest and toasted pine nuts. My personal favorite pairing is a cooling tzatziki sauce served alongside for dipping both the chicken and potatoes. The creamy yogurt base with cucumber and dill creates a beautiful temperature and texture contrast.

    Greek Slow Cooker Lemon Chicken and Potatoes Recipe | Easy Mediterranean Meal

    Exciting Flavor Twists

    While the classic recipe is divine, I love experimenting with creative variations that keep this dish in regular rotation without boredom. Try adding artichoke hearts and olives during the last hour of cooking for a Greek-inspired twist. Crumbled feta cheese sprinkled over the finished dish adds a salty, tangy dimension that’s absolutely mouthwatering. For a spicier version inspired by my trip to Cyprus, add a teaspoon of red pepper flakes and a splash of honey to create a sweet-heat balance. You can also swap the chicken thighs for a whole cut-up chicken to please dark and white meat lovers alike. These simple tweaks transform the same base recipe into something that feels brand new.

    Storage & Troubleshooting Guide

    Proper Storage Methods

    Proper storage techniques ensure this delicious meal can be enjoyed beyond just dinner night. Allow leftovers to cool completely before transferring to airtight containers—I separate the chicken and potatoes to maintain their distinct textures. Refrigerated, they’ll keep beautifully for 3-4 days, with the flavors actually improving overnight as they continue to meld. For longer storage, freeze portions in freezer-safe containers for up to 3 months. When reheating, I recommend thawing overnight in the refrigerator, then warming gently in a 325°F oven covered with foil to prevent drying out. For a quick microwave reheat, add a tablespoon of water or chicken broth to maintain moisture and heat on medium power, stirring the potatoes occasionally.

    Common Issues & Solutions

    Even experienced cooks encounter occasional challenges with slow cooker recipes. If your chicken skin turns out rubbery rather than crisp, that’s actually normal for slow cooking—use the broiler method I mentioned earlier for that perfect finish. Potatoes still firm after cooking? They might be cut too large; next time ensure uniform, smaller pieces. For too-soupy results, remove the lid during the final 30 minutes of cooking to allow some liquid to evaporate, or transfer the juices to a small saucepan and reduce into a more concentrated sauce.

    If your dish lacks flavor intensity, try adding a splash of fresh lemon juice and a sprinkle of flaky sea salt just before serving to brighten all the flavors. Remember that slow cookers vary in temperature, so adjust cooking times accordingly.

    Frequently Asked Questions

    Can I use boneless chicken instead?

    Yes, boneless chicken thighs work well but reduce cooking time by 1-2 hours. Boneless breasts tend to dry out, so if using them, check for doneness at the 3-hour mark on low setting.

    How can I make this Greek Slow Cooker Lemon Chicken and Potatoes more garlicky?

    Double the garlic and add half at the beginning and half during the last 30 minutes of cooking for a more pronounced garlic flavor without bitterness.

    Can I add vegetables besides potatoes?

    Absolutely! Bell peppers, zucchini, or cherry tomatoes work beautifully. Add firmer vegetables halfway through cooking and delicate ones during the final hour.

    What if I don’t have fresh lemons?

    While fresh is best, in a pinch, use 3 tablespoons of bottled lemon juice plus 1 teaspoon of lemon zest (or ¼ teaspoon lemon extract) to approximate the fresh lemon flavor.

    Is this recipe gluten-free?

    Yes, this recipe is naturally gluten-free, making it perfect for those with gluten sensitivities. Just ensure your chicken broth and any added seasonings are certified gluten-free.

    Final Thoughts

    This Greek Slow Cooker Lemon Chicken and Potatoes has become my go-to for both busy weeknights and casual entertaining. There’s something deeply satisfying about creating such bold, authentic flavors with so little active work. I love watching guests’ faces light up with their first bite, that moment of surprise that something so complex-tasting could come from a slow cooker. The bright lemon, fragrant herbs, and tender chicken create a meal that feels like a warm Mediterranean hug. Whether you’re cooking for a family dinner or meal prepping for the week ahead, this dish delivers comfort and sophistication in equal measure. Don’t forget to check out more of my slow cooker favorites on Pinterest!

  • Succulent Italian Herb Butter Prime Rib Recipe | Tender & Flavorful Roast Beef

    Succulent Italian Herb Butter Prime Rib Recipe | Tender & Flavorful Roast Beef

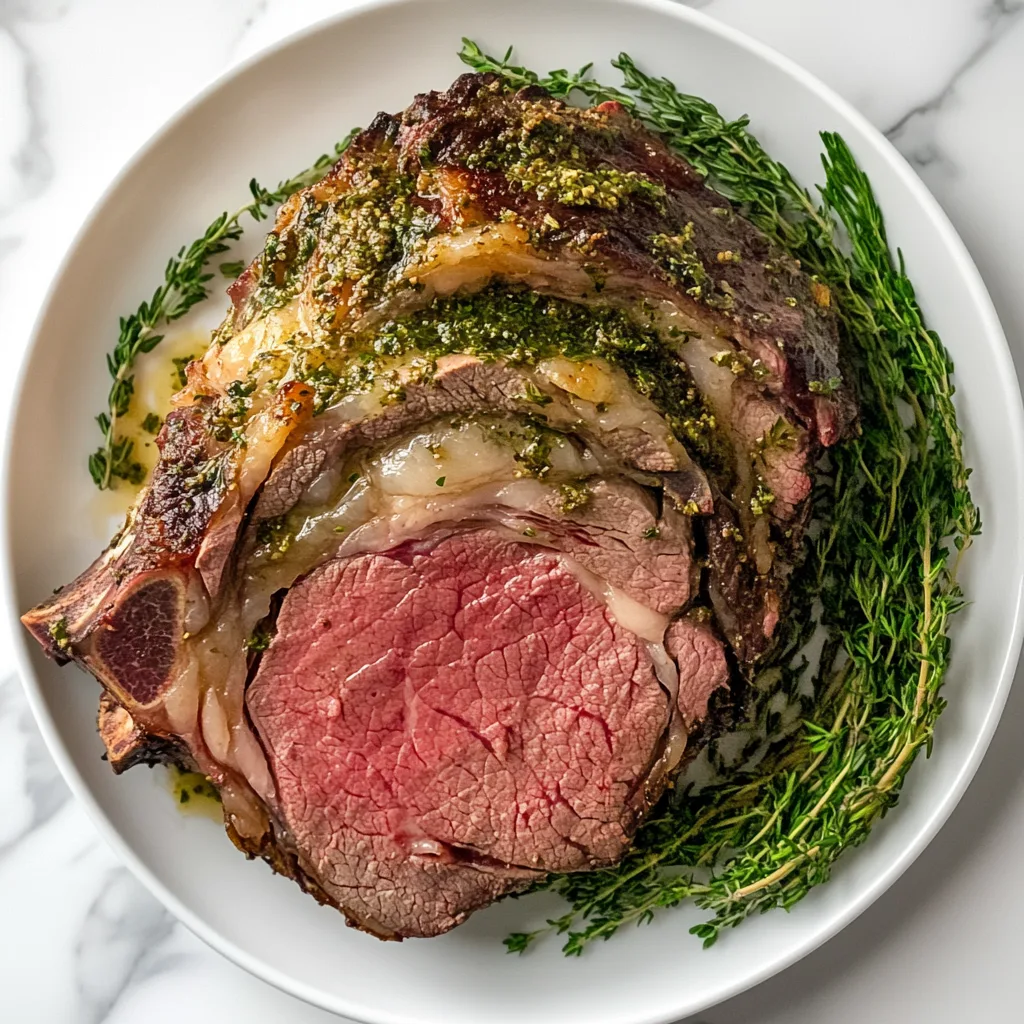
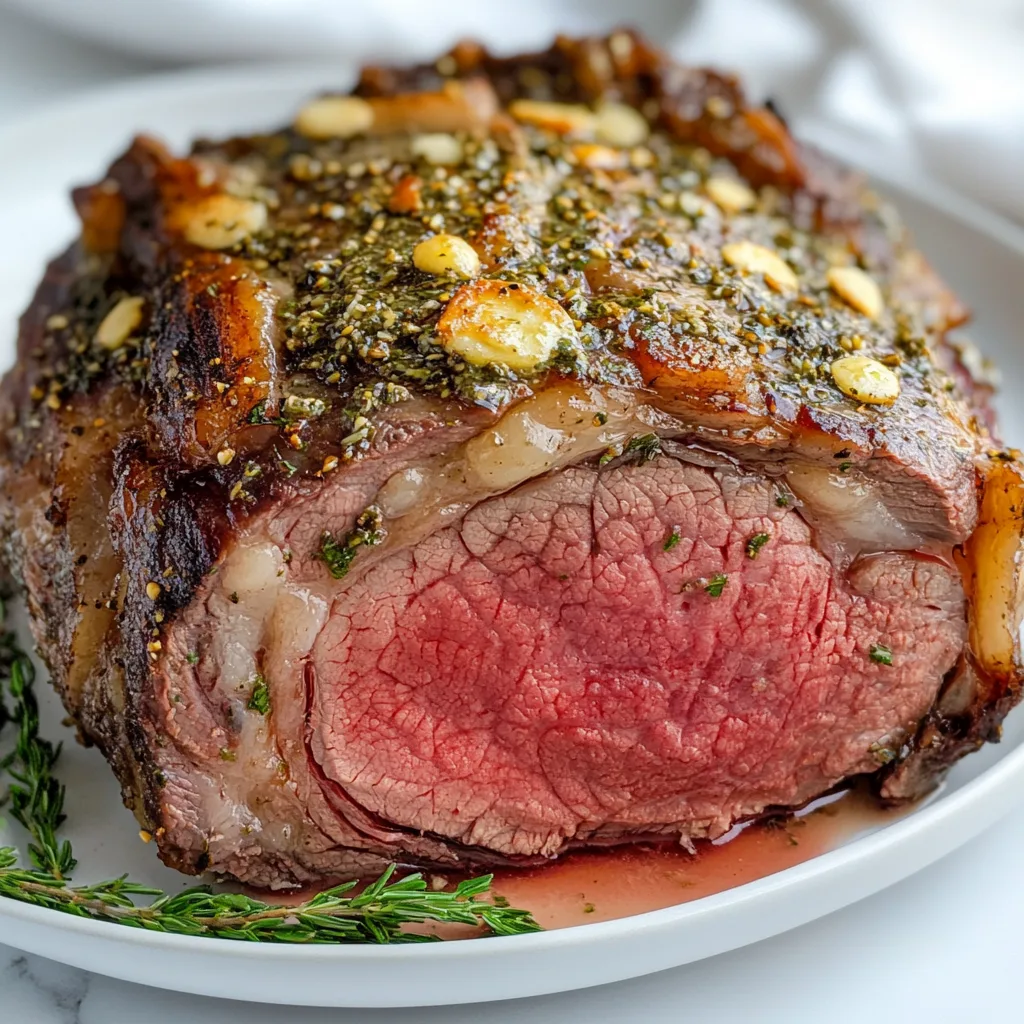
    There’s something truly magical about an Italian Herb Butter Prime Rib taking center stage at your holiday table. The first time I prepared this showstopper for my family, the kitchen filled with an intoxicating aroma of herbs and garlic that had everyone hovering nearby, asking when dinner would be ready. This isn’t just a meal—it’s an experience that creates memories. The herbaceous butter melts into the perfectly cooked meat, creating a flavor profile that’s both sophisticated and comforting.

    If you’ve been intimidated by cooking prime rib before, I promise this recipe will give you the confidence to create a restaurant-quality centerpiece that will have your guests raving for years to come. Check out my slow cooker recipes for more holiday inspiration!

    Succulent Italian Herb Butter Prime Rib Recipe | Tender & Flavorful Roast Beef

    Recipe

    Why You’ll Love This Italian Herb Butter Prime Rib

    Perfect Holiday Centerpiece

    There’s something undeniably impressive about bringing a perfectly cooked prime rib to the table. The Italian herb butter creates a gorgeous crust that’s visually stunning and incredibly flavorful. Last Christmas, my brother-in-law actually applauded when I set it down! The beauty of this recipe is that while it looks incredibly sophisticated, it’s surprisingly straightforward to prepare. The herb butter can be made ahead, and the cooking method is largely hands-off, giving you time to focus on sides and socializing with guests. The dramatic presentation combined with the heavenly aroma makes this dish perfect for special occasions when you want to create a memorable dining experience.

    Foolproof Cooking Method

    Even if you’ve never cooked prime rib before, this recipe is designed to give you consistent results every time. The key is starting with room temperature meat and using a good meat thermometer—these two simple steps eliminate most potential issues. I remember being terrified the first time I cooked such an expensive cut, constantly opening the oven to check on it (big mistake!). Now I rely on time and temperature, not guesswork. The reverse sear method—starting low and slow, then finishing with high heat—ensures a perfectly pink interior with that coveted crusty exterior. The herb butter acts as both a flavor enhancer and a natural basting agent, keeping the meat juicy throughout the cooking process.

    Essential Tips & Tricks

    Selecting and Preparing Your Prime Rib

    Choosing the right cut is your first step toward prime rib perfection. Look for a bone-in prime rib with good marbling—those little streaks of fat mean flavor and tenderness. For a dinner party, plan on about ¾ pound per person for generous portions. Ask your butcher to trim excess fat but leave a ¼-inch layer for flavor. The day before cooking, unwrap the meat, pat it dry with paper towels, and let it air-dry in the refrigerator overnight. This creates a better surface for the herb butter to adhere to and improves browning. Remove your prime rib from the refrigerator 2-3 hours before cooking to ensure even cooking. While it comes to room temperature, prepare your herb butter.

    Perfecting the Italian Herb Butter

    The herb butter is truly the star that elevates this dish from good to extraordinary. For the most vibrant flavor, use fresh herbs whenever possible—rosemary, thyme, and sage create that classic Italian profile. Mince them finely and combine with softened (not melted) butter, allowing the herbs to infuse their oils. Add freshly minced garlic, lemon zest, and a touch of crushed red pepper for depth. My secret ingredient?

    A tablespoon of good quality olive oil mixed into the butter makes it easier to spread and enhances the Mediterranean flavor profile. Make this butter a day ahead and refrigerate, then bring to room temperature before applying generously to your prime rib. The butter should completely coat the exterior, creating a protective and flavorful crust.

    Serving Ideas & Creative Variations

    Perfect Side Dish Pairings

    The rich, herbaceous flavors of Italian Herb Butter Prime Rib pair beautifully with both classic sides and unexpected accompaniments. Traditional options like creamy mashed potatoes or Yorkshire puddings provide the perfect canvas for soaking up those flavorful meat juices. For a more Italian-inspired meal, consider serving with roasted garlic polenta or risotto. Vegetable sides that complement the herbal notes include roasted Brussels sprouts, balsamic-glazed root vegetables, or a simple arugula salad with lemon and parmesan. I love serving a bright, acidic element like gremolata or chimichurri sauce alongside to cut through the richness of the meat. Don’t forget warm, crusty bread for sopping up every last bit of those herb-infused juices!

    Succulent Italian Herb Butter Prime Rib Recipe | Tender & Flavorful Roast Beef

    Creative Flavor Twists

    While the classic Italian herb profile is divine, don’t be afraid to experiment with flavor variations that reflect your personal taste or the season. For a holiday twist, incorporate orange zest and a touch of nutmeg into your herb butter. Craving something bolder? Add horseradish or Dijon mustard to the butter mixture for a spicy kick.

    For a Mediterranean spin, incorporate sun-dried tomatoes, olives, and feta crumbles into your herb butter. You can also play with different herb combinations—swap in oregano, basil, or marjoram for unique flavor profiles. One of my favorite variations includes a tablespoon of balsamic reduction mixed into the butter, which caramelizes beautifully during cooking and adds a subtle sweetness that complements the rich meat perfectly.

    Storage & Troubleshooting Guide

    Proper Storage and Leftovers

    Properly storing leftovers ensures you’ll enjoy your prime rib investment for days to come. Refrigerate any leftover meat within two hours of cooking, wrapping it tightly in plastic wrap or storing in an airtight container for up to 4 days. For best results, slice only what you’ll eat immediately—keeping the roast whole helps retain moisture. When reheating, avoid the microwave which can toughen the meat.

    Instead, wrap slices in foil with a splash of beef broth and warm in a 300°F oven just until heated through. Leftover prime rib makes incredible sandwiches on crusty bread with horseradish cream, or can be diced for hash with potatoes and eggs for a luxurious breakfast. The bones can be simmered for rich beef stock.

    Common Problems and Solutions

    Even experienced cooks encounter challenges with prime rib, but most issues have simple solutions. If your crust isn’t browning properly, your oven temperature might be too low or the meat surface might be too moist. For a perfect crust, ensure your meat is thoroughly patted dry before applying the herb butter, and don’t be afraid to increase the temperature for the final sear.

    Undercooked or overcooked meat usually stems from inaccurate temperature readings—invest in a good digital thermometer and remember that carryover cooking will raise the internal temperature by 5-10°F after removing from the oven. If your herb butter is sliding off during cooking, chill the buttered roast for 30 minutes before putting it in the oven to help it adhere better. For tough meat, the likely culprit is slicing with the grain rather than against it.

    Frequently Asked Questions

    What temperature should Italian Herb Butter Prime Rib be cooked to?

    For medium-rare, cook to an internal temperature of 120-125°F, then remove from oven. The temperature will rise to 130-135°F during resting. For medium, aim for 130-135°F, rising to 140-145°F while resting.

    Can I make the Italian herb butter in advance?

    Absolutely! The herb butter can be prepared up to 3 days ahead and refrigerated. This actually improves the flavor as the herbs infuse the butter. Just bring to room temperature before applying to the roast.

    How long should prime rib rest before carving?

    Let your prime rib rest for at least 20-30 minutes under loose foil. This allows the juices to redistribute throughout the meat, ensuring every slice is moist and flavorful.

    What’s the best way to carve prime rib?

    Remove the bones first by cutting along the bone line. Then place the roast flat-side down and slice against the grain in your desired thickness. Thinner slices (¼-½ inch) are typically best.

    How much Italian Herb Butter Prime Rib should I buy per person?

    Plan for ¾ pound per person for bone-in prime rib (or ½ pound for boneless). This accounts for shrinkage during cooking and ensures generous portions with some leftovers.

    Final Thoughts

    Creating an Italian Herb Butter Prime Rib isn’t just about preparing food—it’s about crafting an experience that brings people together. There’s something deeply satisfying about watching faces light up as you bring this masterpiece to the table. The combination of fragrant herbs, rich butter, and perfectly cooked beef creates a dish that feels special enough for the most important celebrations yet is accessible enough for a skilled home cook to master.

    Don’t be surprised if this becomes your signature dish, requested year after year. For more holiday inspiration and festive recipes, follow me on Pinterest where I share seasonal favorites and cooking tips. Your Italian Herb Butter Prime Rib deserves to be the star of your next gathering—I can’t wait for you to experience the joy it brings!