Category: Lunch

Easy lunch ideas for busy days. Simple, quick recipes with fresh flavor and satisfying meals you can enjoy at home or on the go.

  • Dumpling Bake Delight: Irresistible Comfort Food You’ll Crave Instantly

    Dumpling Bake Delight: Irresistible Comfort Food You’ll Crave Instantly

    Dumpling Bake Delight: Irresistible Comfort Food You’ll Crave Instantly

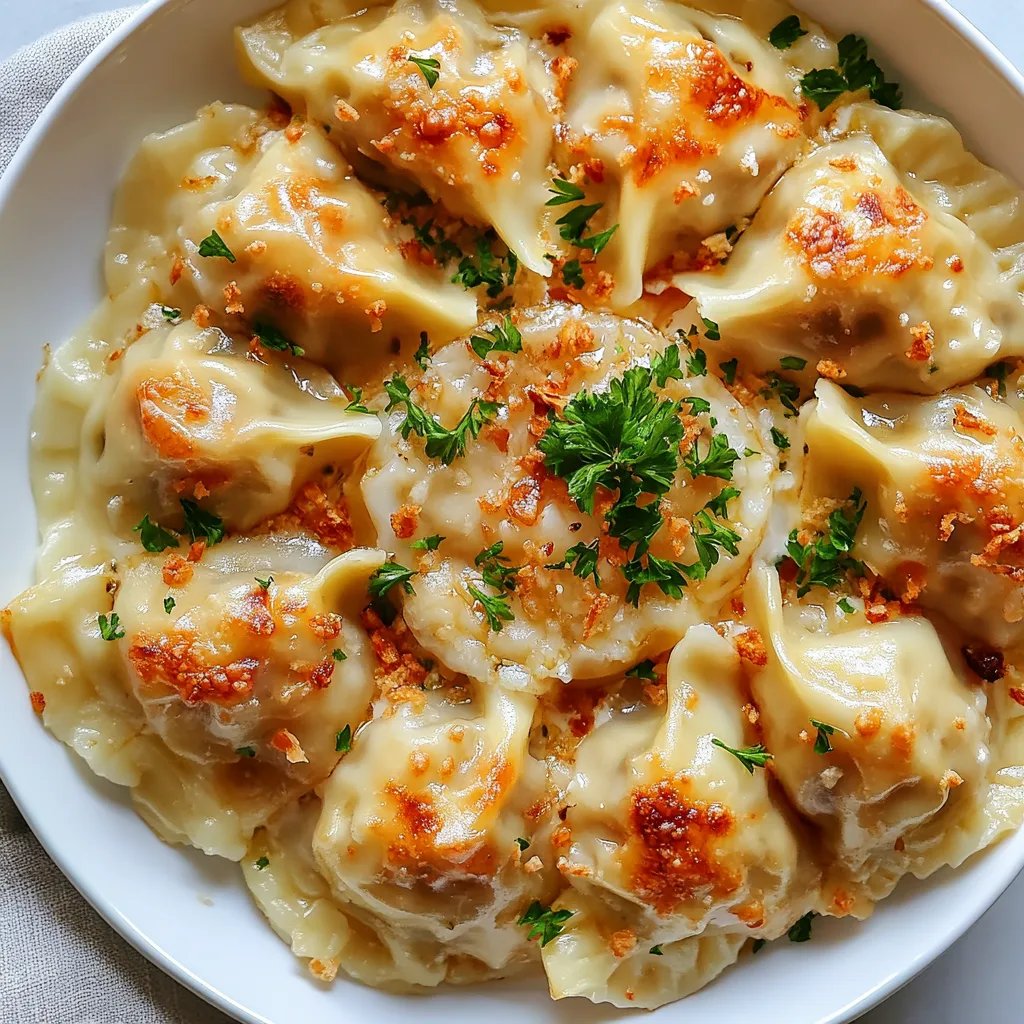
    This Dumpling Bake transforms ordinary ingredients into a soul-warming masterpiece that’s perfect for those evenings when you crave something hearty yet comforting. I discovered this recipe during a particularly chilly autumn weekend when my kitchen became my sanctuary. The way the golden crust forms over those pillowy dumplings while the savory filling bubbles underneath—it’s pure magic! My family now requests this dish whenever the temperature drops, and I’m always happy to oblige. If you love dishes that combine simplicity with impressive results, this one’s about to become your new favorite comfort food.

    Recipe

    Why You’ll Love This Dumpling Bake

    Perfect Comfort Food for Any Season

    There’s something undeniably magical about the way dumplings transform a simple stew into something extraordinary. The tender dumplings absorb all those rich flavors while creating a beautiful textural contrast that’s simply irresistible. I love how they puff up during baking, creating little clouds of doughy goodness that float atop the savory base. On cold evenings, this dish wraps around you like a warm hug, but it’s equally welcome during summer when paired with a crisp salad. The aroma alone as it bakes will have everyone gravitating toward your kitchen!

    Quick Prep with Impressive Results

    One of my favorite things about this Dumpling Bake is how it delivers restaurant-quality results with minimal effort. The prep-to-wow ratio is off the charts! You can assemble everything in about 20 minutes, then let your oven do the heavy lifting. I’ve served this at impromptu dinner parties and received more compliments than dishes that took three times as long. The way the top browns to a perfect golden hue while keeping the dumplings tender underneath creates that professional finish that makes guests think you’ve been cooking all day. It’s my secret weapon for busy weeknights!

    Essential Tips & Tricks

    Mastering the Dumpling Consistency

    Getting your dumpling batter to the perfect consistency is the key to this dish’s success. You’re looking for something that’s thick enough to hold its shape when dropped onto the hot filling, but not so dense that it becomes heavy or doughy. I always use a light touch when mixing—just until the ingredients come together. Over-mixing activates too much gluten and leads to tough dumplings. My foolproof test: the batter should slowly drop from your spoon in a thick ribbon. If it’s runny, add a tablespoon more flour; if it’s too stiff, a splash of milk works wonders. Trust your instincts here!

    Creating the Perfect Base Layer

    The foundation of any great Dumpling Bake lies in its base layer, which needs to have the right balance of flavor and moisture. I learned through trial and error that the filling should be slightly thinner than you might think—those dumplings will absorb liquid as they cook! For maximum flavor, don’t rush the initial sautéing of aromatics. Those extra few minutes developing flavor in your onions and garlic make a world of difference. For a truly spectacular Dumpling Bake, deglaze your pan with a splash of white wine or broth to lift all those delicious browned bits before adding the remaining ingredients.

    Serving Ideas & Creative Variations

    Seasonal Pairings That Elevate the Dish

    This Dumpling Bake shines brightest when paired with simple, complementary sides that balance its richness. During winter months, I love serving it with roasted root vegetables tossed in herbs and olive oil. The slight sweetness and caramelization create a perfect contrast. In warmer seasons, a bright, acidic salad with citrus vinaigrette cuts through the richness beautifully. My family particularly loves when I pair it with Kickin’ Collard Greens for a complete meal that satisfies every craving. Don’t forget a crusty bread for sopping up those incredible juices!

    International Flavor Twists

    One of the joys of this Dumpling Bake is how adaptable it is to different flavor profiles. I’ve created Mediterranean-inspired versions using oregano, lemon zest, and feta in the dumplings, served over a tomato and olive base. For Asian flair, try adding ginger, garlic, and scallions to your dumplings, then serve them over a miso-enriched broth with mushrooms. My personal favorite variation includes fresh herbs and Gruyère cheese in the dumplings, paired with a white wine and leek base. The possibilities are truly endless, making this recipe one you can reinvent countless times without boring your taste buds!

    Storage & Troubleshooting Guide

    Proper Storage for Leftovers

    Storing your Dumpling Bake properly ensures those leftovers remain just as delicious the next day. Allow the dish to cool completely before transferring to airtight containers. The dumplings will continue absorbing liquid as they sit, so I sometimes add a tiny splash of broth when reheating to maintain that perfect consistency. Refrigerated leftovers stay fresh for up to 3 days. For longer storage, portion the bake into freezer-safe containers, leaving some headspace for expansion. When reheating from frozen, I find it’s best to thaw overnight in the refrigerator first, then warm gently in a 325°F oven until heated through.

    Fixing Common Dumpling Issues

    Even experienced cooks occasionally encounter dumpling challenges, but most are easily fixed. If your dumplings seem too dense, you likely over-mixed the batter or used too much flour. Next time, use a lighter touch and remember that a few lumps are actually good! Dumplings that dissolve into the filling usually indicate too much liquid in your batter. To rescue a batch that’s too wet, gently drop spoonfuls onto parchment paper first, then transfer them to your hot filling. If your dumplings aren’t cooking through completely, ensure your filling is bubbling hot before adding them, and consider covering the dish for the first half of baking.

    Frequently Asked Questions

    Can I make this Dumpling Bake ahead of time?

    You can prepare the filling up to 2 days ahead and refrigerate it. When ready to serve, reheat the filling until bubbling, then make fresh dumplings and continue with the recipe. The dumplings are best made just before baking.

    What’s the secret to fluffy dumplings?

    The key is using cold ingredients, minimal mixing, and not peeking while they cook! Over-handling activates gluten and makes tough dumplings. Keep your touch light and let them steam undisturbed.

    Can I make a gluten-free Dumpling Bake?

    Absolutely! Substitute a good quality gluten-free flour blend with xanthan gum. Add 1/4 teaspoon baking powder extra to help them rise, as gluten-free flours need that additional lift.

    How do I know when my Dumpling Bake is done?

    Insert a toothpick into the center of a dumpling—it should come out clean with no wet batter. The top should be golden brown and the filling bubbling around the edges.

    Why did my dumplings sink to the bottom?

    This typically happens when the filling isn’t hot enough when adding the dumplings. Always ensure your base is bubbling hot, and your dumplings are the right consistency—not too wet or heavy.

    Final Thoughts

    This Dumpling Bake has become more than just a recipe in my household—it’s a tradition that signals comfort and togetherness. There’s something magical about watching those simple ingredients transform into something so satisfying. Whether you’re making it for a quiet family dinner or a gathering of friends, the joy it brings to the table is undeniable. I encourage you to make this Dumpling Bake your own by experimenting with flavors that speak to your palate. And don’t forget to share your creations on Pinterest to inspire others on their culinary journey!
  • Deviled Egg Dip Recipe: Creamy, Tangy & Irresistibly Addictive!

    Deviled Egg Dip Recipe: Creamy, Tangy & Irresistibly Addictive!

    Deviled Egg Dip Recipe: Creamy, Tangy & Irresistibly Addictive!

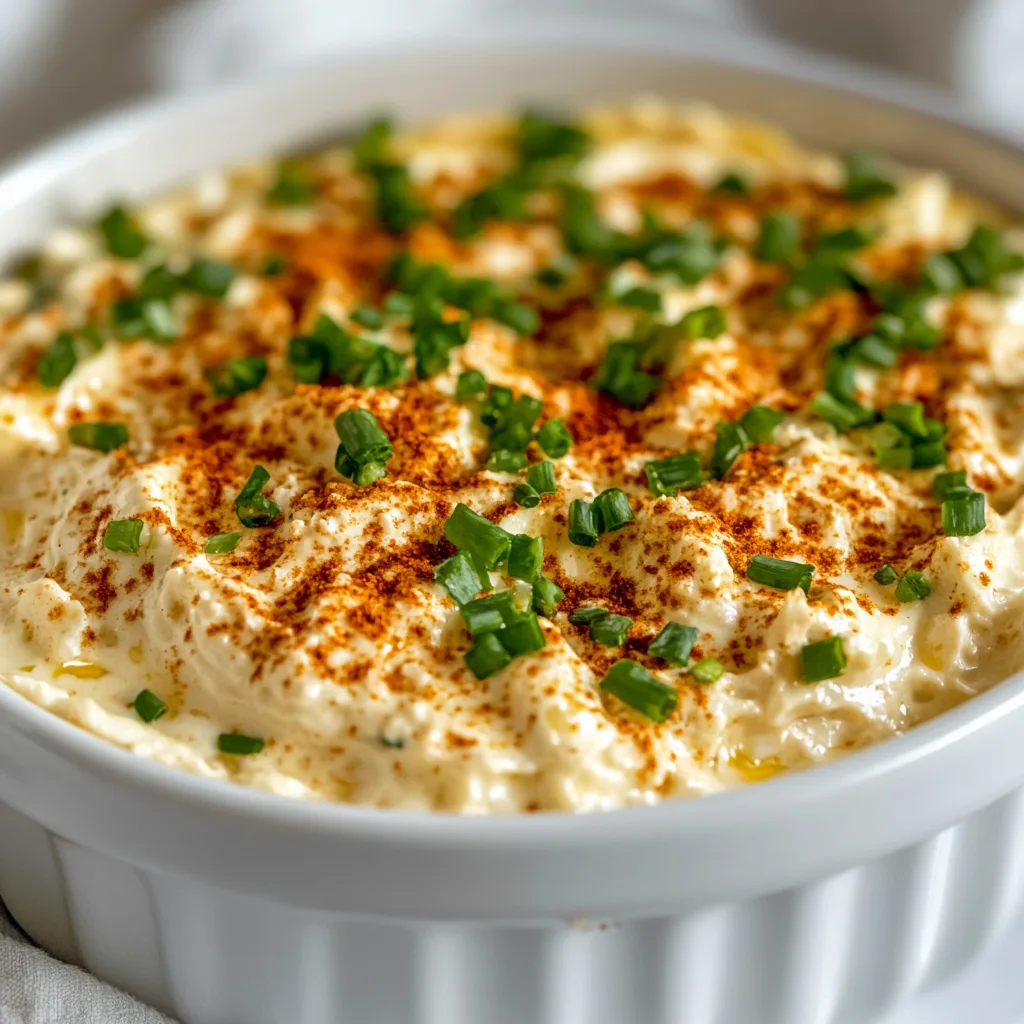
    Deviled Egg Dip transforms the classic appetizer into a crowd-pleasing, scoopable delight that’s perfect for gatherings! I first created this creamy, tangy dip when I needed a last-minute solution for unexpected guests. The familiar flavors of deviled eggs—tangy mustard, creamy mayo, and that signature sprinkle of paprika—come together in a bowl that’s so much easier to serve than traditional deviled eggs. Every time I set this dip out with crackers or veggies, it disappears within minutes! If you love the flavors of deviled eggs but want something simpler to prepare, this dip is about to become your new favorite party trick.

    Recipe

    Why You’ll Love This Deviled Egg Dip

    Perfect Party Pleaser

    There’s something undeniably nostalgic about the flavor of deviled eggs that makes everyone smile. This dip captures that magic without the fussy peeling and piping! I’ve brought this to countless potlucks and family gatherings, and it’s always met with wide eyes and happy murmurs. The smooth, creamy texture paired with that perfect balance of tang and richness makes it impossible to stop dipping. Plus, it comes together in about 10 minutes, which means you can focus on enjoying your guests instead of being stuck in the kitchen preparing individual egg halves!

    Versatile and Customizable

    What I adore about this Deviled Egg Dip is how easily it adapts to your taste preferences. Love a spicy kick? Add extra hot sauce or cayenne. Craving something smokier? Stir in crispy bacon bits or a dash of smoked paprika. I’ve even created a “loaded” version with cheddar cheese and green onions that my husband requests for every game day. The basic recipe provides a fantastic foundation, but you can truly make it your own. My sister-in-law adds pickle relish and calls it her “secret recipe”—though I know exactly where she got the idea!

    Essential Tips & Tricks

    Getting the Perfect Texture

    The secret to silky smoothness lies in how you prepare the eggs. I’ve found that cooking eggs just a minute longer than you normally would for deviled eggs helps create a more blendable consistency. After cooling, I remove the yolks completely and process them first before adding other ingredients. This prevents those pesky lumps that can make the dip less appealing. Room temperature cream cheese is non-negotiable—cold cream cheese will fight against blending smoothly. If you’re in a hurry, unwrap it and microwave for 10-15 seconds to soften without melting.

    Balancing the Flavors

    Finding the perfect flavor balance makes this dip irresistible. Start with less mayo and mustard than you think you need—you can always add more! I taste after each addition, which prevents over-seasoning. The tanginess from mustard should complement the richness of the eggs without overwhelming them. If your dip tastes flat, a tiny splash of vinegar or pickle juice works wonders to brighten everything up. For an extra dimension of flavor, try folding in some finely chopped fresh herbs like dill or chives right before serving.

    Serving Ideas & Creative Variations

    Beyond the Cracker

    While crackers are the classic pairing, this dip’s versatility extends far beyond! I love serving it with colorful vegetable crudités—cucumber rounds, bell pepper strips, and endive leaves make perfect scoops. For a fun brunch option, spread it on toasted bagels or English muffins. My personal favorite discovery happened by accident when I dolloped some onto a baked potato—absolutely divine! Create a beautiful grazing board with the dip as the centerpiece, surrounded by various dippers. The contrast between the creamy dip and crisp vegetables creates a delightful textural experience that keeps everyone coming back for more.

    Seasonal Adaptations

    I love adapting this recipe throughout the year to match the season. During summer gatherings, I fold in finely diced radishes and fresh herbs from my garden for brightness. For fall tailgates, I add a dash of buffalo sauce and blue cheese crumbles. Winter holiday parties call for a touch of truffle oil and chives for elegance. The base recipe remains the same, but these small tweaks make it feel fresh and exciting year-round. My friends have started asking, “What’s in the egg dip this time?” whenever I arrive with my signature serving bowl!

    Storage & Troubleshooting Guide

    Proper Storage Techniques

    The freshness factor is crucial with any egg-based recipe. This dip stays good in an airtight container in the refrigerator for up to 3 days, though it rarely lasts that long in my house! I’ve found that pressing plastic wrap directly onto the surface prevents that unappetizing skin from forming on top. If you’re preparing this for a party, you can make it a day ahead—the flavors actually develop beautifully overnight. Just give it about 15-20 minutes to come to cool room temperature before serving, as the texture becomes more scoopable and the flavors more pronounced when it’s not ice-cold.

    Fixing Common Issues

    If your dip ends up too thick or stiff, simply loosen it with a tablespoon of mayo or even a splash of olive oil. Conversely, if it’s too runny, refrigerating for 30 minutes often helps it firm up. Sometimes the dip can taste too bland—this usually means it needs more salt or acidity. I add salt gradually, tasting between additions, and often find that a squeeze of fresh lemon juice brightens everything perfectly. If you accidentally over-season, folding in additional cream cheese or a hard-boiled egg white (finely chopped) can help dilute the stronger flavors without increasing the volume too much.

    Frequently Asked Questions

    Can I make Deviled Egg Dip ahead of time?

    Yes! You can prepare this dip up to 24 hours in advance. Store it covered in the refrigerator and let it sit at room temperature for 15-20 minutes before serving for the best texture and flavor.

    What’s the best way to cook eggs for Deviled Egg Dip?

    Place eggs in cold water, bring to a boil, then cover and remove from heat. Let them sit for 12 minutes, then transfer to an ice bath. This method prevents the gray ring around the yolk and makes peeling easier.

    Can I freeze leftover Deviled Egg Dip?

    I don’t recommend freezing this dip as the texture becomes grainy when thawed. The mayonnaise tends to separate, and the eggs change consistency in a way that’s not appetizing.

    What can I substitute for mayonnaise in this recipe?

    Greek yogurt makes a great substitute for some or all of the mayonnaise. It provides tanginess and creaminess while reducing calories. You can also use sour cream or mashed avocado.

    How can I make my Deviled Egg Dip spicier?

    Add cayenne pepper, hot sauce, or finely minced jalapeños to give your dip a kick. Start with small amounts and adjust to your taste preference.

    Final Thoughts

    This Deviled Egg Dip has become my signature party contribution for good reason—it combines familiar flavors in an unexpected format that simply delights everyone who tries it. I love watching people’s faces light up when they taste it for the first time and immediately ask for the recipe. The beauty lies in its simplicity and adaptability. Whether you’re hosting an elegant brunch or a casual game day gathering, this dip fits right in. Don’t forget to check out more of my favorite dip recipes on Pinterest—and remember, sometimes the most memorable dishes are the ones that put a clever twist on the classics!

  • Broccoli with Garlic Butter & Cashews: Irresistibly Delicious!

    Broccoli with Garlic Butter & Cashews: Irresistibly Delicious!

    Broccoli with Garlic Butter & Cashews: Irresistibly Delicious!

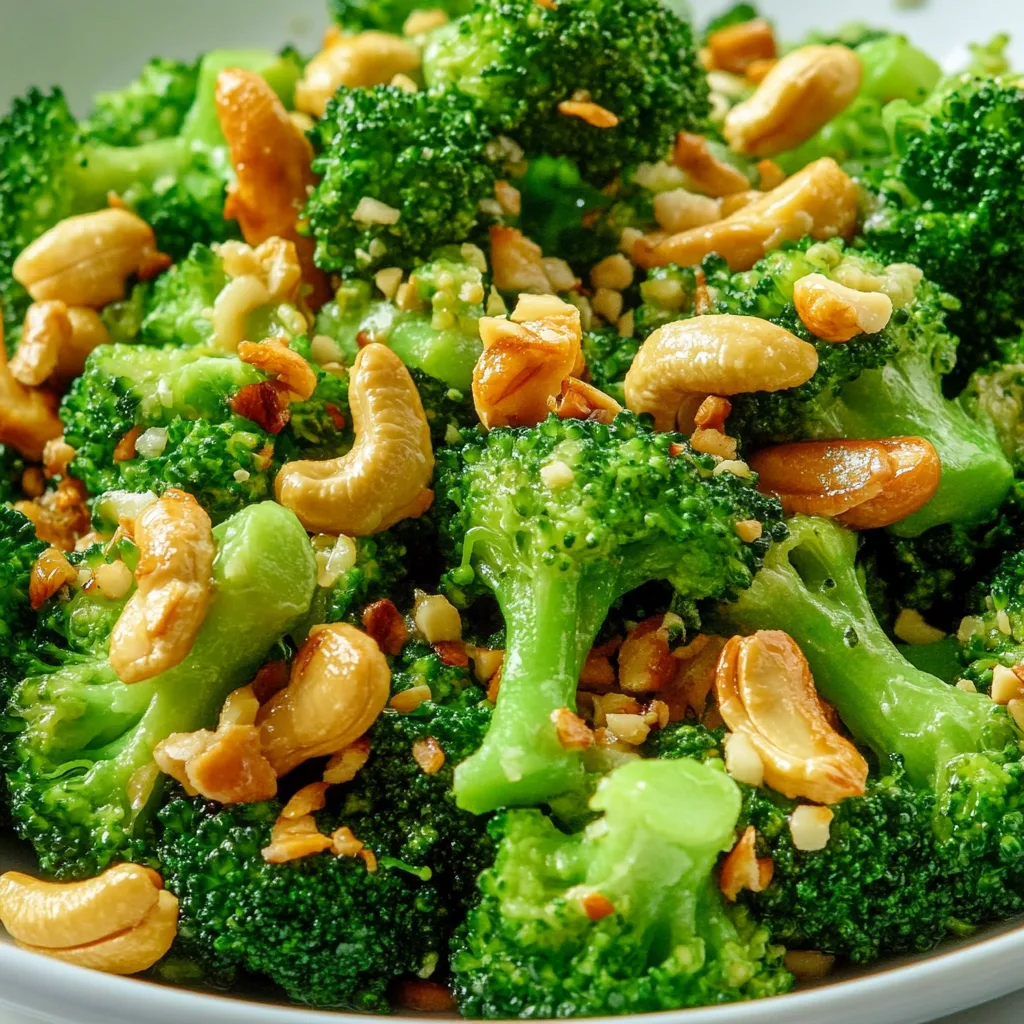
    Broccoli with Garlic Butter and Cashews has been my go-to side dish for years, especially when I need something quick yet impressive. The first time I made this, my kitchen filled with the intoxicating aroma of garlic sizzling in butter, and I knew I’d found a winner. There’s something magical about how the tender-crisp broccoli soaks up that rich garlic butter, while the toasted cashews add the perfect crunch. Whether you’re hosting a dinner party or just trying to get more greens on your family’s plates, this recipe strikes that perfect balance between indulgence and nutrition.

    Recipe

    Why You’ll Love This Broccoli with Garlic Butter and Cashews

    A Perfect Balance of Flavors and Textures

    The beauty of Broccoli with Garlic Butter and Cashews lies in its harmonious contrasts. The slight bitterness of fresh broccoli mellows beautifully against the rich, nutty butter. When that garlic hits the hot pan, it transforms into something sweet and aromatic that coats each floret perfectly. Then come the cashews—toasted just until golden—adding a buttery crunch that elevates the entire dish. I love how the simplicity of these ingredients creates something that feels both comforting and special, perfect alongside anything from a creamy tomato garlic pasta to a holiday roast.

    Quick, Nutritious, and Crowd-Pleasing

    Last Thanksgiving, I was scrambling to find a green vegetable that wouldn’t be ignored on the table. This Broccoli with Garlic Butter and Cashews disappeared before the mashed potatoes! It takes just 15 minutes from start to finish, making it perfect for busy weeknights or last-minute dinner additions. The broccoli provides fiber and vitamins, while the cashews add protein and healthy fats. Even my veggie-skeptical nephew asks for seconds, which feels like winning the lottery. The combination of speed, nutrition, and universal appeal makes this recipe one you’ll return to again and again.

    Essential Tips & Tricks

    Perfecting Your Broccoli Texture

    The secret to stellar Broccoli with Garlic Butter and Cashews is nailing that perfect tender-crisp texture. I learned this the hard way after serving my family soggy broccoli one too many times! Start by cutting your broccoli into even-sized florets so they cook uniformly. For blanching, have your ice bath ready before you start cooking. Three minutes in boiling water is usually perfect—the broccoli should brighten in color but still offer resistance when pierced. Immediately plunge into ice water to stop the cooking process. This technique preserves that vibrant green color and perfect bite that makes this dish so special.

    Elevating Your Garlic Butter Sauce

    The garlic butter sauce is the heart and soul of this dish, so it deserves special attention. Use unsalted butter so you can control the seasoning, and add it to a pan that’s warm but not scorching hot. I once burned the garlic in seconds when my pan was too hot—lesson learned! Slice your garlic rather than mince it for a mellower, more complex flavor that won’t overpower the broccoli. A splash of lemon juice added at the very end brightens everything and cuts through the richness. For an extra dimension, try adding a pinch of red pepper flakes or check out these garlic butter steak techniques for inspiration.

    Serving Ideas & Creative Variations

    Perfect Pairings for Every Occasion

    Broccoli with Garlic Butter and Cashews shines as a versatile side that complements almost any main dish. For weeknight dinners, I serve it alongside simple proteins like grilled chicken or baked salmon. The garlicky notes pair beautifully with pasta dishes or risotto, adding a fresh element to carb-heavy meals. During the holidays, it holds its own on a crowded table, offering a lighter alternative to traditional heavy sides. I recently served it at a dinner party with maple glazed sheet pan salmon, and guests raved about the combination. The vibrant green color also adds visual appeal to any plate, making it as beautiful as it is delicious.

    Exciting Twists on the Classic Recipe

    While the classic version is unbeatable, I love experimenting with this versatile dish. For an Asian-inspired variation, try adding a teaspoon of sesame oil and a sprinkle of toasted sesame seeds instead of cashews. When I’m feeling indulgent, I toss in some crispy bacon bits and a handful of freshly grated Parmesan cheese just before serving. For a vegan version, use olive oil or a plant-based butter and add nutritional yeast for a cheesy flavor. Almonds or pine nuts make excellent substitutes for cashews if that’s what you have on hand. During summer, I often add halved cherry tomatoes that burst slightly in the warm garlic butter, creating little pockets of sweet acidity.

    Storage & Troubleshooting Guide

    Keeping It Fresh and Reheating Successfully

    Properly stored Broccoli with Garlic Butter and Cashews can maintain its deliciousness for several days. Allow leftovers to cool completely before transferring to an airtight container and refrigerating for up to 3 days. The cashews may soften slightly, but the flavor remains wonderful. When reheating, avoid the microwave if possible—it can make the broccoli mushy and the cashews chewy. Instead, give it a quick toss in a hot skillet to revive the textures. If meal prepping, consider keeping the toasted cashews separate until serving time to maintain their crunch. I often make a double batch specifically for leftovers to toss with pasta or add to grain bowls throughout the week.

    Solving Common Cooking Challenges

    Even experienced cooks sometimes encounter issues with Broccoli with Garlic Butter and Cashews. If your broccoli turns out too soft, reduce the blanching time by 30 seconds next time, or skip blanching altogether and sauté from raw for a different texture. Bitter broccoli usually means it’s overcooked—those sulfur compounds become pronounced when broccoli is overdone. For burned garlic (we’ve all been there!), start over with fresh garlic and butter on lower heat. If your cashews taste raw or underdeveloped, toast them separately in a dry pan until golden before adding to the dish. Remember that salt enhances all the flavors, so if the dish tastes flat, try adding a pinch more sea salt at the end.

    Frequently Asked Questions

    Can I use frozen broccoli for this Broccoli with Garlic Butter and Cashews recipe?

    Yes! Thaw it first and pat dry with paper towels to remove excess moisture. Skip the blanching step and add directly to the garlic butter mixture, cooking until just heated through.

    How do I know when my cashews are properly toasted?

    Look for a golden-brown color and a fragrant, nutty aroma. This typically takes 3-5 minutes in a dry pan over medium heat, stirring frequently to prevent burning.

    Can I make this dish ahead of time?

    Prepare the components separately—blanch the broccoli, toast the cashews, and make the garlic butter. Store refrigerated and combine just before serving, quickly reheating in a hot skillet.

    What’s the best way to cut broccoli for this recipe?

    Cut the head into even-sized florets with some stem attached (about 1½-2 inches long). This ensures uniform cooking and creates perfect bite-sized pieces that catch the garlic butter.

    Is this recipe suitable for special diets?

    With minor adjustments, yes! It’s naturally gluten-free, can be made vegan with plant-based butter, and fits keto and low-carb diets. Just adjust portions to match your specific dietary needs.

    Final Thoughts

    There’s something deeply satisfying about transforming simple ingredients into something spectacular, and this Broccoli with Garlic Butter and Cashews does exactly that. I find myself returning to this recipe season after season, whether I’m cooking for myself on a quiet evening or serving a tableful of guests. The combination of tender broccoli, aromatic garlic butter, and crunchy cashews creates a side dish that often becomes the star of the meal. I hope this becomes a staple in your kitchen too—one of those reliable recipes that never disappoints and always brings a little joy to your table. Find more inspiration for this and other delicious recipes on Pinterest.

  • Pizza Rolls with Mozzarella & Garlic Butter: Irresistibly Cheesy!

    Pizza Rolls with Mozzarella & Garlic Butter: Irresistibly Cheesy!

    Pizza Rolls with Mozzarella & Garlic Butter: Irresistibly Cheesy!

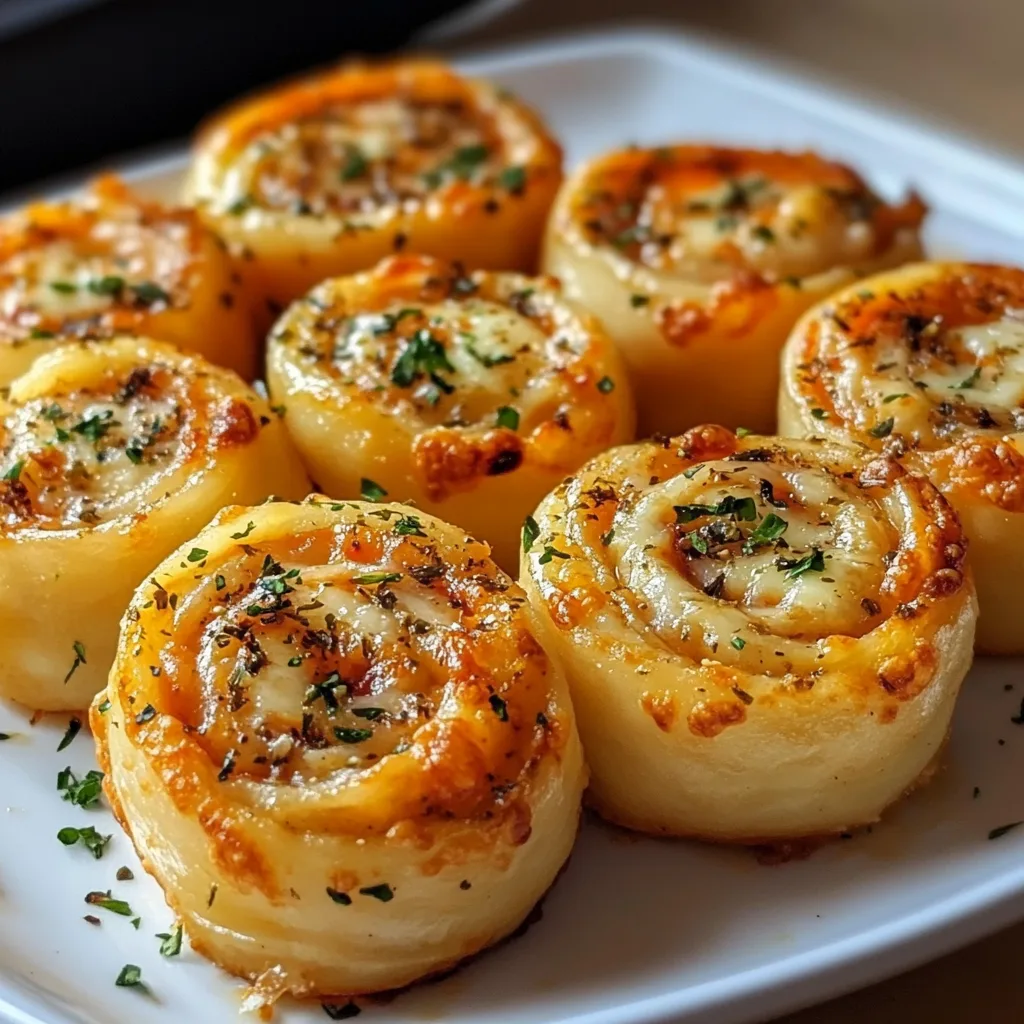
    Pizza Rolls with Mozzarella and Garlic Butter have become my weekend obsession lately. There’s something magical about that first bite—the way the garlic butter melts into the warm dough, creating little pools of flavor that mingle with stretchy mozzarella. I discovered this recipe during a rainy Sunday when my daughter begged for “something cheesy and garlicky,” and we’ve been making them ever since. These rolls strike that perfect balance between impressive and approachable, making them ideal for everything from casual family movie nights to elegant appetizers. If you love the comforting flavors in my Creamy Tomato Garlic Pasta, you’ll adore these rolls!

    Recipe

    Why You’ll Love These Pizza Rolls with Mozzarella and Garlic Butter

    Perfect Texture Combination

    These Pizza Rolls with Mozzarella and Garlic Butter deliver the most satisfying textural contrast you can imagine. The outside develops this gorgeous golden crust that’s just slightly crisp, while the interior stays pillowy and tender. I still remember the first batch I made—my kitchen filled with that incredible aroma of garlic and butter, and my husband wandered in from the garage asking “What smells so amazing?” The mozzarella creates these irresistible cheese pulls that stretch dramatically when you break the rolls apart. It’s comfort food that manages to feel special, like something you’d pay good money for at a restaurant.

    Quick & Customizable Recipe

    What makes these Pizza Rolls with Mozzarella and Garlic Butter truly special is how adaptable they are to whatever ingredients you have on hand. Running short on time? Use store-bought pizza dough instead of making your own. Want to switch up the flavors? Add some sun-dried tomatoes, fresh basil, or even a sprinkle of red pepper flakes for heat. I’ve made these when friends dropped by unexpectedly, and they were genuinely impressed at how “fancy” they seemed despite taking just minutes to assemble. The best part is watching everyone’s faces light up when they take their first bite—that moment of pure food joy is absolutely priceless!

    Essential Tips & Tricks

    Perfecting Your Dough

    The foundation of amazing Pizza Rolls with Mozzarella and Garlic Butter starts with properly handled dough. Always let refrigerated dough come to room temperature before working with it—cold dough fights back and won’t roll properly. I learned this the hard way during a dinner party when I rushed and ended up with tough, uneven rolls! When rolling out your dough, aim for about ¼-inch thickness for the perfect balance of chewiness and crispness. If you’re making homemade dough, don’t skip the resting period; it develops gluten and makes the dough more elastic.

    For extra flavor, try adding a teaspoon of Italian herbs directly into your dough, similar to my Cheesy Baked Mostaccioli Pasta that uses herbs to enhance every bite.

    Garlic Butter Secrets

    The garlic butter is truly the soul of these pizza rolls, so don’t rush this component! For maximum flavor infusion, melt your butter slowly over low heat and add minced garlic, allowing it to gently sizzle without browning. This slow approach releases the garlic’s aromatic oils without any bitterness. I always add a pinch of salt to the butter mixture—it acts as a flavor amplifier that makes the garlic taste even more intense. For an extra dimension, stir in a tablespoon of finely chopped fresh herbs like parsley or basil right at the end. Let the mixture cool slightly before brushing it onto your dough to prevent the butter from soaking in too quickly.

    Serving Ideas & Creative Variations

    Perfect Pairings

    These Pizza Rolls with Mozzarella and Garlic Butter shine brightest when served with the right accompaniments. My family goes crazy for them alongside a warm marinara dipping sauce—something about that tangy tomato flavor cuts through the richness perfectly. For dinner parties, I arrange them on a wooden board with small bowls of pesto, ranch, and honey for an interactive appetizer that never fails to impress. They also make a fantastic side to a hearty soup or salad when you want something more substantial than plain bread. Last weekend, I served them with my Cajun Potato Soup, and the combination was absolutely divine—the spicy soup with the cheesy rolls created the perfect balance.

    Flavor Twists to Try

    Don’t be afraid to experiment with different flavor profiles when making these rolls! One of my favorite variations uses caramelized onions and gruyere instead of mozzarella for a French onion soup-inspired twist. For a Mediterranean version, try adding chopped olives, feta, and a sprinkle of oregano to the filling. My kids love when I make a breakfast version with cheddar and cooked breakfast sausage crumbles—perfect for holiday mornings! You can also play with the butter itself, infusing it with different ingredients like roasted garlic, truffle oil, or even a touch of honey for a sweet-savory combination. The possibilities are truly endless.

    Storage & Troubleshooting Guide

    Keeping Them Fresh

    Proper storage is key to maintaining the delicious texture of your Pizza Rolls with Mozzarella and Garlic Butter. For maximum freshness, allow any leftover rolls to cool completely before storing them in an airtight container. They’ll keep at room temperature for up to 24 hours, but I prefer refrigerating them for longer storage (up to 3 days). When you’re ready to enjoy them again, avoid the microwave which makes them soggy. Instead, reheat them in a 350°F oven for 5-7 minutes until warmed through. The oven revives that wonderful contrast between the crisp exterior and soft interior.

    For meal prep, you can even freeze the unbaked rolls and bake them straight from frozen—just add a few extra minutes to the baking time.

    Common Problems Solved

    Even experienced bakers encounter issues with Pizza Rolls with Mozzarella and Garlic Butter, but there are easy fixes for common problems. If your rolls are leaking cheese during baking, you likely overfilled them or didn’t seal the edges properly. Try using less filling and pinching the seams firmly before baking. Pale, undercooked rolls usually mean your oven temperature is too low—invest in an oven thermometer for accuracy.

    If the bottoms are burning while the tops remain pale, move your baking sheet to a higher rack position. And for rolls that seem dense rather than fluffy, you may have overworked your dough. Remember to handle it gently and let it rest if it becomes too elastic and difficult to roll.

    Frequently Asked Questions

    Can I make Pizza Rolls with Mozzarella and Garlic Butter ahead of time?

    Absolutely! Prepare them up to the point of baking, then refrigerate for up to 24 hours. Allow them to sit at room temperature for 20 minutes before baking for the best texture and even cooking.

    What’s the best cheese to use if I don’t have mozzarella?

    Provolone makes an excellent substitute with similar melting properties. Fontina or a young Gouda also work well. For a sharper flavor, try using half mozzarella and half sharp cheddar.

    Can I make these rolls without garlic?

    Yes! Replace the garlic with herbs like rosemary or thyme for a different flavor profile. You could also use roasted garlic for a milder, sweeter taste that’s less pungent.

    Are these suitable for freezing?

    Definitely! Freeze unbaked rolls on a baking sheet until solid, then transfer to a freezer bag. Bake directly from frozen, adding 5-7 minutes to the baking time. They’ll stay fresh for up to 3 months.

    How do I prevent my dough from becoming tough?

    Handle your dough gently and don’t overwork it. Let it rest if it becomes difficult to roll. Using room temperature dough and not adding too much flour when rolling will help maintain tenderness.

    Final Thoughts

    These Pizza Rolls with Mozzarella and Garlic Butter have become a staple in my recipe collection for good reason—they’re versatile, crowd-pleasing, and deliver maximum flavor with minimal effort. There’s something so satisfying about creating something with your hands that brings people together around the table. Whether you’re serving them as an appetizer, side dish, or main course, these rolls have that special quality that makes everyone reach for just one more. I’d love to see your creations if you try them—tag me on Pinterest with your variations! Remember, cooking is about making memories as much as it is about making meals.

  • Garlic Chicken Wraps: Irresistibly Delicious & Easy to Make!

    Garlic Chicken Wraps: Irresistibly Delicious & Easy to Make!

    Garlic Chicken Wraps: Irresistibly Delicious & Easy to Make!

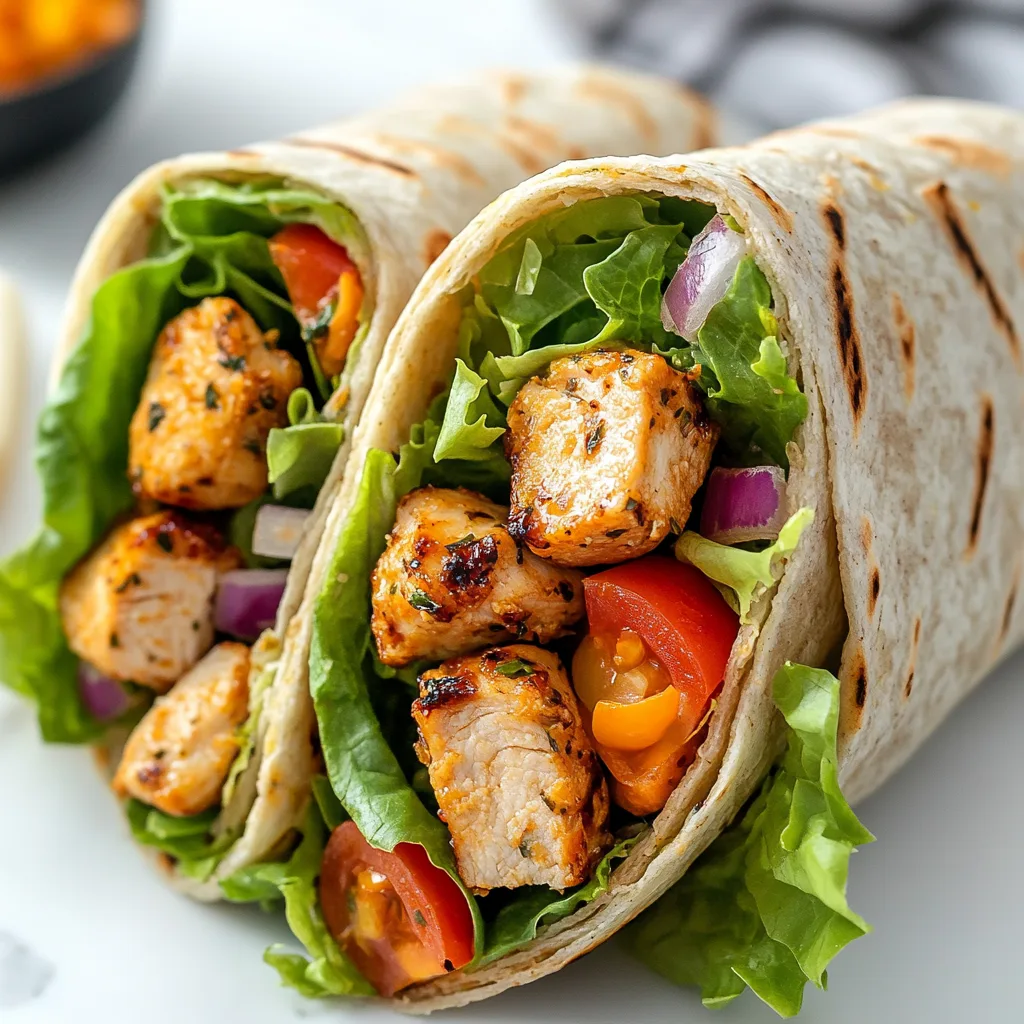
    There’s something magical about Garlic Chicken Wraps that makes them my go-to dinner when life gets hectic. The fragrant aroma of garlic-infused chicken sizzling in the pan instantly transforms my kitchen into a cozy haven. I discovered this recipe during my first apartment days when cooking space was limited but my appetite for flavor wasn’t. These wraps strike that perfect balance between convenience and satisfaction – tender chicken with that irresistible garlic punch, wrapped in a warm tortilla with crisp veggies and a creamy sauce that ties everything together. Let me share this simple yet spectacular meal that’s become a staple in my home kitchen.

    Recipe

    Why You’ll Love These Garlic Chicken Wraps

    Perfect Balance of Flavor and Convenience

    These Garlic Chicken Wraps deliver restaurant-quality taste with minimal effort. The marinade infuses the chicken with deep garlic flavor that’s punchy without overwhelming your palate. I love how the marinade works its magic in just 30 minutes, though I often prepare it in the morning so the chicken soaks up even more flavor throughout the day. The beauty lies in the simplicity – basic ingredients transform into something extraordinary when combined. Plus, the entire meal comes together in under 30 minutes, making it perfect for those evenings when you want something delicious without spending hours in the kitchen.

    Customizable for Every Palate

    What makes these wraps truly special is how easily they adapt to different preferences. My husband loves extra garlic and a spicy kick, while I prefer mine loaded with fresh herbs and avocado. The basic recipe serves as a perfect foundation that welcomes creativity. Swap chicken thighs for breasts, add roasted red peppers for sweetness, or include hummus for a Mediterranean twist. They’re also wonderfully accommodating for dietary needs – use gluten-free wraps or lettuce cups instead of tortillas, or substitute the chicken with chickpeas for a vegetarian version that still delivers that garlicky goodness.

    Essential Tips & Tricks

    Mastering the Marinade

    The secret to exceptional Garlic Chicken Wraps lies in the marinade. I recommend using fresh garlic cloves rather than pre-minced for the most vibrant flavor. Crush them with a little salt to create a paste that distributes more evenly throughout the marinade. Don’t skimp on the olive oil – it helps carry the flavors and keeps the chicken moist. For maximum flavor infusion, score your chicken pieces lightly with a knife before marinating. If you’re short on time, a quick 15-minute marinade at room temperature works better than 30 minutes in the refrigerator, as the cold slows down the flavor absorption process.

    Perfect Cooking Technique

    The cooking method makes all the difference in these wraps. For the juiciest results, cook your marinated chicken over medium-high heat to get a beautiful sear without drying it out. Don’t overcrowd the pan – work in batches if needed to ensure each piece gets properly browned. Let the chicken rest for 5 minutes before slicing to keep all those flavorful juices locked inside. For the tortillas, I’ve found that warming them in a dry skillet for 10-15 seconds per side makes them pliable without becoming brittle. This small step prevents tearing when you’re assembling and creates that lovely contrast between the warm wrap and cool toppings.

    Serving Ideas & Creative Variations

    Perfect Pairings for a Complete Meal

    Transform your Garlic Chicken Wraps into a feast by adding thoughtfully chosen sides. I love serving them with a simple Greek salad – the tangy feta and olives complement the garlic perfectly. For something heartier, try Cajun Potato Soup for a warming side that adds a different flavor dimension. Sweet potato fries with a sprinkle of cinnamon make a surprisingly delicious accompaniment, creating a sweet-savory contrast. For a lighter option, cucumber sticks with tzatziki provide a cooling element that balances the garlic’s intensity. When entertaining, I arrange a DIY wrap station with various toppings so everyone can customize their perfect combination.

    Global Flavor Inspirations

    Take your wraps on a world tour by incorporating international flavors. For Mediterranean-inspired wraps, add feta, olives, and a drizzle of tahini sauce. Asian-fusion wraps come alive with a splash of soy sauce in the marinade, sliced water chestnuts, and a sriracha mayo. My personal favorite is a Mexican twist with avocado, black beans, and lime-cilantro sour cream. For an Indian variation, incorporate some garam masala into your marinade and serve with a side of mango chutney. These global adaptations keep the basic recipe exciting week after week, ensuring your garlic chicken wraps never become boring even in regular rotation.

    Storage & Troubleshooting Guide

    Make-Ahead and Meal Prep Strategies

    Garlic Chicken Wraps are perfect for meal planning. Marinate the chicken up to 24 hours in advance for deeper flavor – just store it in an airtight container in the refrigerator. You can also cook the chicken ahead of time and refrigerate for up to three days. When preparing for meal prep, keep the components separate – store the cooked chicken, prepared veggies, and sauces in individual containers. This prevents soggy wraps and allows for quick assembly throughout the week. For an ultra-convenient option, assemble entire wraps (minus wet ingredients like tomatoes) and wrap tightly in parchment paper before placing in a ziplock bag.

    Solving Common Wrap Challenges

    Even the most experienced home cooks encounter wrap issues occasionally. If your tortillas are cracking, they’re likely too cold or dry – warm them slightly and cover with a damp paper towel before using. For wraps that won’t stay closed, try spreading a thin layer of hummus or cream cheese along the edge as “glue.” If your chicken turned out dry, remedy it by tossing the sliced meat with a tablespoon of chicken broth and a drizzle of olive oil before assembling. Too much garlic bite? Balance it with something sweet like honey in your sauce or caramelized onions in your filling.

    Frequently Asked Questions

    Can I make Garlic Chicken Wraps ahead of time?

    Yes! Prepare components separately and store refrigerated for up to 3 days. Keep wet ingredients separate and assemble just before eating for best texture. For grab-and-go options, wrap in parchment paper and refrigerate overnight.

    How can I make these wraps healthier?

    Use whole grain tortillas, increase the vegetable ratio, and opt for Greek yogurt instead of mayo in your sauce. You can also use less oil in the marinade by substituting some with lemon juice.

    What’s the best way to warm leftover chicken for these wraps?

    Microwave with a damp paper towel covering the chicken for 30-45 seconds, or warm in a skillet with a tablespoon of water to restore moisture without overcooking.

    Can I freeze Garlic Chicken Wraps?

    Freeze the cooked chicken and tortillas separately. Avoid freezing assembled wraps as vegetables and sauces will become watery when thawed, resulting in soggy wraps.

    What’s the secret to perfectly balanced garlic flavor in chicken wraps?

    Balance is key! Use half fresh garlic and half roasted garlic in your marinade. The fresh provides punch while roasted adds sweetness without overwhelming. Let marinate at least 30 minutes.

    Final Thoughts

    These Garlic Chicken Wraps have become my kitchen savior on countless occasions, proving that spectacular flavor doesn’t require complicated techniques or exotic ingredients. The beauty lies in their adaptability – dress them up for dinner guests or simplify for quick lunches. I find myself returning to this recipe whenever I need a reliable meal that delivers on taste without demanding too much time. Whether you follow my recipe exactly or use it as inspiration for your own creation, I hope these wraps bring the same joy to your table that they’ve brought to mine. Don’t forget to check out more wrap inspiration on Pinterest!

  • Hissy Fit Dip: Irresistibly Creamy Snack That Sparks Joy Instantly!

    Hissy Fit Dip: Irresistibly Creamy Snack That Sparks Joy Instantly!

    Hissy Fit Dip: Irresistibly Creamy Snack That Sparks Joy Instantly!

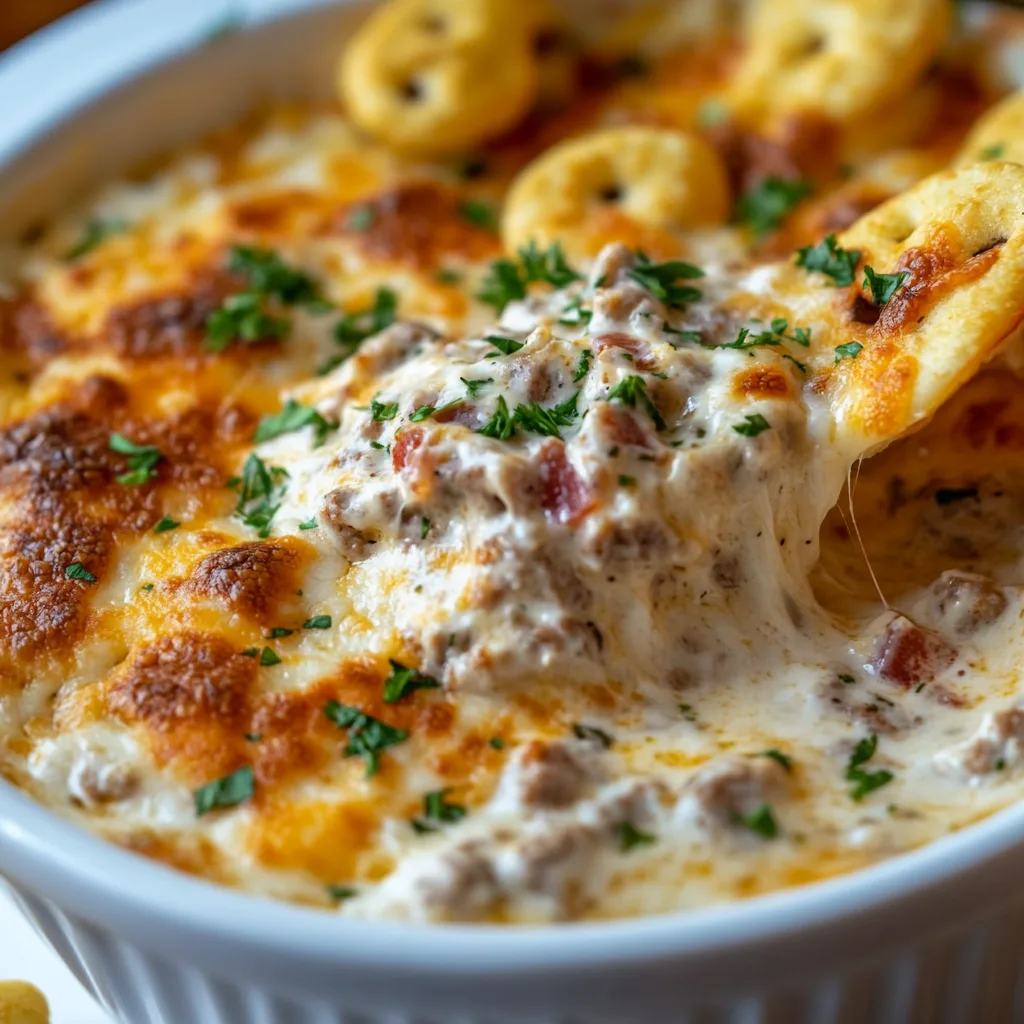
    Hissy Fit Dip is the ultimate crowd-pleaser that never fails to spark joy at gatherings. The first time I brought this creamy, cheesy concoction to my sister’s holiday party, people literally hovered around it all night! There’s something magical about the combination of sausage, cream cheese, and sour cream that creates this irresistible dip that causes people to throw a little “hissy fit” when it’s gone. Whether you’re hosting game day or need a guaranteed hit for your next potluck, this dip delivers that perfect balance of savory richness and addictive texture that keeps everyone coming back for more. Check out my Cajun Potato Soup for another crowd favorite!

    Recipe

    Why You’ll Love This Hissy Fit Dip

    Perfect Party Pleaser

    This Hissy Fit Dip has earned its dramatic name for good reason – it causes quite the stir when the bowl empties! The creamy base combines velvety cream cheese, tangy sour cream, and sharp cheddar that melts into pure decadence. What makes this dip truly special is how the Italian sausage adds a savory punch while the green onions provide a fresh contrast. I’ve watched guests literally scrape the bottom of the dish with their chips! The best part? It’s incredibly simple to make despite tasting like you spent hours in the kitchen. That’s my kind of entertaining recipe.

    Make-Ahead Magic

    One of my favorite things about Hissy Fit Dip is its time-saving potential. You can prepare it entirely the day before, refrigerate overnight, and simply pop it in the oven before guests arrive. The flavors actually develop and deepen as it sits, making it even more delicious the next day. I’ve found this particularly helpful when hosting holiday gatherings – one less thing to prepare while you’re juggling multiple dishes. The dip reheats beautifully without separating, maintaining that perfect creamy consistency that makes it so craveable. Your future self will thank you!

    Essential Tips & Tricks

    Perfect Texture Secrets

    The key to achieving that perfectly creamy consistency in your Hissy Fit Dip lies in a few simple techniques. First, make sure your cream cheese is fully softened before mixing – I leave mine out for at least an hour. When cooking the sausage, break it into small, even crumbles for better distribution throughout the dip. Another game-changer? Grating your own cheese rather than using pre-shredded, which contains anti-caking agents that can affect melting. For extra flavor depth, try adding a splash of Worcestershire sauce – it’s my secret ingredient that adds that “what is that amazing flavor?” element that keeps everyone guessing.

    Temperature Matters

    The temperature journey of your Hissy Fit Dip is crucial for achieving that perfect, dippable texture similar to my Spinach Artichoke Dip. Start by ensuring all refrigerated ingredients reach room temperature before mixing – this prevents those dreaded cold lumps in your dip. When baking, patience is key! The slow melt in a 350°F oven allows the flavors to meld without separating the dairy components. I’ve learned the hard way that rushing this process can result in an oily separation. For serving, a small slow cooker on the warm setting works wonders for keeping your dip at that perfect consistency throughout your gathering.

    Serving Ideas & Creative Variations

    Best Dippers & Pairings

    Hissy Fit Dip deserves the perfect vessel to transport it from bowl to mouth! While sturdy tortilla chips are the classic choice, don’t stop there. Try serving with pretzel crisps, bagel chips, or even fresh vegetable crudités for a textural contrast. For an elevated appetizer spread, I love placing this dip alongside my Crab Crunchies for a hot-and-cold combo that guests adore. The rich, savory flavors in the dip also pair beautifully with a crisp white wine or a light beer. For special occasions, serve in a hollowed-out bread bowl – not only does it look impressive, but the bread becomes an edible dipper!

    Flavor Twists & Add-Ins

    The beauty of Hissy Fit Dip lies in its adaptability to different flavor profiles. My favorite seasonal variation incorporates roasted green chiles and pepper jack cheese for a southwestern kick. For a Mediterranean twist, try adding chopped artichoke hearts, sun-dried tomatoes, and a sprinkle of oregano. Bacon lovers can add crumbled, crispy bacon on top for an extra layer of smoky goodness. Vegetarians needn’t miss out – simply substitute the sausage with a plant-based alternative or sautéed mushrooms for an earthy depth. The possibilities are endless, allowing you to customize this dip for any occasion.

    Storage & Troubleshooting Guide

    Proper Storage Methods

    Storing your Hissy Fit Dip properly ensures you can enjoy every last bite. For leftovers (though I rarely have any!), transfer to an airtight container and refrigerate for up to 4 days. The dip will solidify when cold, so plan to reheat it gently – either in the microwave at 50% power in 30-second intervals, stirring between each, or in the oven at 300°F until just warmed through. If you want to prepare further in advance, the unbaked dip freezes beautifully for up to 3 months. Simply thaw overnight in the refrigerator before baking as directed. I often make a double batch specifically to freeze half for unexpected guests.

    Fixing Common Issues

    Even experienced cooks occasionally encounter issues with Hissy Fit Dip, but they’re easily fixed! If your dip seems too thick after mixing, simply add a tablespoon or two of milk to reach your desired consistency. For a dip that’s separated or appears oily on top, lower your oven temperature and stir well – this usually happens when heat is too high. If your dip lacks flavor, don’t be afraid to amp it up with extra seasonings – a pinch of cayenne or smoked paprika works wonders. And for a dip that’s too runny, adding a handful of extra shredded cheese or letting it bake uncovered for a few extra minutes will help it set beautifully.

    Frequently Asked Questions

    What exactly is Hissy Fit Dip and why is it called that?

    Hissy Fit Dip is a creamy, cheesy sausage dip that gets its name because people supposedly throw a “hissy fit” when it’s gone! The irresistible combination of cream cheese, sour cream, and savory sausage makes it disappear quickly at parties.

    Can I make Hissy Fit Dip vegetarian?

    Absolutely! Substitute the sausage with a plant-based alternative, sautéed mushrooms, or even roasted vegetables like eggplant. The creamy base works beautifully with many vegetarian protein options.

    How far in advance can I prepare this dip?

    You can prepare Hissy Fit Dip up to 2 days in advance and store it unbaked in the refrigerator. The flavors actually improve as it sits, making it perfect for planning ahead.

    Can I make this dip in a slow cooker instead of baking it?

    Yes! Cook the sausage first, then combine all ingredients in your slow cooker on low for 2-3 hours, stirring occasionally until everything is melted and well combined.

    Is Hissy Fit Dip gluten-free?

    The base recipe can be gluten-free if you use certified gluten-free sausage and seasonings. Always check individual ingredient labels, especially seasoning packets, which sometimes contain hidden gluten.

    Final Thoughts

    Hissy Fit Dip has earned its place in my permanent recipe collection for good reason – it never disappoints and always sparks joy around the table. There’s something special about watching friends and family gather around a bubbling dish of this creamy, savory goodness that makes all the cooking worthwhile. The versatility of this dip means it can adapt to any season or occasion, making it truly timeless. Whether it’s your first time making it or your fiftieth, I hope this Hissy Fit Dip brings as much happiness to your gatherings as it has to mine. Don’t forget to check out more delicious recipes on Pinterest!

  • Beef Jerky Bliss: Irresistible Snack That Boosts Your Energy Fast!

    Beef Jerky Bliss: Irresistible Snack That Boosts Your Energy Fast!

    Beef Jerky Bliss: Irresistible Snack That Boosts Your Energy Fast!

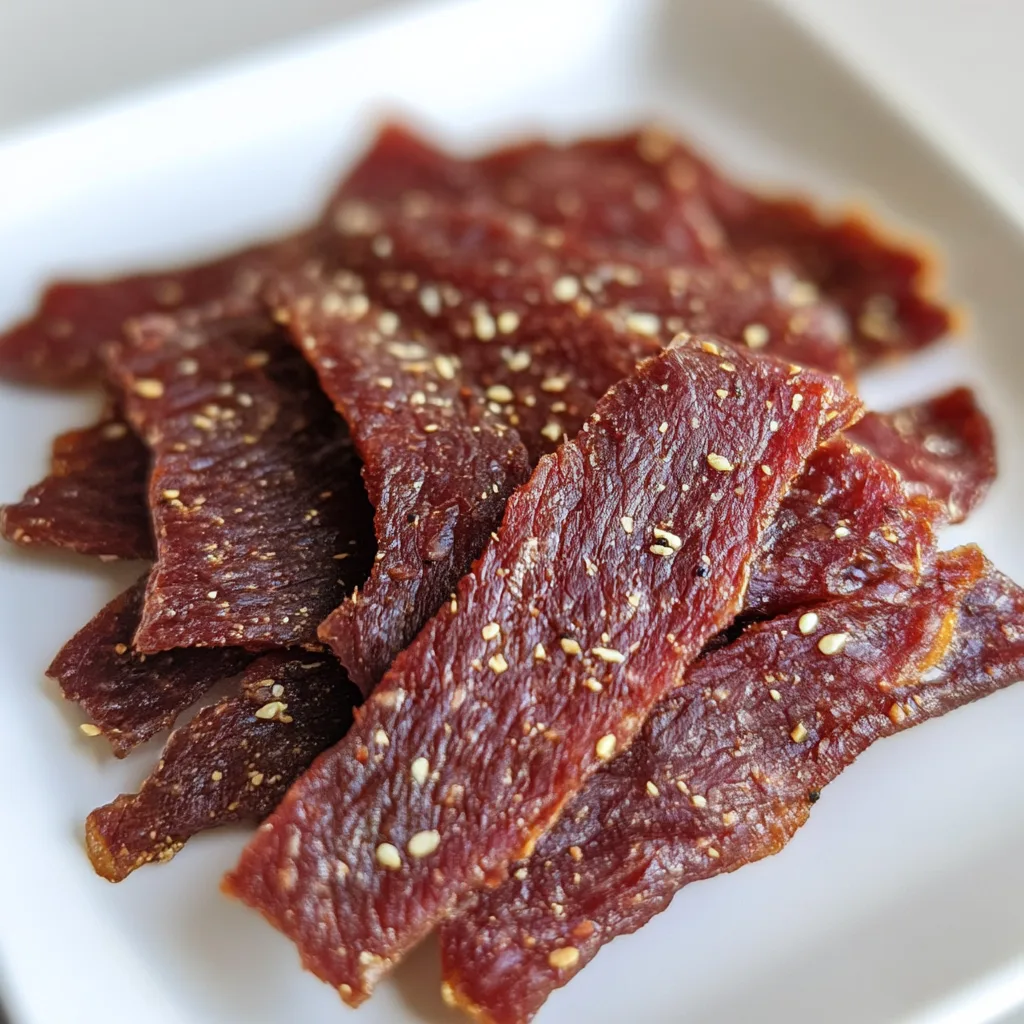
    Beef jerky has been my go-to snack for years, offering that perfect combination of protein-packed satisfaction and bold flavor that keeps me coming back for more. There’s something almost magical about transforming fresh meat into chewy, savory strips that last for weeks. I still remember making my first batch in college—the intoxicating aroma of spices filling my tiny apartment as strips of marinated beef slowly dried. Whether you’re a seasoned jerky enthusiast or a curious first-timer, this homemade beef jerky recipe will revolutionize your snack game with flavors that put store-bought varieties to shame. Let’s dive into creating the ultimate beef jerky.

    Recipe

    Why You’ll Love This Beef Jerky

    Perfect Protein-Packed Snack

    Homemade beef jerky delivers an incredible protein punch without the preservatives found in commercial versions. Each chewy bite provides sustained energy that keeps hunger at bay during long hikes, road trips, or those marathon work sessions. I’ve found it particularly lifesaving during busy weekdays when a proper lunch seems impossible. The beauty of making your own is controlling exactly what goes into it—pure beef with spices you select, making it ideal for anyone following keto, paleo, or low-carb eating plans. Plus, the satisfaction of crafting something this delicious with your own hands? Absolutely priceless.

    Customizable Flavor Profiles

    The flavor possibilities for beef jerky are virtually endless. From classic black pepper and smoky mesquite to exotic teriyaki or fiery sriracha, you can tailor each batch to your exact taste preferences. My personal favorite combines soy sauce, Worcestershire, maple syrup, and a generous dash of smoked paprika for a sweet-savory balance that’s utterly addictive. Experimenting with different marinades becomes an adventure in itself—I’ve surprised myself with unexpected combinations like coffee-infused or bourbon-glazed variations that have become family favorites. The joy of beef jerky making is that each batch can be a completely new experience.

    Essential Tips & Tricks

    Selecting and Preparing the Meat

    Starting with the right cut makes all the difference in crafting exceptional beef jerky. Lean cuts like eye of round, top round, or flank steak work best because excess fat can cause spoilage. When shopping, I always ask my butcher to slice the meat against the grain into 1/8-inch strips—this creates that perfect chewy texture rather than tough, stringy pieces. If cutting yourself, partially freezing the meat for about 2 hours makes slicing dramatically easier. Before marinating, trim away any visible fat and silver skin. This preparation might seem fussy, but trust me, it’s the foundation of jerky that melts in your mouth rather than giving your jaw a workout.

    Mastering the Drying Process

    The secret to perfect beef jerky lies in low, slow drying that removes moisture without cooking the meat. Whether using a dehydrator (my preferred method) or your oven set to its lowest temperature, patience is key. For oven drying, prop the door slightly open with a wooden spoon to allow moisture to escape. I learned the hard way that rushing this process results in either dangerously undercooked jerky or brittle, over-dried pieces. The sweet spot is 4-6 hours at 160°F, checking occasionally until pieces bend without breaking. For food safety, I always start with a quick 10-minute pre-heat at 275°F to kill any potential bacteria before lowering to drying temperature, a tip I picked up from making other dried snacks.

    Serving Ideas & Creative Variations

    Beyond Basic Snacking

    While beef jerky shines as a standalone snack, thinking outside the bag opens up delicious possibilities. I love chopping it into small pieces to add smoky depth to scrambled eggs or sprinkle over salads for a protein boost. It makes an unexpected star ingredient on charcuterie boards, especially paired with sharp cheeses that complement its savory intensity. For hiking trips, I create custom trail mix combining beef jerky with nuts, dried fruit, and dark chocolate chunks—energizing and utterly satisfying. During movie nights, we set out a jerky board with different flavors and dipping sauces like honey mustard or spicy mayo for an elevated snacking experience that beats popcorn any day.

    Global Flavor Inspirations

    Drawing inspiration from world cuisines elevates homemade beef jerky to gourmet status. Korean-inspired jerky with gochujang, sesame oil, and a touch of brown sugar creates a sweet-spicy profile that’s impossible to resist. For Mediterranean flair, try oregano, lemon zest, and olive oil—surprisingly delicious! I became obsessed with Chinese five-spice jerky after sampling something similar at a farmer’s market; the warm, complex notes of star anise and cinnamon transform the beef completely. For something truly special, try incorporating influences from hearty stews with herbs like rosemary and thyme in your marinade. Each cultural twist creates a unique tasting experience that expands your jerky repertoire.

    Storage & Troubleshooting Guide

    Maximizing Freshness and Shelf Life

    Proper storage is crucial for maintaining your beef jerky’s quality and extending its shelf life. Once completely cooled, store in airtight containers away from direct light and heat. Glass jars with tight seals work beautifully, though vacuum-sealed bags offer the longest preservation. If you notice any moisture inside the container within the first day, the jerky needs additional drying time—return it to the dehydrator immediately. For everyday snacking, keep a week’s worth at room temperature and freeze the rest for up to six months. I’ve found adding oxygen absorber packets (available online) to storage containers dramatically increases freshness duration, keeping that just-made texture and flavor intact.

    Solving Common Jerky Problems

    Even experienced jerky makers encounter occasional challenges. If your beef jerky turns out too tough, it likely dried too long or at too high a temperature. Next time, reduce drying time by 30 minutes or lower temperature slightly. Overly salty jerky usually results from marinating too long—eight hours is typically sufficient for thin strips. For jerky that’s too moist or pliable, simply return it to the dehydrator for additional time. White spots that appear during storage are usually salt or sugar crystals from the marinade, not mold (which would be fuzzy and green/blue). When in doubt about safety, remember the golden rule: if it smells off or shows any signs of mold, discard it immediately.

    Frequently Asked Questions

    How long does homemade beef jerky last?

    Properly dried and stored beef jerky typically lasts 1-2 months at room temperature in airtight containers. Refrigerated, it extends to 3-4 months, while freezing preserves it for up to 6 months. Always check for signs of spoilage before consuming.

    What’s the best cut of meat for beef jerky?

    Eye of round, top round, bottom round, and flank steak make excellent beef jerky. These cuts offer the perfect balance of leanness and flavor while remaining economical enough for batch preparation.

    Can I make beef jerky without a dehydrator?

    Absolutely! Use your oven set to its lowest temperature (ideally 160-170°F) with the door slightly propped open. Place meat on wire racks over baking sheets to allow air circulation and check frequently for doneness.

    How do I know when my beef jerky is done?

    Properly finished beef jerky should bend without breaking and not feel moist to the touch. When torn, it should have visible fibers but not snap like a cracker. It shouldn’t feel sticky or overly soft.

    Why is my beef jerky too salty?

    Over-salted beef jerky usually results from too much salt in the marinade or marinating too long. Balance with brown sugar or honey in your next batch, and limit marination to 8-12 hours maximum.

    Final Thoughts

    Creating homemade beef jerky transforms ordinary meat into extraordinary snacking that connects us to age-old preservation traditions while satisfying modern cravings for protein-rich, portable food. The process might seem involved at first, but the rhythm of slicing, marinating, and drying quickly becomes a rewarding ritual. I find myself making beef jerky monthly now, experimenting with new flavors each time while perfecting old favorites. There’s something deeply satisfying about opening your pantry to find jars of handcrafted jerky ready for whatever adventures await. I’d love to see your creations on Pinterest—tag me in your beef jerky masterpieces!

  • Broccoli Chicken Divan Casserole: Irresistibly Creamy & Easy Delight!

    Broccoli Chicken Divan Casserole: Irresistibly Creamy & Easy Delight!

    Broccoli Chicken Divan Casserole: Irresistibly Creamy & Easy Delight!

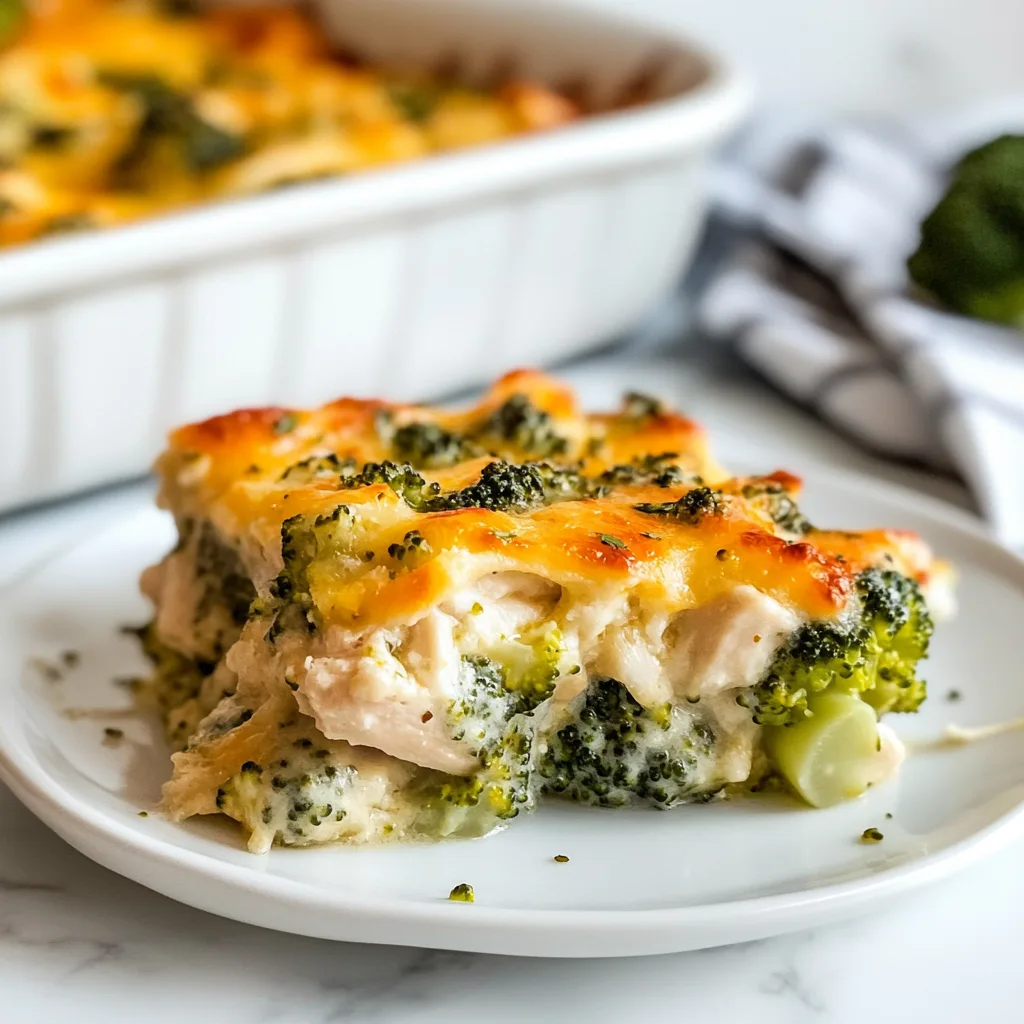
    Broccoli Chicken Divan Casserole has been my winter comfort food MVP for years. There’s something magical about that creamy, cheesy goodness wrapped around tender chicken and perfectly blanched broccoli that makes even the chilliest evenings feel cozy. I discovered this recipe during my first apartment days when I was desperately missing home-cooked meals. Now, it’s become my go-to when friends come over and I want to serve something that feels like a warm hug on a plate. The best part? This casserole is incredibly versatile and can be prepped ahead for those busy weeknights when cooking feels impossible. Let’s dive into this classic comfort food staple.

    Recipe

    Why You’ll Love This Broccoli Chicken Divan Casserole

    Perfect Balance of Flavors and Textures

    This Broccoli Chicken Divan Casserole hits all the right notes with its creamy sauce, tender chicken, and perfectly cooked broccoli. The contrasting textures create a satisfying mouthfeel that keeps you coming back for more. I love how the crispy breadcrumb topping adds that delightful crunch against the velvety sauce. The subtle tang from the sour cream balances the richness, while a hint of curry powder (my secret ingredient!) adds depth without overwhelming. Every bite delivers that perfect harmony that makes comfort food so irresistible. Trust me, even broccoli skeptics will be asking for seconds!

    Make-Ahead Friendly for Busy Weeknights

    Life gets chaotic, which is why I adore how this Broccoli Chicken Divan Casserole fits perfectly into busy schedules. You can prep the entire dish up to 24 hours ahead and just pop it in the oven when needed. I’ve even assembled it during Sunday meal prep, frozen it unbaked, and saved it for those nights when cooking feels impossible. The components can also be prepared separately—cook the chicken and blanch the broccoli in advance, then assemble with the sauce just before baking. This flexibility has saved dinner at my house countless times, especially during those weeks when work deadlines pile up!

    Essential Tips & Tricks

    Perfecting the Sauce Consistency

    The secret to an exceptional Broccoli Chicken Divan Casserole lies in getting that sauce just right. Aim for a consistency that’s thick enough to coat the back of a spoon but still pourable. If your sauce seems too thick, add chicken broth a tablespoon at a time. Too thin? Let it simmer a few minutes longer or add a teaspoon of cornstarch mixed with cold water. I learned the hard way that rushing this step leads to either a watery mess or a gloppy sauce! For extra flavor depth, try using a combination of cheeses like sharp cheddar and Gruyère. This creates complexity that elevates the entire dish, similar to what makes Creamy Chicken Cordon Bleu Casserole so delicious.

    Chicken and Broccoli Preparation Essentials

    For the most flavorful Broccoli Chicken Divan Casserole, proper preparation of the main ingredients is crucial. When it comes to chicken, I prefer poaching boneless breasts in seasoned broth until just cooked through (165°F), then shredding or dicing them. This keeps the meat juicy and receptive to the sauce. For the broccoli, blanch it for exactly 2 minutes in salted water, then immediately plunge into an ice bath. This stops the cooking process, preserves that vibrant green color, and ensures it won’t turn mushy during baking. Remember to thoroughly drain both ingredients—excess moisture is the enemy of a perfect casserole!

    Serving Ideas & Creative Variations

    Complementary Side Dishes

    Broccoli Chicken Divan Casserole shines as a main dish but pairing it with the right sides elevates the entire meal. I love serving it with a simple green salad dressed with a light vinaigrette to cut through the richness. Garlic bread or buttery dinner rolls make perfect companions for soaking up extra sauce. For a lighter option, steamed asparagus or roasted cherry tomatoes add a pop of color and freshness. When I’m feeling fancy, I’ll make Baked Feta Potatoes with Lemon as an accompanying side—the bright citrus notes complement the creamy casserole beautifully and always impress dinner guests!

    Delicious Twists on the Classic Recipe

    The beauty of Broccoli Chicken Divan Casserole lies in its adaptability. Try swapping the chicken for leftover turkey after holidays—I did this last Thanksgiving and it was a game-changing transformation! For a seafood variation, use chunks of poached salmon or cooked shrimp. Vegetable lovers can add cauliflower, bell peppers, or mushrooms alongside the broccoli. To boost nutrition, incorporate quinoa or brown rice into the base. For a spicy kick, add diced jalapeños or a dash of hot sauce to the cream mixture. My personal favorite twist is adding a layer of caramelized onions beneath the chicken—it adds a sweet depth that makes everyone ask for my secret!

    Storage & Troubleshooting Guide

    Proper Storage and Reheating Methods

    Storing your Broccoli Chicken Divan Casserole properly ensures delicious leftovers for days. Refrigerate any cooled leftovers in an airtight container for up to 4 days. When reheating, cover with foil and warm in a 325°F oven for 15-20 minutes to prevent drying out. For single servings, microwave on 70% power with a damp paper towel over the top to maintain moisture. If freezing the casserole, I recommend doing so before baking—wrap tightly in plastic wrap then foil and freeze for up to 3 months. Thaw overnight in the refrigerator before baking. The texture of the sauce might change slightly after freezing, but a gentle stir during reheating usually brings it back together.

    Common Issues and Easy Solutions

    Even experienced cooks encounter challenges with Broccoli Chicken Divan Casserole. If your casserole turns out watery, the likely culprit is underdrained broccoli or too-thin sauce. Next time, thoroughly pat dry all ingredients before assembly. Soggy topping? Try broiling for the final 2 minutes of baking (watch carefully!). If your cheese sauce breaks or curdles, it was likely heated too quickly or at too high a temperature—next time, keep the heat moderate and stir constantly. For a casserole that’s browning too quickly but isn’t heated through, simply cover with foil for the remainder of the baking time. Remember, casseroles continue cooking slightly after removal from the oven!

    Frequently Asked Questions

    Can I use frozen broccoli in my Broccoli Chicken Divan Casserole?

    Yes! Thaw completely and pat dry before using. Frozen broccoli is already blanched, so it’s actually a time-saver. I recommend microwaving it just until thawed, not fully cooked, to prevent mushiness.

    How do I prevent my casserole from becoming watery?

    Thoroughly drain all ingredients, especially the broccoli. If using rotisserie chicken, pat it dry. Ensure your sauce is properly thickened before assembly, and don’t cover the casserole while baking.

    Can I make this casserole ahead of time?

    Absolutely! Assemble up to 24 hours ahead and refrigerate. Add the topping just before baking and add 10-15 minutes to the baking time if cooking straight from the refrigerator.

    What can I substitute for cream of chicken soup?

    Make a homemade white sauce with 2 tablespoons butter, 2 tablespoons flour, and 1 cup chicken broth plus ½ cup milk. Season with salt, pepper, and poultry seasoning for a fresher alternative.

    Is there a low-carb version of Broccoli Chicken Divan Casserole?

    Yes! Skip the breadcrumb topping and use extra cheese instead. Replace flour in the sauce with 1 teaspoon xanthan gum or use cream cheese to thicken. Add extra vegetables for bulk.

    Final Thoughts

    This Broccoli Chicken Divan Casserole has been my reliable companion through countless dinner parties, family gatherings, and cozy nights in. There’s something deeply satisfying about pulling a bubbling, golden-topped casserole from the oven and watching faces light up at the table. The beauty of this dish lies in its perfect balance of comfort and nourishment—indulgent enough to feel special yet wholesome enough for regular rotation. I hope this recipe becomes a beloved staple in your home too! For more comforting casserole ideas, visit our Pinterest board where we’re always adding new inspiration.