Author: Emily Carter

  • Baked Cajun Salmon with Creamy Avocado Lime Sauce – Irresistibly Delicious!

    Baked Cajun Salmon with Creamy Avocado Lime Sauce – Irresistibly Delicious!

    Baked Cajun Salmon with Creamy Avocado Lime Sauce – Irresistibly Delicious!

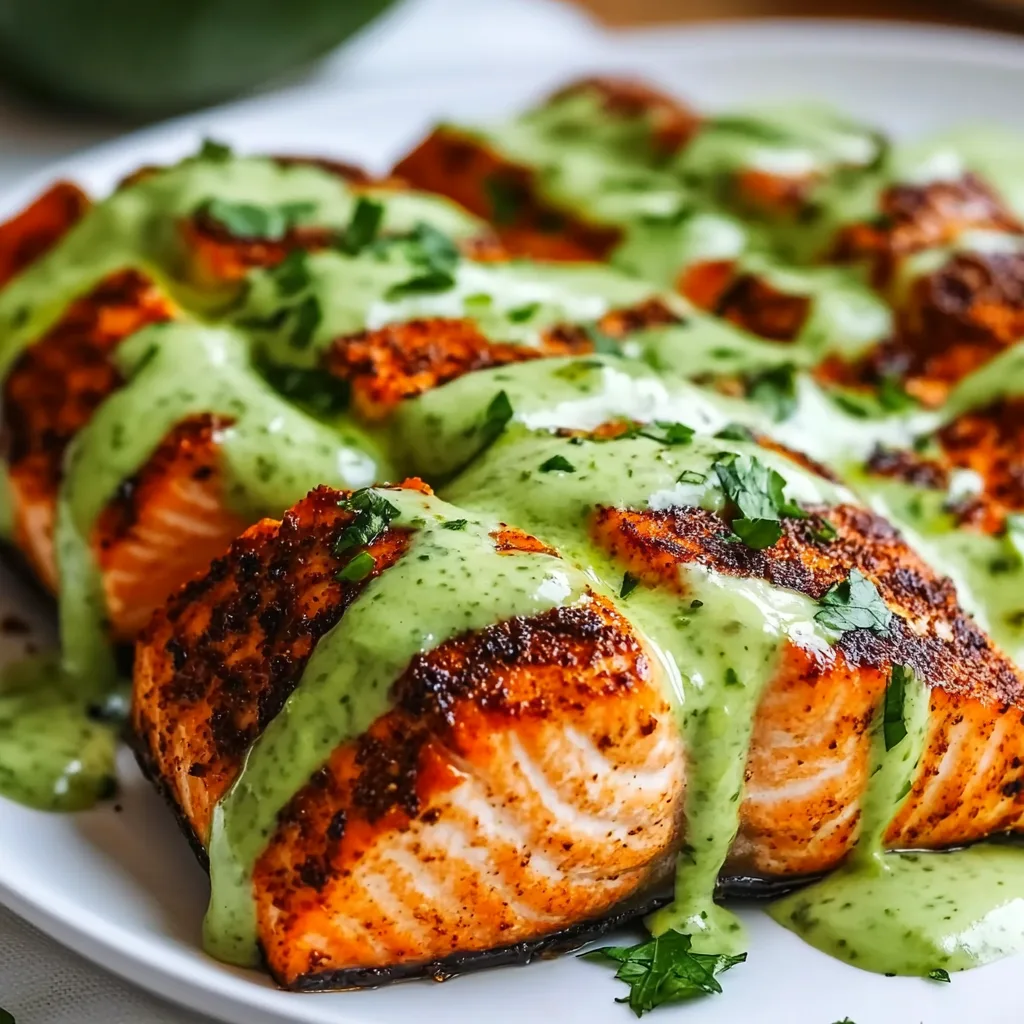
    There’s something magical about the way Baked Cajun Salmon with Creamy Avocado Lime Sauce transforms an ordinary weeknight into something special. The first time I made this dish, my kitchen filled with the aromatic blend of Cajun spices that instantly transported me to New Orleans. The contrast between the spicy, perfectly flaky salmon and the cool, creamy avocado sauce creates a symphony of flavors that dance across your palate. I’ve always believed that the best recipes balance bold flavors with creamy textures, and this one delivers that perfect harmony while being surprisingly simple to prepare. If you’re looking for a dinner that feels fancy but comes together quickly, this recipe from my collection is about to become your new favorite.

    Recipe

    Why You’ll Love This Baked Cajun Salmon with Creamy Avocado Lime Sauce

    Perfect Balance of Flavors

    The beauty of this Baked Cajun Salmon with Creamy Avocado Lime Sauce lies in its perfect flavor balance. The Cajun seasoning creates a spicy, smoky crust on the salmon that’s absolutely irresistible. I love how the heat builds gradually with each bite, warming your taste buds without overwhelming them. Meanwhile, the avocado lime sauce provides a cooling counterpoint that’s rich, tangy, and utterly refreshing. The creamy texture of the sauce complements the flaky salmon perfectly, creating that magical moment when you close your eyes and just savor the bite. It’s comfort food with a sophisticated edge.

    Quick and Nutritious Weeknight Wonder

    This dish has saved me on countless busy evenings when I wanted something nutritious but didn’t have hours to spend in the kitchen. The salmon takes just 12-15 minutes to bake while you whip up the avocado lime sauce in your blender. It’s packed with omega-3 fatty acids from the salmon, healthy fats from the avocado, and plenty of protein to keep you satisfied. I’ve found it’s one of those rare recipes that feels indulgent while actually being good for you. Even my friends who claim they “don’t like fish” have been converted after trying this dish!

    Essential Tips & Tricks

    Selecting and Preparing Your Salmon

    Choosing the right salmon makes all the difference in this Baked Cajun Salmon recipe. Look for fillets that are bright in color with firm flesh and no strong fishy odor. I prefer wild-caught salmon when possible, but good-quality farmed salmon works beautifully too. Before applying the Cajun seasoning, make sure to pat your salmon completely dry with paper towels – this ensures you’ll get that perfect spice crust rather than a steamed effect. For even cooking, try to select fillets of similar thickness, or ask your fishmonger to cut them that way. This simple preparation step is similar to what I do with my Baked Boursin Salmon for consistently perfect results.

    Perfecting Your Cajun Seasoning Blend

    While store-bought Cajun seasoning works in a pinch, I love making my own blend for this Baked Cajun Salmon with Creamy Avocado Lime Sauce. The perfect mix includes paprika, cayenne, garlic powder, onion powder, oregano, thyme, and a touch of brown sugar to balance the heat. The key is adjusting the cayenne to your heat preference – start with less if you’re sensitive to spice. When applying the seasoning, press it gently into the salmon to help it adhere. For maximum flavor, let the seasoned salmon rest for 10-15 minutes before baking, allowing the spices to penetrate the flesh and create that signature Cajun depth.

    Serving Ideas & Creative Variations

    Perfect Pairings for Your Cajun Salmon

    This Baked Cajun Salmon with Creamy Avocado Lime Sauce pairs beautifully with so many sides. My go-to combination is fluffy cilantro-lime rice and roasted asparagus, which complement the flavors without competing with them. For a lighter option, serve it over a bed of mixed greens with cherry tomatoes and cucumber for a refreshing contrast to the spicy salmon. If you’re entertaining, consider serving it alongside my Air Fryer Salmon Tacos with Slaw for a seafood-themed dinner party that will impress your guests. The versatility of this dish means it works equally well for casual family dinners or more formal occasions.

    Exciting Flavor Variations to Try

    While the classic version is divine, this recipe welcomes creative adaptations. For a tropical twist, add mango chunks to the avocado sauce for a sweet-spicy combination that’s absolutely mouthwatering. You can also experiment with the seasoning – try a blackened spice mix or even a honey-chipotle glaze for different flavor profiles. For the sauce, swapping cilantro for basil or adding roasted garlic creates entirely new dimensions. My favorite variation includes a sprinkle of toasted pepitas on top for added crunch. These simple tweaks let you enjoy the same basic recipe in countless delicious ways.

    Storage & Troubleshooting Guide

    Proper Storage and Reheating

    Storing your Baked Cajun Salmon with Creamy Avocado Lime Sauce properly ensures you can enjoy leftovers without sacrificing quality. Store the salmon and sauce separately in airtight containers in the refrigerator. The salmon will keep for up to 3 days, while the avocado sauce is best used within 24 hours (a squeeze of extra lime juice helps prevent browning). When reheating the salmon, do so gently – microwave at 50% power in short bursts or warm in a 275°F oven until just heated through. This prevents the salmon from drying out and becoming tough. I recommend bringing the sauce to room temperature rather than heating it.

    Common Issues and Easy Fixes

    If your salmon turns out too dry, it’s likely been overcooked. Remember that salmon continues cooking slightly after removing from the oven, so take it out when it reaches 135°F internal temperature. For sauce that’s too thick, simply thin it with a splash of water or extra lime juice. If the Cajun seasoning creates too much heat, increase the amount of avocado sauce or add a dollop of Greek yogurt to temper the spice. And if your sauce oxidizes and turns brown, don’t worry about the appearance – the flavor remains delicious, or you can quickly blend in more fresh avocado to revive its vibrant color.

    Frequently Asked Questions

    Can I make this Baked Cajun Salmon with Creamy Avocado Lime Sauce ahead of time?

    Yes! Season the salmon up to 8 hours ahead and refrigerate. Make the avocado sauce up to 4 hours ahead with extra lime juice to prevent browning. Bake the salmon just before serving for best results.

    What’s the best way to tell when salmon is perfectly cooked?

    Look for salmon that flakes easily with a fork but still has a slightly translucent center. For medium doneness, aim for an internal temperature of 125-130°F, which will rise to 135°F while resting.

    Can I use frozen salmon for this recipe?

    Absolutely! Thaw completely in the refrigerator overnight, then pat very dry before seasoning. You might need to increase the baking time by 2-3 minutes depending on the thickness.

    What can I substitute for avocado if I have an allergy?

    Try a sauce made with Greek yogurt, lime juice, herbs, and a touch of olive oil. You’ll still get the creamy texture and tangy flavor that complements the Cajun spices beautifully.

    How spicy is this Baked Cajun Salmon with Creamy Avocado Lime Sauce?

    The spice level is adjustable! Use less cayenne in your Cajun seasoning for a milder dish, or add a sprinkle of red pepper flakes on top for extra heat. The avocado sauce helps balance the spiciness.

    Final Thoughts

    This Baked Cajun Salmon with Creamy Avocado Lime Sauce has become my reliable go-to when I want to impress without stress. There’s something special about the way the spicy Cajun crust contrasts with the cool, creamy avocado that makes every bite feel like a little celebration. I hope this recipe brings the same joy to your kitchen that it has to mine. Don’t forget to check out more of my seafood inspirations on Pinterest and share your own creations with me! This dish proves that extraordinary flavors don’t require extraordinary effort – just quality ingredients and a little culinary creativity.
  • Black Eyed Pea Salad Recipe That Will Wow Your Taste Buds!

    Black Eyed Pea Salad Recipe That Will Wow Your Taste Buds!

    Black Eyed Pea Salad Recipe That Will Wow Your Taste Buds!

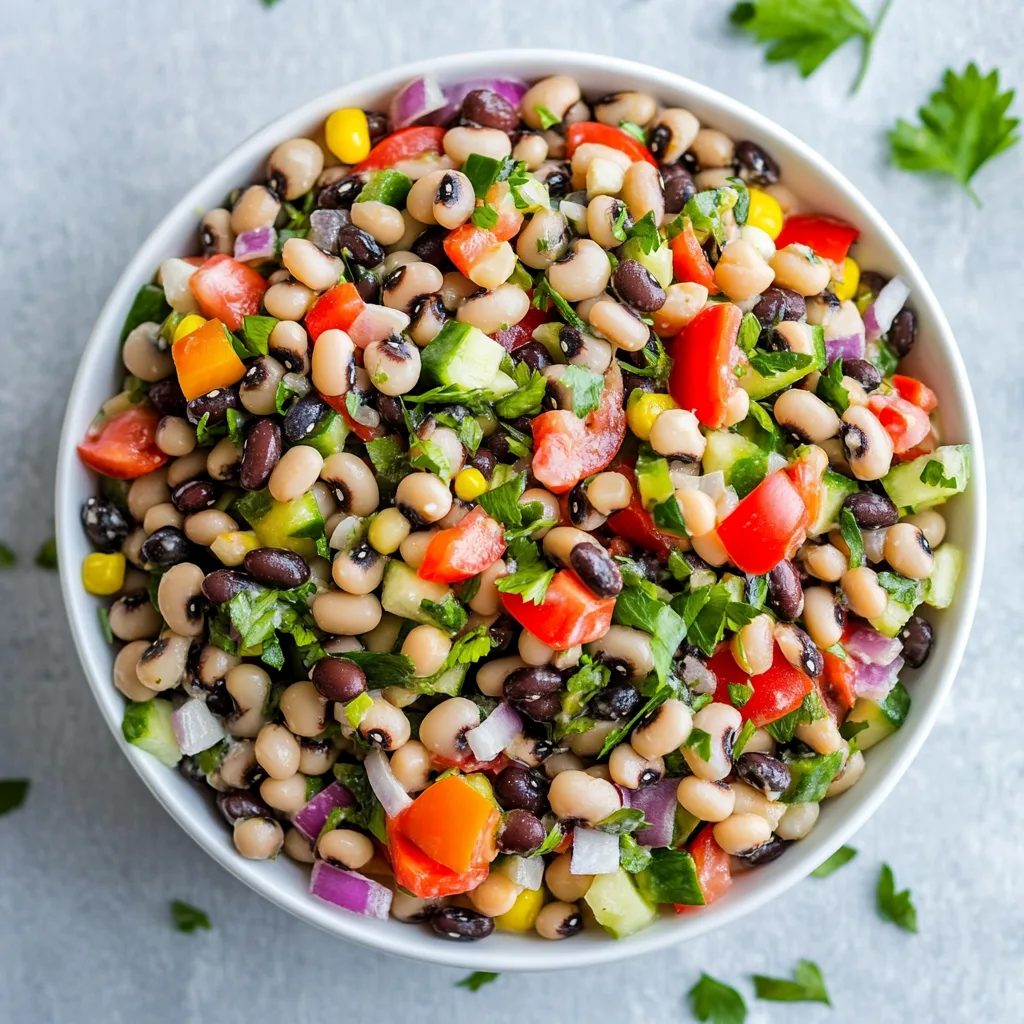
    Black Eyed Pea Salad has been my summer potluck secret weapon for years! There’s something magical about the combination of tender black-eyed peas, crunchy vegetables, and that zingy dressing that makes everyone ask for the recipe. I first discovered this gem at my aunt’s farmhouse gathering, where it sat humbly among fancier dishes yet disappeared first. The beauty of this salad is its versatility – serve it chilled on scorching days or at room temperature when the evening cools. If you’re looking for more crowd-pleasing sides, my Crockpot Black Eyed Peas and Collard Greens is another favorite that pairs beautifully with this salad.

    Recipe

    Why You’ll Love This Black Eyed Pea Salad

    Perfect Make-Ahead Solution

    This Black Eyed Pea Salad is the answer to your busy schedule prayers! I make mine the night before big gatherings, and the flavors actually improve as they mingle in the refrigerator. The peas soak up all that delicious dressing, becoming more flavorful by the hour. For meal prep enthusiasts, this is a dream come true – portion it into containers for quick lunches all week long. I’ve brought this to countless office potlucks, and it’s always a hit because it travels beautifully and doesn’t wilt like leafy salads.

    Nutritional Powerhouse

    Don’t let the delicious taste fool you – this Black Eyed Pea Salad packs serious nutritional benefits! Black-eyed peas are loaded with protein and fiber, making this salad surprisingly filling. I love how it keeps me satisfied through afternoon meetings without that heavy, sleepy feeling. The colorful bell peppers add vitamin C, while the red onions contribute antioxidants. It’s a complete meal in itself or a nutritious side dish. My sister-in-law, who’s a nutritionist, always comments on how this salad checks all the boxes for a balanced dish.

    Essential Tips & Tricks

    Perfecting Your Peas

    The foundation of an exceptional Black Eyed Pea Salad lies in properly prepared peas. I’ve learned through trial and error that canned peas work perfectly when you’re short on time – just rinse thoroughly to remove excess sodium. For the best flavor, however, I recommend cooking dried peas until they’re tender but still hold their shape. The key is to avoid overcooking, which creates a mushy texture. A splash of apple cider vinegar in the cooking water enhances their flavor and helps them maintain their firmness.

    Balancing Your Flavors

    The magic of this Black Eyed Pea Salad happens in the dressing! I always create a perfect balance between acidity, sweetness, and spice. My secret weapon is using both lemon juice and apple cider vinegar for complex acidity. A touch of honey or maple syrup counters the tanginess, while a pinch of cayenne adds subtle heat. Don’t rush this step – let the dressing sit for 5 minutes before tossing with the salad. For more dressing inspiration, check out my Apple Cider Chicken with Crisp Autumn Slaw which uses a similar flavor profile.

    Serving Ideas & Creative Variations

    Perfect Pairings

    This Black Eyed Pea Salad shines as both a side and a main dish! I love serving it alongside grilled proteins like chicken or fish for a complete meal. The tangy flavors complement smoky grilled foods beautifully. For potlucks, I place it next to heartier dishes like cornbread or Kielbasa and Sauerkraut for a delightful contrast of textures and flavors. During summer, I’ve found it’s particularly refreshing when paired with watermelon slices – something about the sweet juiciness alongside the savory salad creates magic on your palate.

    Seasonal Adaptations

    One reason I return to Black Eyed Pea Salad year-round is how easily it adapts to each season! In summer, I load it with fresh corn and juicy cherry tomatoes straight from my garden. Fall calls for diced apples and roasted sweet potatoes. Winter versions get heartier with roasted butternut squash and dried cranberries. Spring brings tender asparagus tips and fresh herbs. The base remains the same, but these seasonal switches keep the salad exciting. My family has come to expect a different version at each gathering, and guessing the variation has become a fun tradition.

    Storage & Troubleshooting Guide

    Keeping It Fresh

    Your Black Eyed Pea Salad will stay delicious for up to five days when stored properly in an airtight container in the refrigerator. I recommend giving it a good stir before serving leftovers to redistribute the dressing. If you’re planning to make it significantly ahead of time, consider keeping delicate ingredients like avocado separate until serving day. For meal prep, I store the dressing separately and combine just before eating to maintain the perfect texture. The peas actually improve with time as they absorb the flavors!

    Rescuing Common Issues

    Even experienced cooks encounter challenges with Black Eyed Pea Salad! If your salad seems too dry after refrigeration, simply add a splash of olive oil and a squeeze of fresh lemon juice to revive it. For salads that turned out too tangy, balance with a drizzle of honey or a sprinkle of finely diced sweet bell pepper. If the peas are undercooked and too firm, place the salad in a microwave-safe bowl and heat for 30 seconds – this gentle warming will soften them without cooking the fresh ingredients.

    Frequently Asked Questions

    Can I use frozen black-eyed peas for this salad?

    Absolutely! Frozen black-eyed peas work wonderfully. Thaw and cook according to package directions, then cool completely before adding to your salad. They often have better texture than canned varieties.

    How far in advance can I make Black Eyed Pea Salad?

    This salad can be prepared up to 2 days ahead. The flavors actually improve as they meld together, making it perfect for meal prep or entertaining.

    Is this recipe gluten-free?

    Yes, this Black Eyed Pea Salad is naturally gluten-free, making it perfect for guests with dietary restrictions. Just double-check any pre-made dressing ingredients if you’re not making it from scratch.

    Can I turn this into a main dish?

    Definitely! Add grilled chicken, shrimp, or feta cheese to transform it into a hearty main. I sometimes add quinoa for an extra protein boost when serving it as a complete meal.

    What’s the best way to serve this at a potluck?

    Transport the salad in a chilled container. I recommend bringing extra dressing on the side to refresh the salad just before serving, especially if it will sit out for several hours.

    Final Thoughts

    This Black Eyed Pea Salad has become more than just a recipe in my household – it’s a tradition that marks gatherings and creates memories. I love watching first-timers take a hesitant spoonful, only to return for seconds with enthusiasm! The beauty of this dish lies in its simplicity and adaptability. Whether you’re a seasoned cook or kitchen newbie, this salad welcomes your personal touch. I hope it brings as much joy to your table as it has to mine. Don’t forget to check out more recipes on Pinterest for inspiration!

  • Baked Boursin Salmon Recipe: Irresistibly Creamy & Easy to Make!

    Baked Boursin Salmon Recipe: Irresistibly Creamy & Easy to Make!

    Baked Boursin Salmon Recipe: Irresistibly Creamy & Easy to Make!

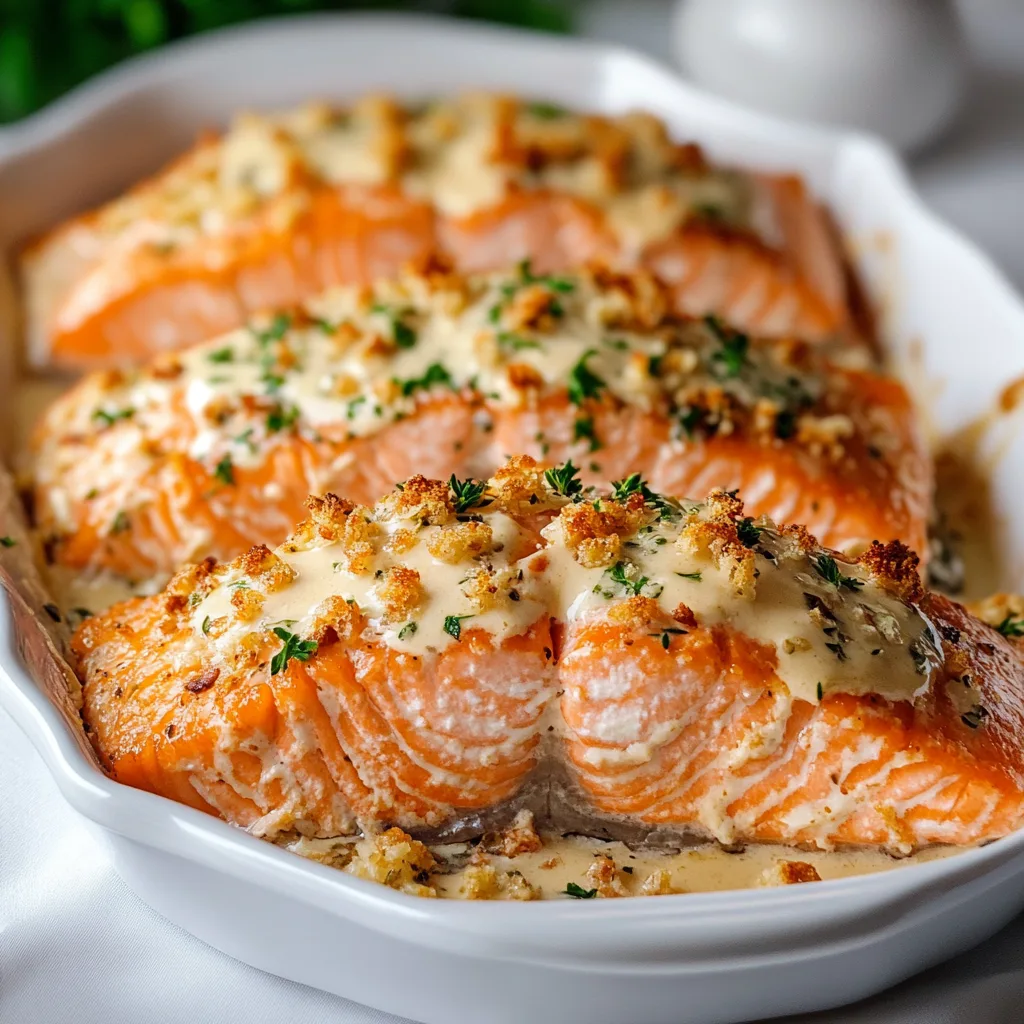
    Baked Boursin Salmon is my ultimate dinner party secret weapon. There’s something magical about the way creamy herb-infused cheese melts into tender salmon fillets, creating a dish that feels luxurious but takes minimal effort. The first time I made this for my sister’s birthday, the kitchen filled with an intoxicating aroma of herbs and butter that had everyone hovering near the oven. I love how the Boursin creates a protective blanket over the salmon, keeping it perfectly moist while infusing it with garlic and herbs. Trust me, this dish will become your new go-to when you want to impress without stress.

    Recipe

    Why You’ll Love This Baked Boursin Salmon

    Perfect Balance of Flavors and Textures

    The rich creaminess of Boursin cheese creates an incredible contrast against the delicate texture of salmon. Each bite delivers a perfect harmony of buttery fish and herb-infused cheese that melts in your mouth. I adore how the garlic notes in the Boursin complement the natural sweetness of the salmon without overpowering it. The cheese forms a light crust on top while keeping the fish underneath incredibly tender and moist. It’s that magical combination of textures—crisp exterior, velvety interior—that makes Baked Boursin Salmon so irresistibly good.

    Impressive Yet Effortless Preparation

    What I love most about this Baked Boursin Salmon is how it transforms a few simple ingredients into something that looks and tastes restaurant-worthy. The entire prep takes less than 10 minutes, yet the results look like you spent hours in the kitchen. Just spread the cheese, add a few seasonings, and let your oven do the work! I’ve made this on hectic weeknights and for special occasions alike. There’s something deeply satisfying about placing a beautifully baked salmon on the table and watching everyone’s eyes widen with anticipation.

    Essential Tips & Tricks

    Selecting and Preparing Your Salmon

    Always choose center-cut salmon fillets of uniform thickness to ensure even cooking. I learned this the hard way when I once used tail pieces that cooked too quickly! Pat the salmon completely dry before applying the Boursin—this creates better adhesion and prevents the cheese from sliding off during baking. Room temperature salmon also bakes more evenly, so I try to let mine sit out for 15-20 minutes before cooking. For an extra flavor boost, season the salmon with salt and pepper before adding the cheese layer. This simple step enhances the natural flavors of the fish beautifully.

    Perfecting the Boursin Layer

    The secret to perfect Baked Boursin Salmon lies in how you apply the cheese. Allow the Boursin to soften slightly at room temperature for about 10 minutes—this makes it much easier to spread evenly without tearing the delicate salmon. I like to mix in a splash of lemon juice and some fresh herbs to brighten the flavor profile. Spread the cheese mixture to an even thickness of about ¼ inch, leaving a small border around the edges. This prevents overflow and creates a beautiful presentation similar to the creamy lemon garlic pan-seared scallops that everyone loves.

    Serving Ideas & Creative Variations

    Complementary Side Dishes

    Baked Boursin Salmon pairs beautifully with light, fresh sides that balance its richness. My personal favorite is a simple arugula salad with lemon vinaigrette and toasted pine nuts—the peppery greens cut through the creaminess perfectly. Roasted asparagus or broccolini also make excellent partners, especially when finished with a light sprinkle of lemon zest. For a more substantial meal, consider serving with wild rice pilaf or crispy bacon honey roasted potatoes. The subtle sweetness of the potatoes creates a wonderful contrast with the savory salmon.

    Creative Flavor Variations

    While classic Baked Boursin Salmon is divine, experimenting with different flavors can create exciting new dishes. Try using different Boursin varieties like black pepper or shallot and chive for subtle flavor shifts. For a Mediterranean twist, mix in sun-dried tomatoes and capers with the Boursin before spreading. I once added a thin layer of pesto between the salmon and cheese, which created an incredible depth of flavor. For special occasions, top the Boursin with a sprinkle of panko breadcrumbs mixed with parmesan for a delightful crunchy crust.

    Storage & Troubleshooting Guide

    Proper Storage and Reheating

    Leftover Baked Boursin Salmon should be refrigerated within two hours of cooking in an airtight container. It will keep well for up to 3 days, though the texture is best when enjoyed within 24 hours. When reheating, avoid the microwave which can make the salmon rubbery. Instead, place it in a 275°F oven, covered with foil, for about 10-15 minutes until just warmed through. I also love using cold leftovers flaked over salads or stirred into pasta for a completely different meal experience the next day.

    Common Issues and Solutions

    If your Baked Boursin Salmon comes out too dry, you likely overcooked it. Remember that salmon continues cooking slightly after being removed from the oven. I aim for an internal temperature of 125°F for medium doneness, which climbs to about 130°F while resting. If the cheese browns too quickly before the salmon is cooked through, simply tent with foil for the remainder of the cooking time. For salmon that releases too much liquid during cooking, try salting it 30 minutes before baking and patting dry again before adding the Boursin.

    Frequently Asked Questions

    Can I use frozen salmon for Baked Boursin Salmon?

    Yes, but thaw it completely in the refrigerator overnight and pat it very dry before adding the Boursin. Frozen salmon often releases more moisture during cooking, so consider salting it after thawing to draw out excess water.

    What can I substitute for Boursin cheese?

    A mixture of cream cheese with fresh herbs (dill, chives, thyme) and minced garlic makes a good substitute. Goat cheese mixed with herbs also works beautifully for a tangier flavor profile.

    How do I know when the salmon is perfectly cooked?

    The salmon should flake easily with a fork but still look slightly translucent in the center. For precision, use a meat thermometer to reach 125-130°F for medium doneness.

    Can I prepare Baked Boursin Salmon ahead of time?

    You can prepare the salmon with the Boursin topping up to 4 hours ahead and refrigerate, covered. Allow it to come to room temperature for 15 minutes before baking.

    How can I make this recipe dairy-free?

    Replace the Boursin with dairy-free cream cheese mixed with olive oil, minced garlic, and fresh herbs. There are also several plant-based Boursin alternatives now available in specialty stores.

    Final Thoughts

    Baked Boursin Salmon has become my ultimate crowd-pleasing dish that strikes that perfect balance between elegant and effortless. There’s something deeply satisfying about creating a meal that looks and tastes impressive while requiring minimal time in the kitchen. The creamy herb-infused topping protects the delicate fish while infusing it with incredible flavor. Whether you’re cooking for a special occasion or elevating a weeknight dinner, this dish delivers restaurant-quality results every time. Find more inspiration for your next meal on our Pinterest page.

  • Oven-Baked Cheesy Tacos: Irresistibly Crispy, Melty & Easy!

    Oven-Baked Cheesy Tacos: Irresistibly Crispy, Melty & Easy!

    Oven-Baked Cheesy Tacos: Irresistibly Crispy, Melty & Easy!

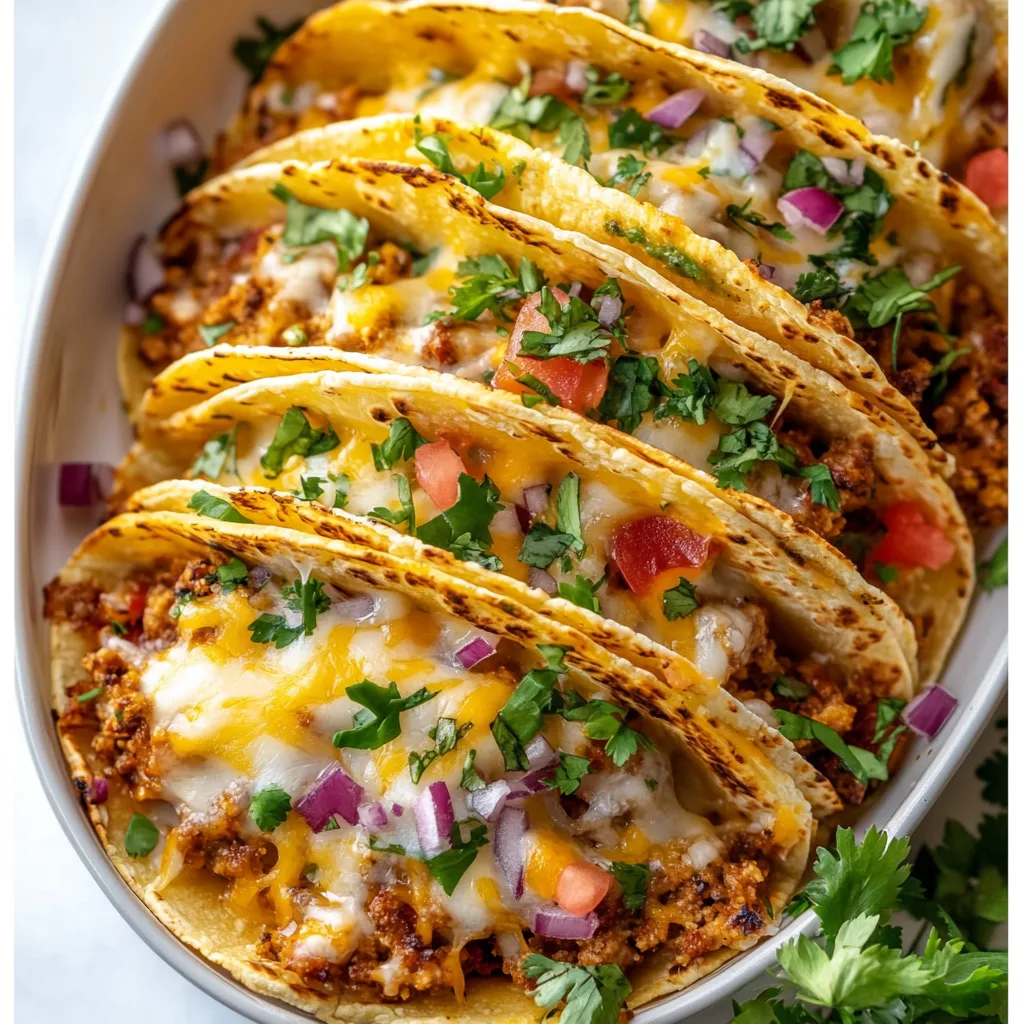
    Oven-Baked Cheesy Tacos have completely transformed taco night at my house! That perfect crunch when you bite into the golden, toasty shell filled with seasoned beef and melty cheese is truly irresistible. I discovered this method last winter when a sudden craving hit during a snowstorm, and I couldn’t bear the thought of standing over the stove frying individual tacos. The genius of this method is that all your tacos bake together, creating that restaurant-quality crispness while you relax. If you love comforting meals that bring everyone to the table with minimal fuss, these cheesy tacos are about to become your new weeknight hero!

    Recipe

    Why You’ll Love These Oven-Baked Cheesy Tacos

    Perfect Texture Every Time

    There’s something magical about the texture contrast in these oven-baked tacos that keeps me coming back again and again. The shells develop this incredible crispness around the edges while staying slightly tender where they cradle all that delicious filling. I love how the cheese gets just slightly browned and bubbly on top, creating those irresistible crispy cheese bits that everyone fights over. The beef stays juicy inside, and when you add that final fresh topping of lettuce and tomato, you get this beautiful temperature and texture play that makes each bite absolutely perfect.

    Easy Make-Ahead Option

    One of my favorite things about these oven-baked cheesy tacos is their meal prep potential. I often brown the taco meat mixture on Sunday afternoons while my daughter’s doing homework at the kitchen counter. The fragrant spices fill the kitchen with the most comforting aroma! Store the cooled meat mixture in the fridge, and when Tuesday’s dinner chaos hits, you can assemble and bake these tacos in just minutes. They’re also perfect for entertaining since you can prepare a whole batch at once instead of standing at the stove making individual tacos to order.

    Essential Tips & Tricks

    Preventing Soggy Shells

    The secret to perfectly crispy oven-baked cheesy tacos is managing moisture. I learned this the hard way after one sadly soggy taco night! First, drain your seasoned beef thoroughly—I even blot it with paper towels sometimes. Then, create a protective barrier by sprinkling a thin layer of shredded cheese on the bottom of each shell before adding the meat. This cheese melts during baking and forms a seal against moisture. Finally, don’t overfill your tacos, and bake them standing upright (not laying flat) to allow steam to escape rather than soften your shells.

    Cheese Selection Matters

    The right cheese blend makes all the difference in these oven-baked cheesy tacos! While pre-shredded Mexican blends work fine, I’ve found that creating my own mix produces the best flavor and melt. I like combining sharp cheddar for flavor with Monterey Jack for its incredible meltability. Freshly grated cheese also melts more evenly than pre-packaged options. For an extra-special batch, try adding a sprinkle of cotija on top after baking or mixing in some pepper jack for a subtle kick, similar to how I layer cheeses in my Greek Meatballs in Lemon Sauce.

    Serving Ideas & Creative Variations

    Build a Taco Bar

    Transform your oven-baked cheesy tacos into an interactive family feast by setting up a taco bar! After the tacos come out of the oven all golden and bubbling, I arrange them on a large platter surrounded by colorful bowls of toppings. My must-haves include diced avocado, fresh cilantro, lime wedges, sliced jalapeños, and at least two kinds of salsa. For special occasions, I’ll add quick-pickled red onions and a bowl of Mexican crema. This setup is perfect for family dinners but also works beautifully for casual entertaining, similar to my approach with Garlic Parmesan Cheeseburger Bombs.

    Creative Protein Swaps

    While traditional ground beef is delicious in these oven-baked cheesy tacos, don’t be afraid to experiment with proteins! Shredded chicken tossed with taco seasoning creates a lighter version that’s equally delicious. For a vegetarian option, I love using a mixture of black beans and roasted sweet potatoes seasoned with the same spices—the sweetness against the savory spices is incredible. Ground turkey works beautifully too, though I add a tablespoon of olive oil to keep it juicy. For special occasions, try seasoned grilled shrimp chopped into bite-sized pieces!

    Storage & Troubleshooting Guide

    Proper Storage Techniques

    The best way to store leftover oven-baked cheesy tacos is to separate the components strategically. I recommend removing any fresh toppings like lettuce and storing them separately in airtight containers. Place the filled taco shells in a single layer in a shallow container, loosely covered with foil (not airtight, which traps moisture). When reheating, use a 350°F oven for about 7-10 minutes to restore crispness. For meal prep, you can store assembled but unbaked tacos covered in the refrigerator for up to 24 hours before baking—just add an extra minute or two to the baking time.

    Fixing Common Problems

    If your oven-baked cheesy tacos aren’t turning out perfectly, a few simple adjustments can make all the difference. For shells that aren’t crisping properly, try preheating your baking sheet before adding the tacos. If your filling is too dry, mix in 2-3 tablespoons of tomato sauce or beef broth to the meat mixture before filling. For tacos that keep falling over during baking, crumple small pieces of aluminum foil to create “holders” between each taco, or invest in a taco baking rack. If cheese isn’t melting evenly, try grating it more finely and sprinkling it throughout the filling, not just on top.

    Frequently Asked Questions

    Can I make oven-baked cheesy tacos ahead of time?

    Yes! Prepare the meat filling up to 3 days ahead and refrigerate. Assemble the tacos up to 24 hours before baking, keeping them covered in the refrigerator. Add 2-3 extra minutes to the baking time if starting from cold.

    What’s the best temperature for baking tacos?

    Bake at 375°F for optimal results. This temperature creates perfectly crispy shells while melting the cheese without burning it. Your oven-baked cheesy tacos should take about 10-12 minutes to reach golden perfection.

    Can I use soft tortillas instead of hard shells?

    Absolutely! Lightly brush corn tortillas with oil, drape them over two bars of your oven rack to form a taco shape, and bake at 375°F for 7-8 minutes until crisp before filling and baking again.

    How do I keep the tacos standing upright?

    Use a specialized taco baking rack, or create your own by scrunching aluminum foil into a snake-like form and shaping it into curves to hold each taco. Alternatively, pack them tightly in a baking dish.

    What sides go well with oven-baked tacos?

    Mexican rice, refried beans, corn salad, or a simple green salad make perfect accompaniments. For a complete fiesta, add guacamole and chips or a refreshing cucumber-tomato salad with lime dressing.

    Final Thoughts

    These oven-baked cheesy tacos have earned their place in my regular dinner rotation because they deliver that perfect combination of convenience and crave-worthy flavor. There’s something so satisfying about pulling out a tray of perfectly crispy, cheese-filled tacos all at once instead of frying them individually. The way the family gathers around, customizing their toppings and diving in while everything’s still hot and bubbling, creates the kind of everyday food memories I cherish. Find more delicious recipes on my Pinterest page!

  • Baked Feta Potatoes with Lemon: Irresistibly Tangy & Crispy Delight!

    Baked Feta Potatoes with Lemon: Irresistibly Tangy & Crispy Delight!

    Baked Feta Potatoes with Lemon: Irresistibly Tangy & Crispy Delight!

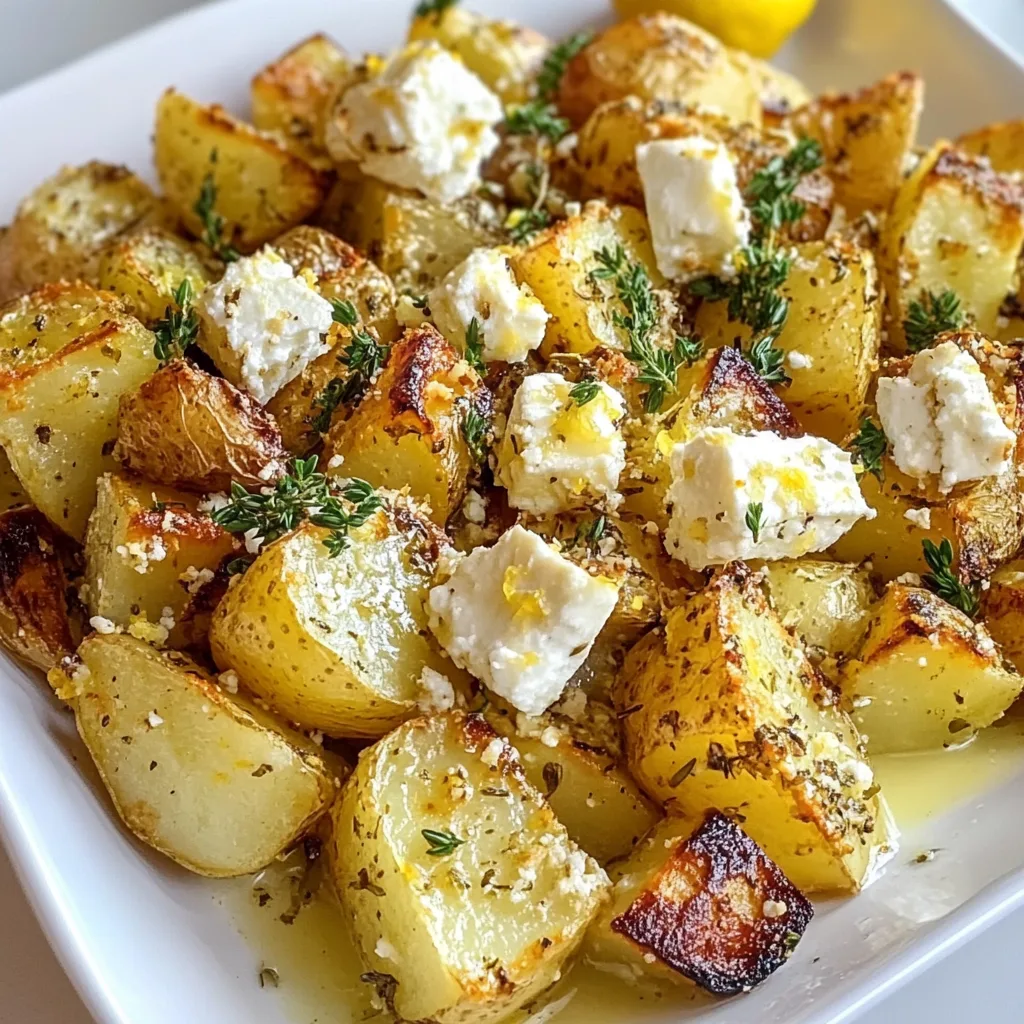
    Baked Feta Potatoes with Lemon has become my absolute comfort food obsession this season. There’s something magical about the way the tangy feta melts into those crispy-edged potatoes, while bright lemon cuts through the richness. I discovered this dish during a rainy Sunday when all I had was a block of feta about to expire and some potatoes in the pantry. What started as kitchen desperation has turned into the recipe my friends now beg me to bring to every gathering. The Mediterranean flavors transport you somewhere sunny even on the coldest days, making this simple dish a true year-round treasure.

    Recipe

    Why You’ll Love This Baked Feta Potatoes with Lemon

    Perfect Balance of Flavors and Textures

    The magic of baked feta potatoes with lemon lies in its contrasting elements that somehow create perfect harmony. The potatoes develop this incredible golden crust while staying fluffy inside, and the feta transforms from crumbly cheese to a creamy, slightly caramelized wonder. I love how the lemon zest infuses everything with brightness, while the juice adds that perfect acidic punch. The first time I served this, my neighbor literally closed her eyes with each bite, declaring it “restaurant quality.” Trust me, the aroma alone as this bakes will have everyone lingering in your kitchen!

    Simple Ingredients, Maximum Impact

    What makes baked feta potatoes with lemon truly special is how it creates extraordinary results from ordinary ingredients. You need just a few staples – potatoes, feta cheese, lemons, olive oil, and herbs. No complicated techniques or specialty items required! I keep these ingredients on hand constantly now because this dish has saved me countless times when unexpected guests arrive. The simplicity means you can focus on enjoying the process rather than stressing over complicated steps. It’s the perfect example of how Mediterranean cooking celebrates basic ingredients in their purest form.

    Essential Tips & Tricks

    Choosing the Right Potatoes

    Selecting the perfect potatoes makes all the difference in this baked feta potatoes with lemon recipe. I’ve found that waxy varieties like Yukon Golds or red potatoes hold their shape beautifully while still developing those crispy edges we crave. They also absorb the lemon and herb flavors more effectively than russets. Cut them into evenly-sized chunks (about 1-inch pieces) to ensure they cook uniformly. I learned this lesson the hard way after serving a batch with some pieces perfectly done and others undercooked! For extra flavor absorption, try parboiling them for just 5 minutes before roasting – it’s a game-changer for texture.

    The Feta Factor

    Not all feta is created equal when making baked feta potatoes with lemon! Look for traditional Greek feta made from sheep’s milk for the creamiest, most authentic result. It should come packed in brine, not the pre-crumbled dry variety. I place my feta block right in the center of the potatoes about halfway through cooking, which allows it to soften without completely melting away. This technique creates pockets of tangy creaminess throughout the dish. For an extra flavor dimension, try marinating your feta in olive oil with herbs and garlic for an hour before baking – the difference is remarkable!

    Serving Ideas & Creative Variations

    Perfect Pairings

    Baked feta potatoes with lemon works beautifully as both a side dish or main course. For a complete meal, I love serving it alongside a simple Greek salad or roasted vegetables for a vegetarian feast. When entertaining, I pair it with slow-roasted chicken or grilled fish for an impressive yet effortless spread. The lemony, herby flavors complement practically any protein! My absolute favorite pairing is with a glass of crisp white wine on my patio as the sun sets. For brunch, try topping it with a fried egg – the runny yolk creates an incredible sauce that elevates this dish to new heights.

    Seasonal Adaptations

    The beauty of baked feta potatoes with lemon is its versatility across seasons. In spring, I fold in fresh peas and mint for brightness. Summer calls for cherry tomatoes and basil added during the last 10 minutes of baking. Fall? Try adding cubed butternut squash and rosemary to the potato mix. Winter versions with caramelized onions and thyme create the ultimate comfort food. My personal favorite adaptation includes thinly sliced Meyer lemons (with peel) scattered throughout during winter months when they’re in season – the slight bitterness balances beautifully with the feta’s creaminess and creates gorgeous caramelized edges.

    Storage & Troubleshooting Guide

    Keeping Leftovers Fresh

    Storing baked feta potatoes with lemon properly ensures you’ll enjoy those delicious leftovers without sacrificing quality. Allow the dish to cool completely before transferring to an airtight container – this prevents condensation that can make the potatoes soggy. Refrigerate for up to 3 days. To reheat, avoid the microwave which can make everything rubbery. Instead, spread the potatoes on a baking sheet and warm in a 350°F oven for about 10 minutes until heated through. The feta won’t be quite as creamy as when freshly made, but the flavors actually develop beautifully overnight, making day-two potatoes sometimes even tastier!

    Fixing Common Issues

    Even experienced cooks occasionally encounter challenges with baked feta potatoes with lemon. If your potatoes aren’t crisping properly, try increasing oven temperature by 25 degrees and ensure you’re not overcrowding the pan – each potato needs space! For overly dry potatoes, toss them with a bit more olive oil before roasting or add a splash of broth halfway through cooking. If your feta is melting too quickly and disappearing, try adding it later in the cooking process or using a firmer variety. And for those who find the lemon flavor too intense, balance it with a drizzle of honey before serving – it creates a lovely sweet-tart profile.

    Frequently Asked Questions

    Can I make baked feta potatoes with lemon ahead of time?

    Yes! Prepare everything up to the baking stage, refrigerate, then bake when ready. For best results, bring to room temperature before baking and add an extra 5-7 minutes to the cooking time.

    What herbs work best with this recipe?

    Fresh oregano, thyme, and rosemary are my top choices. Dill and parsley work beautifully as finishing herbs. Use dried herbs if necessary, but reduce the amount by half.

    Can I substitute the feta cheese?

    Absolutely! Goat cheese or halloumi make excellent alternatives. Each brings a different flavor profile, with halloumi offering more structure and less melting.

    How do I prevent my potatoes from sticking to the pan?

    Ensure your baking sheet is well-oiled or lined with parchment paper. Toss potatoes thoroughly in olive oil before arranging, and don’t disturb them during the first 20 minutes of roasting.

    Why are my baked feta potatoes with lemon soggy instead of crispy?

    Overcrowding the pan is usually the culprit. Use a larger baking sheet or divide between two pans. Also, make sure your oven is fully preheated before adding the potatoes.

    Final Thoughts

    Baked Feta Potatoes with Lemon has become my go-to recipe when I want to impress without stress. There’s something truly special about how these simple ingredients transform into something extraordinary. The bright lemon, creamy feta, and crispy potatoes create a dish that feels both comforting and sophisticated. I hope you’ll make this recipe your own, experimenting with different herbs and seasonal additions. For more Mediterranean-inspired recipes, visit our Pinterest board where we’re constantly adding new flavor combinations to try!

  • Chicken Cordon Bleu Casserole: Irresistible Comfort Food You’ll Love!

    Chicken Cordon Bleu Casserole: Irresistible Comfort Food You’ll Love!

    Chicken Cordon Bleu Casserole: Irresistible Comfort Food You’ll Love!

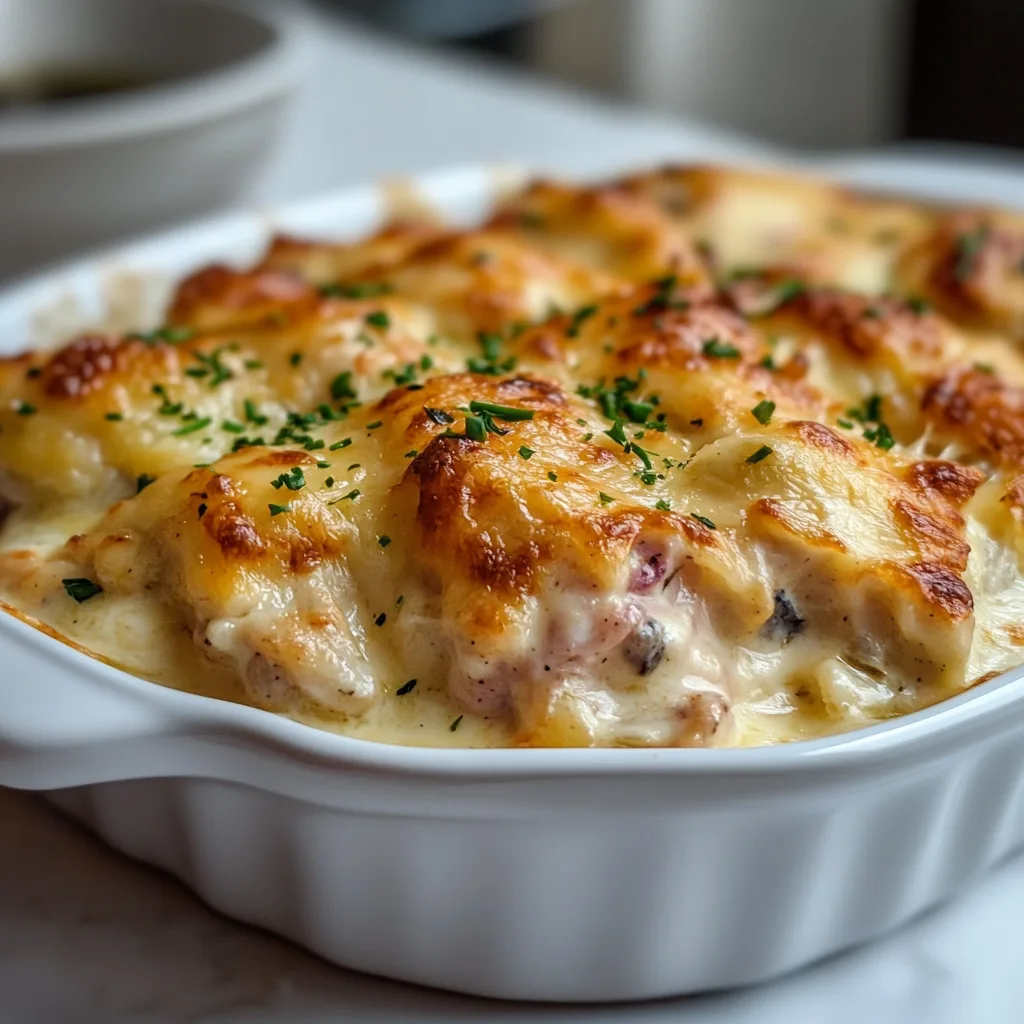
    Chicken Cordon Bleu Casserole transforms a classic French dish into a comforting, family-friendly meal that’s perfect for busy weeknights. The first time I made this creamy, cheesy casserole, my kitchen filled with the most intoxicating aroma of bubbling Swiss cheese and savory ham. There’s something magical about the way the tender chicken, smoky ham, and melty cheese come together in this dish. It’s like a warm hug on a plate! If you love comfort food with a touch of elegance, this Chicken Cordon Bleu Casserole will quickly become a staple in your dinner rotation.

    Recipe

    Why You’ll Love This Chicken Cordon Bleu Casserole

    Perfect Comfort Food With Minimal Effort

    This Chicken Cordon Bleu Casserole delivers all the classic flavors you adore without the fuss of pounding, rolling, and breading chicken breasts. I still remember the first time I served this to my family—eyes widening with that first bite, forks diving back in for more. The creamy sauce envelops tender chicken chunks and salty ham, while the golden breadcrumb topping provides that satisfying crunch you’d get from traditional cordon bleu. It’s the perfect solution for those nights when you crave something special but don’t have the energy for complicated cooking techniques.

    Make-Ahead Magic For Busy Schedules

    One of the greatest advantages of this Chicken Cordon Bleu Casserole is its flexibility for meal planning. I often assemble it the night before, cover it tightly, and refrigerate until I’m ready to bake. The flavors actually develop beautifully as they meld together overnight! You can also freeze the unbaked casserole for up to three months—just thaw overnight in the refrigerator before baking. This has saved me countless times when unexpected guests arrive or when I’m too exhausted to cook after a long day. The convenience factor alone makes this recipe worth keeping in your regular rotation.

    Essential Tips & Tricks

    Achieving The Perfect Cheese Sauce

    The heart of any great Chicken Cordon Bleu Casserole is its velvety cheese sauce. Start with a proper roux (equal parts butter and flour) and cook it until it smells slightly nutty but hasn’t browned. Warm your milk before adding it to prevent lumps, then whisk constantly as you pour it in. Let the sauce thicken before adding your cheeses—I prefer a combination of Swiss and Gruyère for authentic flavor. Remove the pan from heat before adding cheese to prevent graininess. If your sauce seems too thick, add a splash of chicken broth; if it’s too thin, let it simmer a bit longer. The perfect sauce should coat the back of a spoon beautifully.

    Elevating The Flavor Profile

    While traditional Chicken Cordon Bleu Casserole is delicious on its own, a few simple additions can take it to the next level. Adding a tablespoon of Dijon mustard to the sauce provides a subtle tanginess that balances the rich cheese. A splash of white wine deglazes the pan beautifully after sautéing your aromatics. Fresh herbs like thyme or tarragon incorporated into both the sauce and the breadcrumb topping add wonderful aromatic notes. For the breadcrumb topping, mix in a bit of grated Parmesan and a drizzle of melted butter before sprinkling over the casserole—this creates an irresistible golden crust similar to what you’d find in Smothered Chicken Thighs with Creamy Gravy.

    Serving Ideas & Creative Variations

    Perfect Pairings For A Complete Meal

    Chicken Cordon Bleu Casserole shines when paired with the right sides. A simple green salad with a light vinaigrette cuts through the richness beautifully. Steamed asparagus or roasted Brussels sprouts provide a veggie component that complements rather than competes with the casserole’s flavors. For starchier options, buttered egg noodles or fluffy mashed potatoes make excellent beds for serving this creamy delight. I love to serve crusty French bread alongside to soak up every last bit of that decadent sauce. For special occasions, a glass of crisp white wine—like a Chardonnay or Pinot Grigio—elevates the entire experience.

    Exciting Twists On The Classic Recipe

    Don’t be afraid to put your own spin on Chicken Cordon Bleu Casserole! Try substituting prosciutto for ham for a more elegant flavor profile. Experiment with different cheese combinations—smoked Gouda adds wonderful depth, while a bit of cream cheese increases creaminess. For a lighter version, use Greek yogurt in place of some of the heavy cream. Adding vegetables like sautéed mushrooms, spinach, or roasted red peppers introduces new textures and nutrients. For a fun twist that kids love, try mixing in cooked pasta to create a Chicken Cordon Bleu Mac and Cheese. The possibilities are endless!

    Storage & Troubleshooting Guide

    Proper Storage For Leftovers

    Leftover Chicken Cordon Bleu Casserole should be cooled completely before being transferred to airtight containers. Properly stored in the refrigerator, leftovers will stay delicious for 3-4 days. To reheat, cover with foil and warm in a 325°F oven until heated through (about 20 minutes), removing the foil for the last few minutes to re-crisp the top. Microwaving works in a pinch, but the texture won’t be as good. For freezing leftovers, portion into freezer-safe containers and use within 2 months. I like to label mine with the date and reheating instructions—it’s such a treat to discover these homemade “frozen dinners” on busy evenings!

    Fixing Common Casserole Problems

    If your Chicken Cordon Bleu Casserole turns out too watery, there are several potential culprits. Make sure to thoroughly drain any canned ingredients and pat chicken dry before adding it to the mix. Pre-cooking the chicken slightly can help release excess moisture. If the sauce is too thin before baking, add an extra tablespoon of flour to the roux. For a casserole that’s too dry, drizzle in some warm chicken broth or cream before serving. If your topping isn’t browning properly, switch to the broiler for the last 1-2 minutes, watching carefully to prevent burning. Remember that casseroles continue cooking slightly after removal from the oven.

    Frequently Asked Questions

    Can I use rotisserie chicken for Chicken Cordon Bleu Casserole?

    Absolutely! Rotisserie chicken saves time and adds flavor. Shred or cube about 3-4 cups of meat, discarding the skin for the best texture in your casserole.

    How do I prevent my casserole from curdling?

    Lower the oven temperature to 350°F and avoid boiling the sauce. Add cheese off-heat and use full-fat dairy products, which are more stable when baked.

    Can I make this casserole gluten-free?

    Yes! Substitute the flour with cornstarch or gluten-free flour blend, and use gluten-free breadcrumbs or crushed gluten-free crackers for the topping.

    What’s the best cheese for Chicken Cordon Bleu Casserole?

    Swiss cheese is traditional, but a combination of Swiss and Gruyère provides the most authentic flavor. Mozzarella can be added for extra meltiness.

    Can I assemble this casserole in advance?

    Definitely! Prepare the Chicken Cordon Bleu Casserole up to 24 hours ahead, refrigerate covered, and add 10-15 minutes to the baking time when cooking from cold.

    Final Thoughts

    This Chicken Cordon Bleu Casserole has become my go-to recipe when I want to impress without stress. The way it transforms simple ingredients into something that feels special makes it perfect for both weeknight dinners and entertaining guests. I love how versatile it is—adaptable to whatever ingredients I have on hand while still maintaining that classic flavor combination we all crave. Don’t forget to check out more comfort food inspirations on Pinterest for your next cooking adventure. Your family will thank you for bringing this cozy, cheesy delight to the dinner table!

  • Baked Apple Fritter Donut Bread with Vanilla Icing

    Baked Apple Fritter Donut Bread with Vanilla Icing

    Baked Apple Fritter Donut Bread with Vanilla Icing – Irresistibly Delicious!

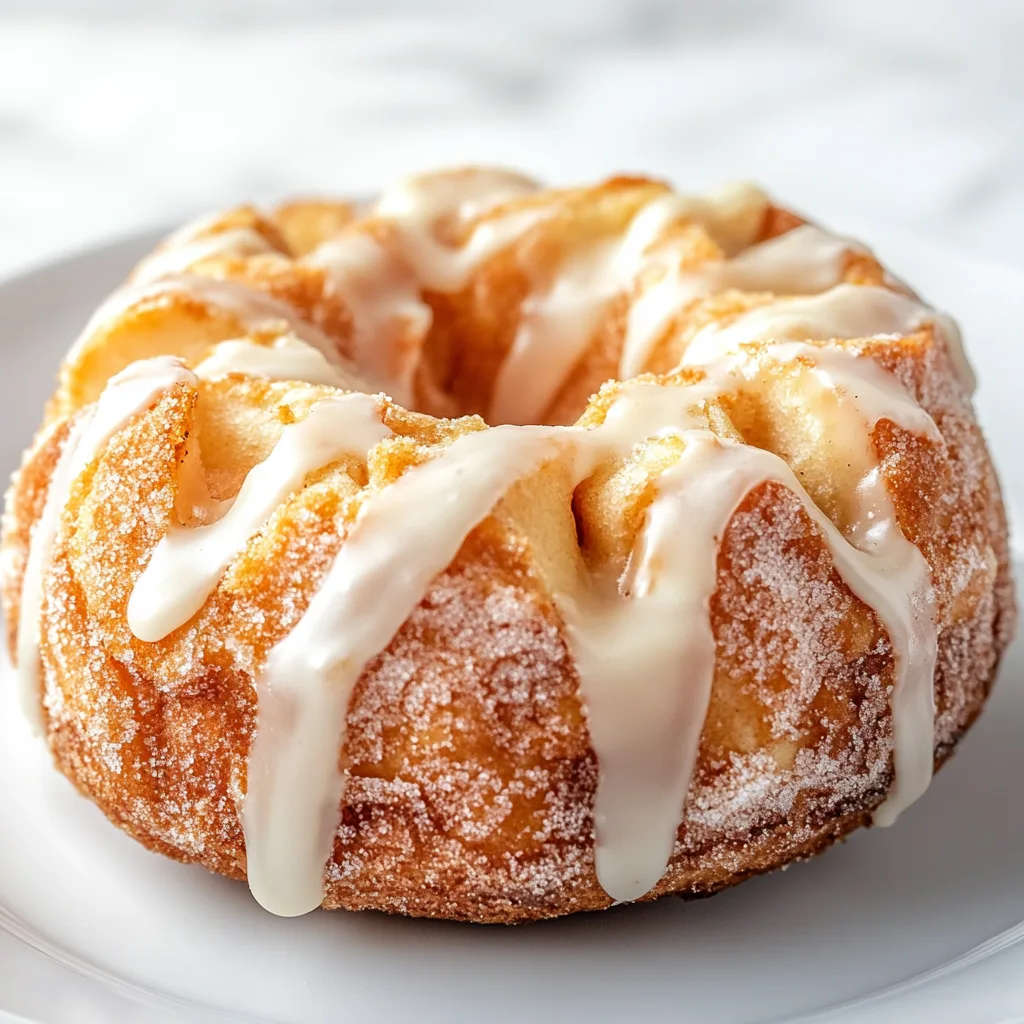
    There’s something magical about the aroma of Baked Apple Fritter Donut Bread with Vanilla Icing wafting through my kitchen on a crisp autumn morning. This delightful treat combines everything I love about apple fritters and donut bread into one irresistible loaf, crowned with a sweet vanilla glaze that drips down the sides. I discovered this recipe last fall when hosting a brunch for my sister’s birthday, and it’s become my go-to when I want to impress guests without spending hours in the kitchen. The tender, apple-studded interior paired with that classic donut flavor will transport you straight to your favorite bakery.

    Recipe

    Why You’ll Love This Baked Apple Fritter Donut Bread with Vanilla Icing

    Perfect Balance of Flavors and Textures

    This bread is truly the best of both worlds – apple fritter goodness meets homemade donut bread. The chunks of cinnamon-spiced apples create pockets of fruity sweetness throughout the moist, tender crumb. What makes this recipe special is how the edges develop that slightly crisp, caramelized texture reminiscent of fried donut edges, while the inside stays soft and cake-like. I love watching guests’ eyes light up when they bite into a piece and discover those hidden apple treasures nestled within the warm spiced bread.

    No Special Equipment Required

    Unlike traditional donuts that require deep frying or special pans, this apple fritter bread comes together with basic kitchen tools. You’ll need just a standard loaf pan, mixing bowls, and a whisk – no fancy equipment necessary! The simplicity of this recipe makes it perfect for those mornings when you want something special without the fuss. I remember attempting to make traditional apple fritters years ago and ending up with a kitchen splattered in oil. This baked version delivers all that flavor with minimal mess and much less effort.

    Essential Tips & Tricks

    Choosing and Preparing Your Apples

    The apples are the star of this show, so choose wisely! I recommend using firm, tart varieties like Granny Smith or Honeycrisp that hold their shape during baking. Dice them into small, uniform pieces (about ¼-inch cubes) to ensure they cook evenly and create that authentic fritter texture. For an extra flavor boost, try using a mix of apple varieties. Don’t skip the step of tossing them with cinnamon and a touch of sugar before folding into the batter – this pre-coating helps distribute those warm spices throughout the bread.

    Perfecting Your Vanilla Icing

    The vanilla icing is what transforms this from a simple quick bread to a true donut-inspired treat, similar to how the glaze elevates my Gluten-Free Lemon Pound Cake. For the perfect consistency, start with less liquid than you think you need, then add more drop by drop until you reach a thickness that will set but still drip beautifully down the sides. Apply the icing while the bread is still slightly warm (but not hot) for that bakery-style finish. A touch of real vanilla extract makes all the difference in the flavor profile.

    Serving Ideas & Creative Variations

    Breakfast and Brunch Pairings

    This Baked Apple Fritter Donut Bread makes a stunning centerpiece for any breakfast spread. I love serving thick slices alongside a fruit salad and hot coffee for weekend brunches. For a more substantial offering, pair it with savory dishes like my Spinach and Feta Egg Casserole to balance the sweetness. When I hosted that birthday brunch, I sliced the bread, arranged it on a tiered stand with fresh berries, and watched it disappear before anything else on the table!

    Seasonal Twists and Add-ins

    While classic apple fritter flavor is hard to beat, this versatile recipe welcomes creative variations. In summer, try adding fresh blueberries alongside the apples. For fall, incorporate pumpkin puree and pumpkin pie spice into the batter. During the holidays, I love adding dried cranberries and orange zest for a festive twist. You can also experiment with different glazes – maple, brown butter, or even a cream cheese frosting all work beautifully. Just keep the total amount of add-ins consistent to maintain the bread’s texture.

    Storage & Troubleshooting Guide

    Keeping Your Bread Fresh

    To maintain that perfect texture, store your apple fritter bread in an airtight container at room temperature for up to 3 days. For longer storage, refrigerate for up to a week, though the texture may become slightly more dense. This bread also freezes beautifully! I often make two loaves and freeze one (unglazed) for unexpected guests. Simply wrap individual slices or the whole loaf in plastic wrap, then foil, and freeze for up to 3 months. Thaw at room temperature and add fresh glaze before serving.

    Troubleshooting Common Issues

    If your bread seems to be browning too quickly on top but remains undercooked inside, tent it with foil halfway through baking. This protects the top while allowing the center to finish cooking. For bread that’s sinking in the middle, your batter might be overmixed or your oven temperature might be off. Always use an oven thermometer for accuracy, and mix just until ingredients are combined. If your apples sink to the bottom, try tossing them in a tablespoon of flour before adding to the batter – this coating technique helps them stay suspended.

    Frequently Asked Questions

    Can I make this Baked Apple Fritter Donut Bread gluten-free?

    Yes! Substitute a 1:1 gluten-free flour blend with xanthan gum. The texture may be slightly different, but still delicious. Consider adding an extra egg for binding.

    How do I know when the bread is fully baked?

    Insert a toothpick into the center – it should come out clean or with a few moist crumbs, not wet batter. The top should be golden brown and spring back when lightly touched.

    Can I use applesauce instead of chopped apples?

    No, chopped apples are essential for authentic fritter texture. However, you can replace some of the oil with unsweetened applesauce for a lighter version.

    Why did my icing soak into the bread?

    Your bread was likely too hot when you applied the icing. Let it cool for at least 20 minutes before glazing for that perfect donut shop finish.

    Can I make muffins instead of a loaf with this recipe?

    Absolutely! Divide the batter among 12 muffin cups and reduce baking time to 18-22 minutes for delightful Apple Fritter Donut Muffins.

    Final Thoughts

    This Baked Apple Fritter Donut Bread with Vanilla Icing brings together the comfort of homemade bread with the indulgence of a bakery treat. It’s become my signature recipe for making ordinary mornings feel special without hours of work. The way the kitchen fills with the aroma of cinnamon and apples as it bakes is almost as rewarding as that first bite – almost! For more delicious breakfast inspiration, be sure to follow me on Pinterest where I share my latest creations.

  • Baked Chicken Parmesan with Spaghetti | Irresistibly Delicious!

    Baked Chicken Parmesan with Spaghetti | Irresistibly Delicious!

    Baked Chicken Parmesan with Spaghetti | Irresistibly Delicious!

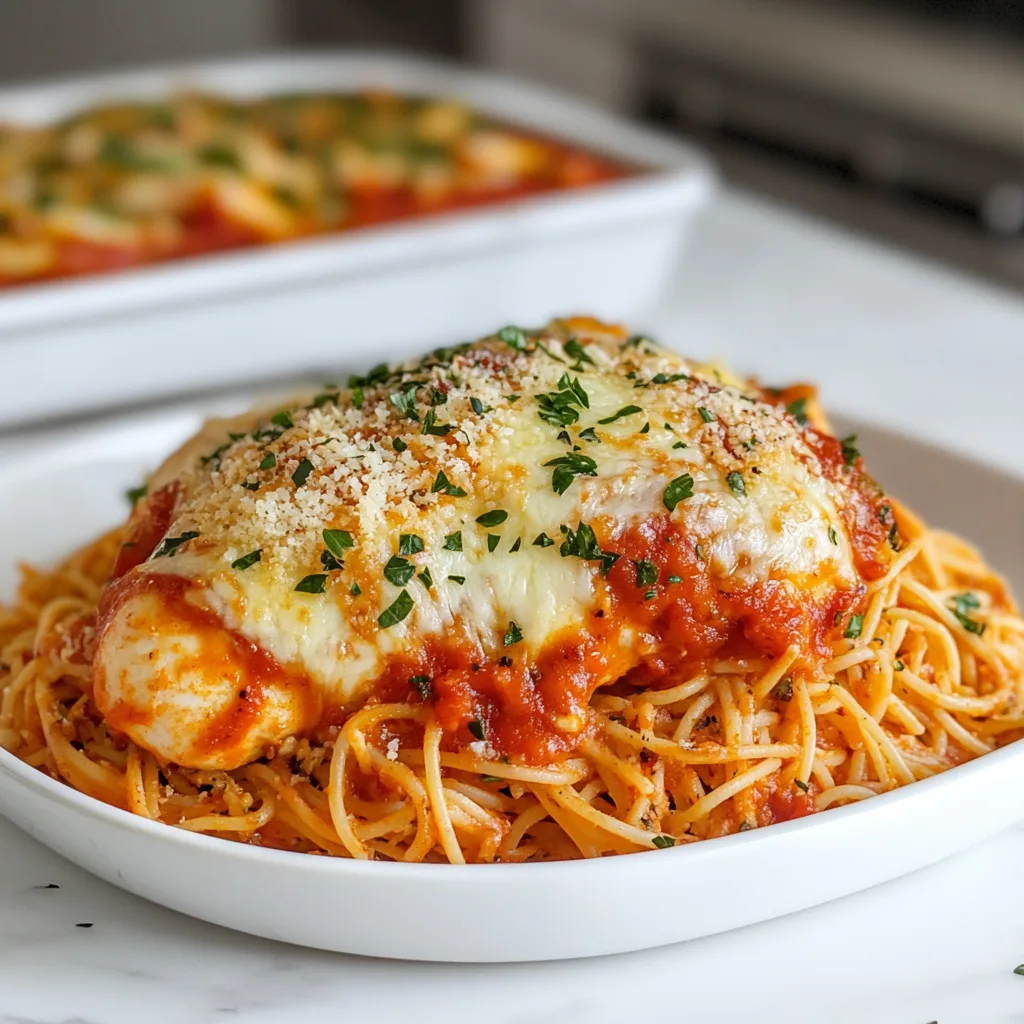
    Baked Chicken Parmesan with Spaghetti and Marinara is the ultimate comfort food that brings restaurant-quality Italian cuisine right to your dinner table. The crispy, golden-brown chicken cutlets layered with melty mozzarella and tangy marinara, nestled atop a bed of perfectly cooked spaghetti—it’s pure magic on a plate! I still remember the first time I made this dish for my family; the kitchen filled with the aromatic blend of herbs and tomatoes while everyone gathered around, drawn by the irresistible smell. This recipe has since become our Friday night tradition, and I’m thrilled to share it with you at Recipes Darleen.

    Recipe

    Why You’ll Love This Baked Chicken Parmesan with Spaghetti and Marinara

    A Healthier Take on the Classic

    This baked version gives you all the flavor without the excessive oil from traditional frying. The chicken turns out incredibly crispy on the outside while remaining juicy and tender inside. I’ve perfected this technique over years of trial and error—discovering that a quick spray of olive oil before baking creates that golden exterior we all crave. Plus, using panko breadcrumbs mixed with parmesan creates an extra crunchy coating that holds up beautifully, even under the marinara sauce. Your family won’t believe it’s not fried!

    Simple Ingredients, Extraordinary Flavor

    What I adore about this Baked Chicken Parmesan with Spaghetti and Marinara is how everyday ingredients transform into something spectacular. The depth of flavor comes from layering simple elements—garlic-infused marinara, freshly grated cheeses, and Italian herbs. Last month, my neighbor asked for the recipe after joining us for dinner, convinced I’d used some secret ingredient! The truth is, it’s all about quality basics and proper technique. The marinara sauce simmers just long enough to concentrate those rich tomato flavors, creating the perfect companion for the crispy chicken.

    Essential Tips & Tricks

    Perfecting Your Chicken Cutlets

    The foundation of amazing Baked Chicken Parmesan starts with properly prepared chicken. I always butterfly thicker breasts or pound them to an even 1/4-inch thickness for consistent cooking. My game-changing tip? Pat the chicken completely dry before breading—this ensures the egg mixture adheres properly. Then, after breading, let the cutlets rest for 10-15 minutes before baking. This little pause allows the coating to set, preventing it from sliding off during baking. I learned this the hard way after several disappointing attempts with soggy chicken!

    The Three-Step Breading Method

    For that restaurant-quality crust that makes Baked Chicken Parmesan with Spaghetti and Marinara truly special, follow my foolproof three-step breading process. First, dust with seasoned flour, then dip in beaten eggs with a splash of milk, and finally coat with a parmesan-panko mixture. The key is using one hand for dry ingredients and the other for wet—this prevents the dreaded “breading fingers” that can ruin your coating. For extra flavor, try adding a pinch of garlic powder and dried oregano to your breadcrumb mixture, just like in my Cheesy Scalloped Potatoes and Beef Bake.

    Serving Ideas & Creative Variations

    Beyond Basic Spaghetti

    While classic spaghetti is the traditional base for Baked Chicken Parmesan, don’t be afraid to experiment! I often serve it over creamy polenta for a luxurious twist that my husband absolutely raves about. Zucchini noodles offer a lighter, low-carb option that still soaks up all that delicious sauce. For a more substantial meal, try pairing with garlic bread or a simple Caesar salad. The versatility of this dish reminds me of my One Pot American Goulash—it’s adaptable to whatever you have on hand while still maintaining its comforting essence.

    Make-Ahead and Freezer Options

    This Baked Chicken Parmesan with Spaghetti and Marinara is perfect for busy weeknights because so much can be prepared ahead. The marinara sauce actually improves overnight as the flavors meld together. You can bread the chicken cutlets and refrigerate them (separated by parchment) for up to 8 hours before baking. For even greater convenience, freeze fully cooked chicken cutlets without sauce or cheese, then reheat and top them when ready to serve. I do this regularly for my teenage son who has late basketball practices—he can assemble a restaurant-quality dinner in minutes!

    Storage & Troubleshooting Guide

    Keeping It Fresh

    Properly stored, Baked Chicken Parmesan with Spaghetti and Marinara stays delicious for several days. Store the components separately when possible—chicken in one container, sauce in another, and pasta in a third. This prevents the breading from becoming soggy. When reheating, the oven works best for maintaining that crispy exterior (about 10 minutes at 350°F), while a microwave is fine for the sauce and pasta. For an extra crispy refresh, try a few minutes in an air fryer! I learned this trick after accidentally making too much for a dinner party last summer.

    Fixing Common Problems

    If your chicken coating turns out soggy, try elevating it on a wire rack while baking to allow air circulation underneath. For sauce that’s too acidic, a pinch of sugar or a grated carrot while simmering works wonders to balance the flavors. If your cheese isn’t browning properly, switch to the broiler for the final 1-2 minutes, watching carefully to prevent burning. And for pasta that’s clumping together, remember to save some of that starchy cooking water—a splash mixed with your sauce creates a silky texture that helps everything cling together beautifully.

    Frequently Asked Questions

    Can I use chicken thighs instead of breasts for Baked Chicken Parmesan?

    Absolutely! Boneless, skinless thighs work beautifully. They’re naturally juicier but will need slightly longer baking time (about 5-7 minutes more). Pound them to even thickness for best results.

    How do I prevent my breading from getting soggy under the sauce?

    Bake the breaded chicken until completely crisp before adding sauce and cheese. Another trick is to add the marinara and cheese just for the last 5 minutes of baking time.

    Can I make this dish gluten-free?

    Yes! Use gluten-free panko breadcrumbs and flour for the chicken coating, and serve with gluten-free pasta or zucchini noodles. The flavor will be nearly identical to traditional Baked Chicken Parmesan with Spaghetti and Marinara.

    What’s the best cheese to use?

    Fresh mozzarella provides the best melt and flavor, but pre-shredded works too. For extra flavor, mix in some fontina or provolone. Always finish with freshly grated Parmesan on top!

    Can I prepare this in advance for a dinner party?

    Definitely! Bread the chicken and prepare the sauce up to a day ahead. Bake the chicken just before guests arrive, then add sauce and cheese for the final minutes before serving.

    Final Thoughts

    Baked Chicken Parmesan with Spaghetti and Marinara brings together simple ingredients to create a meal that feels like a warm hug on a plate. The contrast between the crispy chicken, gooey cheese, tangy sauce, and tender pasta creates a perfect harmony of textures and flavors. Whether you’re cooking for a special occasion or just a cozy family dinner, this dish never disappoints. I’d love to see your creations—share them with us on Pinterest and let me know how this recipe worked for your family!