Author: Emily Carter

  • Healthy Chicken Cauliflower Casserole Recipe That Will WOW You!

    Healthy Chicken Cauliflower Casserole Recipe That Will WOW You!

    Healthy Chicken Cauliflower Casserole Recipe That Will WOW You!

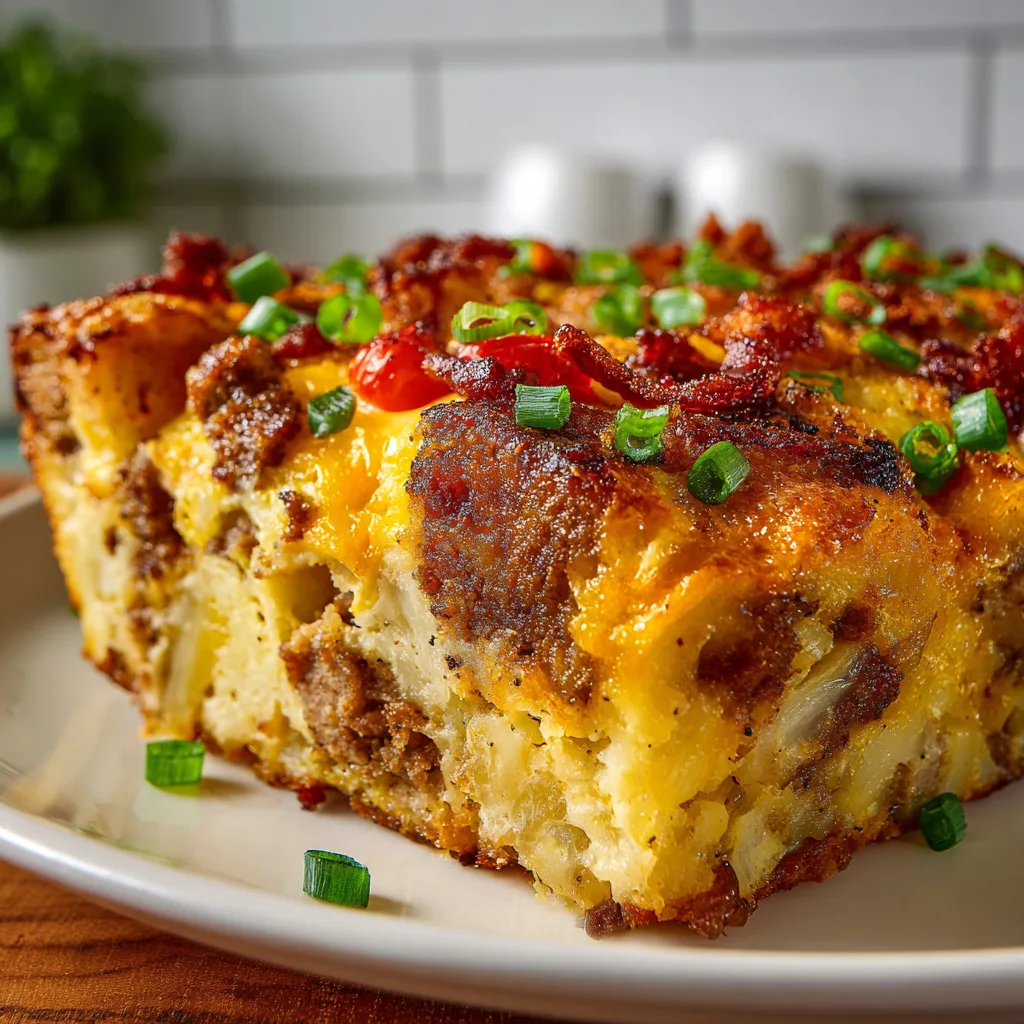
    This Healthy Chicken Cauliflower Casserole is my absolute lifesaver on busy weeknights when I crave something nourishing yet comforting. The first time I made this, my kitchen filled with the most inviting aroma of herbs and roasted cauliflower that had my husband wandering in from his home office asking, “What smells so amazing?” The tender chicken, creamy sauce, and perfectly roasted cauliflower create a flavor symphony that feels indulgent while actually being packed with protein and vegetables. It’s become my go-to recipe when I want something that satisfies my comfort food cravings without the guilt. Check out my collection of family-friendly casseroles for more inspiration!

    Recipe

    Why You’ll Love This Healthy Chicken Cauliflower Casserole

    Perfect Balance of Flavor and Nutrition

    This casserole hits that sweet spot between wholesome and delicious that can be so elusive in healthy cooking. The cauliflower roasts to a gorgeous golden perfection, developing a nutty flavor that pairs beautifully with the savory chicken. I’ve carefully balanced the seasonings so you get that soul-satisfying taste without relying on heavy cream or excessive cheese. My sister-in-law, who typically wrinkles her nose at “healthy versions” of comfort foods, actually asked for seconds! The protein-packed chicken keeps you full, while the cauliflower provides fiber and nutrients without weighing you down.

    Quick Prep with Impressive Results

    One night when I was particularly exhausted after work, I threw this together in about 15 minutes of active time and was amazed at how elegant and delicious the results were. The beauty of this casserole is that while it bakes, you’re free to help with homework, tidy up, or simply enjoy a moment to yourself. I love recipes that work hard for me instead of the other way around! The hands-off cooking time gives the flavors a chance to meld together beautifully, creating something that tastes like you spent hours in the kitchen when really, you just popped it in the oven.

    Essential Tips & Tricks

    Perfect Cauliflower Prep

    The key to this casserole is getting the cauliflower perfectly roasted without becoming mushy. I learned this the hard way after one soggy attempt! Cut your cauliflower into even-sized florets (about 1.5 inches) to ensure they cook uniformly. Pat them thoroughly dry after washing to promote browning. For extra flavor, toss the cauliflower with a tablespoon of olive oil, a pinch of salt, and a sprinkle of garlic powder before adding to the casserole. This simple step elevates the entire dish and creates those irresistible crispy edges that my family fights over. Try this technique with my Dill Yogurt Cucumber Salad for a complete meal.

    Foolproof Chicken Techniques

    For the juiciest chicken possible, I recommend using thighs rather than breasts if you’re concerned about dryness. However, if you prefer breasts, try this foolproof method: brine them in salt water for just 15 minutes before cooking. This simple step was a game-changer for my casseroles! Season your chicken generously with herbs like thyme and rosemary, which complement the cauliflower beautifully. For a time-saving hack, use rotisserie chicken or leftover roasted chicken. Just fold it in during the last 15 minutes of baking to prevent it from drying out.

    Serving Ideas & Creative Variations

    Perfect Pairings

    This Healthy Chicken Cauliflower Casserole stands beautifully on its own, but I love serving it with simple sides that complement without competing. A bright green salad with a lemon vinaigrette cuts through the richness perfectly. When I’m feeding my hungry teenagers, I’ll add a side of quinoa or brown rice to make it more filling. For special occasions, try pairing with roasted asparagus drizzled with balsamic glaze – the slight sweetness is magical with the savory casserole. If you’re looking for another protein-packed option to serve alongside, my Creamy Ranch Turkey Veggie Skillet makes a wonderful addition.

    Exciting Flavor Twists

    Don’t be afraid to make this recipe your own with some creative variations! My Mediterranean version with olives, feta, and a squeeze of lemon juice was a huge hit at last month’s family gathering. For a Mexican-inspired twist, add a teaspoon of cumin, some diced bell peppers, and top with pepper jack cheese instead of mozzarella. When fall arrives, I love incorporating seasonal herbs like sage and rosemary with a sprinkle of dried cranberries. For spice lovers in your family, add a diced jalapeño or a sprinkle of red pepper flakes to give the dish a pleasant heat.

    Storage & Troubleshooting Guide

    Make-Ahead and Freezer Tips

    This casserole is a meal-prep champion that actually tastes better the next day as the flavors continue to develop. You can assemble the entire casserole up to 24 hours ahead and keep it covered in the refrigerator until you’re ready to bake. For freezing, I recommend slightly undercooking the cauliflower as it will continue to soften when reheated. Cool completely before covering tightly with foil and freezing for up to 3 months. My favorite method is to portion individual servings in glass containers for quick grab-and-go lunches. Just thaw overnight in the refrigerator and reheat at 350°F until bubbling.

    Fixing Common Issues

    If your casserole turns out too watery, there’s an easy fix! Cauliflower naturally releases moisture during cooking. Next time, try roasting the cauliflower separately for 15 minutes before adding it to the casserole. For a creamier texture without adding extra dairy, puree a cup of the cauliflower with a bit of broth and fold it back into the mixture. If your top isn’t browning nicely, switch to the broiler for the last 2-3 minutes, watching carefully to prevent burning. And if you find the flavor needs a boost, a splash of white wine or a teaspoon of Dijon mustard works wonders.

    Frequently Asked Questions

    Can I make this Healthy Chicken Cauliflower Casserole vegetarian?

    Absolutely! Replace chicken with chickpeas or white beans for protein. Add extra vegetables like mushrooms or bell peppers for more texture and flavor. The casserole remains satisfying and nutritious.

    How do I prevent my cauliflower from becoming mushy?

    Don’t overcook it initially. Cut florets uniformly, pat them dry before roasting, and consider pre-roasting them for 10-15 minutes before adding to the casserole mixture.

    Can I use frozen cauliflower instead of fresh?

    Yes, but thaw and drain it thoroughly first. Pat it very dry with paper towels to remove excess moisture. It won’t get quite as crispy but will still taste delicious.

    What’s the best cheese to use in this recipe?

    A combination works best – sharp cheddar for flavor and mozzarella for that stretchy texture. Gruyère or fontina add wonderful depth if you’re feeling fancy!

    How can I increase the protein in this dish?

    Add a can of drained white beans, mix in some quinoa, or increase the chicken amount. Greek yogurt in the sauce also boosts protein while adding creaminess.

    Final Thoughts

    This Healthy Chicken Cauliflower Casserole has become more than just a recipe in my household—it’s a reliable friend that shows up when we need nourishment without sacrificing flavor. The way it transforms simple ingredients into something truly special reminds me why I fell in love with cooking in the first place. I hope it brings the same cozy comfort to your table that it has to mine. Remember to make it your own with the variations that speak to your family’s tastes. For more delicious, wholesome recipes, follow me on Pinterest where I’m always sharing new inspiration!
  • Keto Bacon-Wrapped Zucchini Boats: Irresistibly Crispy & Delicious!

    Keto Bacon-Wrapped Zucchini Boats: Irresistibly Crispy & Delicious!

    Keto Bacon-Wrapped Zucchini Boats: Irresistibly Crispy & Delicious!

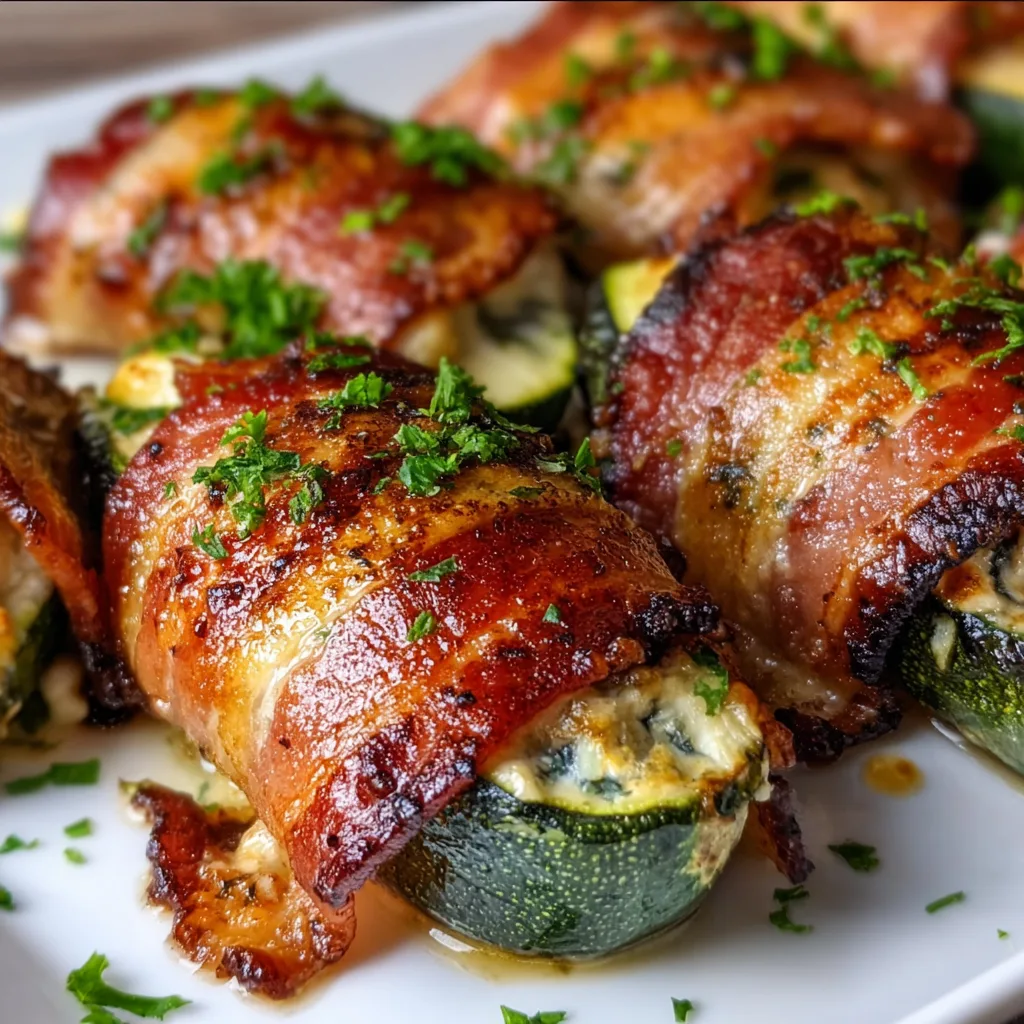
    Keto Bacon-Wrapped Zucchini Boats are the perfect low-carb solution when you’re craving something savory, cheesy, and utterly satisfying. I discovered this recipe during my own keto journey when I desperately needed comfort food without the carbs. The combination of tender zucchini, crispy bacon, and melty cheese creates a flavor explosion that makes you forget you’re eating healthy. These little boats of joy have become my go-to dinner party appetizer because they disappear within minutes! Even my carb-loving friends can’t resist reaching for seconds. Let’s dive into this keto-friendly delight that’s as beautiful as it is delicious.

    Recipe

    Why You’ll Love This Keto Bacon-Wrapped Zucchini Boats

    Perfect Macros for Keto Success

    These zucchini boats are a keto dream come true with their ideal fat-to-carb ratio. Each boat contains just 3-4g net carbs while delivering satisfying fats from the cheese and bacon. I remember serving these at my sister’s birthday gathering—even my dad, who typically scoffs at “diet food,” couldn’t stop raving about them! The zucchini provides essential nutrients while the bacon adds that indulgent flavor we all crave. They’re substantial enough to serve as a main course alongside a simple salad, yet portable enough for meal prep containers. Your keto macros will thank you!

    Quick and Simple Preparation

    One thing I absolutely adore about these Keto Bacon-Wrapped Zucchini Boats is how effortlessly they come together. The entire process takes about 30 minutes from start to finish—perfect for those busy weeknights when cooking feels overwhelming. I’ve made these countless times after long workdays when takeout was tempting me. The prep is straightforward: scoop, fill, wrap, and bake! You can even prepare them ahead of time and pop them in the oven when guests arrive. The smell of bacon crisping in the oven creates an irresistible aroma that fills your kitchen with cozy anticipation.

    Essential Tips & Tricks

    Selecting and Preparing Your Zucchini

    Choosing the right zucchini makes all the difference in this recipe. Look for medium-sized zucchini that are firm and have unblemished skin. Too small, and you won’t have enough room for filling; too large, and they’ll release too much water. When scooping out the centers, leave about ¼-inch thickness around the edges to maintain structural integrity. I learned this the hard way when my first attempt resulted in floppy boats that couldn’t hold their filling! Pat the hollowed zucchini dry with paper towels to remove excess moisture—this prevents soggy results and helps the bacon crisp up beautifully. For extra flavor, try these crispy garlic parmesan green beans as a side dish!

    Bacon Selection and Wrapping Technique

    Not all bacon is created equal for these keto boats! I recommend using thin-cut bacon that crisps easily without requiring excessive cooking time. Thick-cut bacon often remains chewy while the zucchini overcooks. When wrapping, slightly stretch the bacon strip before securing it around the zucchini—this helps it shrink evenly during baking. Start from one end and spiral around, slightly overlapping each turn. Secure with toothpicks if needed, but remember to remove them before serving! I’ve found that pre-cooking the bacon for about 2 minutes helps achieve that perfect crispy exterior while keeping the zucchini tender rather than mushy.

    Serving Ideas & Creative Variations

    Complementary Side Dishes

    These Keto Bacon-Wrapped Zucchini Boats pair beautifully with simple sides that won’t overshadow their flavor. I love serving them alongside a peppery arugula salad dressed with lemon and olive oil—the brightness cuts through the richness perfectly. For family dinners, I’ll add creamy cauliflower mash or roasted radishes as low-carb alternatives to potatoes. When entertaining, I arrange the boats on a wooden board surrounded by olives, cheese cubes, and keto-friendly crackers. The presentation always impresses guests! For an extra special touch, sprinkle everything with fresh herbs just before serving—the pop of green adds visual appeal and freshness.

    Flavor Variations to Try

    While the classic version is divine, experimenting with flavors keeps this recipe exciting meal after meal. My personal favorite variation includes Mediterranean-inspired ingredients—sun-dried tomatoes, feta cheese, and oregano mixed into the filling. For spice lovers, add jalapeños and pepper jack cheese with a sprinkle of taco seasoning. Italian night? Try an Italian sausage filling with ricotta and basil. The possibilities are endless! I once made Buffalo chicken zucchini boats with shredded rotisserie chicken, hot sauce, and blue cheese that disappeared in minutes at a game day gathering. Don’t be afraid to customize based on what’s in your fridge—these boats are forgiving and adaptable.

    Storage & Troubleshooting Guide

    Proper Storage and Reheating

    These Keto Bacon-Wrapped Zucchini Boats store surprisingly well, making them perfect for meal prepping. Once cooled, place them in an airtight container and refrigerate for up to 3 days. For reheating, avoid the microwave which will make the bacon soggy. Instead, place them in a 350°F oven for 10-15 minutes until heated through. The bacon will re-crisp beautifully this way! I often make a double batch on Sundays, enjoying some for dinner and saving the rest for quick lunches. If you want to freeze them, I recommend freezing before the final baking step, then baking from frozen with an extra 10-15 minutes added to the time.

    Common Issues and Solutions

    The most frequent challenge with zucchini boats is excess moisture. If your boats turn out watery, try salting the hollowed zucchini and letting them sit for 10 minutes before patting dry—this draws out moisture before baking. If your bacon isn’t crisping, position the boats higher in the oven or finish with a quick broil (watching carefully to prevent burning). For filling that falls out during baking, make sure you’re not overfilling the boats and consider creating a deeper channel in the zucchini. I once salvaged a batch that was falling apart by transferring everything to a casserole dish and baking it as a deconstructed version—it was different but equally delicious!

    Frequently Asked Questions

    Can I make Keto Bacon-Wrapped Zucchini Boats ahead of time?

    Yes! Prepare them up to 24 hours ahead, store covered in the refrigerator, and bake when ready. For best results, bring them to room temperature for 15 minutes before baking to ensure even cooking.

    What’s the best cheese to use in Keto Bacon-Wrapped Zucchini Boats?

    Sharp cheddar provides the best flavor and meltability, but any keto-friendly cheese works well. Try combinations like mozzarella with parmesan or pepper jack for extra spice.

    How do I prevent my zucchini from becoming mushy?

    Don’t overbake! Cook just until the zucchini is tender-crisp (about 20-25 minutes). Also, removing excess moisture before baking by salting and patting dry helps maintain texture.

    Can I use yellow summer squash instead of zucchini?

    Absolutely! Yellow squash works beautifully as a substitute and offers a slightly sweeter flavor profile. The cooking time and technique remain exactly the same.

    Are these suitable for meal prep?

    These Keto Bacon-Wrapped Zucchini Boats are ideal for meal prep. They reheat well in the oven and maintain their texture for 2-3 days when stored properly in the refrigerator.

    Final Thoughts

    These Keto Bacon-Wrapped Zucchini Boats have become a staple in my low-carb kitchen arsenal. They represent everything I love about keto cooking—simple ingredients transformed into something extraordinarily satisfying. The way the bacon crisps around the tender zucchini while the cheese bubbles to golden perfection never fails to make my mouth water. I’ve served these at casual family dinners and elegant gatherings alike, always to rave reviews. Whether you’re strictly keto or just looking for a delicious way to incorporate more vegetables into your diet, these boats deliver on both flavor and nutrition. Find more inspiration for your keto journey on my Pinterest boards!

  • High-Protein Spinach Artichoke Chicken Casserole You’ll Crave!

    High-Protein Spinach Artichoke Chicken Casserole You’ll Crave!

    High-Protein Spinach Artichoke Chicken Casserole You’ll Crave!

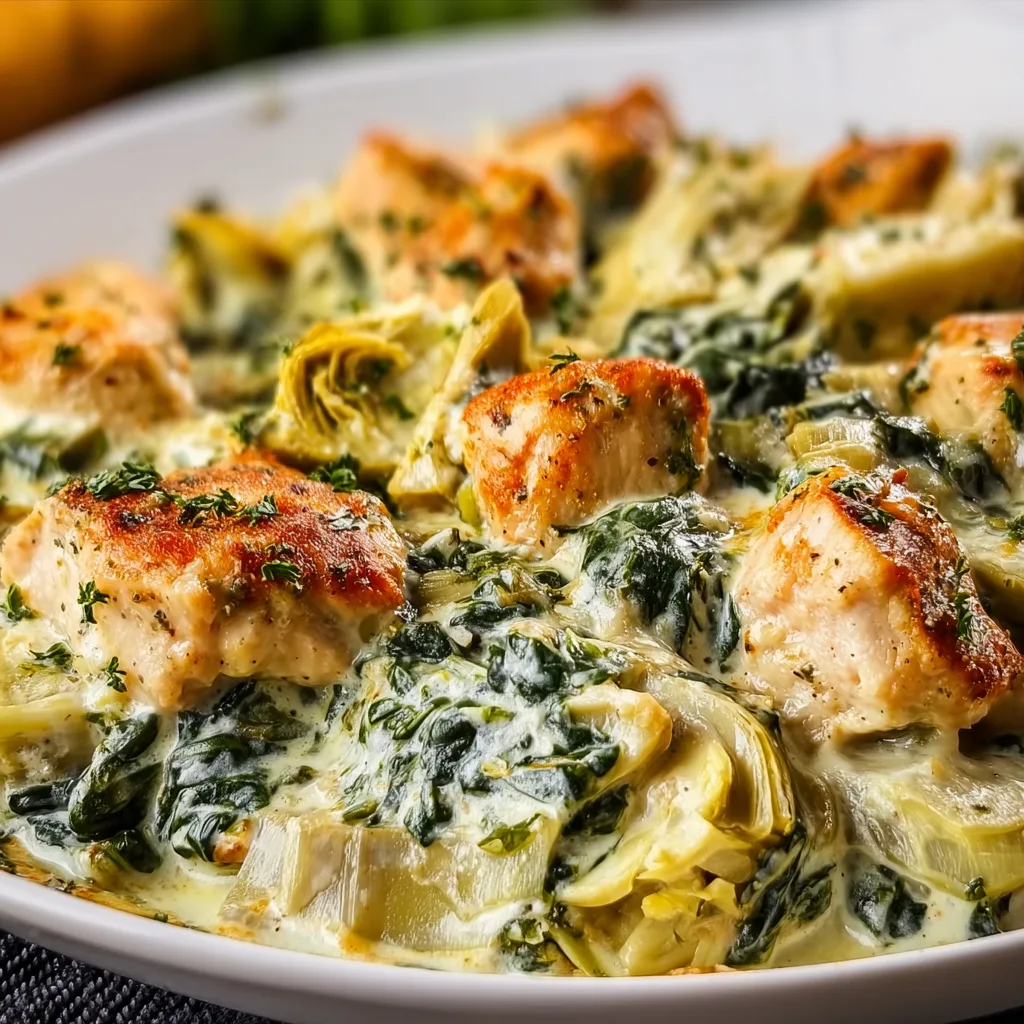
    This High-Protein Spinach and Artichoke Chicken Casserole has become my absolute go-to dinner on those evenings when I crave something hearty yet nutritious. The first time I made it, my kitchen filled with the most intoxicating aroma of garlic, herbs, and melting cheese that had my partner wandering in from the other room asking “What smells so amazing?” It combines tender chicken breast with nutrient-packed spinach and artichokes, all wrapped in a creamy, protein-rich sauce that bubbles to golden perfection in the oven. Trust me, this casserole delivers that cozy comfort food feeling while keeping your nutrition goals on track.

    Recipe

    Why You’ll Love This High-Protein Spinach and Artichoke Chicken Casserole

    Perfect Balance of Nutrition and Flavor

    This casserole isn’t just another pretty dish—it’s a powerhouse of protein that keeps you satisfied for hours. Each serving packs around 35 grams of protein from the chicken breast, Greek yogurt, and cheese blend. I love how the tangy artichoke hearts cut through the richness, while the spinach adds that earthy depth and vibrant color. The first time I served this to my fitness-focused friend Sarah, she couldn’t believe something so creamy and indulgent could align with her macros. The combination of lean protein and vegetables creates that rare sweet spot where nutritious meets delicious.

    Meal Prep Magic

    There’s something incredibly satisfying about having a casserole ready to go in the fridge after a long day. This dish actually tastes even better the next day as the flavors meld together overnight. I often assemble it on Sunday afternoons while listening to my favorite podcast, then portion it into containers for easy grab-and-go lunches throughout the week. The protein content helps keep me full during busy workdays, and unlike some meal prep options that feel sad by Thursday, this casserole maintains its creamy texture and vibrant flavors right to the end of the week.

    Essential Tips & Tricks

    Mastering the Perfect Texture

    The secret to avoiding a watery casserole lies in how you handle the spinach and artichokes. Always thoroughly drain these ingredients—I squeeze the thawed spinach inside a clean kitchen towel until not a single drop remains. For artichokes, I pat them dry with paper towels before chopping. Another game-changer was switching to Greek yogurt instead of sour cream, which adds protein while creating that perfect creamy consistency. When I’m feeling extra indulgent, I add a thin layer of crushed pork rinds on top for a zero-carb crunch that browns beautifully in the oven.

    Flavor-Building Techniques

    Don’t rush the initial sautéing of garlic and onions—this foundational flavor base transforms the entire dish. I learned this the hard way after once hurrying through this step, only to end up with a bland casserole. Now I let them slowly caramelize until golden and fragrant, about 5-7 minutes. Adding a splash of white wine to deglaze the pan incorporates another dimension of flavor. For an extra punch, I mix in a tablespoon of Dijon mustard with the Greek yogurt, which brightens the entire dish without overpowering it. This pairs beautifully with my Crispy Greek Potatoes on special occasions.

    Serving Ideas & Creative Variations

    Complementary Side Dishes

    While this casserole stands perfectly on its own, pairing it with the right sides elevates the entire meal experience. I love serving it with a simple arugula salad dressed with lemon juice and olive oil—the peppery greens and bright acidity balance the creamy casserole beautifully. For a heartier option, roasted cauliflower rice makes an excellent low-carb base that soaks up all those delicious casserole juices. On weekends, I sometimes indulge in a slice of crusty garlic bread for dipping, similar to how I serve my Mediterranean Chicken Orzo, creating that perfect bite of crunchy bread and creamy sauce.

    Creative Protein Variations

    While chicken breast is my go-to, this versatile recipe welcomes creative protein swaps. When I’m short on time, rotisserie chicken shredded into chunks works beautifully and adds a depth of flavor. For seafood lovers, chunks of firm white fish or even shrimp create an elegant variation—just reduce the baking time by about 10 minutes to prevent overcooking. Turkey breast makes an excellent substitute after Thanksgiving when we’re all looking for creative leftover solutions. For vegetarians, replace the chicken with cubed extra-firm tofu that’s been pressed and pre-baked for 20 minutes to remove excess moisture.

    Storage & Troubleshooting Guide

    Proper Storage Techniques

    To maintain optimal freshness, allow the casserole to cool completely before transferring to airtight containers. In the refrigerator, it stays delicious for up to 4 days—perfect for weekly meal prep. For longer storage, freeze individual portions wrapped tightly in plastic wrap then aluminum foil to prevent freezer burn. I label each package with the date using masking tape. When I’m ready to enjoy, I thaw overnight in the refrigerator rather than using the microwave defrost function, which can create hot spots and affect the creamy texture. This methodical approach ensures each serving tastes as good as the first.

    Fixing Common Issues

    If your casserole turns out watery, the culprit is usually undrained vegetables. Next time, double-drain your spinach and artichokes by pressing them in a fine-mesh strainer after the initial squeeze. For a casserole that’s too dry, mix in ¼ cup of chicken broth before baking. If the top browns too quickly before the center is hot, loosely cover with foil for the remaining bake time. When reheating leftovers, sprinkle a few drops of water before microwaving on 70% power, stirring halfway through. This gentle reheating method preserves the creamy texture without creating that rubbery edge that can happen with high-heat microwave settings.

    Frequently Asked Questions

    Is this High-Protein Spinach and Artichoke Chicken Casserole keto-friendly?

    Yes! With only 7g net carbs per serving, this casserole fits perfectly into a ketogenic diet. The high fat content from cheese and the protein from chicken make it an ideal keto meal option.

    Can I use fresh spinach instead of frozen?

    Absolutely. Use about 1 pound of fresh spinach, sauté it first until wilted, then drain thoroughly. Fresh spinach contains more water, so proper draining is crucial to avoid a soggy casserole.

    How can I increase the protein content even further?

    Mix in ½ cup of unflavored protein powder with the Greek yogurt or add ½ cup of cottage cheese to the mixture. You can also top with additional shredded chicken or sprinkle with hemp seeds.

    Can this be made dairy-free?

    Yes, substitute the Greek yogurt with dairy-free yogurt alternatives and use vegan cheese shreds. Nutritional yeast (2-3 tablespoons) adds a cheesy flavor without dairy.

    How do I prevent the casserole from curdling?

    Use room temperature Greek yogurt and cream cheese, and avoid boiling the mixture. Gentle heating and thorough mixing before baking ensures a smooth, creamy texture without curdling.

    Final Thoughts

    This High-Protein Spinach and Artichoke Chicken Casserole has truly transformed my weeknight dinner routine. It strikes that perfect balance between being nutritious enough for everyday meals yet special enough for entertaining guests. The protein-packed ingredients keep me satisfied while the creamy, comforting flavors make healthy eating feel like an indulgence rather than a sacrifice. Whether you’re meal prepping for a busy week or cooking for a family dinner, this versatile casserole adapts to your needs while keeping nutrition at the forefront. Don’t forget to check out more protein-rich recipes on our Pinterest for endless inspiration!

  • Slow Cooker Salisbury Steak Meatballs: Comfort Food Magic!

    Slow Cooker Salisbury Steak Meatballs: Comfort Food Magic!

    Slow Cooker Salisbury Steak Meatballs: Comfort Food Magic!

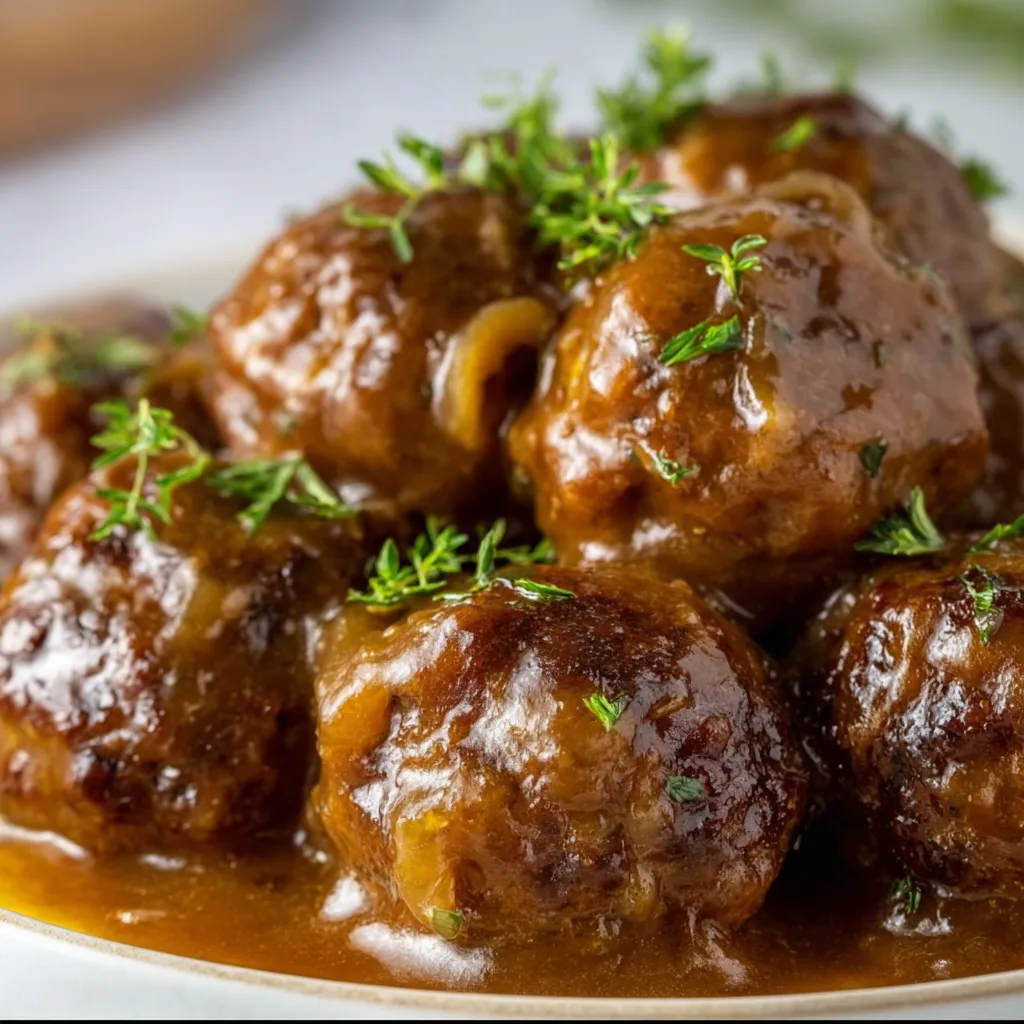
    Slow Cooker Salisbury Steak Meatballs have become my absolute go-to for those evenings when I want something hearty that practically makes itself. There’s something magical about walking through the door after a long day to the rich, savory aroma of these tender meatballs simmering in that velvety mushroom gravy. The first time I made these for my family, my kitchen filled with the kind of comforting scent that makes everyone gravitate toward the slow cooker, lifting the lid for a sneaky taste. If you love classic comfort food with minimal effort, this recipe deserves a permanent spot in your dinner rotation.

    Recipe

    Why You’ll Love This Slow Cooker Salisbury Steak Meatballs

    Perfect Comfort Food with Modern Convenience

    These Slow Cooker Salisbury Steak Meatballs transform a classic diner favorite into something even more delicious and convenient. The beauty lies in how the slow cooking process allows the flavors to meld together, creating incredibly tender meatballs that practically melt in your mouth. I love how the gravy develops this rich, silky texture that clings to each bite. Plus, the hands-off cooking method means you can prep everything in the morning, set your slow cooker, and return to a dinner that tastes like you’ve been tending to it all day. It’s the perfect marriage of nostalgic flavor and modern convenience.

    Budget-Friendly Yet Impressive

    What I adore about this recipe is how it turns affordable ingredients into something that feels special enough for company. Ground beef becomes extraordinary when seasoned just right and slow-cooked to perfection. The mushroom gravy develops such complex flavors that nobody would guess how simple it was to prepare. Last month when my in-laws dropped by unexpectedly, I served these meatballs over mashed potatoes, and they raved about the meal for days. It’s one of those recipes that stretches your grocery budget while still delivering a dinner that feels like a warm hug on a plate.

    Essential Tips & Tricks

    Perfecting Your Meatball Texture

    The secret to irresistible Salisbury steak meatballs lies in the perfect texture. I’ve learned that using a mixture of 85% lean ground beef gives you that ideal balance of flavor and juiciness. Don’t overwork the meat mixture—gentle mixing with your fingertips keeps the meatballs tender rather than tough. My game-changing tip? Add 1-2 tablespoons of plain breadcrumbs soaked in a splash of milk before mixing into your meat. This creates the most delicate, melt-in-your-mouth texture that elevates these meatballs from good to absolutely crave-worthy. Trust me, this small step makes all the difference!

    Creating That Signature Gravy

    The soul of this dish is undoubtedly the rich mushroom gravy that transforms as it simmers. For maximum flavor, take the extra five minutes to brown your mushrooms separately before adding them to the slow cooker. This develops those deep, umami notes that make the sauce irresistible. I discovered that adding a splash of Worcestershire sauce and a tablespoon of tomato paste creates that signature Salisbury steak flavor that reminds me of my grandmother’s cooking. For a silky-smooth finish, similar to my Cheesy Mushroom Swiss Burger Casserole, whisk a cornstarch slurry into the gravy during the final 30 minutes.

    Serving Ideas & Creative Variations

    Classic Comfort Pairings

    These Slow Cooker Salisbury Steak Meatballs shine brightest when served with sides that complement their rich, savory profile. Creamy mashed potatoes create the perfect base to catch every drop of that luscious gravy. On chilly evenings, I love pairing them with buttered egg noodles for a nostalgic dinner that transports me back to childhood. For a lighter option that still satisfies, try serving over cauliflower mash or alongside roasted green beans. The versatility is what makes this recipe a true keeper—it works beautifully with whatever sides you have on hand, making it perfect for busy weeknights when you’re working with what’s in your pantry.

    Global-Inspired Twists

    Don’t be afraid to put your own spin on these meatballs! For a Swedish-inspired variation, add a touch of nutmeg to the meat mixture and stir some sour cream into the gravy during the final cooking stage. I recently tried an Italian twist by incorporating basil, oregano, and a sprinkle of parmesan into the meatballs, then serving them with a side of garlic bread—it was a huge hit! For something completely different, check out my Mississippi Little Smokies for another slow cooker favorite that uses similar techniques but creates an entirely different flavor profile.

    Storage & Troubleshooting Guide

    Making Ahead and Freezing

    These Slow Cooker Salisbury Steak Meatballs are perfect for meal prep and actually taste even better the next day as the flavors continue to develop. Store leftovers in an airtight container in the refrigerator for up to 4 days. For longer storage, these meatballs freeze beautifully for up to 3 months. My time-saving tip is to freeze them in individual portions for quick lunches. When reheating, add a splash of beef broth to revive the gravy’s silky texture. I often make a double batch specifically to freeze half—it’s such a relief to have a homemade dinner ready to go on those hectic days when cooking feels impossible.

    Troubleshooting Common Issues

    If your gravy turns out too thin, don’t worry! Simply mix 1 tablespoon of cornstarch with 2 tablespoons of cold water and stir this slurry into the slow cooker during the last 30 minutes of cooking with the lid off. For gravy that’s too thick, gently whisk in additional beef broth until you reach your desired consistency. If your meatballs seem dry, they may have cooked too long—next time, check for doneness earlier or add a bit more fat to your meat mixture. Remember that slow cookers vary in temperature, so you might need to adjust cooking times slightly for your particular model.

    Frequently Asked Questions

    Can I use frozen meatballs for this Slow Cooker Salisbury Steak Meatballs recipe?

    Yes, you can use frozen meatballs as a time-saver. Add them directly to the slow cooker without thawing, but you may need to extend cooking time by 30-45 minutes to ensure they’re heated through completely.

    Can I make this recipe dairy-free?

    Absolutely! Simply omit the butter and use olive oil instead. Replace any milk in the meatballs with beef broth, and you’ll still get delicious results without compromising on flavor.

    What’s the difference between Salisbury steak and regular meatballs?

    Salisbury steak meatballs contain ingredients like Worcestershire sauce, mustard, and often breadcrumbs soaked in milk. They’re specifically served with a mushroom-onion gravy that gives them their distinctive flavor profile.

    Can I cook this on high instead of low?

    Yes, you can cook on high for 3-4 hours instead of low for 6-8 hours. However, cooking on low produces more tender meatballs and allows flavors to develop more fully.

    Can I add vegetables to the slow cooker?

    Definitely! Bell peppers, carrots, or peas work wonderfully. Add hearty vegetables at the beginning and quick-cooking ones like peas during the last 30 minutes to prevent overcooking.

    Final Thoughts

    These Slow Cooker Salisbury Steak Meatballs have become a cornerstone recipe in my home for good reason. They deliver that perfect balance of convenience and comfort that we all crave in our busy lives. The rich gravy, tender meatballs, and versatile serving options make this dish something I return to season after season. I’d love to see how you serve yours—snap a photo and share it on Pinterest! Whether you stick to the classic version or put your own creative spin on it, these meatballs are sure to become a family favorite in your home too.

  • Cheesy Mushroom & Swiss Burger Casserole That Will Blow Your Mind!

    Cheesy Mushroom & Swiss Burger Casserole That Will Blow Your Mind!

    Cheesy Mushroom & Swiss Burger Casserole That Will Blow Your Mind!

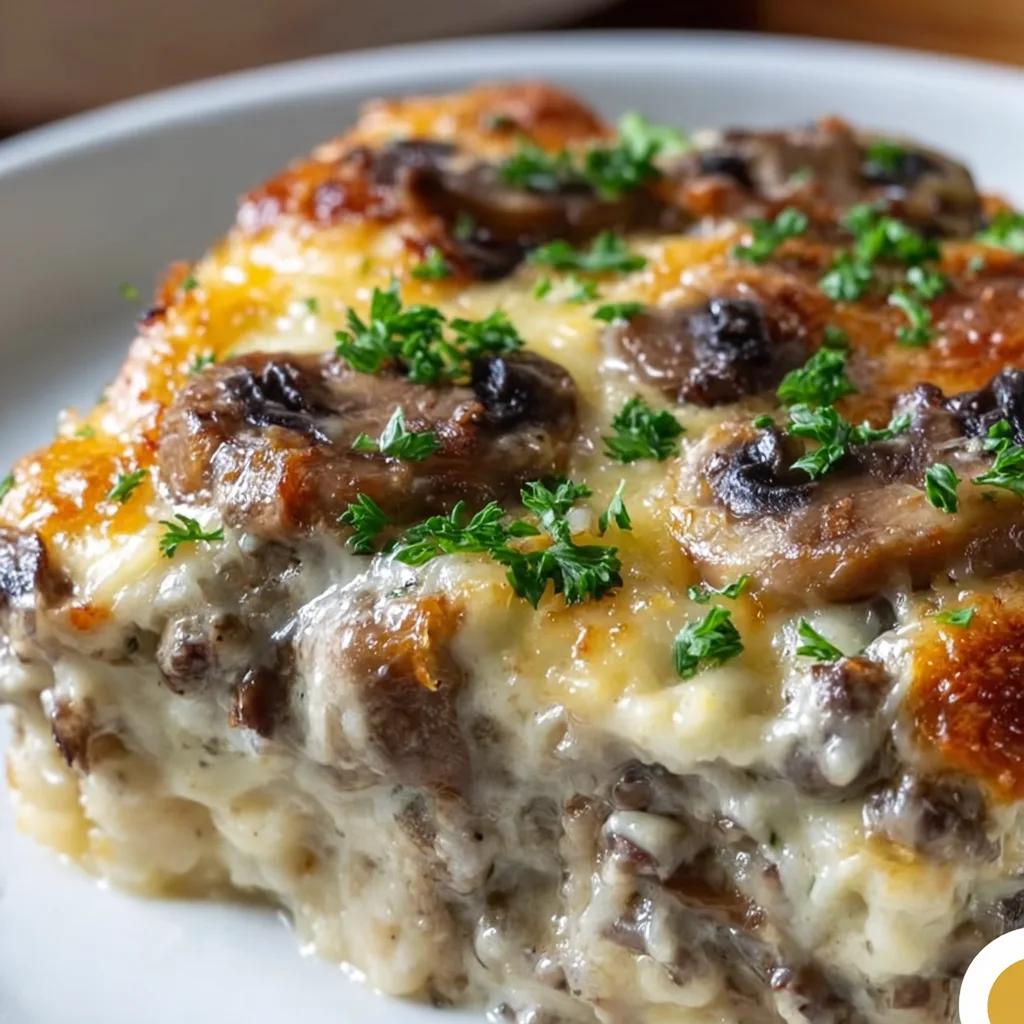
    Cheesy Mushroom & Swiss Burger Casserole combines everything you love about a juicy burger into a comforting, family-style dish that’s perfect for weeknight dinners. The first time I made this for my family, my kitchen filled with the irresistible aroma of sautéed mushrooms and melting Swiss cheese. My husband walked in, took one sniff, and immediately asked, “What’s that amazing smell?” There’s something magical about transforming classic burger flavors into a hearty casserole that brings everyone to the table with eager appetites. If you love easy comfort food like my Easy Potatoes O’Brien Breakfast Casserole, you’ll adore this cheesy delight.

    Recipe

    Why You’ll Love This Cheesy Mushroom & Swiss Burger Casserole

    Perfect Comfort Food for Any Occasion

    This casserole is the definition of crowd-pleasing comfort. The combination of seasoned ground beef, earthy mushrooms, and gooey Swiss cheese creates layers of flavor that satisfy even the pickiest eaters. I’ve served this at everything from casual family dinners to potlucks where it disappears within minutes. There’s something nostalgic about the familiar burger flavors transformed into a fork-tender dish that warms you from the inside out. Plus, it’s substantial enough to feed a hungry family while being special enough for guests.

    Make-Ahead Friendly and Budget Conscious

    One of my favorite aspects of this Cheesy Mushroom & Swiss Burger Casserole is how incredibly versatile it is for busy schedules. You can prep the entire dish up to 24 hours ahead, keeping it covered in the refrigerator until you’re ready to bake. This has saved me countless times during hectic weeknights when cooking from scratch feels impossible. It’s also budget-friendly, using ground beef that stretches further in casserole form than as individual burgers. I often catch it on sale and freeze portions for future easy meals.

    Essential Tips & Tricks

    Perfecting Your Mushroom Preparation

    The key to unlocking maximum flavor lies in how you handle the mushrooms. Never rush this step! I learned the hard way that properly browning mushrooms makes all the difference. Clean them with a damp paper towel rather than washing (they absorb water like sponges). Then slice them evenly and sauté in a hot pan without overcrowding—this ensures they caramelize instead of steam. This develops their rich, meaty flavor that complements the beef perfectly. A splash of Worcestershire sauce while cooking mushrooms adds incredible depth.

    Cheese Selection and Layering Technique

    While Swiss cheese is traditional for this casserole, the cheese-to-ingredient ratio matters tremendously. I recommend using both shredded and sliced Swiss for the perfect texture. Layer thin slices between components for pockets of melty goodness, then top with shredded cheese for that beautiful golden crust. For an extra flavor dimension, mix in a small amount of sharp cheddar with the Swiss. This creates complexity without overpowering the classic flavor combinations that make this dish special.

    Serving Ideas & Creative Variations

    Perfect Pairings for a Complete Meal

    This Cheesy Mushroom & Swiss Burger Casserole shines brightest when paired with simple sides that complement without competing. I love serving it with a crisp green salad dressed lightly with vinaigrette to cut through the richness. Steamed green beans or roasted Brussels sprouts also provide wonderful contrast. For heartier appetites, consider garlic bread or dinner rolls to soak up the delicious sauce. My family’s favorite combination includes a side of Sweet Chili Pineapple Shrimp for special occasions—the sweet-tangy flavors balance the savory casserole beautifully.

    Exciting Flavor Twists to Try

    Don’t be afraid to make this recipe your own with creative variations. For a Southwest-inspired version, add black beans, corn, and pepper jack cheese with a touch of cumin and chili powder. Bacon lovers can fold in crispy bacon bits and substitute some of the Swiss with smoked gouda. For a lighter option, use ground turkey instead of beef and add extra vegetables like bell peppers and spinach. My personal favorite twist is adding caramelized onions and a layer of thinly sliced tomatoes on top before the final cheese layer.

    Storage & Troubleshooting Guide

    Proper Storage for Leftovers

    Leftovers of this Cheesy Mushroom & Swiss Burger Casserole taste even better the next day as the flavors continue to meld. Allow the casserole to cool completely before transferring to airtight containers. It keeps beautifully in the refrigerator for up to 4 days. For longer storage, portion the casserole into freezer-safe containers, leaving some headspace for expansion. Frozen portions will maintain quality for up to 3 months. I like to label with both the date and reheating instructions for my family to easily enjoy when I’m not home.

    Fixing Common Casserole Problems

    If your casserole turns out too watery, the culprit is likely excess moisture from the mushrooms or not draining the beef properly. Next time, ensure you thoroughly drain the cooked beef and sauté mushrooms until their moisture evaporates. For a casserole that’s too dry, mix in a little beef broth or cream before baking. If your top is browning too quickly before the center is hot, loosely cover with foil halfway through baking. Remember that all ovens vary—my older oven runs hot, so I often reduce the temperature slightly.

    Frequently Asked Questions

    Can I make Cheesy Mushroom & Swiss Burger Casserole ahead of time?

    Absolutely! Assemble the casserole up to 24 hours in advance, cover and refrigerate. When ready to serve, add 10-15 minutes to the baking time since you’re starting with a cold dish.

    What can I substitute for Swiss cheese?

    Gruyère makes an excellent substitute with similar melting properties. Provolone or even mozzarella work well, though they’ll give a milder flavor profile.

    Can I use ground turkey instead of beef?

    Yes! Ground turkey works beautifully. Add a tablespoon of olive oil when cooking to compensate for the lower fat content and boost flavor with extra seasonings.

    How do I know when the casserole is done?

    The casserole is ready when it’s bubbling around the edges, the cheese is golden brown, and the center reaches 165°F on an instant-read thermometer.

    Can I add other vegetables to my Cheesy Mushroom & Swiss Burger Casserole?

    Definitely! Bell peppers, spinach, and zucchini are excellent additions. Just sauté them briefly to remove excess moisture before adding to the casserole.

    Final Thoughts

    This Cheesy Mushroom & Swiss Burger Casserole has become a cornerstone in my recipe collection for good reason. It transforms everyday ingredients into something truly special that brings people together around the table. There’s nothing quite like watching faces light up when that bubbling dish of comfort food appears—it’s why I cook in the first place. I’d love to see your versions of this casserole! Share your creations with me on Pinterest and let me know what twists you added to make it your own.

  • Baked Chili Mac Stuffed Peppers That Will Blow Your Mind!

    Baked Chili Mac Stuffed Peppers That Will Blow Your Mind!

    Baked Chili Mac Stuffed Peppers That Will Blow Your Mind!

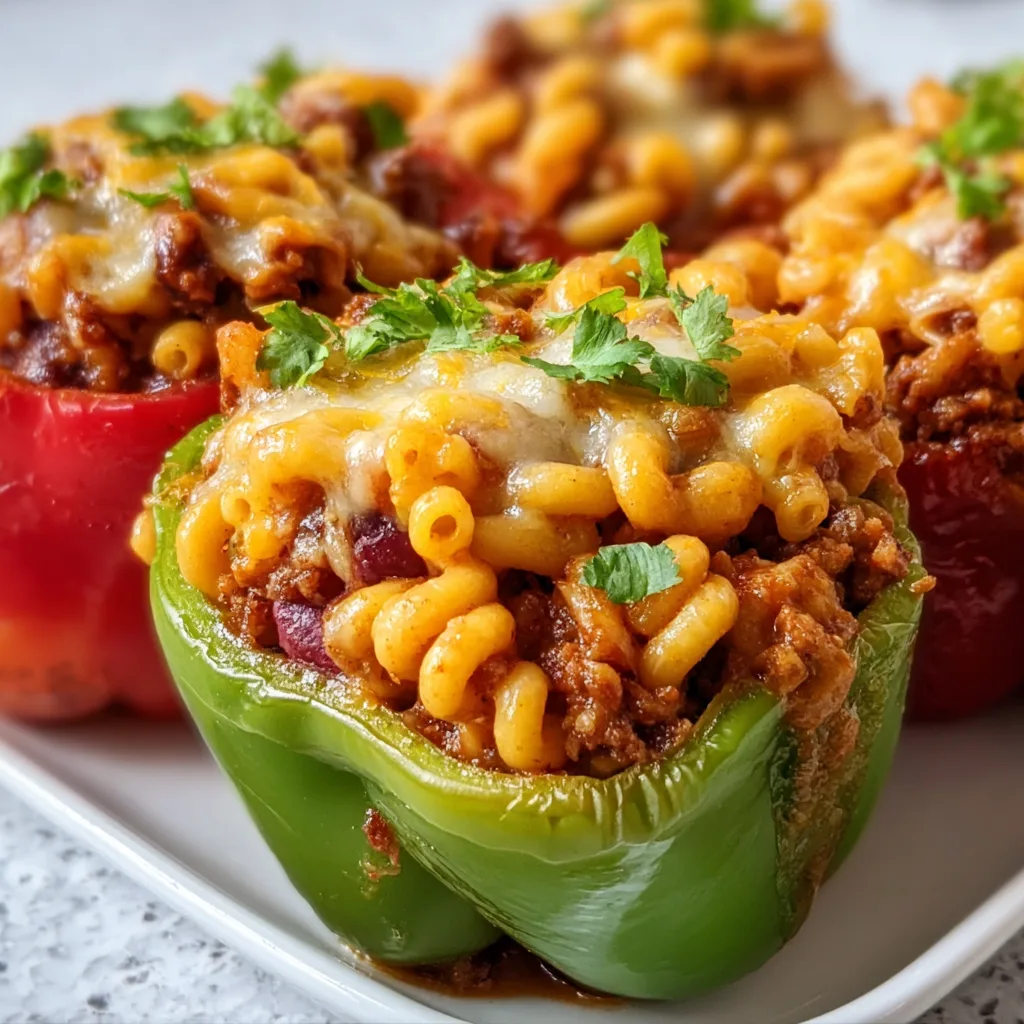
    Baked Chili Mac Stuffed Peppers combine two comfort food classics into one irresistible dish that’s both impressive and easy to make. The first time I made these for my family, my kitchen filled with the most mouthwatering aroma of spices, cheese, and roasted peppers. There’s something magical about the way the sweet bell peppers cradle that hearty, cheesy chili mac filling. It’s like getting a perfect bite of flavor in every colorful pepper boat! If you’re looking for a creative way to use up leftover chili or mac and cheese, this recipe is about to become your new favorite dinner solution.

    Recipe

    Why You’ll Love This Baked Chili Mac Stuffed Peppers

    A Complete Meal in One Dish

    These Baked Chili Mac Stuffed Peppers are the ultimate all-in-one meal that satisfies every craving. The tender bell peppers provide a serving of vegetables while adding natural sweetness that balances the savory, spiced chili mac filling. I love how the peppers soften in the oven but still maintain enough structure to hold that gooey, cheesy goodness inside. Plus, they’re incredibly filling! The combination of protein-packed ground beef, fiber-rich beans, and hearty pasta means you won’t need to worry about making side dishes. It’s comfort food that actually feels good to eat.

    Make-Ahead and Meal Prep Friendly

    One of my favorite things about Baked Chili Mac Stuffed Peppers is how wonderfully they work for meal planning. You can prep these entirely the day before – stuff those peppers, cover the baking dish, and refrigerate until you’re ready to bake. The flavors actually develop overnight, making them even more delicious! I often make a double batch on Sunday and enjoy them throughout the week. They reheat beautifully in the microwave or oven without losing their texture. For busy weeknights, it’s such a relief to have these colorful, nutritious powerhouses waiting in the fridge. Just 30 minutes in the oven and dinner is served!

    Essential Tips & Tricks

    Pepper Preparation Perfection

    Choosing the right peppers makes all the difference in this dish. Look for bell peppers with flat bottoms so they stand upright in your baking dish without tipping over. I prefer using a rainbow of colors – red, yellow, and orange peppers are slightly sweeter than green ones and create a beautiful presentation. When cutting the tops, leave about ¾ of the pepper intact and carefully remove all seeds and membranes. A little tip I discovered: par-bake your empty peppers for 10 minutes before stuffing them. This pre-cooking step ensures they’ll be perfectly tender by the time your filling is hot and bubbly, avoiding that dreaded raw pepper crunch.

    Creating the Perfect Filling

    The heart of these Baked Chili Mac Stuffed Peppers is the flavorful filling that brings together the best of chili and mac and cheese. I recommend using a medium-sized pasta like elbow macaroni or small shells that will easily fit inside the peppers. Cook your pasta just shy of al dente since it will continue cooking in the oven. For the chili component, don’t skimp on the spices! A blend of chili powder, cumin, smoked paprika, and a dash of cayenne creates depth without overwhelming heat. The secret to that creamy, cohesive texture? Stir in some cream cheese along with the shredded cheddar. It melts beautifully and binds everything together.

    Serving Ideas & Creative Variations

    Toppings and Garnishes

    The beauty of Baked Chili Mac Stuffed Peppers lies in the endless topping possibilities. My family loves setting up a little topping bar so everyone can customize their peppers. Fresh cilantro, sliced green onions, and a dollop of sour cream are classics that cool down the spice. For texture contrast, try crushed tortilla chips or crispy fried onions sprinkled over the top just before serving. A squeeze of lime brightens everything up beautifully. My personal favorite finishing touch? A drizzle of hot honey that creates this amazing sweet-heat combo. Don’t forget extra cheese options like crumbled cotija or queso fresco for those who want to take the cheesiness to the next level.

    Dietary Adaptations

    One thing I absolutely love about this recipe is how easily it adapts to different dietary needs. For a vegetarian version, simply swap the ground beef for black beans, pinto beans, or even a plant-based ground meat alternative. The flavor profile works perfectly with these substitutions! Going low-carb? Replace the pasta with cauliflower rice or extra beans. For dairy-free friends, nutritional yeast and dairy-free cheese alternatives melt surprisingly well in this application. Need it gluten-free? Just use your favorite gluten-free pasta – the shorter shapes tend to work best. These adaptations never feel like compromises because the core flavors of these stuffed peppers shine through regardless.

    Storage & Troubleshooting Guide

    Proper Storage Methods

    These Baked Chili Mac Stuffed Peppers are meal prep champions that store beautifully for future enjoyment. Once cooled completely, place leftovers in an airtight container and refrigerate for up to 4 days. The flavors actually continue to develop, making day-two peppers sometimes even tastier! For longer storage, freeze individual peppers wrapped tightly in foil and placed in freezer bags for up to 3 months. I like to label them with the date and reheating instructions. When ready to enjoy, thaw overnight in the refrigerator before reheating. A little trick I’ve found: sprinkle a tablespoon of water over the peppers before reheating to maintain moisture.

    Fixing Common Issues

    Even experienced cooks occasionally encounter challenges with stuffed peppers. If your peppers won’t stand upright, create a stable base by slicing a thin piece off the bottom – just be careful not to cut through to the hollow center. For filling that’s too dry after baking, stir in a splash of warm beef broth or tomato sauce before serving. Too watery? Next time, drain your beans and tomatoes more thoroughly or add a tablespoon of cornstarch to the mixture. If the peppers are still too firm after baking, cover the dish with foil for the first 20 minutes of baking to steam them properly.

    For peppers that split during baking, simply serve them “fallen over” style with extra sauce and cheese on top!

    Frequently Asked Questions

    Can I make Baked Chili Mac Stuffed Peppers ahead of time?

    Absolutely! Prepare and stuff the peppers up to 24 hours in advance, cover with plastic wrap, and refrigerate. Add an extra 5-10 minutes to the baking time when cooking from cold.

    What’s the best cheese for Baked Chili Mac Stuffed Peppers?

    A combination works best – sharp cheddar provides flavor while monterey jack or mozzarella delivers that perfect stretchy texture. For extra richness, mix in 2 tablespoons of cream cheese.

    Can I freeze these stuffed peppers?

    Yes! Freeze fully cooked and cooled peppers individually wrapped in foil, then stored in freezer bags for up to 3 months. Thaw overnight before reheating.

    What sides go well with this dish?

    Keep it simple with a fresh green salad, crusty bread, or corn on the cob. The peppers are already a complete meal with protein, vegetables, and carbs.

    How can I make these spicier?

    Add diced jalapeños or a tablespoon of hot sauce to the filling mixture. You can also top with sliced serrano peppers or red pepper flakes before serving.

    Final Thoughts

    Baked Chili Mac Stuffed Peppers represent comfort food at its finest – familiar flavors transformed into something special that nourishes both body and soul. I love how they bring together the hearty satisfaction of chili mac with the colorful presentation of stuffed peppers. They’ve become a regular in my dinner rotation not just because they’re delicious, but because they’re so versatile and crowd-pleasing. Whether you’re cooking for a family dinner, meal prepping for the week, or impressing guests, these stuffed peppers deliver every time. Don’t forget to check out more comfort food inspiration on Pinterest!

  • Cold Spaghetti Salad: Fresh Veggies & Zesty Dressing Delight!

    Cold Spaghetti Salad: Fresh Veggies & Zesty Dressing Delight!

    Cold Spaghetti Salad: Fresh Veggies & Zesty Dressing Delight!

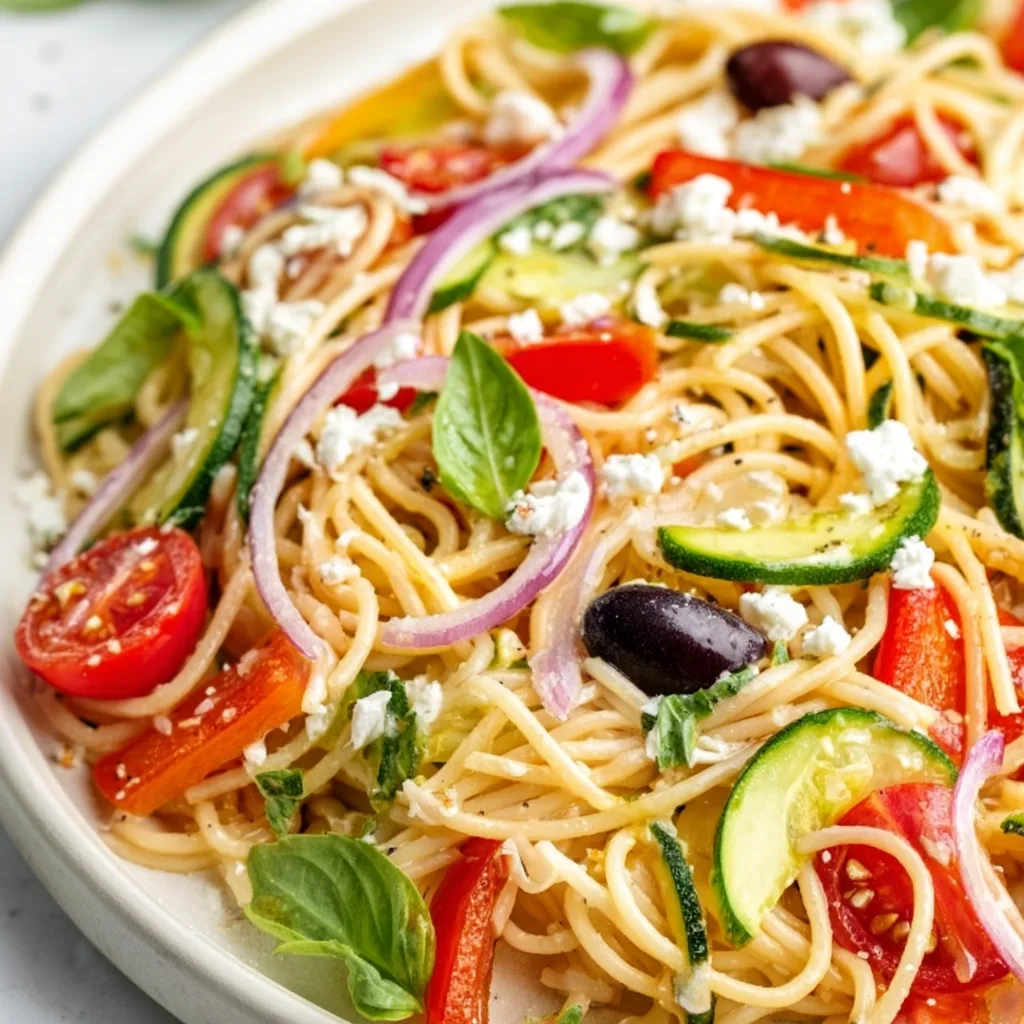
    This Cold Spaghetti Salad with Fresh Veggies and Zesty Dressing has become my summer salvation. There’s something magical about the first bite—tender pasta coated in tangy dressing, crisp vegetables adding that satisfying crunch, and herbs that perfume each forkful. I discovered this recipe during a particularly sweltering July when turning on the oven felt like a personal betrayal. Now it’s my go-to for everything from backyard gatherings to meal prep Sundays. The beauty lies in its versatility and make-ahead convenience that actually improves with time in the fridge. If you’re craving something refreshing yet substantial, this pasta salad delivers every single time.

    Recipe

    Why You’ll Love This Cold Spaghetti Salad with Fresh Veggies and Zesty Dressing

    Perfect for Any Occasion

    This Cold Spaghetti Salad with Fresh Veggies and Zesty Dressing is the chameleon of my recipe collection. It’s elegant enough for summer dinner parties but humble enough for weekday lunches. I’ve brought it to baby showers where it disappeared in minutes and packed it for beach picnics where it stayed deliciously chilled in my cooler. The make-ahead factor is a game-changer—the flavors actually develop and deepen overnight, making this ideal for busy hosts. Plus, it’s customizable for picky eaters (my nephew only eats the pasta and cherry tomatoes, and that’s perfectly fine!).

    A Nutritional Powerhouse

    Don’t let the word “pasta” fool you—this salad packs a serious nutritional punch. The rainbow of fresh vegetables delivers fiber, vitamins, and antioxidants that make this feel as good as it tastes. I load mine with bell peppers in three colors, crisp cucumber, cherry tomatoes, and red onion for a spectrum of nutrients. The zesty dressing uses heart-healthy olive oil rather than mayo, keeping things lighter while maximizing flavor. When I’m feeling extra virtuous, I swap in whole wheat spaghetti for added fiber. It’s that rare combination—a dish that satisfies both your taste buds and your nutritional goals.

    Essential Tips & Tricks

    Perfecting Your Pasta

    The foundation of an exceptional Cold Spaghetti Salad with Fresh Veggies and Zesty Dressing starts with properly cooked pasta. Always salt your water generously—it should taste like the sea—and cook the spaghetti just until al dente. Remember it will continue absorbing dressing as it sits. My secret step? After draining, I immediately toss the hot pasta with a splash of olive oil and a squeeze of lemon juice. This prevents sticking and begins the flavor-building process. For texture perfection, break the spaghetti into thirds before cooking—this makes the final salad much easier to toss and serve. Trust me, I learned this the hard way after wrestling with full-length noodles at a family reunion!

    Dressing to Impress

    The zesty dressing is what transforms this from ordinary pasta salad to something memorable. I create a flavor base with minced garlic and shallots that I let sit in vinegar for 5-10 minutes before adding oil—this mellows their sharpness while infusing the dressing. Use a combination of red wine vinegar and fresh lemon juice for brightness that cuts through the pasta. Don’t skimp on fresh herbs! Basil, parsley, and dill create layers of flavor that dried herbs simply can’t match. For the perfect consistency, emulsify your dressing in a jar with a tight-fitting lid by shaking vigorously until it looks creamy. Check out these homemade dressing techniques for more inspiration.

    Serving Ideas & Creative Variations

    Perfect Pairings

    This Cold Spaghetti Salad with Fresh Veggies and Zesty Dressing shines as a versatile accompaniment. I’ve served it alongside grilled chicken brushed with herbs and lemon for casual weeknight dinners. It’s also stunning next to a platter of Baked Salmon and Vibrant Quinoa for something more elegant. For potlucks, I place it between platters of sliced watermelon and crusty bread—the combination is unbeatable. This salad holds its own as a vegetarian main too—just add chickpeas or white beans for protein. My favorite summer memory? Enjoying this pasta salad with friends on my deck, paired simply with chilled rosé and fresh fruit for dessert. Sometimes the simplest combinations create the most magical meals.

    Creative Twists

    Don’t be afraid to make this recipe your own with seasonal adaptations. In spring, I add blanched asparagus and fresh peas. Summer calls for sweet corn cut from the cob and juicy cherry tomatoes. Fall? Try roasted butternut squash cubes and sage. For Mediterranean flair, add kalamata olives, feta, and artichoke hearts. Going Italian? Incorporate salami, mozzarella pearls, and pepperoncini. My spice-loving friends appreciate when I add a jalapeño and swap the dressing for something with chipotle. The beauty of this Cold Spaghetti Salad with Fresh Veggies and Zesty Dressing is its ability to transform while maintaining its refreshing essence. Follow your culinary intuition and create a version that speaks to your taste preferences.

    Storage & Troubleshooting Guide

    Keeping It Fresh

    Proper storage is crucial for maintaining the vibrant flavors and textures in your Cold Spaghetti Salad with Fresh Veggies and Zesty Dressing. Store it in an airtight container in the refrigerator for up to four days. The salad actually improves after a day as the flavors meld, making it perfect for meal prep. If you’re preparing it far in advance, consider keeping delicate ingredients like fresh herbs and cucumbers separate until serving time. For potlucks or picnics, transport it in a chilled container and keep it out of direct sunlight. I like to pack a small container of extra dressing on the side to refresh the salad just before serving—a quick toss brings back that just-made vibrancy.

    Solving Common Issues

    Even the most experienced cooks encounter challenges. If your salad seems dry after refrigeration, the pasta has likely absorbed the dressing—simply drizzle with a bit more olive oil and a squeeze of lemon juice, then toss gently. Soggy vegetables? They were probably cut too small or added too early. Next time, cut them slightly larger or add water-rich veggies like cucumber and tomato just before serving. If your dressing separated, don’t panic—just whisk it vigorously or shake it in a jar until recombined. And if the flavors seem dull, a pinch of salt, fresh crack of pepper, or extra splash of vinegar will wake everything up. Remember that pasta salad is forgiving—most issues have simple solutions!

    Frequently Asked Questions

    Can I make this Cold Spaghetti Salad with Fresh Veggies and Zesty Dressing ahead of time?

    Absolutely! It actually improves after 24 hours in the refrigerator as the flavors meld. Just reserve some extra dressing to refresh it before serving, and add delicate herbs at the last minute.

    What’s the best pasta shape to use?

    While I prefer spaghetti broken into thirds, any medium pasta works well. Rotini, fusilli, and farfalle are excellent alternatives because their shapes hold dressing in their nooks and crannies.

    How can I make this salad more filling?

    Add protein! Try chickpeas, white beans, cubed cheese, salami, grilled chicken, or shrimp. For a vegetarian boost, toss in some toasted nuts or sunflower seeds for crunch and nutrition.

    Can I use bottled dressing instead of making my own?

    You can, but homemade dressing makes a world of difference. If pressed for time, doctor up a good-quality Italian dressing with fresh lemon juice and chopped herbs.

    Is this recipe suitable for gluten-free diets?

    Simply substitute your favorite gluten-free pasta! Just be sure to cook it precisely according to package directions as gluten-free varieties can become mushy if overcooked.

    Final Thoughts

    This Cold Spaghetti Salad with Fresh Veggies and Zesty Dressing has saved countless summer meals at my table, and I hope it becomes a staple in your recipe collection too. There’s something deeply satisfying about creating a dish that’s simultaneously refreshing and substantial, colorful and nutritious. I love how it bridges the gap between comfort food and fresh, vibrant eating. The next time temperatures climb or you need a reliable crowd-pleaser, remember this versatile recipe. And don’t forget to check out more seasonal inspirations on Pinterest for your next culinary adventure!

  • Easy Potatoes O’Brien Breakfast Casserole That Will Wow Your Tastebuds!

    Easy Potatoes O’Brien Breakfast Casserole That Will Wow Your Tastebuds!

    Easy Potatoes O’Brien Breakfast Casserole That Will Wow Your Tastebuds!

    This Easy Potatoes O’Brien Breakfast Casserole has become my weekend salvation! There’s something magical about the combination of crispy potatoes, colorful peppers, and melty cheese that transforms an ordinary morning into something special. I first created this dish when my sister and her family stayed over during the holidays – I needed something that could feed a crowd without keeping me trapped in the kitchen. The aroma of those sizzling potatoes and peppers filled the house, creating that perfect cozy morning atmosphere that had everyone drifting into the kitchen before I could even call them for breakfast. If you’re looking for a hearty, crowd-pleasing breakfast that practically makes itself, this breakfast casserole is your new best friend.

    Recipe

    Why You’ll Love This Easy Potatoes O’Brien Breakfast Casserole

    Perfect Make-Ahead Solution

    There’s nothing quite like waking up knowing breakfast is practically done. This Easy Potatoes O’Brien Breakfast Casserole can be prepped entirely the night before, allowing the flavors to meld together beautifully overnight. I love assembling it after dinner while my kitchen is already messy, then simply sliding it into the oven the next morning. The combination of crispy potatoes, colorful bell peppers, and protein-packed eggs creates a satisfying breakfast that keeps everyone fueled through the morning. Plus, the hands-off baking time gives me precious minutes to enjoy my coffee in peace!

    Customizable for Every Taste

    One of my favorite things about this Easy Potatoes O’Brien Breakfast Casserole is how wonderfully adaptable it is to different preferences and dietary needs. The classic version features traditional breakfast meats like bacon or sausage, but it’s equally delicious with turkey bacon or plant-based alternatives. You can dial up the heat with extra jalapeños or keep it mild for sensitive palates. I’ve made it with dairy-free cheese for lactose-intolerant friends and loaded it with extra veggies when serving health-conscious guests. The potatoes O’Brien base provides that perfect canvas for creativity while ensuring everyone gets a hearty, satisfying breakfast.

    Essential Tips & Tricks

    Perfect Potato Preparation

    The secret to an exceptional Easy Potatoes O’Brien Breakfast Casserole starts with properly prepared potatoes. I recommend using Yukon Gold or russet potatoes for their ideal texture and flavor. Pre-cook your potatoes slightly before assembling the casserole – whether by parboiling for 5 minutes or microwaving for 3-4 minutes. This ensures they’ll cook evenly and completely in the casserole. Pat them dry thoroughly before combining with other ingredients to prevent excess moisture. For that authentic O’Brien flavor, make sure your diced bell peppers and onions are uniform in size with the potatoes, creating that perfect texture contrast in every bite.

    Layering for Maximum Flavor

    Creating distinct layers in your Easy Potatoes O’Brien Breakfast Casserole makes all the difference in the final result. Start with a thin layer of butter or cooking spray on your baking dish to prevent sticking. Begin with the potato-pepper mixture on the bottom, allowing it to form a crispy base. Next, add your protein layer – whether that’s crispy bacon, browned sausage, or a vegetarian alternative. The egg mixture should be poured over everything, but don’t overmix! Allow it to naturally seep between the layers. Finally, add cheese in two stages – some mixed throughout and a generous layer on top that will create that irresistible golden crust everyone fights over.

    Serving Ideas & Creative Variations

    Brunch-Worthy Pairings

    Transform your Easy Potatoes O’Brien Breakfast Casserole into a showstopping brunch centerpiece with thoughtful accompaniments. I love serving it alongside a colorful fruit salad with seasonal berries and citrus for a refreshing contrast to the savory casserole. A basket of warm biscuits or crusty bread adds wonderful texture and helps soak up every last bit of flavor. For special occasions, offer a simple mimosa bar or spicy Bloody Marys. Don’t forget condiment options like fresh salsa, avocado slices, or sour cream that guests can add according to preference. These thoughtful additions elevate the casserole from a simple breakfast to a memorable brunch experience.

    Global Flavor Inspirations

    Take your Easy Potatoes O’Brien Breakfast Casserole on a worldwide flavor adventure by incorporating international ingredients. Create a Mediterranean version with feta cheese, spinach, and sun-dried tomatoes that brightens the traditional recipe. For Southwestern flair, add black beans, corn, and pepper jack cheese with a dollop of guacamole on top. An Italian-inspired variation might include prosciutto, basil, and mozzarella with a drizzle of balsamic glaze. I recently made a Greek-inspired version with olives and oregano that transported me right back to my vacation in Santorini. These global twists keep the basic recipe exciting while introducing your family to new flavor combinations.

    Storage & Troubleshooting Guide

    Proper Storage Solutions

    Mastering the storage of your Easy Potatoes O’Brien Breakfast Casserole ensures you’ll enjoy perfect leftovers for days. Once cooled completely, cover the casserole dish with plastic wrap or transfer portions to airtight containers before refrigerating. Properly stored, it maintains quality for 3-4 days. For longer storage, freeze individual portions wrapped in plastic then foil, labeling with the date. When reheating, avoid microwaving if possible as it can make the potatoes soggy. Instead, use a 350°F oven for 15-20 minutes until heated through. For single servings, a toaster oven works wonderfully to restore the crispy top while keeping the interior moist and flavorful.

    Fixing Common Issues

    Even experienced cooks occasionally encounter challenges with breakfast casseroles. If your Easy Potatoes O’Brien Breakfast Casserole turns out too watery, the culprit is likely excess moisture from vegetables or undercooked potatoes. Next time, sauté peppers and onions briefly before adding them and ensure potatoes are properly pre-cooked and dried. For a casserole that’s too dry, try increasing the egg mixture by adding an extra egg or splash of milk. If the top browns too quickly before the center is cooked, simply cover with foil for the remaining baking time. And remember that ingredient temperature matters – using cold ingredients straight from the refrigerator can lead to uneven cooking, so let them come to room temperature first.

    Frequently Asked Questions

    Can I make this Easy Potatoes O’Brien Breakfast Casserole vegetarian?

    Absolutely! Skip the meat and add extra vegetables like mushrooms, zucchini, or spinach. For protein, consider mixing in black beans or adding a layer of plant-based breakfast sausage.

    How far in advance can I prepare this casserole?

    You can assemble the entire casserole up to 24 hours before baking. Cover tightly and refrigerate. Allow an extra 5-10 minutes of baking time when cooking from cold.

    What’s the best cheese to use?

    Sharp cheddar provides the best flavor, but feel free to experiment! Monterey Jack melts beautifully, while pepper jack adds a nice kick. A combination of cheeses often creates the most interesting flavor.

    Can I use frozen potatoes O’Brien instead of fresh?

    Yes! Frozen potatoes O’Brien work perfectly and save significant prep time. No need to thaw first – just add them frozen and extend the baking time by about 10-15 minutes.

    Why is my casserole taking longer to cook than the recipe states?

    Oven temperatures vary, and factors like casserole depth and ingredient temperature affect cooking time. Always check doneness by ensuring the center reaches 160°F and isn’t jiggly.

    Final Thoughts

    This Easy Potatoes O’Brien Breakfast Casserole has become a cornerstone in my breakfast repertoire, saving countless mornings with its make-ahead convenience and crowd-pleasing flavors. I love how it brings people together around the table, creating those precious moments of connection that make breakfast special. Whether you’re feeding a houseful of weekend guests or meal prepping for busy weekday mornings, this versatile casserole adapts to your needs. I hope it brings as much joy to your kitchen as it has to mine! Don’t forget to check out more breakfast inspiration on Pinterest for your next morning adventure.