Author: Emily Carter

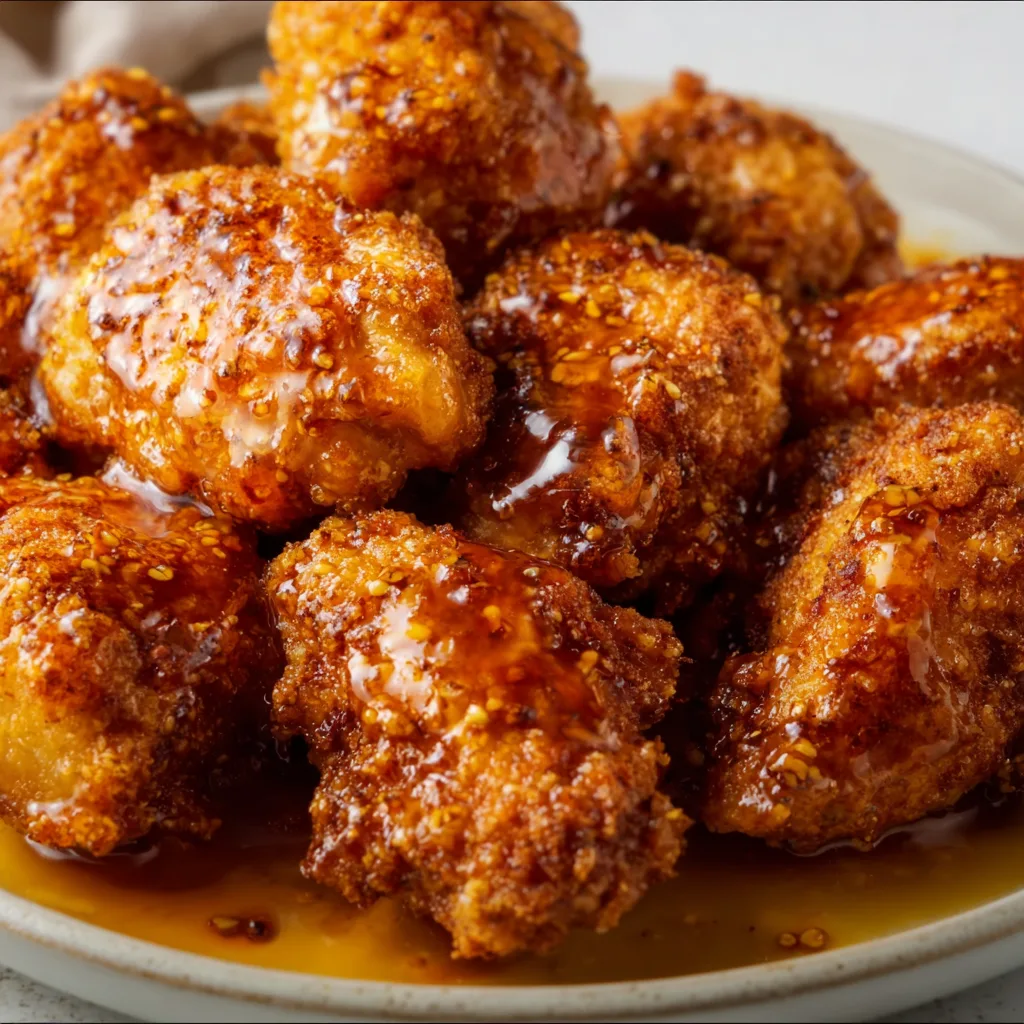
  • Baked Crunchy Hot Honey Chicken: Irresistibly Crispy & Sweet Heat!

    Baked Crunchy Hot Honey Chicken: Irresistibly Crispy & Sweet Heat!

    Baked Crunchy Hot Honey Chicken: Irresistibly Crispy & Sweet Heat!

    Baked Crunchy Hot Honey Chicken has become my absolute obsession this season! There’s something magical about that perfect balance of sweet heat coating impossibly crispy chicken that makes everyone at the table fall silent with that first bite. I discovered this recipe during a weekend cooking marathon when I was craving something with a little kick, and honestly, it’s been on regular rotation ever since. The secret lies in the double coating technique and that luscious hot honey drizzle that creates the most incredible flavor profile. Trust me, this dish hits all the right notes!

    Recipe

    Why You’ll Love This Baked Crunchy Hot Honey Chicken

    Perfect Texture Combination

    The contrasting textures in this dish are what make it truly special. The outside develops this incredible crunchy coating that audibly crackles when you bite into it, while the inside stays remarkably juicy and tender. I still remember the first time I made this for my sister—she literally closed her eyes and sighed after the first bite! The panko breadcrumb mixture creates that restaurant-quality crispiness without deep frying, which means less mess and healthier results. And that moment when the hot honey hits the warm crust? Pure kitchen magic that you’ll crave again and again.

    Flavor That Builds With Every Bite

    The flavor progression in this chicken is what keeps everyone coming back for seconds. It starts with a savory, garlicky note from the seasoned coating, then transitions to a satisfying crunch before the hot honey delivers its sweet-heat finale. I’ve tweaked the spice levels countless times to get that perfect balance where the heat builds gradually rather than overwhelming your palate. The honey mellows everything into this gorgeous sticky glaze that caramelizes slightly in the oven. My neighbor actually texted me at midnight asking for the recipe after trying it at our block party!

    Essential Tips & Tricks

    Perfecting The Crispy Coating

    Creating that restaurant-quality crunch starts with properly preparing your chicken. Pat it completely dry with paper towels before beginning—any moisture is the enemy of crispiness! I learned this the hard way after a disappointing first attempt. For the coating, combine panko with regular breadcrumbs for the perfect texture balance. The game-changer is adding a tablespoon of cornstarch to your flour mixture, which creates an even crispier exterior. And don’t skip the wire rack when baking—it allows hot air to circulate completely around the chicken, resulting in that golden, crunchy crust that makes this recipe truly special.

    Mastering Hot Honey Perfection

    The hot honey drizzle is what transforms this dish from good to unforgettable. I recommend making it while the chicken bakes so it’s warm and pourable when needed. Combine quality honey with your favorite hot sauce (I use a fermented hot sauce for depth), a splash of apple cider vinegar for tanginess, and a pinch of salt to balance the sweetness. Let it simmer until slightly thickened—you want it to coat the back of a spoon but still flow easily. The key timing trick: brush half the mixture on during the last 5 minutes of baking, then reserve the rest for serving. This creates layers of flavor that make each bite more complex than the last.

    Serving Ideas & Creative Variations

    Perfect Pairings

    This showstopping chicken deserves stellar supporting acts on your dinner table. My favorite combination includes a cooling cucumber-dill salad that balances the heat beautifully—the creamy yogurt dressing is particularly magical against the sweet spiciness. For a heartier meal, serve alongside garlic butter parmesan knots and roasted brussels sprouts with a touch of balsamic glaze. When entertaining, I arrange the chicken on a platter with colorful veggie sides and extra hot honey in a small pitcher. The presentation always gets compliments, but it’s those flavor combinations that make guests reach for seconds and thirds!

    Exciting Flavor Twists

    Don’t be afraid to put your own signature spin on this versatile recipe! For an Asian-inspired variation, add ginger and Chinese five spice to your breadcrumb mixture, then finish with a sriracha-honey drizzle and sesame seeds. My summer favorite incorporates lemon zest and herbs into the coating, paired with a hot honey infused with fresh thyme. For a smoky twist, add smoked paprika to both the coating and the honey mixture—this creates incredible depth. And for those who love extra heat, incorporate finely chopped fresh jalapeños into your breadcrumbs. Each variation maintains that perfect crispy-juicy contrast while offering a completely new flavor experience.

    Storage & Troubleshooting Guide

    Keeping It Crispy Later

    Maintaining that signature crunch when storing leftovers requires a few special techniques. First, allow chicken to cool completely before refrigerating to prevent condensation from making it soggy. Store in a container lined with paper towels and leave the lid slightly ajar in the refrigerator. When reheating, avoid the microwave at all costs! Instead, place on a wire rack in a 350°F oven for 10-12 minutes until heated through. For make-ahead preparation, you can coat the chicken and refrigerate for up to 8 hours before baking. The hot honey sauce stores beautifully in a sealed container for up to two weeks—just warm gently before using.

    Solving Common Challenges

    Even experienced cooks encounter troubleshooting moments with crispy chicken recipes. If your coating isn’t browning properly, try increasing the oven temperature by 25 degrees for the last few minutes or giving it a quick broil—just watch carefully to prevent burning! For coating that won’t stick, make sure you’re pressing firmly during the dredging process and allowing excess egg to drip off completely. If your hot honey crystallizes during storage, gently warm it in a water bath. And for those times when the chicken isn’t as juicy as desired, try brining it first in a simple salt solution for 30 minutes before patting dry and proceeding with the recipe.

    Frequently Asked Questions

    Can I make Baked Crunchy Hot Honey Chicken in an air fryer?

    Absolutely! Cook at 380°F for 12-15 minutes, flipping halfway. You’ll get incredible crispiness, but use a light coating of oil spray on the breaded chicken first for best results.

    How spicy is this recipe?

    The heat level is customizable. For a mild version, use 1 teaspoon of hot sauce in the honey. For medium heat, use 1 tablespoon. Heat lovers can add up to 2 tablespoons or include cayenne in the breading.

    Can I use chicken thighs instead of breasts?

    Yes! Boneless thighs work beautifully and stay even juicier. Adjust cooking time to about 25-28 minutes or until they reach 165°F internally.

    What’s the best way to check if the chicken is done?

    Use an instant-read thermometer inserted into the thickest part. It should register 165°F for food safety while maintaining juiciness.

    How do I prevent the honey coating from burning?

    Only add the hot honey during the final 5 minutes of baking. Reserve half for drizzling after cooking to ensure perfect caramelization without burning.

    Final Thoughts

    This Baked Crunchy Hot Honey Chicken has become my go-to recipe when I want to impress without spending hours in the kitchen. There’s something incredibly satisfying about creating that perfect balance of textures and flavors that makes everyone think you’ve been cooking all day. I love watching faces light up with that first crispy, sweet-heat bite! Whether you’re making it for a cozy family dinner or serving it at your next gathering, this dish brings that special restaurant-quality experience right to your table. Don’t forget to share your creations on Pinterest – I’d love to see your version!
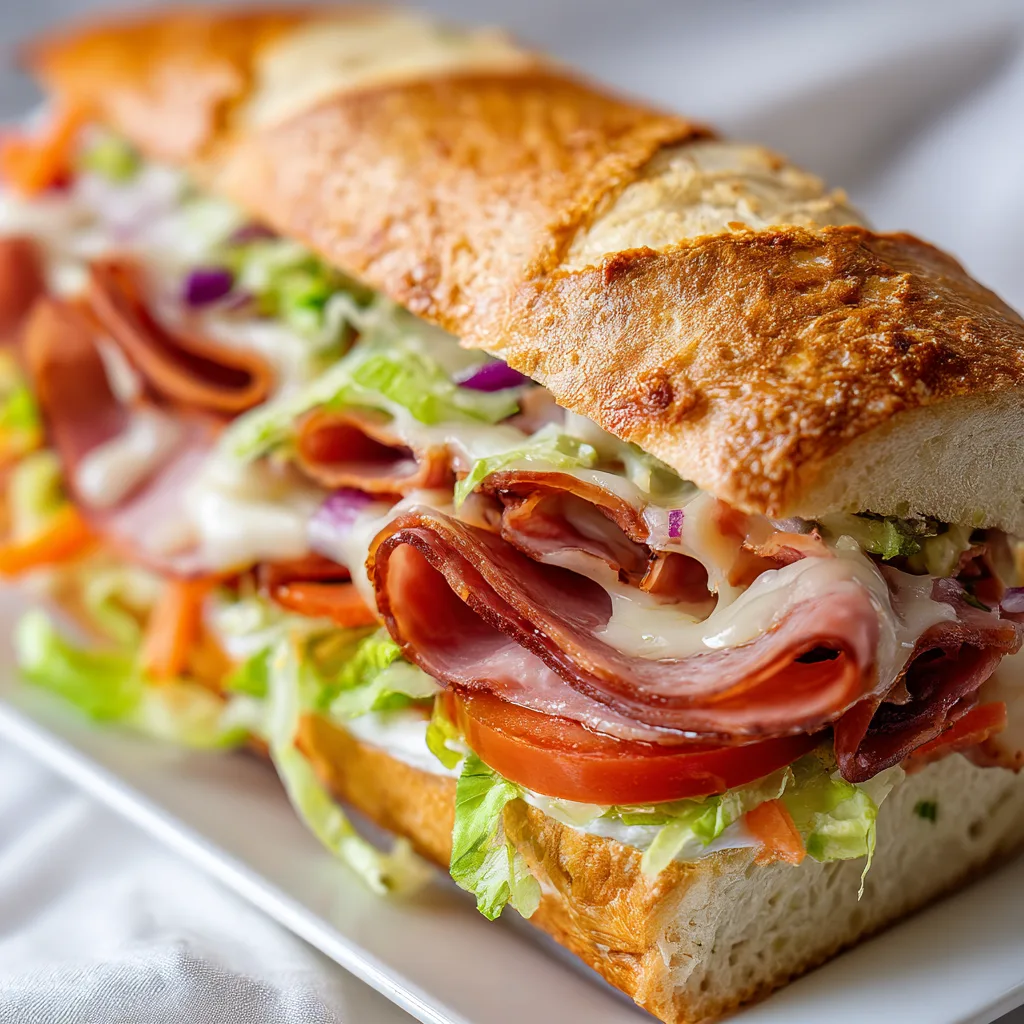
  • Baked Italian Sub Sandwich: Irresistibly Crunchy & Loaded!

    Baked Italian Sub Sandwich: Irresistibly Crunchy & Loaded!

    Baked Italian Sub Sandwich: Irresistibly Crunchy & Loaded!

    This Baked Italian Sub Sandwich has completely transformed my weeknight dinner game! Imagine layers of savory Italian meats, melty provolone cheese, and tangy pepperoncini all wrapped in a crusty loaf that’s been brushed with herb-infused olive oil and baked until golden perfection. The first time I made this for my family, the kitchen filled with an aroma that pulled everyone to the table before I could even call for dinner. It’s become our Friday night tradition – easy enough for busy evenings but special enough to feel like a celebration. If you love cheesy garlic bread, you’ll adore this hearty, flavor-packed sandwich!

    Recipe

    Why You’ll Love This Baked Italian Sub Sandwich

    A Make-Ahead Marvel

    There’s something magical about a sandwich that actually improves with a little time. Unlike regular subs that get soggy, this baked version reaches its peak deliciousness after the flavors have had time to mingle. I often prep these in the morning, wrap them tightly, and then pop them in the oven right before dinner. The olive oil mixture seals the bread, preventing sogginess while infusing every bite with herbs and garlic. The cheese melts into the meats, creating pockets of gooey goodness that make each bite better than the last. Trust me, your patience will be rewarded!

    Restaurant-Quality at Home

    Remember that amazing Italian sub from your favorite deli? This homemade version rivals it – and might even surpass it! The hot oven transforms an ordinary cold sandwich into something extraordinary, with crispy edges and melty centers. I still remember my husband’s face the first time I served these – pure disbelief that something this good came from our kitchen. The best part? You’re in control of the quality and quantity of ingredients. No skimping on the good stuff! Load up with premium meats, fresh vegetables, and as much cheese as your heart desires for a fraction of restaurant prices.

    Essential Tips & Tricks

    Choosing the Perfect Bread

    The foundation of any great Italian sub is the bread selection. I’ve learned through many trials that a crusty Italian loaf or ciabatta works beautifully – they’re sturdy enough to hold all the fillings without becoming soggy. Look for bread that has a slightly chewy interior with a crisp exterior. Avoid super-soft sandwich bread that will collapse under the weight of ingredients. For an extra touch of flavor, I sometimes brush the cut sides with garlic butter before adding fillings. This simple step creates a flavor barrier that keeps everything perfectly balanced, similar to my creamy garlic parmesan chicken pasta approach.

    Layering Strategy Matters

    The way you build your sandwich significantly impacts the final result. Start with a layer of provolone cheese against both bread halves – this creates a moisture barrier and melts beautifully during baking. Next, alternate your meats (salami, capicola, ham) with more cheese. Keep the wet ingredients like roasted red peppers, pepperoncini, and tomatoes toward the center, patted dry with paper towels. For the best flavor distribution, sprinkle each layer lightly with Italian seasoning and a drizzle of oil and vinegar. This methodical approach ensures every bite contains the perfect balance of flavors.

    Serving Ideas & Creative Variations

    Perfect Pairings

    This baked Italian sub sandwich shines as the star of your meal, but a few thoughtful sides can elevate the experience. I love serving it with a simple arugula salad dressed with lemon juice and olive oil – the peppery greens and bright acidity perfectly balance the rich sandwich. A small bowl of good quality olive oil sprinkled with red pepper flakes makes an excellent dipping option for the crusty edges. For a heartier meal, consider a side of creamy tomato soup for that classic soup-and-sandwich comfort. On summer evenings, marinated vegetable salad with olives and artichokes complements the Italian flavors beautifully.

    Exciting Flavor Twists

    While the classic Italian sub is perfection, don’t be afraid to experiment with variations. For a Mediterranean twist, add feta cheese, Kalamata olives, and a smear of hummus. Craving something spicier? Layer in calabrese salami, pepper jack cheese, and hot giardiniera for a fiery kick. For a vegetarian version, replace the meats with grilled eggplant, zucchini, and portobello mushrooms. My family loves when I make a breakfast-inspired version with prosciutto, fontina cheese, and a drizzle of honey – baked until golden and then topped with fresh arugula and a few runny fried eggs.

    Storage & Troubleshooting Guide

    Keeping It Fresh

    These baked Italian subs maintain their quality surprisingly well when stored properly. For make-ahead preparation, assemble the sandwich completely but don’t bake it – wrap tightly in foil and refrigerate for up to 24 hours. When ready to eat, simply bake as directed. Leftover baked sandwiches should be wrapped in foil and refrigerated promptly. To reheat, place the wrapped sandwich in a 300°F oven for about 10 minutes until warmed through. The microwave works in a pinch but will soften the bread. For best results, slice only what you’ll eat immediately and keep the rest intact to preserve moisture.

    Avoiding Common Pitfalls

    The most common issue with baked subs is the dreaded soggy bread syndrome. To prevent this, always toast your bread lightly before assembly and create that protective cheese barrier mentioned earlier. If using particularly juicy ingredients like tomatoes or roasted peppers, pat them thoroughly dry and place them in the center of the sandwich. Another tip: let your sandwich rest for 5 minutes after baking before slicing. This allows the cheese to set slightly and prevents all the fillings from sliding out. If your bread is browning too quickly in the oven, simply cover loosely with foil for the remaining bake time.

    Frequently Asked Questions

    Can I make a Baked Italian Sub Sandwich ahead of time?

    Yes! Assemble up to 24 hours in advance, wrap tightly in foil, and refrigerate. Bake when ready to serve for a fresh-from-the-oven experience without the prep work.

    What’s the best bread for Italian subs?

    Ciabatta or Italian loaves work best due to their sturdy structure and crispy exterior. They hold up to the fillings and baking process without getting soggy.

    Can I make this sandwich vegetarian?

    Absolutely! Substitute the meats with grilled vegetables, extra cheese, or plant-based meat alternatives. The herb oil and baking method will still create amazing flavors.

    How do I prevent my sandwich from getting soggy?

    Create a barrier with cheese against the bread, pat wet ingredients dry, and lightly toast the bread before assembly. These steps protect against moisture infiltration.

    What temperature should I bake my Italian sub sandwich?

    Bake at 375°F for 10-15 minutes until the cheese melts and the bread becomes golden and crispy. Cover with foil if browning too quickly.

    Final Thoughts

    This Baked Italian Sub Sandwich has become more than just a meal in our house – it’s a celebration of flavors that brings everyone to the table. The transformation that happens in the oven is truly magical, turning simple ingredients into something extraordinary. I hope you’ll try this recipe and experience the joy of cutting into that perfectly crispy exterior to reveal the melty, savory layers within. Don’t forget to check out more sandwich inspiration on Pinterest and tag me when you make your own version!

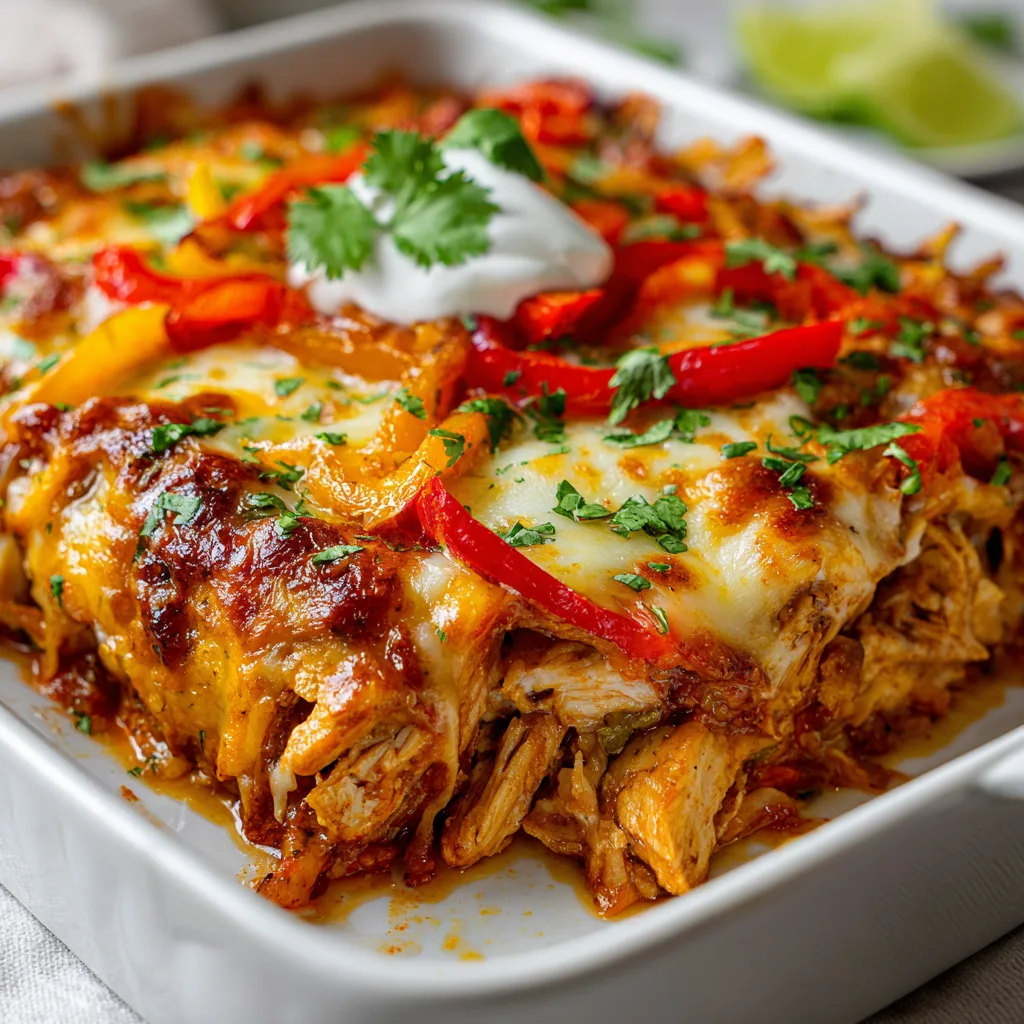
  • Chicken Fajita Casserole Recipe That Will WOW Your Taste Buds!

    Chicken Fajita Casserole Recipe That Will WOW Your Taste Buds!

    Chicken Fajita Casserole Recipe That Will WOW Your Taste Buds!

    This Chicken Fajita Casserole transforms everyone’s favorite Tex-Mex dish into a comforting, one-pan wonder that’s perfect for busy weeknights. The first time I made this, my kitchen filled with the most intoxicating aroma of sizzling peppers and warm spices. My family literally followed their noses to the table! Combining tender chicken, colorful bell peppers, and melty cheese with those bold fajita flavors we all crave, this casserole delivers all the satisfaction of traditional fajitas without the fuss. If you love simple yet flavorful meals like I do, this recipe deserves a permanent spot in your dinner rotation.

    Recipe

    Why You’ll Love This Chicken Fajita Casserole

    Family-Friendly Comfort Food

    There’s something magical about watching my picky 10-year-old nephew devour this casserole when he normally picks around bell peppers on his plate. The familiar flavors blend so harmoniously that even vegetable skeptics clean their plates! The combination of tender chicken, sweet peppers, and gooey cheese creates a texture wonderland that appeals to all ages. Plus, it’s endlessly customizable to suit different spice preferences—add extra jalapeños for heat lovers or keep things mild for sensitive palates. The hands-off baking time means I can help with homework or take a moment for myself while dinner practically makes itself.

    Simple One-Pan Solution

    On those days when I can barely summon the energy to cook (we’ve all been there!), this casserole feels like a kitchen lifeline. With just one baking dish to wash afterward, cleanup becomes almost effortless. I love how the preparation follows a simple layer-and-bake approach that doesn’t require constant attention or complicated techniques. The ingredients are straightforward pantry and refrigerator staples I typically have on hand. When life gets chaotic, knowing I can assemble this dish in about 15 minutes before popping it in the oven creates the kind of cooking confidence that turns an ordinary Tuesday into a deliciously manageable evening.

    Essential Tips & Tricks

    Perfect Chicken Every Time

    The secret to incredibly tender chicken in this casserole lies in two simple techniques. First, slice against the grain into thin, even strips that cook quickly and remain juicy. Second, don’t skip the brief marination with lime juice—even 15 minutes makes a noticeable difference in flavor and tenderness! I learned this the hard way after rushing through preparation once and missing that bright citrus note. For maximum flavor infusion, season your chicken generously with the spice blend, making sure every piece gets evenly coated. If time allows, marinating the chicken for up to 4 hours in the refrigerator will elevate your casserole from good to absolutely crave-worthy.

    Vegetable Preparation Matters

    The way you cut your vegetables dramatically impacts both cooking time and flavor distribution. Aim for uniform slices about ¼-inch thick so everything cooks evenly—nothing’s worse than some perfectly tender peppers mixed with raw crunchy ones! I’ve found that slightly charring the peppers and onions in a hot skillet before adding them to the casserole creates that authentic fajita flavor that makes this dish special. Just a quick 3-5 minute sauté until they begin to soften but still hold their shape works wonders. For an extra flavor boost, try roasting your peppers first, like in these delicious pesto chicken flatbreads that use a similar technique.

    Serving Ideas & Creative Variations

    Build-Your-Own Fajita Bar

    Transform dinner into an interactive experience by serving this casserole as the centerpiece of a build-your-own bar! I set out small bowls of fresh toppings like diced avocado, sour cream, pico de gallo, and lime wedges, allowing everyone to customize their plate. Warm flour tortillas or crispy tostadas make perfect vehicles for scooping up the casserole contents. My niece loves creating “fajita boats” with lettuce leaves for a lighter option. This serving style works beautifully for casual gatherings where conversation flows as freely as the food. For more interactive dinner ideas, check out these steak cheese quesadillas that follow a similar customizable concept.

    Global Flavor Twists

    While traditional fajita seasoning creates a reliable crowd-pleaser, experimenting with different flavor profiles keeps this casserole exciting in regular rotation. Try a Mediterranean version with oregano, lemon, and feta cheese, or venture into Thai-inspired territory with coconut milk, lime, and curry paste instead of the traditional tomato base. My personal favorite variation incorporates a layer of black beans and corn beneath the chicken for added texture and nutrition. For a fusion twist, sprinkle crushed tortilla chips on top during the last five minutes of baking for a satisfying crunch that contrasts beautifully with the tender filling.

    Storage & Troubleshooting Guide

    Make-Ahead & Freezing Success

    This casserole shines as a meal prep champion that actually improves with a bit of time. Assemble everything up to 24 hours before baking, cover tightly with plastic wrap, and refrigerate—the flavors meld beautifully! For freezing, I’ve found that slightly undercooking the vegetables before assembling prevents them from becoming mushy during reheating. Cool the baked casserole completely before freezing in portion-sized containers for up to 3 months. The texture of the cheese may change slightly upon thawing, but a quick sprinkle of fresh cheese during reheating solves this issue. Always thaw overnight in the refrigerator for the best results.

    Fixing Common Issues

    If your casserole turns out watery, the likely culprits are excess moisture from the vegetables or undrained tomatoes. Next time, pre-cook the peppers and onions slightly longer to release more moisture, and be sure to drain canned ingredients thoroughly. For casseroles that lack flavor, boost the seasoning with an extra tablespoon of fajita mix and a splash of lime juice just before serving. Undercooked chicken usually means the pieces were cut too thick—aim for thinner, more uniform slices. If the cheese browns too quickly before the casserole is fully cooked, simply cover with foil for the remainder of the baking time.

    Frequently Asked Questions

    Can I use pre-cooked chicken for this Chicken Fajita Casserole?

    Absolutely! Rotisserie chicken works beautifully—just shred or dice about 3 cups and toss with the fajita seasoning before assembling. This shortcut saves about 15 minutes of prep time without sacrificing flavor.

    What’s the best cheese to use?

    A combination of sharp cheddar and Monterey Jack provides the perfect balance of flavor and meltability. For an authentic touch, try Oaxaca or Chihuahua cheese if you can find them at specialty markets.

    Can I make this vegetarian?

    Yes! Replace chicken with 2 cans of drained black beans or 1 pound of firm tofu cut into cubes. The spice blend works just as well with these protein alternatives for a delicious meatless option.

    How do I prevent the casserole from becoming soggy?

    Pre-cooking the peppers and onions releases their moisture before baking. Also, thoroughly drain any canned ingredients and avoid overfilling the casserole dish to allow proper heat circulation.

    What sides pair well with this dish?

    Cilantro-lime rice, Mexican street corn, or a simple green salad with avocado complement the flavors perfectly. For a lighter meal, serve with cauliflower rice or a fresh cucumber salad.

    Final Thoughts

    This Chicken Fajita Casserole has become my reliable solution for satisfying Tex-Mex cravings without the restaurant price tag or multiple pans to clean. The way the spices permeate every bite, creating layers of flavor that somehow taste even better the next day, makes this dish truly special. I find myself returning to this recipe whenever I need a guaranteed dinner victory that bridges the gap between comfort food and healthful eating. Whether you’re feeding a hungry family or meal prepping for a busy week ahead, this versatile casserole deserves a starring role in your recipe collection. Don’t forget to share your creations on Pinterest!

  • Crispy Baked Chicken Wings: Irresistibly Crunchy & Juicy Delight!

    Crispy Baked Chicken Wings: Irresistibly Crunchy & Juicy Delight!

    Crispy Baked Chicken Wings: Irresistibly Crunchy & Juicy Delight!

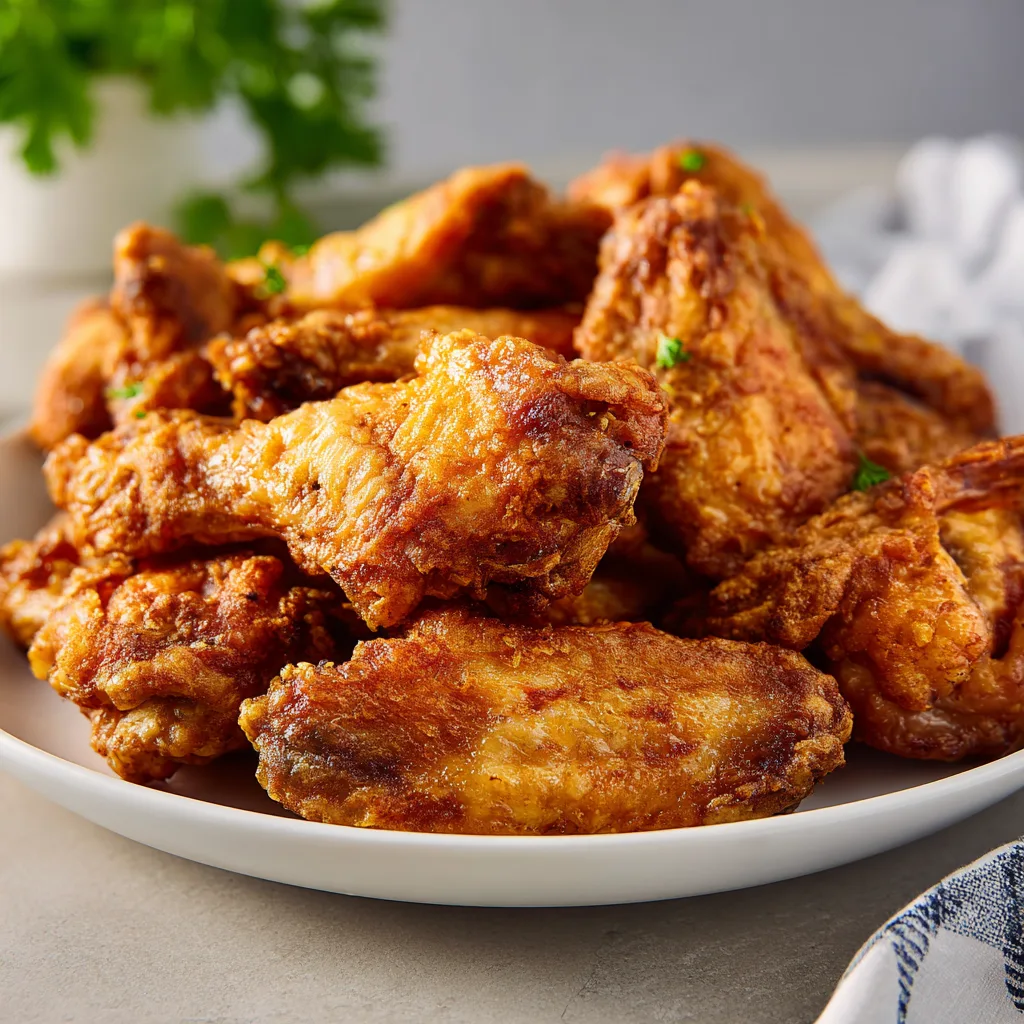
    Crispy Baked Chicken Wings have become my absolute obsession lately. There’s something magical about that perfect crunch giving way to tender, juicy meat underneath—without the mess and guilt of deep-frying! I’ve tested countless methods in my kitchen, and I’m thrilled to share the secrets I’ve discovered for achieving that coveted restaurant-quality crispiness right in your home oven. Whether you’re planning game day snacks or just craving something deliciously satisfying, these wings deliver that irresistible texture that’ll have everyone reaching for seconds. Check out my pesto chicken flatbreads for another crowd-pleasing option!

    Recipe

    Why You’ll Love These Crispy Baked Chicken Wings

    Perfect Texture Without Deep Frying

    The secret technique I’m sharing creates that coveted crispy exterior while keeping the inside perfectly juicy. By patting the wings completely dry and using a special coating mixture with baking powder (not soda!), you’ll achieve a texture that rivals any deep-fried version. I still remember the first time I tried this method—my husband couldn’t believe they weren’t from our favorite wing spot! The skin gets delightfully crunchy while the meat stays tender and full of flavor, giving you that satisfying contrast in every bite.

    Simple Ingredients, Maximum Flavor

    What I adore about these wings is how they transform basic pantry ingredients into something extraordinary. You’ll need just chicken wings, baking powder, salt, garlic powder, and your favorite seasonings. The baking powder (aluminum-free works best) creates a chemical reaction with the chicken skin that produces those crispy results. I love customizing the flavor profile—sometimes going for a spicy cajun blend, other times leaning into garlic parmesan territory. The versatility means you can adapt them to whatever you’re craving or what your guests prefer.

    Essential Tips & Tricks

    The Drying Method That Changes Everything

    The single most important step is thoroughly drying your wings before seasoning. I place mine on a wire rack in the refrigerator, uncovered, for at least 2 hours (overnight is even better). This might seem fussy, but trust me—this air-drying process removes surface moisture that would otherwise steam the wings instead of crisping them. I learned this trick after countless batches of disappointing wings, and it was the game-changer that finally delivered that satisfying crackle when you bite in.

    Temperature Techniques for Maximum Crispiness

    Start with a lower temperature (250°F) for about 30 minutes, then crank it up to 425°F for the final 40-50 minutes. This two-temperature approach renders the fat slowly first, then creates that beautiful crispy finish. Make sure to flip the wings halfway through the high-temperature cooking. For even better results, place them on a wire rack over your baking sheet so hot air circulates completely around each wing. Check out my crispy chicken parmesan zucchini boats for another delicious crispy chicken option!

    Serving Ideas & Creative Variations

    Sauce Strategies That Preserve Crispiness

    The timing of saucing is crucial—apply too early and you’ll sacrifice that perfect crunch. I serve my wings with dipping sauces on the side, or if coating them, I wait until just before serving and toss them quickly. For an extra layer of flavor without compromising texture, brush a thin layer of sauce during the last 5 minutes of baking. My family goes wild for buffalo sauce with blue cheese dressing, but honey garlic and sweet chili are close runners-up. Remember that less is more when it comes to preserving that crispy exterior.

    Unexpected Flavor Combinations

    Move beyond traditional buffalo and try bold flavor profiles that will surprise your taste buds. My current obsession is a maple-sriracha glaze that creates the perfect sweet-heat balance. Another winner is lemon-pepper with a touch of honey—it’s bright, zesty, and slightly sweet. For an Asian-inspired twist, try a mixture of soy sauce, ginger, and a touch of five-spice powder. These unexpected combinations keep this classic appetizer feeling fresh and exciting. Try pairing them with my garlic butter parmesan knots for a complete spread!

    Storage & Troubleshooting Guide

    Maintaining Crispiness When Reheating

    The challenge with leftover wings is keeping that crispy texture when reheating. Skip the microwave (which creates steam and soggy skin) and opt for a 375°F oven for about 10-15 minutes. For even better results, place them on a wire rack during reheating. Air fryers work beautifully too—just 3-4 minutes at 390°F brings back that wonderful crunch. I store leftover wings in a paper towel-lined container in the refrigerator, which helps absorb excess moisture and preserves their texture better than airtight containers.

    Troubleshooting Common Wing Problems

    If your wings aren’t crisping properly, a few common culprits might be to blame. First, check that you’re using baking powder, not baking soda (which creates a metallic taste). Second, ensure your wings are completely dry before baking. If they’re still not crisping, your oven temperature might be off—an inexpensive oven thermometer can help verify. Finally, overcrowding the pan creates steam and prevents proper crisping, so give those wings plenty of space. I learned this lesson the hard way during a Super Bowl party when I tried to cram too many on one tray!

    Frequently Asked Questions

    Can I use frozen chicken wings for this recipe?

    Yes, but thaw them completely first and pat them very dry. Frozen wings contain excess moisture that prevents proper crisping. I recommend thawing in the refrigerator overnight for best results.

    How do I know when my crispy baked chicken wings are done?

    Wings should reach an internal temperature of 165°F. The skin should be visibly crispy and golden brown, and the meat should pull easily from the bone when tested.

    Can I make these wings ahead of time for a party?

    Absolutely! Bake them fully, let cool, then refrigerate. Reheat at 375°F for 10-15 minutes just before serving. They’ll maintain most of their crispiness with this method.

    What’s the difference between party wings and whole wings?

    Party wings are separated into drumettes and flats, while whole wings include these sections plus the wing tip. I prefer party wings for more consistent cooking and easier eating.

    Why is baking powder essential for crispy baked chicken wings?

    Baking powder raises the pH level of the chicken skin, breaking down proteins and creating tiny bubbles during baking. This results in that crackly, crispy texture without deep frying.

    Final Thoughts

    These crispy baked chicken wings have become my go-to recipe whenever I’m craving that perfect combination of juicy meat and crunchy exterior. The beauty lies in their simplicity—just a few ingredients and techniques transform an ordinary cut into something extraordinary. Whether you’re hosting a game day gathering or simply treating yourself to a delicious dinner, these wings deliver restaurant-quality results without the mess or expense of deep-frying. I’d love to see your wing creations on Pinterest!

  • Baked Bang Bang Cauliflower: Crispy, Spicy & Irresistible!

    Baked Bang Bang Cauliflower: Crispy, Spicy & Irresistible!

    Baked Bang Bang Cauliflower: Crispy, Spicy & Irresistible!

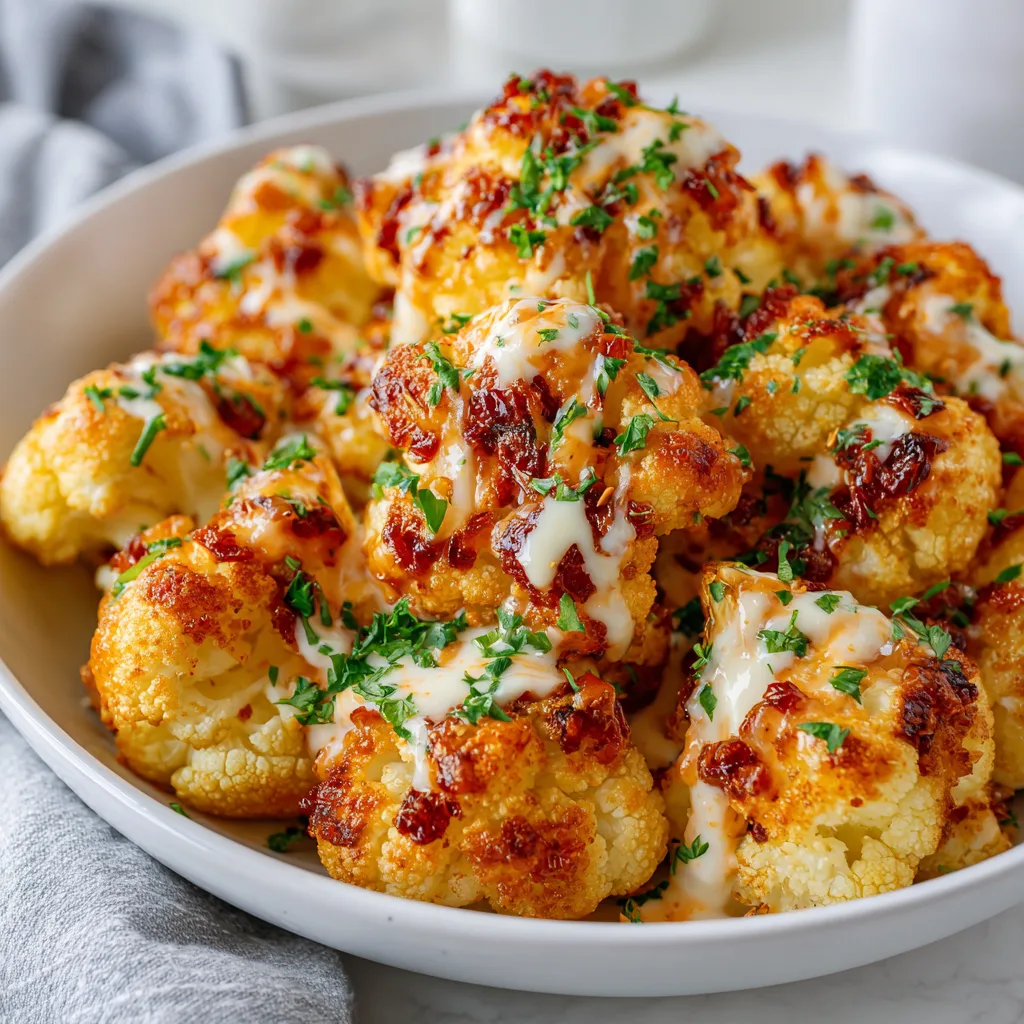
    Baked Bang Bang Cauliflower has completely transformed how I think about vegetable sides. The first time I made this crispy, spicy-sweet delight, my kitchen filled with the most intoxicating aroma that had my family hovering near the oven door! There’s something magical about how the cauliflower gets perfectly tender inside while developing that irresistible golden crust outside. If you’re looking for a dish that delivers big flavor with minimal effort, this recipe is about to become your new obsession.

    Recipe

    Why You’ll Love This Baked Bang Bang Cauliflower

    Perfect Texture Combination

    The textural contrast in this dish is what makes it truly special. Unlike deep-fried versions, baking creates cauliflower with a satisfying crunch without being greasy. I love how each floret develops a crisp exterior while maintaining that tender bite inside. The panko breadcrumb coating gets beautifully golden and creates that satisfying crackle when you bite in. My daughter, who typically pushes vegetables around her plate, actually asked for seconds the first time I made this – a kitchen miracle I still celebrate!

    Flavor That Packs a Punch

    The bang bang sauce is the star of this show – creamy, sweet, spicy, and utterly addictive. The combination of mayo, sweet chili sauce, and sriracha creates this perfect balance that coats each piece of cauliflower beautifully. I find myself adjusting the heat level depending on who’s joining us for dinner. For family meals, I go lighter on the sriracha, but when friends come over for game night, I dial up the spice! The subtle nuttiness of the roasted cauliflower pairs perfectly with the bold sauce.

    Essential Tips & Tricks

    Prep for Perfect Crispiness

    Proper drying is absolutely crucial for achieving that golden crunch we’re after. After washing your cauliflower, take the extra few minutes to thoroughly pat each floret dry with paper towels. Any excess moisture will create steam in the oven, resulting in soggy coating instead of crispy perfection. I also recommend cutting uniform pieces – about 1½-inch florets ensure even cooking. Last weekend, I rushed this step and ended up with some pieces overcooked while others were still too firm.

    Coating Technique Matters

    The secret to perfect coating adhesion is following the right sequence: flour mixture first, then egg wash, then breadcrumbs. This three-step process creates a substantial coating that won’t fall off during baking. I’ve found that using one hand for dry ingredients and one for wet prevents the dreaded “breading fingers” that can make a mess of your kitchen. For extra crispiness, try misting the coated cauliflower with olive oil right before baking – this little trick makes all the difference!

    Serving Ideas & Creative Variations

    Perfect Pairings

    Serve this Baked Bang Bang Cauliflower as an appetizer with extra sauce on the side for dipping and watch it disappear within minutes! For a complete meal, pair it with honey garlic butter roasted carrots and steamed jasmine rice to balance the spicy kick. I love setting these out as the starter for Asian-inspired dinner parties – they’re always the first empty plate! The vibrant orange-red sauce against the golden cauliflower makes for a stunning presentation that impresses guests before they even take a bite.

    Exciting Flavor Twists

    Get creative with your bang bang sauce by adding a tablespoon of honey for extra sweetness or a squeeze of lime for brightness. For a coconut version, replace half the mayo with coconut cream and add a dash of curry powder – absolutely divine! My personal favorite variation came from a happy accident when I was low on ingredients and added a spoonful of peanut butter to the sauce. The nutty depth it created was incredible! You can also experiment with different coatings – try crushed cornflakes or a mix of panko and sesame seeds for added texture.

    Storage & Troubleshooting Guide

    Keeping It Fresh

    These cauliflower bites are at their absolute best when served immediately after baking. However, leftovers can be stored in an airtight container in the refrigerator for up to 3 days. To reheat, avoid the microwave which will make them soggy. Instead, place them on a baking sheet in a 375°F oven for 5-7 minutes until heated through and crispy again. I like to sprinkle a few drops of water on the baking sheet (not on the cauliflower) to create a bit of steam that helps revive them.

    Solving Common Issues

    If your cauliflower turns out soggy rather than crispy, the most likely culprit is overcrowding the baking sheet. The florets need space around them for hot air to circulate. Use two baking sheets if necessary rather than cramming everything onto one. Another common issue is pale coating – this usually means your oven temperature isn’t hot enough. I recommend investing in an oven thermometer to ensure accuracy. For sauce that’s too spicy, simply add more mayo or a tablespoon of honey to balance the heat.

    Frequently Asked Questions

    Can I make Baked Bang Bang Cauliflower ahead of time?

    While best fresh, you can prep the cauliflower and coating ingredients separately up to 24 hours ahead. Coat and bake just before serving for the crispiest results.

    Is there a gluten-free option for this recipe?

    Absolutely! Simply substitute regular flour with your favorite gluten-free flour blend and use gluten-free panko breadcrumbs for the coating.

    How spicy is Baked Bang Bang Cauliflower?

    The spice level is customizable! Adjust the sriracha amount to your preference – start with just 1 teaspoon for mild heat or go up to 2 tablespoons for serious spice lovers.

    Can I air fry instead of bake?

    Yes! Air fry at 375°F for about 12-15 minutes, shaking the basket halfway through. You’ll get extra crispy results with even less oil.

    What can I substitute for mayonnaise in the sauce?

    Greek yogurt makes a great lower-fat alternative, though the sauce will be slightly tangier. For a vegan version, use plant-based mayo.

    Final Thoughts

    Baked Bang Bang Cauliflower has become my go-to when I want to impress without spending hours in the kitchen. There’s something so satisfying about transforming a humble vegetable into something this crave-worthy. The combination of crispy texture and bold, spicy-sweet flavor creates a dish that even vegetable skeptics will love. I hope you’ll give this recipe a try and discover just how exciting cauliflower can be! Don’t forget to check out more delicious recipes on our Pinterest page for more inspiration.

  • High Protein Baked Mac and Cheese That Will Blow Your Mind!

    High Protein Baked Mac and Cheese That Will Blow Your Mind!

    High Protein Baked Mac and Cheese That Will Blow Your Mind!

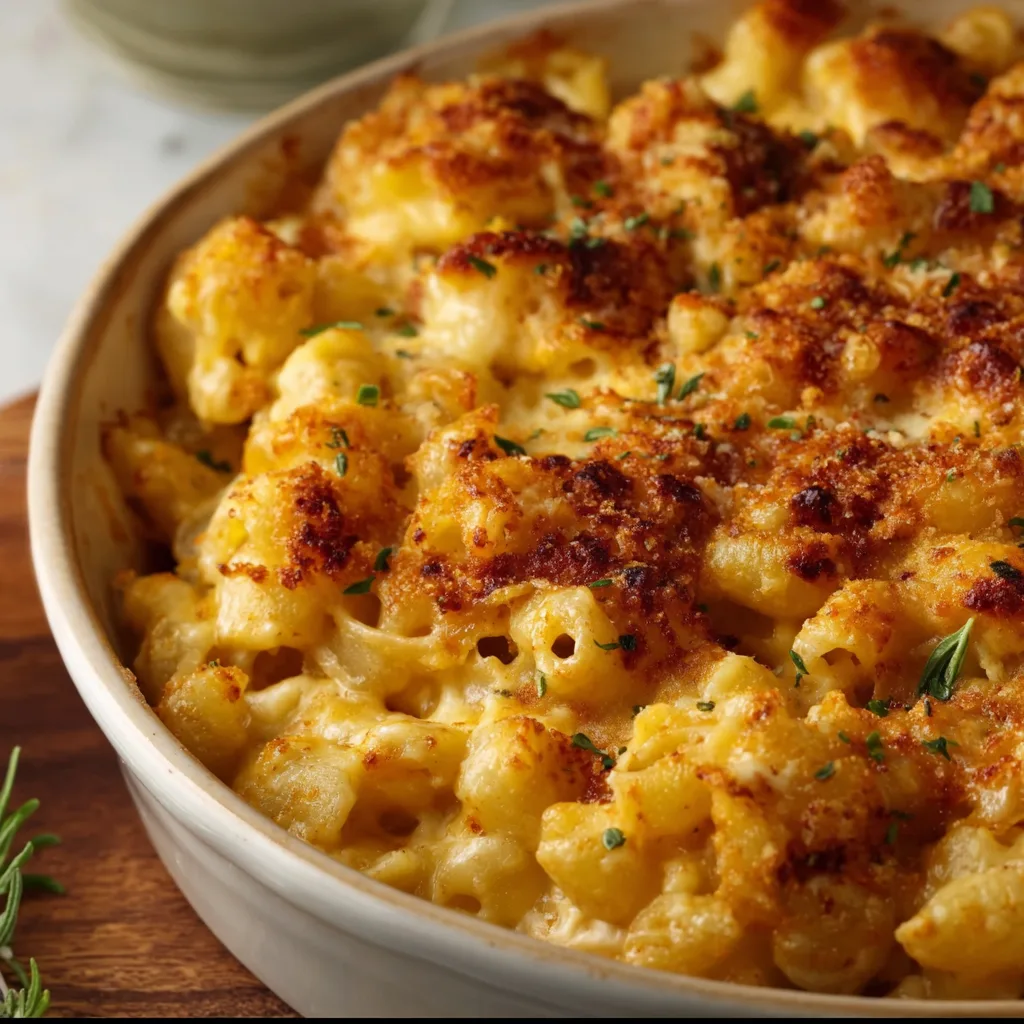
    High Protein Baked Mac and Cheese isn’t just comfort food—it’s a game-changer for those evenings when you’re craving something indulgent but don’t want to sacrifice your nutrition goals. I discovered this recipe during my post-workout hunger panics, when a regular mac and cheese just wasn’t cutting it protein-wise. The first time I pulled this bubbling dish from the oven, with its golden-brown crust and the aroma of sharp cheddar mingling with herbs, I knew I’d found my new favorite. This protein-packed version delivers all the creamy satisfaction of traditional mac and cheese while keeping you fuller longer—perfect for busy weeknight dinners.

    Recipe

    Why You’ll Love This High Protein Baked Mac and Cheese

    Perfect Balance of Flavor and Nutrition

    The magic of this high protein baked mac and cheese lies in its thoughtful ingredients. By incorporating protein-rich elements like cottage cheese, Greek yogurt, and chicken breast, you’ll get about 30-35 grams of protein per serving without sacrificing that classic mac and cheese experience. The blend of sharp cheddar and gruyere creates depth while a touch of mustard powder and garlic adds dimension that elevates it beyond basic comfort food. I love how the protein additions actually improve the texture, making it creamier and more satisfying than traditional versions that can sometimes feel one-dimensional.

    Simple Prep with Maximum Impact

    Don’t let the “high protein” label fool you—this isn’t complicated fitness food. The beauty of this dish is how effortlessly it comes together using mostly pantry staples. You’ll spend about 15 minutes of active prep time, then let your oven do the heavy lifting. The pasta cooks right in the sauce, absorbing all those incredible flavors while creating fewer dishes to wash. My favorite shortcut? Using rotisserie chicken when I’m really pressed for time. The protein boost transforms this from a side dish into a complete meal that keeps everyone at the table satisfied for hours.

    Essential Tips & Tricks

    Choosing the Right Pasta and Proteins

    The pasta you select makes a significant difference in your high protein baked mac and cheese. I recommend protein-enriched pasta varieties like chickpea, lentil, or whole wheat options that add 5-7 extra grams of protein per serving. For the creamiest texture, slightly undercook your pasta by 1-2 minutes before baking. When it comes to protein additions, cottage cheese provides incredible creaminess while boosting protein content, but you can also incorporate shredded chicken, ground turkey, or even chopped ham for variety without compromising that classic mac and cheese experience.

    Perfecting Your Cheese Sauce

    The heart of any mac and cheese is its sauce, and this high-protein version deserves special attention. Start by creating a roux with butter and flour, whisking constantly until it smells slightly nutty. Add warm milk gradually, whisking between additions to prevent lumps. For maximum protein impact, substitute part of the milk with Greek yogurt—it adds tanginess and creaminess while boosting protein content. Always grate your own cheese rather than using pre-shredded varieties which contain anti-caking agents that can make your sauce grainy. My secret ingredient? A tablespoon of Dijon mustard which enhances the cheese flavor without tasting “mustardy.”

    Serving Ideas & Creative Variations

    Family-Friendly Add-Ins

    Transform your high protein baked mac and cheese into a complete meal by incorporating colorful vegetables. Roasted broccoli florets, sautéed spinach, or diced bell peppers not only add nutritional value but also bring beautiful color contrast to the golden cheese. For picky eaters, try blending cooked cauliflower directly into the cheese sauce—it’s virtually undetectable while adding fiber and nutrients. My kids particularly love when I add crispy bacon bits or caramelized onions on top. These little touches make the dish feel special without complicating the preparation, and they’re perfect for introducing vegetables in a way that even the most selective eaters will enjoy.

    Gourmet Twists for Special Occasions

    When I’m serving this high protein baked mac and cheese for guests, I love elevating it with sophisticated flavor combinations. Try adding sun-dried tomatoes and fresh basil for a Mediterranean twist, or incorporate caramelized mushrooms and thyme for an earthy, elegant variation. For seafood lovers, fold in lump crab meat or sautéed shrimp just before baking. A drizzle of truffle oil or a sprinkle of smoked paprika adds a gourmet touch that transforms this comfort food classic. For a stunning presentation, serve individual portions in ramekins topped with a parmesan and panko crust that gets perfectly golden under the broiler for the last two minutes.

    Storage & Troubleshooting Guide

    Make-Ahead and Freezing Instructions

    This high protein baked mac and cheese is perfect for meal prep because it reheats beautifully. You can assemble the entire dish up to 24 hours before baking—just cover tightly and refrigerate. For freezing, prepare the dish but stop before baking, cool completely, then wrap in a double layer of foil and freeze for up to 3 months. When ready to enjoy, thaw overnight in the refrigerator and add an extra 15-20 minutes to the baking time. For individual portions, freeze in silicone muffin cups or small containers for grab-and-go lunches that can be microwaved directly from frozen in 2-3 minute intervals until heated through.

    Fixing Common Issues

    If your high protein baked mac and cheese turns out grainy, it’s likely due to overheating the cheese or using pre-shredded varieties. To fix a broken sauce, try whisking in a tablespoon of lemon juice or cream while gently reheating. For a dish that’s too dry after baking, drizzle in warm milk mixed with a tablespoon of Greek yogurt and gently fold to incorporate. If your mac and cheese lacks flavor, boost the umami with a teaspoon of miso paste or Worcestershire sauce. Remember that high-protein ingredients like cottage cheese can release moisture during baking, so if your dish seems too wet, let it rest for 10 minutes before serving.

    Frequently Asked Questions

    How much protein is in this baked mac and cheese?

    Each serving contains approximately 25-30 grams of protein, depending on your specific protein additions. This is roughly triple the amount found in traditional mac and cheese recipes.

    Can I make this high protein baked mac and cheese vegetarian?

    Absolutely! Replace chicken with white beans, tofu crumbles, or additional cottage cheese. You can also use chickpea or lentil pasta for even more plant-based protein.

    What cheeses work best for flavor and protein content?

    Sharp cheddar, gruyere, and parmesan create the best flavor profile. For additional protein, incorporate cottage cheese, Greek yogurt, or even a small amount of nutritional yeast.

    How can I make this recipe gluten-free?

    Simply substitute your favorite gluten-free pasta and use rice flour or cornstarch for thickening the sauce. The protein content remains high regardless of these substitutions.

    Will kids enjoy this healthier version?

    Yes! The creamy texture and familiar cheese flavor appeal to children, while the protein keeps them fuller longer. The nutrition boost is our little secret!

    Final Thoughts

    This High Protein Baked Mac and Cheese has become my go-to solution for satisfying comfort food cravings without derailing my nutrition goals. The beauty lies in its versatility—whether you’re feeding picky eaters, meal prepping for the week, or hosting a dinner party, this dish delivers on both flavor and function. I love seeing the surprised expressions when I tell people it’s packed with protein! For more protein-rich comfort foods that don’t compromise on taste, check out my Pinterest collection where I’m constantly adding new favorites.

  • Baked Chicken Kabobs Recipe That Will Wow Your Taste Buds!

    Baked Chicken Kabobs Recipe That Will Wow Your Taste Buds!

    Baked Chicken Kabobs Recipe That Will Wow Your Taste Buds!

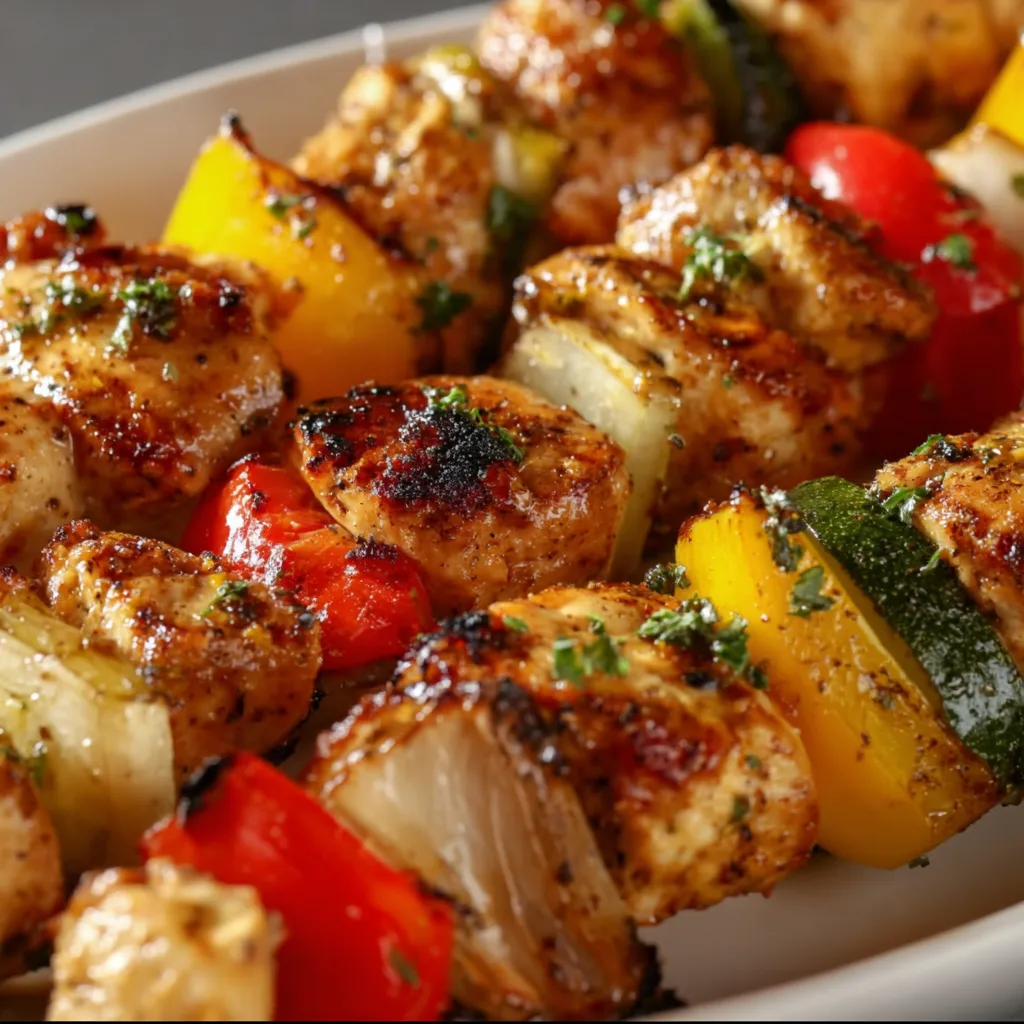
    These Baked Chicken Kabobs have completely transformed my weeknight dinner routine! Juicy chicken chunks marinated in a blend of Mediterranean spices, threaded with colorful bell peppers, red onions, and zucchini, then baked to perfection. I first made these on a rainy Tuesday when grilling outside wasn’t an option, and my family couldn’t stop raving about them. The oven-baking method creates that perfect char without the hassle of manning a grill. Plus, cleanup is a breeze compared to traditional grilling methods. These kabobs deliver restaurant-quality flavor with minimal effort—exactly what busy weeknights call for!

    Recipe

    Why You’ll Love These Baked Chicken Kabobs

    Perfect Texture Every Time

    The magic of oven-baked kabobs lies in the consistent cooking temperature that yields perfectly tender chicken and vegetables. I’ve struggled with unevenly cooked kabobs on the grill for years—some pieces charred while others remained undercooked. Baking solves this problem completely! The dry heat circulates evenly around each skewer, creating that beautiful caramelization on the edges while keeping the chicken incredibly juicy inside. The vegetables develop a lovely roasted sweetness that’s hard to achieve on a stovetop. My kids, who typically push vegetables aside, devour these colorful skewers without complaint!

    Make-Ahead Convenience

    These kabobs are a meal-prepper’s dream! You can prepare the marinated chicken and cut vegetables up to 24 hours in advance, storing them separately in the refrigerator. This flexibility has saved me countless times during hectic weeks. I often prep everything during my Sunday routine, then simply thread and bake when needed. The marinade actually improves over time, infusing the chicken with deeper flavor. For busy families, this recipe offers that perfect balance between impressive presentation and practical preparation. I’ve even assembled the skewers completely and refrigerated them for a few hours before baking with excellent results.

    Essential Tips & Tricks

    Marinating Magic

    The secret to irresistible baked chicken kabobs lies in the marinade timing. While 30 minutes works in a pinch, I’ve found that 4-6 hours creates flavor that penetrates deep into the meat. My go-to marinade combines olive oil, lemon juice, garlic, oregano, and a touch of honey—the acid tenderizes while the honey promotes beautiful caramelization. For an extra flavor boost, reserve a small portion of the marinade (before adding raw chicken) to brush on during the final minutes of baking. This creates a gorgeous glaze that makes the kabobs look and taste like they came from a fancy Mediterranean restaurant.

    Perfect Cutting Technique

    Uniform sizing is absolutely crucial for evenly cooked kabobs. I aim for 1½-inch cubes of chicken and similarly sized vegetable pieces. This consistency ensures everything finishes cooking at the same time. When cutting bell peppers, I’ve found that 1½-inch squares work perfectly—large enough to thread easily but small enough to cook through. For onions, separating the layers before cutting helps them cook more evenly. Zucchini should be sliced slightly thicker than other vegetables (about ¾-inch rounds) since they cook faster. This attention to detail makes all the difference between good kabobs and great ones!

    Serving Ideas & Creative Variations

    Complementary Side Dishes

    These baked chicken kabobs pair beautifully with a variety of sides. My family’s favorite combination includes fluffy basmati rice that soaks up all the flavorful juices and a crisp Greek salad with cucumber, tomato, and feta. For a heartier meal, try serving them alongside roasted garlic potatoes or a warm pita bread with homemade tzatziki sauce. When entertaining, I arrange the kabobs over a bed of lemon-herb couscous for an impressive presentation. The bright, fresh flavors of the kabobs also complement creamy dishes perfectly, creating a balanced meal that satisfies everyone at the table.

    Flavor Variations

    While the classic Mediterranean version remains my go-to, these baked chicken kabobs are incredibly versatile! For an Asian-inspired twist, try a teriyaki marinade with pineapple chunks and bell peppers. My husband loves when I make them with a spicy honey-sriracha glaze paired with zucchini and mushrooms. For a Greek variation, use a lemon-oregano marinade and add cherry tomatoes to the skewers, finishing with crumbled feta after baking. Kids especially enjoy a milder version with a garlic butter marinade. The beauty of this recipe is its adaptability—you can customize the flavors based on your family’s preferences or whatever ingredients you have on hand.

    Storage & Troubleshooting Guide

    Proper Storage Methods

    Leftover baked chicken kabobs maintain their delicious flavor when stored properly. Allow them to cool completely before transferring to an airtight container. They’ll keep in the refrigerator for up to 3 days. For best results, I recommend removing the meat and vegetables from the skewers before storing—this saves space and makes reheating easier. To freeze, place the cooled kabob components in a freezer-safe container, separating layers with parchment paper. They’ll maintain quality for about 2 months. When reheating, a quick 2-3 minutes in a hot skillet revives their texture better than microwaving, which can make the chicken rubbery.

    Common Problems & Solutions

    If your chicken kabobs turn out dry, the most likely culprit is overcooking. I always use an instant-read thermometer to check when the chicken reaches 165°F—any higher and you risk dryness. Another common issue is vegetables cooking at different rates. If you notice this happening, try parboiling denser vegetables like carrots for 2 minutes before threading. For kabobs that stick to the pan, make sure you’re using enough oil on both the food and the baking sheet. Line with parchment paper for extra insurance against sticking. If your kabobs lack flavor, try increasing the salt in your marinade or adding a finishing sprinkle of flaky sea salt before serving.

    Frequently Asked Questions

    Can I make baked chicken kabobs without skewers?

    Absolutely! You can prepare this as a sheet pan meal by spreading the marinated chicken and vegetables evenly on a parchment-lined baking sheet. Bake at the same temperature, stirring once halfway through cooking.

    How do I prevent wooden skewers from burning in the oven?

    Soak wooden skewers in water for at least 30 minutes before threading. For extra protection, wrap exposed ends with small pieces of aluminum foil before baking.

    What’s the best chicken cut for baked chicken kabobs?

    Boneless, skinless chicken thighs provide the juiciest results as they’re more forgiving when baked. Chicken breast works well too but requires more careful monitoring to prevent drying out.

    Can I prepare these kabobs for a large crowd?

    Definitely! The recipe scales easily for parties. Prepare multiple batches of skewers and bake them in shifts, keeping the first batches warm in a low oven (200°F) while finishing the rest.

    How can I tell when my baked chicken kabobs are done?

    Use an instant-read thermometer inserted into the thickest chicken piece to verify it reaches 165°F. The chicken should be opaque throughout with no pink remaining.

    Final Thoughts

    These baked chicken kabobs have earned their spot in my regular dinner rotation for good reason. They transform ordinary chicken into a colorful, flavorful feast that satisfies both kids and adults alike. The oven-baking method delivers consistent results that make this recipe accessible year-round, regardless of weather or grilling equipment. I encourage you to make these versatile kabobs your own by experimenting with different marinades and vegetable combinations. Don’t forget to check out more delicious recipes on Pinterest for endless inspiration!

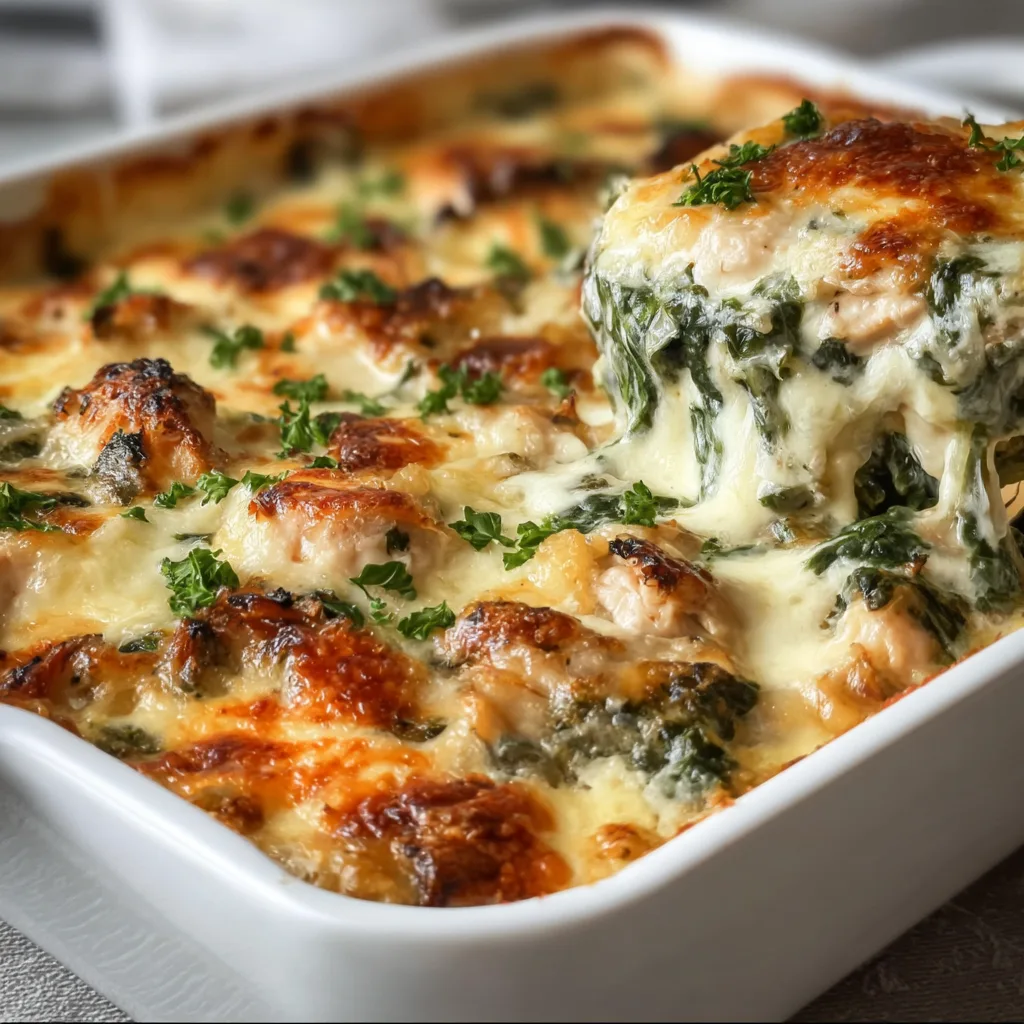
  • Cheesy Chicken & Spinach Casserole Recipe That Wows Every Time!

    Cheesy Chicken & Spinach Casserole Recipe That Wows Every Time!

    Cheesy Chicken & Spinach Casserole Recipe That Wows Every Time!

    This Cheesy Chicken and Spinach Casserole is the ultimate comfort food that brings together tender chicken, vibrant spinach, and a blanket of melted cheese in every delicious bite. I discovered this recipe during a particularly hectic week when I needed something that could feed my family for multiple meals. The aroma that filled my kitchen as it baked was absolutely heavenly—rich, savory, and promising. What I love most is how this casserole manages to be both indulgently creamy and packed with nutritious ingredients. It’s become our go-to dinner for those evenings when we need a warm hug in food form.

    Recipe

    Why You’ll Love This Cheesy Chicken and Spinach Casserole

    Perfect Balance of Comfort and Nutrition

    This casserole strikes that magical balance between comfort food and wholesome eating. The velvety cheese sauce envelops tender chicken pieces, while fresh spinach adds vibrant color and nutrition. I’ve watched even the most dedicated spinach-avoiders in my family clean their plates! The combination of protein from the chicken, calcium from the cheese, and iron from the spinach makes this a well-rounded meal you can feel good about serving. Plus, the creamy texture alongside the slight bite of perfectly cooked vegetables creates a textural experience that keeps everyone coming back for seconds.

    Make-Ahead Convenience

    One of the biggest perks of this Cheesy Chicken and Spinach Casserole is its incredible time-saving potential. You can assemble everything the night before, refrigerate it, and simply pop it in the oven when you get home from work. I’ve even prepared this on Sunday for a Tuesday dinner—talk about planning ahead! The flavors actually develop and deepen as they rest together in the refrigerator, making this casserole taste even better. For busy weeknights when cooking from scratch feels impossible, having this ready-to-bake dish waiting in your refrigerator is nothing short of miraculous.

    Essential Tips & Tricks

    Perfecting the Cheese Sauce

    The secret to an irresistible Cheesy Chicken and Spinach Casserole lies in the cheese sauce foundation. Start with a proper roux (equal parts butter and flour) and whisk constantly to prevent lumps. When adding cheese, remove the pan from heat first and stir in gradually—this prevents the cheese from separating and becoming grainy. I learned this the hard way after one unfortunate stringy disaster! For the best flavor depth, use a combination of cheeses: sharp cheddar for punch, mozzarella for that stretchy pull, and a touch of parmesan for nutty complexity. This approach creates a velvety sauce that coats every bite perfectly.

    Properly Preparing Your Spinach

    Handling spinach correctly makes a world of difference in this casserole. Always thoroughly drain fresh spinach after cooking or thawing frozen spinach—excess moisture will make your casserole watery. My favorite method is squeezing it inside a clean kitchen towel until no more liquid comes out. For the best flavor balance, lightly sauté fresh spinach with a bit of garlic before adding it to the casserole. This quick step removes excess moisture while infusing flavor. If you’re looking for another delicious way to enjoy spinach, my Easy Spinach Stuffed Chicken Breast is another family favorite.

    Serving Ideas & Creative Variations

    Perfect Pairings

    This Cheesy Chicken and Spinach Casserole pairs beautifully with simple sides that complement without competing. A crisp green salad with a light vinaigrette cuts through the richness perfectly—I love arugula with lemon dressing for this. Crusty bread or garlic toast makes an excellent vehicle for scooping up any extra cheese sauce. For a complete meal that balances textures, consider serving alongside Honey Garlic Butter Roasted Carrots for a sweet-savory contrast. When hosting guests, I’ve found that a light white wine like Pinot Grigio or Sauvignon Blanc pairs wonderfully with the creamy, cheesy flavors.

    Exciting Flavor Twists

    Don’t be afraid to make this casserole your own with creative flavor variations. For a Mediterranean twist, add sun-dried tomatoes, olives, and feta cheese—the tangy elements balance the richness beautifully. Spice lovers can kick things up with diced jalapeños or a sprinkle of red pepper flakes. For a fall-inspired version, try adding roasted butternut squash cubes and sage. My family goes wild for the southwest variation with black beans, corn, and a sprinkle of taco seasoning. These adaptations keep the basic recipe exciting even when you serve it regularly.

    Storage & Troubleshooting Guide

    Proper Storage Methods

    To maintain the quality of your Cheesy Chicken and Spinach Casserole, proper storage techniques are essential. Once cooled, cover the casserole dish with plastic wrap or transfer portions to airtight containers before refrigerating. It will keep beautifully for 3-4 days. For longer storage, portion the casserole into freezer-safe containers, label with the date, and freeze for up to 3 months. I often make a double batch specifically to freeze individual portions for quick lunches! When reheating, cover with foil to prevent the top from burning, and add a sprinkle of fresh cheese in the last few minutes for that freshly-baked appeal.

    Fixing Common Issues

    Even experienced cooks occasionally encounter casserole challenges, but most are easily fixed. If your casserole turns out too watery, the culprit is usually undrained spinach or high-moisture cheese. Fix it by uncovering during the last 10 minutes of baking to evaporate excess liquid. For a casserole that’s too dry, drizzle 2-3 tablespoons of chicken broth or cream over the top before reheating. If your cheese sauce has broken or curdled, try whisking in a tablespoon of warm milk while reheating on low. These simple troubleshooting techniques have saved many of my casseroles from near-disaster!

    Frequently Asked Questions

    Can I use frozen spinach in this Cheesy Chicken and Spinach Casserole?

    Yes, frozen spinach works perfectly! Thaw it completely and squeeze out all excess moisture using a clean kitchen towel or paper towels before adding to your casserole.

    What’s the best cheese to use?

    A combination provides the best flavor and texture. I recommend sharp cheddar for flavor, mozzarella for stretch, and a bit of parmesan for depth.

    Can I prepare this casserole ahead of time?

    Absolutely! Assemble up to 24 hours in advance, cover and refrigerate. Add 5-10 minutes to the baking time if cooking directly from the refrigerator.

    How can I make this recipe gluten-free?

    Simply substitute the flour in the roux with a 1:1 gluten-free flour blend and ensure your other ingredients like chicken broth are certified gluten-free.

    What can I substitute for spinach?

    Kale, Swiss chard, or collard greens make excellent substitutes. Just cook them slightly longer than spinach to ensure tenderness.

    Final Thoughts

    This Cheesy Chicken and Spinach Casserole has become more than just a recipe in my household—it’s a reliable comfort we return to time and again. There’s something magical about the way the creamy cheese sauce, tender chicken, and nutritious spinach come together to create a dish that satisfies on every level. Whether you’re feeding a family on a busy weeknight or looking for a crowd-pleasing dish for your next gathering, this casserole delivers both convenience and flavor. I hope it brings as much joy to your table as it has to mine! Don’t forget to check out more of my comfort food recipes on Pinterest.