Author: Emily Carter

  • Chicken Gloria Casserole Recipe That Will Melt Hearts Instantly!

    Chicken Gloria Casserole Recipe That Will Melt Hearts Instantly!

    Chicken Gloria Casserole Recipe That Will Melt Hearts Instantly!

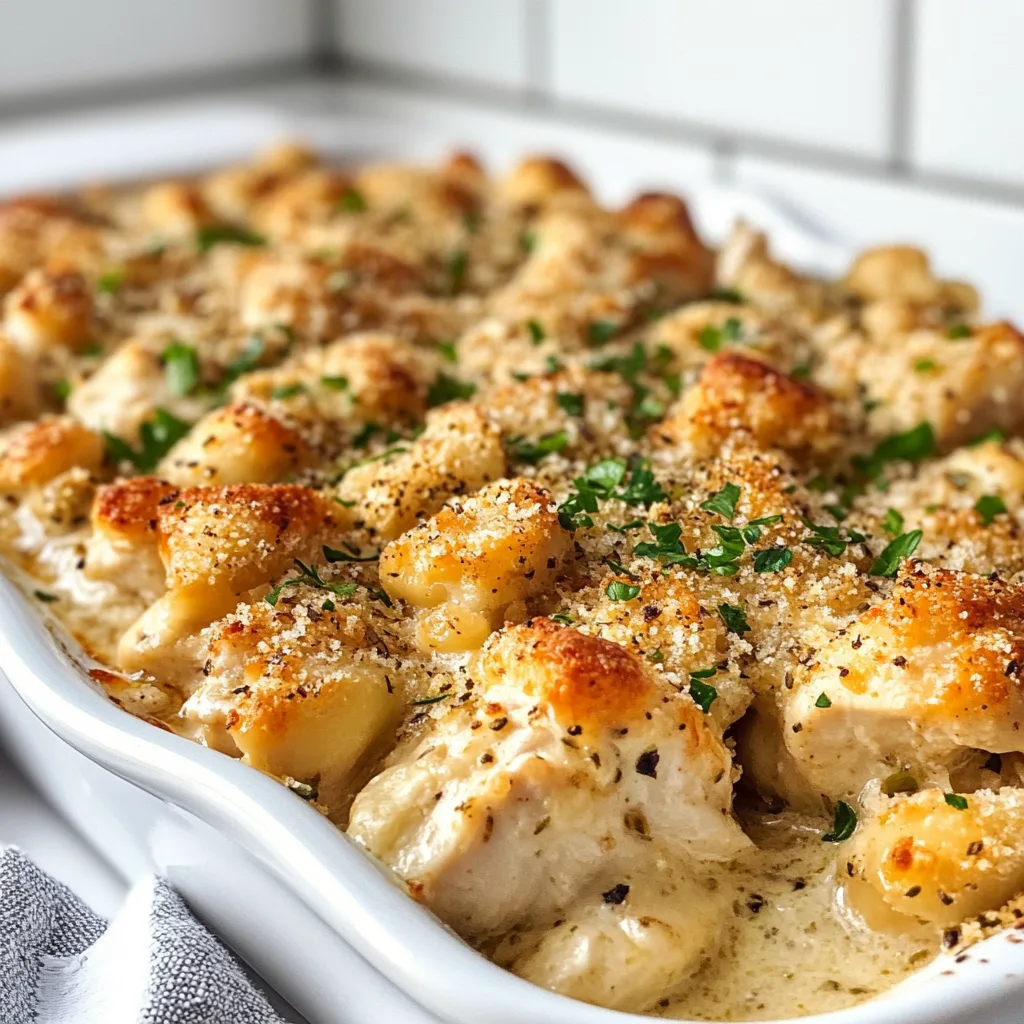
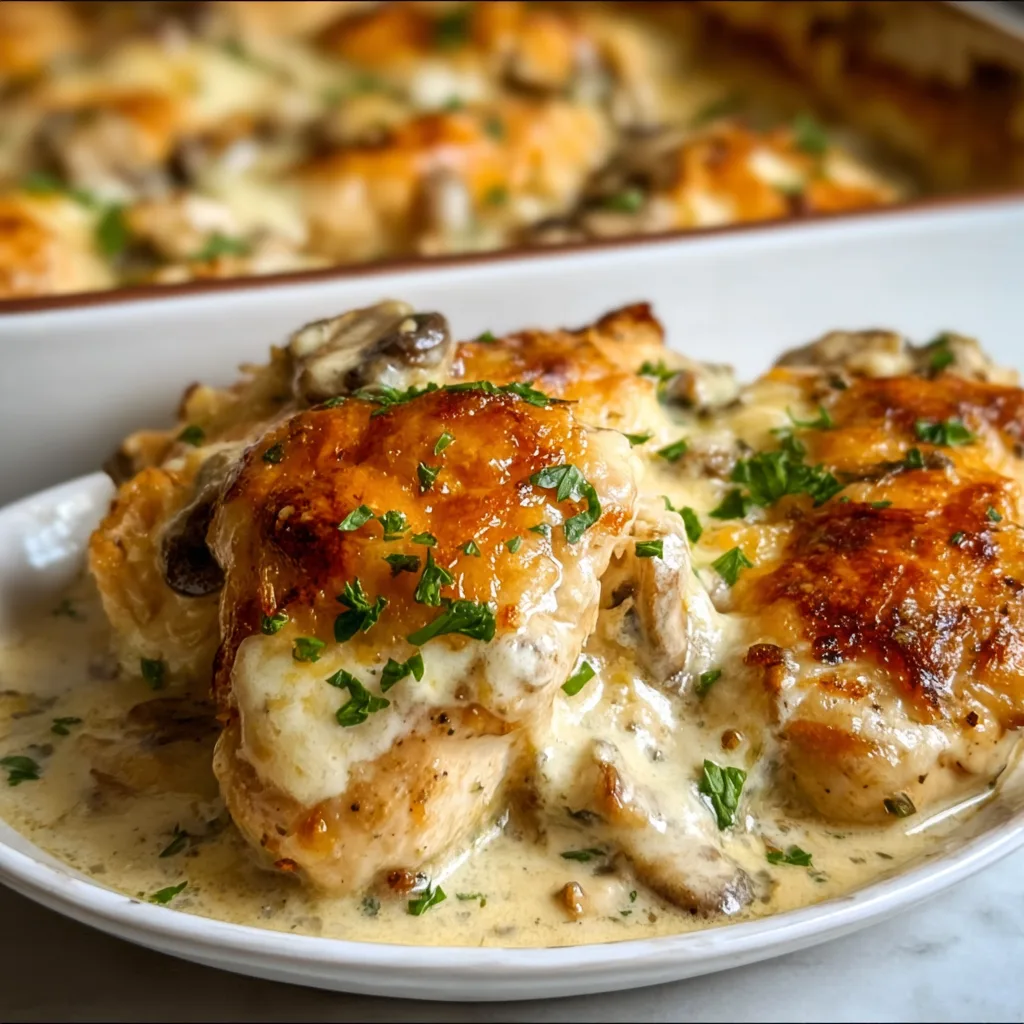
    Chicken Gloria Casserole is that magical dish that transforms ordinary chicken into something extraordinary with minimal effort. The first time I made this creamy, mushroom-laden comfort food, my kitchen filled with an aroma that pulled my family to the table before I could even call for dinner. There’s something incredibly satisfying about watching cheese bubble and brown over tender chicken and savory sauce. It’s become my go-to recipe when I need a reliable crowd-pleaser that feels special without hours of work. Let me show you why this casserole deserves a permanent spot in your dinner rotation.

    Recipe

    Why You’ll Love This Chicken Gloria Casserole

    Perfect Balance of Flavors and Textures

    This casserole delivers the most satisfying combination of tender chicken and velvety mushrooms, all bathed in a creamy sauce that’s rich without being heavy. The first forkful reveals layers of flavor—savory chicken, earthy mushrooms, and that hint of sherry that elevates everything. I love how the sauce seeps into every bite, while the cheese creates that irresistible golden crust on top. When winter winds howl outside, this dish brings the kind of comfort that makes you feel instantly cozy, like someone wrapped you in a warm blanket.

    Make-Ahead Convenience

    One of my favorite things about Chicken Gloria Casserole is its time-flexibility. I can assemble it completely the morning before a dinner party, refrigerate it, and simply slide it into the oven when guests arrive. The flavors actually develop beautifully during this resting time, making it taste even better. For busy weeknights, I often prepare components in advance—cooking chicken on Sunday and assembling the casserole on Tuesday. This adaptability has saved countless dinners on hectic days when cooking from scratch feels impossible.

    Essential Tips & Tricks

    Choosing and Preparing Your Chicken

    The foundation of an exceptional Chicken Gloria Casserole starts with properly prepared chicken breasts. I recommend pounding them to an even thickness (about ½ inch) before cooking to ensure they remain juicy and cook uniformly. Season generously with salt and pepper before browning—this initial searing creates a flavor base that carries through the entire dish. For a shortcut that doesn’t sacrifice quality, rotisserie chicken works beautifully too. Just shred about 3-4 cups and fold it into the sauce before assembling your casserole, similar to how I prepare my Mexican Corn Chicken Soup.

    Perfecting the Mushroom Sauce

    The creamy mushroom sauce is where the magic happens in this casserole. Start by properly browning your mushrooms—this means not crowding the pan and letting them develop a golden crust before stirring. This caramelization creates depth that elevates the entire dish. When adding sherry or wine, let it reduce by half to concentrate the flavors before incorporating cream. For extra richness, stir in a tablespoon of Dijon mustard. The sauce should coat the back of a spoon but still flow slowly—if it’s too thick, add a splash of chicken broth.

    Serving Ideas & Creative Variations

    Perfect Pairings

    Chicken Gloria Casserole shines brightest when paired with sides that complement its creamy richness. I love serving it over buttered egg noodles that catch every drop of that luxurious sauce. For a lighter approach, steamed asparagus or Honey Garlic Butter Roasted Carrots provide the perfect color contrast and fresh flavor balance. A simple green salad dressed with lemon vinaigrette cuts through the richness beautifully. For entertaining, I arrange the casserole in the center of the table with crusty bread for sauce-sopping—it never fails to impress.

    Delicious Twists on the Classic

    While traditional Chicken Gloria Casserole is perfection, I’ve discovered some wonderful variations over years of making this family favorite. Adding artichoke hearts and a pinch of red pepper flakes creates a Mediterranean-inspired version that’s absolutely delicious. For a heartier meal, mix in pre-cooked wild rice or orzo pasta before baking. Swapping half the mushrooms for caramelized onions introduces a subtle sweetness. During holiday seasons, I’ve even added dried cranberries and toasted almonds for festive flair—the sweet-savory combination works surprisingly well.

    Storage & Troubleshooting Guide

    Proper Storage and Reheating

    Chicken Gloria Casserole actually improves with a bit of time, making it perfect for planned leftovers. Store cooled leftovers in an airtight container in the refrigerator for up to 4 days. When reheating, add a splash of chicken broth or cream to revive the sauce, which tends to thicken when chilled. Cover with foil and warm in a 325°F oven until heated through (about 20 minutes). For single servings, microwave on 70% power with a damp paper towel over the top to prevent drying. The casserole also freezes beautifully—portion into freezer-safe containers and use within 3 months.

    Fixing Common Issues

    If your casserole sauce has separated after baking, don’t worry—this is usually fixable. Gently stir in 1-2 tablespoons of warm cream while the casserole is still hot. For a casserole that’s too runny, mix a teaspoon of cornstarch with cold water and stir it into the hot casserole, then return to the oven for 5-10 minutes. If your chicken seems dry, it was likely overcooked before going into the casserole—next time, remove it from the heat when it reaches 155°F, as it will continue cooking in the oven.

    Frequently Asked Questions

    Can I make Chicken Gloria Casserole without mushrooms?

    Absolutely! Substitute with diced zucchini, bell peppers, or artichoke hearts. The creamy sauce works beautifully with many vegetables, though you’ll lose some of that classic earthy flavor.

    What’s the best cheese for Chicken Gloria Casserole?

    Traditional recipes call for Swiss or Gruyère, but I’ve had success with provolone, fontina, or even a mild cheddar. The key is choosing a cheese that melts smoothly.

    Can I use chicken thighs instead of breasts?

    Yes! Boneless, skinless chicken thighs work wonderfully in Chicken Gloria Casserole and often stay juicier. Just adjust cooking time as needed since thighs may take slightly longer.

    How do I know when my casserole is done baking?

    The casserole is ready when it’s bubbling around the edges, the cheese is golden brown, and the internal temperature reaches 165°F.

    Can I make this casserole ahead for a dinner party?

    Definitely! Assemble up to 24 hours ahead, refrigerate covered, then bring to room temperature for 30 minutes before baking. Add 10-15 minutes to the baking time.

    Final Thoughts

    There’s something truly special about setting a bubbling Chicken Gloria Casserole on the table—it transforms an ordinary evening into a cozy gathering. I’ve served this dish during snowstorms, after long workdays, and at holiday dinners, and it never disappoints. The beauty lies in its balance of simplicity and sophistication, comfort and elegance. Whether you’re cooking for family or friends, this casserole has that rare quality of feeling both special and familiar at the same time. Find more comforting recipes on our Pinterest for your next cozy meal.
  • Creamy Angel Chicken Rice Casserole: Irresistibly Delicious Comfort Food

    Creamy Angel Chicken Rice Casserole: Irresistibly Delicious Comfort Food

    Creamy Angel Chicken Rice Casserole: Irresistibly Delicious Comfort Food

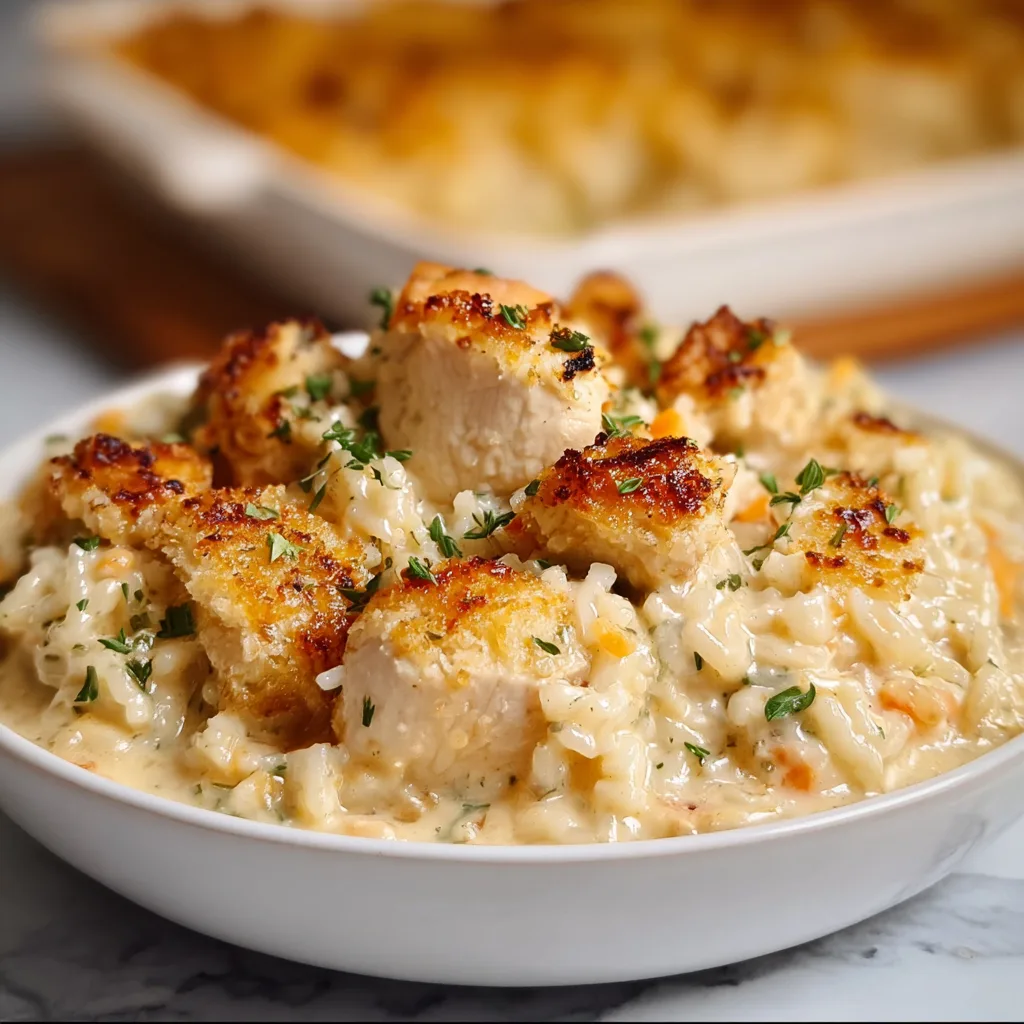
    Creamy Angel Chicken Rice Casserole is my ultimate comfort food revelation that combines tender chicken, fluffy rice, and a velvety cream sauce that melts in your mouth with each heavenly bite. When the evening chill creeps in, I find myself craving this dish that somehow manages to feel like a warm hug on a plate. The combination of Italian seasonings, mushrooms, and that dreamy cream cheese sauce creates something truly magical that’s become a staple in my weeknight rotation. If you’re looking for a dish that’s both impressive and effortless, this creamy casserole is about to become your new favorite.

    Recipe

    Why You’ll Love This Creamy Angel Chicken Rice Casserole

    Perfect Comfort Food for Any Occasion

    There’s something almost magical about pulling this bubbling casserole from the oven, watching the cheese stretch as you scoop out that first serving. The aroma of herbs and garlic fills my kitchen, instantly drawing everyone to the table. What I adore most is how this dish strikes the perfect balance between rich and satisfying without feeling heavy. The angel in the name truly fits—it’s heavenly comfort that works for both casual family dinners and when you’re hosting friends. I’ve served this at potlucks where people immediately ask for the recipe!

    Make-Ahead Friendly and Budget Conscious

    As someone who values both time and grocery budget, this casserole has become my secret weapon. The ingredients are pantry staples that don’t break the bank, and you can often use leftover rotisserie chicken to make it even more economical. I frequently prep this the night before, covering it tightly in the refrigerator, then pop it in the oven when I get home from work. The flavors actually develop beautifully overnight, making this ideal for busy households. Plus, it freezes beautifully for those emergency dinner situations!

    Essential Tips & Tricks

    Achieving the Perfect Creamy Texture

    The secret to that signature velvety sauce lies in how you incorporate the cream cheese. Always let it reach room temperature first, then whisk it gradually into the warm (not hot) broth mixture. This prevents those frustrating little lumps that can ruin the smooth texture. I also recommend using full-fat cream cheese for the richest result. For an extra layer of flavor, deglaze your pan with a splash of white wine before adding the broth—this little trick elevates the entire dish with minimal effort and creates that restaurant-quality depth.

    Rice Selection and Cooking Tips

    Choosing the right rice makes all the difference in this casserole. I’ve found that medium-grain rice provides the perfect texture—not too sticky, not too firm. If you’re using uncooked rice in the casserole, rinse it thoroughly first to remove excess starch that can make your dish gummy. For the most foolproof results, parboil the rice for just 5 minutes before adding it to your casserole. This ensures even cooking and prevents that dreaded undercooked rice scenario that can ruin an otherwise perfect meal.

    Serving Ideas & Creative Variations

    Perfect Pairings for a Complete Meal

    This casserole shines as the star of your dinner table, but pairing it with the right sides elevates the entire experience. I love serving it with a bright, acidic side like lemon-dressed arugula to cut through the richness. For a complete comfort meal, pair with honey garlic butter roasted carrots for a sweet-savory contrast that complements the creamy casserole beautifully. When hosting, I arrange everything on a wooden board with some crusty bread for sopping up that incredible sauce—it creates an inviting, family-style presentation.

    Exciting Flavor Variations to Try

    Don’t be afraid to make this recipe your own! My Mediterranean version uses sun-dried tomatoes, artichokes, and feta cheese for a bright flavor twist that’s perfect for summer. For a Southwestern kick, add diced green chiles, corn, black beans, and top with pepper jack cheese instead of mozzarella. During fall, I love incorporating diced butternut squash and sage—the sweetness pairs beautifully with the creamy sauce. These variations keep the dish exciting while maintaining that comforting, creamy essence that makes it so beloved.

    Storage & Troubleshooting Guide

    Proper Storage and Reheating Methods

    To maintain that heavenly creaminess, store leftovers in an airtight container in the refrigerator for up to 4 days. When reheating, add a splash of chicken broth or cream to revitalize the sauce that may have thickened in the fridge. For best results, reheat covered in a 325°F oven rather than the microwave—this preserves the texture and prevents the edges from drying out. If freezing, cool completely first, then wrap tightly in a double layer of foil and freeze for up to 2 months.

    Fixing Common Casserole Issues

    If your casserole seems too watery after baking, let it rest for 15 minutes before serving—the sauce will naturally thicken as it cools slightly. Conversely, if it’s too dry, you likely need more liquid in your initial mixture. A simple fix is stirring in ¼ cup of warm cream or broth before serving. For casseroles with undercooked rice, cover with foil and return to the oven for an additional 10-15 minutes, adding a small amount of hot broth around the edges to provide moisture without disturbing the top.

    Frequently Asked Questions

    Can I use brown rice in my Creamy Angel Chicken Rice Casserole?

    Yes, but increase the liquid by ¼ cup and extend baking time by 15-20 minutes. Brown rice requires more moisture and time to become tender while maintaining the creamy texture.

    Is it possible to make this casserole vegetarian?

    Absolutely! Substitute the chicken with 2 cups of roasted vegetables like cauliflower and mushrooms, and use vegetable broth instead of chicken broth for equally delicious results.

    Can I prepare this casserole without cream cheese?

    Yes, substitute with ¾ cup of sour cream mixed with ¼ cup heavy cream. The texture will be slightly different but still deliciously creamy.

    How do I prevent the rice from becoming mushy?

    Use parboiled rice or cook your rice to just slightly underdone (about 3-4 minutes less than package directions) before adding to the casserole mixture.

    What’s the best cheese to use on top?

    A combination of mozzarella and Parmesan creates the perfect balance of meltiness and flavor, but any good melting cheese works well.

    Final Thoughts

    This Creamy Angel Chicken Rice Casserole has become more than just a recipe in my household—it’s become a tradition that signals comfort and togetherness. The beauty lies in its versatility and how it welcomes adaptations while maintaining that soul-warming creaminess. Whether you’re cooking for picky eaters or gourmet food lovers, this casserole bridges the gap with its universal appeal. I hope it brings as much joy to your table as it has to mine! Don’t forget to check out more comforting recipes on Pinterest.

  • Amish Country Casserole Recipe That Will Melt Your Heart Quickly

    Amish Country Casserole Recipe That Will Melt Your Heart Quickly

    Amish Country Casserole Recipe That Will Melt Your Heart Quickly

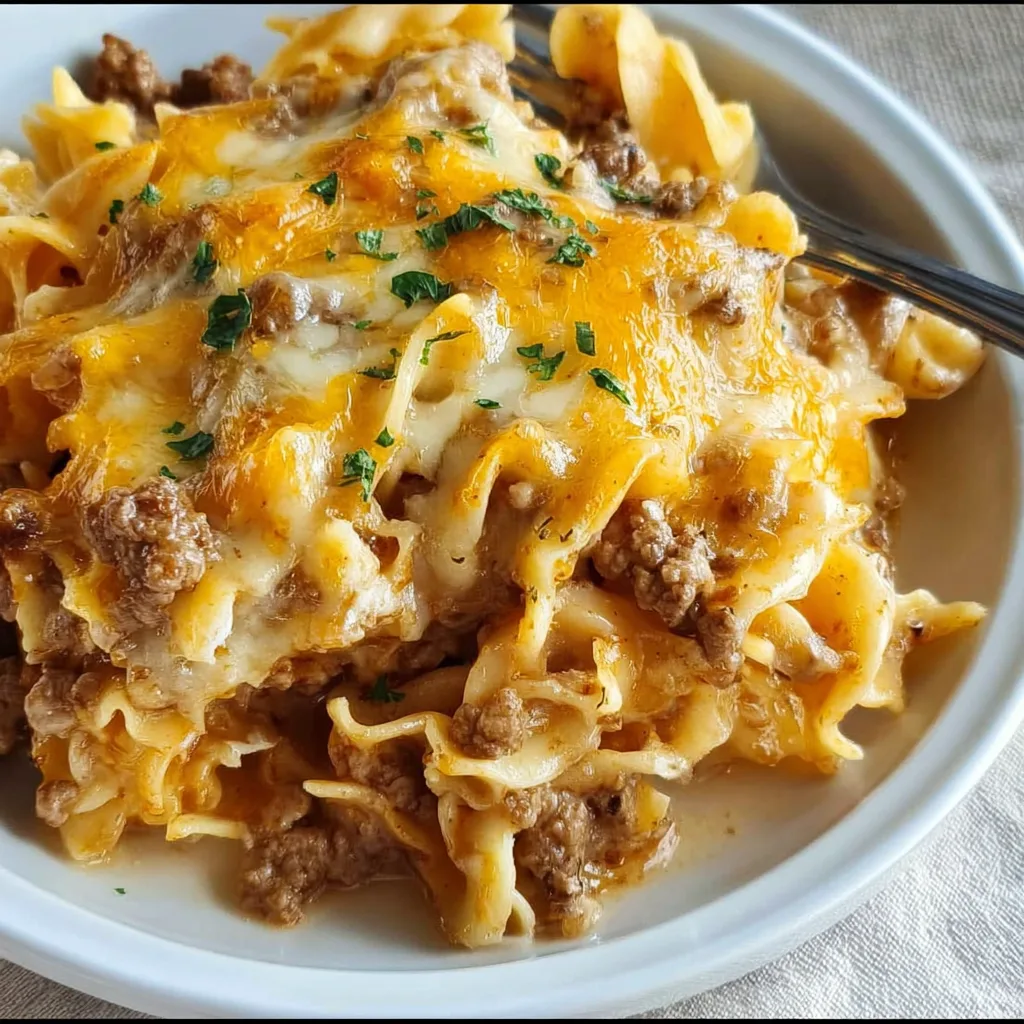
    Amish Country Casserole is the ultimate comfort food that brings together simple ingredients to create something truly magical. Growing up in the Midwest, I discovered this hearty dish at a friend’s family gathering and instantly fell in love with its creamy texture and savory flavor profile. There’s something about the combination of ground beef, tender noodles, and rich tomato sauce that feels like a warm hug on a plate. This budget-friendly meal has become my go-to when I need to feed a crowd or stock my freezer with comforting meals for busy weeknights. The best part? It comes together with pantry staples you likely already have on hand!

    Recipe

    Why You’ll Love This Amish Country Casserole

    Perfect Comfort Food for Any Occasion

    This Amish Country Casserole has become my family’s most requested meal, and for good reason! The creamy texture paired with savory ground beef creates a perfect balance that satisfies even the pickiest eaters. I love how it reminds me of the simple, wholesome meals my grandmother used to make—no fancy ingredients, just pure comfort. The way the egg noodles soak up that rich, tomato-based sauce creates something truly magical. Plus, it’s incredibly versatile—perfect for Sunday family dinners, potlucks, or dropping off at a neighbor’s during tough times.

    Budget-Friendly and Time-Saving

    In today’s world of rising grocery prices, this Amish Country Casserole is a true budget hero. Using affordable ingredients like ground beef, cream of mushroom soup, and egg noodles, it stretches your dollar without sacrificing flavor. I’ve calculated that it feeds my family of four for under $15 total! The time-saving aspect is equally impressive—just 15 minutes of active prep time while the oven does the rest. On particularly hectic days, I’ll assemble it in the morning, refrigerate, and simply pop it in the oven when I get home. The delicious aroma filling the house is worth every penny.

    Essential Tips & Tricks

    Perfecting the Texture and Flavor

    The secret to an exceptional Amish Country Casserole lies in a few critical techniques. First, don’t skip browning the beef thoroughly—those caramelized bits add incredible depth of flavor. I recommend using 85/15 ground beef for the perfect balance of flavor and moisture. When cooking the onions, let them become slightly translucent before adding garlic to prevent burning. For an extra flavor boost, try adding a tablespoon of Worcestershire sauce to the meat mixture. If you prefer a creamier texture, reduce the noodles by ¼ cup or add an extra splash of milk to the soup mixture.

    Make-Ahead and Freezer Instructions

    This casserole is perfect for meal prep, which has saved me countless times during busy weeks. To make ahead, assemble completely, cover tightly with foil, and refrigerate for up to 24 hours before baking (add 10-15 minutes to baking time). For freezing, assemble in a freezer-safe dish, cover with foil and plastic wrap, and freeze for up to 3 months. I recommend slightly undercooking the noodles if freezing to prevent mushiness later. Thaw overnight in the refrigerator before baking as directed, adding about 15-20 minutes to the cooking time. This approach works beautifully for creating easy meals you can enjoy weeks later.

    Serving Ideas & Creative Variations

    Perfect Pairings and Side Dishes

    Amish Country Casserole shines when paired with simple, complementary sides. I love serving it with a crisp green salad dressed lightly with vinaigrette to balance the richness. Steamed green beans or roasted broccoli also work beautifully, adding color and nutrition. For bread, try warm dinner rolls or buttery garlic bread to soak up any remaining sauce. During autumn, I often add a side of homemade applesauce or cranberry sauce for a sweet-savory contrast that feels especially comforting. For special occasions, consider starting with a light soup, like my Classic Ginger Garlic Chicken Noodle Soup to create a complete meal.

    Delicious Variations to Try

    While the classic recipe is wonderful, I’ve experimented with several tasty variations over the years. For a lighter version, substitute ground turkey and low-sodium soups. Adding vegetables like frozen peas, diced carrots, or bell peppers boosts nutrition and color. For cheese lovers, try mixing in 1 cup of shredded cheddar or topping with a combination of mozzarella and Parmesan during the last 10 minutes of baking. My Italian-inspired variation uses Italian seasoning, ground Italian sausage, and a sprinkle of red pepper flakes. For a unique twist, try using cream of celery instead of mushroom soup or adding a layer of sautéed mushrooms.

    Storage & Troubleshooting Guide

    Proper Storage and Reheating Methods

    Proper storage ensures your Amish Country Casserole remains delicious for days. Refrigerate leftovers within two hours of cooking in an airtight container for up to 4 days. For reheating individual portions, the microwave works well—cover loosely and heat for 1-2 minutes, stirring halfway through. For larger portions, reheat in a 325°F oven for about 20 minutes until heated through. To prevent dryness when reheating, sprinkle a few drops of water or milk over the top first. I find the flavors actually develop overnight, making day-two leftovers sometimes even more delicious than the original serving!

    Solving Common Casserole Problems

    Even experienced cooks encounter issues occasionally. If your casserole seems too dry, you likely need more liquid—next time, add an extra ¼ cup of milk to the soup mixture. For a casserole that’s too watery, let it rest longer after baking (15-20 minutes) to absorb excess liquid. If the top browns too quickly before the center is hot, loosely cover with foil halfway through baking. Undercooked noodles? Make sure they’re fully submerged in liquid during baking. For bland results, boost flavor with additional seasonings like garlic powder, onion powder, or herbs. Remember that different oven temperatures vary, so using a kitchen thermometer ensures the casserole reaches 165°F.

    Frequently Asked Questions

    Can I make Amish Country Casserole gluten-free?

    Absolutely! Substitute the egg noodles with gluten-free pasta and use gluten-free cream soups. Check your Worcestershire sauce, as some brands contain gluten. The texture may be slightly different but still delicious.

    How do I know when the casserole is done baking?

    The casserole is done when the edges are bubbling, the top is golden brown, and the internal temperature reaches 165°F. A knife inserted in the center should come out hot.

    Can I use different meats in this recipe?

    Yes! Ground turkey, chicken, or even Italian sausage work wonderfully. For a vegetarian version, substitute with a plant-based ground meat alternative or 2 cups of sautéed mushrooms.

    What makes Amish Country Casserole different from other casseroles?

    Amish Country Casserole features a distinctive combination of egg noodles, ground beef, and creamy tomato sauce. Its simplicity, heartiness, and economical ingredients reflect traditional Amish values of frugality and practicality.

    Can I make this in a slow cooker instead of baking?

    Yes, brown the meat and onions first, then combine all ingredients in your slow cooker. Cook on low for 3-4 hours, adding the cooked noodles during the final 30 minutes to prevent them from becoming mushy.

    Final Thoughts

    This Amish Country Casserole has become more than just a recipe in my household—it’s a tradition that brings us together around the table. The way it fills our home with comforting aromas reminds me that sometimes the simplest foods create the strongest connections. Whether you’re cooking for a crowd or simply want leftovers to enjoy throughout the week, this casserole delivers every time. I hope it brings as much warmth and satisfaction to your table as it has to mine. Don’t forget to check out more comforting recipes on Pinterest!

  • Creamy Cottage Cheese Baked Orzo with Roasted Garlic – Pure Comfort!

    Creamy Cottage Cheese Baked Orzo with Roasted Garlic – Pure Comfort!

    Creamy Cottage Cheese Baked Orzo with Roasted Garlic – Pure Comfort!

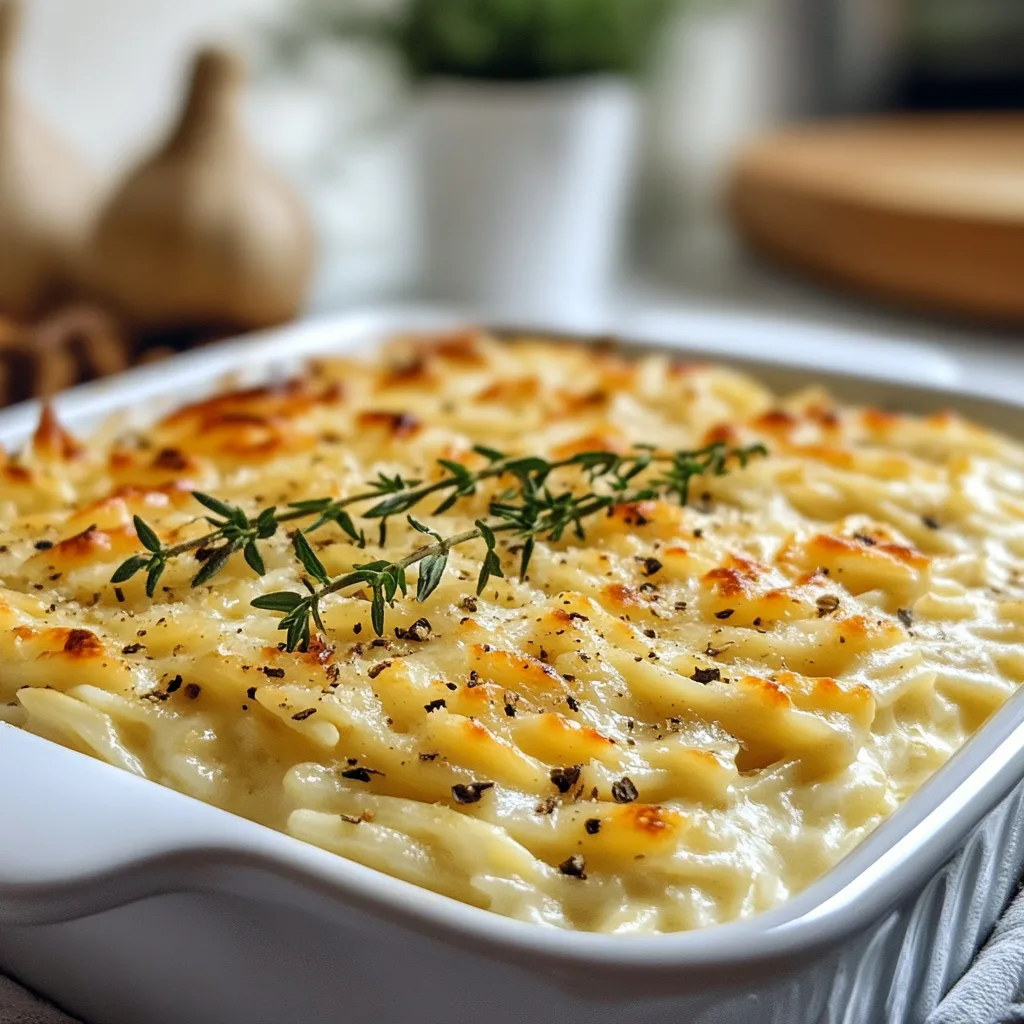
    Creamy Cottage Cheese Baked Orzo with Roasted Garlic has become my absolute go-to comfort dish when I want something that feels indulgent but isn’t overly heavy. The first time I made this, my kitchen filled with the most intoxicating aroma of roasted garlic and herbs that had my neighbor knocking at my door! There’s something magical about how the cottage cheese melts into the orzo, creating pockets of creamy goodness while maintaining its protein-packed benefits. This dish strikes that perfect balance between comforting and nourishing that makes it ideal for everything from cozy weeknight dinners to impressive entertaining. Trust me, this one’s a keeper!

    Recipe

    Why You’ll Love This Creamy Cottage Cheese Baked Orzo with Roasted Garlic

    Perfect Texture & Flavor Combination

    The magic of this dish lies in its incredible textural contrast. The orzo pasta bakes to a perfect al dente while surrounded by pockets of melty, creamy cottage cheese that creates an almost custard-like quality throughout. The roasted garlic adds deep, caramelized notes that transform the entire dish into something extraordinary. I love how the top layer gets slightly crispy while the inside stays lusciously creamy. The first time I served this at a dinner party, my friend Sarah actually closed her eyes while taking her first bite – that’s how good the sensory experience is! The herbs add fresh brightness that cuts through the richness perfectly.

    Nutritional Powerhouse That Doesn’t Sacrifice Flavor

    What makes this baked orzo truly special is how it manages to be both incredibly satisfying and nutritious. The cottage cheese provides a protein boost that transforms this from a simple pasta dish into a complete meal. With approximately 25g of protein per serving, it keeps you full for hours without weighing you down. I started making this during my busy work weeks when I needed something that would fuel my afternoons without causing that heavy, post-lunch crash.

    The calcium content is impressive too – about 30% of your daily needs in each serving! Plus, the roasted garlic isn’t just delicious; it’s packed with immune-boosting compounds that make this as good for your body as it is for your taste buds.

    Essential Tips & Tricks

    Perfecting Your Roasted Garlic

    Roasted garlic is the flavor foundation of this dish, so taking time to get it right makes all the difference. I prefer roasting a whole head of garlic rather than individual cloves – simply slice off the top, drizzle with olive oil, wrap in foil, and roast at 400°F for about 40 minutes until golden and butter-soft. The smell that fills your kitchen is worth the wait alone! For a deeper flavor, add a sprig of fresh thyme to the foil packet.

    Let the garlic cool slightly before squeezing the cloves out – they should slip right out of their papery skins. For busy weeknights, I often roast several heads on Sunday to use throughout the week, similar to how I prep ingredients for my Quick and Easy Creamy Mushroom Soup.

    Selecting & Preparing the Perfect Cottage Cheese

    The cottage cheese selection is crucial for achieving that dreamy, creamy texture. Look for a full-fat, small or medium curd variety for the best melting quality. If you’re watching calories, 2% works well too, but avoid fat-free versions as they won’t create the same luxurious texture. Before folding into the orzo, I recommend draining excess liquid if your cottage cheese seems watery – simply place it in a fine-mesh strainer for 15 minutes. For an extra-smooth consistency, pulse the cottage cheese in a food processor 3-4 times.

    This breaks down some of the curds while maintaining enough texture for those delightful creamy pockets. Season the cottage cheese directly with a pinch of salt and pepper before mixing for the most flavorful result.

    Serving Ideas & Creative Variations

    Seasonal Pairings & Side Dishes

    This versatile baked orzo works beautifully as both a main dish or a sophisticated side. In spring, I love serving it alongside roasted asparagus drizzled with lemon. Summer calls for a fresh tomato and basil salad to complement the creamy pasta. For fall gatherings, pair it with Broccoli with Garlic Butter and Cashews for a delightful textural contrast. During winter months, it’s perfect alongside slow-roasted chicken or as a vegetarian main with a side of glazed carrots. For entertaining, I serve it in individual ramekins for an elegant presentation. The dish holds its heat well, making it perfect for buffet-style serving. A sprinkle of fresh herbs just before serving brings a pop of color and freshness.

    Creative Flavor Twists & Add-Ins

    The beauty of this recipe is its adaptability to whatever ingredients you have on hand. For a Mediterranean twist, fold in chopped sun-dried tomatoes, kalamata olives, and crumbled feta instead of some of the cottage cheese. Spinach and artichoke hearts create a delicious variation reminiscent of the classic dip. For a protein boost, add shredded rotisserie chicken or sautéed shrimp. Mushroom lovers can fold in sautéed wild mushrooms for an earthy, umami-rich version. My personal favorite variation includes roasted butternut squash and crispy sage in the fall – the sweetness of the squash plays beautifully against the creamy, garlicky base. For heat lovers, a pinch of red pepper flakes or chopped jalapeños adds a welcome kick.

    Storage & Troubleshooting Guide

    Proper Storage & Reheating Methods

    This orzo dish is a meal-prepper’s dream as it stores beautifully for up to 4 days in the refrigerator in an airtight container. The flavors actually develop and deepen overnight, making leftovers something to look forward to! When reheating, add a splash of milk or broth to restore the creamy texture, as the pasta will absorb moisture during storage. Microwave on medium power with a damp paper towel over top to prevent drying.

    For best results, reheat in a 350°F oven for 15-20 minutes with a bit of extra cheese on top. While technically freezable for up to 2 months, the texture is best when fresh or refrigerated. If freezing, portion into individual servings and thaw overnight in the refrigerator before reheating.

    Fixing Common Issues

    If your orzo turns out too dry, the most common culprit is either too high a cooking temperature or too much time in the oven. Next time, try covering with foil for part of the baking time to trap moisture. For immediate fixing, stir in a few tablespoons of warm broth or cream. If your dish seems too wet, let it rest for 5-10 minutes after baking – the pasta will continue absorbing liquid. For separation issues with the cottage cheese, make sure you’re using a variety with at least 2% fat content. If the garlic flavor isn’t pronounced enough, try mashing the roasted cloves into a paste before mixing for more even distribution.

    For uneven cooking, ensure your baking dish conducts heat well – ceramic or enameled cast iron works best.

    Frequently Asked Questions

    Can I make Creamy Cottage Cheese Baked Orzo with Roasted Garlic ahead of time?

    Absolutely! Prepare everything up to the baking step, refrigerate covered for up to 24 hours, then add an extra 10 minutes to the baking time when ready to serve. The flavors actually develop beautifully overnight.

    Is there a substitute for cottage cheese?

    Ricotta works wonderfully as a substitute, though the texture will be slightly different. Greek yogurt can work in a pinch, but mix it with a bit of cream cheese for the best consistency.

    Can I use pre-minced garlic instead of roasting my own?

    Fresh roasted garlic provides an incomparable sweetness and depth. Pre-minced won’t achieve the same flavor, but in a time crunch, sauté 2 tablespoons in butter until fragrant before adding.

    What’s the best way to make this gluten-free?

    Simply substitute gluten-free orzo pasta. The cooking time may vary slightly, so check for doneness a few minutes earlier than the recipe suggests.

    How can I add more protein to this dish?

    Fold in shredded rotisserie chicken, sautéed shrimp, or white beans. For vegetarian options, add toasted pine nuts or chopped walnuts for extra protein and a pleasant crunch.

    Final Thoughts

    This Creamy Cottage Cheese Baked Orzo with Roasted Garlic has become a staple in my recipe collection for good reason. It strikes that perfect balance between everyday comfort food and special occasion worthy dish. I love how it transforms humble ingredients into something truly magnificent through simple techniques. The way the garlic perfumes the entire kitchen as it roasts is almost as rewarding as the first creamy, satisfying bite. Whether you’re cooking for yourself, your family, or guests, this versatile dish delivers both nourishment and joy – and isn’t that what the best food should do? For more inspiration, check out my Pinterest board for serving ideas!

  • Garlic Butter Chicken Dump & Bake Casserole – Irresistibly Easy!

    Garlic Butter Chicken Dump & Bake Casserole – Irresistibly Easy!

    Garlic Butter Chicken Dump & Bake Casserole – Irresistibly Easy!

    Garlic Butter Chicken Dump and Bake Casserole is the answer to those hectic weeknights when you’re craving comfort but lack the time for complicated cooking. I discovered this lifesaver recipe last winter when deadlines loomed and dinner seemed impossible. One pot, minimal prep, and maximum flavor—that’s the magic formula here! The aroma of garlic butter wafting through my kitchen as this casserole bakes never fails to make my home feel instantly cozier. Trust me, this recipe will transform your busy weeknight routine into something you actually look forward to. Check out my main recipe collection for more simple dinners!

    Recipe

    Why You’ll Love This Garlic Butter Chicken Dump and Bake Casserole

    Perfect for Busy Weeknights

    This Garlic Butter Chicken Dump and Bake Casserole is the ultimate time-saver for those evenings when cooking feels like climbing a mountain. I remember the first time I made this—I had exactly 10 minutes to get something in the oven before a Zoom call. Just toss your chicken, rice, and seasonings in a baking dish, pour over the magical garlic butter sauce, and let your oven do the heavy lifting. The beauty lies in its simplicity! No pre-cooking, no multiple pots and pans, and minimal cleanup afterward. It’s practically cooking on autopilot.

    Incredible Flavor with Minimal Effort

    The combination of garlic butter with tender chicken creates a flavor profile that tastes like you spent hours in the kitchen. The garlic infuses every grain of rice as it bakes, while the butter creates a rich, velvety sauce that coats everything perfectly. What I love most is how the edges get slightly crispy while the center remains creamy and tender. My family always thinks I’ve been slaving away when in reality, I’ve been relaxing with a book while the casserole works its magic. It’s comfort food that doesn’t demand your constant attention—perfect for those of us who want homemade goodness without the fuss.

    Essential Tips & Tricks

    Getting the Perfect Texture

    The secret to a perfect Garlic Butter Chicken Dump and Bake Casserole lies in the rice-to-liquid ratio. I learned this the hard way after one too-mushy disaster! Use long-grain white rice for best results—it holds its shape beautifully without becoming gummy. Cover your baking dish tightly with foil for the first 30 minutes to trap steam, then uncover for the last 10-15 minutes to achieve that gorgeous golden top. For extra insurance against dry chicken, slice your chicken breasts into even pieces. This simple step ensures everything cooks at the same rate, giving you juicy meat and perfectly tender rice every time.

    Flavor Boosters That Make the Difference

    The basic garlic butter sauce is divine on its own, but I love adding a few flavor enhancers that elevate this casserole to restaurant quality. A splash of white wine deglazes all those wonderful flavors, while a tablespoon of Dijon mustard adds subtle tang. For an umami boost, add a teaspoon of Better Than Bouillon paste to your liquid components. When I’m feeling fancy, I’ll throw in some fresh herbs like thyme or rosemary. These small additions take minimal extra effort but make your Garlic Butter Chicken Dump and Bake Casserole taste like it was crafted by a professional chef.

    Serving Ideas & Creative Variations

    Perfect Pairings for a Complete Meal

    This Garlic Butter Chicken Dump and Bake Casserole shines as a standalone dish, but I love rounding it out with simple sides. A crisp green salad with a lemony vinaigrette provides the perfect bright contrast to the rich, buttery casserole. For a heartier meal, add some roasted vegetables—broccoli, asparagus, or Brussels sprouts work beautifully and can roast alongside your casserole during the last 15 minutes of baking. On particularly chilly evenings, I serve this with a slice of crusty garlic bread for soaking up every last drop of that incredible sauce. The combination of textures and flavors creates a satisfying meal that feels special without extra work.

    Exciting Variations to Keep Things Fresh

    One of my favorite things about this Garlic Butter Chicken Dump and Bake Casserole is how easily it adapts to different flavor profiles. For a Mediterranean twist, add sun-dried tomatoes, artichoke hearts, and feta cheese during the last 10 minutes of baking. Craving something spicy? Add diced jalapeños and substitute pepper jack for the regular cheese. My family’s current favorite is the mushroom edition—I add 8 ounces of sliced mushrooms and a splash of sherry for an elegant twist. For a complete meal in one dish, throw in frozen peas or broccoli florets during the last 15 minutes of cooking. Check out my Creamy Tomato Garlic Pasta for another garlic-forward favorite!

    Storage & Troubleshooting Guide

    Making Ahead and Storing Leftovers

    This Garlic Butter Chicken Dump and Bake Casserole is a meal-prep dream! You can assemble the entire dish up to 24 hours before baking—just keep it covered in the refrigerator and add an extra 10 minutes to the baking time. Leftovers maintain their delicious flavor for up to 4 days when stored in an airtight container. I often portion leftovers into individual containers for quick lunches. To reheat, sprinkle a little water over the top before microwaving to restore moisture. For freezing, cool completely, then wrap tightly in plastic and foil. Freeze for up to 3 months and thaw overnight in the refrigerator before reheating.

    Troubleshooting Common Issues

    If your Garlic Butter Chicken Dump and Bake Casserole turns out with undercooked rice, the culprit is usually insufficient liquid or baking time. Every oven is different, so you might need to add 5-10 minutes to the cooking time. For too-wet casseroles, simply remove the foil earlier and extend the uncovered baking time to allow excess moisture to evaporate. If your chicken seems dry, try brining it beforehand—just 15 minutes in a simple salt solution works wonders. And remember, altitude affects cooking! At higher elevations, you’ll need more liquid and longer cooking times. A meat thermometer is your best friend—chicken should reach 165°F for food safety.

    Frequently Asked Questions

    Can I use brown rice in this Garlic Butter Chicken Dump and Bake Casserole?

    Yes, but you’ll need to adjust cooking time and liquid. Brown rice requires about 50-60 minutes to cook and approximately ½ cup more liquid. Pre-cook it for 15 minutes before adding to the casserole for best results.

    Can I use chicken thighs instead of breasts?

    Absolutely! Chicken thighs work wonderfully and often stay juicier. Bone-in thighs will need about 10-15 minutes longer cooking time. Just ensure they reach 165°F internal temperature.

    How can I make this recipe dairy-free?

    Replace butter with olive oil and a tablespoon of nutritional yeast for flavor. Use dairy-free cheese or omit cheese entirely. The garlic and herbs will still provide plenty of flavor.

    Can I add vegetables directly to the casserole?

    Quick-cooking vegetables like spinach, peas, or diced bell peppers can go in from the start. Hardier vegetables like broccoli or carrots should be added halfway through cooking.

    What’s the best cheese to use in this recipe?

    Mozzarella provides classic meltiness, while Gruyère or fontina add sophisticated flavor. For maximum flavor, use a mixture of sharp cheddar and Parmesan on top during the last 10 minutes.

    Final Thoughts

    This Garlic Butter Chicken Dump and Bake Casserole has become my go-to recipe whenever life gets chaotic but I refuse to compromise on a delicious, homemade dinner. There’s something deeply satisfying about creating something so flavorful with so little active work. The combination of tender chicken, perfectly cooked rice, and that irresistible garlic butter sauce never fails to bring comfort to my table. I hope this recipe brings the same warmth and ease to your kitchen! For more inspiration, follow me on Pinterest where I share my favorite comfort food recipes.

  • Cheesy Baked Mostaccioli Pasta That Will Make Your Taste Buds Dance!

    Cheesy Baked Mostaccioli Pasta That Will Make Your Taste Buds Dance!

    Cheesy Baked Mostaccioli Pasta That Will Make Your Taste Buds Dance!

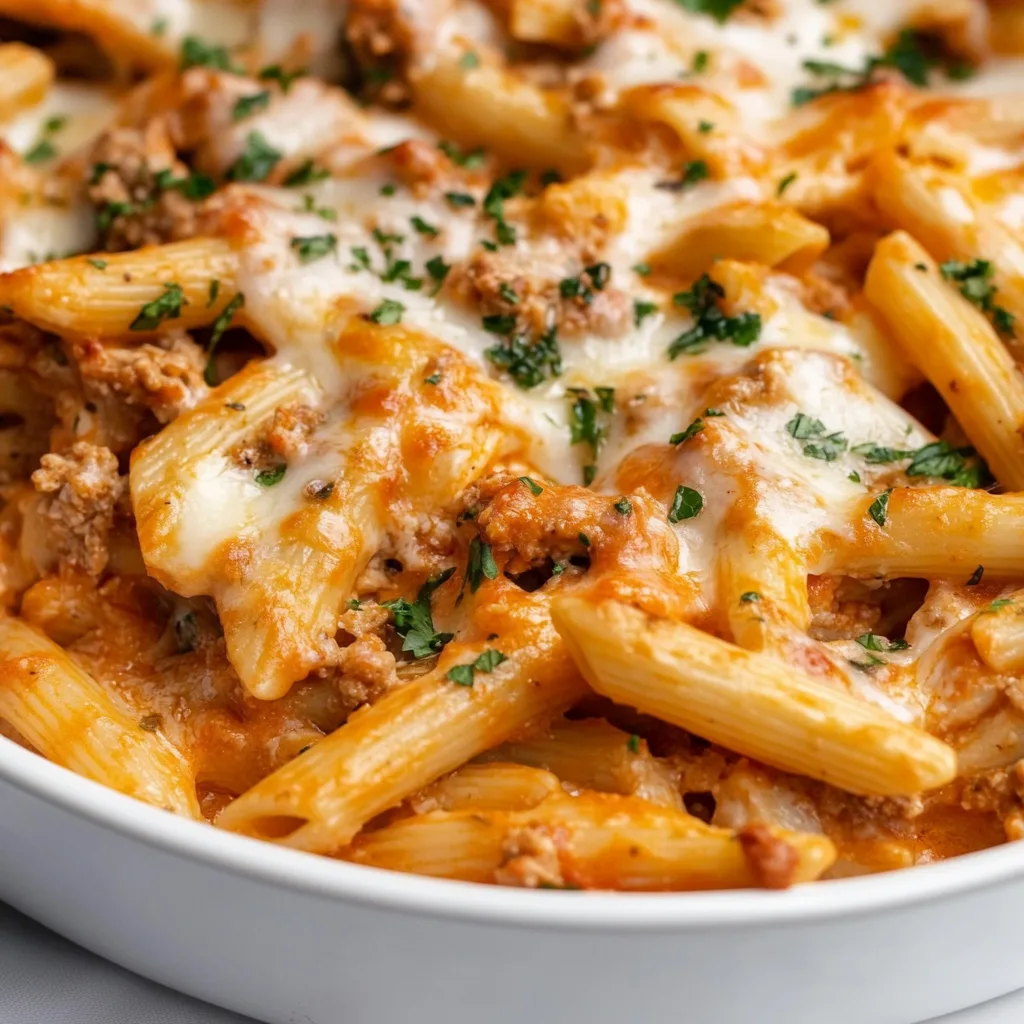
    There’s something magical about a bubbling pan of Cheesy Baked Mostaccioli Pasta fresh from the oven. The way the cheese stretches into long, gooey strands as you lift each serving, the crispy edges that form around the perimeter, and that first bite that warms you from the inside out. This Italian-American comfort food classic has been my go-to for family gatherings since my grandmother first taught me how to make it. It’s like a perfect hybrid between baked ziti and lasagna that’s simpler to prepare but equally satisfying.

    Recipe

    Why You’ll Love This Cheesy Baked Mostaccioli Pasta

    A Crowd-Pleasing Comfort Food

    This Cheesy Baked Mostaccioli Pasta truly brings people together. I still remember making this for my sister’s housewarming party—the moment I set it on the table, conversations paused as everyone eagerly reached for the serving spoon. The combination of al dente pasta tubes, savory meat sauce, and that perfect three-cheese blend creates a dish that satisfies deep comfort food cravings. The beauty lies in its accessibility—even picky eaters can’t resist the familiar, welcoming flavors that remind us of family meals around the table.

    Make-Ahead Convenience

    One of the greatest attributes of Cheesy Baked Mostaccioli Pasta is its flexibility for busy schedules. You can assemble the entire dish up to two days before baking, making it perfect for entertaining or meal prep. The flavors actually develop and deepen as they rest in the refrigerator. I often prepare this on Sunday afternoons, dividing it between two smaller baking dishes—one for dinner that night and another, covered tightly with foil, for mid-week when cooking feels overwhelming. The pasta texture holds up beautifully, absorbing just enough sauce without becoming soggy.

    Essential Tips & Tricks

    Perfect Pasta Technique

    The foundation of exceptional Cheesy Baked Mostaccioli Pasta starts with properly cooked pasta. Always undercook the pasta by 2-3 minutes less than the package directions suggest—it should be quite firm as it will continue cooking in the oven. Salt your pasta water generously until it “tastes like the sea” to season the pasta from within. After draining, I toss the hot pasta with a light coating of olive oil to prevent sticking. This small step makes a remarkable difference in the final texture, preventing the mostaccioli from clumping together during baking.

    Layering for Maximum Flavor

    The magic of this dish happens in the layering technique. Start with a thin layer of sauce on the bottom to prevent sticking, then create distinct layers: pasta, meat sauce, cheese mixture, repeat. The top layer should always be a generous blanket of cheese that will form that irresistible golden crust. I like to reserve about a quarter of the mozzarella to sprinkle on during the last 10 minutes of baking—this creates those picture-perfect cheese pulls that make everyone reach for their phones before digging in.

    Serving Ideas & Creative Variations

    Perfect Pairings

    Cheesy Baked Mostaccioli Pasta shines as the centerpiece of any meal, but thoughtful sides elevate the experience. A crisp Caesar salad with homemade garlicky dressing provides the perfect contrast to the rich pasta. For bread, nothing beats garlic bread with a chewy interior and buttery crust for sopping up extra sauce. When entertaining, I serve this pasta alongside roasted vegetables for a colorful, complete meal. The slight bitterness of roasted broccoli or Brussels sprouts balances the creamy, savory pasta beautifully.

    Exciting Flavor Twists

    While the classic version holds a special place in my heart, this dish welcomes creative adaptations. Try swapping the traditional meat sauce for a spicy sausage version with crumbled Italian sausage and red pepper flakes. For a luxurious twist, add a layer of ricotta mixed with fresh herbs and lemon zest between the pasta layers. Vegetarian guests will appreciate a version with roasted mushrooms, which provide a meaty texture and umami depth. My personal favorite variation includes a handful of sun-dried tomatoes and a sprinkle of smoked mozzarella for a subtle smoky note.

    Storage & Troubleshooting Guide

    Proper Storage Solutions

    Leftover Cheesy Baked Mostaccioli Pasta actually improves overnight as the flavors meld together. Store cooled leftovers in an airtight container in the refrigerator for up to 4 days. For freezing, portion the pasta into individual servings in freezer-safe containers—this makes reheating much more convenient. When properly stored, frozen mostaccioli keeps well for up to 3 months. To prevent freezer burn, press a piece of parchment paper directly onto the surface before sealing. I always label with both the date and reheating instructions for my future self.

    Solving Common Issues

    If your pasta seems dry after baking, the most likely culprit is too little sauce or overcooking the pasta before baking. Next time, add an extra half cup of sauce to the recipe and be vigilant about undercooking the pasta. For soupy mostaccioli, let the baked pasta rest for 15-20 minutes before serving—this allows the excess moisture to be absorbed and the layers to set properly. If your cheese topping isn’t browning nicely, switch your oven to broil for the final 2-3 minutes, watching carefully to achieve that golden perfection without burning.

    Frequently Asked Questions

    Can I make Cheesy Baked Mostaccioli Pasta vegetarian?

    Absolutely! Replace the meat sauce with a hearty vegetable sauce featuring mushrooms, zucchini, and bell peppers. The texture remains satisfying while offering a lighter alternative that doesn’t sacrifice flavor.

    What’s the difference between mostaccioli and penne pasta?

    Mostaccioli has a smooth exterior while penne has ridges. Both work in this recipe, but mostaccioli creates a silkier texture while penne holds more sauce in its grooves.

    Can Cheesy Baked Mostaccioli Pasta be made ahead and frozen?

    Yes! Assemble completely, cover tightly, and freeze unbaked for up to 3 months. Thaw overnight in the refrigerator before baking, adding 15-20 minutes to the baking time.

    What cheeses work best in this dish?

    A combination of mozzarella, Parmesan, and provolone creates the ideal balance of meltability and flavor. Fresh mozzarella adds creaminess, while aged Parmesan provides savory depth.

    How do I prevent my pasta from drying out when reheating?

    Sprinkle 1-2 tablespoons of water over the pasta before reheating, then cover with microwave-safe wrap or foil if using an oven. This creates steam that rehydrates the dish.

    Final Thoughts

    This Cheesy Baked Mostaccioli Pasta represents everything I love about comfort food—it’s generous, adaptable, and brings an immediate smile to everyone at the table. The beauty lies in its perfect balance: substantial enough for special occasions yet simple enough for weeknight dinners. I hope this recipe finds its way into your regular rotation, perhaps even becoming the dish friends and family request when they visit. For more comforting pasta inspiration, follow me on Pinterest where I’m always sharing new variations on beloved classics.

  • Crispy Baked Ranch Chicken Recipe That Will Blow Your Mind!

    Crispy Baked Ranch Chicken Recipe That Will Blow Your Mind!

    Crispy Baked Ranch Chicken Recipe That Will Blow Your Mind!

    Crispy Baked Ranch Chicken has transformed my weeknight dinner routine into something my family actually looks forward to. There’s something magical about that moment when you pull a tray of golden, herb-crusted chicken from the oven, and the aroma of ranch seasoning fills your kitchen. I discovered this recipe during a particularly hectic week when I needed something foolproof yet delicious. The combination of crispy exterior and juicy interior creates that perfect texture contrast that makes even picky eaters clean their plates. If you love comforting meals that don’t require hours in the kitchen, this recipe from my collection will become your new go-to.

    Recipe

    Why You’ll Love This Crispy Baked Ranch Chicken

    Perfect Texture Combination

    The secret to truly exceptional Crispy Baked Ranch Chicken lies in the contrast between the crunchy coating and tender meat. I use a combination of panko breadcrumbs and crushed cornflakes for that extra crunch factor that stays crispy even after baking. The buttermilk marinade works double-duty – tenderizing the chicken while helping all those ranch seasonings infuse deeply. I still remember my daughter’s face lighting up at her first bite, declaring it “better than restaurant chicken!” That perfect texture is achieved without deep-frying, making this a healthier option that doesn’t sacrifice the satisfaction of a crispy exterior.

    Quick and Stress-Free Preparation

    What makes this Crispy Baked Ranch Chicken a true weeknight hero is how effortlessly it comes together. The entire prep process takes just 15 minutes of active time, then your oven does the rest of the work. You can even prepare the chicken in advance – dip and coat the pieces, arrange them on a baking sheet, then refrigerate until you’re ready to bake. This make-ahead flexibility has saved me countless times when unexpected schedule changes pop up. Last month, I prepped everything during my daughter’s afternoon nap, then simply slid the tray into the oven when we returned from soccer practice. Dinner was ready with almost zero evening effort!

    Essential Tips & Tricks

    Perfecting the Coating Process

    The key to achieving that evenly golden crust on your Crispy Baked Ranch Chicken is mastering the dredging technique. I always set up a three-station system – flour mixture, egg wash, and the final breadcrumb coating. Keep one hand for dry ingredients and one for wet to prevent the dreaded “breaded fingers” situation! For maximum crispiness, press the coating firmly onto each piece of chicken, ensuring complete coverage. After coating, let the chicken rest on a wire rack for about 10 minutes before baking. This allows the coating to adhere properly and results in that satisfying crunch similar to my Garlic Chicken Wraps but with a different flavor profile.

    Temperature and Timing Secrets

    Nothing ruins Crispy Baked Ranch Chicken faster than improper baking temperature. I’ve found that preheating your oven to 425°F creates the perfect environment for crispy exteriors while keeping the inside juicy. Always arrange your chicken on a wire rack set inside a baking sheet – this allows hot air to circulate underneath, preventing the dreaded soggy bottom. For boneless chicken breasts, 22-25 minutes is typically perfect, while bone-in pieces need 35-40 minutes. The most reliable method is using a meat thermometer; chicken is done at 165°F. I always rest the chicken for 5 minutes after baking to allow juices to redistribute before serving.

    Serving Ideas & Creative Variations

    Family-Friendly Pairings

    Crispy Baked Ranch Chicken pairs beautifully with so many sides, making it incredibly versatile for family meals. My go-to combination includes roasted garlic mashed potatoes and a simple green salad with ranch dressing (to echo the chicken’s flavors). For a lighter option, try serving with roasted vegetables tossed in the same ranch seasoning for flavor continuity. When I’m craving comfort food, I serve this chicken alongside mac and cheese – the creamy pasta perfectly complements the crunchy chicken. For a complete meal that satisfies everyone’s preferences, consider adding a side of Cheeseburger Soup for those who might want something different.

    Exciting Flavor Twists

    While the classic ranch flavor is delicious, don’t be afraid to experiment with your Crispy Baked Ranch Chicken. For a spicy kick, add cayenne pepper or hot sauce to your breadcrumb mixture. I created a buffalo ranch version by mixing buffalo sauce into the egg wash – it was an instant hit at our game night! For an Italian twist, incorporate grated Parmesan and Italian herbs into your coating. My personal favorite variation is adding lemon zest and fresh dill to the breadcrumbs for a bright, fresh flavor profile. These simple additions transform the basic recipe while maintaining that signature crispy texture everyone loves.

    Storage & Troubleshooting Guide

    Keeping It Crispy Later

    Maintaining that perfect crunch when storing leftover Crispy Baked Ranch Chicken can be challenging, but it’s definitely possible with the right approach. Always allow the chicken to cool completely before refrigerating to prevent condensation from making the coating soggy. Store pieces in a single layer in an airtight container with paper towels between layers to absorb excess moisture. When reheating, skip the microwave! Instead, place the chicken on a wire rack in a 350°F oven for 10-15 minutes until heated through. This restores much of the original crispiness. For meal prep, I often make extra chicken specifically for lunch salads the next day – the texture holds up surprisingly well when served cold.

    Fixing Common Problems

    Even experienced cooks occasionally encounter issues with Crispy Baked Ranch Chicken. If your coating isn’t browning properly, try spraying the breaded chicken lightly with cooking oil before baking. For chicken that’s browning too quickly but isn’t cooked through, lower your oven temperature to 375°F and cover loosely with foil until fully cooked. If your coating falls off during baking, you likely skipped the resting period after breading. Always let the coated chicken sit for a few minutes before baking to help the layers adhere. For overly dry chicken, try brining the meat before coating (20 minutes in salt water), or consider using chicken thighs instead of breasts for naturally juicier results.

    Frequently Asked Questions

    Can I make Crispy Baked Ranch Chicken gluten-free?

    Absolutely! Substitute the regular flour with gluten-free flour and use gluten-free panko breadcrumbs. Rice Chex cereal crushed finely makes an excellent gluten-free alternative to cornflakes for extra crunch.

    How do I ensure my Crispy Baked Ranch Chicken doesn’t turn out dry?

    Use chicken thighs instead of breasts for naturally juicier meat, or brine chicken breasts in salt water for 20 minutes before coating. Always use a meat thermometer to avoid overcooking.

    Can I use homemade ranch seasoning instead of the packet?

    Definitely! Mix 2 tablespoons dried parsley, 1 teaspoon each of dill, garlic powder, onion powder, dried chives, and salt, plus ½ teaspoon black pepper for a homemade alternative.

    What’s the best way to prep Crispy Baked Ranch Chicken ahead of time?

    You can bread the chicken up to 8 hours ahead and refrigerate uncovered on a wire rack. This actually helps the coating adhere better and creates an even crispier result.

    How can I make my Crispy Baked Ranch Chicken extra crunchy?

    For maximum crispiness, double-coat your chicken by dipping in egg wash and breadcrumbs twice. Adding 2 tablespoons of cornstarch to your flour mixture also creates an extra-crispy texture.

    Final Thoughts

    This Crispy Baked Ranch Chicken has become more than just a recipe in my household – it’s a reliable solution for those evenings when I want to serve something that feels special without spending hours in the kitchen. The versatility of this dish means it works equally well for casual family dinners or when entertaining friends. I love seeing empty plates and hearing requests for seconds when I serve this crispy, flavorful chicken. Don’t forget to check out more family-friendly recipes on my Pinterest page for weekly meal inspiration!

  • Broccoli Chicken Divan Casserole: Irresistibly Creamy & Easy Delight!

    Broccoli Chicken Divan Casserole: Irresistibly Creamy & Easy Delight!

    Broccoli Chicken Divan Casserole: Irresistibly Creamy & Easy Delight!

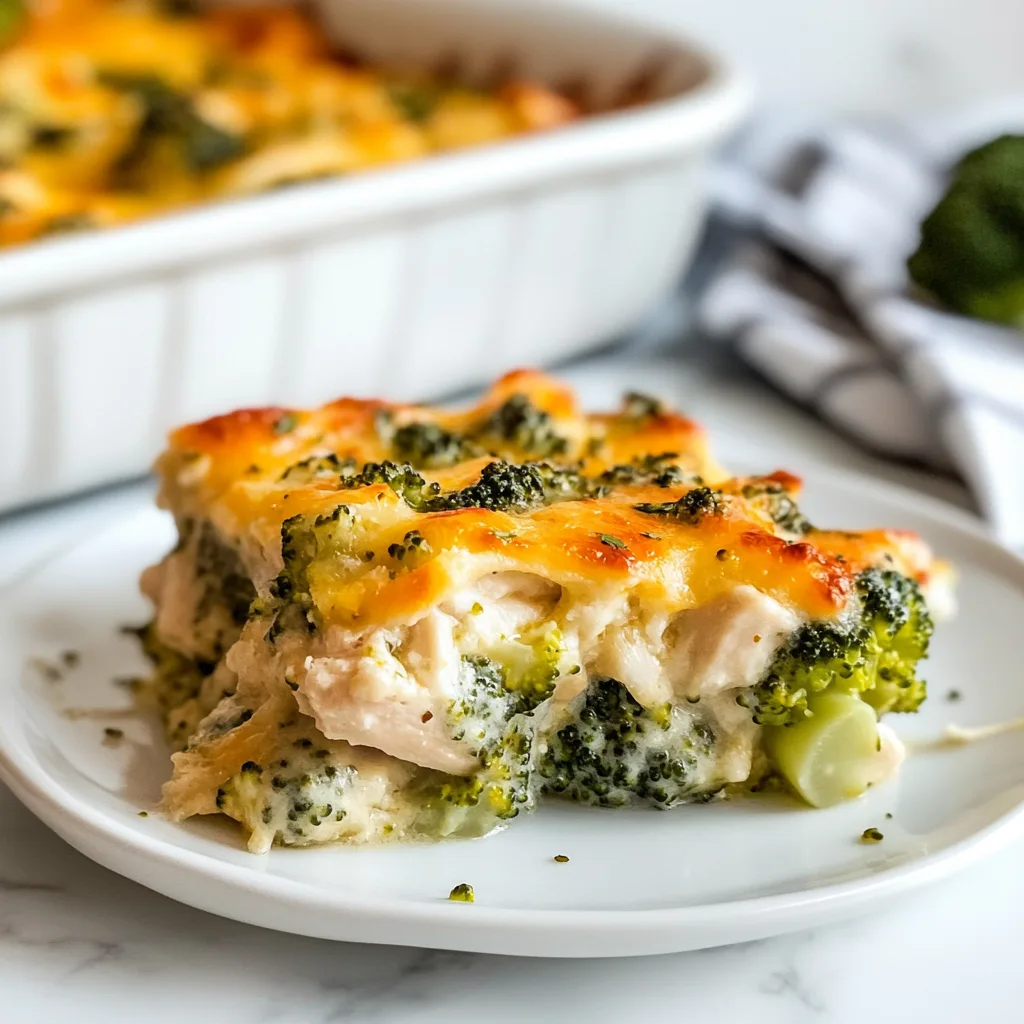
    Broccoli Chicken Divan Casserole has been my winter comfort food MVP for years. There’s something magical about that creamy, cheesy goodness wrapped around tender chicken and perfectly blanched broccoli that makes even the chilliest evenings feel cozy. I discovered this recipe during my first apartment days when I was desperately missing home-cooked meals. Now, it’s become my go-to when friends come over and I want to serve something that feels like a warm hug on a plate. The best part? This casserole is incredibly versatile and can be prepped ahead for those busy weeknights when cooking feels impossible. Let’s dive into this classic comfort food staple.

    Recipe

    Why You’ll Love This Broccoli Chicken Divan Casserole

    Perfect Balance of Flavors and Textures

    This Broccoli Chicken Divan Casserole hits all the right notes with its creamy sauce, tender chicken, and perfectly cooked broccoli. The contrasting textures create a satisfying mouthfeel that keeps you coming back for more. I love how the crispy breadcrumb topping adds that delightful crunch against the velvety sauce. The subtle tang from the sour cream balances the richness, while a hint of curry powder (my secret ingredient!) adds depth without overwhelming. Every bite delivers that perfect harmony that makes comfort food so irresistible. Trust me, even broccoli skeptics will be asking for seconds!

    Make-Ahead Friendly for Busy Weeknights

    Life gets chaotic, which is why I adore how this Broccoli Chicken Divan Casserole fits perfectly into busy schedules. You can prep the entire dish up to 24 hours ahead and just pop it in the oven when needed. I’ve even assembled it during Sunday meal prep, frozen it unbaked, and saved it for those nights when cooking feels impossible. The components can also be prepared separately—cook the chicken and blanch the broccoli in advance, then assemble with the sauce just before baking. This flexibility has saved dinner at my house countless times, especially during those weeks when work deadlines pile up!

    Essential Tips & Tricks

    Perfecting the Sauce Consistency

    The secret to an exceptional Broccoli Chicken Divan Casserole lies in getting that sauce just right. Aim for a consistency that’s thick enough to coat the back of a spoon but still pourable. If your sauce seems too thick, add chicken broth a tablespoon at a time. Too thin? Let it simmer a few minutes longer or add a teaspoon of cornstarch mixed with cold water. I learned the hard way that rushing this step leads to either a watery mess or a gloppy sauce! For extra flavor depth, try using a combination of cheeses like sharp cheddar and Gruyère. This creates complexity that elevates the entire dish, similar to what makes Creamy Chicken Cordon Bleu Casserole so delicious.

    Chicken and Broccoli Preparation Essentials

    For the most flavorful Broccoli Chicken Divan Casserole, proper preparation of the main ingredients is crucial. When it comes to chicken, I prefer poaching boneless breasts in seasoned broth until just cooked through (165°F), then shredding or dicing them. This keeps the meat juicy and receptive to the sauce. For the broccoli, blanch it for exactly 2 minutes in salted water, then immediately plunge into an ice bath. This stops the cooking process, preserves that vibrant green color, and ensures it won’t turn mushy during baking. Remember to thoroughly drain both ingredients—excess moisture is the enemy of a perfect casserole!

    Serving Ideas & Creative Variations

    Complementary Side Dishes

    Broccoli Chicken Divan Casserole shines as a main dish but pairing it with the right sides elevates the entire meal. I love serving it with a simple green salad dressed with a light vinaigrette to cut through the richness. Garlic bread or buttery dinner rolls make perfect companions for soaking up extra sauce. For a lighter option, steamed asparagus or roasted cherry tomatoes add a pop of color and freshness. When I’m feeling fancy, I’ll make Baked Feta Potatoes with Lemon as an accompanying side—the bright citrus notes complement the creamy casserole beautifully and always impress dinner guests!

    Delicious Twists on the Classic Recipe

    The beauty of Broccoli Chicken Divan Casserole lies in its adaptability. Try swapping the chicken for leftover turkey after holidays—I did this last Thanksgiving and it was a game-changing transformation! For a seafood variation, use chunks of poached salmon or cooked shrimp. Vegetable lovers can add cauliflower, bell peppers, or mushrooms alongside the broccoli. To boost nutrition, incorporate quinoa or brown rice into the base. For a spicy kick, add diced jalapeños or a dash of hot sauce to the cream mixture. My personal favorite twist is adding a layer of caramelized onions beneath the chicken—it adds a sweet depth that makes everyone ask for my secret!

    Storage & Troubleshooting Guide

    Proper Storage and Reheating Methods

    Storing your Broccoli Chicken Divan Casserole properly ensures delicious leftovers for days. Refrigerate any cooled leftovers in an airtight container for up to 4 days. When reheating, cover with foil and warm in a 325°F oven for 15-20 minutes to prevent drying out. For single servings, microwave on 70% power with a damp paper towel over the top to maintain moisture. If freezing the casserole, I recommend doing so before baking—wrap tightly in plastic wrap then foil and freeze for up to 3 months. Thaw overnight in the refrigerator before baking. The texture of the sauce might change slightly after freezing, but a gentle stir during reheating usually brings it back together.

    Common Issues and Easy Solutions

    Even experienced cooks encounter challenges with Broccoli Chicken Divan Casserole. If your casserole turns out watery, the likely culprit is underdrained broccoli or too-thin sauce. Next time, thoroughly pat dry all ingredients before assembly. Soggy topping? Try broiling for the final 2 minutes of baking (watch carefully!). If your cheese sauce breaks or curdles, it was likely heated too quickly or at too high a temperature—next time, keep the heat moderate and stir constantly. For a casserole that’s browning too quickly but isn’t heated through, simply cover with foil for the remainder of the baking time. Remember, casseroles continue cooking slightly after removal from the oven!

    Frequently Asked Questions

    Can I use frozen broccoli in my Broccoli Chicken Divan Casserole?

    Yes! Thaw completely and pat dry before using. Frozen broccoli is already blanched, so it’s actually a time-saver. I recommend microwaving it just until thawed, not fully cooked, to prevent mushiness.

    How do I prevent my casserole from becoming watery?

    Thoroughly drain all ingredients, especially the broccoli. If using rotisserie chicken, pat it dry. Ensure your sauce is properly thickened before assembly, and don’t cover the casserole while baking.

    Can I make this casserole ahead of time?

    Absolutely! Assemble up to 24 hours ahead and refrigerate. Add the topping just before baking and add 10-15 minutes to the baking time if cooking straight from the refrigerator.

    What can I substitute for cream of chicken soup?

    Make a homemade white sauce with 2 tablespoons butter, 2 tablespoons flour, and 1 cup chicken broth plus ½ cup milk. Season with salt, pepper, and poultry seasoning for a fresher alternative.

    Is there a low-carb version of Broccoli Chicken Divan Casserole?

    Yes! Skip the breadcrumb topping and use extra cheese instead. Replace flour in the sauce with 1 teaspoon xanthan gum or use cream cheese to thicken. Add extra vegetables for bulk.

    Final Thoughts

    This Broccoli Chicken Divan Casserole has been my reliable companion through countless dinner parties, family gatherings, and cozy nights in. There’s something deeply satisfying about pulling a bubbling, golden-topped casserole from the oven and watching faces light up at the table. The beauty of this dish lies in its perfect balance of comfort and nourishment—indulgent enough to feel special yet wholesome enough for regular rotation. I hope this recipe becomes a beloved staple in your home too! For more comforting casserole ideas, visit our Pinterest board where we’re always adding new inspiration.