Author: Lily Bennett

  • Easy Salmon Tartlets Recipe: Irresistibly Tasty & Quick to Make

    Easy Salmon Tartlets Recipe: Irresistibly Tasty & Quick to Make

    Easy Salmon Tartlets Recipe: Irresistibly Tasty & Quick to Make

    These Easy Salmon Tartlets have completely transformed my appetizer game! Buttery, flaky shells cradle a creamy salmon filling that balances rich flavors with bright herbs and zesty lemon. I first made these for my sister’s housewarming party last spring, and they disappeared within minutes—leaving everyone asking for the recipe! The beauty lies in their elegant appearance that belies how simple they are to prepare. With store-bought tart shells and just a handful of ingredients, you can create these impressive bites that work equally well for casual gatherings or special occasions.

    Recipe

    Why You’ll Love These Easy Salmon Tartlets

    Perfect Balance of Flavors and Textures

    The magic of these tartlets happens when creamy filling meets crisp pastry. Each bite delivers a delightful contrast—buttery pastry shells shatter delicately against the velvety salmon mixture. I love how the richness of the salmon and cream cheese gets brightened by fresh dill and a squeeze of lemon juice. The flavor profile is sophisticated without being complicated, making these little bites feel special even though they require minimal effort. My neighbor described them as “restaurant-quality appetizers that don’t need a restaurant kitchen.”

    Make-Ahead Convenience for Stress-Free Entertaining

    Nothing makes me happier than appetizers I can prepare in advance! These tartlets are entertaining heroes because you can make the filling up to 24 hours ahead and store it in the refrigerator. When guests arrive, simply pipe or spoon the mixture into pre-baked shells, garnish, and serve. This flexibility means less last-minute kitchen stress and more time enjoying your company. I’ve found this particularly helpful during holiday gatherings when oven space becomes precious real estate.

    Essential Tips & Tricks

    Mastering the Perfect Filling Consistency

    The secret to these tartlets is achieving that silky-smooth texture in your filling. Make sure your cream cheese is properly softened—I leave mine out for at least an hour before mixing. When combining ingredients, use a food processor for the smoothest results. If you notice your mixture seems too thick, add a touch of heavy cream one teaspoon at a time until it reaches a pipeable consistency. For extra flavor depth, I sometimes fold in a teaspoon of capers for little bursts of briny goodness.

    Preventing Soggy Pastry Shells

    Nothing ruins these tartlets faster than soggy bottoms! To ensure crisp shells, pre-bake your pastry cases until golden and completely cooked through. Let them cool fully before filling. If making ahead, store unfilled shells in an airtight container with parchment paper between layers. Another trick I swear by: brush the inside of each shell with a thin layer of beaten egg white and return to the oven for 2 minutes. This creates a moisture barrier between the filling and pastry, keeping everything perfectly crisp until serving time.

    Serving Ideas & Creative Variations

    Elegant Presentation Techniques

    Elevate these tartlets with thoughtful garnishes that add both visual appeal and flavor complexity. My go-to finishing touches include tiny dill sprigs, paper-thin cucumber ribbons, or small capers. For special occasions, add a tiny dollop of caviar or salmon roe on top—the pop of color and briny flavor takes these to another level. Arrange tartlets on a white platter scattered with fresh herbs, or serve them on a wooden board alongside lemon wedges for an effortlessly elegant presentation that always impresses guests.

    Flavor Variations to Keep Things Interesting

    While the classic version is divine, these tartlets welcome creative adaptations! Try swapping fresh herbs to change the profile—substitute dill with tarragon for a French twist or cilantro and lime for Southwestern flair. For a smokier version, use hot-smoked salmon instead of poached or canned. My sister-in-law makes a fantastic variation with a thin layer of avocado purée beneath the salmon mixture. For heat lovers, add a tiny pinch of cayenne or a few drops of hot sauce to the filling—the gentle warmth complements the rich salmon beautifully.

    Storage & Troubleshooting Guide

    Proper Storage for Maximum Freshness

    To maintain optimal texture, store assembled tartlets in the refrigerator for up to 8 hours before serving. Place them in a single layer in an airtight container with small gaps between each tartlet to prevent sticking. For longer storage, keep the shells and filling separate—shells in an airtight container at room temperature and filling refrigerated for up to 2 days. I learned this the hard way after preparing everything 24 hours ahead once, only to find slightly softened shells by serving time!

    Quick Fixes for Common Issues

    Even experienced cooks encounter challenges! If your filling turns out too runny, refrigerate it for 30 minutes to firm up, or add more cream cheese in small amounts. For filling that’s too stiff, incorporate a splash of heavy cream or a touch more lemon juice. If your shells crack during baking, don’t panic—the filling will hide minor imperfections. For major cracks, make a quick paste of flour and water to “glue” pieces back together, then return to the oven for 2-3 minutes to set before cooling and filling.

    Frequently Asked Questions

    Can I use canned salmon for these Easy Salmon Tartlets?

    Absolutely! Drain canned salmon well and remove any skin or bones. Premium canned salmon works beautifully and saves significant prep time compared to cooking fresh salmon.

    How far in advance can I make these tartlets?

    You can prepare the filling up to 2 days ahead and store it refrigerated. The shells can be baked 1 day ahead. Assemble tartlets up to 8 hours before serving for best texture.

    Can I freeze these tartlets?

    I don’t recommend freezing assembled tartlets as the texture suffers. However, you can freeze unfilled pastry shells for up to 1 month, and thaw before filling.

    What can I substitute for cream cheese?

    Mascarpone makes a luxurious substitute. For a lighter option, try Greek yogurt mixed with a small amount of mayonnaise, though the filling will be slightly less firm.

    Are these tartlets suitable for a buffet setting?

    Yes! These tartlets hold their shape well at room temperature for 2-3 hours, making them perfect for buffets. Place them on a chilled serving platter for longer events.

    Final Thoughts

    These Easy Salmon Tartlets have become my signature appetizer for good reason—they strike that perfect balance between impressive and achievable. The combination of buttery pastry and creamy salmon filling creates bite-sized morsels that disappear quickly at any gathering. I love watching guests’ expressions as they taste these for the first time, often followed by requests for the recipe! Whether you’re hosting a holiday celebration or casual get-together, these tartlets bring a touch of elegance without hours of work. Find more inspiration for your next gathering on my Pinterest board.
  • Vietnamese Lemongrass Chicken: Irresistibly Flavorful & Easy Recipe!

    Vietnamese Lemongrass Chicken: Irresistibly Flavorful & Easy Recipe!

    Vietnamese Lemongrass Chicken: Irresistibly Flavorful & Easy Recipe!

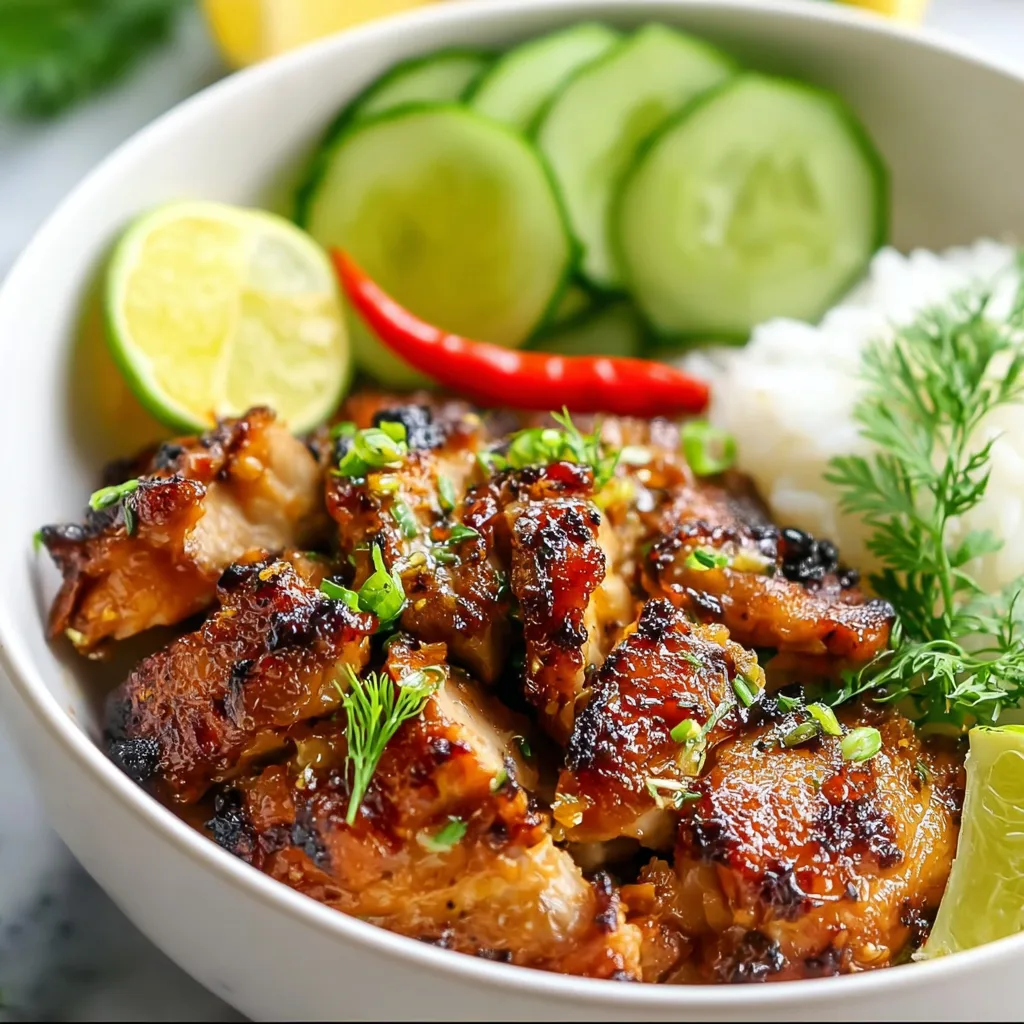
    Vietnamese Lemongrass Chicken has been my go-to recipe whenever I want to transport my senses straight to the vibrant streets of Hanoi. The first time I tasted this dish, the fragrant lemongrass and tender chicken created such a magical combination that I knew I had to master it at home. The aromatic marinade infuses the chicken with layers of flavor – tangy, savory, and slightly sweet with that distinctive citrusy lemongrass punch. If you’re looking for a dish that delivers big on flavor without hours in the kitchen, this recipe from my collection might just become your new weeknight favorite.

    Recipe

    Why You’ll Love This Vietnamese Lemongrass Chicken

    Perfect Balance of Flavors

    The magic of Vietnamese Lemongrass Chicken lies in its perfect harmony of flavors. The lemongrass provides a bright, citrusy note that dances with the umami depth of fish sauce and the subtle sweetness of brown sugar. I love how the garlic and shallots create a savory foundation, while a hint of lime juice adds that perfect touch of acidity. When these ingredients marry together and coat the chicken, something truly special happens. The first bite always makes me close my eyes and savor the moment – it’s that good. Trust me, your taste buds will thank you.

    Quick and Approachable Preparation

    Don’t let the complex flavor profile fool you – this dish is surprisingly straightforward to prepare. The marinade comes together in minutes, and the actual cooking time is minimal. I remember frantically searching for a dinner solution after a long workday, and this recipe saved me. Simply blend the aromatics, marinate the chicken (even 30 minutes will do in a pinch), and then quickly cook until caramelized. The fragrance that fills your kitchen as it cooks is reward enough, but the resulting tender, flavor-packed chicken is the true prize. It’s weeknight-friendly but impressive enough for guests.

    Essential Tips & Tricks

    Mastering the Marinade

    The marinade is truly the heart and soul of this dish. For maximum flavor, crush your lemongrass stalks before mincing – this releases the essential oils that carry that distinctive fragrance. I learned this trick from a Vietnamese friend who watched me struggling to extract enough flavor. Don’t skip the fish sauce – it might smell strong on its own, but it creates that authentic umami depth that makes this dish special. For best results, marinate for at least 2 hours, but overnight is ideal. The longer marinade time allows the flavors to penetrate deeply into the chicken, creating layers of taste in every bite.

    Achieving Perfect Caramelization

    The signature look of Vietnamese Lemongrass Chicken comes from its beautiful caramelization. To achieve this, make sure your pan is properly heated before adding the chicken. I once rushed this step and missed out on that gorgeous golden-brown exterior. Use a heavy-bottomed skillet or wok and cook in batches to prevent overcrowding – this ensures each piece gets proper heat contact. The brown sugar in the marinade helps create that sticky, caramelized exterior, but watch carefully as it can burn quickly. For an extra flavor boost, try my Crispy Homemade Chicken Spring Rolls alongside this dish for a complete Vietnamese feast.

    Serving Ideas & Creative Variations

    Traditional Vietnamese Accompaniments

    Serve your Vietnamese Lemongrass Chicken with fluffy jasmine rice to soak up all those incredible flavors. A side of quick-pickled vegetables adds the perfect contrast – just thinly slice carrots and daikon, then toss with rice vinegar, sugar, and salt. I love adding a small bowl of nuoc cham (Vietnamese dipping sauce) on the side for drizzling. The first time I served this complete meal, my family couldn’t believe it wasn’t takeout! For a truly authentic experience, wrap pieces of the chicken in lettuce leaves with fresh herbs like mint, cilantro, and Thai basil. The fresh crunch against the savory chicken creates a magical texture contrast.

    Modern Fusion Interpretations

    Get creative with how you serve this flavor-packed chicken! Try it as filling for bánh mì sandwiches with pickled vegetables, mayo, and cilantro on crusty bread. I’ve even used leftover lemongrass chicken to top rice bowls with avocado, cucumber, and a spicy mayo drizzle. For a lighter option, toss it into a vibrant salad with mango, red bell peppers, and a lime-fish sauce vinaigrette. My personal favorite variation is using it as filling for summer rolls with rice noodles and fresh herbs – perfect for hot days! For more Asian-inspired flavors, check out my Beef Bulgogi Bowls that use a similar sweet-savory balance.

    Storage & Troubleshooting Guide

    Proper Storage for Maximum Freshness

    Store any leftover Vietnamese Lemongrass Chicken in an airtight container in the refrigerator for up to 3 days. The flavors actually continue to develop, making day-two leftovers sometimes even more delicious! If you want to freeze portions, let the chicken cool completely before transferring to freezer-safe containers or bags. I like to portion it out for easy grab-and-go lunches. Frozen lemongrass chicken will maintain its quality for about 2-3 months. When reheating, add a splash of water to prevent drying out, and consider a quick finish in a hot pan to revive some of that caramelization magic.

    Common Issues and Simple Solutions

    If your chicken lacks that signature lemongrass flavor, you might need to process the lemongrass more thoroughly. I once made this mistake and was disappointed by the muted flavor. Make sure to remove the tough outer layers and finely mince or blend the tender inner portion. If your chicken is burning before cooking through, your heat is likely too high – lower it and give the chicken more time. For dry chicken, try using thigh meat instead of breast, as it’s more forgiving and stays juicier. And if the sauce isn’t caramelizing properly, try adding a teaspoon of honey to help it along.

    Frequently Asked Questions

    What cuts of chicken work best for Vietnamese Lemongrass Chicken?

    Chicken thighs are ideal as they stay juicy and tender. Boneless, skinless thighs offer the perfect balance of convenience and flavor, but bone-in works too if you increase the cooking time slightly.

    Can I make this dish less spicy?

    Absolutely! Adjust or omit the chili to suit your preference. The lemongrass, garlic, and fish sauce provide plenty of flavor even without the heat.

    How far in advance can I prepare the marinade?

    The marinade can be made up to 3 days ahead and stored in the refrigerator. This actually allows the flavors to meld beautifully before adding your chicken.

    Is fish sauce necessary for authentic flavor?

    Yes, fish sauce is crucial for authentic Vietnamese Lemongrass Chicken. It provides the distinctive umami depth that defines Vietnamese cuisine, though soy sauce can substitute in a pinch.

    What’s the best way to prepare lemongrass for this recipe?

    Remove the tough outer layers, use only the bottom 4-5 inches of the stalk, and finely mince or process it. Bruising it first with the back of your knife helps release the essential oils.

    Final Thoughts

    Vietnamese Lemongrass Chicken brings the vibrant flavors of Southeast Asia right to your dinner table with minimal effort. The aromatic combination of fresh lemongrass, savory fish sauce, and caramelized sugar creates a dish that’s both comforting and exciting. What I love most is how versatile it is – perfect for a quiet weeknight dinner or as the star of a weekend gathering. Whether you stick to tradition or experiment with modern variations, this recipe delivers authentic flavor that will transport you straight to the streets of Vietnam. Find more inspiration for your cooking adventures on Pinterest.

  • Shrimp Newburg Recipe: Creamy, Decadent, and Irresistibly Easy!

    Shrimp Newburg Recipe: Creamy, Decadent, and Irresistibly Easy!

    Shrimp Newburg Recipe: Creamy, Decadent, and Irresistibly Easy!

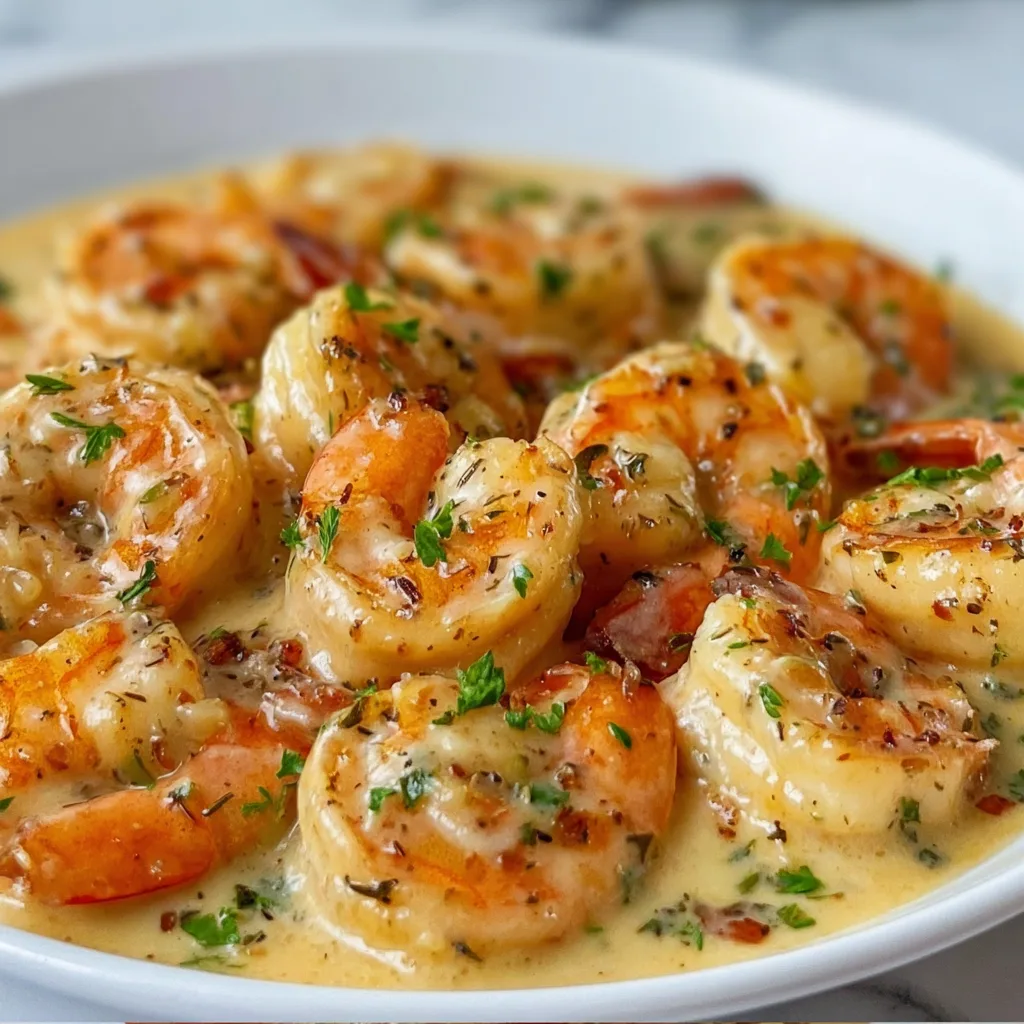
    Shrimp Newburg is one of those classic dishes that manages to be both elegantly sophisticated and comforting at the same time. The first time I made this rich, creamy creation, I was transported back to my grandmother’s dining room where special occasions always meant something decadent on the table. The tender shrimp bathed in a velvety cognac-kissed sauce creates a luxurious meal that feels like a warm hug on a plate. Whether you’re planning a romantic dinner or simply want to elevate your weeknight cooking, this Shrimp Newburg recipe promises restaurant-quality results with surprisingly little effort.

    Recipe

    Why You’ll Love This Shrimp Newburg Recipe

    Perfect Balance of Flavors and Textures

    There’s something magical about the way the sweet, tender shrimp mingles with the rich, buttery sauce in this recipe. The delicate seafood flavor shines through while being complemented by the warm notes of cognac or sherry. I love how the sauce coats each shrimp perfectly, creating little pockets of flavor with every bite. The slight tanginess from the lemon juice brightens everything up, preventing the dish from becoming too heavy. It’s this perfect balance that makes Shrimp Newburg so addictive – sophisticated enough for special occasions but comforting enough to make you close your eyes with each delicious forkful.

    Quick Yet Impressive Results

    Despite its fancy reputation, Shrimp Newburg comes together in about 30 minutes from start to finish. This makes it my go-to when I need something impressive but don’t have hours to spend in the kitchen. The sauce thickens beautifully as it simmers, transforming before your eyes into that signature velvety consistency. I still remember the first time I served this to guests – they couldn’t believe I’d whipped it up so quickly! The combination of minimal prep work and maximum flavor impact makes this recipe a true kitchen hero when you want to impress without stress. Your dinner guests will think you spent hours crafting this luxurious dish.

    Essential Tips & Tricks

    Selecting and Preparing the Shrimp

    The foundation of an exceptional Shrimp Newburg starts with high-quality shrimp. I recommend using large or jumbo shrimp (16-20 count per pound) for the best texture and presentation. Fresh is wonderful if you have access, but don’t hesitate to use frozen shrimp that’s been properly thawed. The key is ensuring they’re deveined and peeled, leaving just the tails on for a prettier presentation if desired. When cooking the shrimp, remember that they’ll continue cooking in the sauce, so it’s better to slightly undercook them in the initial sauté. Pink with just a hint of translucence is perfect – they should have just curled into a loose C-shape.

    Creating the Perfect Sauce Consistency

    The signature velvety texture of Shrimp Newburg sauce requires a bit of attention but is simple to master. Start with a proper roux by cooking the flour and butter until it smells slightly nutty but hasn’t browned. When adding your liquid ingredients, pour slowly while whisking constantly to prevent lumps from forming. If your sauce seems too thick, add a tablespoon of cream or stock at a time until you reach the desired consistency. For a silkier finish, temper your egg yolks by adding a small amount of the hot sauce to them before incorporating them back into the pan. This prevents curdling and creates that luxurious mouthfeel that makes Shrimp Newburg so special.

    Serving Ideas & Creative Variations

    Classic and Modern Serving Suggestions

    Traditionally, Shrimp Newburg is served over buttery toast points or puff pastry shells for an elegant presentation. For a more substantial meal, spoon it over perfectly cooked rice or angel hair pasta that will catch all that luscious sauce. One of my favorite ways to serve it is nestled in a bed of creamy mashed potatoes with a sprinkle of fresh chives – the contrast between the silky sauce and fluffy potatoes is divine! For a low-carb option, consider serving over cauliflower rice or alongside roasted asparagus. Whatever base you choose, a simple green salad with a light vinaigrette makes the perfect accompaniment to balance the richness of this spectacular dish.

    Exciting Flavor Twists and Additions

    While the classic recipe is perfection, I love experimenting with flavor variations that put a personal spin on this timeless dish. Adding a pinch of smoked paprika or cayenne pepper brings a subtle heat that complements the sweetness of the shrimp beautifully. For a Mediterranean twist, stir in some sun-dried tomatoes and a handful of baby spinach just before serving. Seafood lovers might appreciate a mixed version with lobster or scallops alongside the shrimp – I tried this for a holiday dinner and it was a showstopper! You can also incorporate crispy bacon bits for a smoky contrast or add sautéed mushrooms for an earthy dimension that pairs wonderfully with the rich sauce.

    Storage & Troubleshooting Guide

    Proper Storage and Reheating Methods

    Shrimp Newburg is best enjoyed fresh, but leftovers can be stored in an airtight container in the refrigerator for up to 2 days. When reheating, do so gently over low heat to prevent the sauce from breaking and the shrimp from becoming tough. I recommend adding a splash of cream or milk when reheating to revitalize the sauce’s silky texture. For the best results, warm the sauce separately until it’s just heated through, then add the shrimp for the final minute to avoid overcooking. Unfortunately, Shrimp Newburg doesn’t freeze well due to the cream-based sauce, which can separate upon thawing, and the texture of the shrimp may become compromised.

    Common Issues and How to Fix Them

    Even experienced cooks occasionally encounter challenges with Shrimp Newburg. If your sauce breaks or curdles, don’t panic! Try removing it from heat and whisking in a tablespoon of cold cream or a small pat of softened butter. For a sauce that’s too thin, create a slurry with a teaspoon of cornstarch and cold water, then whisk it in while the sauce simmers. Conversely, if your sauce is too thick, gradually add warm stock or cream until you reach the desired consistency. Overcooked shrimp can become rubbery – if this happens, consider chopping them and incorporating them into a creamy pasta dish where the sauce will help mask the texture.

    Remember that patience is key – gentle heat and constant attention yield the best results.

    Frequently Asked Questions

    What exactly is Shrimp Newburg?

    Shrimp Newburg is a rich American seafood dish consisting of shrimp in a creamy sauce made with butter, egg yolks, cream, and sherry or cognac. It originated in the late 1800s and is traditionally served over toast points, puff pastry, or rice.

    Can I make Shrimp Newburg ahead of time?

    You can prepare the sauce up to 24 hours ahead, but I recommend cooking the shrimp just before serving. Reheat the sauce gently, then add freshly cooked shrimp to maintain their tender texture and prevent overcooking.

    What can I substitute for the alcohol in Shrimp Newburg recipe?

    For a non-alcoholic version, substitute the sherry or cognac with seafood stock mixed with a tablespoon of lemon juice and a teaspoon of vanilla extract. This maintains the depth of flavor without using alcohol.

    How can I tell when the shrimp are perfectly cooked?

    Perfectly cooked shrimp turn pink, opaque, and curl into a loose C-shape. If they curl into a tight O-shape, they’re overcooked. They should feel firm but still have a slight bounce when pressed.

    What sides pair well with this dish?

    Light, fresh sides balance Shrimp Newburg’s richness best. Consider steamed asparagus, a simple green salad, roasted Brussels sprouts, or garlic green beans. For starches, rice, crusty bread, or pasta work beautifully.

    Final Thoughts

    This Shrimp Newburg recipe transforms simple ingredients into something truly special – a dish that feels like celebration on a plate. I hope you’ll embrace both the classic preparation and the creative variations to make this recipe your own. There’s something deeply satisfying about mastering a timeless dish like this, watching as humble shrimp transform into an elegant meal worthy of your most cherished gatherings. Whether for a romantic dinner, holiday feast, or simply because you deserve something extraordinary, Shrimp Newburg delivers comfort and luxury in equal measure. Find more seafood inspirations on our Pinterest board and keep creating beautiful meals!

  • One-Skillet Pepperoncini Chicken – Easy, Juicy & Flavor-Packed!

    One-Skillet Pepperoncini Chicken – Easy, Juicy & Flavor-Packed!

    One-Skillet Pepperoncini Chicken – Easy, Juicy & Flavor-Packed!

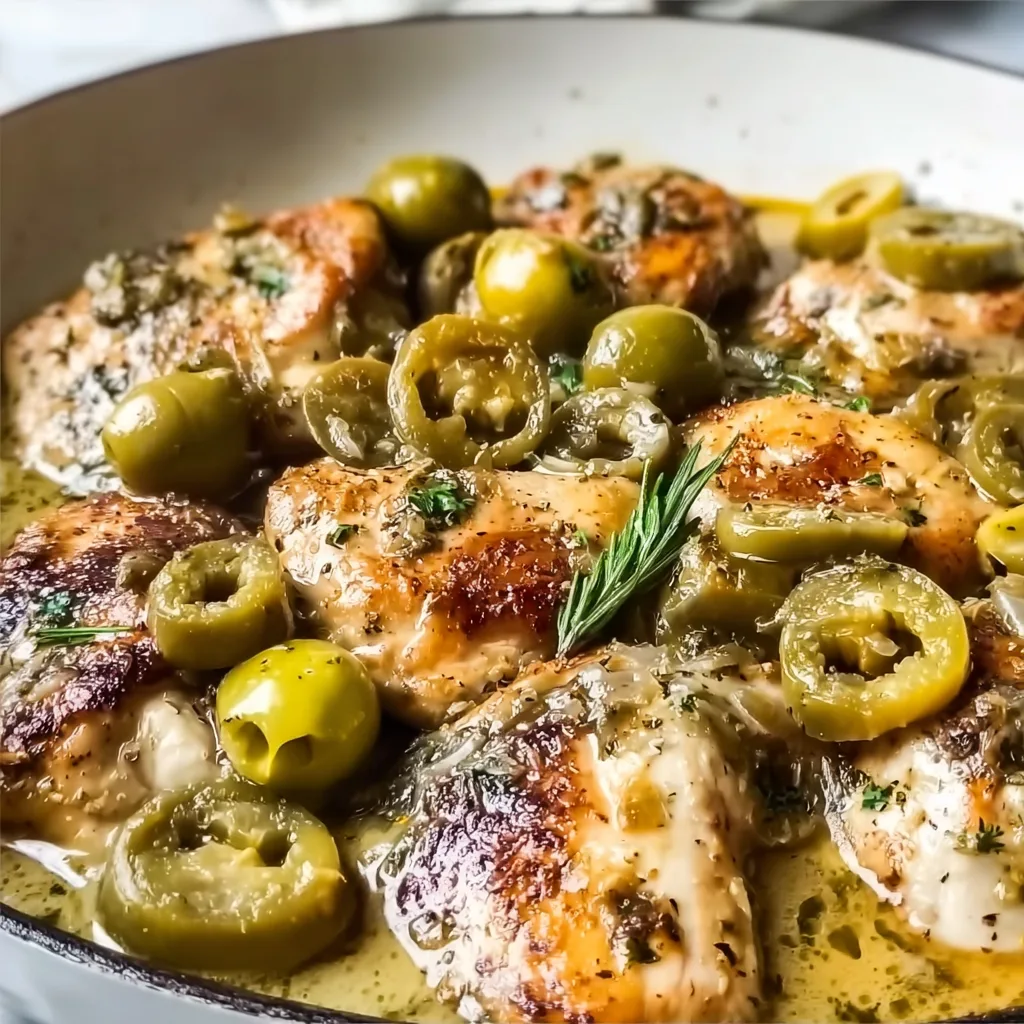
    One-Skillet Pepperoncini Chicken has become my weeknight dinner hero, and I’m betting it’ll soon be yours too. There’s something magical about the tangy, slightly spicy pepperoncini peppers mingling with tender chicken as everything cooks together in a single pan. The first time I made this dish, my kitchen filled with an aroma that had my partner wandering in from the living room asking, “What smells so incredible?” That’s the beauty of this recipe—it’s effortlessly impressive while being remarkably simple. The pepperoncini brine creates a self-making sauce that transforms ordinary chicken into something crave-worthy. Ready to discover your new favorite weeknight meal?

    Recipe

    Why You’ll Love This One-Skillet Pepperoncini Chicken

    Perfect Balance of Flavors

    The genius of One-Skillet Pepperoncini Chicken lies in its perfect flavor harmony. The mild heat from the pepperoncini peppers balances beautifully with the savory chicken, creating a dish that’s tangy without overwhelming your palate. I love how the peppers mellow as they cook, releasing their bright, briny essence into the sauce. The chicken absorbs all these flavors as it simmers, becoming incredibly tender and juicy. What makes this dish special is how the pepperoncini brine transforms into a velvety sauce that’s just begging to be spooned over rice or sopped up with crusty bread.

    Minimal Cleanup, Maximum Impact

    As someone who values both delicious food and minimal dishwashing, this One-Skillet Pepperoncini Chicken recipe is a dream come true. Everything comes together in one single pan, meaning you’ll spend more time enjoying dinner and less time scrubbing pots and pans afterward. I still remember the first time I made this on a hectic Wednesday when deadlines were looming—the relief of creating something so flavorful with such little effort felt like a small miracle. The presentation is naturally beautiful too, with the golden chicken nestled among the bright pepperoncini peppers, making it perfect for both casual family dinners and entertaining guests.

    Essential Tips & Tricks

    Choosing the Right Ingredients

    The secret to exceptional One-Skillet Pepperoncini Chicken starts with quality ingredients. Opt for bone-in, skin-on chicken thighs for the juiciest results—they’re more forgiving and won’t dry out during cooking. When selecting pepperoncini, look for jars labeled “mild” if you prefer less heat or “hot” if you enjoy a spicier kick. I’ve learned through trial and error that including some of the pepperoncini brine (about ¼ cup) creates a more flavorful sauce. For an extra dimension of flavor, add a splash of white wine or chicken broth to deglaze the pan after browning the chicken, scraping up all those delicious brown bits from the bottom of the skillet.

    Mastering the Cooking Technique

    The key to perfect One-Skillet Pepperoncini Chicken lies in the searing technique. Start with a hot skillet—I prefer cast iron for its heat retention—and don’t rush the browning process. Let the chicken skin develop a golden crust before flipping, usually 5-7 minutes per side. This step creates incredible flavor and texture. Once you’ve added your pepperoncini and liquid, resist the urge to stir too frequently. Instead, let everything simmer gently, occasionally spooning the sauce over the chicken. This basting technique ensures the meat stays moist while absorbing all those tangy flavors. For an extra touch of richness, consider adding a pat of butter to the sauce just before serving, like in these Garlic Butter Chicken Broccoli recipes.

    Serving Ideas & Creative Variations

    Perfect Pairings

    One-Skillet Pepperoncini Chicken pairs beautifully with so many sides, making it incredibly versatile for any occasion. My personal favorite is serving it over creamy polenta or mashed potatoes, which provide the perfect canvas for soaking up that incredible sauce. For a lighter option, try it with a simple arugula salad dressed with lemon and olive oil—the peppery greens complement the tangy chicken wonderfully. Crusty bread is non-negotiable in my home; there’s nothing better than using it to capture every last drop of the pepperoncini sauce. For a complete meal that will impress guests, pair it with Italian Chopped Salad and some roasted vegetables for a colorful, satisfying dinner.

    Creative Twists on the Classic

    While the classic One-Skillet Pepperoncini Chicken is perfect as is, I love experimenting with variations that keep this dish exciting. Try adding Mediterranean flair by incorporating olives, capers, and a sprinkle of feta cheese in the last few minutes of cooking. For a creamier version, stir in a splash of heavy cream or cream cheese just before serving. When I’m in the mood for something heartier, I add cannellini beans or chickpeas to the skillet, allowing them to warm through and absorb the flavors.

    You can also transform this into a pasta dish by shredding the cooked chicken and tossing everything with your favorite pasta shape—penne and orecchiette work particularly well, catching all that delicious sauce in their nooks and crannies.

    Storage & Troubleshooting Guide

    Proper Storage Methods

    One-Skillet Pepperoncini Chicken makes exceptional leftovers, often tasting even better the next day as the flavors continue to develop. Store any remaining chicken and sauce in an airtight container in the refrigerator for up to 3 days. For best results, let the dish cool completely before refrigerating. When reheating, add a splash of chicken broth to maintain moisture and prevent the sauce from reducing too much. If you want to freeze portions for later, remove the chicken from the bones first, then store the meat and sauce together in freezer-safe containers for up to 2 months. Thaw overnight in the refrigerator before gently reheating on the stovetop.

    Troubleshooting Common Issues

    If your One-Skillet Pepperoncini Chicken sauce is too thin, there’s a simple fix: remove the chicken temporarily and simmer the sauce over medium heat until it reduces to your desired consistency. Conversely, if the sauce becomes too thick or intense, add a splash of chicken broth or water to thin it out. For chicken that isn’t browning properly, ensure your skillet is hot enough before adding the meat and that the chicken skin is thoroughly patted dry.

    If you find the dish too tangy from the pepperoncini, balance it with a teaspoon of honey or a knob of butter to round out the flavors. Remember that different brands of pepperoncini vary in acidity, so adjusting to taste is perfectly normal.

    Frequently Asked Questions

    Can I use boneless chicken for One-Skillet Pepperoncini Chicken?

    Yes! Boneless chicken thighs or breasts work well but cook faster than bone-in pieces. Reduce cooking time by about 10 minutes and check for doneness with a meat thermometer (165°F internal temperature).

    Are pepperoncini peppers very spicy?

    Pepperoncini peppers are mild on the heat scale, offering more tanginess than spice. They’re perfect for those who enjoy flavor without intense heat, making this dish family-friendly.

    Can I make this dish ahead for a dinner party?

    Absolutely! One-Skillet Pepperoncini Chicken actually improves with time as flavors meld. Prepare it a day ahead, refrigerate, then gently reheat before serving for maximum flavor.

    What’s the best skillet to use?

    A cast iron skillet works best because it retains heat evenly and creates beautiful browning. However, any oven-safe skillet with a heavy bottom will work well.

    How can I make the sauce creamier?

    For a creamier One-Skillet Pepperoncini Chicken sauce, stir in 2-3 tablespoons of cream cheese or heavy cream during the last 5 minutes of cooking, allowing it to melt into the sauce.

    Final Thoughts

    One-Skillet Pepperoncini Chicken has earned its place in my regular meal rotation because it delivers so much flavor with so little effort. There’s something deeply satisfying about creating a dish where simple ingredients transform into something greater than the sum of their parts. I find myself craving the bright, tangy flavors and tender chicken even as I write this. Whether you’re cooking for a busy weeknight or a special gathering, this versatile recipe adapts to any occasion. Don’t forget to check out more delicious recipes on Pinterest for inspiration. I hope this One-Skillet Pepperoncini Chicken brings as much joy to your table as it has to mine!

  • Quick Jumbo Dinner Rolls: Irresistibly Soft & Fluffy Every Time!

    Quick Jumbo Dinner Rolls: Irresistibly Soft & Fluffy Every Time!

    Quick Jumbo Dinner Rolls: Irresistibly Soft & Fluffy Every Time!

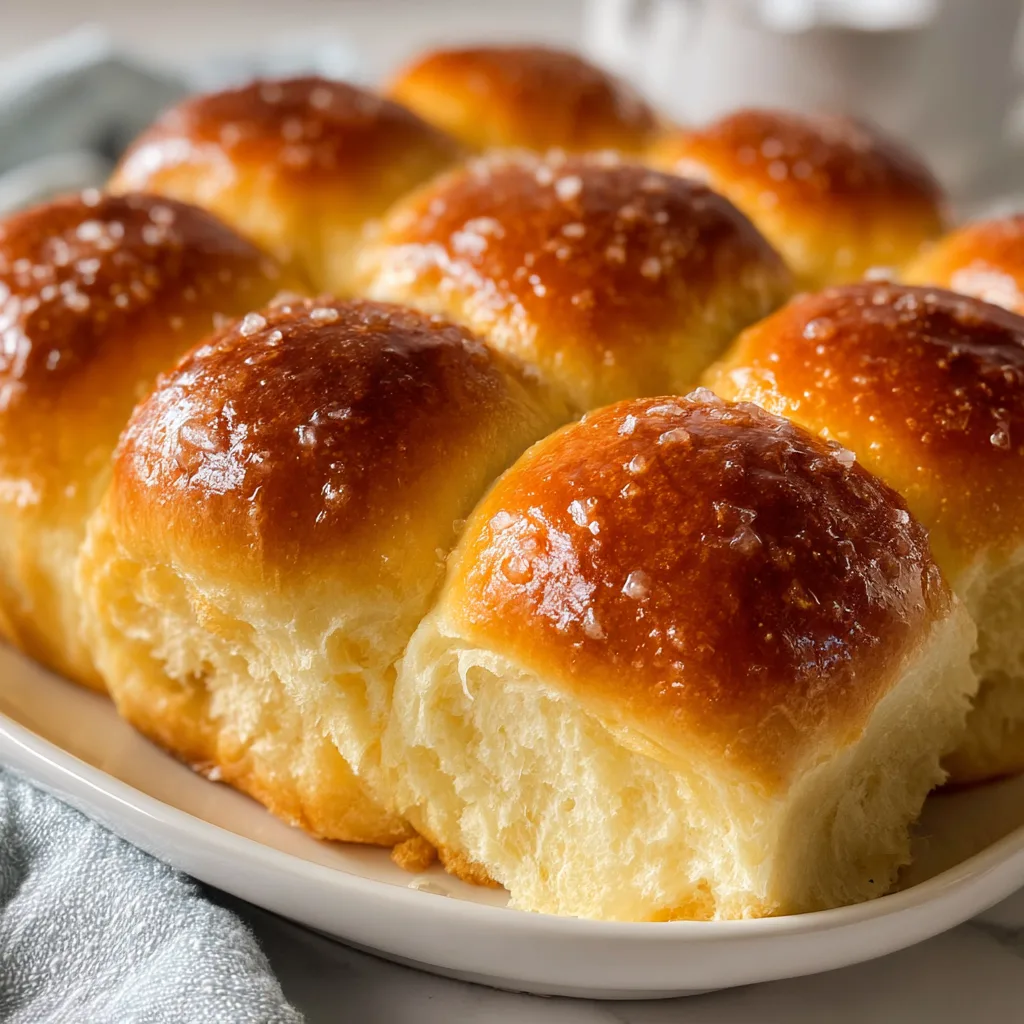
    Quick Jumbo Dinner Rolls have been my saving grace on countless busy weeknights when I need something homemade but don’t have hours to spare. There’s something magical about pulling a tray of golden, fluffy rolls from the oven just as dinner hits the table. The aroma alone transforms an ordinary meal into something special. I discovered this recipe during a particularly chaotic holiday season, and it’s become my go-to ever since. Unlike traditional dinner rolls that can take hours with multiple rises, these jumbo beauties are ready in a fraction of the time without sacrificing that pillowy texture we all crave. Let me show you how to make these irresistible rolls that will have everyone reaching for seconds.

    Recipe

    Why You’ll Love These Quick Jumbo Dinner Rolls

    Perfect for Busy Weeknights

    These quick jumbo dinner rolls truly live up to their name—ready in under an hour from start to finish! I remember the first time I made them for a Tuesday family dinner; my daughter walked in from soccer practice, caught that yeasty scent, and her eyes widened with disbelief. “You made homemade bread on a weeknight?!” The time-saving secret lies in using instant yeast and a slightly warmer rise environment. The dough comes together in minutes in a stand mixer, and with just one abbreviated rise, you’ll have impressive, bakery-worthy rolls that taste like they took all day. No one needs to know how simple they actually were!

    Crowd-Pleasing Size and Texture

    The jumbo part of these dinner rolls isn’t just for show—it’s what makes them special. Each roll is generously sized, creating that perfect tear-apart moment when you pull them open to reveal the steamy, tender interior. The texture hits that sweet spot between fluffy and substantial, with just enough chew to feel satisfying. I’ve found that the larger size also helps the rolls stay softer longer, which means any leftovers (though rare in my house!) remain delicious for breakfast the next day. The golden tops get a brush of melted butter right after baking, adding a rich finish that makes these rolls absolutely irresistible.

    Essential Tips & Tricks

    Mastering the Quick Rise

    The key to these quick jumbo dinner rolls lies in creating the perfect environment for that single, efficient rise. I learned this trick after a baking disaster: warm your oven to its lowest setting for just 2 minutes, then turn it off completely. This creates a draft-free, slightly warm space that encourages rapid yeast development. Place your covered dough inside and watch the magic happen in just 20-25 minutes! Another game-changer is using room temperature ingredients—cold milk or eggs will significantly slow down the process. I keep everything on the counter for 30 minutes before starting, which makes all the difference in achieving that quick rise without compromising texture.

    Shaping for Perfect Results

    Properly shaping your rolls creates that professional bakery look and ensures even baking. I use a kitchen scale to divide the dough into equal portions (about 3 ounces each for truly jumbo rolls). The technique that changed everything for me: roll each portion into a tight ball by cupping your hand over the dough and moving in small circles against an unfloured surface. This creates surface tension for a beautiful rise. Place them in your baking dish with about an inch between each roll—they’ll expand to touch during rising, creating those classic soft sides that tear apart so satisfyingly. A light egg wash before baking gives them that irresistible golden shine.

    Serving Ideas & Creative Variations

    Perfect Pairings

    These quick jumbo dinner rolls elevate practically any meal from ordinary to memorable. They’re substantial enough to serve alongside hearty soups like my family’s favorite chicken udon soup, where they’re perfect for soaking up every last drop of broth. I particularly love them with holiday meals—last Thanksgiving, my brother-in-law used one to create a mini turkey sandwich right at the table! The slightly sweet, buttery flavor complements both casual weeknight dinners and special occasions. Try them with roasted chicken, beef stew, or even a simple pasta dinner. The versatility is what makes them a staple in my recipe collection—they truly make any meal feel complete.

    Flavor Twists and Add-Ins

    While the classic version is perfection, these rolls become even more special with simple variations. My personal favorite is adding fresh herbs to the dough—rosemary and thyme create an aromatic roll that’s divine with roasted meats. For a sweeter version, fold in cinnamon and a touch of brown sugar for breakfast rolls. Another crowd-pleaser: fold in shredded cheese and minced garlic for a savory twist that disappears in minutes. The dough is incredibly forgiving, making it perfect for experimentation. I’ve even topped them with everything bagel seasoning before baking when serving with soup. Each variation maintains the quick preparation time while creating something uniquely delicious.

    Storage & Troubleshooting Guide

    Keeping Rolls Fresh

    These quick jumbo dinner rolls stay remarkably fresh when stored properly. For next-day enjoyment, let them cool completely before placing in an airtight container or zip-top bag at room temperature—they’ll maintain their softness for up to 2 days. For longer storage, the freezer is your friend! I wrap individual rolls tightly in plastic wrap, then place them in a freezer bag for up to 3 months. The best part: they reheat beautifully. Just wrap frozen rolls in foil and warm in a 300°F oven for about 10 minutes, or microwave for 20-30 seconds. I’ve found that refreshing them with a light brush of butter after reheating brings back that fresh-baked magic.

    Troubleshooting Common Issues

    Even experienced bakers encounter challenges, but most roll problems have simple solutions. If your dough isn’t rising quickly enough, check your yeast’s expiration date—this was my mistake once that resulted in dense rolls! Another common issue is overproofing, where the dough rises too long and then collapses in the oven. Watch for the dough to double in size, then bake immediately. For rolls that brown too quickly, place foil loosely over the top halfway through baking. And if your rolls turn out dense rather than fluffy, you likely added too much flour—the dough should feel slightly tacky but not stick to your fingers. These simple adjustments will help ensure perfect jumbo rolls every time.

    Frequently Asked Questions

    Can I make these Quick Jumbo Dinner Rolls ahead of time?

    Absolutely! Prepare the dough through shaping, then cover and refrigerate overnight. The next day, let them come to room temperature (about 30-45 minutes) before baking. They’ll be just as delicious with less day-of work.

    Why didn’t my rolls rise properly?

    Check your yeast’s freshness and ensure your liquid ingredients are warm (105-110°F)—not hot or cold. Also, make sure your rising environment is warm and draft-free for optimal yeast activation.

    Can I make these rolls smaller for a larger quantity?

    Yes! Divide the dough into 16-18 portions instead of 12 for standard-sized dinner rolls. Reduce the baking time by about 3-4 minutes and watch them closely.

    How can I make these Quick Jumbo Dinner Rolls extra soft?

    Add 1/4 cup of potato flakes to the dough for ultra-soft texture. Also, brush with melted butter immediately after baking to keep the tops tender and flavorful.

    Can I use active dry yeast instead of instant?

    Yes, but you’ll need to proof it first in warm liquid with a pinch of sugar until foamy (about 5-10 minutes) before adding to the dry ingredients, and expect a slightly longer rise time.

    Final Thoughts

    These Quick Jumbo Dinner Rolls have become my secret weapon in the kitchen—impressive enough for special occasions yet simple enough for weeknights. There’s something deeply satisfying about placing a basket of warm, homemade rolls on the table, especially when they required so little effort. The beauty of this recipe is its reliability; I’ve made these rolls countless times, and they never disappoint. Whether paired with a hearty soup or served alongside a holiday feast, these quick jumbo dinner rolls bring that special touch that makes a meal memorable. I hope they become a beloved staple in your home as they have in mine. For more delicious bread recipes, visit our Pinterest collection.

  • Baked BBQ Sausages in Oven – Juicy, Easy & Irresistible!

    Baked BBQ Sausages in Oven – Juicy, Easy & Irresistible!

    Baked BBQ Sausages in Oven – Juicy, Easy & Irresistible!

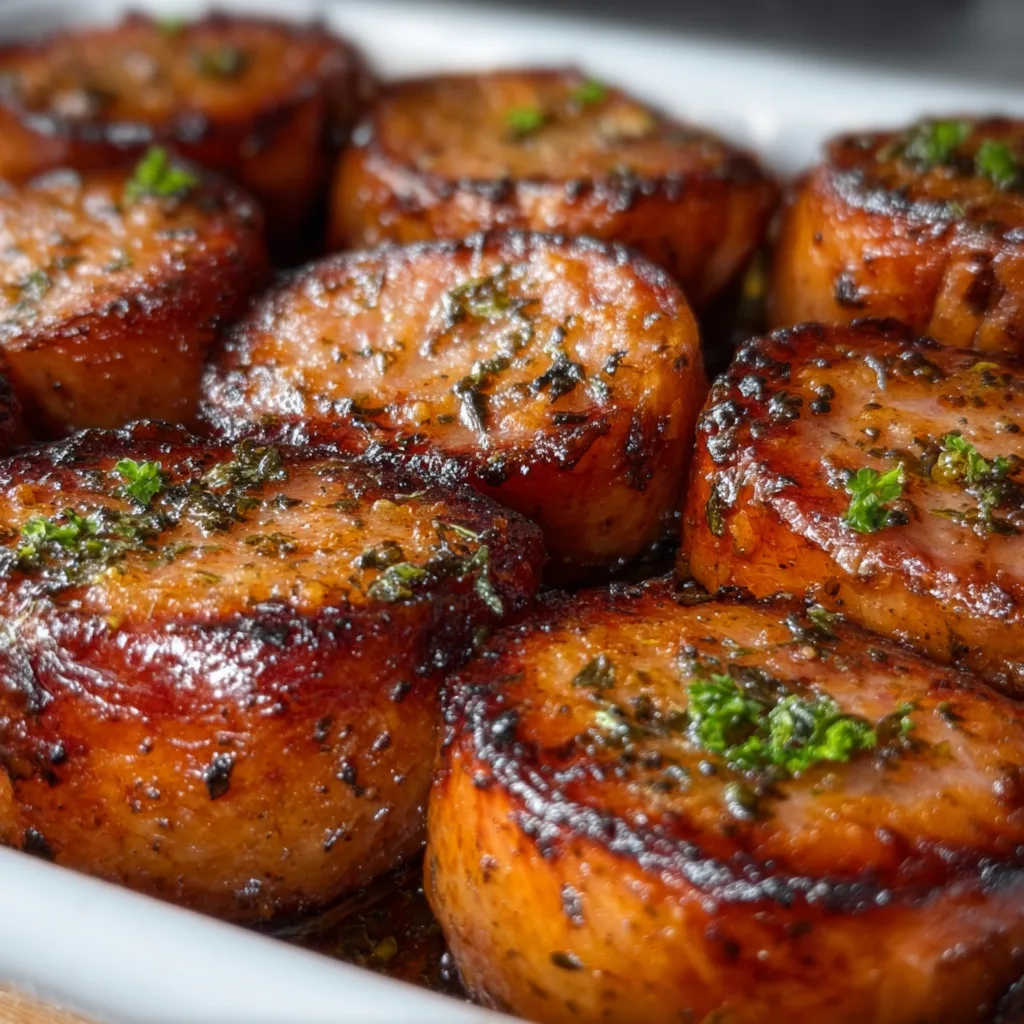
    Baked BBQ Sausages in the oven have become my go-to dinner solution on those evenings when I’m craving something hearty but don’t have the energy for anything complicated. There’s something magical about the way the oven transforms those humble links into caramelized, juicy morsels of deliciousness. I first discovered this method during a rainy Sunday when grilling outside wasn’t an option, and honestly? The oven-baked version might be even better! The edges get perfectly crisp while the inside stays tender and bursting with flavor. If you’ve been looking for a foolproof way to cook sausages, this method from my kitchen collection is about to become your new favorite.

    Recipe

    Why You’ll Love These Baked BBQ Sausages in Oven

    Perfect Texture Every Time

    The magic of oven-baking sausages lies in the consistent heat that surrounds them, creating that ideal balance of crispy exterior and juicy interior. Unlike pan-frying, where I always struggled with uneven cooking or burned spots, the oven method delivers perfection every time. I still remember serving these at a family gathering and watching my brother-in-law’s eyes widen with that first bite. The gentle heat allows the fat to render slowly, basting the sausages from within while the BBQ sauce caramelizes into a sticky, flavorful glaze. Trust me, once you try this method, you’ll never go back to standing over a splattering stovetop.

    Minimal Effort, Maximum Flavor

    What truly won me over about these BBQ sausages is how ridiculously easy they are to prepare. On busy weeknights when I’m juggling work emails and helping with homework, I can simply line a baking sheet, arrange the sausages, brush with sauce, and let the oven work its magic. No constant flipping or monitoring required! The hands-off cooking time gives me precious minutes to throw together a quick side dish or simply catch my breath. And the flavor payoff? Absolutely worth the minimal effort. The BBQ sauce concentrates and caramelizes, creating deep, complex flavors that taste like you’ve been cooking all day.

    Essential Tips & Tricks

    Choosing the Right Sausages

    The foundation of amazing baked sausages starts with selecting the right variety. I’ve experimented with everything from spicy Italian to sweet apple varieties, and they all work beautifully with this method. For the richest flavor, look for sausages with at least 15-20% fat content – this keeps them juicy during the baking process. My personal favorite? A good quality pork and fennel sausage that pairs perfectly with sweet BBQ sauce. Fresh sausages will always give you the best texture, but even pre-cooked varieties benefit from this baking method. Just remember to reduce the cooking time slightly if using pre-cooked options to prevent them from drying out.

    Perfecting Your BBQ Glaze

    The secret to truly exceptional oven-baked sausages lies in the BBQ glaze. While store-bought sauce works perfectly, I love to doctor mine up with a tablespoon of honey and a splash of apple cider vinegar for that perfect sweet-tangy balance. Apply your sauce in layers – start with a light coating before baking, then add a second layer halfway through cooking for maximum flavor impact. For an extra special touch that I learned from my Baked Chicken Kabobs recipe, try mixing in a teaspoon of smoked paprika or a dash of bourbon to your BBQ sauce. These little tweaks elevate the humble sausage into something truly crave-worthy.

    Serving Ideas & Creative Variations

    Family-Friendly Meal Pairings

    These BBQ sausages are incredibly versatile when it comes to creating complete meals. My family’s favorite pairing is with creamy mashed potatoes that soak up all that delicious sauce – I’ve literally seen my kids use their potatoes as a vehicle to scoop up every last bit from their plates! For a lighter option, try serving alongside a crisp coleslaw with a tangy dressing to cut through the richness. Roasted vegetables like bell peppers and zucchini complement the smoky flavors beautifully, or go classic with some Parmesan Garlic Rice for a crowd-pleasing combination. Don’t forget some crusty bread to mop up those irresistible pan juices!

    Exciting Flavor Twists

    While classic BBQ sauce is always a winner, these oven-baked sausages are the perfect canvas for flavor experimentation. For an Asian-inspired version, try glazing with a mixture of hoisin sauce, ginger, and a drizzle of honey. Mediterranean flavors work beautifully too – a combination of oregano, lemon zest, and olive oil creates a bright, herbaceous profile. My personal favorite twist came from a happy accident when I was out of BBQ sauce – I used a blend of maple syrup, Dijon mustard, and a pinch of cayenne pepper. The sweet-heat combination was so good it’s now in regular rotation! Don’t be afraid to customize based on what your family loves.

    Storage & Troubleshooting Guide

    Proper Storage Solutions

    Storing leftover baked sausages properly ensures they remain just as delicious the next day. Allow them to cool completely before transferring to an airtight container – this prevents condensation that can make them soggy. They’ll keep beautifully in the refrigerator for up to 3 days. For longer storage, these sausages freeze surprisingly well! I often make a double batch specifically for freezing. Wrap individual sausages in parchment paper before placing in a freezer bag to prevent them from sticking together. When reheating, avoid the microwave if possible – a few minutes in a 350°F oven will restore their delicious texture without drying them out.

    Fixing Common Issues

    Even the simplest recipes can sometimes go awry, but most BBQ sausage mishaps are easily fixed. If your sausages are browning too quickly but aren’t cooked through, simply lower the oven temperature by 25 degrees and cover loosely with foil to prevent further browning. For sausages that burst during cooking (releasing all those precious juices), try pricking them lightly with a fork before baking next time. If your BBQ glaze is burning rather than caramelizing, it likely contains too much sugar – try mixing your sweet sauce with a bit of broth or water to dilute it slightly. Remember that different ovens vary in temperature, so your first batch may require some timing adjustments.

    Frequently Asked Questions

    What temperature should I bake sausages in the oven?

    For perfect baked BBQ sausages in the oven, preheat to 400°F (200°C). This temperature creates the ideal balance of caramelized exterior while ensuring the inside cooks through properly without drying out.

    How long do sausages take to cook in the oven?

    Fresh sausages typically need 25-30 minutes at 400°F, turning halfway through. Thicker sausages may require up to 35 minutes. Always check for an internal temperature of 160°F to ensure they’re fully cooked.

    Can I use frozen sausages for this recipe?

    Yes! Add 5-10 minutes to the cooking time and skip the initial sauce application. Apply BBQ sauce only after the first 15 minutes when they’ve thawed in the oven.

    What’s the best way to prevent sausages from drying out?

    Avoid pricking the sausages before baking to keep juices inside. Place them on a rack over a baking sheet so they cook in their own fat, and don’t overcook beyond 160°F internal temperature.

    Can I make these sausages ahead for a party?

    Absolutely! Bake them 80% of the way through, then refrigerate. Before serving, finish in a 375°F oven for 10-15 minutes with a fresh application of BBQ sauce for a perfect glaze.

    Final Thoughts

    These baked BBQ sausages in the oven have truly become a staple in my cooking repertoire – the perfect balance of effortless preparation and impressive results. There’s something deeply satisfying about pulling a tray of gorgeously caramelized sausages from the oven, knowing that such minimal effort produced something so delicious. Whether you’re feeding a hungry family on a weeknight or entertaining friends on the weekend, this method delivers consistent, crave-worthy results. I hope you’ll give these oven-baked sausages a try and discover just how simple and rewarding they can be! For more delicious inspiration, check out my Pinterest collection.

  • Shrimp Orzo in Lemon Garlic Sauce | Irresistibly Zesty & Quick!

    Shrimp Orzo in Lemon Garlic Sauce | Irresistibly Zesty & Quick!

    Shrimp Orzo in Lemon Garlic Sauce | Irresistibly Zesty & Quick!

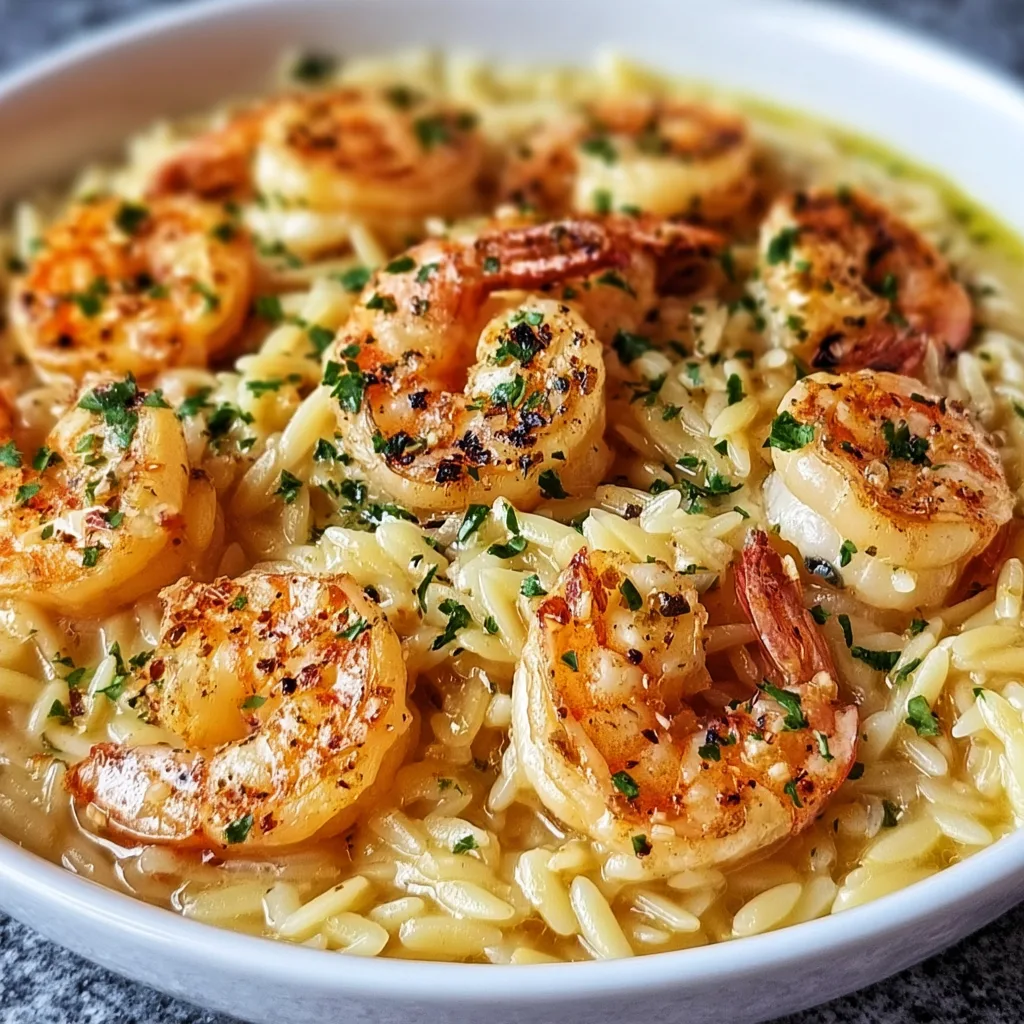
    Shrimp Orzo in Lemon Garlic Sauce is the perfect balance of comfort and sophistication that I’m absolutely obsessed with lately. Picture this: plump, juicy shrimp nestled among tender orzo pasta, all bathed in a silky lemon garlic sauce that hits every perfect note – bright, creamy, and utterly craveable. I first created this dish on a rainy Sunday when I needed something that felt special but didn’t require hours in the kitchen. The way the sauce clings to each piece of orzo makes every bite a little moment of joy. Trust me, this is about to become your new weeknight favorite that feels anything but ordinary. Let me show you how to make magic happen in just one pan.

    Recipe

    Recipe

    Why You’ll Love This Shrimp Orzo in Lemon Garlic Sauce

    Perfect Balance of Flavors

    There’s something almost magical about the combination of zesty lemon and aromatic garlic in this dish. The brightness cuts through the richness, creating this perfect harmony that dances on your tongue. I love how the lemon juice adds that perfect zing without overwhelming the delicate sweetness of the shrimp. The garlic infuses the entire dish with a warm, inviting aroma that fills your kitchen and makes everyone ask “what smells so amazing?” It’s the kind of dish that feels sophisticated enough for company but simple enough for a Tuesday night when you need something comforting after a long day.

    One-Pan Simplicity

    As someone who values both flavor and efficiency, I’m all about one-pan wonders that deliver maximum impact with minimal cleanup. This shrimp orzo comes together in just one skillet, where each ingredient builds upon the last, creating layers of flavor that taste like you’ve been cooking all day. The orzo absorbs all those gorgeous flavors as it cooks directly in the sauce, becoming plump and tender. I’ve found this method actually creates a creamier texture than boiling the pasta separately. Plus, on busy nights, knowing I’ll only have one pan to wash makes me much more likely to cook something delicious rather than ordering takeout.

    Essential Tips & Tricks

    Perfecting Your Shrimp

    The key to restaurant-quality shrimp is avoiding overcooking at all costs! I always pat my shrimp completely dry with paper towels before seasoning – this ensures they get that beautiful golden sear rather than steaming. Cook them just until they turn pink and opaque (about 2 minutes per side), then remove them from the pan while you prepare the sauce and orzo. This two-stage cooking method prevents rubbery, tough shrimp. Remember that they’ll continue cooking slightly when added back to the hot pasta, so it’s better to undercook them initially. The perfect shrimp should have a slight C shape – if they curl into tight O shapes, they’re overcooked.

    Creating a Silky Sauce

    The velvety texture of this sauce comes from a few simple techniques that make all the difference. Start by deglazing the pan with a splash of white wine to release those flavorful browned bits from cooking the shrimp. When adding lemon juice, incorporate the zest too – it contains the aromatic oils that give depth beyond just acidity. For extra creaminess without heaviness, try stirring in a tablespoon of cream cheese or a splash of half-and-half in the final minute of cooking. My favorite trick is adding a knob of cold butter right at the end with the heat off – this creates a glossy, restaurant-worthy finish that elevates the entire dish.

    Serving Ideas & Creative Variations

    Perfect Pairings

    This shrimp orzo deserves to be the star of your table, but a few simple sides can complete the meal beautifully. I love serving it with a crisp side salad dressed with just olive oil and lemon to echo the flavors in the main dish. For a heartier option, some garlic bread is perfect for soaking up every last drop of that incredible sauce. When entertaining, I start with a light appetizer like marinated olives or a small cheese plate. This dish pairs wonderfully with a chilled Pinot Grigio or Sauvignon Blanc that complements the citrus notes. For a non-alcoholic option, sparkling water with a squeeze of lemon and sprig of basil is refreshingly perfect.

    Exciting Twists

    Don’t be afraid to make this recipe your own with some creative variations! For a Mediterranean twist, add halved cherry tomatoes, crumbled feta, and fresh dill in the last few minutes of cooking. Seafood lovers can turn this into a mixed seafood delight by adding scallops, mussels, or pieces of firm white fish alongside the shrimp. For a touch of heat, red pepper flakes or a dash of cayenne wake up all the flavors. When I’m craving extra vegetables, I fold in fresh spinach or asparagus pieces right at the end until just wilted. For a heartier version perfect for cooler months, try adding roasted cherry tomatoes and Italian sausage for a delicious twist.

    Storage & Troubleshooting Guide

    Proper Storage

    This shrimp orzo makes fantastic leftovers when stored properly. Transfer any remaining portions to an airtight container and refrigerate for up to 2 days. The flavors actually continue to develop overnight, making next-day lunch something to look forward to! When reheating, add a splash of chicken broth or water to loosen the sauce, as the orzo will continue absorbing liquid. I prefer gentle reheating in a covered skillet over medium-low heat rather than the microwave, which can make the shrimp tough. If you’re meal prepping, consider keeping the cooked shrimp separate and adding them only during reheating to prevent them from becoming overcooked.

    Common Issues Solved

    If your sauce seems too thin or watery, don’t worry – simply simmer uncovered for a few extra minutes to reduce and thicken. Conversely, if it’s too thick, add small amounts of broth until you reach your desired consistency. For orzo that’s undercooked or too firm, add ¼ cup more liquid and continue cooking, checking every 2 minutes until perfect. If your shrimp release too much liquid and dilute the flavor, increase seasoning and add a squeeze of fresh lemon to brighten everything back up. Remember that the sauce will thicken as it cools, so it’s better to err on the slightly thinner side when serving. Trust your taste buds – they’re your best guide!

    Frequently Asked Questions

    Can I use frozen shrimp for this Shrimp Orzo in Lemon Garlic Sauce?

    Absolutely! Thaw completely and pat very dry before cooking. I actually keep frozen shrimp on hand specifically for quick meals like this when I don’t have time to shop for fresh.

    What can I substitute for orzo pasta?

    Any small pasta works beautifully – try small shells, ditalini, or even Israeli couscous. Adjust cooking time according to package directions since they may differ slightly from orzo.

    Is this dish spicy?

    Not as written, but it’s easy to add heat! Red pepper flakes, cayenne pepper, or a dash of hot sauce can be added to taste for those who enjoy some spice.

    Can I make this dairy-free?

    Yes! Skip the butter and Parmesan, using olive oil instead. For creaminess, try coconut cream or a splash of your favorite plant-based cream alternative.

    How do I prevent the orzo from sticking to the pan?

    Stir frequently, especially during the first few minutes of cooking. Using a non-stick pan or well-seasoned cast iron skillet also helps prevent sticking issues.

    Final Thoughts

    This Shrimp Orzo in Lemon Garlic Sauce has become my go-to dish when I want to impress without stress. There’s something about the combination of tender shrimp, perfectly cooked orzo, and that bright, velvety sauce that feels like a warm hug at the end of a long day. I hope you’ll give this recipe a try and make it your own – it’s flexible enough to adapt to what you have on hand while still delivering that restaurant-quality experience right at your kitchen table. Don’t forget to check out more seafood inspiration on my Pinterest boards for your next cooking adventure!

  • Baked Lemon Garlic Tilapia: Irresistibly Zesty & Easy Dinner Winner

    Baked Lemon Garlic Tilapia: Irresistibly Zesty & Easy Dinner Winner

    Baked Lemon Garlic Tilapia: Irresistibly Zesty & Easy Dinner Winner

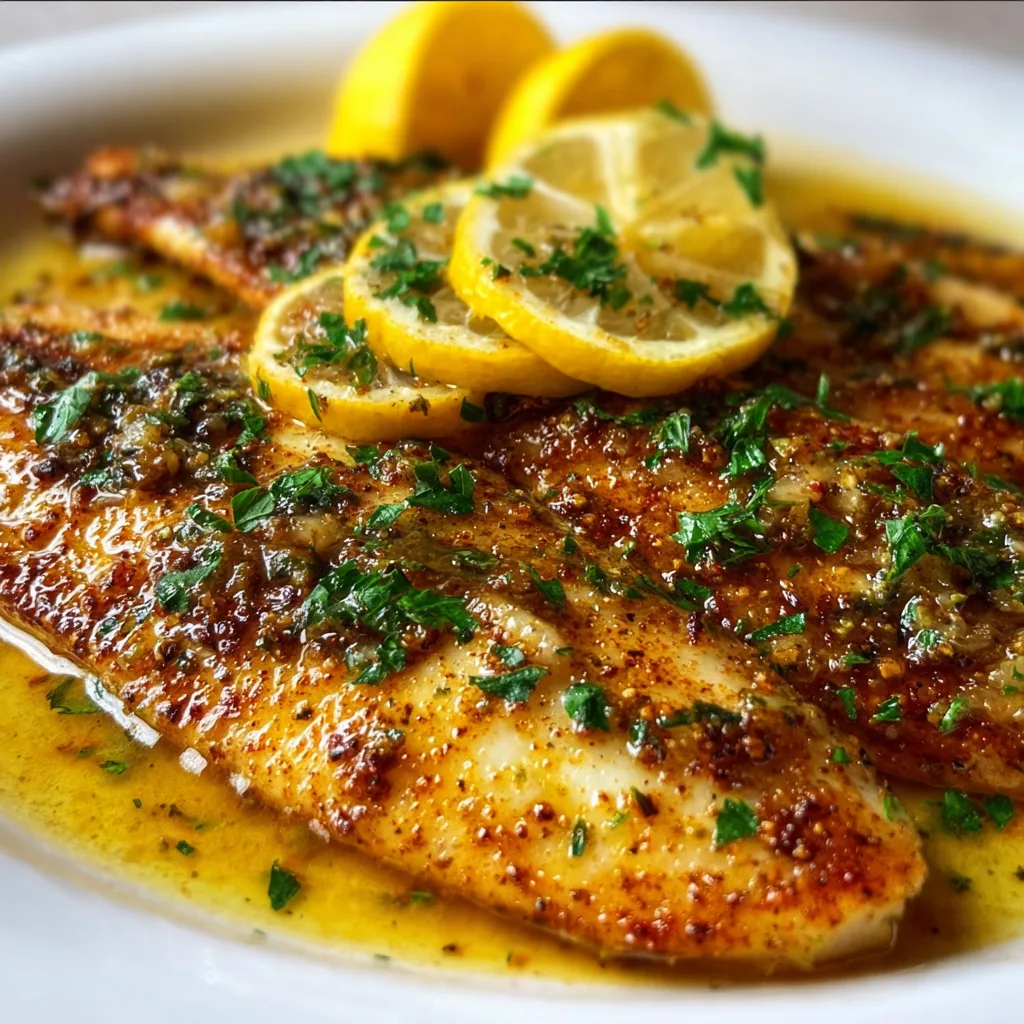
    Baked Lemon Garlic Tilapia has become my absolute go-to dinner for those evenings when I want something impressive without the fuss. The first time I made this dish, the aroma of garlic and lemon filled my kitchen, and I knew I’d found a winner. There’s something magical about how the bright citrus cuts through the delicate fish, creating a perfect balance that feels both indulgent and light. If you’re looking for a simple yet elegant seafood recipe that comes together in under 30 minutes, this one deserves a spot in your regular rotation.

    Recipe

    Why You’ll Love This Baked Lemon Garlic Tilapia

    Perfect for Busy Weeknights

    This dish has saved me countless times when I’m racing against the clock but still want something nutritious and delicious. Tilapia fillets bake in just 12-15 minutes, meaning you can have dinner on the table faster than delivery would arrive. I love how the preparation is so straightforward—just season, add your lemon and garlic, and pop it in the oven. On particularly hectic evenings, I’ll prep the seasoning mix in the morning, so when I get home, it’s truly a matter of minutes before the heavenly aroma fills the kitchen. The minimal cleanup is just the cherry on top!

    A Nutritional Powerhouse

    Beyond its incredible flavor, this Baked Lemon Garlic Tilapia delivers serious health benefits. Tilapia is naturally low in calories but high in protein, making it perfect for anyone watching their waistline while still wanting to feel satisfied. The addition of heart-healthy olive oil and antioxidant-rich garlic transforms this from just a tasty meal into a nutritional powerhouse. I’ve found this dish particularly appealing when I’m trying to incorporate more lean protein into my diet without sacrificing flavor. Plus, it’s naturally gluten-free, making it an inclusive option when entertaining guests with dietary restrictions.

    Essential Tips & Tricks

    Selecting the Perfect Tilapia

    Finding the freshest tilapia makes all the difference in this recipe. When I’m at the seafood counter, I always look for clear, bright eyes and firm flesh that springs back when touched. The fillets should have a mild, clean scent—nothing fishy! If fresh isn’t available, don’t hesitate to use frozen; just thaw it properly in the refrigerator overnight. I’ve discovered that wild-caught tilapia often has a better flavor profile than farm-raised, though either works beautifully in this recipe. For the most consistent results, try to select fillets of similar thickness so they’ll cook evenly and be ready at the same time.

    Mastering the Lemon Garlic Flavor

    The magic of this dish lies in the perfect balance of lemon and garlic. I learned through trial and error that slicing the lemon thinly allows its oils to infuse the fish without overwhelming it with acidity. For the garlic, I prefer mincing it fresh rather than using pre-packaged options—the flavor difference is remarkable! A little trick I’ve discovered: let the minced garlic sit in the olive oil for about 10 minutes before using it to allow the flavors to bloom. For an extra dimension, try adding a touch of white wine to the baking dish—it creates a light sauce that’s absolutely divine.

    Serving Ideas & Creative Variations

    Complementary Side Dishes

    This Baked Lemon Garlic Tilapia pairs beautifully with vegetables that can cook at the same temperature. I often toss asparagus or cherry tomatoes with olive oil and herbs, then arrange them around the fish for the last 10 minutes of baking—one-pan dinner success! For a heartier meal, Parmesan Garlic Rice creates a delicious foundation that soaks up the lemony juices. On summer evenings, I serve this with a crisp cucumber and avocado salad dressed simply with lemon juice and olive oil. The refreshing contrast against the warm, flaky fish creates a dining experience that feels restaurant-worthy but requires minimal effort.

    Global Flavor Adaptations

    While the classic lemon-garlic combination is timeless, this recipe serves as a wonderful canvas for experimentation. For a Mediterranean twist, I sometimes add kalamata olives, capers, and a sprinkle of feta cheese during the last few minutes of baking. When I’m craving something with Asian flair, I substitute lime for lemon and add ginger, a splash of soy sauce, and a drizzle of sesame oil. My family particularly loves when I take it in a Cajun direction with a light dusting of blackening spice and a few slices of jalapeño. The versatility of tilapia means it plays well with flavors from virtually any cuisine.

    Storage & Troubleshooting Guide

    Proper Storage Solutions

    Leftover Baked Lemon Garlic Tilapia can be safely refrigerated for up to three days when stored in an airtight container. I find glass containers work best for preserving the delicate flavor without picking up refrigerator odors. To reheat, I avoid the microwave which can make the fish rubbery. Instead, I place it in a 275°F oven, covered with foil and a splash of water for moisture, until just warmed through—usually about 10 minutes. If you’re meal prepping, this dish works surprisingly well; just slightly undercook the fish initially so it doesn’t become overcooked when reheated. The lemon flavor actually intensifies beautifully overnight!

    Fixing Common Issues

    Even experienced cooks occasionally encounter challenges with fish. If your tilapia turns out too dry, it was likely overcooked—next time, check it earlier or use a meat thermometer (145°F is perfect). For too much acidity, balance it by serving with a side that has a touch of sweetness or creaminess. If the garlic burns and becomes bitter, try adding it halfway through the cooking process instead of at the beginning. Sometimes tilapia can release excess moisture during baking, making the dish watery; to prevent this, pat the fillets very dry before seasoning and consider salting them 30 minutes before cooking to draw out moisture.

    Frequently Asked Questions

    Can I use another type of fish for this Baked Lemon Garlic Tilapia recipe?

    Absolutely! Cod, sole, or halibut work wonderfully with these flavors. Just adjust cooking time based on thickness—thicker fillets need a few extra minutes.

    How do I know when the tilapia is fully cooked?

    The fish should flake easily with a fork and appear opaque throughout. For precision, use a thermometer to reach 145°F in the thickest part.

    Can I prepare this dish ahead of time?

    You can prepare the seasoning and slice the lemon in advance, but I recommend baking right before serving for the best texture and flavor.

    Is tilapia high in mercury?

    Tilapia is considered a low-mercury fish, making it a safe choice for regular consumption and appropriate for most family members.

    What’s the best way to prevent the fish from sticking to the pan?

    Line your baking dish with parchment paper or give it a light coating of olive oil spray before adding the fish.

    Final Thoughts

    This Baked Lemon Garlic Tilapia has become more than just a recipe in my household—it’s a reliable friend that delivers on flavor, nutrition, and simplicity every single time. The bright, clean flavors make it appealing to even reluctant seafood eaters, while its versatility means it never gets boring. I love how it can transform from an everyday family dinner to an impressive entertaining option with just a few garnishes. Don’t forget to check out more seafood inspiration on Pinterest for creative ways to enjoy this dish!