Blog

  • Grilled Cheese with Gouda, Roasted Mushrooms & Onion Bliss

    Grilled Cheese with Gouda, Roasted Mushrooms & Onion Bliss

    Grilled Cheese with Gouda, Roasted Mushrooms & Onion Bliss

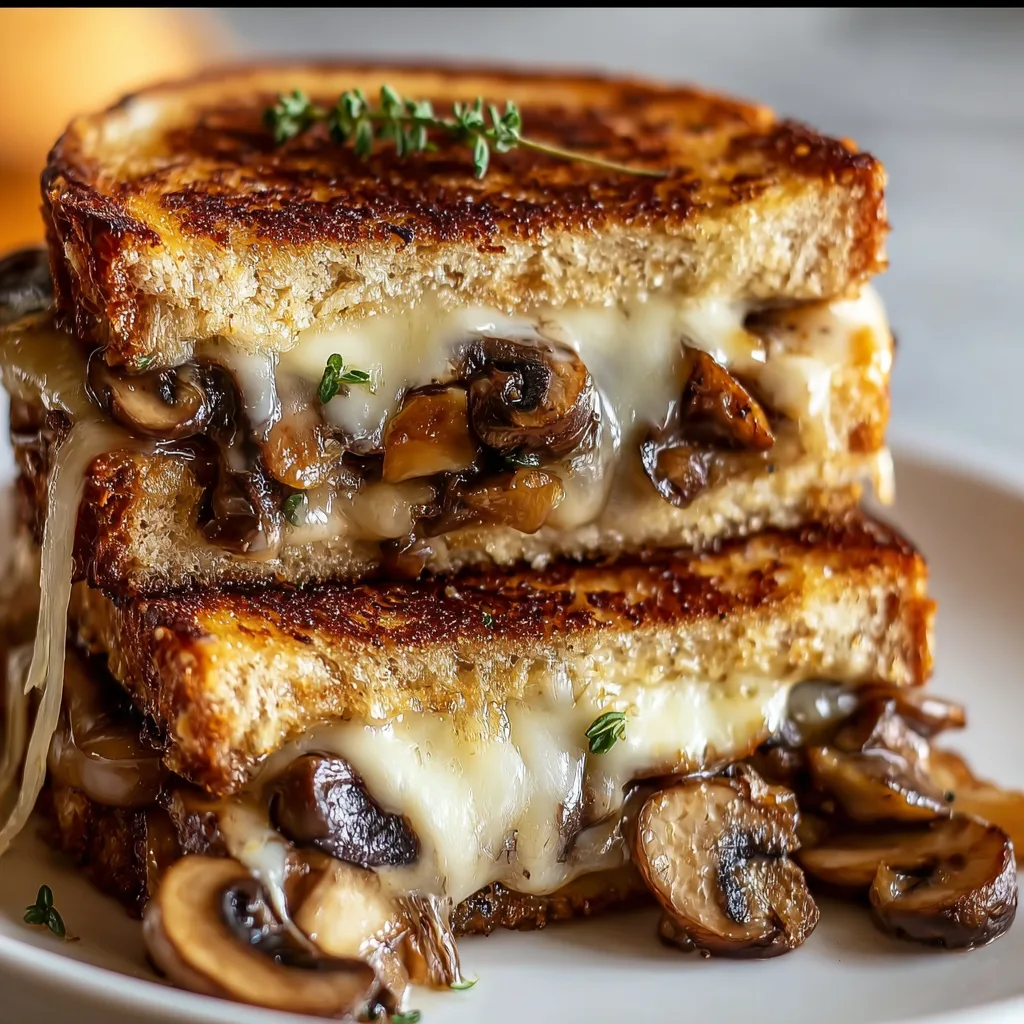
    Grilled cheese with gouda roasted mushrooms and onion is the ultimate comfort sandwich that elevates the classic into something extraordinary. The first time I made this for my sister during a rainy afternoon, the kitchen filled with the earthy aroma of caramelized mushrooms and sweet onions, and we both fell silent at the first bite. There’s something magical about how the nutty gouda melts between crispy, buttery bread while the roasted mushrooms add a rich umami depth. This isn’t just a sandwich—it’s a sensory experience that transforms simple ingredients into something crave-worthy. Check out my sourdough bread recipe for the perfect base!

    Recipe

    Why You’ll Love This Grilled Cheese with Gouda Roasted Mushrooms and Onion

    A Perfect Balance of Flavors and Textures

    This sandwich hits all the right notes with its contrasting textures and harmonious flavors. The crispy, golden-brown exterior gives way to melty, stretchy gouda that pulls apart in the most satisfying way. The mushrooms bring a meaty, earthy quality while the caramelized onions add natural sweetness that cuts through the richness. I love how the butter creates those perfectly crisp edges that crackle when you bite in. It’s the kind of sandwich that makes you close your eyes and savor each bite, appreciating how simple ingredients can create such complex flavors when treated with care.

    Quick Gourmet Comfort in Minutes

    Despite its gourmet flavor profile, this grilled cheese with gouda roasted mushrooms and onion comes together in just about 20 minutes. The roasting process intensifies the mushroom flavor while drawing out moisture, ensuring your sandwich stays perfectly crispy. I’m always amazed at how something this delicious doesn’t require hours in the kitchen. It’s sophisticated enough for dinner with a glass of wine but comforting enough for a quick lunch when you need something soul-warming. The ingredients are accessible year-round, making this a reliable go-to sandwich that never disappoints.

    Essential Tips & Tricks

    Perfecting Your Mushroom Roast

    The key to exceptional mushrooms is proper roasting technique. Slice mushrooms uniformly (about ¼-inch thick) and never crowd the pan—they need space to release moisture and caramelize. I toss mine with olive oil, a pinch of thyme leaves, and a light sprinkle of salt before roasting at 425°F for 15-20 minutes. The high heat creates those beautiful golden edges with concentrated flavor. A cast iron skillet works beautifully here, but any oven-safe pan will do. Remember to stir halfway through cooking for even browning. This method ensures your mushrooms are flavor bombs, not soggy disappointments.

    The Art of Sandwich Assembly

    Building the perfect grilled cheese is all about layering. Start with room-temperature butter spread evenly on the outside of each bread slice—this ensures even browning. For the filling, I place a thin layer of gouda on the bottom slice, followed by mushrooms and onions, then another layer of gouda before closing the sandwich. This cheese-veggie-cheese architecture creates a natural glue that holds everything together. Cook on medium-low heat (never high!) for 3-4 minutes per side until golden brown and the cheese is completely melted. Patience here pays off with perfect texture contrast that makes each bite memorable.

    Serving Ideas & Creative Variations

    Perfect Pairings for Your Elevated Grilled Cheese

    This isn’t just any sandwich—it deserves thoughtful accompaniments. A small bowl of tomato bisque creates the classic comfort duo, with the acidity cutting through the rich cheese. For something lighter, try a simple arugula salad with lemon vinaigrette; the peppery greens and bright dressing balance the sandwich’s richness beautifully. In fall, I love serving this with a cup of butternut squash soup for seasonal harmony. A crisp dill pickle spear on the side provides palate-cleansing crunch between bites. These pairings elevate a simple sandwich into a complete meal that feels both special and satisfying.

    Exciting Flavor Twists

    While the classic version is perfection, this sandwich welcomes creative variations. Try substituting gouda with smoked mozzarella for a campfire essence, or blend gouda with a touch of blue cheese for sophisticated tang. For an herbal note, add a light spread of garlic-thyme butter to the bread’s interior. Mushroom lovers can experiment with varieties—shiitakes add meatiness, while oyster mushrooms bring delicate texture. Add a thin layer of caramelized apple slices for sweet-savory contrast, or incorporate crispy pancetta for a salty crunch. Each variation maintains the sandwich’s soul while offering new flavor dimensions.

    Storage & Troubleshooting Guide

    Making Ahead and Reheating

    While grilled cheese is best enjoyed fresh, you can prepare components ahead of time. Roast mushrooms and onions up to three days in advance, storing them in an airtight container in the refrigerator. When ready to use, bring them to room temperature before assembling your sandwich. For leftover assembled sandwiches (though they rarely survive!), wrap tightly in foil and refrigerate for up to 24 hours. Reheat in a skillet over medium-low heat with a touch of butter, or use a toaster oven at 325°F for 5-7 minutes. Avoid microwaving, which creates a soggy texture that ruins the crispy exterior.

    Solving Common Sandwich Struggles

    Even experienced cooks encounter grilled cheese challenges. If your bread browns too quickly before cheese melts, your heat is too high—lower it and cover the pan with a lid to help melt the cheese. For sandwiches that fall apart, ensure your cheese completely covers the filling ingredients to act as glue. If mushrooms make your bread soggy, pat them dry after roasting and let them cool slightly before assembly. When using artisanal bread, slice it slightly thicker (½-inch) for structural integrity. For uneven browning, use a weight (like another small pan) to press the sandwich gently for better contact with the cooking surface.

    Frequently Asked Questions

    What’s the best bread for grilled cheese with gouda roasted mushrooms and onion?

    Sourdough provides excellent structure and flavor contrast. Its slight tanginess balances the rich gouda and mushrooms, while its sturdy texture stands up to the fillings without getting soggy.

    Can I use pre-sliced mushrooms to save time?

    Yes! Pre-sliced mushrooms work perfectly. Just ensure they’re patted dry before roasting, as packaged mushrooms often contain extra moisture that can prevent proper caramelization.

    How can I make this sandwich vegetarian-friendly?

    This sandwich is already vegetarian! Just verify your cheese uses vegetarian rennet if that’s a concern. For a vegan version, substitute plant-based butter and vegan cheese alternatives.

    What’s the best way to caramelize onions quickly?

    Add 1/4 teaspoon of baking soda to sliced onions with a pinch of salt. This raises the pH and speeds up caramelization to about 15 minutes instead of 45, while maintaining flavor.

    Can I prepare the mushrooms and onions in advance?

    Absolutely! Roast mushrooms and caramelize onions up to 3 days ahead and refrigerate. This makes assembly quick when you’re ready for a delicious grilled cheese sandwich.

    Final Thoughts

    The grilled cheese with gouda roasted mushrooms and onion transforms a childhood classic into a sophisticated meal that still delivers that essential comfort factor. I find myself making this sandwich whenever I need a quick but special meal that feels like a warm hug. The combination of nutty cheese, earthy mushrooms, and sweet onions creates layers of flavor that make this so much more than the sum of its parts. Whether for a quick lunch or casual dinner party, this elevated grilled cheese proves that simple food, when made with care and quality ingredients, can be the most satisfying culinary experience. Find more inspiration on Pinterest!


  • Chocolate Chip Vanilla Custard Brioche: Irresistibly Soft & Delicious!

    Chocolate Chip Vanilla Custard Brioche: Irresistibly Soft & Delicious!

    Chocolate Chip Vanilla Custard Brioche: Irresistibly Soft & Delicious!

    Chocolate Chip Vanilla Custard Brioche has become my weekend obsession lately. There’s something magical about the way buttery brioche soaks up creamy vanilla custard, creating those perfectly crisp edges while staying tender inside. I first attempted this recipe after a rainy Sunday brunch at my favorite bakery left me craving more. The gentle aroma of vanilla that fills your kitchen as this bakes is worth the effort alone! If you love bread pudding but want something more special, this chocolate-studded delight will become your new favorite indulgence.

    Recipe

    Why You’ll Love This Chocolate Chip Vanilla Custard Brioche

    Perfect Balance of Textures

    The contrast of textures in this chocolate chip vanilla custard brioche is what makes it truly special. The exterior develops a delicate golden crust that gives way to a pillowy, custard-soaked interior that melts in your mouth. I love watching my guests’ expressions when they take their first bite – that moment when the soft brioche yields between their teeth and the warm chocolate chips create pockets of gooey goodness. The brioche bread itself brings a richness that regular white bread simply can’t match, absorbing the custard while maintaining its structure.

    Make-Ahead Convenience

    This chocolate chip vanilla custard brioche is the ultimate make-ahead dish for busy hosts. I’ve prepared it the night before countless dinner parties, allowing the brioche to fully soak up the vanilla custard overnight in the refrigerator. This not only saves precious time when you have guests coming, but it actually improves the final texture! The flavors meld together beautifully, and the chocolate chips soften just enough without completely melting into the mixture. Plus, there’s something deeply satisfying about waking up knowing breakfast is practically ready to slide into the oven.

    Essential Tips & Tricks

    Selecting the Right Brioche

    Choosing the perfect brioche is crucial for this recipe. Look for a loaf that’s slightly stale (1-2 days old) as it will absorb the custard more effectively without becoming soggy. I learned this the hard way when I once used fresh brioche and ended up with a too-mushy center! The bread should have a tight crumb structure and rich yellow color from the eggs and butter. If you can only find fresh brioche, simply cube it and leave it out uncovered for a few hours or toast it lightly in a 300°F oven for about 10 minutes to dry it slightly before soaking in custard.

    Perfecting the Custard Base

    The vanilla custard base deserves your full attention – it’s where the magic happens! I whisk the eggs thoroughly before adding other ingredients to ensure a silky-smooth texture. Real vanilla bean paste creates those beautiful specks throughout the custard, but a high-quality extract works wonderfully too. The custard should coat the back of a spoon but still pour easily. My secret? Adding a tiny pinch of salt and a splash of bourbon (optional but amazing) to enhance the vanilla flavor. Be patient when pouring it over the brioche, allowing time for absorption between additions.

    Serving Ideas & Creative Variations

    Seasonal Fruit Pairings

    Fresh berries transform this chocolate chip vanilla custard brioche into a show-stopping dessert or brunch centerpiece. During summer, I love serving it with a tumble of mixed berries slightly macerated with a touch of sugar and lemon zest. The bright acidity cuts through the richness perfectly! In fall, try sautéed cinnamon apples or poached pears alongside. For an extra touch of elegance, dust with powdered sugar just before serving and add a dollop of lightly whipped cream. The contrast between warm brioche and cool, fresh fruit creates a delightful sensory experience your guests will rave about.

    Flavor Variations to Try

    While chocolate chip vanilla custard brioche is divine in its classic form, don’t be afraid to experiment with flavors. Try swapping dark chocolate chips for white chocolate and adding orange zest to the custard for a citrusy twist. Cinnamon-spiced brioche works beautifully with the vanilla custard, especially with a drizzle of maple syrup. For an adult version, soak dried cherries in rum before folding them in alongside the chocolate chips. My personal favorite variation includes a layer of almond cream between brioche pieces and a sprinkle of sliced almonds on top for a delightful crunch that complements the soft interior.

    Storage & Troubleshooting Guide

    Proper Storage Methods

    Proper storage ensures your chocolate chip vanilla custard brioche stays delicious for days. Once completely cooled, cover any leftovers tightly with plastic wrap or transfer to an airtight container and refrigerate for up to 3 days. The custard component means this dish should never sit at room temperature for more than 2 hours. To reheat, cover with foil and warm in a 325°F oven for about 15 minutes, or microwave individual portions for 30-45 seconds. The texture is best when reheated rather than eaten cold from the fridge, as warming restores that wonderful contrast between the crisp top and soft interior.

    Fixing Common Issues

    Even experienced bakers encounter occasional challenges with custard brioche. If your dish seems too soggy in the center, it likely needs more baking time – cover with foil to prevent over-browning and continue baking. For a custard that’s separated or curdled, your oven was probably too hot; next time, bake at a slightly lower temperature. If the top browns too quickly before the center sets, simply tent with foil halfway through baking. And remember, if your brioche floats in the custard rather than soaking it up, your bread might be too fresh – try toasting the cubes lightly next time before assembling.

    Frequently Asked Questions

    Can I use regular bread instead of brioche for chocolate chip vanilla custard brioche?

    While you can substitute challah or even good-quality white bread, brioche’s buttery richness creates the best flavor and texture. Regular bread will work but won’t deliver quite the same luxurious result.

    How do I know when my custard brioche is perfectly baked?

    The top should be golden brown and slightly puffed, and a knife inserted in the center should come out mostly clean with just a few moist crumbs. The center should be set but still have a slight jiggle.

    Can I freeze chocolate chip vanilla custard brioche?

    Yes! Wrap individual portions tightly in plastic wrap and then foil. Freeze for up to 1 month and thaw overnight in the refrigerator before reheating in a 325°F oven until warmed through.

    What chocolate works best in this recipe?

    Semi-sweet chocolate chips hold their shape well, but chopped dark chocolate bars create beautiful melty pockets. Avoid milk chocolate which can become too sweet when combined with the custard.

    Is there a dairy-free version of this recipe?

    Absolutely. Substitute plant-based butter in the brioche (or buy dairy-free brioche) and use coconut cream or almond milk in the custard. The texture will be slightly different but still delicious.

    Final Thoughts

    This chocolate chip vanilla custard brioche has become my go-to recipe whenever I want to create something that feels special without requiring professional baking skills. There’s something deeply satisfying about transforming simple ingredients into such a comforting, impressive dish. I hope you’ll try it the next time you’re craving something that bridges the gap between breakfast and dessert. Don’t forget to share your creations on Pinterest – I’d love to see your take on this versatile treat!

  • Crispy Teriyaki Chicken Wonton Tacos: Irresistibly Crunchy Delight!

    Crispy Teriyaki Chicken Wonton Tacos: Irresistibly Crunchy Delight!

    Crispy Teriyaki Chicken Wonton Tacos: Irresistibly Crunchy Delight!

    Crispy teriyaki chicken wonton tacos have become my absolute obsession this season! These little handheld delights combine the satisfying crunch of fried wonton wrappers with the sweet-savory magic of teriyaki chicken for an irresistible fusion experience. The first time I made these for my sister’s birthday gathering, they disappeared faster than I could set down the serving platter! The combination of textures and flavors is simply magical – tender chicken coated in that sticky-sweet teriyaki glaze, all nestled in a crispy wonton shell that shatters delightfully with each bite. If you’re looking for an impressive appetizer that delivers big on flavor without hours of work, these crispy chicken tenders have met their match!

    Recipe

    Why You’ll Love These Crispy Teriyaki Chicken Wonton Tacos

    Perfect Party Food That Impresses

    These crispy teriyaki chicken wonton tacos are the ultimate crowd-pleaser for any gathering. I’ve served them at everything from casual game nights to fancier dinner parties, and they’ve earned rave reviews every single time. The visual appeal alone makes them Instagram-worthy – those perfectly golden wonton shells filled with glossy teriyaki chicken and topped with vibrant slaw create an irresistible presentation. Plus, they’re substantial enough to satisfy without being too filling, making them perfect for grazing throughout an evening of socializing. The handheld nature means guests can easily mingle while enjoying them!

    Quick Prep with Major Flavor Payoff

    One of the biggest reasons to love these crispy teriyaki chicken wonton tacos is how much flavor you get for relatively little effort. The chicken marinates quickly in the teriyaki sauce, absorbing all those sweet-savory notes while you prep the other components. The assembly process is straightforward and can even become a fun activity with family or friends helping out. I love that I can prepare most elements ahead of time and simply fry the wonton shells and assemble right before serving. For a busy host, this kind of efficient yet impressive recipe is absolute gold – maximum impact with manageable preparation!

    Essential Tips & Tricks

    Mastering the Perfect Wonton Shell

    Creating the ideal wonton taco shell requires a bit of technique, but it’s easier than you might think! The key temperature for frying is 350°F – any cooler and they’ll absorb too much oil, any hotter and they’ll burn before crisping properly. I use a pair of tongs to hold each wonton wrapper in a taco shape for about 30 seconds in the hot oil. Watch for that golden hue – it happens quickly! Let them drain on paper towels standing upright (I lean them against a rolled kitchen towel). For extra crispiness that stands up to the fillings, let them cool completely before assembling. This prevents any disappointing soggy shells!

    Teriyaki Sauce Secrets

    The soul of these crispy teriyaki chicken wonton tacos lies in the sauce. While store-bought works in a pinch, homemade teriyaki delivers incomparable flavor. My foolproof ratio is 1/4 cup soy sauce, 2 tablespoons brown sugar, 1 tablespoon mirin, 1 teaspoon grated ginger, and 1 clove minced garlic. The reduction technique makes all the difference – simmer until it coats the back of a spoon for that perfect glossy finish that clings to the chicken. For an extra flavor dimension, add a touch of sesame oil at the end. This approach creates a balanced sweet-savory profile that elevates the entire taco experience!

    Serving Ideas & Creative Variations

    Complementary Side Dishes

    These crispy teriyaki chicken wonton tacos pair beautifully with light, fresh accompaniments that balance their rich flavors. I love serving them alongside a cucumber-avocado salad dressed simply with rice vinegar and sesame oil – the cooling creaminess provides the perfect counterpoint to the sweet-savory tacos. For a more substantial spread, consider adding coconut rice or a simple miso soup. When entertaining, I arrange the tacos on a large platter surrounded by small bowls of additional toppings like sliced scallions, sesame seeds, and extra teriyaki sauce for drizzling. This interactive approach always delights guests!

    Exciting Flavor Twists

    While the classic crispy teriyaki chicken wonton tacos are incredible, don’t be afraid to experiment with variations! For a spicy kick, add sriracha to your teriyaki sauce or incorporate thinly sliced jalapeños in your slaw. For a luxurious upgrade, try adding diced mango or pineapple to bring a tropical sweetness that complements the teriyaki beautifully. Seafood lovers can substitute the chicken with shrimp or even salmon for an elegant twist. My personal favorite variation includes a drizzle of spicy mayo sauce – just mix mayonnaise with a bit of sriracha and lime juice for an incredible flavor boost!

    Storage & Troubleshooting Guide

    Proper Storage Methods

    The components of crispy teriyaki chicken wonton tacos are best stored separately to maintain their integrity. The cooked teriyaki chicken keeps well in an airtight container in the refrigerator for up to 3 days and can be gently reheated in a skillet with a splash of water. The wonton shells are trickier – they’re best when freshly fried, but if necessary, store completely cooled shells in a paper bag (not plastic, which traps moisture) at room temperature for up to 2 days. Any prepared slaw should be stored without dressing and combined just before serving to prevent sogginess. Never store assembled tacos, as they’ll quickly become a sad, soggy disappointment!

    Fixing Common Problems

    Even experienced cooks encounter challenges with crispy teriyaki chicken wonton tacos. If your wonton shells are breaking during frying, your oil might be too hot or you may be handling them too roughly – try reducing the temperature and using gentler movements with your tongs. For shells that aren’t crispy enough, they likely need more frying time or your oil temperature is too low. If your teriyaki sauce is too thin, continue reducing it until it reaches that perfect sticky consistency. For chicken that seems dry, try marinating it longer next time, or add a tablespoon of cornstarch to your sauce to help it cling better to the meat.

    Frequently Asked Questions

    Can I make crispy teriyaki chicken wonton tacos ahead of time?

    You can prepare the chicken and toppings a day ahead, but fry the wonton shells and assemble just before serving. For best results, keep components separate until the last minute to maintain that signature crispiness.

    What’s the best way to shape the wonton shells?

    Use tongs to hold each wonton wrapper in a taco shape in hot oil for about 30 seconds until golden. Drain upright against a rolled kitchen towel to maintain their shape while cooling.

    Can I bake the wonton shells instead of frying?

    Yes! Drape wonton wrappers over the edges of an oven-safe rack, spray with oil, and bake at 375°F for 5-7 minutes until golden and crisp. They’ll have a slightly different texture but still delicious.

    How do I keep the tacos from getting soggy?

    Ensure your chicken isn’t too saucy, drain any excess liquid from toppings, and assemble just before serving. The wonton shells should be completely cooled before filling.

    What can I substitute for wonton wrappers?

    Egg roll wrappers cut in half work well, as do small flour tortillas. For a gluten-free option, try thin rice paper wrappers, though the texture will differ significantly.

    Final Thoughts

    These crispy teriyaki chicken wonton tacos represent everything I love about fusion cooking – playful combinations that honor multiple culinary traditions while creating something uniquely delicious. The contrast between the crunchy wonton shell and tender, flavor-packed chicken creates an experience that’s greater than the sum of its parts. Whether you’re looking to impress at your next gathering or simply want to elevate your weeknight dinner routine, these tacos deliver big on flavor and fun. I hope you’ll give them a try and perhaps even create your own signature variation! Find more inspiration on my Pinterest where I’m always sharing new fusion creations.

  • Caramelized Onion Pizza with Melty Cheese That Will Blow Your Mind!

    Caramelized Onion Pizza with Melty Cheese That Will Blow Your Mind!

    Caramelized Onion Pizza with Melty Cheese That Will Blow Your Mind!

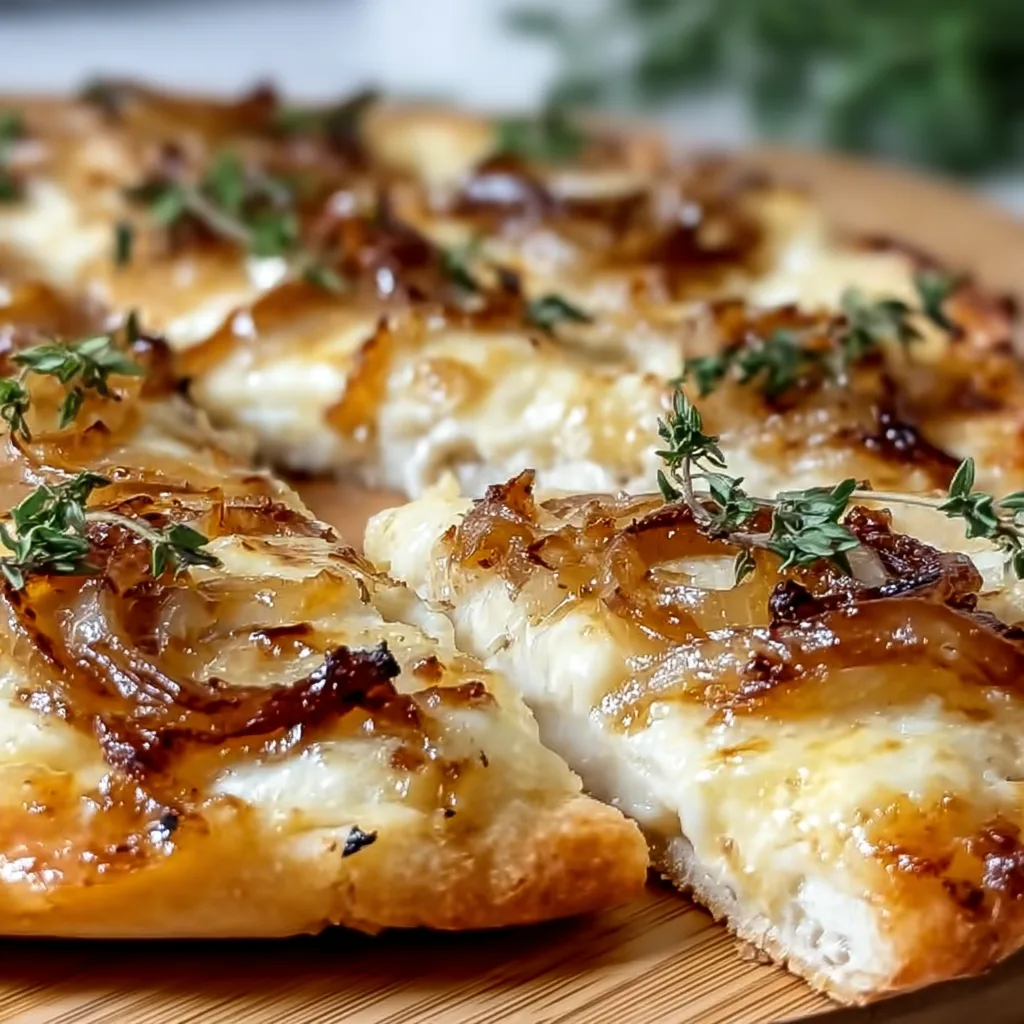
    Caramelized Onion Pizza with Melty Cheese has been my Friday night salvation more times than I can count. There’s something almost magical about the way those deeply golden, sweet onions melt into pools of bubbling cheese on a perfectly crisp crust. The first time I made this pizza, my kitchen filled with an aroma so intoxicating that my neighbor actually texted to ask what I was cooking! This isn’t just dinner—it’s a sensory experience that transforms simple ingredients into something extraordinary. If you’ve been searching for that perfect homemade pizza recipe that rivals your favorite restaurant, your search ends here.

    Recipe

    Why You’ll Love This Caramelized Onion Pizza with Melty Cheese

    The Perfect Balance of Flavors

    The magic of this caramelized onion pizza lies in its perfect balance of sweet and savory notes. The onions transform during their slow cook, releasing natural sugars that caramelize into a jam-like consistency with deep amber color and incredible depth. I love how they create pockets of intense flavor against the backdrop of creamy, melty cheese. The slight char from a hot oven adds that subtle smokiness that makes you close your eyes with each bite. This isn’t just pizza—it’s a carefully orchestrated symphony where each ingredient plays its essential part.

    A Surprisingly Simple Technique

    Don’t let the gourmet results fool you—this caramelized onion pizza with melty cheese is remarkably approachable for beginners. The most time-consuming part is caramelizing the onions, but it’s mostly hands-off time where patience does the heavy lifting. I’ve found that slicing onions thinly and cooking them low and slow creates that melt-in-your-mouth texture that makes this pizza special. The rest comes together in minutes: stretching dough, layering toppings, and watching your creation transform in a hot oven. My favorite moments are those final minutes when the cheese bubbles and edges crisp to golden perfection.

    Essential Tips & Tricks

    Mastering the Onion Caramelization

    The soul of this pizza lies in perfectly caramelized onions—rich, golden, and intensely flavorful. Start with 2-3 large onions sliced thinly, a tablespoon of butter, and a splash of olive oil in a wide pan. The key is patience: keep the heat medium-low and stir occasionally for 30-45 minutes. I learned the hard way that rushing this process leads to burned, bitter onions instead of sweet, jammy goodness. A pinch of salt helps draw out moisture, while a teaspoon of brown sugar near the end enhances that natural caramelization. The result should be deeply golden, intensely aromatic, and almost melting.

    Cheese Selection Secrets

    Choosing the right cheese blend elevates your caramelized onion pizza from good to unforgettable. I recommend a combination of mozzarella for that perfect stretch, fontina for rich meltability, and a touch of sharp Parmesan for depth. Grating your own cheese (rather than using pre-shredded) makes a remarkable difference in how evenly it melts. For an extra dimension, try adding small dollops of goat cheese or blue cheese between the onions—the tangy contrast against the sweet onions creates magical bites that will have everyone reaching for seconds. Remember that less is more; overloading causes soggy centers.

    Serving Ideas & Creative Variations

    Perfect Pairings for Your Pizza Night

    Elevate your caramelized onion pizza experience with thoughtfully chosen complementary sides. A peppery arugula salad dressed simply with lemon and olive oil cuts through the richness perfectly. For something heartier, my roasted red grape pizza makes an unexpected but delicious companion that continues the sweet-savory theme. When serving for guests, I arrange small bowls of infused olive oils, chili flakes, and honey for drizzling—the honey especially creates magic with the caramelized onions. For beverages, a crisp white wine or a light amber ale balances the pizza’s rich flavors without overwhelming them.

    Seasonal Twists and Add-Ons

    The beauty of this caramelized onion pizza with melty cheese lies in its adaptability to seasonal ingredients. In summer, try adding thinly sliced fresh figs or peaches during the last few minutes of baking—their natural sweetness intensifies the caramelized onions. Fall calls for thin apple slices and a sprinkle of fresh thyme. Winter versions shine with roasted butternut squash cubes and crispy sage leaves. For meat lovers, crispy pancetta or prosciutto added after baking provides a perfect salty contrast. My personal favorite variation includes a drizzle of balsamic glaze and a handful of fresh arugula added just before serving.

    Storage & Troubleshooting Guide

    Keeping Your Pizza Fresh

    Properly storing leftover caramelized onion pizza preserves its delicious flavors for enjoyment later. Allow pizza to cool completely before refrigerating to prevent condensation that makes the crust soggy. Place slices in an airtight container with parchment paper between layers, or wrap individually in aluminum foil. Refrigerate for up to 3 days. For reheating, avoid the microwave which leaves the crust chewy—instead, use a preheated 350°F oven for 5-7 minutes until warmed through. The cheese will re-melt beautifully while the crust regains its crispness without drying out.

    Solving Common Pizza Problems

    Even experienced bakers encounter challenges with homemade pizza. If your crust turns out soggy in the center, try pre-baking the dough for 3-4 minutes before adding toppings. For caramelized onion pizza specifically, drain any excess moisture from the onions before topping your pizza. If cheese browns too quickly before the crust is done, lower your oven rack position or cover loosely with foil. When onions burn rather than caramelize, remember the process can’t be rushed—keep heat low and extend cooking time. Lastly, if your dough springs back when stretching, let it rest 10-15 minutes to relax the gluten.

    Frequently Asked Questions

    How long does it take to caramelize onions for pizza?

    Properly caramelizing onions takes 30-45 minutes over medium-low heat. This slow process develops their sweet, complex flavor and jammy texture that makes caramelized onion pizza so special. Rushing this step results in inferior flavor.

    Can I make caramelized onion pizza ahead of time?

    Yes! Prepare and caramelize the onions up to 3 days ahead and refrigerate. You can even assemble the entire pizza, freeze unbaked, and cook directly from frozen, adding 5-7 minutes to your baking time.

    What’s the best cheese for caramelized onion pizza with melty cheese?

    A combination of mozzarella, fontina, and Parmesan creates the perfect melt and flavor profile. For extra dimension, add small dollops of goat cheese or blue cheese between the caramelized onions.

    How do I prevent my pizza crust from getting soggy?

    Pre-bake your crust for 3-4 minutes before adding toppings. Also, make sure your caramelized onions aren’t too wet by cooking off excess moisture, and don’t overload with cheese.

    Can I make this pizza without a pizza stone?

    Absolutely! A preheated baking sheet or cast iron pan works well. For extra crispiness, sprinkle cornmeal on the pan before adding your dough to prevent sticking and add texture.

    Final Thoughts

    This caramelized onion pizza with melty cheese has become more than just a recipe in my kitchen—it’s a celebration of how simple ingredients transform with a little time and attention. The contrast between sweet, jammy onions and savory, stretchy cheese creates something truly special that’s worth every minute of preparation. I love seeing the expressions on friends’ faces with that first bite, when expectations are exceeded and conversations momentarily pause. Don’t forget to check out more creative pizza ideas on our Pinterest for endless inspiration. Your perfect pizza night awaits!

  • Classic Baked Milk Pudding Recipe That Will Melt Your Heart!

    Classic Baked Milk Pudding Recipe That Will Melt Your Heart!

    Classic Baked Milk Pudding Recipe That Will Melt Your Heart!

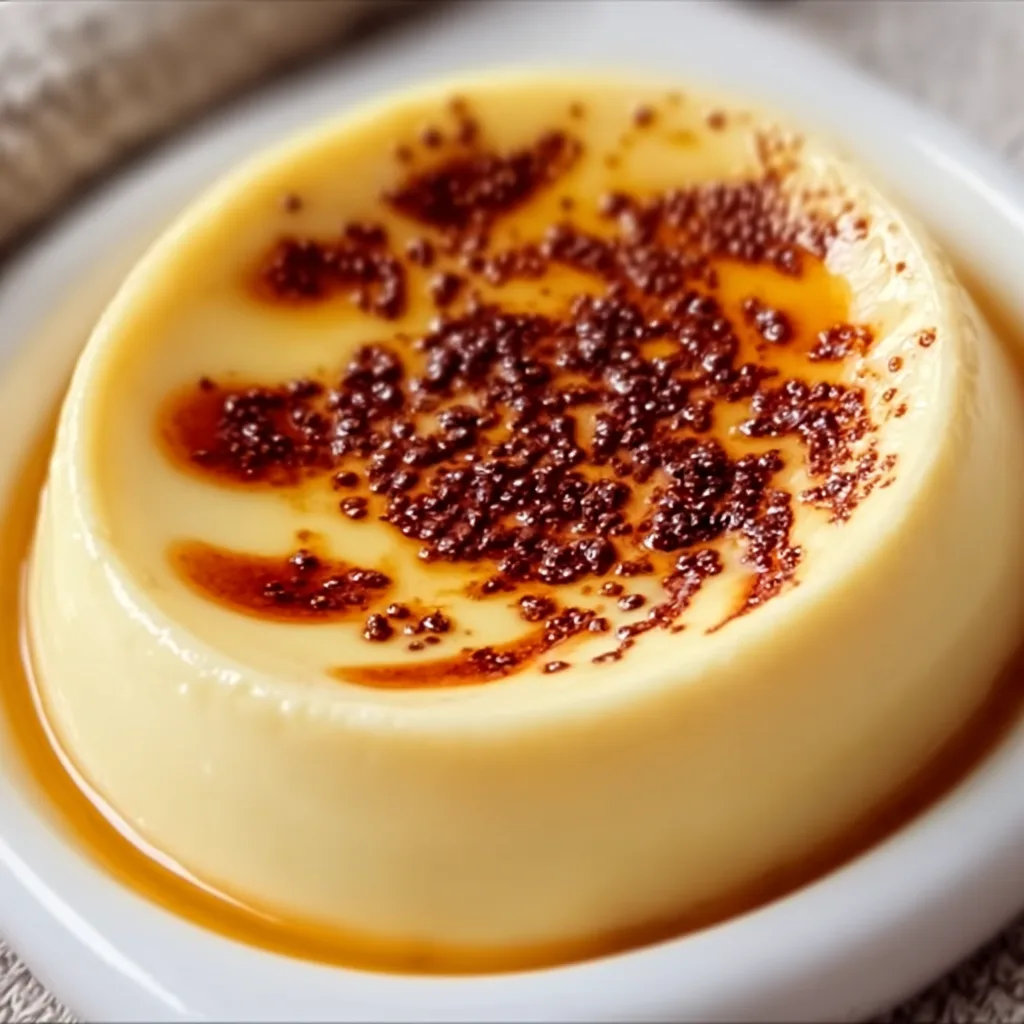
    There’s something incredibly comforting about a Classic Baked Milk Pudding that takes me back to my grandmother’s kitchen. The silky, creamy texture and gentle vanilla aroma filling the house always signaled that something special was in the oven. This timeless dessert strikes the perfect balance between simple ingredients and luxurious results. With just milk, eggs, sugar, and a hint of vanilla, you can create a velvety custard that’s both humble and elegant. I’ve perfected this recipe over years of Sunday family gatherings, and now I’m excited to share my foolproof method with you at Recipes Darleen.

    Recipe

    Why You’ll Love This Classic Baked Milk Pudding

    Simplicity Meets Elegance

    This Classic Baked Milk Pudding requires just a handful of pantry staples, yet delivers restaurant-worthy results. The magic happens when these humble ingredients transform in the oven, creating layers of creamy texture and subtle caramelization. I love how it’s fancy enough for company but simple enough for a weeknight treat. The gentle wobble when perfectly baked brings me so much joy—it’s that sweet spot between custard and cake that makes this dessert truly special. Your kitchen will fill with the most heavenly vanilla aroma as it bakes.

    Versatility for Every Season

    One of the things I cherish most about this Classic Baked Milk Pudding is how it adapts to any season. In summer, I serve it chilled with fresh berries and a light dusting of powdered sugar. Come fall, I add warming spices like cinnamon and nutmeg to the base. Winter calls for a drizzle of caramel sauce and a sprinkle of sea salt. Spring brings opportunities for floral notes like lavender or rose water. This chameleon-like quality makes it my go-to dessert year-round, always feeling fresh and appropriate for whatever produce is at its peak.

    Essential Tips & Tricks

    Perfecting Your Pudding Texture

    The secret to achieving that dreamy, silky Classic Baked Milk Pudding texture is all in the baking method. Always use a water bath (bain-marie) to ensure gentle, even heating that prevents curdling and creates that perfect custard consistency. I learned the hard way that direct heat leads to a rubbery result! Strain your mixture before baking to remove any egg bits that might disrupt the smooth texture. And remember—patience is key. The pudding should still have a slight wobble in the center when done, as it will continue to set as it cools, just like in this Custard Bread Pudding.

    Temperature Control Matters

    Getting the temperature right is crucial for Classic Baked Milk Pudding success. Start with room temperature ingredients—cold eggs or milk can cause the mixture to separate. Heat your milk slowly until it’s steaming but not boiling (around 180°F if you have a thermometer). When adding hot milk to eggs, temper gradually by whisking a small amount of milk into eggs first, then slowly incorporate the rest. This prevents scrambled eggs in your pudding! Bake at a low temperature (around 325°F) and check frequently toward the end. The edges should be set but the center should still quiver slightly when gently shaken.

    Serving Ideas & Creative Variations

    Seasonal Toppings to Elevate Your Pudding

    The beauty of a Classic Baked Milk Pudding lies in its versatility as a canvas for seasonal toppings. In summer, I love crowning it with macerated berries—strawberries, blueberries, or raspberries tossed with a touch of sugar and lemon zest. Fall brings opportunities for spiced apple compote or poached pears. Winter calls for citrus segments with honey and pistachios. A dollop of lightly whipped cream is always welcome, regardless of season. For special occasions, I’ll add a brûléed sugar top, creating a delightful textural contrast similar to my Crème Brûlée Macarons that guests absolutely adore.

    Global Flavor Inspirations

    Take your Classic Baked Milk Pudding on a world tour by incorporating international flavor profiles. For a Mediterranean twist, infuse the milk with orange blossom water and top with crushed pistachios and honey. Channel Latin flavors by adding cinnamon and a touch of dulce de leche. For an Asian-inspired version, incorporate coconut milk and top with mango and toasted coconut flakes. A British approach might include a splash of tea-infused milk and a side of shortbread. I love how these variations maintain the pudding’s comforting essence while offering exciting new taste experiences that reflect diverse culinary traditions.

    Storage & Troubleshooting Guide

    Keeping Your Pudding Perfect

    Classic Baked Milk Pudding stores beautifully when handled properly. Once completely cooled, cover with plastic wrap pressed directly onto the surface to prevent a skin from forming. Refrigerate for up to 3 days while maintaining that silky texture. If you notice any condensation forming, gently blot it with a paper towel before serving. For the best flavor experience, remove from the refrigerator about 20 minutes before serving to take the chill off. Individual portions in ramekins store particularly well and make for elegant pre-portioned desserts that can be quickly dressed up with toppings just before serving.

    Fixing Common Pudding Problems

    Even experienced bakers encounter issues with Classic Baked Milk Pudding occasionally. If your pudding develops a grainy texture, it likely overcooked or the eggs curdled. Next time, use a gentler heat and be vigilant about your water bath. Weeping or separation indicates the pudding was baked at too high a temperature—lower by 25°F in your next attempt. For a pudding that didn’t set properly, it likely needed more time in the oven. Remember that it should still have a slight wobble when done. If your pudding develops a tough skin despite your best efforts, simply peel it away before serving or embrace it as a rustic touch!

    Frequently Asked Questions

    Can I make Classic Baked Milk Pudding ahead of time?

    Absolutely! It actually improves with a day in the refrigerator as the flavors meld beautifully. Make it up to 2 days ahead and store covered in the refrigerator until ready to serve.

    What’s the difference between milk pudding and flan?

    While both are egg-based custards, Classic Baked Milk Pudding has a softer, creamier texture without caramel. Flan typically features a caramelized sugar layer on top and has a firmer consistency.

    Can I use non-dairy milk for this recipe?

    Yes, but results will vary. Full-fat coconut milk works best as an alternative, producing a rich texture. Almond and oat milk create a lighter pudding but may require additional thickening.

    Why did my pudding crack on top?

    Cracking usually occurs from overbaking or baking at too high a temperature. Always use a water bath and check for doneness when the center still has a slight wobble.

    How do I know when my Classic Baked Milk Pudding is perfectly done?

    The edges should be set but the center should jiggle slightly when gently shaken, similar to a just-set gelatin. It will continue firming up as it cools.

    Final Thoughts

    This Classic Baked Milk Pudding has been my faithful companion through countless family gatherings and quiet evenings alike. Its ability to transform simple ingredients into something truly special reminds me why I fell in love with baking in the first place. There’s a certain magic in creating something so silky and comforting with just a few basic ingredients. Whether you’re making it for a special occasion or simply because you deserve a little sweetness, I hope this pudding brings you the same joy and comfort it has always brought to my table. Don’t forget to check out more delicious ideas on my Pinterest!

  • Sweet Asian Chili Crab Rangoon Pizza That Will Blow Your Mind!

    Sweet Asian Chili Crab Rangoon Pizza That Will Blow Your Mind!

    Sweet Asian Chili Crab Rangoon Pizza That Will Blow Your Mind!

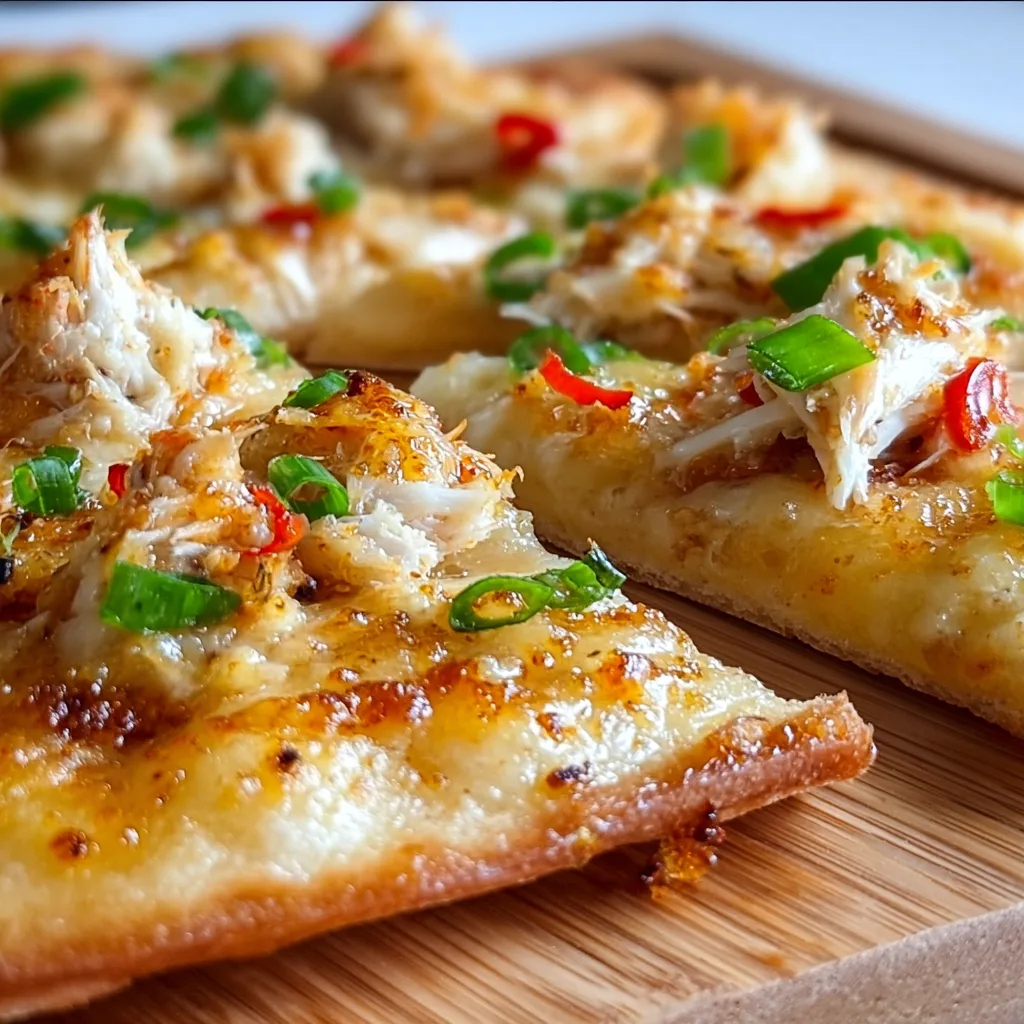
    Sweet Asian Chili Crab Rangoon Pizza combines two of my absolute favorite indulgences into one irresistible dish. The first time I created this fusion masterpiece, my kitchen filled with the aromatic blend of sweet chili sauce and cream cheese that instantly transported me back to my favorite Thai restaurant. The crispy pizza crust creates the perfect canvas for the creamy crab rangoon filling, while the sweet Asian chili drizzle adds that perfect kick of heat and sweetness. If you love experimenting with fusion recipes, this pizza will definitely earn a permanent spot in your rotation.

    Recipe

    Why You’ll Love This Sweet Asian Chili Crab Rangoon Pizza

    A Perfect Fusion of Flavors

    This Sweet Asian Chili Crab Rangoon Pizza delivers an explosion of flavors in every bite. The rich, creamy crab rangoon filling with its hint of seafood sweetness pairs beautifully with the tangy-sweet chili sauce that gets caramelized slightly during baking. I’ve found that using real crab meat makes a noticeable difference, though imitation works in a pinch. The contrast between the crispy crust and the velvety cream cheese mixture creates a textural paradise that keeps you coming back for another slice. It’s like enjoying your favorite appetizer and main course all at once!

    Impressive Yet Simple to Make

    Don’t let the fancy name fool you—this pizza is surprisingly straightforward to prepare. I remember panicking when my in-laws announced an impromptu visit, and this Sweet Asian Chili Crab Rangoon Pizza saved dinner! The pre-made pizza dough cuts your prep time in half, while the cream cheese mixture comes together in minutes. You can even prepare the toppings ahead of time and assemble just before baking. The visual impact of the finished pizza, with its drizzles of sweet chili sauce and sprinkle of green onions, makes it look like you spent hours in the kitchen when it really only takes about 30 minutes of active time.

    Essential Tips & Tricks

    Getting the Perfect Crust

    The foundation of any great pizza is its crust, and this Sweet Asian Chili Crab Rangoon Pizza is no exception. I learned the hard way (after one soggy-centered disaster) that pre-baking the crust for 5-7 minutes before adding toppings is crucial. This prevents the moisture from the cream cheese mixture from making things soggy. Room temperature dough stretches more easily without tearing, so take it out of the refrigerator about 30 minutes before you plan to use it. For an extra crispy edge, brush the outer rim with a mixture of olive oil and minced garlic before baking. This simple step elevates the flavor profile tremendously!

    Balancing Sweet and Savory

    The magic of this pizza lies in the perfect balance between sweet and savory elements. The cream cheese mixture should be seasoned well with garlic, a touch of soy sauce, and just enough salt to enhance the crab flavor without overpowering it. When adding the sweet chili sauce, less is more—you can always serve extra on the side. I like to reserve some sauce for drizzling after baking for maximum visual impact and fresh flavor. Adding thinly sliced jalapeños offers a nice counterpoint to the sweetness if you enjoy a bit more heat. Remember that the flavors will intensify as they bake, so taste as you go and adjust accordingly.

    Serving Ideas & Creative Variations

    Perfect Pairings

    This Sweet Asian Chili Crab Rangoon Pizza works beautifully as both an appetizer cut into small squares or as a main dish. For a complete Asian-inspired meal, I love serving it with a simple cucumber salad dressed with rice vinegar and sesame oil. The cool crispness perfectly complements the rich pizza. A light miso soup also makes a lovely starter. For beverages, try an ice-cold Tsingtao beer or a semi-sweet Riesling that can stand up to the sweet chili flavors. When I served this at my sister’s birthday, I paired it with homemade chicken ramen for a fusion feast that had everyone asking for recipes!

    Exciting Variations

    Don’t be afraid to make this recipe your own! For a spicier version, mix Sriracha into your cream cheese base or swap the sweet chili sauce for a spicy Korean gochujang. For a vegetarian option, replace the crab with finely diced water chestnuts and shiitake mushrooms for a similar texture and umami flavor. Lobster or shrimp can be luxurious substitutes for the crab. You can also play with the base—try a cauliflower crust for a gluten-free option or wonton wrappers cut into squares and baked until crisp for bite-sized appetizers. Adding a sprinkle of furikake (Japanese seaweed seasoning) before serving adds a delightful oceanic note.

    Storage & Troubleshooting Guide

    Proper Storage Methods

    Like most pizzas, Sweet Asian Chili Crab Rangoon Pizza is best enjoyed fresh from the oven when the contrast between the crispy crust and creamy topping is at its peak. However, leftovers can be stored in an airtight container in the refrigerator for up to 2 days. To reheat, avoid the microwave which will make the crust soggy. Instead, place slices on a baking sheet in a 350°F oven for 5-7 minutes until heated through. For make-ahead preparation, you can mix the crab rangoon filling up to 24 hours in advance and store it covered in the refrigerator, which actually allows the flavors to meld beautifully.

    Troubleshooting Common Issues

    If your pizza crust turns out soggy in the center, the culprit is usually too much moisture in the toppings. Make sure to drain the crab meat thoroughly and pat it dry with paper towels before mixing with the cream cheese. Another tip is to spread a thin layer of olive oil on the par-baked crust before adding the cream cheese mixture, creating a barrier against moisture. If your sweet chili sauce burns during baking, try adding it during the last 5 minutes of baking instead, or reserve it entirely for drizzling after the pizza comes out of the oven. For a crust that’s too tough, remember that overworking the dough develops gluten—handle it gently.

    Frequently Asked Questions

    Can I use imitation crab for this Sweet Asian Chili Crab Rangoon Pizza?

    Absolutely! Imitation crab works perfectly and is more budget-friendly. Just chop it finely and squeeze out any excess moisture before mixing with the cream cheese to prevent a soggy crust.

    How spicy is this pizza?

    The heat level is mild to medium, depending on your sweet chili sauce. For less heat, choose a milder sauce or use less. For more kick, add fresh jalapeños or a dash of sriracha to the cream cheese mixture.

    Can I make this pizza ahead of time?

    You can prepare the crab rangoon mixture up to 24 hours ahead and store it in the refrigerator. I recommend assembling and baking the pizza just before serving for the best texture and flavor.

    What’s the best way to reheat leftovers?

    Reheat in a 350°F oven for 5-7 minutes on a baking sheet. Avoid microwaving, which makes the crust soggy. A toaster oven also works wonderfully for smaller portions.

    Is there a gluten-free option?

    Yes! Use a pre-made gluten-free pizza crust or cauliflower crust. Just ensure your sweet chili sauce is gluten-free, as some brands contain soy sauce with wheat.

    Final Thoughts

    This Sweet Asian Chili Crab Rangoon Pizza represents everything I love about fusion cooking—it’s unexpected, delightful, and creates new flavor experiences from familiar favorites. The combination of creamy, sweet, and savory elements makes every bite a little adventure. Don’t be surprised if this becomes your new go-to when you want to impress guests or simply treat yourself to something special. For more creative recipes, check out my Pinterest board where I’m always pinning new fusion inspirations!

  • Garlic-Ranch Chicken Pizza Recipe That Will Blow Your Mind!

    Garlic-Ranch Chicken Pizza Recipe That Will Blow Your Mind!

    Garlic-Ranch Chicken Pizza Recipe That Will Blow Your Mind!

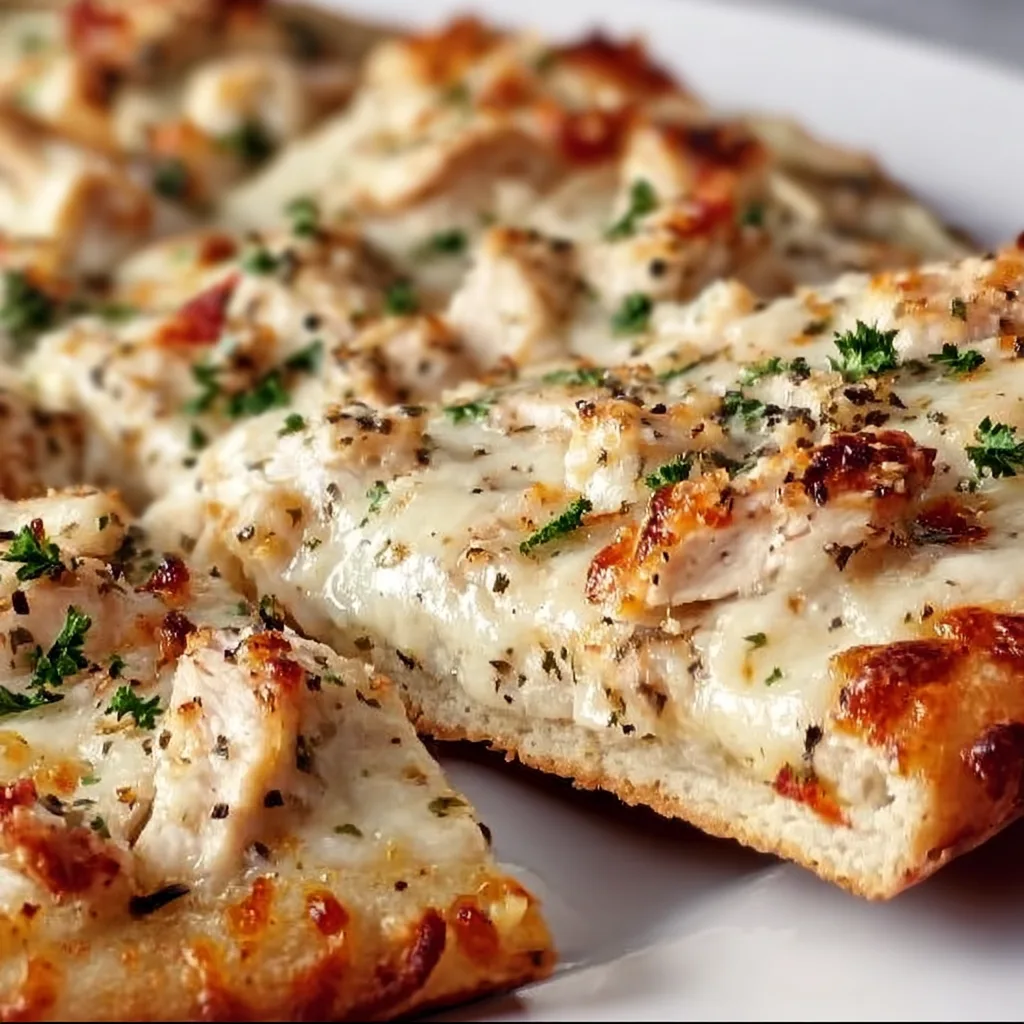
    Garlic-Ranch Chicken Pizza has become my family’s Friday night tradition, and I’m thrilled to share this recipe with you! There’s something magical about the combination of tangy ranch, aromatic garlic, and tender chicken that creates pure comfort food bliss. The first time I made this pizza, my kitchen filled with an irresistible aroma that had everyone hovering near the oven, impatiently waiting for the timer to ding. This isn’t just any pizza—it’s a flavor explosion that balances creamy, savory, and herbaceous notes in every bite. Whether you’re hosting friends or enjoying a cozy night in, this homemade pizza will quickly become your new favorite.

    Recipe

    Why You’ll Love This Garlic-Ranch Chicken Pizza

    A Flavor Combination That Wows

    The magic of this Garlic-Ranch Chicken Pizza lies in its perfect balance of flavors. The tangy ranch base replaces traditional tomato sauce, creating a creamy foundation that pairs beautifully with roasted garlic. I still remember my daughter’s face lighting up with her first bite, declaring it “the best pizza ever!” The chicken adds hearty protein while fresh herbs bring brightness. What makes this truly special is how the cheese gets golden and bubbly while the crust develops that perfect crisp-yet-chewy texture. It’s comfort food elevated to something truly crave-worthy.

    Quick & Easy for Busy Weeknights

    Despite its impressive flavor profile, this Garlic-Ranch Chicken Pizza comes together surprisingly fast. You can use pre-cooked rotisserie chicken and store-bought dough to slash prep time on hectic evenings. I’ve made this on countless Wednesday nights when energy was low but dinner expectations were high! The assembly takes just minutes—spread the ranch, sprinkle the toppings, and pop it in the oven. While it bakes, you’ll have time to toss a simple salad or set the table. It’s the perfect solution for those nights when you want something delicious without spending hours in the kitchen.

    Essential Tips & Tricks

    Perfecting Your Pizza Dough

    The foundation of any great Garlic-Ranch Chicken Pizza starts with the dough. For the best texture, let store-bought dough come to room temperature for at least 30 minutes before stretching. This prevents that frustrating snap-back that happens with cold dough! I learned this trick after one disastrous attempt where my dough kept shrinking. For homemade dough, a slow rise in the refrigerator develops deeper flavor. Don’t rush the pre-bake step—giving your crust a 5-minute head start in the oven ensures it won’t become soggy under those delicious toppings. Your patience will be rewarded with perfectly crisp edges.

    Layering Technique for Maximum Flavor

    The secret to an exceptional Garlic-Ranch Chicken Pizza is all in how you build those layers. Start with a thin layer of ranch dressing (homemade takes it to another level!) followed by a sprinkle of minced garlic. Add half your cheese before the chicken—this creates a protective barrier that prevents the crust from getting soggy. I discovered this method after serving one too many floppy-centered pizzas! Reserve some fresh herbs to add after baking for a burst of color and flavor. For an extra flavor boost, try drizzling hot honey over the finished pizza just before serving.

    Serving Ideas & Creative Variations

    Perfect Pairings for Your Pizza Night

    Elevate your Garlic-Ranch Chicken Pizza experience with thoughtfully chosen sides. A crisp Caesar salad with homemade dressing creates a restaurant-worthy meal at home. On summer evenings, I love serving this pizza alongside grilled vegetables tossed in balsamic glaze—the slight sweetness complements the savory pizza perfectly! For casual gatherings, pair with garlic knots or breadsticks for dipping. If you’re hosting a pizza night, consider setting up a dessert station with brownies for after. Don’t forget a light beverage like sparkling water with lemon or a crisp white wine to cut through the richness.

    Exciting Twists on the Classic Recipe

    While the classic Garlic-Ranch Chicken Pizza is delicious, don’t be afraid to experiment! Swap traditional mozzarella for smoked gouda for a deeper flavor profile—this was an accidental discovery when I ran out of mozzarella one night! Add crispy bacon bits or substitute grilled chicken with buffalo chicken for heat lovers. Vegetarian guests? Replace chicken with roasted cauliflower or broccoli tossed in the same seasonings. For a fresh summer version, finish with arugula and a squeeze of lemon after baking. My family’s current favorite variation includes caramelized onions and a drizzle of balsamic glaze—it’s sophisticated enough for company but easy enough for weeknights.

    Storage & Troubleshooting Guide

    Keeping Leftovers Fresh

    Store leftover Garlic-Ranch Chicken Pizza properly to maintain its delicious flavor and texture. For maximum freshness, let pizza cool completely before refrigerating to prevent condensation from making the crust soggy. I place slices in a single layer in an airtight container with parchment paper between layers. Refrigerate for up to 3 days—though honestly, leftovers rarely last that long in my house! To reheat, avoid the microwave which leaves the crust chewy. Instead, use a skillet on medium-low heat with a lid for 3-4 minutes, or an air fryer at 350°F for 3 minutes to restore that perfect crispy-yet-tender texture.

    Solving Common Pizza Problems

    Even experienced home cooks encounter pizza challenges! If your Garlic-Ranch Chicken Pizza crust turns out soggy in the middle, try pre-baking the crust longer before adding toppings. I learned this after serving an undercooked pizza that left everyone disappointed. Too much ranch dressing can also create moisture issues—use a light hand when spreading it. If your cheese isn’t browning properly, switch to the broiler for the final minute of cooking (but watch carefully!). For a crust that’s burning before the toppings are done, lower your oven rack and reduce temperature by 25°F. Remember that every oven is different, so note what works best with yours.

    Frequently Asked Questions

    Can I make Garlic-Ranch Chicken Pizza ahead of time?

    Yes! Prepare components separately (pre-bake crust, cook chicken, mix garlic-ranch sauce) up to 2 days ahead. Assemble and bake just before serving for the freshest result. This makes entertaining much easier!

    What’s the best cheese for this pizza?

    A combination of mozzarella for meltability and sharp cheddar for flavor works beautifully. For extra richness, add a sprinkle of Parmesan or Asiago on top during the last few minutes of baking.

    Can I freeze leftover pizza?

    Absolutely! Wrap individual slices tightly in plastic wrap, then foil. Freeze for up to 2 months. Reheat from frozen in a 375°F oven for 12-15 minutes until hot and crispy.

    Is there a good vegetarian alternative to chicken?

    Roasted chickpeas seasoned with garlic powder and Italian herbs make an excellent protein substitute. Sautéed mushrooms also provide a meaty texture that pairs wonderfully with the garlic-ranch flavors.

    How do I prevent my Garlic-Ranch Chicken Pizza from getting soggy?

    Pre-bake your crust for 5-7 minutes before adding toppings. Also, drain any excess moisture from your chicken and vegetables before placing them on the pizza to ensure a perfectly crispy result.

    Final Thoughts

    This Garlic-Ranch Chicken Pizza has transformed our family’s pizza nights from ordinary to extraordinary. The combination of creamy ranch, aromatic garlic, tender chicken, and melty cheese creates something truly special that friends and family will request again and again. I love how versatile this recipe is—perfect for everything from casual weeknights to entertaining guests. Whether you follow the recipe exactly or make it your own with creative variations, I’m confident this will become a beloved addition to your recipe collection. For more delicious inspiration, check out my Pinterest page where I share new pizza ideas regularly!

  • Sweet Chili Pineapple Shrimp That’ll Ignite Your Taste Buds!

    Sweet Chili Pineapple Shrimp That’ll Ignite Your Taste Buds!

    Sweet Chili Pineapple Shrimp That’ll Ignite Your Taste Buds!

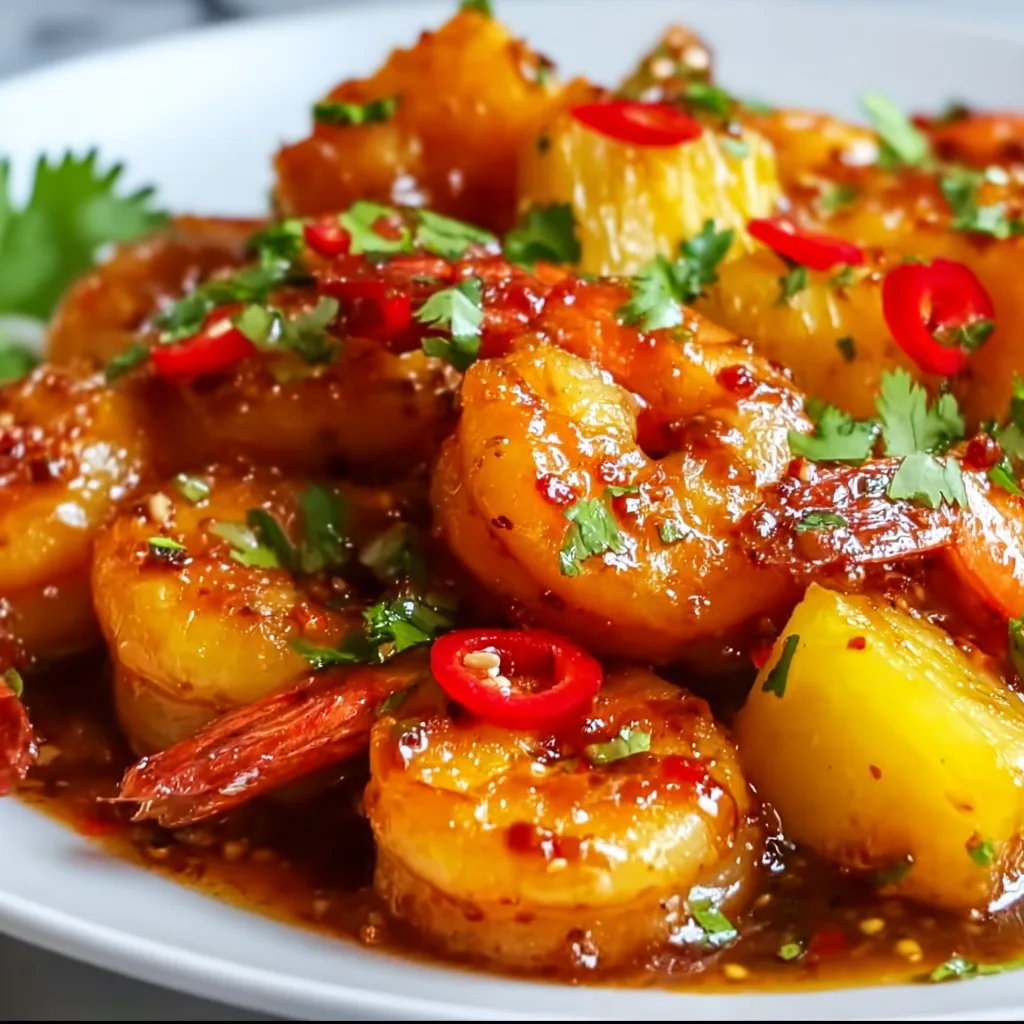
    Sweet Chili Pineapple Shrimp is my absolute go-to when I want to impress dinner guests without spending hours in the kitchen. The perfect balance of sweet, tangy pineapple and spicy chili sauce creates a flavor explosion that transforms ordinary shrimp into something extraordinary. I discovered this recipe during a beach vacation when a local chef shared his secret for the most addictive appetizer I’d ever tasted. The juicy pineapple chunks caramelize slightly while cooking, creating little pockets of tropical sweetness that complement the succulent shrimp perfectly. Trust me, this dish will transport you straight to paradise with every bite!

    Recipe

    Why You’ll Love This Sweet Chili Pineapple Shrimp

    Quick Yet Impressive

    This Sweet Chili Pineapple Shrimp comes together in just 20 minutes, making it perfect for both weeknight dinners and spontaneous gatherings. The vibrant colors alone make it Instagram-worthy without any fancy plating techniques. I love how the glossy sauce clings to each plump shrimp, creating that restaurant-quality appearance with minimal effort. Last month when my in-laws dropped by unexpectedly, I whipped this up and they thought I’d been cooking all day! The combination of convenience and visual appeal makes this recipe a true keeper in my busy household.

    Perfect Flavor Balance

    The magic of this Sweet Chili Pineapple Shrimp lies in its harmonious blend of contrasting flavors. The sweet pineapple juice caramelizes slightly during cooking, creating a natural sweetness that balances perfectly with the spicy kick from the chili sauce. There’s also a subtle tanginess that keeps your taste buds engaged with every bite. I’m particularly fond of how the garlic and ginger create a fragrant base that elevates the entire dish. When my daughter (who typically avoids anything with “spicy” in the name) requested seconds, I knew this recipe had achieved the perfect flavor equilibrium.

    Essential Tips & Tricks

    Selecting the Best Ingredients

    Starting with high-quality shrimp makes all the difference in this Sweet Chili Pineapple Shrimp recipe. Look for plump, firm shrimp with a mild ocean scent – nothing fishy! I prefer 16-20 count shrimp for the perfect bite-size experience. For the pineapple, fresh is ideal, but high-quality canned chunks in natural juice (not syrup) work wonderfully in a pinch. The sweet chili sauce is the star ingredient – I recommend Mae Ploy or similar authentic brands rather than generic versions. When I use fresh ginger instead of powdered, the aromatic difference is remarkable, adding that special “what’s in this?” quality guests always notice.

    Perfecting the Cooking Technique

    The secret to perfectly cooked shrimp is paying close attention to their color transformation. They should turn from translucent gray to opaque pink in just 2-3 minutes per side. Overcooking leads to rubbery disappointment! I learned this lesson the hard way during a dinner party last year. For the ideal caramelization, use a cast-iron skillet if possible – the even heat distribution creates beautiful golden edges on both the shrimp and pineapple chunks. Let the sauce reduce just until it coats the back of a spoon for that perfect sticky-but-not-too-thick consistency.

    Serving Ideas & Creative Variations

    Beautiful Presentation Options

    Elevate your Sweet Chili Pineapple Shrimp by serving it in a hollowed pineapple boat for maximum tropical vibes. This presentation trick never fails to impress at my summer gatherings! Garnish with thinly sliced green onions, sesame seeds, and fresh cilantro for pops of color and texture. For a more elegant dinner party approach, serve individual portions in martini glasses with a lime wedge perched on the rim. When I’m hosting a casual get-together, I serve this dish with decorative toothpicks alongside other finger foods for easy mingling. The vibrant colors make this dish a natural centerpiece.

    Exciting Recipe Adaptations

    Transform this Sweet Chili Pineapple Shrimp into various meals by making simple adjustments. For a heartier dinner, serve over coconut rice or noodles to soak up the delicious sauce. My family loves when I add bell peppers, snap peas, and water chestnuts for extra crunch and nutrition. For a spicier version, add a diced jalapeño or red pepper flakes during cooking. You can even substitute chicken for shrimp if you’re serving guests with shellfish allergies. My favorite weekend variation includes adding a splash of rum to the sauce (which cooks off) for an elevated tropical flavor that makes dinner feel like a special occasion.

    Storage & Troubleshooting Guide

    Proper Storage Methods

    Store leftover Sweet Chili Pineapple Shrimp in an airtight container in the refrigerator for up to two days. The flavors actually develop nicely overnight, making this a great make-ahead option for busy weekends. I recommend reheating gently in a skillet rather than microwaving to preserve the shrimp’s texture. If you want to prep components ahead of time, marinate the raw shrimp in a separate container from the chopped pineapple and sauce ingredients. This preparation strategy has saved me countless minutes during hectic weeknight dinners. For food safety, always cool the dish completely before refrigerating to prevent bacterial growth.

    Fixing Common Issues

    If your Sweet Chili Pineapple Shrimp sauce is too thin, create a quick slurry with 1 teaspoon cornstarch and 1 tablespoon cold water. Add this thickening agent gradually while the sauce simmers until you reach your desired consistency. For sauce that’s too thick, simply add a splash of pineapple juice or chicken broth. If you accidentally oversalted the dish, add a squeeze of fresh lime juice to balance the flavors. When I once found my sauce too sweet, a tablespoon of rice vinegar perfectly counteracted the sweetness. Remember that shrimp cook extremely quickly – if they start to curl tightly, they’re likely overcooked.

    Frequently Asked Questions

    Can I make Sweet Chili Pineapple Shrimp ahead of time?

    Yes! Prepare the sauce and cut pineapple up to 24 hours ahead. Cook the shrimp just before serving for best texture. The dish reheats well but fresh-cooked shrimp have superior texture.

    What can I substitute for sweet chili sauce?

    Mix 3 tablespoons honey, 2 tablespoons rice vinegar, 1 teaspoon sriracha, and ½ teaspoon garlic powder. Adjust heat level to taste. This homemade version works beautifully in a pinch!

    Is this recipe gluten-free?

    Most sweet chili sauces contain wheat-based soy sauce. Use tamari instead of soy sauce and verify your sweet chili sauce is certified gluten-free for a safe gluten-free version.

    How spicy is Sweet Chili Pineapple Shrimp?

    It’s moderately spicy with a sweet balance. Adjust heat by using more or less sweet chili sauce. For kid-friendly versions, reduce chili and add extra pineapple juice.

    Can I use frozen shrimp?

    Absolutely! Thaw completely and pat dry before cooking to prevent excess moisture. Pre-cooked frozen shrimp work too—just add them at the very end to warm through without overcooking.

    Final Thoughts

    Sweet Chili Pineapple Shrimp has become my signature dish for good reason—it delivers maximum flavor with minimum effort. The bright colors, bold flavors, and versatility make it perfect for everything from quick family dinners to impressive entertaining. I love watching people’s eyes light up with that first bite as the sweet, tangy, and spicy notes dance across their palate. Whether you serve it as an appetizer, main course, or party snack, this recipe proves that sometimes the simplest combinations create the most memorable meals. Find more tropical-inspired recipes on Pinterest!