Blog

  • Mediterranean Steak Bowl Recipe: Bold Flavors You’ll Crave!

    Mediterranean Steak Bowl Recipe: Bold Flavors You’ll Crave!

    Mediterranean Steak Bowl Recipe: Bold Flavors You’ll Crave!

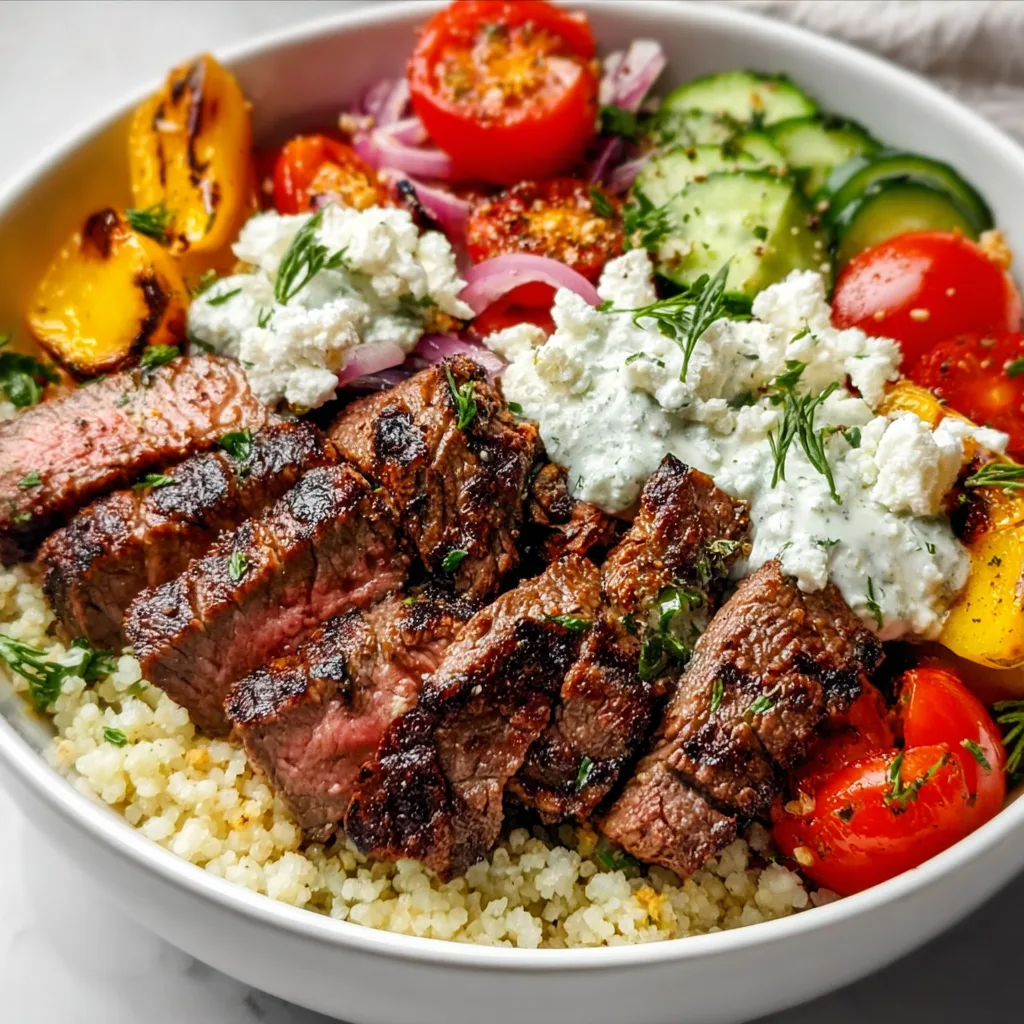
    This Mediterranean Steak Bowl Recipe transforms your kitchen into a coastal paradise with just a few simple ingredients. The sizzle of perfectly seasoned steak meeting a hot pan instantly transports me to sun-drenched shores, even on the dreariest days. I first created this bowl after returning from a trip to Greece, desperately trying to capture those vibrant flavors that lingered in my memory. The combination of juicy steak strips, tangy tzatziki, and colorful vegetables creates a balanced meal that’s both satisfying and nutritious. Trust me, this recipe will quickly become your go-to when you’re craving something special without hours of preparation.

    Recipe

    Why You’ll Love This Mediterranean Steak Bowl Recipe

    Perfect Balance of Flavors and Textures

    The magic of this Mediterranean Steak Bowl Recipe lies in its harmonious blend of contrasting elements. The charred steak with its smoky exterior and tender interior creates the perfect foundation. I love how the cooling tzatziki sauce provides a refreshing counterpoint to the warm meat, while the crisp vegetables add a satisfying crunch. The first time I served this to friends, they couldn’t believe how the simple combination of lemon, garlic, and herbs transformed ordinary ingredients into something extraordinary. Each bite offers a different sensation – from the creaminess of feta to the pop of juicy tomatoes.

    Quick and Nutritionally Complete

    What initially drew me to this Mediterranean Steak Bowl Recipe was how it delivers a complete meal in under 30 minutes. The lean protein from the steak pairs beautifully with fiber-rich vegetables and complex carbohydrates from the grain base. I’ve made this on countless busy weeknights when I wanted something nutritious but lacked the energy for elaborate cooking. The healthy fats from olive oil and avocado leave you satisfied without feeling heavy. My favorite part? You can prep most components ahead, making assembly lightning-fast when hunger strikes. It’s truly the perfect balance of convenience and nutrition.

    Essential Tips & Tricks

    Mastering the Steak

    The heart of any Mediterranean Steak Bowl Recipe is, of course, the steak itself. For maximum tenderness, start with room-temperature meat and pat it thoroughly dry before seasoning. I learned the hard way that cold, damp steak never achieves that beautiful sear we’re after. Let your pan get screaming hot before adding the meat, then resist the urge to move it around – that’s how you get those gorgeous caramelized edges. For medium-rare perfection, I cook about 3-4 minutes per side, then let it rest for at least 5 minutes before slicing against the grain. This resting period is non-negotiable if you want those juices redistributed!

    Building the Perfect Bowl

    The assembly order of your Mediterranean Steak Bowl Recipe makes a surprising difference in the final experience. Start with a base of warm grains like bulgur, quinoa, or couscous – they absorb the flavorful juices beautifully. Then create distinct sections for each component rather than mixing everything together. This preserves the integrity of delicate ingredients and allows for customized bites. I always place my tzatziki in a separate container if meal prepping to prevent sogginess. For the ultimate presentation, add a final drizzle of high-quality olive oil and a sprinkle of fresh herbs just before serving to wake up all those Mediterranean flavors.

    Serving Ideas & Creative Variations

    Family-Style Mediterranean Feast

    Transform this Mediterranean Steak Bowl Recipe into an interactive dining experience by serving it family-style. I arrange all components in separate colorful bowls down the center of my table, allowing everyone to build their own perfect creation. This approach has saved many dinners with picky eaters! Include some unexpected additions like marinated olives, roasted red peppers, or pickled onions to elevate the spread. For special occasions, I’ll add warm pita bread on the side for scooping up extra tzatziki. The communal nature of sharing creates a convivial atmosphere that perfectly captures the Mediterranean spirit of gathering around food.

    Seasonal and Dietary Adaptations

    One reason I return to this Mediterranean Steak Bowl Recipe throughout the year is its incredible adaptability. In summer, I incorporate garden-fresh tomatoes and cucumbers, while autumn calls for roasted sweet potatoes or butternut squash. For vegetarian guests, I simply swap the steak for grilled halloumi or hearty mushrooms marinated in the same spices. My sister follows a keto diet and enjoys this with cauliflower rice instead of grains. For a lighter lunch version, I often use the components to fill lettuce cups rather than creating a full bowl. The Mediterranean flavor profile works beautifully across these variations while maintaining its essential character.

    Storage & Troubleshooting Guide

    Meal Prep and Storage Solutions

    The Mediterranean Steak Bowl Recipe makes an ideal meal prep option with a few strategic adjustments. I recommend storing the components separately in glass containers for up to three days. Keep the tzatziki and any fresh herbs in their own containers on top to add just before eating. The steak reheats surprisingly well at 50% power in the microwave with a damp paper towel over it to retain moisture. For the freshest experience, consider prepping the marinade and chopping vegetables ahead, but cooking the steak the day you plan to eat. This approach gives you the convenience of meal prep with the quality of freshly cooked protein.

    Solving Common Challenges

    Even experienced cooks encounter issues with Mediterranean Steak Bowl Recipe execution. If your steak turns out tough, you’ve likely either overcooked it or failed to slice against the grain. For tender results, invest in an instant-read thermometer and aim for 130-135°F for medium-rare. Soggy vegetables can ruin the textural contrast – solve this by keeping watery ingredients like tomatoes and cucumbers separate until serving time. If your tzatziki sauce becomes too thin, strain your yogurt through cheesecloth before mixing in other ingredients. And for those times when the flavors seem flat, a squeeze of fresh lemon and an extra pinch of salt just before serving works wonders to brighten everything up.

    Frequently Asked Questions

    What cut of beef works best for Mediterranean Steak Bowl Recipe?

    Ribeye or sirloin steak offer the best balance of flavor and tenderness. For a budget-friendly option, flank steak works well if marinated for at least 30 minutes and sliced thinly against the grain.

    Can I make this recipe vegetarian?

    Absolutely! Substitute the steak with grilled halloumi cheese, portobello mushrooms, or even roasted chickpeas seasoned with the same Mediterranean spices for a satisfying plant-based alternative.

    How do I make authentic tzatziki sauce?

    Combine Greek yogurt with grated cucumber (squeezed dry), minced garlic, dill, olive oil, and lemon juice. Let it rest for at least 30 minutes before serving to allow flavors to meld together.

    What grains work best as the base?

    Bulgur wheat, quinoa, farro, or couscous all make excellent bases. For a lower-carb option, cauliflower rice or a bed of mixed greens works beautifully.

    Can I prepare components of this bowl ahead of time?

    Yes! Marinate and cook the steak, prepare the tzatziki, and chop vegetables up to 2-3 days in advance. Store separately and assemble just before serving for the freshest experience.

    Final Thoughts

    This Mediterranean Steak Bowl Recipe has become my culinary lifeline on days when I crave something special without the fuss. The vibrant colors, bold flavors, and nourishing ingredients never fail to uplift my mood and satisfy my hunger. I find myself returning to it season after season, tweaking components based on what’s fresh and available. There’s something deeply comforting about this perfect balance of protein, vegetables, and grains coming together in one beautiful bowl. I hope it brings the same joy to your table as it consistently does to mine! Find more inspiring bowl recipes on Pinterest.

  • Loaded BBQ Chicken Sweet Fries | Irresistibly Delicious & Viral!

    Loaded BBQ Chicken Sweet Fries | Irresistibly Delicious & Viral!

    Loaded BBQ Chicken Sweet Fries | Irresistibly Delicious & Viral!

    Loaded BBQ Chicken Sweet Fries are my absolute comfort food obsession that combines crispy sweet potato fries with juicy BBQ chicken and all the fixings. The first time I made these for my family game night, there was a moment of pure silence followed by a chorus of “WOW!” as everyone dove in for seconds. The contrast between the sweet potatoes, tangy BBQ sauce, and melty cheese creates a flavor explosion that’s impossible to resist. Perfect for casual gatherings or a cozy night in, these loaded fries are like honey BBQ chicken mac and cheese reimagined in a crispy, handheld form.

    Recipe

    Why You’ll Love This Loaded BBQ Chicken Sweet Fries

    A Perfect Balance of Flavors and Textures

    The magic of Loaded BBQ Chicken Sweet Fries lies in the harmonious contrast between ingredients. The natural sweetness of the roasted sweet potatoes creates a beautiful foundation for the savory, slightly tangy BBQ chicken. When topped with sharp cheddar cheese that melts into all the nooks and crannies, you get this incredible texture play with each bite. I love how the crispy edges of the sweet potatoes maintain their structure even under all those toppings. It’s like a flavor treasure hunt where every forkful offers something slightly different – a bit of green onion here, a touch of sour cream there.

    Quick Prep for Maximum Impact

    What I adore most about these Loaded BBQ Chicken Sweet Fries is how they deliver restaurant-quality results with minimal effort. You can use leftover chicken or rotisserie chicken to cut prep time in half, making this perfect for busy weeknights. The visual wow factor is off the charts – that moment when you pull the tray from the oven with the cheese bubbling and golden always makes me feel like a culinary genius. My teenagers request these constantly, and I love watching their friends’ eyes widen when I set down a platter of these loaded fries during their hangouts.

    Essential Tips & Tricks

    Perfect Sweet Potato Preparation

    The foundation of amazing Loaded BBQ Chicken Sweet Fries is properly cooked sweet potatoes. For ultimate crispiness, cut your sweet potatoes into evenly sized fries (about ¼-inch thick) and don’t overcrowd the baking sheet – use two if necessary! Toss them with cornstarch before oil and seasoning to create that crispy exterior. I learned this trick after several soggy attempts, and it’s been a game-changer. Roasting at 425°F gives that perfect caramelization without burning. Remember to flip halfway through cooking for even browning and that delicious contrast between crispy outside and tender inside.

    Layering for Success

    The secret to next-level Loaded BBQ Chicken Sweet Fries is all in the strategic layering. Start with a layer of crispy sweet potato fries, then add half your cheese before adding the BBQ chicken – this creates a “cheese glue” that helps everything stick together. Add the remaining cheese on top of the chicken and return to the oven just until melted. I once made the mistake of adding all toppings before melting the cheese and ended up with a soggy mess! Save your cold toppings (sour cream, green onions, cilantro) for after baking to maintain textural contrast and fresh flavor pops.

    Serving Ideas & Creative Variations

    Family-Style Presentations

    Serving Loaded BBQ Chicken Sweet Fries family-style creates an instant party atmosphere. I love presenting them on a large wooden board with small bowls of extra toppings around the edges so everyone can customize their portion. For game days, try individual servings in paper food boats for that stadium feel without the mess. My favorite weekend brunch twist is topping them with a fried egg – that runny yolk creates a decadent sauce that elevates everything it touches. The casual, shareable nature of this dish makes it perfect for bringing people together without the formality of a plated meal.

    Exciting Flavor Twists

    While the classic Loaded BBQ Chicken Sweet Fries are incredible, don’t be afraid to experiment with different flavor profiles. Try a southwestern version with black beans, corn, and avocado for a Mexican-inspired fiesta. For heat lovers, add diced jalapeños and drizzle with spicy mayo before serving. My daughter’s favorite variation uses pulled pork instead of chicken with a Carolina-style vinegar sauce that cuts through the sweetness of the potatoes beautifully. For a Mediterranean twist, try using Greek yogurt instead of sour cream and sprinkle with feta and olives after baking.

    Storage & Troubleshooting Guide

    Proper Storage for Leftovers

    Loaded BBQ Chicken Sweet Fries are best enjoyed fresh, but proper storage can help maintain their texture and flavor if you have leftovers. Store the components separately when possible – keep the baked sweet potato fries in an airtight container, and store the BBQ chicken and cold toppings separately. This prevents everything from becoming a soggy mess. When reheating, use an air fryer or oven at 350°F for about 5-7 minutes to restore crispiness. I’ve found that microwaving is the enemy of crispy fries, so avoid this method if possible! Properly stored, components will last 2-3 days in the refrigerator.

    Troubleshooting Common Issues

    The most common challenge with Loaded BBQ Chicken Sweet Fries is maintaining the perfect texture balance. If your sweet potato fries turn out soggy, they were likely overcrowded on the baking sheet or the oven temperature wasn’t high enough. For next time, use multiple baking sheets and check that your oven is properly calibrated. If your BBQ sauce is burning before the fries are done, try adding it to the chicken in the last 5-10 minutes of cooking instead. I once had a disaster when my cheese wouldn’t melt properly – the solution was to let the fries cool slightly before adding cheese, as extremely hot fries can cause cheese to separate.

    Frequently Asked Questions

    Can I make Loaded BBQ Chicken Sweet Fries ahead of time?

    Prepare components separately up to 24 hours ahead. Roast sweet potatoes and prepare BBQ chicken, then store refrigerated. Reheat fries until crispy, add chicken and cheese, then broil briefly before adding cold toppings.

    How do I ensure my sweet potato fries get crispy?

    Cut fries uniformly, toss with cornstarch before oil, arrange in a single layer without overcrowding, and bake at high heat (425°F). Flip halfway through baking for even crispiness.

    What’s the best BBQ sauce for Loaded BBQ Chicken Sweet Fries?

    Use a sauce with balanced sweetness and tanginess. I prefer hickory or honey BBQ for sweet potatoes. Homemade sauce gives the best flavor, but quality store-bought works great too.

    Can I make this recipe vegetarian?

    Absolutely! Replace chicken with black beans, chickpeas, or plant-based chicken alternatives. Use the same BBQ sauce coating technique and keep all other toppings the same.

    What sides pair well with Loaded BBQ Chicken Sweet Fries?

    A simple green salad with vinaigrette balances the richness. For heartier appetites, add corn on the cob or coleslaw. A cold pickle spear provides refreshing contrast.

    Final Thoughts

    These Loaded BBQ Chicken Sweet Fries have become my go-to recipe when I want to impress without spending hours in the kitchen. There’s something magical about the combination of sweet potatoes, tangy BBQ chicken, and all those colorful toppings that just makes people happy. I’ve watched this dish bring together picky eaters and food enthusiasts alike around my table. Whether you’re feeding a crowd or treating yourself to something special, these loaded fries deliver maximum satisfaction with minimal effort. Find more inspiration for your next gathering on Pinterest.

  • Sweet Maraschino Cherry Cookies: Irresistibly Soft & Bursting with Flavor

    Sweet Maraschino Cherry Cookies: Irresistibly Soft & Bursting with Flavor

    Sweet Maraschino Cherry Cookies: Irresistibly Soft & Bursting with Flavor

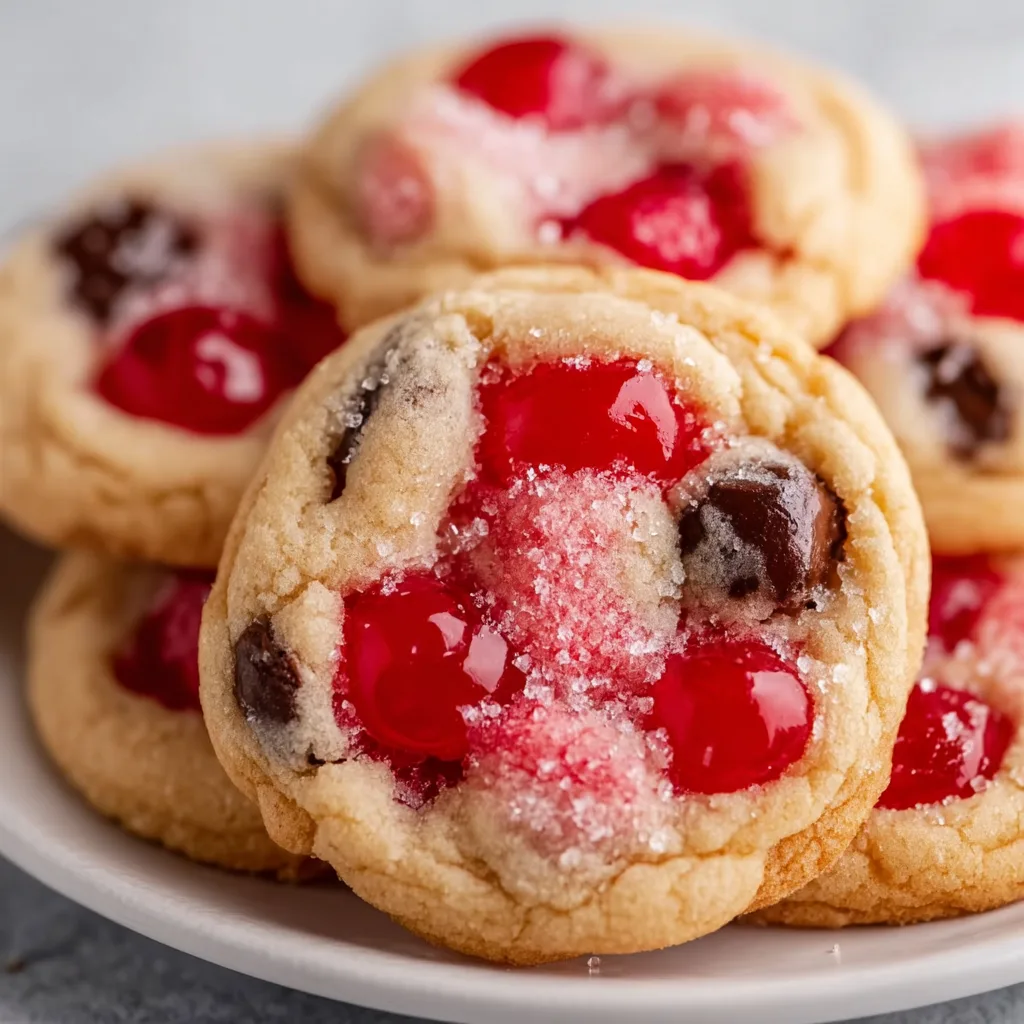
    Sweet Maraschino Cherry Cookies are the perfect blend of buttery cookie dough and bright, juicy cherry pieces that create little pockets of sweetness in every bite. The first time I made these for my family’s holiday cookie exchange, they disappeared faster than any other treat on the table! There’s something magical about the pop of red against the golden cookie that makes them irresistible. If you love the nostalgic flavor of maraschino cherries like I do, these cookies will transport you straight back to childhood sundaes and special occasion desserts. Let’s dive into this cheerful, cherry-studded delight!

    Recipe

    Why You’ll Love These Sweet Maraschino Cherry Cookies

    Perfect Texture Balance

    These cookies hit that sweet spot between chewy and tender that makes them absolutely irresistible. The edges crisp up beautifully while the centers stay soft and pillowy. I’ve tested this recipe countless times to ensure the perfect ratio of butter to flour, creating a cookie that holds its shape without being too cakey or too flat. The maraschino cherries add little pockets of moisture that keep everything tender, even days after baking. The contrast between the cookie’s slight vanilla crispness and the soft cherry pieces creates a textural symphony that’ll have everyone reaching for seconds.

    Stunning Visual Appeal

    Let’s be honest—we eat with our eyes first, and these cookies are absolutely gorgeous. The vibrant red cherry pieces create a beautiful mosaic against the golden cookie background. When I bring these to gatherings, people always comment on how pretty they look before they even taste them! The cherries maintain their bright color during baking, making these cookies perfect for holiday platters, Valentine’s Day treats, or anytime you need a pop of color on your dessert table. They photograph beautifully too, making them ideal for those Instagram-worthy baking moments that’ll have your followers asking for the recipe.

    Essential Tips & Tricks

    Cherry Preparation Secrets

    The key to perfect cherry cookies starts with proper cherry preparation. I’ve learned through many batches that patting the cherries completely dry is non-negotiable—excess moisture can make your cookies spread too much. Use paper towels and be thorough! For the most vibrant flavor, I recommend chopping the cherries into quarters rather than tiny pieces. This preserves their juicy texture while distributing them evenly throughout the dough. For an extra flavor boost, add 1-2 teaspoons of the cherry jar liquid to your dough. This infuses the entire cookie with that signature sweet cherry essence without compromising the texture.

    Dough Handling Techniques

    The way you handle your dough makes all the difference in these cookies. Keep your ingredients at room temperature before mixing—especially the butter and eggs—for the smoothest incorporation. When adding the flour, mix just until combined; overmixing develops gluten that toughens cookies. My secret technique? Chill the dough for at least 30 minutes before baking. This prevents excessive spreading and intensifies the flavors as they meld together. When portioning, I use a cookie scoop for uniform size, ensuring even baking. For picture-perfect cookies, press a few extra cherry pieces onto the tops just before baking.

    Serving Ideas & Creative Variations

    Elegant Presentation Options

    Transform these already beautiful cookies into showstopping treats with a few simple presentation tricks. Dust them lightly with powdered sugar for a snow-kissed effect that makes the red cherries pop even more dramatically. For holiday gatherings, arrange them in concentric circles on a white platter with sprigs of mint for a festive touch. I love serving these slightly warm with vanilla ice cream for an elevated dessert that reminds me of cherry Garcia ice cream. For gifting, stack them in clear cellophane bags tied with red ribbon, or layer them in vintage tins between sheets of parchment for a nostalgic touch that always brings smiles.

    Flavor Twist Suggestions

    While the classic recipe is divine, these cookies welcome creative variations! Add white chocolate chips for a creamy contrast that complements the cherries beautifully. For a sophisticated twist, mix in 1/2 teaspoon of almond extract—this enhances the cherry flavor in an unexpected way that tastes absolutely gourmet. Chocolate lovers can fold in mini semi-sweet chocolate chips or drizzle the cooled cookies with melted dark chocolate. My personal favorite variation includes finely chopped pistachios for a red-and-green holiday theme with a delightful crunch. For summer gatherings, try adding lemon zest to brighten the flavor profile.

    Storage & Troubleshooting Guide

    Optimal Freshness Strategies

    To maintain that perfect chewy texture, store your maraschino cherry cookies in an airtight container at room temperature for up to 5 days. The moisture from the cherries actually helps these cookies stay fresher longer than typical sugar cookies! For extended storage, place parchment paper between layers to prevent sticking. You can also freeze the baked cookies for up to 3 months—just thaw at room temperature for about an hour before serving. My favorite freshness hack? Place a slice of bread in the container with the cookies; it will give up its moisture to keep your cookies soft without affecting their flavor.

    Common Problems Solved

    If your cookies spread too much during baking, the culprit is usually cherry moisture. Make sure you’ve thoroughly dried the cherries and properly chilled your dough. Too-flat cookies can also result from butter that’s too warm—it should be softened but still cool to the touch. For cookies that turn out too cakey or dry, you’ve likely used too much flour; I recommend weighing ingredients for precision. If your cherries are turning brownish during baking instead of staying vibrant red, try reducing your oven temperature by 25°F and slightly shortening the bake time. Remember that cookies continue to set as they cool on the baking sheet.

    Frequently Asked Questions

    Can I use frozen cherries instead of maraschino cherries?

    Frozen cherries have more moisture and a different flavor profile. If substituting, thaw completely, drain thoroughly, and pat very dry. The cookies will have a more natural cherry taste but less vibrant color.

    How do I prevent my Sweet Maraschino Cherry Cookies from spreading too much?

    Ensure your cherries are completely dry, chill the dough for at least 30 minutes before baking, and use cool baking sheets. If they’re still spreading, add an extra tablespoon of flour to the dough.

    Can I make the dough ahead of time?

    Absolutely! The dough can be refrigerated for up to 3 days or frozen for 3 months. If frozen, thaw overnight in the refrigerator before portioning and baking.

    Why did my cherries sink to the bottom of the cookies?

    Toss your chopped cherries in a small amount of flour before folding them into the dough. This coating helps them stay suspended throughout the cookie during baking.

    Are these cookies suitable for shipping?

    Yes! These cookies travel well because they stay moist from the cherries. Pack them with parchment between layers in a sturdy container, and they’ll arrive intact and delicious.

    Final Thoughts

    These Sweet Maraschino Cherry Cookies bring together the nostalgic flavor of cherries with the comfort of a perfectly baked cookie. They’ve become my signature treat for spreading joy, whether at holiday gatherings or just because someone needs a smile. The bright pops of cherry create not just a beautiful cookie, but moments of connection when shared. I hope these become a favorite in your baking repertoire too! For more delightful treats, check out my other recipes at Pinterest where I’m always sharing seasonal inspiration.

  • Marbled Cookies with Peanut Butter & Chocolate Brownie Swirls: Irresistible!

    Marbled Cookies with Peanut Butter & Chocolate Brownie Swirls: Irresistible!

    Marbled Cookies with Peanut Butter & Chocolate Brownie Swirls: Irresistible!

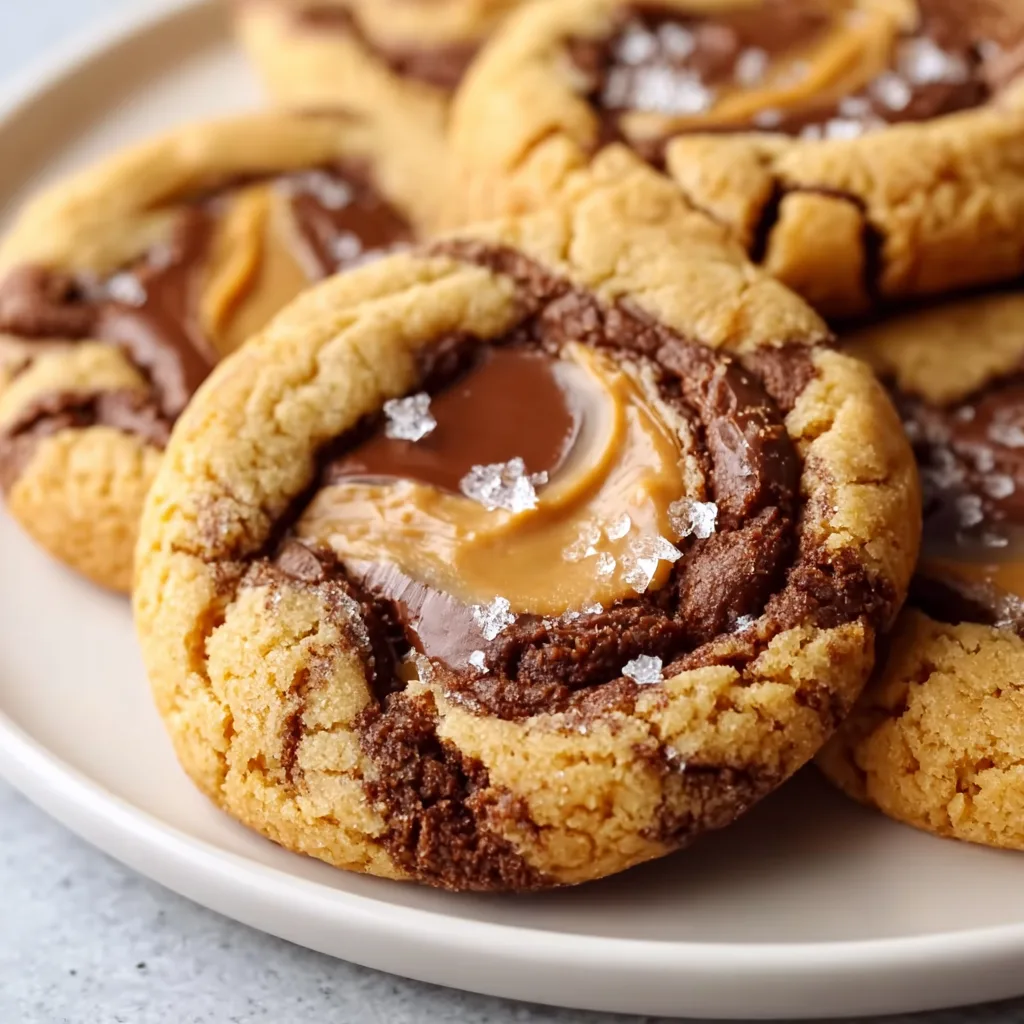
    Marbled cookies with peanut butter and chocolate brownie swirls combine two beloved flavors in one irresistible treat that’s guaranteed to disappear from your cookie jar in record time. The first time I made these for my sister’s birthday gathering, they vanished before I could even snap a photo! There’s something magical about the way the rich chocolate brownie batter weaves through the peanut butter cookie dough, creating beautiful swirls that are as delicious as they’re stunning. If you’re looking for a showstopper cookie that delivers on both presentation and flavor, you’ve found it in these marbled delights.

    Recipe

    Why You’ll Love These Marbled Cookies with Peanut Butter and Chocolate Brownie Swirls

    Perfect Texture Contrast

    The texture magic happens when these two distinct doughs come together. The peanut butter portions bake up with that signature slight chew we all adore, while the brownie sections deliver pockets of fudgy goodness that practically melt in your mouth. I still remember the first batch I made—standing in my kitchen, breaking one open while still warm, and watching the steam rise as the chocolate center revealed itself. The edges get that perfect crisp while the centers stay soft and tender. It’s this delightful contrast that makes these cookies impossible to resist!

    Impressive Visual Appeal

    These cookies aren’t just delicious—they’re stunning to look at. The marbled swirls create a beautiful pattern unique to each cookie, making them perfect for gifting or displaying at parties. Last Christmas, I arranged them on a tiered stand at our family gathering, and they became an instant conversation starter! The dramatic contrast between the golden peanut butter dough and rich chocolate brownie swirls gives these cookies an artisanal bakery look that will have everyone thinking you spent hours perfecting them (though our little secret is how simple they are to make!).

    Essential Tips & Tricks

    Mastering the Marbling Technique

    The key to gorgeous marbling is in how you handle the dough. After preparing both components, chill them for 15-20 minutes—not so firm they’re unworkable, but cool enough to maintain distinct swirls. I like to use a light hand when combining them; overworking will muddy your beautiful patterns! Try the pinch-and-fold method: take small pieces of each dough, place them side by side, then gently fold just 2-3 times. For dramatic swirls, keep the chocolate and peanut butter portions roughly equal in size before combining them into cookie dough balls.

    Temperature Control Is Crucial

    Both your ingredients and baking environment play vital roles in these cookies’ success. Start with room temperature butter for both doughs—cold butter won’t cream properly, while melted butter changes the texture entirely. After shaping your cookies, a brief 15-minute chill in the refrigerator helps them maintain their shape and prevents excessive spreading. I learned this the hard way during a summer baking session when my kitchen was particularly warm! Watch your oven temperature closely too—too hot and the peanut butter portions will brown before the brownie sections are done.

    Serving Ideas & Creative Variations

    Transform these already spectacular cookies into dessert masterpieces! Try serving them slightly warm with a scoop of vanilla bean ice cream for a decadent treat that’ll make everyone swoon. For dinner parties, I’ve sandwiched them with a thin layer of salted caramel between two cookies—the salty-sweet combination is absolutely divine! They also pair beautifully with coffee or milk, making them perfect for afternoon treats. For an extra special touch, drizzle cooled cookies with a simple white chocolate ganache to add another layer of visual appeal and flavor complexity.

    Exciting Flavor Twists

    While the classic peanut butter and chocolate combination is timeless, don’t be afraid to experiment! Try substituting the peanut butter portion with cookie butter for a spiced twist, or add orange zest to the brownie batter for a chocolate-orange variation. My personal favorite twist is adding a teaspoon of espresso powder to the brownie portion—it intensifies the chocolate flavor without tasting like coffee. For holiday versions, incorporate crushed peppermint into the chocolate dough or cinnamon into the peanut butter dough for seasonal flair that’ll have everyone asking for your recipe.

    Storage & Troubleshooting Guide

    Keeping Your Cookies Fresh

    To maintain the perfect texture balance, store these marbled cookies in an airtight container at room temperature for up to 5 days. Place parchment paper between layers to prevent sticking and preserve those beautiful swirls. If you need longer storage, freeze the baked cookies for up to 3 months! I often make a double batch specifically for freezing—just thaw at room temperature for about an hour before serving. The dough itself also freezes beautifully; form the marbled balls, freeze on a baking sheet, then transfer to a freezer bag for ready-to-bake treats whenever a craving strikes.

    Troubleshooting Common Issues

    If your cookies spread too much during baking, your dough was likely too warm. Next time, try chilling longer before baking or reducing your butter slightly. For cookies that don’t spread enough, gently press the dough balls down before baking. If your marbling looks muddy rather than distinct, your doughs may have been too soft—chill them separately longer before combining. Sometimes the brownie portions can overbake while waiting for the peanut butter sections to finish; if this happens, try making your brownie dough slightly wetter than the recipe suggests or reducing your oven temperature by 25°F and extending bake time.

    Frequently Asked Questions

    Can I make these marbled cookies ahead of time?

    Absolutely! You can prepare the dough up to 3 days in advance and refrigerate it, or freeze the shaped cookie dough balls for up to 2 months. Just add 1-2 minutes to the baking time if baking from frozen.

    How do I know when my marbled cookies with peanut butter and chocolate brownie swirls are done baking?

    Look for lightly golden edges on the peanut butter portions while the brownie sections should appear set but still slightly soft in the center. They’ll continue to firm up as they cool.

    Can I use natural peanut butter in this recipe?

    I don’t recommend it. The oils in natural peanut butter separate and can cause unpredictable results. Stick with conventional creamy peanut butter for the best texture and consistency.

    Why did my cookies not marble properly?

    Temperature is key! If either dough is too soft, they’ll blend together instead of creating distinct swirls. Chill both doughs separately before attempting to marble them together.

    Can I make these cookies gluten-free?

    Yes! Replace the all-purpose flour with a 1:1 gluten-free baking blend. The texture may be slightly different, but the marbling effect and flavors will remain delicious.

    Final Thoughts

    These marbled cookies with peanut butter and chocolate brownie swirls have become my signature bake for good reason—they deliver that perfect balance of impressive appearance and incredible flavor that keeps everyone coming back for more. The joy of breaking open a cookie to reveal those beautiful swirls never gets old! Whether you’re baking for a special occasion or simply treating yourself, these cookies bring a touch of bakery-quality indulgence to your home kitchen. Don’t forget to share your creations on Pinterest and tag me—I love seeing your marbled masterpieces!

  • Cozy Skillet Fried Potatoes: Crispy Comfort in Every Bite!

    Cozy Skillet Fried Potatoes: Crispy Comfort in Every Bite!

    Cozy Skillet Fried Potatoes: Crispy Comfort in Every Bite!

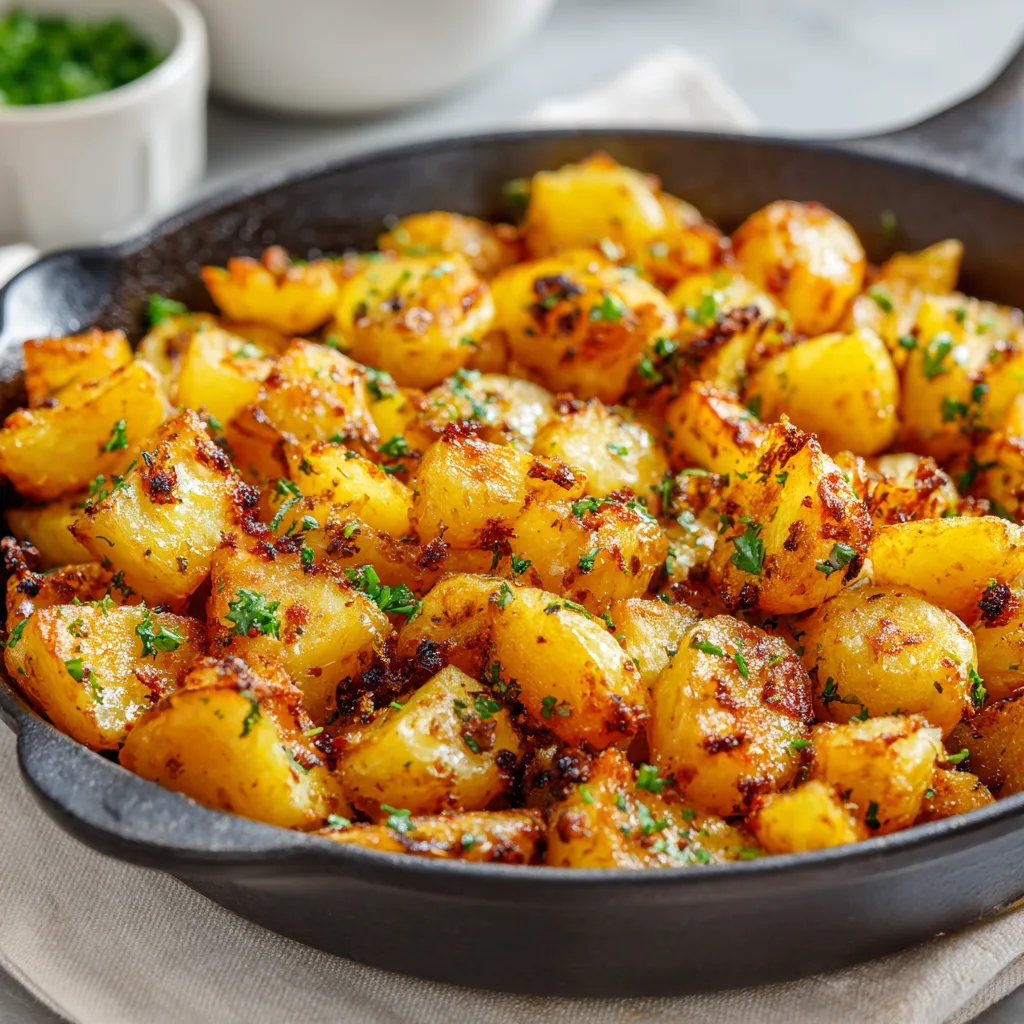
    Cozy Skillet Fried Potatoes have been my go-to comfort food since I was tall enough to peek over the stove. There’s something magical about the sizzle of potatoes hitting hot oil, the aroma of onions caramelizing, and that first perfectly crispy bite that takes me right back to my grandmother’s kitchen. Whether you’re looking for a hearty breakfast side or a simple dinner companion, these golden-brown beauties deliver warmth in every bite. I’ve perfected my technique over the years, and I’m thrilled to share my secrets for achieving that ideal balance of crispy exteriors and tender, fluffy insides that’ll make your homemade meals feel like a warm hug.

    Recipe

    Why You’ll Love These Cozy Skillet Fried Potatoes

    Perfect Texture Combination

    The magic of properly fried potatoes lies in that irresistible contrast between crispy exteriors and tender insides. I’ve spent years perfecting this balance, discovering that a quick par-boil before frying makes all the difference. The starch on the outside creates that golden crust we all crave, while the inside stays pillowy soft. When you hear that first sizzle as the potatoes hit the hot oil, and that earthy potato aroma fills your kitchen, you’ll understand why this simple dish has stood the test of time as a comfort food staple in homes across the world.

    Simple Ingredients, Maximum Flavor

    What I adore most about Cozy Skillet Fried Potatoes is how they transform humble ingredients into something extraordinary. You likely have everything you need already: potatoes, oil, butter, onions, and seasonings. The real secret is in how these basic elements interact. The butter adds richness, while a touch of garlic powder and paprika elevates the natural potato flavor. Last weekend, I made these for a late breakfast and my kitchen smelled so inviting that my neighbor actually texted to ask what I was cooking! These potatoes don’t just taste like comfort—they create an atmosphere of warmth that draws people together.

    Essential Tips & Tricks

    Choosing and Preparing Your Potatoes

    The foundation of exceptional skillet fried potatoes starts with selecting the right variety. Yukon Golds offer that perfect balance of waxy and starchy properties, creating crispy exteriors while maintaining creamy centers. Russets work beautifully too, yielding extra-crispy results. Whichever you choose, cut them into uniform pieces (about ½-inch cubes or ¼-inch slices) to ensure even cooking. I always soak mine in cold water for 15 minutes, then pat them completely dry before cooking—this removes excess starch that might prevent crisping. This simple step made a dramatic difference when I started doing it consistently.

    Mastering the Cooking Process

    The key to achieving that coveted golden crust is patience and proper heat management. Start with a well-seasoned cast iron skillet heated to medium-high with a generous coating of oil and butter. Once your potatoes hit the pan, resist the urge to stir constantly! Let them develop that beautiful crust before flipping—about 4-5 minutes per side. I learned this lesson the hard way after years of impatient stirring. For extra flavor, add your onions when the potatoes are about halfway done, so they caramelize without burning. This method pairs perfectly with my Irish Colcannon Potatoes for a comforting potato feast.

    Serving Ideas & Creative Variations

    Perfect Pairings

    Cozy Skillet Fried Potatoes shine as both supporting actors and stars of the meal. For breakfast, serve them alongside fried eggs with runny yolks that create a natural sauce when broken over the crispy potatoes—pure morning bliss! They’re equally delicious with a dollop of sour cream and fresh chives for dinner, or tucked into breakfast burritos with scrambled eggs and cheese. My family’s favorite weekend tradition involves these potatoes served with thick-cut bacon and my homemade Strawberry Freezer Jam spread on toast. The sweet-savory combination creates a perfect balance that keeps everyone at the table longer.

    Flavorful Twists

    The beauty of skillet potatoes lies in their versatility as a canvas for countless flavor profiles. For Southwestern flair, add bell peppers, jalapeños, and finish with fresh cilantro and lime zest. Mediterranean-inspired potatoes shine with rosemary, thyme, and a sprinkle of feta cheese in the last few minutes of cooking. My personal favorite variation came from a happy accident—I was out of regular onions and substituted leeks, then added a handful of grated Parmesan at the end. The result was so delicious that it’s now in my regular rotation! Don’t be afraid to experiment with whatever herbs and spices speak to your cravings.

    Storage & Troubleshooting Guide

    Keeping Leftovers Crispy

    While Cozy Skillet Fried Potatoes are best enjoyed fresh from the pan, leftovers can still be delicious with proper handling. Store them in an airtight container in the refrigerator for up to three days, but avoid stacking them if possible to preserve some crispiness. For reheating, skip the microwave which will make them soggy. Instead, spread them on a baking sheet and heat at 375°F for 10-12 minutes until hot and re-crisped. I’ve found adding a light drizzle of olive oil before reheating helps restore some of that fresh-cooked texture. For an extra flavor boost, sprinkle with fresh herbs after reheating.

    Troubleshooting Common Issues

    If your potatoes aren’t crisping properly, a few common culprits might be to blame. First, ensure your potatoes are completely dry before frying—excess moisture creates steam instead of that golden crust we’re after. Second, resist overcrowding the pan, as too many potatoes will lower the oil temperature and cause steaming. Work in batches if needed for a perfectly crispy result. If your potatoes are browning too quickly on the outside while staying raw inside, your heat is too high. Lower it slightly and cover the pan for a few minutes to help them cook through while maintaining that beautiful crust.

    Frequently Asked Questions

    What potatoes work best for skillet fried potatoes?

    Yukon Golds offer the perfect balance of waxy and starchy properties for crispy exteriors and creamy centers. Russets work well too, creating extra-crispy results with fluffy interiors.

    How do I ensure my potatoes get crispy?

    Dry your potatoes thoroughly after cutting, use enough oil in a hot skillet, avoid overcrowding, and resist stirring too frequently to allow a crust to form before flipping.

    Can I make cozy skillet fried potatoes ahead of time?

    While best fresh, you can par-cook them until almost done, then refrigerate. Finish by crisping in a hot skillet for 5-7 minutes just before serving.

    What’s the best fat for frying potatoes?

    A combination of butter and oil gives the best flavor and crisping potential. The butter provides rich flavor while oil allows for higher heat without burning.

    How can I add more flavor to my skillet potatoes?

    Try adding garlic powder, paprika, rosemary, thyme, or smoked paprika. For depth, include caramelized onions, bell peppers, or finish with fresh herbs and cheese.

    Final Thoughts

    These Cozy Skillet Fried Potatoes represent more than just a recipe—they’re a portal to comfort, connection, and countless happy memories around the table. The simple act of transforming humble potatoes into crispy, golden treasures has a way of making any meal feel special. Whether they’re accompanying your morning eggs or sitting alongside your evening roast, these potatoes bring warmth to the plate and heart alike. I hope you’ll make them part of your own cooking repertoire and discover the joy they bring. For more comforting recipes, follow me on Pinterest where I share my favorite cozy creations.

  • Cream Cheese Cinnamon Swirl Banana Bread That Melts in Your Mouth!

    Cream Cheese Cinnamon Swirl Banana Bread That Melts in Your Mouth!

    Cream Cheese Cinnamon Swirl Banana Bread That Melts in Your Mouth!

    There’s something magical about the aroma of Cream Cheese Cinnamon Swirl Banana Bread baking in the oven. It transforms my kitchen into a cozy haven, especially on those chilly Sunday mornings when the world feels a bit too hectic. I’ve spent years perfecting this recipe, balancing the sweetness of overripe bananas with tangy cream cheese and warming cinnamon swirls. The first time I served this to my family, my nephew declared it “the best thing ever baked” – and honestly, I couldn’t disagree! If you’re looking for that perfect balance of comfort and indulgence, this recipe delivers both with every slice.

    Recipe

    Why You’ll Love This Cream Cheese Cinnamon Swirl Banana Bread

    Perfect Balance of Flavors and Textures

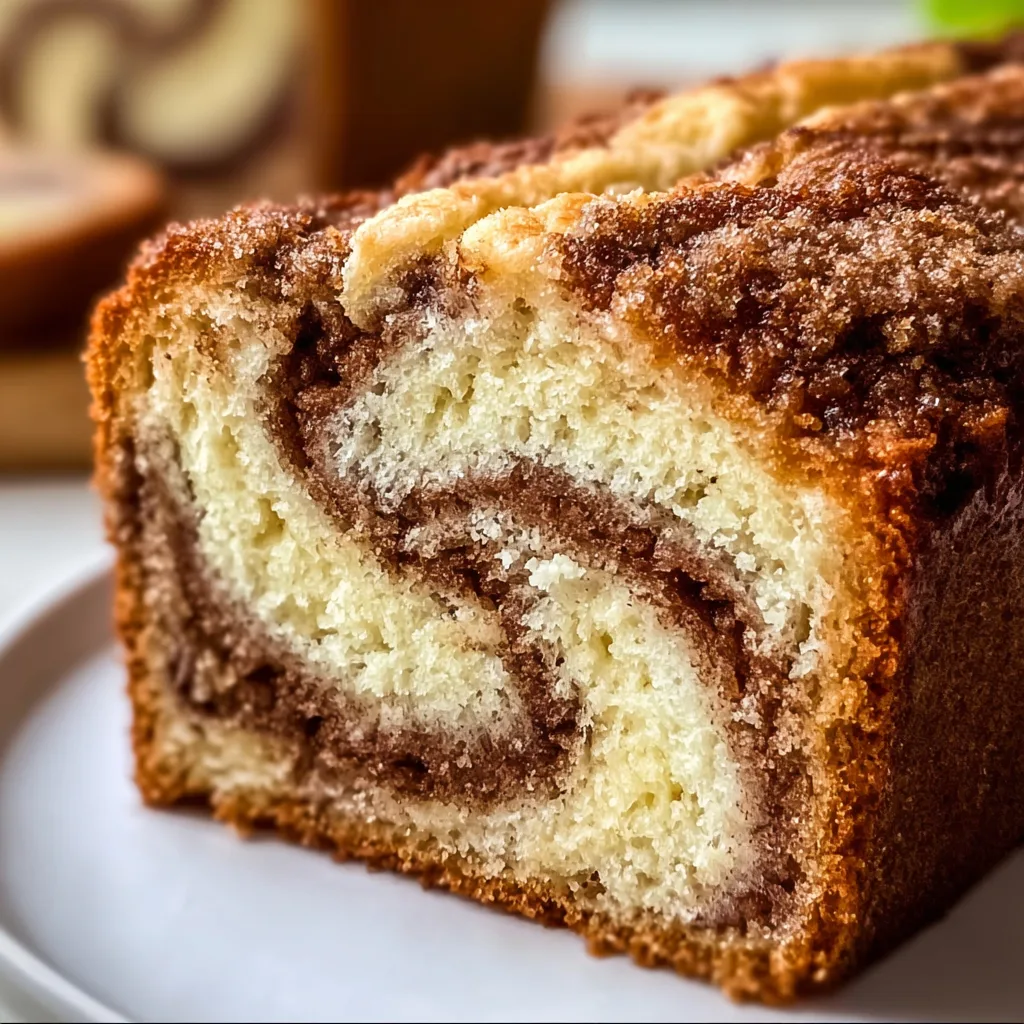
    This isn’t your ordinary banana bread. The cream cheese layer creates pockets of tangy richness that perfectly counterbalance the sweet, moist banana bread base. Each bite offers a different experience – sometimes you’ll get the warmth of cinnamon, other times the creamy richness of cheese. I love how the top develops a slightly crisp edge while the inside stays impossibly tender. The cinnamon swirl creates beautiful ribbons throughout the loaf, making it as gorgeous to look at as it is delicious to eat. Your taste buds will dance between sweet, tangy, and warmly spiced notes.

    Simple Ingredients, Extraordinary Results

    What makes this recipe truly special is how everyday ingredients transform into something extraordinary. You likely have most of these items in your pantry already – ripe bananas (the spottier the better!), cream cheese, cinnamon, and basic baking staples. I remember making this during a snowstorm when grocery runs weren’t an option, and it still turned out magnificent. The magic happens in how these simple ingredients interact: the natural enzymes in overripe bananas create a deeper flavor, while the fat in cream cheese adds moisture that keeps the bread fresh for days. It’s kitchen alchemy at its finest!

    Essential Tips & Tricks

    Mastering the Perfect Swirl

    The secret to those gorgeous cinnamon ribbons lies in the technique. After preparing your batters, alternate dollops of banana mixture and cream cheese mixture in your loaf pan. Then, take a butter knife and gently swirl in a figure-eight pattern – but don’t overdo it! Three or four passes through the batter is plenty. I learned this the hard way after once creating a muddled mess by over-swirling. Remember to reserve some cinnamon-sugar mixture for sprinkling on top before baking. This creates a delightful crackly crust that adds wonderful texture contrast to the soft interior. Your patience during this step pays off beautifully.

    Banana Selection and Preparation

    For truly exceptional banana bread, banana ripeness is non-negotiable. Look for bananas with abundant brown spots or even mostly black peels – these contain more sugar and flavor compounds. If your bananas aren’t quite ready, try placing them in a paper bag with an apple to speed ripening. When mashing, leave some small chunks for texture variation. I prefer using a fork rather than a blender for more control over the consistency. The natural moisture in overripe bananas contributes to the bread’s tender crumb, so resist the urge to use underripe fruit, which will result in drier, less flavorful bread.

    Serving Ideas & Creative Variations

    Perfect Pairings for Any Occasion

    This versatile treat shines in so many settings. For breakfast, try warming a slice and adding a small pat of salted butter that melts into all the crevices. For dessert, top with a scoop of vanilla ice cream or a dollop of whipped cream. I love serving this at brunches alongside savory dishes like my Cream Cheese Avocado Bacon Bites for a perfect sweet-savory balance. For afternoon tea, cut into smaller squares and arrange on a tiered tray with fresh berries. The bread also makes a thoughtful homemade gift – wrap a loaf in parchment paper, tie with twine, and attach a handwritten note for a personal touch.

    Seasonal and Dietary Adaptations

    The beauty of this recipe is how easily it adapts to dietary needs and seasonal variations. For gluten-free guests, substitute a 1:1 gluten-free flour blend. Dairy-free? Try plant-based cream cheese alternatives that still provide that tangy richness. In fall, add a tablespoon of pumpkin pie spice to the batter for autumn warmth. Summer brings opportunities for adding fresh blueberries or strawberries to the batter. I’ve even created a tropical version with coconut flakes and a teaspoon of rum extract that transported me straight to vacation mode. The versatility makes this bread a year-round favorite that never gets boring.

    Storage & Troubleshooting Guide

    Keeping Your Bread Fresh

    The moisture retention in this bread is remarkable thanks to the cream cheese and bananas. Store at room temperature in an airtight container for up to 3 days, though I doubt it will last that long! For longer storage, wrap individual slices in plastic wrap, then place in a freezer bag for up to 3 months. When ready to enjoy, thaw at room temperature or microwave for 20-30 seconds. I like to slice the entire loaf before freezing for easy single servings. The cream cheese swirl actually helps the bread maintain its moisture even after freezing, making this an excellent make-ahead treat.

    Solving Common Baking Issues

    If your bread isn’t rising properly, check if your baking powder is fresh – it loses potency after about 6 months. For sinking middles, your oven temperature may be too high initially; consider getting an oven thermometer to verify accuracy. If the top browns too quickly before the center is done, loosely tent with foil halfway through baking. Underbaking results in a gummy texture, while overbaking creates dryness. The perfect doneness test: a toothpick inserted in the center should come out with a few moist crumbs, but no wet batter. Remember that the bread continues cooking slightly as it cools in the pan.

    Frequently Asked Questions

    Can I make Cream Cheese Cinnamon Swirl Banana Bread without eggs?

    Yes! Replace each egg with either ¼ cup applesauce or a flax egg (1 tablespoon ground flaxseed mixed with 3 tablespoons water, left to gel for 15 minutes). The texture will be slightly denser but still delicious.

    How ripe should my bananas be?

    The riper, the better! Look for bananas with abundant brown spots or even completely black peels. These contain more sugar and banana flavor that makes the bread incredibly moist and flavorful.

    Can I use low-fat cream cheese?

    Full-fat cream cheese provides the best texture and flavor, but you can use low-fat in a pinch. Avoid fat-free varieties as they contain stabilizers that don’t bake well and can make your swirl watery.

    Why did my cream cheese sink to the bottom?

    This happens when the cream cheese mixture is too thin. Make sure your cream cheese is at room temperature but not overly soft, and don’t overmix it with other ingredients. Adding 1 tablespoon of flour to the cheese mixture can help.

    Can I make this recipe as muffins instead?

    Absolutely! Pour the batter into lined muffin tins and reduce baking time to 18-22 minutes. This makes portion control easier and creates perfect grab-and-go breakfast options.

    Final Thoughts

    This Cream Cheese Cinnamon Swirl Banana Bread has become my signature bake for good reason. It transforms simple ingredients into something truly special – a treat that bridges the gap between everyday snack and decadent dessert. The contrast between tangy cream cheese, sweet bananas, and warm cinnamon creates complexity that keeps everyone coming back for “just one more slice.” I’d love to see your creations on Pinterest – tag me when you make this recipe! Remember, the most important ingredient is the love you put into making it. Happy baking!

  • Fresh Pasta Salad Recipe That Will Wow Your Taste Buds!

    Fresh Pasta Salad Recipe That Will Wow Your Taste Buds!

    Fresh Pasta Salad Recipe That Will Wow Your Taste Buds!

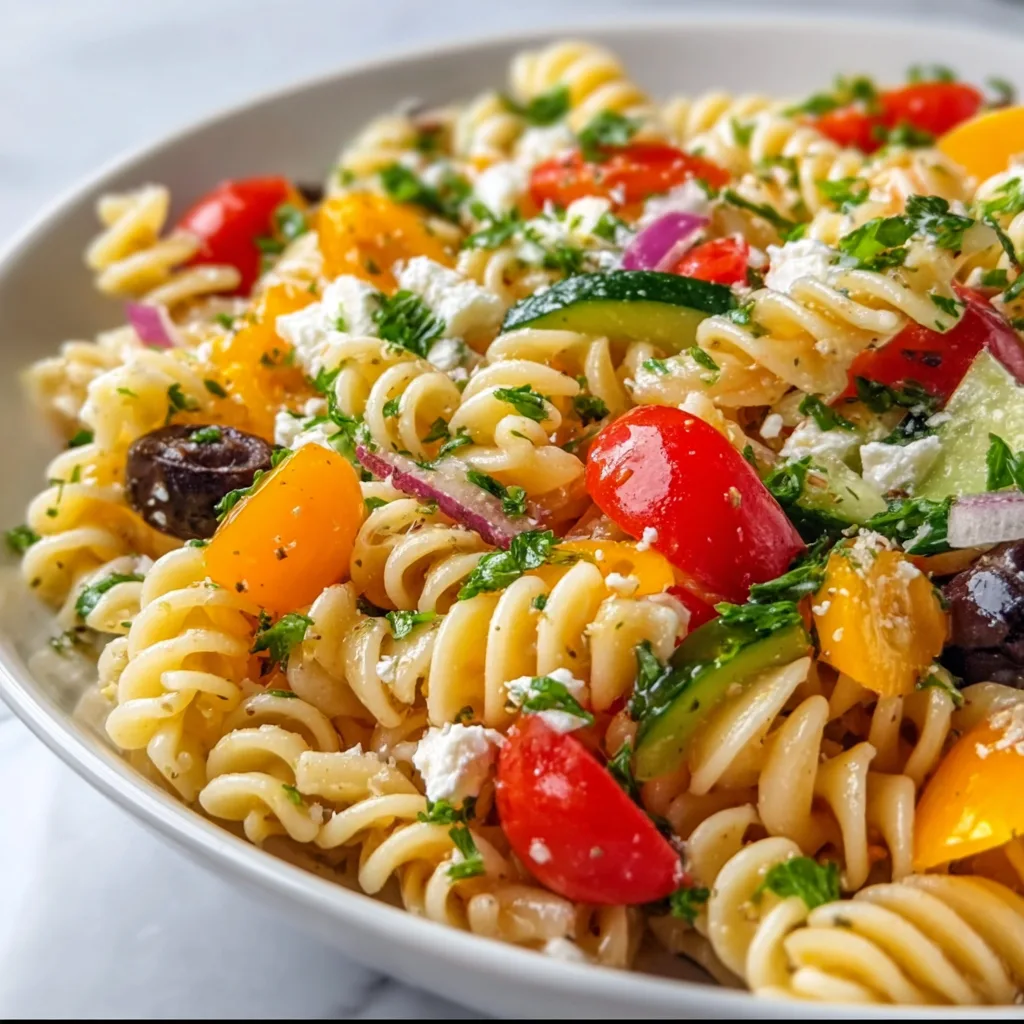
    Fresh pasta salad recipe is my ultimate summer savior—a vibrant medley of al dente pasta, crisp vegetables, and zesty dressing that never fails to brighten up any gathering. The first time I made this for my sister’s backyard party, it disappeared faster than I could refill my own plate! There’s something magical about the way the flavors meld together, creating that perfect balance of tangy, savory, and fresh. Whether you’re planning a picnic, need a quick lunch, or craving something refreshing for dinner, this pasta salad delivers big flavor with minimal effort. Let me show you how to create this colorful bowl of happiness that’s become my go-to recipe staple.

    Recipe

    Why You’ll Love This Fresh Pasta Salad Recipe

    Perfect Make-Ahead Option

    There’s nothing quite like opening the fridge to find a ready-made meal waiting for you. This fresh pasta salad recipe actually improves with time as the flavors marry together in the refrigerator. I love making a big batch on Sunday afternoons while my favorite playlist fills the kitchen. The pasta soaks up all those incredible flavors overnight, making Monday’s lunch something to look forward to rather than dread. Plus, it’s incredibly versatile—you can add protein like grilled chicken or chickpeas to transform it from side dish to satisfying main course without any extra fuss.

    Customizable to Your Taste

    One of the greatest joys of this fresh pasta salad recipe is how easily it adapts to whatever you’re craving or whatever’s in your fridge. Those cherry tomatoes starting to wrinkle? Toss them in! Cucumber looking lonely in the produce drawer? Chop it up! The base formula remains the same—pasta, veggies, dressing—but the specifics are entirely up to you. I’ve made Mediterranean versions with feta and olives, Italian-inspired ones with mozzarella and basil, and even spicy Southwest variations with corn and black beans. Your imagination is truly the only limit here.

    Essential Tips & Tricks

    Pasta Selection and Preparation

    Choosing the right pasta makes all the difference in your fresh pasta salad recipe. I always reach for medium-sized shapes with nooks and crannies that trap the dressing—think rotini, farfalle, or fusilli rather than long spaghetti or fettuccine. Always cook your pasta al dente (with a bit of bite) since it will continue to soften slightly as it absorbs the dressing. My non-negotiable step? Rinsing the pasta in cold water immediately after cooking. This stops the cooking process and prevents your pasta from becoming a mushy mess. Plus, a drizzle of olive oil after rinsing keeps those pieces perfectly separated.

    Dressing Development

    The dressing is the heart and soul of any fresh pasta salad recipe. I like to create a balance of flavors—something acidic (lemon juice or vinegar), something sweet (honey or maple syrup), something savory (Dijon mustard), and quality oil. Whisk these elements together until emulsified before pouring over your salad. My secret weapon? Adding a splash of the pasta cooking water to the dressing. The starchy water helps the dressing cling to every piece of pasta rather than pooling at the bottom of your bowl. For extra zing, try this alongside my dill pickle pasta salad for a fun contrast of flavors!

    Serving Ideas & Creative Variations

    Perfect Pairings

    This fresh pasta salad recipe works beautifully as both supporting actor and star of the show. For summer barbecues, I love serving it alongside grilled proteins—the cool, tangy salad provides the perfect counterpoint to smoky meats. For lighter meals, a scoop alongside a crusty bread and some hummus creates a satisfying lunch. The colors alone make it a standout on any buffet table! Last weekend, I paired it with my baked salmon and vibrant quinoa for a dinner party, and my guests couldn’t stop raving about how well they complemented each other.

    Seasonal Adaptations

    One of the joys of a versatile fresh pasta salad recipe is adapting it throughout the year. In summer, I load it with garden-fresh produce—juicy tomatoes, crisp cucumbers, and handfuls of herbs straight from my windowsill pots. Come fall, I pivot to roasted butternut squash, dried cranberries, and toasted pecans. Winter calls for heartier additions like roasted red peppers and artichoke hearts, while spring brings tender asparagus and sweet peas. The pasta provides a consistent canvas, but the seasonal vegetables keep the dish feeling new and exciting all year long.

    Storage & Troubleshooting Guide

    Maximizing Freshness

    To keep your fresh pasta salad recipe at its best, store it in an airtight container in the refrigerator for up to four days. I find glass containers work better than plastic for maintaining freshness and preventing any lingering odors. If you’re making this ahead for a party, hold back a small portion of the dressing to refresh the salad just before serving—this perks up the flavors instantly. For ingredients that might wilt or get soggy (like lettuce or avocado), consider adding those elements only to the portion you’ll be eating immediately rather than mixing them into the entire batch.

    Reviving Day-Old Pasta Salad

    Even the most perfect fresh pasta salad recipe might need a little help after sitting in the refrigerator overnight. The pasta continues to absorb dressing, sometimes leaving your once-vibrant salad a bit dry. My simple fix: keep a small jar of extra dressing in the fridge alongside your pasta salad. A quick drizzle and gentle toss brings everything back to life! Another trick I’ve discovered: adding a handful of fresh ingredients like cherry tomatoes or cucumber the next day introduces new texture and moisture. A sprinkle of fresh herbs or a squeeze of lemon juice can also wake up the flavors.

    Frequently Asked Questions

    Can I make this fresh pasta salad recipe gluten-free?

    Absolutely! Simply substitute your favorite gluten-free pasta. I recommend corn-rice blends as they hold their shape better than rice-only varieties. Just be sure to check all other ingredients for hidden gluten.

    How far in advance can I make pasta salad?

    You can prepare this salad up to 3 days ahead. For maximum freshness, store the dressing separately and combine a few hours before serving to allow flavors to meld without becoming soggy.

    What’s the best way to prevent pasta from sticking together?

    Rinse cooked pasta thoroughly with cold water, then toss with a tablespoon of olive oil while still in the colander. Add dressing while pasta is still slightly warm for better absorption.

    Can I add protein to make this a complete meal?

    Definitely! Grilled chicken, canned tuna, chickpeas, or cubed cheese are excellent additions that transform this side dish into a satisfying main course with minimal effort.

    How do I fix a pasta salad that’s too dry?

    If your salad seems dry after refrigeration, whisk together a quick mixture of olive oil, vinegar, and a pinch of salt. Add gradually while gently tossing until desired moisture is restored.

    Final Thoughts

    This fresh pasta salad recipe has become my reliable kitchen companion through countless gatherings, meal preps, and impromptu dinners. Its adaptability means it never gets boring, while its make-ahead nature makes it perfect for busy lives. I love watching friends’ faces light up when they taste that perfect balance of flavors—tangy, fresh, and satisfying all at once. Whether you’re a cooking novice or seasoned chef, this versatile dish deserves a spot in your regular rotation. Don’t forget to share your creations on Pinterest for inspiration!

  • Raspberry Cream Cheese Coffee Cake That Will Melt Your Heart!

    Raspberry Cream Cheese Coffee Cake That Will Melt Your Heart!

    Raspberry Cream Cheese Coffee Cake That Will Melt Your Heart!

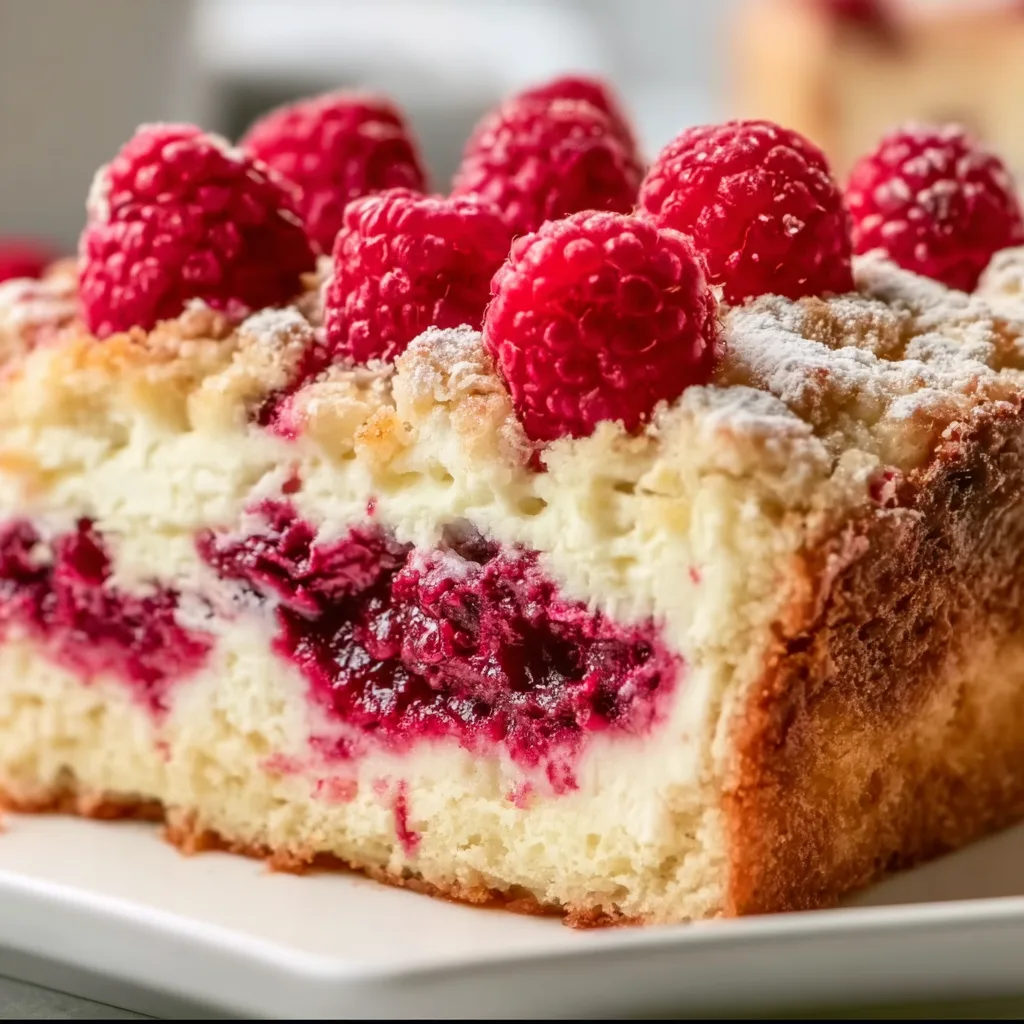
    There’s something undeniably magical about a Raspberry Cream Cheese Coffee Cake that makes ordinary mornings feel special. The tender, buttery crumb paired with tangy cream cheese and bursts of sweet-tart raspberries creates a symphony of flavors that dance across your taste buds with each bite. I first made this cake for a Sunday brunch with friends, and the way their eyes lit up when I sliced into those beautiful ruby-streaked layers told me everything I needed to know. This recipe has become my go-to when I want something that feels indulgent yet balanced—perfect alongside your morning coffee or as an afternoon pick-me-up.

    Recipe

    Why You’ll Love This Raspberry Cream Cheese Coffee Cake

    Perfect Balance of Flavors and Textures

    This coffee cake hits all the right notes with its perfect contrast of textures—from the tender, moist cake to the creamy cheese layer and juicy raspberry ribbons. What makes it truly special is how the tanginess of the cream cheese balances the sweetness of the cake and fruit. The slight crunch from the streusel topping adds another dimension that makes each bite interesting. I love watching people take their first bite and experience that moment of surprise when they discover the hidden cream cheese layer. It’s like unwrapping a delicious present with every forkful!

    Make-Ahead Convenience

    One of the greatest things about this Raspberry Cream Cheese Coffee Cake is its impressive staying power. You can bake it the evening before a gathering and it’s actually even better the next day when the flavors have had time to meld together. This has saved me countless times when hosting brunch—I can focus on my guests instead of being stuck in the kitchen. The cake also freezes beautifully, which means you can always have a special treat ready for unexpected visitors or those mornings when you deserve something extraordinary with your coffee.

    Essential Tips & Tricks

    Perfecting the Cream Cheese Layer

    The secret to a velvety cream cheese layer is all about temperature and timing. Always use room temperature cream cheese—I leave mine out for at least an hour before mixing. Cold cream cheese will leave you with frustrating lumps that never fully incorporate. When spreading the cream cheese mixture, leave a small border around the edges to prevent it from seeping out during baking. I learned this the hard way after one memorable cake became a cream cheese volcano! For extra flavor dimension, try adding a hint of lemon zest to the cream cheese mixture—it brightens everything up beautifully.

    Raspberry Handling Techniques

    When working with raspberries, gentle handling is key to maintaining their delicate structure. I prefer using fresh berries when they’re in season and at their peak flavor, but good-quality frozen raspberries work wonderfully too. If using frozen, don’t thaw them completely—partially thawed berries are easier to fold into the batter without bleeding too much color. For a more intense raspberry presence, try swirling some raspberry freezer jam through the batter along with the whole berries. This creates pockets of concentrated flavor that make each bite an adventure.

    Serving Ideas & Creative Variations

    Elegant Presentation Options

    Transform your Raspberry Cream Cheese Coffee Cake from everyday treat to showstopper with a few simple garnishes. Just before serving, dust the top with powdered sugar for an elegant, bakery-worthy finish. For special occasions, arrange fresh raspberries and mint leaves on top, or drizzle with a thin white glaze that sets with beautiful crackling patterns. I love serving individual slices on vintage plates with a dollop of lightly sweetened whipped cream on the side. The contrast of the cool cream against the warm cake (if you heat slices briefly) creates a sensory experience that guests always remember.

    Seasonal and Dietary Adaptations

    This versatile recipe welcomes adaptation based on seasons or dietary needs. In summer, try substituting blackberries or blueberries for a different flavor profile. For fall, cinnamon-spiced apple slices create a cozy variation that pairs beautifully with the cream cheese. To make this cake gluten-free, substitute a high-quality cup-for-cup gluten-free flour blend—just watch the baking time as it might need a few extra minutes. For a dairy-free version, plant-based cream cheese alternatives work surprisingly well, though the texture will be slightly different. The beauty of this cake is how it evolves with your needs!

    Storage & Troubleshooting Guide

    Optimal Storage Methods

    To maintain the perfect texture of your coffee cake, proper storage is essential. At room temperature, cover loosely with foil or place in a cake dome for up to 2 days. For longer storage, refrigerate in an airtight container for up to 5 days—the cream cheese layer makes refrigeration necessary after the initial day. Always bring refrigerated slices to room temperature before serving to restore that melt-in-your-mouth quality. For freezing, wrap individual slices tightly in plastic wrap, then foil, and freeze for up to 3 months. I like labeling each package with the date so I’m never guessing about freshness.

    Fixing Common Baking Issues

    Even experienced bakers encounter challenges! If your cake sinks in the middle, it’s likely underbaked or was opened too early during baking—resist peeking until at least 30 minutes have passed. For a cake that’s browning too quickly but remains undercooked inside, loosely tent with foil for the remaining bake time. If your raspberries sink to the bottom, try tossing them in a tablespoon of flour before adding to the batter. And if your cream cheese layer disappears into the cake, make sure it’s spread evenly and that the batter layers are distinct before baking. Remember, even “imperfect” coffee cake is still delicious coffee cake!

    Frequently Asked Questions

    Can I make Raspberry Cream Cheese Coffee Cake ahead of time?

    Absolutely! This cake actually tastes better the next day as flavors meld overnight. Bake it up to 24 hours in advance, cool completely, and store covered at room temperature or refrigerated if your kitchen is warm.

    How do I prevent my berries from sinking to the bottom?

    Toss your raspberries in 1-2 tablespoons of flour before folding them into the batter. This light coating helps suspend them throughout the cake during baking.

    Can I substitute other berries in this coffee cake?

    Yes! Blueberries, blackberries, or strawberries work beautifully. Just make sure to adjust sweetness if using more tart berries like blackberries.

    Why did my cream cheese layer disappear?

    Your batter might have been too thin or the cream cheese mixture too soft. Chill the cream cheese layer for 15 minutes before adding the top layer of batter for better definition.

    How can I tell when my Raspberry Cream Cheese Coffee Cake is done?

    Insert a toothpick into the center—it should come out with a few moist crumbs but no wet batter. The cake should also spring back slightly when touched.

    Final Thoughts

    This Raspberry Cream Cheese Coffee Cake has become more than just a recipe in my kitchen—it’s a reliable friend for celebrations big and small. The way it bridges the gap between breakfast and dessert makes it uniquely versatile, while the beautiful contrast of tangy cream cheese and sweet-tart raspberries keeps everyone coming back for “just one more slice.” Whether you’re sharing it with loved ones or savoring a quiet moment alone, this coffee cake has a way of making ordinary days feel special. For more delightful baking inspiration, visit my Pinterest board where I’m always sharing seasonal favorites!