Blog

  • Baked Chili Mac Stuffed Peppers That Will Blow Your Mind!

    Baked Chili Mac Stuffed Peppers That Will Blow Your Mind!

    Baked Chili Mac Stuffed Peppers That Will Blow Your Mind!

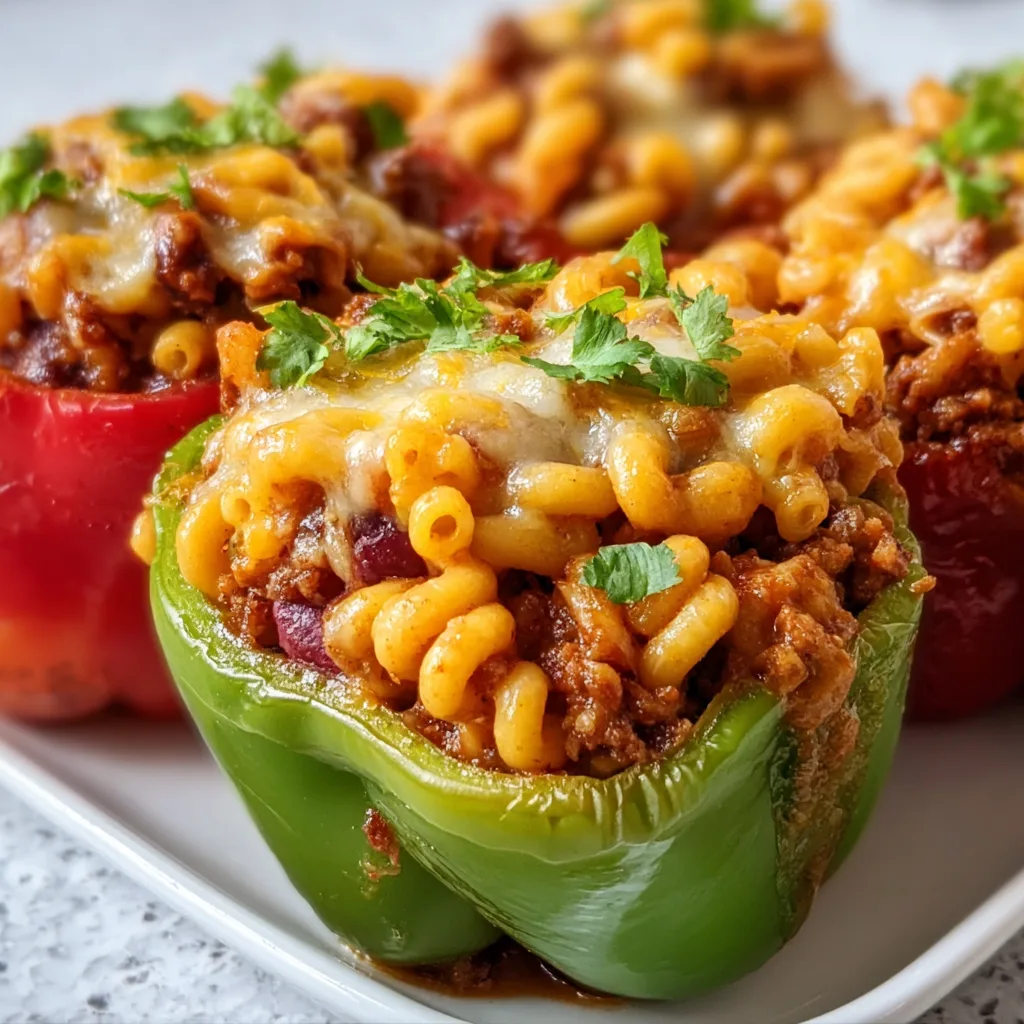
    Baked Chili Mac Stuffed Peppers combine two comfort food classics into one irresistible dish that’s both impressive and easy to make. The first time I made these for my family, my kitchen filled with the most mouthwatering aroma of spices, cheese, and roasted peppers. There’s something magical about the way the sweet bell peppers cradle that hearty, cheesy chili mac filling. It’s like getting a perfect bite of flavor in every colorful pepper boat! If you’re looking for a creative way to use up leftover chili or mac and cheese, this recipe is about to become your new favorite dinner solution.

    Recipe

    Why You’ll Love This Baked Chili Mac Stuffed Peppers

    A Complete Meal in One Dish

    These Baked Chili Mac Stuffed Peppers are the ultimate all-in-one meal that satisfies every craving. The tender bell peppers provide a serving of vegetables while adding natural sweetness that balances the savory, spiced chili mac filling. I love how the peppers soften in the oven but still maintain enough structure to hold that gooey, cheesy goodness inside. Plus, they’re incredibly filling! The combination of protein-packed ground beef, fiber-rich beans, and hearty pasta means you won’t need to worry about making side dishes. It’s comfort food that actually feels good to eat.

    Make-Ahead and Meal Prep Friendly

    One of my favorite things about Baked Chili Mac Stuffed Peppers is how wonderfully they work for meal planning. You can prep these entirely the day before – stuff those peppers, cover the baking dish, and refrigerate until you’re ready to bake. The flavors actually develop overnight, making them even more delicious! I often make a double batch on Sunday and enjoy them throughout the week. They reheat beautifully in the microwave or oven without losing their texture. For busy weeknights, it’s such a relief to have these colorful, nutritious powerhouses waiting in the fridge. Just 30 minutes in the oven and dinner is served!

    Essential Tips & Tricks

    Pepper Preparation Perfection

    Choosing the right peppers makes all the difference in this dish. Look for bell peppers with flat bottoms so they stand upright in your baking dish without tipping over. I prefer using a rainbow of colors – red, yellow, and orange peppers are slightly sweeter than green ones and create a beautiful presentation. When cutting the tops, leave about ¾ of the pepper intact and carefully remove all seeds and membranes. A little tip I discovered: par-bake your empty peppers for 10 minutes before stuffing them. This pre-cooking step ensures they’ll be perfectly tender by the time your filling is hot and bubbly, avoiding that dreaded raw pepper crunch.

    Creating the Perfect Filling

    The heart of these Baked Chili Mac Stuffed Peppers is the flavorful filling that brings together the best of chili and mac and cheese. I recommend using a medium-sized pasta like elbow macaroni or small shells that will easily fit inside the peppers. Cook your pasta just shy of al dente since it will continue cooking in the oven. For the chili component, don’t skimp on the spices! A blend of chili powder, cumin, smoked paprika, and a dash of cayenne creates depth without overwhelming heat. The secret to that creamy, cohesive texture? Stir in some cream cheese along with the shredded cheddar. It melts beautifully and binds everything together.

    Serving Ideas & Creative Variations

    Toppings and Garnishes

    The beauty of Baked Chili Mac Stuffed Peppers lies in the endless topping possibilities. My family loves setting up a little topping bar so everyone can customize their peppers. Fresh cilantro, sliced green onions, and a dollop of sour cream are classics that cool down the spice. For texture contrast, try crushed tortilla chips or crispy fried onions sprinkled over the top just before serving. A squeeze of lime brightens everything up beautifully. My personal favorite finishing touch? A drizzle of hot honey that creates this amazing sweet-heat combo. Don’t forget extra cheese options like crumbled cotija or queso fresco for those who want to take the cheesiness to the next level.

    Dietary Adaptations

    One thing I absolutely love about this recipe is how easily it adapts to different dietary needs. For a vegetarian version, simply swap the ground beef for black beans, pinto beans, or even a plant-based ground meat alternative. The flavor profile works perfectly with these substitutions! Going low-carb? Replace the pasta with cauliflower rice or extra beans. For dairy-free friends, nutritional yeast and dairy-free cheese alternatives melt surprisingly well in this application. Need it gluten-free? Just use your favorite gluten-free pasta – the shorter shapes tend to work best. These adaptations never feel like compromises because the core flavors of these stuffed peppers shine through regardless.

    Storage & Troubleshooting Guide

    Proper Storage Methods

    These Baked Chili Mac Stuffed Peppers are meal prep champions that store beautifully for future enjoyment. Once cooled completely, place leftovers in an airtight container and refrigerate for up to 4 days. The flavors actually continue to develop, making day-two peppers sometimes even tastier! For longer storage, freeze individual peppers wrapped tightly in foil and placed in freezer bags for up to 3 months. I like to label them with the date and reheating instructions. When ready to enjoy, thaw overnight in the refrigerator before reheating. A little trick I’ve found: sprinkle a tablespoon of water over the peppers before reheating to maintain moisture.

    Fixing Common Issues

    Even experienced cooks occasionally encounter challenges with stuffed peppers. If your peppers won’t stand upright, create a stable base by slicing a thin piece off the bottom – just be careful not to cut through to the hollow center. For filling that’s too dry after baking, stir in a splash of warm beef broth or tomato sauce before serving. Too watery? Next time, drain your beans and tomatoes more thoroughly or add a tablespoon of cornstarch to the mixture. If the peppers are still too firm after baking, cover the dish with foil for the first 20 minutes of baking to steam them properly.

    For peppers that split during baking, simply serve them “fallen over” style with extra sauce and cheese on top!

    Frequently Asked Questions

    Can I make Baked Chili Mac Stuffed Peppers ahead of time?

    Absolutely! Prepare and stuff the peppers up to 24 hours in advance, cover with plastic wrap, and refrigerate. Add an extra 5-10 minutes to the baking time when cooking from cold.

    What’s the best cheese for Baked Chili Mac Stuffed Peppers?

    A combination works best – sharp cheddar provides flavor while monterey jack or mozzarella delivers that perfect stretchy texture. For extra richness, mix in 2 tablespoons of cream cheese.

    Can I freeze these stuffed peppers?

    Yes! Freeze fully cooked and cooled peppers individually wrapped in foil, then stored in freezer bags for up to 3 months. Thaw overnight before reheating.

    What sides go well with this dish?

    Keep it simple with a fresh green salad, crusty bread, or corn on the cob. The peppers are already a complete meal with protein, vegetables, and carbs.

    How can I make these spicier?

    Add diced jalapeños or a tablespoon of hot sauce to the filling mixture. You can also top with sliced serrano peppers or red pepper flakes before serving.

    Final Thoughts

    Baked Chili Mac Stuffed Peppers represent comfort food at its finest – familiar flavors transformed into something special that nourishes both body and soul. I love how they bring together the hearty satisfaction of chili mac with the colorful presentation of stuffed peppers. They’ve become a regular in my dinner rotation not just because they’re delicious, but because they’re so versatile and crowd-pleasing. Whether you’re cooking for a family dinner, meal prepping for the week, or impressing guests, these stuffed peppers deliver every time. Don’t forget to check out more comfort food inspiration on Pinterest!
  • Asian Dumpling Lasagna Soy: Irresistibly Delicious & Easy Recipe!

    Asian Dumpling Lasagna Soy: Irresistibly Delicious & Easy Recipe!

    Asian Dumpling Lasagna Soy: Irresistibly Delicious & Easy Recipe!

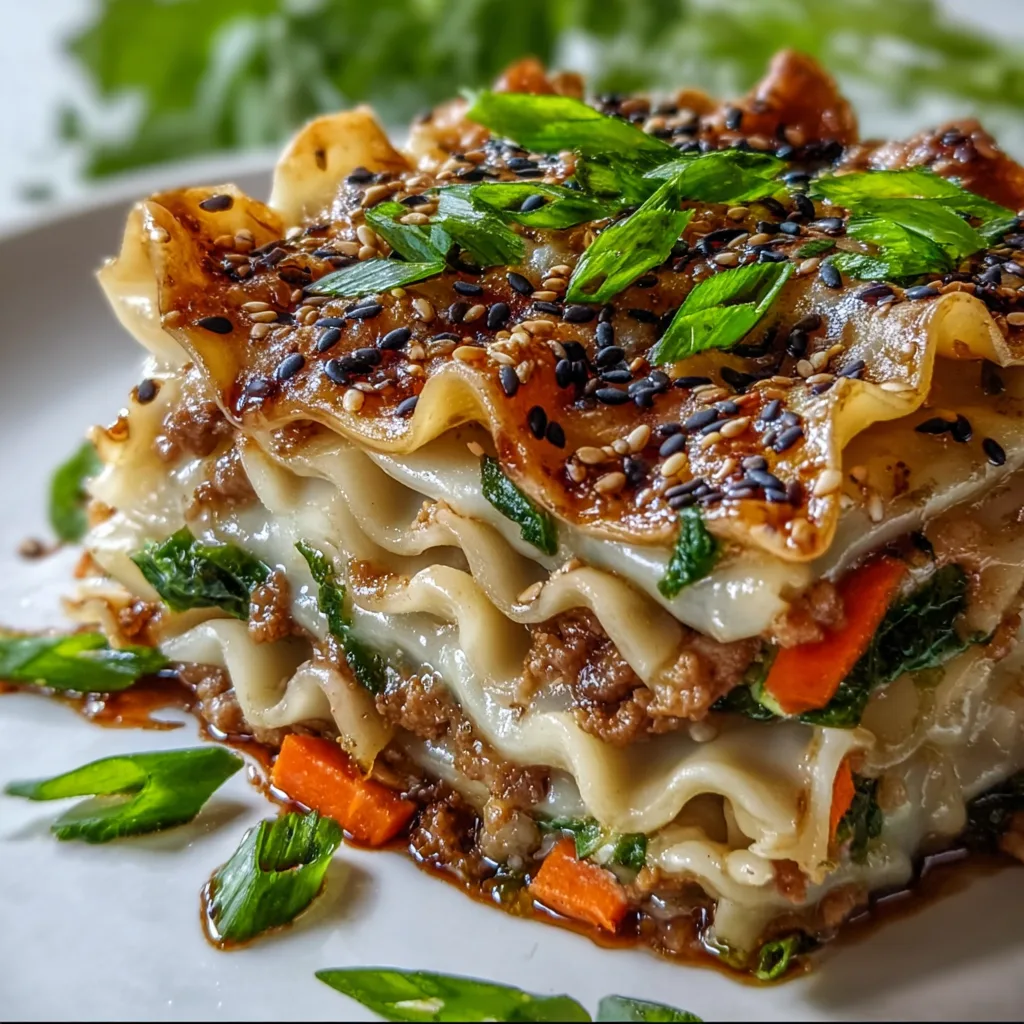
    Asian Dumpling Lasagna Soy fusion is my newest obsession, combining the best of both culinary worlds into one spectacular dish. The first time I layered those delicate dumpling wrappers with savory soy-infused filling, my kitchen filled with an aroma that transported me straight to my favorite dim sum restaurant. This creative twist marries traditional Italian comfort food with vibrant Asian flavors, resulting in a dish that’s both familiar and excitingly new. The umami-rich soy sauce creates depth while the dumpling wrappers offer a silky texture that’s utterly irresistible. If you’ve been looking for a crowd-pleaser that breaks the mold, you’ll find it in this delicious fusion creation.

    Recipe

    Why You’ll Love This Asian Dumpling Lasagna Soy

    Perfect Fusion of Flavors

    This dish brings together the comforting layers of traditional lasagna with the vibrant umami punch of Asian ingredients. The dumpling wrappers create delicate, silky layers that absorb the rich soy-based sauce beautifully. I was skeptical the first time I tried substituting pasta sheets with dumpling wrappers, but the result was mind-blowing! They maintain their integrity while soaking up all those gorgeous flavors. The soy sauce adds that perfect savory depth that marries the Asian and Italian elements seamlessly. Every bite delivers a harmonious balance that will have your taste buds dancing between familiar comfort and exciting new territory.

    Impressive Yet Approachable

    Don’t let the fusion concept intimidate you – this Asian Dumpling Lasagna Soy recipe is surprisingly weeknight friendly. The components come together more quickly than traditional lasagna, with dumpling wrappers requiring no pre-boiling. I’ve served this at dinner parties to wide-eyed amazement, yet it’s simple enough for a Tuesday night family meal. The layers create a stunning presentation when sliced, revealing distinct strata of filling and wrappers. Your guests will think you spent hours in the kitchen, but your secret is safe with me! The combination of accessible ingredients with an unexpected presentation makes this dish perfect for both special occasions and everyday dining.

    Essential Tips & Tricks

    Perfecting Your Dumpling Wrapper Layers

    The key to exceptional Asian Dumpling Lasagna Soy lies in how you handle those delicate wrappers. Unlike pasta, dumpling wrappers are much thinner and more delicate, requiring gentle handling. I learned the hard way that overlapping them slightly creates the perfect foundation – about ¼ inch overlap prevents gaps while cooking. Keep unused wrappers covered with a damp cloth as you work to prevent them from drying out and cracking. When layering, brush each wrapper lightly with a mixture of sesame oil and soy sauce to enhance flavor and prevent sticking. This simple step transforms the texture and flavor profile dramatically, creating distinct layers that hold together beautifully when served.

    Balancing Your Soy Sauce Mixture

    Finding the right soy sauce balance is crucial to avoid overwhelming the dish with saltiness. I recommend using low-sodium soy as your base and enhancing it with other flavors. My perfect ratio is 3 tablespoons low-sodium soy sauce, 1 tablespoon dark soy (for color and depth), 2 teaspoons rice vinegar, and 1 teaspoon honey to balance. This creates a complex flavor without the salt bomb effect. Remember that the soy will concentrate as it cooks, so what might taste perfect in the bowl could become too intense in the final dish. If you’re concerned about saltiness, try making your own dipping sauce to serve alongside rather than incorporating all the soy directly into the layers.

    Serving Ideas & Creative Variations

    Complementary Side Dishes

    This Asian Dumpling Lasagna Soy pairs beautifully with lighter sides that balance its rich, savory profile. I love serving it with a crisp cucumber salad dressed simply with rice vinegar, a touch of sugar, and sesame seeds. The cool crunch provides the perfect contrast to the warm, layered lasagna. Steamed baby bok choy with a light drizzle of oyster sauce makes another excellent companion, adding a fresh green element to the plate. For a more substantial meal, consider garlic-fried rice or even a simple miso soup to start. The key is choosing sides that complement rather than compete with the complex flavors in your main dish, creating a harmonious Asian-inspired meal.

    Protein and Dietary Adaptations

    The beauty of this Asian Dumpling Lasagna Soy lies in its versatility for different dietary needs. Traditional ground pork or beef works wonderfully, but don’t stop there! For seafood lovers, a mixture of chopped shrimp and scallops creates an elegant variation with delicate sweetness. Vegetarians can enjoy a hearty filling of finely chopped shiitake mushrooms, crumbled tofu, and shredded cabbage that mimics the texture of meat while absorbing all those wonderful soy flavors. For vegan adaptations, substitute the egg wash with cornstarch slurry to help bind the layers. Those watching carbs can try using thinly sliced zucchini or eggplant in place of some dumpling wrapper layers for a lighter version that still captures the essence of this fusion dish.

    Storage & Troubleshooting Guide

    Proper Storage and Reheating

    This Asian Dumpling Lasagna Soy actually improves with a day of rest, making it perfect for make-ahead meals. Store leftovers in an airtight container in the refrigerator for up to 3 days. The flavors will continue to meld, creating an even more delicious experience when reheated. For best results, reheat individual portions in the microwave at 70% power with a damp paper towel over the top to prevent the wrappers from drying out. If reheating the entire lasagna, cover with foil and warm in a 325°F oven for about 20 minutes until heated through. Freezing is also an option – cut into individual portions first, wrap tightly in plastic wrap and foil, then freeze for up to 1 month.

    Troubleshooting Common Issues

    The most frequent challenge with Asian Dumpling Lasagna Soy is managing the moisture balance. If your lasagna turns out too watery, it’s likely from vegetables releasing excess liquid during cooking. Pre-cook and drain vegetables thoroughly before adding to your filling mixture. Another common issue is wrappers tearing during assembly – work on a clean, dry surface and handle them with care. If the final dish seems too dry, brush a mixture of soy sauce and chicken broth between layers next time. For lasagna that falls apart when serving, allow it to rest 15-20 minutes after baking to set properly. This cooling period makes all the difference between a sloppy mess and beautiful, distinct layers that hold their shape on the plate.

    Frequently Asked Questions

    Can I make Asian Dumpling Lasagna Soy ahead of time?

    Absolutely! Assemble the entire lasagna up to 24 hours in advance, cover tightly with plastic wrap, and refrigerate. Remove from the refrigerator 30 minutes before baking. The flavors actually develop beautifully during this rest time.

    What’s the best type of dumpling wrapper to use?

    Look for round gyoza or wonton wrappers in the refrigerated section of Asian markets or well-stocked grocery stores. Square wrappers work too, but round ones create more even layers with less overlap.

    Can I freeze leftovers?

    Yes! Portion cooled leftovers into individual servings, wrap tightly in plastic wrap then foil, and freeze for up to 1 month. Thaw overnight in the refrigerator before reheating.

    How can I make this spicier?

    Add 1-2 teaspoons of chili oil, sambal oelek, or sriracha to your soy sauce mixture. Alternatively, include finely diced fresh chilies in your filling for heat throughout the dish.

    What vegetables work best in Asian Dumpling Lasagna Soy filling?

    Vegetables that don’t release excessive moisture work best: finely diced bell peppers, shredded carrots, chopped spinach (squeezed dry), mushrooms, and green onions all complement the soy flavors beautifully.

    Final Thoughts

    This Asian Dumpling Lasagna Soy represents everything I love about modern cooking – fearlessly crossing culinary boundaries to create something uniquely delicious. The marriage of delicate dumpling wrappers with rich, umami-packed soy filling creates a dish that honors both traditions while becoming something entirely new. Don’t be afraid to make it your own with personal touches and adaptations. The joy of cooking comes from these creative moments! I’d love to see your creations on Pinterest – tag me in your fusion masterpieces and let me know how your family enjoyed this cross-cultural delight!

  • Garlic Herb Dutch Oven Bread – Irresistibly Fresh & Flavor-Packed!

    Garlic Herb Dutch Oven Bread – Irresistibly Fresh & Flavor-Packed!

    Garlic Herb Dutch Oven Bread - Irresistibly Fresh & Flavor-Packed!

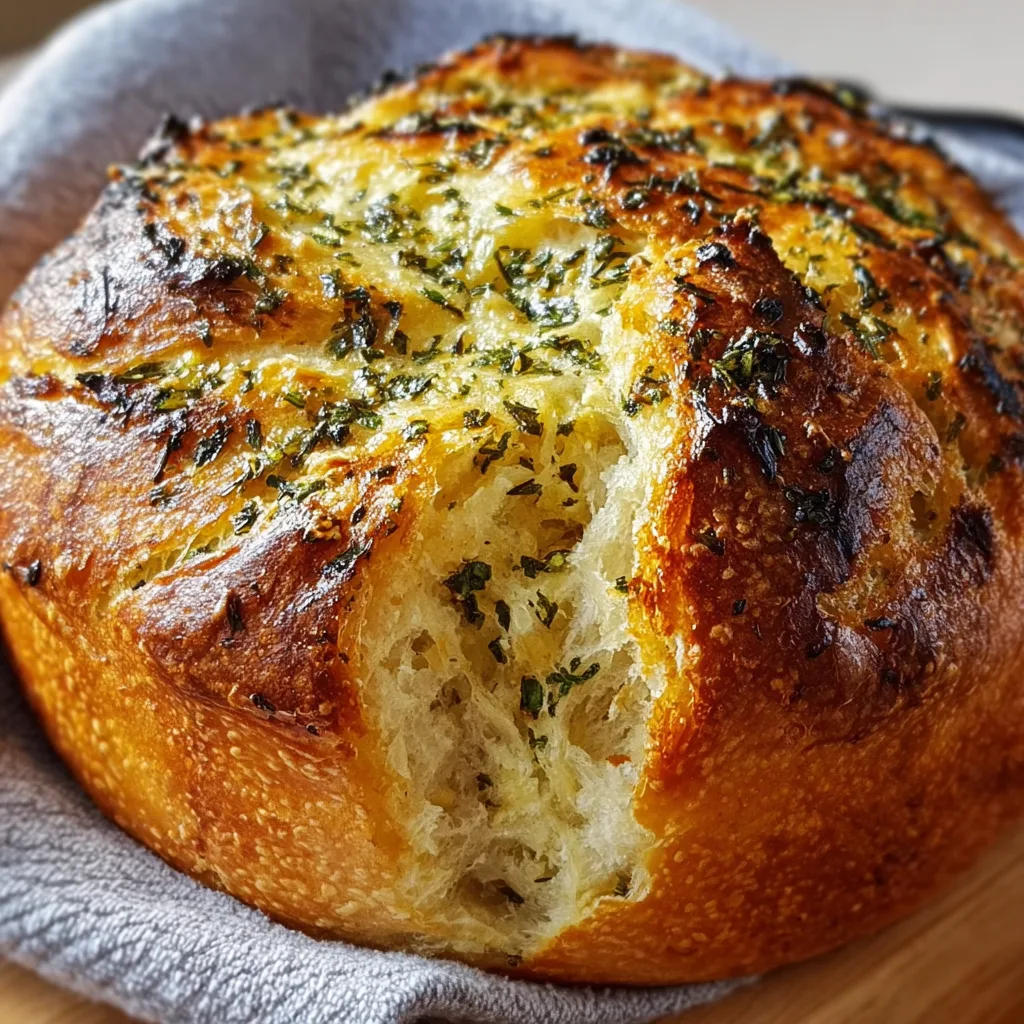
    Garlic Herb Dutch Oven Bread has completely transformed my weekend baking routine. There’s something magical about the moment you lift that heavy lid to reveal a perfectly crusty, aromatic loaf that you created with your own hands. I still remember the first time I made this bread—my kitchen filled with that irresistible bakery scent, and my husband wandered in from the garden asking what smelled so heavenly. This rustic, artisanal bread requires minimal hands-on effort but delivers professional-quality results that will make you feel like a master baker. Perfect for dinner parties or simply elevating your everyday meals with something special.

    Recipe

    Why You’ll Love This Garlic Herb Dutch Oven Bread

    Foolproof for Beginners

    Even if you’ve never baked bread before, this recipe welcomes you with open arms. The no-knead method eliminates the intimidation factor that comes with traditional bread baking. I was terrified of yeast recipes until this became my gateway bread! The dutch oven does the heavy lifting by creating the perfect environment for your dough—trapping steam to develop that coveted crispy crust while keeping the inside tender and airy. You’ll be amazed how a handful of simple ingredients transform into something that looks and tastes like it came from an artisanal bakery.

    Incredible Flavor Complexity

    The combination of fresh garlic and herbs creates a flavor profile that elevates this bread beyond the ordinary. Each bite offers a perfect harmony of savory notes that complement virtually any meal. I love using rosemary and thyme from my little windowsill herb garden, but you can customize the herb blend based on what you have on hand. The slow fermentation process (don’t worry, it’s hands-off!) develops a subtle tanginess that balances the rich garlic and herb infusion. This depth of flavor simply can’t be matched by store-bought alternatives.

    Essential Tips & Tricks

    Mastering the Dutch Oven Method

    The secret to that professional bakery-style crust lies in preheating your dutch oven properly. Place it in the oven during the preheat phase to ensure it’s blazing hot when your dough goes in. This immediate heat shock creates that gorgeous crackling exterior. I learned this the hard way after my first loaf turned out pale and soft! Make sure your dutch oven is rated for high temperatures (most are, but always check). For the best results, remove the lid during the final 15 minutes of baking to allow the crust to develop that beautiful golden-brown color and crispy texture.

    Perfecting Your Dough Consistency

    Achieving the right dough hydration makes all the difference in your final loaf. The dough should be sticky but manageable—wetter than traditional bread dough but not soupy. If it’s too dry, your bread will be dense; too wet, and it’ll spread rather than rise. Don’t panic if your dough seems unusually wet compared to other bread recipes you’ve tried. This high hydration is what creates those beautiful air pockets inside. Use just enough flour during shaping to prevent sticking, but resist the urge to add too much, which would toughen your bread.

    Serving Ideas & Creative Variations

    Perfect Pairings for Any Meal

    This Garlic Herb Dutch Oven Bread elevates practically any meal from ordinary to extraordinary. Serve warm slices alongside hearty soups like Beef and Barley for a comforting dinner that feels like a hug in a bowl. I love tearing chunks to dip into good olive oil and balsamic vinegar as an appetizer when friends come over. For breakfast, toast thick slices and top with avocado and eggs for an Instagram-worthy start to your day. The subtle garlic and herb flavors complement without overpowering, making this bread the perfect supporting character for any culinary story.

    Creative Flavor Twists

    Don’t be afraid to experiment with different flavor combinations that reflect your mood or meal. Add sun-dried tomatoes and olives for a Mediterranean twist that pairs beautifully with pasta dishes. Incorporate grated parmesan and cracked black pepper for an indulgent cheese bread that’s perfect alongside a simple salad. My personal favorite variation includes roasted garlic and caramelized onions folded into the dough for an intensely savory profile. The basic recipe is your canvas—each variation creates a completely different experience while maintaining that perfect texture contrast between crust and crumb.

    Storage & Troubleshooting Guide

    Keeping Your Bread Fresh

    To maintain that perfect crust-to-crumb ratio, store your bread cut-side down on a cutting board for the first day. For longer storage, wrap loosely in a clean kitchen towel rather than plastic, which makes the crust soggy. If you won’t finish the loaf within 2-3 days, slice and freeze it in a ziplock bag—this way you can toast individual slices as needed. Revive day-old bread by spritzing with water and heating in a 350°F oven for 5-10 minutes. The moisture will reactivate the crust while warming the interior to that just-baked texture.

    Solving Common Baking Issues

    If your bread turns out dense or flat, the culprit is usually under-proofing or using inactive yeast. Test your yeast’s freshness before starting, and give your dough adequate time to rise—especially in cooler kitchens where fermentation slows down. For pale crusts, your oven or dutch oven likely wasn’t hot enough; always preheat thoroughly. If your bread sticks to the pot, try dusting the bottom with cornmeal or using parchment paper. Remember that bread baking improves with practice! Each “mistake” teaches you something valuable about the process, bringing you closer to your perfect loaf.

    Frequently Asked Questions

    Can I make Garlic Herb Dutch Oven Bread without a dutch oven?

    While a dutch oven creates the ideal environment, you can use any oven-safe pot with a tight-fitting lid. Alternatively, place a baking dish with water on the bottom rack to create steam while baking your bread on a preheated stone.

    How do I know when my dough has proofed enough?

    Properly proofed dough will have roughly doubled in size and will slowly spring back when gently poked with your finger, leaving a slight indentation that doesn’t completely disappear.

    Can I use dried herbs instead of fresh in this recipe?

    Absolutely! Use about one-third the amount of dried herbs compared to fresh. Dried herbs have more concentrated flavor, so a little goes a long way.

    What’s the best flour for Garlic Herb Dutch Oven Bread?

    Bread flour yields the chewiest texture, but all-purpose flour works perfectly well. For extra flavor depth, substitute up to 25% of your flour with whole wheat.

    Why did my bread not rise properly?

    Under-rising typically results from inactive yeast, too-cold ingredients, or insufficient proofing time. Ensure your kitchen is warm enough and give the dough adequate time to develop.

    Final Thoughts

    This Garlic Herb Dutch Oven Bread has become more than just a recipe in my kitchen—it’s a weekend ritual that signals time to slow down and savor life’s simple pleasures. There’s something deeply satisfying about creating something so beautiful and delicious with just flour, water, yeast, and a few aromatic additions. Whether you’re a seasoned baker or complete novice, this bread welcomes you with open arms and forgiving techniques. I hope this loaf brings as much joy to your table as it has to mine! For more bread inspiration, visit Pinterest.

  • Lemon Herb Grilled Chicken Quinoa Bowl: Fresh, Zesty & Irresistible!

    Lemon Herb Grilled Chicken Quinoa Bowl: Fresh, Zesty & Irresistible!

    Lemon Herb Grilled Chicken Quinoa Bowl: Fresh, Zesty & Irresistible!

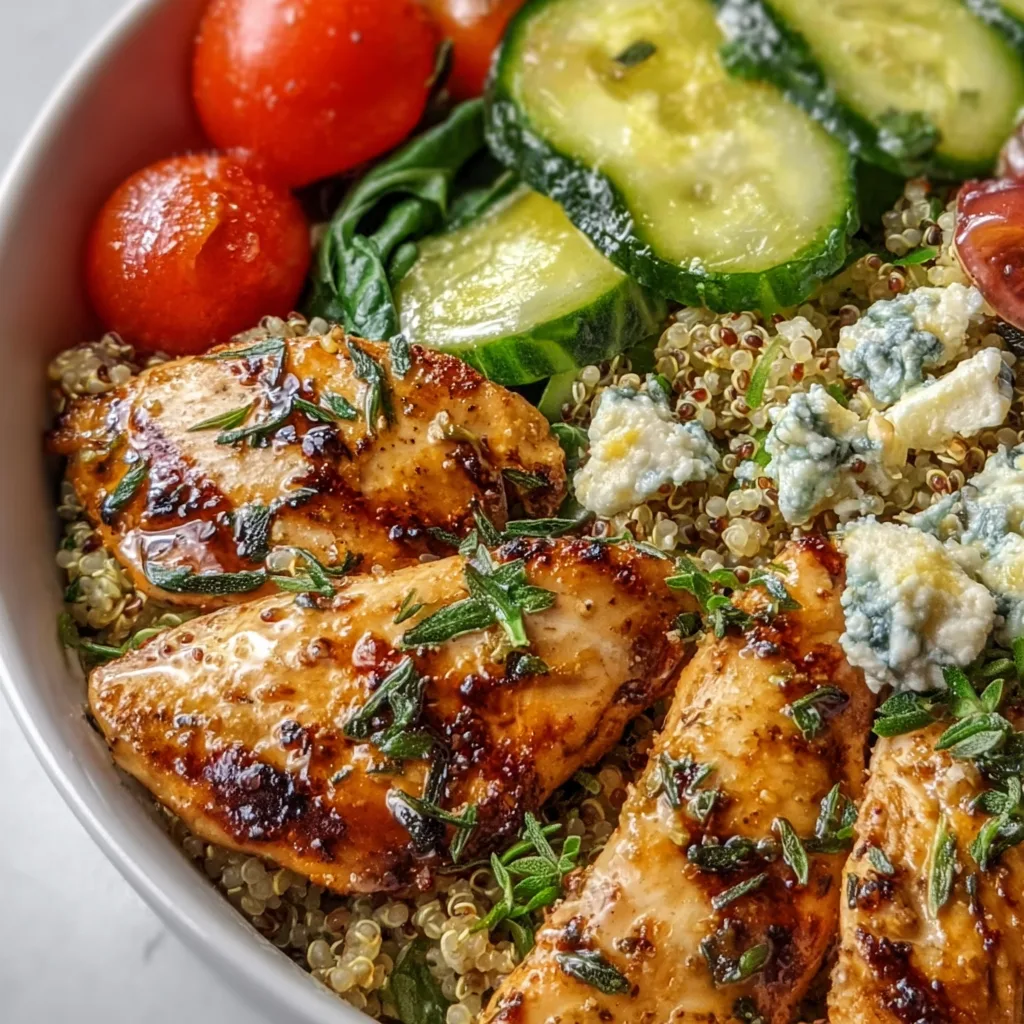
    This Lemon Herb Grilled Chicken Quinoa Bowl has completely transformed my weeknight dinner routine! The bright, zesty flavors of freshly squeezed lemon juice mingling with aromatic herbs creates a dish that’s both nourishing and incredibly satisfying. I first created this bowl on a warm summer evening when I craved something light yet filling. The tender grilled chicken paired with fluffy quinoa and crisp vegetables offers the perfect balance of protein, fiber, and fresh flavors. Whether you’re meal prepping for busy days or serving a casual dinner, this versatile bowl delivers restaurant-quality taste with minimal effort. Trust me, this will become your new go-to healthy comfort meal!

    Recipe

    Why You’ll Love This Lemon Herb Grilled Chicken Quinoa Bowl

    Perfect Balance of Flavors and Nutrition

    The magic of this Lemon Herb Grilled Chicken Quinoa Bowl lies in its harmonious blend of bright citrus, savory herbs, and nutty quinoa. Each bite delivers a flavor explosion that’s simultaneously refreshing and satisfying. The protein-packed chicken keeps you full for hours, while the quinoa provides essential fiber and nutrients. I love how the lemon zest brightens everything, cutting through the richness with its vibrant acidity. What makes this bowl truly special is how it manages to be incredibly healthy while tasting indulgent – no bland “diet food” here! It’s become my favorite post-workout meal when I want something restorative yet delicious.

    Quick and Versatile for Any Occasion

    This Lemon Herb Grilled Chicken Quinoa Bowl is the ultimate time-saving solution for hectic weeknights or meal prep Sundays. The entire dish comes together in under 30 minutes, and you can prepare components ahead of time. I’ve served this at casual dinner parties (guests always ask for the recipe!) and packed it for office lunches with equal success. The versatility is unmatched – use whatever seasonal vegetables you have on hand, swap quinoa for rice, or adjust the herbs based on what’s in your garden. My neighbor even adapted it for her picky eaters by simplifying the seasonings, and her kids devoured it!

    Essential Tips & Tricks

    Perfecting Your Chicken Marinade

    The secret to truly exceptional Lemon Herb Grilled Chicken Quinoa Bowls starts with a properly marinated chicken. Allow at least 30 minutes (though 2-4 hours is ideal perfection) for the flavors to penetrate the meat. I combine fresh lemon juice, olive oil, minced garlic, and a generous blend of herbs – oregano, thyme, and rosemary are my go-to combination. The acidity from the lemon not only flavors but also tenderizes the chicken. For maximum flavor, don’t forget to zest your lemon before juicing it! That outer layer contains intense citrus oils that make all the difference. My personal tip? Add a splash of honey to balance the acidity and promote beautiful caramelization when grilling.

    Quinoa Cooking Secrets

    Perfectly cooked quinoa forms the foundation of an amazing Lemon Herb Grilled Chicken Quinoa Bowl, and it’s all about technique. Always rinse thoroughly before cooking to remove the natural saponin coating that can cause bitterness. For fluffy, separate grains, use a 1:2 ratio of quinoa to liquid, and once boiling, reduce to a gentle simmer and resist the urge to stir! For an incredible flavor boost, cook your quinoa in chicken or vegetable broth instead of water. My game-changing tip is adding a bay leaf and a squeeze of lemon juice to the cooking liquid. Let the quinoa rest covered for 5 minutes after cooking – this final steaming ensures perfect texture every time.

    Serving Ideas & Creative Variations

    Seasonal Adaptations and Add-ins

    The beauty of this Lemon Herb Grilled Chicken Quinoa Bowl lies in its adaptability through the seasons. In summer, I add fresh berries and cucumber for cooling crispness, while autumn calls for roasted butternut squash and pomegranate seeds. Winter versions shine with roasted root vegetables and hearty kale, while spring begs for tender asparagus and sweet peas. For added texture, sprinkle toasted pine nuts, pepitas, or sliced almonds on top. My family loves when I incorporate creamy avocado slices for richness. For a Mediterranean twist, add olives and feta cheese – the salty tang perfectly complements the lemon-herb flavors and creates an entirely new experience with the same base recipe.

    Dietary Modifications

    This Lemon Herb Grilled Chicken Quinoa Bowl easily adapts to various dietary needs without sacrificing flavor. For a plant-based alternative, substitute the chicken with marinated grilled tofu, tempeh, or chickpeas tossed in the same lemon-herb mixture. Those following keto or low-carb diets can replace quinoa with cauliflower rice while maintaining all the bright flavors. For dairy-free options, skip cheese toppings or use nutritional yeast for a similar umami quality. Those with gluten sensitivities can rest easy – this bowl is naturally gluten-free! My neighbor with multiple allergies absolutely loves this recipe because it’s so easily customized while keeping the core flavor profile intact.

    Storage & Troubleshooting Guide

    Meal Prep and Storage Solutions

    Lemon Herb Grilled Chicken Quinoa Bowls are meal prep champions that maintain their quality beautifully. Store components separately in airtight containers for maximum freshness – this prevents soggy vegetables and keeps textures distinct. The chicken and quinoa will stay good for 3-4 days refrigerated, though I find the chicken is best within the first 2 days. For freezing, focus on the cooked chicken and quinoa (store separately) which freeze well for up to 2 months. I always prepare extra lemon-herb dressing in a small jar to refresh the flavors when serving leftovers. Pro tip: Keep delicate greens and avocado separate, adding them fresh just before eating for the best experience.

    Fixing Common Issues

    Even experienced cooks occasionally encounter challenges with their Lemon Herb Grilled Chicken Quinoa Bowl. If your chicken turns out dry, try brining it first (1 tablespoon salt per cup of water for 30 minutes), or use chicken thighs which are more forgiving and flavorful. For bitter quinoa, ensure you’re rinsing thoroughly and consider toasting it briefly before cooking to develop nutty flavors. If your bowl tastes bland, brighten it with an extra squeeze of fresh lemon, a drizzle of good olive oil, or a sprinkle of flaky sea salt. When meal prepping, prevent sogginess by placing moisture-heavy ingredients like tomatoes or cucumber on top rather than directly touching the quinoa.

    Frequently Asked Questions

    Can I make this Lemon Herb Grilled Chicken Quinoa Bowl ahead of time?

    Absolutely! Prepare components separately and store refrigerated for up to 3 days. Keep wet ingredients separate from dry ones, and add fresh herbs, avocado, and any delicate toppings just before serving for best results.

    What’s the best way to reheat leftovers?

    Microwave the chicken and quinoa separately with a splash of water or broth to prevent drying. Alternatively, warm gently in a skillet. Add fresh lemon juice and herbs after reheating to revive flavors.

    Can I use other grains instead of quinoa?

    Definitely! Farro, brown rice, barley, or couscous work beautifully. Adjust cooking times and liquid amounts according to your chosen grain’s requirements. The lemon-herb flavors complement any grain wonderfully.

    How can I make this bowl more filling?

    Add healthy fats like avocado, nuts, or a drizzle of olive oil. Increase protein by adding a soft-boiled egg or chickpeas. For more volume, double the vegetables or add roasted sweet potatoes.

    Is there a shortcut version of this Lemon Herb Grilled Chicken Quinoa Bowl?

    Use pre-cooked rotisserie chicken tossed with lemon juice and dried herbs. Microwave ready-to-eat quinoa packets, and incorporate pre-chopped vegetables from your grocery store’s produce section for a 10-minute assembly.

    Final Thoughts

    This Lemon Herb Grilled Chicken Quinoa Bowl has become my kitchen salvation on days when I want something nourishing yet exciting. The bright citrus notes and fragrant herbs transform simple ingredients into a meal that feels special enough for company yet easy enough for everyday enjoyment. I find myself returning to this recipe again and again, each time discovering new variations and combinations. Whether you’re a seasoned cook or just starting your culinary journey, this bowl offers the perfect balance of simplicity and satisfaction. Don’t forget to check out more of my favorite bowl recipes on Pinterest for endless inspiration!

  • Chaos Style Confetti Birthday Cake: Irresistibly Fun & Flavorful!

    Chaos Style Confetti Birthday Cake: Irresistibly Fun & Flavorful!

    Chaos Style Confetti Birthday Cake: Irresistibly Fun & Flavorful!

    The Chaos Style Confetti Birthday Cake brings pure joy to any celebration with its vibrant colors and deliciously messy aesthetic. Unlike perfectly polished bakery cakes, this homemade treasure embraces beautiful imperfection with rainbow sprinkles, colorful cake layers, and creamy frosting that doesn’t need to be Instagram-perfect. I created this recipe after my daughter requested something “super colorful and fun” for her 8th birthday. The beauty is in its approachable nature – anyone can make this showstopper, even if you’ve never decorated a cake before! Let’s dive into this celebration in cake form.

    Recipe

    Why You’ll Love This Chaos Style Confetti Birthday Cake

    A Stress-Free Celebration Centerpiece

    This cake is the ultimate stress-reliever for home bakers. The “chaos style” approach means imperfections aren’t just accepted—they’re celebrated! Those uneven frosting swirls? Intentional artistic expression. Sprinkles cascading down the sides? That’s the signature look we’re going for! I’ve watched even my most anxious friends relax while decorating because there’s no pressure to achieve perfection. The vibrant colors and playful decoration style instantly create a festive atmosphere that screams “let’s celebrate!” without requiring professional decorating skills.

    Customizable for Any Celebration

    While it’s called a birthday cake, this Chaos Style Confetti creation adapts beautifully to any occasion. Change the color palette to match your theme—pastels for baby showers, team colors for graduations, or metallic sprinkles for New Year’s celebrations. The base recipe remains the same, but the personality shifts with your color choices. I’ve made a Halloween version with orange, purple, and black, and a Christmas edition with red, green, and gold that were both massive hits. The joy is in making it your own!

    Essential Tips & Tricks

    Mastering the Colorful Cake Layers

    The secret to perfect confetti cake layers lies in the color distribution. Rather than just adding sprinkles to vanilla batter, divide your batter into 3-4 portions and color each differently. Fold in complementary sprinkles to each colored batter for maximum visual impact. Be careful not to overmix once you’ve added food coloring—just 10-15 gentle folds will do. I learned this the hard way when I once overbeat the batter and ended up with a dense, tough cake. For the brightest colors, use gel food coloring instead of liquid drops for vibrant hues that won’t affect the batter consistency.

    Frosting Success Strategies

    The signature look of this Chaos Style Confetti Birthday Cake comes from its gloriously imperfect frosting application. Start with a thin crumb coat and chill for 20 minutes before adding the final layer. This prevents those pesky cake crumbs from showing through your colorful frosting. For the chaotic-yet-controlled look, use different colored frostings in various sections of the cake—no need to blend them perfectly! I recommend the Italian herbs and cheese bread as a savory palate cleanser to serve alongside this sweet treat at your party.

    Serving Ideas & Creative Variations

    Interactive Serving Suggestions

    Make your Chaos Style Confetti Birthday Cake the centerpiece of an interactive dessert station! Serve slices alongside mix-and-match toppings like extra sprinkles, chocolate sauce, fresh berries, and whipped cream. This creates a personalized experience where guests can add their own chaotic finishing touches. I’ve found that setting up a “sprinkle station” with different colored sprinkles in small bowls lets everyone add their own flair. This approach works beautifully for kids’ parties but is equally popular with adults who secretly love playing with their food too!

    Unexpected Flavor Combinations

    While the classic vanilla confetti cake brings nostalgic joy, don’t be afraid to experiment with flavor twists! Try a chocolate-confetti marble base, lemon-infused layers, or even a subtle almond extract addition to elevate the flavor profile. My personal favorite variation includes layers of strawberry freezer jam between the cake layers for a fruity surprise that cuts through the sweetness. The beauty of the chaos style is that it welcomes experimentation—both visually and in flavor combinations.

    Storage & Troubleshooting Guide

    Keeping Your Cake Fresh

    Store your Chaos Style Confetti Birthday Cake properly to maintain its moist texture and vibrant appearance. For short-term storage (1-2 days), keep it at room temperature under a cake dome or inverted bowl to prevent it from drying out. For longer storage, wrap individual slices in plastic wrap and refrigerate for up to 5 days. The cold fridge can slightly firm up the texture, so I always recommend letting refrigerated slices sit at room temperature for 20 minutes before serving to restore that perfect cake consistency.

    Rescuing Common Cake Emergencies

    Even the most chaotic cake can sometimes need a little rescue! If your cake layers crack, embrace it as part of the chaos or use extra frosting as “glue” to hold pieces together. For frosting fixes, keep a cup of hot water nearby—dipping your spatula in hot water helps smooth stubborn frosting areas. If your sprinkles are bleeding color into white frosting, don’t panic! Simply call it a “watercolor effect” and pretend it was intentional. I once dropped an entire corner of my cake and rebuilt it with frosting—no one ever knew!

    Frequently Asked Questions

    What makes a Chaos Style Confetti Birthday Cake different from regular confetti cake?

    The Chaos Style embraces imperfection with deliberately uneven frosting, abundant sprinkles, and multiple colors. It’s about fun over precision, making it perfect for beginners and experienced bakers who want to relax and enjoy the process.

    Can I make this cake in advance?

    Absolutely! Bake layers up to 3 days ahead and store wrapped in plastic at room temperature. Frost 1 day before serving for best results. The completed cake stays fresh at room temperature for 2 days.

    Are there any shortcuts for busy bakers?

    Yes! Use quality boxed cake mix as your base, then add extra vanilla and fold in premium sprinkles. Store-bought frosting can be divided and colored for the same chaotic effect.

    What sprinkles work best for this recipe?

    Jimmies (the long thin sprinkles) work best as they don’t bleed much into batter. Avoid nonpareils (tiny balls) in the batter as they tend to dissolve and bleed color.

    How do I transport my Chaos Style Confetti Birthday Cake safely?

    Chill the frosted cake for 1 hour before transport to firm up the frosting. Use a cake carrier with a locking lid, and place a non-slip mat underneath to prevent sliding.

    Final Thoughts

    The Chaos Style Confetti Birthday Cake represents everything I love about home baking—it’s joyful, approachable, and celebrates imperfection. There’s something magical about watching people’s faces light up when they see those vibrant colors and playful decorations. The best compliment I’ve received wasn’t about how professional it looked, but how much fun it was to eat! I hope this cake brings the same chaotic happiness to your celebrations. Don’t forget to share your creations on Pinterest to inspire others with your unique take on this festive masterpiece!

  • Crispy Cranberry Cobbler: Irresistibly Sweet & Perfectly Crunchy!

    Crispy Cranberry Cobbler: Irresistibly Sweet & Perfectly Crunchy!

    Crispy Cranberry Cobbler: Irresistibly Sweet & Perfectly Crunchy!

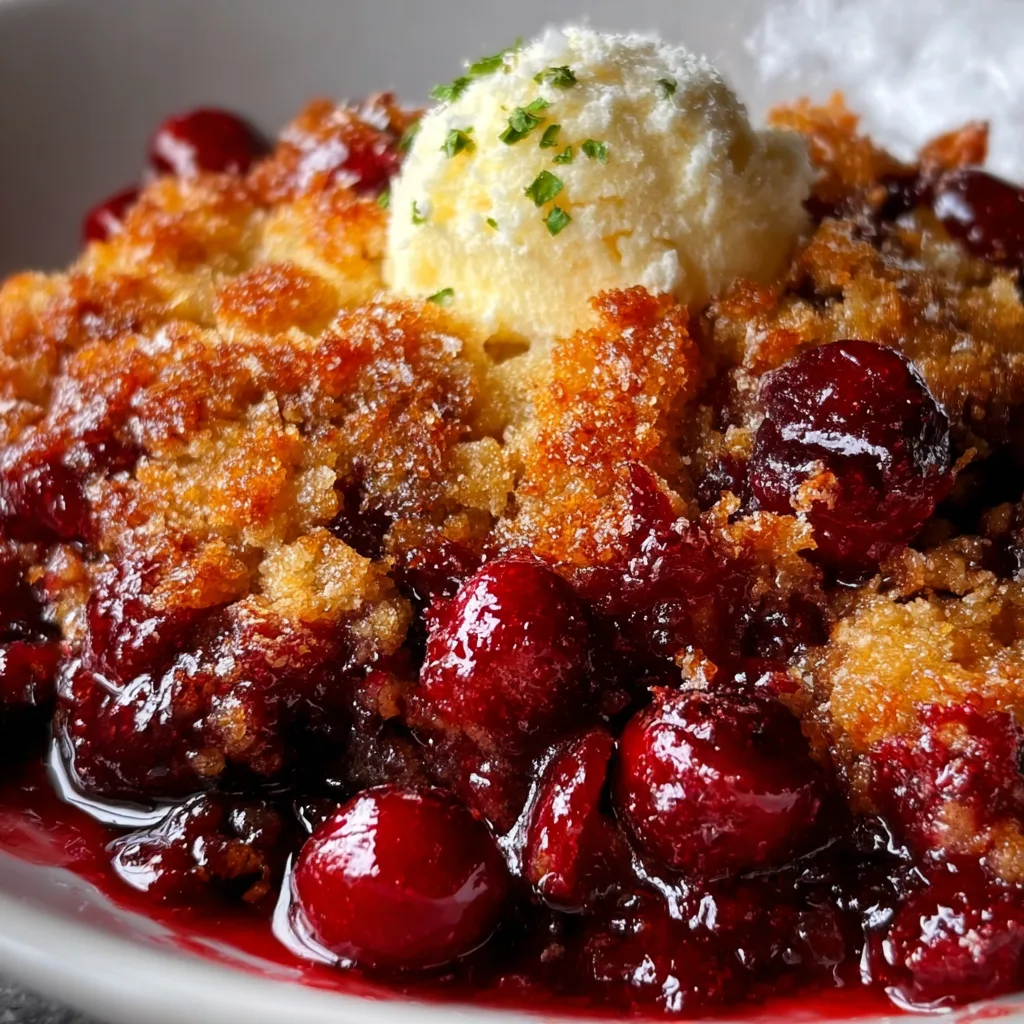
    Crispy Cranberry Cobbler has become my ultimate holiday comfort dessert. The contrast between the tart cranberries and sweet, buttery topping creates pure magic in every bite. I discovered this recipe during a snowy weekend at my grandmother’s cabin, where we baked it in her cast-iron skillet while sharing stories by the fireplace. The bubbling crimson filling and golden-brown crust made the entire cabin smell like heaven. If you love desserts that balance sweet and tart perfectly, you’ll adore this cobbler that’s both rustic and elegant enough for any gathering. Check out my strawberry dump cake for another fruity treat!

    Recipe

    Why You’ll Love This Crispy Cranberry Cobbler

    Perfect Balance of Flavors

    The magic of this Crispy Cranberry Cobbler lies in its perfect flavor harmony. Fresh cranberries bring a bright, tangy punch that cuts through the sweetness of the buttery topping. I’ve carefully balanced the sugar to let the cranberries’ natural tartness shine without overwhelming your taste buds. The hints of orange zest and vanilla extract add warmth and complexity that make this dessert truly special. When the juices bubble up through the crispy topping, they create these incredible pockets of jammy goodness that will have everyone scraping their plates for the last bite.

    Simple Yet Impressive

    Don’t let its gorgeous appearance fool you—this Crispy Cranberry Cobbler is surprisingly easy to prepare. The filling requires just a handful of ingredients that you simply toss together. The topping comes together in minutes with pantry staples like flour, sugar, and butter. I love how this dessert looks rustic yet elegant when it emerges from the oven with that golden, crackly crust. It’s my go-to when I need to impress guests but don’t have hours to spend in the kitchen. The hands-on time is minimal, but the “oohs” and “aahs” when you serve it are guaranteed!

    Essential Tips & Tricks

    Perfecting the Filling

    For the absolute best Crispy Cranberry Cobbler, use fresh cranberries whenever possible. They maintain their shape better and provide that signature pop of tartness. In a pinch, frozen works too—just don’t thaw them first! Add them straight from the freezer to prevent excess moisture. I like to mix in a handful of diced apples or pears for textural contrast and natural sweetness. The secret to balancing the tartness is a touch of orange zest and a splash of vanilla. These aromatic additions transform the filling from simply tart to wonderfully complex without masking the cranberry’s natural brightness.

    Creating That Perfect Crispy Top

    The key to achieving that irresistible crispy topping is cold butter and proper baking technique. Cut your butter into small cubes and keep it refrigerated until the last possible moment. Work it into the dry ingredients using your fingertips until you have pea-sized crumbles—don’t overmix! For extra crunch, try adding a handful of chopped pecans or a sprinkle of turbinado sugar before baking. I’ve found that baking at a slightly higher temperature (375°F) for the first 15 minutes creates that beautiful golden crust, then reducing to 350°F allows the filling to bubble without burning the top. Check out my blueberry bread pudding for another dessert with perfect texture contrast!

    Serving Ideas & Creative Variations

    Perfect Pairings

    Serve your Crispy Cranberry Cobbler warm from the oven for the ultimate comfort experience. A scoop of vanilla ice cream melting into the hot cobbler creates a heavenly temperature contrast that’s simply irresistible. For a more sophisticated touch, try serving it with a dollop of lightly sweetened mascarpone or crème fraîche. During holiday gatherings, I love to pair this with a mug of spiced cider or a glass of dessert wine. The cobbler also makes a delightful breakfast treat when topped with a spoonful of Greek yogurt—I won’t tell if you don’t!

    Seasonal Adaptations

    While classic Crispy Cranberry Cobbler shines during fall and winter, you can adapt this recipe year-round with seasonal fruits. In summer, try substituting half the cranberries with fresh raspberries or blackberries for a brighter flavor profile. For a cozy autumn variation, mix in diced pears and a sprinkle of crystallized ginger. Winter calls for adding warming spices like cinnamon, nutmeg, and cloves to the filling. You can even transform it into a spring dessert by combining cranberries with strawberries and a hint of lemon zest. Check out my cherry cranberry energy bites for another versatile cranberry treat!

    Storage & Troubleshooting Guide

    Keeping It Fresh

    Your Crispy Cranberry Cobbler will stay delicious for 3-4 days when properly stored. Once completely cooled, cover it loosely with foil rather than plastic wrap to preserve the topping’s crispness. If refrigerating, bring it to room temperature before serving, or warm individual portions in the microwave for 20-30 seconds. For longer storage, this cobbler freezes beautifully—portion it into airtight containers and freeze for up to 3 months. The texture of the topping may change slightly after freezing, but a few minutes in a 350°F oven will restore its crispness.

    Troubleshooting Common Issues

    If your Crispy Cranberry Cobbler filling is too runny, try adding an extra tablespoon of cornstarch to the fruit mixture next time. For overly tart results, increase the sugar by 2-3 tablespoons or add a tablespoon of honey to mellow the acidity. If your topping isn’t crisping up, check your oven temperature with an oven thermometer—it might be running cool. Alternatively, try moving the cobbler to a higher rack for the last 10 minutes of baking. For a soggy bottom crust, pre-bake the fruit filling for 10 minutes before adding the topping, which gives excess moisture a chance to evaporate.

    Frequently Asked Questions

    Can I make Crispy Cranberry Cobbler ahead of time?

    Yes! Prepare the filling and topping separately up to 2 days ahead. Store them in the refrigerator, then assemble and bake just before serving for the crispiest results.

    How do I know when my cobbler is done baking?

    Look for a golden-brown topping and bubbling fruit around the edges. The filling should be thick and jammy, not watery, which typically takes 45-50 minutes.

    Can I use dried cranberries instead of fresh?

    While fresh cranberries are ideal for Crispy Cranberry Cobbler, you can use dried in a pinch. Rehydrate them by simmering in water or juice for 15 minutes, then drain before using.

    What’s the difference between a cobbler and a crisp?

    Cobblers have a biscuit-like or cake-like topping, while crisps feature a streusel topping with oats. This recipe creates a hybrid with the best qualities of both!

    Is this recipe gluten-free?

    The standard Crispy Cranberry Cobbler contains wheat flour, but you can easily substitute a 1:1 gluten-free flour blend in the topping for a gluten-free version.

    Final Thoughts

    This Crispy Cranberry Cobbler has become more than just a dessert in my kitchen—it’s a tradition that marks the changing seasons and brings comfort to any table. The contrast between the tart cranberries and sweet, buttery topping creates a dessert that feels both nostalgic and exciting. I hope you’ll make this recipe your own, perhaps adding your family’s favorite spices or serving it in a way that becomes your signature. The beauty of this cobbler is in its simplicity and adaptability. Find more inspiration for seasonal treats on my Pinterest!

  • Cottage Cheese Egg Bites That’ll Boost Your Energy Instantly!

    Cottage Cheese Egg Bites That’ll Boost Your Energy Instantly!

    Cottage Cheese Egg Bites That’ll Boost Your Energy Instantly!

    These Cottage Cheese Egg Bites are about to revolutionize your breakfast game! Fluffy, protein-packed, and endlessly customizable, they’re my go-to for busy mornings when I need something substantial that won’t weigh me down. The first time I made these little bites of heaven, I was skeptical about the cottage cheese—but that first warm, savory bite with its perfectly creamy texture completely won me over. Now they’re a staple in my meal prep routine, and I’m excited to share this versatile recipe that works beautifully for breakfast, lunch, or even a quick snack.

    Recipe

    Why You’ll Love These Cottage Cheese Egg Bites

    Nutritional Powerhouse

    These cottage cheese egg bites are a protein powerhouse that keeps you satisfied for hours. The combination of eggs and cottage cheese creates the perfect macronutrient balance with approximately 15g of protein per serving. I love how they fuel my morning workouts without the heaviness of traditional breakfast foods. The best part? They’re naturally low-carb and gluten-free, making them ideal for various dietary preferences. When I’m focused on clean eating, these bites are my secret weapon—they’re indulgent yet wholesome, with all the nutrition my body craves.

    Time-Saving Convenience

    Nothing beats the meal prep magic of these cottage cheese egg bites. I make a big batch on Sunday, and voilà—breakfast is sorted for the entire week! They reheat beautifully in just 30 seconds, perfect for those mornings when I’m rushing out the door. The hands-off cooking time means I can multitask while they bake, getting other morning chores done. My favorite part? The endless flavor combinations mean I never get bored. When time is tight but I refuse to compromise on nutrition, these egg bites are my reliable solution.

    Essential Tips & Tricks

    Perfecting the Texture

    The secret to silky-smooth cottage cheese egg bites lies in the blending technique. I learned the hard way that skipping this step leaves you with chunky, uneven bites! Pulse the cottage cheese and eggs together until completely smooth—about 30 seconds in a good blender. For extra fluffiness, separate your eggs and whip the whites before folding them in. Another game-changer? Let your egg mixture rest for 5 minutes before baking to allow the ingredients to fully incorporate. This tiny step makes a noticeable difference in the final texture, creating that custard-like center we’re all aiming for.

    Preventing Common Mistakes

    The water bath method is non-negotiable for perfect cottage cheese egg bites! Skip it, and you’ll end up with rubbery, overcooked edges. Simply place your muffin tin in a larger baking dish and add hot water halfway up the sides. Another crucial tip: don’t overfill your muffin cups—¾ full is the sweet spot. I once made the mistake of filling them to the top and watched in horror as they puffed up dramatically, then deflated into sad little discs. For easy removal, let them cool for 5 minutes before gently loosening with a knife. Patience here prevents the heartbreak of torn egg bites!

    Serving Ideas & Creative Variations

    Flavor Combinations

    The versatility of cottage cheese egg bites makes them a blank canvas for countless flavor profiles. My Mediterranean version with sun-dried tomatoes, spinach, and feta is a household favorite—the saltiness of the feta perfectly balances the creamy base. For a Southwest kick, try corn, black beans, pepper jack cheese, and a dash of cumin. Feeling fancy? Add smoked salmon, dill, and capers for a brunch-worthy treat. The key is balancing flavors and not overdoing the mix-ins. About 1-1.5 cups total for a 12-bite batch keeps them structurally sound while still bursting with flavor.

    Elegant Presentation

    Transform these humble cottage cheese egg bites into an impressive spread worthy of weekend brunch! I arrange them on a wooden board surrounded by fresh herbs, cherry tomatoes, and avocado slices for a gorgeous presentation. For a complete meal, pair them with a simple arugula salad dressed with lemon and olive oil. When serving guests, I place each bite in a colorful silicone cup and garnish with microgreens. The vibrant colors pop against the yellow egg bites, making an ordinary breakfast feel special. Don’t forget a sprinkle of flaky sea salt and fresh cracked pepper just before serving!

    Storage & Troubleshooting Guide

    Proper Storage Methods

    Proper cooling is essential before storing your cottage cheese egg bites. I let mine cool completely on a wire rack to prevent condensation, which can make them soggy. For refrigeration, store in an airtight container with parchment paper between layers—they’ll stay fresh for up to 4 days. When freezing, I flash-freeze them individually on a baking sheet before transferring to a freezer bag, which prevents them from sticking together. They maintain their wonderful texture for up to 3 months frozen! For best results, thaw overnight in the refrigerator before gently reheating in the microwave for 20-30 seconds.

    Fixing Common Issues

    If your cottage cheese egg bites turn out too dense, you likely overmixed the batter or skipped the water bath. Next time, mix just until combined and don’t forget that crucial steam environment. Dealing with egg bites that stick to the pan? Even with non-stick pans, I’ve found a light coating of cooking spray is non-negotiable. For bites that deflate dramatically, your oven was likely too hot—invest in an oven thermometer for accuracy. If they’re watery, you probably added too many moisture-rich vegetables. Pre-cook watery ingredients like mushrooms or zucchini, and always pat them dry before adding to your mixture.

    Frequently Asked Questions

    Can I make cottage cheese egg bites without a muffin tin?

    Absolutely! A silicone egg bite mold works beautifully, or you can use a small baking dish and cut into squares after cooling. Just adjust the baking time accordingly—larger containers will need a few extra minutes.

    Are cottage cheese egg bites keto-friendly?

    Yes! With approximately 2g of carbs per bite, they’re perfect for keto diets. The high protein and fat content from eggs and cottage cheese make them ideal for maintaining ketosis while staying satisfied.

    How can I make these egg bites vegetarian?

    Simply skip the meat and load up on vegetables and cheese! Try combinations like mushroom and gruyère, spinach and feta, or roasted red pepper with goat cheese for delicious vegetarian options.

    Can I use low-fat cottage cheese instead of full-fat?

    You can, but full-fat cottage cheese yields a creamier, more satisfying texture. If using low-fat, consider adding a tablespoon of cream or cream cheese to maintain richness.

    Why did my cottage cheese egg bites collapse after baking?

    This happens when egg bites cool too quickly. Let them cool gradually in the turned-off oven with the door cracked open for about 5 minutes before removing completely.

    Final Thoughts

    These cottage cheese egg bites have transformed my morning routine, combining nutrition and convenience in one delicious package. What started as a simple experiment has become a cornerstone of my weekly meal prep. I love how they adapt to whatever ingredients I have on hand, never getting boring despite regular rotation. Whether you’re a busy parent, fitness enthusiast, or someone who simply appreciates good food, these versatile bites deserve a spot in your recipe collection. Don’t forget to check out more protein-packed breakfast ideas on Pinterest!

  • Mango Chia Overnight Oats: Easy, Delicious & Energizing Breakfast!

    Mango Chia Overnight Oats: Easy, Delicious & Energizing Breakfast!

    Mango Chia Overnight Oats: Easy, Delicious & Energizing Breakfast!

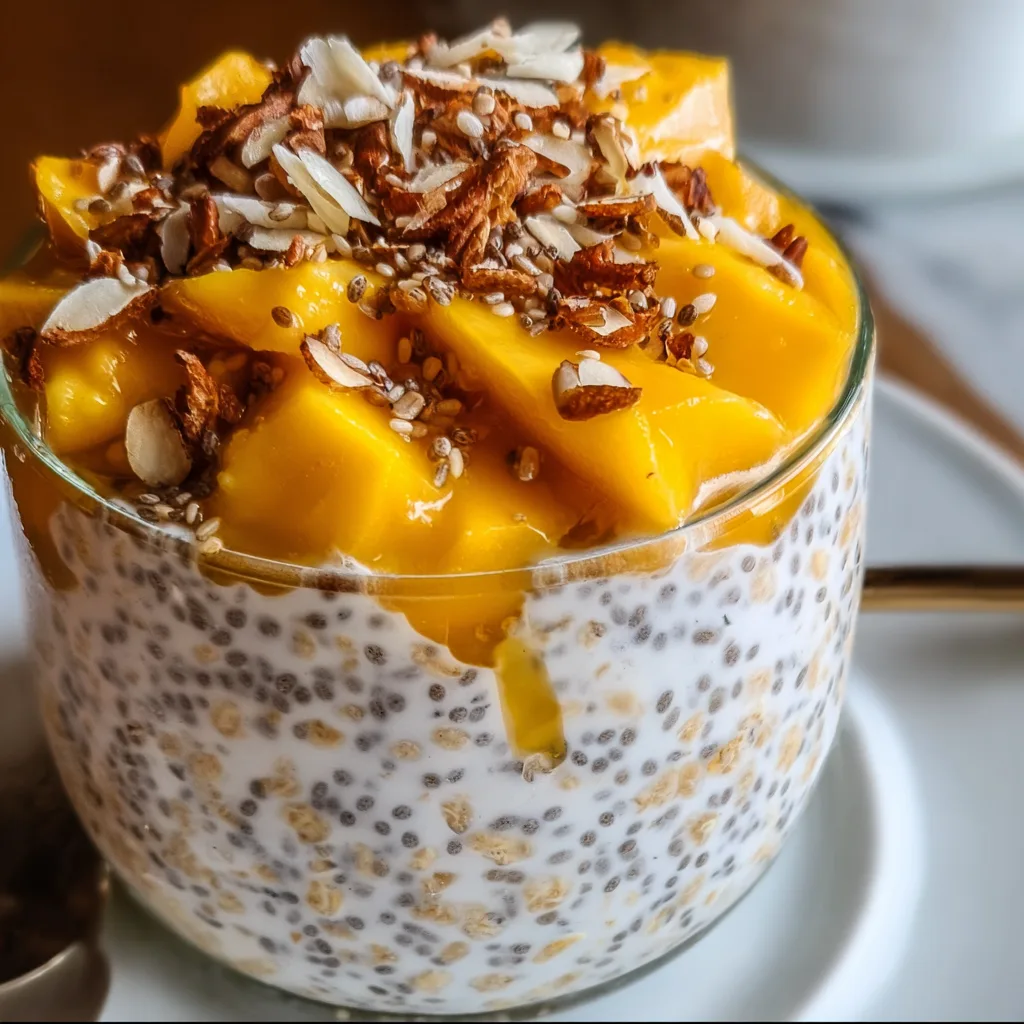
    Mango Chia Overnight Oats have become my morning salvation during busy weeks when hitting snooze feels more appealing than making breakfast. There’s something magical about opening the fridge to find these creamy, tropical jars waiting – sweet mango chunks nestled between layers of vanilla-scented oats and chia pudding. The first time I made these, I was rushing to catch an early flight and nearly wept with joy the next morning when breakfast was already handled. Trust me, these make-ahead breakfasts deliver both convenience and a burst of sunshine flavor that’ll make you actually look forward to mornings.

    Recipe

    Why You’ll Love This Mango Chia Overnight Oats

    Perfect Balance of Nutrition and Flavor

    These Mango Chia Overnight Oats aren’t just delicious – they’re practically a nutritional powerhouse in a jar. The chia seeds expand overnight, creating that pudding-like consistency while delivering omega-3s and fiber that keep you satisfied until lunch. The natural sweetness from ripe mangoes eliminates the need for added sugars, making this a breakfast that both satisfies your sweet tooth and nourishes your body. I’ve found that the combination of protein from Greek yogurt, complex carbs from oats, and healthy fats from chia creates the perfect morning energy balance.

    Customizable for Every Preference

    What I adore most about Mango Chia Overnight Oats is how endlessly adaptable they are to your personal taste. The base recipe works beautifully as written, but feel free to adjust the sweetness, creaminess, or texture to your liking. Prefer a thicker consistency? Add more chia. Want it creamier? Increase the yogurt ratio. You can use fresh or frozen mango depending on the season, and even substitute with other tropical fruits like pineapple or papaya. I’ve made these with coconut milk for a dairy-free version that tastes like a tropical vacation in a jar!

    Essential Tips & Tricks

    Getting the Perfect Texture

    The secret to silky-smooth Mango Chia Overnight Oats lies in the ratio of liquid to dry ingredients. I’ve found that 1:1 works perfectly – for every half cup of oats, use half a cup of milk. Let the mixture rest for about 10 minutes after initial stirring, then give it another quick stir before refrigerating to prevent clumping. For the creamiest texture, use rolled oats rather than steel-cut or instant. If you prefer a pudding-like consistency, increase the chia seeds slightly. I once accidentally added too much milk and ended up with breakfast soup – still tasty, but definitely not the texture I was aiming for!

    Selecting and Preparing the Mango

    The ripeness of your mango makes all the difference in these overnight oats. Look for mangoes that yield slightly to gentle pressure and smell sweet at the stem end. To prep, stand the mango on its end and slice down along each side of the flat pit. Score the flesh in a grid pattern without cutting through the skin, then invert and slice off the cubes. For convenience, frozen mango chunks work beautifully too – just thaw them slightly before adding. I like to reserve some fresh mango cubes for topping just before serving for that perfect contrast of textures.

    Serving Ideas & Creative Variations

    Tropical Paradise Toppings

    Elevate your Mango Chia Overnight Oats with tropical toppings that transform a simple breakfast into something special. Toasted coconut flakes add wonderful crunch, while a sprinkle of macadamia nuts brings richness. For extra tropical vibes, add fresh pineapple chunks or kiwi slices alongside your mango. A drizzle of honey or maple syrup works beautifully if you prefer additional sweetness. My personal favorite is adding a dollop of coconut whipped cream on special mornings – it makes breakfast feel like dessert while still being nutritious!

    Seasonal Adaptations

    While mango is the star of this breakfast, don’t hesitate to create seasonal variations throughout the year. In summer, fresh berries or peaches make wonderful alternatives or additions to the mango. Fall calls for diced apples with cinnamon and a touch of maple syrup. Winter? Try adding blood orange segments and a hint of cardamom. Spring brings strawberries and rhubarb compote possibilities. The base of oats and chia remains consistent while the fruits and spices can change with what’s available. This flexibility means you’ll never tire of your overnight oats routine!

    Storage & Troubleshooting Guide

    Meal Prep and Storage Solutions

    Mango Chia Overnight Oats are the ultimate meal prep champion, easily lasting 3-4 days in the refrigerator. I prefer storing them in individual mason jars or glass containers with tight-fitting lids to maintain freshness. For the best texture, layer the ingredients rather than mixing everything together – oat mixture on the bottom, chia pudding in the middle, and fresh mango on top. If meal prepping for several days, consider adding the fresh mango the night before eating rather than all at once. This prevents the fruit from becoming soggy while ensuring your breakfast remains vibrant and fresh-tasting.

    Fixing Common Issues

    Even the most experienced overnight oats makers encounter occasional texture problems. If your oats turn out too thick, simply stir in a splash of milk before eating. Too runny? Add a teaspoon of additional chia seeds, stir, and let sit for 10 minutes. If your mangoes weren’t sweet enough, a drizzle of honey or maple syrup easily fixes the flavor. For grainy chia texture, try soaking the chia seeds separately in milk for 10 minutes before adding to the oat mixture. And if you forget to make your oats overnight, a quick 30-minute refrigeration will give you a decent result in a pinch!

    Frequently Asked Questions

    Can I make Mango Chia Overnight Oats without dairy?

    Absolutely! Substitute the milk with almond, coconut, or oat milk, and use dairy-free yogurt. Coconut milk creates an especially tropical flavor that complements the mango beautifully.

    How long do Mango Chia Overnight Oats stay fresh?

    They’ll keep well in the refrigerator for 3-4 days in airtight containers. The texture may thicken slightly over time, so you might want to add a splash of milk before eating.

    Can I warm up my overnight oats?

    Yes! While traditionally served cold, Mango Chia Overnight Oats can be gently warmed in the microwave for 30-45 seconds. Just add the fresh mango after heating.

    Is there a way to make these higher in protein?

    Easily boost protein by stirring in a scoop of vanilla protein powder, increasing the Greek yogurt portion, or topping with a tablespoon of hemp seeds.

    Can I use frozen mango in my overnight oats?

    Frozen mango works perfectly in Mango Chia Overnight Oats! Either thaw completely and drain excess liquid, or add frozen chunks directly – they’ll thaw overnight and release juices into the oats.

    Final Thoughts

    Mango Chia Overnight Oats have transformed my mornings from rushed and stressful to peaceful and nourishing. There’s something deeply satisfying about opening the fridge to find breakfast already prepared – especially one this delicious and nutritious. The tropical sweetness of mango paired with the creamy, pudding-like texture creates a breakfast worth getting out of bed for. Whether you’re a busy parent, working professional, or simply someone who appreciates good food with minimal effort, these overnight oats deserve a permanent spot in your breakfast rotation. Find more breakfast inspiration on Pinterest!