Blog

  • Easy Sopapilla Cheesecake Bars – Irresistibly Creamy & Quick!

    Easy Sopapilla Cheesecake Bars – Irresistibly Creamy & Quick!

    Easy Sopapilla Cheesecake Bars – Irresistibly Creamy & Quick!

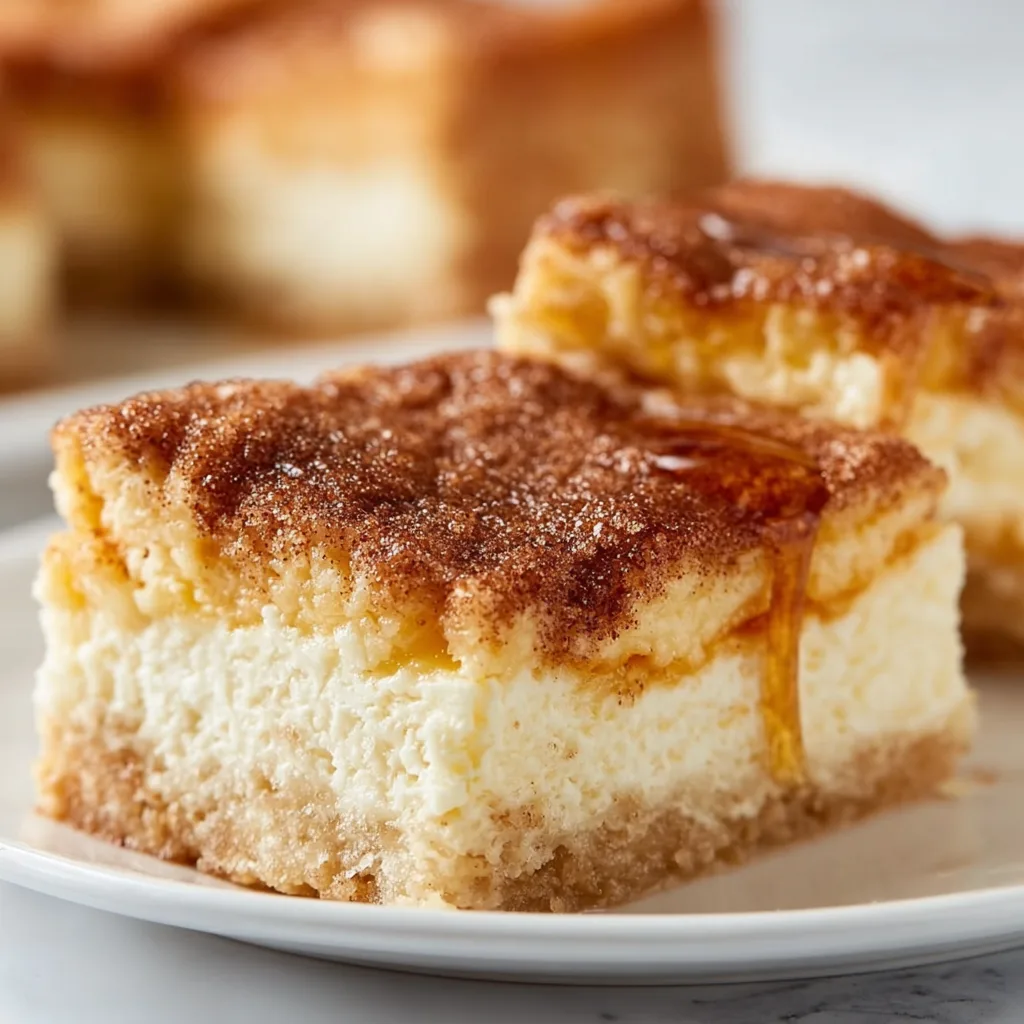
    Easy Sopapilla Cheesecake Bars have completely transformed my dessert game, friends! The first time I pulled these golden, cinnamon-sugar dusted bars from my oven, the aroma transported me straight to my grandmother’s kitchen. That perfect balance of creamy cheesecake filling sandwiched between flaky layers of crescent dough creates pure magic in every bite. Whenever I need a crowd-pleasing dessert that looks fancy but requires minimal effort, these bars are my secret weapon. Trust me, they’ll become your go-to sweet treat for potlucks and family gatherings too!

    Recipe

    Why You’ll Love These Easy Sopapilla Cheesecake Bars

    Simple Ingredients, Extraordinary Results

    These sopapilla cheesecake bars require just a handful of pantry staples that transform into something truly special. The base is simply refrigerated crescent roll dough (genius!), while the filling needs only cream cheese, sugar, and vanilla. I love how the top layer gets that signature cinnamon-sugar coating that caramelizes slightly during baking. The beauty lies in how these humble ingredients create distinct textural layers – crisp, creamy, and slightly chewy all in one dessert. It’s like having churros and cheesecake join forces in the most delightful way!

    Perfect for Any Occasion

    I’ve brought these sopapilla cheesecake bars to summer potlucks, holiday gatherings, and even as a “just because” treat for neighbors. They’re incredibly versatile and always disappear within minutes! The bars travel well, can be served warm or chilled, and look beautiful with minimal effort. Last Christmas, my sister-in-law texted for the recipe before she’d even left our gathering. What I appreciate most is how they feel special enough for celebrations yet simple enough for weeknight cravings when you need something sweet without a big production.

    Essential Tips & Tricks

    Mastering the Perfect Texture

    The key to exceptional sopapilla cheesecake bars lies in the temperature control of your ingredients. Always start with room temperature cream cheese – I promise this makes a world of difference in achieving that silky-smooth filling without lumps. Another game-changer is pressing the bottom layer of dough firmly into your baking dish before adding the filling. This creates a stable base that won’t get soggy. For that authentic sopapilla texture on top, brush melted butter generously before sprinkling with cinnamon sugar, which creates that characteristic crispy, slightly flaky texture that’s absolutely irresistible.

    Make-Ahead Magic

    These bars are perfect for busy hosts because they can be prepped in advance! I’ve found that assembling everything up to 24 hours before baking works beautifully – just like my Easy Cinnamon Swirl Cookies Recipe that’s always a hit. Store the unbaked dish covered in the refrigerator, then bring to room temperature for 20 minutes before baking. Alternatively, bake the bars completely, cool, and refrigerate for up to 3 days. The flavor actually deepens overnight, making the cinnamon-sugar notes more pronounced. For the freshest taste, I recommend adding the final drizzle of honey just before serving to maintain that perfect balance of textures.

    Serving Ideas & Creative Variations

    Delicious Pairings

    These sopapilla cheesecake bars shine brightest with thoughtful accompaniments. My favorite way to serve them is slightly warm with a scoop of vanilla bean ice cream that melts ever so slightly into the cinnamon-sugar topping. For brunch gatherings, I pair them with fresh berries and a dollop of whipped cream. Coffee lovers in my family insist they’re perfect alongside a strong cup of dark roast that cuts through the sweetness. For an extra-special touch, warm some honey with a cinnamon stick and drizzle it over the bars just before serving – this elevates the traditional honey topping to new heights!

    Flavor Twists to Try

    While the classic version is perfection, I love experimenting with variations that keep this recipe exciting. Try adding a layer of fruit preserves between the bottom crust and cheesecake filling – raspberry or apricot works beautifully here, similar to my approach in Berry Cheesecake Dessert Kabobs. For a Mexican chocolate twist, add a teaspoon of cinnamon and a pinch of cayenne to the filling. During fall, I incorporate pumpkin puree and pumpkin pie spice into the cheesecake layer. For a citrus variation that’s especially refreshing in summer, add lemon or orange zest to both the filling and the cinnamon-sugar topping.

    Storage & Troubleshooting Guide

    Keeping Them Fresh

    Properly stored sopapilla cheesecake bars maintain their delicious flavor and texture for days. Once completely cooled, place them in an airtight container with parchment paper between layers if stacking. They’ll keep beautifully in the refrigerator for up to 5 days, though the crust gradually softens over time. For longer storage, these bars freeze exceptionally well! Wrap individual portions in plastic wrap, then foil, and freeze for up to 3 months. I like to thaw them overnight in the refrigerator, then warm slightly in a 300°F oven for 10 minutes to restore some crispness to the crust.

    Fixing Common Issues

    Even experienced bakers encounter challenges sometimes! If your cheesecake filling seems too runny, it’s likely the cream cheese wasn’t fully softened or was overmixed. The solution is simple: chill the assembled bars for 30 minutes before baking to help the filling set properly. For a soggy bottom crust, try pre-baking the bottom layer for 5 minutes before adding the filling. If your topping isn’t browning evenly, move the dish to a higher oven rack for the last few minutes of baking. And remember that some cracking in the filling is perfectly normal and will be covered by that gorgeous cinnamon-sugar topping!

    Frequently Asked Questions

    Can I use low-fat cream cheese for sopapilla cheesecake bars?

    While possible, full-fat cream cheese creates the richest texture and flavor. If using low-fat, add 1 tablespoon of cornstarch to help the filling set properly.

    How do I know when the bars are fully baked?

    Look for golden brown edges and a slight jiggle in the center. The bars will continue setting as they cool, so don’t overbake them.

    Can I make these without cinnamon for guests with allergies?

    Absolutely! Substitute cardamom or nutmeg, or simply use sugar alone for the topping. The bars will still be delicious with a slightly different flavor profile.

    Why did my crescent dough layers puff up too much?

    This happens when the dough isn’t pressed firmly enough into the pan. Use a flat-bottomed measuring cup to really compress each layer before baking.

    What’s the best pan size for easy sopapilla cheesecake bars?

    A 9×13-inch baking dish works perfectly. Glass or ceramic pans conduct heat more evenly than metal for this particular recipe.

    Final Thoughts

    Easy Sopapilla Cheesecake Bars represent everything I love about baking – simple techniques that yield impressive results with minimal fuss. There’s something magical about watching guests’ eyes light up when they take their first bite of these cinnamon-sugar topped treats. Whether you’re a seasoned baker or just starting out, these bars deliver reliable deliciousness every time. Don’t forget to save this recipe and check out more sweet inspirations on Pinterest. Your kitchen will smell amazing, and your taste buds will thank you!

  • Crunchy Asian Ramen Noodle Salad That Everyone’s Obsessed With!

    Crunchy Asian Ramen Noodle Salad That Everyone’s Obsessed With!

    Crunchy Asian Ramen Noodle Salad That Everyone’s Obsessed With!

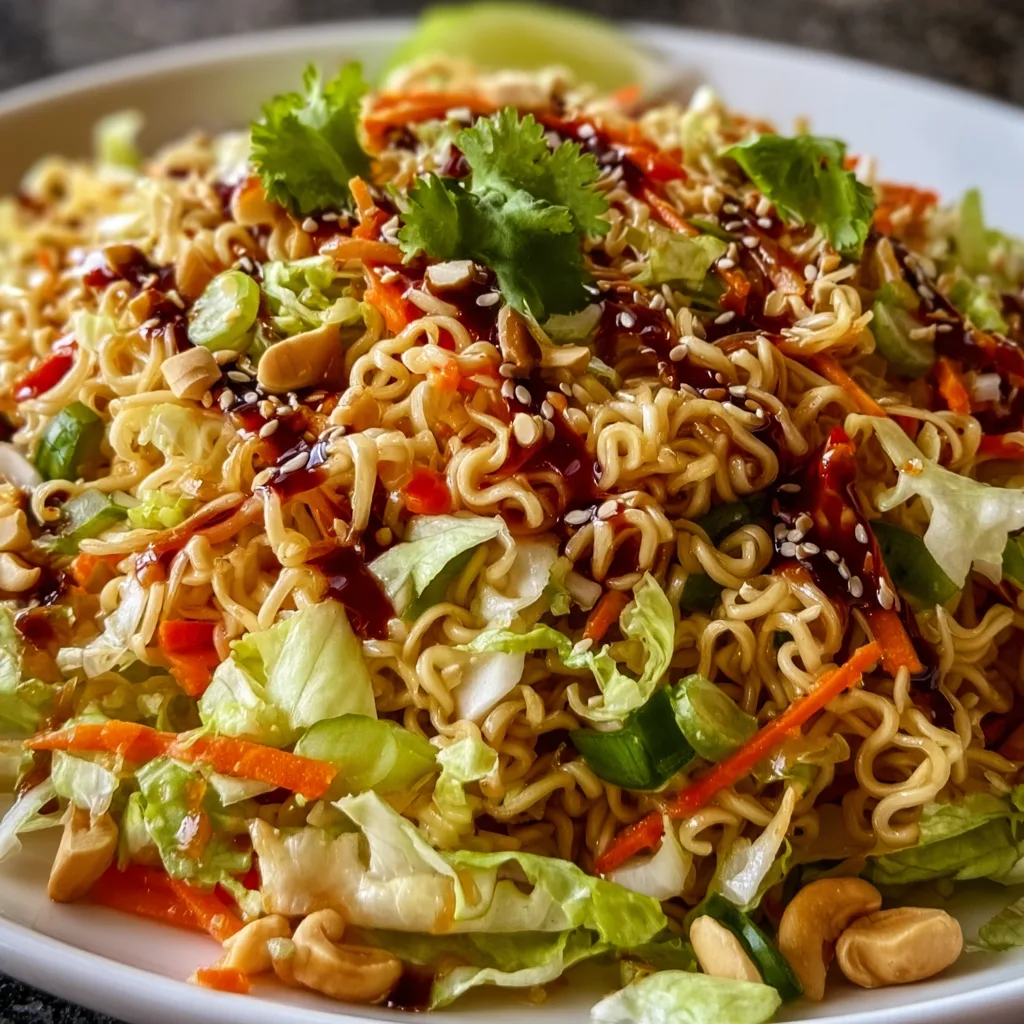
    This Crunchy Asian Ramen Noodle Salad brings me back to every summer potluck of my childhood—that unmistakable crunch of ramen noodles, the nutty toasted almonds, and that sweet-tangy dressing that somehow makes everything taste like sunshine. I still remember standing in my aunt’s kitchen, sneaking bites before dinner was served, the sesame oil lingering on my fingers. This isn’t just a salad; it’s a texture paradise that combines crispy, crunchy elements with fresh, vibrant vegetables and an umami-packed dressing that will have everyone asking for your recipe. Trust me, this will become your go-to potluck superstar.

    Recipe

    Why You’ll Love This Crunchy Asian Ramen Noodle Salad

    Perfect Make-Ahead Crowd-Pleaser

    The beauty of this Crunchy Asian Ramen Noodle Salad lies in its make-ahead magic. The flavors actually improve as they mingle in the refrigerator, making this the perfect dish to prepare the night before your gathering. I’ve brought this to countless office potlucks, and it’s always the first bowl to empty. The textures stay intact beautifully—the cabbage maintains its crispness while the dressing seeps into all the nooks and crannies of those crunchy noodles, creating that perfect balance of soft and crispy that keeps everyone coming back for seconds.

    Versatile and Customizable Base

    What I adore about this salad is how wonderfully adaptable it is to whatever you have on hand. The core ingredients create a perfect canvas for your creativity. Short on red cabbage? Green works just fine. Want more protein? Toss in some edamame or shredded chicken. I’ve made this during those “what’s left in the fridge” moments and still received rave reviews. The essential components—the crunchy ramen, the sweet-savory dressing, and fresh vegetables—create a foolproof foundation that welcomes substitutions while maintaining that signature Asian-inspired flavor profile.

    Essential Tips & Tricks

    Noodle Toasting Technique

    The secret weapon in this salad is properly toasted ramen noodles. Break the uncooked noodles into bite-sized pieces, discard the seasoning packet (we’re creating our own flavor magic!), and toast them in a dry skillet until they turn golden brown. Watch carefully—they go from perfect to burned in seconds! I learned this the hard way after ruining a batch while checking a text message. The toasting releases a nutty aroma that transforms those humble noodles into crunchy gold. For extra flavor, toast your almonds and sesame seeds at the same time.

    Dressing Dynamics

    The dressing is where this salad truly shines, balancing sweet, tangy, and umami notes perfectly. I recommend whisking it separately before adding to the salad—this ensures even distribution without drowning any ingredients. The combination of sesame oil, rice vinegar, honey, and soy sauce creates a complex flavor that keeps evolving as it sits. For best results, make the dressing a day ahead to let the flavors meld. I once forgot this step and made it last-minute for a dinner party, and while still delicious, it wasn’t quite as magical.

    Serving Ideas & Creative Variations

    Protein Pairings

    Transform this side dish into a complete meal by adding your favorite protein. Grilled chicken marinated in a complementary Asian-inspired sauce creates a delicious harmony of flavors. I love serving this with teriyaki salmon for dinner guests—the combination always impresses. For vegetarian options, crispy tofu or a soft-boiled egg adds wonderful texture contrast. The salad’s bright flavors also pair beautifully with spicy dishes, creating a cooling counterpoint that balances heat while maintaining its own distinctive character.

    Seasonal Adaptations

    One of the joys of this Crunchy Asian Ramen Noodle Salad is how easily it transforms with the seasons. In summer, I add fresh mango chunks and cilantro for a tropical twist that’s refreshingly bright. Fall calls for thinly sliced apples and dried cranberries. Winter? Try blood oranges and pomegranate seeds for festive pops of color and juicy sweetness. The cabbage base provides a reliable canvas year-round, while seasonal produce keeps the salad feeling fresh and exciting. I’ve served this at everything from summer barbecues to Christmas dinner with appropriate seasonal tweaks.

    Storage & Troubleshooting Guide

    Maintaining Maximum Crunch

    To preserve the signature crunch factor that makes this salad so addictive, I recommend a strategic assembly approach. Store the dressing, toasted elements (ramen noodles, almonds, seeds), and vegetable base separately until about 30 minutes before serving. This prevents the noodles from becoming soggy while still allowing enough time for flavors to meld. For potlucks, I pack components in separate containers and assemble on site. If you must prepare entirely ahead, reserve a small portion of the crunchy elements to sprinkle on top just before serving.

    Reviving Day-Old Salad

    Even perfectly stored, this salad will gradually lose some crunch after 24 hours—though the flavor actually improves. To revive day-old salad, try this rescue technique: toast a fresh batch of ramen noodles and almonds, then fold them into your leftover salad. A small splash of rice vinegar and drizzle of sesame oil will brighten the flavors that may have mellowed overnight. I discovered this trick after making too much for a family gathering, and the refreshed leftovers were almost better than the original batch—perfect for lunch the next day!

    Frequently Asked Questions

    Can I make Crunchy Asian Ramen Noodle Salad ahead of time?

    Yes! Prepare components separately up to 2 days ahead. Store dressing, toasted elements, and vegetable base in separate containers. Combine 30 minutes before serving for optimal texture and flavor development.

    What can I substitute for ramen noodles?

    Broken rice noodles, chow mein noodles, or even crispy wonton strips work beautifully. For a grain-free option, try toasted slivered almonds and extra sunflower seeds for similar crunch.

    Is this salad suitable for gluten-free diets?

    Not traditionally, as ramen contains wheat. However, substitute rice noodles or gluten-free ramen and use tamari instead of soy sauce for a delicious gluten-free adaptation.

    How long will leftovers stay fresh?

    The dressed salad maintains good texture for about 24 hours refrigerated. After that, the noodles soften but remain tasty for up to 3 days in an airtight container.

    Can I add other vegetables to this salad?

    Absolutely! Bell peppers, snap peas, shredded carrots, and water chestnuts all make excellent additions. Just ensure they’re cut thinly to maintain the salad’s signature texture balance.

    Final Thoughts

    This Crunchy Asian Ramen Noodle Salad has saved countless potlucks, weeknight dinners, and lunch ruts in my kitchen. There’s something irresistible about that perfect balance of textures and flavors—crunchy, fresh, sweet, tangy, and savory all in one colorful bowl. It’s the rare dish that pleases both adventurous eaters and picky ones alike. Whether you’re making it exactly as written or putting your own spin on it, this salad brings a bit of joy to any table. Don’t forget to check out more of my favorite salad recipes on Pinterest!

  • Creamy Broccoli Cheddar Chicken Recipe That Will WOW Your Taste Buds!

    Creamy Broccoli Cheddar Chicken Recipe That Will WOW Your Taste Buds!

    Creamy Broccoli Cheddar Chicken Recipe That Will WOW Your Taste Buds!

    Creamy Broccoli Cheddar Chicken has become my absolute go-to comfort dish when I need something that feels like a warm hug on a plate. There’s something magical about the way tender chicken breast mingles with vibrant broccoli florets, all enveloped in a velvety cheese sauce that pools deliciously around your favorite side. I first created this recipe on a rainy Sunday when my kitchen windows were fogged with condensation, and I’ve been perfecting it ever since. The aroma alone—garlicky, buttery, with that distinctive sharp cheddar scent—transforms my entire home into a sanctuary of coziness. If you’re craving something that balances indulgence with wholesome ingredients, this one-pan wonder deserves a permanent spot in your dinner rotation.

    Recipe

    Why You’ll Love This Creamy Broccoli Cheddar Chicken

    Family-Friendly Comfort Food

    This dish has become my family’s unanimous favorite, earning cheers even from my formerly broccoli-averse nephew! The tender chicken stays incredibly juicy while the broccoli maintains just enough bite to feel substantial. What makes this recipe truly special is how it transforms simple ingredients into something that feels restaurant-worthy. The sauce achieves that perfect consistency—not too thick, not too runny—coating each bite with creamy goodness. I’ve watched guests close their eyes with that first forkful, savoring the moment before inevitably asking for the recipe. It’s comfort food elevated without any fussy techniques.

    One-Pan Simplicity

    On hectic weeknights when I’m juggling deadlines and household tasks, this one-pan meal has saved my sanity countless times. Everything comes together in about 30 minutes with minimal cleanup afterward—just one skillet to wash! The cooking process flows effortlessly: sear the chicken, create the velvety sauce, return everything to the pan, and let it bubble to perfection. I love how the broccoli florets catch little pools of the sauce in their flowery tops, making each bite a perfect balance of textures. The simplicity belies how impressive the final dish looks when served, making it equally perfect for both Tuesday dinners and weekend entertaining.

    Essential Tips & Tricks

    Perfecting Your Cheese Sauce

    The secret to silky smoothness lies in how you incorporate the cheese. I learned this the hard way after one unfortunate grainy disaster! Always remove your pan from direct heat before adding cheese, then sprinkle it gradually while stirring constantly. This prevents the proteins from seizing up and creating that dreaded gritty texture. Temperature control is everything—too hot and the sauce breaks, too cool and it won’t melt properly. I prefer using freshly grated cheddar rather than pre-shredded, which contains anti-caking agents that can interfere with melting. For extra depth, try mixing sharp cheddar with a touch of smoked gouda or fontina.

    Chicken Preparation Techniques

    Achieving perfectly juicy chicken starts with even thickness. I always butterfly or pound my chicken breasts to about ¾-inch thickness to ensure they cook uniformly without drying out. Season generously with salt and pepper before searing—this creates that beautiful golden crust that adds tremendous flavor. For maximum juiciness, resist the urge to constantly move the chicken while it’s searing. Let it develop that caramelized exterior undisturbed for at least 3-4 minutes per side. If you’re short on time, you can use pre-cooked rotisserie chicken instead, adding it just before the broccoli to warm through without overcooking.

    Serving Ideas & Creative Variations

    Perfect Pairing Suggestions

    This creamy chicken dish begs for something to catch all that luscious sauce! My family’s favorite pairing is fluffy basmati rice that soaks up every last drop. For lower-carb options, cauliflower rice or zucchini noodles work beautifully without compromising the comfort factor. When I’m feeling fancy, I serve it alongside crusty artisan bread for dipping or over buttered egg noodles. The sauce also pairs wonderfully with roasted sweet potatoes or crispy Greek potatoes for textural contrast. Don’t forget a simple side salad with vinaigrette to cut through the richness—the acidity provides perfect balance to the creamy elements.

    Exciting Flavor Variations

    The beauty of this recipe lies in its adaptability! My current obsession is adding sun-dried tomatoes and spinach for a Mediterranean twist that brightens the entire dish. For heat lovers in your household, incorporating diced jalapeños or a dash of cayenne transforms it into a spicy delight. Mushroom enthusiasts should try adding sautéed cremini or shiitake mushrooms for earthy depth. Swap the cheddar for gruyère and add fresh thyme for French-inspired elegance, or go Italian with mozzarella, basil and a splash of white wine in the sauce. For special occasions, stir in a handful of lump crab meat or cooked bacon bits just before serving.

    Storage & Troubleshooting Guide

    Proper Storage Methods

    This dish maintains its delicious integrity when stored properly! Transfer any leftovers immediately to airtight containers once cooled to room temperature—never leave it sitting out longer than two hours. In the refrigerator, it stays perfectly good for 3-4 days, though the sauce may thicken considerably. For freezing, I recommend portioning into individual servings in freezer-safe containers where it will keep for up to 2 months. The texture of the broccoli will soften after freezing, but the flavor remains wonderful. Always label containers with the date to keep track of freshness!

    Fixing Common Issues

    Even experienced cooks encounter challenges! If your sauce has separated or curdled, don’t panic—lower the heat immediately and whisk in a tablespoon of cold cream or cream cheese to help re-emulsify it. For sauce that’s too thin, create a slurry with a teaspoon of cornstarch mixed with cold water and whisk it in while simmering. If it’s too thick, gradually add chicken broth or cream until you reach your desired consistency. Broccoli too crunchy? Cover the pan for the last few minutes of cooking to steam it to perfection. Chicken turned out dry? Slice it thinly and let it rest in the sauce to reabsorb moisture.

    Frequently Asked Questions

    Can I use frozen broccoli for this Creamy Broccoli Cheddar Chicken recipe?

    Absolutely! Thaw it first and pat dry with paper towels to remove excess moisture. Add it to the recipe slightly later than fresh broccoli since it’s already partially cooked.

    What’s the best cheese substitute if I don’t have cheddar?

    Monterey Jack melts beautifully and offers a mild flavor, while Gruyère provides a nuttier taste. Provolone or Colby work well too—just avoid very soft cheeses like Brie that change the sauce texture.

    How can I make this recipe lighter?

    Use low-fat milk instead of heavy cream, reduce cheese by 25%, and increase the broccoli portion. You can also substitute Greek yogurt for some of the cream for added protein.

    Can I prepare components ahead of time?

    Yes! Cube chicken and store refrigerated for up to 24 hours. Chop broccoli and refrigerate in a container with a damp paper towel. Pre-measure other ingredients for quick assembly when ready to cook.

    Is this recipe gluten-free?

    The base recipe is naturally gluten-free if you use cornstarch instead of flour for thickening. Always verify your chicken broth is gluten-free, as some commercial brands contain wheat derivatives.

    Final Thoughts

    This Creamy Broccoli Cheddar Chicken has become more than just a recipe in my household—it’s a reliable friend that shows up on our busiest nights and most special gatherings alike. The way it transforms humble ingredients into something that feels special represents everything I love about home cooking. I find myself craving not just the flavors but the comforting ritual of making it, watching the sauce bubble and thicken as the kitchen fills with that irresistible aroma. Whether you’re cooking for picky eaters or gourmet food lovers, this versatile dish adapts to your needs while remaining wonderfully satisfying. Don’t forget to check out more cozy comfort food ideas on Pinterest!

  • French Onion Pot Roast Recipe That Will Melt Your Heart Fast

    French Onion Pot Roast Recipe That Will Melt Your Heart Fast

    French Onion Pot Roast Recipe That Will Melt Your Heart Fast

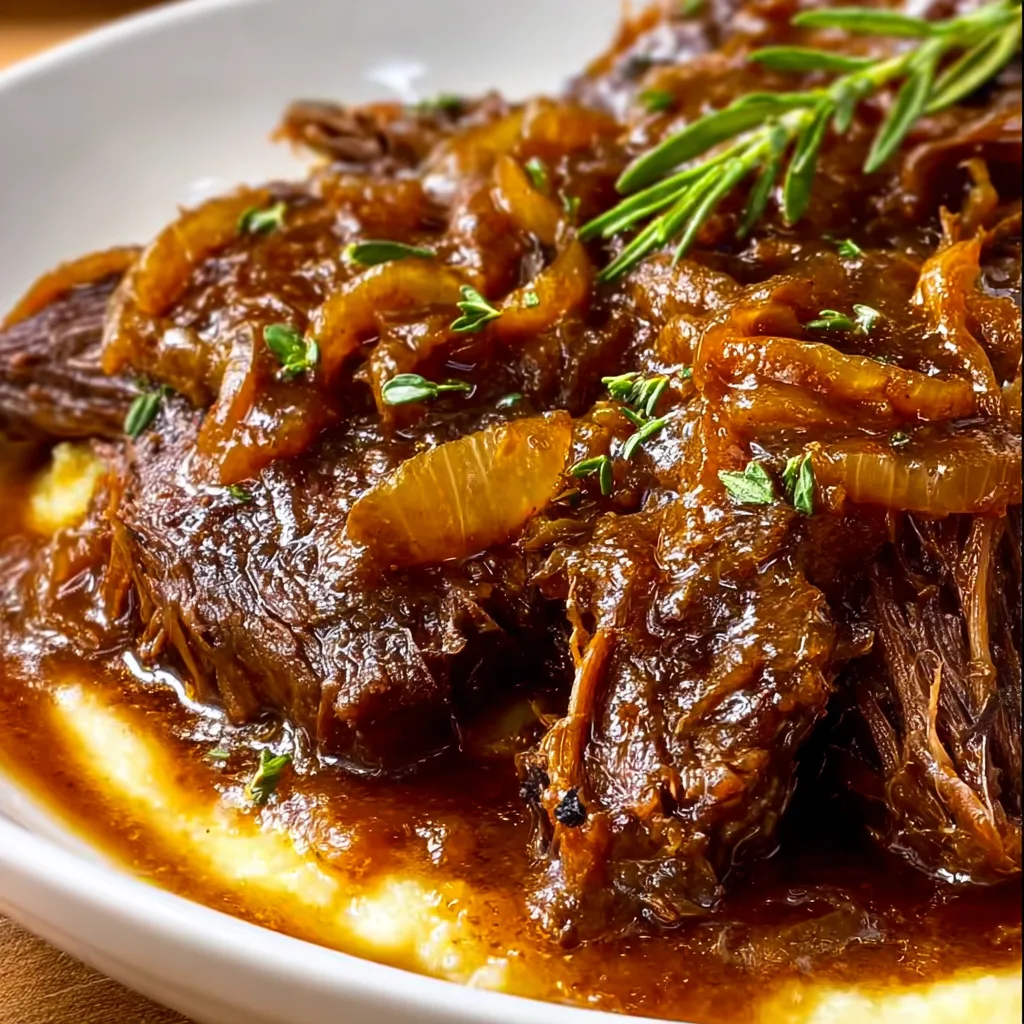
    French Onion Pot Roast transforms an ordinary Sunday dinner into a celebration of comfort food magic. The first time I made this dish, my kitchen filled with an aroma so rich and inviting that my neighbor actually texted to ask what I was cooking! There’s something deeply satisfying about the marriage of caramelized onions and tender beef, slowly braised until it practically melts on your fork. If you’re looking for a show-stopping meal that delivers both elegance and homey comfort, you’ve found it in this French Onion Pot Roast.

    Recipe

    Why You’ll Love This French Onion Pot Roast

    A Symphony of Flavors in One Pot

    This French Onion Pot Roast delivers an incredible depth of flavor that will make your taste buds dance. The sweet caramelized onions meld with savory beef broth and herbs, creating a rich umami base that infuses every bite of the meat. What makes this dish truly special is how the beef absorbs all those flavors during the slow cooking process. I love watching my family’s faces light up with that first bite—when the tender meat practically dissolves on their tongues and the French onion flavors bloom. It’s comfort food elevated to an art form!

    Effortless Elegance for Any Occasion

    Don’t let the impressive results fool you—this French Onion Pot Roast is surprisingly simple to prepare. The magic happens while you’re away, making it perfect for both busy weeknights and special gatherings. Just sear, add ingredients, and let your Dutch oven or slow cooker do the heavy lifting. I’ve served this at everything from casual family dinners to holiday feasts, and it never fails to impress. The best part? You’ll spend minimal time in the kitchen while creating a meal that looks and tastes like you’ve been cooking all day.

    Essential Tips & Tricks

    Selecting and Preparing the Perfect Cut

    Choosing the right cut of beef is crucial for French Onion Pot Roast success. I recommend a chuck roast (3-4 pounds) for its marbling and connective tissue that breaks down beautifully during slow cooking. Before cooking, let your meat come to room temperature and pat it thoroughly dry—this ensures a proper sear that locks in juices. Season generously with salt and pepper on all sides. For the onions, use sweet varieties like Vidalia or yellow onions, sliced into uniform thickness to ensure they caramelize evenly. This foundation sets you up for pot roast perfection!

    Mastering the Cooking Technique

    The secret to an exceptional French Onion Pot Roast lies in two critical steps: a proper sear and slow braising. First, sear the roast in a hot Dutch oven until deeply browned on all sides—don’t rush this step! It develops crucial flavor compounds. Next, caramelize those onions slowly until they’re golden and sweet. When braising, maintain a low, steady temperature (300°F in the oven or low setting in a slow cooker). For the most tender results, aim for 3-4 hours in a Dutch oven or 8-10 hours in a slow cooker. The Mediterranean Chicken Orzo uses similar slow-cooking principles!

    Serving Ideas & Creative Variations

    Perfect Pairings for a Complete Meal

    French Onion Pot Roast shines brightest when paired with sides that complement its rich flavors. My go-to accompaniment is creamy mashed potatoes to soak up that glorious gravy. For a lighter option, try roasted root vegetables or a simple green salad with vinaigrette. Want to lean into the French inspiration? Serve alongside crusty bread topped with melted Gruyère. For special occasions, I often prepare Ruth’s Chris Style Potatoes Au Gratin as a decadent side. The starchy comfort perfectly balances the savory depth of the pot roast, creating a meal that feels both special and satisfying.

    Exciting Twists on the Classic Recipe

    While traditional French Onion Pot Roast is divine, don’t be afraid to make it your own! For a wine-infused variation, replace half the beef broth with a dry red wine like Cabernet Sauvignon. Mushroom lovers can add 8 ounces of sliced cremini or baby portobello mushrooms when caramelizing the onions. For a hint of sweetness, try adding 2 tablespoons of balsamic vinegar to the braising liquid. My family’s favorite twist includes adding fresh thyme sprigs and a bay leaf to the pot. These simple additions maintain the essence of the dish while creating something uniquely yours!

    Storage & Troubleshooting Guide

    Proper Storage for Maximum Flavor

    French Onion Pot Roast actually improves with time, making it perfect for meal prepping. Store leftovers in an airtight container in the refrigerator for up to 4 days—the flavors will continue to develop! For freezing, separate the meat from the gravy to maintain better texture, then store in freezer-safe containers for up to 3 months. When reheating, I recommend low and slow methods: either in a covered dish in a 325°F oven or in a saucepan over medium-low heat. Add a splash of beef broth if needed to revive the sauce. The flavors will be even more harmonious the next day!

    Solving Common Cooking Challenges

    If your French Onion Pot Roast turns out tough, it likely needs more time—this cut benefits from patience. Simply return it to the pot with additional liquid and continue cooking until fork-tender. For gravy that’s too thin, remove the meat and reduce the liquid over medium heat, or create a slurry with 1 tablespoon cornstarch mixed with 2 tablespoons cold water. For too-thick gravy, gradually add beef broth until you reach your desired consistency. If your onions burned rather than caramelized, next time cook them over lower heat for longer—proper caramelization takes 25-30 minutes of gentle cooking.

    Frequently Asked Questions

    What cut of beef works best for French Onion Pot Roast?

    Chuck roast is ideal due to its marbling and connective tissue that breaks down during slow cooking. Brisket or bottom round roast also work well, but chuck offers the best balance of flavor, tenderness, and affordability.

    Can I make French Onion Pot Roast in a slow cooker?

    Absolutely! Sear the meat and caramelize onions separately, then transfer everything to your slow cooker. Cook on low for 8-10 hours or high for 5-6 hours until fork-tender.

    How do I know when my pot roast is done?

    The meat should easily shred with a fork when it’s done. If you meet resistance, it needs more time. A meat thermometer should read around 205°F for that perfect fall-apart texture.

    Can I prepare French Onion Pot Roast ahead of time?

    Yes! It actually tastes better the next day as flavors continue to develop. Refrigerate for up to 4 days or freeze for up to 3 months. Reheat gently with a splash of broth.

    What’s the secret to rich flavor in French Onion Pot Roast?

    The magic comes from properly caramelizing the onions (20-30 minutes until deep golden) and thoroughly searing the meat. Don’t rush these steps—they create the deep flavor foundation.

    Final Thoughts

    French Onion Pot Roast has become my go-to recipe when I want to fill my home with irresistible aromas and gather loved ones around the table. There’s something almost magical about transforming simple ingredients into something so deeply satisfying through the patient process of slow cooking. Whether you’re making this for a special occasion or simply because you deserve something wonderful, this dish delivers comfort in every bite. I’d love to see your creations—share them with me on Pinterest and let me know how your French Onion Pot Roast turned out!

  • High-Protein Spinach Artichoke Chicken Casserole You’ll Crave!

    High-Protein Spinach Artichoke Chicken Casserole You’ll Crave!

    High-Protein Spinach Artichoke Chicken Casserole You’ll Crave!

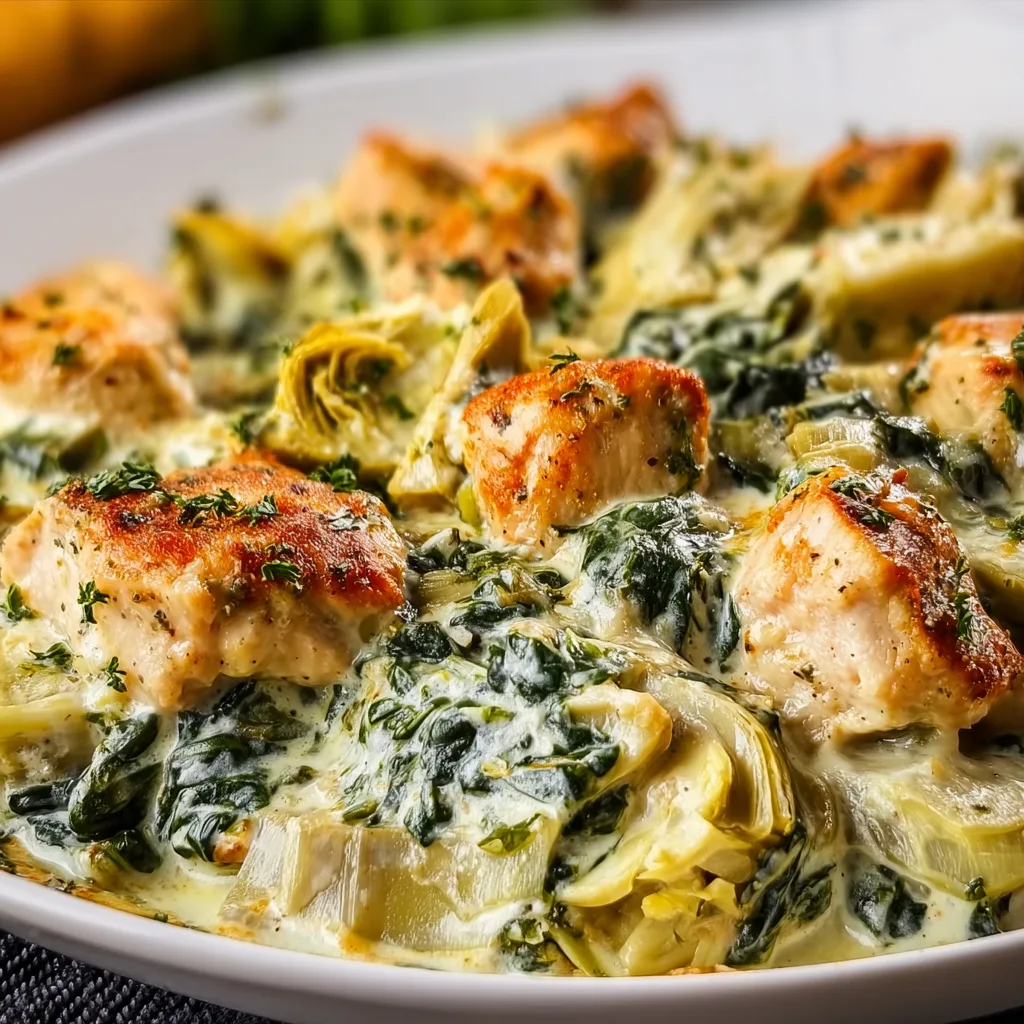
    This High-Protein Spinach and Artichoke Chicken Casserole has become my absolute go-to dinner on those evenings when I crave something hearty yet nutritious. The first time I made it, my kitchen filled with the most intoxicating aroma of garlic, herbs, and melting cheese that had my partner wandering in from the other room asking “What smells so amazing?” It combines tender chicken breast with nutrient-packed spinach and artichokes, all wrapped in a creamy, protein-rich sauce that bubbles to golden perfection in the oven. Trust me, this casserole delivers that cozy comfort food feeling while keeping your nutrition goals on track.

    Recipe

    Why You’ll Love This High-Protein Spinach and Artichoke Chicken Casserole

    Perfect Balance of Nutrition and Flavor

    This casserole isn’t just another pretty dish—it’s a powerhouse of protein that keeps you satisfied for hours. Each serving packs around 35 grams of protein from the chicken breast, Greek yogurt, and cheese blend. I love how the tangy artichoke hearts cut through the richness, while the spinach adds that earthy depth and vibrant color. The first time I served this to my fitness-focused friend Sarah, she couldn’t believe something so creamy and indulgent could align with her macros. The combination of lean protein and vegetables creates that rare sweet spot where nutritious meets delicious.

    Meal Prep Magic

    There’s something incredibly satisfying about having a casserole ready to go in the fridge after a long day. This dish actually tastes even better the next day as the flavors meld together overnight. I often assemble it on Sunday afternoons while listening to my favorite podcast, then portion it into containers for easy grab-and-go lunches throughout the week. The protein content helps keep me full during busy workdays, and unlike some meal prep options that feel sad by Thursday, this casserole maintains its creamy texture and vibrant flavors right to the end of the week.

    Essential Tips & Tricks

    Mastering the Perfect Texture

    The secret to avoiding a watery casserole lies in how you handle the spinach and artichokes. Always thoroughly drain these ingredients—I squeeze the thawed spinach inside a clean kitchen towel until not a single drop remains. For artichokes, I pat them dry with paper towels before chopping. Another game-changer was switching to Greek yogurt instead of sour cream, which adds protein while creating that perfect creamy consistency. When I’m feeling extra indulgent, I add a thin layer of crushed pork rinds on top for a zero-carb crunch that browns beautifully in the oven.

    Flavor-Building Techniques

    Don’t rush the initial sautéing of garlic and onions—this foundational flavor base transforms the entire dish. I learned this the hard way after once hurrying through this step, only to end up with a bland casserole. Now I let them slowly caramelize until golden and fragrant, about 5-7 minutes. Adding a splash of white wine to deglaze the pan incorporates another dimension of flavor. For an extra punch, I mix in a tablespoon of Dijon mustard with the Greek yogurt, which brightens the entire dish without overpowering it. This pairs beautifully with my Crispy Greek Potatoes on special occasions.

    Serving Ideas & Creative Variations

    Complementary Side Dishes

    While this casserole stands perfectly on its own, pairing it with the right sides elevates the entire meal experience. I love serving it with a simple arugula salad dressed with lemon juice and olive oil—the peppery greens and bright acidity balance the creamy casserole beautifully. For a heartier option, roasted cauliflower rice makes an excellent low-carb base that soaks up all those delicious casserole juices. On weekends, I sometimes indulge in a slice of crusty garlic bread for dipping, similar to how I serve my Mediterranean Chicken Orzo, creating that perfect bite of crunchy bread and creamy sauce.

    Creative Protein Variations

    While chicken breast is my go-to, this versatile recipe welcomes creative protein swaps. When I’m short on time, rotisserie chicken shredded into chunks works beautifully and adds a depth of flavor. For seafood lovers, chunks of firm white fish or even shrimp create an elegant variation—just reduce the baking time by about 10 minutes to prevent overcooking. Turkey breast makes an excellent substitute after Thanksgiving when we’re all looking for creative leftover solutions. For vegetarians, replace the chicken with cubed extra-firm tofu that’s been pressed and pre-baked for 20 minutes to remove excess moisture.

    Storage & Troubleshooting Guide

    Proper Storage Techniques

    To maintain optimal freshness, allow the casserole to cool completely before transferring to airtight containers. In the refrigerator, it stays delicious for up to 4 days—perfect for weekly meal prep. For longer storage, freeze individual portions wrapped tightly in plastic wrap then aluminum foil to prevent freezer burn. I label each package with the date using masking tape. When I’m ready to enjoy, I thaw overnight in the refrigerator rather than using the microwave defrost function, which can create hot spots and affect the creamy texture. This methodical approach ensures each serving tastes as good as the first.

    Fixing Common Issues

    If your casserole turns out watery, the culprit is usually undrained vegetables. Next time, double-drain your spinach and artichokes by pressing them in a fine-mesh strainer after the initial squeeze. For a casserole that’s too dry, mix in ¼ cup of chicken broth before baking. If the top browns too quickly before the center is hot, loosely cover with foil for the remaining bake time. When reheating leftovers, sprinkle a few drops of water before microwaving on 70% power, stirring halfway through. This gentle reheating method preserves the creamy texture without creating that rubbery edge that can happen with high-heat microwave settings.

    Frequently Asked Questions

    Is this High-Protein Spinach and Artichoke Chicken Casserole keto-friendly?

    Yes! With only 7g net carbs per serving, this casserole fits perfectly into a ketogenic diet. The high fat content from cheese and the protein from chicken make it an ideal keto meal option.

    Can I use fresh spinach instead of frozen?

    Absolutely. Use about 1 pound of fresh spinach, sauté it first until wilted, then drain thoroughly. Fresh spinach contains more water, so proper draining is crucial to avoid a soggy casserole.

    How can I increase the protein content even further?

    Mix in ½ cup of unflavored protein powder with the Greek yogurt or add ½ cup of cottage cheese to the mixture. You can also top with additional shredded chicken or sprinkle with hemp seeds.

    Can this be made dairy-free?

    Yes, substitute the Greek yogurt with dairy-free yogurt alternatives and use vegan cheese shreds. Nutritional yeast (2-3 tablespoons) adds a cheesy flavor without dairy.

    How do I prevent the casserole from curdling?

    Use room temperature Greek yogurt and cream cheese, and avoid boiling the mixture. Gentle heating and thorough mixing before baking ensures a smooth, creamy texture without curdling.

    Final Thoughts

    This High-Protein Spinach and Artichoke Chicken Casserole has truly transformed my weeknight dinner routine. It strikes that perfect balance between being nutritious enough for everyday meals yet special enough for entertaining guests. The protein-packed ingredients keep me satisfied while the creamy, comforting flavors make healthy eating feel like an indulgence rather than a sacrifice. Whether you’re meal prepping for a busy week or cooking for a family dinner, this versatile casserole adapts to your needs while keeping nutrition at the forefront. Don’t forget to check out more protein-rich recipes on our Pinterest for endless inspiration!

  • Creamy Mediterranean Quesadillas: Irresistibly Delicious & Easy!

    Creamy Mediterranean Quesadillas: Irresistibly Delicious & Easy!

    Creamy Mediterranean Quesadillas: Irresistibly Delicious & Easy!

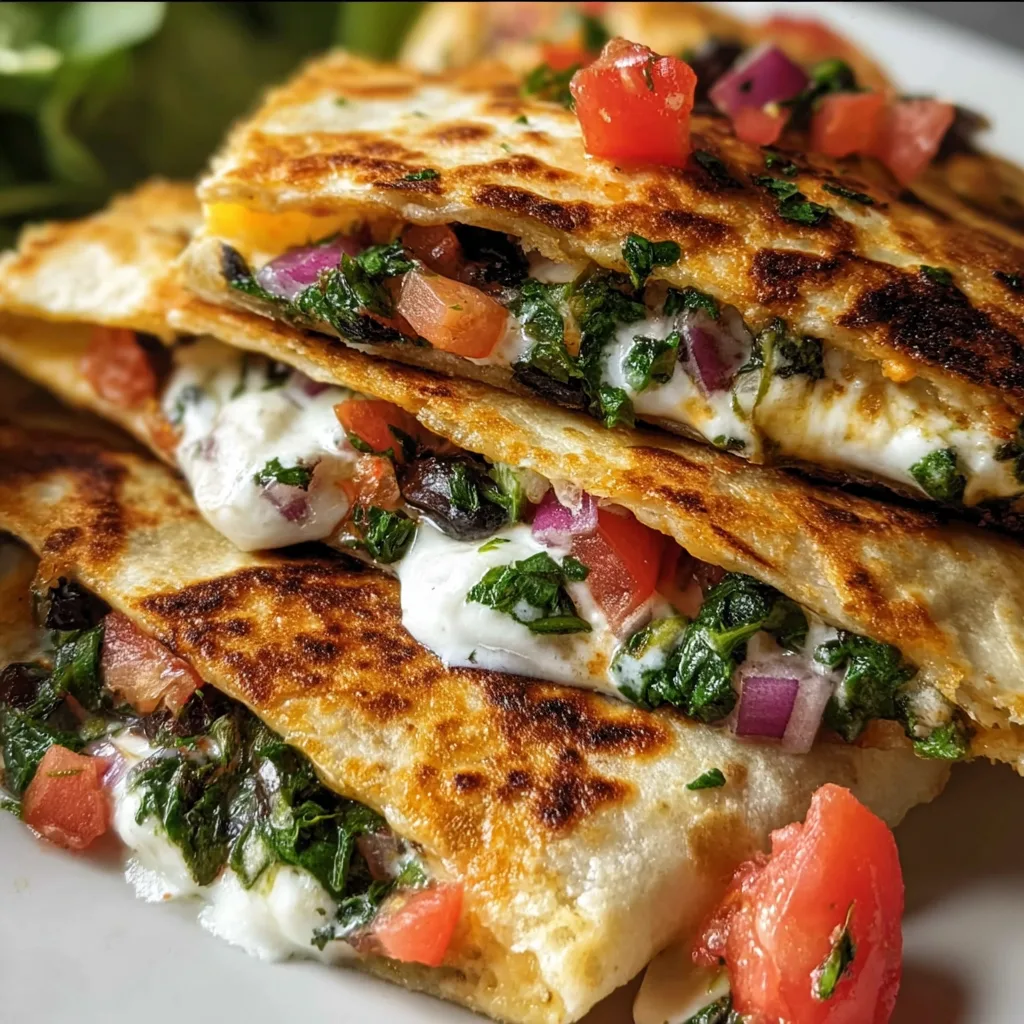
    Creamy Mediterranean Quesadillas bring together the bright, tangy flavors of the Mediterranean with the comforting, melty goodness of a classic quesadilla. The first time I made these for my family, the kitchen filled with the aromatic blend of herbs and spices that instantly transported us to a seaside taverna. There’s something magical about the way the feta cheese melts alongside creamy hummus, creating pockets of tangy saltiness against the backdrop of warm, toasted tortillas. This recipe has become my go-to when I’m craving something that feels both indulgent and fresh at the same time – perfect for a quick lunch or casual dinner with friends. Let’s dive into this Mediterranean twist on a beloved classic!

    Recipe

    Why You’ll Love This Creamy Mediterranean Quesadillas

    A Perfect Fusion of Flavors

    The beauty of these Creamy Mediterranean Quesadillas lies in their perfect balance of flavors and textures. Each bite delivers the creamy tanginess of feta cheese and hummus alongside the bright pop of sun-dried tomatoes and kalamata olives. I love how the Mediterranean ingredients transform an everyday quesadilla into something extraordinary. The first time I served these at a casual gathering, my friend Sarah literally closed her eyes with that first bite – that moment of pure food joy is exactly why I keep making these. They’re sophisticated enough for entertaining but simple enough for a weeknight dinner.

    Quick and Customizable

    What makes these Creamy Mediterranean Quesadillas truly special is how quickly they come together while still feeling like something special. In just 15 minutes, you can have a restaurant-worthy meal on the table! I’ve made these on busy weeknights when time was tight but still wanted something more exciting than my usual fare. The recipe is endlessly customizable – add grilled chicken for extra protein, swap in different Mediterranean vegetables based on what’s in season, or experiment with different types of hummus. This flexibility makes them perfect for families with varying preferences or for using up whatever ingredients you have on hand.

    Essential Tips & Tricks

    Perfecting the Crispy Exterior

    The key to truly outstanding Creamy Mediterranean Quesadillas is achieving that perfect golden-brown crust on the outside while keeping the filling melty and warm. I learned the hard way that medium-low heat is your friend here – too hot and your tortilla burns before the filling warms through. A light brush of olive oil (rather than butter) on the outside of the tortilla not only adds authentic Mediterranean flavor but creates the most beautiful crisp texture. Don’t rush the process! Allow each side about 2-3 minutes to develop that gorgeous color and crunch that makes the contrast with the creamy filling so divine.

    Balancing Your Fillings

    Finding the right balance of ingredients is crucial for these Creamy Mediterranean Quesadillas. The star components – feta, hummus, olives, and sun-dried tomatoes – all pack intense flavors, so distribution matters. I spread a thin layer of hummus first as a “glue,” then sprinkle other ingredients evenly, focusing on balance rather than overloading. One mistake I made early on was adding too many wet ingredients, which made the quesadillas soggy. For perfectly crisp results, pat any marinated items dry before adding them to your tortilla. This approach ensures every bite has the perfect balance of Mediterranean flavors without becoming overwhelming or messy.

    Serving Ideas & Creative Variations

    Mediterranean-Inspired Sides

    Elevate your Creamy Mediterranean Quesadillas experience by pairing them with complementary sides that enhance the meal’s Mediterranean theme. A simple Greek salad with crisp cucumbers, juicy tomatoes, and a lemon-olive oil dressing makes for a refreshing contrast to the warm, crispy quesadillas. I love serving these with a side of tzatziki sauce for dipping – the cool yogurt sauce with its hints of cucumber and dill perfectly balances the rich, savory quesadillas. For a more substantial meal, consider adding a small portion of lemon herb rice that soaks up any extra sauce and rounds out the Mediterranean flavor profile.

    Creative Filling Variations

    Don’t be afraid to experiment with different fillings to create your own signature version of Creamy Mediterranean Quesadillas. Try adding roasted red peppers for sweetness and color or spinach for a nutritious boost. For a protein-packed variation, add shredded rotisserie chicken, grilled shrimp, or even chickpeas for a vegetarian option. One of my favorite variations includes a sprinkle of za’atar seasoning and a drizzle of honey before folding – the sweet-savory combination is absolutely divine. You could also try different cheeses alongside the feta – a mild mozzarella melts beautifully and creates that Instagram-worthy cheese pull we all love.

    Storage & Troubleshooting Guide

    Make-Ahead and Storage Options

    These Creamy Mediterranean Quesadillas are perfect for meal prep and can be easily stored for later enjoyment. For make-ahead options, prepare the filling mixture up to two days in advance and store it in an airtight container in the refrigerator. When you’re ready to eat, simply assemble and cook the quesadillas fresh. If you have leftover cooked quesadillas, let them cool completely before wrapping in foil and refrigerating for up to two days. To reheat, avoid the microwave which will make them soggy – instead, place them in a dry skillet over medium-low heat for 2-3 minutes per side to restore their crispy exterior.

    Solving Common Quesadilla Problems

    Even experienced cooks occasionally run into issues when making quesadillas. If your Creamy Mediterranean Quesadillas are turning out too soggy, the culprit is likely excess moisture in your ingredients. Make sure to drain and pat dry any marinated components like artichoke hearts or sun-dried tomatoes. If your tortillas are breaking when you fold them, try warming them slightly before adding fillings to make them more pliable. For filling that keeps falling out, don’t overfill and make sure to leave a half-inch border around the edges. Finally, if your cheese isn’t melting properly, try covering the pan with a lid for 30 seconds to trap heat and encourage melting.

    Frequently Asked Questions

    What makes Mediterranean quesadillas different from regular quesadillas?

    Creamy Mediterranean Quesadillas feature ingredients like feta cheese, hummus, olives, and herbs typical of Mediterranean cuisine, creating a tangy, herb-forward flavor profile that differs from the traditional Mexican-inspired versions with cheddar and jalapeños.

    Can I make these quesadillas ahead of time?

    Yes! Prepare the filling mixture up to 2 days ahead and store refrigerated. For best results, assemble and cook the quesadillas just before serving to maintain the crispy exterior.

    What’s the best cheese to use in Mediterranean quesadillas?

    Feta is traditional, but a combination of feta and mozzarella works beautifully. The feta provides tang while mozzarella delivers that satisfying melty texture everyone loves.

    Are these quesadillas healthy?

    They can be! Mediterranean ingredients are rich in heart-healthy fats, protein, and antioxidants. Use whole wheat tortillas and control portion sizes for a balanced meal option.

    How can I make these quesadillas vegan?

    Simply swap the cheese for plant-based feta alternatives and ensure your hummus is vegan. The Mediterranean flavor profile works wonderfully with vegan ingredients while maintaining the creamy texture.

    Final Thoughts

    These Creamy Mediterranean Quesadillas have become a staple in my kitchen for good reason – they’re the perfect marriage of familiar comfort food with exciting, vibrant flavors. There’s something magical about the way the creamy, tangy filling contrasts with the crispy tortilla exterior. Whether you’re serving them for a quick lunch, casual dinner, or elegant appetizers cut into triangles, they’re guaranteed to impress. I hope you’ll give these Mediterranean-inspired quesadillas a try and perhaps even create your own signature version! Don’t forget to check out more Mediterranean-inspired recipes on Pinterest for additional inspiration.

  • Easy Cheesy Taco Pasta Recipe That Will Melt Your Heart!

    Easy Cheesy Taco Pasta Recipe That Will Melt Your Heart!

    Easy Cheesy Taco Pasta Recipe That Will Melt Your Heart!

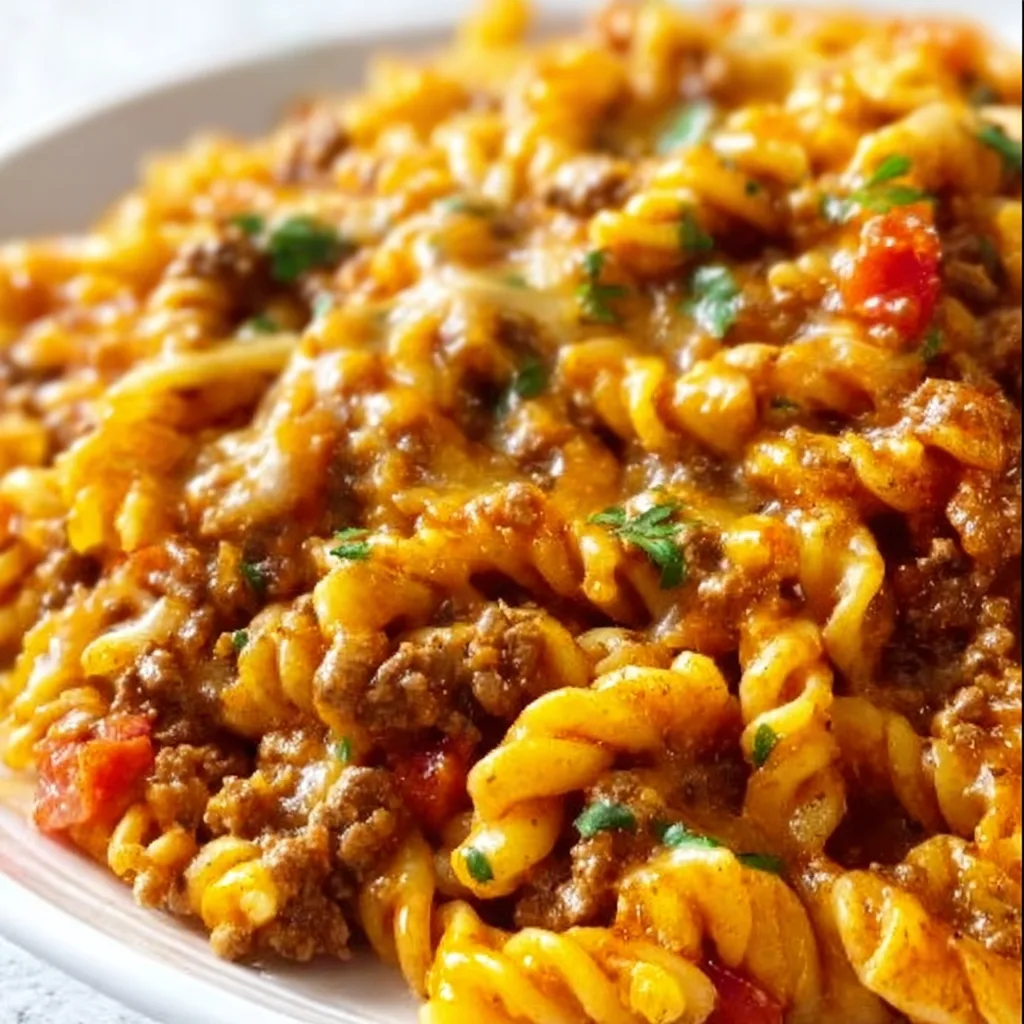
    Easy Cheesy Taco Pasta is the ultimate weeknight wonder that’s saved my sanity more times than I can count. Picture this: it’s Wednesday evening, I’m exhausted after a long day, and the thought of complicated cooking makes me want to order takeout. That’s when this 30-minute miracle comes to my rescue! The combination of seasoned ground beef, gooey melted cheese, and tender pasta creates a comfort food masterpiece that my family requests weekly. If you’re looking for simple recipes that deliver big flavor, this dish belongs in your regular rotation—just like my Mediterranean Chicken Orzo that’s another weeknight favorite.

    Recipe

    Why You’ll Love This Easy Cheesy Taco Pasta

    Family-Friendly Comfort Food

    This dish is pure magic when it comes to pleasing picky eaters. The familiar taco flavors wrapped in a creamy pasta package make it impossible to resist! I’ve seen my most vegetable-averse nephew clean his plate and ask for seconds when this appears on the table. The beauty lies in its versatility—you can dial the spice level up or down depending on your family’s preferences. Plus, that moment when you pull it from the stove and see the cheese melting into ribbons of golden deliciousness? Pure kitchen satisfaction that warms my heart every time.

    Quick and Budget-Friendly

    On busy weeknights when time feels like sand slipping through my fingers, this dish is my secret weapon. From pantry to table in just 30 minutes flat, it’s faster than delivery and infinitely more satisfying. The ingredients won’t break the bank either—ground beef (or turkey for a lighter option), pasta, taco seasoning, and cheese are staples that often go on sale. I keep these ingredients on hand specifically for those “I can’t even think about cooking” evenings. One pot means minimal cleanup, and that alone makes this recipe worth its weight in gold when I’m exhausted but still want to nourish my family properly.

    Essential Tips & Tricks

    Perfect Pasta Selection

    The pasta you choose makes a significant difference in the final texture of this dish. I recommend medium shells or rotini that capture little pockets of the sauce in their crevices. Cook the pasta just until al dente—about 1-2 minutes less than package directions—since it will continue cooking when combined with the hot taco mixture. This prevents the dreaded mushy pasta syndrome! For an extra flavor boost, try cooking your pasta in chicken broth instead of water. The subtle savory notes elevate the entire dish and remind me of my Chicken Carbonara where the pasta similarly soaks up all those delicious flavors.

    Seasoning Secrets

    While store-bought taco seasoning works perfectly, making your own signature blend takes this dish from good to unforgettable. My personal mix includes chili powder, cumin, garlic powder, onion powder, oregano, paprika, and a pinch of cinnamon for warmth. The homemade version allows you to control the salt and eliminate preservatives. Don’t skip blooming your spices! Add them to the beef while it’s still cooking and let them toast for 30 seconds before adding liquids. This simple step releases the essential oils in the spices, creating deeper, more complex flavors that make your taste buds dance with joy.

    Serving Ideas & Creative Variations

    Toppings Bar Extravaganza

    Transform dinner into an interactive experience by setting up a toppings bar alongside your pasta. Fresh diced tomatoes, sliced black olives, chopped green onions, and dollops of sour cream create a customizable feast. My personal favorite is adding diced avocado and a squeeze of lime for brightness. When I hosted my sister’s birthday dinner, I created individual pasta bowls with the basic recipe, then let everyone personalize their portions. The joy on everyone’s faces as they created their perfect combination reminded me why I love cooking—it brings people together! This approach works beautifully with my One-Pot Burrito Bowls too.

    Creative Twist Options

    When I’m feeling adventurous, I love giving this classic a fresh spin. Try substituting ground chicken or turkey for beef, or go vegetarian with black beans and corn for protein. For a creamy variation, stir in 4 ounces of cream cheese along with the shredded cheese. Feeling bold? Add a can of diced green chiles or jalapeños for heat. My latest obsession is the “inside-out” version—stuff the mixture into bell peppers, top with more cheese, and bake until bubbly. The peppers add a sweet crunch that complements the savory filling perfectly and transforms this quick dinner into something special enough for weekend entertaining.

    Storage & Troubleshooting Guide

    Make-Ahead and Freezing Tips

    This dish shines as a meal prep champion! Store leftovers in airtight containers in the refrigerator for up to 4 days. The flavors actually deepen overnight, making next-day lunch something to look forward to. For freezing, slightly undercook the pasta, then cool completely before transferring to freezer-safe containers. It keeps beautifully for up to 3 months. When reheating, add a splash of water or broth to revive the sauce. I often make a double batch on Sunday, freezing half in individual portions for those inevitable crazy weeknights when cooking from scratch just isn’t happening.

    Fixing Common Issues

    If your sauce seems too watery, don’t panic! Simply simmer uncovered for a few extra minutes to reduce the liquid. For sauce that’s too thick, add beef broth or water in small increments until you reach your desired consistency. If you accidentally oversalted, add a squeeze of lime juice and a dollop of sour cream to balance the flavors. For pasta that’s clumping together, a drizzle of olive oil and gentle tossing works wonders. Remember that perfection isn’t the goal—even my “kitchen fail” versions of this recipe have been devoured with enthusiasm by my family!

    Frequently Asked Questions

    Can I make Easy Cheesy Taco Pasta vegetarian?

    Absolutely! Substitute the ground beef with black beans, pinto beans, or meat alternatives like Beyond Beef. Add corn and bell peppers for extra texture and nutrition. The taco seasoning works beautifully with plant-based proteins.

    How spicy is this dish?

    The heat level is completely customizable. Use mild taco seasoning and skip the hot sauce for a kid-friendly version, or add diced jalapeños and hot sauce to kick up the spice for heat lovers.

    Can I use gluten-free pasta?

    Yes! Rice, corn, or chickpea pasta works well. Cook it 1-2 minutes less than package directions as gluten-free varieties can become mushy quickly. The sauce components are naturally gluten-free.

    What cheese works best for this recipe?

    A Mexican cheese blend offers the best melt and flavor, but cheddar, Monterey Jack, or pepper jack are excellent alternatives. For extra creaminess, mix in some cream cheese or queso fresco.

    Can I make this in a slow cooker?

    Yes! Brown the meat first, then add all ingredients except pasta and cheese to the slow cooker. Cook on low for 4-6 hours, add cooked pasta and cheese during the final 15 minutes.

    Final Thoughts

    Easy Cheesy Taco Pasta has become my household’s definition of comfort food that doesn’t compromise on flavor or convenience. There’s something magical about how simple ingredients transform into a dish that feels like a warm hug at the end of a long day. I love seeing the smiles around my table when I serve this family favorite. Whether you’re cooking for picky kids or sophisticated adults, this adaptable recipe delivers satisfaction every time. Don’t forget to check out more quick dinner ideas on our Pinterest for daily inspiration!

  • Garlic Parmesan Chicken Meatloaf: Irresistibly Juicy & Easy Recipe

    Garlic Parmesan Chicken Meatloaf: Irresistibly Juicy & Easy Recipe

    Garlic Parmesan Chicken Meatloaf: Irresistibly Juicy & Easy Recipe

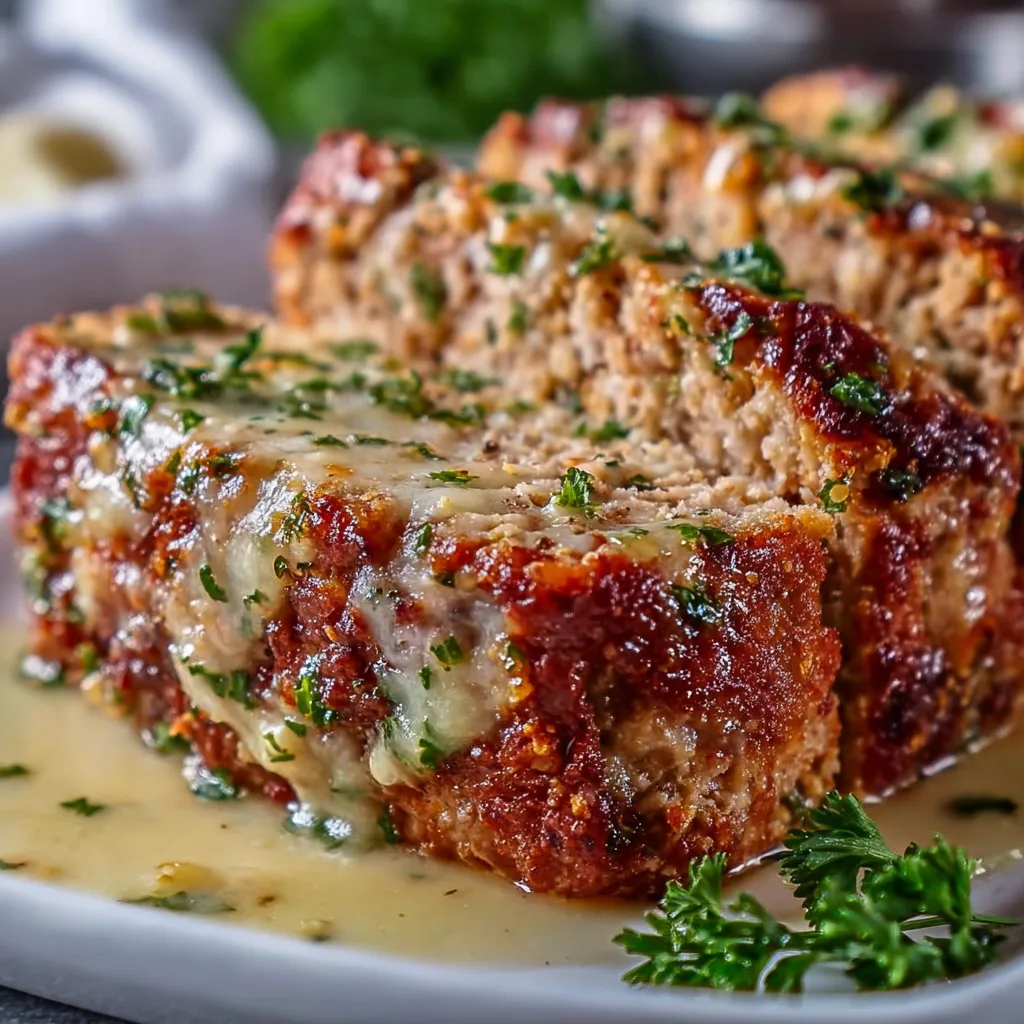
    Garlic Parmesan Chicken Meatloaf brings together two comfort food favorites in one irresistible dish. The first time I made this for my family, the kitchen filled with an aroma so mouthwatering that everyone wandered in asking what was cooking. There’s something magical about the way the garlic and parmesan infuse the tender chicken, creating a flavor profile that’s both familiar and exciting. If you’ve been searching for a lighter alternative to traditional beef meatloaf that doesn’t sacrifice flavor, this recipe deserves a spot in your dinner rotation. It’s become one of my most requested dishes for Sunday family dinners.

    Recipe

    Why You’ll Love This Garlic Parmesan Chicken Meatloaf

    Perfect Balance of Flavors

    The beauty of this Garlic Parmesan Chicken Meatloaf lies in its perfect flavor harmony. The sharpness of aged parmesan cuts through the mild chicken, while fresh garlic adds that unmistakable aromatic punch that makes your mouth water before you even take a bite. I’ve found that adding a touch of Italian herbs—basil, oregano, and a pinch of thyme—elevates the profile from good to extraordinary. The subtle heat from crushed red pepper flakes (optional, but recommended!) creates dimension without overwhelming the palate. It’s comfort food that feels sophisticated enough for company.

    Healthier Without Compromise

    Switching to ground chicken makes this meatloaf significantly lighter than beef versions without sacrificing moisture or flavor. One evening after a particularly indulgent weekend, I wanted comfort food that wouldn’t leave me feeling heavy. This creation was the perfect solution! The parmesan and breadcrumbs help bind everything together while adding richness, so you’ll never miss the beef. Plus, you can easily sneak extra veggies into the mix—finely diced bell peppers, spinach, or grated zucchini blend seamlessly into the mixture, boosting nutrition while keeping the texture perfect. It’s a win-win for flavor and health.

    Essential Tips & Tricks

    Achieving Perfect Moisture

    The secret to a never-dry Garlic Parmesan Chicken Meatloaf is maintaining the right moisture balance. Since ground chicken can dry out faster than beef, I always add 2-3 tablespoons of olive oil to the mixture. Another game-changer? Soaking your breadcrumbs in a little milk before mixing them in. This creates a panade that locks in moisture during baking. I learned this trick after one too many dry meatloaves! For extra insurance, place a small dish of water on the lower rack of your oven while baking. The steam helps maintain humidity, resulting in a meatloaf that’s tender and juicy every time. Trust me, these small steps make all the difference.

    Perfecting the Mix & Shape

    Resist the urge to overmix your meatloaf ingredients! This was my biggest mistake when I first started making chicken meatloaf. Overworking the mixture compacts the proteins too tightly, resulting in a dense, tough texture. Instead, combine ingredients with a light hand, mixing just until incorporated. When forming your loaf, avoid packing it too firmly—a loose shape allows heat to circulate better. For individual portions that cook faster, try making mini loaves in a muffin tin like I do for my weeknight dinner shortcuts. They cook in half the time and create more of those delicious caramelized edges everyone fights over!

    Serving Ideas & Creative Variations

    Perfect Pairings

    Garlic Parmesan Chicken Meatloaf pairs beautifully with both classic and unexpected sides. For a traditional comfort meal, serve alongside creamy mashed potatoes—the sauce from the meatloaf creates an incredible impromptu gravy. On warmer evenings, I love it with a crisp Caesar salad or roasted vegetables that catch all those flavorful drippings. When I’m feeling fancy, I serve it with Ruth’s Chris Style Potatoes Au Gratin for a restaurant-worthy dinner at home. The rich, cheesy potatoes complement the savory meatloaf perfectly. For a lighter option, steamed asparagus drizzled with lemon or a simple arugula salad with balsamic glaze provides a refreshing contrast.

    Exciting Flavor Twists

    The basic Garlic Parmesan Chicken Meatloaf recipe is wonderfully adaptable to different flavor profiles. For a Mediterranean twist, fold in sun-dried tomatoes, olives, and feta instead of parmesan. My family went crazy for this version last summer! For something with Asian flair, replace the Italian seasonings with ginger, scallions, and a brush of hoisin glaze during the last 15 minutes of baking. Buffalo chicken lovers can add hot sauce to the mix and top with blue cheese crumbles. I’ve even made a “pizza” version with mozzarella, pepperoni pieces, and a marinara topping that my kids request constantly. Don’t be afraid to experiment—this recipe provides the perfect canvas for creativity.

    Storage & Troubleshooting Guide

    Proper Storage & Reheating

    Garlic Parmesan Chicken Meatloaf makes excellent leftovers when stored properly. Refrigerate any remaining meatloaf within two hours of cooking, tightly wrapped or in an airtight container. It will maintain its quality for 3-4 days. For reheating, avoid the microwave if possible—it can dry out the chicken quickly. Instead, slice the meatloaf, add a splash of chicken broth or a drizzle of olive oil, cover with foil, and warm in a 300°F oven until heated through. This preserves the moisture and flavor. I often make a double batch specifically for meal prep, slicing the second loaf for sandwiches throughout the week. Trust me, a slice between good bread with some arugula makes the best lunch!

    Solving Common Problems

    If your meatloaf seems too wet or too dry, easy adjustments will save the day. For a mixture that’s too wet and doesn’t hold its shape, gradually add more breadcrumbs or a sprinkle of parmesan until it firms up. Conversely, if your mixture seems too dry or dense, incorporate a tablespoon of olive oil or an extra egg white. If the top browns too quickly during baking, simply tent it with foil for the remainder of the cook time. I once salvaged an overly browned meatloaf by spreading a thin layer of marinara on top during the last 10 minutes—it became a happy accident that my family now requests! Remember that internal temperature is your best guide—chicken meatloaf is done at 165°F.

    Frequently Asked Questions

    Can I make Garlic Parmesan Chicken Meatloaf ahead of time?

    Absolutely! You can prepare the mixture up to 24 hours ahead and refrigerate it uncooked. Just bring it closer to room temperature before baking. You can also fully cook it, refrigerate, and reheat when needed.

    What’s the best ground chicken to use?

    I recommend ground chicken that’s not too lean (around 93% lean). If you can only find very lean ground chicken, add an extra tablespoon of olive oil to maintain moisture.

    Can I freeze this meatloaf?

    Yes! Cool completely, then wrap tightly in plastic wrap followed by foil. Freeze for up to 3 months. Thaw overnight in the refrigerator before reheating.

    How do I know when my Garlic Parmesan Chicken Meatloaf is done?

    The most reliable method is using a meat thermometer. The internal temperature should reach 165°F. The meatloaf should also be lightly browned on top.

    Can I substitute ground turkey for chicken?

    Definitely! Ground turkey works perfectly in this recipe with no other adjustments needed. The garlic and parmesan flavors complement turkey beautifully.

    Final Thoughts

    This Garlic Parmesan Chicken Meatloaf has become my go-to when I want to serve something comforting yet impressive. There’s something special about the way the garlic and cheese transform humble ground chicken into a dish that feels both nostalgic and fresh. I love watching people take that first bite and seeing their surprise at how flavorful chicken meatloaf can be. Whether you’re cooking for picky eaters, health-conscious family members, or just looking to switch up your dinner routine, this recipe delivers every time. Don’t forget to check out more comfort food favorites on Pinterest for inspiration!