Blog

  • Coconut Curry Chicken Crock Pot Recipe: Irresistibly Easy & Delicious!

    Coconut Curry Chicken Crock Pot Recipe: Irresistibly Easy & Delicious!

    Coconut Curry Chicken Crock Pot Recipe: Irresistibly Easy & Delicious!

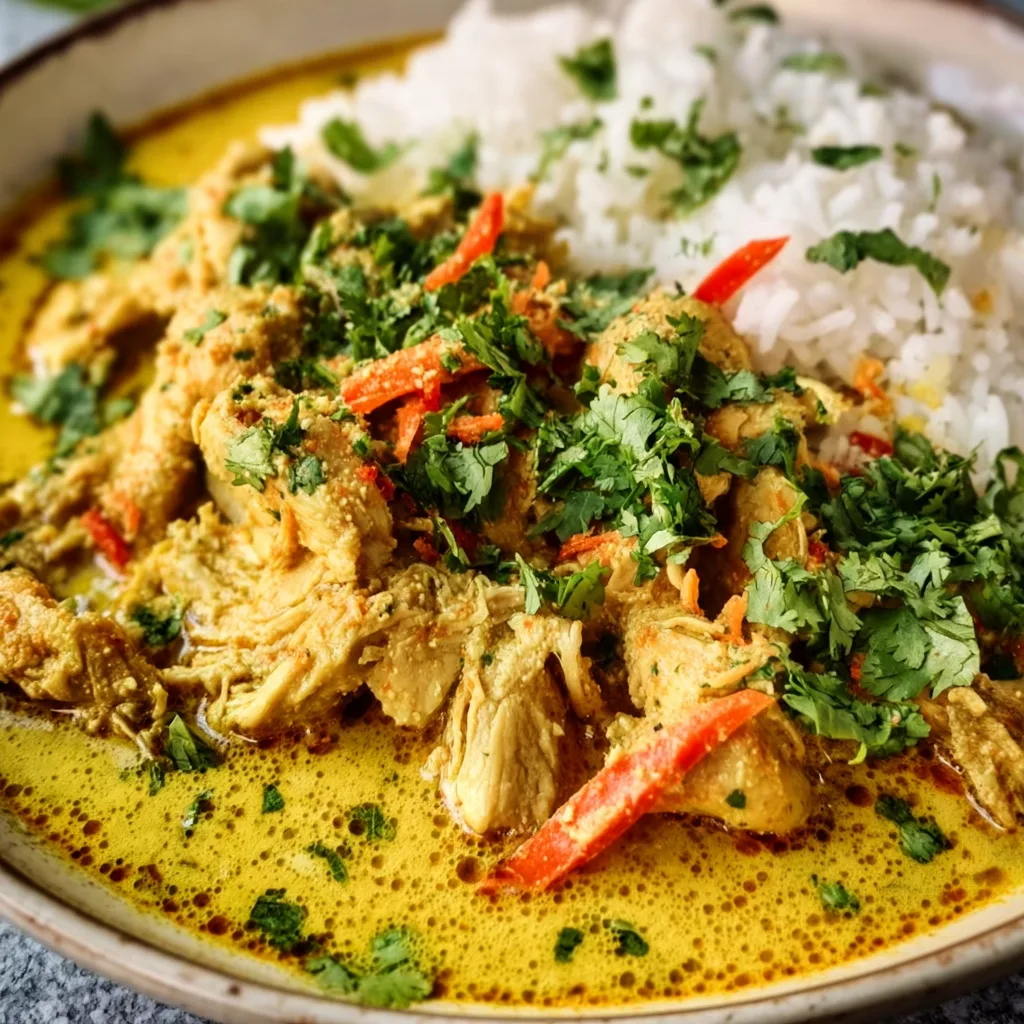
    Coconut Curry Chicken Crock Pot is one of those magical recipes that transforms your kitchen with aromatic spices while requiring minimal effort on your part. The first time I made this, my entire house filled with the most intoxicating blend of curry, coconut, and ginger that had my family wandering into the kitchen hours before dinner time. There’s something deeply satisfying about setting up your slow cooker in the morning and returning to a perfectly tender, flavor-infused meal that tastes like you’ve been cooking all day.

    Recipe

    Why You’ll Love This Coconut Curry Chicken Crock Pot

    Effortless Preparation with Maximum Flavor

    This Coconut Curry Chicken Crock Pot recipe is a true time-saver without sacrificing an ounce of flavor. I remember frantically searching for dinner solutions during my busiest work week and discovering this gem that requires just 15 minutes of prep. Simply brown the chicken (optional but recommended for deeper flavor), toss everything in the slow cooker, and walk away. The combination of creamy coconut milk, aromatic curry powder, and perfectly tender chicken creates layers of flavor that develop beautifully during the slow cooking process.

    Versatile for Any Occasion

    Whether you’re hosting a casual dinner party or meal prepping for the week, this curry fits perfectly into any scenario. It’s elegant enough for guests yet practical enough for everyday meals. I’ve served this at impromptu gatherings where friends still ask for the recipe years later. The dish adapts well to dietary preferences too – swap in vegetables for a lighter option or add potatoes for heartier appetites. Plus, the flavors actually improve overnight, making it ideal for planning ahead or enjoying delicious leftovers.

    Essential Tips & Tricks

    Ingredient Selection Matters

    The quality of your ingredients makes all the difference in this Coconut Curry Chicken Crock Pot recipe. Always opt for full-fat coconut milk for that luxurious creaminess – light versions simply don’t deliver the same silky texture. When choosing curry powder, look for one that’s vibrant in color and aromatic; a dull, dusty powder likely means diminished flavor. I learned this lesson the hard way after using an ancient curry powder from the back of my spice cabinet! For the chicken, boneless thighs provide more moisture and flavor than breasts, though either works beautifully.

    Layering and Timing Techniques

    Proper layering in your slow cooker creates the most balanced flavor profile. Start by placing heartier vegetables like potatoes or carrots at the bottom where they’ll cook thoroughly in the liquid. The chicken goes next, followed by more delicate ingredients like bell peppers or snow peas added during the final 30-60 minutes to maintain their texture. For a 6-8 hour cook time on low, your chicken will be perfectly tender without becoming stringy. This chicken and dumplings recipe uses similar timing principles for perfect results every time.

    Serving Ideas & Creative Variations

    Perfect Pairings

    The luscious sauce in this Coconut Curry Chicken Crock Pot practically begs for something to soak it up. Fluffy jasmine rice is my go-to, but basmati or even cauliflower rice works wonderfully too. For a complete meal, I like to serve with warm naan bread for scooping up every last drop of sauce. A simple side of cucumber raita provides a cooling contrast to the warm spices. I once served this curry with a mango chutney that my neighbor brought back from India, and the sweet-spicy combination was absolutely divine – worth seeking out a good quality chutney to elevate the experience.

    Exciting Flavor Variations

    Don’t be afraid to make this recipe your own with creative twists. Adding a tablespoon of peanut butter creates a Thai-inspired variation with delightful complexity. For heat lovers, incorporate fresh jalapeños or a dash of sriracha. My personal favorite variation includes a handful of spinach stirred in during the last 5 minutes for color and nutrition. For a fusion approach, try adding a teaspoon of garam masala alongside the curry powder, similar to the spice blend in these Mississippi Little Smokies but with an Indian-inspired profile.

    Storage & Troubleshooting Guide

    Proper Storage for Maximum Flavor

    This Coconut Curry Chicken Crock Pot recipe actually improves with time, making it perfect for meal prep. Store leftovers in airtight containers in the refrigerator for up to 4 days – I find the flavor peaks on day two! For freezing, cool the curry completely before transferring to freezer-safe containers, leaving a half-inch of space for expansion. It freezes beautifully for up to 3 months. When reheating, add a splash of coconut milk or chicken broth if the sauce has thickened too much. I like to portion individual servings for quick lunches that taste homemade even weeks later.

    Common Issues and Easy Fixes

    If your curry sauce is too thin, remove the lid during the last 30 minutes of cooking to allow some liquid to evaporate. Alternatively, create a cornstarch slurry (1 tablespoon cornstarch mixed with 2 tablespoons cold water) and stir it in during the last 20 minutes. For a curry that lacks punch, brighten it with a squeeze of fresh lime juice and a handful of chopped cilantro before serving. If you accidentally over-spiced, add more coconut milk to mellow the heat. Remember that flavors intensify in the slow cooker, so it’s better to start with less spice and adjust upward.

    Frequently Asked Questions

    Can I use chicken breasts instead of thighs in this Coconut Curry Chicken Crock Pot recipe?

    Absolutely! Chicken breasts work well but cook faster than thighs. Reduce cooking time to 4-5 hours on low to prevent them from drying out. They’ll absorb the curry flavors beautifully while staying tender.

    Is this recipe spicy?

    The heat level is customizable. Standard curry powder provides mild warmth, not spiciness. For heat, add red pepper flakes, cayenne, or fresh chilies according to your preference.

    Can I make this dairy-free?

    Yes! This recipe is naturally dairy-free as it uses coconut milk rather than cream. Just ensure any store-bought curry paste you might add doesn’t contain hidden dairy ingredients.

    What vegetables work best in this curry?

    Bell peppers, carrots, potatoes, cauliflower, and spinach are excellent choices. Add hardy vegetables at the beginning and delicate ones in the final 30-60 minutes of cooking.

    Can I cook this on high instead of low?

    Yes, cook on high for 3-4 hours instead of 6-8 hours on low. However, low and slow cooking develops deeper flavors and more tender chicken texture.

    Final Thoughts

    This Coconut Curry Chicken Crock Pot recipe has become my reliable companion for busy weeknights and impressive entertaining alike. There’s something magical about the way the coconut milk melds with the curry spices during the slow cooking process, creating a depth of flavor that belies its simple preparation. I hope this dish brings as much comfort and joy to your table as it has to mine. For more slow cooker inspiration, check out my Pinterest collection where I’m constantly adding new favorites!
  • Lemon Chicken Piccata That’ll Wow Your Taste Buds Instantly!

    Lemon Chicken Piccata That’ll Wow Your Taste Buds Instantly!

    Lemon Chicken Piccata That’ll Wow Your Taste Buds Instantly!

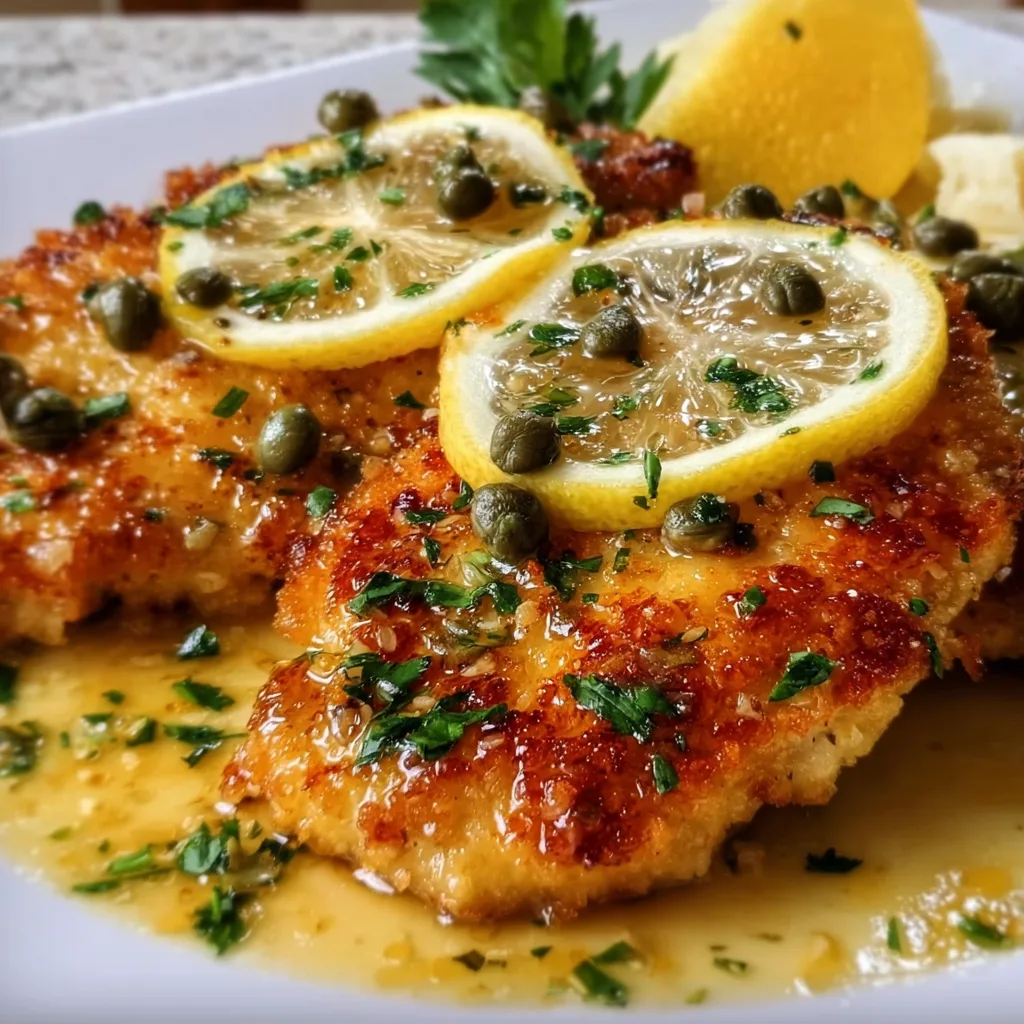
    Lemon Chicken Piccata is that perfect balance of bright, tangy flavors and rich, buttery goodness that never fails to make dinner feel special. I discovered this recipe during a particularly chaotic week when I needed something impressive yet doable. The first time those capers hit the sizzling pan, filling my kitchen with that unmistakable aroma, I knew this would become a staple in my home. It’s the kind of dish that makes you look like a culinary genius while secretly being one of the easiest recipes in your arsenal. Let me show you why this Italian-inspired classic deserves a permanent spot in your dinner rotation.

    Recipe

    Why You’ll Love This Lemon Chicken Piccata

    A Symphony of Flavors in Every Bite

    There’s something magical about the combination of fresh lemon juice, briny capers, and rich butter that transforms simple chicken cutlets into something extraordinary. Each bite delivers a perfect balance of tangy brightness and savory depth that dances on your taste buds. The sauce is velvety yet light, clinging to the chicken without overwhelming it. I love how the acidity of the lemon cuts through the richness, making this dish feel simultaneously indulgent and refreshing. It’s sophisticated enough for company but simple enough for a Tuesday night when you need a little culinary sunshine on your plate.

    Ready in Under 30 Minutes

    As someone who values both flavor and efficiency, I appreciate that this Lemon Chicken Piccata comes together in lightning speed. The thin chicken cutlets cook in minutes, and the sauce requires just a quick simmer to reach perfection. I’ve made this on evenings when I’m racing against the clock but still want something that feels special. The prep work is minimal—just pounding chicken, dredging in flour, and gathering a few ingredients for the sauce. Even on my busiest days, I can have this elegant meal on the table in less than 30 minutes, which feels like a small miracle when life gets hectic.

    Essential Tips & Tricks

    Mastering the Perfect Chicken Cutlet

    The foundation of exceptional Lemon Chicken Piccata lies in properly prepared chicken. I always pound the chicken to an even 1/4-inch thickness, which ensures quick, uniform cooking and tender meat. Take a moment to season your flour generously with salt and pepper—this isn’t just for the exterior flavor but seasons the entire dish. When dredging, press the chicken firmly into the flour mixture, then shake off the excess to prevent the coating from becoming gummy. For that beautiful golden crust, make sure your pan is hot enough that the chicken sizzles on contact but not so hot that the butter burns.

    Creating a Silky, Balanced Sauce

    The sauce is where this dish truly shines, and getting it right is easier than you might think. Always deglaze the pan with wine or chicken broth, scraping up those flavorful brown bits (fond) from cooking the chicken. They’re little packets of concentrated flavor! When adding lemon juice, start with less and taste as you go—you can always add more, but you can’t take it away. For the silkiest finish, swirl in cold butter at the very end with the heat turned off. This technique, called mounting with butter, creates an emulsified sauce that won’t separate and coats the chicken beautifully. For a creamier variation, add a splash of heavy cream.

    Serving Ideas & Creative Variations

    Perfect Pairings for a Complete Meal

    Lemon Chicken Piccata begs for something to soak up its delicious sauce. I love serving it over angel hair pasta tossed with a bit of olive oil and parsley—the thin strands capture the sauce perfectly. For a lighter option, try it with fluffy couscous or creamy polenta. On the vegetable front, roasted asparagus or sautéed green beans complement the lemony flavors beautifully. A simple arugula salad with shaved parmesan and a light vinaigrette adds a peppery freshness that balances the richness of the dish. For special occasions, I’ll add a side of garlic herb Dutch oven bread to soak up every last drop of that precious sauce.

    Exciting Twists on the Classic Recipe

    While traditional Lemon Chicken Piccata is divine, don’t be afraid to make it your own! Try adding artichoke hearts or halved cherry tomatoes during the last few minutes of cooking for extra color and texture. For a Mediterranean spin, toss in some olives alongside the capers. When I’m feeling indulgent, I’ll top each portion with a sprinkle of crumbled crispy prosciutto or pancetta. For a dairy-free version, substitute good olive oil for the butter—it changes the character slightly but is equally delicious. You can even try it with thinly pounded pork cutlets or firm white fish for a completely different yet equally satisfying meal.

    Storage & Troubleshooting Guide

    Keeping It Fresh for Later

    Lemon Chicken Piccata makes excellent leftovers when stored properly. Transfer cooled chicken and sauce to an airtight container and refrigerate for up to 3 days. The flavors actually develop beautifully overnight! When reheating, do so gently—microwave on medium power with a splash of chicken broth to prevent drying, or warm slowly in a covered skillet. If you want to freeze portions, separate the chicken from the sauce if possible. The sauce may break when thawed, but whisking it vigorously while reheating can help restore its texture. For meal prep, you can pound and flour the chicken in advance, storing it with parchment paper between layers.

    Fixing Common Piccata Problems

    Even experienced cooks occasionally encounter issues with this dish. If your sauce is too tart, balance it with a pinch of sugar or a bit more butter. For a sauce that’s too thin, let it reduce a little longer, or mix a teaspoon of cornstarch with cold water and whisk it in. If your chicken becomes tough, it’s likely overcooked—next time, watch it more carefully and remember that it will continue cooking slightly in the hot sauce. Flour falling off the chicken? Make sure your pan and oil are hot enough before adding the meat, and don’t move the chicken around too much during the first minute of cooking to allow the crust to set properly.

    Frequently Asked Questions

    Can I make Lemon Chicken Piccata without capers?

    Absolutely! While capers provide that classic briny flavor, you can substitute olives, pickled onions, or even a splash of pickle juice for tanginess. The dish will have a different character but will still be delicious.

    What’s the best way to prevent my Lemon Chicken Piccata sauce from breaking?

    Keep your heat low when adding the lemon juice, and incorporate cold butter at the end with the heat turned off, swirling rather than stirring. This creates a stable emulsion that won’t separate.

    Can I use chicken thighs instead of breasts for Lemon Chicken Piccata?

    Yes! Boneless, skinless thighs work beautifully. Pound them gently to even thickness, though they won’t need to be as thin as breasts. They’ll need slightly longer cooking time but offer more flavor.

    What wine pairs best with this dish?

    A crisp white wine with good acidity complements Lemon Chicken Piccata perfectly. Try Pinot Grigio, Sauvignon Blanc, or an unoaked Chardonnay to balance the lemony sauce.

    How do I ensure my chicken stays moist in Lemon Chicken Piccata?

    Don’t overcook it! Pound to even thickness, cook quickly over medium-high heat until just golden (about 3 minutes per side), and let it finish cooking gently in the sauce for tender, juicy results.

    Final Thoughts

    This Lemon Chicken Piccata has saved countless dinners in my home, transforming ordinary evenings into something special with minimal effort. There’s something deeply satisfying about creating such bright, complex flavors with just a handful of ingredients. Whether you’re cooking for a special someone or simply treating yourself to a meal that feels like a warm hug, this dish delivers every time. I hope you’ll add it to your repertoire and discover your own perfect version. And if you create something wonderful, I’d love to see it on Pinterest where we can all share our kitchen victories!

  • General Tso’s Chicken: Irresistibly Crispy, Bursting with Flavor!

    General Tso’s Chicken: Irresistibly Crispy, Bursting with Flavor!

    General Tso's Chicken: Irresistibly Crispy, Bursting with Flavor!

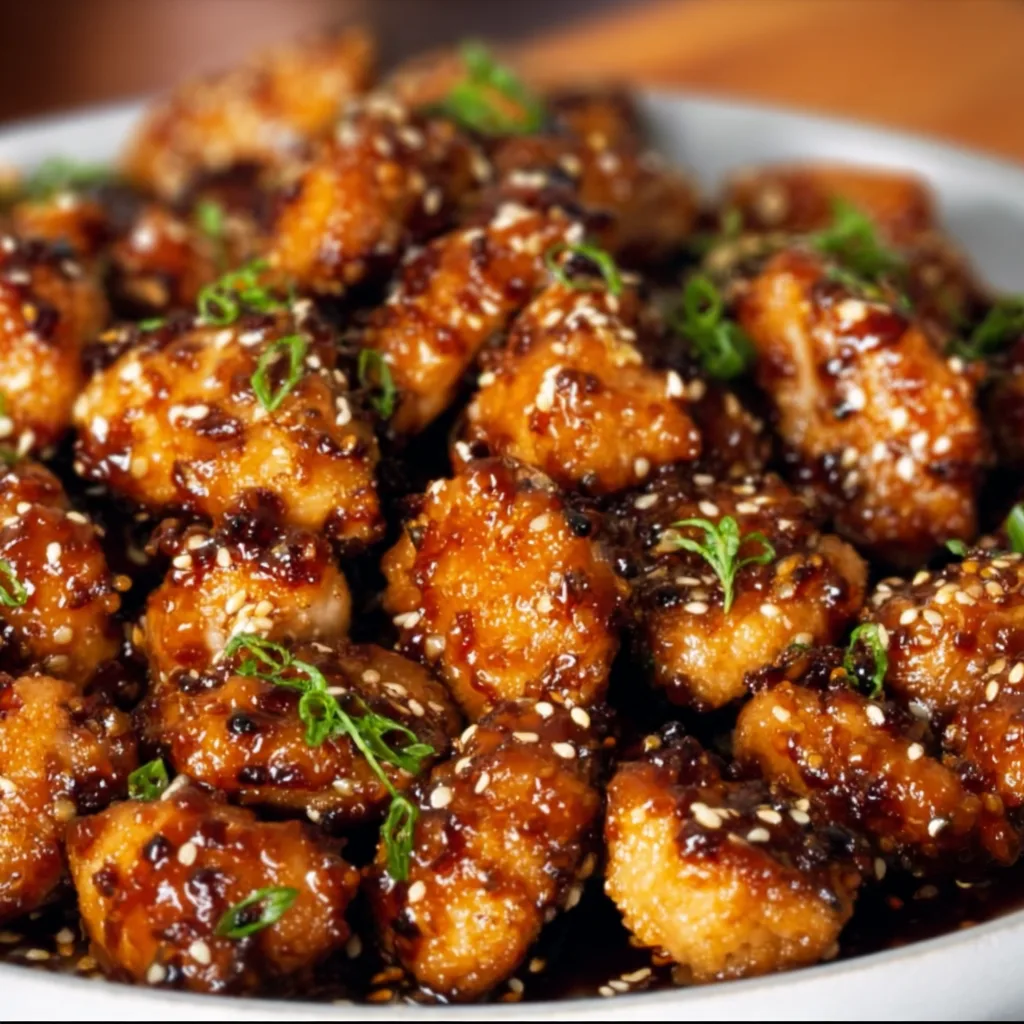
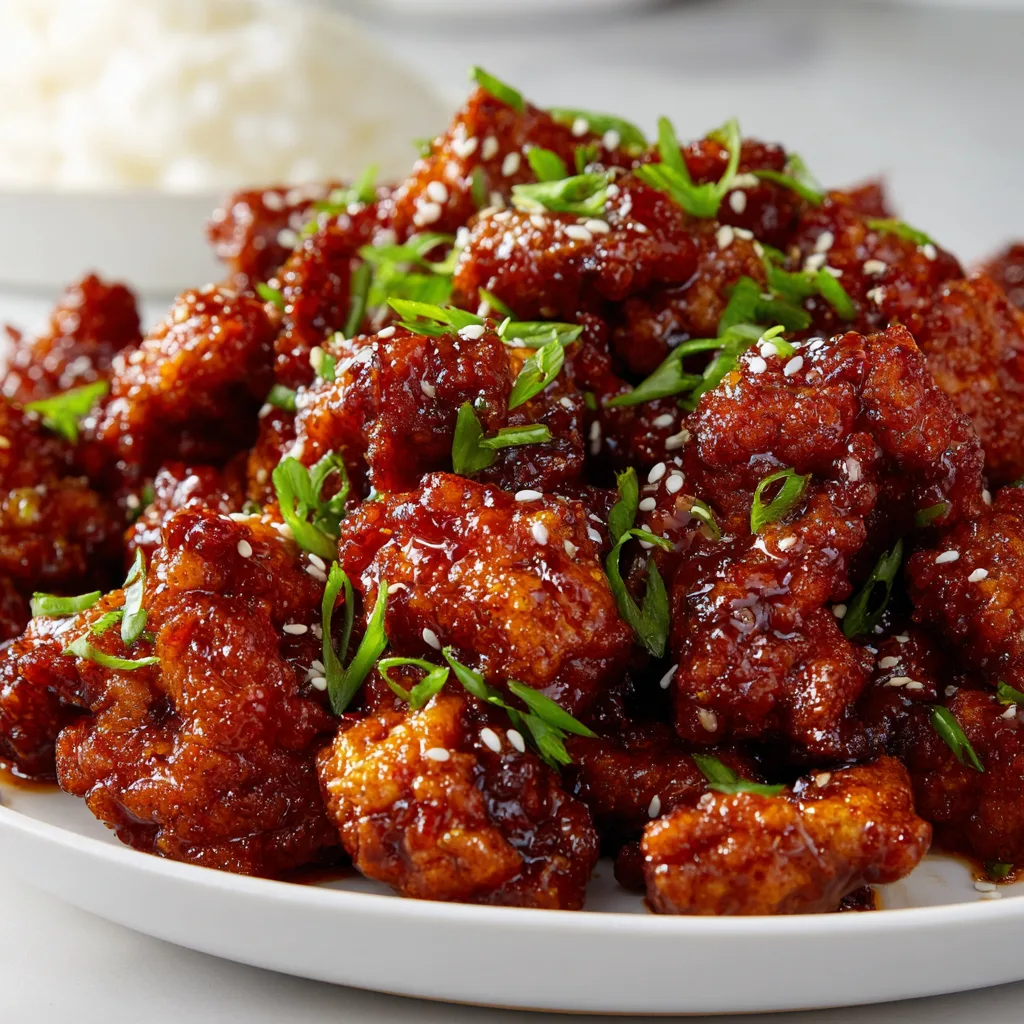
    General Tso’s Chicken has been my secret weapon for dinner parties for years. That perfect balance of sweet, savory, and spicy flavors wrapped around crispy chicken pieces makes everyone think I’ve spent hours in the kitchen. The truth? This Chinese-American classic comes together in under 30 minutes once you know the tricks! I still remember the first time I made it for my sister’s birthday—the kitchen filled with that irresistible aroma of garlic, ginger, and caramelized sauce. Today, I’m sharing my foolproof recipe that delivers restaurant-quality General Tso’s Chicken right in your home kitchen.

    Recipe

    Why You’ll Love This General Tso’s Chicken

    Perfect Balance of Flavors

    The magic of General Tso’s lies in its perfectly balanced sauce. Sweet honey and brown sugar dance with tangy rice vinegar, while garlic and ginger provide aromatic depth. I’ve tweaked this recipe over dozens of attempts to find that ideal harmony where no single flavor overpowers the others. The sauce clings to each piece of chicken, creating little pockets of flavor that burst with each bite. My husband calls it “takeout that makes you never want takeout again”—and honestly, that’s the highest compliment a home cook can receive!

    Quick and Impressive Results

    Don’t let the impressive results fool you—this recipe is surprisingly beginner-friendly. The chicken fries up in minutes, and the sauce comes together while the chicken rests. Even on my busiest weeknights, I can have this on the table in about 25 minutes. The first time I made it for guests, they couldn’t believe it wasn’t from our favorite Chinese restaurant! That moment when everyone goes quiet at the dinner table because they’re too busy enjoying each bite? That’s the silent satisfaction every home cook dreams about.

    Essential Tips & Tricks

    Perfecting the Crispy Coating

    The secret to restaurant-quality texture starts with properly coated chicken. I velveted my chicken for years (that fancy Chinese tenderizing technique), but discovered a simpler method: cornstarch is your best friend! Toss your chicken pieces in cornstarch rather than heavy batters—it creates that signature light, crispy exterior that soaks up sauce perfectly without getting soggy. Make sure your oil is hot enough (around 350°F) before adding chicken, and fry in batches to avoid dropping the temperature and creating soggy results.

    Sauce Consistency Matters

    Getting the perfect sauce thickness makes or breaks this dish. I learned this the hard way when my first attempt turned out watery and disappointing. Now I always create a cornstarch slurry (equal parts cornstarch and cold water) and add it at the very end, stirring constantly as the sauce thickens. Look for that glossy sheen and the ability to coat the back of a spoon—that’s when you know it’s ready. For an authentic touch, add dried chilis to infuse the oil before building your sauce, just like they do in authentic Chinese recipes.

    Serving Ideas & Creative Variations

    Perfect Pairings

    General Tso’s Chicken deserves the right supporting cast. Fluffy jasmine rice is my go-to base—it soaks up that delicious sauce perfectly. For a complete meal, I add steamed broccoli or bok choy on the side, letting their mild flavors complement the chicken’s bold profile. Want to make it restaurant-style? Serve with crab rangoons or spring rolls for a complete feast. My family loves when I add a quick cucumber salad with rice vinegar and sesame oil for a refreshing contrast to the rich chicken.

    Fun Flavor Twists

    While traditional General Tso’s is amazing, don’t be afraid to make it your own! Add pineapple chunks for a sweet-tart dimension that complements the sauce beautifully. For heat lovers, increase the dried chilies or add a drizzle of chili oil at the end. My personal favorite twist? Adding orange zest and juice for a General Tso’s-Orange Chicken hybrid that’s absolutely divine. For a healthier spin, try the same sauce with air-fried chicken or even crispy tofu for vegetarian guests.

    Storage & Troubleshooting Guide

    Keeping It Fresh

    General Tso’s Chicken can be stored properly for delicious leftovers—if there are any! Place cooled leftovers in an airtight container and refrigerate for up to 3 days. The key to reheating is low and slow in a covered skillet with a tablespoon of water to rehydrate the sauce. Avoid microwaving if possible, as it tends to make the chicken rubbery. If you’re meal prepping, consider keeping the sauce separate from the fried chicken until ready to serve to maintain that perfect texture.

    Fixing Common Issues

    Even experienced cooks encounter challenges! If your sauce is too thin, gradually add more cornstarch slurry, one teaspoon at a time. Too thick? A splash of chicken broth thins it perfectly without diluting flavor. If your chicken isn’t crisping properly, your oil likely isn’t hot enough—use a thermometer to maintain 350°F. And if the sauce tastes too sweet or too sour, balance it with a bit more vinegar or sugar respectively. Remember that authentic General Tso’s should have a noticeable tang with moderate sweetness and heat.

    Frequently Asked Questions

    Is General Tso’s Chicken authentically Chinese?

    General Tso’s Chicken is actually Chinese-American, created by Chinese immigrants in New York in the 1970s. While inspired by Hunan cooking techniques, you won’t find it in China!

    Can I make General Tso’s Chicken less spicy?

    Absolutely! Reduce or omit the dried chilies and decrease the amount of chili paste. The dish will still have its signature sweet-tangy flavor without the heat.

    What’s the difference between General Tso’s and Orange Chicken?

    General Tso’s is spicier with a more complex savory-sweet balance, while orange chicken is sweeter with a pronounced citrus flavor from orange juice and zest.

    Can I make this gluten-free?

    Yes! Simply substitute regular soy sauce with tamari or coconut aminos, and verify your other bottled ingredients are certified gluten-free.

    How do I get the crispiest chicken for my General Tso’s Chicken?

    For ultra-crispy chicken, double-fry the pieces! Fry once at 325°F until almost done, rest for 5 minutes, then fry again at 350°F until golden and crispy.

    Final Thoughts

    This General Tso’s Chicken recipe has become my go-to for impressing guests and satisfying family cravings alike. There’s something magical about creating those familiar takeout flavors at home, but with fresher ingredients and customized to your exact taste preferences. The beauty lies in its adaptability—make it spicier, sweeter, or even healthier while maintaining that signature General Tso’s experience. I hope this recipe finds its way into your regular rotation, bringing the same joy to your table that it has to mine. Don’t forget to check out more Asian-inspired recipes on Pinterest!

  • Chicken Carbonara Recipe: Creamy, Irresistible Pasta You’ll Love!

    Chicken Carbonara Recipe: Creamy, Irresistible Pasta You’ll Love!

    Chicken Carbonara Recipe: Creamy, Irresistible Pasta You’ll Love!

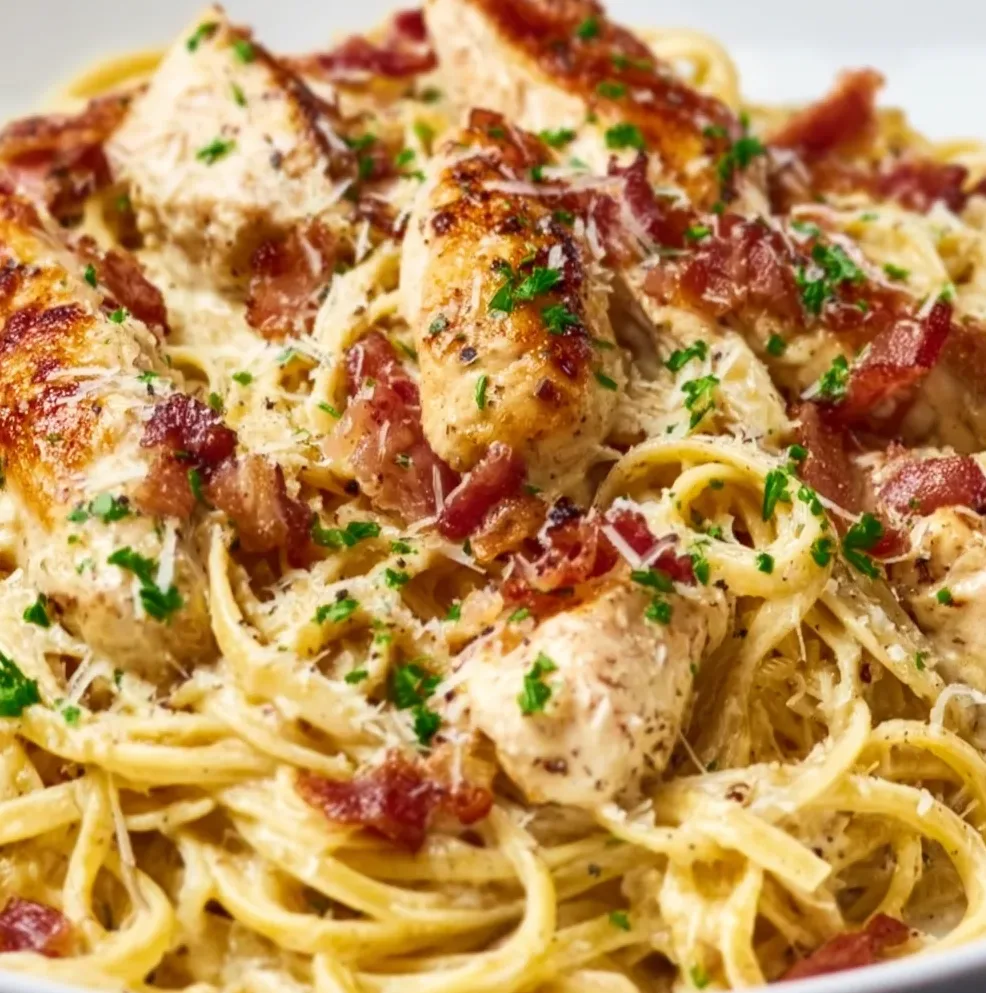
    Chicken Carbonara is that magical pasta dish that transforms humble ingredients into something extraordinary. The first time I made it for my family, I watched as my husband’s eyes lit up with that “where has this been all my life?” expression. There’s something about the silky sauce coating each strand of pasta, the savory bacon bits, and juicy chicken that creates pure comfort in a bowl. It’s my go-to recipe when I need a crowd-pleasing dinner that feels special but doesn’t keep me in the kitchen all night. Ready to create some pasta magic? Let’s dive into this creamy chicken carbonara that’ll have everyone asking for seconds!

    Recipe

    Why You’ll Love This Chicken Carbonara

    A Perfect Balance of Flavors

    The magic of Chicken Carbonara lies in its perfect harmony of flavors. The saltiness from the pancetta or bacon plays beautifully against the richness of egg yolks and parmesan. When I first mastered this recipe, I was amazed at how the heat from the pasta creates that silky sauce without scrambling the eggs. The addition of tender chicken adds protein and makes this a complete meal. I love how the black pepper adds just enough heat to cut through the creaminess, creating a dish that’s indulgent but never heavy. Each bite delivers that satisfying combination that makes Italian cooking so beloved.

    Quick & Elegant Comfort Food

    There’s something wonderfully contradictory about Chicken Carbonara – it’s both weeknight simple and dinner-party worthy. I can have it on the table in under 30 minutes, yet guests always think I’ve gone to special effort. The ingredients are pantry staples I usually have on hand – pasta, eggs, cheese, bacon, and chicken. On those evenings when I’m exhausted but still want something that feels like a proper meal, this is my saving grace. The way the sauce clings to each strand of pasta creates that cozy, comforting feeling that makes you slow down and savor each bite.

    Essential Tips & Tricks

    Mastering the Creamy Sauce

    The trickiest part of Chicken Carbonara is achieving that silky sauce without ending up with scrambled eggs. My foolproof method: take the pan off the heat before adding the egg mixture. The residual warmth will cook the eggs gently while you toss everything together. Another game-changer was using room temperature eggs – they’re less likely to seize up when they hit the warm pasta. And don’t skip that splash of pasta water! The starchy liquid helps create the perfect consistency. I always reserve about a cup before draining, then add it gradually until the sauce coats the back of a spoon.

    Ingredient Selection Matters

    Using the right ingredients makes all the difference in this seemingly simple dish. Traditional carbonara uses guanciale (cured pork jowl), but pancetta or good quality bacon works beautifully too. For the cheese, authentic Pecorino Romano adds the perfect sharp, salty bite, though Parmigiano-Reggiano is a fine substitute. When cooking the chicken, I season it well and get a nice golden sear before cutting it into bite-sized pieces – this builds flavor similar to those delicious Cajun garlic butter chicken dishes we all love. Freshly cracked black pepper (not pre-ground) provides that signature carbonara warmth.

    Serving Ideas & Creative Variations

    Perfect Pairings

    Chicken Carbonara shines as the star of the meal, but a few thoughtful sides elevate the experience. I love serving it with a bright arugula salad dressed simply with lemon and olive oil – the peppery greens and acidic dressing cut through the richness perfectly. A side of roasted asparagus or broccoli adds color and nutrition. For wine, a crisp Pinot Grigio or light Chardonnay complements without overwhelming. When I’m feeling extra, I’ll add some garlic herb Dutch oven bread on the side – there’s nothing better for soaking up any remaining sauce on your plate!

    Fun Twists on the Classic

    While traditional carbonara is perfect as-is, I love experimenting with creative variations. Adding peas brings a pop of color and sweetness that balances the savory elements. For a seafood twist, swap chicken for sautéed shrimp – they cook in minutes and pair beautifully with the creamy sauce. When I’m craving extra vegetables, I’ll toss in sautéed mushrooms or spinach. For a spicy kick, red pepper flakes work wonders. My family’s favorite variation includes a sprinkle of fresh herbs like basil or parsley just before serving – that bright, fresh note takes the dish to another level.

    Storage & Troubleshooting Guide

    Proper Storage & Reheating

    Carbonara is best enjoyed fresh from the pan, but leftovers can be stored properly. Refrigerate in an airtight container for up to 2 days. When reheating, the trick is adding moisture since the pasta absorbs sauce as it sits. I place leftovers in a skillet over medium-low heat with a splash of water or chicken broth, stirring gently until warmed through. Microwave reheating works in a pinch – cover with a damp paper towel and heat in 30-second intervals, stirring between each. The texture won’t be quite as silky as the original, but it’ll still make for a delicious lunch the next day.

    Fixing Common Carbonara Problems

    Even experienced cooks encounter carbonara challenges. If your sauce turns lumpy (the dreaded scrambled eggs), don’t panic! Try whisking in a tablespoon of hot pasta water to smooth things out. Too thick? More pasta water will thin the sauce to the perfect consistency. Too thin? Let it sit for a minute – it will naturally thicken as it cools slightly. If your bacon or pancetta released too much fat, drain some before adding the pasta. For bland carbonara, freshly grated cheese and black pepper are your rescuers. Remember, pasta continues absorbing sauce after serving, so it’s better to err on the side of slightly too saucy.

    Frequently Asked Questions

    Can I make Chicken Carbonara ahead of time?

    Carbonara is best made fresh, as the sauce can separate when reheated. If needed, prepare the components separately and assemble just before serving for the silkiest texture.

    Is it safe to eat the eggs in Chicken Carbonara?

    Yes, the residual heat from the pasta cooks the eggs to a safe temperature. For extra assurance, use pasteurized eggs, especially when serving vulnerable populations.

    Can I use pre-cooked chicken in this recipe?

    Absolutely! Rotisserie or leftover chicken works beautifully. Add it at the end just to warm through, preventing it from becoming tough.

    What pasta shapes work best for carbonara?

    Long pasta like spaghetti, linguine, or fettuccine traditionally works best because the sauce clings well to each strand, creating the perfect bite.

    How do I prevent my Chicken Carbonara sauce from separating?

    Work quickly when combining hot pasta with the egg mixture, and remember to take the pan off the heat. The residual warmth gently cooks the sauce without separating.

    Final Thoughts

    This Chicken Carbonara has become my reliable kitchen hero – sophisticated enough for special occasions yet simple enough for weeknights. There’s something magical about transforming a handful of humble ingredients into something that brings people together around the table with satisfied smiles. Whether you follow the traditional approach or add your own creative spin, the heart of carbonara remains that irresistible creamy, savory comfort that makes Italian cuisine so beloved worldwide. I’d love to see your carbonara creations – tag me on Pinterest with your pasta masterpieces!

  • Creamy Pepperoncini Chicken Skillet | Easy, Tangy, Crowd-Pleaser!

    Creamy Pepperoncini Chicken Skillet | Easy, Tangy, Crowd-Pleaser!

    Creamy Pepperoncini Chicken Skillet | Easy, Tangy, Crowd-Pleaser!

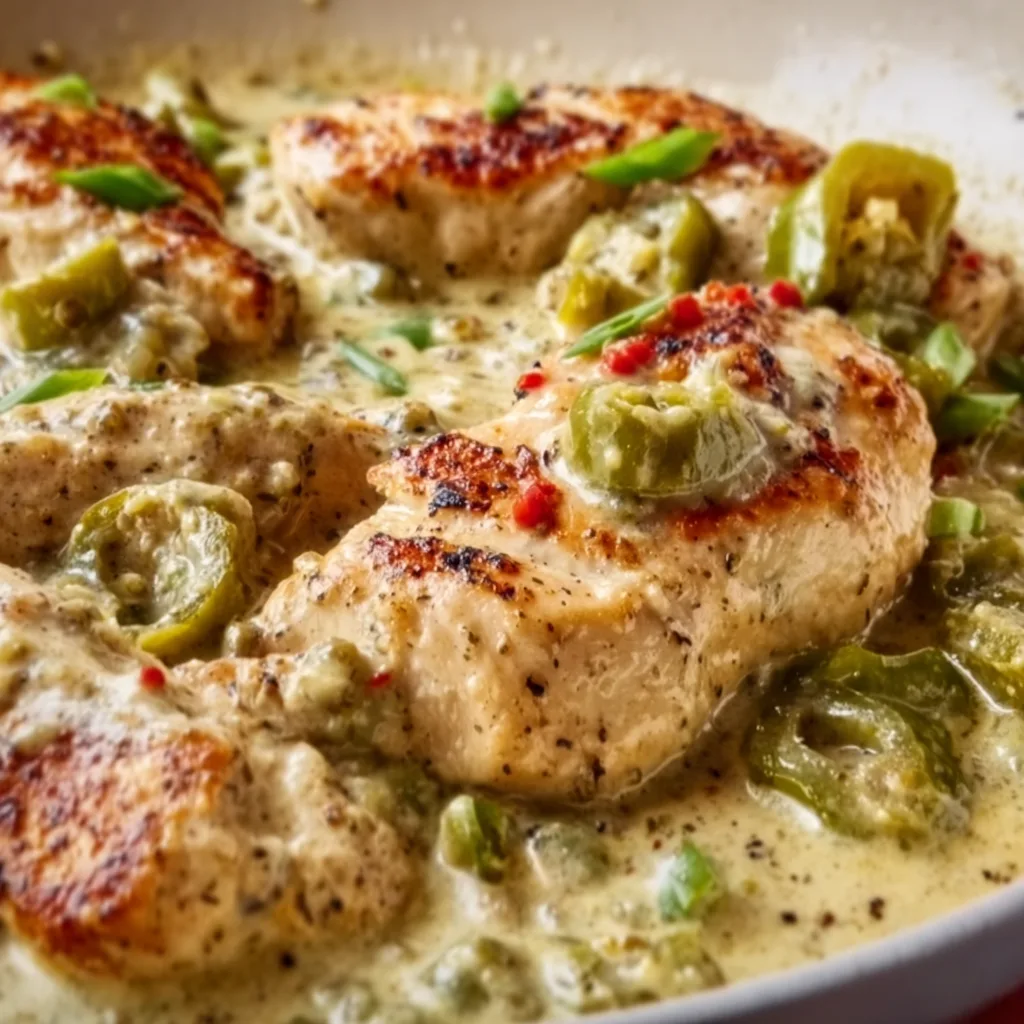
    This Creamy Pepperoncini Chicken Skillet has completely transformed my weeknight dinner routine. The first time I made it, my kitchen filled with the tangy aroma of pepperoncinis melding with rich cream, and I knew this wasn’t just another chicken dish. The perfect balance of zesty peppers and velvety sauce creates something truly magical that coats each bite of tender chicken. When my partner took their first bite, they closed their eyes and simply said, “We’re adding this to the regular rotation.” If you love dishes with a bit of tang and incredible creaminess like my chicken and dumplings with biscuits, this skillet wonder deserves a spot in your recipe collection.

    Recipe

    Why You’ll Love This Creamy Pepperoncini Chicken Skillet

    A Perfect Balance of Flavors

    The magic of this dish lies in its perfect flavor harmony. Those mild, tangy pepperoncini peppers bring just enough zip without overwhelming the palate, while the cream sauce mellows everything into silky perfection. I still remember making this on a particularly stressful Tuesday, and the way the bright, acidic notes cut through the richness of the sauce completely turned my mood around. The chicken soaks up all these flavors, becoming incredibly tender and juicy. What I love most is how the sauce develops those beautiful caramelized bits from the chicken that deepen the overall taste profile.

    Quick and Simple Preparation

    On nights when I can barely muster the energy to cook, this one-pan wonder comes to my rescue. Everything comes together in about 30 minutes, which feels like a small miracle for something this flavorful. I’ve made this while helping my son with homework and taking work calls—it’s that manageable. The ingredient list isn’t intimidating either; most items are probably already in your pantry. The pepperoncinis do the heavy lifting flavor-wise, so you don’t need to measure out complicated spice blends. Just sear, simmer, and serve—dinner solved with minimal cleanup.

    Essential Tips & Tricks

    Choosing and Preparing Your Ingredients

    Starting with high-quality pepperoncinis makes a noticeable difference in this dish. I prefer the jarred variety packed in brine rather than vinegar for a cleaner flavor that won’t overwhelm the cream sauce. Pat your chicken completely dry before seasoning—this creates that gorgeous golden crust that adds texture and depth. When it comes to the cream element, full-fat options deliver the silkiest results, though I’ve used light cream in a pinch. Don’t skimp on reducing the sauce properly; those extra 2-3 minutes of simmering concentrate the flavors and create the perfect consistency to coat the back of a spoon.

    Mastering the Cooking Technique

    The secret to this dish is controlling your heat throughout the cooking process. Start with a hot pan to get that beautiful sear on the chicken, then reduce to medium-low when adding the cream to prevent curdling. I learned this the hard way when I once rushed and ended up with a separated sauce! Another game-changer is deglazing the pan with a splash of chicken broth before adding the cream—it lifts all those flavorful browned bits from the bottom of the skillet. If your sauce ever looks too thin, a quick slurry of cornstarch and water works wonders, similar to how I thicken my Cajun garlic butter chicken bowtie pasta.

    Serving Ideas & Creative Variations

    Perfect Pairings for a Complete Meal

    This creamy skillet chicken practically begs to be served over a bed of buttery egg noodles that catch every drop of that luscious sauce. On lighter nights, I serve it with roasted asparagus or a bright arugula salad dressed simply with lemon and olive oil for contrast. For a heartier option, creamy polenta or mashed potatoes make an excellent base. My family’s favorite way to enjoy it is with crusty sourdough bread for dipping into the sauce—there’s something deeply satisfying about soaking up those last bits from your plate. A chilled glass of Pinot Grigio completes the experience perfectly.

    Exciting Recipe Adaptations

    The basic template of this dish invites endless creative modifications. When I’m feeding spice-lovers, I add a pinch of red pepper flakes or a diced jalapeño alongside the pepperoncinis. For a Mediterranean twist, toss in some halved cherry tomatoes and crumbled feta during the last few minutes of cooking. You can easily swap chicken thighs for breasts if you prefer darker meat—they actually become even more tender in the sauce. Vegetarians in my family enjoy this same sauce concept with pan-seared cauliflower steaks or mushrooms instead of chicken. For special occasions, I’ve added sweet chili pineapple shrimp for an unexpected surf-and-turf variation.

    Storage & Troubleshooting Guide

    Proper Storage for Leftovers

    This creamy chicken reheats beautifully, making it perfect for meal prepping. Store leftovers in airtight containers in the refrigerator for up to 3 days—the flavors actually develop and improve overnight! When reheating, add a splash of chicken broth or cream to revive the sauce if it’s thickened too much. For busy weeks, I portion individual servings with their accompanying sides in microwave-safe containers. I don’t recommend freezing this dish, as cream-based sauces tend to separate when thawed. If you absolutely must freeze it, reheat gently on the stovetop with additional cream to help re-emulsify the sauce.

    Solving Common Cooking Challenges

    If your sauce breaks or looks curdled, don’t panic! Lower the heat immediately and whisk in a tablespoon of cold cream to help it come back together. For sauce that’s too thin, simmer a few minutes longer or add a cornstarch slurry (1 teaspoon cornstarch mixed with 1 tablespoon cold water). Conversely, if it’s too thick, thin with additional broth or cream. Bland sauce can be perked up with a squeeze of lemon juice or a splash of pepperoncini brine. If your chicken is tough, it’s likely overcooked—next time, remove it from the skillet earlier and return it to the sauce just to warm through before serving.

    Frequently Asked Questions

    Can I use chicken thighs instead of breasts in my Creamy Pepperoncini Chicken Skillet?

    Absolutely! Chicken thighs work beautifully and often turn out more tender and flavorful. Just adjust cooking time slightly as thighs may take 2-3 minutes longer to cook through completely.

    Are pepperoncinis spicy?

    Pepperoncinis are actually quite mild with a tangy, slightly sweet flavor and minimal heat. They register only 100-500 Scoville units, making them perfect for those who enjoy flavor without significant spiciness.

    Can I make this dish dairy-free?

    Yes! Substitute the cream with full-fat coconut milk or your favorite unsweetened plant-based cream alternative. The sauce won’t be quite as rich but will still have delicious flavor.

    What’s the best skillet to use for this recipe?

    A heavy-bottomed cast iron or stainless steel skillet works best. These materials provide even heat distribution and develop those flavorful browned bits that enhance the sauce.

    How do I know when the chicken is cooked perfectly?

    Cook chicken to an internal temperature of 165°F (74°C). For best results, remove from heat at 160°F as it will continue cooking to safe temperature while resting.

    Final Thoughts

    This Creamy Pepperoncini Chicken Skillet has earned its place as one of my most requested recipes for good reason. It transforms simple ingredients into something truly special with minimal effort—exactly what we all need in our cooking arsenal. The bright tang of the pepperoncinis against the rich, velvety sauce creates a crave-worthy combination that feels both comforting and sophisticated. I hope this becomes a new favorite in your home like it has in mine! For more delicious recipe inspiration, check out my other creations on Pinterest.

  • Garlic Butter Chicken & Potatoes Skillet: Easy, Crispy & Delicious!

    Garlic Butter Chicken & Potatoes Skillet: Easy, Crispy & Delicious!

    Garlic Butter Chicken & Potatoes Skillet: Easy, Crispy & Delicious!

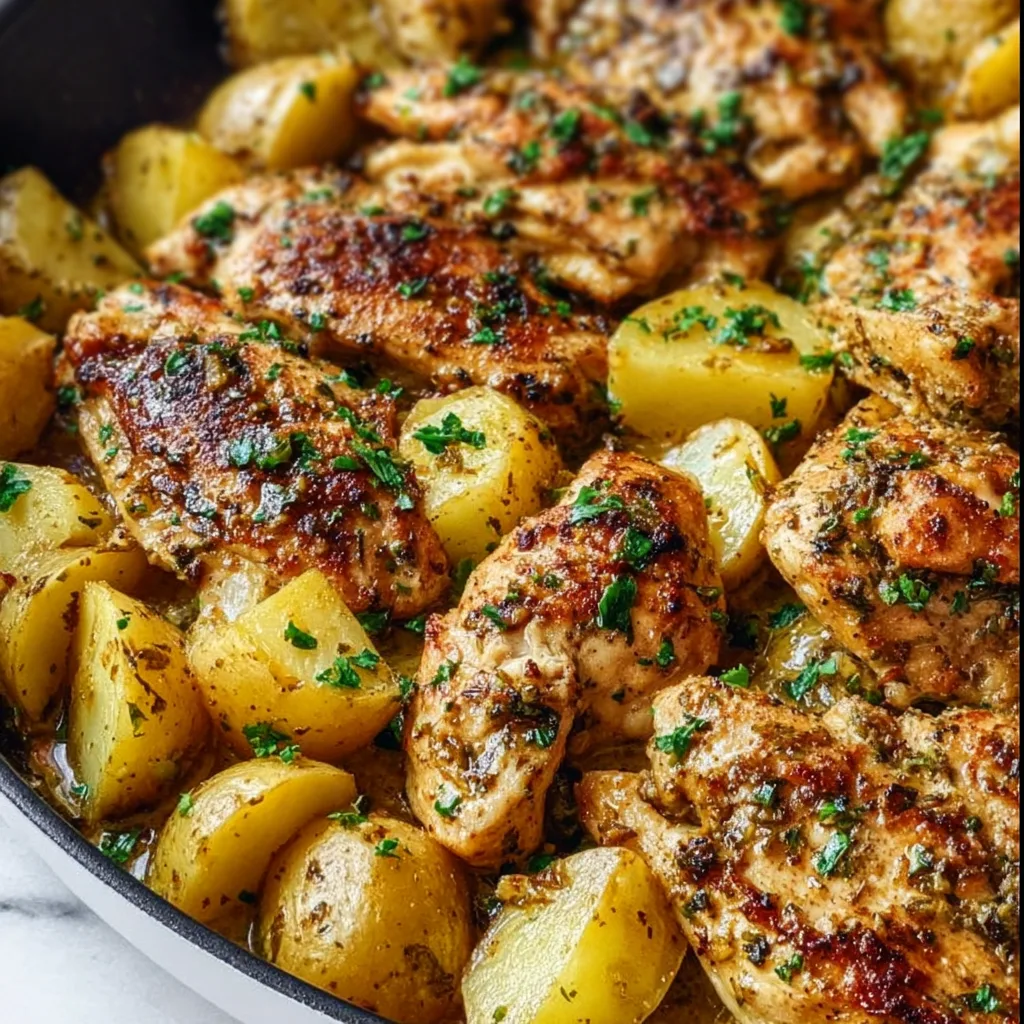
    This Garlic Butter Chicken and Potatoes Skillet is what dinner dreams are made of, friends. Picture this: tender chicken thighs with crispy golden skin, nestled alongside perfectly roasted potatoes, all swimming in a silky garlic butter sauce that makes you want to lick the plate clean. I discovered this one-pan wonder on a rainy Tuesday when comfort food was calling my name, and it’s been in my regular rotation ever since. The beauty lies in its simplicity—minimal ingredients, maximum flavor, and only one skillet to wash! If you’re looking for a cozy dinner that feels like a warm hug, this recipe is your answer.

    Recipe

    Why You’ll Love This Garlic Butter Chicken and Potatoes Skillet

    Perfect One-Pan Convenience

    Let me tell you why this garlic butter chicken and potatoes skillet deserves a spot in your weekly meal plan. First, it’s the ultimate weeknight savior—everything cooks in one pan, which means fewer dishes and more time to actually enjoy your evening. The potatoes soak up all those incredible chicken juices and garlic butter flavors as they roast, creating little flavor bombs in every bite. I’ve made this on busy Thursdays when the last thing I wanted was a kitchen disaster, and it delivered restaurant-quality results with minimal effort.

    Rich Flavor Profile That Impresses

    The flavor combination here is absolutely magical. The garlic butter sauce creates this incredible richness that coats every piece of chicken and potato with savory goodness. The herbs add freshness while the slight caramelization on the potatoes adds a sweet note that balances everything perfectly. I served this to my pickiest friend (you know the type) who actually asked for the recipe—that’s when I knew this dish was something special. The aroma alone will have your family gathering in the kitchen before you even call them for dinner.

    Essential Tips & Tricks

    Perfect Chicken Selection & Prep

    For the juiciest results, bone-in, skin-on chicken thighs are non-negotiable here. The bones keep the meat moist while the skin crisps up beautifully and adds so much flavor. Pat them completely dry before seasoning—this is crucial for that golden-brown sear that locks in juices. I once skipped this step in a hurry and regretted it immediately. For the potatoes, Yukon golds are my go-to because they get creamy inside while maintaining their shape. Cut them into even pieces (about 1-inch) so they cook at the same rate as the chicken.

    Mastering the Garlic Butter Sauce

    The heart and soul of this dish is the garlic butter sauce, and getting it right makes all the difference. Use fresh garlic cloves (never pre-minced from a jar) and crush them rather than mince them for a more mellow, roasted flavor. Add the garlic to the butter only after it’s melted and slightly cooled to prevent burning—burned garlic will ruin the entire dish with bitterness. I like to infuse the butter with fresh thyme sprigs while it melts, then remove them before adding the garlic. For more comfort food inspiration, check out my Chicken and Dumplings with Biscuits Recipe.

    Serving Ideas & Creative Variations

    Complementary Side Dishes

    While this garlic butter chicken and potatoes skillet is a complete meal on its own, I love serving it with something green to balance the richness. A simple arugula salad with lemon vinaigrette cuts through the buttery sauce perfectly. For a heartier option, roasted Brussels sprouts or steamed broccoli work beautifully. Sometimes I’ll warm some crusty bread to soak up that incredible sauce—because letting any of it go to waste would be a culinary crime! If you’re serving company, a chilled white wine like Chardonnay complements the buttery flavors wonderfully.

    Exciting Flavor Variations

    Don’t be afraid to put your own spin on this versatile dish! Add lemon slices and capers for a piccata-inspired version that’s bright and tangy. For a Spanish twist, sprinkle in some smoked paprika and add chorizo pieces to the skillet. My personal favorite variation includes adding mushrooms halfway through cooking—they absorb all that garlic butter and become absolutely divine. For more one-pan dinner inspiration, my One Pot Burrito Bowls use the same convenient cooking method with completely different flavors.

    Storage & Troubleshooting Guide

    Proper Storage & Reheating

    This dish maintains its deliciousness as leftovers if stored properly. Transfer cooled chicken and potatoes to an airtight container and refrigerate for up to 3 days. For reheating, avoid the microwave which will make the chicken rubbery and the potatoes soggy. Instead, place everything in a covered skillet over medium-low heat with a splash of chicken broth to revive the sauce. The oven works beautifully too—10 minutes at 350°F in a covered dish will restore everything to its former glory without drying out the chicken.

    Solving Common Issues

    If your potatoes aren’t cooking at the same rate as the chicken, there’s an easy fix. Start the potatoes in the skillet about 10 minutes before adding the chicken. For sauce issues, if it’s too thin, remove the chicken and potatoes once cooked, then simmer the sauce until it reduces to your desired consistency. If the garlic starts to brown too quickly, lower the heat immediately and add a splash of chicken broth to stop the cooking process. Remember that different skillets conduct heat differently—cast iron retains heat longer than stainless steel.

    Frequently Asked Questions

    Can I use boneless chicken breasts instead of thighs?

    Yes, but reduce cooking time to about 20-25 minutes total and consider adding a bit more butter to compensate for the lower fat content. Monitor carefully to prevent drying out.

    How do I know when the garlic butter chicken and potatoes skillet is done cooking?

    Chicken should reach 165°F internally and release clear juices when pierced. Potatoes should be fork-tender but not mushy. The skin should be golden and crisp.

    Can I prep this dish ahead of time?

    Absolutely! Season the chicken and prep the potatoes up to 24 hours ahead. Store separately in the refrigerator, then bring to room temperature before cooking.

    What’s the best skillet to use for this recipe?

    A 12-inch cast iron skillet works best as it retains heat evenly and creates perfect browning. A heavy-bottomed oven-safe skillet is a good alternative.

    Can I make this dish dairy-free?

    Yes, substitute olive oil for butter and add a squeeze of lemon at the end for brightness. The flavor profile will change but still be delicious.

    Final Thoughts

    This Garlic Butter Chicken and Potatoes Skillet has become my reliable hero on nights when I want something comforting yet impressive. There’s something deeply satisfying about creating a meal where every element cooks together, sharing flavors and becoming more than the sum of its parts. The combination of crispy-skinned chicken, tender potatoes, and that luscious garlic butter sauce creates a dinner experience that feels special enough for company yet simple enough for Tuesday night. I’d love to see your version if you try it—tag me on Pinterest with your creation!

  • Honey Garlic Chicken Bites That’ll Make Your Taste Buds Explode!

    Honey Garlic Chicken Bites That’ll Make Your Taste Buds Explode!

    Honey Garlic Chicken Bites That’ll Make Your Taste Buds Explode!

    Honey Garlic Chicken Bites have completely transformed my weeknight dinner game, and I’m absolutely thrilled to share this recipe with you! These bite-sized pieces of heaven combine juicy chicken chunks with a sticky-sweet glaze that caramelizes to perfection. The first time I made these for my family, my kitchen filled with the most incredible aroma of sizzling garlic and honey, and everyone literally hovered around the stove waiting for them to finish. They’re quick enough for busy evenings but impressive enough for guests. If you love the perfect balance of sweet and savory like my chicken and dumplings with biscuits, you’ll adore these irresistible bites!

    Recipe

    Why You’ll Love This Honey Garlic Chicken Bites

    Perfect Balance of Flavors

    The magic of these Honey Garlic Chicken Bites lies in their impeccable flavor profile. The natural sweetness from honey beautifully complements the punchy garlic, while a touch of soy sauce adds that umami depth that makes you close your eyes with each bite. I’ve carefully balanced these ingredients so neither overwhelms the other. The sauce reduces to a glossy coating that clings to each piece of chicken, creating little flavor bombs that burst in your mouth. The slight caramelization around the edges adds a subtle complexity that elevates this simple dish to restaurant quality.

    Quick and Versatile Meal Solution

    These Honey Garlic Chicken Bites come together in just under 25 minutes, making them perfect for those evenings when you’re short on time but still want something delicious. The ingredients are pantry staples I always keep on hand – chicken, honey, garlic, soy sauce – which means I can whip this up without a special grocery trip. I’ve served these as a main dish with rice, added them to salads for protein, used them in wraps, and even served them as appetizers with toothpicks when friends drop by unexpectedly. Their versatility makes them a true kitchen hero in my recipe collection.

    Essential Tips & Tricks

    Perfecting the Chicken Texture

    The secret to incredibly tender Honey Garlic Chicken Bites lies in the cutting technique and cooking time. I always cut my chicken into even, bite-sized pieces (about 1-inch cubes) to ensure they cook uniformly. Pat the chicken dry before cooking – this is non-negotiable if you want that beautiful caramelization! Cook the chicken in batches to avoid overcrowding the pan, which would cause it to steam rather than sear. A hot pan is essential – you should hear that satisfying sizzle when the chicken hits the surface. This creates that wonderful textural contrast: crisp exterior, juicy interior.

    Mastering the Sticky-Sweet Sauce

    The sauce consistency is what transforms ordinary chicken chunks into crave-worthy Honey Garlic Chicken Bites. Start by sautéing your garlic just until fragrant (about 30 seconds) – any longer and it will burn and turn bitter. When adding honey, let it bubble and reduce slightly before incorporating soy sauce. This layering of flavors makes all the difference! For the perfect thick, glossy sauce, let it simmer until it coats the back of a spoon. A splash of rice vinegar at the end brightens everything up, like my Mississippi Little Smokies – that hint of acid balances the sweetness beautifully.

    Serving Ideas & Creative Variations

    Perfect Pairings for a Complete Meal

    Serve these sticky-sweet Honey Garlic Chicken Bites over a bed of fluffy jasmine rice to soak up every drop of that luscious sauce. I love adding a side of steamed broccoli or sugar snap peas for color and crunch – the sauce tastes amazing on veggies too! For a lower-carb option, cauliflower rice works beautifully, or try them atop a crisp green salad for a delightful contrast in textures. On busy nights, I’ll stuff these into lettuce cups with some shredded carrots and sliced green onions for a hand-held dinner that my kids go crazy for. The versatility makes these bites a true weeknight wonder.

    Exciting Flavor Twists

    Don’t be afraid to put your own spin on these Honey Garlic Chicken Bites! Add a tablespoon of sriracha or gochujang for a spicy-sweet version that tingles your taste buds. For an Asian-inspired twist, mix in some grated ginger and finish with sesame seeds and green onions – reminiscent of my popular crispy teriyaki chicken wonton tacos. Pineapple chunks added during the last minute of cooking create a delicious tropical variation. Orange zest and a splash of orange juice transform these into orange chicken bites. You can even try different proteins – this sauce works wonderfully with shrimp, tofu, or pork for endless meal possibilities.

    Storage & Troubleshooting Guide

    Proper Storage for Maximum Freshness

    These Honey Garlic Chicken Bites maintain their delicious flavor even as leftovers, making them perfect for meal prep. Store them in an airtight container in the refrigerator for up to 3 days. The sauce might thicken slightly when chilled, which actually helps it cling better to the chicken. For reheating, a quick 60-90 seconds in the microwave works well, but for best results, reheat them in a skillet over medium heat with a tiny splash of water to revive the sauce. If freezing, place cooled chicken bites on a parchment-lined baking sheet to freeze individually before transferring to a freezer bag – this prevents them from sticking together.

    Troubleshooting Common Issues

    If your sauce isn’t thickening properly, try adding a cornstarch slurry (1 teaspoon cornstarch mixed with 1 tablespoon water) and simmer for an additional minute. For sauce that’s too thick, a splash of chicken broth or water will thin it to your desired consistency. If your chicken isn’t browning well, your pan probably isn’t hot enough – make sure it’s properly preheated before adding the chicken. Burning garlic is a common pitfall; if this happens, don’t try to salvage it as it will impart a bitter taste. Instead, wipe the pan clean and start the sauce again. Remember that honey can burn easily, so keep the heat at medium once it’s added.

    Frequently Asked Questions

    Can I make Honey Garlic Chicken Bites with chicken thighs instead of breast?

    Absolutely! Chicken thighs work beautifully and often stay juicier. Just trim excess fat and cut into even pieces for consistent cooking.

    How can I make these Honey Garlic Chicken Bites gluten-free?

    Simply swap regular soy sauce for tamari or coconut aminos. Double-check your other ingredients, but the core components are naturally gluten-free.

    My sauce isn’t thickening – what am I doing wrong?

    Make sure you’re simmering long enough and at the right temperature. For quicker thickening, add a cornstarch slurry (1 teaspoon cornstarch mixed with 1 tablespoon water).

    Can I prep these Honey Garlic Chicken Bites ahead for a party?

    Yes! Cook them fully, cool, then refrigerate. Reheat in a skillet with a splash of water to revive the sauce, or serve at room temperature as appetizers.

    What’s the best way to get that perfect caramelization on my Honey Garlic Chicken Bites?

    Pat chicken completely dry before cooking, use a very hot pan, don’t overcrowd pieces, and allow the honey to bubble and reduce until it reaches that sticky-glossy stage.

    Final Thoughts

    These Honey Garlic Chicken Bites have earned their place as a staple in my dinner rotation because they deliver maximum flavor with minimum effort. There’s something magical about that sticky-sweet glaze clinging to perfectly tender chicken that just makes everyone happy. I find myself craving these on busy weeknights and special occasions alike. Whether you’re feeding picky eaters or gourmet food lovers, these bites hit all the right notes. I’d love to see your creations if you try this recipe – tag me on Pinterest to share your Honey Garlic Chicken Bites success!

  • High Protein Crustless Chicken Pot Pie – Comfort Food Reinvented!

    High Protein Crustless Chicken Pot Pie – Comfort Food Reinvented!

    High Protein Crustless Chicken Pot Pie – Comfort Food Reinvented!

    High protein crustless chicken pot pie brings all the cozy comfort of traditional pot pie without the heavy crust! I discovered this gem on a chilly Sunday when I was craving something warming but didn’t want to derail my protein goals. The kitchen filled with the aroma of herbs and roasted chicken as it baked, and that first spoonful? Pure creamy satisfaction with tender chicken chunks and vegetables in every bite. If you’re looking for a protein-packed dinner that doesn’t sacrifice flavor, this might become your new weeknight staple, just like it did in my home.

    Recipe

    Why You’ll Love This High Protein Crustless Chicken Pot Pie

    Perfect Balance of Nutrition and Comfort

    This dish delivers an impressive protein punch while keeping carbs in check. Each serving packs around 30g of protein from the chicken, cottage cheese, and eggs that form the creamy base. The beauty is how it satisfies that pot pie craving without weighing you down afterward. I love how my family doesn’t even miss the crust—they’re too busy enjoying the savory filling that’s become the star. The blend of herbs infuses every bite with that classic pot pie flavor while keeping the calorie count reasonable for those watching their intake.

    Quick Prep for Busy Weeknights

    Unlike traditional pot pies that require making and rolling dough, this crustless version comes together in about 15 minutes of active prep. I can toss it together after work, pop it in the oven, and have dinner ready in under an hour. The ingredients are pantry and fridge staples I usually have on hand—chicken, frozen vegetables, eggs, and cottage cheese. On particularly hectic evenings, using rotisserie chicken cuts the prep time even further. This has saved dinner at my house countless times when I’m tempted to order takeout but want something nourishing instead.

    Essential Tips & Tricks

    Perfecting the Protein Base

    The secret to the perfect texture lies in how you handle the protein-rich base. Blend the eggs and cottage cheese until completely smooth for a custardy finish that holds everything together. Room temperature eggs incorporate better and prevent the mixture from seizing up when baking. For maximum flavor infusion, don’t rush adding the seasonings—I like to whisk them thoroughly into the egg mixture rather than just sprinkling on top. This ensures every bite has that perfect savory profile that makes you forget you’re eating something so protein-focused.

    Vegetable and Chicken Preparation

    Pre-cooking your vegetables slightly before adding them to the mixture prevents excess water release that could make your pot pie soggy. I give them a quick sauté with a bit of garlic until they’re just tender but still have some bite. For the chicken, shredding or dicing into small, even pieces ensures it distributes well throughout the mixture. Season the chicken separately before adding it to the base—this layering of flavors makes a noticeable difference in the final dish. Pat everything dry with paper towels to remove excess moisture before combining.

    Serving Ideas & Creative Variations

    Complementary Side Dishes

    This high protein crustless chicken pot pie pairs beautifully with light sides that won’t overwhelm its delicate flavors. A simple arugula salad with lemon vinaigrette provides a refreshing contrast to the creamy texture. For a more substantial meal that still keeps the protein focus, add a side of steamed asparagus or green beans tossed with a little olive oil and lemon zest. When I’m serving this for Sunday dinner, I sometimes add roasted sweet potatoes on the side for those family members who want something more filling without compromising the healthier main dish.

    Flavor Variations to Keep It Interesting

    The basic recipe is wonderfully adaptable to different flavor profiles. For a Mediterranean twist, add sun-dried tomatoes, feta, and olives with a sprinkle of oregano. My family loves when I make a Southwest version with bell peppers, corn, black beans, and a dash of cumin and chili powder. For a cozy fall variation, try adding diced butternut squash, sage, and a touch of nutmeg. You can also experiment with different protein sources—ground turkey works beautifully, and I’ve even made a seafood version with shrimp and a hint of Old Bay seasoning that disappeared in minutes.

    Storage & Troubleshooting Guide

    Proper Storage for Meal Prep

    This crustless pot pie is perfect for meal prep as it stores beautifully in both the refrigerator and freezer. Once completely cooled, portion individual servings into airtight containers for grab-and-go lunches throughout the week. It keeps well in the refrigerator for up to 4 days without losing its texture or flavor. For freezing, wrap individual portions tightly in plastic wrap then foil, or use freezer-safe containers. Label with the date and use within 3 months. I like to thaw overnight in the refrigerator before reheating to maintain that perfect creamy consistency.

    Fixing Common Issues

    If your pot pie turns out too watery, the culprit is usually excess moisture in the vegetables. Next time, make sure to pre-cook and drain them thoroughly before adding to the egg mixture. For a pot pie that’s too dry, try increasing the cottage cheese slightly or adding a splash of milk to the base. If the top is browning too quickly before the center is set, simply cover loosely with foil for the remainder of the baking time. For more protein, you can add a scoop of unflavored protein powder to the egg mixture—I’ve done this successfully without affecting the taste.

    Frequently Asked Questions

    Can I make this high protein crustless chicken pot pie ahead of time?

    Absolutely! Prepare the mixture up to 24 hours ahead and refrigerate. Let it sit at room temperature for 15 minutes before baking. The flavors actually develop nicely with a little rest time.

    What can I use instead of cottage cheese?

    Greek yogurt works beautifully as a substitute. You’ll maintain the protein content while getting a similar creamy texture. For a richer version, try ricotta cheese.

    How do I know when it’s fully cooked?

    The pot pie should be set in the center with light golden edges. Insert a knife in the center—it should come out clean. The internal temperature should reach 165°F.

    Can I use plant-based protein instead of chicken?

    Yes! Firm tofu, tempeh, or a combination of beans and lentils work well. Just make sure they’re well-drained and pre-seasoned to infuse flavor throughout the dish.

    Is this recipe suitable for meal prepping?

    This is perfect for meal prep! The crustless pot pie reheats beautifully and maintains its texture. Portion into individual containers for quick, protein-packed lunches all week.

    Final Thoughts

    This high protein crustless chicken pot pie has become a staple in my kitchen for good reason—it delivers comfort food satisfaction while supporting health goals. What I love most is how versatile it is, adapting to whatever vegetables are in season or proteins I have on hand. The way it fills the house with those homey aromas makes even the most ordinary weeknight feel special. Don’t forget to check out more protein-packed comfort food ideas on Pinterest for inspiration! Your journey to delicious, nutritious meals just got a whole lot tastier.