Blog

  • Easter No Bake Oreo Balls: Irresistibly Easy & Delicious Treats!

    Easter No Bake Oreo Balls: Irresistibly Easy & Delicious Treats!

    Easter No Bake Oreo Balls: Irresistibly Easy & Delicious Treats!

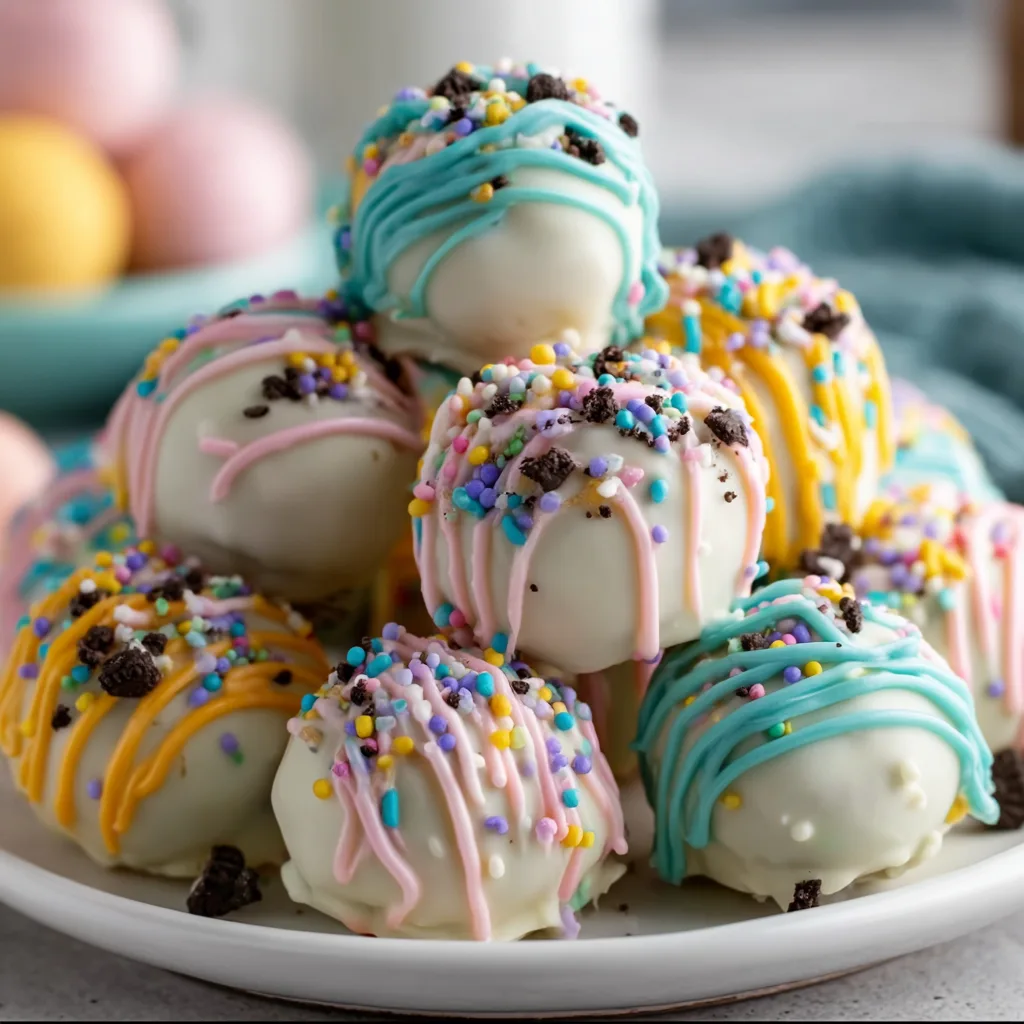
    Easter No Bake Oreo Balls have become my absolute favorite last-minute treat when I need something festive that doesn’t require turning on the oven. The first time I made these for my family’s Easter gathering, they disappeared faster than the hidden eggs in our annual hunt! There’s something magical about the combination of crushed Oreos and cream cheese, rolled into perfect little spheres and decorated with pastel-colored white chocolate. They’re decadently rich yet so simple to make, making them the perfect addition to your holiday dessert spread.

    Recipe

    Why You’ll Love These Easter No Bake Oreo Balls

    Perfect for Busy Holiday Schedules

    These no bake treats are a lifesaver during the hectic Easter season. When I’m juggling egg hunts, family dinners, and spring cleaning, the last thing I want is a complicated dessert. These Oreo balls require just 15 minutes of active time and can be made days ahead. The simple process of crushing cookies, mixing with cream cheese, and dipping in chocolate is almost therapeutic. I love that I can prepare them while catching up with family in the kitchen—no hot ovens or precise timing needed!

    Crowd-Pleasing Flavor Everyone Loves

    There’s a reason Oreo balls have stood the test of time—they’re absolutely irresistible! The combination of chocolate cookies with tangy cream cheese creates a truffle-like texture that melts in your mouth. I’ve never met anyone who could stop at just one. Even my picky nephew, who claims to “not like desserts,” requested these for his birthday after trying them at Easter. The familiar Oreo flavor appeals to kids while the rich, creamy texture satisfies sophisticated adult palates, making them the perfect cross-generational treat.

    Essential Tips & Tricks

    Getting the Perfect Consistency

    The secret to amazing Oreo balls lies in achieving that perfect texture. I’ve found that using a food processor creates the most consistent crumb, but a zip-top bag and rolling pin works wonderfully too—plus it’s a great way to release some stress! Make sure your cream cheese is properly softened (I leave mine out for at least 30 minutes), as cold cream cheese will leave lumps. When mixing, you’re looking for a play-dough consistency that holds together without being sticky. If your mixture seems too wet, add a few more crushed Oreos; too dry, add a tiny bit more cream cheese.

    Mastering the Chocolate Coating

    The chocolate coating can make or break your Easter No Bake Oreo Balls. I learned the hard way that proper chocolate melting is crucial! Use good quality white chocolate (or candy melts for vibrant Easter colors) and melt it slowly—either in 30-second microwave intervals or with a double boiler. The game-changer for me was adding a teaspoon of coconut oil to the melted chocolate, which creates a smoother consistency that’s easier to work with. Keep your Oreo balls chilled until the moment you’re ready to dip them, and use a fork to gently lower them into the chocolate for the most even coating.

    Serving Ideas & Creative Variations

    Festive Easter Decorations

    Transform these simple treats into showstopping Easter delights with creative decorations! I love using pastel-colored white chocolate with contrasting drizzles for a spring vibe. Edible decorations like small sugar flowers, bunny sprinkles, or even crushed freeze-dried strawberries create beautiful pops of color. For my niece’s Easter party, I arranged the Oreo balls in a nest of edible Easter grass with some mini chocolate eggs scattered around—the presentation was so adorable that guests were taking photos before diving in! Consider placing each ball in mini cupcake liners for easy serving.

    Flavor Twists for Every Preference

    While classic Oreos are divine, experimenting with different flavor combinations takes these treats to new heights! For Easter, I often make a variety pack: mint Oreos dipped in dark chocolate, golden Oreos with white chocolate and lemon zest, and birthday cake Oreos with pastel sprinkles. Adding a drop of peppermint extract to the chocolate coating or mixing in a tablespoon of peanut butter to the filling creates delightful variations. My personal favorite is using the coconut Oreos with a hint of lime zest in the filling—they taste like spring in a bite!

    Storage & Troubleshooting Guide

    Keeping Your Oreo Balls Fresh

    These Easter No Bake Oreo Balls stay perfectly fresh when stored properly. After they’ve set completely, place them in an airtight container with parchment paper between layers to prevent sticking. They’ll keep in the refrigerator for up to two weeks, though they rarely last that long in my house! For longer storage, you can freeze them for up to three months. I like to make a double batch and freeze half—they thaw beautifully in the refrigerator overnight. Just be aware that if you’ve used sprinkles or delicate decorations, freezing might affect their appearance.

    Fixing Common Problems

    Even experienced bakers encounter issues sometimes! If your Oreo balls are too soft to roll, simply refrigerate the mixture for 15-20 minutes to firm it up. Chocolate coating cracking? That’s usually because the balls were too cold when dipped—let them warm slightly at room temperature. If your chocolate seizes or becomes too thick, gently stir in a teaspoon of coconut oil to restore a smooth consistency. For balls that are rolling unevenly, try using a small cookie scoop to portion the mixture, then roll between your palms for perfect spheres. Remember, even imperfect Oreo balls are delicious!

    Frequently Asked Questions

    Can I make Easter No Bake Oreo Balls ahead of time?

    Absolutely! These treats can be made up to 5 days in advance when stored in the refrigerator. The flavors actually develop nicely over time, making them perfect for holiday prep.

    What’s the best way to crush Oreos for this recipe?

    A food processor creates the finest, most consistent crumb. If you don’t have one, place cookies in a ziplock bag and crush with a rolling pin until you achieve a fine powder.

    Can I use reduced-fat cream cheese?

    Yes, but the texture will be slightly different. Full-fat cream cheese creates a richer, more truffle-like consistency, while reduced-fat makes a slightly firmer ball.

    How do I prevent my hands from getting messy while rolling?

    Lightly coat your hands with cooking spray or a tiny bit of coconut oil before rolling. Alternatively, wearing food-safe gloves makes the process much cleaner.

    Why are my Easter No Bake Oreo Balls too sticky to roll?

    Your mixture may be too warm or have too much cream cheese. Refrigerate for 20-30 minutes to firm up, or gradually add more crushed Oreos until you reach a rollable consistency.

    Final Thoughts

    These Easter No Bake Oreo Balls have become a beloved tradition in my home—the perfect blend of simplicity and indulgence for spring celebrations. There’s something magical about watching family members’ eyes light up when they spot the colorful platter of treats. Whether you’re a seasoned baker or someone looking for an easy yet impressive dessert, these no-bake delights deliver every time. I hope these Oreo balls bring as much joy to your Easter gathering as they have to mine! Don’t forget to share your creations on Pinterest to inspire others.
  • Easter Bunny Coconut Tails Recipe – Irresistibly Fluffy & Fun!

    Easter Bunny Coconut Tails Recipe – Irresistibly Fluffy & Fun!

    Easter Bunny Coconut Tails Recipe – Irresistibly Fluffy & Fun!

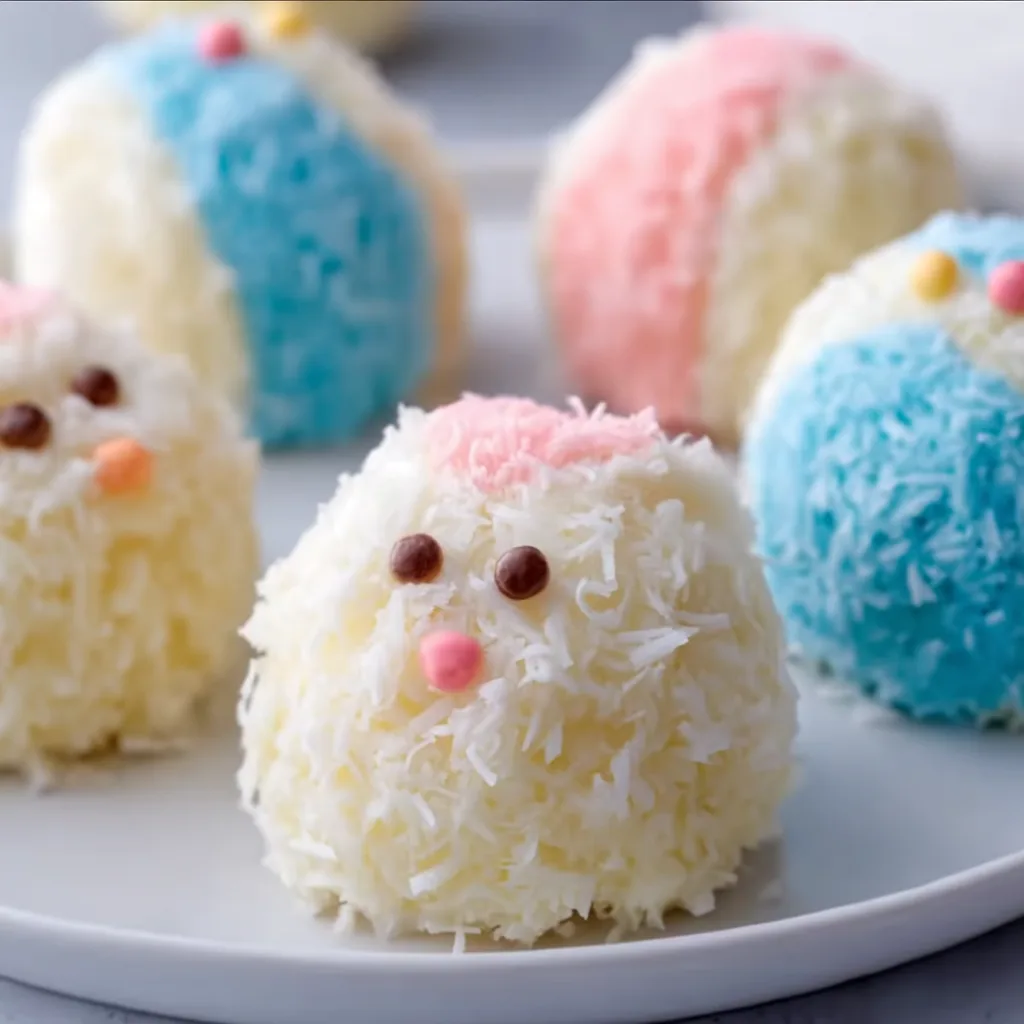
    Easter Bunny Coconut Tails have become my absolute favorite springtime treat to share with family and friends. These adorable, sweet confections combine the tropical bliss of coconut with rich chocolate and festive decorations that bring the Easter spirit to life. The first time I made these for my niece’s Easter egg hunt, the children’s eyes lit up with such joy that I’ve made them a tradition ever since. What makes these treats special isn’t just their delicious flavor, but how they transform an ordinary gathering into a magical Easter celebration. The best part? They’re surprisingly simple to create!

    Recipe

    Why You’ll Love This Easter Bunny Coconut Tails

    Perfect Balance of Flavors and Textures

    These Easter Bunny Coconut Tails offer the most satisfying texture contrast you can imagine. The exterior coating of shredded coconut provides a delightful chewiness, while the interior remains soft and tender. I love how the sweetness of the coconut paste balances perfectly with the rich chocolate dip. Each bite delivers a wonderful mouthfeel that’s both substantial and delicate. The subtle vanilla notes complement the coconut without overpowering it, creating a treat that even coconut skeptics find irresistible. My husband, who typically avoids coconut desserts, asks for these every spring!

    Impressive Yet Easy to Create

    Don’t let their adorable appearance fool you – these bunny tails are remarkably beginner-friendly! Unlike complicated Easter desserts that require special equipment or advanced techniques, these cute treats come together with basic ingredients and simple steps. I remember panicking when I volunteered to bring dessert to a family Easter brunch, but these saved the day with just 30 minutes of active preparation. The rolling technique creates perfectly round shapes every time, and the decorating process is forgiving enough that kids can join in. They look professional without requiring professional skills!

    Essential Tips & Tricks

    Perfecting the Coconut Mixture

    The secret to exceptional Easter Bunny Coconut Tails lies in the coconut mixture consistency. I’ve found that chilling the mixture for at least 30 minutes before rolling makes handling infinitely easier. If your mixture feels too wet, gradually add more powdered sugar, one tablespoon at a time, until it reaches a moldable consistency. For extra coconut flavor, replace vanilla extract with coconut extract, or use half of each. When incorporating the shredded coconut, fold gently rather than stirring vigorously to maintain the light texture. This approach has given me perfect results every time I’ve made them for Easter gatherings.

    Mastering the Chocolate Coating

    Temperature control is crucial when working with the chocolate coating. I learned the hard way that overheated chocolate becomes grainy and unusable! Melt your chocolate in 30-second intervals, stirring between each, until just smooth. Adding a teaspoon of coconut oil to the melted chocolate creates the perfect consistency for dipping. For a cleaner finish, use a fork to dip each coconut ball, tapping gently to remove excess chocolate. If you’re making these in warm weather, place the chocolate-dipped tails in the refrigerator for 5 minutes before adding decorations to prevent smudging your creative designs.

    Serving Ideas & Creative Variations

    Festive Presentation Techniques

    Transform these treats into a showstopping Easter display with thoughtful presentation touches. Arrange your Easter Bunny Coconut Tails in small paper cupcake liners and place them in a basket lined with colorful Easter grass. For an elegant table centerpiece, create a “bunny garden” by inserting toothpicks into the tails and anchoring them in a block of floral foam covered with artificial moss. I love adding fresh spring flowers around the display for a natural touch. For children’s parties, create individual favor bags with two or three tails tied with pastel ribbons. These presentations elevate the treats from simple sweets to memorable Easter moments.

    Exciting Flavor Twists

    While traditional Easter Bunny Coconut Tails are delicious, experimenting with flavor variations keeps this recipe fresh year after year. Try infusing the coconut mixture with a tablespoon of lemon zest for a bright, citrusy version that pairs beautifully with spring teas. For chocolate lovers, fold mini chocolate chips into the coconut mixture before rolling. My personal favorite variation includes a teaspoon of almond extract and finely chopped dried cherries for sophisticated flavor. For a tropical twist, replace some of the liquid with pineapple juice and decorate with tiny pieces of dried pineapple “ears” to create bunny-pineapple hybrids that children find absolutely hilarious.

    Storage & Troubleshooting Guide

    Proper Storage Techniques

    To maintain the perfect texture of your Easter Bunny Coconut Tails, proper storage is essential. Store finished tails in an airtight container in the refrigerator, where they’ll keep beautifully for up to one week. Place parchment paper between layers to prevent sticking. If you need to make them further in advance, these treats freeze exceptionally well! Simply place fully set tails in a freezer-safe container with parchment between layers and freeze for up to three months. When ready to serve, thaw overnight in the refrigerator, then let stand at room temperature for 20 minutes for the best flavor and texture experience.

    Solving Common Problems

    Even experienced bakers encounter challenges! If your coconut mixture is too crumbly to form balls, add a teaspoon of milk or cream until it reaches the right consistency. Conversely, if your mixture is too sticky, refrigerate it longer or roll your hands in powdered sugar before forming each ball. For chocolate coating that’s hardening too quickly, add an additional half-teaspoon of coconut oil to extend working time. If decorations won’t adhere to the chocolate, your coating may have set too firmly—try gently pressing decorations into the chocolate immediately after dipping, or add a tiny dot of melted chocolate as “glue” for each decoration.

    Frequently Asked Questions

    Can I make Easter Bunny Coconut Tails without sweetened condensed milk?

    Yes! Substitute 4 ounces of cream cheese (softened) mixed with ¼ cup honey or maple syrup. This alternative provides the right consistency while maintaining the sweetness needed for authentic flavor.

    How do I prevent the coconut from falling off the Easter Bunny Coconut Tails?

    Roll the formed balls in slightly dampened hands before coating in coconut. The moisture helps the coconut adhere better, and a gentle pressing motion secures the coconut in place.

    Can I make these dairy-free?

    Absolutely! Use coconut condensed milk instead of regular, and select dairy-free chocolate for dipping. The results are equally delicious and perfect for guests with dairy sensitivities.

    What’s the best coconut to use for this recipe?

    I recommend unsweetened shredded coconut for the coating and sweetened coconut for the mixture. This balance provides the perfect sweetness level and creates the most authentic texture.

    How far in advance can I make these for an Easter party?

    You can prepare Easter Bunny Coconut Tails up to 3 days ahead and store them in the refrigerator. For the freshest presentation, add any delicate decorations the day of serving.

    Final Thoughts

    Easter Bunny Coconut Tails bring together everything I love about holiday baking—simplicity, deliciousness, and that magical ability to create lasting memories. The joy on everyone’s faces when they spot these adorable treats on the Easter table makes every minute of preparation worthwhile. Whether you’re a seasoned baker or trying your hand at homemade Easter treats for the first time, these coconut tails deliver both impressive results and genuine happiness. I hope they become a beloved tradition in your home, just as they have in mine. Happy Easter baking, friends!

    Check out more festive recipes on Pinterest!

  • No-Bake Easter Fudge: Irresistibly Creamy & Easy Delight!

    No-Bake Easter Fudge: Irresistibly Creamy & Easy Delight!

    No-Bake Easter Fudge: Irresistibly Creamy & Easy Delight!

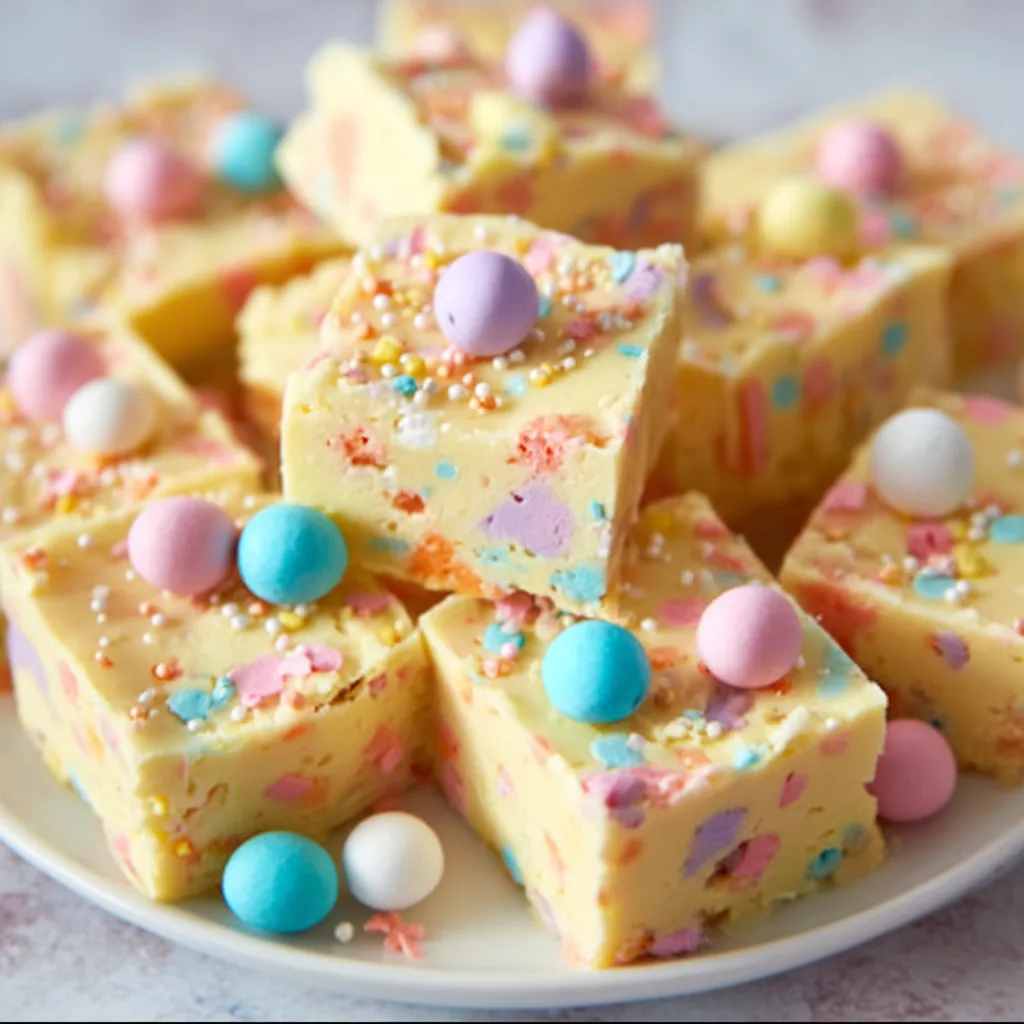
    There’s something magical about no-bake Easter Fudge that brings the spring celebration to life without turning on your oven. As someone who cherishes creating sweet memories during holidays, I’ve found this creamy, colorful treat strikes the perfect balance between festive and fuss-free. The pastel colors remind me of those Sunday morning Easter egg hunts from my childhood, where the excitement of discovering something sweet hidden in the grass made the day special. This recipe captures that same joy in every bite, with layers of velvety chocolate and spring-inspired toppings that will delight everyone at your Easter gathering.

    Recipe

    Why You’ll Love This no-bake Easter Fudge

    Perfect for Busy Holiday Preparations

    When Easter weekend arrives, the last thing you need is another complicated recipe competing for oven space. This no-bake Easter Fudge saves the day by requiring zero baking time! I remember last Easter when my sister dropped by unexpectedly with her kids—I whipped this up while we caught up over coffee, and it set in time for an afternoon treat. The simple preparation means you can focus on other holiday activities while still presenting a showstopping dessert that looks like you spent hours in the kitchen. The quick set time makes it perfect for last-minute gatherings.

    Customizable for Everyone’s Tastes

    One of my favorite things about this no-bake Easter Fudge is how easily it adapts to different preferences. Whether you’re serving chocolate purists or candy enthusiasts, this recipe welcomes creativity. The basic fudge base stays the same, but you can personalize with white chocolate, dark chocolate, or milk chocolate layers. Last year, I made a batch with a section of peanut butter fudge for the adults and a colorful sprinkle section that my niece still talks about. Add Easter candies, crushed cookies, or pastel sprinkles to create a dessert that’s uniquely yours.

    Essential Tips & Tricks

    Achieving the Perfect Fudge Texture

    The secret to silky-smooth no-bake Easter Fudge lies in how you handle the chocolate. I learned this the hard way after a batch turned grainy when I rushed the process. Always melt chocolate slowly over low heat or in short microwave bursts, stirring frequently. The condensed milk should be at room temperature before mixing to prevent temperature shock. When folding ingredients together, use gentle motions rather than vigorous stirring, which can introduce air bubbles. For multi-layered fudge, allow each layer to set slightly before adding the next—about 15 minutes in the refrigerator works perfectly.

    Preventing Common Mistakes

    Even the simplest recipes have pitfalls, and no-bake Easter Fudge is no exception. The most common issue I’ve encountered is fudge that’s too soft or won’t set properly. The culprit is usually added liquid from extracts or food coloring. Always use gel food coloring rather than liquid versions to maintain the proper consistency. Line your pan with parchment paper with overhang for easy removal—nothing ruins beautiful fudge faster than struggling to get it out of the pan! If adding candies or decorations, press them in gently while the fudge is still slightly soft but not completely liquid, similar to my approach with no-bake Grinch pie.

    Serving Ideas & Creative Variations

    Festive Presentation Techniques

    Transform your no-bake Easter Fudge from delicious to unforgettable with thoughtful presentation. I love arranging square fudge pieces in Easter baskets lined with colorful tissue paper for gifting. For serving at home, try creating a dessert board with the fudge as the centerpiece, surrounded by fresh berries, cookies, and chocolate eggs. Last Easter, I used a small bunny-shaped cookie cutter for some pieces and left others as squares, creating a playful mixed arrangement on my grandmother’s vintage cake stand. The contrast of shapes made the display so much more interesting without any extra work.

    Seasonal Flavor Combinations

    While traditional chocolate fudge is always a hit, seasonal flavors can make your no-bake Easter Fudge truly memorable. Try a lemon-white chocolate layer with crushed lemon cookies for a spring-inspired variation. Coconut cream with a drop of almond extract creates a delicate flavor reminiscent of Easter coconut cakes. For chocolate lovers, consider a chocolate-strawberry combination that echoes chocolate-covered strawberries, similar to the flavor pairing in my easy chocolate cream pie. The freshness of fruit flavors balances the richness of the fudge, making it perfect for spring celebrations.

    Storage & Troubleshooting Guide

    Keeping Fudge Fresh

    Proper storage ensures your no-bake Easter Fudge stays delicious for days after making it. Store it in an airtight container with parchment paper between layers to prevent sticking. At room temperature, it will maintain its texture for 3-4 days, though I find the flavor actually improves after the first day as the ingredients meld together. For longer storage, refrigerate for up to two weeks, but bring to room temperature before serving to restore that melt-in-your-mouth quality. If you’re planning far ahead, you can even freeze the fudge for up to three months—just wrap individual pieces tightly in plastic wrap before placing in a freezer container.

    Rescuing Less-Than-Perfect Results

    Even experienced bakers sometimes end up with fudge that’s too soft or too firm. If your no-bake Easter Fudge is too soft after chilling, it likely needs more time in the refrigerator—give it at least 4 hours or overnight. For extremely soft fudge, try freezing it for firmer texture. If it’s too hard or grainy, let it come to room temperature, then gently warm and re-whip with a small amount of cream. Don’t worry about appearance flaws—strategically placed toppings like Easter sprinkles or candy can disguise any surface imperfections while adding festive charm.

    Frequently Asked Questions

    Can I make no-bake Easter Fudge ahead of time?

    Absolutely! This fudge actually benefits from being made 1-2 days in advance. The flavors meld together beautifully, and it stays fresh in an airtight container in the refrigerator for up to two weeks.

    How can I make this recipe vegan?

    Substitute the condensed milk with coconut condensed milk and use dairy-free chocolate chips. The setting process works the same way, and most guests won’t notice the difference in the final product.

    Why did my fudge not set properly?

    Improper setting usually happens when there’s too much liquid or the chocolate-to-condensed milk ratio is off. Make sure to use exact measurements and allow sufficient chilling time (at least 4 hours, preferably overnight).

    What’s the best chocolate to use for no-bake Easter Fudge?

    High-quality chocolate chips or bars with 50-60% cocoa content work best. They melt smoothly and set with the perfect fudgy texture without being too soft or too brittle.

    Can I freeze leftover fudge?

    Yes! Wrap individual pieces tightly in plastic wrap, then store in an airtight container. Freeze for up to 3 months and thaw in the refrigerator overnight before serving.

    Final Thoughts

    This no-bake Easter Fudge has become my holiday tradition for good reason—it delivers maximum joy with minimum effort. The combination of creamy texture, customizable flavors, and festive appearance makes it perfect for Easter celebrations of any size. Whether you’re making it as a last-minute dessert or planning ahead for gifts, this recipe proves that sometimes the simplest treats create the strongest memories. I hope this fudge brings as much sweetness to your Easter gathering as it has to mine! Don’t forget to check out more seasonal inspiration on Pinterest.

  • Cadbury Egg Oatmeal Cookies | Irresistible Easter Chocolate Treats

    Cadbury Egg Oatmeal Cookies | Irresistible Easter Chocolate Treats

    Cadbury Egg Oatmeal Cookies | Irresistible Easter Chocolate Treats

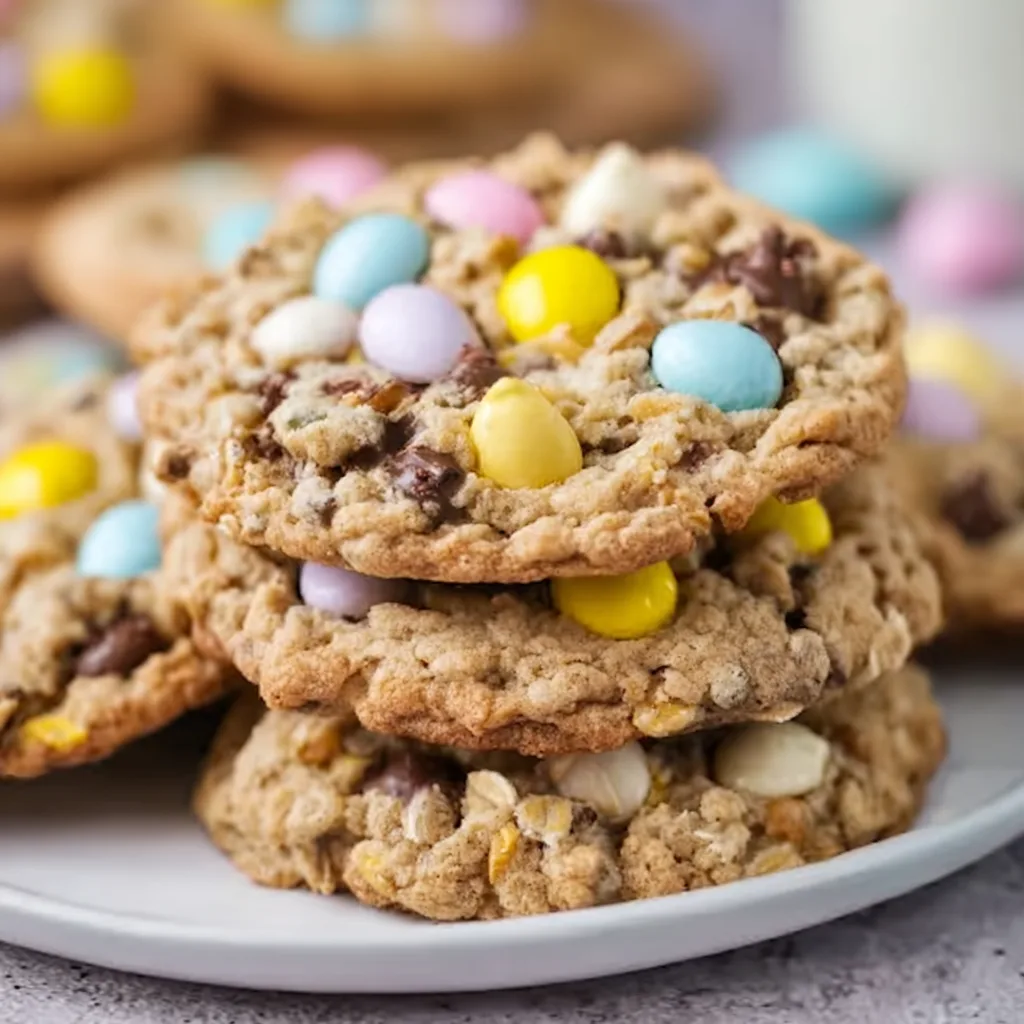
    Cadbury Egg Oatmeal Chocolate Chip Easter Cookies are the ultimate spring treat that combines the nostalgic charm of Easter candy with the comforting warmth of homemade cookies. Every bite delivers the perfect balance of chewy oatmeal, melty chocolate chips, and those irresistible candy-coated chocolate eggs that remind me of childhood Easter basket hunts. I’ve perfected this recipe over years of springtime baking sessions with my kids, watching their faces light up as they crush the colorful Cadbury eggs. These cookies have become our family’s most requested Easter tradition, and I’m thrilled to share the magic with you at Recipes Darleen.

    Recipe

    Why You’ll Love These Cadbury Egg Oatmeal Chocolate Chip Easter Cookies

    Perfect Texture Combination

    The chewy oatmeal base creates the ideal foundation for these cookies, offering a heartier bite than your standard chocolate chip cookie. I’ve carefully balanced the ratio of brown to white sugar to ensure they stay soft in the center with slightly crisp edges. The oats add a wonderful texture that contrasts beautifully with the smooth chocolate chips and the candy-coated crunch of the Cadbury eggs. When you bite into one of these cookies still warm from the oven, the melted chocolate mingles with bits of candy shell in a way that’s absolutely magical. It’s like experiencing the best parts of an Easter basket in cookie form!

    Simple Yet Impressive

    Despite their show-stopping appearance, these Easter cookies are surprisingly straightforward to make. The dough comes together in just one bowl (fewer dishes is always a win in my kitchen!), and you don’t need any fancy equipment beyond a mixer and a cookie sheet. I love that these cookies look professionally made with minimal effort—those vibrant Cadbury egg pieces create a naturally festive appearance that’s perfect for Easter gatherings. Kids can help crush the eggs and fold them into the dough, making this a wonderful family baking project that creates memories alongside delicious treats.

    Essential Tips & Tricks

    The secret to exceptional texture in these cookies lies in how you handle the ingredients. Always bring your butter to room temperature naturally (about 1 hour on the counter) rather than microwaving it, which can cause uneven melting. When incorporating the oats, pulse them briefly in a food processor for a more uniform texture that still maintains their hearty character. For the Cadbury eggs, I’ve found that placing them in a zip-top bag and giving them a few gentle taps with a rolling pin creates the perfect mixture of small and medium pieces—you want some powder for flavor throughout and some chunks for those delightful candy bites. Check out my Easy Cinnamon Swirl Cookies Recipe for more cookie-making techniques!

    Strategic Mix-Ins

    The mix-in timing is crucial for these cookies. Fold in your chocolate chips first, distributing them evenly throughout the dough. Then—and this is important—add the crushed Cadbury eggs last with just a few gentle folds. Over-mixing will cause the colorful candy coating to bleed into your dough, muddying the vibrant appearance. I reserve about ¼ cup of the crushed eggs to press into the tops of the cookies right before baking, which creates that beautiful bakery-style presentation. For the best flavor balance, use semi-sweet chocolate chips rather than milk chocolate, as the Cadbury eggs already provide plenty of sweetness.

    Serving Ideas & Creative Variations

    Easter Celebration Presentations

    These cookies make a stunning centerpiece for any Easter gathering. I love arranging them on a tiered cake stand surrounded by fresh spring flowers for a beautiful dessert table display. For Easter brunch, try serving them alongside a spring-inspired charcuterie board with pastel-colored fruits, light cheeses, and honey for a sweet-savory balance. If you’re hosting an Easter egg hunt, these make perfect prizes—wrap individual cookies in cellophane bags tied with pastel ribbons. For a truly decadent treat, sandwich vanilla ice cream between two cookies and roll the edges in additional crushed Cadbury eggs for an Easter cookie ice cream sandwich that will have everyone talking!

    Seasonal Adaptations

    While these cookies are Easter classics, you can easily modify them for year-round enjoyment. In summer, swap the Cadbury eggs for M&Ms in patriotic colors for July 4th celebrations. Come fall, substitute with chopped Reese’s Pieces or butterscotch chips for a harvest-inspired version. During winter holidays, use red and green M&Ms or crushed peppermint candies. The versatile oatmeal base pairs beautifully with nearly any mix-in! For a grown-up version, try adding a tablespoon of orange zest and a splash of bourbon to the dough—it creates a sophisticated flavor profile that pairs wonderfully with after-dinner coffee, similar to my Creamy Tomato Orzo with Chicken for a complete meal.

    Storage & Troubleshooting Guide

    Keeping Cookies Fresh

    To maintain the perfect texture of your Cadbury Egg Oatmeal Chocolate Chip Cookies, store them in an airtight container at room temperature with a slice of bread. The bread will release moisture, keeping your cookies soft and chewy for up to 5 days. If you need to stack them, place a sheet of parchment paper between layers to prevent sticking and protect those beautiful candy pieces. These cookies also freeze beautifully—arrange them in a single layer on a baking sheet until frozen solid, then transfer to a freezer bag. They’ll keep for up to 3 months, and you can thaw individual cookies at room temperature for about 20 minutes when the craving strikes!

    Fixing Common Issues

    If your cookies spread too much during baking, your butter was likely too warm. Pop the prepared dough in the refrigerator for 30 minutes before baking to firm it up. For cookies that don’t spread enough, try flattening the dough balls slightly before baking. If your Cadbury eggs are melting too quickly and creating a messy appearance, try freezing the crushed pieces for 15 minutes before folding them into the dough. This helps them hold their shape and color during baking. For cookies that are browning too quickly on the bottom, try using parchment paper instead of greasing your baking sheet, and position your oven rack in the upper third of the oven.

    Frequently Asked Questions

    Can I use regular Cadbury Creme Eggs instead of the mini eggs?

    While you can, the creme filling tends to melt completely and create pockets in the cookies. The candy-coated mini eggs hold their shape better and provide that signature crunch. I recommend sticking with the mini eggs for best results.

    Fold the crushed Cadbury eggs in very gently and minimally at the end of mixing. You can also freeze the crushed eggs for 15 minutes before adding them to help the colors stay intact during mixing and baking.

    Can I make the Cadbury Egg Oatmeal Chocolate Chip Easter Cookies ahead of time?

    Absolutely! The dough can be refrigerated for up to 3 days or frozen for up to 3 months. If frozen, thaw overnight in the refrigerator before scooping and baking.

    Are these cookies suitable for shipping as Easter gifts?

    Yes, but pack them carefully with parchment paper between layers and use a sturdy container. Ship with expedited service to ensure freshness, and consider adding a slice of bread to maintain moisture.

    Can I make these cookies gluten-free?

    Yes, substitute a 1:1 gluten-free flour blend and certified gluten-free oats. Just verify your Cadbury eggs are gluten-free, as candy manufacturing processes can vary.

    Final Thoughts

    These Cadbury Egg Oatmeal Chocolate Chip Easter Cookies have become my family’s most treasured spring tradition. The joy of watching loved ones bite into these perfectly chewy, colorful treats makes all the baking worthwhile. There’s something truly special about how these cookies capture the playful spirit of Easter while delivering serious flavor. I hope they bring the same warmth and celebration to your home as they have to mine. Don’t forget to share your creations on Pinterest and tag me—I absolutely love seeing how these festive cookies brighten your Easter celebrations!

  • Easter Swirl Pie Recipe: Irresistible, Creamy & Perfectly Festive!

    Easter Swirl Pie Recipe: Irresistible, Creamy & Perfectly Festive!

    Easter Swirl Pie Recipe: Irresistible, Creamy & Perfectly Festive!

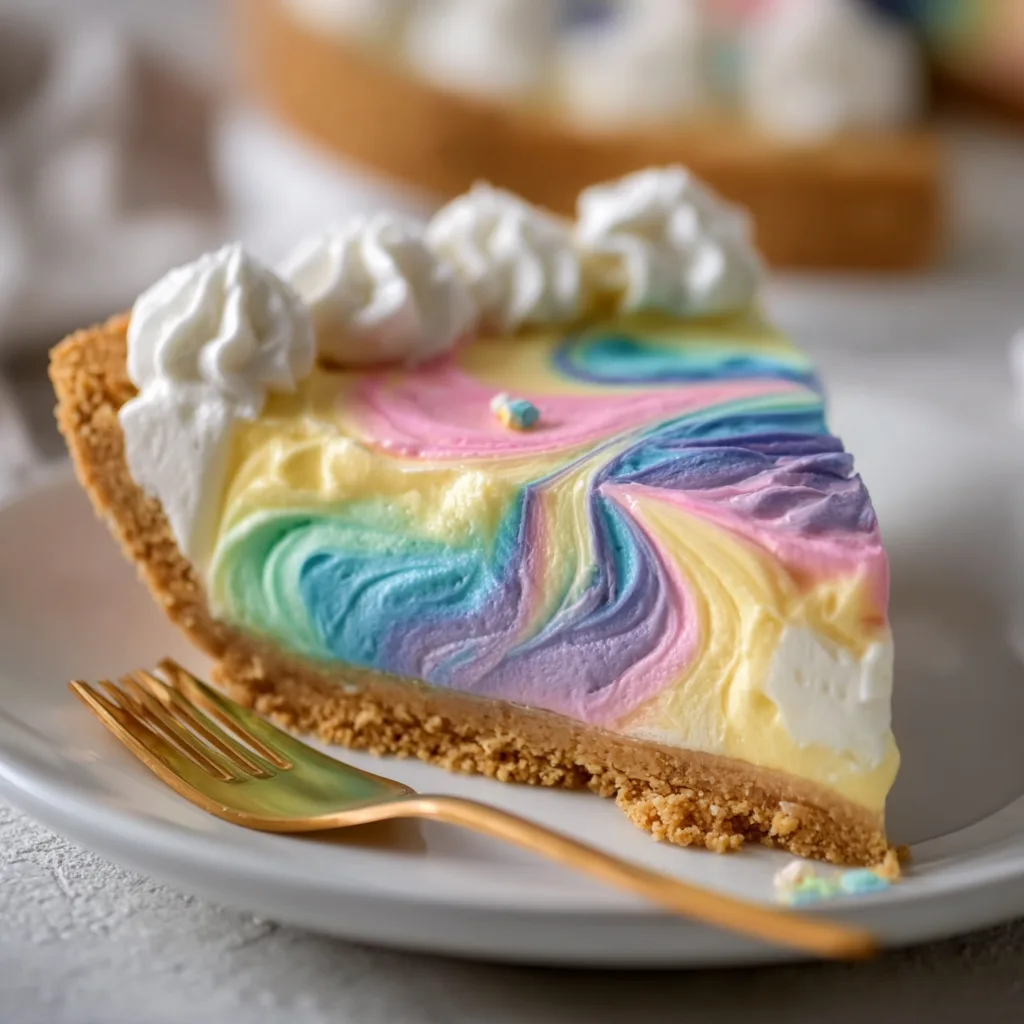
    Easter Swirl Pie brings together everything I love about spring desserts – vibrant colors, creamy textures, and that perfect balance of sweetness that makes everyone at the table smile. The first time I made this for my family’s Easter gathering, my niece’s eyes lit up at the beautiful swirls of pastel colors dancing across the surface. It’s become our tradition ever since! This no-bake wonder combines a buttery cookie crust with a luscious cream cheese filling that’s both light and decadent. Perfect for those sunny spring afternoons when you want something special without spending hours in the kitchen. Let’s create some Easter magic together!

    Recipe

    Why You’ll Love This Easter Swirl Pie

    A Showstopper That’s Actually Simple

    This Easter Swirl Pie looks like it requires professional pastry skills, but it’s our little secret how effortlessly achievable it truly is! The beautiful marbled effect comes from simply swirling food coloring through the creamy filling with a toothpick – a technique so easy my 8-year-old nephew mastered it on his first try. I love that the prep takes just 20 minutes of hands-on time, then the refrigerator does all the work. The combination of the crunchy cookie base with the silky, cloud-like filling creates that perfect textural contrast that makes everyone reach for seconds.

    Perfect Make-Ahead Dessert

    One of my favorite things about this Easter Swirl Pie is how it actually improves with time. Making it a day ahead allows the flavors to meld beautifully and the texture to set perfectly. This has saved me countless times when hosting Easter gatherings – I can focus on the main dishes while knowing dessert is already handled. The pie maintains its vibrant swirls and fresh taste for up to three days in the refrigerator, though I doubt it will last that long! The convenience factor alone makes this recipe worth adding to your spring repertoire, especially when you’re juggling multiple dishes for holiday entertaining.

    Essential Tips & Tricks

    Mastering the Perfect Swirl

    The secret to those Instagram-worthy swirls is all in the technique and timing. Start with your filling at the perfect cool-room temperature – not too firm and not too soft. Drop your food coloring in small dots across the surface rather than big pools. Then use a toothpick to create gentle figure-eight motions, being careful not to over-mix. I learned this the hard way when I once stirred too much and ended up with a uniform lavender pie instead of beautiful swirls! Remember that less is more – just a few gentle passes will create the most striking patterns that will have everyone asking how you did it.

    Crust Consistency Matters

    The foundation of any great pie is its crust, and for our Easter Swirl Pie, getting the right texture is crucial. The cookie crumbs should be fine but not powdery, and the butter should be fully melted but not hot when mixed in. Press the mixture firmly into your pie dish using the bottom of a measuring cup – this creates an even layer that won’t crumble when sliced. For an extra special touch, try using vanilla wafers or shortbread cookies instead of graham crackers. The subtle flavor difference adds a wonderful dimension that complements the creamy filling beautifully.

    Serving Ideas & Creative Variations

    Seasonal Garnishes

    Elevate your Easter Swirl Pie with thoughtfully chosen toppings that celebrate spring. I love arranging fresh berries around the edge – strawberries, blueberries, and raspberries create a natural color palette that complements the pastel swirls. For an extra touch of Easter charm, add a few mini chocolate eggs or bunny-shaped chocolates in the center. Edible flowers like violets or pansies make for a stunning presentation that’s perfect for special occasions. Last Easter, I added a light dusting of crushed freeze-dried strawberries over one section, and it added the most beautiful pop of color and flavor!

    Flavor Adaptations

    While the classic version uses vanilla extract, don’t be afraid to experiment with different flavor profiles. Adding a tablespoon of lemon zest creates a bright, citrusy version perfect for spring. Almond extract gives a sophisticated twist, while a tablespoon of maple syrup adds warmth and depth. For chocolate lovers, fold mini chocolate chips into the filling before adding the color swirls. My personal favorite variation includes a thin layer of lemon curd beneath the cream cheese mixture – the tangy-sweet combination is absolutely divine and adds a sunny yellow accent that’s perfect for Easter celebrations.

    Storage & Troubleshooting Guide

    Keeping It Fresh

    To maintain your Easter Swirl Pie’s beautiful appearance and delicious taste, proper storage is essential. Always cover the pie with plastic wrap that doesn’t touch the surface – I like to insert toothpicks around the edges to keep the wrap elevated. Store in the refrigerator for up to three days, though the crust will begin softening slightly after the first day. If you need to make it further in advance, the pie freezes surprisingly well! Wrap tightly in plastic followed by foil, freeze for up to one month, and thaw overnight in the refrigerator. The colors may become slightly less vibrant, but the taste remains delicious.

    Fixing Common Issues

    Even experienced bakers encounter challenges sometimes! If your filling seems too runny, place it in the refrigerator for 15-20 minutes before attempting to swirl your colors. For a filling that’s too firm, let it sit at room temperature for a few minutes or gently warm the bowl in your hands. If your swirls become muddy, less is more with the food coloring – use gel colors rather than liquid for more concentrated color with less moisture. And if your crust crumbles when serving, try chilling the pie for an extra hour before cutting, and always use a sharp knife dipped in hot water and wiped clean between slices.

    Frequently Asked Questions

    Can I make Easter Swirl Pie without cream cheese?

    Yes! Substitute mascarpone for a richer flavor or use dairy-free cream cheese alternatives for a vegan version. Just ensure whatever you use can set firmly when chilled.

    How do I prevent my colors from looking muddy?

    Use gel food coloring instead of liquid drops, apply colors in small dots rather than large pools, and swirl gently with minimal passes of your toothpick.

    Can I use a pre-made crust for this recipe?

    Absolutely! A store-bought graham cracker crust works perfectly and saves time. Just ensure it’s a 9-inch deep-dish style to hold all the filling.

    What’s the best way to achieve vibrant Easter swirl colors?

    Use concentrated gel food coloring in classic Easter shades (pink, yellow, light blue, lavender). Apply small dots and swirl minimally for the brightest results.

    How far in advance can I make Easter Swirl Pie?

    You can prepare this pie 2-3 days before serving. The flavors actually improve after a day in the refrigerator, making it perfect for holiday prep.

    Final Thoughts

    This Easter Swirl Pie has become more than just a dessert in my home – it’s a celebration of spring, family traditions, and the simple joy of creating something beautiful together. The colorful swirls remind us that after winter’s monotony comes spring’s vibrant renewal. Whether you’re hosting a grand Easter feast or just want to bring a touch of seasonal cheer to your table, this pie delivers both visual delight and delicious satisfaction. I hope it brings as much joy to your gatherings as it has to mine! For more seasonal inspiration, check out my Pinterest collection of spring desserts.

  • Cadbury Easter Egg Cupcakes That’ll Melt Your Heart Instantly!

    Cadbury Easter Egg Cupcakes That’ll Melt Your Heart Instantly!

    Cadbury Easter Egg Cupcakes That’ll Melt Your Heart Instantly!

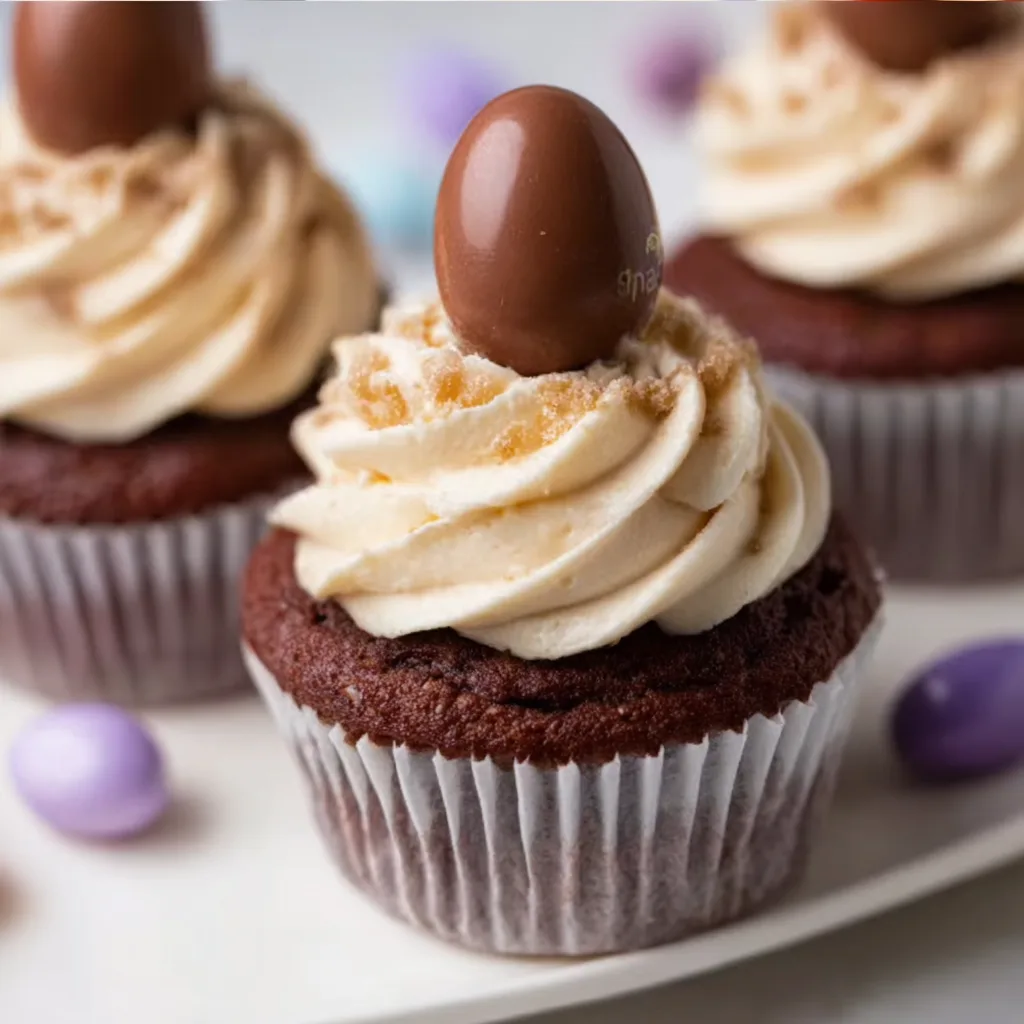
    Cadbury Easter Egg Cupcakes bring the magic of Easter right to your kitchen with delightfully moist vanilla cupcakes topped with silky buttercream and those iconic mini chocolate eggs we all adore. I discovered this recipe three years ago when my niece begged for “something special with those yummy eggs” for her spring birthday. The moment those curious little faces peered into my kitchen to see colorful cupcakes with chocolate treasures nestled on top—pure joy! These cupcakes strike the perfect balance between homemade goodness and festive charm, making them an Easter tradition worth starting.

    Recipe

    Why You’ll Love These Cadbury Easter Egg Cupcakes

    Perfect Balance of Flavors and Textures

    These cupcakes deliver a sensory symphony that makes everyone smile. The tender vanilla cake provides the perfect canvas—not too sweet but incredibly moist with a delicate crumb that practically melts in your mouth. Then comes the silky buttercream, whipped to cloud-like perfection with just the right amount of sweetness. But the real magic? That moment when you bite into a Cadbury mini egg and experience the satisfying crack of the candy shell giving way to creamy milk chocolate. The contrast between soft cake, creamy frosting, and that distinctive candy crunch creates an irresistible texture experience.

    Stunning Visual Appeal with Minimal Effort

    Even if you consider yourself baking-challenged, these cupcakes will make you look like a pastry professional. The pastel-colored Cadbury eggs create an instantly festive appearance that screams “Easter celebration” without requiring fancy decorating skills. I love watching guests’ eyes light up when they see these beauties on the dessert table! The natural speckled pattern on the candy shells adds a charming touch that feels both elegant and playful. For an extra visual boost, arrange them on a tiered stand with some fresh spring flowers or scattered jelly beans around the base—Instagram-worthy with barely any effort.

    Essential Tips & Tricks

    Perfecting Your Cupcake Base

    The foundation of exceptional Cadbury Easter Egg Cupcakes lies in the cake texture. Room temperature ingredients are non-negotiable—cold eggs or butter will create a dense, uneven crumb. I learned this the hard way during my first attempt when I impatiently used cold eggs straight from the fridge! For ultra-moist cupcakes, measure your flour by spooning it into measuring cups rather than scooping directly from the container, which compacts it. Don’t overmix once the dry ingredients meet the wet—stop when just combined to keep that tender crumb we’re after. Similar to my Easy Cinnamon Swirl Cookies Recipe, patience with the basics yields the best results.

    Strategic Decoration Techniques

    Timing is everything when adding those precious Cadbury eggs to your cupcakes. Apply your buttercream while it’s at the perfect consistency—soft enough to pipe smoothly but firm enough to hold its shape. If decorating in advance, wait to add the Cadbury eggs until 1-2 hours before serving; this prevents the candy coating from potentially bleeding color into your frosting. For a professional touch, use a large star tip to pipe a generous swirl, creating a little “nest” for 2-3 mini eggs. Alternatively, press crushed Cadbury eggs directly into the frosting for a more rustic, textured look that reveals the colorful interior of the candies.

    Serving Ideas & Creative Variations

    Festive Presentation Options

    Transform these cupcakes into a showstopping centerpiece by arranging them in the shape of an Easter egg or bunny on a large serving board. Add fresh spring elements like edible flowers, mint leaves, or even little nests made from shredded coconut tinted green with food coloring. For brunch gatherings, I love serving individual cupcakes on vintage teacups or small decorative plates with personalized name tags—perfect for socially-distanced celebrations. Create a cohesive Easter theme by coordinating your serving platters with pastel-colored linens and scattered jellybeans or chocolate cherry treats for a complete dessert experience.

    Exciting Flavor Combinations

    While classic vanilla cupcakes are divine, don’t be afraid to experiment with complementary flavors. A hint of lemon zest in the batter brings a fresh spring dimension that pairs beautifully with the chocolate eggs. For chocolate lovers, replace half the vanilla extract with orange extract in a chocolate cupcake base—the orange-chocolate combination with Cadbury eggs is absolutely heavenly. My personal favorite variation includes a surprise center: simply core each baked and cooled cupcake, add a teaspoon of salted caramel or raspberry jam, and replace the top before frosting. This creates an unexpected burst of flavor that makes guests ask for your secret recipe.

    Storage & Troubleshooting Guide

    Maintaining Freshness and Quality

    To preserve these delightful treats at their peak deliciousness, store unfrosted cupcakes at room temperature in an airtight container for up to 2 days. Once frosted, refrigeration becomes necessary, but bring them back to room temperature before serving for the best texture and flavor experience. The candy eggs may develop condensation if refrigerated and then brought to room temperature quickly, so I recommend adding them just before serving when possible. If you’re planning ahead, freeze unfrosted cupcakes wrapped individually in plastic wrap and placed in a freezer bag—they’ll maintain quality for up to 3 months.

    Solving Common Cupcake Challenges

    Even experienced bakers encounter the occasional cupcake catastrophe. If your cupcakes sink in the middle, your oven was likely too hot—invest in an oven thermometer for accuracy. For cupcakes that stick to liners, try greasing the liners lightly with cooking spray before filling, or opt for high-quality grease-resistant liners. Buttercream breaking or looking curdled? It’s usually a temperature issue—if too soft, refrigerate for 10-15 minutes; if too stiff, let it warm slightly while gently remixing. Remember that even “imperfect” cupcakes will taste delicious, especially once topped with those beloved Cadbury eggs!

    Frequently Asked Questions

    Can I make Cadbury Easter Egg Cupcakes in advance?

    Yes! Bake cupcakes up to 2 days ahead and store unfrosted in an airtight container. Prepare frosting 1 day ahead and refrigerate. Assemble within 24 hours of serving, adding the Cadbury eggs just before serving for best appearance.

    What’s the best way to prevent the candy color from bleeding into the frosting?

    Add Cadbury Easter Egg decorations 1-2 hours before serving. Alternatively, place eggs on a small piece of white chocolate as a barrier between the candy shell and frosting.

    Can I use regular-sized Cadbury eggs instead of mini ones?

    Absolutely! Chop regular Cadbury eggs into quarters for topping or fold crushed pieces into the batter for chocolate pockets throughout the cupcake.

    What’s the secret to moist cupcakes?

    Don’t overmix the batter once flour is added, and measure flour correctly by spooning into measuring cups rather than scooping. Removing cupcakes from the oven at just the right time prevents dryness.

    How can I make these cupcakes gluten-free?

    Substitute a high-quality cup-for-cup gluten-free flour blend. The texture may be slightly different, but the Cadbury Easter Egg decorations will still make them festive and delicious.

    Final Thoughts

    These Cadbury Easter Egg Cupcakes have become my go-to spring celebration dessert—they’re the perfect balance of nostalgic Easter candy and homemade baking magic. What makes them truly special is how they bring people together; there’s something about those colorful candy-topped treats that makes everyone smile, regardless of age. I hope these cupcakes find their way into your Easter traditions and create as many sweet memories for your family as they have for mine. Don’t forget to share your creations on Pinterest to inspire others with your Cadbury Easter Egg Cupcakes masterpieces!

  • Chipotle Chicken Bowls: Irresistible Flavor You’ll Crave Instantly

    Chipotle Chicken Bowls: Irresistible Flavor You’ll Crave Instantly

    Chipotle Chicken Bowls: Irresistible Flavor You’ll Crave Instantly

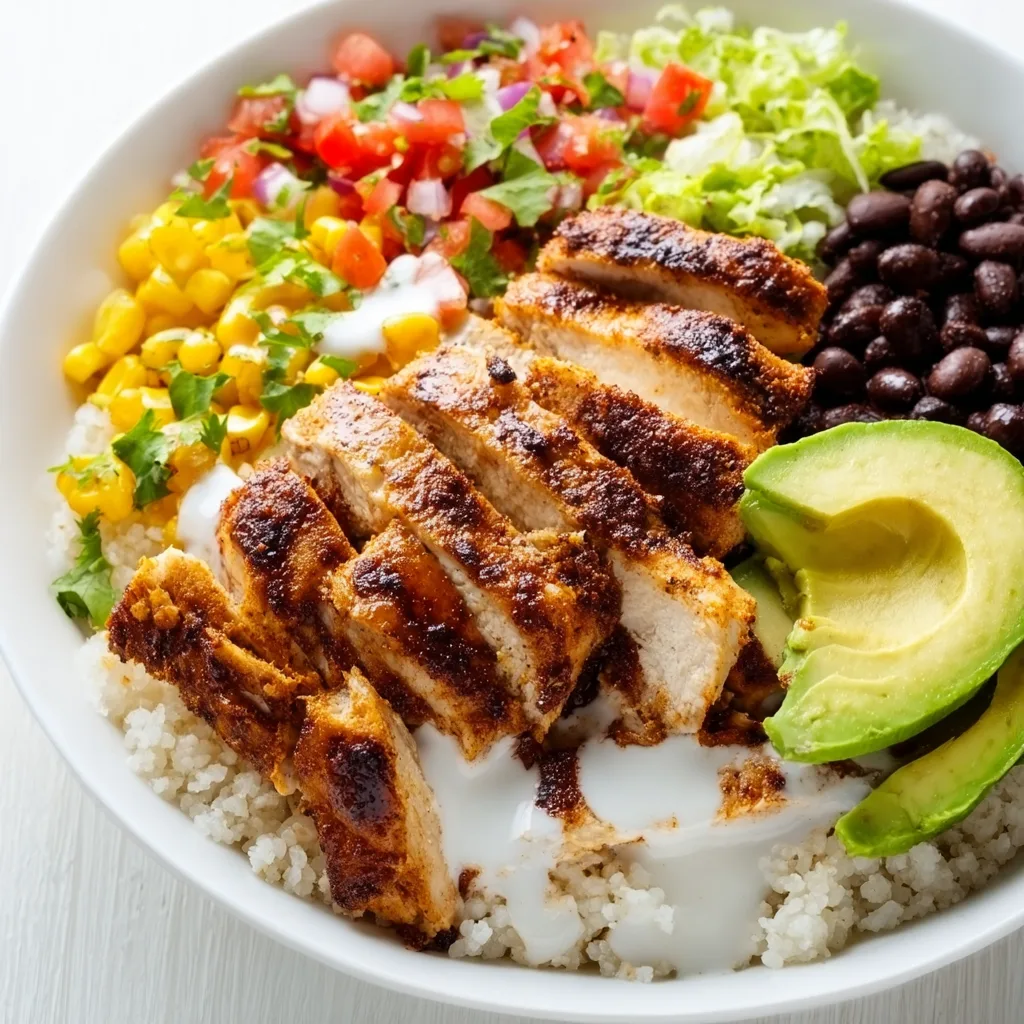
    Chipotle Chicken Bowls have completely transformed my weeknight dinner game. The perfect balance of smoky heat, tender chicken, and fresh toppings creates a restaurant-quality meal right in your own kitchen. I discovered this recipe during a particularly chaotic week when I needed something both nourishing and exciting. The first bite transported me from my messy kitchen to a sunny patio somewhere much warmer! These customizable bowls are perfect for meal prep or serving a crowd, and they’re endlessly adaptable to whatever ingredients you have on hand. Let me show you how to create these vibrant, flavorful bowls.

    Recipe

    Why You’ll Love These Chipotle Chicken Bowls

    Perfect Balance of Flavors and Textures

    There’s something magical about the way these components come together. The chipotle marinade infuses the chicken with smoky depth while lime and cilantro brighten everything up. I love how each bite offers something different—creamy avocado against crunchy bell peppers, fluffy rice soaking up the savory juices from the chicken. My husband, who typically reaches for seconds of anything with heat, actually closed his eyes while eating this! The balance of spicy, tangy, and fresh elements creates a bowl that satisfies every craving at once.

    Quick and Customizable for Any Diet

    These bowls are incredibly adaptable for different dietary needs without sacrificing an ounce of flavor. Need it gluten-free? The recipe already is! Going low-carb? Swap the rice for cauliflower rice or extra greens. Vegetarian? The marinade works beautifully on firm tofu or portobello mushrooms. I’ve made these on busy weeknights in under 30 minutes and for meal prep Sundays, portioning everything into containers for easy lunches. The components keep well separately and can be assembled fresh when you’re ready to eat, making them perfect for families with different schedules.

    Essential Tips & Tricks

    Mastering the Chipotle Marinade

    The heart of these bowls is the chipotle marinade that transforms ordinary chicken into something extraordinary. For maximum flavor, marinate your chicken for at least 30 minutes, though overnight is even better if you can plan ahead. I like using canned chipotles in adobo sauce—just 2-3 peppers blended with olive oil, lime juice, garlic, and a touch of honey creates the perfect balance. Don’t discard the remaining peppers! Freeze them individually in an ice cube tray with a bit of the sauce for future recipes. The marinade also works beautifully as a finishing sauce when reduced and drizzled over the completed bowls.

    Prep Strategy for Stress-Free Assembly

    The key to making these bowls without kitchen chaos is strategic prep. I learned this the hard way after a particularly frantic dinner where everything finished at different times! Start by marinating the chicken and cooking your rice or grain base. While those components work, chop all vegetables and prepare toppings in small bowls. This assembly-line approach makes the final putting-together feel almost meditative rather than stressful. Cook the chicken last so it’s hot and juicy when served. For family-style serving, arrange everything in separate bowls and let everyone build their perfect combination.

    Serving Ideas & Creative Variations

    Family-Style Toppings Bar

    Transform dinner into an interactive experience by setting up a build-your-own bowl station. I arrange small bowls of toppings—diced avocado, sliced radishes, crumbled cotija cheese, pickled red onions, and lime wedges—down the center of our table. Everyone gets a base of rice and chicken, then customizes with their favorite toppings. This approach has been a game-changer for our family dinners, especially with my picky nephew who suddenly became adventurous when given control over his meal! The colorful spread also makes for a gorgeous table that’s perfect for casual entertaining.

    Seasonal Adaptations Worth Trying

    These bowls evolve beautifully with the seasons. In summer, I add charred corn fresh off the cob and juicy cherry tomatoes. Fall brings roasted sweet potatoes and pepitas. Winter? Try roasted Brussels sprouts and a drizzle of pomegranate molasses. The basic formula stays the same, but the seasonal touches keep the meal feeling fresh year-round. For a fun twist on the traditional bowl, try wrapping the components in large lettuce leaves for handheld “tacos” or stuffing them into bell peppers and baking until tender. The chipotle chicken also makes incredible nachos with a few additional toppings.

    Storage & Troubleshooting Guide

    Meal Prep and Storage Solutions

    These chipotle chicken bowls are meal prep champions. The cooked chicken stays juicy for 3-4 days in an airtight container, while rice can last up to 5 days. I recommend storing components separately and assembling just before eating. For the freshest experience, keep delicate items like avocado, lime wedges, and cilantro separate until serving time. If you’re packing these for lunch, use a compartmentalized container or stack components with heavier items on bottom. A small container of extra sauce on the side revives everything when you’re ready to eat, making day-three leftovers taste almost as good as fresh.

    Fixing Common Chipotle Bowl Problems

    Even experienced cooks encounter issues sometimes! If your chicken turns out too spicy, add more honey to the marinade next time or serve with cooling elements like extra avocado or a dollop of sour cream. Chicken too dry? It’s likely overcooked—next time, remove it from heat when it reaches 165°F and let it rest before slicing. For soggy rice, try rinsing it thoroughly before cooking and letting it steam with the lid on for 10 minutes after cooking. And if your avocados brown too quickly, toss them in a little lime juice before adding to your bowl, or simply cut them fresh right before serving.

    Frequently Asked Questions

    Can I make Chipotle Chicken Bowls ahead of time?

    Absolutely! Prepare components separately and store in the refrigerator for 3-4 days. Keep wet ingredients separate from dry ones, and add fresh elements like avocado and cilantro just before serving.

    How can I adjust the spice level?

    Control the heat by adjusting the amount of chipotle peppers. Start with just one pepper for mild heat, or remove the seeds for flavor without intense spiciness. Balance with more honey or lime juice if needed.

    What’s the best rice to use for these bowls?

    I prefer long-grain white rice or basmati for its fluffy texture, but brown rice adds wonderful nutty flavor and extra fiber. For authentic flavor, cook your rice with a bay leaf and lime zest.

    Can I use pre-cooked chicken to save time?

    Yes! Rotisserie chicken works beautifully. Simply warm it and toss with a few tablespoons of the chipotle sauce. This cuts preparation time in half while still delivering amazing flavor.

    Are these Chipotle Chicken Bowls freezer-friendly?

    The marinated chicken freezes wonderfully, raw or cooked. Rice also freezes well in portion-sized containers. Thaw overnight in the refrigerator and reheat gently with a splash of water to restore moisture.

    Final Thoughts

    These Chipotle Chicken Bowls have become my go-to recipe when I want something that feels special without requiring hours in the kitchen. The smoky-sweet chipotle flavor creates a crave-worthy meal that’s still wholesome and satisfying. I love how they bring everyone to the table with excitement—there’s something magical about a meal that’s both nourishing and feels like a treat. Whether you’re meal prepping for a busy week or hosting casual dinner with friends, these bowls deliver big flavor with minimal fuss. Find more inspiration for your next meal at Pinterest.

  • Quick Chicken Zucchini Stir Fry: Easy, Delicious & Ready Fast!

    Quick Chicken Zucchini Stir Fry: Easy, Delicious & Ready Fast!

    Quick Chicken Zucchini Stir Fry: Easy, Delicious & Ready Fast!

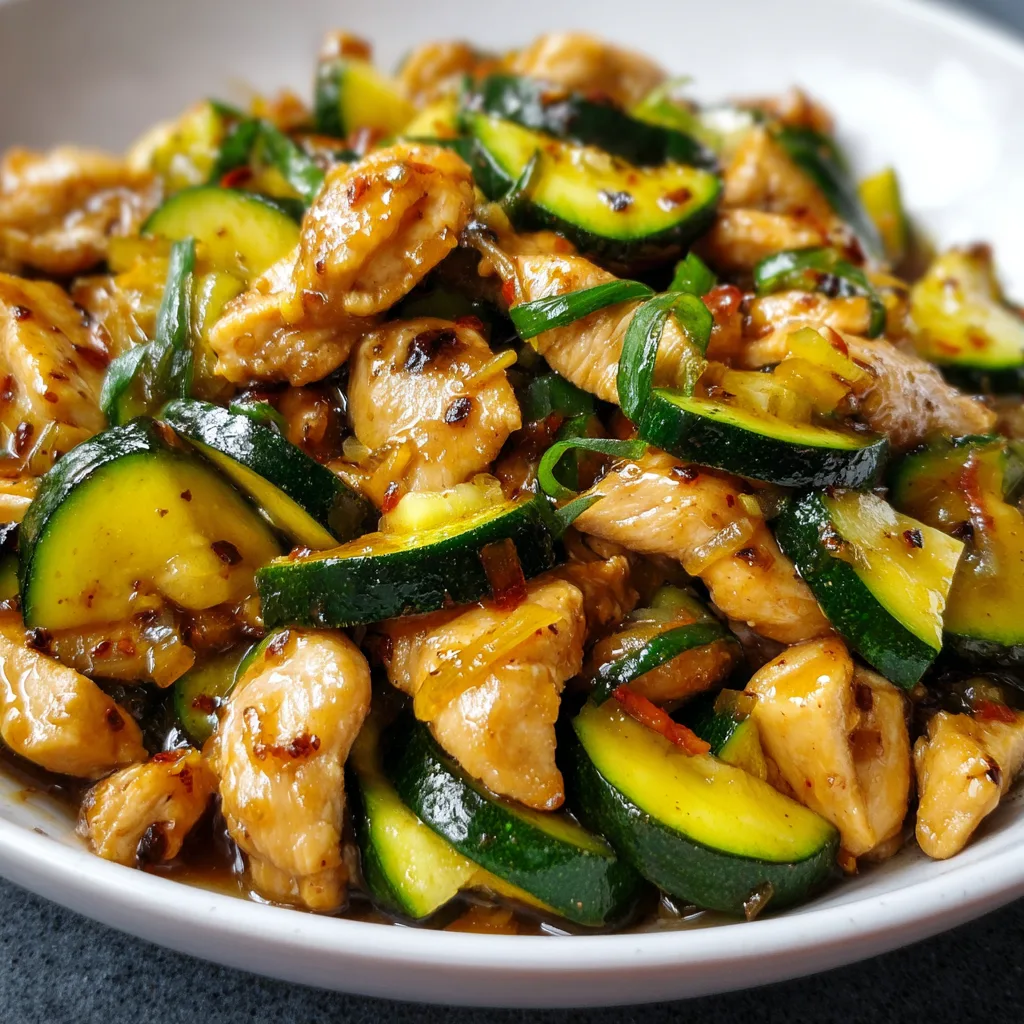
    This Quick Chicken Zucchini Stir Fry saved my Thursday night dinner last week when I was staring at the clock—already 6:30 and nothing planned. I grabbed the chicken from the fridge, spotted two forgotten zucchinis, and within 20 minutes, we were sitting down to a meal that made my husband ask, “Did you order takeout?” The secret lies in the simple sauce that transforms these everyday ingredients into something restaurant-worthy. If you’re looking for a weeknight dinner hero that’s healthy, fast, and bursting with flavor, this stir fry might just become your new go-to recipe, just like it’s become mine at Recipes Darleen.

    Recipe

    Why You’ll Love This Quick Chicken Zucchini Stir Fry

    Perfect for Busy Weeknights

    There’s something magical about a meal that comes together in under 30 minutes but tastes like you spent hours in the kitchen. This Quick Chicken Zucchini Stir Fry is my weeknight secret weapon—just slice, dice, and you’re halfway there! The chicken cooks in minutes, the zucchini stays perfectly crisp-tender, and the sauce thickens to glossy perfection right before your eyes. I love how the kitchen fills with that savory-sweet aroma that makes everyone suddenly appear at the dinner table without being called. It’s become my reliable answer to “What’s for dinner?” when time isn’t on my side.

    Healthy Yet Satisfying

    What I adore about this stir fry is how it manages to be both nutritious and crave-worthy at the same time. The lean chicken breast provides plenty of protein-packed goodness while the zucchini adds fiber, vitamins, and that fresh element that makes everything feel lighter. Unlike takeout that leaves you feeling heavy, this homemade version gives you control over the sodium and oil. I’ve served this to my health-conscious sister and my “where’s the real food?” brother-in-law, and both went back for seconds. It’s that rare unicorn of a meal that satisfies everyone without compromising on nutrition.

    Essential Tips & Tricks

    Mastering the High-Heat Technique

    The true secret to restaurant-quality stir fry isn’t fancy ingredients—it’s all about technique and timing. Get your pan screaming hot before adding anything to it. I learned this lesson the hard way after years of soggy stir fries! A carbon steel wok is ideal, but any large skillet works if you don’t crowd it. Cook your chicken in batches if needed—overcrowding causes steaming instead of searing. That golden-brown color on your chicken? That’s pure flavor developing. The zucchini should only cook for 2-3 minutes to maintain that perfect crisp-tender bite that makes this Quick Chicken Zucchini Stir Fry so addictive.

    Creating the Perfect Sauce Balance

    The sauce is where your stir fry transforms from basic to brilliant. The magic formula combines salty (soy sauce), sweet (honey or brown sugar), acid (rice vinegar), and umami (garlic and ginger). I always mix my sauce ingredients in a small bowl before cooking begins—this ensures everything incorporates evenly when that sizzling hot pan demands your full attention. My personal touch is adding a teaspoon of sesame oil at the very end, off heat. It creates that authentic aroma that makes everyone ask what smells so amazing. Remember to reserve a tablespoon of cornstarch slurry to thicken the sauce just right.

    Serving Ideas & Creative Variations

    Beyond Basic Rice

    While steamed jasmine rice makes a perfect bed for this stir fry, don’t stop there! I’ve discovered that this Quick Chicken Zucchini Stir Fry pairs beautifully with so many grain alternatives. Try cauliflower rice for a lower-carb option, or quinoa for extra protein. My personal favorite is serving it over rice noodles—they soak up that delicious sauce in the most satisfying way. For a complete meal makeover, try wrapping everything in lettuce cups topped with crushed peanuts and extra sriracha. It’s reminiscent of those fancy Asian Dumpling Lasagna flavors but comes together in half the time.

    Customizing Your Protein and Vegetables

    The beauty of this recipe lies in its flexible foundation. Swap chicken for thinly sliced beef, shrimp, or even tofu for a vegetarian version—just adjust cooking times accordingly. The vegetable possibilities are endless too! I often add bell peppers, snap peas, or broccoli florets when they need using up. My daughter’s favorite version includes thinly sliced carrots and baby corn. For a spicier kick, add sliced fresh chilies or a dollop of chili crisp oil. Sometimes I’ll toss in a handful of cashews or water chestnuts for added crunch. Each variation feels like a completely different meal while using the same cooking method.

    Storage & Troubleshooting Guide

    Making It Last (And Taste Great)

    This Quick Chicken Zucchini Stir Fry is a meal-prep champion that actually improves overnight as the flavors meld. Store leftovers in airtight containers in the refrigerator for up to 3 days. I recommend slightly undercooking the zucchini if you know you’ll be reheating, as it continues to soften. For reheating, a quick minute in the microwave works, but for best results, toss it in a hot skillet with a splash of water to revive the sauce. If freezing (yes, you can!), freeze the chicken and sauce separately from the zucchini, then combine after thawing for the freshest texture.

    Fixing Common Stir Fry Problems

    Even experienced cooks encounter stir fry challenges. If your sauce is too thin, mix an additional teaspoon of cornstarch with cold water and stir it in while the pan is still hot. Conversely, if it’s too thick, add a tablespoon of chicken broth or water. Dealing with soggy vegetables? That usually means your pan wasn’t hot enough or you overcrowded it. Next time, try cooking in smaller batches. If your chicken turned out tough, it was likely overcooked—remember that it continues cooking slightly in the hot sauce. A meat thermometer showing 165°F is your best friend for perfectly juicy chicken every time.

    Frequently Asked Questions

    Can I make this Quick Chicken Zucchini Stir Fry ahead of time?

    Yes! Prep all ingredients and mix the sauce up to 24 hours ahead. Store everything separately in the refrigerator, then cook just before serving for the freshest texture and flavor—the actual cooking takes less than 10 minutes.

    What’s the best way to slice zucchini for stir fry?

    For quick, even cooking, slice zucchini into half-moons about ¼-inch thick. If using larger zucchini, quarter them lengthwise first, then slice to avoid waterlogged pieces in your stir fry.

    Can I use frozen vegetables instead of fresh?

    Absolutely! Thaw completely and pat dry before adding to the pan. Frozen vegetables are already partially cooked, so add them toward the end of cooking time to prevent mushiness.

    How do I prevent my chicken from sticking to the pan?

    Ensure your pan is properly heated before adding oil, then let the oil heat until it shimmers. Don’t move the chicken pieces for the first 1-2 minutes to allow a proper sear to form.

    Is this recipe gluten-free?

    Not as written, but easily adaptable! Simply substitute regular soy sauce with tamari or coconut aminos, and verify your other condiments are certified gluten-free for a delicious gluten-free meal.

    Final Thoughts

    This Quick Chicken Zucchini Stir Fry has become my reliable lifesaver on busy nights when I need something nutritious, delicious, and fast. What I love most is watching my family devour vegetables without a single complaint—a minor miracle in my household! The beauty of this dish lies in its adaptability and simplicity. Once you master the basic technique, you’ll find yourself creating endless variations based on what’s in your fridge. For more quick dinner inspiration that transforms simple ingredients into memorable meals, check out our Pinterest collection of weeknight wonders!