Blog

  • Maple Pumpkin Cookies: 9 Secrets That Will Blow Your Mind

    Maple Pumpkin Cookies: 9 Secrets That Will Blow Your Mind

    Maple Pumpkin Cookies used to sound like something you’d find at a bake sale wrapped in plastic—forgettable and overly sweet. But let me tell you, I was so wrong. These are the cookies that changed my mind—and my fall baking game. Hey! I’m Darleen Vamce—34, Salt Lake City native, and a woman who once thought slow cookers were only good for potlucks and mushy stews. Then came “The Great Mealtime Struggle”: three hungry kids, a relentless job, and a kitchen that always seemed to mock me. One chaotic morning, I tossed together pumpkin, maple syrup, and spices while holding a baby on my hip. What came out of the oven? Magic. Now, this humble cookie is a fall tradition—soft, spiced, and finished with a kiss of maple glaze. It’s the kind of treat that makes your family think you’re a baking genius… even if you’re running on caffeine and dry shampoo.
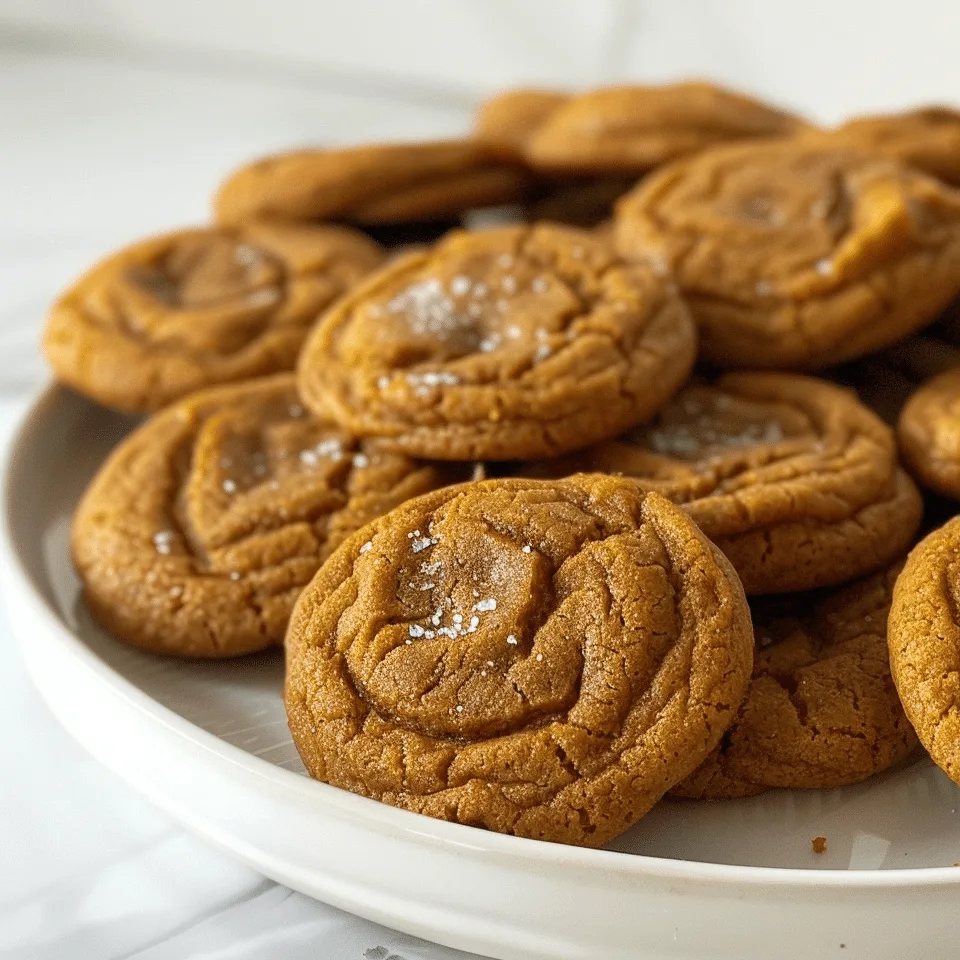
    Maple pumpkin cookies on a rustic table with fall decor

    Recipe

    Maple Pumpkin Cookies That Taste Like Fall in Every Bite

    These maple pumpkin cookies are soft, chewy, and everything you love about autumn. Blending warm pumpkin spice with the deep richness of maple syrup, they’re the kind of homemade fall treats that disappear fast. Whether you’re baking for a Thanksgiving dessert tray or a cozy Sunday afternoon, these cookies deliver every time. The best part? You don’t need fancy tools or hours in the kitchen. Just real ingredients and a little mixing magic.

    The Secret to Soft, Chewy Pumpkin Cookies

    Texture makes or breaks a cookie. And with pumpkin in the mix, things can get cakey fast. The secret here is moisture balance. Too much pumpkin purée? You get muffins. Too little? They dry out. This recipe hits the sweet spot—resulting in perfectly moist pumpkin cookies with just the right amount of chew. A touch of brown sugar adds richness, while a blend of cinnamon, nutmeg, and cloves keeps every bite cozy and spiced.

    Why Maple Glaze Makes Them Unforgettable

    You could stop at the cookie, but the maple glaze takes things to a new level. It’s smooth, naturally sweet, and soaks into the warm cookies like a dream. This isn’t just a drizzle—it’s a finishing touch that adds depth and dimension. When the glaze cools, it creates a delicate crust over the top, giving every bite a balance of softness and a slight snap. Pair that with the earthy notes of real maple syrup, and you’ve got yourself an easy pumpkin dessert that feels gourmet.

    Bake These Maple Pumpkin Cookies Like a Pro

    You don’t need to be a professional baker to make maple pumpkin cookies that taste bakery-worthy. This recipe is designed for real kitchens, real people, and real life. With a few smart tips and pantry staples, you’ll be pulling perfectly soft, chewy, and spiced cookies from the oven every time.

    Your Pantry Might Already Have Everything You Need

    One reason I keep coming back to this recipe? It’s built on simple, affordable ingredients. You’ll need flour, canned pumpkin, real maple syrup, brown sugar, and the holy trinity of fall spices: cinnamon, nutmeg, and cloves. Add in an egg, vanilla, baking soda, and butter, and you’re ready. If you’ve made homemade fall treats before, chances are everything you need is already on your shelf. These cookies are the definition of a quick and easy pumpkin dessert, perfect for last-minute guests or late-night cravings.

    For more cozy cookie inspiration, check out this slow cooker pumpkin butter recipe—it’s a game-changer in fall baking and can even be swirled into your next batch of cookies.

    Tips to Nail That Signature Maple Pumpkin Flavor

    Balance is key. Too much spice can overwhelm the pumpkin; too little, and you lose that autumn essence. What makes these maple pumpkin cookies stand out is how the maple doesn’t fight with the spice—it smooths it out. It complements the pumpkin instead of competing. Try to use real maple syrup if you can—it’s worth it. If you’re looking for more depth, a pinch of flaky sea salt on top before baking makes the flavors pop.

    These are not your average pumpkin spice cookies. They’re layered, rich, and built to impress—without being fussy.

    How to Make Maple Pumpkin Cookies Everyone Remembers

    You know those recipes that show up once and suddenly become tradition? That’s exactly what happened with these maple pumpkin cookies. They hit the table once—and now, I’m not allowed to skip them. They’re the kind of fall cookie recipe that gets asked about even when it’s not fall.

    Prep Like a Weeknight Pro (Even If You’re Not One)

    You don’t need hours to make something great. These cookies are a 15-minute prep win. First, combine wet ingredients: butter, maple syrup, pumpkin purée, vanilla, and egg. Then mix the dry: flour, baking soda, salt, and all those classic pumpkin spice cookie flavors. Fold everything together just until mixed. That’s it. Chill for 30 minutes if you want thicker cookies, or bake right away if you’re after that golden-edge softness.

    One shortcut I love? I sometimes double the batch and freeze half the dough. That way, I’ve always got a stash of homemade fall treats ready for any occasion—or emergency sweet tooth moment.

    Looking for a bakery-style twist on pumpkin treats? Don’t miss these Pumpkin Cinnamon Roll Muffins—they’re fluffy, sweet, and absolutely worth waking up for.

    Serving and Storing Tips That Actually Work

    Let cookies cool fully before storing. If you glaze them while warm, the maple topping will melt into the cookie, which some folks love—but if you want that glossy finish, wait until they cool. Store in an airtight container for up to 4 days at room temp or freeze them (unglazed) for up to 2 months.

    And pro tip? Reheat them for 5 seconds in the microwave to bring back that warm, just-baked magic. These chewy pumpkin cookies were made to be enjoyed warm with a cup of coffee or cider in hand.

    Maple Pumpkin Cookies That Feel Like a Cozy Hug

    The beauty of maple pumpkin cookies isn’t just the flavor—it’s the moment they create. These cookies bring the kind of comfort that makes your kitchen feel like fall, even if it’s 85 degrees outside. They’re soft, fragrant, and rich enough to feel indulgent but simple enough to make on a Wednesday.

    Add Your Own Fall-Inspired Twist

    Want to make these cookies your own? Try folding in chopped pecans or white chocolate chips. Both bring texture and added sweetness that plays well with the earthy pumpkin. For a deeper autumn vibe, sprinkle with cinnamon sugar right before baking. These kinds of little touches turn a basic batch into your signature treat.

    If you love spicing up your fall baking game, check out these Pumpkin Brownies. They’ve got that same bold flavor with a fudgy finish that’s impossible to resist.

    You can even sandwich a spoonful of cream cheese frosting between two cookies for the ultimate fall dessert upgrade. Whatever version you choose, these cookies are built to be customized—and shared.

    Why These Cookies Deserve a Spot in Your Fall Lineup

    Every year, we all get bombarded with pumpkin-flavored everything. But these maple pumpkin cookies don’t feel gimmicky. They feel homemade. Real. Cozy. And more than anything, they taste like the kind of recipe that’ll show up in your family binder for years.

    Whether you’re baking for a party, prepping for a bake sale, or just trying to create a calm moment in a hectic season, these cookies deliver. They’re soft, warm, and finished with that maple glaze that pulls everything together. One bite in, and you’ll understand why these aren’t just cookies—they’re a tradition waiting to happen.

    Glazed maple pumpkin cookies cooling on a rack

    Conclusion: Bake the Cookies, Keep the Magic

    These maple pumpkin cookies aren’t just another fall treat—they’re the kind of cozy, flavor-packed dessert that brings people back to your kitchen year after year. With warm spices, chewy texture, and a drizzle of maple glaze, they turn even the most hectic day into a little seasonal celebration.

    So, what are you waiting for? Try them at home, and when your family raves (they will), tag me on Facebook with your batch! Let’s make this your new favorite fall tradition.
    FAQs About Maple Pumpkin Cookies

    How do I keep maple pumpkin cookies soft for days?

    The key is moisture. Store your maple pumpkin cookies in an airtight container with a slice of bread or a piece of parchment between layers. This helps retain softness without making them soggy. These cookies naturally stay chewy thanks to the pumpkin, so they’re perfect for make-ahead fall baking.

    Can I freeze maple pumpkin cookie dough?

    Absolutely. Maple pumpkin cookies freeze beautifully. Scoop the dough into balls and freeze on a baking sheet, then transfer to a zip-top bag. When ready to bake, add 2–3 minutes to the cook time without thawing. It’s a great way to always have a batch of cozy cookies ready to go.

    What’s the best maple syrup for these cookies?

    Use pure maple syrup—not pancake syrup. Grade A dark amber syrup gives your maple pumpkin cookies a deep, rich flavor that stands up to the spices and pumpkin. The maple glaze especially benefits from a quality syrup, adding real depth and that signature fall taste.

    Can I make these maple pumpkin cookies gluten-free?

    Yes! Simply swap the flour with a 1:1 gluten-free baking blend. Many readers also love pairing this with oat flour for a slightly nuttier texture. Just keep an eye on moisture—gluten-free flours can behave differently, but the pumpkin helps keep everything tender.

  • Crockpot Cream Cheese Chicken Chili: 7 Reasons to Love

    Crockpot Cream Cheese Chicken Chili: 7 Reasons to Love

    Crockpot cream cheese chicken chili isn’t just a recipe—it’s a lifesaver wrapped in a warm, creamy bowl of comfort. Hey! I’m Darleen Vamce—34, Salt Lake City native, and a woman who used to think slow cookers were just for potlucks and overly mushy stews. I was wrong. Very wrong. Now, this humble little machine is basically my co-chef, my weekday dinner savior, and the secret weapon behind most of the meals that make my family think I have superpowers.

    It all started during The Great Mealtime Struggle: three hungry kids, a full-time job, and a crying baby on my hip. I threw chicken, beans, tomatoes, cream cheese, and spices into the slow cooker—pure chaos. By dinner? Magic.

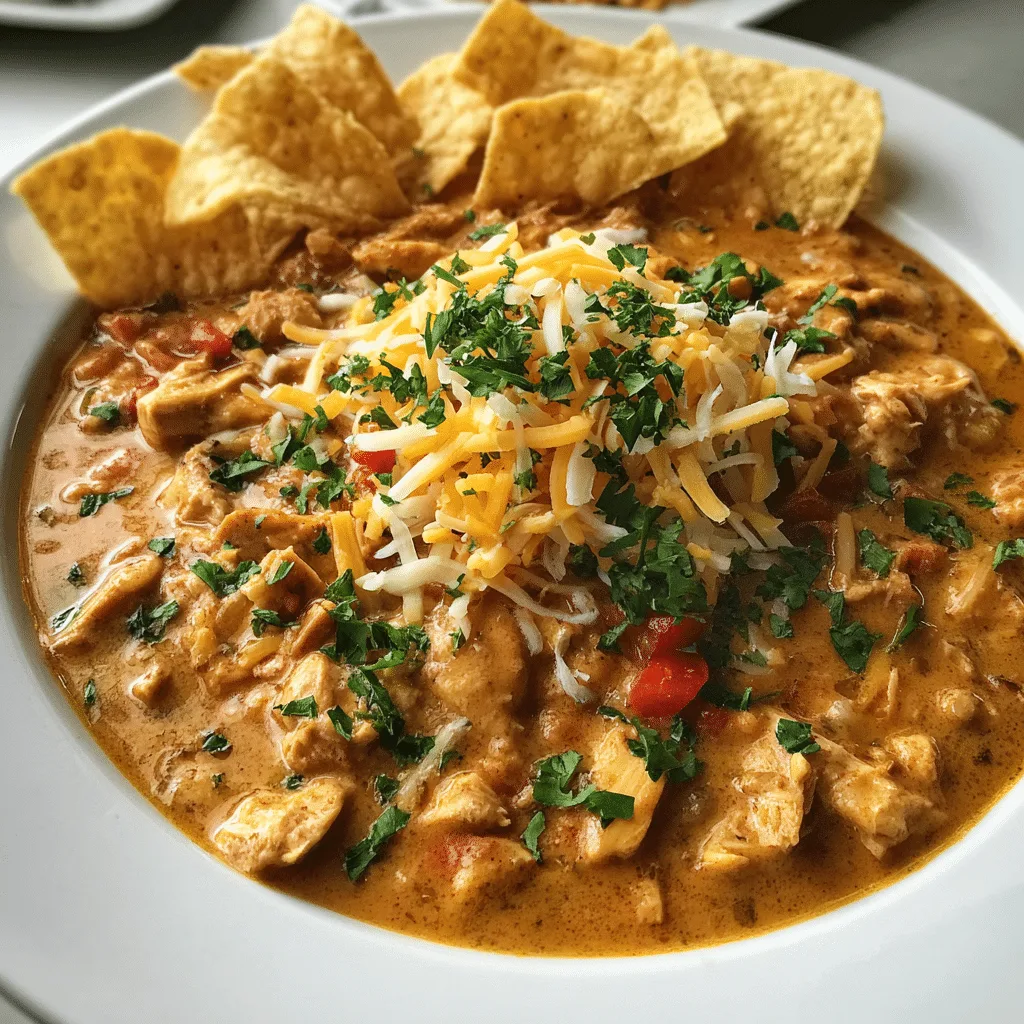
    Crockpot cream cheese chicken chili served in a rustic bowl

    Recipe

    Why This Chili Is a Game-Changer

    A Creamy, Comfort-Food Classic with a Twist

    Crockpot cream cheese chicken chili is the kind of meal that makes you feel like you’ve mastered dinner—without breaking a sweat. It’s not just another slow cooker recipe. It’s the kind of creamy chicken chili recipe that combines spice, richness, and hearty flavor in every bite.

    This dish uses tender shredded chicken, smooth cream cheese, beans, and a blend of spices that melt into each other during a low-and-slow cook. The result? A thick, comforting bowl that tastes like it simmered all day—because it did.

    And the best part? It’s a dump-and-go crockpot dinner. You toss in everything in the morning, set it, and forget it until the aroma pulls you back to the kitchen hours later.

    The Slow Cooker Secret: Set It and Let Life Happen

    One of the top reasons people fall in love with slow cooker cream cheese chicken chili is the simplicity. You don’t have to hover over a stovetop. You don’t have to stir constantly. You don’t even need to chop much.

    This dish is made for busy weekdays, lazy Sundays, and everything in between. Whether you’re meal-prepping for the week or just need a low-effort chicken chili that hits every comfort note, this recipe delivers. It’s creamy, spicy, satisfying, and filling enough to stand alone—or pair perfectly with cornbread or rice.

    Once you try it, this chili becomes your best slow cooker chili recipe for cold nights, potlucks, and everything in between.

    What Makes Crockpot Cream Cheese Chicken Chili So Addictive

    A Creamy Texture That Feels Like a Hug

    The heart of this recipe is right in the name: crockpot cream cheese chicken chili. That cream cheese? It’s the game-changer. As it melts into the slow cooker, it transforms the chili into a rich, velvety dream. The texture is thicker than your average white chicken chili with cream cheese, and that’s exactly why people keep coming back to it.

    Each spoonful feels indulgent—like comfort food elevated. But it’s not heavy. The balance between protein-packed chicken, creamy broth, and just the right amount of heat makes this dish feel both soothing and energizing.

    Use full-fat cream cheese for that luxurious finish, or try reduced-fat for a lighter version without sacrificing taste.

    Built-In Flavor Layers Without Any Fuss

    Most chilis require layers of sautéing and seasoning at just the right moment. Not this one. Crockpot cream cheese chicken chili builds flavor all on its own while you live your life. The magic comes from combining everyday pantry staples—like canned beans, diced tomatoes, and ranch seasoning—with minimal effort.

    What makes this recipe even more irresistible is its spice profile. A can of green chilies adds just enough kick without overpowering. Paprika and cumin deepen the flavor, making it one of the most flavor-packed crockpot chicken chili meals you’ll ever make.

    It’s bold. It’s hearty. And it’s about to become a regular on your dinner table.

    A Family-Friendly Favorite That Never Fails

    Loved by Kids, Approved by Grown-Ups

    If there’s one thing crockpot cream cheese chicken chili does better than most meals, it’s keeping the whole family happy. Even picky eaters fall for its creamy texture and mild heat. The balance of flavors makes it easy to serve to both kids and adults—no extra pots, no tweaks, no complaints.

    This isn’t just another comfort food chicken chili. It’s a guaranteed crowd-pleaser, perfect for game day spreads, Sunday dinners, or busy school nights. Add shredded cheese or tortilla chips on top, and suddenly it feels like a chili bar right in your kitchen.

    Even better? Leftovers reheat beautifully and taste even richer the next day.

    High-Protein and Hearty Enough to Stand Alone

    Thanks to the shredded chicken and beans, crockpot cream cheese chicken chili is packed with protein. It fills you up without feeling overly heavy, making it ideal for lunch meal prep or long days when you need lasting energy.

    This dish checks every box: creamy, savory, spicy, and satisfying. Whether you’re serving it with rice, cornbread, or just a big spoon, it holds up. It’s also one of those hearty family meal crockpot dishes that saves you time and money—no fancy ingredients, just real, good food that stretches across multiple servings.

    For something equally warming and no-fuss, try this easy crockpot taco soup. It pairs beautifully with your weekly rotation of slow cooker favorites.

    With a simple ingredient list and bold results, this chili isn’t just easy—it’s dependable.

    Easy to Customize and Perfect for Leftovers

    Make It Yours with Simple Swaps

    One of the best things about crockpot cream cheese chicken chili is how easy it is to tweak without messing up the magic. You can adjust spice levels, change up the beans, or swap in rotisserie chicken if you’re in a rush. Want it extra creamy? Stir in more cream cheese at the end. Need a lighter version? Use light cream cheese and skip the sour cream garnish.

    You can even transform this creamy chicken chili recipe into a white chili by using white beans and omitting the tomatoes. The flexibility means it never gets boring—and your family will think you’re cooking a brand-new meal each time.

    Leftovers That Taste Even Better Tomorrow

    Let’s be honest: not all dishes reheat well. But crockpot cream cheese chicken chili actually improves with time. The spices deepen overnight, and the cream cheese thickens the broth, turning it into an even richer meal the next day.

    Store it in the fridge for up to four days or freeze it in single portions for quick lunches. It’s one of the best recipes for batch cooking, especially if you’re building a freezer stash of easy, satisfying meals.

    If you’re craving another cozy, creamy option, this Crockpot Chicken Corn Chowder is just as warm and family-approved—perfect for your slow cooker rotation.

    Between the easy tweaks and leftover gold, this chili is more than dinner. It’s your future lunch, your weekend savior, and your new go-to for cozy comfort without the hassle.

    Cream cheese chicken chili topped with cheese and tortilla chips

    Conclusion: Try It Once, Love It Forever

    Crockpot cream cheese chicken chili isn’t just another slow cooker dinner—it’s the kind of recipe that quietly works its way into your weekly rotation. It’s creamy, hearty, low-effort, and completely customizable. Whether you’re feeding a hungry family, meal-prepping for the week, or just craving something cozy and satisfying, this chili shows up—and delivers.

    It’s one of those dishes that feels like a win every single time.

    Try it at home, snap a photo, and tag me on instagram! I’d love to see your version—and if you make any creative twists, tell me in the comments. Let’s keep this comfort food community strong, one bowl at a time.

    Frequently Asked Questions About Crockpot Cream Cheese Chicken Chili

    Can I make crockpot cream cheese chicken chili with frozen chicken?

    Yes, you can use frozen chicken in crockpot cream cheese chicken chili, but it’s important to cook it on high for the first hour to ensure safe cooking. After that, switch to low and let the chili cook slowly to build deep, creamy flavor. Always check the internal temp hits 165°F before shredding.

    What beans work best in this creamy chicken chili?

    White beans like Great Northern or cannellini are the most common for crockpot cream cheese chicken chili, but black beans or pinto beans also work well. The chili is flexible, so you can use what you have on hand while keeping the creamy texture and hearty base intact.

    How spicy is crockpot cream cheese chicken chili?

    This recipe has a mild kick thanks to diced green chilies and chili powder. If you want to increase the heat, add cayenne pepper or use hot diced chilies. If you need to keep it kid-friendly, use mild seasoning blends. The creamy base helps balance out any added spice.

    Can I make this creamy chicken chili ahead of time?

    Absolutely. In fact, crockpot cream cheese chicken chili often tastes even better the next day. Store leftovers in an airtight container in the fridge for up to four days, or freeze portions for later. The flavors will deepen and the texture thickens, making it ideal for meal prep and batch cooking.

  • Cheesy Ranch Potatoes & Smoked Sausage: 5 Stunning Secrets

    Cheesy Ranch Potatoes & Smoked Sausage: 5 Stunning Secrets

    Cheesy Ranch Potatoes & Smoked Sausage used to sound like a last-minute potluck dish—until I made it my weeknight secret weapon.

    Hey! I’m Darleen Vamce—34, Salt Lake City native, and a woman who used to think slow cookers were just for potlucks and overly mushy stews. I was wrong. Very wrong. Now, this humble little machine is basically my co-chef, my weekday dinner savior, and the secret weapon behind most of the meals that make my family think I have superpowers.

    It all started during The Great Mealtime Struggle. Out of desperation, I tossed in sausage, potatoes, ranch, and cheese one-handed—baby on hip. The result? Magic.

    Cheesy Ranch Potatoes & Smoked Sausage in slow cooker with melted cheese

    Recipe

    Cheesy Ranch Potatoes & Smoked Sausage: A Comfort Food Classic

    If you’re craving something hearty, simple, and full of rich flavor, cheesy ranch potatoes and smoked sausage are about to become your go-to meal. This rustic dish brings together the smoky depth of sausage, the creamy melt of cheese, and the tangy zip of ranch seasoning—no fancy prep required. It’s one of those rare dinners that’s just as satisfying on a rushed Tuesday as it is on a lazy Sunday.

    Back when I first tossed this together in my slow cooker, I had no idea it would become such a staple in our kitchen. It’s not just about throwing ingredients into a pot—it’s about layering bold, familiar flavors that remind you of something your grandma might’ve made, only easier.

    This dish isn’t just another smoked sausage dinner idea. It’s a warm, creamy, stick-to-your-ribs kind of meal that feeds a hungry crowd without draining your energy.

    Why This Meal Works for Real Life

    When weeknights feel overwhelming, creamy sausage & potatoes step in like a friend who just gets you. You don’t need exotic ingredients or culinary training—just a slow cooker, a few pantry staples, and about ten minutes of prep time.

    With one batch, you’ll have enough to feed your crew and still sneak a spoonful straight from the pot. Plus, it reheats beautifully—making it ideal for leftovers, lunchboxes, or second dinners after football practice.

    Whether you’re new to hearty slow cooker meals or just looking for a fresh way to serve up smoked sausage, this recipe checks every box. Simple. Filling. And completely unforgettable.

    How to Make Cheesy Ranch Potatoes & Smoked Sausage Perfect Every Time

    The beauty of Cheesy Ranch Potatoes & Smoked Sausage lies in its simplicity, but getting it just right takes a few smart choices. It’s not just about tossing things in a slow cooker—it’s about building layers of texture and flavor that turn this from a basic dinner into a comfort food legend.

    Start with smoked sausage—kielbasa works beautifully. Slice it into thick rounds so it holds its texture. Then grab baby potatoes or red potatoes for that tender bite that holds shape after hours of slow cooking. Don’t skimp on the cheese, either. Sharp cheddar melts best and gives the dish that rich, craveable finish.

    Add ranch seasoning—store-bought or homemade—right over the top. It’s the secret to that tangy, herby kick that makes people ask for seconds. As it cooks, everything comes together: the fat from the sausage seeps into the potatoes, the cheese melts into the broth, and that creamy texture builds low and slow.

    Pro Tips for Creamier, Bolder Flavor

    Want next-level flavor in your cheesy crockpot potato sausage dish? Stir in a splash of heavy cream or sour cream right before serving. It takes the texture from creamy to luxurious without complicating anything.

    Also, layer the ingredients smartly. Potatoes on the bottom, then sausage, then seasoning and cheese. This ensures even cooking and perfect texture.

    Set your slow cooker to low for 6–7 hours or high for 3–4. The result? A melt-in-your-mouth meal that’s pure magic—and perfect for cozy nights, cold days, or whenever life calls for easy, soul-soothing food.

    Variations on Cheesy Ranch Potatoes & Smoked Sausage

    One of the best things about Cheesy Ranch Potatoes & Smoked Sausage is how flexible it is. This isn’t a one-size-fits-all kind of meal. With a few simple swaps, you can make it fit your pantry, your taste buds, or your budget—without losing what makes it comforting.

    If you’re a fan of rich, hearty meals, you might also love recipes like Crockpot Pierogi Casserole with Kielbasa, which leans into similar smoky, cheesy flavors. Don’t have cheddar on hand? Swap in mozzarella for a mellow melt or pepper jack if you’re after a little heat.

    To lighten things up, try turkey sausage and a splash of Greek yogurt. Want more texture? Stir in diced bell peppers, frozen corn, or chopped onions. You can even throw in some fresh spinach at the end to sneak in a little green.

    Make It Your Own Without Losing the Magic

    For added richness in your creamy sausage and potatoes, try a spoonful of sour cream stirred in right before serving. Or crisp it up: after slow cooking, slide the dish under your broiler to get a golden, bubbly top.

    Another favorite twist? Turn it into a rice dish instead of potatoes—just like in Crockpot Cheesy Sausage & Rice, where the flavor stays bold but the texture transforms into something new.

    Whatever you tweak, the core stays the same: smoky sausage, melty cheese, and that craveable ranch flavor—all coming together in one creamy, dreamy bite.

    Why Cheesy Ranch Potatoes & Smoked Sausage Are Always a Win

    There’s something truly comforting about making Cheesy Ranch Potatoes & Smoked Sausage on a busy weeknight. It’s a dish that brings together everything you want in a meal—smoky flavor, creamy texture, cheesy richness, and that familiar tang of ranch. If you’ve been searching for a recipe that checks every box, this is it.

    Cheesy Ranch Potatoes & Smoked Sausage is one of those rare meals that feels indulgent but takes almost no effort. Just slice, layer, and slow cook. By dinnertime, you’ve got something that tastes like it took hours—but really didn’t.

    What sets Cheesy Ranch Potatoes & Smoked Sausage apart is how well it adapts to real life. Whether it’s freezing cold out or you’ve just hit the end of your energy for the day, this recipe delivers. It fits right in with your list of hearty slow cooker meals, the kind that keep your people full and happy.

    Bonus: It’s a Freezer-Friendly Lifesaver

    This Cheesy Ranch Potatoes & Smoked Sausage recipe also freezes beautifully. You can prep everything ahead of time, stash it in a bag, and dump it straight into your slow cooker when you’re ready. Busy morning? Problem solved.

    Looking for more stress-free dinner wins? Our Dump and Go Crockpot Dinners—it’s a goldmine of stress-free meals just like this one.

    In my house, Cheesy Ranch Potatoes & Smoked Sausage isn’t just a favorite—it’s a fallback plan, a comfort food hug, and a guaranteed crowd-pleaser. Make it once, and you’ll know exactly why it stays in rotation.

    Bowl of Cheesy Ranch Potatoes & Smoked Sausage served warm

    The Final Scoop on Cheesy Ranch Potatoes & Smoked Sausage

    Cheesy Ranch Potatoes & Smoked Sausage is more than just a slow cooker meal—it’s a go-to dinner you’ll come back to again and again. Whether you follow the classic version or throw in your own twist, this recipe works hard so you don’t have to.

    It’s warm, filling, and full of flavor. But best of all, it’s the kind of meal that brings everyone to the table—without the stress, mess, or guesswork. From freezer prep to weeknight rescue, Cheesy Ranch Potatoes & Smoked Sausage fits real life.

    So go ahead—make it this week. Let the slow cooker do the work. Then serve it up, watch your crew dig in, and enjoy that quiet moment when nobody’s talking because the food is just that good.

    Try it at home and tag me on social media! I’d love to see how your version turns out—and what twists you add to make it yours.

    Frequently Asked Questions About Cheesy Ranch Potatoes & Smoked Sausage

    What is the best sausage for Cheesy Ranch Potatoes & Smoked Sausage?

    For the richest flavor, go with fully cooked smoked sausage or kielbasa. Their bold, savory flavor pairs perfectly with the creamy potatoes and sharp cheddar. If you’re looking to cut fat or calories, turkey sausage is a great swap that still works beautifully in Cheesy Ranch Potatoes & Smoked Sausage.

    Can I make Cheesy Ranch Potatoes & Smoked Sausage without a slow cooker?

    Absolutely. While a slow cooker creates that deep, well-blended flavor, you can bake the dish in a Dutch oven or casserole dish at 350°F for about 60–75 minutes. Just be sure to cover it with foil to retain moisture. You’ll still get all the flavor that makes Cheesy Ranch Potatoes & Smoked Sausage a crowd favorite.

    How do I store and reheat leftovers?

    Store leftovers of Cheesy Ranch Potatoes & Smoked Sausage in an airtight container in the fridge for up to 4 days. Reheat in the microwave or oven. Add a splash of cream or broth if the potatoes dry out slightly.

    Can I prep Cheesy Ranch Potatoes & Smoked Sausage as a freezer meal?

    Yes, this recipe is perfect for freezer prep. Add all raw ingredients into a freezer-safe bag, label, and store. When ready, thaw overnight in the fridge and cook in your slow cooker as usual. Cheesy Ranch Potatoes & Smoked Sausage holds up well in the freezer and saves time on busy mornings.
  • Pumpkin Protein Balls: 7 Irresistible Bites To Energize You

    Pumpkin Protein Balls: 7 Irresistible Bites To Energize You

    Pumpkin Protein Balls became my secret weapon during what I call “The Great Mealtime Struggle.” Three kids, a full-time job, and a kitchen that laughed at me every night—it was chaos. Out of desperation, I leaned on quick, make-ahead snacks that didn’t just fill little bellies but fueled me too. That’s when pumpkin, oats, and protein powder teamed up to create these bite-sized lifesavers. They’re simple, satisfying, and just sweet enough to feel like a treat. Today, I’m sharing seven irresistible versions that keep my family happy and my sanity intact.

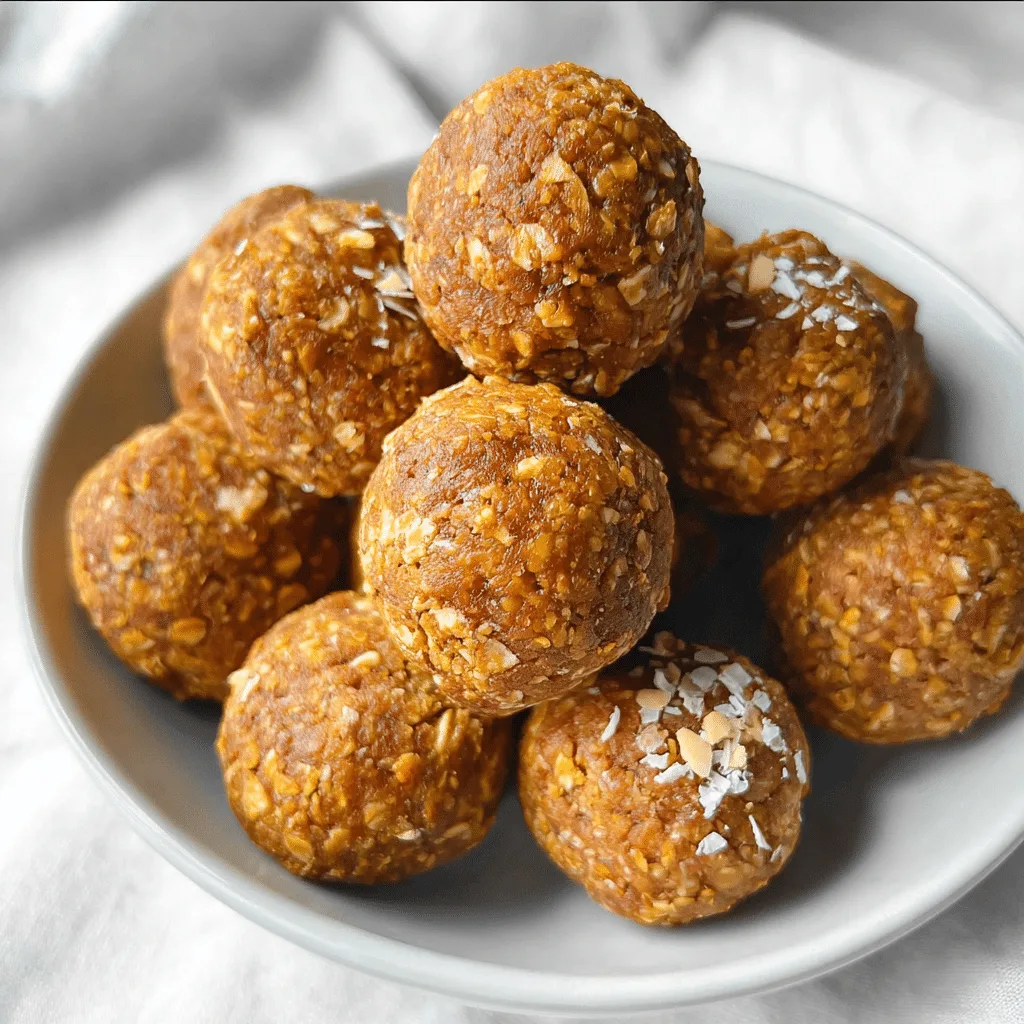
    Pumpkin Protein Balls healthy no-bake snack

    Recipe

    Why Pumpkin Protein Balls Are a Game-Changer

    The Power of Pumpkin and Protein

    Pumpkin Protein Balls aren’t just trendy; they are practical fuel for busy lives. Pumpkin is naturally rich in fiber, vitamins, and antioxidants, while protein powder provides the strength your body needs to stay energized. When combined with oats, nut butter, and a touch of sweetness, you get protein pumpkin energy balls that taste indulgent but work like smart fuel.

    These easy no-bake pumpkin balls also save time. In just minutes, you can mix ingredients, roll them, and store them for quick snacks all week. Unlike packaged bars, they’re customizable—you control the sugar, the protein source, and the flavors. For fall lovers, pumpkin spice protein balls bring that cozy seasonal flavor without the heavy calories of pies and lattes.

    A Healthy Snack That Fits Any Lifestyle

    One reason Pumpkin Protein Balls stand out is their flexibility. They work for athletes needing a post-workout recovery snack, kids wanting a sweet treat, or anyone searching for healthy pumpkin snacks that travel well. They’re naturally gluten-free if you choose certified oats, and you can make them dairy-free by swapping plant-based protein powders.

    Unlike complicated recipes, these bites don’t require baking, blending, or special tools. Just a bowl, a spoon, and a few wholesome ingredients. Within 15 minutes, you’ll have pumpkin spice energy bites that satisfy cravings while keeping your nutrition on track.

    The best part? They’re proof that healthy doesn’t mean boring. By using seasonal flavors, protein power, and simple prep, you’ll have snacks that taste like dessert yet deliver long-lasting energy.

    The Simple Secrets Behind Perfect Pumpkin Protein Balls

    Easy Ingredients, Big Flavor

    The beauty of Pumpkin Protein Balls is how simple the ingredient list can be. Start with pumpkin purée for natural sweetness and moisture. Add oats for fiber, nut butter for creaminess, and a scoop of protein powder to create a high protein pumpkin recipe that fuels your body. A sprinkle of cinnamon or pumpkin spice makes each bite taste like fall.

    What makes them even better is their adaptability. Swap almond butter for peanut butter, add chia seeds for extra fiber, or drizzle melted dark chocolate for a touch of indulgence. These quick pumpkin energy bites can be tailored to suit different tastes without losing their nutritional punch.

    Snacks That Fit Every Diet

    Pumpkin Protein Balls aren’t one-size-fits-all—they can be adapted to almost any lifestyle. Want gluten free pumpkin protein balls? Use certified gluten-free oats. Prefer dairy-free? Choose plant-based protein powder and nut butters. Looking for low-sugar snacks? Replace sweeteners with stevia, monk fruit, or let the natural pumpkin flavor shine.

    For parents, these bites make healthy pumpkin snacks that kids actually enjoy. For adults, they’re a guilt-free treat that doubles as steady energy for work, workouts, or travel. Since they require no baking, the prep is fast, cleanup is easy, and the results are consistently delicious.

    When balanced with the right ingredients, Pumpkin Protein Balls prove that nutritious food can be quick, flexible, and crave-worthy. Each batch delivers taste, texture, and energy without relying on processed snacks.

    Creative Twists for Pumpkin Protein Balls

    Flavor Variations That Keep Things Exciting

    Pumpkin Protein Balls are versatile, which means you’ll never get bored. Start with the classic blend of pumpkin purée, oats, nut butter, and protein powder. From there, the options are endless. Add dark chocolate chips for a dessert-like bite, toss in chia seeds for added fiber, or roll them in shredded coconut for texture.

    If you love seasonal flavors, pumpkin spice protein balls bring that cozy fall touch without being heavy. You can even experiment with cocoa powder for a chocolate version that reminds you of Pumpkin Brownies Recipes. These small changes transform a simple recipe into a rotation of quick pumpkin energy bites you’ll actually crave.

    Snacks for Every Occasion

    Another reason Pumpkin Protein Balls shine is their ability to fit into any moment of the day. They work as a pre-workout boost, a school snack, or a mid-afternoon pick-me-up at the office. Because they are compact and mess-free, you can pack them in a lunchbox or store them in the fridge for grab-and-go convenience.

    For busy families, they double as healthy pumpkin snacks that satisfy without processed sugar. And if you need inspiration for other wholesome ideas, recipes like Pumpkin Oatmeal Cookies show how easy it can be to create nutritious treats with minimal ingredients.

    The bottom line? With a few pantry staples, you can always whip up energy bites with pumpkin that feel indulgent but deliver long-lasting energy. It’s a balance of flavor and function that makes these bites a staple in every season.

    Making Pumpkin Protein Balls Part of Everyday Life

    Meal Prep That Works With Your Schedule

    Pumpkin Protein Balls are the kind of snack that make weekly meal prep effortless. Mix, roll, and store them in the fridge or freezer, and you’ll have a ready-to-go snack anytime cravings hit. Unlike packaged bars, these quick pumpkin energy bites can be customized to match your goals—whether it’s more protein, fewer carbs, or extra fiber.

    They also pair beautifully with other seasonal treats. Imagine packing a lunchbox that includes a couple of Pumpkin Protein Balls alongside a soft Pumpkin Cinnamon Roll Muffin. It’s a balance of comfort and nutrition that makes even busy mornings feel a little easier.

    A Snack That Satisfies Every Craving

    The beauty of Pumpkin Protein Balls is how well they fit into any craving. If you want something sweet, add chocolate chips or a drizzle of nut butter. If you’re craving cozy fall flavors, lean into spices and rolled oats for pumpkin spice protein balls. And when you want something rich, you can even echo the flavor of Moist Pumpkin Chocolate Chip Bread in bite-sized form.

    This flexibility is why many consider them among the best pumpkin protein snacks. They keep energy steady without the crash, satisfy your sweet tooth, and fuel you with lasting nutrition. Whether you’re heading to the gym, tackling work, or just need an afternoon pick-me-up, these energy bites with pumpkin prove that healthy can also be delicious.

    Pumpkin Protein Balls served on a plate for healthy snacking
    Pumpkin Protein Balls make the perfect grab-and-go energy bites.

    Conclusion: Make Pumpkin Protein Balls Your Go-To Snack

    Pumpkin Protein Balls prove that healthy eating doesn’t have to be complicated or boring. With just a few simple ingredients, you can create snacks that taste like dessert yet deliver long-lasting energy. From quick pumpkin energy bites to pumpkin spice protein balls, these recipes fit perfectly into busy schedules, family lunchboxes, and post-workout routines.

    The best part? They’re endlessly customizable—add chocolate chips for sweetness, chia seeds for fiber, or swap protein powders to match your lifestyle. Whether you need gluten free pumpkin protein balls, vegan options, or simply crave healthy pumpkin snacks, there’s a version for you.

    Now it’s your turn. Try one (or all seven) of these irresistible bites in your own kitchen. And when you do, share them with friends, pack them for work, or tag me on Facebook—I’d love to see how your Pumpkin Protein Balls turn out.

    FAQ About Pumpkin Protein Balls

    Are Pumpkin Protein Balls healthy?

    Yes, Pumpkin Protein Balls are a healthy snack because they combine protein powder, oats, and pumpkin purée for balanced nutrition. They provide fiber, protein, and healthy fats while staying lower in sugar compared to packaged bars.

    Can I make Pumpkin Protein Balls without protein powder?

    Absolutely. If you prefer a whole-food option, replace protein powder with almond flour, ground flaxseed, or extra oats. The result will still give you energy bites with pumpkin that taste great and keep you full.

    How long do Pumpkin Protein Balls last?

    Stored in an airtight container in the fridge, Pumpkin Protein Balls last up to one week. You can also freeze them for up to three months, making them perfect for meal prep and quick pumpkin energy bites on busy days.

    Can Pumpkin Protein Balls be made gluten-free or vegan?

    Yes. For gluten free pumpkin protein balls, choose certified oats. To make them vegan, use plant-based protein powder and nut butters. These swaps make it easy to enjoy healthy pumpkin snacks that fit your diet.
  • Pumpkin Dump Cake: 9 Irresistible Reasons It’s Viral Now

    Pumpkin Dump Cake: 9 Irresistible Reasons It’s Viral Now

    Pumpkin Dump Cake used to sound like one of those chaotic, too-simple-to-work recipes I’d scroll past. But one frantic fall evening—baby on my hip, dinner undone, and three hungry kids circling like sharks—I gave it a try. Total game-changer.

    Hey! I’m Darleen Vamce—34, Salt Lake City native, and a woman who once believed slow cookers and dump cakes were just potluck filler. I was wrong. This spicy, sweet, golden-topped beauty baked itself while I wrangled bedtime, and now it’s my go-to magic trick. Today, I’m sharing 9 irresistible reasons this cozy classic has gone full-on viral—and why it deserves a permanent spot in your fall dessert lineup.

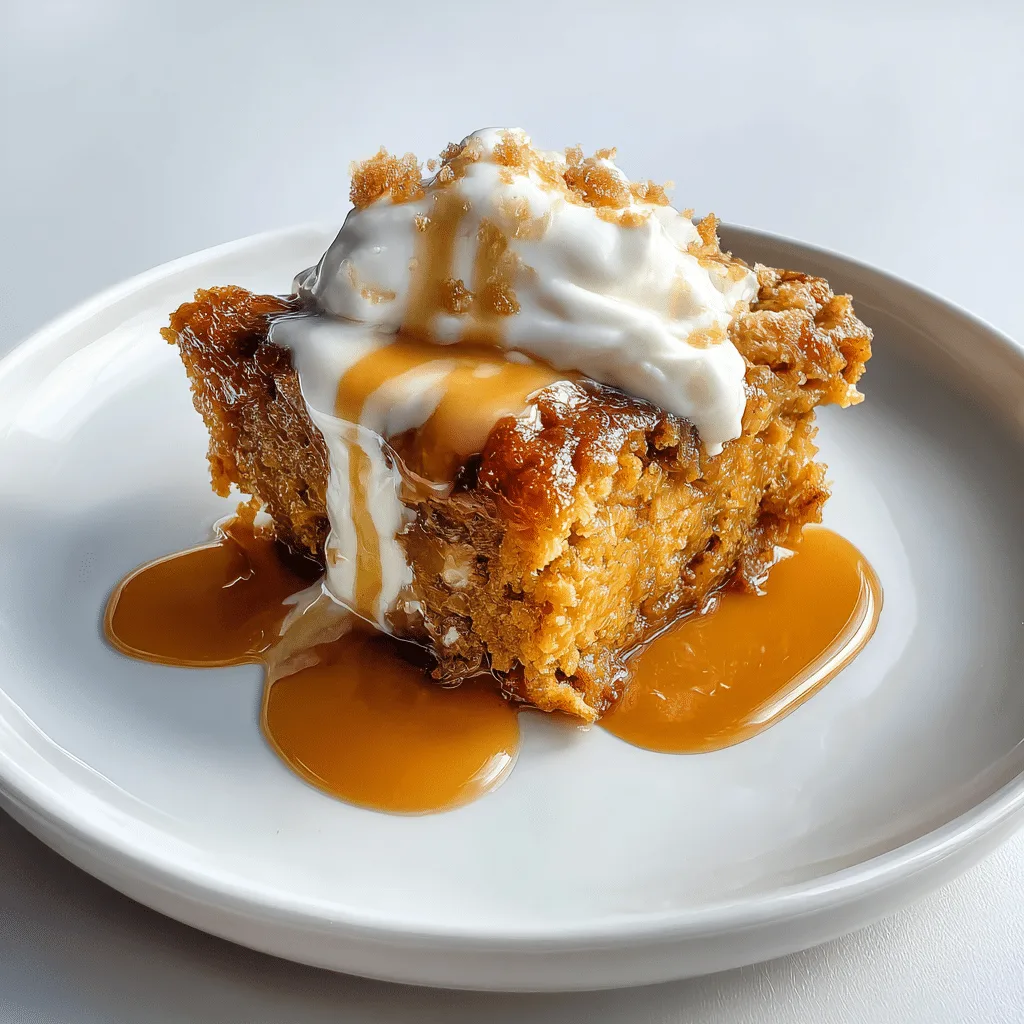
    Pumpkin Dump Cake served warm with whipped cream
    Table of Contents

    Recipe

    Why Pumpkin Dump Cake Is the Viral Dessert of the Season

    What Makes Pumpkin Dump Cake So Easy?

    Pumpkin Dump Cake has taken over Pinterest boards and fall baking blogs—and for good reason. It’s a one-pan wonder that doesn’t require a mixer, fancy ingredients, or even cake-making skills. Just layer canned pumpkin, sweetened milk, pumpkin spice, and dry cake mix, then top with butter and bake. That’s it.

    The simplicity makes it a favorite for busy families and last-minute guests. Whether you’re prepping a Thanksgiving dessert or need something quick on a weeknight, this easy pumpkin dessert fits the bill. No bowls, no stress, just a warm, spiced cake with an irresistible golden topping.

    What makes it different from a traditional pumpkin pie or layered cake is its texture—soft and custard-like on the bottom, crumbly and buttery on top. It’s cozy, comforting, and incredibly forgiving. Even if you’re not a baker, it comes out delicious every single time.

    The Dump Cake That Doesn’t Taste “Dumped”

    We’ve all tried those “dump-and-go” recipes that promise magic and end up bland. Not this one. Pumpkin Dump Cake has the depth of flavor you’d expect from a gourmet dessert with none of the effort. Thanks to the pumpkin puree, spices, and buttery topping, it tastes like a cross between a spice cake and a pumpkin pie—but better.

    If you’re into warm, gooey fall desserts like this, you’ll love the slow cooker pumpkin cobbler recipe too—it’s another viral winner built for cozy nights in.

    You can tweak this dump cake to match your mood or pantry. Add chopped pecans for crunch, swirl in cream cheese for tang, or sprinkle a little brown sugar on top for caramelization. It’s incredibly versatile and fits just about any fall baking idea you might be dreaming of.

    It’s also the kind of dessert that wows at gatherings without you needing to fuss. While others are elbow-deep in pie dough, you’re calmly pulling a bubbling, golden beauty out of the oven—and accepting compliments like you slaved for hours.

    The Texture and Flavor Behind Pumpkin Dump Cake’s Obsession

    A Moist Pumpkin Dessert That Gets Better Overnight

    One of the biggest reasons Pumpkin Dump Cake has gone viral? Its ridiculously moist texture—like pudding met spice cake and they made a perfect fall baby. The canned pumpkin and evaporated milk create a soft, custardy base, while the dry cake mix bakes into a golden, buttery topping that practically melts in your mouth.

    If you’re someone who leans toward moist pumpkin cake or even bread pudding, this recipe will check all the boxes. Even better? It somehow tastes more amazing the next day. The flavors deepen, the topping softens just enough, and the whole dish becomes richer and more indulgent. It’s a rare kind of leftover that doesn’t feel like a compromise.

    Serve it cold from the fridge, reheat it for a warm dessert, or even sneak a spoonful straight from the pan. There’s no wrong way to enjoy it.

    Better Than Pie? For Many, Yes

    Let’s be honest: Pumpkin pie has ruled fall desserts for decades. But not everyone loves the texture or effort it takes to get the crust just right. That’s where Pumpkin Dump Cake steps in as a hero for the pie-fatigued crowd. No rolling pins. No soggy bottoms. Just a scoopable, buttery dream that delivers all the spice and flavor without the fuss.

    Many bakers—especially first-timers—prefer dump cake because it’s practically foolproof. The prep is fast, and the result feels like you did something impressive, even if you tossed it together during nap time.

    This dessert is also endlessly adaptable. Want it gluten-free? Use an alternative cake mix. Want it dairy-free? Sub in coconut milk and vegan butter. It doesn’t fight you back—it just works.

    How Pumpkin Dump Cake Wins Hearts at Every Table

    It’s the Ultimate Crowd-Pleaser

    From potlucks to Sunday dinners, Pumpkin Dump Cake shows up and steals the spotlight. While fancier cakes can flop or pies crack under pressure, this dessert never fails. It’s rustic, warm, and always welcome.

    The smell alone—cinnamon, nutmeg, brown sugar—makes your kitchen feel like fall wrapped itself in a blanket. Serve it straight from the baking dish with a big spoon or portion it into ramekins for a more polished look. Either way, it feels homemade and heartfelt, the way fall desserts should.

    One reason it connects so well with people? It tastes nostalgic. The warm spice, the tender base, and the buttery crumb mimic the best parts of grandma’s kitchen without the labor. It brings back memories and makes new ones.

    Families love it. Friends ask for the recipe. And guests go back for seconds—often before they finish the first round.

    Pairs With Anything (Even Breakfast)

    Versatility is another reason Pumpkin Dump Cake keeps showing up in viral recipe lists. It’s not just a dessert—it’s also a cozy weekend breakfast or a mid-morning coffee companion. You can serve it with a scoop of vanilla ice cream, a dollop of whipped cream, or even a spoonful of Greek yogurt if you’re leaning toward fall breakfast ideas.

    Hosting a brunch? Cut it into squares and top with maple drizzle. Want it extra decadent? Add caramel sauce and roasted pecans. It leans into whatever vibe you’re going for, from casual weeknight treat to Thanksgiving showstopper.

    And since it travels well, it’s ideal for bringing to a family gathering, a bake sale, or a holiday event where you want to impress without overthinking it. Pumpkin Dump Cake adapts to the moment—and that’s a big reason it continues to spread across social feeds and family recipe boxes alike.

    Prep, Store, and Savor Pumpkin Dump Cake Your Way

    Make-Ahead and Store Like a Pro

    One more reason Pumpkin Dump Cake keeps trending? It’s built for busy lives. You can prep it the night before and bake it fresh the next day—or even freeze it unbaked for later. The ingredients don’t suffer from sitting. In fact, the spices and pumpkin meld beautifully when given a little extra time.

    If you’re hosting Thanksgiving or a fall gathering, this dessert gives you one less thing to worry about. Just assemble in a foil pan, cover tightly, and refrigerate. When you’re ready, bake and serve. It’s that simple.

    Storing leftovers? Keep them in an airtight container in the fridge. It stays moist for days. Reheat in the microwave or toaster oven, or enjoy it cold for a midday treat.

    Want More Pumpkin Magic?

    If you love the cozy, cake-like vibe of this dessert, you’ll want to try the moist pumpkin chocolate chip bread next. It offers the same sweet-spice satisfaction in a sliceable, snackable form.

    Pumpkin treats don’t need to be complicated. Whether it’s dump cake, muffins, or dessert breads, the real win is that they bring people together. These kinds of recipes—simple, reliable, comforting—are the ones that end up scribbled on index cards, emailed to friends, and baked again and again.

    That’s what makes Pumpkin Dump Cake so viral. It’s not a one-hit wonder—it’s a new classic.

    Pumpkin Dump Cake served in a white bowl with vanilla ice cream

    Conclusion: Pumpkin Dump Cake Deserves a Spot in Your Recipe Box

    At the end of the day, Pumpkin Dump Cake isn’t just a trending dessert—it’s a reliable, cozy, and downright magical solution to fall cravings. It’s simple enough for weeknights, special enough for holidays, and flexible enough to fit your pantry and preferences. Whether you’re baking for your family, a party, or just yourself, this is one of those recipes that never disappoints.

    So go ahead—print it, pin it, save it. Better yet, make it.

    Try this Pumpkin Dump Cake at home, and when you do, tag me on Facebook or drop a comment on the blog—I’d love to see how you made it your own. Because let’s be honest: if a recipe this easy can feel this special, it’s worth sharing.

    Frequently Asked Questions

    Can I make pumpkin dump cake ahead of time?

    Yes! Pumpkin dump cake is ideal for prepping ahead. Assemble it the night before, cover it tightly, and refrigerate. Bake it fresh when you’re ready. You can also freeze it unbaked for up to one month.

    What cake mix is best for pumpkin dump cake?

    A yellow cake mix is most commonly used, but spice cake mix adds even more fall flavor. You can also try gluten-free or sugar-free mixes based on your needs.

    How do I store leftover pumpkin dump cake?

    Store leftovers in an airtight container in the refrigerator for up to 4 days. It reheats beautifully in the microwave and is also delicious served cold the next day.

    Can I use fresh pumpkin instead of canned?

    Absolutely. Just make sure it’s pureed and not too watery. You’ll need about 1 ¾ cups of fresh pumpkin puree to replace one 15-ounce can.

  • Pumpkin Cinnamon Roll Muffins: 5 Fall Treats You’ll Love

    Pumpkin Cinnamon Roll Muffins: 5 Fall Treats You’ll Love

    Pumpkin Cinnamon Roll Muffins weren’t always part of my kitchen magic.

    Hey! I’m Darleen Vamce—34, Salt Lake City native, and a woman who once believed slow cookers were just for potlucks and mushy stews. I was wrong. Very wrong. These days, that humble machine is my co-chef and secret weapon—especially during fall.

    It all started in the chaos of what I now call The Great Mealtime Struggle: three hangry kids, a demanding job, and a kitchen that mocked me nightly. One foggy October morning, I tossed canned pumpkin, cinnamon, and dough into the slow cooker—baby balanced on one hip. What came out? Muffins so soft, gooey, and cinnamon-swirled, my family thought I’d turned into a fall fairy.

    Since then, these Pumpkin Cinnamon Roll Muffins have become a warm, sweet staple in our home—and now, I’m sharing them with you.

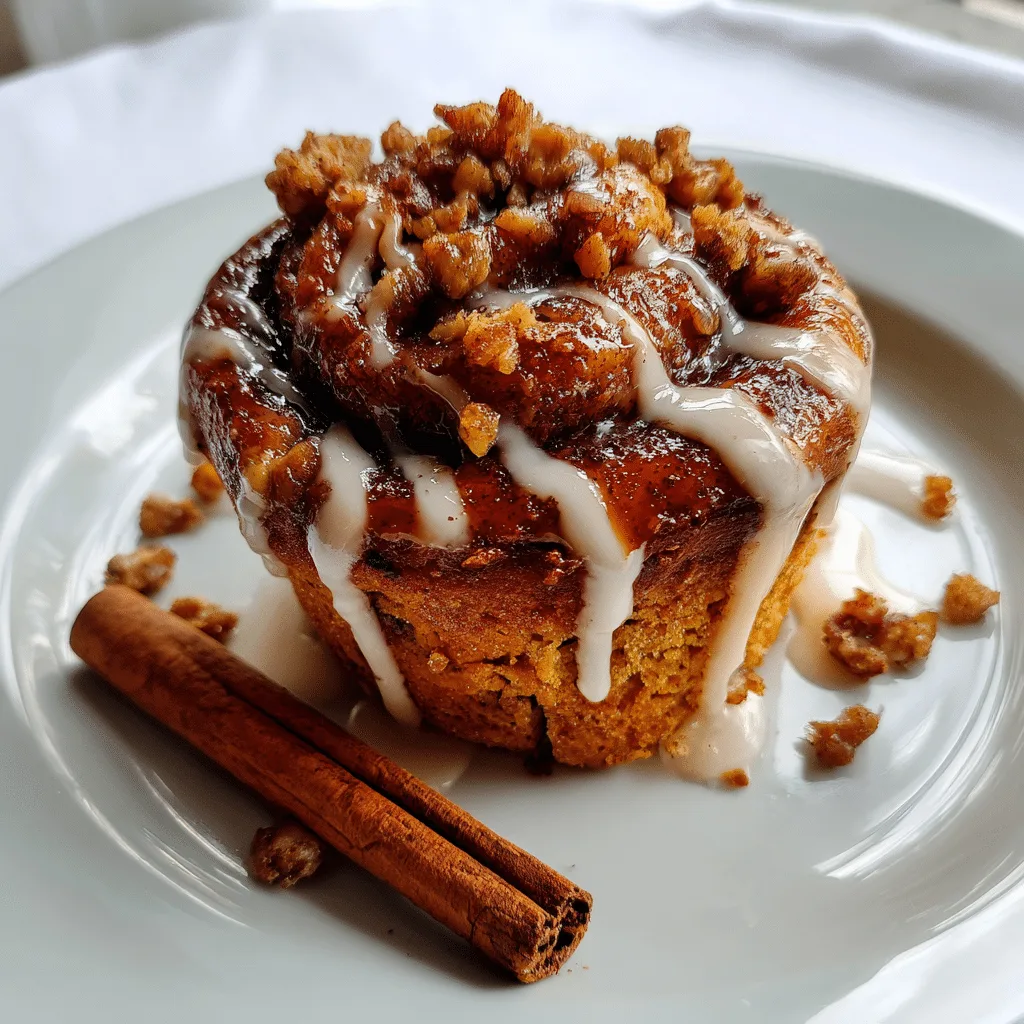
    Pumpkin Cinnamon Roll Muffins on rustic fall table

    Recipe

    Pumpkin Cinnamon Roll Muffins: The Ultimate Fall Morning Treat

    Why Pumpkin Cinnamon Roll Muffins Are the Coziest Bake of the Season

    Pumpkin Cinnamon Roll Muffins bring together two of fall’s most comforting flavors: warm pumpkin spice and sweet cinnamon swirl. These soft, gooey muffins strike the perfect balance between a dessert and a cozy breakfast, making them a favorite for both weekday mornings and lazy fall weekends.

    Each bite delivers the gentle sweetness of pumpkin, the warmth of cinnamon, and the soft texture you expect from bakery-style muffins. But the real magic happens when that sweet cinnamon glaze melts into every swirl and crack. It’s like biting into autumn itself.

    What makes these muffins even better? They’re surprisingly easy to prepare—no yeast, no rolling, no fuss. Just mix, swirl, and bake. And if you’re a fan of gooey pumpkin rolls or soft cinnamon pumpkin muffins, you’ll love this simplified version baked right into a muffin tin.

    Simple Ingredients, Big Fall Flavor

    The best thing about Pumpkin Cinnamon Roll Muffins is that they use pantry staples with a seasonal twist. Think canned pumpkin, brown sugar, cinnamon, and flour. Add a touch of nutmeg or cloves if you love that deep autumn spice dessert vibe. The result? Fluffy muffins with swirls of cinnamon sugar and a drizzle of icing that feels indulgent but is easy enough for a weekday treat.

    Whether you’re baking for a cozy brunch, prepping slow cooker pumpkin muffins for a crowd, or just craving something warm with your morning coffee, this recipe delivers every time. It’s no wonder these muffins have become a go-to in kitchens across the country as soon as the leaves start to fall.

    How to Make Pumpkin Cinnamon Roll Muffins at Home

    Step-by-Step for Soft, Gooey Perfection

    Making Pumpkin Cinnamon Roll Muffins at home is easier than you might think. There’s no need to knead dough or mess with yeast. This recipe is about simplicity without sacrificing flavor or texture.

    Start by whisking together your dry ingredients—flour, baking powder, salt, cinnamon, and nutmeg. In a separate bowl, combine canned pumpkin, brown sugar, eggs, vanilla, and oil. The pumpkin keeps the muffins moist and adds that unmistakable fall flavor. Once the wet and dry ingredients are blended, you’re ready to create the swirl.

    The cinnamon swirl is the star of these muffins. A mix of softened butter, cinnamon, and brown sugar is spooned or piped into the batter before baking. As they rise in the oven, the swirl melts into the muffin, creating ribbons of cinnamon spice throughout.

    These muffins bake in about 20 minutes, just until the tops spring back lightly to the touch. Let them cool slightly before adding a simple glaze made from powdered sugar and milk. The glaze seeps into the cinnamon cracks and makes each bite feel like a sweet reward.

    Tools and Tips for Success

    You don’t need special equipment to make Pumpkin Cinnamon Roll Muffins, but a muffin pan with paper liners makes cleanup easier. A piping bag or even a zip-top bag with the corner snipped works great for adding the cinnamon filling. For an extra bakery-style touch, sprinkle a bit of raw sugar on top before baking to create a crisp, golden finish.

    Whether you’re serving them warm for breakfast or packing a few for an afternoon snack, these muffins hit all the notes of a classic fall baking idea—easy, sweet, and unforgettable.

    Customizing Pumpkin Cinnamon Roll Muffins for Any Occasion

    Flavor Twists That Still Feel Like Fall

    Pumpkin Cinnamon Roll Muffins are versatile enough to adapt to your cravings or pantry. Want a bit more texture? Add chopped pecans or walnuts into the batter. Craving something sweeter? Swirl in a bit of maple syrup or top with cream cheese glaze for a rich finish.

    You can also play with the spice level. Try adding ground ginger, cardamom, or even a pinch of clove for a deeper autumn spice dessert profile. Each of these additions complements the pumpkin base and warm cinnamon tones without overpowering the soft, moist texture of the muffins.

    And if you love classic pumpkin rolls, you’ll appreciate how these muffins deliver the same comfort—with way less work. For a yeast-based version with a bolder swirl, check out these sourdough pumpkin cinnamon rolls you can prep in advance.

    Batch, Freeze, and Reheat Like a Pro

    Pumpkin Cinnamon Roll Muffins also freeze exceptionally well. Let them cool completely, wrap each in parchment or foil, and place them in an airtight container. When you’re ready to enjoy, warm one in the oven or microwave for that fresh-baked feel.

    For meal prep lovers, double the batch and refrigerate the unbaked batter for up to 24 hours. The flavors deepen, and the texture remains fluffy. This makes them perfect for make-ahead breakfasts or spontaneous fall brunch plans.

    Whether you’re a casual baker or a pumpkin-obsessed pro, these muffins are your shortcut to seasonal comfort with every bite.

    Serve Pumpkin Cinnamon Roll Muffins Like a Pro

    Simple Presentation That Feels Special

    Pumpkin Cinnamon Roll Muffins are delicious straight from the oven, but how you serve them can elevate the entire experience. For a classic bakery-style look, let them cool slightly before drizzling with a vanilla glaze. Serve on a wooden board with a side of warm apple cider or cinnamon tea, and suddenly your kitchen feels like an autumn café.

    For brunch settings, pair these muffins with savory options like eggs or roasted sweet potatoes to balance the sweetness. They also work well as a dessert when served with a dollop of whipped cream or a scoop of vanilla bean ice cream.

    If you want to make a full fall-themed spread, add in other quick pumpkin bakes like these 3-ingredient pumpkin oatmeal cookies to give your guests options without extra stress in the kitchen.

    Make It Kid-Friendly or Crowd-Ready

    Kids love anything handheld, and Pumpkin Cinnamon Roll Muffins are the ultimate grab-and-go snack for fall school lunches or after-school treats. You can even turn the batter into mini muffins for little hands, adjusting bake time to around 10–12 minutes.

    For larger gatherings, consider doubling the recipe and offering a topping bar with icing, crushed nuts, or maple drizzle. Everyone gets to customize their muffin, and you stay out of the oven once guests arrive.

    These muffins fit every moment—whether you’re baking for a holiday, a Saturday morning, or just because pumpkin spice is calling your name. They’re soft, sweet, and flexible enough to suit almost any fall occasion.

    Pumpkin Cinnamon Roll Muffins served with glaze and coffee
    A perfect fall morning with warm muffins and cinnamon glaze

    Conclusion: Your New Favorite Fall Muffin Is Here

    Pumpkin Cinnamon Roll Muffins aren’t just a seasonal bake—they’re a warm, spiced celebration of everything we love about fall. Whether you’re baking a batch for a quiet morning or preparing a cozy spread for family, these muffins deliver comfort in every bite.

    Try them out this week, and if you fall in love with them as much as my family did, don’t forget to share a photo and tag me on Facebook. I’d love to see your twist on this fall favorite!

    Frequently Asked Questions About Pumpkin Cinnamon Roll Muffins

    Can I make Pumpkin Cinnamon Roll Muffins ahead of time?

    Yes, absolutely. You can make the batter a day in advance and refrigerate it overnight. The muffins bake just as soft and fluffy the next morning. They’re also freezer-friendly—just wrap and store them in an airtight container for up to two months.

    What’s the best glaze for these muffins?

    A simple powdered sugar and milk glaze works beautifully. For more depth, try adding vanilla extract, maple syrup, or even a touch of cream cheese to the mix. The glaze seeps into the cinnamon swirl and enhances every bite.

    Are these muffins suitable for breakfast?

    Definitely. Pumpkin Cinnamon Roll Muffins are filling, flavorful, and not overly sweet, making them a great option for breakfast or brunch. Pair them with Greek yogurt or fresh fruit for a more balanced meal.

    Can I make them gluten-free?

    Yes, you can substitute a 1:1 gluten-free baking flour blend in this recipe. Just be sure to check that your baking powder and other ingredients are certified gluten-free as well. The texture will be slightly different but still delicious.

  • Crockpot Hashbrown Casserole: 7 Proven Ways To Win

    Crockpot Hashbrown Casserole: 7 Proven Ways To Win

    Crockpot Hashbrown Casserole changed everything for me. I’m Darleen Vamce—34, mom of three, Salt Lake City native, and once a skeptic who thought slow cookers only made bland potluck stews.

    During what I call The Great Mealtime Struggle—three hungry kids, a nonstop job, and me staring at “nothing” in the fridge—I grabbed my dusty crockpot, dumped in hashbrowns, cheese, and cream one-handed with a baby on my hip. Hours later, dinner was magic: creamy, golden, family-approved. Since then, this casserole has been my secret weapon, proving dinner can be effortless and extraordinary.

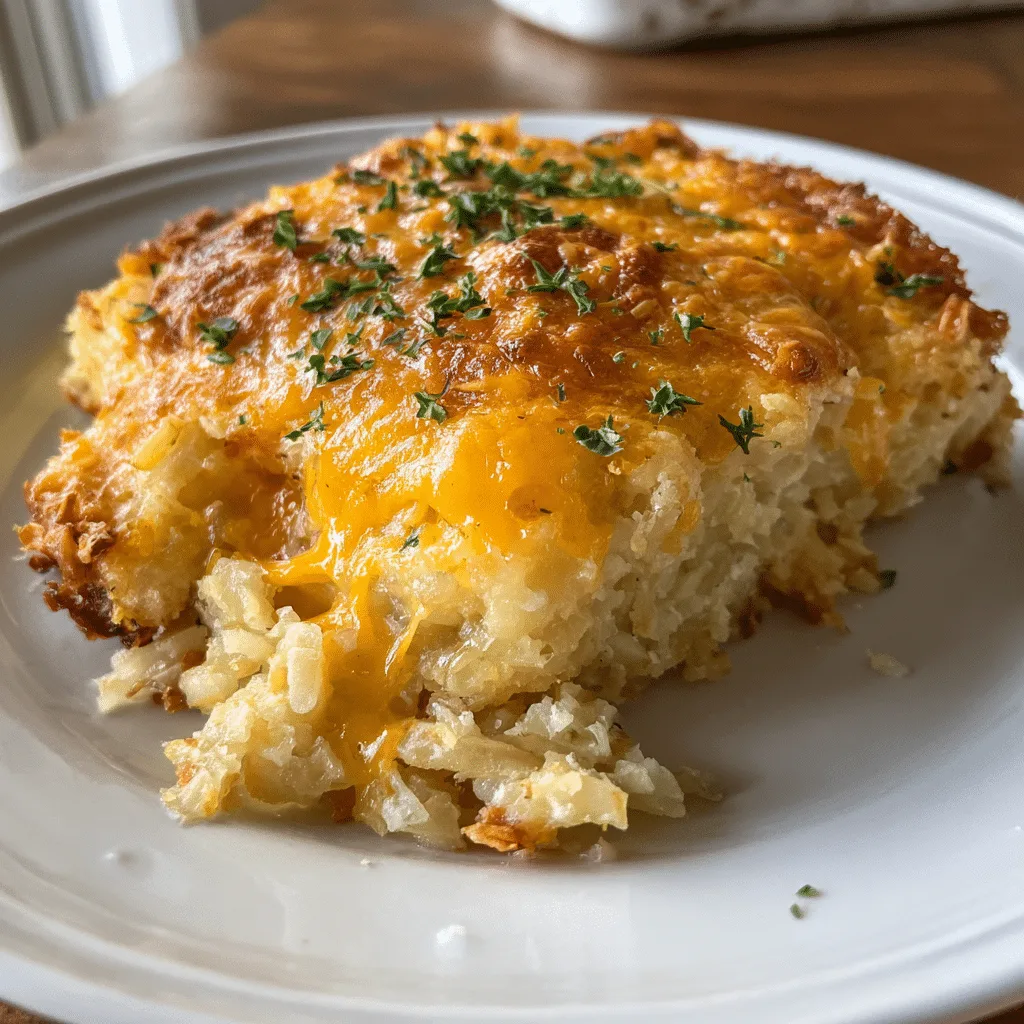
    Crockpot Hashbrown Casserole in a slow cooker with golden cheese

    Recipe

    Why Crockpot Hashbrown Casserole Belongs in Every Kitchen

    A Comfort Food Classic

    Crockpot Hashbrown Casserole is more than just a side dish; it’s comfort food at its finest. Imagine waking up to the aroma of slow cooker potato casserole simmering away, ready to serve without lifting a finger after a busy day. The beauty of this dish is how simple ingredients transform into something rich, creamy, and satisfying. Whether you serve it as a hearty breakfast, a holiday side, or a quick weeknight dinner, it always delivers. Families love it because it’s reliable, versatile, and endlessly customizable with your favorite add-ins.

    The Secret to Creamy Perfection

    What makes a creamy hashbrown casserole recipe unforgettable is balance: tender shredded potatoes, layers of melty cheese, and just enough cream to create that golden, bubbling finish. Cooking it in the crockpot locks in flavor while freeing you from the kitchen. Unlike oven-baked versions, the slow cooker method guarantees even cooking and that irresistible cheesy texture every bite. Many cooks call it their family-friendly crockpot recipe because it satisfies kids and adults alike. Pair it with roasted meats, eggs, or serve it on its own as a main dish—it’s always a winner.

    Building Flavor into Crockpot Hashbrown Casserole

    Why Flavor Layers Matter

    Crockpot Hashbrown Casserole succeeds because every bite feels indulgent yet balanced. Start with frozen hashbrowns, then build on that base with cream, cheese, and seasonings that melt together during slow cooking. This layering technique turns an ordinary potato dish into something extraordinary. For a Southern-style twist, many cooks add diced onions, sour cream, or even a handful of crumbled bacon. Just like with Crockpot Corn on the Cob, the key is letting simple ingredients transform with slow heat.

    Creative Variations for Every Table

    A cheesy hashbrown casserole crockpot recipe easily adapts to family preferences. Want extra heartiness? Stir in diced ham, shredded chicken, or sausage before cooking. Looking for a meatless option? Add broccoli, peppers, or spinach for a colorful, creamy hashbrown casserole recipe that doubles as a main dish. Fans of hearty casseroles also love the flavors of Crockpot Pierogi Casserole with Kielbasa and Make Crockpot Taco Tater Tot Casserole—two recipes that share the same comfort-food DNA.

    The versatility of Crockpot Hashbrown Casserole is why it shines on busy weeknights, holiday spreads, and even breakfast tables. It fits seamlessly among family-friendly crockpot recipes that guarantee empty plates and happy faces, proving once again that slow cooking isn’t just convenient—it’s delicious.

    Tips for Foolproof Crockpot Hashbrown Casserole

    Choosing the Right Ingredients

    The success of Crockpot Hashbrown Casserole starts with ingredient quality. Frozen shredded potatoes provide consistency, but fresh potatoes work if you have time to shred and drain them. Use sharp cheddar for bold flavor or mix in mozzarella for a creamier pull. A creamy hashbrown casserole recipe benefits from rich dairy—sour cream, condensed soup, or even Greek yogurt for a lighter twist. Much like Crockpot Lasagna Soup, it’s the careful choice of ingredients that elevates simple staples into a dish people crave.

    Cooking and Serving Tips

    Slow cookers vary, so check for doneness around the four-hour mark on low heat. The edges should be golden while the center stays soft and creamy. For extra texture, transfer the finished casserole to a baking dish and broil briefly for a crisp top. This technique creates the same satisfying bite found in hearty dishes like Crockpot Chicken Corn Chowder or Crockpot Million Dollar Pasta.

    Serving is flexible—offer it as a brunch centerpiece with eggs and fruit, as a dinner side with roasted meats, or on its own with a salad for a full meal. Its versatility ensures it remains a family-friendly crockpot recipe that always finds a place at the table.

    Making Crockpot Hashbrown Casserole Your Own

    Seasonal and Holiday Twists

    Crockpot Hashbrown Casserole is a year-round favorite, but it shines especially during the holidays. For Thanksgiving, fold in green beans or mushrooms to echo classic casseroles. At Easter, brighten the dish with diced ham and a sprinkle of fresh parsley. During cozy fall nights, add warming spices or roasted vegetables for a comforting variation. Like Slow Cooker Chicken Enchilada Casserole, it adapts easily to whatever flavors the season calls for, ensuring it always feels fresh and special.

    Pairing for Complete Meals

    One of the best things about this cheesy hashbrown casserole crockpot dish is how well it pairs with both everyday dinners and celebratory feasts. Serve it alongside hearty mains like Pot Roast Slow Cooker Recipe for a Sunday dinner that feeds a crowd. On busier nights, balance it with lighter fare such as a salad or simple roasted vegetables. Families who love pasta nights often add it to menus with Crockpot Garlic Parm Chicken Pasta, creating a table full of comforting choices.

    Crockpot Hashbrown Casserole proves that slow cooking doesn’t mean sacrificing flavor or creativity. With endless variations, reliable results, and the ability to complement nearly any main dish, this recipe becomes more than just food—it becomes a tradition.

    Slice of Crockpot Hashbrown Casserole served on plate

    Conclusion: Bring Crockpot Hashbrown Casserole to Your Table

    Crockpot Hashbrown Casserole has a way of turning busy days into memorable mealtimes. With just a few pantry staples and a slow cooker, you can create a creamy, cheesy dish that feels like a hug on a plate. It’s flexible enough for holidays, hearty enough for weeknights, and beloved enough to become a family tradition.

    Now it’s your turn: try this recipe at home, snap a photo, and share it with us on Facebook. Tag me in your post—I’d love to see how your version of Crockpot Hashbrown Casserole turns out and celebrate your kitchen win together.

    FAQ About Crockpot Hashbrown Casserole

    Can I make Crockpot Hashbrown Casserole ahead of time?

    Yes, you can prepare Crockpot Hashbrown Casserole the night before. Mix the potatoes, cheese, and cream base, then refrigerate. In the morning, place the mixture into the slow cooker and set on low. This make-ahead option makes it a reliable breakfast or brunch dish and ensures flavors have time to blend for a creamy hashbrown casserole recipe.

    What cheese works best in a cheesy hashbrown casserole crockpot recipe?

    Sharp cheddar is the classic choice, giving Crockpot Hashbrown Casserole bold flavor and a golden finish. However, mozzarella, Colby Jack, or even pepper jack work beautifully for creaminess and variety. Blending cheeses adds richness and a stretchy texture that makes the casserole even more irresistible. The slow cooking process melts the cheese evenly throughout the dish.

    Can I use fresh potatoes instead of frozen hashbrowns?

    Yes, fresh potatoes can replace frozen hashbrowns in Crockpot Hashbrown Casserole. Shred them finely and squeeze out excess moisture with a towel before cooking. This step prevents the casserole from becoming watery and keeps the texture close to a traditional slow cooker potato casserole. While frozen hashbrowns save time, fresh potatoes provide a rustic, homemade taste.

    How long does Crockpot Hashbrown Casserole need to cook?

    On low, Crockpot Hashbrown Casserole typically takes 4–6 hours. On high, it cooks in about 2–3 hours. Cooking times may vary depending on your slow cooker. You’ll know it’s ready when the edges are golden and the center is hot and creamy. For a crisp top, transfer to a baking dish and broil briefly before serving.

  • Crockpot Corn on the Cob: 7 Powerful Reasons You’ll Love It

    Crockpot Corn on the Cob: 7 Powerful Reasons You’ll Love It

    Crockpot Corn on the Cob changed everything for me. I used to think corn had to be boiled—messy, rushed, and never quite right. But during The Great Mealtime Struggle (three kids, zero time), I dusted off my slow cooker out of desperation. Tossed in fresh corn, butter, herbs—walked away. What came out? Magic. Sweet, buttery, perfectly tender corn with zero effort.

    Hey, I’m Darleen Vance, Salt Lake City mom, and slow cooker convert. Now this little machine is my co-chef. If you’re craving hands-off comfort food, this corn recipe is your next obsession. Let’s make it together.

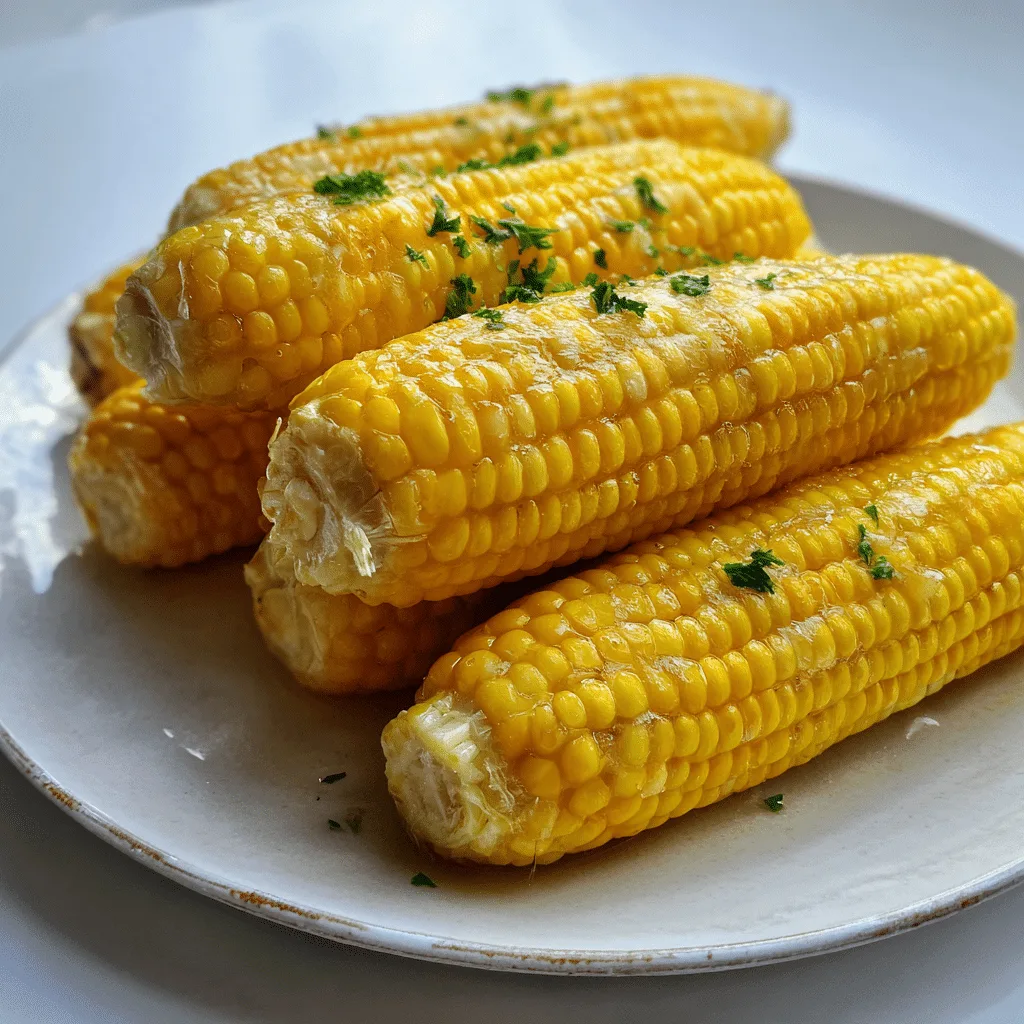
    Crockpot corn on the cob served with melted butter

    Recipe

    Why Crockpot Corn on the Cob Beats Boiling Every Time

    If you’ve only ever made corn by boiling it on the stovetop, Crockpot Corn on the Cob is about to become your new favorite trick. Traditional boiling requires constant monitoring, perfect timing, and a hot kitchen—none of which fits into a busy day. With the slow cooker, though, all it takes is five minutes of prep and a handful of simple ingredients.

    This cooking method turns fresh ears of corn into tender, buttery perfection without the stress. No need to wrap in foil or hover over a pot. Just drop it in, set it, and come back to sweet, flavor-packed results that taste like they were grilled at a summer cookout.

    The Secret to Tender, Flavor-Packed Corn

    One of the most surprising things about making corn this way is how deeply the flavors infuse. Because it cooks slowly, the butter, herbs, and seasonings soak right into every kernel. Unlike boiling—where flavor can get lost in the water—slow cooking locks it in.

    Whether you’re making this for a family dinner or a weekend BBQ side dish, Crockpot Corn on the Cob delivers that perfect bite every time. It’s not just easier—it’s better. The texture is silky, the taste is rich, and you don’t need any fancy ingredients to get there.

    Stay tuned for Part 2, where we’ll explore how to choose the best corn and why this method is ideal for meal prep.

    How to Pick the Best Corn for Your Crockpot

    Fresh, Frozen, or Husked? What Works Best

    When it comes to Crockpot Corn on the Cob, fresh ears are ideal—but not your only option. Sweet corn still in the husk can be trimmed slightly and slow-cooked with husk on for a more rustic flavor. Frozen corn on the cob works too, especially if you’re short on time or cooking out of season.

    Look for ears with tight green husks, sticky silk, and plump kernels when buying fresh. Organic or farmers market varieties tend to have the most flavor, making them perfect for low-and-slow cooking methods.

    Make It a Meal: Perfect Slow Cooker Pairings

    This dish shines on its own but pairs beautifully with other slow cooker recipes. One of our favorites is this savory Crockpot Chicken Corn Chowder—a hearty, comforting dish that also highlights the magic of corn done right. Both recipes can be prepped in under 10 minutes, making them a match made for busy weeknights or easy weekend gatherings.

    These recipes work so well together because the flavors complement each other. Sweet corn balances creamy soups, spicy stews, and even smoky BBQ meats—making your slow cooker not just convenient, but surprisingly versatile.

    Stay tuned for Part 3: the step-by-step method, flavor add-ins, and cook time hacks to make this corn unforgettable.

    How to Cook Crockpot Corn on the Cob to Perfection

    Step-by-Step for Fail-Proof Flavor

    Cooking Crockpot Corn on the Cob is all about simplicity. Start by shucking the corn, removing silk, and trimming the ends. Place the ears in the slow cooker—stacking if needed. Add ½ cup of water, a few pats of butter, salt, and optional seasonings like garlic powder or smoked paprika.

    Cover and cook on high for 2–3 hours or low for 4–5 hours, depending on your schedule. You’ll know it’s ready when the kernels are tender and easily pierced with a fork. The slow heat allows the corn to absorb every drop of buttery flavor without drying out or turning mushy.

    This technique works great for both fresh and frozen corn. If using frozen, increase cook time by 30–45 minutes. No thawing needed—just toss it in.

    Flavor Add-Ins You’ll Want to Try

    Once you’ve mastered the basics, it’s time to experiment. Crockpot Corn on the Cob can be easily customized for any occasion. Try adding:

    • Fresh herbs like thyme or rosemary
    • Crushed garlic or onion powder
    • Chili flakes for heat
    • A splash of lime juice for a citrus twist
    • Grated parmesan or cotija cheese post-cook for richness

    This makes it ideal for everything from BBQs and family dinners to potlucks and holiday sides. And because the corn stays warm in the slow cooker, it’s also great for serving buffet-style.

    You can even prep it in the morning and let it cook while you’re out. No stirring, no watching—just walk into a kitchen that smells like summer.

    Up next in Part 4: storage tips, meal prep ideas, and how to repurpose leftovers without waste.

    Storage Tips and Leftover Magic

    How to Store Crockpot Corn on the Cob

    If you’re lucky enough to have leftovers, storing Crockpot Corn on the Cob is simple. Let the corn cool completely, then wrap each ear in foil or place in an airtight container. Store in the refrigerator for up to 3 days.

    To reheat, just pop them back into the slow cooker on warm for 30 minutes or microwave each ear for about 60–90 seconds. The flavor stays rich and the texture remains perfectly tender—no need to boil again.

    Smart Ways to Repurpose Leftovers

    Don’t toss extra corn—repurpose it. Cut the kernels off the cob and use them in salads, salsas, quesadillas, or even baked casseroles. One dish we love to pair with leftover corn is this creamy Slow Cooker Crack Corn Dip. It’s rich, crowd-pleasing, and easy to throw together with ingredients you already have.

    You can also stir the kernels into cornbread batter, blend them into chowder, or freeze them in a zip-top bag for later. This makes your Crockpot Corn on the Cob not just a side dish—but a smart meal-prep move.

    Whether you’re cooking for a crowd or just planning ahead, this recipe keeps delivering long after dinner is done.

    Crockpot corn on the cob served with parmesan and herbs

    Frequently Asked Questions

    Can I make Crockpot Corn on the Cob without adding water?

    Yes, but Crockpot Corn on the Cob turns out best with at least ½ cup of water. The steam helps lock in moisture and flavor, giving you perfectly tender corn every time.

    How long should I cook Crockpot Corn on the Cob?

    For optimal texture, cook Crockpot Corn on the Cob on high for 2–3 hours or on low for 4–5 hours. It’s hands-off and always delivers buttery, sweet results.

    Can I use frozen corn to make Crockpot Corn on the Cob?

    Definitely. You can make Crockpot Corn on the Cob with frozen ears—just add them straight to the slow cooker. No thawing needed. Increase cook time by about 30–45 minutes.

    What flavors work best in Crockpot Corn on the Cob?

    Crockpot Corn on the Cob pairs well with butter, garlic powder, smoked paprika, lime juice, or fresh herbs. For a creamy finish, add grated parmesan or cotija cheese after cooking.

    Conclusion: Try It and Never Boil Again

    Crockpot Corn on the Cob is the kind of recipe that sneaks up on you—in the best way. It’s simple, buttery, and unexpectedly rich in flavor. Whether you’re serving it at a cookout, alongside weeknight chicken, or prepping for a stress-free holiday meal, this slow cooker method delivers every single time.

    Once you try it, boiling will feel like a chore from the past. Trust me—I’ve been there.

    Tried this recipe? I’d love to see how it turned out! Tag me or share your results over on Facebook and let’s keep the slow-cooking magic going.