Blog

  • Vegan Asian Recipes: 1 Irresistibly Bold Ramen Miracle

    Vegan Asian Recipes: 1 Irresistibly Bold Ramen Miracle

    Vegan Asian recipes don’t have to be complicated. I used to think you needed homemade broth, hard-to-pronounce ingredients, or restaurant skills to pull off bold flavor. Turns out, all it takes is one pan, two packs of ramen, and a craving.

    This recipe came to life on a night when I had 10 minutes, zero patience, and a kitchen full of snack-hungry kids. I grabbed garlic, soy sauce, sesame oil—and magic happened. The noodles turned glossy, savory, and just sticky enough to feel indulgent. No tofu, no broth, no fuss.

    Now this stir-fried ramen is on constant rotation. It’s the kind of vegan Asian recipe that delivers flavor and comfort—fast.
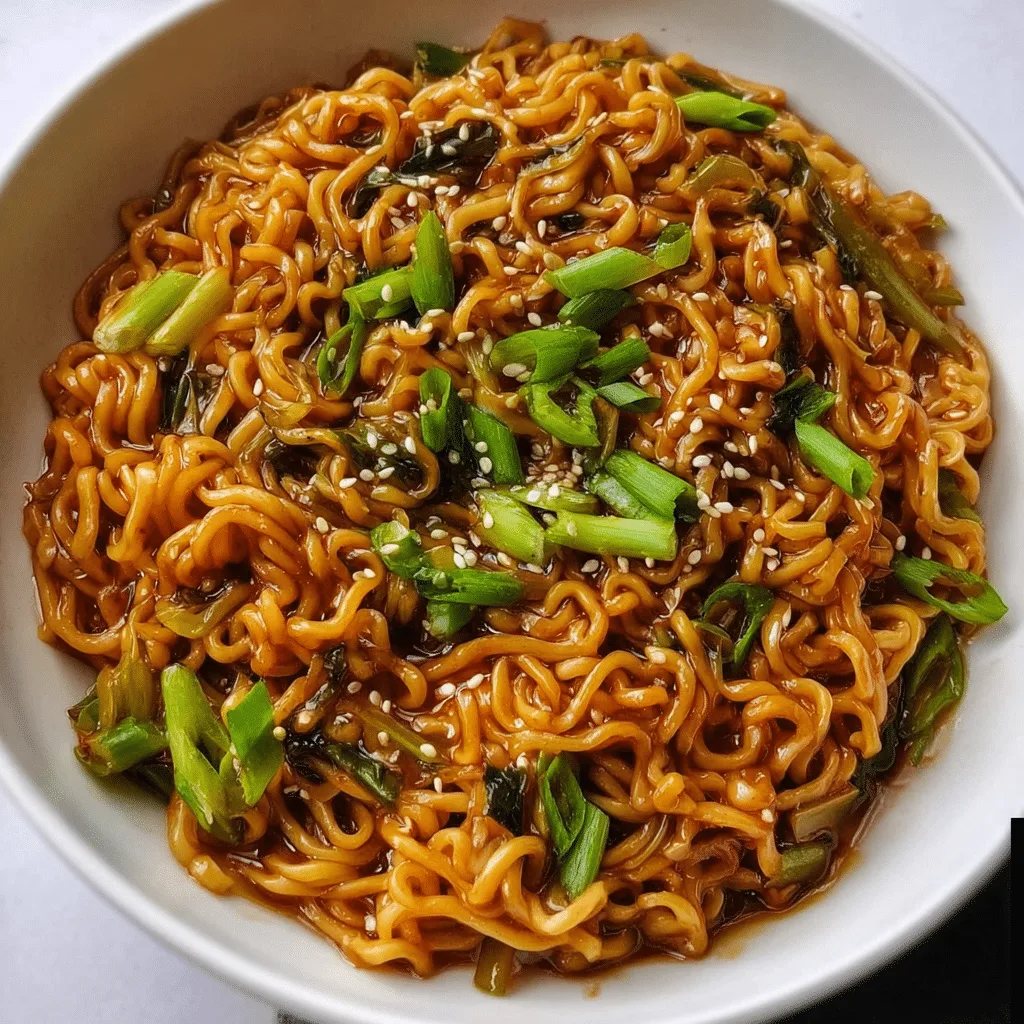
    vegan Asian recipes garlic soy ramen stir-fry in skillet with scallions

    Recipe

    The Simplicity Behind Viral Vegan Asian Recipes

    Why Simple Vegan Asian Recipes Win Every Time

    Vegan Asian recipes stand out because they do so much with so little. You don’t need a mile-long ingredient list or hours in the kitchen to build bold, satisfying flavor. Sometimes, all you need is a hot pan, some pantry staples, and noodles.

    This garlic soy ramen stir-fry is exactly that. It’s fast, flavorful, and doesn’t rely on tofu, fake meats, or specialty sauces. Just soy sauce, garlic, sesame oil, and a few noodles—done in 15 minutes and better than takeout.

    What makes vegan Asian recipes like this so powerful is their layering of umami, sweet, salty, and tangy flavors—all from real, plant-based ingredients. The noodles soak it up and transform into something sticky, rich, and totally crave-worthy.

    How This Stir-Fry Became a Weeknight Go-To

    This wasn’t some planned, perfected recipe. It started out as a fridge-foraging moment—two ramen bricks, leftover scallions, and a serious craving for something fast. I threw everything into a pan with garlic and soy sauce and hoped for the best.

    The result? A glossy, garlicky, slightly sweet stir-fried noodle bowl that instantly became a regular on our dinner table. No tofu to press. No broth to simmer. Just quick, comforting flavor you can build in one skillet with minimal cleanup.

    Now when I talk about go-to vegan Asian recipes, this one’s always at the top of the list. It’s proof that plant-based cooking doesn’t have to be complicated to be absolutely delicious.

    What Makes These Vegan Asian Recipes So Crave-Worthy

    Simple Ingredients, Serious Flavor

    What I love most about vegan Asian recipes like this garlic soy ramen is that they use humble ingredients to deliver huge flavor. No tofu, no prep-heavy veggies—just real pantry staples that punch above their weight.

    The base of this stir-fry is built with soy sauce, garlic, ginger, and toasted sesame oil. Add a splash of rice vinegar and a touch of sweetness (like maple syrup or brown sugar), and you’ve got that perfect balance of salty, sweet, and tangy—classic in so many plant-based Asian meals.

    What really seals the deal is the texture. The noodles soak up that glossy sauce and cling to every bite. A quick toss in the skillet and you’re left with something bold, satisfying, and way faster than takeout.

    Fast Food Feel, Real Food Flavor

    Most nights, I don’t have time to roast, bake, or blend anything. I need dinner in one pan, fast. That’s why this dish ranks high in my personal list of go-to vegan Asian recipes.

    You boil noodles, make the sauce in a bowl, sauté garlic and green onions, then toss it all together. No tofu to marinate. No chopping beyond a scallion. It’s the kind of vegan stir-fry noodles that feel indulgent but are totally plant-based and clean.

    And because it’s so simple, it’s endlessly flexible. Add shredded carrots, cabbage, or leftover veggies if you have them—or don’t. Either way, the flavor stays bold, sticky, and soul-satisfying.

    If you love flavor-forward meals like this, you might also enjoy my Slow Cooker Red Lentil Curry—a spicy, nourishing dish that’s also 100% plant-based and slow-cooker friendly.

    Step-by-Step for the Easiest Vegan Asian Recipes

    Building Your Garlic Soy Ramen in One Pan

    When I say vegan Asian recipes don’t need to be complicated, this one is proof. It’s just a few steps, all in one skillet, and packed with the kind of flavor that makes you forget how fast it came together.

    Step 1: Cook the noodles.
    Boil two packs of ramen noodles (skip the seasoning). Drain them just before they’re fully soft so they don’t overcook when stir-fried.

    Step 2: Make the sauce.
    In a small bowl, whisk together soy sauce, dark soy sauce (for color and richness), a little maple syrup or brown sugar, rice vinegar, and toasted sesame oil. This balance of salty, sweet, and tangy is what makes garlic soy ramen shine.

    Step 3: Stir-fry the aromatics.
    In a hot pan, sauté minced garlic, grated ginger, and the white parts of green onions in a little neutral oil. This base smells incredible and brings depth to the sauce.

    Step 4: Toss it all together.
    Add the cooked noodles to the pan. Pour in the sauce and stir-fry for 1–2 minutes until the noodles soak up every drop. Finish with the green onion tops and a sprinkle of sesame seeds if you’ve got them.

    A Perfect Fit for Busy Nights

    This is what makes vegan Asian recipes like this one essential in my kitchen: they deliver comfort, speed, and satisfaction without requiring special ingredients or long prep times.

    There’s no need to chop ten vegetables or simmer a broth. You’re simply tossing noodles in a bold, sticky sauce that clings to every strand and makes the whole dish feel like something you’d order at your favorite ramen spot—but faster and plant-based.

    Customizing and Storing Your Favorite Vegan Asian Recipes

    Make It Your Own: Fast Tweaks That Keep It Fresh

    The beauty of vegan Asian recipes—especially this stir-fried garlic soy ramen—is how flexible they are. This dish is delicious exactly as written, but you can easily adjust it to fit your tastes or whatever’s sitting in the crisper drawer.

    Try these simple upgrades:

    • Boost the veggies: Toss in shredded cabbage, julienned carrots, snap peas, or baby spinach during the last minute of stir-frying. They’ll soften quickly and soak up the sauce.
    • Change the noodles: Don’t have ramen? Use udon, soba, or rice noodles. Even spaghetti works in a pinch.
    • Turn up the heat: Add a dash of sriracha, chili flakes, or chili crisp if you like a kick.
    • Go crunchy: Top with chopped peanuts, toasted sesame seeds, or crispy shallots.

    This is why I keep recipes like this close—vegan Asian recipes that feel comforting but don’t require strict rules. One pan, one sauce, endless ways to play.

    How to Store and Reheat Like a Pro

    Because this is a stir-fry and not a broth-based dish, it stores well—but with a few tips to keep it perfect.

    • Fridge: Store leftovers in an airtight container for up to 3 days. The flavors actually deepen overnight.
    • Reheat: Use a nonstick skillet over medium heat. Add a splash of water or soy sauce to loosen up the noodles and bring the sauce back to life.
    • Don’t freeze: Stir-fried noodles don’t freeze well—they tend to dry out or go mushy. This dish is best enjoyed fresh or within a couple of days.

    Simple, fast, and satisfying—vegan Asian recipes like this are what weekday wins are made of. Minimal ingredients. Maximum flavor. Total keeper.

    Bowl of vegan garlic soy stir-fried ramen with green onions
    Ready to eat: fast, flavorful, and plant-based garlic soy noodles

    Conclusion: This Is Why I Love Vegan Asian Recipes

    I didn’t expect this simple pan of noodles to become a weeknight favorite. But here we are—another batch sizzling on the stove while the kids set the table and the house smells like sesame and garlic.

    Vegan Asian recipes don’t have to be complex to deliver flavor that feels indulgent. This garlic soy ramen stir-fry proves it. One pan, a handful of ingredients, and a dinner that feels like it took way more effort than it did.

    So try it. Make it your own. And when you do, tag me @recipesdarleen—I’d love to see how your bowl turns out.
    Common Questions About Vegan Asian Recipes and Ramen

    Can I use other noodles in vegan Asian recipes?

    Yes! Ramen noodles work great, but you can substitute soba, udon, rice noodles, or even spaghetti. Just cook until al dente and avoid overcooking, especially before stir-frying.

    Is this garlic soy ramen gluten-free?

    Not by default, but you can make it gluten-free by using gluten-free tamari instead of soy sauce and choosing gluten-free noodles like rice or soba made from 100% buckwheat.

    Can I add vegetables to this stir-fry?

    Absolutely. That’s the beauty of quick vegan Asian recipes—you can toss in what you love or need to use up. Shredded cabbage, spinach, bell peppers, and carrots all work well. Just don’t overcrowd the pan or you’ll lose the crisp texture.

    Can I double the sauce?

    Yes, and you should if you like things extra saucy. Just don’t overdo the soy sauce—balance it with extra maple syrup or vinegar to keep the flavors from getting too salty or flat.

  • Vertical Crockpot Lasagna: 5 Viral Hacks For Easy Dinners

    Vertical Crockpot Lasagna: 5 Viral Hacks For Easy Dinners

    Vertical Crockpot Lasagna is the viral slow-cooker hack that turns pasta night into pure magic. Instead of layering noodles flat, you stand them upright in the crock, letting sauce and cheese melt down into every bite. It looks fun, cooks easy, and makes weeknight lasagna totally stress-free.

    I’m Darleen Vance—34, Salt Lake City native, and once the queen of “what’s for dinner?” panic. Back in The Great Mealtime Struggle, I pulled out a dusty crockpot, tossed in noodles, sauce, and cheese, and hoped for the best. The result changed everything. Since then, my slow cooker has been my second brain—helping me win dinner while life keeps moving.

    This lasagna hack? It’s my new favorite victory.

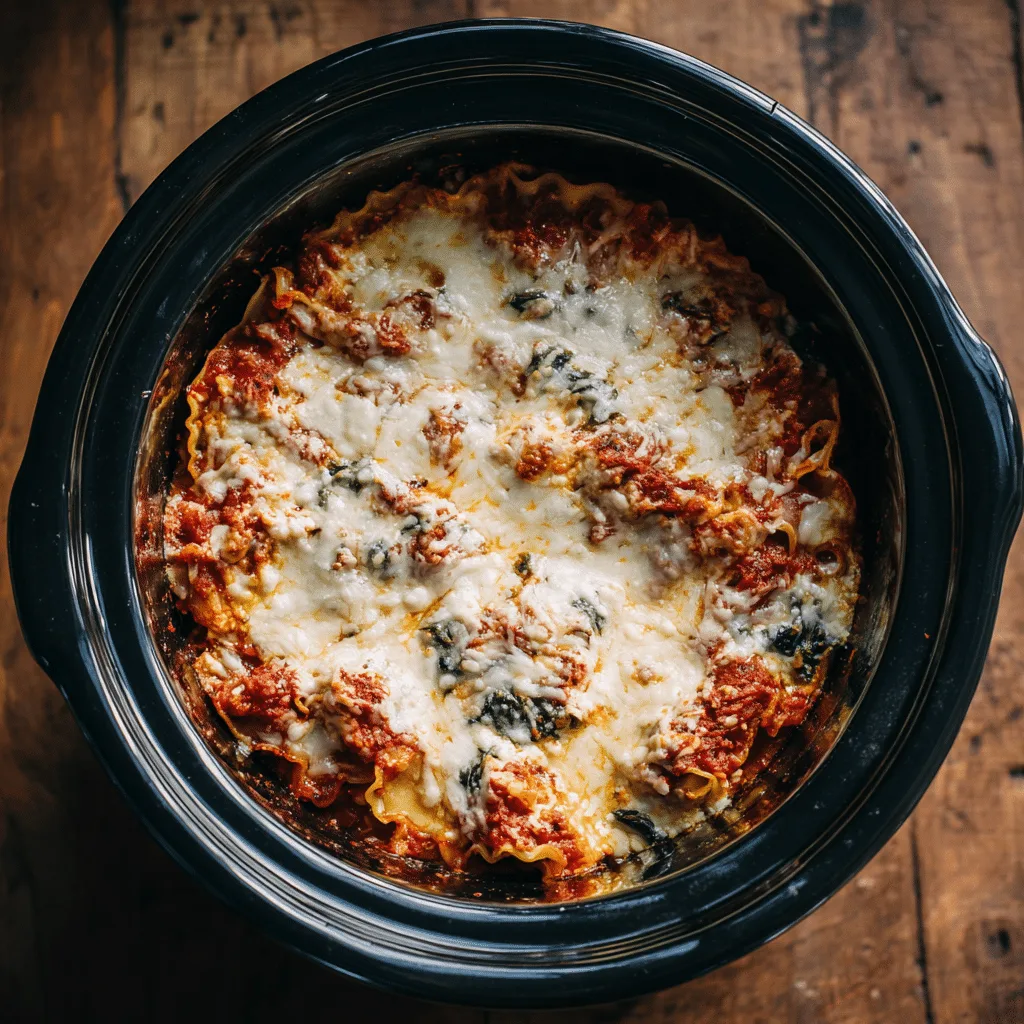
    Vertical crockpot lasagna recipe with upright noodles in slow cooker

    Recipe

    Vertical Crockpot Lasagna Explained: A Slow Cooker Hack

    What Is Vertical Crockpot Lasagna?

    Vertical Crockpot Lasagna is a creative twist on the classic slow cooker lasagna recipe. Instead of laying noodles flat in layers, the pasta is stood upright in the crockpot, forming tall rows that soak up sauce, cheese, and meat evenly. This method creates individual servings that hold their shape better than traditional lasagna.

    Unlike the usual crockpot lasagna recipe where layers sometimes collapse or turn mushy, this upright noodle crockpot lasagna allows heat to circulate more evenly. The marinara sauce drips down between each noodle, while ricotta and mozzarella melt into creamy pockets. It’s a simple slow cooker lasagna hack that delivers big on flavor without extra effort.

    Families who try this technique often describe it as part lasagna, part pasta bake, and completely unforgettable.

    Why This Hack Works for Busy Families

    For busy weeknights, a vertical crockpot lasagna recipe is the definition of easy comfort food. There’s no need to pre-boil noodles or spend time fussing with layers. Instead, the no-boil crockpot lasagna noodles cook perfectly upright, softening in the sauce as dinner simmers.

    This lazy crockpot lasagna method saves time and reduces cleanup. Everything goes into one pot, making it a one-pot crockpot lasagna solution that fits right into a hectic schedule. While the slow cooker does the work, families can focus on homework, sports, or winding down.

    The result is a cheesy crockpot lasagna that feels homemade but requires minimal effort. For parents, it’s a recipe that delivers not only a delicious meal but also the peace of mind that dinner is handled.

    5 Viral Hacks for Vertical Crockpot Lasagna

    This lasagna hack already feels like a game-changer, but these five tricks make it even easier and more delicious. Each one has spread across social media because it solves common dinner problems while keeping the slow cooker lasagna fun and foolproof.

    1. Use No-Boil Noodles for Less Prep

    Skip the boiling pot of water. No-boil crockpot lasagna noodles soften perfectly as they stand upright in the sauce. This simple adjustment saves time and prevents soggy pasta.

    2. Spoon Ricotta Between Noodles

    Instead of layering ricotta across the top, spoon it between upright noodles. This creates creamy pockets in every bite and keeps the cheesy crockpot lasagna evenly rich.

    3. Add Spinach for a One-Pot Meal

    Tuck fresh spinach or chopped zucchini between the noodles before pouring in the sauce. It turns this slow cooker lasagna hack into a one-pot crockpot lasagna with built-in vegetables.

    4. Mix Two Cheeses for Extra Flavor

    Combine mozzarella with provolone or parmesan for a cheesier, more complex flavor. The upright noodle crockpot lasagna holds the melted cheese beautifully without collapsing.

    5. Cook on Low for Perfect Texture

    Set your crockpot to low for 5–6 hours. Cooking low and slow ensures the noodles stay tender but not mushy, while the flavors blend like a traditional baked lasagna.

    Variations of Vertical Crockpot Lasagna

    Vertical Crockpot Lasagna is versatile, making it perfect for families who want new flavors without extra work. By switching sauces, proteins, or veggies, this slow cooker lasagna hack adapts to every craving.

    White Chicken Alfredo Version


    For a creamy twist, swap marinara for Alfredo sauce and use shredded chicken. Layer mozzarella and parmesan between the upright noodles. This version delivers the comfort of pasta Alfredo with the fun look of upright noodle crockpot lasagna.

    Veggie-Packed Lasagna

    Create a meatless one-pot crockpot lasagna by sliding zucchini, mushrooms, or spinach between the noodles. The sauce soaks through, giving every bite layers of flavor and nutrients. It’s an easy weeknight crockpot dinner that doesn’t feel heavy.

    Spicy Sausage and Arrabbiata

    For those who love bold flavors, spicy Italian sausage with arrabbiata sauce makes a memorable cheesy crockpot lasagna. The upright noodles trap just enough heat to keep it exciting without overwhelming the dish.

    Serving and Storing Tips

    Serving vertical crockpot lasagna is simple. Lift the noodles upright with tongs, and you’ll have instant lasagna cups, each filled with cheese and sauce. Pair it with salad or garlic bread for a complete meal.

    Leftovers keep well in the fridge for three days. Freeze portions by standing noodles in a container with sauce and cheese. Reheat gently in the oven or microwave until bubbly. For another cozy pasta idea, try my Crockpot Lasagna Soup, which has the same comfort in a spoonable form.

    Why Vertical Crockpot Lasagna Went Viral

    The reason vertical crockpot lasagna exploded on social media is simple: it looks as fun as it tastes. Standing noodles upright turns a basic crockpot lasagna recipe into something eye-catching. Each noodle becomes its own serving, dripping with marinara and melted mozzarella. On platforms like Pinterest and TikTok, this style of cheesy crockpot lasagna delivers instant “wow factor.”

    Beyond its visual appeal, the hack solves real problems. Traditional layered lasagna can slide apart or overcook in a slow cooker. But upright noodle crockpot lasagna holds its shape, cooks evenly, and makes portioning effortless. For busy families, this lazy crockpot lasagna method feels like discovering a shortcut that doesn’t sacrifice flavor.

    Best Pairings and Add-Ons

    Vertical crockpot lasagna pairs beautifully with simple sides. A crisp salad and garlic bread balance the rich, cheesy layers. Red wine or sparkling water makes a natural match.

    If you want to expand your slow cooker lineup, try my Crockpot Million Dollar Pasta. Like vertical crockpot lasagna, it uses the set-and-forget method but delivers a creamy, indulgent pasta dish the whole family loves.

    For weeknights, pairing vertical crockpot lasagna with another one-pot crockpot recipe ensures dinner feels special without adding stress.

    Vertical crockpot lasagna served with garlic bread and salad

    Conclusion

    Vertical Crockpot Lasagna started as a viral slow cooker hack, but it’s quickly becoming a staple in busy kitchens. With upright noodles soaking in sauce and cheese, this easy weeknight crockpot dinner delivers comfort food without the hassle. Families love it because it’s fun, foolproof, and delicious every time.

    If you’re ready to try something new, grab your crockpot, stand those noodles tall, and let dinner cook itself. And when you make this recipe, tag me on Facebook—I’d love to see your take on this playful twist. Dinner doesn’t have to be stressful; with vertical crockpot lasagna, it’s pure joy.

    Frequently Asked Questions About Vertical Crockpot Lasagna

    Can I use no-boil noodles in vertical crockpot lasagna?

    Yes. No-boil noodles are perfect for this slow cooker lasagna hack. They soften gradually as they stand upright in the sauce, giving you tender pasta without pre-cooking.

    How long does vertical crockpot lasagna take to cook?

    Cook on low for 5–6 hours or on high for about 3 hours. The upright noodle crockpot lasagna will be tender, with cheese melted evenly throughout.

    Can I freeze leftovers from vertical crockpot lasagna?

    Absolutely. Stand noodles in a freezer-safe container with sauce and cheese. Reheat gently in the oven or microwave until bubbly.

    Why stand the noodles upright instead of layering?

    Standing noodles upright creates even cooking and easier serving. It also prevents the mushy texture that can happen in a traditional crockpot lasagna recipe.
  • Slow Cooker French Onion Chicken: 6 Epic Comfort Secrets

    Slow Cooker French Onion Chicken: 6 Epic Comfort Secrets

    Slow Cooker French Onion Chicken wasn’t always on my dinner radar. Hey! I’m Darleen Vamce—34, Salt Lake City native, mom of three, and a woman who once thought slow cookers were only good for potlucks and soggy stews. Turns out, I was wrong. Very wrong.

    It all began during what I now call The Great Mealtime Struggle: three hungry kids circling the kitchen, a day job that refused to quit at five, and me, staring at the fridge like it might magically cook dinner. Out of pure desperation, I dusted off an old slow cooker, tossed in chicken, onions, and a sprinkle of hope—baby balanced on my hip. The result? Magic.

    Since then, this humble appliance has become my secret weapon. Meals like French Onion Chicken simmer away while life keeps moving. By the time dinner rolls around, the house smells like a cozy bistro, and my family thinks I’m some kind of kitchen sorceress.

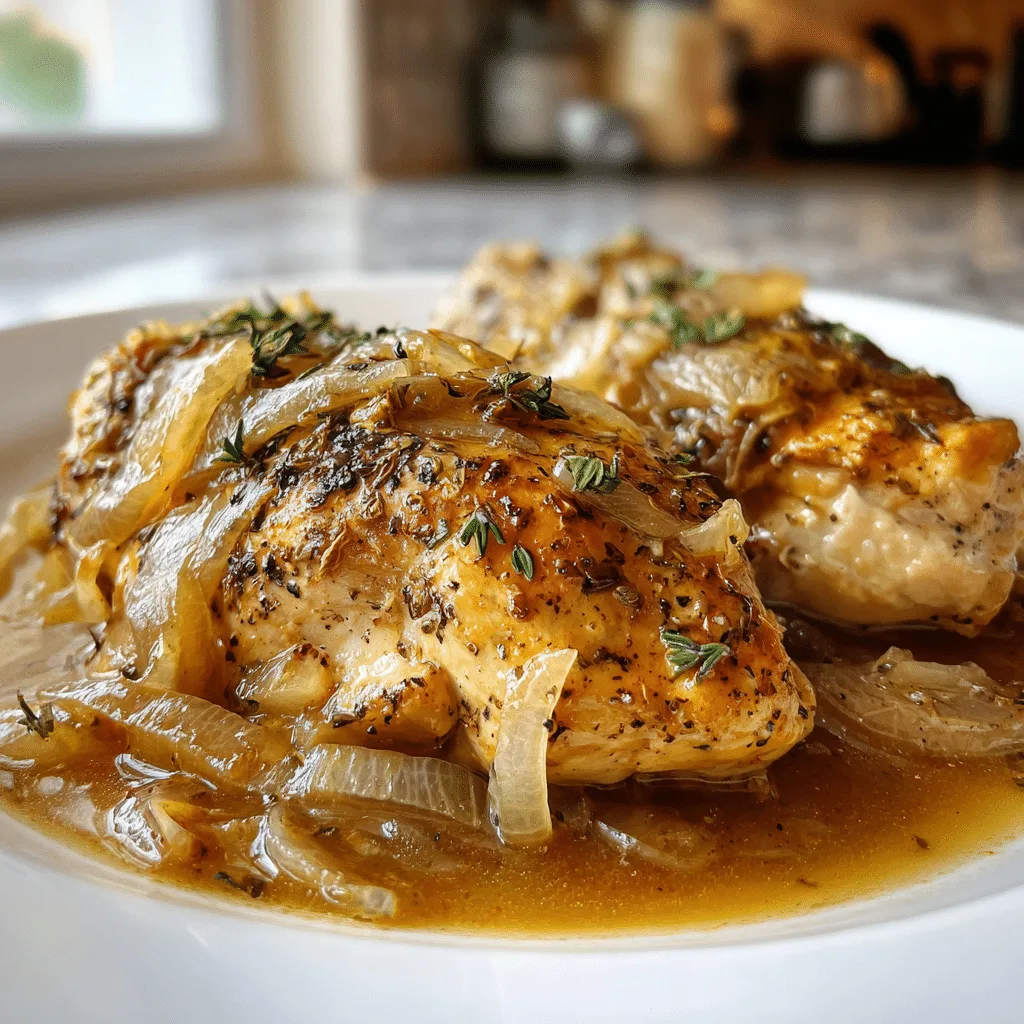
    Slow Cooker French Onion Chicken in a rustic bowl with melted cheese and caramelized onions

    Recipe

    Why Slow Cooker French Onion Chicken Works Every Time

    Slow Cooker French Onion Chicken is the recipe that transformed how I think about weeknight meals. What started as a quick experiment during a hectic evening soon became one of my family’s most requested dinners. The slow cooker takes simple ingredients—chicken, onions, broth, and cheese—and turns them into a comforting dish that feels far more indulgent than the effort required.

    Unlike complicated stovetop recipes, this one requires almost no babysitting. The crockpot French onion chicken simmers all day, letting the flavors deepen while you get on with life. By dinner, the chicken is tender, the onions are caramelized, and the whole kitchen carries the aroma of cozy comfort food.

    The Secret Behind the Flavor

    The magic lies in the combination of caramelized onions and broth. As the chicken cooks slowly, it soaks up layers of savory depth. Add a topping of melted cheese, and you’ve got a dish that rivals restaurant comfort food chicken dinners. This isn’t just an easy slow cooker chicken recipe—it’s a warm, hearty meal that satisfies every time.

    Cheesy French onion chicken also offers flexibility. You can serve it over mashed potatoes, pair it with rice, or spoon it onto crusty bread for a sandwich-style twist. However you plate it, the result is always a family-friendly crockpot meal that feels special without extra work.

    For anyone balancing a busy schedule, this recipe proves that slow cooked chicken with onions and cheese can deliver flavor and comfort while still being practical. It’s simple, reliable, and made for those nights when you need dinner to cook itself.

    6 Epic Comfort Secrets of Slow Cooker French Onion Chicken

    Slow Cooker French Onion Chicken isn’t just another crockpot dinner—it’s a recipe packed with secrets that transform everyday ingredients into unforgettable comfort food. After years of testing family-friendly crockpot meals, I’ve uncovered the six little details that make this dish stand out every time.

    Secret 1: Caramelized Onions Done Right

    The slow cooker does the heavy lifting, but starting with golden onions ensures layers of rich flavor. They melt into the broth, giving every bite a deep, cozy taste.

    Secret 2: Perfect Broth Balance

    Use a mix of beef broth and a splash of chicken stock. This balance keeps the chicken tender while creating that iconic French onion soup richness.

    Secret 3: Choosing the Right Chicken

    Boneless, skinless chicken breasts work well, but thighs deliver even more juicy tenderness after hours of slow cooking.

    Secret 4: A Blanket of Cheese

    Cheesy French onion chicken deserves a topping of Swiss or Gruyère. Let it melt slowly for that irresistible pull.

    Secret 5: The Comfort Pairings

    Serve it with mashed potatoes, rice, or even crusty bread. Each option soaks up the savory sauce in a different way.

    Secret 6: Let Time Work Its Magic

    Patience pays off. The longer it cooks, the more the flavors deepen, making this one of the most rewarding easy slow cooker chicken recipes.

    If you love slow cooked chicken with onions and cheese, you’ll also want to explore cozy classics like this slow cooker chicken and stuffing recipe. It’s another simple dinner that proves comfort food can be effortless.

    Making Slow Cooker French Onion Chicken Work for You

    Slow Cooker French Onion Chicken is more than a one-night recipe—it’s a strategy for making weeknights calmer and meals more memorable. When a crockpot French onion chicken recipe simmers all day, the kitchen fills with an aroma that feels like a warm welcome after a long day.

    Prep Tips That Save Time

    One of the best parts about this easy slow cooker chicken recipe is how little prep it needs. Slice onions the night before, store them in the fridge, and toss them in with the chicken before heading out the door. Adding broth and seasonings in advance makes mornings smoother and guarantees a hearty dinner waiting at home.

    To boost flavor, some cooks quickly sear the chicken before adding it to the crockpot. While optional, this small step adds depth and ensures your cheesy French onion chicken tastes like it came from a restaurant kitchen.

    Serving Ideas That Keep It Fresh

    This comfort food chicken dinner never feels repetitive because it adapts to what’s on hand. Pair it with mashed potatoes for classic comfort, serve over rice for a hearty bowl, or spoon slow cooked chicken with onions and cheese onto toasted bread for a French onion sandwich twist.

    Families love that it works for casual dinners or cozy gatherings. Even picky eaters find something to love, thanks to the cheesy topping and tender chicken.

    Why It’s Always a Win

    At its core, Slow Cooker French Onion Chicken is about simplicity delivering flavor. It’s the kind of family-friendly crockpot meal that makes busy nights feel manageable and ordinary days feel special. Reliable, adaptable, and delicious, it proves that comfort food doesn’t have to be complicated.

    Slow Cooker French Onion Chicken plated with mashed potatoes and parsley garnish

    How to Store and Reheat Slow Cooker French Onion Chicken

    Slow Cooker French Onion Chicken is just as valuable the next day as it is straight from the crockpot. In fact, many say the flavors deepen overnight, making leftovers even more satisfying. Having a reliable plan for storage and reheating ensures that every serving of this comfort food chicken dinner tastes as good as the first.

    Storing Leftovers the Right Way

    Once your crockpot French onion chicken cools, place it into airtight containers. Store the chicken with caramelized onions and broth together to keep the texture moist and tender. In the fridge, it will last for up to four days without losing flavor.

    If you want to make it ahead, this cheesy French onion chicken also freezes well. Simply portion the chicken and broth into freezer-safe bags or containers. When sealed properly, slow cooked chicken with onions and cheese can be kept for up to three months.

    Reheating for the Same Comfort

    To reheat, place leftovers in a covered skillet or saucepan with a splash of broth. Warm over medium-low heat until the chicken is hot and the cheese melts again. Avoid microwaving for too long, as it can make the chicken tough.

    Some families even repurpose the reheated dish into creative meals, like French onion chicken sandwiches or topping baked potatoes with the saucy mix. This flexibility keeps dinner exciting while still relying on the same cozy recipe.

    For another reheating-friendly option, check out this slow cooker chicken enchilada casserole. Like French onion chicken, it proves that simple crockpot recipes can stretch into multiple meals without losing flavor.

    Conclusion: Bring Slow Cooker French Onion Chicken Home

    Slow Cooker French Onion Chicken proves that dinner can be both effortless and extraordinary. With just a few ingredients, the crockpot transforms chicken, onions, and broth into a dish that tastes far more indulgent than the work required. From family weeknights to cozy weekends, this recipe has earned its place as a true comfort food classic.

    The beauty of Slow Cooker French Onion Chicken lies in its flexibility. It can be served over potatoes, rice, or bread, making it adaptable for every table. It’s also forgiving—whether you choose thighs for tenderness or breasts for lean protein, the slow cooker ensures every bite stays juicy.

    Most importantly, it’s a recipe that brings people together. The aroma alone draws everyone to the kitchen, and the cheesy topping guarantees empty plates. For families juggling busy schedules, this dish offers both nourishment and comfort, reminding us that the best meals don’t need to be complicated.

    If you’re ready to try Slow Cooker French Onion Chicken in your own kitchen, now’s the time. Gather your ingredients, set the slow cooker, and let it work its magic. Then share your results—I’d love to see how this recipe becomes part of your table.

    ???? Try it at home, and don’t forget to tag me on Facebook with your Slow Cooker French Onion Chicken creations!

    FAQ About Slow Cooker French Onion Chicken

    What makes Slow Cooker French Onion Chicken so popular?

    Slow Cooker French Onion Chicken is loved because it combines the richness of French onion soup with tender, slow cooked chicken. The result is a hearty, cheesy comfort food that feels gourmet but is simple to prepare. Families appreciate how it transforms basic ingredients into a restaurant-worthy dinner.

    Can I make Slow Cooker French Onion Chicken ahead of time?

    Yes. Slow Cooker French Onion Chicken can be prepped the night before. Slice onions, season chicken, and keep everything ready in the fridge. In the morning, place it in the crockpot, set the timer, and come home to a ready-made comfort meal that tastes like it cooked itself.

    What’s the best cheese for Slow Cooker French Onion Chicken?

    The most popular choices are Swiss and Gruyère, both of which melt beautifully and add authentic French onion flavor. Some home cooks also use provolone or mozzarella for a milder, stretchy topping. No matter the choice, the cheese makes Slow Cooker French Onion Chicken irresistible.

    Can Slow Cooker French Onion Chicken be frozen?

    Absolutely. Slow Cooker French Onion Chicken freezes well in sealed containers or bags. Store with broth to keep it moist. When reheated gently, it tastes just as comforting as when first cooked, making it a smart option for meal prep and busy weeknights.
  • Roasted Brussel Sprouts and Butternut Squash: 9 Ways to Love

    Roasted Brussel Sprouts and Butternut Squash: 9 Ways to Love

    Roasted Brussel Sprouts and Butternut Squash became more than just vegetables on a sheet pan for me—they became the answer to chaos. Hey, I’m Darleen Vamce, 34, a Salt Lake City mom who once thought slow cookers and roasting pans were just shortcuts for people too tired to cook “real” meals. Then came the Great Mealtime Struggle: three hungry kids, a job that didn’t stop at 5, and a kitchen that seemed to mock me every night.

    Out of desperation, I grabbed brussel sprouts and butternut squash, tossed them with olive oil and spices, slid the tray in the oven, and prayed. What came out wasn’t just dinner—it was magic. Caramelized edges, sweet-savory flavor, and a dish my family begged me to repeat. Since then, I’ve found nine ways to love this combo, and each one feels like a little kitchen victory.

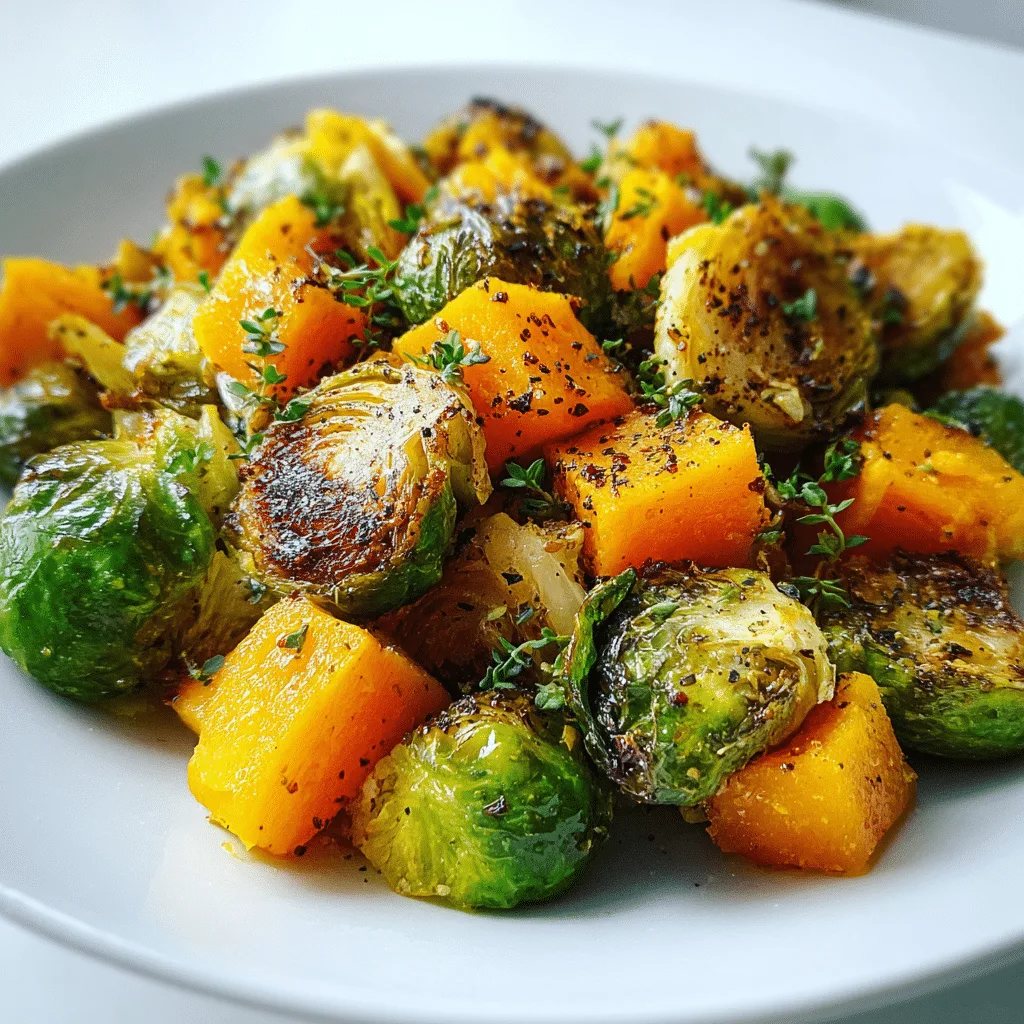
    Roasted brussel sprouts and butternut squash on a tray

    Recipe

    Why Roasted Brussel Sprouts and Butternut Squash Work So Well

    Roasted brussel sprouts and butternut squash might seem like an ordinary pairing, but together they create a side dish that balances flavor and texture beautifully. When roasted in a hot oven, the sprouts develop crispy edges while their centers stay tender. Butternut squash, on the other hand, caramelizes into soft, slightly sweet bites. This contrast of savory crunch with natural sweetness is what makes the dish stand out at weeknight dinners or holiday gatherings.

    Both vegetables are nutrient-rich. Brussels sprouts offer fiber and vitamin C, while butternut squash adds beta-carotene and a natural creaminess once roasted. Together, they deliver a dish that feels indulgent yet wholesome. The caramelized brussel sprouts with butternut squash also pair well with proteins like chicken, turkey, or even salmon, making them versatile enough for almost any meal.

    The Secret to Perfect Oven Roasted Vegetables

    Choosing and Prepping the Vegetables

    The first step to achieving the best oven roasted squash and brussel sprouts is selecting fresh produce. Look for firm, bright-green sprouts and a squash with smooth skin and deep orange flesh. Trim the sprouts and slice the squash into even cubes to ensure they roast at the same pace.

    Roasting for Maximum Flavor

    High heat is essential. Spread the vegetables in a single layer, drizzle with olive oil, and season with salt, pepper, and perhaps garlic or paprika. At 400°F, the vegetables caramelize within 25–30 minutes, turning crispy, golden, and flavorful. This technique transforms a simple mix into a holiday roasted vegetables recipe that feels both comforting and elegant.

    9 Ways to Love Roasted Brussel Sprouts and Butternut Squash (1–3)

    Roasted brussel sprouts and butternut squash are a base for countless flavor combinations that keep dinner exciting. By changing glazes, seasonings, or spice levels, this simple pairing transforms into something extraordinary. Here are the first three ways to love this healthy, flavorful duo.

    1. Sweet Maple Glaze

    Drizzle maple syrup over oven roasted squash and brussel sprouts, then add a dusting of cinnamon. The syrup caramelizes, creating a sweet-savory balance that feels festive. This variation makes a holiday roasted vegetables recipe that pairs beautifully with roasted turkey or ham.

    2. Garlic and Parmesan Comfort

    Crispy brussel sprouts mixed with parmesan and roasted butternut squash turn into a cozy side dish that feels indulgent yet balanced. Adding garlic enhances the depth of flavor, making it an easy option for weeknight meals. This caramelized brussel sprouts with butternut squash combination proves that healthy sides can taste decadent.

    3. Spice It Up With Chili

    For a bold twist, add red pepper flakes or cayenne to roasted brussel sprouts and butternut squash. The squash’s sweetness tempers the heat, creating a dish that excites without overwhelming. Pair this spicy version with grilled chicken or a bowl of pumpkin butternut squash soup for a warm, seasonal meal.

    4. Honey Mustard Twist

    One delicious way to enjoy roasted brussel sprouts and butternut squash is by coating them in a honey mustard glaze before roasting. The honey clings to the vegetables, creating a golden caramelized layer that enhances the natural sweetness of the squash. At the same time, the mustard adds a tangy, sharp contrast that makes each bite exciting. This combination of sweet and tangy flavors elevates the dish far beyond basic oven roasted squash and brussel sprouts. It’s a variation that works beautifully for weeknight meals when you want bold taste without complicated prep, yet it also feels fancy enough for a holiday roasted vegetables recipe that impresses guests.

    5. Balsamic and Rosemary Elegance

    Another refined option is roasting brussel sprouts and butternut squash with balsamic vinegar and fresh rosemary. The vinegar reduces slightly in the oven, intensifying into a rich glaze that coats the caramelized brussel sprouts with depth and complexity. Meanwhile, rosemary perfumes the entire tray of vegetables, lending an earthy fragrance that pairs especially well with roasted meats. This variation highlights the versatility of roasted brussel sprouts and butternut squash, showing how easily they can transform into a restaurant-quality side dish. The combination of savory herbs and tangy-sweet balsamic makes this version a go-to for gatherings where presentation and flavor both matter.

    6. Garlic Parmesan Pairing

    Few combinations are as satisfying as garlic, parmesan, and perfectly roasted vegetables. Tossing brussel sprouts and butternut squash with minced garlic before roasting allows the flavors to infuse deeply, while parmesan added near the end melts into a crisp, savory coating. The contrast between the crispy, nutty parmesan and the caramelized vegetables creates an irresistible side dish that works for any occasion. This variation shines when served alongside a hearty main, such as garlic parmesan chicken and potatoes. The richness of garlic and parmesan balances the sweet, earthy notes of the roasted vegetables, making the entire meal both comforting and elevated.

    7. Cranberry and Pecan Crunch

    One unforgettable way to enjoy roasted brussel sprouts and butternut squash is to finish them with dried cranberries and toasted pecans. The tart bite of cranberries balances the caramelized sweetness of the squash, while the nuts add a rich, buttery crunch. Together, they turn simple roasted brussel sprouts and butternut squash into a side dish that feels festive and full of texture. This variation is especially popular during the holidays, when a colorful vegetable medley makes the table feel warm and inviting.

    8. Mediterranean-Inspired Blend

    For a lighter and brighter twist, roasted brussel sprouts and butternut squash can be tossed with olive oil, lemon zest, and crumbled feta cheese. The tang of the feta enhances the natural sweetness of the roasted squash, while the lemon lifts the earthy flavor of the sprouts. Adding a sprinkle of oregano or thyme gives this dish a distinctly Mediterranean flair. This approach proves how versatile caramelized brussel sprouts with butternut squash can be, whether served at a casual lunch or as part of a more elaborate spread alongside dishes like crockpot corn on the cob.

    9. Maple Dijon Roasted Vegetables

    The final way to love this combination is by blending maple syrup and Dijon mustard into a glaze. Unlike the honey mustard twist, maple Dijon gives roasted brussel sprouts and butternut squash a deeper sweetness balanced by the sharp, savory notes of mustard. As the vegetables roast, the glaze thickens and clings to every bite, creating a glossy finish that looks as good as it tastes. This version is proof that oven roasted squash and brussel sprouts can be transformed into something extraordinary with just a few pantry staples.

    Roasted brussel sprouts and butternut squash served in a bowl

    Conclusion: 9 Ways to Love Roasted Brussel Sprouts and Butternut Squash

    Roasted brussel sprouts and butternut squash prove that simple ingredients can transform into extraordinary dishes with just a little creativity. From maple glazes to balsamic elegance, garlic parmesan comfort, and Mediterranean-inspired blends, this humble duo adapts to every mood and mealtime. Whether you’re serving a weeknight dinner or hosting a holiday feast, these vegetables deliver flavor, texture, and nutrition in every bite.

    Cooking roasted brussel sprouts and butternut squash isn’t just about getting dinner on the table—it’s about creating moments where food feels both nourishing and special. With these nine ways to love the combination, you’ll never run out of inspiration to make vegetables the highlight of the plate.

    Now it’s your turn—try one of these variations at home and let me know how it goes. Which of the nine ways will you make first? Share your version, and if you post on Pinterest, tag me so I can see your delicious creation!

    FAQ About Roasted Brussel Sprouts and Butternut Squash

    Should I boil brussel sprouts before roasting with squash?

    No, boiling isn’t necessary. Roasted brussel sprouts and butternut squash caramelize best when cooked raw with olive oil and seasoning at high heat. Boiling can make them mushy.

    How do I keep roasted brussel sprouts from getting soggy?

    Spread them in a single layer on the baking sheet and avoid overcrowding. Proper air circulation helps roasted brussel sprouts and butternut squash turn golden and crisp instead of steaming.

    What seasoning goes best with roasted brussel sprouts and butternut squash?

    Classic options include garlic, parmesan, balsamic, rosemary, or chili flakes. Sweet touches like maple or honey also enhance the natural flavor of roasted squash and brussel sprouts.

    Can I prepare roasted brussel sprouts and butternut squash ahead of time?

    Yes. Roast them, cool completely, and store in an airtight container in the fridge for up to 3 days. Reheat in the oven at 375°F to bring back their crisp texture.
  • Milk Bar Pumpkin Pie: 5 Secrets You’ll Crave to Know

    Milk Bar Pumpkin Pie: 5 Secrets You’ll Crave to Know

    Milk Bar Pumpkin Pie first showed up in my kitchen during a chaotic fall afternoon. I was juggling a teething baby, a sink full of dishes, and zero plans for dessert. I needed something—anything—that felt like a win. So I did what any overwhelmed mom with a sweet tooth would do: I searched for a pumpkin pie that didn’t feel basic.

    That’s when I found it. The pie. The one that looked like it belonged behind glass at a New York bakery, but promised to be doable in a real-life kitchen. I took a deep breath, prepped the crust, poured the filling, and hoped for the best.

    One bite later, I knew: Milk Bar Pumpkin Pie wasn’t just dessert. It was a turning point.

    Now it’s my fall signature—and by the end of this post, you’ll see why. I’m sharing the 5 crave-worthy secrets that make this pie a viral hit. If you’ve ever wanted to bake something that gets people talking (and asking for the recipe), you’re in the right place.

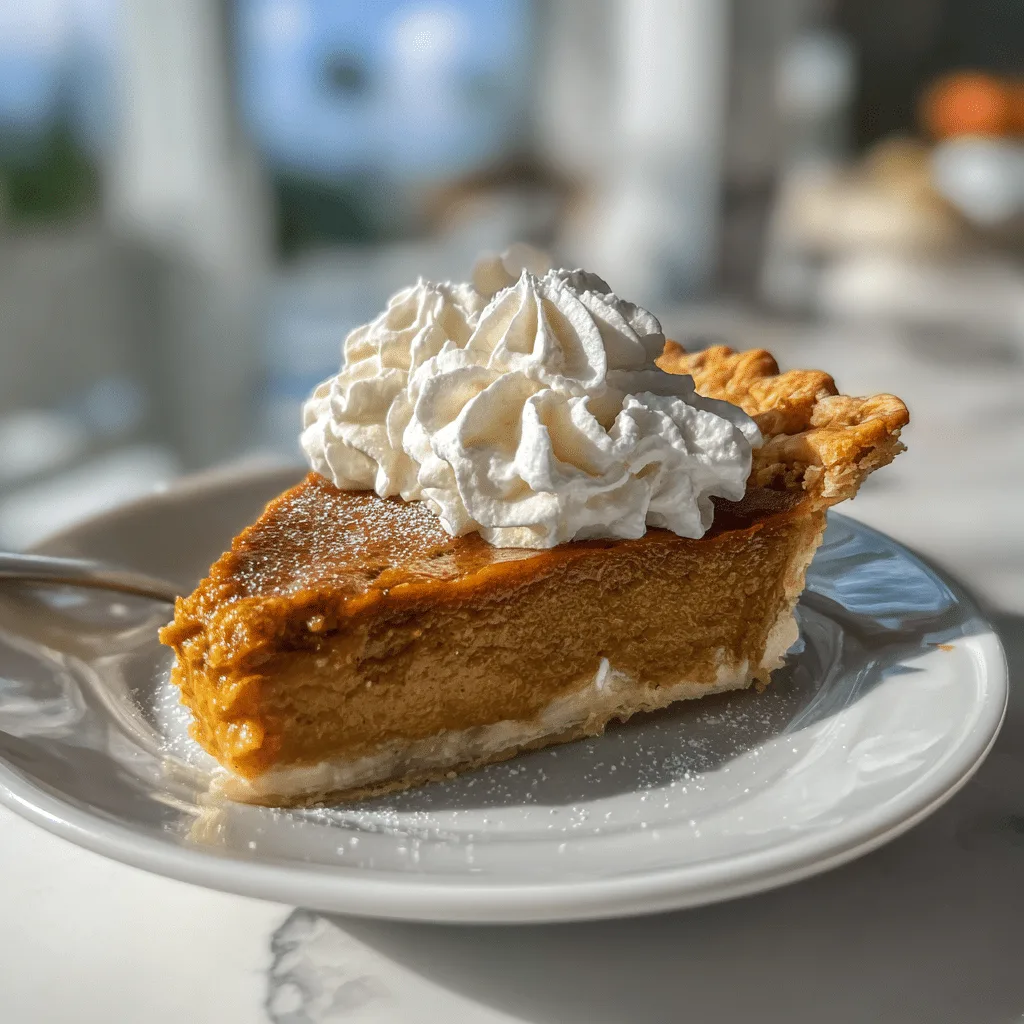
    Milk Bar Pumpkin Pie with golden crust and creamy filling on rustic table

    Recipe

    The Milk Bar Pumpkin Pie That Took Over Fall

    The Pie That Rewrote Pumpkin Tradition

    Milk Bar Pumpkin Pie isn’t just a dessert—it’s a moment. It’s the one pie that made me stop seeing pumpkin as a backup option and start treating it like the star of the season. Most fall pies follow the same formula: warm spices, canned filling, maybe a decorative crust if you’re feeling fancy. This one rewrites the script.

    Instead of a flaky crust, you get a buttery graham cracker base—a salty-sweet crunch that hugs a filling as smooth as pumpkin custard. The center has a glossy, caramelized top that hints at burnt sugar without tipping into bitterness. One bite is all it takes to realize this isn’t your grandma’s Thanksgiving pie—though she might ask for the recipe.

    It’s bold, silky, and rich, thanks to ingredients like sweetened condensed milk and browned butter. It doesn’t overload the spice blend either. You still get the warm notes of cinnamon and nutmeg, but they play a supporting role, not the lead.

    Why Everyone Is Obsessed

    What makes Milk Bar Pumpkin Pie go viral every fall? The texture is part of it—dense yet creamy, with a bite that melts before you can name all the flavors. But there’s also a kind of modern nostalgia baked in. It tastes familiar, but better. Simpler, but elevated.

    Unlike overly sweet versions that mask the flavor of pumpkin, this one lets it shine. It balances every element with purpose. That’s why it ends up on everything from Friendsgiving tables to high-end bakery counters.

    Whether you’re hosting a fall dinner or just craving something seasonal and unforgettable, this pie delivers on every level. It’s the kind of dessert you’ll make once—and then again and again until it becomes your signature dish.

    The Flavor Profile of Milk Bar Pumpkin Pie

    More Than a Holiday Pie

    Milk Bar Pumpkin Pie delivers the kind of flavor that makes people stop mid-bite and ask, “What’s in this?” It’s not just another fall dessert—it’s the balance of creamy, sweet, and a touch of salty that earns its reputation.

    The pumpkin filling is rich but not overwhelming, made with condensed milk for that signature smoothness. A hint of vanilla and brown sugar deepens the flavor without letting the spices overpower. You still get that classic autumn vibe—cinnamon, ginger, nutmeg—but it’s refined, not aggressive.

    Where most pies lean heavy on clove or allspice, this one pulls back. The result? A balanced, flavorful pumpkin custard that tastes like it belongs in a high-end bakery but feels comforting enough for your kitchen table.

    A Crust That Changes Everything

    Forget traditional pie crust. What sets Milk Bar Pumpkin Pie apart is its graham cracker crust—but not just any graham crust. It’s salty, buttery, and holds its crunch under a luscious filling. The contrast between the crisp base and the silky center is what makes each bite satisfying.

    There’s something almost nostalgic about the texture, but elevated. Think of your favorite cheesecake crossed with a warm, spiced pudding. That contrast is exactly why so many home bakers swap their go-to recipe for this one once they try it.

    If you’re exploring fall treats, this is right up there with classics like these Pumpkin Chocolate Chip Muffins—another bakery-worthy recipe you can easily make at home.

    How to Recreate the Milk Bar Pumpkin Pie at Home

    Easy Steps, Big Flavor

    You don’t need to live near a Milk Bar bakery or be a pastry chef to experience the magic of Milk Bar Pumpkin Pie. With the right ingredients and a bit of patience, this iconic fall dessert can come straight from your own oven.

    Start with the crust. You’ll want a base of crushed graham crackers, melted butter, and just a pinch of salt. Press it firmly into your pie dish and bake it briefly so it sets before you pour in the filling.

    The filling is where the transformation happens. Use pure pumpkin purée (not pie filling), sweetened condensed milk, a few eggs, and a mix of warm spices. What sets this apart is the creamy texture—thanks to the ratio of pumpkin to milk—and the deep caramel note you get by baking low and slow until the top turns a glossy amber.

    The Secret Is in the Bake

    Don’t rush the bake. That gentle heat allows the custard to set without cracking and creates the signature sheen on top. Once it cools, chill it completely to let the flavors settle. Serve it cold or at room temperature, with a dollop of whipped cream or a scoop of vanilla ice cream if you’re feeling extra festive.

    What makes Milk Bar Pumpkin Pie such a crowd-pleaser—aside from its rich flavor—is how approachable it really is. In fact, if you’re looking to serve a variety of holiday desserts, you might want to also check out these Pumpkin Bars in 5 Simple Steps—they’re equally indulgent and even easier to portion for guests.

    Whether you’re baking for tradition, curiosity, or just because it’s Thursday, this pie deserves a spot in your fall lineup.

    Tips to Make Your Milk Bar Pumpkin Pie Perfect

    Avoid Common Baking Mistakes

    Even though Milk Bar Pumpkin Pie is known for being user-friendly, a few missteps can still mess with that silky texture and rich flavor. The number one issue? Overbaking. Pull the pie when the center still has a slight wobble—residual heat will finish the job. If the middle cracks, it usually means the oven was too hot or the pie baked too long.

    Next, let’s talk crust. A soggy bottom can ruin the experience. Always pre-bake your graham cracker crust for 8–10 minutes to help it hold its crunch under that creamy filling. If you skip this step, you risk a chewy layer that pulls away when slicing.

    Also, don’t substitute evaporated milk for sweetened condensed milk. It won’t give you the dense, velvety texture that defines this dessert. Condensed milk is key to that glossy, custard-like finish Milk Bar is famous for.

    Make It Part of Your Fall Ritual

    Once you’ve mastered this pie, it’s hard to imagine fall without it. The beauty of Milk Bar Pumpkin Pie is that it brings bakery-level flavor into a home kitchen. It’s also endlessly versatile—top it with whipped cream, sprinkle it with cinnamon sugar, or pair it with a mug of hot cider for the ultimate cozy night in.

    If you’re looking to stretch those fall flavors into breakfast, don’t miss this comforting Slow Cooker Pumpkin Pie Oatmeal. It turns the essence of pumpkin pie into a slow-simmered, satisfying start to your day—and it proves that pumpkin belongs on the table from morning to night.

    Slice of Milk Bar Pumpkin Pie served with whipped cream

    5 Secrets Behind the Viral Milk Bar Pumpkin Pie

    1. Graham Cracker Crust Over Flaky Pastry
      The salty-sweet crunch of the graham cracker base gives each bite more texture and contrast than traditional pie crusts.
    2. Sweetened Condensed Milk Is the Star
      No evaporated milk here. Condensed milk creates a rich, custard-like filling that’s glossy, creamy, and unforgettable.
    3. Low-and-Slow Baking Method
      Baking at a lower temperature helps the pie set without cracking, and it creates that signature caramelized top.
    4. Pumpkin Flavor That Isn’t Over-Spiced
      Balanced spices let the pumpkin shine instead of drowning it in cinnamon and clove.
    5. Make-Ahead Friendly
      This pie actually tastes better the next day. Chill it overnight to deepen the flavor and improve the texture.

    Conclusion: Bring the Magic of Milk Bar Pumpkin Pie Home

    Milk Bar Pumpkin Pie isn’t just a dessert—it’s a celebration of everything fall should taste like. Buttery graham cracker crust. Creamy, spiced filling. A slice that feels like both a bakery indulgence and a homemade memory.

    It’s the kind of pie that makes people stop mid-bite. And now, it’s yours to make.

    Whether it’s for Thanksgiving, Friendsgiving, or just a cozy Sunday night, this pie has earned a permanent place on my fall table—and I hope it finds one on yours, too.

    Try it at home and tag me on Facebook if you do—I’d love to see your version!

    Frequently Asked Questions About Milk Bar Pumpkin Pie

    What makes Milk Bar Pumpkin Pie different from traditional pumpkin pie?

    Milk Bar Pumpkin Pie uses a salty graham cracker crust and a creamy, custard-like filling made with sweetened condensed milk. Unlike traditional pies, it bakes low and slow for a silky texture and a glossy top that sets it apart.

    Can I make Milk Bar Pumpkin Pie ahead of time?

    Yes. This pie is ideal for make-ahead prep. Bake it the day before, let it cool completely, and chill it overnight. The flavor deepens and the texture improves as it rests.

    Does Milk Bar Pumpkin Pie need to be refrigerated?

    Absolutely. Once the pie is cooled to room temperature, store it in the refrigerator. The creamy filling is perishable and stays freshest when chilled.

    Can I freeze leftover Milk Bar Pumpkin Pie?

    Yes, you can freeze it. Wrap the pie tightly in plastic wrap and foil. Freeze for up to one month. Thaw in the fridge overnight and serve slightly chilled or at room temperature.

  • Pumpkin Chocolate Chip Muffins: 5 Amazing Reasons To Bake

    Pumpkin Chocolate Chip Muffins: 5 Amazing Reasons To Bake

    Pumpkin chocolate chip muffins weren’t always part of my kitchen magic. Back when I was juggling three hungry kids, a never-ending job, and a baby balanced on my hip, I thought muffins like these belonged to Pinterest-perfect bakers. Then came “The Great Mealtime Struggle.” Out of desperation, I dusted off my slow cooker for dinner and, later that week, tossed pumpkin, flour, and chocolate chips into a bowl for breakfast.

    What came out of the oven was more than a muffin—it was soft, sweet comfort that made my family smile. Since then, these muffins have become a fall ritual, a quick bake that feels like a hug in every bite.

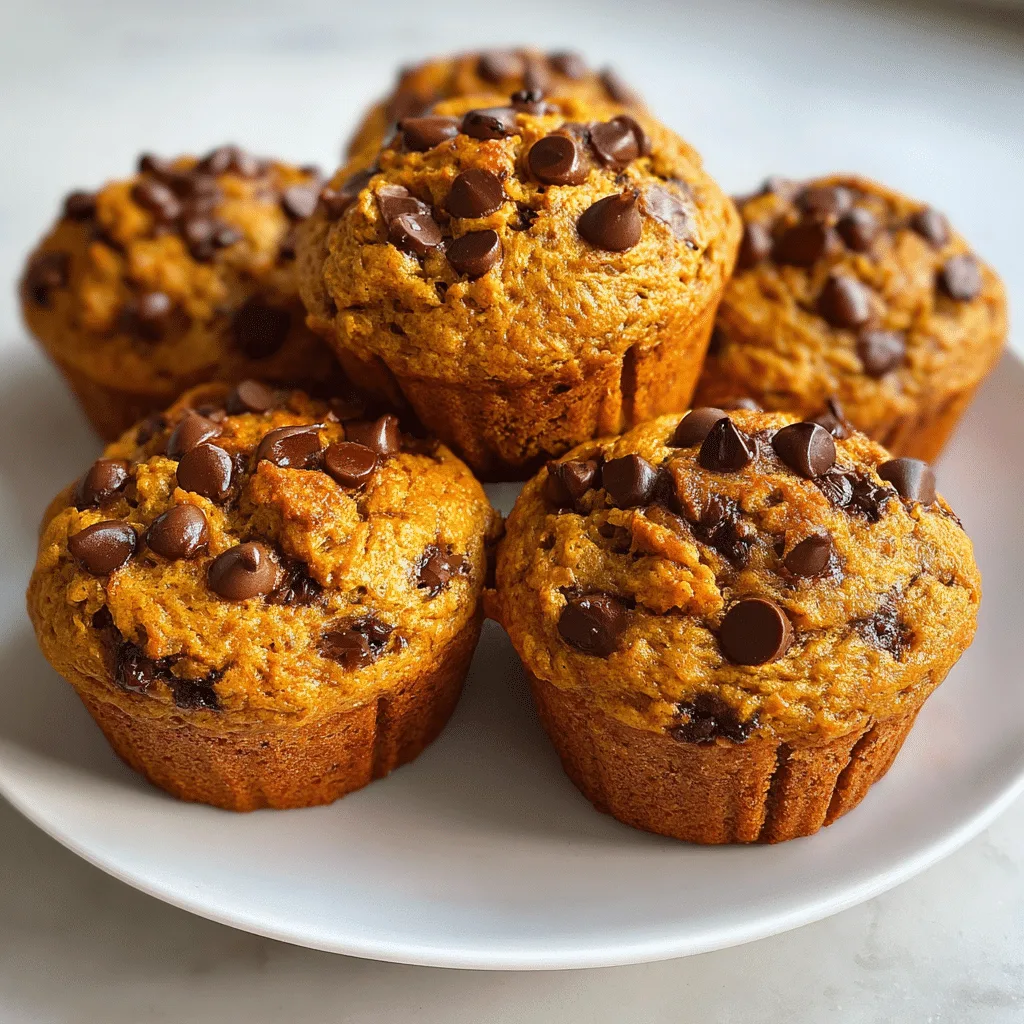
    Pumpkin chocolate chip muffins on a rustic table with melted chocolate.

    Recipe

    Why Pumpkin Chocolate Chip Muffins Are a Fall Favorite

    Pumpkin chocolate chip muffins hold a special place in many kitchens because they combine the cozy flavors of autumn with the sweetness of chocolate. The pumpkin keeps the muffins moist, while the chocolate chips melt into tiny pockets of comfort. This mix turns a simple bake into something memorable. Unlike plain muffins, these have both seasonal charm and year-round appeal. Families love them for breakfast, after-school snacks, or quick desserts that taste homemade but require minimal effort.

    Moist pumpkin muffins also bring versatility. They pair well with coffee, tea, or a glass of milk, and they stay soft for days, making them a practical choice for busy weeks. When you bake a batch, your home instantly fills with the warm scent of cinnamon and pumpkin spice, creating an inviting atmosphere that feels like fall in every bite.

    The Secret Behind the Perfect Texture

    An easy pumpkin muffin recipe begins with simple ingredients: pumpkin puree, flour, eggs, sugar, and just the right amount of spice. The addition of chocolate chips not only balances the earthy pumpkin flavor but also adds richness. To achieve soft and fluffy muffins, it’s important not to overmix the batter. Stir until combined, then let the oven create the magic.

    For anyone looking at fall baking ideas, this recipe is a go-to because it requires little preparation but delivers consistent results. Even novice bakers find that pumpkin chocolate chip muffins rise beautifully with a tender crumb. It’s proof that comfort food doesn’t need to be complicated.

    The Joy of Baking Pumpkin Chocolate Chip Muffins

    There’s something comforting about baking pumpkin chocolate chip muffins on a cool day. The process is simple, yet the results feel indulgent. Mixing pumpkin puree with flour, sugar, and chocolate chips creates a batter that transforms into moist pumpkin muffins with a soft crumb and rich flavor. This easy pumpkin muffin recipe doesn’t require professional skill, only a willingness to stir and bake.

    Families often enjoy these muffins as part of their fall baking ideas, but they’re not limited to autumn. Their flavor makes them a year-round favorite. Unlike store-bought treats, homemade pumpkin chocolate chip muffins let you control sweetness, spice, and texture, making each batch uniquely your own.

    More Than Just a Seasonal Treat

    Pumpkin desserts often carry the reputation of being tied only to fall. However, pumpkin chocolate chip muffins prove that this ingredient works anytime. They can be baked in small batches for weekday breakfasts or doubled for gatherings. Pairing them with other seasonal recipes—such as this pumpkin bread with cream cheese frosting—creates a spread that celebrates flavor while keeping preparation simple.

    The beauty of this recipe lies in its balance. The pumpkin adds moisture and nutrition, while the chocolate chips add indulgence. The result is a treat that feels both wholesome and satisfying. For anyone looking for a reliable pumpkin dessert recipe, these muffins deliver every time.

    Pumpkin Chocolate Chip Muffins as Everyday Comfort

    Pumpkin chocolate chip muffins are more than just a seasonal bake; they’re an everyday comfort that fits into nearly any moment. Whether served warm from the oven on a quiet morning or tucked into a lunchbox for a midday pick-me-up, they deliver both flavor and nostalgia. The balance of pumpkin and chocolate makes them versatile—never too sweet, never too plain. This pumpkin dessert recipe has earned its spot as a family classic.

    Their soft and fluffy texture means they can be enjoyed plain or dressed up with a touch of glaze or cream cheese frosting. Even when baked in large batches, these muffins stay moist for days, making them practical for busy households. Because they’re quick to mix and bake, they often become the go-to option when cravings strike but time is limited.

    Pairing Muffins with Other Pumpkin Treats

    One of the joys of baking pumpkin chocolate chip muffins is how easily they complement other fall baking ideas. A table filled with these muffins alongside cookies, bars, or brownies feels abundant without requiring hours of complicated preparation. For example, pairing them with a simple pumpkin brownies recipe creates variety while staying within the same comforting flavor family.

    This balance of ease and reward makes pumpkin chocolate chip muffins one of the most reliable recipes to keep on hand. They remind us that baking can be both simple and satisfying, transforming basic ingredients into moments of joy.

    Pumpkin Chocolate Chip Muffins as a Versatile Treat

    Pumpkin chocolate chip muffins shine as a versatile treat that suits many occasions. They work beautifully for a quick pumpkin breakfast, a cozy afternoon snack, or even a light dessert after dinner. Because the recipe is easy to adapt, bakers can adjust the level of spice, swap in whole wheat flour, or even add nuts for extra texture. These homemade pumpkin muffins give you freedom to experiment while still delivering a tender crumb and satisfying flavor.

    For families, the muffins offer practicality. They can be baked ahead of time, stored in an airtight container, and enjoyed throughout the week. That reliability makes them just as valuable as more traditional pumpkin spice muffins, while still standing out for their chocolatey twist.

    Adding Variety with Other Pumpkin Recipes

    The best part of keeping pumpkin chocolate chip muffins in your rotation is how easily they pair with other seasonal recipes. Serving them alongside maple pumpkin cookies or bars creates a dessert table that feels complete without requiring complicated steps. This combination balances flavors—soft and moist muffins beside chewy, spiced cookies—delivering variety for guests and family alike.

    These muffins also highlight the charm of fall baking. The warm aroma, the moist texture, and the familiar pumpkin spice blend come together in a way that feels timeless. Whether you’re baking for yourself or sharing with others, pumpkin chocolate chip muffins bring a sense of comfort that never goes out of style.

    Fresh pumpkin chocolate chip muffins served with coffee.

    Conclusion

    Pumpkin chocolate chip muffins prove that simple ingredients can create extraordinary results. Soft, moist, and filled with chocolatey goodness, they’re perfect for breakfast, snacks, or dessert. Whether you’re baking for a busy weekday or a festive fall gathering, these muffins always deliver. They remind us that comfort food doesn’t have to be complicated—it just has to be shared.

    Now it’s your turn. Bake a batch of pumpkin chocolate chip muffins, enjoy the warm flavors of pumpkin and spice, and don’t forget to share your creations. Try it at home and tag me on pinterest —I’d love to see your muffins fresh from the oven!

    FAQ About Pumpkin Chocolate Chip Muffins

    How do you keep pumpkin chocolate chip muffins moist?

    Pumpkin naturally keeps baked goods soft and moist, but proper storage matters. Cool muffins completely, then store them in an airtight container at room temperature for up to three days. For longer freshness, refrigerate or freeze, then reheat before serving.

    Can I make pumpkin chocolate chip muffins healthier?

    Yes, you can adapt this easy pumpkin muffin recipe with whole wheat flour, less sugar, or dark chocolate chips. Adding oats or nuts boosts fiber and texture while keeping the muffins satisfying.

    Can I freeze homemade pumpkin muffins?

    Absolutely. Bake, cool, and wrap muffins individually in plastic wrap or freezer bags. They can be stored for up to three months. To enjoy, thaw at room temperature or warm briefly in the oven.

    What spices go best with pumpkin chocolate chip muffins?

    Classic pumpkin spice blends—cinnamon, nutmeg, ginger, and cloves—bring out the best flavor. A pinch of allspice or cardamom adds depth, turning your muffins into bakery-style pumpkin spice muffins.
  • Pumpkin Bread With Cream Cheese Frosting: Your #1 Love

    Pumpkin Bread With Cream Cheese Frosting: Your #1 Love

    Pumpkin bread with cream cheese frosting used to sound like something I’d bring to a bake sale and forget about by Monday. But then came The Great Mealtime Struggle—three kids, one job that never ended at five, and a fridge full of “someday” ingredients. That’s when I reached for the dusty slow cooker and a can of pumpkin. I didn’t know what I was doing—just that something sweet, warm, and magic needed to happen… fast.

    What came out was golden, moist, spiced just right—and slathered in tangy cream cheese frosting that made my husband raise his eyebrows like I’d summoned fall itself. From that day forward, this pumpkin bread became my #1 love for chilly mornings, bake sales, or anytime my soul needed a hug.

    And now? I’m sharing it with you.

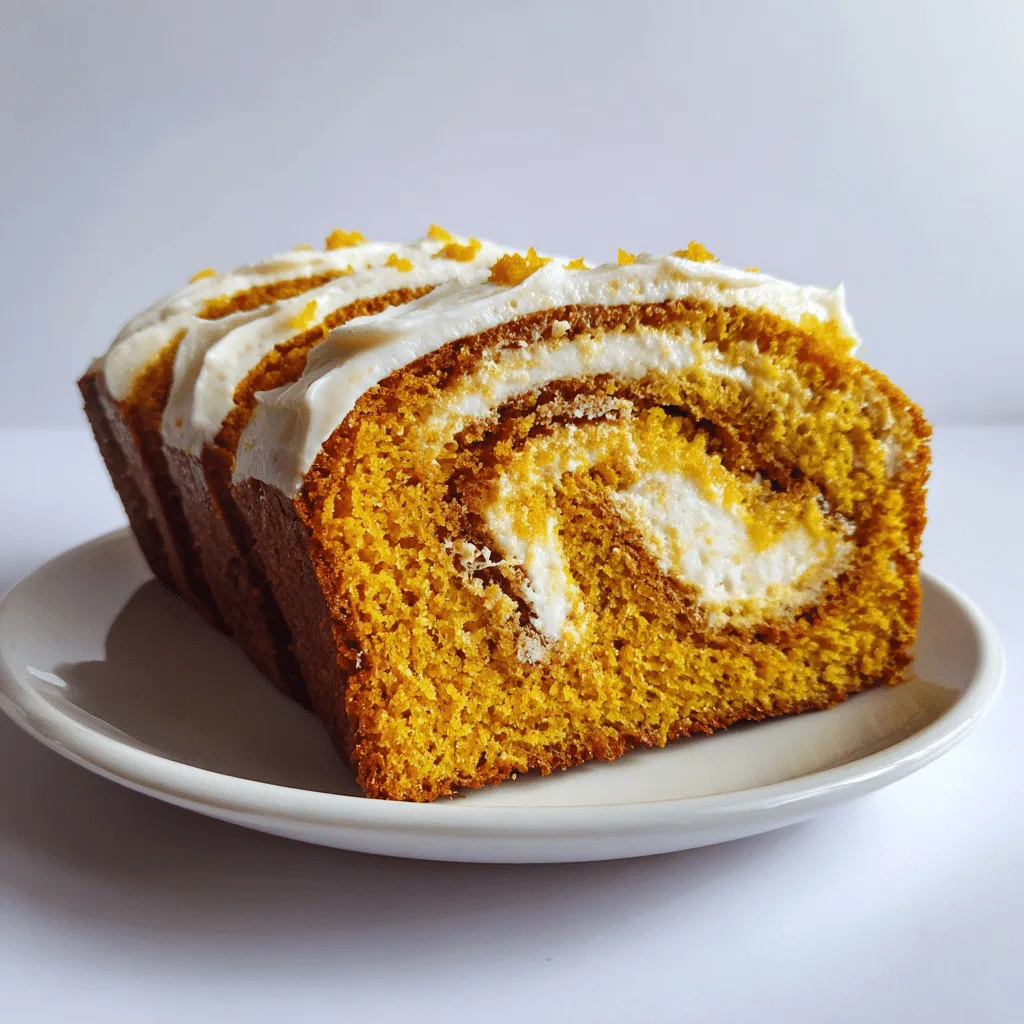
    Pumpkin bread with cream cheese frosting on a rustic wooden board

    Recipe

    The Cozy Rise of Pumpkin Bread With Cream Cheese Frosting

    The Fall Favorite That Never Gets Old

    Pumpkin bread with cream cheese frosting isn’t just a seasonal treat anymore. It’s become a year-round comfort food that satisfies everything from Sunday cravings to holiday hosting needs. Whether you serve it warm at brunch or sneak a slice with your afternoon coffee, this homemade pumpkin loaf delivers the kind of cozy, rich flavor that never feels tired.

    The appeal lies in its versatility. Want it extra moist? Use real pumpkin purée. Need a lighter texture? Swap in cake flour. Craving a bold finish? A thick layer of cream cheese frosting adds that sweet, tangy twist that elevates this loaf into dessert territory.

    With spices like cinnamon, nutmeg, and clove mingling with vanilla and brown sugar, each bite feels like fall wrapped in a bakery-style pumpkin bread—only easier to make at home.

    Why Cream Cheese Frosting Is the Game Changer

    Let’s be honest—good pumpkin bread can stand on its own. But top it with cream cheese frosting, and suddenly it becomes unforgettable. That rich, creamy layer contrasts perfectly with the dense, spiced loaf beneath. It turns a humble slice into something indulgent, almost like pumpkin cake.

    This frosting doesn’t just sit on top; it completes the bite. A touch of tang from the cream cheese cuts through the sweetness and enhances the pumpkin flavor. It’s no wonder many call this the best fall bread recipe they’ve ever tried.

    And the best part? You don’t need to be a professional baker to pull it off. With the right ingredients and just a few mixing bowls, this recipe delivers big flavor with minimal fuss.

    Behind the Bake – What Makes Pumpkin Bread With Cream Cheese Frosting So Addictive

    Moist, Dense, and Perfectly Spiced

    What separates pumpkin bread with cream cheese frosting from the rest of your recipe box? It’s the texture. This isn’t a dry loaf you serve out of guilt—it’s a rich, moist pumpkin bread that holds its flavor and softness for days. The secret lies in balancing wet ingredients like pumpkin purée and oil with just the right amount of flour.

    To elevate the flavor, use a spice blend that includes cinnamon, nutmeg, ginger, and a pinch of clove. This combination transforms your loaf into a bakery-style pumpkin bread that feels like fall in every bite. A little brown sugar deepens the sweetness while adding a caramel undertone.

    Not sure how to keep your bread moist without going soggy? Try folding in Greek yogurt or sour cream. Both add body and richness, and they play well with the spices and frosting later on.

    Choosing the Right Frosting Pairing

    Let’s talk about that frosting. A basic glaze won’t do your loaf justice. What it really needs is a thick, tangy cream cheese frosting that holds its shape and flavor even when stored in the fridge. Cream cheese, butter, powdered sugar, and vanilla—whipped until smooth—form the perfect crown for this fall dessert.

    Some bakers add a splash of maple syrup or pumpkin spice directly into the frosting for extra dimension. Others swirl it with cinnamon to match the bread’s interior. However you do it, one thing’s clear: the frosting takes your pumpkin loaf from snack to showstopper.

    If you’re in the mood to explore another moist variation, try this moist pumpkin chocolate chip bread—a crowd-pleaser that pairs equally well with or without frosting.

    From Prep to Perfection – How to Make Pumpkin Bread With Cream Cheese Frosting Shine

    Building the Perfect Pumpkin Loaf Base

    Creating the best pumpkin bread with cream cheese frosting starts with your base. It’s not just about mixing flour and sugar—it’s about layering texture and flavor. Start with high-quality canned pumpkin, not pumpkin pie filling. The latter has added spices and sugars that can throw off your balance.

    Use eggs for richness, a neutral oil for moisture, and both white and brown sugar for depth. Fold in your dry ingredients carefully—overmixing can make your pumpkin loaf tough. Add-ins like chopped pecans or mini white chocolate chips give it an unexpected twist, but the bread should always stay soft and tender.

    Baking in a loaf pan gives you those golden-brown edges and a soft middle. Be sure to line your pan with parchment for easy removal. When a toothpick comes out with a few moist crumbs, it’s done—don’t overbake.

    The Art of Spreading the Frosting

    Once your loaf cools completely, it’s time for the showstopper: cream cheese frosting. Spread it thick. A generous layer not only adds sweetness but also helps preserve the bread’s moisture if you’re storing it.

    Some bakers chill the frosting before spreading to get those beautiful swirls on top. You can even pipe it for a more decorative look, especially if you’re serving this as a fall baking recipe centerpiece. Want a rustic finish? Dust the frosted top with cinnamon or a drizzle of maple glaze.

    If you’re baking ahead, store your loaf in an airtight container in the fridge. The flavor deepens by day two, making it one of the best easy pumpkin desserts to prepare in advance.

    Serving and Storing Pumpkin Bread With Cream Cheese Frosting

    From the First Slice to the Last Crumb

    Fresh out of the oven, pumpkin bread with cream cheese frosting is all about warm spices, rich moisture, and irresistible sweetness. But how you serve it can make or break the experience.

    For best results, let the loaf cool for at least 60 minutes before adding frosting. If the bread’s too warm, your cream cheese topping will melt and slide. Slice with a serrated knife and serve at room temperature—or slightly chilled if you want the frosting firmer.

    Pair it with hot apple cider, chai tea, or strong coffee. It’s just as perfect for casual brunches as it is for Thanksgiving dessert. And if you’re looking for something slightly lighter but still seasonal, these pumpkin bars deliver a soft bite with big fall flavor in a thinner layer.

    Keep It Fresh, Freeze It Smart

    Storing your pumpkin loaf properly means days of easy, sweet snacking. If frosted, keep it in an airtight container in the fridge for up to five days. The bread gets more flavorful by day two as the spices settle into the crumb.

    Want to freeze it? Slice before freezing for easy grab-and-go portions. Just wrap each slice in parchment paper and place in a freezer-safe bag. Thaw at room temp, and frost just before serving.

    And if you’re craving more fall slow cooker comfort, don’t miss this slow cooker pumpkin cobbler—a gooey, spiced dessert that pairs perfectly with whipped cream or vanilla ice cream.

    Slice of pumpkin bread with cream cheese frosting on a dessert plate

    Conclusion: Try Pumpkin Bread With Cream Cheese Frosting at Home

    There’s something irresistible about pumpkin bread with cream cheese frosting—it’s comforting, flavorful, and versatile. Whether you’re baking for a crowd, meal prepping for the week, or just craving a cozy fall slice, this recipe delivers every time. It’s more than dessert—it’s a tradition in the making.

    Try it, share it, and make it your own. And if you bake it, tag me —I’d love to see how your version of this classic turns out.

    FAQs About Pumpkin Bread With Cream Cheese Frosting

    How do I keep pumpkin bread with cream cheese frosting from becoming soggy?

    To keep pumpkin bread with cream cheese frosting from getting soggy, make sure the bread is fully cooled before adding frosting. Store it in a sealed container in the fridge, and place parchment paper between slices if stacking. Avoid storing it while warm, as trapped steam creates moisture buildup.

    Can I make pumpkin bread with cream cheese frosting ahead of time?

    Absolutely. Pumpkin bread with cream cheese frosting actually tastes better the next day. Bake and cool the loaf, then wrap tightly and refrigerate. Add frosting just before serving, or frost and chill if you prefer a denser topping. The flavor of the spices deepens overnight.

    What makes this pumpkin bread recipe different from others?

    It’s the balance of texture and flavor. This pumpkin bread with cream cheese frosting combines a moist, rich base with a sweet, tangy top layer. The frosting complements the pumpkin without overpowering it. Plus, it’s easy to customize with nuts, chocolate chips, or a hint of maple.

    Can I freeze pumpkin bread with cream cheese frosting?

    Yes. Slice the frosted pumpkin bread with cream cheese frosting and wrap each piece in parchment, then seal in a freezer-safe bag. When ready to eat, let it thaw in the fridge or at room temperature. Frosting texture may soften, but the flavor holds strong.

  • Apple Pumpkin Streusel Muffins: 7 Autumn Treats You’ll Love

    Apple Pumpkin Streusel Muffins: 7 Autumn Treats You’ll Love

    Apple Pumpkin Streusel Muffins weren’t always in my baking rotation. Back when life felt like a never-ending game of “what’s for dinner,” I didn’t think I had time for homemade anything—let alone muffins. But one hectic morning, I threw together a quick batter using leftover pumpkin, a diced apple, and my favorite streusel topping. The house smelled like a fall-scented candle exploded… and the kids devoured them before I even sat down.

    Now, these muffins are a fall staple. Cozy, spiced, and topped with a golden crumble, they taste like warm hugs and weekend mornings—even on a Tuesday. Ready to make a batch? Let’s bake something beautiful (and crazy easy).

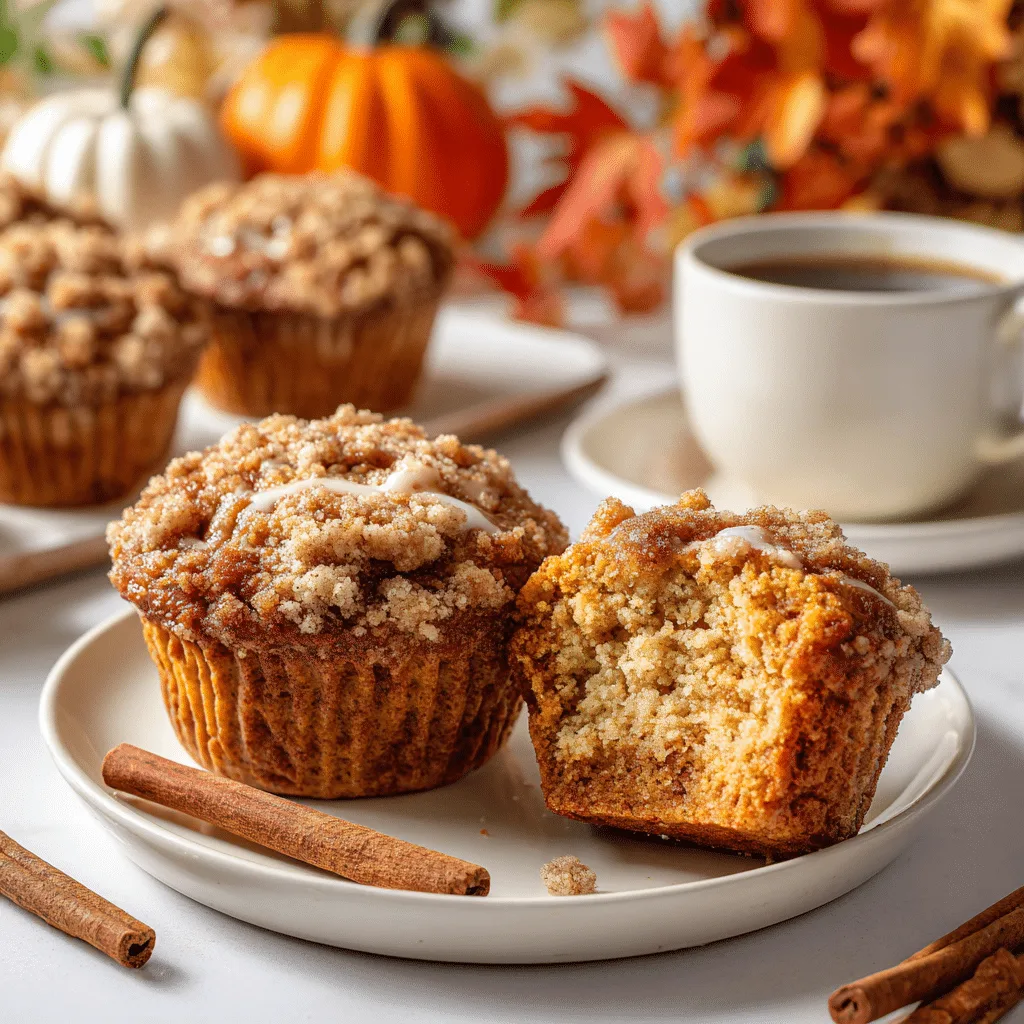
    Fresh apple pumpkin streusel muffins on a fall-themed table

    Recipe

    Apple Pumpkin Streusel Muffins: A Cozy Fall Essential

    The Perfect Balance of Apple and Pumpkin

    When the weather cools and leaves start falling, there’s nothing more comforting than a warm batch of apple pumpkin streusel muffins. These muffins strike the ideal balance between sweet apple chunks and earthy pumpkin purée, creating a rich, moist texture in every bite.

    Unlike basic pumpkin muffins or traditional apple muffins, this recipe brings together two classic fall flavors for something truly special. The pumpkin adds moisture and depth, while the apple provides a natural sweetness and subtle tartness that cuts through the richness.

    Using common pantry ingredients like cinnamon, nutmeg, and brown sugar, these muffins are easy to whip up for a quick breakfast, after-school snack, or cozy weekend bake.

    What Makes the Streusel Topping Stand Out

    What elevates these apple pumpkin streusel muffins above the rest is the crumbly, buttery streusel topping. Made from a simple mix of flour, brown sugar, butter, and warm spices, the topping bakes into a crisp, golden layer that contrasts beautifully with the soft, moist muffin base.

    This bakery-style finish gives the muffins a professional touch without adding extra effort. It’s the kind of texture that makes people pause mid-bite and ask, “Did you really make these from scratch?”

    If you’ve never tried combining a crunchy streusel with spiced pumpkin muffins before, this is your moment. It transforms a simple recipe into something worth repeating all season long.

    Why Apple Pumpkin Streusel Muffins Are a Must-Bake This Fall

    Seasonal Ingredients That Shine

    Fall is the season for cozy flavors, and apple pumpkin streusel muffins make perfect use of what’s in abundance—sweet apples, spiced pumpkin, and warming cinnamon. These muffins are made with real pumpkin purée and chopped apples, not artificial flavorings. The result? A muffin that tastes like autumn in every bite.

    If you love soft, bakery-style muffins with a tender crumb, these won’t disappoint. The pumpkin adds moisture while the apple bits create subtle bursts of sweetness. Whether you’re baking for a brunch or just meal-prepping breakfast for the week, they’re satisfying, wholesome, and deeply flavorful.

    If you’re craving more seasonal bakes, these Pumpkin Cinnamon Roll Muffins are another fall-favorite with a swirl of spice in every bite.

    A Topping That Feels Bakery-Worthy

    The streusel topping is simple to make but delivers big rewards. A mix of brown sugar, flour, butter, and spices creates a sweet, crunchy crown for each muffin. It not only enhances the texture but also gives the muffins a beautiful, golden top that looks as good as it tastes.

    This same topping works well in other cozy bakes, too—like in a Pumpkin Dump Cake where it crisps up into a golden crust over soft, spiced layers.

    Together, the soft interior and crunchy top make these apple pumpkin streusel muffins a go-to fall bake—one that’s just as welcome at a weekday breakfast as it is at a holiday gathering.

    Baking Apple Pumpkin Streusel Muffins Like a Pro

    Tips for Moist, Flavorful Muffins Every Time

    A muffin should be moist, never dry—and these apple pumpkin streusel muffins deliver just that. But a few small baking tweaks make a big difference.

    First, don’t overmix your batter. Stir just until the flour disappears to keep the texture soft and tender. Use fresh pumpkin purée and juicy apples like Honeycrisp or Fuji for best results. If you want an extra flavor boost, try adding a pinch of ground cloves or allspice.

    Letting the batter rest for 10 minutes before baking allows the flour to hydrate, which helps create that high, domed bakery-style top everyone loves.

    Freezer-Friendly for Busy Mornings

    These muffins are as practical as they are delicious. Once cooled, you can freeze them in an airtight bag or container for up to three months. Just reheat in the microwave or oven, and you’ve got a warm, spiced muffin ready to go.

    They pair beautifully with hot cider, coffee, or even a drizzle of maple glaze. And if you’re a fan of batch baking, you might also enjoy these Pumpkin Oatmeal Cookies—a super simple, three-ingredient treat that’s just as freezer-friendly.

    Whether you’re baking ahead or serving fresh, apple pumpkin streusel muffins make fall mornings feel just a little more special.

    Serving and Storing Apple Pumpkin Streusel Muffins

    Best Ways to Serve These Fall Favorites

    Apple pumpkin streusel muffins are incredibly versatile. Serve them warm for breakfast with a pat of butter or pair them with an afternoon coffee or tea. The spiced flavor and tender crumb make them a hit at fall potlucks, school bake sales, or as a thoughtful hostess gift.

    For a more decadent touch, add a maple glaze drizzle or a swipe of cinnamon cream cheese frosting. The muffins’ soft interior and crunchy topping can handle the upgrade without becoming too sweet.

    They’re also fantastic alongside heartier autumn dishes. If you’re looking for a cozy pairing, try them with a bowl of Pumpkin Chorizo Soup for a savory-sweet combo that screams fall comfort.

    How to Store for Peak Freshness

    To keep muffins fresh, store them in an airtight container at room temperature for up to three days. If your kitchen runs warm, refrigerate them instead—but be sure to let them come to room temp or give a quick 10-second microwave zap before serving.

    For longer storage, freeze the muffins individually in plastic wrap or a freezer-safe container. They’ll stay delicious for up to three months, ready to thaw whenever you need a fall-flavored pick-me-up.

    Whether fresh out of the oven or reheated on a chilly morning, these apple pumpkin streusel muffins will keep their flavor, texture, and charm from the first bite to the last.

    Served apple pumpkin streusel muffins with coffee

    Conclusion: Bake Once, Love Forever

    Apple pumpkin streusel muffins aren’t just a fall treat—they’re a little act of comfort, warmth, and magic baked into every crumb. With simple ingredients, cozy flavors, and that golden, buttery streusel topping, they prove you don’t need a fancy bakery to make something that feels special.

    Whether you’re baking a batch to share or just to sneak one warm from the pan before the kids see them, these muffins deliver every time.

    Try them at home and tag me on Facebook! I’d love to see how they turn out in your kitchen—and hear what cozy memories they help you create.

    FAQ About Apple Pumpkin Streusel Muffins

    Can I make apple pumpkin streusel muffins gluten-free?

    Yes, you can substitute the all-purpose flour with a 1:1 gluten-free baking blend. Make sure it includes xanthan gum for structure, and check that your streusel topping uses gluten-free oats if included.

    What kind of apples work best in these muffins?

    Firm, slightly tart apples like Honeycrisp, Fuji, or Granny Smith hold their shape and balance the sweetness of the pumpkin. Avoid soft apples, which may become mushy when baked.

    Can I use canned pumpkin pie mix instead of pumpkin purée?

    It’s best to use pure pumpkin purée, not pumpkin pie mix. The mix includes added sugar and spices, which can throw off the flavor and texture balance of your muffins.

    How do I keep the streusel topping from sinking?

    Make sure your streusel is crumbly, not wet. Chill it briefly before sprinkling on top of the muffin batter, and avoid pressing it in. A cold, firm streusel bakes up crisp and stays on top.