Blog

  • Crockpot Peanut Clusters: 5 Irresistible Reasons to Try Now

    Crockpot Peanut Clusters: 5 Irresistible Reasons to Try Now

    Crockpot Peanut Clusters are the no-fuss, melt-in-your-mouth treats that completely changed how I feel about slow cooker desserts.

    Hey! I’m Darleen Vamce—34, Salt Lake City native, and a woman who used to think slow cookers were just for potlucks and overly mushy stews. I was wrong. Very wrong. Now, this humble little machine is basically my co-chef, my weekday dinner savior, and the secret weapon behind most of the meals that make my family think I have superpowers.

    It all started during The Great Mealtime Struggle: three hungry kids, a day job that didn’t quit at 5, and a mocking kitchen. Out of desperation, I dumped peanuts, chocolate, and candy into the crockpot—baby on hip. A few hours later? Magic. Crockpot peanut clusters were born… and they never last a day in this house.
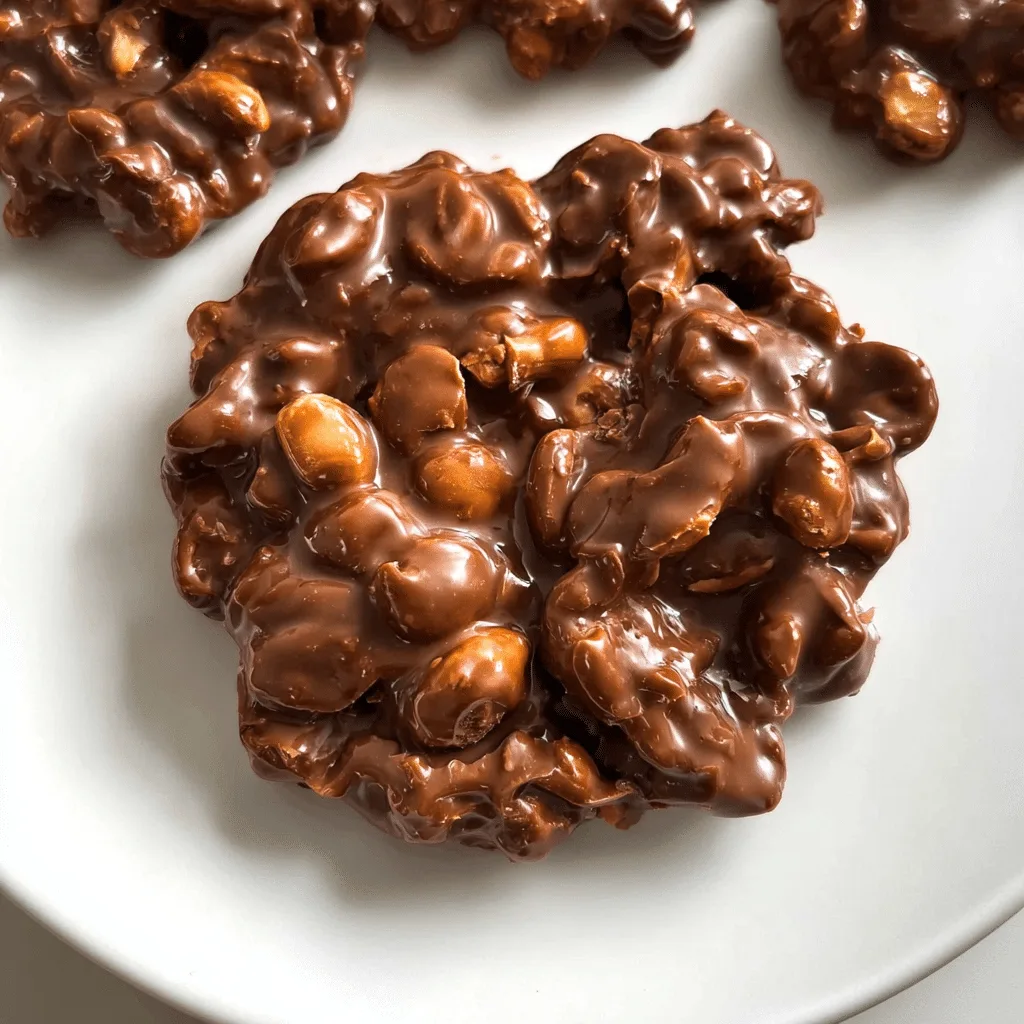
    Crockpot peanut clusters in a bowl with holiday lights

    Recipe

    Crockpot Peanut Clusters: The Sweet Treat You Didn’t Know You Needed

    Making crockpot peanut clusters is like discovering the shortcut to holiday joy. These chocolate-drenched, salty-sweet little candies are incredibly simple—just toss a few ingredients in your slow cooker and let the magic happen. No baking. No stress. Just sweet satisfaction.

    They’re perfect for gifting, dessert trays, or sneaking one by one when no one’s looking. Whether it’s your first time using a slow cooker for dessert or you’re a seasoned crockpot queen, these chocolate peanut clusters are basically foolproof.

    The best part? You don’t need fancy tools or rare ingredients. With basic pantry staples, your slow cooker does all the work, transforming peanuts and chocolate into glossy clusters that firm up beautifully once cooled.

    Why Crockpot Desserts Are a Game-Changer

    Traditional candy-making requires candy thermometers, perfect timing, and a lot of stirring. But slow cooker peanut clusters flip the script. The slow, even heat of a crockpot melts the chocolate perfectly without burning it, giving you a smooth, silky coating every time.

    It’s a low-effort, high-reward kind of recipe. You can prep it in the morning, let it melt slowly while you go about your day, and come back to a pot of delicious chocolate candy ready to spoon onto parchment paper.

    This is especially helpful around the holidays. With cookie trays overflowing, a holiday candy recipe that practically makes itself is a welcome relief. And if you’re looking for Christmas treat ideas that won’t have you sweating in front of the oven, this is it.

    The Ingredients That Make Crockpot Peanut Clusters Perfect

    When it comes to crockpot peanut clusters, the beauty is in their simplicity. You don’t need to be a candy expert—or even particularly good in the kitchen. All you need are a few key ingredients: roasted peanuts, semi-sweet or milk chocolate chips, white almond bark, and sometimes a sprinkle of sea salt for that extra wow.

    These clusters combine sweet and salty in the best way. The peanut base provides crunch and depth, while the chocolate and candy coating delivers that smooth, melt-in-your-mouth finish. Want to jazz things up? Stir in some crushed pretzels, marshmallows, or even chopped holiday mints.

    Compared to stovetop recipes, slow cooker peanut clusters are low-risk. You won’t burn the chocolate, and the texture stays soft and glossy while it sets. The hands-off approach means less stress and more time to focus on family, friends, or even wrapping gifts.

    A Crockpot Candy Recipe That Works Every Time

    Let’s face it: baking during the holidays can be overwhelming. That’s why this crockpot candy recipe is a total sanity-saver. It scales well, stores beautifully, and makes a big batch. You can spoon the mixture into festive mini cupcake liners, wrap them in cellophane, and give them as homemade gifts.

    If you love creative slow cooker ideas, you’ll also want to try this crockpot cinnamon roll casserole. It’s another indulgent treat that uses your crockpot’s gentle heat to create dessert perfection.

    The real secret? These easy peanut clusters harden just right—no fridge needed. Just let them cool on wax paper for an hour or two and you’ve got dozens of bite-sized chocolates that look like they came from a candy shop.

    No-Bake Chocolate Treats Everyone Will Love

    If you’re short on time but craving something sweet, crockpot peanut clusters are the ultimate solution. These no-bake chocolate treats skip the oven altogether but deliver the same rich, indulgent flavor you’d expect from a bakery.

    There’s something nostalgic about the way chocolate melts slowly in a slow cooker. The scent alone is enough to make the whole kitchen feel warmer. With every batch of crockpot peanut clusters, you’re layering comfort, sweetness, and that irresistible crunch.

    What makes this even better? You can make a full batch with just a handful of ingredients. That’s why these also fall under the category of 3-ingredient peanut clusters, especially if you use a simple combo of chocolate, peanuts, and almond bark. The result is smooth, glossy, and totally crave-worthy.

    These treats aren’t just good—they’re flexible. Swap the peanuts for cashews or almonds. Use dark chocolate chips for a richer flavor. Want to keep it festive? Add red and green sprinkles for the holidays.

    How to Store Crockpot Peanut Clusters

    One of the best parts about making crockpot peanut clusters is how beautifully they store. Let them cool at room temperature, then transfer to an airtight container. No fridge required unless you’re in a hot climate. These clusters stay firm, flavorful, and ready-to-eat for up to two weeks.

    If you’re prepping for a party or planning food gifts in advance, you’ll also love this peach cobbler in slow cooker. It’s another effortless slow cooker dessert that tastes far fancier than the work it takes.

    Whether it’s a Tuesday night or the week before Christmas, these slow cooker peanut clusters are the kind of easy win that every home cook deserves in their back pocket.

    Christmas Treat Ideas: Crockpot Peanut Clusters for the Holidays

    When the holidays roll around, I always double the batch of crockpot peanut clusters. They’re hands-down one of the easiest Christmas treat ideas I rely on year after year. The sweet-salty balance, paired with that silky chocolate coating, makes them impossible to resist at cookie swaps, school parties, and neighbor gifts.

    Want to make them even more festive? Try using red, green, or gold sprinkles before they set. Or mix in peppermint bits for a minty twist. This is a recipe that welcomes creativity—but always delivers consistent results.

    These little clusters are a true time-saver, especially when ovens are already filled with roasts and pies. With a reliable candy made in slow cooker recipe like this, you’re free to focus on the rest of the holiday hustle without skipping out on dessert.

    Gift-Worthy Candy Without the Fuss

    Presentation can make all the difference—especially when gifting. Once your crockpot peanut clusters are cooled and firm, tuck them into mini cupcake liners, stack them in cellophane bags, and tie with ribbon. You’ve got a homemade gift that looks high-end but only took minutes of prep.

    And if you’re already planning your holiday food gifts, consider pairing these with this cozy pumpkin dump cake. It’s another hands-off dessert with big crowd appeal.

    Whether you’re filling tins, trays, or snack boxes, these slow cooker peanut clusters will become the MVP of your festive spread. They’re simple, scalable, and downright addictive.

    Crockpot peanut clusters ready to serve and share

    Conclusion: Make Crockpot Peanut Clusters Your Sweetest Secret

    Crockpot peanut clusters aren’t just easy—they’re joyful, giftable, and straight-up delicious. Whether you’re a slow cooker newbie or a seasoned pro, this recipe delivers every single time. The best part? It takes almost no effort, but it feels like magic.

    So go ahead—make a batch this weekend. Wrap them up, pass them out, or hoard them for yourself (no judgment here). And if you do make them, tag me on social Media and let me see your sweet success!
    FAQs : Crockpot Peanut Clusters

    What kind of chocolate works best for crockpot peanut clusters?

    Use high-quality chocolate chips—semi-sweet, milk, or even dark. Almond bark or candy melts help smooth the texture and improve firmness once cooled.

    Can I use other nuts besides peanuts?

    Yes! Almonds, cashews, and pecans work beautifully. Just be sure they’re roasted (and unsalted, if possible) for best results.

    How long do crockpot peanut clusters last?

    Stored in an airtight container at room temperature, they’ll stay fresh for up to two weeks. You can also freeze them for up to 2 months.

    Can I make crockpot peanut clusters without almond bark?

    Absolutely. Just substitute with extra chocolate chips and a teaspoon of coconut oil to maintain the silky finish and texture.

  • Crockpot Steak Bites: 8 Delicious Reasons To Cook Now

    Crockpot Steak Bites: 8 Delicious Reasons To Cook Now

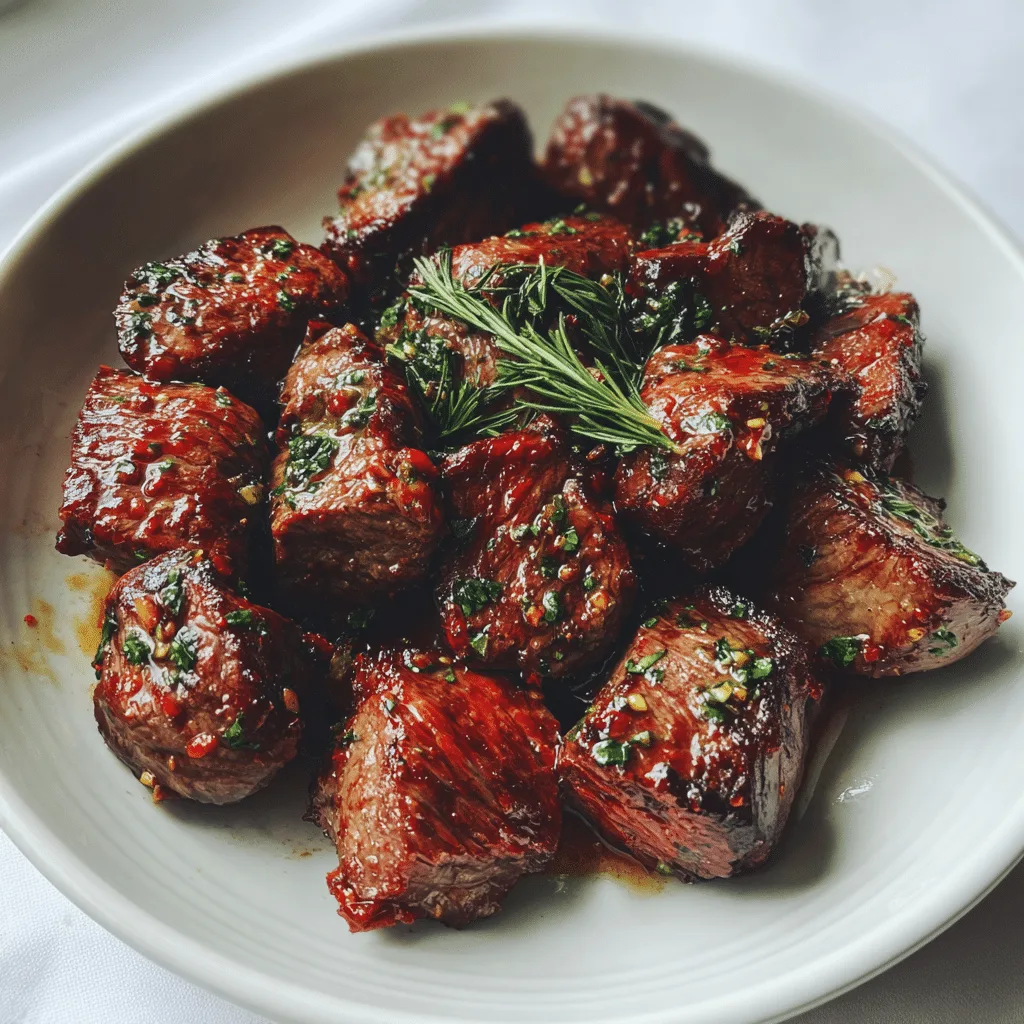
    Crockpot Steak Bites have a way of turning an ordinary night into something special. I learned this the hard way—back when dinnertime felt more like a battlefield than a family moment. Three hungry kids, a job that ran past five, and a kitchen that always seemed to mock me. Out of pure desperation, I dusted off my slow cooker, tossed in chunks of steak, garlic, and a few spices—baby balanced on my hip—and hoped for the best.

    What came out was magic: tender, juicy bites that tasted like I’d spent hours fussing over the stove. That night, I realized my slow cooker wasn’t just a gadget—it was my secret weapon.

    Crockpot steak bites in garlic butter slow cooked to perfection

    Recipe

    Why Crockpot Steak Bites Are a Weeknight Game-Changer

    When life gets busy, dinner often feels like an afterthought. That’s where crockpot steak bites step in. With just a few minutes of prep, you can turn budget-friendly cuts of beef into tender steak bites that taste restaurant-worthy. The slow cooker does the hard work while you manage the rest of your day. Unlike stovetop recipes that require constant attention, this method rewards you with juicy beef bites that stay flavorful for hours.

    For parents juggling school pickups, sports practices, or late-night projects, having a reliable slow cooker beef recipe is a lifesaver. It means you can walk into your kitchen after a long day and be greeted with the savory aroma of garlic butter steak bites simmering away. That kind of comfort doesn’t just feed your family—it restores your energy.

    The Magic of Low and Slow Cooking

    The secret to tender beef bites lies in patience. Cooking steak bites in the crockpot allows the meat to break down slowly, soaking up every bit of broth, seasoning, and butter you add. Even less expensive cuts transform into melt-in-your-mouth bites.

    Unlike quick-fry methods that risk drying out your meat, the crockpot creates a steady, moist heat that locks in juices. The result is steak bites so flavorful and juicy that they rival any steakhouse dinner. Pair them with mashed potatoes, rice, or roasted vegetables, and you’ll have a meal that tastes like it took all day—even though you barely lifted a finger.

    Ingredients for crockpot steak bites with beef, garlic, butter, and broth
    Simple ingredients for slow cooker steak bites

    Crockpot Steak Bites for Effortless Family Dinners

    One of the best things about crockpot steak bites is how adaptable they are. Whether you need a weeknight meal that practically cooks itself or a cozy Sunday dinner, these tender beef bites fit the bill. With garlic butter melting into the sauce, every bite feels indulgent without being complicated. The flavor payoff is enormous compared to the effort you put in.

    Families often look for easy crockpot beef recipes that taste like comfort food but don’t require standing over a stove. That’s exactly what these steak bites deliver. With slow, steady heat, the beef absorbs every layer of seasoning, leaving you with juicy bites that kids and adults both love. Add mashed potatoes or pasta, and you’ll have a full plate that rivals takeout.

    Why They’re Perfect for Meal Planning

    Steak bites in the slow cooker aren’t just delicious—they’re smart. They reheat beautifully, making them a great addition to meal prep menus. Store leftovers in airtight containers, and you’ve got ready-to-go lunches or quick dinners for the week.

    This style of cooking also stretches your budget. Using affordable cuts of beef, you can transform them into tender steak bites that taste like a splurge. That’s the beauty of low and slow cooking—it makes everyday ingredients shine.

    If you’re craving more slow-cooked comfort, you’ll love trying my crockpot cream cheese chicken chili. It’s another hearty, family-approved dinner that’s just as effortless.

    Flavor Variations for Crockpot Steak Bites

    What makes crockpot steak bites so exciting is how versatile they are. With the same base of tender beef bites, you can create multiple flavor profiles that keep weeknight dinners from ever feeling repetitive. Garlic butter steak bites may be the classic, but a splash of soy sauce turns them into a savory, Asian-inspired meal. Swap in barbecue sauce, and you have smoky steak bites that pair perfectly with cornbread or mac and cheese.

    For those who like heat, adding crushed red pepper or jalapeños gives your slow cooker beef a bold kick. If comfort food is your style, simmer the bites in beef broth and onion soup mix for a dish that’s rich and hearty. The beauty of slow cooking is how the flavors meld together into something deeper and more satisfying than stovetop shortcuts.

    Pairing Steak Bites With Other Family Favorites

    Serving steak bites in the slow cooker doesn’t just mean one meal—it means multiple possibilities. Spoon them over creamy mashed potatoes, toss them with buttered noodles, or pile them onto toasted hoagie rolls for steak sandwiches. The leftovers taste even better the next day, making them ideal for meal prep.

    If you want more inspiration, try my comforting pot roast slow cooker recipe. It has the same “set it and forget it” ease but brings a totally different flavor experience to your table. Both dishes prove that slow cooking can turn budget cuts of beef into tender, mouthwatering meals.

    Tips for Perfect Crockpot Steak Bites Every Time

    Cooking crockpot steak bites might be simple, but a few small tricks can take them from good to unforgettable. Start with searing the beef quickly in a skillet before transferring it to the slow cooker. That caramelized crust adds layers of flavor you can’t get otherwise. Adding garlic butter or onion soup mix boosts richness and gives your steak bites that melt-in-your-mouth quality everyone craves.

    Another key to success is liquid. Whether you use beef broth, red wine, or even a splash of soy sauce, the right base helps tender beef bites stay juicy. This liquid doubles as a sauce, soaking into potatoes, rice, or noodles served on the side. It’s comfort food magic, and it’s all done without hovering over the stove.

    Serving Crockpot Steak Bites for Any Occasion

    The beauty of steak bites in the slow cooker is flexibility. On weeknights, they’re a quick win that keeps your family satisfied. For gatherings, you can serve them as an appetizer with toothpicks or pile them onto sliders. They’re hearty enough for dinner yet versatile enough for parties.

    Don’t forget that slow cooking makes this recipe forgiving—meaning even beginner cooks can pull it off with confidence. If you’re looking for another budget-friendly dish with the same low-effort, high-reward payoff, check out my crockpot beef tips and noodles. It’s proof that the slow cooker turns everyday beef into a crowd-pleasing feast.

    With these tips, you’ll never run out of ways to make juicy crockpot beef the star of your table.

    Garlic butter crockpot steak bites served over mashed potatoes

    Conclusion: Why Crockpot Steak Bites Deserve a Spot on Your Menu

    At the end of the day, crockpot steak bites prove that dinner doesn’t have to be complicated to be unforgettable. With minimal effort, you get tender, juicy beef bites that taste like a restaurant meal but cook themselves while you live your life. Whether you serve them with mashed potatoes, over pasta, or tucked into sliders, this slow cooker recipe delivers comfort and flavor every single time.

    If you’ve been searching for a dish that saves time without sacrificing taste, this is it. Prep in the morning, let the crockpot work its magic, and enjoy a dinner that makes everyone at the table happy.

    Try it at home, and when you do, tag me on instagram —I’d love to see your take on these juicy crockpot beef bites. Trust me, once you taste them, they’ll become a regular part of your meal rotation.

    Frequently Asked Questions About Crockpot Steak Bites

    Can I use any cut of beef for crockpot steak bites?

    Yes, you can use different cuts, but tougher and more affordable ones like chuck roast, stew meat, or sirloin tips work best. The slow cooker transforms them into tender beef bites that taste just as delicious as expensive cuts.

    Do I need to sear steak bites before adding them to the slow cooker?

    Searing isn’t required, but it adds a rich, caramelized flavor to your slow cooker steak bites. If you’re short on time, you can skip it—the beef will still be juicy and flavorful.

    How long do crockpot steak bites take to cook?

    On low, they need about 6 to 7 hours. On high, plan for 3 to 4 hours. Cooking low and slow usually gives the best texture, making the meat extra tender and juicy.

    What sides go well with steak bites in the slow cooker?

    Classic pairings include mashed potatoes, buttered noodles, or rice. For lighter options, try roasted vegetables or a fresh salad. The garlic butter steak bites sauce also makes an excellent drizzle for bread.
  • Pumpkin Cream Cheese Coffee Cake: 7 Stunning Secrets

    Pumpkin Cream Cheese Coffee Cake: 7 Stunning Secrets

    Pumpkin cream cheese coffee cake isn’t just a dessert—it’s a little slice of sanity in the chaos of busy family life. Hey! I’m Darleen Vamce—34, Salt Lake City native, and a woman who once thought slow cookers were the only secret weapon in my kitchen. I was wrong. Very wrong. One autumn, during what I call The Great Mealtime Struggle—three hungry kids circling like hawks, a full-time job still humming in my head, and dinner nowhere in sight—I pulled out a dusty slow cooker and tossed in what I had.

    Magic happened. Since then, I’ve chased recipes that feel the same: effortless, comforting, and secretly impressive. This cake? It’s the fall version of that miracle—pumpkin spice warmth, a tangy cream cheese swirl, and a crumbly topping that makes the whole house smell like you’ve been baking all day.

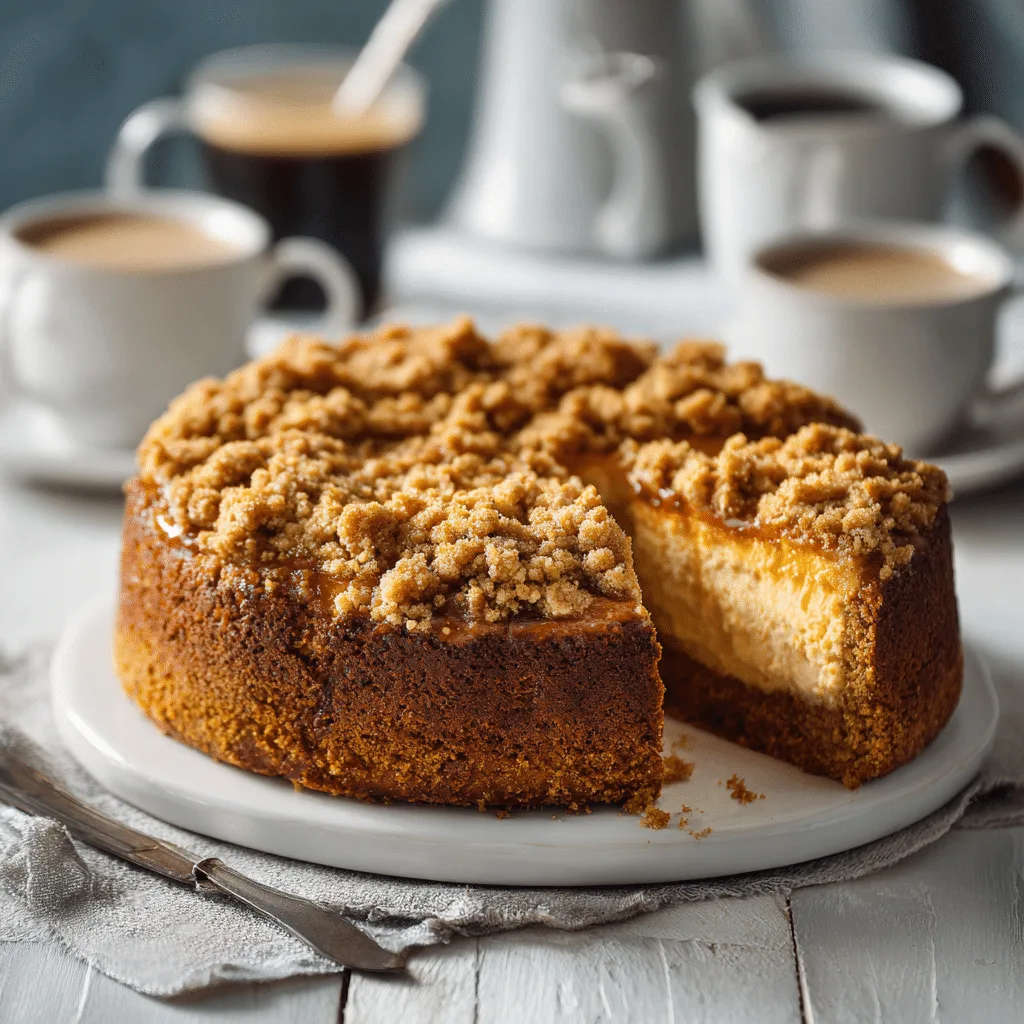
    Pumpkin cream cheese coffee cake with streusel topping on table

    Recipe

    Discovering the Magic of Pumpkin Cream Cheese Coffee Cake

    Why Pumpkin Cream Cheese Coffee Cake Steals the Show

    Pumpkin cream cheese coffee cake has become a staple in fall kitchens for good reason. The moist pumpkin base delivers a depth of flavor that pairs beautifully with the tang of a cream cheese swirl. Add a buttery streusel topping, and you’ve created a dessert that feels both homey and indulgent. Unlike ordinary pumpkin spice coffee cake, this version blends richness and balance in every bite.

    As the weather cools, many of us crave desserts that feel warm, comforting, and a little nostalgic. This cake checks all those boxes. It is not only perfect for family gatherings but also a star at brunch tables and holiday spreads. While traditional pumpkin desserts like pie or bread carry their charm, the cream cheese layer in this cake makes it irresistible.

    The Story Behind Fall’s Favorite Coffee Cake

    For years, I thought of coffee cake as a plain breakfast treat. That changed the moment I baked my first pumpkin coffee cake recipe layered with cream cheese. It was a revelation. The swirl added creaminess that transformed the texture, and the pumpkin spice aroma filled the kitchen with unmistakable autumn energy.

    What makes this dessert even more special is its versatility. It can be served warm with a cup of coffee, chilled as an after-dinner indulgence, or dressed up with a drizzle of glaze for holidays. The combination of moist pumpkin cake and creamy filling makes it one of the best pumpkin desserts for fall. It is simple to prepare, yet the results always look and taste like something you spent hours perfecting.

    The Perfect Balance of Flavors in Pumpkin Cream Cheese Coffee Cake

    How the Cream Cheese Layer Transforms Pumpkin Coffee Cake

    Pumpkin cream cheese coffee cake is more than just a fall dessert; it’s a carefully balanced masterpiece. The moist pumpkin cake base, enriched with pumpkin spice, provides a warm and earthy flavor. When you swirl in cream cheese, the cake transforms into something richer and more decadent. The tangy layer cuts through the sweetness, adding contrast and creaminess that regular pumpkin spice coffee cake can’t deliver.

    The streusel topping provides the final touch. With buttery crumbs and a subtle crunch, it creates the ideal texture contrast. Every forkful gives you a taste of moist pumpkin cake, creamy filling, and crisp topping all at once. It’s easy to see why this recipe has become one of the best pumpkin desserts for fall gatherings.

    Why This Recipe Deserves a Spot in Your Fall Rotation

    Unlike pumpkin bread or muffins, this cake feels special enough for holidays but simple enough for everyday baking. It works for breakfast, brunch, or dessert. The cream cheese swirl makes it taste indulgent without being overwhelming. That balance of flavors keeps guests reaching for seconds.

    If you’re a fan of creative pumpkin desserts, you’ll love pairing this with ideas like these pumpkin chocolate chip muffins. Both recipes capture the essence of autumn while offering unique textures and flavors.

    Pumpkin cream cheese coffee cake also keeps beautifully, making it a reliable choice for busy weeks. Bake it once, and you’ll have slices ready for school lunches, quick snacks, or a cozy evening treat. It’s a practical recipe that still feels festive.

    Baking Pumpkin Cream Cheese Coffee Cake to Perfection

    Step-by-Step Secrets to Moist Pumpkin Coffee Cake

    Pumpkin cream cheese coffee cake is at its best when baked with care. Start by preparing a moist pumpkin cake batter infused with cinnamon, nutmeg, and cloves. These spices not only enhance the pumpkin flavor but also fill the kitchen with the cozy aroma of fall. The cream cheese layer should be smooth and slightly sweet, creating that signature swirl that sets this cake apart from ordinary pumpkin desserts.

    Layering is key. Spread half of the pumpkin batter into the pan, add the cream cheese mixture, and then finish with the remaining batter. A generous sprinkle of streusel topping ensures every slice has crunch and texture. The result is a dessert that rivals even the most decadent pumpkin spice coffee cake.

    Why This Cake Belongs on Every Fall Table

    This pumpkin coffee cake recipe is versatile enough to suit many occasions. Serve it warm for a holiday brunch, or let it cool and cut into squares for school lunches. It’s a treat that feels indulgent yet practical. The balance of moist pumpkin cake, tangy cream cheese, and buttery streusel guarantees it will be a crowd favorite.

    For another fall classic, try pairing this recipe with pumpkin bread with cream cheese frosting. Both highlight the irresistible duo of pumpkin and cream cheese, proving that these ingredients are meant to be together.

    Pumpkin cream cheese coffee cake isn’t just dessert—it’s a tradition in the making, one that brings warmth, comfort, and unforgettable flavor to your seasonal table.

    Serving and Storing Pumpkin Cream Cheese Coffee Cake

    The Best Ways to Enjoy Pumpkin Coffee Cake

    Pumpkin cream cheese coffee cake shines in every setting. Fresh from the oven, it pairs beautifully with a steaming cup of coffee or tea, making mornings feel special. Once cooled, it slices neatly into squares, perfect for potlucks, office gatherings, or holiday dessert tables. Unlike many pumpkin desserts, this cake manages to be rich and satisfying without being overly sweet, which is why it appeals to a wide audience.

    This pumpkin coffee cake recipe also adapts well to toppings. A drizzle of vanilla glaze adds elegance, while a dusting of powdered sugar keeps it simple and rustic. For those who love variety in their fall baking, pairing it with treats like pumpkin bars with simple steps makes for a dessert spread that delights everyone.

    How to Store Pumpkin Cream Cheese Coffee Cake

    One of the most practical features of this dessert is its staying power. Wrap leftovers tightly and store them in the refrigerator for up to five days. The cream cheese layer keeps the cake moist, so it actually tastes even better the next day. For longer storage, slices can be wrapped individually and frozen for up to two months. Simply thaw at room temperature or warm briefly in the oven to bring back that just-baked flavor.

    Pumpkin cream cheese coffee cake is the dessert that keeps giving. Whether it’s enjoyed fresh, chilled, or reheated, it never loses its balance of spiced pumpkin flavor, creamy swirl, and crumbly topping. It’s the kind of recipe that quickly becomes a family tradition, passed around the table year after year.

    Slices of pumpkin cream cheese coffee cake served on plates

    7 Stunning Secrets to the Perfect Pumpkin Cream Cheese Coffee Cake

    Secret #1: Use Fresh Pumpkin Purée When Possible

    Canned pumpkin works, but fresh purée gives this pumpkin cream cheese coffee cake a deeper flavor and smoother texture. Roasting sugar pumpkins adds natural sweetness that makes every bite richer.

    Secret #2: Keep the Batter Light by Avoiding Overmixing

    When combining wet and dry ingredients, mix only until just combined. Overmixing activates gluten, which makes the pumpkin coffee cake dense instead of tender and moist.

    Secret #3: Room Temperature Cream Cheese Is Essential

    Softened cream cheese blends smoothly into the filling, creating that luscious swirl. Cold cream cheese clumps, leaving uneven streaks instead of a creamy layer.

    Secret #4: Layer Batter and Cream Cheese the Right Way

    For the best results, spread half the pumpkin batter first, then the cream cheese filling, followed by the rest of the batter. This keeps the swirl even and prevents the cream cheese from sinking.

    Secret #5: Chill Before Slicing for Cleaner Pieces

    Pumpkin cream cheese coffee cake tastes great warm, but chilling for at least 30 minutes before cutting gives neat slices with defined layers.

    Secret #6: Balance Spices for Depth of Flavor

    Cinnamon should lead, but adding nutmeg and cloves enhances complexity. This blend turns an ordinary pumpkin spice coffee cake into something unforgettable.

    Secret #7: Store Properly to Keep It Moist

    Wrap leftovers tightly and refrigerate for up to five days. In fact, the cream cheese layer keeps the cake moist, and the flavor deepens overnight. For long-term storage, freeze slices individually.

    Conclusion: Bring Pumpkin Cream Cheese Coffee Cake to Your Table

    Pumpkin cream cheese coffee cake is more than a seasonal recipe—it’s comfort baked into every slice. The spiced pumpkin base, creamy swirl, and buttery streusel topping come together to create a dessert that feels indulgent yet practical, festive yet simple. It’s the kind of recipe that turns ordinary mornings into celebrations and transforms holiday gatherings into something extra special.

    If you’ve been searching for a dessert that captures the essence of fall without requiring complicated steps, this is it. Bake it once, and you’ll see why it quickly becomes a tradition. Whether you serve it at brunch, as an after-dinner sweet, or tucked into lunchboxes, it never disappoints.

    Now it’s your turn: try this recipe in your kitchen, and when you do, share it with me! Tag me on social media so I can see how your pumpkin cream cheese coffee cake turned out. After all, the best recipes aren’t just baked—they’re shared.

    FAQ: Pumpkin Cream Cheese Coffee Cake

    What makes pumpkin cream cheese coffee cake different from regular pumpkin cake?

    Pumpkin cream cheese coffee cake includes a creamy swirl of sweetened cream cheese, which balances the spiced pumpkin base. The added streusel topping creates texture and flavor that a plain pumpkin cake usually lacks.

    Can I make pumpkin cream cheese coffee cake ahead of time?

    Yes. This cake stores beautifully. Bake it a day ahead, wrap it well, and refrigerate. The flavors actually deepen overnight, making it even more delicious the next day.

    How do I keep pumpkin cream cheese coffee cake moist?

    The cream cheese swirl helps lock in moisture, but proper storage is key. Wrap tightly in plastic or store in an airtight container. Avoid leaving it uncovered, as that will dry out the cake.

    Can I freeze pumpkin cream cheese coffee cake?

    Absolutely. Slice the cake, wrap each piece in plastic wrap, then freeze. When ready to serve, thaw at room temperature or reheat in the oven to restore its fresh-baked texture.
  • Crockpot Cinnamon Roll Casserole: 10x Better Than Baked!

    Crockpot Cinnamon Roll Casserole: 10x Better Than Baked!

    Crockpot Cinnamon Roll Casserole changed everything for me. Hey—I’m Darleen Vamce, 34, Salt Lake City native, and a woman who once believed slow cookers were just for mushy potlucks. I was wrong. Very wrong. This casserole? It’s the recipe that made me a morning hero.

    Back during “The Great Mealtime Struggle”—three hungry kids, a job that never ended, and a fussy baby on my hip—I threw refrigerated cinnamon rolls, eggs, and cream into the slow cooker and hoped for the best. What came out was gooey, golden, bakery-scented magic. Now it’s our Sunday morning tradition—and my secret weapon.

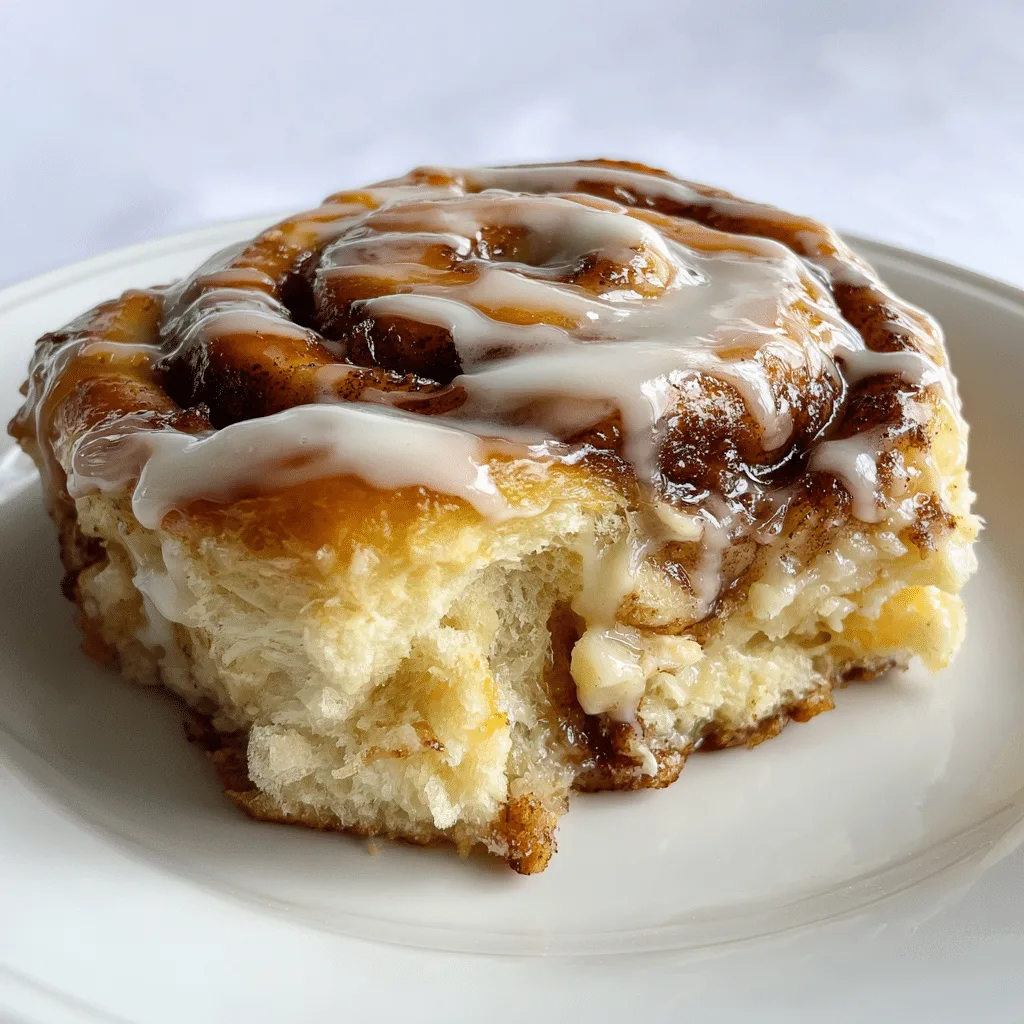
    Crockpot Cinnamon Roll Casserole baked to golden gooey perfection in slow cooker

    Recipe

    Crockpot Cinnamon Roll Casserole for Effortless Breakfasts

    A Lazy Morning Hero You’ll Want on Repeat

    Crockpot Cinnamon Roll Casserole is the breakfast shortcut you didn’t know you needed. Whether you’re dealing with a busy weekday or a lazy Sunday, this slow cooker dish delivers gooey cinnamon sweetness without hovering over a stove. It’s the kind of recipe that smells like a bakery and feels like a hug.

    What sets this apart from a traditional baked version is the texture—soft in the center, caramelized on the edges, and infused with cinnamon sugar flavor throughout. Plus, the hands-off nature makes it ideal for hectic mornings or when guests are over. Set it, forget it, and impress everyone.

    Why the Crockpot Beats the Oven Every Time

    If you’ve ever made a baked cinnamon roll casserole, you know the struggle—dry edges, undercooked centers, or rushed prep that turns chaotic. The slow cooker changes that. It creates even heat, locking in moisture, and transforming refrigerated cinnamon rolls into a creamy, pull-apart treat.

    This dish isn’t just delicious—it’s also practical. It uses affordable, easy-to-find ingredients like refrigerated rolls and pantry staples. That makes it perfect for those mornings when you want something sweet but don’t want to measure flour at 6 a.m.

    It also falls into the “dump and go breakfast casserole” category, which busy parents swear by. There’s minimal prep and zero stress, but the payoff is huge: warm, bakery-style cinnamon rolls with almost no effort.

    How to Make Crockpot Cinnamon Roll Casserole Perfectly

    Simple Ingredients, Big Flavor Payoff

    To make Crockpot Cinnamon Roll Casserole, you don’t need a long ingredient list or fancy tools. The recipe uses basic items you likely already have: refrigerated cinnamon rolls, eggs, cream, vanilla, and cinnamon. That’s it. These pantry staples come together in your slow cooker to create something truly decadent.

    What makes this dish stand out from other slow cooker breakfast casseroles is its texture. It’s soft and creamy in the middle with warm, gooey edges. Unlike baked versions that can dry out or overcook, the crockpot version traps moisture and flavor with ease.

    For those who love brunch-style comfort food but hate early-morning chaos, this is a dream. It’s also a perfect match for anyone who loves dump and go breakfast casserole recipes. Just slice the cinnamon rolls, layer them, pour the custard mix over, and press start.

    Pro Tips for Crockpot Cinnamon Roll Success

    Here’s how to make sure your Crockpot Cinnamon Roll Casserole turns out bakery-perfect every time:

    • Grease the insert well. This keeps the edges from sticking and makes cleanup faster.
    • Use parchment or a slow cooker liner if you want the casserole to lift out easily.
    • Cut rolls evenly. This helps them bake uniformly.
    • Resist overcooking. Even in a slow cooker, this dish only needs 2 to 2.5 hours on low.

    Want to try another sweet and satisfying crockpot breakfast? This Crockpot Hashbrown Casserole is savory, cheesy, and makes a great pairing for brunch spreads.

    Between the prep speed and the final flavor, it’s easy to see why Crockpot Cinnamon Roll Casserole is a go-to for holidays, weekends, and whenever you crave something special.

    Variations to Spice Up Your Crockpot Cinnamon Roll Casserole

    Easy Twists for Every Season or Mood

    Crockpot Cinnamon Roll Casserole is delicious as-is, but once you’ve made it a few times, it’s hard not to experiment. From cozy fall spices to decadent toppings, small changes can turn this into something new each time you make it.

    Here are a few tried-and-true variations that work beautifully in the slow cooker:

    • Pumpkin Spice Twist: Add ½ cup pumpkin puree and 1 teaspoon pumpkin pie spice to the custard mixture. It transforms the dish into a fall-flavored dream. If you’re into pumpkin and cinnamon combos, you’ll love these Pumpkin Cinnamon Roll Muffins too.
    • Apple Cinnamon Version: Add a layer of diced apples tossed with cinnamon and brown sugar. This gives your casserole an apple-pie-meets-cinnamon-roll effect.
    • Cream Cheese Filling: Drop dollops of sweetened cream cheese between the layers. It adds richness and a cheesecake-like center.

    These tweaks all keep the prep simple but offer huge flavor upgrades. Just like your other slow cooker breakfast casseroles, it’s all about flexibility.

    Glaze It Like a Pro

    While the included icing packet from the cinnamon rolls works in a pinch, making your own glaze takes this dessert to the next level.

    Try this quick combo:

    • 1 cup powdered sugar
    • 2 tablespoons cream or milk
    • ½ teaspoon vanilla extract

    Drizzle it over the warm casserole just before serving. The result? A glossy, sweet finish that melts into every bite.

    Whether you go classic or dressed-up, Crockpot Cinnamon Roll Casserole will keep earning repeat requests. And every version is still just as easy.

    How to Serve Crockpot Cinnamon Roll Casserole Right

    When and Where to Serve This Cozy Treat

    Crockpot Cinnamon Roll Casserole isn’t just a one-season wonder. It’s perfect for holiday brunches, weekend breakfasts, and even dessert tables. Serve it warm, straight from the slow cooker, or let it set for a sliceable texture.

    Pair it with fresh berries, whipped cream, or a drizzle of maple syrup for a brunch-worthy spread. For a more indulgent feel, add vanilla ice cream and turn it into a full-on dessert. It also travels well—just keep the lid on and bring the whole crock to your gathering.

    Because it’s such a low-effort dish with a big payoff, you’ll want to keep this recipe in rotation. It fits right in with other sweet slow cooker desserts like this Peach Cobbler in Slow Cooker—simple, satisfying, and totally stress-free.

    Storing and Reheating Tips

    Leftovers are rare, but if you do have any, here’s how to handle them:

    • Refrigerate: Store in an airtight container for up to 4 days.
    • Reheat: Microwave individual portions for 30–45 seconds or warm in the oven at 300°F for 10–15 minutes.
    • Avoid freezing: The texture may become soggy after thawing.

    Crockpot Cinnamon Roll Casserole holds up well for a day or two and makes a delicious midweek treat. Just scoop, warm, and enjoy the cinnamon-sugar comfort all over again.

    Warm slice of crockpot cinnamon roll casserole served on a plate with icing

    Conclusion: Make This Crockpot Cinnamon Roll Casserole Today

    Crockpot Cinnamon Roll Casserole isn’t just a recipe—it’s a ritual. A simple, slow-cooked creation that turns chaotic mornings into cozy memories. From busy weekdays to festive brunches, this casserole delivers warm, gooey joy without the stress.

    If you’re short on time but big on comfort, this one’s for you. It’s the kind of dish that makes people think you spent hours in the kitchen, when really, you just let your slow cooker work its magic.

    Try it at home—and when you do, tag me on Facebook. I’d love to see how your version turns out and what creative twists you bring to it!

    FAQ: Crockpot Cinnamon Roll Casserole

    Can I use homemade cinnamon rolls instead of canned?

    Yes, but expect a slightly longer cook time. Homemade dough adds a fresher flavor but may rise more, so don’t overfill your crockpot. Just cut the dough into even pieces before layering.

    Can I make Crockpot Cinnamon Roll Casserole overnight?

    Not recommended. While it’s tempting, most slow cookers overcook this casserole if left too long. Instead, prep all the ingredients the night before and start cooking in the morning.

    What size slow cooker works best for this recipe?

    A 6-quart oval slow cooker is ideal. It allows the casserole to spread evenly and cook without burning. Avoid smaller sizes to prevent overflow.

    Is this dish good for a holiday brunch?

    Absolutely. Crockpot Cinnamon Roll Casserole is a top pick for Christmas morning or Easter brunch. It holds its heat well and pairs beautifully with other crockpot brunch recipes.

  • Crack Burgers: 1 Proven Recipe That Will Skyrocket Flavor

    Crack Burgers: 1 Proven Recipe That Will Skyrocket Flavor

    Crack Burgers: 1 Proven Recipe That Will Skyrocket Flavor isn’t just another dinner idea—it’s a lifesaver born out of chaos. I’m Darleen Vance, a 34-year-old mom from Salt Lake City who once thought burgers were only fast-food territory. That was before “The Great Mealtime Struggle”—three hungry kids circling like sharks, a day job that stretched way past 5, and one tired mom staring down an empty dinner plan. Out of desperation, I grabbed ground chuck, bacon, ranch mix, and cheddar. One bite later, my family swore I had superpowers. Now, this burger is my weeknight magic trick—and soon, it’ll be yours too.

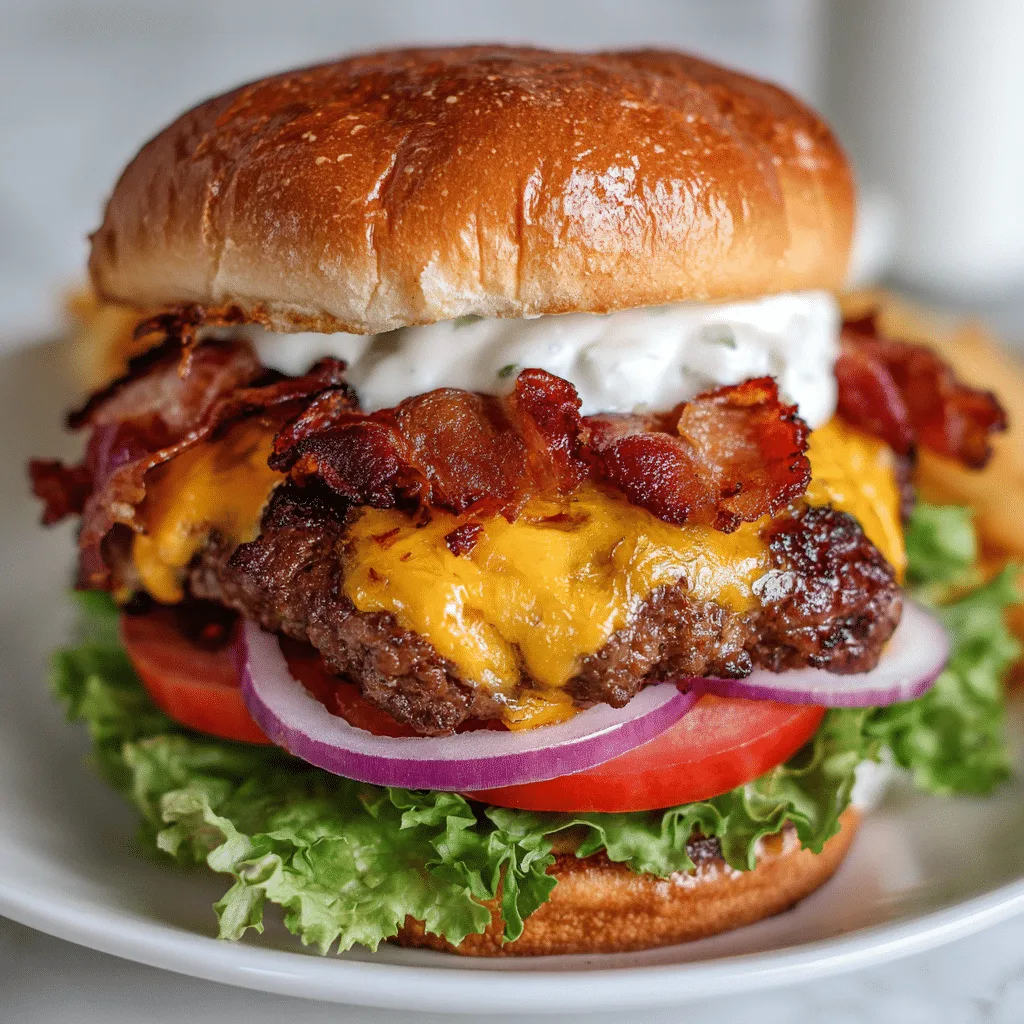
    Crack Burgers proven recipe with bacon and cheddar

    Recipe

    The Magic Behind Crack Burgers

    Why Crack Burgers Stand Out

    Crack Burgers are more than just a twist on a classic beef patty. They’re the perfect combination of smoky bacon, sharp cheddar, and creamy ranch seasoning mixed right into the ground chuck. This proven recipe doesn’t just satisfy hunger—it skyrocket flavor in every single bite. When you sink your teeth into one of these juicy ranch bacon burgers, the texture is tender, the seasoning balanced, and the cheese melts into every corner of the patty.

    Unlike fast-food versions, this recipe uses fresh ingredients and a simple method that makes it easy to recreate a gourmet burger experience at home. The result is a burger that feels both indulgent and achievable, whether you’re cooking on a busy weeknight or serving friends on the weekend.

    A Proven Method for Juicy Perfection

    The secret to this flavor-packed burger recipe is in the mix. By blending cheddar, sour cream, ranch seasoning, and bacon crumbles directly into the beef, you lock in moisture and create layers of flavor that no topping alone can match. This isn’t just an ultimate homemade burger—it’s a method that guarantees consistent results every time.

    When grilled or pan-seared, the patties develop a golden crust while staying juicy inside. Pair that with a lightly toasted bun and crisp lettuce, and you’ve got an irresistible cheesy burger that feels restaurant-quality without leaving your kitchen.

    Why This Recipe Delivers

    Many burger recipes promise flavor, but few deliver like this one. The balanced blend of ingredients makes it a skyrocket burger taste experience—savory, creamy, and just a little smoky. It’s the kind of burger that proves comfort food can be both simple and unforgettable.

    Building the Ultimate Crack Burger

    Choosing the Right Beef

    The foundation of Crack Burgers is quality ground chuck. With the perfect balance of fat and lean meat, it creates a juicy burger that never feels dry. While many recipes call for leaner blends, this proven juicy burger method relies on at least 80/20 ground chuck to guarantee flavor and tenderness. Pairing the beef with ranch seasoning mix and sour cream builds a creamy richness right into the patty.

    For those who enjoy experimenting, blending ground chuck with a small amount of ground brisket or sirloin can enhance depth of flavor. Still, the classic combination of chuck, bacon, and cheddar stands as the best crack burger recipe for consistent results.

    The Secret Flavor Boost

    What sets this recipe apart is the addition of cheddar cheese and crispy bacon folded into the beef mixture before cooking. Unlike a traditional cheeseburger, where cheese melts only on top, this method creates a flavor-packed burger recipe that tastes indulgent with every bite. The bacon delivers smoky crunch, while the cheese adds a creamy balance that keeps the patty moist.

    Using sour cream may surprise some cooks, but it’s the hidden ingredient that ensures this ultimate homemade burger stays tender. Combined with ranch seasoning, it transforms a simple beef patty into an irresistible cheesy burger with unmistakable richness.

    Toasting and Toppings That Matter

    To finish strong, toast the bun lightly to prevent sogginess and provide a subtle crunch. Crisp lettuce adds freshness, balancing the richness of the beef. From there, toppings are optional but never necessary—because the patty itself delivers a skyrocket burger taste on its own.

    The result? A burger that feels indulgent, balanced, and worthy of the title Crack Burger: 1 Proven Recipe That Will Skyrocket Flavor.

    Mastering Flavor Layers in Crack Burgers

    The Art of Flavor Stacking

    When it comes to Crack Burgers, the secret isn’t just in the ingredients—it’s in how those flavors are layered. Every bite should deliver smoky bacon, creamy cheddar, and that unmistakable tang from ranch seasoning. This isn’t your average beef patty; it’s a proven juicy burger method that makes each mouthful unforgettable. By mixing the cheese and sour cream directly into the ground chuck, you create a burger that locks in flavor at its core, not just on the surface.

    A Comfort Food Connection

    Crack Burgers belong to the same family of flavor-packed comfort food as a good Sloppy Joe or melty cheesesteak. If you’re craving more hearty ideas after trying this recipe, you’ll love these Philly Cheesesteak Sloppy Joes for their savory punch, or these Slow Cooker Sloppy Joe Stacks for an easy weeknight win. Both share the same goal: delivering bold flavors that feel indulgent but still simple enough to make at home.

    Why This Recipe Wins

    What makes Crack Burgers stand above other burger recipes is the balance. The bacon adds salt and crunch, the cheese keeps it moist, and the ranch seasoning ties everything together with a zesty finish. It’s an ultimate homemade burger that earns its place alongside other comfort food staples. Whether you’re grilling outdoors or pan-searing in the kitchen, this proven recipe guarantees a skyrocket burger taste that will keep friends and family asking for seconds.

    Serving Crack Burgers Like a Pro

    Perfect Pairings for Flavor

    Crack Burgers deserve sides that match their bold personality. Think crispy fries, onion rings, or even a fresh salad for balance. For game nights or gatherings, pair these juicy ranch bacon burgers with something shareable, like a hot Crockpot Big Mac Dip. Both recipes deliver that indulgent, flavor-packed experience people can’t resist.

    To keep the spotlight on the patty, avoid piling on too many toppings. The bacon, cheddar, and ranch seasoning already create an ultimate homemade burger with layers of taste. A simple lettuce leaf and a toasted bun are all it takes to let this proven juicy burger method shine.

    Taking Comfort Food Further

    Crack Burgers belong to a bigger world of skyrocket burger taste and hearty recipes designed to satisfy. If you’re after another comforting dish, try the creamy richness of this Crockpot Cream Cheese Chicken Chili. Just like Crack Burgers, it proves that simple ingredients can create flavor that feels both indulgent and reliable.

    Why These Burgers Stay Unbeatable

    Every detail of this recipe is built to deliver: smoky bacon, creamy cheddar, tangy ranch seasoning, and juicy ground chuck blended together. It’s not just another cheesy burger recipe—it’s the best crack burger recipe for families who crave real comfort food. From first bite to last, this sensational dish proves why Crack Burgers are a proven recipe that will skyrocket flavor and keep everyone coming back for more.

    Crack Burgers served with fries and melted cheddar
    The ultimate Crack Burger ready to enjoy

    Conclusion: Time to Try Crack Burgers

    Crack Burgers: 1 Proven Recipe That Will Skyrocket Flavor isn’t just another meal—it’s comfort food perfected. By blending smoky bacon, sharp cheddar, ranch seasoning, and sour cream right into the beef, you create an irresistible cheesy burger that stands out from every other recipe. The result is a flavor-packed burger that delivers juicy perfection in every bite.

    Whether you’re grilling for a crowd or cooking dinner on a weeknight, this ultimate homemade burger proves that a few smart ingredients can transform a simple patty into something sensational. Families crave it, friends ask for seconds, and it always earns its spot at the table.

    Now it’s your turn—make this recipe, take that first bite, and see why Crack Burgers are a proven method for comfort food bliss. Try it at home and share your version on social media. Tag me so I can see your creation and celebrate your skyrocket burger taste moment right alongside you.

    Frequently Asked Questions About Crack Burgers

    What makes Crack Burgers different from regular burgers?

    Crack Burgers stand out because the flavor isn’t just on top. Bacon, cheddar cheese, sour cream, and ranch seasoning are blended directly into the beef. This method creates a juicy ranch bacon burger that delivers skyrocket flavor in every single bite.

    Can I make Crack Burgers ahead of time?

    Yes. You can mix and form the patties up to 24 hours in advance and store them in the refrigerator. When ready, grill or pan-fry them. This proven juicy burger method ensures the patties stay flavorful and tender, even when prepped ahead.

    What cheese works best in Crack Burgers?

    Cheddar is the classic choice, but pepper jack or Colby jack also melt beautifully and add different layers of flavor. Each variation still creates an irresistible cheesy burger that feels indulgent yet simple to make at home.

    Are Crack Burgers good for meal prep?

    They can be! Once cooked, the patties store well in the fridge for up to three days. Reheat gently to maintain moisture. Many families prepare these ultimate homemade burgers on Sunday and enjoy them throughout the week as an easy dinner option.

  • Mozzarella Stuffed Meatballs: 3 Irresistible Secrets

    Mozzarella Stuffed Meatballs: 3 Irresistible Secrets

    Mozzarella stuffed meatballs used to sound like something I’d only attempt for a fancy dinner party—or, let’s be honest, never. But life had other plans. Hey! I’m Darleen Vamce—34, Salt Lake City native, and a woman who used to think slow cookers were just for potlucks and mushy stews. I was wrong. Very wrong. Now, this humble little machine is my secret weapon for turning chaos into comfort food.

    It all started during what I call “The Great Mealtime Struggle”: three kids circling the kitchen like sharks, a workday that didn’t know how to quit, and one very skeptical glance at an old slow cooker. I tossed in some beef, garlic, breadcrumbs, and—on a wild whim—a cube of mozzarella. What came out? Pure joy. Cheesy, savory, melt-in-your-mouth magic. Since that day, these meatballs have become a regular request, and I’m not mad about it.

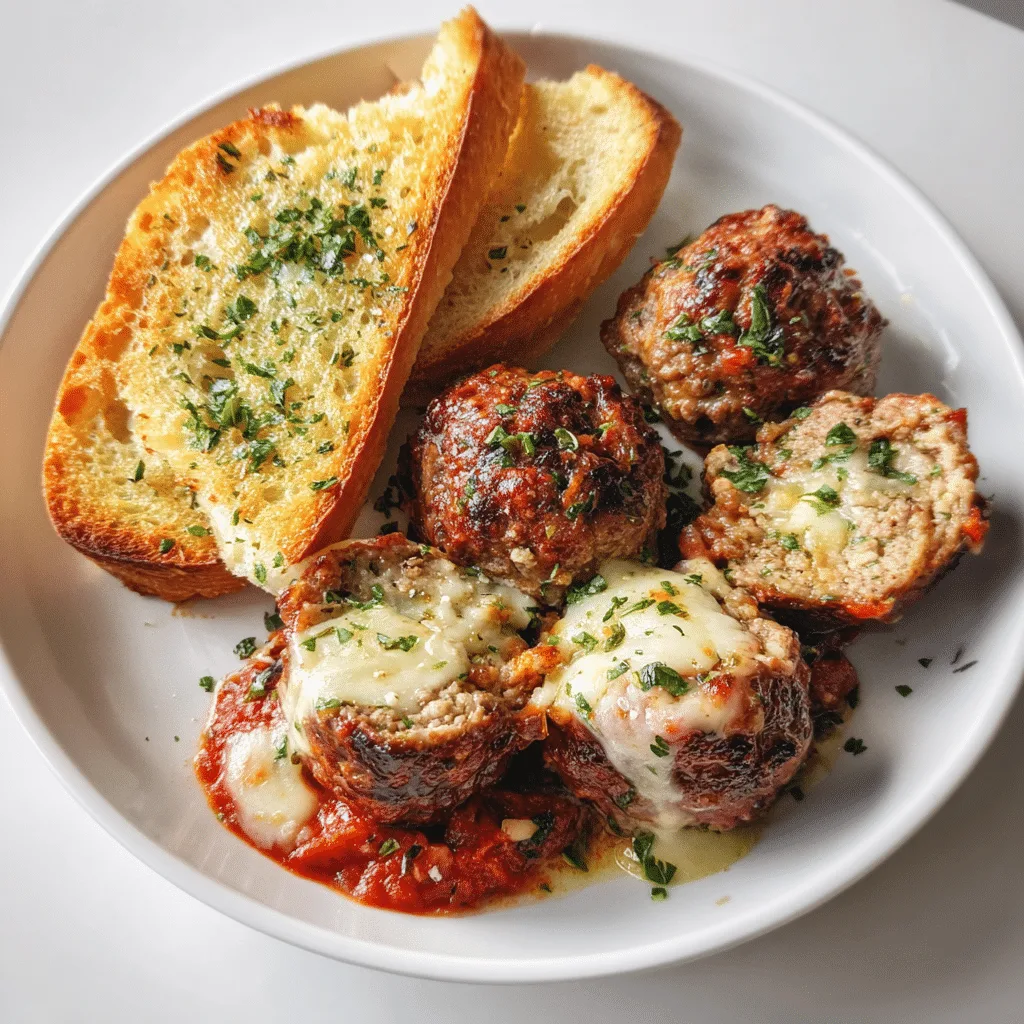
    Mozzarella stuffed meatballs in marinara sauce in skillet

    Recipe

    The Comfort Food You Didn’t Know You Needed

    Why Mozzarella Stuffed Meatballs Deserve a Spot in Your Weekly Rotation

    Let’s be honest: we all have that one recipe that lives on repeat. After one bite of these mozzarella stuffed meatballs, you’ll wonder how you ever lived without them. They’re not just cheesy—they’re juicy, flavorful, and packed with a gooey mozzarella center that turns every bite into a mini celebration.

    These meatballs aren’t trying to be fancy. They’re pure comfort food classic, born for slow cookers and chaotic weeknights. Think of it as the best of both worlds: tender, well-seasoned beef and pork on the outside, a cheese-filled meatball surprise on the inside.

    What makes them even better? You can prep them in the morning, pop them in your slow cooker, and come home to a house that smells like an Italian grandmother moved in. Even the pickiest kid (or partner) will cave by dinner.

    The Secret Sauce: It’s Not Just About the Cheese

    Sure, the mozzarella gets all the attention—but it’s only part of the story. The real magic happens in the base: a blend of ground meat, garlic, herbs, and breadcrumbs that soak up all the tomato sauce goodness over hours of slow simmering.

    The long cook time in a crockpot isn’t just convenient—it’s transformative. The meatballs become incredibly tender while the sauce deepens in flavor. The cheese? It melts perfectly in the middle, creating that irresistible gooey mozzarella center that sets this recipe apart.

    Pair it with a bowl of spaghetti, or just serve it with warm garlic bread. Either way, these stuffed meatballs are more than just a meal—they’re a slow-cooked hug on a plate.

    How to Make Mozzarella Stuffed Meatballs That Actually Impress

    Start with the Right Ingredients for Flavor and Texture

    When making mozzarella stuffed meatballs, the first secret is balance. Use a 50/50 blend of ground beef and pork for a juicy bite. Pork adds richness, while beef keeps the texture hearty. Add garlic, onion, Italian herbs, eggs, and breadcrumbs soaked in milk—it’s that combo that gives you the best homemade meatballs without dryness.

    Now for the fun part: the cheese. Use block mozzarella, cut into cubes. Shredded cheese melts too quickly and leaks out. We want that gooey, cheesy center to stay right where it belongs.

    Layer these meatballs gently in your crockpot over a base of tomato sauce. A splash of balsamic vinegar adds depth, while crushed red pepper flakes bring just a hint of heat. The longer it simmers, the better it gets.

    Let the Slow Cooker Work Its Magic

    Once everything’s in the pot, you can forget about it. That’s the second secret. Slow cooking allows the flavors to marry and the meat to become fork-tender. You don’t need to brown them first—just let them simmer for 4–6 hours on low. The cheese stays molten and the sauce absorbs all that meaty goodness.

    If you love slow-cooked meals like this, you’ll probably also fall hard for Slow Cooker French Onion Chicken. It’s rich, comforting, and similarly low-effort.

    By dinnertime, your Italian meatballs with mozzarella will be bubbling and irresistible. Serve them over spaghetti, zucchini noodles, or just mop up the sauce with toasted garlic bread. It’s cozy, crowd-pleasing, and about to become your new favorite dinner.

    Stuffed Meatballs That Keep Everyone Coming Back

    Make-Ahead Magic with Mozzarella Stuffed Meatballs

    One of the best things about mozzarella stuffed meatballs is how beautifully they work as a make-ahead meal. You can roll them, stuff them, and freeze them raw—or even fully cooked. Either way, when you’re ready, drop them into your slow cooker with a hearty tomato sauce and let the slow simmer do all the heavy lifting.

    These stuffed meatballs hold their shape without drying out, thanks to the slow cooker’s moist heat. They become tender, juicy, and packed with flavor. And that gooey mozzarella center? Still right there, waiting to surprise you with every bite.

    They also reheat like a dream, which makes them perfect for leftovers. Serve over pasta, stuff them into rolls for meatball subs, or just eat them with a fork right from the fridge. No shame here.

    Italian Comfort Food That Stuns Without Stress

    Whether you’re feeding kids, impressing guests, or just need a weeknight win, mozzarella stuffed meatballs deliver. They’re rich enough to feel special, easy enough to make without stress, and flexible enough to fit any mealtime mood.

    And if you’re craving even more of that Italian comfort food vibe, don’t sleep on Crockpot Lasagna Soup. It’s like a cozy bowl of pasta and sauce met a warm hug and turned into soup. Both recipes share that “low effort, big flavor” magic that turns slow cooking into your weeknight superpower.

    The slow cooker does more than save time—it makes meals that feel like home. And nothing says “welcome to the table” like cheesy, tender, sauce-covered meatballs made with love.

    Make Mozzarella Stuffed Meatballs Your Signature Dish

    Tips to Elevate Your Mozzarella Stuffed Meatballs Game

    You’ve already got the basics down, but if you want your mozzarella stuffed meatballs to truly shine, it’s all in the little details. Use fresh herbs like parsley or basil for a burst of brightness. Add a dash of Worcestershire sauce to the meat mix—it enhances the umami and depth. And don’t forget to chill the stuffed meatballs for 20 minutes before cooking to help them hold their shape.

    Want your sauce to be next-level? Stir in a spoonful of tomato paste and a splash of cream near the end of cooking. It adds richness and body that clings perfectly to your cheesy meatballs.

    For even more inspiration on turning humble ingredients into a dish that feels indulgent, check out Crockpot Million Dollar Pasta. Like these meatballs, it’s cheesy, satisfying, and shockingly easy to make.

    Mozzarella stuffed meatballs served over spaghetti

    Why This Recipe Never Fails to Impress

    There’s a reason mozzarella stuffed meatballs have become a go-to in my kitchen. They strike that perfect balance of simple and impressive—easy to make, yet loaded with flavor. They’re adaptable, too. Switch out the mozzarella for provolone or fontina. Add chopped spinach to the meat mixture. Or go spicy with hot Italian sausage.

    Whether you serve them for Sunday dinner, meal prep for the week, or bring them to a potluck, they never disappoint. The combination of savory meat, tangy sauce, and that magical cheese-filled center hits every time.

    They’re not just meatballs. They’re slow-cooked comfort food that tells a story, feeds a crowd, and leaves everyone asking for seconds.

    If you’re still on the fence, let this be your sign—mozzarella stuffed meatballs are worth every bite. They’re easy to prep, slow-cooker friendly, and bursting with flavor thanks to that melty, cheese-filled middle. Whether you’re feeding a busy family or just want something warm and satisfying after a long day, this dish never lets you down.

    And hey, if my once-mocked slow cooker can become the MVP of my kitchen, it can do the same for yours.

    So go ahead—give it a try. Make these tonight, and don’t forget to tag me with your cheesy creation on Facebook. I promise: one bite, and you’ll never look at meatballs the same way again.

    Frequently Asked Questions About Mozzarella Stuffed Meatballs

    How do you keep mozzarella from leaking out of meatballs?

    To keep mozzarella safely tucked inside your mozzarella stuffed meatballs, use small cubes of low-moisture mozzarella and make sure it’s fully sealed in the center of each meatball. Chilling the formed meatballs before cooking helps lock everything in.

    Can I use frozen meatballs and stuff them with cheese?

    It’s best to make stuffed meatballs from scratch. Pre-cooked frozen meatballs don’t allow for cheese stuffing, and they won’t give you that perfect gooey mozzarella center. Making your own gives better flavor, texture, and that melty cheese surprise.

    What sauce pairs best with mozzarella stuffed meatballs?

    Classic marinara is the most popular pairing, but a spicy arrabbiata or a creamy tomato basil sauce also works wonderfully. The acidity complements the richness of the cheese and meat, making it the ideal Italian comfort food combo.

    Can mozzarella stuffed meatballs be frozen after cooking?

    Yes! These mozzarella stuffed meatballs freeze beautifully. Let them cool completely, then store in a freezer-safe container with sauce. Reheat in the slow cooker or oven for an easy, delicious meal any night of the week.

  • Baked Feta and Butternut Squash Pasta: 10 Easy Ways

    Baked Feta and Butternut Squash Pasta: 10 Easy Ways

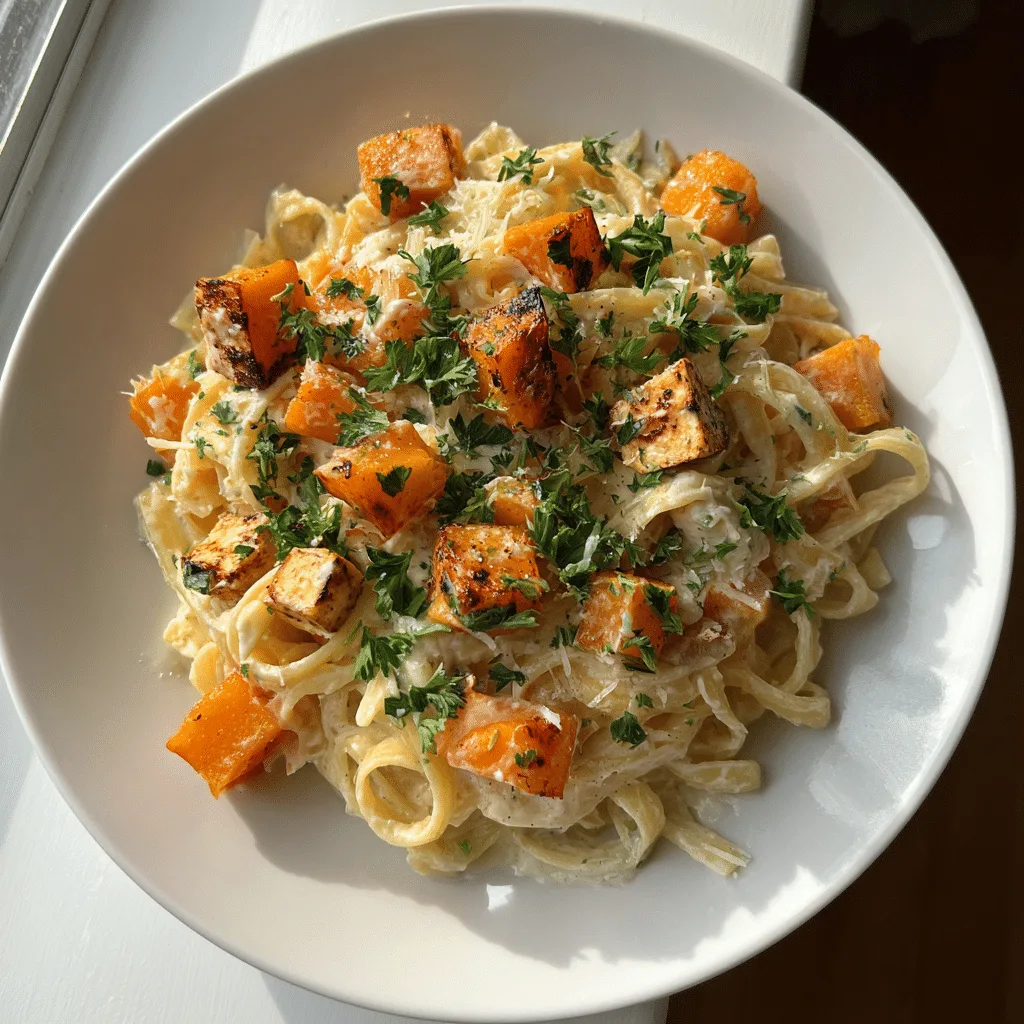
    Baked Feta and Butternut Squash Pasta isn’t just another dinner—it’s the kind of meal that sneaks into your weekly rotation and never leaves. Hey, I’m Darleen Vamce—34, Salt Lake City native, and the woman who once thought slow cookers and baked pasta tricks were for potlucks only. I was wrong. Very wrong. My kitchen changed during what I call “The Great Mealtime Struggle”—three hungry kids, a day job that laughed at the clock, and one dusty casserole dish. I tossed in feta, squash, pasta, and hope. The result? Magic. Cozy, creamy, life-saving magic.

    Baked Feta and Butternut Squash Pasta in rustic bowl

    Recipe

    Why Baked Feta and Butternut Squash Pasta Works

    Baked Feta and Butternut Squash Pasta has earned a place at the table because it combines everything we crave in comfort food—creamy texture, savory cheese, and sweet roasted squash. When the feta bakes, it transforms into a silky sauce that clings to every piece of pasta. Paired with the caramelized richness of roasted butternut squash, it creates a dish that feels indulgent without being complicated. This recipe brings together the rustic charm of fall cooking with the modern viral appeal of the famous baked feta pasta trend.

    What makes this version stand out is its balance. The squash adds natural sweetness, the feta brings tangy creaminess, and the pasta ties it all together in one cozy bite. It’s not just a seasonal favorite; it’s the kind of meal you’ll want to make year-round.

    The Appeal of Creamy and Cozy Pasta

    One reason creamy feta butternut squash pasta resonates with so many cooks is its simplicity. You don’t need an elaborate list of ingredients or hours in the kitchen. With roasted squash, a block of feta, and your favorite pasta, you can have a hearty dinner that tastes like it simmered all day.

    This combination is versatile too. You can swap in whole wheat noodles for extra fiber, use one-pot baked feta and squash pasta for easier cleanup, or even add fresh herbs to highlight the roasted flavors. The result is always satisfying, always comforting, and always ready to impress.

    In the end, this dish is more than a recipe. It’s a reminder that the best dinners often come from the simplest ingredients. With just a few thoughtful touches, baked feta pasta variations like this one can transform an ordinary night into something memorable.

    Flavor Layers in Baked Feta and Butternut Squash Pasta

    Baked Feta and Butternut Squash Pasta shines because every ingredient pulls its weight. Roasted butternut squash softens into caramelized cubes that deliver natural sweetness. The feta, once baked, melts into a creamy sauce that coats the pasta perfectly. Together, they create a dish that feels gourmet but comes together with pantry staples.

    One of the secrets behind creamy feta butternut squash pasta is contrast. The tang from the cheese balances the squash’s sweetness, while the pasta adds a hearty backbone. Even with just a handful of ingredients, the flavors are layered and satisfying.

    Simple Variations for Every Season

    The beauty of baked feta pasta variations lies in flexibility. If you crave a lighter version, try adding spinach or kale at the end for freshness. For a richer touch, stir in roasted garlic or caramelized onions alongside the feta. Each adjustment keeps the essence of Baked Feta and Butternut Squash Pasta while making it your own.

    When fall flavors inspire you, a great pairing is to serve this dish with a side of Honey Roasted Butternut Squash with Cranberries. It complements the pasta’s creamy profile while adding a festive touch.

    The versatility means this recipe never gets boring. One week you might prepare it as a one-pot baked feta and squash pasta for easy cleanup; another time, you may highlight fresh herbs like sage or rosemary. Every version captures the same cozy essence while offering a new take on a viral classic.

    How to Master Baked Feta and Butternut Squash Pasta

    Making Baked Feta and Butternut Squash Pasta at home is about embracing both technique and comfort. Start by roasting the squash until it’s caramelized and golden, which deepens its sweetness. Nestle a block of feta in the pan, drizzle everything with olive oil, and let the oven work its magic. The baked feta transforms into a creamy sauce, ready to coat pasta once it’s stirred together.

    One of the strengths of this dish is how easily it adapts. A one-pot baked feta and squash pasta version streamlines cleanup, while roasting garlic or shallots alongside the squash intensifies flavor. Herbs like rosemary or sage add a woodsy finish, perfect for fall evenings.

    Pairing and Serving Suggestions

    This cozy pasta recipe pairs beautifully with a crisp salad or a warm side of garlic bread. If you want to stretch the comfort food theme, consider serving it with a bowl of Pumpkin Butternut Squash Soup. Together, they create a seasonal spread that feels like an autumn harvest feast.

    Another trick is to finish the dish with a splash of pasta water before tossing everything together. This simple step helps the sauce cling more evenly, giving every bite that signature creamy finish. Roasted butternut squash with baked feta doesn’t just look beautiful on the table—it also delivers flavor that feels both rustic and modern.

    The result is a pasta that satisfies on multiple levels: sweet, savory, creamy, and filling. Whether you’re serving guests or just craving something comforting after a long day, Baked Feta and Butternut Squash Pasta proves that the best meals can be simple yet unforgettable.

    Creative Twists on Baked Feta and Butternut Squash Pasta

    What keeps Baked Feta and Butternut Squash Pasta exciting is how easy it is to experiment. Beyond the classic version, you can swap pasta shapes, try different herbs, or even add a touch of spice. Crushed red pepper brings heat, while fresh basil or parsley lends brightness. These baked feta pasta variations prove that the dish adapts to whatever mood you’re in.

    For a richer take, stir in sun-dried tomatoes or roasted mushrooms. If you want something lighter, toss in spinach just before serving. Every tweak feels like a brand-new recipe while still holding on to the creamy foundation that makes the dish so beloved.

    Turning Weeknight Meals into Comfort

    This recipe doesn’t just belong on the weekend menu. One-pot baked feta and squash pasta makes weeknights smoother, requiring minimal cleanup. It’s the type of cozy fall pasta you can prepare ahead of time and reheat when life feels overwhelming.

    When you’re in the mood for another indulgent pasta dish, you’ll love exploring Crockpot Million Dollar Pasta. Like baked feta and squash pasta, it transforms simple ingredients into a meal that tastes far more luxurious than the effort it takes.

    Pairing these two recipes in your kitchen means you’ll always have a creamy, comforting dinner ready to wow your family. Both dishes highlight how resourceful pasta can be when paired with the right ingredients.

    Baked Feta and Butternut Squash Pasta isn’t just a trend—it’s a staple you’ll crave again and again. With a little creativity, it becomes more than just a recipe. It turns into a reliable source of comfort, flavor, and inspiration in your kitchen.

    Serving of baked feta and butternut squash pasta

    Conclusion

    Baked Feta and Butternut Squash Pasta is more than a viral sensation—it’s a recipe that earns a permanent spot in your rotation. The combination of creamy baked feta and sweet roasted squash delivers layers of flavor that feel indulgent yet comforting. What makes it even more appealing is its adaptability: one night you may keep it classic, the next you might add greens, garlic, or fresh herbs for a new twist.

    This pasta isn’t just about feeding your family; it’s about creating moments at the table that feel cozy, warm, and memorable. It proves that great flavor doesn’t require complicated steps—just the right pairing of simple ingredients.

    If you’ve been looking for a dish that balances ease with incredible taste, this is the one. Try Baked Feta and Butternut Squash Pasta at home, share your version with friends, and tag me on social media. I’d love to see how you bring your own flavor to this classic comfort recipe.

    FAQ

    What makes Baked Feta and Butternut Squash Pasta so special?

    This pasta stands out because the baked feta turns creamy and tangy, while roasted butternut squash adds caramelized sweetness. Together, they create a comforting, balanced dish that feels both gourmet and simple.

    Can I make Baked Feta and Butternut Squash Pasta ahead of time?

    Yes, you can prepare it in advance. Store the pasta in an airtight container for up to three days. Reheat with a splash of pasta water or cream to restore the creamy texture.

    What pasta shapes work best with baked feta and squash?

    Short pasta like penne, rigatoni, or fusilli works best. Their ridges help capture the creamy feta sauce and small chunks of roasted butternut squash.

    How can I make this dish more filling?

    You can bulk up the recipe by adding protein such as grilled chicken, Italian sausage, or chickpeas. These additions blend seamlessly with the creamy feta butternut squash base.

  • Honey Roasted Butternut Squash with Cranberries and Feta

    Honey Roasted Butternut Squash with Cranberries and Feta

    Honey roasted butternut squash with cranberries and feta wasn’t always on my dinner table—but now, it’s a non-negotiable staple every fall. Hey! I’m Darleen Vamce—34, Salt Lake City native, and a woman who used to think slow cookers were just for potlucks and overly mushy stews. I was wrong. Very wrong. Now, this humble little machine is basically my co-chef, my weekday dinner savior, and the secret weapon behind most of the meals that make my family think I have superpowers.

    This recipe was born during “The Great Mealtime Struggle,” when flavor felt like a luxury. Spoiler: this dish saved the day—and my sanity.

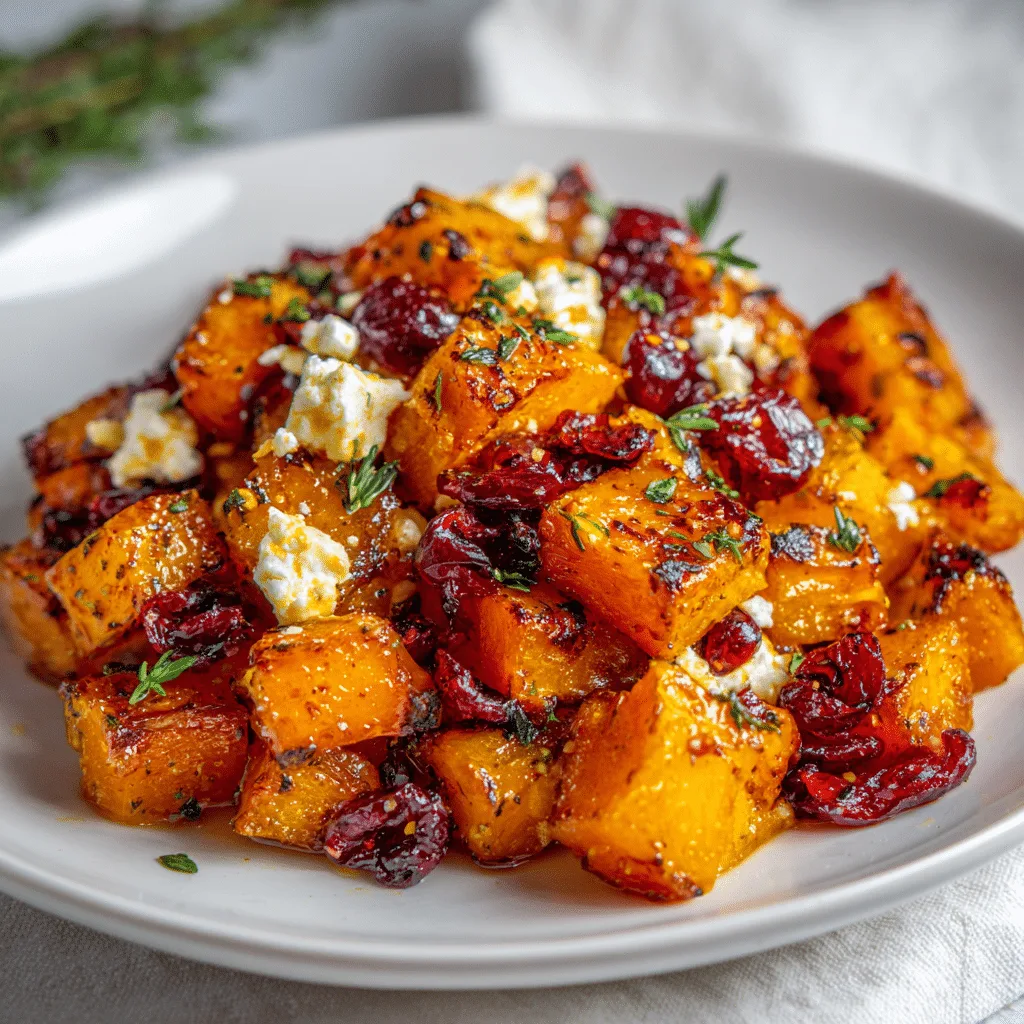
    Honey roasted butternut squash with cranberries and feta in baking dish

    Recipe

    Why This Honey Roasted Butternut Squash with Cranberries and Feta Works

    A Sweet-Savory Combination That Wins Every Time

    Honey roasted butternut squash with cranberries and feta is the kind of dish that makes people pause mid-bite. It’s the perfect mix of sweet, savory, creamy, and tangy—all wrapped up in a forkful of roasted comfort. I stumbled onto this flavor combination during one hectic weeknight, when I had half a squash, a forgotten bag of dried cranberries, and a block of feta waiting for inspiration.

    It turns out, sometimes the best recipes are born from what’s already in your pantry.

    The roasted butternut squash caramelizes in the oven, its edges golden and crisp, while the honey deepens the natural sweetness. The cranberries offer a tart, chewy pop that cuts through the richness, and that salty crumble of feta? It brings it all home.

    This recipe isn’t just delicious—it’s practical. It’s easy enough for a quick weeknight dinner but elegant enough for your Thanksgiving table or any cozy fall gathering. It’s become my go-to holiday side dish when I need something that tastes like effort but feels effortless.

    The Ingredients Do the Heavy Lifting

    Let’s talk about what makes this sweet and savory side dish so memorable. First, the butternut squash itself—it’s the perfect fall vegetable: hearty, healthy, and just a bit sweet on its own. Add a little olive oil, garlic, and honey, and you get a rich, golden roast that holds its shape but melts in your mouth.

    Then there are the dried cranberries. I always reach for the sweetened kind because they balance the squash perfectly. And the feta cheese—tangy, creamy, and a little crumbly—is what makes this dish stand out from every other roasted vegetable recipe. It’s a bold pairing, but it works every time.

    A sprinkle of fresh thyme or rosemary gives it a fragrant, herby kick. If you’re feeling adventurous, a pinch of cinnamon or smoked paprika adds just enough edge without overpowering the dish.

    This isn’t just another roasted vegetable recipe—it’s a healthy fall side dish that feels indulgent but comes together with minimal prep.

    How to Roast Butternut Squash with Feta and Cranberries Like a Pro

    Start with Fresh, Simple Ingredients

    When it comes to honey roasted butternut squash with cranberries and feta, the quality of your ingredients makes all the difference. Choose a squash that feels heavy for its size and has a deep orange color inside—it will be sweeter and roast up beautifully.

    Peel and cube the squash evenly so it cooks at the same pace. I like to cut mine into ¾-inch chunks. Toss them with olive oil, honey, and a pinch of salt and pepper. For added flavor, sprinkle on fresh thyme or rosemary—both herbs pair incredibly well with the natural sweetness of squash.

    Arrange the cubes on a baking sheet in a single layer. This helps them roast instead of steam. You want those gorgeous caramelized edges—it’s the key to developing deep, roasted flavor.

    Roast at 400°F for about 30–35 minutes, flipping halfway. The squash should be tender and golden brown.

    Finishing Touches: Balance, Texture, and Pop

    Once your butternut squash is roasted, it’s time to turn this side into something truly special.

    Add a handful of dried cranberries for tart chewiness. Their subtle tang cuts through the richness of the squash. Then crumble feta cheese over the top—it adds creamy saltiness that balances every bite. A drizzle of honey or balsamic glaze can take it to the next level.

    This dish is ideal for a cozy autumn recipe, but it shines just as bright on a holiday table. The contrasting textures—roasted edges, chewy berries, and creamy feta—are what make it unforgettable.

    For more cozy side ideas using fall vegetables, you might also love this roasted brussel sprouts and butternut squash recipe that brings in even more seasonal flavors.

    Whether you’re meal-prepping a healthy fall side dish or making a crowd-pleaser for Thanksgiving, this one never disappoints.

    Serving and Pairing This Butternut Squash Side Dish

    Versatile Enough for Weeknight Dinners or Holiday Feasts

    Honey roasted butternut squash with cranberries and feta isn’t just for special occasions. While it shines at Thanksgiving and fall gatherings, it’s also a surprisingly easy dish for any night of the week. The balance of flavors works well next to roasted meats, poultry, or plant-based mains.

    For a quick meal, I love serving this alongside grilled chicken or baked salmon. It adds a sweet and savory element that rounds out the plate. On holidays, it’s a standout dish among traditional sides like stuffing, mashed potatoes, and green beans.

    This recipe also makes a great vegetarian holiday side for potlucks or dinner parties. The bright cranberry and creamy feta combination is unexpected but loved by all ages.

    Whether you’re creating a healthy fall side dish or prepping a make-ahead lunch, this one does it all with style.

    What Pairs Well with This Flavor Combo

    If you’re wondering what else to serve with your honey roasted butternut squash with cranberries and feta, here are a few standout options that keep the seasonal flavors flowing.

    Roasted meats with earthy or herbal marinades work best. Think rosemary pork loin, lemon-garlic chicken, or even roast turkey. For something richer, try a side of garlic parmesan chicken and potatoes—the creamy, savory layers complement the squash’s sweetness perfectly.

    If you’re keeping it plant-based, roasted Brussels sprouts, sautéed kale, or wild rice pilaf create a warm, grounding plate. You can also sprinkle toasted walnuts or pumpkin seeds on top of your squash for extra crunch.

    This dish is adaptable, beautiful on the table, and deeply satisfying in flavor and texture. It’s the kind of recipe that moves from weeknight staple to seasonal tradition without skipping a beat.

    Storing and Reheating Honey Roasted Butternut Squash with Cranberries and Feta

    Make-Ahead Friendly and Meal Prep Approved

    One of the reasons I love honey roasted butternut squash with cranberries and feta so much is how well it fits into real life. This is not one of those fussy recipes that needs to be eaten immediately. In fact, it gets even better the next day.

    If you’re prepping ahead for a dinner party or a holiday feast, roast the squash up to two days in advance. Store it in an airtight container in the fridge. When you’re ready to serve, simply warm it in the oven at 350°F for 10–15 minutes. Add the feta and cranberries just before serving so their textures stay vibrant and fresh.

    This dish also reheats beautifully in the microwave, making it perfect for lunch leftovers or weeknight side dishes. Whether you’re building a plate around roasted chicken or mixing it into a grain bowl, this squash delivers every time.

    How Long Does It Last and How to Keep It Fresh

    Properly stored, honey roasted butternut squash with cranberries and feta will last up to 4 days in the refrigerator. If you’re storing leftovers, let the squash cool fully before sealing. Don’t skip this step—trapped steam can make the roasted edges soft and soggy.

    Want to freeze it? You can, but skip the feta and cranberries until after reheating for the best texture. Frozen roasted squash lasts up to three months and can be revived in the oven or air fryer to bring back its golden caramelized edges.

    And here’s a little trick—use any extra squash to top salads or mix into pasta with a splash of cream. It’s flexible, flavorful, and never goes to waste.

    If you love seasonal comfort food, you’ll also enjoy this creamy, warming pumpkin butternut squash soup that turns cold nights into cozy dinners.

    This recipe isn’t just about flavor—it’s about flexibility. Whether you’re planning ahead or winging it last minute, it works.

    Plated honey roasted butternut squash with cranberries and feta

    Conclusion: Add This Showstopper to Your Seasonal Table

    Honey Roasted Butternut Squash with Cranberries and Feta isn’t just another side dish—it’s the one that gets everyone asking for the recipe. The caramelized squash, tangy cranberries, and salty feta come together in the most satisfying way. Whether you’re serving it at a holiday feast or a Tuesday night dinner, it brings warmth, color, and unbeatable flavor to the table.

    It’s sweet, savory, vibrant, and so simple to make—just a few fresh ingredients and a hot oven turn ordinary squash into something crave-worthy.

    If you haven’t tried Honey Roasted Butternut Squash with Cranberries and Feta yet, this is your sign. Add it to your fall recipe rotation, bookmark it for Thanksgiving, or make it tonight just because. Your kitchen will smell amazing, and your plate will look like it belongs in a cookbook.

    Try it at home and tag me on social media—I’d love to see your take on this cozy, crowd-pleasing classic.

    FAQs about honey roasted butternut squash with cranberries and feta

    What makes honey roasted butternut squash with cranberries and feta so special?

    Honey roasted butternut squash with cranberries and feta combines the best of fall flavors. The squash becomes tender and caramelized from roasting, the cranberries add a tart chew, and the feta gives a creamy, salty finish. Together, they create a sweet-savory side dish that’s both elegant and comforting.

    Can I make honey roasted butternut squash with cranberries and feta ahead of time?

    Yes, you can absolutely make honey roasted butternut squash with cranberries and feta ahead of time. Roast the squash and store it in the fridge for up to 2 days. Add the cranberries and feta just before serving for the freshest flavor and texture.

    Is this dish healthy?

    Honey roasted butternut squash with cranberries and feta is a healthy, nutrient-dense option. Butternut squash is packed with fiber, vitamin A, and potassium. Using olive oil and moderate amounts of feta keeps it flavorful without being heavy. It’s a great vegetarian side dish for fall or holiday meals.

    What should I serve with honey roasted butternut squash with cranberries and feta?

    This dish pairs well with roasted meats, especially poultry and pork. It’s also excellent with hearty grain salads or fall soups. Try it with turkey at Thanksgiving or next to a rich main like garlic parmesan chicken. Honey roasted butternut squash with cranberries and feta is versatile enough for both casual dinners and formal gatherings.