Blog

  • Crockpot Honey Lime Chicken Tacos: 5-Ingredient Epic Win

    Crockpot Honey Lime Chicken Tacos: 5-Ingredient Epic Win

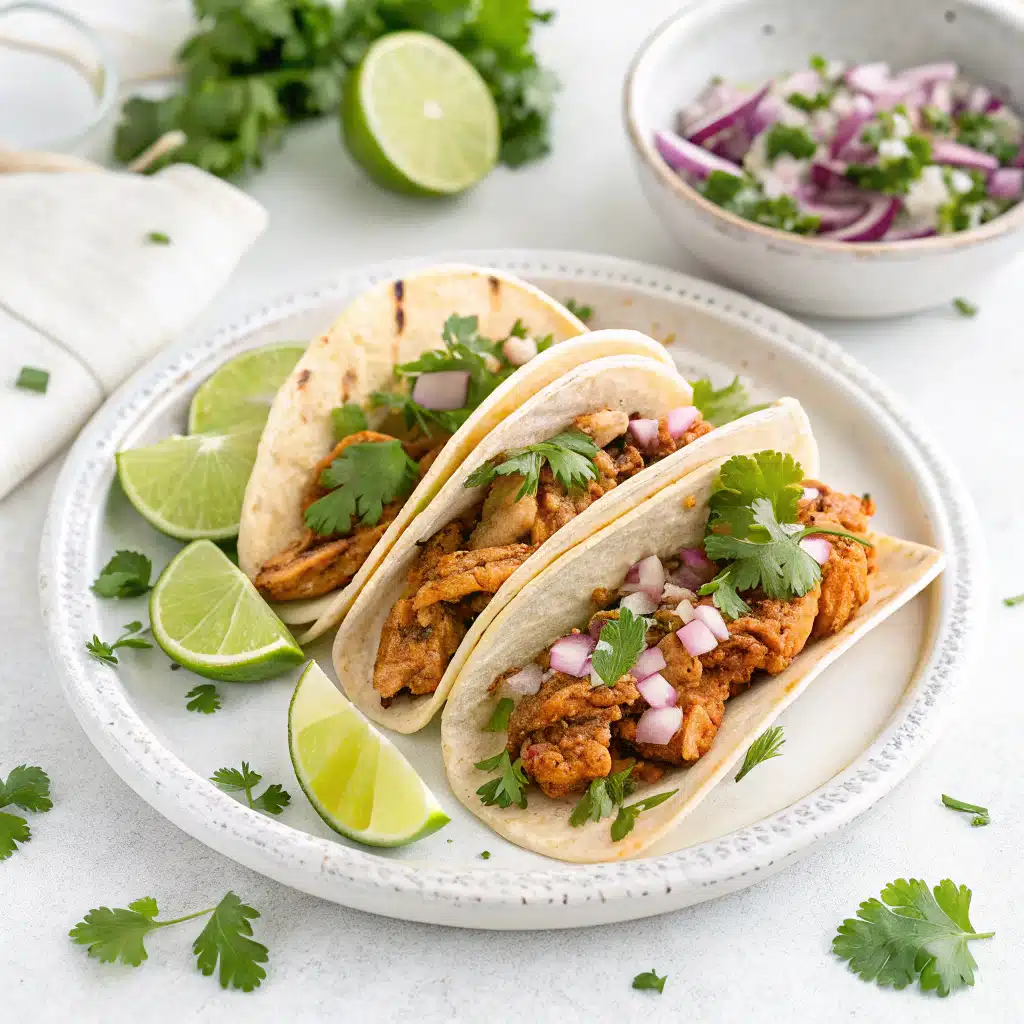
    Crockpot Honey Lime Chicken Tacos saved my Tuesday. I tossed everything into the slow cooker, then my mixer broke, my toddler painted the dog with sour cream, and I realized the limes were hiding in the fruit drawer. Still, these Crockpot Honey Lime Chicken Tacos came out tender, sticky-sweet, and bright with citrus. I shredded the chicken with two forks like a hero, squeezed in extra lime, and boom—taco night was back on track. If kitchen chaos is your normal (same here), this recipe is your set-it-and-forget-it sanity saver.
    Recipe

    Why You’ll Love Crockpot Honey Lime Chicken Tacos

    Set-It-and-Forget-It Flavor

    Crockpot Honey Lime Chicken Tacos bring weeknight joy to your table with practically no effort. The slow cooker transforms simple pantry staples into juicy, tender, shredded chicken tacos layered with citrusy zing and honey-kissed sweetness. Each bite tastes like a street taco with a bright lime squeeze and a whisper of chili warmth. If you love slow cooker honey lime chicken and crave taco night without babysitting the stove, this is your golden ticket. The crock pot does all the work, and dinner still tastes like you simmered all afternoon.

    As for me, I once measured the honey with an unmarked sippy cup (don’t ask), and Crockpot Honey Lime Chicken Tacos still turned out restaurant-level delicious. That’s how forgiving this slow cooker honey lime chicken recipe is. The combination of lime zest, garlic, and chili powder infuses the shredded chicken so it’s never bland, just bright and bold. When you’re ready to assemble, warm tortillas, pile on chicken, and top with crunchy slaw and avocado for the perfect sweet-heat balance.

    TikTok-Tested, Family-Approved

    These Crockpot Honey Lime Chicken Tacos lean right into the viral trend of sticky, citrusy shredded chicken, but they’re truly family-friendly. My kids go for flour tortillas, while I love corn tortillas with extra cilantro and cotija. Add jalapeño if you want that trending sweet-heat kick. And if you need more slow cooker inspo, try my Slow Cooker BBQ Chicken Sliders—another weeknight gem you can set and forget.

    Slow Cooker Honey Lime Chicken Tacos: The Easy Method

    Simple Steps for Foolproof Results

    Start with boneless chicken breasts, whisk in honey, fresh lime juice, and spices, then let the crock pot work its magic. Crockpot Honey Lime Chicken Tacos rely on the slow cooker to tenderize every bite, locking in sweet lime flavor with chili warmth. The cooking liquid becomes a glossy glaze that coats shredded chicken beautifully. For the best shredded chicken tacos texture, cook low and slow, then shred and toss back in the sauce so each strand absorbs that honey-lime goodness.

    Pro move? Reserve a little cooking liquid to moisten leftovers. These Crockpot Honey Lime Chicken Tacos also adore a quick slaw—just cabbage, lime, and a pinch of salt. Add avocado for creaminess and cotija for salty pop. The result is that classic slow cooker honey lime chicken profile: sweet, tangy, and perfectly balanced. If you enjoy bright flavors, a final squeeze of lime over each taco is a must.

    Darleen’s Chaos Tip Box

    I once dropped the lime zester in the crock pot, fished it out with tongs, and kept going. Dinner still won. Crockpot Honey Lime Chicken Tacos forgive minor mess-ups: too much honey? Add extra lime. Too sharp? A pinch more honey. Too mild? Sprinkle more chili powder and cumin. That’s why these slow cooker honey lime chicken tacos are my go-to when life is loud and time is tight. For a veggie-forward side, pair with my Quinoa Stuffed Bell Peppers—they balance the sweet-savory taco vibes.

    Easy Honey Lime Shredded Chicken Tacos: Variations

    Flavor Boosters You’ll Love

    Want to remix your Crockpot Honey Lime Chicken Tacos? Stir in a spoonful of chipotle in adobo for smoky heat, or a splash of orange juice for a citrusy twist. Swap chili powder for ancho chili to deepen the flavor, or add a handful of pineapple chunks during the last 30 minutes for a tropical, Pinterest-popular spin. These slow cooker honey lime chicken tacos are versatile: they’re a canvas for your cravings and a friendly base for whatever toppings your family loves.

    Try it street-taco style with chopped onion and cilantro, or go California-style with shredded cabbage, avocado, and a drizzle of crema. I’ve even served Crockpot Honey Lime Chicken Tacos bowl-style over cilantro-lime rice—so good. When the power went out mid-cook once, I wrapped the warm crock in a towel and finished it in the oven at low heat. Still perfect. The honey and lime keep the shredded chicken juicy no matter what.

    • Lettuce wraps instead of tortillas for a light, gluten-free take.
    • Cauliflower tortillas for low-carb Crockpot Honey Lime Chicken Tacos.
    • Pineapple salsa or mango pico for a sweet, colorful finish.
    • Jalapeño cilantro crema for creamy heat.
    • Quesadilla-style: stuff and griddle for crispy edges.

    For more crowd-pleasing party bites, my Parmesan Pretzel Bites with Garlic Dip always disappear first!

    Meal Prep, Storage, and FAQs for Honey Lime Tacos

    Make-Ahead and Meal Prep

    Crockpot Honey Lime Chicken Tacos are meal-prep gold. Cook once, eat twice (or more!). Store shredded chicken and cooking liquid separately for 3–4 days in the fridge. Reheat gently with a splash of liquid to keep that slow cooker honey lime chicken succulent. Portion into lunch containers with tortillas on the side so they don’t get soggy. For freezer meal magic, freeze the cooked shredded chicken flat in zip-top bags for up to 3 months; thaw overnight and warm in a skillet.

    On a wild Wednesday, I forgot tortillas and served the honey lime chicken over greens with crispy tortilla strips. New favorite. That’s the beauty of these Crockpot Honey Lime Chicken Tacos—they morph into bowls, salads, quesadillas, or nacho toppings. Taco night, lunch boxes, game day: covered.

    Storage, Troubleshooting, FAQs

    • Too sweet? Add extra lime juice and a pinch of salt.
    • Too tangy? Stir in a teaspoon of honey and a dab of crema.
    • Dry chicken? Toss with more warm cooking liquid and a drizzle of olive oil.
    • No cotija? Use feta or a sprinkle of sharp cheddar.
    • Gluten-free? Use certified gluten-free corn tortillas.

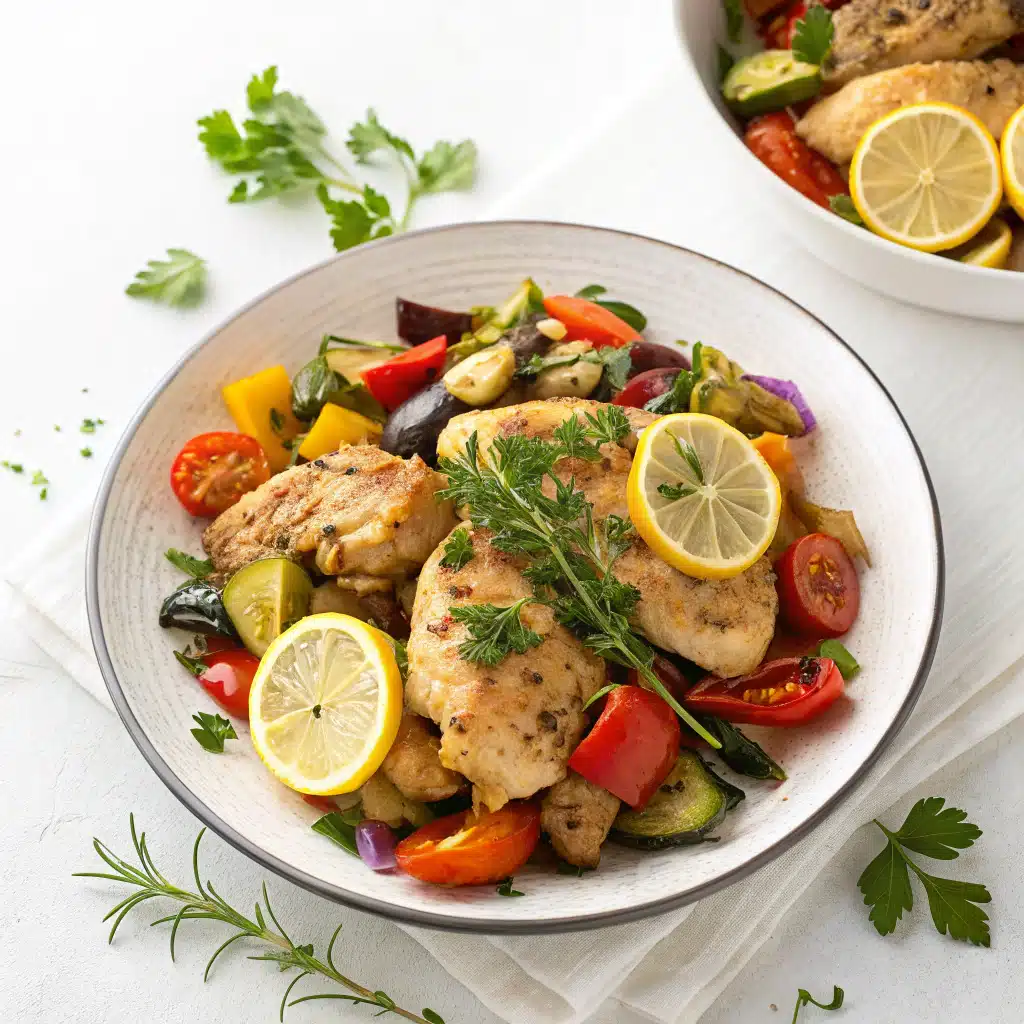
    Need another slow-cooker dinner? Don’t miss my One-Pot Mediterranean Chicken & Vegetables—full flavor, minimal cleanup.

    FAQs

    Can I make Crockpot Honey Lime Chicken Tacos with chicken thighs?

    Yes. Boneless skinless thighs stay extra juicy. Reduce cook time slightly and shred when tender.

    How do I thicken the sauce for Crockpot Honey Lime Chicken Tacos?

    Simmer 1 cup of strained cooking liquid in a skillet for 5–7 minutes, or whisk in a cornstarch slurry (1 tsp cornstarch + 1 tsp water) and cook until glossy.

    What toppings go best with slow cooker honey lime chicken tacos?

    Cabbage slaw, avocado, cotija, cilantro, pickled onions, jalapeño slices, pineapple salsa, and lime wedges are all great choices.

    Can I make these Crockpot Honey Lime Chicken Tacos in an Instant Pot?

    Yes. Pressure cook on High for 10 minutes with natural release for 5 minutes, then quick release, shred, and toss with sauce.

    Conclusion

    Crockpot Honey Lime Chicken Tacos deliver bright, sticky-sweet, and zesty flavor with minimal effort, making them a weeknight staple you’ll crave. The slow cooker honey lime chicken stays tender and juicy, perfect for shredded chicken tacos loaded with slaw, avocado, and cotija. Whether you serve them as bowls, lettuce wraps, or classic tacos, Crockpot Honey Lime Chicken Tacos bring crowd-pleasing flavor that never fails. Prep is quick, cleanup is easy, and leftovers reheat like a dream. I hope this becomes your next signature taco night recipe. Try it at home and tag me—I can’t wait to see your Crockpot Honey Lime Chicken Tacos shine on your table!
  • Zucchini Noodle Alfredo Bake: Irresistible Secrets

    Zucchini Noodle Alfredo Bake: Irresistible Secrets

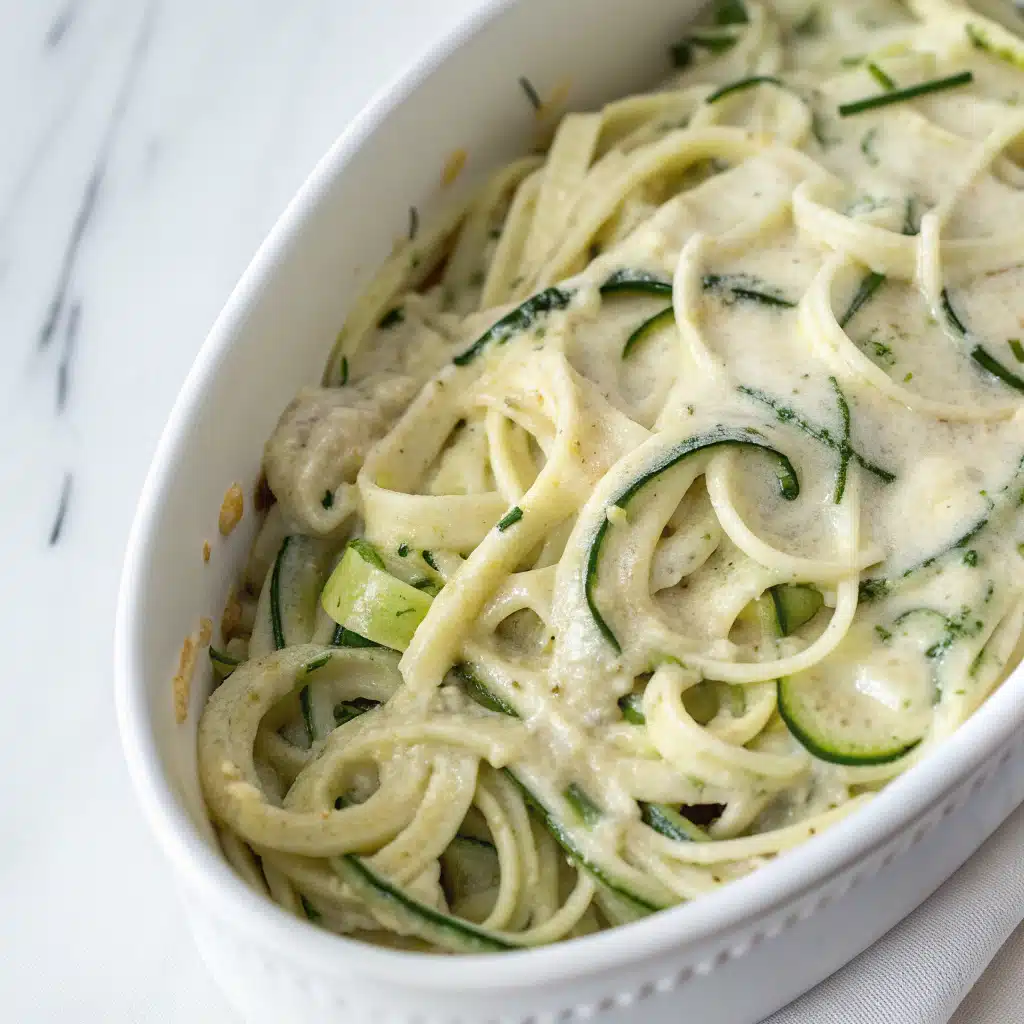
    Zucchini Noodle Alfredo Bake saved dinner last Tuesday. I was late from carpool, my oven mitts were hiding, and my saint of a slow cooker was already full of chicken stock for tomorrow. So I grabbed zucchini, made quick zoodles, whipped a fast Alfredo, and slid this Zucchini Noodle Alfredo Bake into the oven. The kids hovered. The dog did, too. Ten minutes after the timer beeped, we were eating creamy, cozy, light comfort. I call it Zucchini Noodle Alfredo Bake magic because it tastes like pasta night without the pasta panic.

    Zucchini Noodle Alfredo Bake – 7 Irresistible Secrets for Cozy Comfort

    Recipe

    Zucchini Noodle Alfredo Bake for Busy Nights

    On school nights in Salt Lake City, I keep dinner simple. This Zucchini Noodle Alfredo Bake is my no-drama answer when the after-school shuffle runs late. It gives you creamy Alfredo comfort, but with light, twirly zoodles instead of heavy pasta. Because zucchini cooks fast, the whole dish moves quickly, and the oven does the finish. While it bakes, I pack lunches, start a load of laundry, and pretend I’ve got it together.

    Here’s why this bake helps. Zucchini noodles soak up just enough sauce to taste rich, yet they don’t weigh you down. The Alfredo is quick: garlic, half-and-half, a little cream cheese for body, and a shower of Parmesan. Then everything slides into a casserole dish, gets blanketed with mozzarella, and bakes until bubbly. Everyone at the table gets that cozy Alfredo bite. But they also get vegetables. That’s a quiet mom victory.

    If you love a creamy, oven-finished dinner, you’ll also love my Creamy Cauliflower Mac and Cheese Bake. It hits that same golden, melty top—just with a veggie twist.

    Why This Low-Carb Classic Is Trending

    We’re all craving lighter comfort food, and this Zucchini Noodle Alfredo Bake fits. It’s low-carb, gluten-free friendly, and still tastes like a Saturday-night splurge. Social feeds love it because it’s gorgeous: ribbons of zucchini under a bronzed cap of cheese. But it’s more than a pretty face. It meal-preps well, uses simple pantry staples, and plays nice with proteins—rotisserie chicken, leftover grilled steak, or a can of cannellini beans.

    It also solves a real dinner dilemma. We want the creamy Alfredo vibe, but we don’t want to boil a huge pot of pasta. With zoodles, there’s no waiting for water, and cleanup is easier. And if you need even more cozy ideas, my Pumpkin Alfredo Pasta Bake brings a fall twist that’s just as family-loved.

    Creamy Zucchini Alfredo Bake: Step-by-Step

    First, spiralize your zucchini. If you don’t have a spiralizer, a julienne peeler or the store-bought zoodles work fine. Salt the strands and give them a short rest in a colander. This draws out extra water. Then squeeze. Not like you’re mad at it—just enough to keep the bake from getting watery.

    Next, the sauce. I warm olive oil and butter, add garlic, then whisk in half-and-half and cream cheese. It melts smooth, fast. A splash of broth loosens it, and Parmesan thickens it right back up. A hint of nutmeg and lemon zest makes it sing. Pepper and salt to taste. That’s your creamy Alfredo base, ready in minutes.

    Toss the zoodles with sauce. Add cooked chicken if you’ve got it, or mushrooms if you don’t. Peas are optional, but my kids cheer for them. Into the dish it goes. Top with mozzarella and a little extra Parmesan. Bake until it bubbles and the edges turn golden. Let it rest so it sets. Then serve those beautiful scoops with parsley on top.

    Pro Tips for Perfect Zoodles

    • Drain, then squeeze: Salting and gently squeezing keeps the Zucchini Noodle Alfredo Bake creamy, not watery.
    • Don’t overbake: Zoodles soften fast. Pull when it’s just bubbly; they’ll finish as it rests.
    • Freshly grated cheese: Pre-shredded can clump. Fresh Parmesan and mozzarella melt smoother.
    • Balance the sauce: If it’s too thick, add a splash of broth. Too thin? Simmer 1–2 more minutes.
    • Add a crunch: Sprinkle almond flour or gluten-free crumbs on top for texture, if you like.

    Best Zucchini Noodle Alfredo Casserole

    I call this the best Zucchini Noodle Alfredo Casserole because it nails the balance. It’s cozy but bright, rich but not heavy. And it welcomes what you have on hand. I’ve folded in leftover rotisserie chicken, roasted broccoli, even a handful of spinach that needed love. Parmesan gives you that classic Alfredo bite, while mozzarella makes the top gooey and irresistible. The nutmeg whispers comfort, and the lemon zest keeps it fresh.

    Because the base is so simple, you can build flavors your family loves. Want it garlicky? Add another clove. Want heat? Crushed red pepper makes it pop. Want extra protein without meat? Ricotta dollops tucked under the cheese do the trick. You get to steer this casserole to your taste and your pantry.

    When I have a night with no oven time, I lean on my slow cooker (it truly saved my sanity). For those days, try my hearty Slow Cooker Butternut Squash Lentil Curry. Different vibe. Same soul-warming bowl.

    Swaps and Variations (Pinterest-Style)

    • Protein swap: Rotisserie chicken, sautéed shrimp, crumbled turkey sausage, or white beans.
    • Veggie boost: Spinach, kale ribbons, roasted broccoli, or sliced mushrooms.
    • Cheese vibe: Swap mozzarella for provolone; add a ricotta layer for lasagna feels.
    • Dairy-light: Use evaporated milk instead of half-and-half; thicken with 1 tsp cornstarch.
    • Lemon-pepper: Double the zest and add 1 tsp lemon pepper to the sauce.
    • Bake-and-broil: Finish under broiler 1–2 minutes for a bronzed top.
    • Keto-ish: Skip peas and any crumbs; use heavy cream and pork rind “crumbs.”
    • Herb garden: Stir in fresh basil or thyme before baking.
    • Extra comfort: Layer in a few slices of fresh mozzarella for big melty puddles.
    • Sheet-pan option: Bake in a wide pan for more browned edges.

    Healthy Zucchini Noodle Alfredo Recipe

    This healthy Zucchini Noodle Alfredo Recipe leans on vegetables and protein, not pasta, to fill you up. It’s naturally gluten-free if you skip breadcrumbs. It’s lower in carbs thanks to zucchini. And it’s flexible. You can use light dairy, or go richer with heavy cream on days you need a hug in a bowl. The trick to keeping it healthy and happy is balance—enough sauce to coat, not drown; enough cheese to satisfy, not bury.

    Serve it with a crisp salad or roasted veggies. If you want a simple one-pan partner for another night, bookmark my One-Pot Mediterranean Chicken & Vegetables. Both are bright, simple, and weeknight-ready.

    Storage, Troubleshooting, and Make-Ahead

    • Fridge: Store leftovers in an airtight container 3–4 days.
    • Reheat: Warm gently at 325°F, 10–12 minutes, or microwave in 30-second bursts.
    • Make-ahead: Assemble up to 24 hours in advance. Drain zoodles well so it doesn’t get watery.
    • Freeze: Best to freeze the sauce and cooked protein, then assemble fresh with zoodles.
    • Too watery? Zoodles weren’t drained enough or overbaked. Next time, salt/squeeze and pull earlier.
    • Too bland? Add 1/4 tsp more salt, a squeeze of lemon, and an extra sprinkle of Parmesan.
    • Not creamy? Simmer sauce an extra minute and use freshly grated cheese.

    FAQs

    Can I use store-bought zoodles?

    Yes. Pat them dry and still salt/squeeze for a few minutes to prevent watery bake.

    What protein works best?

    Shredded chicken, shrimp, turkey sausage, or cannellini beans all work well.

    Is this Zucchini Noodle Alfredo Bake gluten-free?

    Yes, as written. Just skip any breadcrumb topping or use gluten-free crumbs.

    Can I make it dairy-free?

    Try unsweetened cashew milk, dairy-free cream cheese, and your favorite vegan mozzarella.

    Conclusion

    Zucchini Noodle Alfredo Bake is my shortcut to a cozy dinner that still feels light. It tastes like comfort. It cooks fast. It uses what’s already in the fridge. If weeknights at your house look like mine—soccer cleats at the door, homework spread out, and a mom just trying to get a win—this dish helps. It’s creamy, green, and good. Try it at home and tag me so I can cheer you on. And when you want another oven-baked hug, remember my Creamy Cauliflower Mac and Cheese Bake or my cozy fall Pumpkin Alfredo Pasta Bake. Dinner, done—and done with love.

  • Quinoa Stuffed Bell Peppers with Veggies: 5 Irresistible

    Quinoa Stuffed Bell Peppers with Veggies: 5 Irresistible

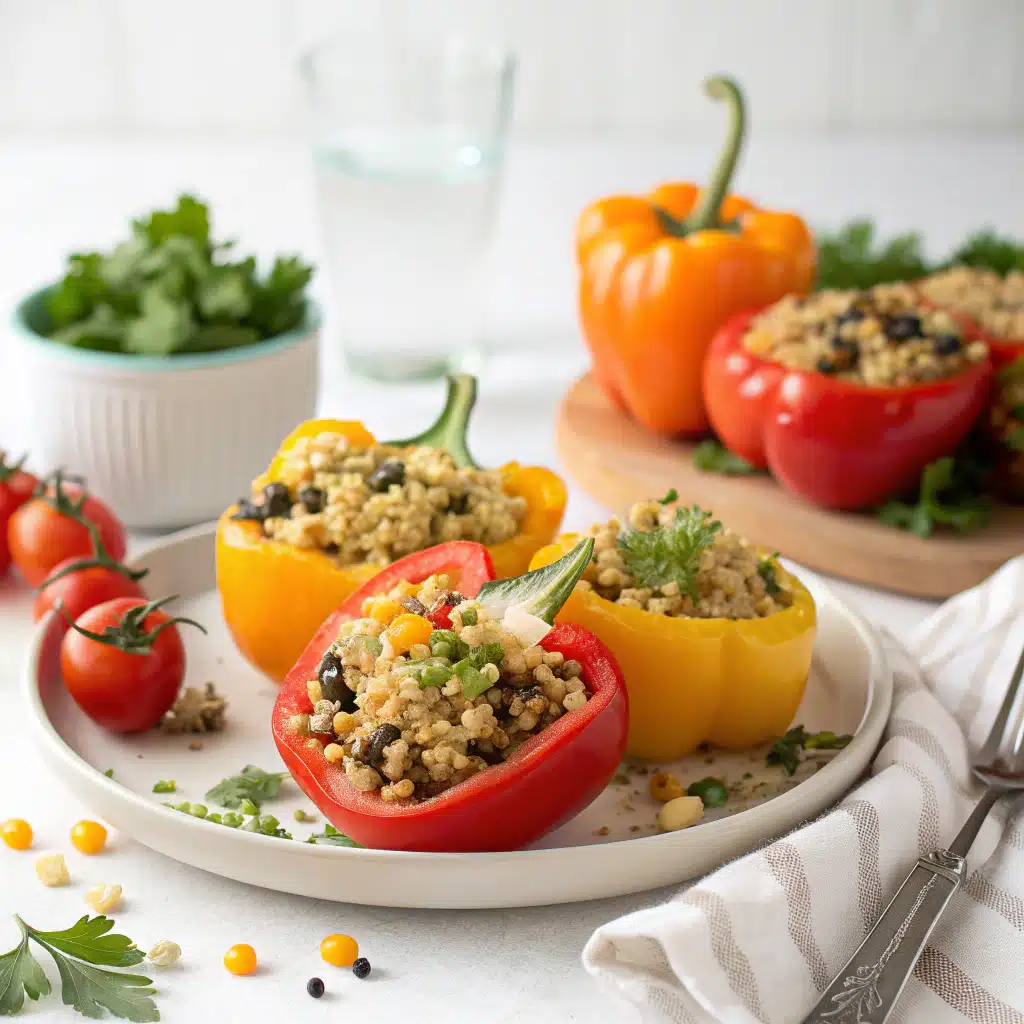
    Quinoa Stuffed Bell Peppers with Veggies. I made Quinoa Stuffed Bell Peppers with Veggies on a Tuesday night while my son practiced drums and the dog stared at the oven like it owed him money. Quinoa Stuffed Bell Peppers with Veggies kept the chaos quiet. I’m Darleen from Salt Lake City, the mom who swears her slow cooker saved her sanity. But this is one of those easy oven wins. Simple, hearty, colorful. And yes—kid-approved after a sprinkle of cheese.

    Quinoa Stuffed Bell Peppers with Veggie

    Table of Contents

    Recipe

    Quinoa Stuffed Bell Peppers with Veggies: Why You’ll Love This

    These Quinoa Stuffed Bell Peppers with Veggies are bright, filling, and flexible. They taste like comfort food but still feel light. The quinoa gets fluffy. The veggies stay fresh. The bell peppers turn tender and a little sweet. And the spices? Cozy. This is the kind of dinner that makes a Tuesday feel like a small win. It’s also a recipe you can trust. I’ve made these Quinoa Stuffed Bell Peppers with Veggies on soccer nights, homework nights, and the kind of nights when every pan is already dirty. They still deliver.

    We’re talking protein-packed quinoa, fiber-rich beans, and a rainbow of vegetables. The flavor is big without being fussy. The steps are quick. Most of all, the leftovers are even better. The filling holds together, so these Quinoa Stuffed Bell Peppers with Veggies reheat like champs. If your crew eats dairy, a little melt on top seals the deal. If not, it’s still a win—vegan-friendly and naturally gluten-free.

    What’s Trending: Weeknight Veggie Mains Everyone Craves

    Right now, simple veggie-forward dinners are having a moment. We want fast, we want colorful, we want good-for-you without a lecture. These hit that sweet spot. Meal prep lovers adore them because you can store, reheat, and pack a pepper for lunch. Home cooks love them because the technique is forgiving. And families love them because they’re saucy, chewy, and fun to eat. Think of them like tiny edible bowls, stuffed with flavor. If you’re building a routine around plants, add these to the regulars—right next to my Sweet Potato Lentil Stew for soup nights and this Harvest Grain Bowl for lunch prep days.

    How to Make Quinoa Veggie Stuffed Peppers (Step by Step)

    Set the oven to 375°F. Prep your peppers. Cook the quinoa while you chop the veggies. Sauté the onion, garlic, zucchini, corn, and tomatoes. Stir everything with spices and beans. Stuff, bake, and done. This rhythm is easy to learn and easy to love. The result is everything you want from Quinoa Stuffed Bell Peppers with Veggies—soft peppers, a hearty filling, and just enough warmth to make the house smell amazing.

    Here’s a quick plan: start by rinsing quinoa. It removes any bitterness. Use broth for more flavor. While it simmers, chop the vegetables. Keep them small so they cook fast and fit into the peppers. When the quinoa is fluffy, combine it with the sautéed veggies, black beans, spices, herbs, and lemon juice. Taste it now and adjust the salt. Then pack it into the peppers. Bake covered to steam. Finish uncovered so the tops get a little golden. That’s how Quinoa Stuffed Bell Peppers with Veggies get their cozy texture.

    Tips from a Busy Mom Kitchen

    • Use even-sized peppers so they bake at the same speed.
    • Stand peppers snug in the pan; add a splash of water to steam.
    • Season the filling generously. Peppers mellow flavors a bit.
    • Go dairy-free? Skip cheese and add 2 tablespoons nutritional yeast.
    • Want a faster bake? Halve peppers lengthwise and lay them cut-side up.
    • Make it a full sheet-pan meal: roast extra zucchini or mushrooms alongside.
    • Slow cooker hack: fill peppers and cook on Low for 3–4 hours. My slow cooker earned its crown again.

    By the way, if you love set-it-and-forget-it nights, bookmark my Slow Cooker Butternut Squash Lentil Curry. It plays nicely with these Quinoa Stuffed Bell Peppers with Veggies for a week of plant-powered dinners.

    Healthy Quinoa Stuffed Bell Peppers with Veggies: Flavor Paths

    Think of the filling as your blank canvas. Quinoa is nutty. Beans bring creamy structure. Peppers give sweetness. From there, you can steer flavor any direction and still keep that core magic of Quinoa Stuffed Bell Peppers with Veggies. Want Mediterranean vibes? Add olives, feta, and oregano. Want Tex-Mex? Use chili powder, cumin, and a swirl of salsa. Want bright and herby? Lemon zest and parsley do the trick. No matter the twist, the method stays the same—so your hands know what to do even on busy nights.

    It’s also a smart place to use up odds and ends. A handful of spinach? Toss it in. Half a can of beans? Perfect. Leftover roasted veggies? Even better. And if you need to stretch the filling for a bigger crowd, add extra corn, more beans, or a scoop of cooked rice. These Quinoa Stuffed Bell Peppers with Veggies are forgiving and generous like that.

    Swaps & Variations (Pin-Friendly)

    • Mediterranean: add kalamata olives, sun-dried tomatoes, and crumbled feta.
    • Tex-Mex: use taco seasoning, black beans, and a spoon of salsa. Top with pepper jack.
    • Italian-ish: stir in basil, oregano, and diced roasted red peppers. Top with mozzarella.
    • Vegan Boost: skip cheese, add nutritional yeast and chopped walnuts for crunch.
    • Kid-Comfort: extra corn, mild cheese, and a drizzle of ranch on the side.
    • Protein Flip: add cooked ground turkey or chicken sausage for non-veg eaters.
    • Low-Waste: mince pepper tops and sauté into the filling so nothing goes to waste.

    However you remix, the heart of Quinoa Stuffed Bell Peppers with Veggies stays the same: a warm, colorful meal that tastes like comfort and cleans out your fridge in the best way.

    Quinoa Veggie Stuffed Peppers: Make-Ahead, Freeze, Reheat

    These Quinoa Stuffed Bell Peppers with Veggies were made for meal prep. You can assemble them a day ahead, cover, and refrigerate. Then bake when you’re ready. Or bake them fully, cool, and store in airtight containers for up to four days. For freezing, wrap each pepper tightly and freeze up to two months. Thaw overnight and reheat covered at 350°F for 20 minutes, then uncover for a few more minutes. The filling stays tender, and the peppers keep their shape.

    Reheat tips: add a splash of broth to the pan so things stay moist. Microwave? Totally fine. Use medium power so the filling warms evenly. If you like extra sauce, spoon on salsa, marinara, or a quick lemon yogurt drizzle. Sauce keeps leftovers exciting and keeps Quinoa Stuffed Bell Peppers with Veggies in your rotation.

    Troubleshooting & Quick Fixes

    • Peppers too firm? Bake 5–10 minutes longer, covered.
    • Filling tastes flat? Add a pinch more salt and a squeeze of lemon.
    • Too dry? Stir in a spoon of olive oil or broth before stuffing.
    • Too wet? Bake uncovered longer to evaporate, or fold in more quinoa.
    • No time to pre-cook quinoa? Use microwavable pre-cooked quinoa to save 15 minutes.

    When life is wild, keep dinner simple. Quinoa Stuffed Bell Peppers with Veggies do that with color, comfort, and just the right kind of cozy. For game days or parties, pair a tray with my Parmesan Pretzel Bites and call it a win.

    FAQs

    Can I make Quinoa Stuffed Bell Peppers with Veggies ahead?

    Yes. Assemble and refrigerate up to 24 hours. Then bake when ready.

    How do I keep peppers from tipping over?

    Trim a thin slice off the bottom to level them. Pack them snug in the pan.

    What if I don’t have black beans?

    Use chickpeas, pinto beans, or lentils. The recipe is flexible.

    Can I make them spicier?

    Yes. Add diced jalapeño or a pinch of red pepper flakes to the filling.

    Conclusion

    From one busy Salt Lake City mom to another: dinner doesn’t need to be fancy to feel special. Quinoa Stuffed Bell Peppers with Veggies bring color, comfort, and calm to the table. The method is easy. The flavor is big. The clean-up is kind. And the leftovers? They’re the hero of your tomorrow lunch. I lean hard on my slow cooker most nights, but these peppers prove the oven still knows how to save the day. Try it at home and tag me. I want to see your pans full of Quinoa Stuffed Bell Peppers with Veggies, the colors you picked, and the swaps you tried.

  • One-Pot Mediterranean Chicken & Vegetables: 5 Irresistible

    One-Pot Mediterranean Chicken & Vegetables: 5 Irresistible

    One-Pot Mediterranean Chicken & Vegetables. The night I burned the garlic bread while helping with a math meltdown, I promised myself fewer pans and more peace. One-Pot Mediterranean Chicken & Vegetables became my weeknight lifeline. The flavors sing. The cleanup is tiny. One-Pot Mediterranean Chicken & Vegetables saved Tuesday and made my kids ask for seconds. That’s the win I chase.

    One-Pot Mediterranean Chicken & Vegetables

    Recipe

    Why This One-Pot Works + What’s Trending

    One-Pot Mediterranean Chicken & Vegetables: Why It Works Every Time

    One-Pot Mediterranean Chicken & Vegetables wins because flavor stacks in the same pot. First, you brown the chicken. The bits on the bottom are pure gold. Then the vegetables tumble in and grab that goodness. A splash of broth and lemon lifts everything. Because it all cooks together, the chicken stays juicy and the vegetables taste like they belong. One-Pot Mediterranean Chicken & Vegetables means less heat on the brain and fewer dishes in the sink. It’s bold yet gentle. It’s bright yet cozy. And it’s flexible, so you use what you have and keep moving. When I make One-Pot Mediterranean Chicken & Vegetables, I can answer spelling words and still serve dinner on time.

    Right now, the Mediterranean diet is everywhere. And for good reason. It’s heavy on vegetables, olive oil, herbs, and lean protein. That’s exactly the heartbeat of this one-pot. The lemon cuts through, the oregano sings, and the olives add a little salty pop. It’s food that feels fresh but still warms a Tuesday. Meanwhile, weeknight cooks are craving fewer steps. That’s why this method leans on sear, simmer, finish. No fussy sauces. No mystery packets. Just pantry spices and produce. In a season of overscheduled everything, One-Pot Mediterranean Chicken & Vegetables lets you cook like a pro while living like a person. And yes, it’s beautiful enough for company.

    Step-by-Step + Busy Mom Tips

    Easy One-Pot Mediterranean Chicken & Vegetables (Step-by-Step)

    Season the chicken with salt, pepper, oregano, and smoked paprika. Heat a Dutch oven with olive oil and sear the thighs until browned. That’s your flavor base. Pull the chicken out. Add onion, bell peppers, and potatoes. Salt them and stir. Let the edges catch a little color. Stir in garlic. Then pour in broth and lemon. Scrape the pot clean. The brown bits melt into the sauce. Tuck the chicken back with any juices. Cover and simmer. This keeps the chicken tender and the potatoes on track. Next, add zucchini, tomatoes, and olives. Cover again until the chicken hits 165°F. Finally, turn off the heat, crumble feta, and sprinkle parsley. One-Pot Mediterranean Chicken & Vegetables comes together simple and sure.

    Practical Tips for Busy Nights

    • Pat the chicken dry so it browns fast. Wet chicken steams.
    • Slice vegetables ahead in the morning. Store in the fridge. Then it’s a dump-and-stir night.
    • Use a hot pan. Let the oil shimmer before adding chicken.
    • Keep the lid on during the simmer. That gentle steam is your friend.
    • Taste at the end. Lemon and salt wake the pot up.
    • For kids, chop olives smaller. They’ll get the flavor without the face.

    One-Pot Mediterranean Chicken & Vegetables likes a simple side: couscous, quinoa, or crusty bread. However, it’s a full meal as is. Because the vegetables carry it, your plate looks colorful without extra work. And the kitchen stays calm.

    Healthy Angle + Swaps & Variations

    Healthy One-Pot Mediterranean Chicken & Vegetables

    This is the kind of meal that checks boxes without tasting like a checklist. Olive oil over butter. Herbs over heavy sauces. Vegetables in half the pot. Protein that actually satisfies. One-Pot Mediterranean Chicken & Vegetables gives you fiber, color, and clean flavor. Meanwhile, it’s family-friendly. My crew will always eat something if it’s lemony and tender. You can go lower-carb by skipping potatoes and adding extra zucchini or cauliflower florets. You can go dairy-free by leaving off the feta. Still delicious. Because the seasoning carries the weight, the swaps are easy. And if you’re watching sodium, use low-sodium broth and rinse the olives. Little tweaks keep the joy while fitting your goals.

    Swaps & Variations (Pinterest-Style)

    • Chicken breasts: Cut into big chunks. Simmer less (10–12 minutes).
    • Veggie swap: Use eggplant, artichokes, or green beans instead of zucchini.
    • Potato-free: Add cauliflower or extra peppers for a lighter One-Pot Mediterranean Chicken & Vegetables.
    • Spice route: Add cumin or coriander for an earthy spin.
    • Herb finish: Basil or mint with the parsley for a bright, fresh top.
    • Olive-free: Capers give similar briny pop.
    • Make it saucier: Add 1/2 cup more broth and a knob of butter or a drizzle more oil.
    • Sheet-pan night: Same flavors, but roast at 425°F on a big pan. Toss halfway. Finish with feta and herbs.

    However you tweak it, One-Pot Mediterranean Chicken & Vegetables keeps that lemon-herb soul. It’s forgiving, so you can cook from your pantry and still win dinner.

    Meal Prep, Storage & Troubleshooting

    One-Pot Mediterranean Chicken & Vegetables for Meal Prep

    I batch this on Sundays when the week looks wild. One-Pot Mediterranean Chicken & Vegetables reheats like a dream. It’s great in bowls with quinoa or over greens with a little extra lemon. Because the sauce is light, it doesn’t feel heavy at lunch. Pack the feta and herbs separate so they stay fresh. If you love a make-ahead shortcut, you can pre-season the chicken the night before. You can also slice vegetables and store them in zip bags. When the clock says go, you’re minutes from a simmer.

    Storage, Troubleshooting & Quick Fixes

    • Storage: Cool, then refrigerate up to 4 days. Freeze up to 2 months (skip feta before freezing).
    • Reheat: Stovetop over low with a splash of broth, or microwave in short bursts. Add fresh lemon at the end.
    • Too watery: Simmer uncovered for 3–5 minutes to reduce. Add an extra squeeze of lemon and a pinch of salt.
    • Chicken dry: You cooked it too long. Next time, check at 160°F and let carryover heat finish it.
    • Veggies too soft: Add zucchini later next time. Tomatoes go in near the end.
    • Too salty: Add more lemon juice and serve with plain couscous or rice to balance.

    Even on the messiest day, One-Pot Mediterranean Chicken & Vegetables stays steady. And if soccer practice goes long, it rests well on low heat for a few minutes. Dinner still lands kind.

    FAQs

    Can I use chicken breasts?

    Yes. Cut them into large chunks. Simmer 10–12 minutes so they stay juicy.

    Do I need a Dutch oven?

    No. A deep, heavy skillet with a lid works. Keep heat medium and don’t crowd.

    How do I keep veggies from getting mushy?

    Add zucchini and tomatoes near the end. Keep the simmer gentle and check early.

    Is One-Pot Mediterranean Chicken & Vegetables freezer-friendly?

    Yes. Skip the feta before freezing. Reheat gently and add fresh lemon and feta to serve.

    Conclusion

    Here’s what I love most: One-Pot Mediterranean Chicken & Vegetables tastes sunny, but it cooks steady. It fits between homework and bedtime without asking much. It lets me be a mom first and a cook second. And my kitchen stays calm. So grab a lemon, heat the pot, and let the oregano do the work. Try it at home and tag me so I can cheer you on. One-Pot Mediterranean Chicken & Vegetables is your weeknight win. I’ll be right here in Salt Lake City, rooting for your dinner.

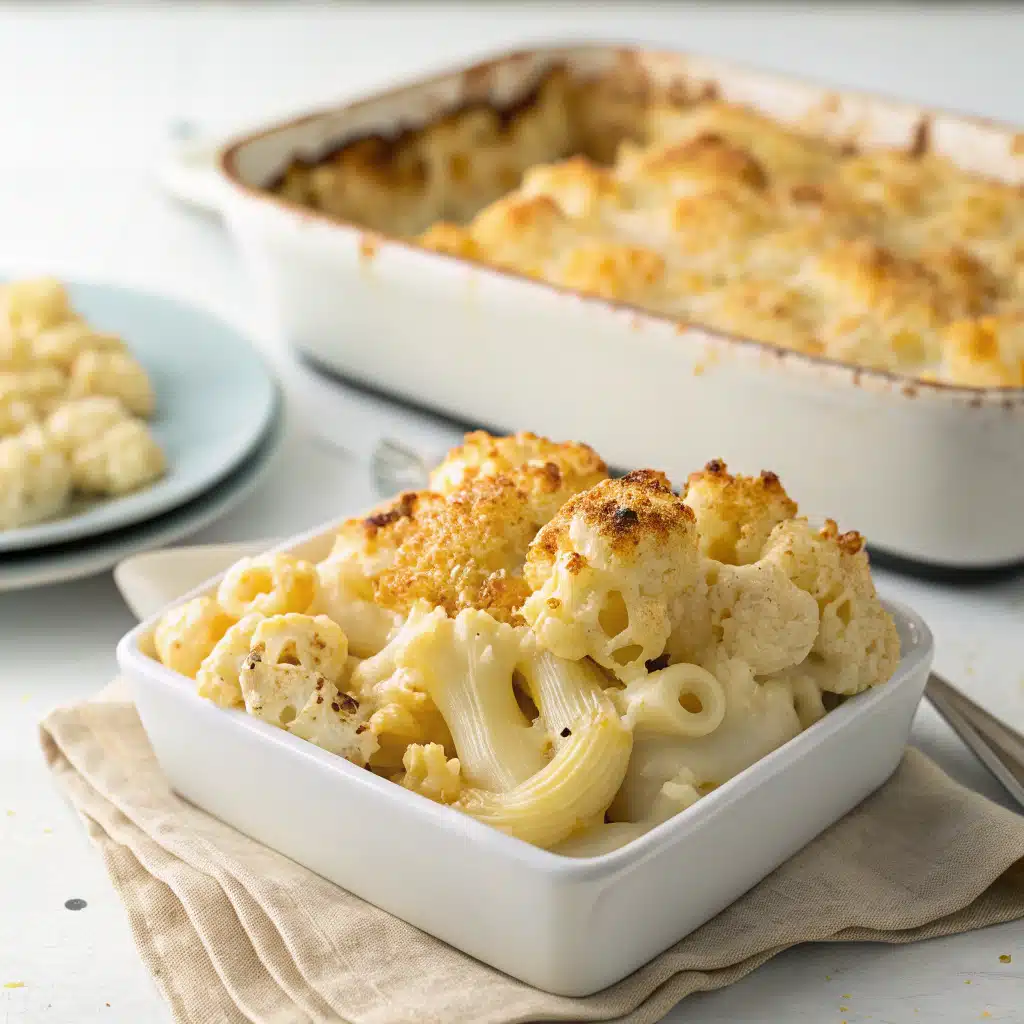
  • Creamy Cauliflower Mac & Cheese Bake | Make It Tonight

    Creamy Cauliflower Mac & Cheese Bake | Make It Tonight

    Creamy Cauliflower Mac & Cheese Bake. The night I invented this, my twins staged a noodle mutiny while the dog stole a cheese cube. I still won dinner. Creamy Cauliflower Mac & Cheese Bake saved it. Creamy Cauliflower Mac & Cheese Bake also hid a mountain of veggies, and no one blinked. I’m Darleen from Salt Lake City, the mom who swears her slow cooker saved her sanity—but on busy bake nights, this oven miracle does the saving.

    Creamy Cauliflower Mac & Cheese Bake

    Recipe

    Comfort That Hits Every Note

    Creamy Cauliflower Mac & Cheese Bake: Why Families Love It

    Creamy Cauliflower Mac & Cheese Bake is the warm blanket dinner needs. It’s creamy, cozy, and bold with real cheddar. It’s also bright with cauliflower that melts into the sauce. My crew tastes “mac and cheese.” I know there’s a veggie win hiding in there. That’s the kind of mom magic I’ll take.

    I lean on Creamy Cauliflower Mac & Cheese Bake when schedules get weird. Practice runs late. The mountains throw us a surprise snow. I want one pan that feeds everyone and doesn’t judge how fast we eat. The casserole goes in, the kitchen smells like a diner, and moods lift. Because that bubbling top? It heals a day.

    And the texture. Creamy Cauliflower Mac & Cheese Bake uses a silky cauliflower puree in the cheese sauce. So it’s luscious without dumping in heavy cream. Sharp cheddar balances it. A little Dijon wakes it up. A touch of smoked paprika gives the baked edges quiet drama. Each fork hits cheese pulls, soft pasta, and tender cauliflower bites. That variety makes a casserole feel special, not heavy.

    For me, this recipe is also about control. I can make it ahead. I can bake it later. I can cut it clean for lunch boxes. That’s a small mom victory after years of “What’s for dinner?” five minutes before dinner. Creamy Cauliflower Mac & Cheese Bake means I answer calmly, then sit and actually eat with my kids.

    Comfort Food, But Make It Trendy

    The world wants comfort food that still feels smart. This bake nails that sweet spot. Cauliflower puree thickens the sauce naturally. It’s an old-school trick that feels new again, like sheet-pan dinners and snack boards for supper. Creamy Cauliflower Mac & Cheese Bake checks the boxes: family-friendly, hidden veggies, freezer-friendly, and social-media-pretty with a golden top.

    We’re also craving pantry wins. Elbows, a head of cauliflower, cheese, milk, a little broth. You probably have most of this. You’ll use one pot, one skillet, one casserole dish. The process is simple. Steam cauliflower. Blend. Make a quick roux. Stir in cheese. Fold in pasta and florets. Top. Bake. That’s real-life doable—even on a school night when someone needs help with fractions and someone else is singing in the bathroom.

    If you love cozy bakes, you might also enjoy my Pumpkin Alfredo Pasta Bake for a fall spin, or my hearty Slow Cooker Three-Bean Chili Mac when you want your slow cooker to do the heavy lifting. But tonight, let the oven shine with Creamy Cauliflower Mac & Cheese Bake.

    Method That Respects Your Time

    Cauliflower Mac and Cheese Bake, the Weeknight Hero

    Here’s what I love: Creamy Cauliflower Mac & Cheese Bake tastes like a Sunday casserole but cooks like a Tuesday win. The cauliflower boils or steams in 8–10 minutes. Half becomes a velvety puree with a splash of broth. That puree slips into a classic cheese sauce, making it extra smooth and extra clingy to pasta without extra cream. It’s the secret that makes everyone ask, “Why is this so creamy?”

    Meanwhile, pasta cooks to al dente. Please don’t overdo it, because the oven will finish the job. Undercooking by a minute keeps your Creamy Cauliflower Mac & Cheese Bake perfectly tender after bubbling away. The sauce wraps each bite. The cauliflower florets tucked throughout give your fork texture and a nod to veggie land without shouting “diet food.”

    The topping? I’m team panko plus Parmesan with melted butter. It toasts up golden and crunchy. You get contrast. And yes, kids notice crunch. Adults do, too. It’s why we love casseroles. They hit creamy, cheesy, and crispy all at once. Creamy Cauliflower Mac & Cheese Bake checks every box.

    Time-Saving Tips from My Salt Lake City Kitchen

    • Prep cauliflower in the morning. Cut florets and store in cold water in the fridge. When it’s dinner time, they’ll cook fast.
    • Steam cauliflower right in the microwave. Bowl, splash of water, plate on top, 8–10 minutes. Done.
    • Blend with what you have. Immersion blender saves a dish. Counter blender makes it extra smooth. Both work for Creamy Cauliflower Mac & Cheese Bake.
    • Shred cheese yourself. Pre-shredded can be chalky. Fresh shred melts smoother and makes Creamy Cauliflower Mac & Cheese Bake extra velvety.
    • Make now, bake later. Assemble, cover, and refrigerate up to 24 hours. Add 10 minutes to bake time.
    • Use your slow cooker as a helper. Keep the finished casserole on warm if your crowd eats in shifts. My slow cooker has saved many sanity points here.
    • Batch it. Double the recipe, bake one, freeze one. You’ll thank yourself on a week you didn’t see coming.

    With these moves, Creamy Cauliflower Mac & Cheese Bake slides into your rotation without drama. Dinner done. Dishes light. Family happy.

    Flavor Play and Smart Swaps

    Creamy Cauliflower Mac & Cheese Bake with Hidden Veggies

    Kids can be suspicious. Mine are experts. So I designed Creamy Cauliflower Mac & Cheese Bake to be creamy first, veggie second. The cauliflower puree blends into the sauce so smoothly no one sees it. It tastes like cheese heaven with a lift of freshness. You still tuck in tender florets for fiber and bite, but you can chop them small if your audience is picky. I usually leave the pieces bite-sized and let the cheese do the distracting.

    Want to layer more goodness? Stir in peas for sweetness. Fold in spinach until it wilts into the sauce. Add roasted broccoli or diced roasted red peppers if your people like color. Yet even without extras, Creamy Cauliflower Mac & Cheese Bake carries flavor thanks to sharp cheddar, a bit of Gruyère or Jack, Dijon, and a whisper of smoked paprika.

    We also talk balance. This casserole brings protein from cheese and yogurt, carbs from pasta, and fiber from cauliflower. It’s a full plate in one pan. And it’s the kind of plate you can eat on a couch under a blanket when the Jazz game is on and the dog is finally tired.

    Swaps and Variations (Pinterest-Style)

    • Gluten-free: Use GF elbows and gluten-free panko. The rest of Creamy Cauliflower Mac & Cheese Bake stays the same.
    • Low-carb: Skip pasta. Double the cauliflower florets. Bake as a cauliflower gratin with extra cheese.
    • Protein boost: Fold in shredded rotisserie chicken or cooked turkey sausage. Or top with crispy bacon bits.
    • Different cheeses: Try white cheddar, fontina, or smoked gouda for a twist. A little cream cheese makes it extra lush.
    • Heat lovers: Add a dash of hot sauce or a pinch of cayenne. Pepper jack makes Creamy Cauliflower Mac & Cheese Bake spicy-cheesy.
    • Veggie load: Stir in peas, corn, or roasted broccoli. Tiny diced carrots add sweetness and color.
    • Breadcrumb glow-up: Mix panko with grated Parmesan and fresh herbs. Or use crushed buttery crackers for nostalgic crunch.
    • Make-ahead kit: Pre-cook pasta and cauliflower, store the sauce separately. Combine and bake on the day.
    • Date-night style: Bake in mini ramekins for individual portions. Fancy but easy.

    If you’re building a game-day menu, pair this bake with my Cheesy Jalapeño Popper Dip (Crockpot Style). Creamy meets creamy, and no one complains.

    Prep Ahead, Store Smart, Fix Fast

    Creamy Cauliflower Mac & Cheese Bake for Meal Prep

    Sunday prep can save your week. Creamy Cauliflower Mac & Cheese Bake is a champ here. Assemble it fully, cover tight, and stash in the fridge up to 24 hours. Bake when you’re ready, adding about 10 minutes since it starts cold. Or portion it into two smaller pans and bake one now, freeze one for later. The second pan is a gift to Future You—the mom who forgot about late pickup and also promised brownies.

    For lunches, cut the baked casserole into squares and pack with a crunchy salad. It reheats well, so it’s a nice break from sandwiches. The cauliflower keeps it moist, so leftovers don’t go chalky. It stays creamy.

    If you want a quicker dinner another night, consider my 5-Ingredient Slow Cooker Chicken Fajitas. Then circle back to Creamy Cauliflower Mac & Cheese Bake when you’re craving cheesy comfort again.

    Storage, Reheat, and Troubleshooting

    • Fridge: Store leftovers of Creamy Cauliflower Mac & Cheese Bake in airtight containers 3–4 days.
    • Freeze: Cool completely. Wrap tightly. Freeze up to 2 months. Thaw in the fridge overnight, then reheat covered at 350°F.
    • Reheat: Add a splash of milk, cover with foil, and warm at 325–350°F until hot. For single servings, microwave in 30-second bursts, stirring.
    • Sauce too thick? Whisk in warm milk or broth, a tablespoon at a time, until it loosens.
    • Sauce grainy? Cheese likely overheated. Next time, remove the sauce from heat before adding cheese, and stir gently.
    • Watery bake? Drain cauliflower well and don’t overcook pasta. Bake uncovered for the last 5 minutes to evaporate moisture.
    • Not cheesy enough? Use sharper cheddar and a touch more Parmesan on top. Season the sauce; cheese likes salt.

    With these fixes, Creamy Cauliflower Mac & Cheese Bake stays reliable and delicious, even on chaotic nights.

    FAQs

    Can I make Creamy Cauliflower Mac & Cheese Bake gluten-free?

    Yes. Use gluten-free pasta and GF panko. Make the roux with a 1:1 gluten-free flour blend.

    Can I skip the pasta and use all cauliflower?

    Yes. Double the florets and bake as a cheesy cauliflower gratin. It stays creamy and satisfying.

    What cheeses melt best in this bake?

    Fresh-shredded sharp cheddar plus Gruyère or Monterey Jack melt smoothly and taste bold.

    How do I prevent a grainy sauce?

    Take the pot off heat before adding cheese. Stir gently. Don’t boil the cheese.

    Conclusion

    Here’s what I know after many busy nights: a pan of Creamy Cauliflower Mac & Cheese Bake brings the room together. It smells like comfort. It eats like a hug. And it sneaks in a veggie victory without any speeches. The sauce is silky. The top is golden. The bites are cheesy, tender, and just a little crunchy. As a Salt Lake City mom who leans on her slow cooker most days, I love how this oven bake steps up when I need it. Try it at home and tag me so I can cheer you on. Make Creamy Cauliflower Mac & Cheese Bake tonight, and watch the table get quiet in the best way.

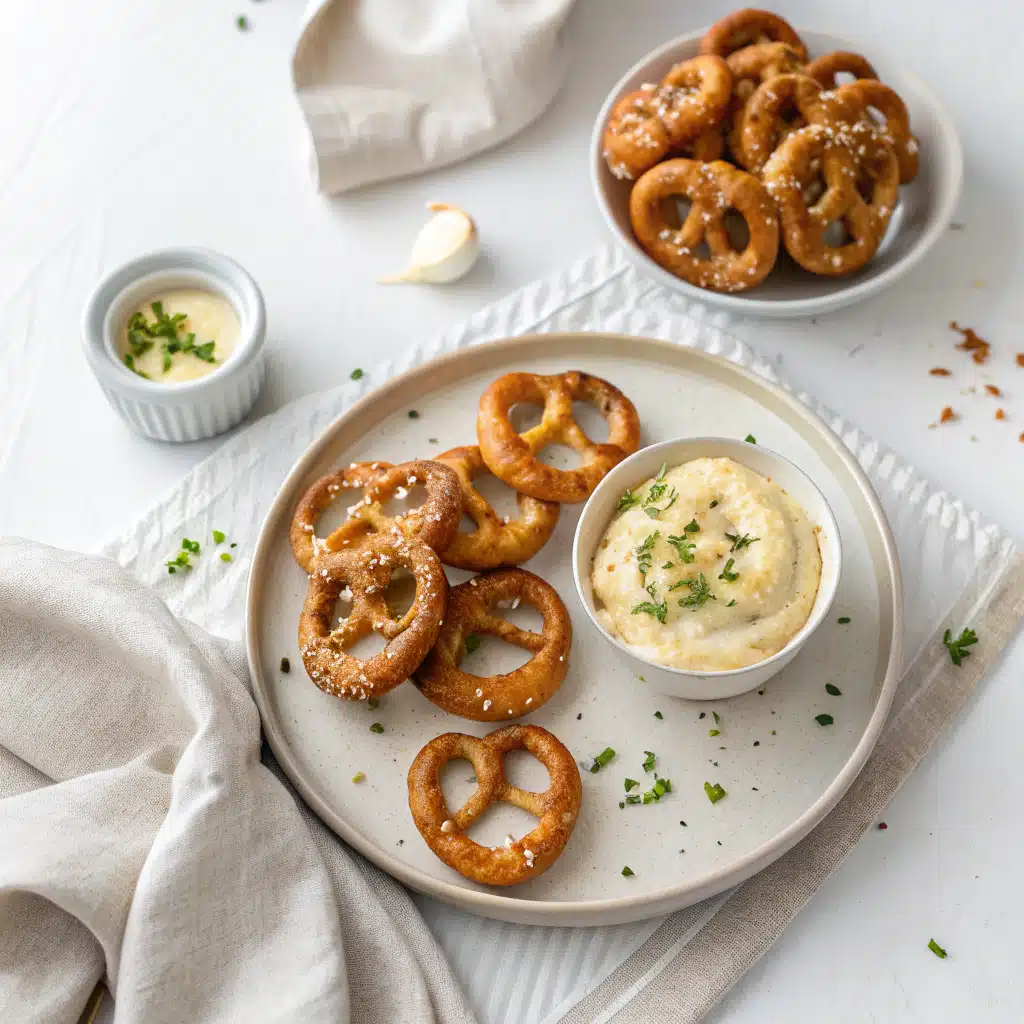
  • Parmesan Pretzel Bites with Garlic Dip | Try It Now

    Parmesan Pretzel Bites with Garlic Dip | Try It Now

    Parmesan Pretzel Bites with Garlic Dip started as a simple game-day idea and turned into a full-on family obsession. I’m Darleen from Salt Lake City, the mom who swears her slow cooker saved her sanity, but today the oven gets the love. I made Parmesan Pretzel Bites with Garlic Dip while the kids argued about team colors and the dog stole a cheese shred. Parmesan Pretzel Bites with Garlic Dip still came out soft, golden, and gone in minutes. Real life. Real snacks. Real good.

    Parmesan Pretzel Bites with Garlic Dip

    Recipe

    Parmesan Pretzel Bites with Garlic Dip: Why You’ll Love Them

    These Parmesan Pretzel Bites with Garlic Dip are everything we love about snack night in a tiny, warm, cheesy package. The bites are soft inside, slightly crisp outside, and showered with nutty Parmesan. The garlic dip is creamy, bright, and balanced—rich, but not heavy. And because the dough is simple, you can mix, rest, shape, and bake without drama. Even better, Parmesan Pretzel Bites with Garlic Dip handle reheating like champs, so you can bake ahead, then warm and serve when the doorbell rings. If you’ve been hunting for a crowd-pleaser, this is it.

    Let’s talk texture. We do the classic baking soda bath for that signature pretzel chew. Then we brush on garlic butter and toss with Parmesan so it clings to every edge. The result is big flavor in each bite. And yes, you can make the dip while the pretzels bake. If you’re like me—always juggling homework checks and a dog that thinks he’s a sous chef—Parmesan Pretzel Bites with Garlic Dip still fit into real life. They’re quick enough for weeknights and special enough for game days, birthdays, and neighbor drop-ins.

    Serve these with a simple veggie tray or a cozy slow-cooker main. If you want ideas, try my Slow Cooker BBQ Chicken Sliders or keep the dip train rolling with my Cheesy Jalapeño Popper Dip (Crockpot Style). Together, they make the happiest snack table on the block.

    The Game-Day Trend You’ll Actually Use

    Food trends come and go, but Parmesan Pretzel Bites with Garlic Dip sit solidly in the “make again” column. They’re portable, shareable, and frankly addictive. Kids can dunk them without spills. Grown-ups can snack and chat without knives or forks. And because the dough is forgiving, you can roll, cut, and bake even if you’ve never shaped a pretzel before. Social feeds love these, and your people will too. Add a little pretzel salt for extra crunch and contrast. Or skip it if you prefer a softer, cheesier finish.

    Trending flavors are all about garlic-parmesan everything, and this recipe leans in. We use fresh garlic in butter for the bites, and another hit of garlic in the dip for that creamy, savory pull. Parmesan Pretzel Bites with Garlic Dip make their own moment the minute they hit the table, and you can absolutely play with sauces—honey mustard, marinara, or a spicy aioli. But the garlic dip is the star: smooth, garlicky, lemony, and built to cling to those warm edges. That’s why this snack shows up on repeat around here. And when life is busy, recipes that behave well are all I want.

    How to Make Parmesan Pretzel Bites with Garlic Dip (Step by Step)

    For the dough, you’ll bloom yeast in warm water, add a touch of honey, melted butter, salt, and flour. It comes together soft and easy to handle. After a short rise, you’ll shape ropes and cut them into bite-size pieces. Then comes the pretzel magic: a quick baking soda bath. That bath gives Parmesan Pretzel Bites with Garlic Dip their classic chew and deep color. After the bath, brush with egg wash, bake until golden, and toss with garlic butter and Parmesan while still warm.

    The dip is simple too. Cream cheese makes it lush, sour cream and a bit of mayo keep it smooth, and loads of garlic delivers the flavor you’re here for. A squeeze of lemon brightens everything. Stir in Parmesan and herbs, then adjust the thickness with a splash of milk. The result is a bowl you’ll want to guard with your life. When the pretzel bites come out hot, the dip melts just enough to coat every bite. That’s the dream bite of Parmesan Pretzel Bites with Garlic Dip.

    And yes, you can multitask. While the dough rests, assemble your dip and set the oven. While the bites bake, melt butter with garlic. Then toss-toss-toss and serve. Because Parmesan Pretzel Bites with Garlic Dip thrive on timing, this flow keeps your kitchen calm and your counter clear.

    Tips for Foolproof Pretzel Bites

    • Measure flour right. Spoon and level so the dough stays soft, not dense. Soft dough makes the best Parmesan Pretzel Bites with Garlic Dip.
    • Mind the water temperature. Warm, not hot. About 110°F wakes yeast up without shocking it.
    • Don’t skip the baking soda bath. It’s the classic pretzel step. Without it, you won’t get that deep color or chewy edge.
    • Work in batches. Drop about 12–15 pieces at a time into the bath so they don’t stick.
    • Toss while warm. The Parmesan sticks best when the bites are hot and the butter is melty.
    • Use finely grated Parmesan. It clings like snow. If you use shreds, they may slide off.
    • For extra garlic, rub a cut clove over bites right out of the oven before you toss. The aroma on Parmesan Pretzel Bites with Garlic Dip is wild.
    • Air fryer option: 375°F for 5–7 minutes after the bath. Brush with butter, then Parmesan.

    Parmesan Pretzel Bites with Garlic Dip: Flavor Boosts You’ll Crave

    These little bites are like blank canvases that already taste great. But if you want to dress up Parmesan Pretzel Bites with Garlic Dip for date night or a party spread, you have options. Add a pinch of smoked paprika to the garlic butter for warmth. Or whisk in a spoon of pesto for a green, herby lift. A grate of lemon zest over the platter makes the whole tray pop. And if you’re serving chili or soup, sprinkle a little cayenne on top of the dip for a zip that still plays nice with the Parmesan.

    For a big game spread, set up a sauce board. Keep the garlic dip in the center, then offer honey mustard, warm marinara, and a spicy ranch. People love choices, and it turns Parmesan Pretzel Bites with Garlic Dip into a little tasting bar. It also keeps snackers happy while you bring out the main dish. And if you like a theme, pair these with my Maple Bourbon Meatball Appetizers for a sweet-savory combo that always vanishes first.

    Another boost: herbs. Fresh parsley is classic, but chives or dill can give a soft, oniony lift. If you’re out of fresh herbs, dried Italian seasoning works in a pinch. And for cheese lovers, mix Parmesan with a little Pecorino Romano for a sharper finish. However you swing it, Parmesan Pretzel Bites with Garlic Dip are flexible, forgiving, and ready for your style.

    Swaps and Variations (Pin It!)

    • Whole wheat twist: Swap 1 cup all-purpose flour for white whole wheat. Add 1–2 tablespoons extra water if needed.
    • Dairy-free: Use vegan butter and a plant-based parm, and make the dip with dairy-free cream cheese and coconut yogurt.
    • Gluten-free: Use a 1:1 gluten-free baking blend designed for yeast doughs. Expect a slightly different chew, but still delicious.
    • Cheddar-garlic: Toss hot bites with garlic butter and finely shredded sharp cheddar, then finish with a sprinkle of Parmesan.
    • Ranch-dusted: After buttering, dust lightly with dry ranch seasoning. Then serve with the garlic dip for double flavor.
    • Everything bagel: Skip salt and Parmesan; use everything seasoning after butter. Serve with the garlic dip for balance.
    • Mini dogs: Wrap small hot dogs with dough, bath, bake, and finish with Parmesan. Dip in garlic dip and mustard.
    • Spicy style: Stir Calabrian chili paste into your garlic butter or add crushed red pepper to the dip.

    However you swap, keep the heart of the recipe the same. That way, you still get the chewy center, glossy finish, and Parmesan magic that make Parmesan Pretzel Bites with Garlic Dip a keeper.

    Parmesan Pretzel Bites with Garlic Dip: Storage, Reheat, and Make-Ahead

    Good news: Parmesan Pretzel Bites with Garlic Dip are make-ahead friendly. Bake the bites, cool completely, and refrigerate up to 3 days or freeze up to 2 months. To reheat, spread on a sheet pan and warm at 350°F for 6–8 minutes (12–14 if frozen). Brush with a little butter and add a fresh dusting of Parmesan for a just-baked vibe. For an air fryer, reheat at 320–340°F for 3–5 minutes.

    The garlic dip keeps in the fridge up to 4 days. For best texture, whisk before serving and thin with a splash of milk if it sets up. Because the dip has dairy, keep it chilled until party time, then set it out for 1–2 hours max. If you’re transporting, pack the dip over ice or use a chilled serving bowl. And if you like a warm dip, microwave in 10–15 second bursts, stirring between, until creamy—but don’t let it bubble.

    Want to work ahead? Shape the bites, flash-freeze on a tray, and store in a bag. When you’re ready, boil straight from frozen in the baking soda bath, bake, and finish with butter and Parmesan. It’s the fastest path to Parmesan Pretzel Bites with Garlic Dip for last-minute guests.

    Troubleshooting & Quick Fixes

    • Dense bites: Dough was too dry or not proofed long enough. Next time, add 1–2 tablespoons warm water and let it rise in a warm spot.
    • Pale color: Oven too cool or short bake. Preheat fully and bake until deep golden brown for classic pretzel vibes.
    • Parmesan won’t stick: Toss while hot and use finely grated cheese. A touch more butter helps.
    • Dip too thick: Stir in milk, 1 tablespoon at a time. For extra zip, add lemon juice and a pinch of salt.
    • Too salty: Use flaky salt sparingly. Parmesan adds salt on its own, so taste as you go.
    • Flat flavor: Add more garlic, a squeeze of lemon, or a sprinkle of fresh herbs to wake up Parmesan Pretzel Bites with Garlic Dip.

    FAQs

    Can I make the dough in advance?

    Yes. Refrigerate the risen dough up to 24 hours. Let it sit 20–30 minutes before shaping.

    Do I have to use the baking soda bath?

    It’s key for color and chew. Without it, the bites will taste more like standard rolls.

    Can I freeze Parmesan Pretzel Bites with Garlic Dip?

    Freeze baked bites up to 2 months. The dip freezes poorly. Make the dip fresh.

    What if I don’t have Parmesan?

    Use Pecorino Romano or finely grated Asiago. Flavor will be sharper, but still great.

    Conclusion

    From one busy kitchen to another, I hope these Parmesan Pretzel Bites with Garlic Dip bring the same joy to your table that they bring to mine. They’re simple, golden, and wildly snackable—proof that a little dough and a lot of garlic can turn a regular night into a memory. If you try them, tag me so I can cheer you on. And if you need a main to pair with them, cruise my homepage at Facebook for slow-cooker comforts and bite-size wins. Try it at home and tag me!


  • Bang Bang Chicken Bowl – 1 Sensational Recipe You’ll Crave

    Bang Bang Chicken Bowl – 1 Sensational Recipe You’ll Crave

    Bang Bang Chicken Bowl is the ultimate weeknight dinner—sweet, spicy, creamy, and completely effortless thanks to your slow cooker. This bold, flavor-packed meal pairs juicy shredded chicken with a crave-worthy sauce that tastes like your favorite takeout but is so much healthier.

    Hey! I’m Darleen Vamce—34, Salt Lake City native, and a woman who used to think slow cookers were just for potlucks and overly mushy stews. I was wrong. Very wrong. Now, this humble little machine is basically my co-chef, my weekday dinner savior, and the secret weapon behind most of the meals that make my family think I have superpowers.

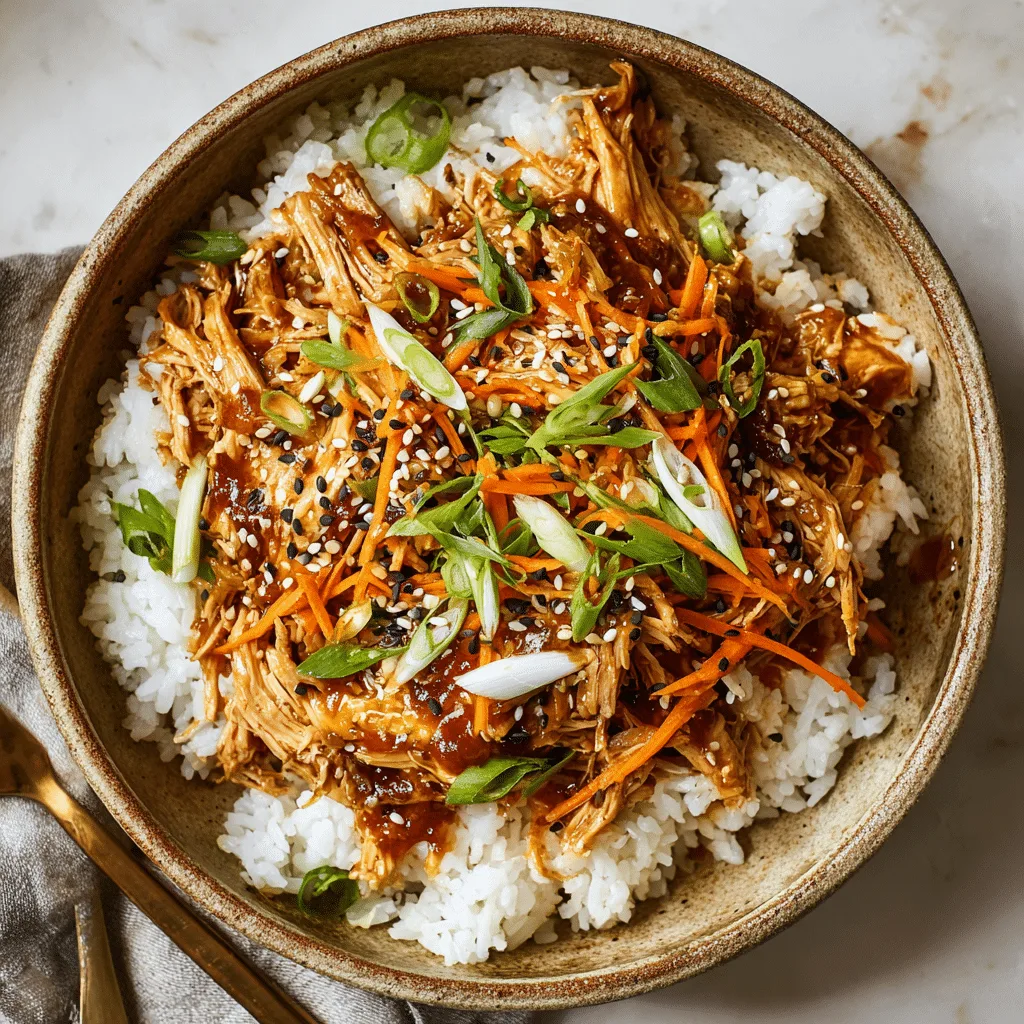
    Bang Bang Chicken Bowl with jasmine rice and spicy sauce

    Recipe

    Bang Bang Chicken Bowl: Slow Cooker Magic for Busy Nights

    Why This Bang Bang Chicken Bowl Belongs in Your Dinner Rotation

    Bang Bang Chicken Bowl isn’t just another trendy recipe—it’s a slow cooker essential that delivers bold flavor with minimal effort. If you’re juggling work, family, and dinner prep, this recipe is exactly the kind of reliable, flavor-packed meal you need.

    The star of this dish is the sauce. It’s a creamy, sweet, and spicy blend of mayonnaise, chili sauce, sriracha, and rice vinegar. The slow cooker infuses every bite of chicken with this irresistible combination, giving you tender, pull-apart meat that soaks up every drop of flavor. Serve it over fluffy jasmine rice with shredded carrots and scallions for a complete bowl that feels like takeout—without the delivery fee.

    This dish holds its own next to other reader favorites like our Slow Cooker Honey Garlic Chicken or the crowd-pleasing Crockpot Thai Peanut Chicken. But unlike some of the more complex slow cooker meals, this one takes under 10 minutes to prep.

    You can also scale this up for weekly meal prep or down for a cozy dinner for two. The leftovers reheat beautifully, making it a smart option for anyone who wants real food without fuss.

    The Secret Sauce That Changes Everything

    The bang bang sauce is what makes this bowl unforgettable. It’s the kind of sauce that gets requested again before dinner’s even over. You only need a few pantry staples, and once you try it, you’ll find excuses to drizzle it on everything—from grilled shrimp to roasted vegetables.

    Balanced, bold, and surprisingly simple, this sauce turns basic slow cooker chicken into something crave-worthy.

    How to Make Slow Cooker Bang Bang Chicken the Easy Way

    Slow cooker bang bang chicken isn’t just convenient—it’s nearly foolproof. This is the kind of recipe that lets you set it in the morning and forget about it until dinner. With only a few steps, you can turn raw chicken and a handful of ingredients into a restaurant-style meal with zero stress.

    Start by placing boneless, skinless chicken breasts in your slow cooker. Season with garlic powder and a pinch of salt. In a small bowl, whisk together mayonnaise, sweet chili sauce, sriracha, honey, and rice vinegar. This is your bang bang sauce, and it’s the flavor backbone of the entire dish.

    Pour the sauce over the chicken, cover the slow cooker, and cook on low for 4 to 5 hours. You’ll know it’s done when the chicken shreds easily with two forks. Return the shredded meat to the sauce and stir well to coat every bite.

    Serve it over jasmine or basmati rice, then top with shredded carrots, scallions, and sesame seeds. For added crunch, try crushed peanuts or crispy wontons.

    If you’ve made our Slow Cooker Buffalo Chicken Bowls, the method here will feel familiar. Just like that recipe, this one is endlessly adaptable. Prefer thighs? Use them. Want it milder? Cut back on the sriracha.

    For a lower-carb option, swap the rice for cauliflower rice or serve it in lettuce wraps. However you customize it, this recipe is built for your real life.

    Build a Spicy Bang Bang Chicken Bowl That Fits Your Style

    The best part about a spicy bang bang chicken bowl is how customizable it is. Whether you’re feeding picky kids or spice lovers, this recipe can easily be adjusted to match the mood and the menu.

    For those who enjoy serious heat, add more sriracha or even a few crushed red pepper flakes to the sauce. Want to tone it down? Swap some of the chili sauce with Greek yogurt for a milder, creamy result. The base recipe stays the same, but how you serve it makes all the difference.

    We love layering it over warm jasmine rice, but the options don’t stop there. You can also build this bowl with quinoa, brown rice, or even noodles. For a lighter version, try crunchy lettuce wraps, zucchini noodles, or a simple salad base. It’s just as satisfying and perfect for low-carb diets.

    Don’t forget about toppings. Fresh shredded carrots, scallions, sesame seeds, cilantro, or chopped peanuts all add texture and balance. Feeling extra? Drizzle a little extra bang bang sauce on top—or keep a small dish on the side for dipping.

    This bowl works great with leftovers too. Try the chicken in tacos, over nachos, or inside a wrap for lunch the next day. It even freezes well.

    If you’re looking for other easy bowl-style dinners, check out our Slow Cooker BBQ Chicken Bowls. Like this one, they’re flexible, fast, and full of flavor.

    You can make this dish once and reinvent it all week long—without anyone getting bored.

    Why This Creamy Bang Bang Chicken Recipe Is a Meal Prep Hero

    A solid creamy bang bang chicken recipe isn’t just about flavor—it’s about flexibility. That’s what makes this dish so popular for meal prep. One batch gives you multiple servings of tender, shredded chicken drenched in that signature sauce. The texture holds up, and the flavor deepens after a day or two in the fridge.

    To store, divide the chicken and rice into individual containers, then top with your preferred veggies and toppings. Keep a small side of extra sauce sealed separately to drizzle just before serving. This ensures your toppings stay crisp and fresh, while the chicken stays juicy.

    You can enjoy this meal hot or cold, which makes it ideal for lunches at work, after-school dinners, or late-night bites when you don’t feel like cooking. Plus, it reheats in minutes without drying out—a rare trait for slow cooker meals.

    If you’re planning your week ahead, double the recipe and freeze half. It stores beautifully in freezer-safe containers for up to three months. Just thaw overnight and warm it gently on the stove or in the microwave.

    Need more freezer-friendly slow cooker ideas? Our Slow Cooker Salsa Verde Chicken is another great option to prep ahead and mix into bowls, tacos, or salads.

    Whether you’re meal prepping for the week or feeding a crowd, this recipe checks every box: fast, flavorful, and reliable. It’s one of those dishes you’ll start keeping ingredients on hand for, because once your family tries it, they’ll ask for it again.

    And again.

    Frequently Asked Questions About Bang Bang Chicken Bowl

    What is bang bang chicken made of?

    Bang bang chicken is typically made with shredded or grilled chicken tossed in a creamy, spicy sauce. The sauce usually includes mayonnaise, sweet chili sauce, sriracha, and a touch of vinegar or honey for balance.

    Can I make bang bang chicken without a slow cooker?

    Yes. You can bake or sauté the chicken instead. Just cook it through, shred or slice, and mix it with the bang bang sauce. The slow cooker adds tenderness, but it’s not required.

    Is bang bang chicken bowl spicy?

    It can be, depending on how much sriracha you use. The original version is mildly spicy with a sweet heat. You can adjust the spice level up or down based on your preferences.

    How long does bang bang chicken last in the fridge?

    Stored in an airtight container, bang bang chicken lasts up to 4 days in the refrigerator. For meal prep, keep the sauce separate from toppings until ready to serve.

    Final Thoughts: Make This Bang Bang Chicken Bowl Tonight

    This Bang Bang Chicken Bowl is proof that big flavor doesn’t require complicated cooking. With just a handful of pantry staples and your slow cooker, you can create a meal that hits every note—sweet, spicy, creamy, and satisfying.

    Whether you serve it over rice, in lettuce wraps, or straight from the bowl, this recipe delivers every time. It’s ideal for meal prep, family dinners, or when you just need something foolproof and crave-worthy.

    Try it at home and tag me on social media with your version. I love seeing how these bowls come together in your kitchen.

  • Maple-Glazed Squash & Brussels Sprouts: Cozy Tips

    Maple-Glazed Squash & Brussels Sprouts: Cozy Tips

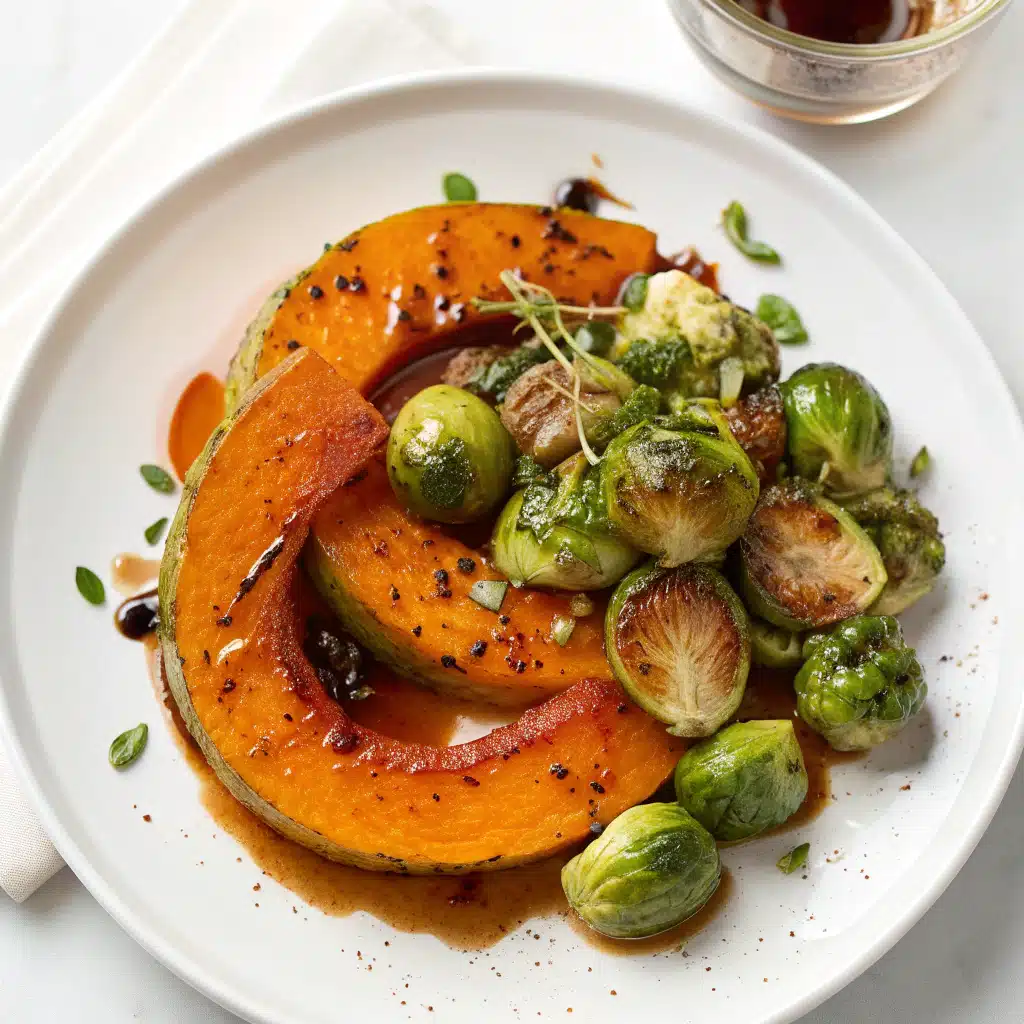
    Maple-Glazed Squash & Brussels Sprouts is the side dish I pull out when the day feels wobbly and dinner needs a hug. I first tossed Maple-Glazed Squash & Brussels Sprouts together after a chilly farmers’ market run—my hands still cold, my kitchen warm with the promise of caramelized edges. The maple clings, the sprouts get crispy, and the squash turns buttery-soft. My kids call it “the cozy pan,” because Maple-Glazed Squash & Brussels Sprouts somehow makes a Tuesday feel like a holiday. It’s simple, grounded, and endlessly flexible—exactly how I like to cook.

    Maple-Glazed Squash & Brussels Sprouts: 7 Cozy Tips

    Recipe

    Maple-Glazed Squash & Brussels Sprouts Recipe Secrets

    The savory-sweet balance that makes this side irresistible

    Maple-Glazed Squash & Brussels Sprouts wins hearts because it nails the balance of savory and sweet. Brussels sprouts bring nutty, roasted depth and crispy edges; squash offers buttery softness and caramelized sweetness; pure maple syrup ties it together. A whisper of smoked paprika gives gentle warmth, while Dijon adds brightness. The result? Maple-Glazed Squash & Brussels Sprouts that tastes like a holiday side dish on a Tuesday night. When your vegetables are oven-roasted at a high heat, you get that irresistible char that signals deep flavor. For even better caramelization, split the vegetables across two sheet pans and don’t overcrowd—space is your best friend.

    To get the most from Maple-Glazed Squash & Brussels Sprouts, dry your veggies well before tossing with the maple glaze. Moisture is the enemy of crisp. Then, flip halfway for even browning. Finally, finish with a splash of apple cider vinegar right on the hot pan. This tiny step wakes up the maple roasted squash and roasted Brussels sprouts, pulling out savory complexity and cutting through sweetness. If you love a bit of texture, a shower of toasted pecans or pumpkin seeds gives crunch against the tender squash. Suddenly, Maple-Glazed Squash & Brussels Sprouts becomes more than a side—it’s the dish everyone reaches for first.

    Trending tip: acid at the end equals chef-level flavor

    Chefs love acid because it lifts heavy flavors. When you drizzle cider or balsamic vinegar over Maple-Glazed Squash & Brussels Sprouts straight from the oven, it’s like turning up the color on a photo. The maple glaze feels brighter, the roasted Brussels sprouts taste nuttier, and the caramelized squash sings. Want inspiration for a full fall menu? Pair with my Harvest Grain Bowl with Cranberries & Pecans and finish with Cherry-Spiced Pumpkin Bread for a seasonal spread that’s hearty, wholesome, and deeply satisfying.

    How to Make Maple-Glazed Squash & Brussels Sprouts

    Ingredients that make the maple glaze shine

    For Maple-Glazed Squash & Brussels Sprouts, reach for pure maple syrup—its clean sweetness caramelizes beautifully. Olive oil helps with browning; a small knob of butter (optional) adds glossy richness. Garlic powder, thyme, and smoked paprika bring cozy, roasted notes that complement both squash and sprouts. The combination creates Maple-Glazed Squash & Brussels Sprouts that’s savory, sweet, and aromatic in all the right ways. Use butternut or delicata squash; delicata saves time because you don’t have to peel it. Choose firm Brussels sprouts of similar size so they roast evenly. This simple pantry-friendly list transforms into the kind of sheet pan vegetables you’ll crave weekly.

    Pro tips for crisp, caramelized results every time

    • Preheat fully: A hot oven (425°F) guarantees crispy edges. Cold sheet pans help too—your veg hits a sizzling surface.
    • Space matters: Spread Maple-Glazed Squash & Brussels Sprouts between two pans. Overcrowding steams instead of browns.
    • Flip once: Roast 12–15 minutes, flip, then roast again until the maple glaze caramelizes and the roasted Brussels sprouts have charred leaves.
    • Finish with acid: A splash of cider or balsamic vinegar at the end perks up the maple roasted squash.
    • Add crunch and color: Pecans and cranberries add texture and a pop of tart-sweet.
    • Salt at the right time: Season before roasting and taste again after finishing.
    • Make it a meal: Serve Maple-Glazed Squash & Brussels Sprouts over farro or quinoa, or alongside roasted chicken. For a cozy plant-based dinner, try it next to my Slow Cooker Butternut Squash Lentil Curry.

    Maple-Glazed Squash & Brussels Sprouts Variations

    Savory-sweet twists to match your mood

    If you love Maple-Glazed Squash & Brussels Sprouts but want fresh twists, try these: Swap thyme for sage to lean into Thanksgiving vibes, or add a pinch of cinnamon for warmth. Finish with shaved Parmesan for savory depth, or crumble in crisp bacon if you’re not keeping it vegetarian. To go smoky, use extra smoked paprika and a drizzle of balsamic glaze. For brightness, toss with lemon zest and pomegranate arils. Each small shift keeps Maple-Glazed Squash & Brussels Sprouts exciting while honoring its roasted, caramelized soul. Prefer heat? A dash of chili flakes perks up the maple glaze without overpowering the squash.

    Pinterest-trending swaps that work

    • Delicata over butternut: No peeling, pretty scalloped edges, same maple-glazed reward.
    • Add chickpeas: Toss a drained can with the vegetables to turn Maple-Glazed Squash & Brussels Sprouts into a hearty, protein-boosted bowl.
    • Air fryer method: 390°F for 14–18 minutes, shaking a few times, works wonders for small batches of maple roasted squash and roasted Brussels sprouts.
    • Nut-free crunch: Use roasted pepitas or sunflower seeds.
    • Cranberries out, grapes in: Roasted red grapes become jammy and gorgeous with maple.
    • Herby finish: A handful of chopped parsley or chives right before serving brightens the dish.
    • Grain bowl upgrade: Serve Maple-Glazed Squash & Brussels Sprouts over warm quinoa, spoon on Greek yogurt or tahini sauce, and sprinkle dukkah for an on-trend, Instagram-ready plate.

    Maple-Glazed Squash & Brussels Sprouts: Serving & Storage

    What to serve with this cozy side

    Maple-Glazed Squash & Brussels Sprouts plays well with roasted turkey, herb chicken, seared salmon, or a hearty grain pilaf. For a meatless feast, pair with a creamy soup or stew and a crusty loaf. It’s a natural fit for holiday menus, but it’s fast enough for weeknights. The maple glaze delivers a comforting sweetness that complements savory mains without tipping into dessert territory. Want a full fall dinner lineup? Start with a warming bowl like my Slow Cooker Three-Bean Chili Mac, then add Maple-Glazed Squash & Brussels Sprouts for color, texture, and balance. Your table will feel abundant and inviting.

    Storage, reheating, and troubleshooting

    Storage: Refrigerate Maple-Glazed Squash & Brussels Sprouts in an airtight container for 4 days. Reheat on a hot sheet pan at 400°F for 8–10 minutes to revive crisp edges.
    Troubleshooting soggy veg: Overcrowding is the usual culprit. Use two pans and keep the vegetables in a single layer. Dry well before tossing in maple glaze.
    Too sweet? Add more vinegar and salt at the end to balance.
    Not browning? Raise oven temp to 440°F for the last 5 minutes and switch to convection if you have it.
    Meal prep: Roast ahead, then add pecans and cranberries just before serving so they keep their crunch.
    Holiday timing: Roast before guests arrive and reheat while the main rests—Maple-Glazed Squash & Brussels Sprouts holds beautifully.

    FAQs

    Can I make Maple-Glazed Squash & Brussels Sprouts vegan?

    Yes. Omit the butter and use only olive oil. The recipe stays naturally dairy-free and gluten-free.

    What squash works best for Maple-Glazed Squash & Brussels Sprouts?

    Butternut and delicata are favorites. Delicata requires no peeling; butternut gets extra creamy and caramelized.

    How do I keep Brussels sprouts crispy?

    Dry well, use two sheet pans, and roast at 425°F. Space the pieces out and flip halfway for even browning.

    Can I prep Maple-Glazed Squash & Brussels Sprouts ahead?

    Yes. Toss in the maple glaze up to 6 hours ahead and refrigerate. Roast just before serving for the best texture.

    Conclusion

    When the evening calls for comfort, Maple-Glazed Squash & Brussels Sprouts answers fast. The roasted Brussels sprouts turn irresistibly crispy, the maple roasted squash goes silky and sweet, and that tiny splash of vinegar ties up the cozy, caramelized bow. It’s the side I make when I want a guaranteed crowd-pleaser without fuss. Try Maple-Glazed Squash & Brussels Sprouts for your weeknights, then bring it to your holiday table and watch it disappear first. If this recipe finds a spot in your rotation, share a photo and tag me—I love seeing your pan dinners glow. And if you’re building a fall menu, don’t miss that warm grain bowl above; together, they’re a celebration of simple, good food that loves you back.