Blog

  • BBQ Pulled Chicken – 1 Easy Slow Cooker Recipe You’ll Love

    BBQ Pulled Chicken – 1 Easy Slow Cooker Recipe You’ll Love

    The first time I made this slow cooker BBQ Pulled Chicken, it wasn’t even planned. I was standing in my kitchen with a toddler on my hip, a half-used bottle of BBQ sauce, and zero energy. So I grabbed some chicken thighs from the freezer, dumped everything into my crockpot, and crossed my fingers. Six hours later? My house smelled like a backyard cookout, and dinner tasted like I actually planned something.

    This recipe is the first in my lineup of 7 Crockpot freezer meals in 20 minutes. It’s easy, it’s cheap, and it tastes even better the next day. Win-win-win.
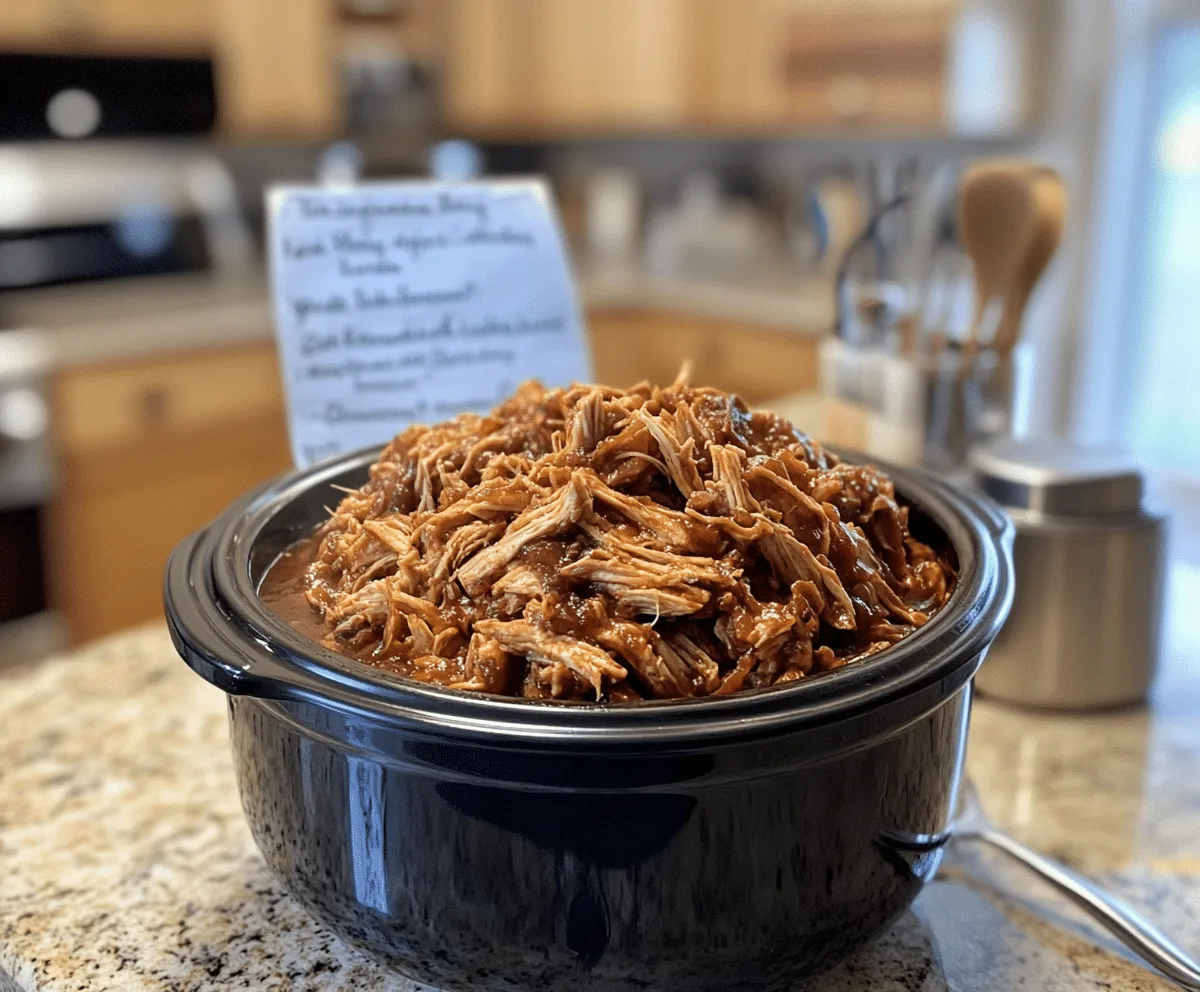
    Slow cooker BBQ pulled chicken in a modern white kitchen setup

    Recipe

    Why BBQ Pulled Chicken Belongs in Every Slow Cooker Rotation

    BBQ pulled chicken is one of the most reliable, family-friendly meals you can make in a slow cooker. With just a few minutes of prep, it transforms everyday ingredients into a meal that’s full of smoky, savory flavor. The slow cooker does all the work while you handle everything else life throws your way.

    What makes slow cooker BBQ pulled chicken so special? It’s incredibly versatile. Serve it on buns, load it into tacos, pile it over rice or stuff it into sweet potatoes. No matter how you plate it, this BBQ pulled chicken never fails to impress. It’s budget-friendly, hands-off, and crowd-pleasing.

    You only need a few pantry staples to make it: chicken, BBQ sauce, spices, and maybe a splash of vinegar. The result? Juicy, tender BBQ pulled chicken ready to shred and serve any way you like.

    Simple Ingredients for Flavorful BBQ Pulled Chicken

    The beauty of this recipe lies in its simplicity. Here’s everything you need to make slow cooker BBQ pulled chicken that’s loaded with flavor:

    • 2 pounds boneless, skinless chicken breasts or thighs
    • 1 ½ cups BBQ sauce (store-bought or homemade)
    • 1 teaspoon garlic powder
    • 1 teaspoon onion powder
    • ½ teaspoon smoked paprika
    • 1 tablespoon brown sugar (optional, if your BBQ sauce isn’t sweet enough)
    • 1 tablespoon apple cider vinegar or Worcestershire sauce
    • Salt and pepper to taste

    Everything goes straight into the slow cooker—no searing, no sauce-reducing, no complicated steps. Just set it and forget it.

    You can experiment with different BBQ sauces to give the pulled chicken your personal twist. Whether you prefer smoky, tangy, spicy, or sweet, the slow cooker will bring those flavors together beautifully.

    If you’re interested in other hands-free recipes with bold flavor, check out my Slow Cooker Buffalo Chicken for another winner that works for weeknights or game day.

    How to Cook BBQ Pulled Chicken Perfectly Every Time

    Slow Cooker Times and Tips for Juicy BBQ Pulled Chicken

    Cooking BBQ pulled chicken in the slow cooker is all about low, steady heat. When done right, the chicken becomes so tender that it shreds effortlessly and soaks up every bit of barbecue flavor. The key is not rushing the process.

    Here’s a time guide that works for most slow cooker models:

    • Low heat: 6 to 7 hours
    • High heat: 3 to 4 hours

    For the most flavorful and tender BBQ pulled chicken, the low and slow method is the winner. Chicken breasts or thighs simmer gently in the sauce, absorbing every bit of spice and sweetness. Once it’s done, you can shred it directly in the cooker or remove it for easier handling.

    Avoid overcooking. While slow cookers are forgiving, leaving BBQ pulled chicken in for too long can cause it to dry out or become stringy. Use a fork to test doneness at the 6-hour mark if cooking on low. The chicken should pull apart easily and feel juicy when shredded.

    If you like your BBQ pulled chicken with deeper flavor, add a splash of extra sauce after shredding and let it warm through on the “Keep Warm” setting for 20 to 30 minutes.

    How to Shred BBQ Pulled Chicken Fast and Clean

    Once the chicken is cooked, it’s time to shred. This step makes all the difference—it’s where the texture changes from plain chicken to that signature pulled style.

    Here are three foolproof methods:

    1. Two Forks
    Place the chicken on a cutting board or plate. Hold one fork in each hand and pull the chicken apart. This traditional method works great but takes a bit of time.

    2. Hand Mixer
    Put the cooked chicken in a large bowl. Use a hand mixer on low speed for about 30 seconds. It will break down the chicken quickly and evenly.

    3. Stand Mixer
    Drop the cooked chicken into the bowl of your stand mixer. Use the paddle attachment and run it on low for 20 to 30 seconds. You’ll have perfectly shredded BBQ pulled chicken in seconds.

    Return the shredded chicken to the slow cooker, stir it into the sauce, and let it soak up all the barbecue flavor.

    For an even richer taste, try adding an extra half cup of your favorite BBQ sauce before serving. It brings back moisture and adds another layer of tangy, smoky sweetness to the BBQ pulled chicken.

    Looking for another shreddable, family-approved recipe? Don’t miss my Slow Cooker Chicken Tinga—it’s spicy, juicy, and just as easy.

    Creative Ways to Serve BBQ Pulled Chicken

    BBQ Pulled Chicken Sandwiches, Tacos, and More

    Once your BBQ pulled chicken is tender and shredded, the real fun begins—serving it. This is where you can get creative and adapt it to any meal or craving. Whether you’re feeding kids, guests, or just meal prepping for the week, this versatile chicken delivers.

    Start with the classic BBQ pulled chicken sandwich. Pile the meat high on a soft brioche bun or potato roll. Top with creamy coleslaw for crunch and contrast. Add pickles or sliced jalapeños if you like heat. It’s a fast and filling dinner that always gets compliments.

    For something lighter, use flour or corn tortillas to make BBQ pulled chicken tacos. Add avocado, shredded lettuce, or a drizzle of ranch. Wrap it all up for a smoky spin on taco night.

    Here are more favorite ways to serve BBQ pulled chicken:

    • Stuffed baked potatoes: Top a baked potato with chicken, shredded cheese, and sour cream.
    • Rice bowls: Build a base of rice or quinoa, add chicken, and pile on veggies.
    • Flatbread pizzas: Use naan or pita as a base, spread BBQ sauce, chicken, and mozzarella, then bake.
    • Wraps: Roll it into a tortilla with greens and shredded cheddar for a quick lunch.

    The flexible nature of BBQ pulled chicken means you can serve it differently every day without getting bored. That’s why it’s one of the most cooked recipes in my house.

    Leftover BBQ Pulled Chicken? Turn It Into New Meals

    One of the best parts about BBQ pulled chicken is how well it keeps—and how easy it is to transform into new dishes. Leftovers become building blocks for fast meals when you’re short on time or energy.

    Here are my favorite leftover ideas:

    BBQ Chicken Quesadillas
    Spread shredded chicken and cheese on a tortilla, fold it, and cook until crisp. Dip in ranch or sour cream.

    BBQ Chicken Mac and Cheese
    Mix into stovetop or baked mac and cheese. The smoky BBQ flavor gives creamy pasta an exciting twist.

    BBQ Chicken Breakfast Hash
    Sauté diced potatoes with onions, add chicken, and top with a fried egg. It’s bold, hearty, and great for weekends.

    BBQ Chicken Sliders
    Use dinner rolls or Hawaiian rolls to make mini sandwiches. Serve at parties or as a fun dinner option for kids.

    BBQ Chicken Nachos
    Layer tortilla chips with BBQ pulled chicken, shredded cheese, black beans, and green onions. Bake and serve with salsa and sour cream.

    When you make a big batch of BBQ pulled chicken, you open the door to four or five meals from one cook. That’s why I recommend doubling the recipe—you’ll thank yourself later.

    If batch cooking is your thing, check out my Slow Cooker Freezer Prep Guide for smart planning strategies that save time and money.

    Store and Freeze Pulled Chicken the Right Way

    How to Store and Reheat Without Losing Flavor

    After dinner is done, storing your leftovers properly can make all the difference. Pulled chicken keeps well in the fridge and tastes just as good the next day—sometimes better.

    Let the chicken cool slightly before transferring it to an airtight container. Store it in the refrigerator for up to four days. When it’s time to reheat, there are a few good options:

    • Microwave: Add a splash of water or sauce, cover loosely, and warm in 30-second bursts.
    • Stovetop: Reheat over low heat with a little broth or extra sauce to prevent drying.
    • Slow cooker: Use the “Warm” or “Low” setting for a large batch.

    Avoid overheating the meat. It’s already cooked through, so your goal is to warm it gently while keeping it tender and moist.

    For more practical tips, see my guide on Reheating Slow Cooker Meals Without Ruining Them.


    Freezing Pulled Chicken for Easy Weeknight Dinners

    Freezing is one of the easiest ways to get ahead on meal prep. This chicken freezes beautifully and reheats without losing its texture or taste.

    Here’s how to do it:

    1. Cool the chicken completely.
    2. Portion it into meal-sized amounts—about 1 to 2 cups per bag or container.
    3. Use freezer-safe, airtight containers or zip-top bags.
    4. Label with the date and type of dish.
    5. Freeze flat to save space.

    When you’re ready to use it, thaw overnight in the fridge. Then reheat on the stovetop, in the microwave, or even in a soup or stew. It’s flexible, flavorful, and ready when you need it.

    Looking for more ways to make freezer meals work? Check out my Slow Cooker Freezer Prep Plan for step-by-step help.

    Frequently Asked Questions About BBQ Pulled Chicken

    Can I use frozen chicken to make BBQ pulled chicken in the slow cooker?

    No, you should not place frozen chicken directly into the slow cooker. For food safety reasons, always thaw chicken completely before cooking to avoid uneven temperatures and potential bacteria growth.

    What type of BBQ sauce works best for pulled chicken?

    Any thick, flavorful BBQ sauce will work, but sauces with a balance of sweet, smoky, and tangy flavors tend to perform best. Look for options with molasses, apple cider vinegar, or natural smoke flavor for depth.

    Can I make BBQ pulled chicken with chicken thighs instead of breasts?

    Yes, boneless chicken thighs are an excellent alternative. They stay moist and shred easily, often resulting in richer flavor and a more tender texture than chicken breasts.

    How do I keep BBQ pulled chicken from drying out?

    To prevent dryness, cook the chicken just until it shreds easily, then stir it back into the sauce. If reheating, add a small splash of water or extra BBQ sauce to maintain moisture and prevent overcooking.

    Conclusion

    Slow cooker BBQ pulled chicken is one of those meals that proves simple can still be impressive. It takes almost no effort to prepare, yet the results are consistently tender, flavorful, and ready to serve in multiple ways. Whether you’re loading it into buns, tacos, bowls, or meal-prepping for the week, this dish delivers every time.

    If you’ve been looking for a reliable, go-to slow cooker recipe, this one belongs in your rotation. It’s flexible enough to adapt to your favorite sauces, budget-friendly for busy families, and perfect for batch cooking.

    Try it at home—and tag me in your creations on Instagram @RecipesDarleen. I love seeing how you serve it!
  • Tangy Dill Pickle Dip (Viral Snack) — 7 Pro Tricks

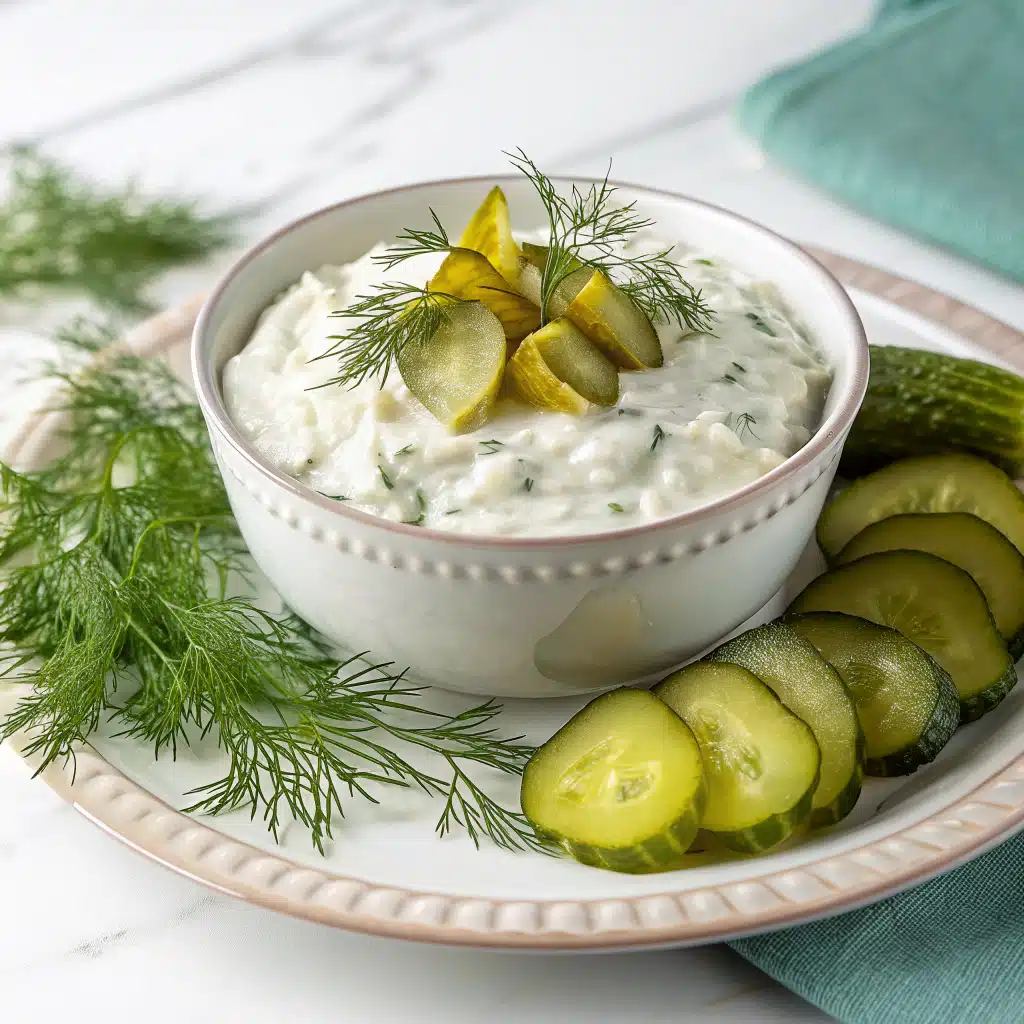
    Tangy Dill Pickle Dip (Viral Snack) — 7 Pro Tricks

    Tangy Dill Pickle Dip (Viral Snack) was born at my sister’s last-minute game night when the veggie tray looked lonely and chips were calling. I grabbed what we had—cream cheese, dill pickles, a splash of brine—and five minutes later Tangy Dill Pickle Dip (Viral Snack) was the loudest hit on the table. We scraped the bowl clean, and the kids asked for more. Now, I keep the ingredients on hand because Tangy Dill Pickle Dip (Viral Snack) is my effortless party trick: creamy, crunchy, and perfectly tangy every time.

    Tangy Dill Pickle Dip (Viral Snack) — 7 Pro Tricks

    Recipe

    What Makes Tangy Dill Pickle Dip So Addictive?

    The Pickle Factor: Not Just Any Jar Will Do

    The key to this dip’s viral charm lies in the pickles. Not all pickles are created equal. For this dip to truly shine, you need crunchy, tangy, full-dill pickles—not the sweet bread-and-butter kind or the limp slices found in generic jars. Go for refrigerated deli-style spears or whole kosher dills for the best flavor punch.

    Pickles are the backbone of this recipe, delivering that signature zip and a satisfying crunch in every bite. But here’s a game-changing tip: pulse them in a food processor rather than chopping by hand. It keeps the brine sealed inside the chunks and prevents soggy dip.

    Pro Trick #1: Pulse your pickles instead of chopping to keep the texture sharp and the flavor bold.

    Creamy Base That Actually Holds Up

    A lot of viral dips taste great right out of the fridge but fall flat after 10 minutes on the counter. This dip avoids that fate by using a three-part base: cream cheese, sour cream, and Greek yogurt. The blend is smooth, rich, and stable enough to stay creamy during your entire event.

    The cream cheese provides structure, the sour cream adds a slight tang, and the Greek yogurt offers protein and a subtle lift. It’s a combo that makes the dip spoonable yet thick enough to cling to everything from chips to carrot sticks.

    Pro Trick #2: Use full-fat ingredients. The reduced-fat versions can make the dip watery and less flavorful over time.

    Coming up next, you’ll learn how to tweak the flavor base using pantry staples—and how one surprise ingredient can turn this simple recipe into a conversation starter.

    Boost the Flavor with Pantry Staples

    Bold Seasonings That Bring It All Together

    What separates an average pickle dip from a craveable one is seasoning. The pickles bring plenty of zing, but to round out the flavor, you’ll need a few strategic pantry staples. Garlic powder and onion powder add warmth and depth, balancing out the brightness of the pickles.

    A dash of pickle juice intensifies the briny flavor without overpowering the creamy base. It also helps the texture loosen just enough to become perfectly scoopable.

    Pro Trick #3: Stir in one tablespoon of pickle juice for enhanced flavor and a smoother dip consistency.

    If you’re feeling adventurous, try a pinch of smoked paprika or cayenne. It won’t turn it into a spicy dip, but it will add subtle complexity that keeps people reaching for more.

    Fresh Herbs: Why Dill Deserves the Spotlight

    It’s called dill pickle dip for a reason—fresh dill is essential. Dried dill works in a pinch, but fresh dill brings a vibrant, almost citrus-like aroma that plays beautifully against the creaminess.

    You don’t need much. Just one tablespoon of finely chopped fresh dill is enough to take this dip from good to exceptional. Sprinkle a little extra on top before serving for both color and aroma.

    Pro Trick #4: Always add fresh herbs at the end. Mixing them in too early can dull their flavor, especially if the dip sits overnight.

    For extra flair, consider a quick garnish: thin pickle slices, a sprinkle of shredded cheese, or even a dash of everything bagel seasoning for texture.

    Next up, you’ll learn how to make it ahead, store it properly, and turn this simple dip into a party trick you’ll pull out again and again.

    Make-Ahead Tips and Storage That Keep It Fresh

    How to Prep Tangy Dill Pickle Dip in Advance

    One of the best things about this dip—besides how quickly it disappears—is how well it holds up in the fridge. In fact, it tastes better after a few hours. The flavors have time to meld, the texture firms up slightly, and the pickle brine integrates perfectly with the base.

    If you’re prepping for a party, make the dip at least four hours ahead, or even the night before. Store it in an airtight container and give it a quick stir before serving. It’s a perfect make-ahead appetizer that keeps your event stress-free.

    Pro Trick #5: Chill your dip overnight and stir just before serving for peak texture and balanced flavor.

    How to Store Leftovers (If You Have Any)

    This dip doesn’t just survive the fridge—it thrives in it. Store leftovers in a sealed glass container for up to three days. The texture remains creamy, and the dill stays fresh without wilting or turning bitter.

    Avoid freezing. Because of the dairy base, freezing alters the texture and makes it grainy. It’s best enjoyed fresh—or eaten cold right out of the fridge with a spoon (we won’t judge).

    Pro Trick #6: Transfer the dip to a shallow container to help it chill evenly and keep the herbs fresh.

    Want to use the leftovers creatively? Spread it on a sandwich, mix into potato salad, or spoon onto grilled meats. It’s surprisingly versatile.

    Coming next: Serving ideas that will turn this dip into the star of any spread, plus the final trick that made this recipe go viral in the first place.

    Serve It Like a Pro and Go Viral

    Smart Serving Ideas for Maximum Crunch

    A great dip deserves great dippers. Skip the basic saltines—this tangy dill pickle dip shines with bold textures and hearty bases. Thick-cut kettle chips, pretzel thins, pita crackers, and fresh-cut cucumbers are perfect matches. Even celery sticks give it a fresh snap that works beautifully with the creamy base.

    If you’re serving for a crowd, divide the dip into two bowls: one for the main table, and one as backup in the fridge. That way, the second bowl stays cool, and your dip never turns soft or warm.

    Pro Trick #7: Serve with a mix of soft and crunchy dippers to balance every bite and keep guests coming back.

    Hosting a party? Pair this with my Slow Cooker Buffalo Chicken Sliders for a game day spread that checks every box: spicy, cool, crunchy, and creamy.

    The Secret Garnish That Made It Go Viral

    Want your version to go viral on social media too? Here’s the twist: top the dip with a thin layer of chopped dill pickles and crushed kettle chips just before serving. This adds crunch, color, and that “wow” factor that looks amazing in photos.

    This trick, combined with a rustic bowl and bold dippers, makes your spread instantly shareable—and yes, it’s already been featured in reels and TikToks across foodie accounts. If you want more social-worthy snacks, don’t miss this Slow Cooker Beer Cheese Dip that melts perfectly every time.

    Final tip: serve it chilled, not cold. Take it out 10 minutes before guests arrive to let it soften just slightly. That’s when the flavors pop, and the texture turns irresistibly dippable.

    FAQs

    Can I make Tangy Dill Pickle Dip (Viral Snack) ahead?
    Yes, chill up to 24 hours; stir in a splash of pickle juice to refresh before serving.

    What pickles work best for this creamy pickle dip?
    Crisp refrigerated dill pickles deliver the brightest snap, but shelf-stable dills work too.

    How do I make a dairy-free dill pickle ranch dip?
    Use plant-based cream cheese and thick dairy-free yogurt; season with dill and brine.

    Is Tangy Dill Pickle Dip (Viral Snack) good for low-carb snacks?
    Yes—serve with cucumber chips, celery, and pork rinds for a low-carb spread.

    Conclusion

    Tangy Dill Pickle Dip (Viral Snack) proves that simple ingredients can deliver big-time flavor. With a creamy base, crunchy dill pickles, and that addictive briny pop, this creamy pickle dip becomes everyone’s favorite party appetizer. Keep it classic, turn up the heat, or riff with dill pickle ranch dip vibes—the bowl always empties. I’m betting your crowd will love it as much as mine does. If you make Tangy Dill Pickle Dip (Viral Snack), leave a comment, tag me in your photos, and rate the recipe so others can find this viral snack recipe too. Ready to build your spread? Browse more comfort dishes at Recipes Darleen and snag another easy star for your table.

  • 7 Cozy Secrets for Slow Cooker Butternut Squash Lentil Curry

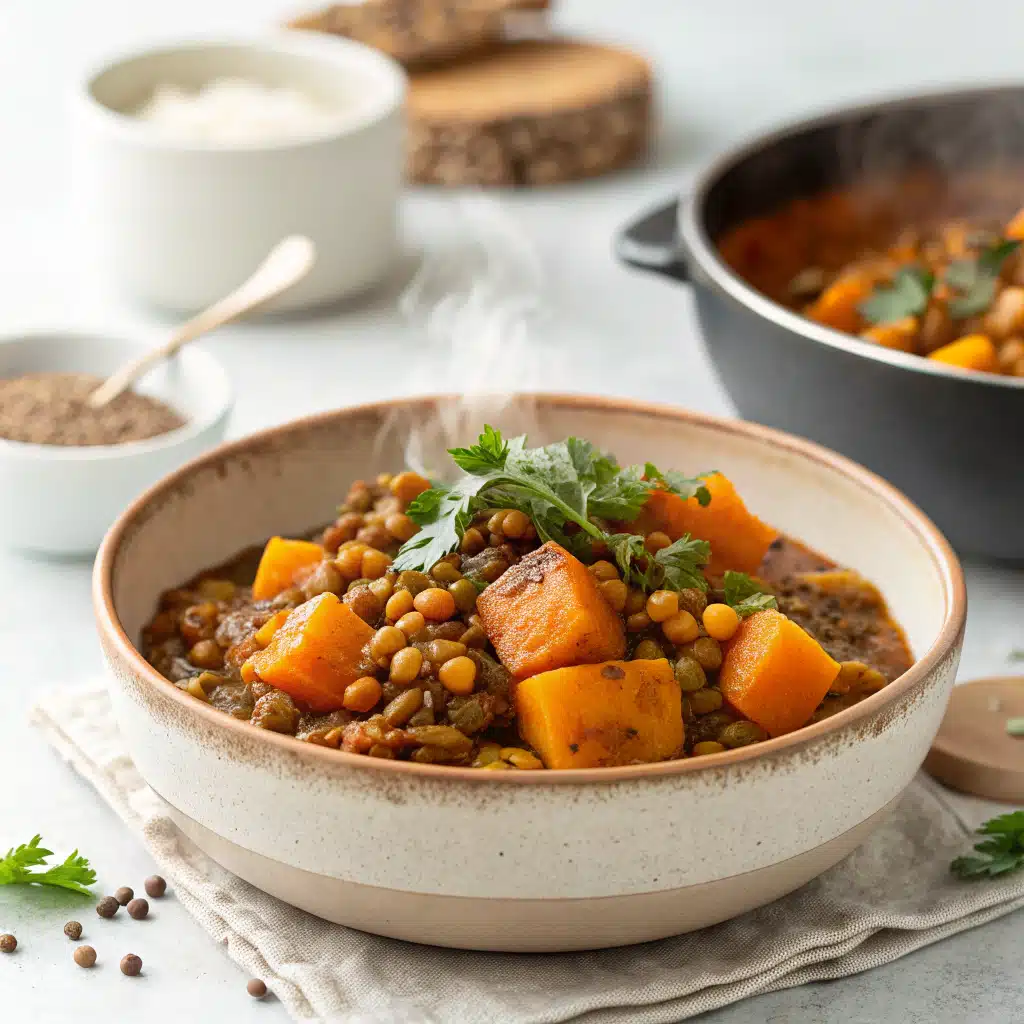
    7 Cozy Secrets for Slow Cooker Butternut Squash Lentil Curry

    Slow Cooker Butternut Squash Lentil Curry is my rainy-Tuesday lifesaver. I tossed everything in the crockpot before school drop-off, and by dinner the house smelled like a cozy curry shop. When the kids wandered in—muddy shoes, big appetites—I ladled out Slow Cooker Butternut Squash Lentil Curry with warm naan and they went silent (the best compliment). This Slow Cooker Butternut Squash Lentil Curry tastes luxuriously creamy, but it’s dairy-free, budget-friendly, and practically cooks itself. That’s the kind of weeknight magic I live for.

    7 Cozy Secrets for Slow Cooker Butternut Squash Lentil Curry

    Recipe

    Structured JSON-LD Schema

    The Best Slow Cooker Butternut Squash Lentil Curry (Basics)

    Why this red lentil curry thrives in a crockpot

    When you want cozy, set-and-forget comfort, Slow Cooker Butternut Squash Lentil Curry delivers like a hug in a bowl. Red lentils melt into a silky base while butternut squash turns buttery-tender, creating a creamy coconut curry without any dairy. The slow cooker coaxes out sweetness from the squash and caramelizes onion and garlic just enough to round out spice, so every spoonful tastes like hours of hands-on cooking—minus the work. If you’re craving a vegan slow cooker curry that is inexpensive, nourishing, and deeply flavorful, this is your weeknight hero.

    Because red lentils break down quickly, they thicken the curry into a rich, restaurant-style texture. A splash of coconut milk adds body for that irresistible spoon-coating finish. Turmeric, cumin, coriander, and garam masala infuse the pot with Indian-inspired aromas that play beautifully with squash. Serve your Slow Cooker Butternut Squash Lentil Curry with rice, quinoa, or warm naan for a complete gluten-free dinner packed with plant-based protein and fiber.

    This Slow Cooker Butternut Squash Lentil Curry is more than comfort food—it’s a nutrient-dense, anti-inflammatory powerhouse. Butternut squash brings beta-carotene and vitamin C, while lentils bring iron and satiating protein. Turmeric and ginger are the buzzy super-spices of the moment, prized for supporting recovery and everyday wellness. If you love simple, wholesome slow cooker meals, bookmark this recipe next to my Slow Cooker Three-Bean Chili Mac or cozy up with creamy Slow Cooker Pumpkin Mac and Cheese. Together, they make a budget-friendly meal plan that tastes like a hug, night after night.

    Crockpot Butternut Squash Lentil Curry Ingredients & Smart Swaps

    The essentials for Slow Cooker Butternut Squash Lentil Curry

    For the creamiest Slow Cooker Butternut Squash Lentil Curry, start with cubed butternut squash, dry red lentils, coconut milk, crushed tomatoes, vegetable broth, and onion, garlic, and ginger. Curry powder forms the base, supported by cumin, coriander, turmeric, and garam masala for depth. Baby spinach stirred in at the end adds fresh, vibrant color and nutrients, while lime juice brightens the entire vegan curry. This crockpot butternut squash curry is naturally gluten-free and dairy-free, with hearty plant-based protein that keeps you full and energized.

    Smart swaps to match your pantry

    No squash? Sub sweet potatoes or pumpkin for an equally silky slow cooker curry. Only have green or brown lentils? They’ll work, but the texture will be chunkier; add 30–45 minutes to the cook time. Want extra protein? Stir in a can of drained chickpeas during the last hour. Prefer lighter coconut flavor? Use light coconut milk and reduce the broth slightly for a thicker finish. For extra greens, fold in kale (stems removed) and let it soften an additional 10–15 minutes.

    You can also turn this Slow Cooker Butternut Squash Lentil Curry into a Thai-inspired spin with Thai curry paste and a splash of soy or tamari for umami complexity. However you swap, the crockpot still delivers that creamy coconut curry comfort we crave.

    How to Make Slow Cooker Butternut Squash Lentil Curry (Step-by-Step)

    Hands-off method, big flavor

    Rinse the red lentils until the water runs mostly clear, then add them to your slow cooker with cubed butternut squash, chopped onion, minced garlic, grated ginger, crushed tomatoes, coconut milk, and broth. Season with curry powder, cumin, coriander, turmeric, garam masala, salt, and black pepper. Stir well. Cook your Slow Cooker Butternut Squash Lentil Curry on LOW for 6–7 hours (or HIGH for 3–4 hours), until the lentils are creamy and the squash is tender. Stir in baby spinach to wilt, add lime juice, and adjust salt to taste. That’s it—crockpot magic.

    • Sweet Heat: Add a diced jalapeño or 1/2 teaspoon cayenne for a spicy kick in your Slow Cooker Butternut Squash Lentil Curry.
    • Autumn Harvest: Swap in pumpkin or delicata squash for a seasonal rotation.
    • Protein Boost: Stir in chickpeas or cubed tofu during the last hour for extra plant-based protein.
    • Golden Glow: Finish with extra turmeric and cracked pepper for that golden latte glow in curry form.
    • Herby Finish: Top with cilantro, mint, and toasted coconut flakes to mimic restaurant-style coconut curry. For more set-and-forget inspiration, check out my soothing Slow Cooker Bone Broth health secrets—perfect for sipping between hearty curry nights.

    Slow Cooker Butternut Squash Lentil Curry Meal Prep, Storage & Troubleshooting

    Make-ahead and storage tips

    Slow Cooker Butternut Squash Lentil Curry is a meal-prep champion. Portion into airtight containers and refrigerate up to 5 days; the flavors deepen as it rests. To freeze, cool completely and store flat in freezer bags or in lidded containers for up to 3 months. Thaw overnight in the fridge or gently reheat from frozen with a splash of broth. Reheat on the stovetop over medium-low, stirring in extra coconut milk if you want creamier, dairy-free comfort. Serve leftovers over rice, quinoa, or spoon it with warm naan for a gluten-free, vegan dinner any night.

    Troubleshooting your crockpot curry

    • Too thin? Simmer uncovered for 10–15 minutes or mash a few squash cubes and lentils to thicken.
    • Too thick? Stir in warm broth or coconut milk until it’s your ideal creamy coconut curry texture.
    • Lentils undercooked? Cook 30–45 minutes longer; older lentils can take extra time.
    • Needs brightness? A squeeze of lime and a pinch more salt transform flavors fast.
    • Too spicy? Add more coconut milk or a spoon of plain yogurt (if not strictly dairy-free).

    Make it your own

    Your Slow Cooker Butternut Squash Lentil Curry can swing from mild and cozy to vibrant and spicy. Garnish with cilantro, mint, scallions, toasted cashews, or coconut flakes. Add frozen peas for a pop of sweetness or stir in kale for extra greens. Pair with basmati rice, brown rice, quinoa, or low-carb cauliflower rice. However you build your bowl, this creamy, vegan red lentil curry proves that simple pantry staples and a crockpot can taste extraordinary.

    Can I cook Slow Cooker Butternut Squash Lentil Curry on HIGH? Yes. Cook on HIGH for 3–4 hours, or on LOW for 6–7 hours, until lentils are creamy and squash is tender.

    Do I need to soak red lentils first? No soaking needed. Rinse red lentils well to remove excess starch—then add directly to the slow cooker.

    Can I use light coconut milk? Yes. Light coconut milk works; reduce vegetable broth slightly for a thicker curry or simmer uncovered to concentrate.

    How do I keep leftovers from drying out? When reheating, stir in a splash of broth or coconut milk to revive the creamy, dairy-free curry texture.

    div id=”conclusion”>

    At the end of a busy day, Slow Cooker Butternut Squash Lentil Curry proves that nourishing, budget-friendly comfort can be as easy as loading a crockpot. With red lentils, butternut squash, and gentle spices, this vegan, dairy-free curry tastes like you fussed for hours—yet it’s a true set-and-forget dinner. Serve your Slow Cooker Butternut Squash Lentil Curry over fluffy basmati rice, shower it with cilantro and lime, and let the cozy aroma do the rest. If you try this Slow Cooker Butternut Squash Lentil Curry, leave a comment, share a photo, and tell me your favorite swaps. Craving more slow-cooked comfort? Explore my site for weeknight heroes and seasonal favorites that make home cooking feel easy and joyful.

  • Harvest Grain Bowl with Cranberries & Pecans Quick Recipe

    Harvest Grain Bowl with Cranberries & Pecans Quick Recipe

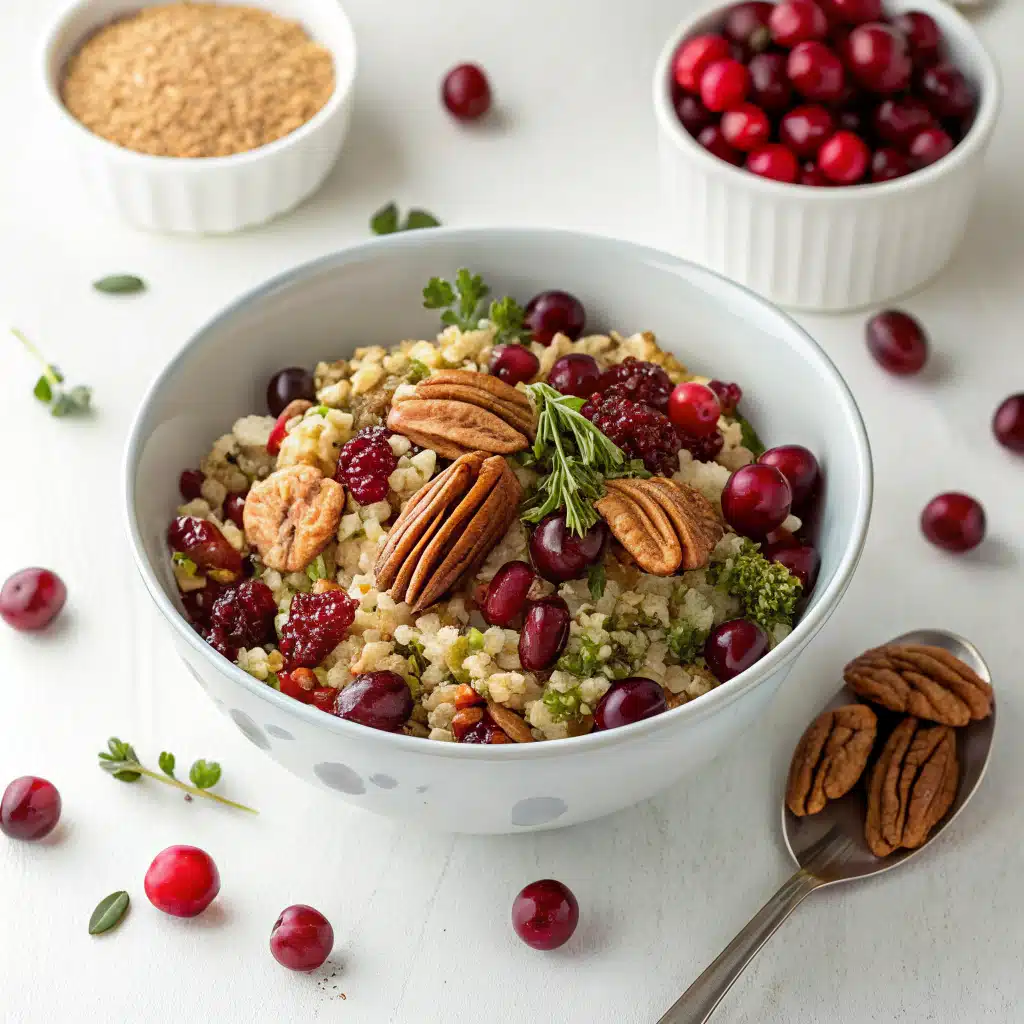
    Harvest Grain Bowl with Cranberries & Pecans came to life on a blustery weeknight when my kids were “starving” and I needed dinner fast. I tossed warm farro with kale, roasted sweet potatoes, and a maple Dijon drizzle, then showered it with cranberries and pecans. The kitchen smelled like fall. Harvest Grain Bowl with Cranberries & Pecans felt elegant yet practical—sweet, savory, and satisfying. The next day, I packed leftovers, and it was just as good cold. Harvest Grain Bowl with Cranberries & Pecans is my cozy answer to busy days when I want something nourishing without fuss.

    Harvest Grain Bowl with Cranberries & Pecans Quick Recipe

    Why This Harvest Grain Bowl Is a Fall Favorite

    The Power of a Quick Grain Bowl (Keyword: harvest grain bowl with cranberries & pecans)

    If you’re craving something hearty, fresh, and fast, this harvest grain bowl with cranberries & pecans has your name written all over it. It’s a no-cook meal that packs fall flavor in every bite—chewy grains, sweet-tart cranberries, crunchy pecans, and a tangy apple cider dressing that ties it all together. Think of it as your autumn answer to dinner fatigue.

    This bowl doesn’t just deliver big on flavor. It’s also loaded with fiber, plant-based protein, and healthy fats to keep you energized (and full) for hours. It’s also extremely meal-prep friendly. One batch and you’ve got lunch sorted for days.

    And yes—this recipe can easily be adjusted for gluten-free or vegan diets. You can even make it low-carb by subbing in cauliflower rice instead of farro or quinoa.

    Naturally, it’s become one of the most searched grain bowl recipes during September through November, which makes sense—it’s basically fall in a bowl!

    ???? Related: If you love cozy bowls like this, don’t miss my Slow Cooker Butternut Squash Chili.


    Why Cranberries and Pecans Work So Well Together

    There’s a reason you see cranberries and pecans paired together in everything from salads to stuffings. It’s a classic combo because they balance each other out so well.

    • Cranberries bring brightness and tart sweetness that lifts up the entire dish.
    • Pecans add depth, richness, and a buttery crunch that keeps every bite interesting.

    Together, they give your grain bowl both texture and complexity—something a lot of quick lunch recipes miss. The toasted pecans especially add a roasted warmth that plays beautifully against fresh greens like spinach or kale.

    Want to make it more indulgent? Add a sprinkle of goat cheese or feta, or even a soft-boiled egg for extra creaminess.

    ???? Try pairing this bowl with a warm mug of Slow Cooker Apple Cider to make it the ultimate cozy fall lunch.

    Make It Your Way – Customizing the Grain Bowl

    Seasonal Swaps and Add-Ins (Keyword variation: cranberry pecan grain bowl)

    The beauty of a cranberry pecan grain bowl lies in how forgiving and flexible it is. Whether your fridge is full of random leftovers or you’re following a specific diet, this recipe adapts like a champ.

    Here are some easy seasonal swaps to keep it fresh all year long:

    • Spring: Add sliced radishes, sugar snap peas, or roasted asparagus.
    • Summer: Swap cranberries for fresh blueberries or strawberries; use arugula instead of kale.
    • Fall/Winter: Stick with dried cranberries, roasted sweet potato chunks, and toasted pecans. Add goat cheese or a drizzle of maple syrup for depth.

    ???? Want more flavor? Roast your grains in garlic-infused olive oil before assembling the bowl. It adds a whole new dimension of umami.

    ???? Need more protein? Add:

    • Grilled chicken
    • Roasted chickpeas
    • Soft-boiled eggs
    • Seared tofu
    • Leftover turkey (hello, Thanksgiving remix!)

    ???? Meal prep tip: Store your grain base, toppings, and dressing separately in the fridge. Combine only when ready to eat to keep everything fresh and crisp.

    ???? If you like make-ahead bowls, check out my Slow Cooker Barley & Veggie Bowl.


    Choosing the Right Grain Base

    Let’s break down the best grains to use and when:

    GrainTextureCook TimeBest For
    FarroNutty, chewy25–30 minHearty, fall-themed bowls
    QuinoaFluffy, light15 minGluten-free & protein-rich
    Brown riceFirm, earthy40–45 minClassic, filling grain base
    BarleySoft, plump30–40 minComforting & traditional
    CouscousSoft, quick5–10 minBusy weekday lunches

    If you’re short on time, quinoa or couscous are your go-tos. Want something a bit meatier? Farro or barley deliver a chew that holds up to dressing and toppings alike.

    ???? Tip: Always season your grains while cooking—a little salt or veggie broth goes a long way in boosting flavor from the base up.

    ???? Related: Explore our Slow Cooker Grain Bowl category for more weeknight-friendly ideas.

    Nutrition Breakdown and Why It’s a Clean-Eating Win

    Why This Bowl Is Actually Good for You

    (Keyword variation: healthy grain bowl with cranberries and pecans)

    This healthy grain bowl with cranberries and pecans isn’t just easy to make—it’s a nutrient-packed, balanced meal that works hard for your body. With fiber-rich grains, antioxidant-heavy fruit, heart-healthy fats, and fresh greens, it’s a clean-eating choice that doesn’t skimp on flavor or satisfaction.

    Let’s look at how the ingredients support your health:

    Ingredient Key Benefits
    Farro or Quinoa High in fiber, B vitamins, protein, and magnesium
    Dried Cranberries Rich in antioxidants and natural sweetness
    Pecans Provide healthy fats, plant protein, and zinc
    Greens (Kale or Spinach) Loaded with vitamin K, iron, and antioxidants
    Olive Oil Supports heart health and reduces inflammation
    Apple Cider Vinegar Helps with digestion and blood sugar balance

    This combination of slow-digesting carbohydrates, natural sweetness, and plant-based protein creates a meal that keeps you full, energized, and satisfied for hours.

    To adjust it for your needs:

    • Use unsweetened dried cranberries or pomegranate seeds to reduce sugar.
    • Add grilled chicken, chickpeas, or lentils to boost protein.
    • Swap kale for massaged spinach if you want something more tender.

    For a gut-friendly variation, squeeze lemon juice over the greens and let them sit for 10 minutes before mixing. This makes the greens more digestible and flavorful.

    For more clean bowl ideas, check out the Slow Cooker Anti-Inflammatory Lentil Soup, which also prioritizes whole foods and high fiber content.

    Storage, Prep, and Busy Weeknight Hacks

    How to Store and Pack This Bowl

    (Keyword variation: cranberry pecan grain salad meal prep)

    One of the best things about this cranberry pecan grain salad meal prep recipe is how well it holds up over time. It doesn’t get soggy, the flavors actually deepen, and the texture stays fresh—perfect for storing, stacking, and grabbing during a hectic week.

    Here’s how to make it work:

    Refrigerator Storage:

    • Store in an airtight container in the fridge for up to 4 days
    • Keep the dressing in a separate container to preserve texture
    • If you’re using greens like kale, it’s okay to pre-mix—kale holds up better than spinach
    • For delicate greens, layer them on top and mix just before eating

    Lunchbox Tip:

    • Use compartment-style containers with space for grains, toppings, and dressing
    • Pack a lemon wedge for a fresh boost right before eating

    Freezer Option:

    • The grain base (quinoa, farro, or brown rice) can be cooked ahead and frozen in portions
    • Do not freeze the greens, cranberries, or nuts—they’ll lose texture

    Best Containers to Use:

    • Glass containers with locking lids
    • Mason jars (layered with dressing on bottom, grains in the middle, greens on top)
    • Bento boxes with separate compartments

    If you’re packing this for work, add your dressing just before eating for the best texture and taste.

    For more easy-prep dishes that hold up well, visit the Make-Ahead Meal Archives.


    Grain Bowl Hacks for Busy People

    Let’s face it—life is full. Some days, even tossing together a salad can feel like a task. That’s where these practical shortcuts come in:

    1. Use Pre-Cooked Grains
    Most grocery stores now carry pre-cooked quinoa, farro, and brown rice in shelf-stable pouches or the freezer aisle. Keep them stocked for emergency meals.

    2. Batch Your Toppings
    Chop your pecans, rinse your greens, and crumble your cheese all at once. Store them in small containers for quick assembly.

    3. Double the Dressing
    Make a full jar of the apple cider vinaigrette. It keeps for a full week in the fridge and also works on roasted veggies and other salads.

    4. Build a Grain Bowl Bar
    Prep a few different toppings and let the family build their own. Offer options like:

    • Chickpeas
    • Roasted sweet potato
    • Feta
    • Pickled onions
    • Sunflower seeds

    This encourages healthy eating without turning dinner into a chore.

    5. Use It as a Side Dish
    This bowl doesn’t have to be the whole meal. It pairs beautifully with roasted chicken, grilled salmon, or soup for a well-rounded dinner.

    For more time-saving ideas, check out the 30-Minute Slow Cooker Meals on the blog.

    Can I make the Harvest Grain Bowl with Cranberries & Pecans gluten-free?

    Yes—swap farro for quinoa or brown rice and confirm your cranberries are certified gluten-free.

    How do I keep apples from browning in my grain bowl?

    Toss diced apples with a teaspoon of lemon juice or add them right before serving the harvest bowl.

    What proteins pair best with this cranberry pecan bowl?

    Roasted turkey, rotisserie chicken, salmon, tofu, or chickpeas complement the maple Dijon dressing beautifully.

    Can I serve it cold?

    Absolutely. This Harvest Grain Bowl with Cranberries & Pecans is delicious warm, room temp, or chilled.

    When I need a comforting, colorful dinner without overthinking, the Harvest Grain Bowl with Cranberries & Pecans always delivers. The contrast of chewy grains, roasted sweet potato, crisp kale, tart cranberries, and crunchy pecans—glossed in maple Dijon—makes this fall grain bowl feel special on any night. It’s easy to meal prep, endlessly adaptable, and proudly weeknight-simple. Whether you use farro or quinoa, feta or goat cheese, this cranberry pecan harvest bowl brings cozy, nourishing energy to your table. If you loved this recipe, explore more comforting dishes on my site’s homepage at https://recipesdarleen.com/ and bookmark your favorites. Then, share your Harvest Grain Bowl with Cranberries & Pecans creations—I can’t wait to see your spins and seasonal twists.

  • 5-Ingredient Slow Cooker Chicken Fajitas: Easy Win

    5-Ingredient Slow Cooker Chicken Fajitas: Easy Win

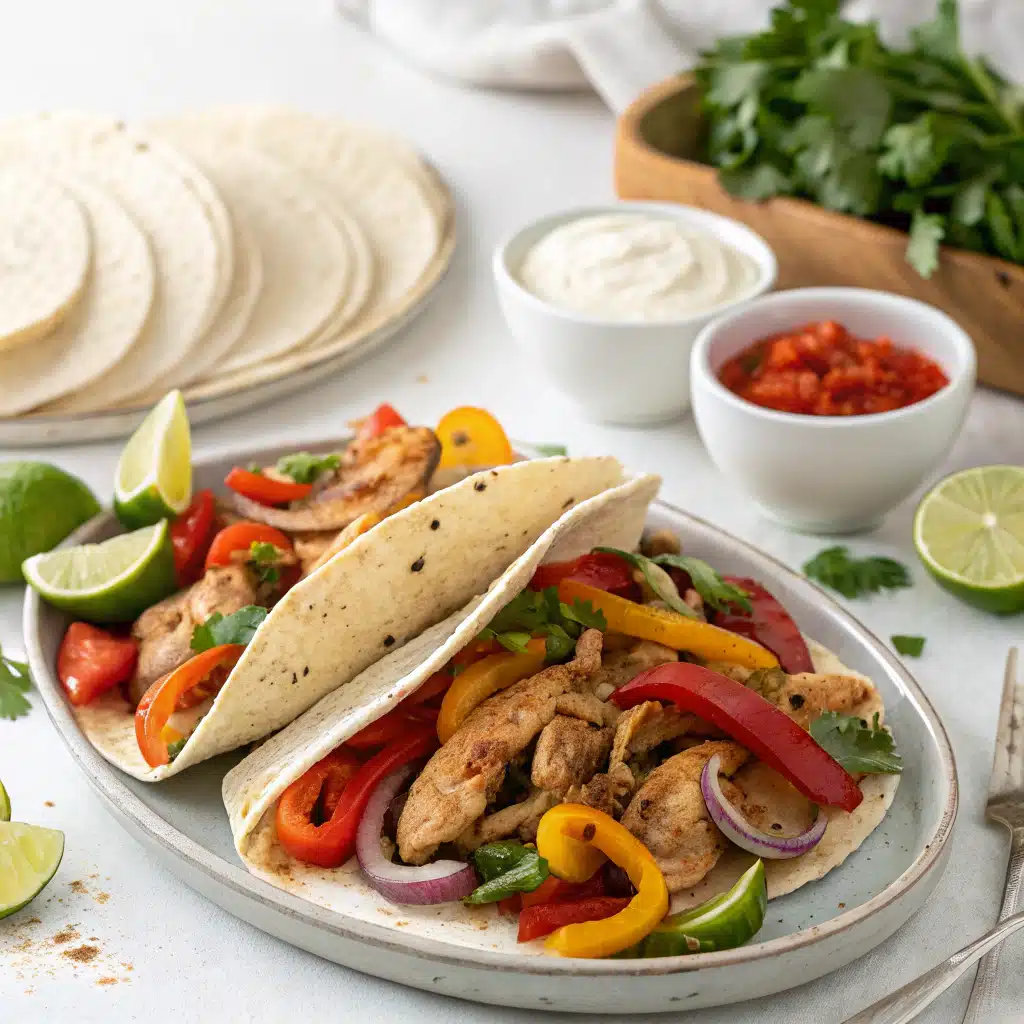
    5-Ingredient Slow Cooker Chicken Fajitas rescued our Tuesday the week soccer practice ran late and my phone died at the checkout. I tossed five basics into the crockpot at lunch, and by dinner, the house smelled like a Tex-Mex hug. These 5-Ingredient Slow Cooker Chicken Fajitas taste like you slow-sautéed all day, but they’re truly dump-and-go. My kids pile theirs into warm tortillas; I spoon mine over cauliflower rice. When life feels full, 5-Ingredient Slow Cooker Chicken Fajitas prove dinner can still be cozy, colorful, and completely doable.

    5-Ingredient Slow Cooker Chicken Fajitas: Easy Win

    Recipe

    Just 5 Ingredients, Endless Flavor

    You heard that right—five ingredients is all it takes to create sizzling, restaurant-style chicken fajitas at home. No complicated prep. No weird spices. No stress.

    All you need are:

    • Boneless skinless chicken breasts (or thighs)
    • Bell peppers (any color mix)
    • Onion
    • A packet of fajita seasoning (store-bought or homemade)
    • A splash of lime juice or salsa for moisture

    Toss it all in the slow cooker, set it, forget it—and return to a house that smells like a fiesta. The chicken becomes melt-in-your-mouth tender, and the veggies stay flavorful without turning to mush.

    If you’re used to dry stovetop fajitas or flavorless freezer meals, this is about to be a delicious upgrade.

    Easy Chicken Fajitas in the Slow Cooker: Set It and Forget It

    This recipe is designed for the real world—where dinner needs to be flavorful and flexible. Whether you’ve got five minutes in the morning or need to meal prep for the week, these slow cooker chicken fajitas are your golden ticket.

    Here’s how simple it is:

    • Layer sliced onions and bell peppers on the bottom of your slow cooker.
    • Place chicken breasts or thighs on top.
    • Sprinkle the fajita seasoning over everything.
    • Add a splash of lime juice or salsa.
    • Cover and cook on low for 5–6 hours or high for 2–3 hours.

    The result? Chicken so tender it falls apart with a fork, surrounded by perfectly seasoned peppers and onions. This dish gives you all the fajita flavors you love, with none of the skillet babysitting or oil splatter.

    Looking for variety? You can swap in sliced portobello mushrooms for a meatless version or add black beans in the last hour for extra protein and fiber.

    For other fuss-free weeknight favorites, you’ll also love our Slow Cooker Salsa Verde Chicken.

    Meal Prep Friendly, Family Approved

    One of the biggest wins with this slow cooker fajita recipe is how well it works for meal prepping. Make a big batch on Sunday and you’ve got lunches and dinners sorted all week long.

    Serve them:

    • In warm tortillas with shredded cheese and sour cream
    • Over rice for a fajita bowl
    • Inside lettuce wraps for a low-carb option
    • With tortilla chips for a deconstructed fajita nacho night

    Want to freeze leftovers? Go ahead. The chicken and veggies reheat beautifully—just store in an airtight container and thaw in the fridge overnight before reheating.

    Got picky eaters? Let everyone build their own fajitas at the table. It’s interactive, fun, and surprisingly mess-free. Plus, you control the spice level—just use a mild seasoning or kick it up with chipotle powder or sliced jalapeños.

    Don’t forget to check out our Slow Cooker Chicken Tacos for another family-friendly option with the same set-it-and-forget-it ease.

    Slow Cooker Chicken Fajita Bowls: Your Meal Prep Hero

    Once you realize how versatile these slow cooker chicken fajitas are, it’s hard to go back. Sure, they’re great in tortillas—but let’s talk about fajita bowls.

    Picture this: a warm base of fluffy rice (white, brown, or even cauliflower), topped with juicy shredded chicken, tender-crisp bell peppers, creamy avocado slices, a dollop of sour cream, and a sprinkle of cheese. Boom—lunch or dinner is served.

    You can even add:

    • Canned corn
    • Black beans
    • Pickled red onions
    • Fresh cilantro
    • A squeeze of lime

    Want to level up? Drizzle your bowl with homemade chipotle ranch or spoon on some Slow Cooker Queso Blanco for creamy, melty deliciousness.

    This recipe works for everyone—low carb, high protein, gluten-free eaters, and even picky toddlers. Just swap or skip ingredients based on what you have on hand.

    And if you’re short on time (or energy), fajita bowls make fantastic lunchbox leftovers. Pack them in glass containers with divided compartments and you’ve got grab-and-go meals ready for the entire week.

    Creative Ways to Serve These Fajitas

    Here’s where these slow cooker chicken fajitas really shine: they’re endlessly adaptable.

    Need ideas? Try these:

    • Fajita stuffed sweet potatoes – Bake sweet potatoes and pile on the chicken and peppers.
    • Quesadillas – Use the leftovers between two tortillas with cheese, then pan-fry or air fry.
    • Loaded nachos – Spread tortilla chips on a sheet pan, layer the chicken and veggies, sprinkle cheese, and bake.
    • Breakfast scramble – Toss leftovers into scrambled eggs for a smoky morning meal.

    Even better, the flavors improve overnight. That fajita seasoning gets even deeper and richer, making next-day meals taste like they came from a food truck.

    ???? Pro tip: Make a double batch. You’ll be amazed how quickly it disappears.

    And if you’re in love with minimal-ingredient slow cooker recipes, don’t miss our 3-Ingredient BBQ Pulled Chicken—another no-fuss crowd pleaser.

    From Slow Cooker to Sizzling Skillet: Restaurant-Style at Home

    Want to add a little sizzle to your slow-cooked fajitas? Here’s the move: once everything’s done, transfer the cooked chicken and veggies to a cast iron skillet or sheet pan and broil for 3–5 minutes.

    This step:

    • Intensifies the smoky flavor
    • Adds crispy edges and char
    • Makes it look and taste like it came from your favorite Tex-Mex restaurant

    Just toss the shredded chicken and peppers onto the pan, spread it evenly, and hit broil. You’ll hear that satisfying sizzle and smell the magic happen.

    Top with a handful of shredded cheese and slide it back under the broiler for another minute if you’re feeling bold. Add to warm flour tortillas with guac, and it’s practically a fiesta.

    ???? Want a cozy comfort spin? Wrap the fajita filling in tortillas, layer with enchilada sauce and cheese, then bake. Instant fajita enchiladas. Pair with our Slow Cooker Mexican Rice for a killer combo.

    Hosting? Turn It Into a Fajita Bar

    If you’re feeding a crowd or hosting a casual dinner night, this is the ultimate easy party trick: turn your slow cooker chicken fajitas into a DIY fajita bar.

    Here’s what to include:

    • Warmed tortillas (corn and flour)
    • Fajita chicken and peppers (straight from the slow cooker)
    • Bowls of toppings: shredded cheese, sour cream, guacamole, salsa, diced onions, cilantro, and lime wedges
    • Hot sauce options (let your guests go wild)

    Just set everything out buffet-style and let guests build their own. It’s low effort, highly interactive, and always a hit.

    And best of all, it keeps you out of the kitchen and in the party. You made dinner hours ago—and now you get to actually enjoy it.

    If you’re prepping for a weekend game day or birthday party, pair these fajitas with Slow Cooker Mexican Corn Dip and a pitcher of margaritas. You’ve got yourself a no-fail hit.

    FAQs

    Can I use frozen chicken?

    Yes, but for food safety and best texture, thaw first. If cooking from frozen, extend the time and verify 165°F internal temp.

    What toppings go best with slow cooker fajitas?

    Lime, cilantro, avocado, pico, shredded cheese, sour cream or Greek yogurt, and pickled jalapeños complement 5-Ingredient Slow Cooker Chicken Fajitas beautifully.

    How do I keep peppers from getting mushy?

    Slice thicker and add half of them in the last hour. You can also reduce liquid by venting the lid near the end.

    Is this keto or low-carb?

    Yes—serve 5-Ingredient Slow Cooker Chicken Fajitas over cauliflower rice or in lettuce wraps and skip tortillas and sweet toppings.

    Conclusion

    If dinner has felt complicated lately, let 5-Ingredient Slow Cooker Chicken Fajitas bring you back to simple, joyful cooking. With just chicken, peppers, onion, seasoning, and salsa, you’ll get bold, Tex-Mex comfort from a set-and-forget slow cooker meal that loves you back with leftovers. Whether you tuck the juicy chicken into warm tortillas or spoon it over greens, these slow cooker fajitas fit busy weeknights, budget goals, and picky eaters. I hope 5-Ingredient Slow Cooker Chicken Fajitas become your new midweek ritual—reliable, colorful, and downright craveable. When you make them, come back and tell me how you served yours, and don’t forget to print the recipe card below so dinner is one step closer tomorrow.

  • Slow Cooker Pineapple Teriyaki Chicken in 5 Ingredients

    Slow Cooker Pineapple Teriyaki Chicken in 5 Ingredients

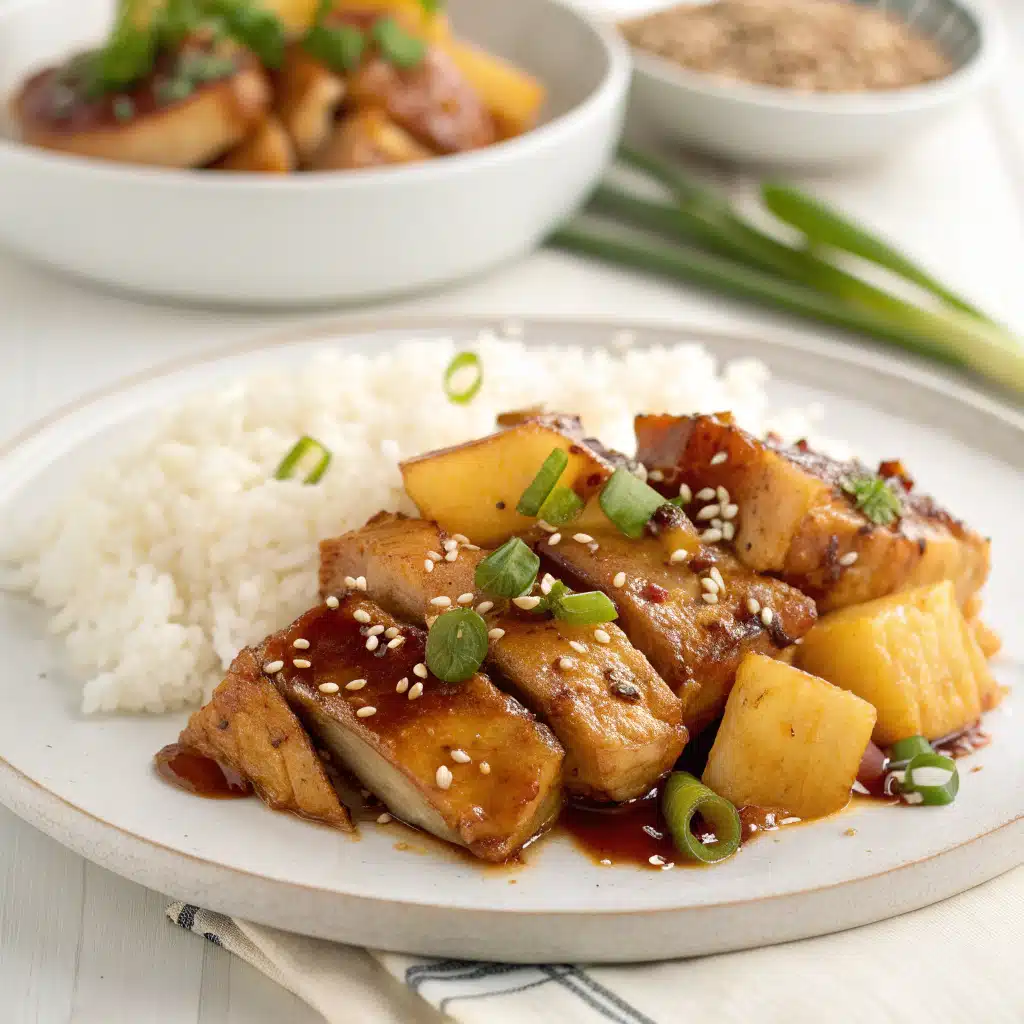
    Slow Cooker Pineapple Teriyaki Chicken started as a midweek scramble when my kids had back‑to‑back practices and I had zero time to fuss. I threw a handful of pantry staples in the crock, crossed my fingers, and came home to the kind of aroma that makes neighbors “just happen” to drop by. Slow Cooker Pineapple Teriyaki Chicken is sweet, tangy, and incredibly tender—one of those dump-and-go dinners that feels like a small miracle. Now it’s our go-to on crazy nights. Slow Cooker Pineapple Teriyaki Chicken proves that simple ingredients can deliver a cozy, takeout-style dinner without the takeout price.

    Slow Cooker Pineapple Teriyaki Chicken in 5 Ingredients

    Recipe

    Slow Cooker Pineapple Teriyaki Chicken Recipe

    Why Set-and-Forget Flavor Wins

    Slow Cooker Pineapple Teriyaki Chicken is the kind of dinner that rewards you for doing almost nothing. The crockpot coaxes sweetness from pineapple, concentrates a glossy teriyaki sauce, and keeps chicken unbelievably tender. When I want minimal prep and maximal payoff, Slow Cooker Pineapple Teriyaki Chicken delivers every time. The gentle heat lets the pineapple juice mingle with soy-based teriyaki, garlic, and ginger for a balanced sweet-and-savory vibe—exactly what a busy weeknight needs.

    Because Slow Cooker Pineapple Teriyaki Chicken is a dump-and-go recipe, it’s perfect for beginners or anyone who hates hovering over a stove. The result tastes like takeout—sticky, satisfying, and cozy—without the cost or the wait, and Slow Cooker Pineapple Teriyaki Chicken shines on rice, quinoa, or veggies.

    Lately, social feeds are full of set‑and‑forget crockpot dinners, and Slow Cooker Pineapple Teriyaki Chicken sits right at the top. It’s kid-approved, freezer‑friendly, and meal‑prep gold. You can assemble it in a freezer bag, thaw overnight, then dump it in before work. It scales up effortlessly for guests and down for date night. Pair Slow Cooker Pineapple Teriyaki Chicken with steamed broccoli, a crunchy slaw, or pan‑seared snap peas for color and texture. Want more slow cooker wins? Try my cozy Slow Cooker Three-Bean Chili Mac or crowd‑pleasing Slow Cooker Crack Chicken Chili. Both bring that same weeknight magic—hands-off cooking, big payout—just like this favorite.

    Crockpot Pineapple Teriyaki Chicken

    Ingredients That Do the Heavy Lifting

    At its core, Crockpot Pineapple Teriyaki Chicken needs only five power players: chicken thighs, pineapple chunks with juice, thick teriyaki sauce, garlic, and ginger. Thighs stay succulent in the slow cooker, but breasts work too—watch the time to prevent drying out. Pineapple juice naturally tenderizes while adding bright sweetness. A thick teriyaki sauce gives that lacquered finish without simmering it on the stove. Garlic and ginger bring the familiar takeout aroma that makes Slow Cooker Pineapple Teriyaki Chicken irresistible. For gluten‑free eaters, choose a tamari‑based teriyaki. If you love a little heat, add sriracha or chili flakes. To level up Slow Cooker Pineapple Teriyaki Chicken, finish with toasted sesame seeds and scallions.

    Pro Tips for Juicy Results

    – Layer smart: Stir the sauce first, then nestle the chicken so every piece is coated.
    – Time it right: On LOW, plan ~4 hours; on HIGH, 2 to 2 1/2. Overcooking dries lean cuts. For Slow Cooker Pineapple Teriyaki Chicken with breasts, check at 1 3/4 hours on HIGH.
    – Thicken at the end: A quick cornstarch slurry makes the sauce glossy. Don’t add dry starch at the beginning.
    – Shred vs. slice: Shred for saucy rice bowls; slice for bento‑style plates. Either way, Slow Cooker Pineapple Teriyaki Chicken stays tender.
    – Meal prep: Portion into containers with rice and veggies for 3–4 lunches. For more prep‑friendly comfort, see my Olive Garden Chicken Pasta (Crockpot). It’s another budget‑friendly, hands‑off keeper—right alongside Slow Cooker Pineapple Teriyaki Chicken.

    Teriyaki Chicken in the Slow Cooker

    Serving Ideas and Creative Twists

    Teriyaki Chicken in the Slow Cooker is endlessly versatile. Spoon it over jasmine rice, coconut rice, or garlicky quinoa. Build pineapple teriyaki chicken bowls with cucumber ribbons, shredded carrots, edamame, and a drizzle of extra sauce. Tuck it into lettuce cups for a lighter spin, or make weeknight sliders with brioche and a crunchy slaw. When we entertain, I set out Slow Cooker Pineapple Teriyaki Chicken with steamed bao buns and everyone builds their own.

    For a noodle night, toss cooked rice noodles with the sauce and top with the chicken. If you’re on a cozy soup streak, bookmark my Slow Cooker Spinach Artichoke Chicken Soup—a creamy comfort that pairs perfectly with Slow Cooker Pineapple Teriyaki Chicken as a sweet‑savory main.

    – Protein: Use boneless pork loin or turkey tenderloin with the same timing, then slice thin.
    – Pineapple: Swap in pineapple tidbits or fresh chunks; add a splash of pineapple juice if needed.
    – Sauce base: No teriyaki? Mix 1/2 cup low‑sodium soy sauce, 1/3 cup brown sugar or honey, 1 tablespoon rice vinegar, and a little pineapple juice. It still tastes like Slow Cooker Pineapple Teriyaki Chicken bliss.
    – Veggies: Add bell peppers or snap peas in the last 30 minutes so they stay crisp. Stir in broccoli florets for a classic bowl.
    – Instant Pot: Pressure cook 8 minutes on High, quick release, then thicken. You’ll have Slow Cooker Pineapple Teriyaki Chicken flavor in a fraction of the time—ideal on ultra‑busy nights.

    Pineapple Teriyaki Chicken (Slow Cooker Method)

    Make-Ahead, Store, and Reheat

    For make‑ahead ease, assemble Pineapple Teriyaki Chicken (Slow Cooker Method) as a freezer pack: chicken + pineapple + teriyaki + garlic + ginger in a gallon bag, air pressed out. Freeze flat up to 3 months. Thaw overnight and cook as directed. Store cooked Slow Cooker Pineapple Teriyaki Chicken in airtight containers up to 4 days; the flavor deepens by day two. Reheat gently on the stovetop with a splash of water to loosen the sauce. The dish also freezes well for 2–3 months. Defrost in the fridge, then warm through. If you meal prep, portion Slow Cooker Pineapple Teriyaki Chicken with rice and greens so lunches are ready to grab.

    Troubleshooting and Quick Fixes

    – Sauce too thin? Stir in a cornstarch slurry and cook on HIGH 10–15 minutes. It transforms into the glossy glaze you expect from Slow Cooker Pineapple Teriyaki Chicken.
    – Too salty? Add a squeeze of lemon or a touch more pineapple juice, and a teaspoon of brown sugar to balance.
    – Too sweet? Splash in rice vinegar or extra soy/tamari. The savory edge restores balance in Slow Cooker Pineapple Teriyaki Chicken.
    – Chicken dry? Thighs are more forgiving than breasts; shred and fold back into sauce. Next time, shorten cook time for breast meat.
    – Need more heat? Finish with chili crisp or sriracha. It’s a fast way to customize Slow Cooker Pineapple Teriyaki Chicken for spice lovers.

    FAQs

    Can I use chicken breasts instead of thighs?

    Yes. Use boneless skinless breasts and reduce the cook time slightly—check at 1 1/2 to 1 3/4 hours on HIGH or about 3 hours on LOW to keep them juicy.

    How do I make this gluten-free?

    Choose a tamari-based teriyaki sauce labeled gluten‑free, or make homemade teriyaki with tamari. Always verify labels on sauces and thickeners.

    Can I prep this as a freezer meal?

    Absolutely. Add everything to a freezer bag, freeze flat up to 3 months, thaw overnight, and cook as written. It tastes just like freshly assembled.

    How can I thicken the sauce without cornstarch?

    Use arrowroot starch (same method), or simmer the cooked sauce uncovered on HIGH for 15 minutes. A knob of butter at the end adds gloss.

    Conclusion

    Slow Cooker Pineapple Teriyaki Chicken proves that humble pantry ingredients can make a dinner everyone asks for by name. The crockpot does the work; you take the credit. Between its sticky‑sweet sauce, tender chicken, and the set‑and‑forget method, Slow Cooker Pineapple Teriyaki Chicken is an easy favorite you’ll return to on busy weeks and lazy Sundays alike. Double it for guests, meal‑prep it for lunches, or keep a freezer kit on standby.

    If you love dependable slow cooker dinners with big flavor, add this to your rotation—and then explore more keepers like my chili mac and crack chicken chili linked above. When you make Slow Cooker Pineapple Teriyaki Chicken, leave a rating and tell me how you served it. I can’t wait to hear your family’s twist.

  • Pumpkin Alfredo Pasta Bake – 7 Cozy Secrets to Try

    Pumpkin Alfredo Pasta Bake – 7 Cozy Secrets to Try

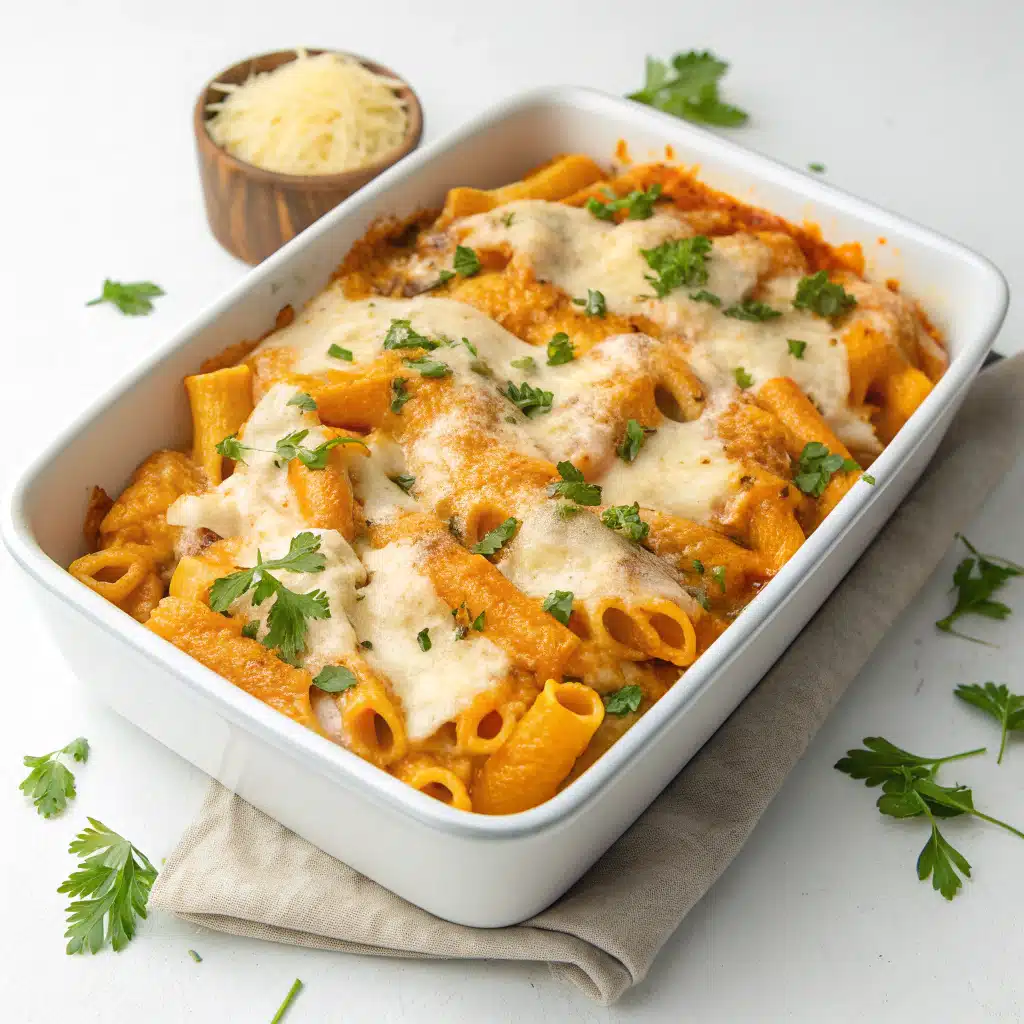
    Pumpkin Alfredo Pasta Bake started as a Tuesday-night experiment when my kids asked for “something cozy.” I stirred pumpkin into my go-to Alfredo, slid it into the oven, and that first bubbling bite sealed the deal. Now Pumpkin Alfredo Pasta Bake is our sweater-weather ritual—silky, garlicky, and just sweet enough. When friends stop by, I double it, because Pumpkin Alfredo Pasta Bake always disappears fast. I’m Darleen Vance, and this is the kind of recipe that turns a chilly night into a warm memory.

    Pumpkin Alfredo Pasta Bake – 7 Cozy Secrets to Try

      Pumpkin Meets Alfredo: Why It Just Works

      Pumpkin and Alfredo sauce might sound like an unexpected pair, but they’re surprisingly compatible. The earthy richness of pumpkin puree blends seamlessly into a creamy Alfredo base, creating a sauce that’s both luxurious and balanced. It’s not overly sweet or too strong—the pumpkin simply deepens the flavor and adds a silky texture.

      This combination makes the dish feel comforting yet elevated. You’re still getting that classic creaminess you expect from Alfredo, but with a seasonal twist that makes it perfect for fall dinners, family meals, or casual entertaining.

      There’s no need to prep fresh pumpkin. A good-quality canned pumpkin puree is all you need to achieve the right consistency and flavor. To enhance the richness, a dash of nutmeg or cinnamon can add depth, while fresh sage brings a subtle herbaceous note. Dried sage works fine if that’s what you have on hand.

      Pumpkin Alfredo isn’t just about flavor—it’s about comfort and ease. This base sauce is one you’ll want to return to all season long.

      Choosing the Right Pasta for the Bake

      The type of pasta you use can make or break your bake. It’s not just about shape—it’s about structure. For this dish, the goal is to choose a pasta that holds sauce well without turning soft or mushy after baking.

      Short shapes like penne, rigatoni, or ziti are perfect. They trap the creamy pumpkin Alfredo in every crevice and maintain their texture during baking. If you prefer long noodles, fettuccine is a strong choice, especially if you want the dish to feel a bit more elevated.

      Be sure to cook the pasta until just under al dente. It will continue cooking in the oven and absorb some of the sauce, locking in flavor. Overcooked pasta going into the bake will lead to a mushy result, so err on the side of firm when boiling.

      The right pasta ensures every bite has the perfect balance of sauce, seasoning, and structure.

      Make It Ahead: Your Weeknight Secret Weapon

      One of the best things about this pumpkin Alfredo pasta bake is that it’s incredibly make-ahead friendly. If your weeknights are anything like mine—busy, loud, and often chaotic—this dish becomes a lifesaver.

      The trick is simple. Prepare everything up to the point of baking. That means cook the pasta, make the pumpkin Alfredo sauce, mix it all together, and transfer it to your baking dish. Then cover it tightly with foil and refrigerate. It will hold well for up to 24 hours.

      When you’re ready to bake, take it out of the fridge while the oven preheats. Add a few extra minutes to the cook time since it’s going in cold. Top it with cheese just before baking to keep the texture fresh and the top golden brown.

      This prep-ahead method not only saves time—it also deepens the flavors. Letting the pasta rest in the sauce gives it time to absorb the richness of the Alfredo and the subtle sweetness of the pumpkin.

      It’s also a perfect option for dinner parties or holidays when oven space and time are both limited. Bake once your guests arrive, and serve hot without a mess in the kitchen.

      Add Protein Without Losing the Creaminess

      If you want to turn this into a more complete one-dish meal, protein is the next layer to consider. The key is choosing additions that complement, rather than overwhelm, the creamy pumpkin Alfredo base.

      Cooked chicken breast or rotisserie chicken are excellent options. Shred or cube it and stir it into the sauce before combining with the pasta. The mild flavor of chicken pairs well with the creamy, herby sauce.

      Crumbled Italian sausage—especially chicken or turkey sausage—adds a savory, slightly spicy contrast that balances the sweetness of the pumpkin. Cook it separately and drain the fat before adding.

      Vegetarians can bulk it up with sautéed mushrooms, roasted cauliflower, or canned white beans. These ingredients add texture and depth without changing the flavor profile.

      Avoid adding raw meat to the casserole before baking. For both food safety and consistency, all proteins should be pre-cooked and seasoned lightly before mixing into the dish.

      Each of these options brings a new dimension to the bake while preserving the dish’s core appeal: creamy, comforting, and easy to assemble.

      Use the Right Cheese for Flavor and Texture

      Cheese is more than a topping—it’s a key part of what makes this pasta bake so irresistibly cozy. But not all cheeses behave the same way in the oven. Choosing the right ones makes a noticeable difference in both taste and texture.

      For the sauce, Parmesan is non-negotiable. Its salty, nutty flavor cuts through the richness of the cream and pumpkin. Use freshly grated if possible; pre-shredded versions often include anti-caking agents that can affect the smoothness of your Alfredo.

      Mozzarella works best as a topping. It melts evenly and gives that classic golden-brown finish that makes every casserole more inviting. If you want a little more flavor, try mixing in shredded provolone or fontina for a blend that’s still melty but more complex.

      Avoid cheeses that release too much oil or become rubbery when baked, such as cheddar or Monterey Jack. They can overpower the delicate flavor of the pumpkin Alfredo base.

      For a crisp topping, sprinkle a mix of breadcrumbs and grated Parmesan over the mozzarella before baking. This creates a golden crust with just the right crunch to contrast the creamy interior.

      Bake at the Right Temperature for the Best Results

      This pasta bake is all about timing and temperature. You want the sauce to bubble, the cheese to melt, and the top to brown—without drying out the pasta or scorching the edges.

      The sweet spot is 375°F (190°C). At this temperature, you’ll get even heat distribution, allowing the sauce to warm through without curdling or separating. A 9×13 baking dish is ideal for this recipe, giving the pasta enough room to spread without becoming too shallow or too thick.

      Bake uncovered for the last 10 minutes to let the cheese topping brown and the breadcrumbs (if using) crisp up. If the top starts to brown too quickly, you can tent it loosely with foil.

      You’ll know it’s done when the edges are bubbling and the center is piping hot. Let the bake rest for 5 to 10 minutes after removing it from the oven. This helps the sauce thicken slightly and makes serving easier.

      Don’t rush this step—serving too soon can cause the sauce to run and the portions to fall apart. Letting it settle helps everything hold together beautifully on the plate.

      Serve It Right: What to Pair With Pumpkin Alfredo Bake

      This pasta bake is rich and creamy, so your side dishes should balance it out with texture, freshness, or acidity. Even a simple pairing can elevate the entire meal.

      Start with something green. A crisp arugula salad with lemon vinaigrette cuts through the richness. Mixed greens with apple slices, walnuts, and a light balsamic dressing also complement the subtle sweetness of the pumpkin Alfredo.

      For bread, go for something that can hold up to the sauce. Rustic sourdough, garlic bread, or a hearty multigrain roll work well. Avoid soft, buttery dinner rolls—they’ll disappear under the weight of the dish.

      Roasted vegetables make a great addition. Try brussels sprouts, green beans, or carrots tossed in olive oil and herbs. Roasting brings out their natural sweetness and adds depth to the plate.

      You don’t need a lot—just something fresh and vibrant to round out the meal. This pasta bake is the star, and a few well-chosen sides help it shine.

      Store and Reheat Without Losing Quality

      Pumpkin Alfredo Pasta Bake stores well, making it a reliable option for meal prep or leftovers. But how you store and reheat it can affect texture and flavor.

      Once the bake has cooled, divide leftovers into airtight containers. Store in the refrigerator for up to four days. If storing the entire casserole dish, cover tightly with foil or a lid to prevent it from drying out.

      For freezing, portion it into individual servings. Wrap tightly in plastic wrap, then foil, and label with the date. It will keep for up to two months.

      When reheating, avoid the microwave if possible—it tends to separate cream sauces. Instead, reheat in a 350°F oven, covered, for about 15 to 20 minutes or until warmed through. For frozen portions, thaw overnight in the fridge first, then bake.

      If the sauce seems dry, add a splash of milk or cream before reheating to bring back the original texture. Stir gently and cover with foil to prevent over-browning.

      This bake tastes just as good the next day—sometimes even better—as the flavors continue to develop.

      FAQs

      Can I make Pumpkin Alfredo Pasta Bake without heavy cream?

      Yes. Use half-and-half or a mix of evaporated milk and broth. Keep the simmer gentle and add extra Parmesan to maintain a silky, creamy pumpkin pasta texture.

      Which pasta shape is best for Pumpkin Alfredo Pasta Bake?

      Rigatoni or penne are ideal because ridges grab the pumpkin Alfredo sauce. Ziti, shells, or cavatappi also work well in a baked fall casserole.

      How do I keep Pumpkin Alfredo Pasta Bake from drying out?

      Undercook pasta by 2 minutes, don’t skimp on sauce, and cover loosely with foil if the top browns before the center bubbles. A splash of milk on reheat restores creaminess.

      Is Pumpkin Alfredo Pasta Bake vegetarian?

      Yes, if you use vegetable broth and vegetarian-friendly Parmesan. Skip chicken or bacon add-ins and lean into spinach, mushrooms, or roasted cauliflower.

      Conclusion

      When the air turns crisp, I pull out this Pumpkin Alfredo Pasta Bake and watch shoulders drop around the table. It’s the kind of creamy pumpkin pasta that whispers “you’re home” with every bite—garlicky, sage-scented, and gloriously golden. Whether you keep it vegetarian or fold in rotisserie chicken, Pumpkin Alfredo Pasta Bake delivers reliable weeknight comfort and celebration-ready ease. If it becomes your new fall ritual, don’t be surprised. Save this Pumpkin Alfredo Pasta Bake, share it with a friend, and tell me how you made it your own—I’ll be cheering you on from my kitchen to yours.

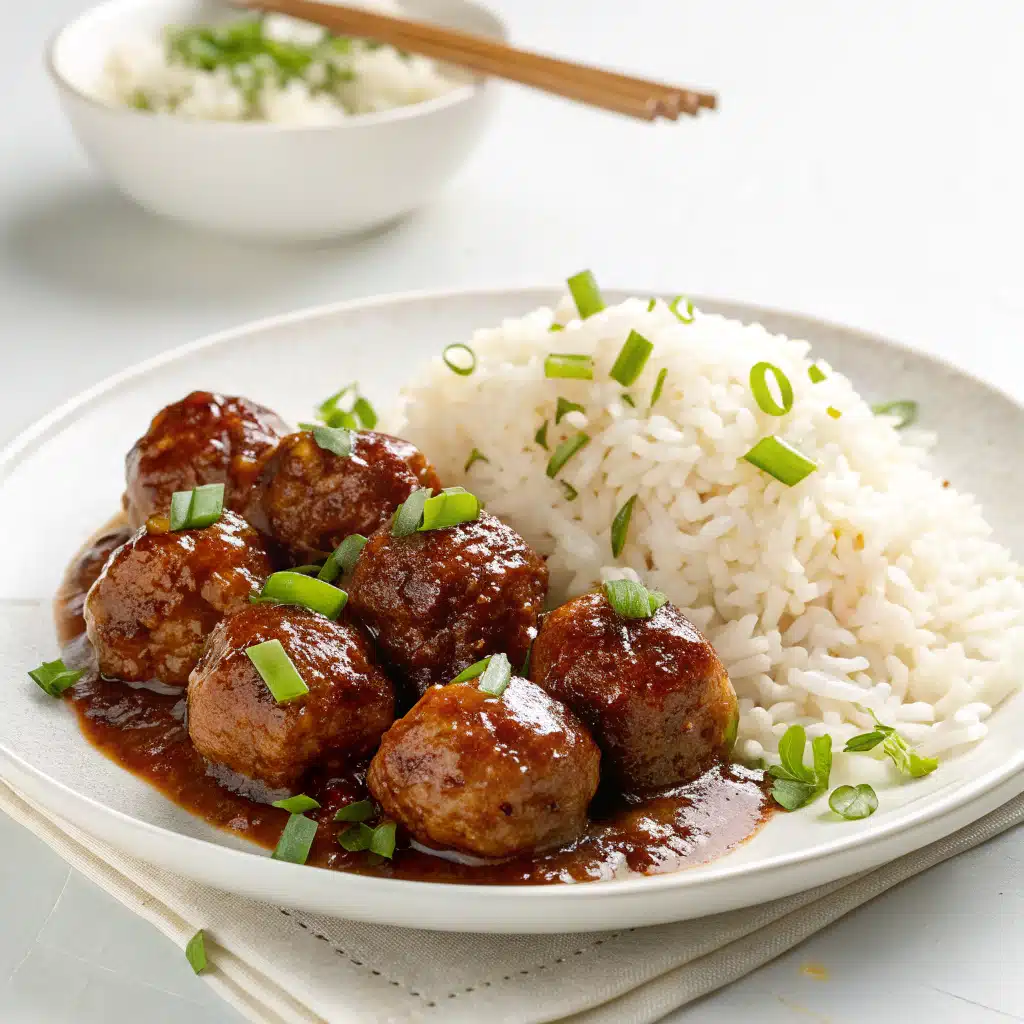
    • 7 Cozy Wins: Slow Cooker Honey Garlic Meatballs & Rice

      7 Cozy Wins: Slow Cooker Honey Garlic Meatballs & Rice

      Slow Cooker Honey Garlic Meatballs & Rice came to my rescue on a day when the to-do list felt taller than me. I mixed the sauce, poured it over meatballs, and let the crockpot hum along while I wrangled after-school chaos. Slow Cooker Honey Garlic Meatballs & Rice isn’t fancy—it’s practical, sweet, garlicky, and comforting. And when those glossy meatballs met fluffy rice, the table went quiet in the best way. Slow Cooker Honey Garlic Meatballs & Rice saves dinner and sanity, one bowl at a time.

      7 Cozy Wins: Slow Cooker Honey Garlic Meatballs & Rice

      Auto Fill Script

      Slow Cooker Honey Garlic Meatballs & Rice Recipe

      The secret to sticky-sweet crockpot perfection

      Slow Cooker Honey Garlic Meatballs & Rice is the kind of weeknight dinner that loves you back: minimal prep, big flavor, and a cozy bowl you’ll crave again. The glossy honey-garlic sauce leans sweet and savory with a whisper of heat, coating tender crockpot honey garlic meatballs and soaking into fluffy rice like a dream. This slow-cooked classic checks every box—family-friendly, budget-friendly, and meal-prep gold. The sweet, sticky sauce comes together with pantry staples: honey for gloss, garlic for punch, ketchup for body, soy sauce for umami, and rice vinegar for balance. Stir in a quick cornstarch slurry to finish and you’ve got that takeout-style sheen—all without lifting more than a whisk. When Slow Cooker Honey Garlic Meatballs & Rice is on the table, dinner feels effortless yet special, the kind of one-pot comfort that invites seconds. Pro tip: keep frozen meatballs on hand so Slow Cooker Honey Garlic Meatballs & Rice is always 10 minutes away from “set it and forget it.” If you love cozy slow cooker dinners, try the hearty sibling energy of my Three-Bean Chili Mac at https://recipesdarleen.com/slow-cooker-three-bean-chili-mac/ for another crowd-pleaser.

      Short answer: it’s reliable. Slow Cooker Honey Garlic Meatballs & Rice shows up on busy nights and still tastes like you tried. The slow cooker melts flavors together, letting the honey-garlic sauce cling to every bite. Served over jasmine or brown rice, these crockpot honey garlic meatballs become a complete meal with pantry-friendly ingredients and easy add-ins like broccoli or snap peas. It’s perfect for potlucks and game day too—keep the meatballs warm on Low and set out rice for DIY bowls. Looking for appetizer energy? Spear the meatballs with picks and serve the rice on the side. This flexible, Asian-inspired, family-friendly dinner is trending because it balances comfort with convenience. Bonus: Slow Cooker Honey Garlic Meatballs & Rice scales well for meal prep—portion into rice bowls, stash in the fridge, and you’re set for the week. Want another nostalgic meatball favorite? My Grape Jelly Meatballs at https://recipesdarleen.com/grape-jelly-meatballs-recipe/ bring that classic party vibe.

      Crockpot Honey Garlic Meatballs with Rice

      Ingredients that make the sauce sing

      To nail Crockpot Honey Garlic Meatballs with Rice, lean on a powerful but simple lineup. Honey creates a glossy, sticky sauce; minced garlic adds the punch; ketchup keeps it saucy; low-sodium soy sauce (or tamari) builds savory depth; and rice vinegar brightens the finish. A touch of sriracha or chili-garlic sauce delivers gentle heat, while sesame oil rounds out that takeout flavor. For Slow Cooker Honey Garlic Meatballs & Rice, frozen meatballs mean zero stress, but homemade meatballs work too—beef, turkey, or chicken. When the slow cooker does its thing, the meatballs baste in sauce and the flavors concentrate. Finish with a quick cornstarch slurry to thicken, then spoon over rice. Every bite of Slow Cooker Honey Garlic Meatballs & Rice feels balanced, comforting, and downright satisfying.

      Pro tips for saucy, foolproof results

      – Use low-sodium soy sauce so the crockpot honey garlic meatballs don’t get too salty as they reduce.
      – Taste the sauce before it cooks; adjust vinegar or honey to find your sweet spot.
      – If you’re using homemade meatballs for Slow Cooker Honey Garlic Meatballs & Rice, sear or bake first so they hold their shape.
      – Thicken at the end: stir in the cornstarch slurry and cook on High 10–15 minutes until glossy.
      – Serve over hot rice so the sticky sauce melts into every grain.
      – Add steamed broccoli or stir-fried veggies for a complete rice bowl.
      – Meal prep move: portion Slow Cooker Honey Garlic Meatballs & Rice into containers with rice for grab-and-go lunches.
      Craving more slow cooker comfort? Cozy up to this Pot Roast classic at https://recipesdarleen.com/pot-roast-slow-cooker-recipe/ for another weeknight winner.

      Honey Garlic Meatball Rice Bowls (Slow Cooker)

      Build-your-bowl toppings and grains

      Honey Garlic Meatball Rice Bowls (Slow Cooker) make dinner feel fresh every time. Start with jasmine, basmati, or brown rice; quinoa works too if you want extra protein. Layer on slow cooker honey garlic meatballs, then add quick toppings: sliced cucumbers, shredded carrots, scallions, sesame seeds, and a squeeze of lime. For extra veg, toss in steamed broccoli or edamame. The beauty of Slow Cooker Honey Garlic Meatballs & Rice is how easily it flexes to your taste—make it spicier with red pepper flakes or sriracha, or mellow things out with a drizzle of creamy yogurt or kewpie mayo. The sticky sauce is the star, and the slow-cooked flavor hugs every component. With these honey garlic meatballs and rice bowls, you’ll have a meal that’s equal parts satisfying, colorful, and weeknight simple.

      Pinterest-loved swaps and viral twists

      – Use cauliflower rice under your crockpot honey garlic meatballs for a lighter bowl.
      – Sub tamari or coconut aminos for gluten-free Slow Cooker Honey Garlic Meatballs & Rice.
      – Add pineapple tidbits for a sweet-and-tangy, takeout-style twist.
      – Swap turkey meatballs or chicken meatballs for a leaner protein.
      – Finish with toasted nori strips for a sushi-bowl vibe.
      – Sprinkle crispy onions or roasted peanuts for crunch.
      – Make it a party: serve Slow Cooker Honey Garlic Meatballs & Rice bar-style with toppings in small bowls.
      For a creamy, comforting slow cooker soup that pairs well with rice bowls, try my Spinach Artichoke Chicken Soup at https://recipesdarleen.com/slow-cooker-spinach-artichoke-chicken-soup-2/.

      Make-Ahead Honey Garlic Meatballs and Rice (Slow Cooker)

      Meal prep, freezer tips, and timing

      Slow Cooker Honey Garlic Meatballs & Rice was made for meal prep. Mix the sauce in a jar up to 5 days ahead. In the morning, add meatballs to the crockpot, pour the sauce, and go. If you batch-cook rice on Sundays, this crockpot honey garlic meatballs dinner turns into ultra-fast weeknight bowls. Freezer tip: assemble meatballs plus sauce in a gallon bag; freeze flat for up to 3 months. Thaw overnight in the fridge and slow cook as directed. If cooking from frozen, allow extra time and ensure the slow cooker heats safely. For best texture, thicken with the cornstarch slurry at the very end and serve over hot rice so the sticky sauce doesn’t congeal. Slow Cooker Honey Garlic Meatballs & Rice keeps well and tastes even better the next day.

      Storage, troubleshooting, and FAQs

      – Storage: Refrigerate Slow Cooker Honey Garlic Meatballs & Rice in airtight containers up to 4 days; rice stored separately reheats best.
      – Reheat: Microwave in short bursts with a splash of water; or warm on the stovetop over low heat until the sauce loosens.
      – Sauce too thin? Add an extra teaspoon of cornstarch mixed with cold water; simmer briefly.
      – Too salty? Stir in a bit more honey or plain tomato sauce/ketchup to balance; serve with unsalted rice.
      – Too sweet? Add a splash of rice vinegar or soy sauce.
      – Meatballs tough? They may be overcooked; next time, use Low setting and shorter total time.
      If you like protein-packed soups that reheat beautifully, bookmark my High-Protein Tomato Soup at https://recipesdarleen.com/high-protein-tomato-soup-benefits/.

      Can I use homemade meatballs? Absolutely. Brown or bake them first so they hold up, then proceed as written for Slow Cooker Honey Garlic Meatballs & Rice.

      What rice works best? Jasmine rice is classic, but brown rice, basmati, or even cauliflower rice all pair perfectly with crockpot honey garlic meatballs.

      How do I make it gluten-free? Use tamari or coconut aminos instead of soy sauce and confirm your meatballs are gluten-free. Serve over rice for a naturally gluten-free bowl.

      Can I double the recipe? Yes. Use a 6–7 quart slow cooker and increase the sauce by 50–75%. Stir once midway if possible for even coating.

      Slow Cooker Honey Garlic Meatballs & Rice is that rare dinner that does it all—sweet, garlicky, and glossy with just enough heat, piled high over tender rice. It’s the slow cooker comfort we lean on during busy seasons, and the crockpot honey garlic meatballs everyone asks for after one bite. Whether you meal prep bowls for the week or serve a family-style pot with toppings on the side, this sweet-and-savory favorite brings relief and joy to the table. If you try Slow Cooker Honey Garlic Meatballs & Rice, leave a comment with your favorite swap or spice level. From my warm, slightly chaotic kitchen to yours—let’s keep dinner simple and delicious.