Blog

  • One-Pot Thai Pumpkin Curry Soup: 7 Cozy Secrets

    One-Pot Thai Pumpkin Curry Soup: 7 Cozy Secrets

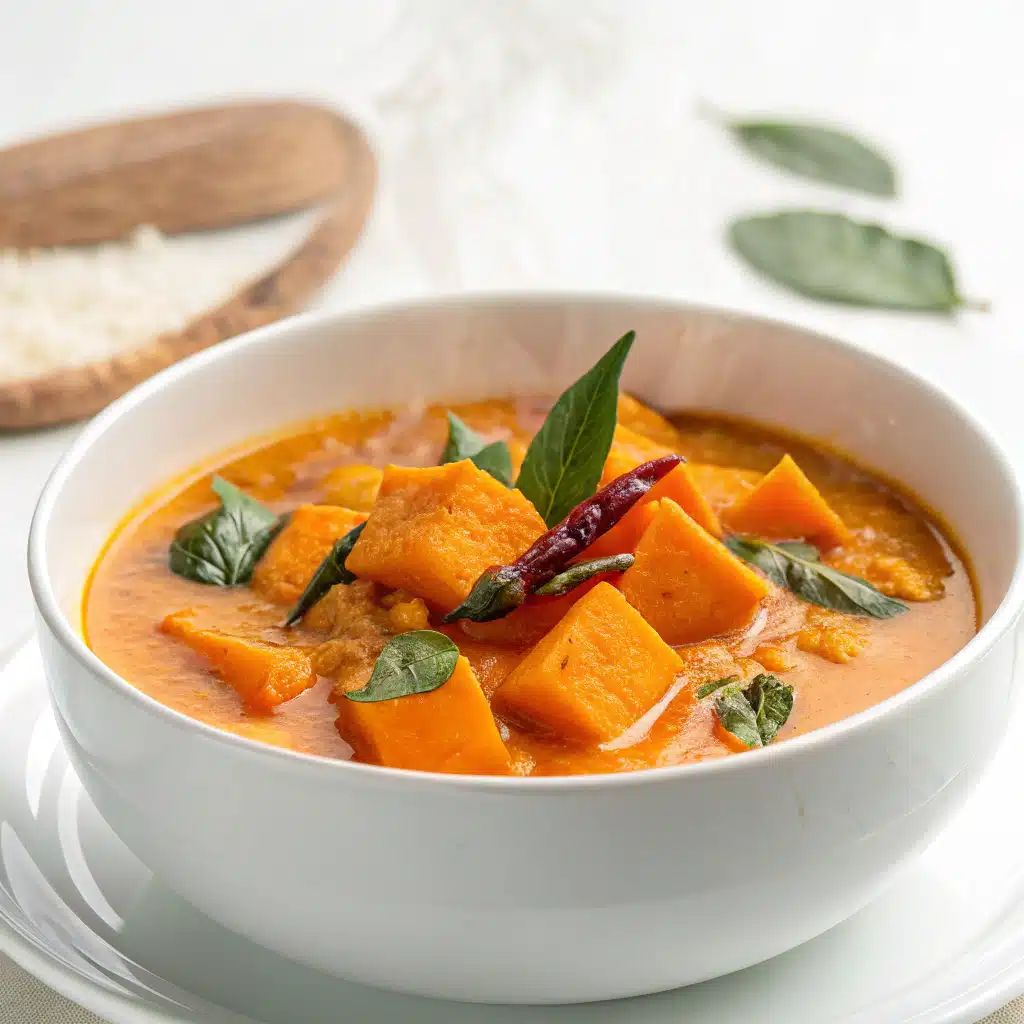
    One-Pot Thai Pumpkin Curry Soup rescued my Tuesday. I knocked over a stack of measuring cups, my toddler practiced percussion on pots, and the doorbell rang just as the coconut milk foamed. Somehow, dinner still landed on the table in 35 minutes. One-Pot Thai Pumpkin Curry Soup is my chaos-friendly, creamy, spicy-sweet bowl that tastes like a hug with a squeeze of lime. I promise this is the one-pot win you need when life is loud, hungry, and deliciously real.
    ne-pot Thai pumpkin curry soup

    Recipe

    Why You’ll Love One-Pot Thai Pumpkin Curry Soup

    Comfort in a Bowl, Speed on the Stove

    One-Pot Thai Pumpkin Curry Soup is the ultimate cozy-meets-quick dinner. Creamy coconut milk, silky pumpkin, and fragrant red curry paste swirl into a spicy-sweet, velvety soup that calms weeknight chaos. Because it’s a true one-pot recipe, clean-up is blissfully simple. Tender bell peppers and protein-packed chickpeas make it filling, while lime juice and ginger keep the flavor bright and fresh. If you love Thai coconut curry soup and crave a fast fall fix, this pot delivers big flavor in just 35 minutes.

    I built this as a flexible, family-friendly dish. Use canned pumpkin puree for speed or diced fresh pumpkin for texture. The result is a Thai pumpkin coconut curry soup that tastes restaurant-worthy with budget-friendly ingredients and minimal effort. Finish with cilantro, Thai basil, and toasted pumpkin seeds for crunch. The aroma alone is mood-lifting.

    Meal-prep fans love this One-Pot Thai Pumpkin Curry Soup because it reheats beautifully and stays silky. It’s naturally gluten-free and easily vegan with the right curry paste. The spice level is adjustable, so it’s kid-friendly or heat-lover approved. This creamy pumpkin soup pairs perfectly with rice noodles or a scoop of jasmine rice for a heartier bowl. For a full cozy-season lineup, try my Sweet Potato Lentil Stew and this soup back-to-back. True story: I once splashed curry all over my apron as the doorbell rang—laughed, wiped, and kept stirring. Dinner still won.

    Ingredients That Make This Thai Pumpkin Curry Soup Shine

    Coconut Milk, Red Curry Paste, and Pumpkin: The Power Trio

    One-Pot Thai Pumpkin Curry Soup leans on a trio that never fails: coconut milk for richness, red curry paste for heat and aromatics, and pumpkin for silky body. Garlic, ginger, and onion form a savory base. A dash of maple syrup rounds out the spicy-sour balance, while lime juice brightens the finish. Chickpeas add plant protein and bell peppers bring color and crunch. Optional lemongrass or kaffir lime leaves amplify those Thai restaurant vibes in your own kitchen.

    If you’re browsing your pantry thinking, “Do I have enough ingredients for Thai pumpkin coconut curry soup?” the answer is likely yes. Keep a can of pumpkin, coconut milk, and a jar of Thai red curry paste on standby, and dinner is always minutes away. For more pantry-friendly magic, see my fast-fave One-Pot Mediterranean Chicken & Vegetables.

    Pro Ingredient Tips

    • Choose a vegan red curry paste if you’re plant-based; some contain shrimp paste.
    • Full-fat coconut milk gives the creamiest texture; light coconut milk will be thinner.
    • Use tamari for gluten-free; fish sauce adds umami if not vegan.
    • Maple syrup balances curry paste and lime without making the soup sweet.
    • Lemongrass or kaffir lime leaves are optional but elevate the Thai coconut curry soup flavor.

    My chaos moment here? I opened chickpeas without a strainer and chased them around the sink like marbles. You don’t need fancy gear for One-Pot Thai Pumpkin Curry Soup—just a big pot and a spoon.

    How to Cook One-Pot Thai Pumpkin Curry Soup Like a Pro

    From Sauté to Simmer: Simple Steps

    Start your One-Pot Thai Pumpkin Curry Soup by softening onion in coconut oil, then bloom garlic, ginger, and red curry paste to unlock deep flavor. Whisk in pumpkin puree, coconut milk, and broth until smooth. Season with maple syrup, tamari, and optional turmeric. If you have lemongrass or kaffir lime leaves, add them now and simmer to infuse the soup. Bell pepper and chickpeas go in next; simmer until peppers are tender but not mushy. Hit it with fresh lime juice at the end.

    For ultra-velvety texture, blend a portion of the Thai pumpkin coconut curry soup and return it to the pot. Or pulse briefly with an immersion blender so you keep some texture. Garnish with cilantro, Thai basil, pumpkin seeds, and scallions for that bistro finish.

    Pinterest-Loved Swaps and Variations

    • Protein twist: Add shredded rotisserie chicken or cubed tofu.
    • Veg-packed: Stir in spinach or kale in the last 2 minutes.
    • Carb love: Serve over jasmine rice or rice noodles.
    • Sweeter heat: Use kabocha squash for a naturally sweet Thai pumpkin curry soup.
    • Crunch factor: Top with crispy shallots or roasted chickpeas.

    I once swapped in leftover roasted butternut squash and it made this One-Pot Thai Pumpkin Curry Soup taste like I planned a whole weekend menu. Spoiler: I didn’t. If appetizers are on your mind, pair this soup with my Pumpkin Hummus with Pita Chips for a pumpkin-forward dinner party that impresses.

    Make-Ahead, Storage, and Fixes for Thai Pumpkin Curry Soup

    Meal Prep, Freeze, Reheat

    One-Pot Thai Pumpkin Curry Soup is meal-prep gold. Portion into airtight containers, cool completely, then refrigerate up to 4 days or freeze up to 2 months. Reheat gently on the stove with a splash of broth or water to loosen. The spices deepen after a day, which is why Thai pumpkin coconut curry soup tastes even better as leftovers.

    Troubleshooting and FAQs in Brief

    • Too thick? Add broth to thin.
    • Too thin? Simmer uncovered to reduce, or blend a cup of soup.
    • Too spicy? Stir in more coconut milk or a teaspoon of nut butter.
    • Too flat? Add lime juice and a pinch of salt to wake up flavors.

    Real-life Darleen moment: I once added double curry paste mid-phone call. Oops. A splash of coconut milk and maple syrup tamed the heat and saved dinner. This One-Pot Thai Pumpkin Curry Soup is forgiving, which is why it’s a regular in my kitchen rotation alongside favorites like my craveable Greek Yogurt Chicken Curry.

    FAQs

    Can I use butternut squash instead of pumpkin?

    Yes. Use 4 cups peeled, cubed butternut squash and simmer until tender; the soup will be slightly sweeter but just as silky.

    Is this One-Pot Thai Pumpkin Curry Soup vegan and gluten-free?

    It’s naturally gluten-free when made with tamari. To keep it vegan, choose a vegan curry paste and skip fish sauce.

    How spicy is this soup?

    Medium by default. Use 2 tablespoons curry paste for mild and 3 tablespoons for hotter; finish with chili flakes to taste.

    Can I make it in an Instant Pot?

    Yes. Sauté aromatics on Sauté mode, add liquids and pumpkin, pressure cook 3 minutes, quick release, add peppers and chickpeas, simmer on Sauté 3–5 minutes, finish with lime.

    Conclusion

    One-Pot Thai Pumpkin Curry Soup is the reliable, cozy bowl you’ll crave all season—creamy coconut, bright lime, and warming red curry delivering flavor in every spoonful. This Thai pumpkin coconut curry soup is weeknight-easy, meal-prep friendly, and endlessly customizable with tofu, chicken, greens, or noodles. Whether you’re gathering friends or balancing a busy week, this one-pot wonder keeps dinner joyful and low-stress. From my very real, slightly chaotic kitchen to yours, I can’t wait for you to taste it. Try One-Pot Thai Pumpkin Curry Soup at home and tag me so I can cheer on your delicious bowl!
  • Pumpkin Sage Gnocchi with Kale: 7 Irresistible Secrets

    Pumpkin Sage Gnocchi with Kale: 7 Irresistible Secrets

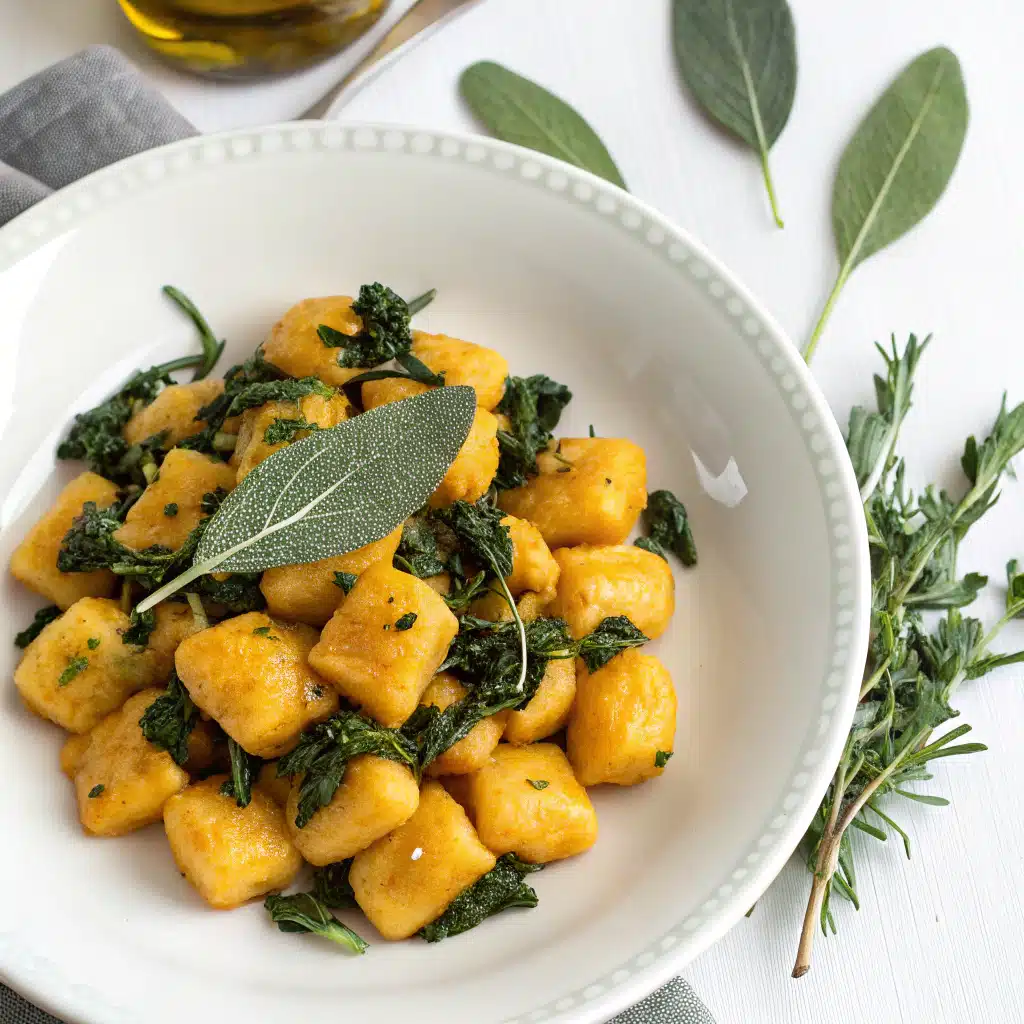
    Pumpkin Sage Gnocchi with Kale is that cozy bowl I crave on blustery nights. Last fall, my timer competed with my dog howling and my twins power-sliding across the kitchen—real-life chaos. I burned the first batch of sage and still ended up with the dreamiest, silkiest sauce. Pumpkin Sage Gnocchi with Kale rescued dinner in 30 minutes flat, with crispy kale and nutty Parmesan smoothing out the madness. I’m Darleen Vance, and I promise this recipe flexes for weeknights, date nights, and “I forgot the salad” nights. It’s simple, swoon-worthy, and tastes like a hug in a bowl.

    This pumpkin sage gnocchi with kale is creamy, cozy, and full of fall flavor. A quick pasta dinner that feels comforting and delicious. Try it this week!

    Recipe

    Pumpkin Sage Gnocchi with Kale for Cozy Weeknights

    The flavor magic: sage, pumpkin, and crispy kale

    Pumpkin Sage Gnocchi with Kale is my love letter to fall comfort food. The earthy sweetness of pumpkin meets aromatic sage and a hint of nutmeg, coating pillowy gnocchi in a creamy pumpkin sauce. Kale adds lovely texture—wilted and tender, with a few crispy edges if you sauté it first. This skillet gnocchi dinner gives you the satisfaction of a slow-cooked sauce in half an hour. It’s the perfect vegetarian dinner: wholesome, rich, and balanced. The pumpkin puree brings velvety body without needing tons of cream, while sage infuses the butter like a cozy brown-butter sauce. A generous flurry of Parmesan ties it together with savory depth.

    When I first made Pumpkin Sage Gnocchi with Kale for a midweek taste test, my stove fan roared like a jet engine. I dropped a spoon, my dog snagged a kale stem, and—somehow—this creamy pumpkin sauce still came out restaurant-worthy. The secret is letting the sauce simmer gently so the sage has time to perfume the pan. If you’re short on time, use shelf-stable gnocchi and pre-chopped kale. It’s a weeknight-friendly pasta, a one-pan comfort meal, and it delivers that “deliciously extra” vibe without extra work.

    Online, Pumpkin Sage Gnocchi with Kale is trending because it’s rich yet wholesome, and it makes kale undeniably craveable. Use a splash of vegetable broth to lighten the sauce, then finish with a touch of cream or coconut milk for dairy-free decadence. For even more flavor, crisp the sage in butter first. The contrast of gnocchi’s soft bite and kale’s tender edges is what keeps your fork returning. Bonus: Pumpkin is full of beta-carotene, kale is fiber-rich, and this vegetarian pasta offers satisfying comfort food energy—exactly what a chilly night calls for.

    Easy Pumpkin Sage Gnocchi with Kale: Sauce & Texture

    How to build a silky pumpkin-sage sauce

    The heart of Pumpkin Sage Gnocchi with Kale is the creamy pumpkin sauce. Start by melting butter and crisping fresh sage leaves until aromatic. Scoop the sage out to keep it crisp for topping. In the infused butter, sauté garlic and kale; the kale will soften and scent the pan. Stir in pumpkin puree, a splash of broth, and cream (or coconut milk). Season with nutmeg, salt, and black pepper. The sauce should be velvety, not heavy. Add a handful of Parmesan to create a glossy, clingy texture that hugs each gnocchi. This method maximizes sage flavor while keeping the pumpkin front-and-center. You’ll love how the sauce coats the gnocchi without feeling too dense.

    My real-life test? The first time I made Pumpkin Sage Gnocchi with Kale for company, my phone timer failed, the doorbell rang, and my toddler declared a spontaneous “flour party.” Even with distractions, the sauce handled a short pause off-heat. I whisked in a splash more broth, and it bounced back creamy and lush. That’s the beauty of skillet gnocchi: it’s forgiving. If your sauce seems thick, loosen it with broth or a ladle of gnocchi cooking water. If it’s thin, simmer one to two minutes to reduce. Taste and tweak salt—it brings the pumpkin alive.

    Practical tips for gnocchi perfection

    • Use shelf-stable or refrigerated gnocchi for speed; pan-sear after boiling for a toasty bite.
    • Prefer richer flavor? Brown the butter lightly before adding sage for a deeper, nutty backbone.
    • Keep kale stems out; use chopped leaves for tender texture and faster cook time.
    • Finish Pumpkin Sage Gnocchi with Kale with lemon zest for brightness and red pepper flakes for heat.
    • Vegetarian tip: choose vegetarian-friendly Parmesan or use Pecorino Romano.

    Want more cozy bowls? Try my Warm Apple Cinnamon Quinoa Bowl for breakfast balance, or pair this pasta with a snack like Pumpkin Hummus with Pita Chips when guests pop in.

    Creamy Pumpkin Sage Gnocchi with Kale: Variations

    Make it yours: protein boosts and dairy-free twists

    Pumpkin Sage Gnocchi with Kale is a flexible base for your weeknight cravings. Keep it vegetarian or add protein: browned Italian chicken sausage, seared mushrooms, or crispy chickpeas. For dairy-free, swap butter with olive oil and use full-fat coconut milk, plus a spoonful of nutritional yeast for cheesy depth. To go extra creamy without more dairy, whisk in a tablespoon of mascarpone or ricotta at the end. If you’re gluten-free, use cauliflower gnocchi and sear it well so it stays crisp-tender. For a lighter spin, add a handful of baby spinach with the kale to boost greens.

    Here’s a true Darleen moment: I once doubled Pumpkin Sage Gnocchi with Kale for friends and realized I had only half the gnocchi. Panic! I added a can of white beans and extra kale, and it turned into a hearty, protein-rich skillet dinner everyone adored. That happy accident taught me this creamy pumpkin pasta is incredibly adaptable. Keep the sauce silky and well-seasoned, and you can improvise the rest confidently.

    • Brown butter + crispy sage topping with toasted walnuts or pepitas for crunch.
    • Dairy-free dream: coconut milk plus lemon zest and chives for vibrant flavor.
    • Extra veggies: roasted delicata or butternut cubes folded in for texture and color.
    • Heat lovers: Calabrian chili paste or a pinch of cayenne for a subtle kick.
    • Cheese finish: a shower of Pecorino, or dollops of whipped ricotta right before serving.

    For another seasonal side that pairs beautifully, bookmark my Maple-Glazed Squash & Brussels Sprouts. The sweet-savory balance plays perfectly with Pumpkin Sage Gnocchi with Kale.

    Skillet Pumpkin Sage Gnocchi with Kale: Storage & Fixes

    How to store, reheat, and serve ahead

    Store leftover Pumpkin Sage Gnocchi with Kale in an airtight container for up to 3 days. The sauce will thicken in the fridge; reheat gently on the stovetop with a splash of broth or water to loosen. If making ahead, assemble the creamy pumpkin sauce and kale, then cook gnocchi fresh and toss to serve. That way, gnocchi stays pillowy. If you need to reheat the full dish, do it low and slow—high heat can split dairy. Leftovers also make a great add-in for a baked gnocchi casserole: transfer to a baking dish, top with Parmesan, and bake at 375°F for 10–12 minutes until bubbly.

    Once, I stashed Pumpkin Sage Gnocchi with Kale at the back of my fridge and forgot it behind the yogurt. Two days later, it reheated like a dream with a splash of broth—still creamy, still sage-kissed. Lesson learned: label and date, and you’ll find your midnight snack faster.

    Troubleshooting FAQs

    • Sauce too thick? Add broth or reserved pasta water, 1–2 tablespoons at a time.
    • Sauce too thin? Simmer 1–2 minutes to reduce; add a touch more Parmesan to emulsify.
    • Gnocchi gummy? Don’t overboil; boil until they float, then sauté for a light crust.
    • Bland flavor? Increase salt, black pepper, and finish with lemon zest for brightness.
    • Kale chewy? Remove tough stems and chop leaves small; sauté until just tender.

    FAQs

    Can I use homemade gnocchi?

    Absolutely. Boil until they float, then gently pan-sear before tossing in the pumpkin-sage sauce to maintain texture.

    How do I make it dairy-free?

    Use olive oil instead of butter, coconut milk instead of cream, and nutritional yeast in place of Parmesan. It stays creamy and flavorful.

    What protein pairs best?

    Try crispy pancetta, chicken sausage, roasted chickpeas, or sautéed mushrooms. Fold in at the end so the sauce stays silky.

    Can I freeze Pumpkin Sage Gnocchi with Kale?

    I don’t recommend freezing gnocchi in sauce—the texture suffers. Freeze the sauce alone, then cook fresh gnocchi and combine.

    Conclusion

    Pumpkin Sage Gnocchi with Kale delivers creamy comfort food vibes in 30 minutes, with fragrant sage, velvety pumpkin, and just-wilted kale. This cozy vegetarian pasta is endlessly adaptable: make it dairy-free, add protein, or keep it classic with Parmesan and crispy sage. The skillet method guarantees pillowy gnocchi and a creamy pumpkin sauce that clings just right. Whether you’re feeding a crew or cooking solo, Pumpkin Sage Gnocchi with Kale is the kind of weeknight dinner that feels like a celebration—simple, seasonal, and soul-soothing. Try it at home and tag me so I can cheer on your delicious chaos!

  • Slow Cooker Beef Barley Stew: Cozy Secrets to Crave

    Slow Cooker Beef Barley Stew: Cozy Secrets to Crave

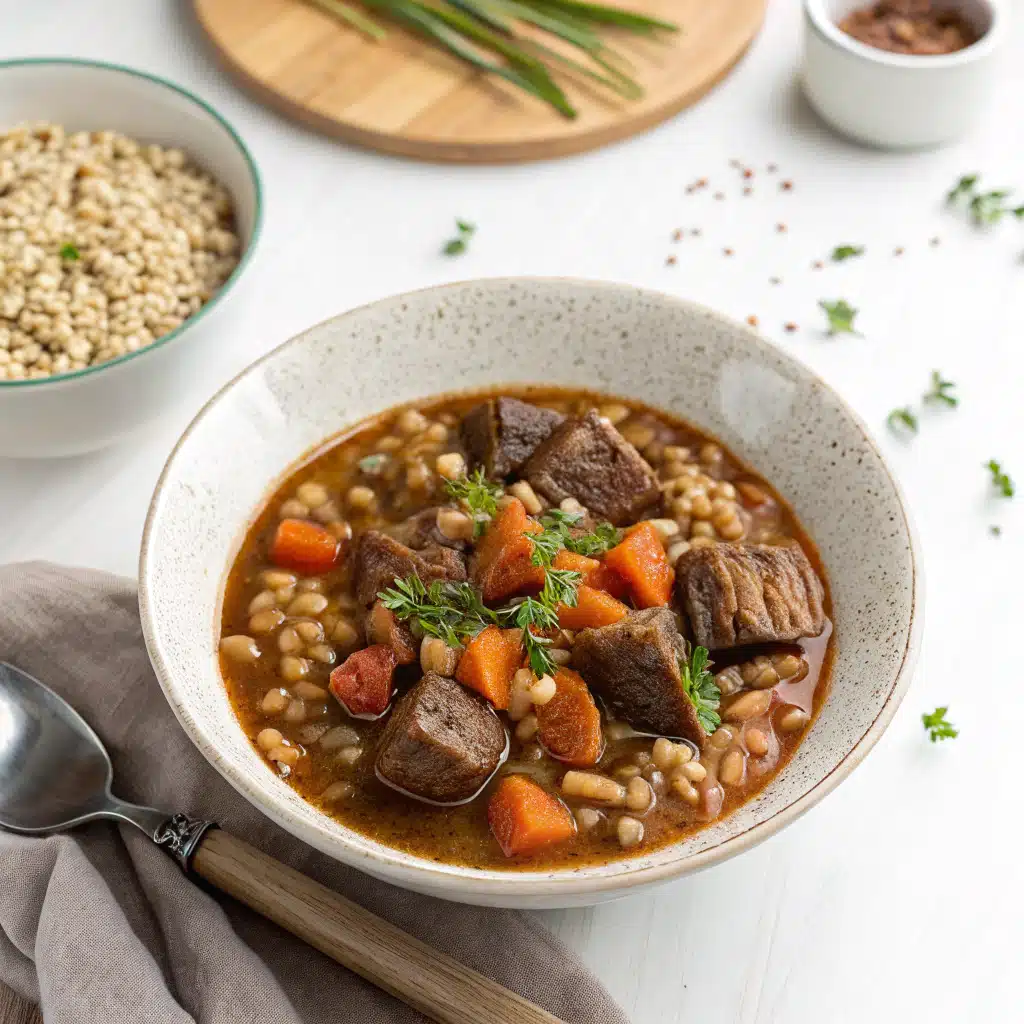
    Slow Cooker Beef Barley Stew is my answer to chaotic weeknights. Last Tuesday, my son asked for help with a science project as my dog chased a rogue carrot across the kitchen. I tossed everything into the crockpot, said a quick prayer, and returned hours later to a pot of Slow Cooker Beef Barley Stew that made the whole house smell like a cozy hug. I’m Darleen Vance, and this is the hearty, no-fuss dinner that saves me when life gets real.

    A hearty and cozy slow cooker beef barley stew simmered with tender beef, vegetables, and wholesome barley.

    Recipe

    Slow Cooker Beef Barley Stew: The Flavor Blueprint

    Choosing the right beef and barley

    Slow Cooker Beef Barley Stew shines when you choose the cuts and grains that love low heat. Beef chuck is the hero: its marbling melts into tenderness during the long simmer, giving Slow Cooker Beef Barley Stew a spoon-soft bite. Pearl barley adds body and a nutty backbone that thickens the broth naturally. Skip quick-cooking barley—it can turn mushy by the time the beef is properly tender. Layer umami with tomato paste, Worcestershire, and a splash of soy. A bay leaf plus thyme and rosemary create the classic comfort profile. Mushrooms deepen savoriness, while peas added at the end brighten the bowl without overcooking.

    My trick? Sear the beef. A fast, golden crust builds fond (those tasty brown bits) you can deglaze into the pot. That extra step elevates Slow Cooker Beef Barley Stew from good to restaurant-worthy.

    Why this comfort food is trending

    Between meal prep and budget-friendly dinners, Slow Cooker Beef Barley Stew is having a moment. It’s an all-in-one, set-and-forget crockpot dinner that feeds a crowd, freezes like a dream, and tastes even better the next day. On chilly fall evenings, the aroma alone can turn your kitchen into a cozy retreat. I once prepped this while juggling a lost lunchbox and a ringing doorbell—real life!—and still landed bowls of Slow Cooker Beef Barley Stew so hearty my kids asked for seconds. If you love practical, family-first recipes, bookmark this and also peek at my Sweet Potato Lentil Stew for meatless nights and Crockpot Honey Lime Chicken Tacos when you’re craving zesty.

    Crockpot Beef Barley Stew: Technique & Timing

    Low and slow for silky tenderness

    For Crockpot Beef Barley Stew, time is your friend. Cook on Low for 7–8 hours for the most tender beef; High for 4–5 works if you’re pressed. Brown the beef first—yes, it matters. Deglaze your pan with red wine or broth to capture every caramelized bit. Add barley and vegetables at the start; they can handle the long bath. Keep frozen peas for the last few minutes so they stay vibrant. The result is Crockpot Beef Barley Stew that tastes like it simmered in a farmhouse kitchen all day.

    Darleen moment: I once forgot to plug in the slow cooker—yep! I salvaged dinner by switching to High and adding a small cube of beef bouillon for extra oomph. Crisis averted, Crockpot Beef Barley Stew saved.

    Practical tips for set-and-forget success

    • Cut beef evenly (1-inch cubes) so Crockpot Beef Barley Stew cooks uniformly.
    • Use low-sodium broth; you can season at the end.
    • Don’t lift the lid—every peek adds 20–30 minutes to cook time.
    • If the stew is too thin, simmer with the lid ajar for 10 minutes.
    • For a richer Crockpot Beef Barley Stew, add a teaspoon of soy or fish sauce for umami.

    Need a lighter pairing? Try my Garlic Lemon Baked Salmon another night to balance out the weekly menu.

    Beef Barley Stew in a Slow Cooker: Ingredients That Sing

    What goes into classic comfort

    Beef Barley Stew in a Slow Cooker depends on a harmonious mix: beef chuck for tenderness, pearl barley for chewy richness, and a trio of onion, carrot, and celery for sweetness and depth. Garlic and tomato paste bring savoriness, while thyme and rosemary make the house smell like a Sunday supper. A dash of Worcestershire and soy sauce add layered umami. Mushrooms are optional, but they make Beef Barley Stew in a Slow Cooker taste bistro-level. Finish with peas and fresh parsley to brighten the bowl.

    Darleen’s oops: I once used quick-cooking barley by accident, and Beef Barley Stew in a Slow Cooker turned too soft. Lesson learned—stick to pearl barley. Now I label the jar to dodge any weeknight brain fog.

    Pinterest-trending swaps and variations

    • Mediterranean: Add diced tomatoes, olives, and a pinch of oregano.
    • Red wine glow-up: A half cup adds depth to Beef Barley Stew in a Slow Cooker.
    • Veg-forward: Double mushrooms and add parsnips; keep beef to 1 lb.
    • Gluten-aware: Barley contains gluten; swap with short-grain brown rice (add in last 2–3 hours) or potatoes.
    • Herb swap: Try herbes de Provence for a floral twist.

    Serving idea: Ladle Beef Barley Stew in a Slow Cooker over mashed potatoes or a slice of toasted sourdough to catch all that gravy.

    Best Slow-Cooked Barley Stew: Serving, Storage, and Fixes

    How to plate and pair

    The best Slow-Cooked Barley Stew deserves simple sides: crusty bread, a little butter, and a crisp green salad. Shave Parmesan on top if you’re feeling fancy. A swirl of sour cream adds light tang. For cozy weekends, keep the slow cooker on Warm and let everyone scoop their own. The best Slow-Cooked Barley Stew is hearty enough to stand alone, but it’s fantastic with roasted Brussels sprouts or a vinegar slaw to cut the richness.

    Mini Darleen chaos: My timer once failed, and dinner risked overcooking. I stirred in a splash of broth, a squeeze of tomato paste, and fresh parsley—best Slow-Cooked Barley Stew revived and company none the wiser.

    Storage, troubleshooting, and FAQs

    • Storage: Refrigerate up to 4 days. Barley keeps thickening, so stir in a splash of water or broth when reheating.
    • Freeze: Up to 3 months. Thaw overnight, then reheat gently.
    • Too thick? Add broth and heat through.
    • Too thin? Simmer uncovered 10 minutes or mash a few veggies in the pot.

    FAQs

    Can I use quick-cooking barley?

    It tends to get mushy in the slow cooker. Use pearl barley for the best texture.

    Do I have to brown the beef?

    No, but searing adds deep flavor and a richer Slow Cooker Beef Barley Stew. It’s worth the few extra minutes.

    Can I make this without wine?

    Yes. Substitute with more beef broth. You’ll still get hearty, savory results.

    How do I thicken the stew?

    Simmer uncovered 10 minutes, mash a few veggies, or stir in a teaspoon of cornstarch mixed with cold water.

    Conclusion

    Slow Cooker Beef Barley Stew is the kind of comfort food that turns ordinary nights into something memorable. With tender beef chuck, pearl barley, and a rich, savory broth, this Slow Cooker Beef Barley Stew rewards minimal effort with maximum flavor. It’s budget-friendly, freezer-ready, and easy to customize with mushrooms, herbs, and a splash of red wine. From busy school days to cozy Sundays, you’ll love how this crockpot classic fits real life. I’m Darleen Vance, cheering you on from my slightly chaotic kitchen—try it at home and tag me! For more cozy bowls, browse the site or start with my recipes. Happy slow cooking!

  • Greek Yogurt Chicken Curry: 7 Irresistible Secrets

    Greek Yogurt Chicken Curry: 7 Irresistible Secrets

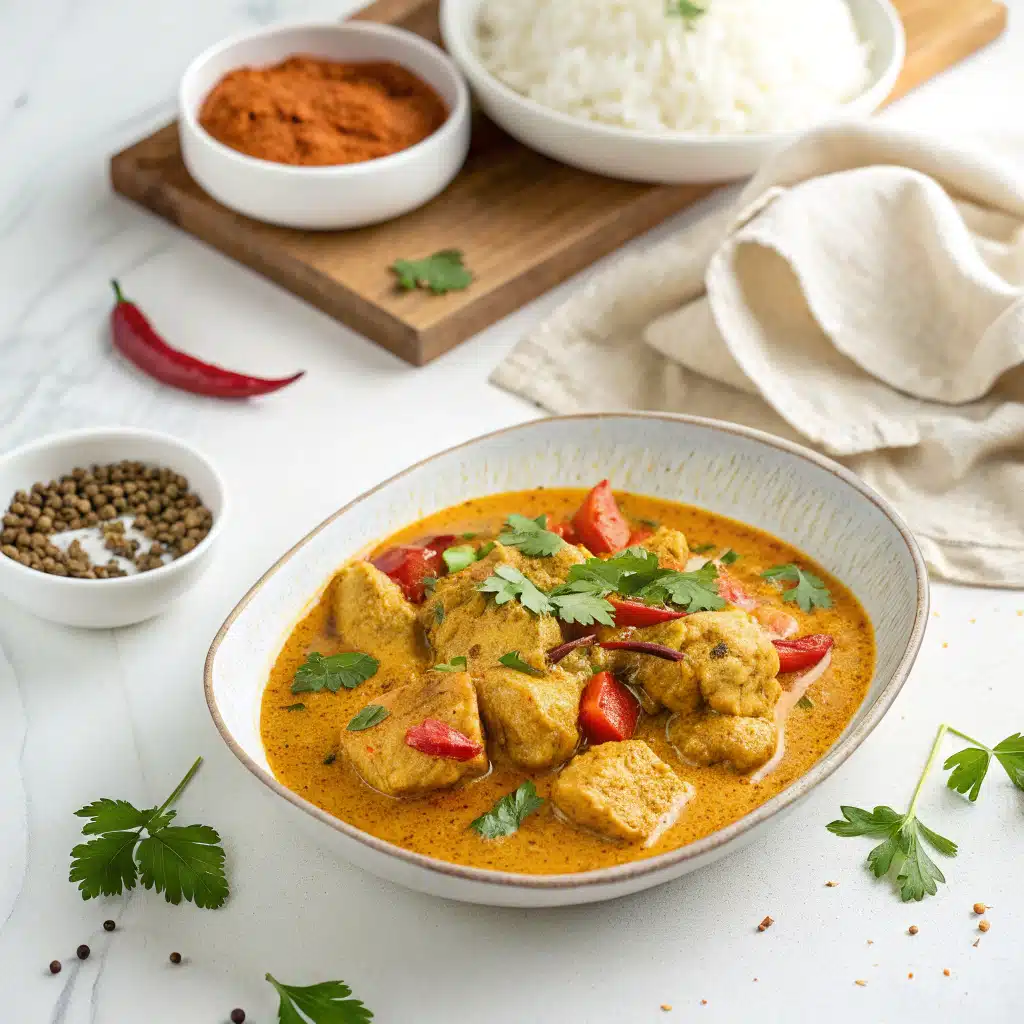
    Greek Yogurt Chicken Curry. I made it while soccer cleats dripped on the drying rack and the dog chased a rogue cherry tomato. The slow cooker hummed. The house smelled like a cozy takeout night without the bill. Greek Yogurt Chicken Curry came to the rescue when I had zero brain cells left. And yes, Greek Yogurt Chicken Curry is as creamy and bright as it sounds—my kids asked for seconds and my husband asked for the leftovers.

    Greek Yogurt Chicken Curry

    Recipe


    Greek Yogurt Chicken Curry (Slow Cooker Magic)

    Here’s why Greek Yogurt Chicken Curry has a permanent spot in my Salt Lake City meal plan: It turns a wild weekday into a warm, calm night. The chicken goes in. The lid clicks. Life can be messy for a few hours while flavor quietly does its thing. The result is tender chicken in a creamy, tangy sauce that’s light but comforting. Instead of heavy cream, Greek yogurt brings protein, probiotics, and a clean tang. The spices—garam masala, cumin, coriander, turmeric—bloom into a golden sauce that tastes like takeout, but it’s homemade and balanced. Greek Yogurt Chicken Curry is that rare slow cooker dinner that finishes fresh, not flat. It’s saucy, spoonable, and so family-friendly.

    Greek Yogurt Chicken Curry also solves the eternal question: “What’s for dinner?” You need a handful of pantry spices, tomato paste, and broth. You need chicken and Greek yogurt. That’s it. Serve it over basmati rice or scoop it up with warm naan. If you’re low-carb, use cauliflower rice. If you love veggies, toss in peas or spinach at the end. It’s flexible and forgiving—perfect for busy nights when you need dinner to happen without drama.

    Everyone’s talking about Greek yogurt in curry because it gives creaminess without the heaviness. It’s high-protein, naturally thick, and it tenderizes chicken like a dream. It also plays well with bold spices and bright acids. In Greek Yogurt Chicken Curry, the tang lifts the whole pot. You get that buttery mouthfeel, but the sauce still tastes clean and vibrant. Another reason it’s trending: easy meal prep. Yogurt marinades are quick. Yogurt also speeds up flavor, so a short marinate window works. And because slow cookers are back in style (hello, sanity savers), Greek Yogurt Chicken Curry fits how we cook right now—set, forget, finish with yogurt, and serve.


    Easy Greek Yogurt Chicken Curry Recipe (Step-by-Step)

    Greek Yogurt Chicken Curry starts with a simple marinade. The yogurt, ginger, garlic, and spices cuddle up to the chicken and make it tender. Then I sauté onion and tomato paste to build base flavor—this is optional, but in my kitchen, it’s the difference between good and unforgettable. Into the slow cooker it goes with broth. Hours later, we finish with tempered Greek yogurt so the sauce turns creamy without curdling. It’s steady, simple, and repeatable.

    Pro tip from one mom to another: temper the yogurt. Whisk it with a little cornstarch and a ladle of hot sauce, then swirl it in on Low. That’s how you keep Greek Yogurt Chicken Curry silky. Add peas at the end if your kids like a pop of sweetness. Lemon brightens everything. Cilantro makes it look fancy even if you cooked in leggings with a mystery stain.

    Practical Tips for Busy Nights

    • Use thighs. They stay juicy in the slow cooker. Chicken breasts work, but watch the cook time.
    • Bloom spices. A quick sauté with onion and tomato paste wakes them up. Your Greek Yogurt Chicken Curry will taste deeper.
    • Temper the yogurt. Always. Warm it with hot sauce from the pot before adding. No curdles, just creamy.
    • Plan sides. Start rice 25 minutes before serving or warm naan while you finish the sauce.
    • Make it mild. Skip the cayenne for kids or add it to your own bowl.
    • Meal prep win. Double and freeze half. Future you will cheer.
    • Slow cooker timing. Low for 4–5 hours is magic. High for 2–3 works in a pinch.

    If you love easy, saucy dinners like Greek Yogurt Chicken Curry, try my One-Pot Mediterranean Chicken & Vegetables next. It’s the same weeknight energy—bright flavors, minimal dishes.


    Healthy Greek Yogurt Chicken Curry

    Let’s talk feel-good details. Greek Yogurt Chicken Curry is naturally gluten-free and high in protein. Using Greek yogurt instead of heavy cream cuts saturated fat while keeping that silky texture. The spices bring more than flavor: turmeric’s warm color, ginger’s zing, garlic’s comfort. It’s a dinner that loves you back. Add peas for fiber. Serve with brown basmati if you want extra whole grains. Or spoon it over roasted cauliflower for a lower-carb bowl that still feels cozy.

    And yes, this is a perfect meal prep star. The flavors meld overnight in the fridge. Greek Yogurt Chicken Curry reheats like a dream when you treat it gently (more on that below). It’s the kind of dish I make on a Monday so Thursday-me still feels organized. If you’re into plant-forward dinners too, tuck this away for later: my Slow Cooker Butternut Squash Lentil Curry is another creamy, spice-kissed bowl that warms hands and hearts.

    Swaps & Variations (Pinterest-Style)

    • Creamier: Stir in 2 tbsp coconut cream with the tempered yogurt for extra lush sauce.
    • Milder: Skip cayenne and use only sweet paprika. Kid-approved Greek Yogurt Chicken Curry guaranteed.
    • Spicier: Add 1–2 chopped serranos or 1 tsp red pepper flakes with the onion.
    • Veg boost: Toss in baby spinach during the last 5 minutes. It wilts fast.
    • Protein swap: Turkey tenderloins or shrimp work. Shrimp cooks in 15–20 minutes at the end.
    • Dairy-free: Use a thick dairy-free yogurt (coconut-based), and still temper to prevent splitting.
    • Tang shift: Use lime instead of lemon for a brighter edge.
    • Tomato-forward: Add 1/2 can crushed tomatoes with the broth for a rosier sauce.
    • Stovetop: Simmer covered 20–25 minutes, then finish with tempered yogurt off the heat.

    Pssst: hosting game night? Pair Greek Yogurt Chicken Curry with a fun nibble like my Parmesan Pretzel Bites with Garlic Dip. Cozy food, zero stress.


    Creamy Greek Yogurt Chicken Curry Serving Ideas

    Greek Yogurt Chicken Curry loves fluffy basmati rice. I rinse the rice, then cook it with a bay leaf and a pinch of salt. Naan is perfect for scooping. A quick cucumber salad cools every bite—thin slices, a splash of lemon, pinch of salt. If you’re feeding a crowd, set up a curry bar: rice, Greek Yogurt Chicken Curry, peas, cilantro, limes, yogurt drizzle, chili flakes. Everyone builds their own bowl. It feels special and it’s still easy.

    For sides, roasted cauliflower or carrots slide right into the oven while the slow cooker works. I also keep frozen peas on hand because they turn this curry into a complete one-bowl dinner in seconds. The sauce coats every grain of rice. The chicken stays tender. And that yogurt finish brings gentle tang that keeps you going back for another bite.

    Storage, Troubleshooting & Quick FAQs

    • Fridge: Store Greek Yogurt Chicken Curry in airtight containers up to 4 days.
    • Reheat: Warm gently on the stove over low or in the microwave at 50–60% power, stirring between bursts. Don’t boil.
    • Freeze: Yes—2 to 3 months. Thaw overnight, reheat low and slow, add a spoon of fresh yogurt to refresh.
    • Curdling fix: Temper your yogurt and keep heat low. Use full-fat Greek yogurt and a little cornstarch for insurance.
    • Salt at the end: Yogurt’s tang can hide salt. Taste after adding lemon, then season.
    • Batch-cook: Double and split into two containers. One for now, one for later-me who forgot to meal plan.

    If you’re building a full slow-cooker week, queue up my easy Slow Cooker BBQ Chicken Sliders after you make Greek Yogurt Chicken Curry. Crowd-pleasers, both.


    FAQs

    Can I use chicken breasts?

    Yes. Cook on Low 3–4 hours. Check early so they don’t dry out.

    How do I keep the yogurt from curdling?

    Temper it with hot sauce and stir in on Low. Don’t boil after adding.

    Is Greek Yogurt Chicken Curry spicy?

    It’s mild as written. Skip cayenne for zero heat or add more for kick.

    Can I make it on the stovetop?

    Yes. Simmer covered 20–25 minutes, then add tempered yogurt off heat.

    Conclusion

    From one tired mom to another: Greek Yogurt Chicken Curry is your calm in the chaos. It’s creamy without being heavy, bright without being sharp, and cozy without being fussy. My slow cooker saves my sanity, and this recipe is proof. Try it on a night when you’re pulled in nine directions. Let the spices and yogurt do the work. Then sit, eat, and breathe. If you make Greek Yogurt Chicken Curry, tag me so I can cheer you on—dinner heroes unite!

  • Pumpkin Hummus with Pita Chips – Easy Make It Tonight

    Pumpkin Hummus with Pita Chips – Easy Make It Tonight

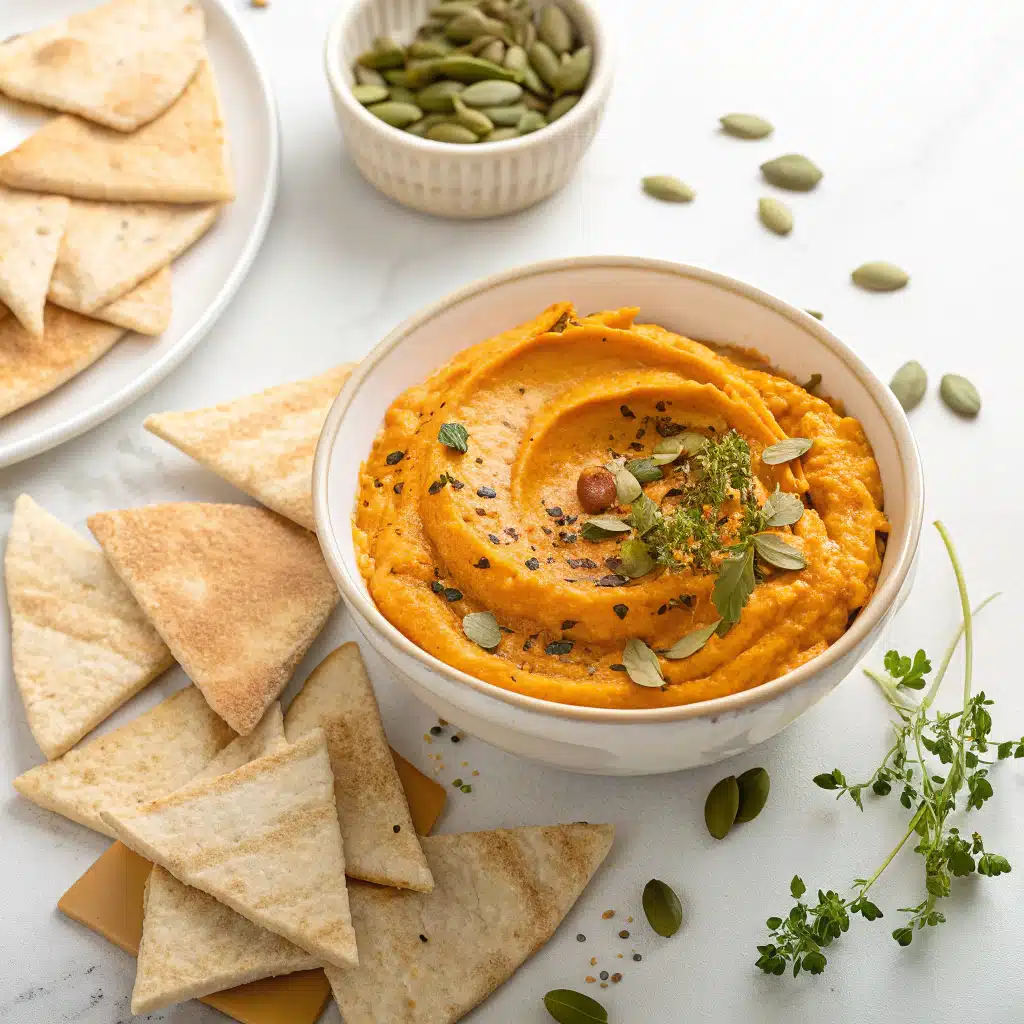
    Pumpkin Hummus with Pita Chips. That’s what saved my tail last Friday when the neighborhood kids swarmed my kitchen like tiny, adorable tornadoes. I was halfway through homework math and the dog was licking a measuring cup. Pumpkin Hummus with Pita Chips slid in like a hero. It’s creamy, bright, and fast. Pumpkin Hummus with Pita Chips takes pantry stuff and turns it into a cozy fall snack you can serve before dinner or at game night. It’s simple. It’s budget-friendly. And it tastes like you tried harder than you did. That’s my kind of mom win.

    Pumpkin Hummus with Pita Chips – Make It Tonight

    Recipe

    Pumpkin Hummus with Pita Chips: Why We Love It

    Pumpkin Hummus with Pita Chips is a cozy twist on a classic. It’s the same silky hummus you know, only brighter and a little sweeter from pumpkin. The spices are gentle. The texture is dreamy. The pita chips? Crunch for days. When folks stop by, I set down Pumpkin Hummus with Pita Chips and the room goes quiet for about three minutes. Then the compliments start. It’s wholesome, but it tastes like a party. And it works as an appetizer, snack, or a light lunch with a salad. My crew will swipe it on everything—carrot sticks, crackers, even leftover chicken.

    Here’s the best part. You need pantry staples and one can of pumpkin puree. Chickpeas, tahini, lemon, garlic, and warm seasoning. That’s it. You can bake the pita chips while the food processor does its thing. So the whole batch comes together fast. If you’re hosting, double the hummus and bake extra chips. Pumpkin Hummus with Pita Chips holds up well on a snack board with grapes, apples, and cheddar. It’s also a smart make-ahead for busy nights because it keeps beautifully.

    Trending Now: Boards, Tailgates, and Snackle Boxes

    We’re deep into board season. Snack boards. Tailgate spreads. After-practice snackle boxes. Pumpkin Hummus with Pita Chips slides right into those trends. It looks pretty on a platter with pepitas and paprika on top. It’s budget-friendly. It’s plant-based and gluten-free if you use GF pita or serve with veggies. And it pairs with everything from sharp cheese to roasted turkey. On TikTok you’ll see folks swirling dips with a spoon. Do that. It grabs light and makes your Pumpkin Hummus with Pita Chips look fancy with zero effort. Then tumble in a pile of warm pita chips and watch it disappear.

    Easy Pumpkin Hummus with Pita Chips at Home

    This is weeknight-easy. While the oven heats, slice pitas into wedges. Toss with olive oil, garlic powder, salt, and pepper. Spread them on two pans so they crisp, not steam. Meanwhile, start the hummus base. I add tahini, lemon, and garlic to the processor first. Blend until fluffy. This whips air into the tahini and keeps the hummus smooth. Next, add pumpkin, chickpeas, spices, and salt. Blend. Stream in olive oil. Thin with aquafaba (the liquid from the can) until it’s creamy and scoopable. Taste. Adjust lemon and salt. That’s your Pumpkin Hummus with Pita Chips—done in under 30 minutes.

    Don’t stress if your food processor is tiny. Work in two batches. Or use a high-speed blender with a tamper. If you’re making Pumpkin Hummus with Pita Chips for a crowd, you can double the hummus in a large processor and bake chips on two racks. Rotate pans halfway. Keep the first pan warm in the oven while the second finishes. And if your kids are like mine, post a guard. Those pita chips vanish fast. I usually hide a small bowl for me. No shame.

    Real-Mom Tips for Smoother Hummus

    • Use aquafaba. It thins without watering down flavor.
    • Whip tahini first. It’s the secret to silky Pumpkin Hummus with Pita Chips.
    • Warm your chickpeas 30 seconds in the microwave before blending for extra creaminess.
    • Scrape the bowl. Do it twice. It matters.
    • Salt gradually. Flavors bloom after a few minutes.
    • Finish with a swirl. Spoon a spiral and drizzle oil in the groove. Pretty and practical.

    Want more fall goodness? Try my Maple Glazed Squash & Brussels Sprouts for an easy side. Or snack next to my Cranberry Jalapeño Cream Cheese Dip at your holiday party. Both play nice with Pumpkin Hummus with Pita Chips.

    Pumpkin Hummus with Pita Chips: Variations You’ll Crave

    Once you nail the base, riff away. Pumpkin Hummus with Pita Chips loves warm spices and bold toppings. Keep it classic or go big. Here are easy ways to change the vibe without changing the method. I test these when I’m waiting on school pick-up, because you can blend, taste, and be out the door in five minutes. Pumpkin Hummus with Pita Chips is flexible like that, which is why I lean on it for potlucks and tailgates. It dresses up, it dresses down, and it always gets eaten.

    Swaps & Add-Ins (Pin These!)

    • Roasted garlic: Swap raw garlic for 2–3 cloves roasted. Softer, sweeter hummus.
    • Maple-kissed: Add 1–2 tsp pure maple syrup. Great with sharp cheddar on the board.
    • Harissa heat: Stir in 1 tsp harissa paste for smoky spice.
    • Chipotle pumpkin: Blend in 1 chipotle in adobo for warmth and color.
    • Curry pumpkin: Add 1 tsp curry powder and a pinch of turmeric.
    • Yogurt swirl: Marble 1/4 cup Greek yogurt on top for tang (not vegan).
    • Seed butter swap: No tahini? Use sunflower seed butter for a nut-free, sesame-free twist.
    • Veggie dippers: Keep Pumpkin Hummus with Pita Chips on the board, but add cucumbers, celery, and bell peppers for crunch.
    • Air fryer chips: 350°F, 5–6 minutes, shaking once. Faster pita chips for busy nights.
    • Everything seasoning: Sprinkle chips with everything bagel seasoning before baking for big flavor.

    Planning a full fall spread? Bake my Cherry-Spiced Pumpkin Bread for dessert. It sits well next to Pumpkin Hummus with Pita Chips on a buffet and makes the whole house smell like a café.

    Pumpkin Hummus with Pita Chips: How to Serve

    Serve Pumpkin Hummus with Pita Chips in a shallow bowl so scoops are easy. Drizzle olive oil. Dust with smoked paprika. Add toasted pepitas for texture. I like to fan the pita chips around the bowl, then fill the rest of the platter with grapes, apple slices, carrots, cucumbers, cherry tomatoes, and a few cheeses. For game day, add olives and salami. For Thanksgiving, sprinkle with pomegranate arils. It’s a five-minute glow-up that makes Pumpkin Hummus with Pita Chips look like you hired a caterer.

    Storage, Troubleshooting, and Party Timing

    Storage is simple. Refrigerate hummus in an airtight container up to 5 days. Freeze up to 2 months. Thaw overnight and reblend with a splash of lemon. Keep pita chips in a sealed bag or tin up to 5 days. Re-crisp at 325°F for 3–4 minutes. If your hummus is too thick, add more aquafaba or water. If it’s too thin, blend in more chickpeas. If it tastes flat, add a pinch of salt and a squeeze of lemon; that wakes it up. Bitter? Your tahini might be old. Add more lemon and a little maple to balance.

    Party timeline: Make the hummus a day ahead for best flavor. Bake chips the morning of the party. Assemble the platter right before guests arrive. And if you need a hearty slow cooker main to set beside Pumpkin Hummus with Pita Chips, I love these Slow Cooker BBQ Chicken Sliders. Cozy, hands-off, and a crowd-pleaser.

    FAQs

    Can I use fresh pumpkin?

    Yes. Roast and mash, then measure 1 cup. Drain excess liquid so the hummus stays thick.

    Is Pumpkin Hummus with Pita Chips vegan?

    Yes, as written. Use vegan pita or veggie dippers if needed.

    Can I make it without tahini?

    Use sunflower seed butter or a mild nut butter. Start with 2 tbsp and adjust.

    How do I keep pita chips crisp?

    Cool fully, store airtight. Re-crisp in a 325°F oven for 3–4 minutes before serving.

    Conclusion

    I’m a mom who loves shortcuts that still taste homemade. Pumpkin Hummus with Pita Chips hits that sweet spot. It’s pantry-simple, fast, and forgiving. It feeds hungry teenagers and impresses your in-laws. It’s bright from lemon and cozy from pumpkin and spice. The chips stay crisp. The hummus stays creamy. And you get to look like the calm one when the doorbell rings. Try it at home and tag me, because I want to see your platter. If Pumpkin Hummus with Pita Chips saves your evening like it saves mine, we’re calling that a win.

  • Warm Apple Cinnamon Quinoa Bowl: 7 Irresistible Cozy Secrets

    Warm Apple Cinnamon Quinoa Bowl: 7 Irresistible Cozy Secrets

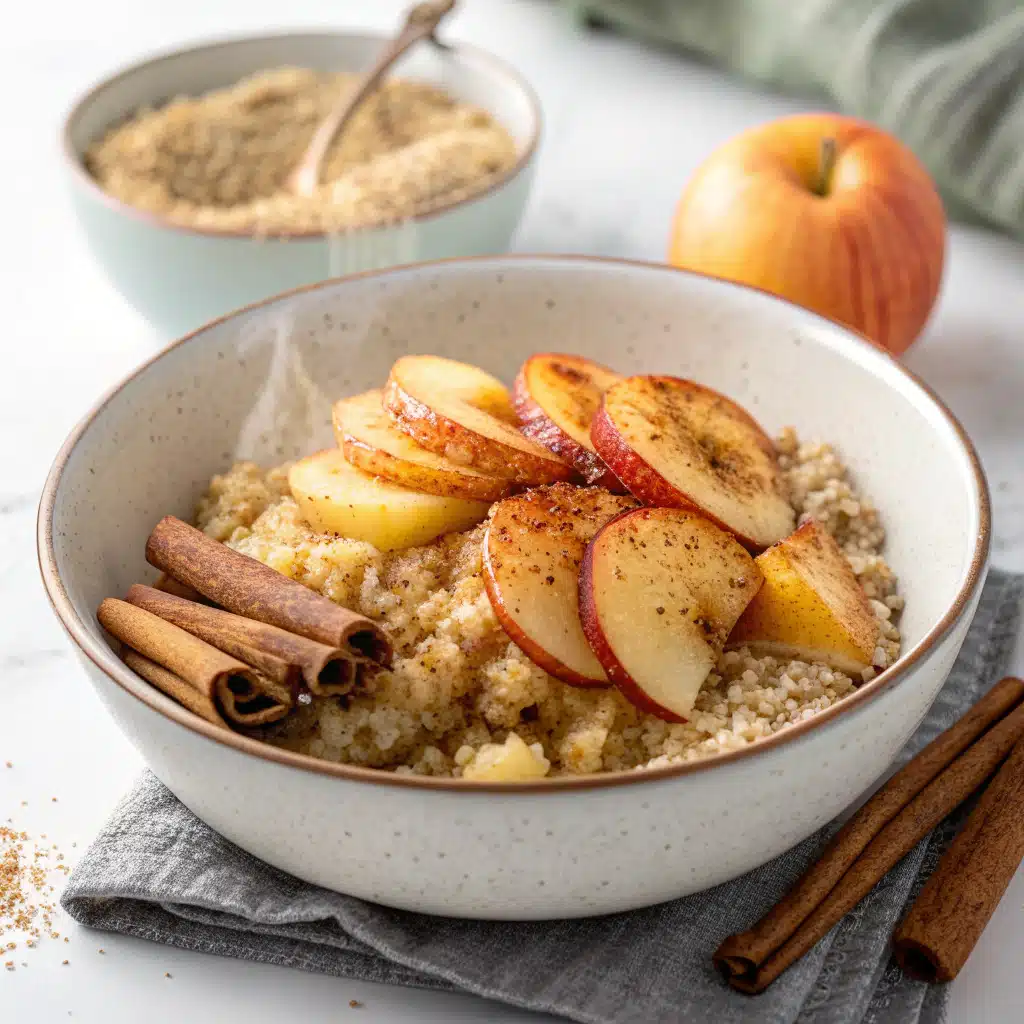
     Warm Apple Cinnamon Quinoa Bowl mornings are my favorite kind of cozy. The day I first tested this, my timer buzzed, the cat knocked a cinnamon jar off the counter, and I stirred with one hand while rescuing a rolling apple with the other. That’s real-life Darleen Vance kitchen chaos—sweet, spicy, and slightly sticky. This Warm Apple Cinnamon Quinoa Bowl smells like a fall farmers’ market and eats like a hug. Quick, comforting, and protein-packed, it’s a breakfast that feels special even on a Tuesday.

    Warm Apple Cinnamon Quinoa Bowl: 7 Irresistible Cozy Secrets

    Recipe

    Why This Warm Apple Cinnamon Quinoa Bowl Wins Breakfast

    The cozy science behind a quinoa breakfast

    The Warm Apple Cinnamon Quinoa Bowl blends wholesome quinoa with sweet apples and warming cinnamon to create a breakfast that checks every box: taste, texture, and nutrition. Quinoa is a complete protein, which means your Warm Apple Cinnamon Quinoa Bowl keeps you full longer than most cereal bowls. The apple brings natural sweetness and crunch, while cinnamon adds that nostalgic, bakery-level aroma. When you simmer quinoa in almond milk or your favorite milk, the grains turn plush and creamy—like a gluten-free porridge with a gentle, nutty backbone. A drizzle of maple syrup and a dusting of cinnamon turns your quinoa breakfast into a comfort-forward, high-protein bowl you’ll crave.

    I love that this healthy apple cinnamon breakfast bowl is fast. In as little as 25 minutes, you have a warm, spoonable meal that fuels your morning routine. If you’re chasing a healthier lifestyle, the Warm Apple Cinnamon Quinoa Bowl is naturally gluten-free, with an easy dairy-free, vegan path (use plant milk and maple syrup). It’s an ideal cozy fall breakfast, yet bright enough for spring—especially with a tart Honeycrisp apple.

    Breakfast bowls are everywhere for a reason: they’re customizable, camera-ready, and deeply satisfying. The Warm Apple Cinnamon Quinoa Bowl takes your breakfast bowl trend and gives it a timeless twist with apple pie vibes. On busy mornings, I batch-cook quinoa and reheat it with almond milk to rebuild a super-fast Warm Apple Cinnamon Quinoa Bowl in minutes. Add-ons like walnuts, raisins, or chia seeds boost fiber and healthy fats, making this apple cinnamon quinoa breakfast a powerhouse. For more cozy, nutrient-forward inspo, check out my Sweet Potato Lentil Stew after you master this bowl—another hug-in-a-bowl favorite.

    One more Darleen Vance kitchen moment: I once misread my notes and doubled the cinnamon—accidentally creating the most aromatic kitchen in the neighborhood. The Warm Apple Cinnamon Quinoa Bowl still rocked, just extra spiced. No regrets.

    How to Make a Warm Apple Cinnamon Quinoa Bowl (Step-by-Step)

    The foundation: fluffy, creamy quinoa

    For a foolproof Warm Apple Cinnamon Quinoa Bowl, start by rinsing your quinoa well—this removes saponins, the bitter coating, so all you taste is gentle nuttiness. The liquid matters: simmer quinoa in unsweetened almond milk (or oat, dairy, or coconut milk) for a creamy, porridge-like finish. A pinch of sea salt brightens the flavors, while cinnamon infuses from the start. As the quinoa simmers, your kitchen fills with cozy apple-cinnamon notes—exactly why this Warm Apple Cinnamon Quinoa Bowl is a morning mood-lifter.

    Once the quinoa is nearly tender, fold in diced apple, vanilla, and maple syrup. Cooking the apple for just a couple of minutes keeps it tender-crisp, so every spoonful of your Warm Apple Cinnamon Quinoa Bowl has contrast—silky quinoa, juicy apple, and a warm spice trail. Finish with toppings you love: walnuts for crunch, raisins for chew, and a little yogurt or almond butter if you’re feeling extra.

    Practical tips for consistent success

    • Use a 1:2 to 1:2.5 quinoa-to-liquid ratio for a creamy Warm Apple Cinnamon Quinoa Bowl. Start with more if you like it porridgy.
    • Don’t skip the rest: once cooked, cover the pot for two minutes. Your Warm Apple Cinnamon Quinoa Bowl becomes fluffier and creamier.
    • Maple syrup sweetens with depth and complements cinnamon and apple. Honey works too, but maple keeps that classic fall vibe.
    • Apples: Honeycrisp, Pink Lady, or Gala are top picks. They hold shape and brighten the Warm Apple Cinnamon Quinoa Bowl with gentle sweetness.
    • For added protein, stir in Greek yogurt off heat, or add a scoop of vanilla protein powder and more milk to adjust the texture.

    Darleen Vance disaster diary: The first time I shot this recipe, my tripod clipped the saucepan just as the Warm Apple Cinnamon Quinoa Bowl reached peak creaminess. It slid, I lunged, and somehow saved the bowl with a heroic potholder swoop. Breakfast victory.

    Variations: Pinterest-Ready Twists on Your Bowl

    Customize your Warm Apple Cinnamon Quinoa Bowl

    Consider the Warm Apple Cinnamon Quinoa Bowl your base canvas. Want more fall flair? Add a dash of nutmeg or cardamom. Prefer caramel notes? Stir in a spoon of date syrup. For a protein-packed apple cinnamon quinoa breakfast, add toasted pecans and a dollop of Greek or coconut yogurt. If you’re dairy-free, swirl in almond or cashew butter. This versatile Warm Apple Cinnamon Quinoa Bowl also loves textures: sprinkle granola on top, toss in dried cranberries, or fold in pear instead of apple for a softer finish.

    Treat the Warm Apple Cinnamon Quinoa Bowl like a mix-and-match breakfast bar for the family. Set out bowls of raisins, chia, pumpkin seeds, and extra cinnamon. Everyone customizes their own healthy apple cinnamon breakfast bowl, and suddenly mornings feel playful, not rushed. If you adore veggie-forward, quinoa-powered recipes, you’ll also love my Quinoa Stuffed Bell Peppers with Veggies for lunch—more ways to keep quinoa exciting all day.

    • Apple pie protein: Add vanilla protein powder and a splash of extra milk to your Warm Apple Cinnamon Quinoa Bowl; finish with apple slices fanned on top.
    • Apple crumble bowl: Top your Warm Apple Cinnamon Quinoa Bowl with a quick stovetop “crumble” of oats, walnuts, cinnamon, and maple toasted in a skillet.
    • Caramel apple drizzle: Heat a spoon of almond butter with maple and a pinch of salt; spoon over the Warm Apple Cinnamon Quinoa Bowl for a glossy finish.
    • Overnight version: Cook quinoa ahead, then reheat with milk in the morning for a five-minute Warm Apple Cinnamon Quinoa Bowl.

    Darleen Vance real-life note: I once tried a latte pour-over moment for a photo and missed the bowl entirely—almond milk everywhere. The Warm Apple Cinnamon Quinoa Bowl still looked gorgeous after the cleanup. Priorities.

    Pro Tips, Storage, and Troubleshooting

    Dialing in texture and flavor

    • Too thick? Warm with extra milk until your Warm Apple Cinnamon Quinoa Bowl is spoonable and silky.
    • Too thin? Simmer a minute longer, or stir in a spoon of chia to thicken.
    • Not sweet enough? Add another drizzle of maple syrup or a few chopped dates.
    • Want deeper spice? Bloom cinnamon in a teaspoon of coconut oil for 30 seconds before adding quinoa and milk.

    For a streamlined morning, make a double batch of quinoa on Sunday. Reheat portions with milk and cinnamon, then add apple fresh for crispness. The Warm Apple Cinnamon Quinoa Bowl tastes best when the apple is slightly crunchy against the creamy base.

    Storage, reheating, and quick fixes

    • Storage: Refrigerate the Warm Apple Cinnamon Quinoa Bowl (without toppings) up to 4 days in an airtight container.
    • Reheat: Add 2–4 tablespoons milk per serving and warm on the stovetop or microwave until creamy again.
    • Freezing: Freeze portions up to 2 months. Thaw overnight, reheat with milk, and refresh with cinnamon.
    • Fix a bitter taste: Always rinse quinoa. If it still tastes off, add a pinch of salt and a touch more maple in your Warm Apple Cinnamon Quinoa Bowl.

    Craving more cozy mains after breakfast? My Maple-Glazed Squash & Brussels Sprouts is a sweet-savory, weeknight-friendly side that pairs beautifully with roasted proteins.

    Chaos corner by Darleen Vance: I once reheated my Warm Apple Cinnamon Quinoa Bowl on high and walked away to answer the door. Milk volcano. Now I reheat low and slow with a splash of extra milk—lesson learned.

    FAQs

    Can I make the Warm Apple Cinnamon Quinoa Bowl vegan?

    Yes—use plant milk (almond, oat, or soy) and maple syrup. Skip dairy yogurt or use coconut yogurt. The bowl stays cozy, creamy, and fully plant-based.

    Which apples are best for a Warm Apple Cinnamon Quinoa Bowl?

    Honeycrisp, Pink Lady, Gala, or Fuji hold their shape and offer balanced sweetness. They keep your bowl bright, juicy, and not mushy.

    How do I add more protein to the Warm Apple Cinnamon Quinoa Bowl?

    Stir in Greek yogurt off heat, add a scoop of vanilla protein powder with extra milk, or garnish with nuts and chia. Quinoa already contributes complete protein.

    Can I make the Warm Apple Cinnamon Quinoa Bowl ahead?

    Yes. Cook quinoa, refrigerate 3–4 days, and reheat with milk and cinnamon. Add fresh diced apple and toppings just before serving for best texture.

    Conclusion

    The Warm Apple Cinnamon Quinoa Bowl is a comfort-first, nutrition-dense breakfast that transforms ordinary mornings. Creamy quinoa, juicy apple, and cozy cinnamon turn a quick pot into a spoonable hug. It’s a gluten-free, high-protein breakfast that’s easy to customize with nuts, raisins, chia, or a swirl of yogurt. Make a big batch, reheat on busy days, and your Warm Apple Cinnamon Quinoa Bowl still tastes bakery-fresh. If you love bowls that feel like self-care, this healthy apple cinnamon breakfast is your new ritual. Try it at home and tag me—I can’t wait to see your Warm Apple Cinnamon Quinoa Bowl magic.

  • Lentil Shepherd’s Pie with Sweet Potato Mash: Epic Wins

    Lentil Shepherd’s Pie with Sweet Potato Mash: Epic Wins

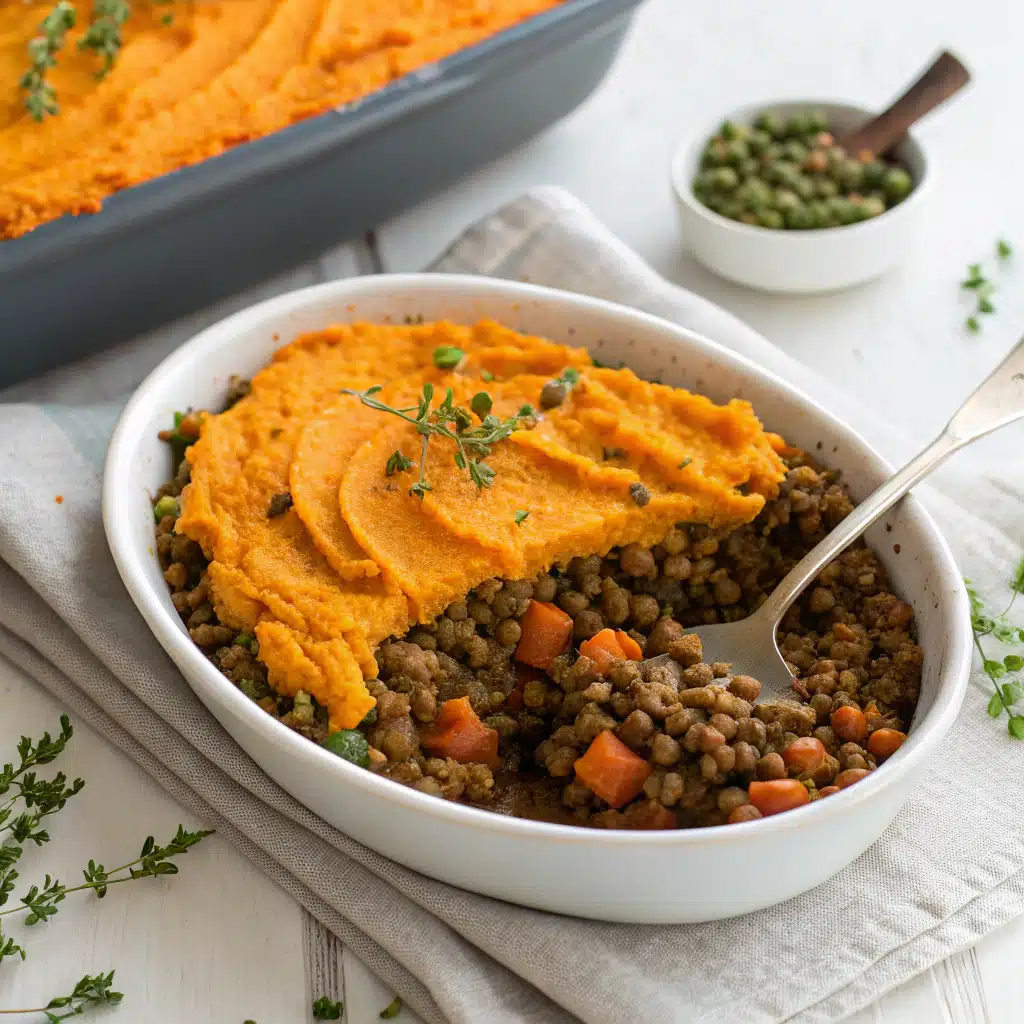
    Lentil Shepherd’s Pie with Sweet Potato Mash. I made it after soccer pickup, a missing lunchbox, and a dishwasher that refused to start. I forgot the thyme, then spilled peas across the floor. Still, dinner won. Lentil Shepherd’s Pie with Sweet Potato Mash is that kind of recipe—steady and forgiving. When the house feels loud and the clock feels fast, Lentil Shepherd’s Pie with Sweet Potato Mash brings everyone to the table, happy and quiet.

    Lentil Shepherd’s Pie with Sweet Potato Mash

    Recipe

    Why you’ll love it

    Lentil Shepherd’s Pie with Sweet Potato Mash: Cozy Weeknight Hero

    Lentil Shepherd’s Pie with Sweet Potato Mash tastes like a hug and cooks like a weeknight champ. It’s creamy up top, hearty underneath, and full of everyday pantry heroes. Lentils stand in for meat, and they do it with pride. They soak up tomato, herbs, and a little umami, so every bite feels deep and satisfying. Sweet potatoes make the mash silky and bright. Kids like the natural sweetness. Grown-ups love that it’s loaded with fiber and protein. My crew asks for seconds.

    Here’s the best part: this Lentil Shepherd’s Pie with Sweet Potato Mash won’t wreck your budget or your evening. You can simmer the lentils ahead. You can throw the filling into a slow cooker if life gets wild. Then you spread the mash, bake, and listen to the table quiet down. That quiet is gold.

    Comfort food is having a big moment, but people want lighter, plant-based dinners too. This vegetarian shepherd’s pie checks both boxes. It’s a meatless comfort food that still feels classic. The sweet potato topping gives gorgeous color and more vitamins. The lentil filling brings iron, protein, and cozy stew vibes. On Pinterest and TikTok, you’ll see cottage pie remakes, gluten-free twists, and dairy-free swaps. This recipe slides right in with the best of them.

    Another reason it’s trending? Meal prep. Lentil Shepherd’s Pie with Sweet Potato Mash is a meal-prep darling. It freezes well, reheats without fuss, and feeds a crowd. I’ve packed it for neighbors and new parents more times than I can count. If you love warm bowls like my Sweet Potato Lentil Stew, you’ll love this too.

    Ingredients & tips

    Vegetarian Shepherd’s Pie with Sweet Potato Mash: Ingredients That Matter

    For the filling, I use brown or green lentils. They hold their shape and bring a savory bite. Onion, carrots, celery, and mushrooms build the base. Garlic, tomato paste, and a splash of Worcestershire (or tamari for vegan) make it taste rich. Thyme, rosemary, and smoked paprika add depth. A little cornstarch slurry thickens the sauce so it’s spoonable. Frozen peas go in at the end so they stay bright.

    For the topping, sweet potatoes steal the show. Boil or steam until soft, then mash with butter or olive oil and a splash of milk (dairy or oat). A pinch of cinnamon wakes up the sweetness. A dusting of Parmesan or nutritional yeast on top adds a golden, savory layer. That contrast—the caramel notes of sweet potato and the hearty lentils—is why Lentil Shepherd’s Pie with Sweet Potato Mash wins hearts.

    Gluten-free? This dish easily goes gluten-free with tamari and cornstarch. Dairy-free? Use olive oil and plant milk. Want it even heartier? Stir in chopped greens or extra mushrooms. It’s flexible, forgiving, and family-tested.

    Time-Saving Tips from a Slow-Cooker Mom

    I swear my slow cooker saved my sanity. On days I’m chasing kids and deadlines, I let it simmer the filling. Add lentils, broth, veggies, tomato paste, and spices. Cook on low for 6 to 7 hours. Stir in peas and the cornstarch slurry at the end. Top with mash and broil or bake to finish. Boom—Lentil Shepherd’s Pie with Sweet Potato Mash, no stress.

    Short on time? Use canned lentils, drained and rinsed, and reduce broth. Microwave sweet potatoes to speed things up. Keep minced garlic, pre-chopped mirepoix, and frozen peas on hand. While the mash cools, set the table. While it bakes, take a breath. Dinner will be ready, and it will be good. If you like slow-cooker comfort, try my Slow Cooker Butternut Squash Lentil Curry next. It feeds hungry people without drama.

    How to & swaps

    Vegan Lentil Shepherd’s Pie with Sweet Potato Mash: How-To Steps

    Here’s the simple flow. First, simmer your lentils in broth until just tender. Meanwhile, sauté onion, carrots, celery, and mushrooms in olive oil until soft and golden. Add garlic, tomato paste, thyme, rosemary, and smoked paprika. Stir in Worcestershire (vegan) or tamari. Add the cooked lentils and remaining broth. Simmer to thicken, then use a quick cornstarch slurry to get that perfect gravy. Fold in peas off the heat.

    For the sweet potato mash, boil or steam chunks until tender. Drain well. Mash with butter or olive oil, salt, pepper, cinnamon, and milk of choice. Taste and adjust. You want creamy, spreadable mash—thick, not runny. Spread the lentil filling in a baking dish. Spoon the sweet potato mash over the top. Use a fork to make ridges. Sprinkle Parmesan or nutritional yeast if you like. Bake until it bubbles at the edges and the peaks turn golden.

    That’s it. You’ve made Vegan Lentil Shepherd’s Pie with Sweet Potato Mash that tastes classic and cozy. If you want to serve something creamy alongside, my Creamy Cauliflower Mac and Cheese Bake is the dream team side.

    Swaps & Variations

    • Half-and-half mash: Use half sweet potatoes, half Yukon Golds for a less sweet top.
    • Extra veg: Fold in chopped spinach, kale, or corn with the peas.
    • Cheesy crust: Add sharp cheddar or dairy-free cheddar before baking.
    • Umami boost: A splash of balsamic or a teaspoon of miso in the filling.
    • Heat lovers: Smoked paprika plus a pinch of red pepper flakes.
    • Gluten-free: Tamari instead of Worcestershire, cornstarch for thickening.
    • Canned lentils: Yes—rinse, drain, and reduce broth by half.
    • Sheet-pan style: Bake in a shallow pan for more crispy edges.
    • Slow cooker: Cook filling low 6–7 hours; top and finish under broiler.
    • Mini pies: Bake in ramekins for grab-and-heat lunches.

    Each version keeps the heart of Lentil Shepherd’s Pie with Sweet Potato Mash—savory, creamy, and weeknight-ready. Pin the ideas you love and make it your own.

    Meal prep & fixes

    Gluten-Free Lentil Shepherd’s Pie with Sweet Potato Mash: Make-Ahead and Meal Prep

    I love a dish that works hard for you. Make the lentil filling on Sunday. Chill it. Mash the sweet potatoes and chill those too. On Tuesday, spread, bake, and serve. Or assemble the whole Lentil Shepherd’s Pie with Sweet Potato Mash, wrap tight, and refrigerate 2 days or freeze up to 3 months. Bake from chilled for 30–35 minutes. From frozen, bake covered for 45–55 minutes, then uncover to brown.

    For lunch boxes, I portion squares into glass containers. Add a handful of greens or a quick salad kit. It reheats in the microwave in about 2–3 minutes. The sweet potato mash stays creamy, the lentil layer stays hearty, and it still tastes like a warm hug.

    Storage, Freezer, and Troubleshooting

    Storage: Keep leftovers covered in the fridge 4 days. Freeze for 3 months in airtight containers. Reheat gently in the oven at 350°F or in the microwave, and splash in a spoon of broth if it seems dry.

    Troubleshooting: Is your filling watery? Simmer a few minutes or add another teaspoon of cornstarch mixed with cold water. Is your mash too loose? Stir over low heat to steam off moisture, or add a bit more Parmesan or nutritional yeast. Was your top pale? Broil 2–3 minutes, watching closely. Need more savory punch? Add a splash of tamari or a dash of balsamic. With these tiny adjustments, Lentil Shepherd’s Pie with Sweet Potato Mash will land perfectly every time.

    FAQs

    Can I make Lentil Shepherd’s Pie with Sweet Potato Mash fully vegan?

    Yes. Use olive oil, plant milk, vegan Worcestershire or tamari, and nutritional yeast instead of cheese.

    Can I use canned lentils?

    Yes. Drain and rinse. Reduce the broth by half and simmer less, just to thicken.

    How do I make it ahead?

    Assemble, cover, and refrigerate up to 2 days. Bake 30–35 minutes at 400°F until hot and bubbly.

    Do I have to peel the sweet potatoes?

    No. Peel for smooth mash or leave skins for texture and extra fiber. Mash well either way.

    Conclusion

    Some dinners feel like a deep breath. Lentil Shepherd’s Pie with Sweet Potato Mash is that for my family. It’s simple to cook, warm to serve, and easy to reheat. The lentils bring comfort. The sweet potatoes bring glow. And the whole pan brings everyone to the table. If your week looks busy, this recipe has your back. Try Lentil Shepherd’s Pie with Sweet Potato Mash at home and tag me so I can cheer you on. And if you’re building a cozy menu, peek at my Quinoa Stuffed Bell Peppers with Veggies for another bright, family-loved bake. Dinner can be calm. Dinner can be kind. You’ve got this.

  • Garlic Lemon Baked Salmon with Asparagus: Proven Secrets

    Garlic Lemon Baked Salmon with Asparagus: Proven Secrets

    Recipe

    Garlic Lemon Baked Salmon with Asparagus: Why This Works

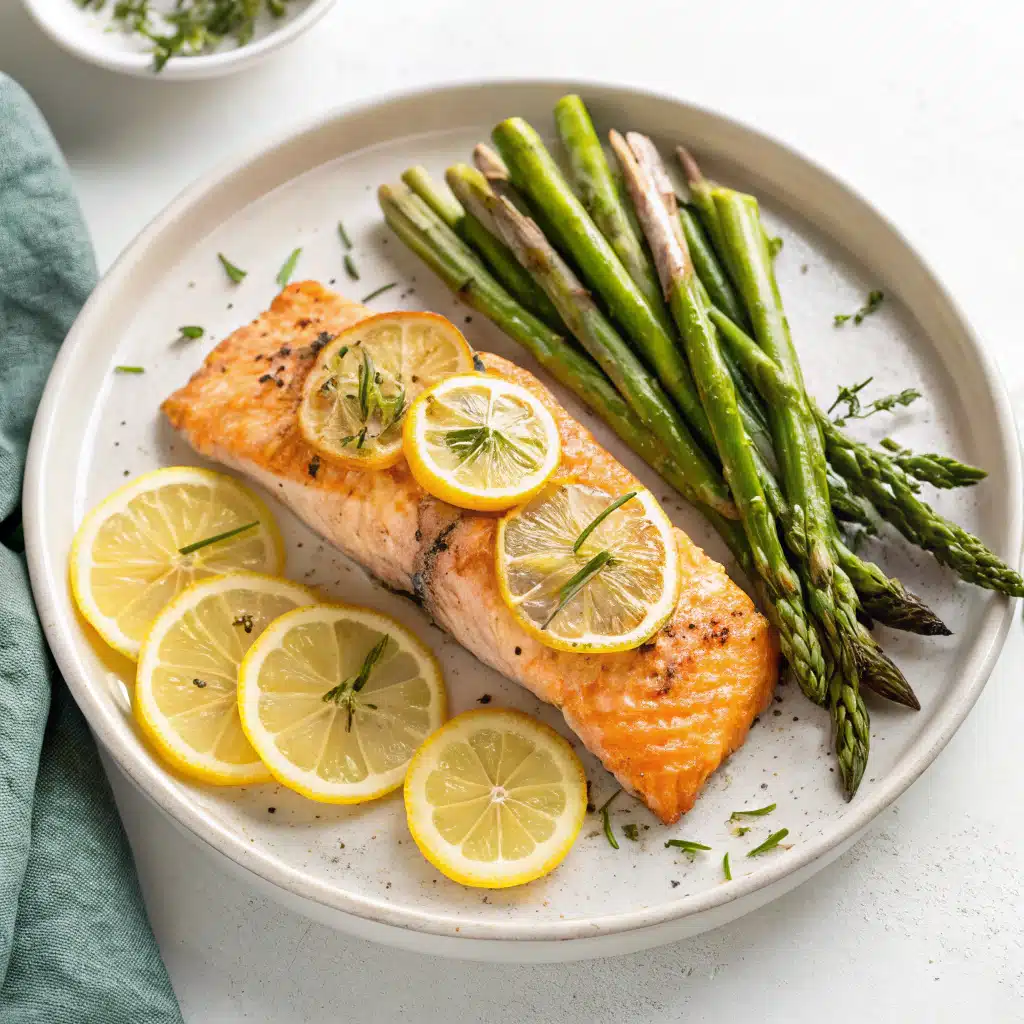
    Garlic Lemon Baked Salmon with Asparagus is smart, simple cooking. The lemon cuts the richness, the garlic builds flavor fast, and the asparagus roasts in the same pan. Because everything cooks together, you get fewer dishes and more time. The result is flaky salmon, tender spears, and a bright pan sauce that tastes like spring. If you’ve ever worried baked salmon might dry out, this method solves it. The olive oil, a touch of butter, and that tart lemon juice keep each bite moist. Meanwhile, the zest lifts the flavor, so it tastes fresh, not flat. In my kitchen, this is a weeknight rescue and a company-worthy plate.

    When I say Garlic Lemon Baked Salmon with Asparagus saves the day, I mean it. I can season, toss, and slide the pan into a hot oven in under 10 minutes. While it roasts, I set the table, rinse berries, or just sip water and exhale. Because I’m a mom first, I lean on reliable tricks. This recipe loves those tricks: preheated sheet pan, even thickness on fillets, and a quick broil at the end for color. So, dinner feels sunny and smells like a bistro, but it’s pure home.

    Trending Now: Sheet-Pan Flavor Without Compromise

    Sheet-pan meals are everywhere, but Garlic Lemon Baked Salmon with Asparagus actually delivers. It’s a real weeknight dinner that’s healthy, fast, and vibrant. You get clean protein, fresh veggies, and great texture. The edges of the asparagus get a little crisp, and the salmon stays tender. Plus, the lemon-garlic butter tastes like you fussed. You didn’t. You just let high heat and simple seasoning work hard. If you’re into one-pan dinners like my One-Pot Mediterranean Chicken & Vegetables, this belongs on your list. It’s crowd-pleasing, kid-friendly, and easy to scale for guests or meal prep.

    Garlic Lemon Baked Salmon with Asparagus Recipe Steps

    Here’s how I make Garlic Lemon Baked Salmon with Asparagus. First, I preheat the oven to 425°F and place a rimmed sheet pan inside. A hot pan means better sear and less sticking. Then, I trim asparagus ends and pat the salmon dry. Meanwhile, I whisk olive oil, melted butter, garlic, lemon zest, lemon juice, salt, pepper, and a pinch of paprika. The marinade smells bright and cozy all at once. Next, I toss asparagus with a spoonful of the mixture. After that, I brush the rest over salmon. Because salmon cooks fast, I keep fillets about the same thickness. I set everything on the hot pan and roast 12–14 minutes, depending on thickness.

    To finish Garlic Lemon Baked Salmon with Asparagus, I broil for 1–2 minutes for a little color. Then I rest the fish for 3 minutes, so juices settle. You can check doneness with a thermometer: aim for 125–130°F in the thickest part for medium and juicy. If you like it more done, go to 135°F. The flesh should flake easily and still look moist. Finally, I shower it with fresh parsley and extra lemon. The pan juices make a quick sauce. Spoon it over everything. It’s bright, garlicky, and buttery—your fork will know where to go.

    Time-Saving Tips for Busy Nights

    Because we’re juggling life, I prep pieces in advance. I zest and juice lemons in the morning and keep them in the fridge. I also trim asparagus ahead and store it wrapped in a towel. Then, when it’s go time, Garlic Lemon Baked Salmon with Asparagus hits the pan fast. If I know we’ll be late, I line my sheet with parchment for quick cleanup. For picky eaters, I sometimes add a few mini potatoes, par-cooked in the microwave. They roast up nicely alongside. Also, if salmon is thick, I start asparagus 3–4 minutes early. That way, both are done together. This recipe truly flexes with real life.

    Garlic Lemon Baked Salmon with Asparagus Variations

    I love Garlic Lemon Baked Salmon with Asparagus as written, but it’s fun to play. You can use wild sockeye for a deeper color and leaner bite, or go with Atlantic salmon for a richer, buttery texture. If you’re dairy-free, skip the butter and add a drizzle of extra olive oil. For herb lovers, try dill or chives in place of parsley. A whisper of honey balances the lemon for kids who prefer sweeter notes. Sometimes, I add cherry tomatoes to the pan during the last 8 minutes. They burst and make a quick, juicy sauce. Another night, I tossed in thin lemon slices so they caramelize and perfume the fish.

    Garlic Lemon Baked Salmon with Asparagus also means easy sides. While it roasts, I cook a quick pot of couscous or warm leftover rice. If you want more veg, add a handful of baby broccolini during the last few minutes. Or keep it low carb and serve with a salad. On cozy nights, I pair it with my Sweet Potato Lentil Stew for a hearty spread. For game days, I set out a tray with salmon, asparagus, and a little garlic yogurt dip, then sneak a plate while the family cheers. It’s versatile and polite—always ready to fit your plan.

    Swaps & Variations (Pinterest-style)

    • Citrus swap: Try orange zest for a mellow twist on Garlic Lemon Baked Salmon with Asparagus.
    • Herb route: Dill + lemon = classic. Basil + lemon = fresh and sweet.
    • Heat lovers: A pinch of red pepper flakes or smoked paprika.
    • Veg mix: Add thin carrots or snap peas for rainbow vibes.
    • Foil packets: Wrap each portion for tender, steamy results—great for camping.
    • Air fryer: 390°F, 8–10 minutes for 6-oz fillets, asparagus in a second batch.
    • Butter-free: Use avocado oil for a dairy-free Garlic Lemon Baked Salmon with Asparagus.
    • Grain bowl: Flake salmon over quinoa with extra lemon and herbs.

    Garlic Lemon Baked Salmon with Asparagus Meal Prep

    For meal prep, Garlic Lemon Baked Salmon with Asparagus holds up well. I bake, cool, and portion into containers with lemon wedges. Because salmon dries if overheated, I reheat gently. I like the microwave at 50% power for 60–90 seconds, just until warm. Or I use a covered skillet on low with a splash of water. For lunches, I eat it cold over greens with extra lemon and olive oil. It’s bright, clean, and filling. Protein stays high, carbs stay low, and the plate still feels happy. You can double the recipe, use two pans, and rotate them halfway. That keeps the roasting even and the asparagus snappy.

    Garlic Lemon Baked Salmon with Asparagus also works for guests. I arrange fillets on one side of the sheet and asparagus on the other. Then, I drizzle everything with the lemon-garlic butter right before baking, so it all tastes fresh. If dinner stretches, I hold the pan in a 200°F oven for 10–12 minutes. It stays warm without overcooking. When the doorbell rings, I add a little parsley and a few extra lemon slices. The kitchen smells bright and welcoming. Meanwhile, if you need a fun starter, my Parmesan Pretzel Bites with Garlic Dip is a hit, and it keeps the garlic theme going.

    Storage, Troubleshooting & Quick Fixes

    • Storage: Refrigerate Garlic Lemon Baked Salmon with Asparagus in airtight containers up to 3 days.
    • Freezing: Freeze salmon portions up to 2 months; skip freezing asparagus—it gets mushy.
    • Dry salmon? Brush with olive oil and lemon juice, cover loosely with foil, and reheat gently.
    • Underdone? Pop back in the oven for 2–3 minutes; check temp again.
    • Too tart? Add a teaspoon of honey or a pat of butter to the warm pan juices.
    • Rubbery asparagus? It was overcooked. Next time, roast it 3–4 minutes ahead or choose thicker spears.
    • No thermometer? Look for opaque flesh that flakes easily with a fork.

    FAQs

    Can I use frozen salmon?

    Yes. Thaw overnight in the fridge, pat very dry, and proceed. Add 1–2 minutes to bake time.

    What temperature is best for salmon?

    Roast at 425°F. Aim for 125–130°F internal temp for juicy, flaky salmon.

    Can I swap asparagus?

    Yes. Try broccolini, green beans, or zucchini. Adjust timing so veggies stay tender-crisp.

    Is Garlic Lemon Baked Salmon with Asparagus good for meal prep?

    Absolutely. Portion in containers. Reheat gently or serve cold over greens.

    Wrap-Up

    When the evening tilts wild, I reach for Garlic Lemon Baked Salmon with Asparagus. It’s fast, forgiving, and full of flavor. The lemon wakes it up. The garlic brings comfort. The asparagus turns tender and sweet. Most of all, it brings everyone to the table without a fuss. I’m still the mom who loves her slow cooker, but this sheet-pan dinner gives me that same calm in 25 minutes flat. Try it at home and tag me. I want to see your pans, your plates, and your happy bites. And if you need another cozy idea after, my Slow Cooker Butternut Squash Lentil Curry hits the spot.