Blog

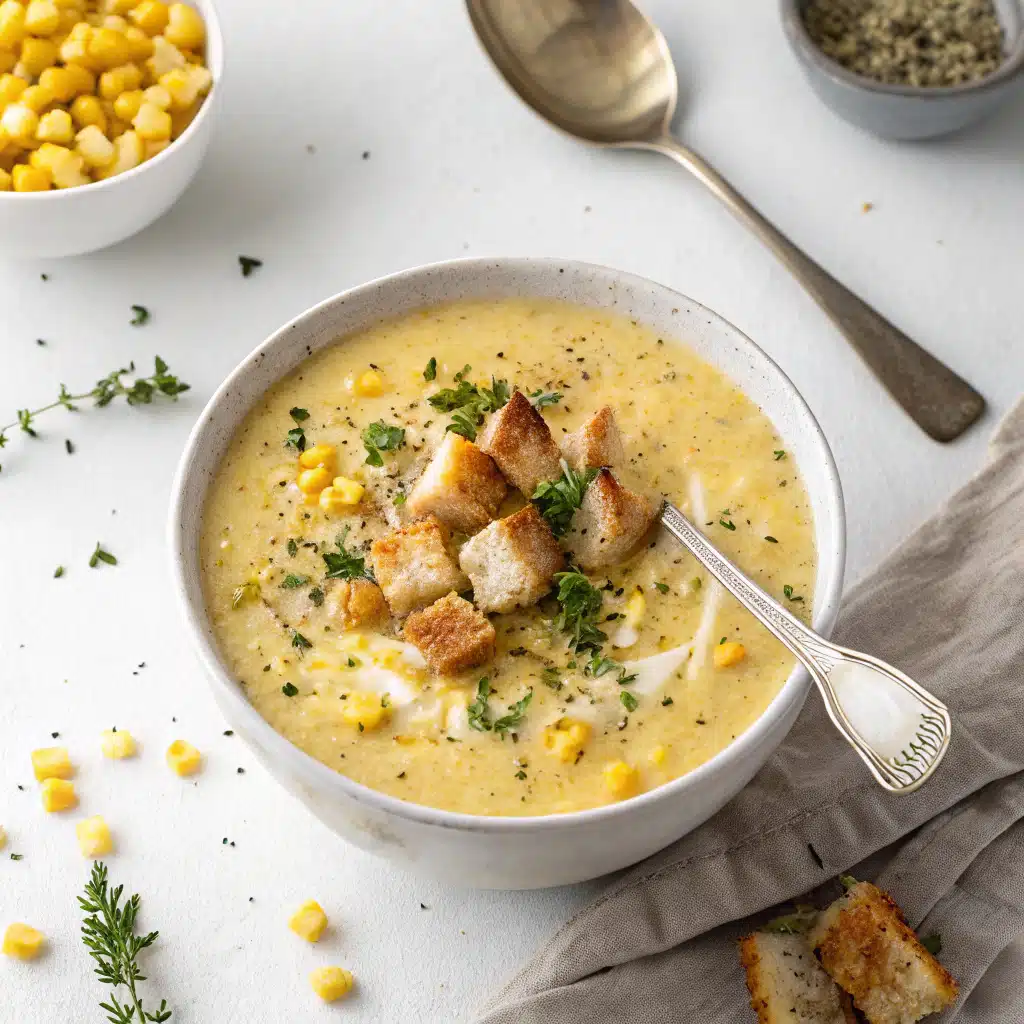
  • Creamy Corn Chowder: 7 Secrets to Cozy Comfort

    Creamy Corn Chowder: 7 Secrets to Cozy Comfort

    Creamy Corn Chowder brings me right back to the night I tried to puree hot soup without the blender lid—corn confetti on the ceiling, kids cheering like I staged it, and my dog trying to lick the backsplash. Creamy Corn Chowder was still a win that night: sweet corn, tender potatoes, and a silky broth that turned our kitchen chaos into cozy comfort. I’ve refined the method (and learned about venting steam!), and today I’m sharing the foolproof recipe and all my tips so your bowl tastes like sunshine—without repainting your ceiling.
    Creamy Corn Chowder: 7 Irresistible Secrets to Cozy Comfort

    Recipe: Creamy Corn Chowder

    Best Creamy Corn Chowder (The Cozy Classic)

    Why this Creamy Corn Chowder wins busy weeknights

    Creamy Corn Chowder is the ultimate cozy soup: sweet corn, tender potato, and a velvety base that tastes like sunshine in a bowl. The secret is blending some of the corn with milk to create a naturally silky body. No heavy roux, no long simmer—just bright, clean corn soup flavor. This sweet corn chowder cooks in under an hour, is pantry-friendly, and doubles like a dream. When you crave a comforting, hearty chowder, this creamy soup hits every note, from bacon corn chowder vibes to simple, vegetarian-friendly warmth. Serve Creamy Corn Chowder with a crisp salad or crusty bread, or pair it with Baked Feta Pasta for a cozy dinner duet.

    To make Creamy Corn Chowder pop, I char a handful of kernels in a skillet for caramelized notes. A splash of lemon at the end lifts the creamy soup, while smoked paprika and thyme layer in gentle depth. If you love bacon corn chowder, use the drippings to bloom your spices for extra umami. Prefer a light corn soup? Swap heavy cream for half-and-half. However you stir it, Creamy Corn Chowder remains the star—lusciously creamy, sweet, and balanced. Personal chaos note: I once tried adding the lemon too early and curdled my pot. Now I finish lemon off heat and my Creamy Corn Chowder stays silky and camera-ready.

    Sweet Corn Chowder Secrets for Extra Silkiness

    Use “corn milk” and potato for body—no flour required

    Creamy Corn Chowder doesn’t need flour to feel indulgent. Blending part of the corn with milk creates “corn milk,” which supplies natural starch and pure corn flavor. Yukon Gold potatoes add creamy body without graininess. For a gluten-free chowder, this technique is gold. Want a slightly richer potato corn soup? Finish with a tablespoon of butter right before serving. This sweet corn chowder technique extracts every ounce of corn sweetness and keeps your Creamy Corn Chowder tasting fresh, not heavy.

    Pro tips for flawless creamy soup texture

    • Blend half the corn, not all—keep texture in Creamy Corn Chowder.
    • Simmer gently; a rolling boil can make dairy split in your chowder.
    • Thicken wisely: add cornstarch slurry only if you crave a thicker chowder.
    • Finish with lemon and chives for brightness that lifts creamy soup richness.

    Real-life Darleen moment: Once my immersion blender cord lassoed the pepper grinder straight into the pot. We fished it out, laughed, and ate anyway—and that Creamy Corn Chowder was still the best of the month. For more cozy mains to pair with this corn soup, try my Ultimate Chicken Pot Pie Casserole.

    Potato Corn Chowder Variations You’ll Love

    From bacon corn chowder to veggie-loaded bowls

    Creamy Corn Chowder is endlessly flexible. Stir in crispy bacon for smoky bacon corn chowder, rotisserie chicken for hearty protein, or swap broth for vegetable stock and skip bacon for a vegetarian corn soup. Add poblano and a pinch of cumin for Southwest corn chowder, or toss in shrimp for a coastal twist. I love folding in a handful of cheddar for a cheesy corn chowder that still lets the sweet corn sing. However you riff, keep the base the same—corn milk, potatoes, and gentle simmering—so your Creamy Corn Chowder stays velvety.

    • Roasted corn and garlic: roast at 425°F for 15 minutes; blend half for a roasty Creamy Corn Chowder.
    • Dairy-light: use evaporated milk plus a dollop of Greek yogurt off heat.
    • Heat lovers: add chipotle in adobo for smoky heat in your corn soup.
    • Late-summer farm-stand: toss in zucchini coins for veggie-packed chowder.

    My most memorable riff? I ran out of potatoes and used leftover roasted sweet potatoes. The Creamy Corn Chowder turned sunset-orange and my kids asked for seconds. For more soup-night inspo, peek at my Crockpot Creamy Tomato Basil Tortellini Soup.

    Easy Creamy Corn Chowder: Storage, Troubleshooting, FAQs

    Make-ahead, freezing, and reheating

    Creamy Corn Chowder stores beautifully. Refrigerate up to 4 days in an airtight container. Reheat gently on the stovetop over low heat, adding a splash of broth or milk to loosen. For freezing, chill completely, skip the final lemon and chives, and freeze up to 2 months; add lemon and chives after reheating to keep flavor bright. Potatoes soften more after freezing, but the chowder still tastes fantastic. This make-ahead friendly corn soup is a weeknight hero.

    Fix broken or thin chowder like a pro

    • If Creamy Corn Chowder looks thin: simmer 3–5 minutes uncovered or add a small cornstarch slurry.
    • If it splits: remove from heat, whisk in 1–2 tablespoons cold cream, then rewarm gently.
    • Too sweet? Balance with extra salt, pepper, and a squeeze more lemon.
    • Needs oomph? A pinch of smoked paprika or cheddar wakes up creamy soup fast.

    Chaos corner: I once added cayenne twice. A spoon of cream plus a diced potato simmered in the pot tamed the heat and saved our Creamy Corn Chowder. For a hearty pairing, try my Easy Slow Cooker French Onion Roast.

    FAQs

    Can I make Creamy Corn Chowder without bacon?

    Yes. Use olive oil in place of bacon drippings and vegetable broth. The chowder stays rich from blended corn and cream.

    How do I make this corn soup dairy-light?

    Use half-and-half or evaporated milk, then finish off heat with a spoon of Greek yogurt for body and tang.

    What’s the best potato for potato corn soup?

    Yukon Gold holds shape and adds creaminess. Russets work too but break down more for a thicker chowder.

    Can I use frozen or canned corn?

    Absolutely. Frozen is closest to fresh. If using canned, drain and rinse; blend half and stir the rest in whole.

    Conclusion

    Creamy Corn Chowder is more than a bowl of soup—it’s a little weeknight ceremony of comfort. With corn milk for silkiness, tender potatoes, and simple spices, this creamy soup tastes indulgent yet bright. Whether you prefer bacon corn chowder, a vegetarian corn soup, or a cheesy potato corn soup, the base stays luscious and reliable. I’ve cooked this through spills, missing lids, and laughing kids, and it still delivers pure, cozy magic. Make Creamy Corn Chowder tonight, ladle generously, and share your bowl with someone you love. Try it at home and tag me! And when you’re ready for more comfort, explore the classics on my pinterest account

  • Crunchy Air Fryer Buffalo Cauliflower: 7 Epic Secrets

    Crunchy Air Fryer Buffalo Cauliflower: 7 Epic Secrets

    Crunchy Air Fryer Buffalo Cauliflower is my weeknight hero and game-day MVP. Last Sunday, I, Darleen Vance, had a full-on kitchen circus: my air fryer preheating like a jet engine, kids asking for ranch, and our dog swiping a naked floret mid-dredge. I still got dinner on the table in 25 minutes. Crunchy Air Fryer Buffalo Cauliflower proves you can have crispy, saucy, spicy veggie “wings” without deep-frying or chaos well, less chaos.

    Crunchy Air Fryer Buffalo Cauliflower: 7 Epic Secrets

    Recipe

    Crunchy Air Fryer Buffalo Cauliflower: The Secret Crunch

    How Crunchy Air Fryer Buffalo Cauliflower gets shatteringly crisp

    Crunchy Air Fryer Buffalo Cauliflower succeeds because we stack small, smart techniques that maximize crispness without deep-frying. First, a strategic blend of flour plus cornstarch and a pinch of baking powder creates tiny steam pockets that expand and crisp in the air fryer. Second, panko breadcrumbs add rugged texture, catching hot air and amplifying crunch. Third, we preheat to 400°F and cook hot and fast in a single, well-spaced layer. That’s how this air fryer buffalo cauliflower bites recipe delivers a seriously crispy exterior while keeping the centers tender.

    Once crisp, we sauce strategically. Toss lightly or glaze the Crunchy Air Fryer Buffalo Cauliflower for 1–2 minutes in the basket to set the buffalo. This locks in that addictive spicy tang without sogginess. It’s the same approach I use for crunchy cauliflower wings in the oven: crisp first, sauce last, return to heat briefly. The result: bold buffalo flavor with a true crunch.

    Real kitchen chaos? The first time I tested this, I, Darleen Vance, overstuffed the basket while my timer beeped, my phone rang, and my kid asked, “Is the ranch cold yet?” I split the batch, spaced it out, and BOOM—peak crunch. Learn from my crowd-control mistake and cook in batches.

    Crunchy Air Fryer Buffalo Cauliflower hits the sweet spot: big flavor, weeknight speed, and health-forward comfort. You get the vibe of buffalo wings with plant-powered cauliflower, less oil, and quick cleanup. It’s a game day appetizer, a meatless Monday star, and an anytime snack. On social feeds, you’ll see crispy cauliflower wings dipped in ranch, sprinkled with chives, and stacked tall. The magic is real: a golden crust, spicy buffalo sauce, and that dunkable cool ranch moment.

    For full comfort-food energy, pair a batch with my Skillet Mac and Cheese with Tomato or keep it light alongside Garlic Butter Shrimp Pasta for the surf-and-spice crowd. Either way, Crunchy Air Fryer Buffalo Cauliflower brings that addictive crunch every time.

    Air Fryer Buffalo Cauliflower Breading and Sauce

    Breading technique that truly sticks

    The dredge roadmap for Crunchy Air Fryer Buffalo Cauliflower is simple and reliable. Pat dry your florets. Toss in a dry mix (flour + cornstarch + baking powder + spices) so the wet adheres. Dip into egg-and-milk (or a flax egg plus plant milk) to create a thin, sticky layer. Finish by pressing into panko for rugged crunch. This triple pass creates a crispy shell that air-fries like a dream.

    Spacing is everything. Airflow equals crunch for air fryer buffalo cauliflower bites. Work in batches, oil-spray lightly, and flip at the 8-minute mark. If a piece looks pale, it probably needs more time or a bit more oil mist. The coating should look sandy-golden before you sauce the crispy cauliflower. Then glaze or toss with buffalo and heat 1–2 minutes to set the shine without softening the crust.

    Darleen Vance kitchen confession: I once tried shortcuts and skipped the dry dredge. Disaster. The wet slid off, and my “crunch” tasted like a soft sweater. With the dry-wet-panko flow, my Crunchy Air Fryer Buffalo Cauliflower finally acted like true crispy cauliflower wings—bold, crunchy, and sauce-ready.

    Practical tips for extra-crunchy success

    • Cut florets evenly (about 1.5 inches) so they cook uniformly.
    • Use cornstarch; it lightens the crust and helps keep Crunchy Air Fryer Buffalo Cauliflower crisp.
    • Preheat the air fryer. Hot basket = instant sizzle and better crust.
    • Don’t soak in sauce. Toss quickly or brush, then re-crisp for 1–2 minutes.
    • Gluten-free? Use fine almond flour + gluten-free panko.
    • Vegan? Use a flax egg + oil instead of butter in the buffalo.

    Make it a meal: serve with crunchy slaw and potato wedges, or turn it into buffalo cauliflower tacos. For cozy season, see my Creamy Tomato Basil Tortellini Soup—dip your Crunchy Air Fryer Buffalo Cauliflower right in. It’s a vibe.

    Variations and Pinterest-Ready Swaps

    Flavor variations for Crunchy Air Fryer Buffalo Cauliflower

    Crunchy Air Fryer Buffalo Cauliflower is a flexible base. Here are flavor spins that stay crisp and exciting:

    • Garlic-Parmesan: Skip buffalo, toss in 1 tablespoon melted butter, 2 tablespoons grated Parmesan, 1 minced garlic clove, and parsley.
    • Sweet Heat: Mix buffalo with 1 tablespoon honey and a squeeze of lime for sticky-sweet spicy cauliflower wings.
    • Lemon Pepper: Add 1 teaspoon lemon pepper to the dredge and finish with lemon zest and a drizzle of olive oil.
    • Korean-Inspired: Glaze with gochujang, honey, soy sauce, and rice vinegar; garnish with sesame seeds.
    • BBQ Ranch: Brush with smoky BBQ sauce and serve with ranch for a tailgate classic.

    Keep the structure—crisp first, sauce second—and your Crunchy Air Fryer Buffalo Cauliflower will stay crunchy. If you’re all-in on fall flavors, pair a spicy batch with my One-Pot Thai Pumpkin Curry Soup or Savory Pumpkin and Bacon Risotto for sweet-spicy balance.

    Darleen Vance test-kitchen moment: During a Pinterest live, I accidentally grabbed smoked paprika twice. My Crunchy Air Fryer Buffalo Cauliflower came out smokier than planned—and the chat went wild for it. Don’t fear bold spice; buffalo can handle it.

    Pinterest-trending swaps and plating ideas

    • Gluten-Free Crunch: Almond flour + gluten-free panko = sturdy crust for your air fryer buffalo cauliflower bites.
    • Dairy-Free Drizzle: Use avocado oil in the buffalo; serve with dairy-free ranch.
    • Low-Carb Option: Use crushed pork rinds instead of panko for a keto-ish crispy cauliflower wing vibe.
    • Party Platter: Pile high, drizzle with ranch, and sprinkle chives. Serve with celery, carrot sticks, and lemon wedges.
    • Taco Night: Tuck Crunchy Air Fryer Buffalo Cauliflower into warm tortillas with slaw, avocado, and lime.

    For share-worthy photos: go heavy on chives, keep the plate white, and leave negative space. A glossy sauce sheen screams crunch. That’s the Pinterest promise with Crunchy Air Fryer Buffalo Cauliflower.

    Storage, Troubleshooting, and More

    Storage, reheating, and fixing soggy cauliflower

    Leftover Crunchy Air Fryer Buffalo Cauliflower? Cool completely, then store in an airtight container for up to 3 days. Re-crisp in the air fryer at 375°F for 3–5 minutes. If already sauced, expect slightly less crunch—still delicious. For meal prep, keep sauce on the side and toss just before serving.

    Why is it soggy? Common culprits: overcrowding the basket, skipping preheat, or coating too thick. Fix it by spacing florets, lightly oil-spritzing, and extending cook time 2–3 minutes. Pale spots? Flip and spray again. Soft crust? Sauce less and glaze briefly. The crispy cauliflower goal is non-negotiable.

    Chaos report from Darleen Vance: I once sneezed mid-panko toss, sent breadcrumbs flying, and overcompensated with oil spray. Still got Crunchy Air Fryer Buffalo Cauliflower with a bronze, not greasy, crust—because the dry-wet-panko chain saves the day.

    Quick wins and crossovers

    • Oven-only crowd? Bake at 450°F and broil at the end—nearly as crunchy.
    • Make it a game-day board with dips: ranch, blue cheese, and honey-mustard.
    • Serve with celery ribbons and lemon wedges for that classic buffalo-plate look.
    • Love cozy casseroles? Try my Ultimate Chicken Pot Pie Casserole for a comfort-food marathon.

    FAQs

    Can I make Crunchy Air Fryer Buffalo Cauliflower gluten-free?

    Yes. Use almond flour (or a 1:1 gluten-free blend) in the dredge and gluten-free panko. The crunch still slaps.

    How do I keep the coating from falling off?

    Pat florets dry, use the dry-wet-panko method, press crumbs gently, and mist with oil. Flip once and don’t overcrowd.

    Can I bake it instead of air frying?

    Absolutely. Bake at 450°F for 22–26 minutes on a parchment-lined sheet, flipping once; broil 1–2 minutes to finish.

    Is it spicy, and how do I reduce heat?

    Buffalo brings heat. Soften with honey or butter, use a mild hot sauce, and double up on ranch for balance.

    Conclusion

    Crunchy Air Fryer Buffalo Cauliflower is the weeknight-meets-game-day recipe I reach for when I want crispy cauliflower wings without the fryer mess. The cornstarch-panko combo, high heat, and quick buffalo glaze give you legit crunch and bold flavor. Whether you serve these air fryer buffalo cauliflower bites with ranch, blue cheese, or over salad, they deliver texture and spice in minutes. From gluten-free swaps to dairy-free tweaks, this recipe flexes to your table and still hits that crunchy, saucy note. Cook a batch of Crunchy Air Fryer Buffalo Cauliflower, cue up your favorite dip, and enjoy every bite. Try it at home and tag me!

  • Garlic Butter Shrimp Pasta: 7 Irresistible Secrets

    Garlic Butter Shrimp Pasta: 7 Irresistible Secrets

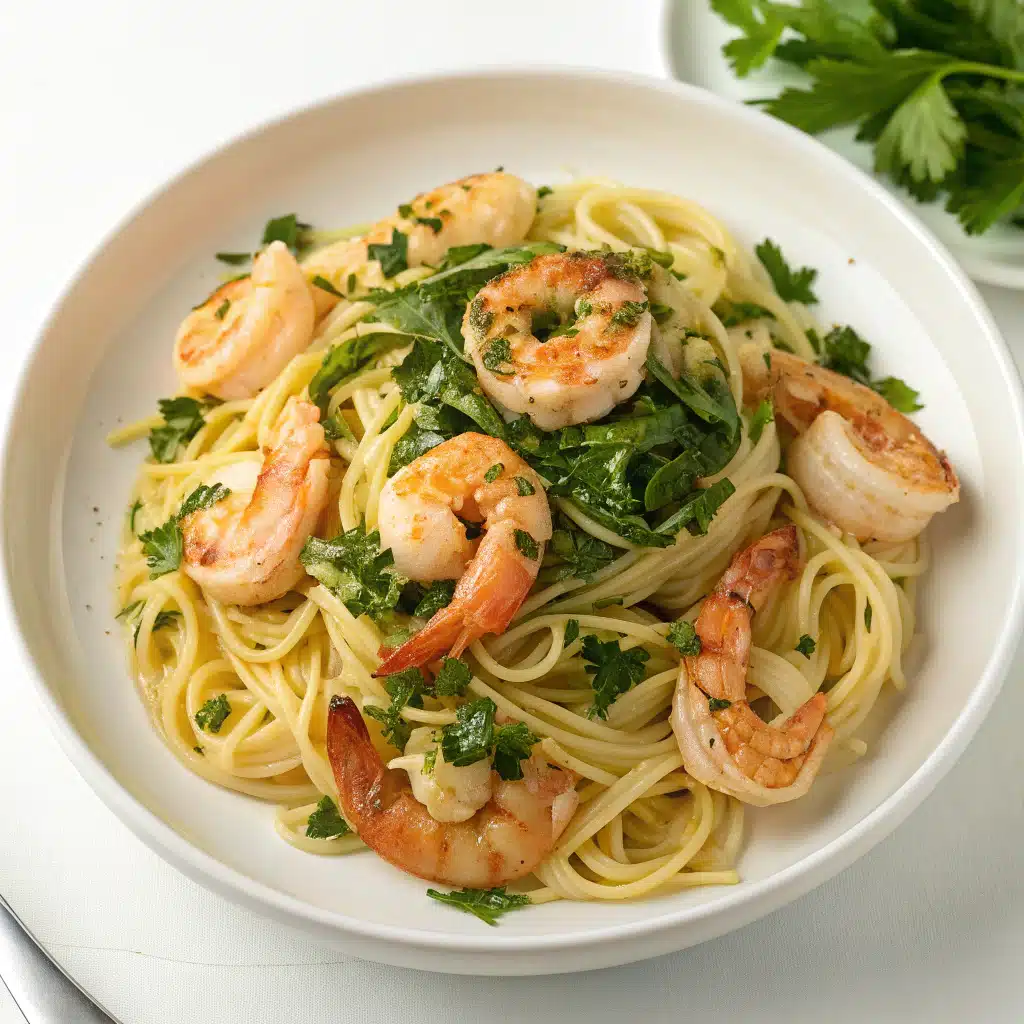
    Garlic Butter Shrimp Pasta saved my Tuesday night. I’m Darleen Vance, and I was juggling a Zoom call, a clingy cat, and a boiling pot when the colander slipped. Pasta avalanche. I laughed, regrouped, and made another batch—because Garlic Butter Shrimp Pasta is that fast. Shrimp seared in garlicky butter, lemony gloss, and silky strands of pasta can fix a rough day and make everyone at the table think you planned it this way all along.

    Garlic Butter Shrimp Pasta: 7 Irresistible Secrets

    Recipe

    Garlic Butter Shrimp Pasta Recipe (Step-by-Step Guide)

    Why This Garlic Shrimp Pasta Works

    Garlic Butter Shrimp Pasta is that magical sweet spot between comfort food and a bright shrimp scampi pasta. The buttery garlic sauce clings to al dente linguine, while lemon and a touch of red pepper flakes add lift. Parmesan melts in to create a silky, restaurant-worthy finish. It’s quick, unfussy, and wildly flavorful—an easy weeknight dinner that still feels special. The secret is emulsifying butter, starchy pasta water, and olive oil so the garlic butter sauce becomes glossy instead of greasy. I love how Garlic Butter Shrimp Pasta delivers big flavor with minimal prep, basic pantry ingredients, and a single skillet. Shrimp, garlic, lemon, and parsley do all the heavy lifting, giving this lemon garlic pasta lightness and depth.

    Real-life chaos note from Darleen Vance: the first time I photographed this dish, I dropped an entire bowl of Parmesan on the floor. The cat approved. I remade the garlic butter sauce in minutes, and dinner was still on time. That’s the beauty of Garlic Butter Shrimp Pasta—fast recovery, fast reward.

    The 25-Minute Viral Weeknight Dinner

    When a pasta goes viral, it’s usually for speed and flavor. Garlic Butter Shrimp Pasta nails both. From the moment water boils to the final twirl, you’re looking at 25 minutes. Sear shrimp hot and fast for juicy bites, then build a scampi-style base with garlic and wine or stock. Toss with spaghetti or linguine and a shower of Parmesan. It’s the kind of quick pasta that turns a Tuesday into a celebration. If you like the ease of internet-famous meals like my baked feta pasta, you’ll love this one. Garlic Butter Shrimp Pasta is weeknight-friendly, date-night-worthy, and endlessly adaptable with pantry swaps.

    How to Make Garlic Butter Shrimp Pasta Like a Pro

    Ingredients That Make Flavor Pop

    For the best Garlic Butter Shrimp Pasta, reach for large shrimp (21/25 or 26/30). Bigger shrimp stay juicy and are less likely to overcook. Fresh garlic makes the buttery garlic sauce unmistakable—use five cloves and mince finely so it blooms quickly. Dry white wine adds restaurant-style complexity; chicken stock works great if you prefer not to cook with wine. Lemon zest and juice brighten the shrimp scampi pasta, and Parmesan adds saltiness and body. Don’t forget parsley for freshness. Finally, starchy pasta water is your secret to emulsifying the garlic butter sauce, giving Garlic Butter Shrimp Pasta that glossy, clingy finish people crave. Linguine or spaghetti both shine; gluten-free pasta works too.

    When I tested this recipe between soccer practice drop-offs, I had exactly 30 minutes. I set the pot to boil before I grabbed the shrimp from the fridge—timing is everything. By the time the pasta hit al dente, the garlic butter sauce was ready. Garlic Butter Shrimp Pasta came together so fast I even had five minutes to clear counters before serving.

    Pro Tips for Shrimp Scampi Pasta Success

    • Dry the shrimp well so they sear, not steam.
    • Salt the pasta water generously; the noodles carry seasoning into the sauce.
    • Use a wide skillet to avoid overcrowding and to reduce the wine quickly.
    • Reserve more pasta water than you think you’ll need; it’s liquid gold.
    • Finish Garlic Butter Shrimp Pasta off heat to prevent breaking the sauce.

    Want more weeknight wins? Try my cozy slow cooker French onion roast for hands-off comfort, then keep this Garlic Butter Shrimp Pasta in your back pocket for fast, fresh brightness. Both deliver big flavor with minimal stress, and both keep my family cheering at the table.

    Creamy Garlic Butter Shrimp Pasta Variations

    Lemon, Wine, and Parmesan Balance

    Garlic Butter Shrimp Pasta shines when flavors balance: rich butter, fragrant garlic, zingy lemon, and savory Parmesan. If your sauce tastes flat, add a squeeze more lemon. If it’s too sharp, swirl in another pat of butter. For a creamy garlic butter shrimp pasta, add 1/4 cup heavy cream after reducing the wine; simmer 30 seconds before tossing with pasta. This keeps the sauce voluptuous without feeling heavy. Love extra heat? Add a pinch more red pepper flakes. If you crave even more brininess, toss in a teaspoon of capers. Garlic Butter Shrimp Pasta is endlessly adjustable, and that flexibility is why it’s such a keeper for busy cooks and pasta lovers alike.

    Darleen Vance kitchen confession: one shoot day, my kiddo swapped parsley for cilantro on the counter. I tossed it in, wondered why my Garlic Butter Shrimp Pasta smelled like taco night, and we all had a good laugh. The fix was easy—more lemon, extra Parmesan, and a quick sprinkling of the right herb. Dinner saved.

    Pinterest-Favorite Swaps and Variations

    • Veggie boost: Add baby spinach or halved cherry tomatoes in the last minute.
    • Low-carb: Swap linguine for zucchini noodles; warm briefly in the sauce.
    • Gluten-free: Use your favorite GF spaghetti and a splash more pasta water to emulsify.
    • Extra silky: Whisk 1 tbsp cold butter in at the end for a classic scampi gloss.
    • Citrus twist: Try Meyer lemon for a sweeter finish.
    • Surf-and-turf: Add seared scallops to amplify the seafood vibe.

    If you enjoy bright, lemony dinners, you’ll also adore my garlic-lemon baked salmon with asparagus. Serve that on a different night and keep Garlic Butter Shrimp Pasta for your quick-fix pasta craving—it’s the best of both worlds.

    Healthy Garlic Butter Shrimp Pasta: Storage, Fixes

    Make-Ahead and Reheat

    Garlic Butter Shrimp Pasta is best right after tossing—shrimp are delicate and pasta continues to absorb sauce. That said, you can prep components: mince garlic, zest lemons, chop parsley, and thaw shrimp in the morning. Cook pasta just shy of al dente to reheat gently. To reheat leftovers, add a splash of water, stock, or a pat of butter to loosen the garlic butter sauce and warm over low heat, tossing constantly. For a lighter night, pair Garlic Butter Shrimp Pasta with a crisp salad or steamed asparagus. You can also split portions with extra veggies stirred in—baby spinach wilts right in and stretches the sauce beautifully.

    Darleen Vance PSA: I once forgot to save pasta water. I nearly cried… then used a few tablespoons of hot tap water whisked with a knob of butter. Garlic Butter Shrimp Pasta still came out silky. Not ideal, but still delicious.

    Troubleshooting & Quick Answers

    • Sauce looks oily? Add a bit of hot pasta water and toss off heat to re-emulsify.
    • Shrimp rubbery? You overcooked. Next time, pull at just-opaque and let carryover heat finish.
    • Too tart? Balance with another pat of butter or a sprinkle more Parmesan.
    • Too bland? Add a pinch of salt and a few drops of lemon—season in layers.

    For more cozy mains to rotate with Garlic Butter Shrimp Pasta, bookmark my creamy, crowd-pleasing chicken pot pie casserole—a guaranteed family hit.

    FAQs

    Can I make Garlic Butter Shrimp Pasta without wine?

    Yes. Use low-sodium chicken stock or vegetable stock. Add a teaspoon of white wine vinegar or extra lemon to bring brightness.

    What pasta shape is best for Garlic Butter Shrimp Pasta?

    Linguine and spaghetti are classics, but fettuccine, bucatini, or gluten-free spaghetti all work well because they hold the silky garlic butter sauce.

    How do I avoid overcooking the shrimp?

    Cook shrimp hot and fast, 1–2 minutes per side, until just opaque. Remove from heat and let carryover heat finish the center as you toss the pasta.

    Can I add cream to Garlic Butter Shrimp Pasta?

    Absolutely. Stir in 1/4 cup heavy cream after reducing the wine/stock for a luxurious creamy garlic butter shrimp pasta.

    Conclusion

    When the night calls for quick comfort with fresh, bright flavor, Garlic Butter Shrimp Pasta answers in 25 minutes flat. Juicy shrimp, a buttery garlic sauce, lemon zip, and Parmesan make every twirl irresistible. This shrimp scampi pasta adapts to your life: creamy or classic, gluten-free or low-carb, pantry-ready and always satisfying. I’m Darleen Vance, and I promise this Garlic Butter Shrimp Pasta will become your weeknight hero and your date-night secret weapon. Try it at home, tag me with your twirls, and tell me your favorite variation. Dinner victory, guaranteed.

  • Cheesy Ranch Chicken & Rice Bake: 5 Irresistible Tricks

    Cheesy Ranch Chicken & Rice Bake: 5 Irresistible Tricks

    Cheesy Ranch Chicken & Rice Bake came to life the night my timer died, my toddler hid the measuring cups, and the dog made off with a block of cheddar. Classic Darleen Vance kitchen chaos! I whisked sour cream with cream of chicken, shook ranch seasoning like confetti, and prayed the rice would bake tender. It did—and the whole pan vanished. Now this Cheesy Ranch Chicken & Rice Bake is our go-to for busy soccer nights, potlucks, and lazy Sundays. It’s creamy, cozy, and gloriously unfussy.

    Cheesy Ranch Chicken & Rice Bake

    Recipe

    Why This Cheesy Ranch Chicken & Rice Bake Works

    Comfort-food science behind the ranch chicken casserole

    There’s a reason Cheesy Ranch Chicken & Rice Bake wins weeknights. Starch from the rice creates body, the condensed soup adds silky structure, and sour cream keeps everything lush without curdling at oven temps. Ranch seasoning layers classic buttermilk-herb tang through the creamy chicken and rice, while a sharp cheddar cap melts into that irresistible, bubbly, golden lid. It’s the perfect one-pan casserole: the rice cooks gently in broth under the chicken, catching all those savory drippings so every grain is infused with flavor. That’s the baked chicken and rice magic—no soggy bottom, no dry top, just spoonable, scoopable comfort food.

    The viral appeal: easy, cheesy, repeatable

    On busy nights, a ranch chicken casserole checks all the boxes: affordable ingredients, minimal prep, and hands-off cooking. This Cheesy Ranch Chicken & Rice Bake leans into pantry staples—ranch mix, cream of chicken, long-grain rice—plus family-friendly add-ins like peas and carrots. It’s the kind of creamy chicken and rice that looks good on video, plates cleanly for kids, and reheats like a dream. The flavor profile is deeply familiar (hello, cheddar ranch), but the texture is restaurant-level: tender rice, juicy chicken, and a melty top. And yes, it’s absolutely meal-prep-friendly.

    Real life Darleen Vance moment: I once preheated my oven… with the foil box inside. Smoke alarm symphony. Still, the Cheesy Ranch Chicken & Rice Bake soldiered on, and dinner was saved—because this recipe is as forgiving as it is delicious.

    Ingredients, Swaps, and Pro Tips for Creamy Chicken and Rice

    Ingredient intel for the best baked chicken and rice

    Use long-grain white rice (not instant) for structure. Chicken thighs are ultra-juicy, but breasts work beautifully here. Ranch seasoning is the signature, and a mix from the packet is perfect—homemade ranch is great, too. Sour cream and condensed cream of chicken make the base of this Cheesy Ranch Chicken & Rice Bake ultra-creamy. Sharp cheddar brings bold flavor; Monterey Jack boosts melt. Low-sodium broth keeps the ranch chicken casserole from turning too salty. Herbs like chives or parsley brighten the finish.

    Pro tips for consistent, creamy results

    • Rinse the rice to remove excess starch; it keeps the creamy chicken and rice silky, not gluey.
    • Spread ingredients evenly so the baked chicken and rice cooks uniformly.
    • Seal tightly with foil for the first bake—steam is your friend.
    • Stir gently after 45 minutes to redistribute rice and sauce, then add cheese for that classic cheddar ranch casserole finish.
    • Rest 10 minutes before serving for perfect scoopable squares.

    Once, mid-shoot, I realized I’d shredded exactly half the cheddar… because my teen ate the rest straight from the block. I made do and the Cheesy Ranch Chicken & Rice Bake still vanished—proof that this creamy casserole is delightfully forgiving.

    Love cozy casseroles? My Ultimate Chicken Pot Pie Casserole serves the same comfort-food vibe. Craving a slow-cooked hug? Try the Easy Slow Cooker French Onion Roast.

    Step-by-Step and Pinterest-Trending Variations

    Step-by-step: foolproof ranch chicken casserole

    1. Grease a 9×13 dish; rinse and spread long-grain rice; add broth and butter.
    2. Season chicken with ranch, garlic, onion, paprika, pepper, and salt; layer over rice.
    3. Whisk sour cream and cream of chicken; spread; add peas/carrots if using.
    4. Cover tightly with foil; bake 45 minutes.
    5. Stir, then add cheddar and Jack; bake uncovered 15–20 minutes until rice is tender.
    6. Optional buttery crumb topping for crunch during the last minutes.
    7. Rest, top with herbs, and serve your Cheesy Ranch Chicken & Rice Bake.
    • Buffalo Ranch: Add 2–3 Tbsp hot sauce to the sour cream mixture. Blue cheese crumbles on top.
    • Bacon Ranch: Fold in 1/2 cup cooked, crumbled bacon and swap Monterey Jack for pepper jack.
    • Broccoli Cheddar Ranch: Add 2 cups small broccoli florets (blanched) for a veggie-forward creamy chicken and rice.
    • Greek Yogurt Lightened-Up: Replace half the sour cream with plain Greek yogurt.
    • Gluten-Free: Use a gluten-free condensed soup and certified gluten-free ranch mix.

    Once, I tried a spicy riff during a game-day spread and accidentally grabbed the ghost pepper hot sauce. We called it the “Firehouse Cheesy Ranch Chicken & Rice Bake.” Tears were shed. Water was chugged. Still… not a crumb remained.

    P.S. If you adore creamy bowls, my Crockpot Creamy Tomato Basil Tortellini Soup is another weeknight win.

    We called it the “Firehouse Cheesy Ranch Chicken & Rice Bake.” Tears were shed. Water was chugged. Still… not a crumb remained.

    Storage, Reheating, and Troubleshooting

    Make-ahead, meal-prep, and freezer tips

    • Make-ahead: Assemble the Cheesy Ranch Chicken & Rice Bake up to the foil-covered step and refrigerate 24 hours. Add 5–10 minutes to bake time.
    • Leftovers: Refrigerate 3–4 days in an airtight container. Reheat covered at 325°F until warm, or microwave in 60-second bursts.
    • Freezer: Bake, cool fully, wrap well, and freeze up to 2 months. Thaw overnight; reheat covered at 325°F. Add fresh cheese on top to revive that cheddar ranch glow.

    FAQs and quick fixes

    • Rice underdone? Stir in 1/4–1/2 cup hot broth, cover with foil, and bake 10 more minutes.
    • Too salty? Use low-sodium broth and soup next time; serve with a dollop of plain yogurt to balance.
    • Too loose? Rest 10–15 minutes; rice continues to set. Over time, it transforms into that perfect creamy chicken and rice casserole texture.

    True Darleen story: I once forgot to rinse the rice and my ranch chicken casserole turned gluey. Still tasty, but lesson learned—rinsing keeps Cheesy Ranch Chicken & Rice Bake fabulously creamy, not clumpy.

    FAQs

    Can I use brown rice in Cheesy Ranch Chicken & Rice Bake?

    Yes, but increase broth to 3 1/2 cups and bake covered 60 minutes before adding cheese, then 15–20 minutes uncovered.

    Can I make this ranch chicken casserole without canned soup?

    Whisk 1 1/4 cups chicken broth with 2 Tbsp flour and 2 Tbsp butter; simmer to thicken. Stir in 1/4 cup milk, then proceed.

    What’s the best cheese for creamy chicken and rice?

    Sharp cheddar for flavor, Monterey Jack for melt. Pepper jack adds heat; Colby works in a pinch.

    Can I use rotisserie chicken?

    Yes. Stir 3 cups shredded rotisserie chicken in at the 45-minute mark, then proceed with cheese and final bake.

    Conclusion

    When you need a guaranteed win, Cheesy Ranch Chicken & Rice Bake delivers: creamy chicken and rice, savory ranch, and a melty cheddar crown. This ranch chicken casserole is weeknight-easy, pantry-friendly, and endlessly adaptable—Buffalo, bacon, or broccoli cheddar, take your pick. With simple steps and smart tips, your baked chicken and rice will emerge tender and saucy every time. I hope this becomes your family’s new comfort-food ritual, just like it did in my chaotic, happy kitchen. Try it at home and tag me—let’s see your Cheesy Ranch Chicken & Rice Bake glow!

  • Skillet Mac & Cheese with Tomato: 7 Creamy Secrets

    Skillet Mac & Cheese with Tomato: 7 Creamy Secrets

    Skillet Mac & Cheese with Tomato is my love letter to chaotic, delicious weeknights. Last Tuesday, I (Darleen Vance!) was juggling a Zoom call, a science project volcano, and a cat convinced the basil was a toy. I grabbed my trusty cast-iron, and Skillet Mac & Cheese with Tomato saved dinner in under 40 minutes. The creamy cheddar, juicy cherry tomatoes, and golden panko topping had everyone quiet by the second bite—proof that a one-pan pasta can end a stormy evening with cheesy calm.

    Skillet Mac & Cheese with Tomato: 7 Creamy Secrets

    Recipe

    Skillet Mac & Cheese with Tomato Basics

    What makes Skillet Mac & Cheese with Tomato unforgettable

    Skillet Mac & Cheese with Tomato is comfort food that tastes restaurant-level yet cooks like a dream in one pan. The secret is a silky roux-based sauce that hugs every curve of al dente macaroni, then a burst of juicy cherry tomatoes to brighten the creamy cheddar and mozzarella. The balance of tangy tomato and rich cheese makes this skillet pasta the kind of weeknight dinner you’ll put on repeat. A crackly panko-Parmesan topping adds crunch, while fresh basil keeps the flavors lively. Because it’s all done in a skillet, you can go from stovetop to a quick broil in minutes. This Skillet Mac & Cheese with Tomato is the one-pan mac your family will request relentlessly.

    The internet’s obsession with cast-iron mac is real, and for good reason: cast-iron holds heat like a pro and creates that craveable golden lid. Skillet Mac & Cheese with Tomato taps into the trend with a mix of sharp cheddar, a touch of mozzarella stretch, and ripe tomatoes that release just enough juice to season the sauce.

    It’s a riff that bridges creamy mac and fresh pasta al pomodoro classic, but a little fresher and lighter. True Darleen moment: I once dropped the panko tub, sent crumbs snowing across the kitchen, and still served the most loved Skillet Mac & Cheese with Tomato of the month. Moral of the story—messy kitchen, perfect dinner. This cheesy tomato macaroni is built to forgive and delight.

    One-Pan Tips & Flavor Boosts

    Cheese choices that level up Skillet Mac & Cheese with Tomato

    To make Skillet Mac & Cheese with Tomato truly next-level, grate your own cheese. Freshly grated sharp cheddar melts smoothly and avoids clumping, while a bit of low-moisture mozzarella adds that photogenic stretch. Parmesan intensifies savoriness and seasons the panko crust. If you love smokiness, a pinch of smoked paprika subtly underscores the roasted tomato vibe. Prefer a creamier body? Fold in a spoonful of sour cream or Greek yogurt at the end. This one-pan mac and cheese thrives on balance: creamy, tangy, and just a touch punchy from Dijon and pepper. With this approach, Skillet Mac & Cheese with Tomato becomes your guaranteed crowd-pleaser.

    Practical one-pan technique for weeknights

    Cook pasta to a firm al dente and reserve a bit of starchy water. Build a quick roux in the skillet, whisk in warmed milk and broth, then fold in tomatoes and cheeses off heat to prevent breaking. Add pasta and basil, then finish under the broiler for a crisp top. Dinner is done. Real-life chaos note from Darleen Vance: I once realized we were out of milk mid-stir. I swapped in half broth and half evaporated milk—Skillet Mac & Cheese with Tomato still turned out beautifully. The dish is flexible, forgiving, and fast, which is why Skillet Mac & Cheese with Tomato is my go-to on homework-heavy nights.

    Cast-Iron Variations & Swaps

    Ingredient spotlights for cast-iron mac

    Cast-iron loves texture. For Skillet Mac & Cheese with Tomato, choose pasta shapes with ridges or curves—cavatappi and elbows are perfect. Cherry or grape tomatoes hold their shape and pop sweetly in the sauce; in winter, canned fire-roasted tomatoes (drained) can step in and still deliver magic. Fresh basil finishes bright, but chopped parsley or a little thyme works too. If you love tomato-centric dinners, you’ll also swoon for my Baked Feta Pasta and cozy Creamy Tomato Basil Tortellini Soup. But tonight, Skillet Mac & Cheese with Tomato wins for speed and skillet drama.

    Want that Pinterest buzz? Try these: swap half the cheddar for Gruyère for a luxe note, or stir in a spoon of pesto with the basil for a herby kick. Roast the tomatoes first for concentrated sweetness. Gluten-free? Use your favorite GF pasta and panko. High-protein? Add a cup of cottage cheese blended smooth before the cheddar.

    Spice lovers can stir in Calabrian chile paste. For a farmer’s market vibe, fold in baby spinach or blistered corn. My most viral variation replaced mozzarella with burrata for tableside drama´´tear it over the hot Skillet Mac & Cheese with Tomato and broil for 30 seconds. That moment? Instant “save” and “share.” This is still Skillet Mac & Cheese with Tomato at heart creamy, tomato-bright, and irresistibly golden.

    Stovetop Timing, Storage, and Fixes

    Timing your Skillet Mac & Cheese with Tomato

    Here’s the rhythm: Boil pasta (8–9 minutes). While it cooks, sauté onion and garlic (4 minutes), whisk in flour and liquids (4 minutes), melt cheese off heat (1 minute), fold in pasta and basil (1 minute), then broil (1–2 minutes). Rest for 5 minutes to set. That’s the magic formula that keeps Skillet Mac & Cheese with Tomato creamy, cohesive, and weeknight-fast. The skillet-to-broiler finish gives that signature crunch without drying out the sauce.

    Storage, troubleshooting, and quick FAQs

    Storage: Cool, then refrigerate in an airtight container up to 4 days. Reheat gently on the stovetop with a splash of milk. Freeze up to 2 months (thaw overnight, reheat with extra liquid).

    Fixes: If the sauce thickens too much, thin with pasta water or milk. If cheese looks grainy, you likely overheated it—take off heat, whisk in 2 tablespoons of warm milk and a spoon of sour cream. Too tangy? Balance with a teaspoon of butter. Not enough tomato flavor? Add a few halved tomatoes to the hot surface and let them blister for 30 seconds.

    Darleen chaos alert: I’ve broiled a minute too long and nearly went full campfire. If your topping darkens fast, move the skillet to a lower rack and tent loosely with foil for a minute. The core of Skillet Mac & Cheese with Tomato should stay creamy, never dry.

    FAQs

    Can I make Skillet Mac & Cheese with Tomato without a broiler?

    Yes. Skip the panko or toast it separately in a pan with oil and Parmesan, then sprinkle over the finished mac.

    What tomatoes work best?

    Cherry or grape tomatoes hold their shape and add pops of sweetness. In off-season, use drained canned fire-roasted tomatoes.

    Can I use pre-shredded cheese?

    You can, but freshly grated melts smoother. Anti-caking agents in bagged cheese can make sauces grainy.

    How do I make it spicier?

    Add red pepper flakes, a squeeze of hot sauce, or a teaspoon of Calabrian chile paste to the sauce.

    Conclusion

    Skillet Mac & Cheese with Tomato is your weeknight ace: one pan, bold flavor, golden crunch, and a creamy center that holds. With a smart roux, bright cherry tomatoes, and a trio of cheeses, this skillet pasta delivers comfort and freshness in every bite. I’ve made this during science projects, soccer carpool, and a power outage (cast-iron to the rescue). When life gets chaotic, Skillet Mac & Cheese with Tomato tastes like a hug. Bookmark it next to my recipe archive and share it with someone who loves cheesy comfort. Try it at home and tag me let’s make Skillet Mac & Cheese with Tomato the star of your happiest table.

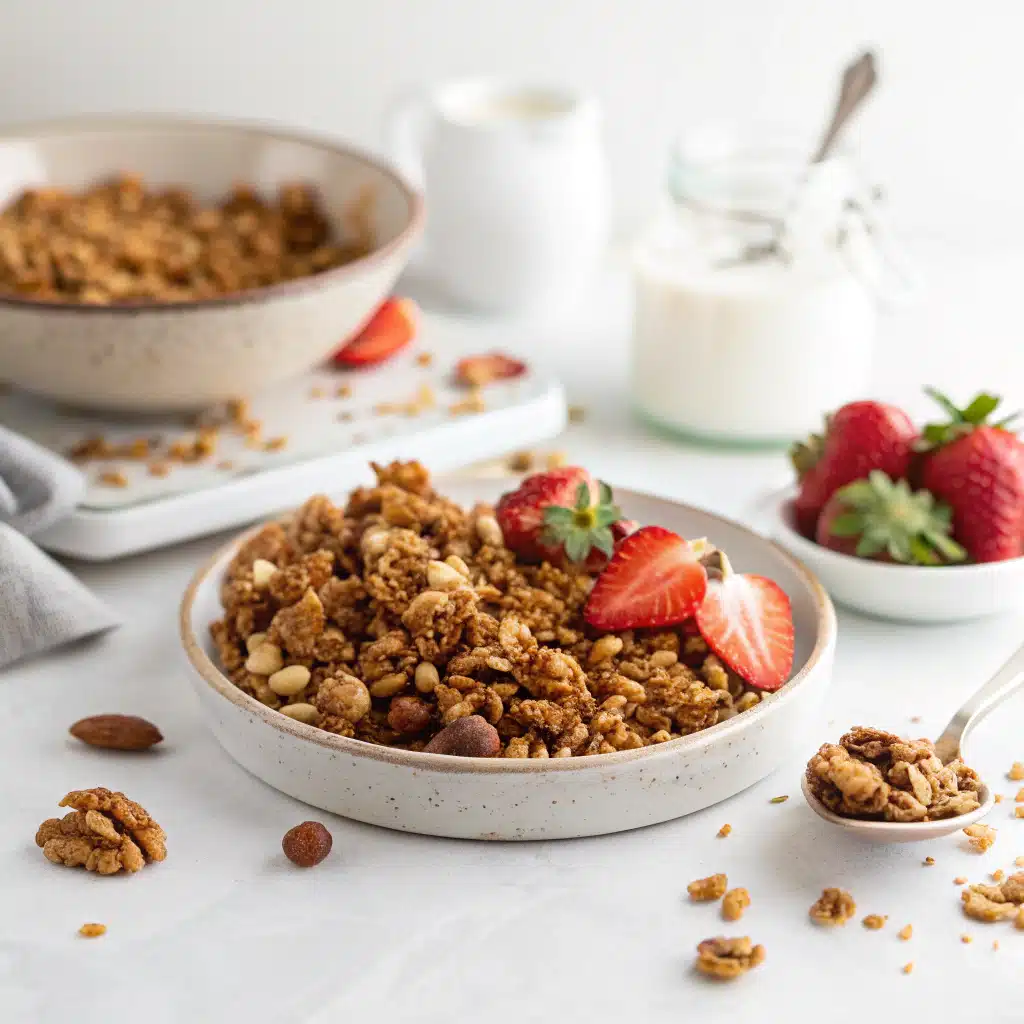
  • Crockpot Gluten-Free Granola: 7 Irresistible Crunch Secrets

    Crockpot Gluten-Free Granola: 7 Irresistible Crunch Secrets

    Crockpot Gluten-Free Granola is my breakfast love language. One rainy morning, I (Darleen Vance) tried to toast oats on the stovetop while packing lunches. The dog stole a banana, the timer didn’t go off, and boom—burnt bits. That’s when Crockpot Gluten-Free Granola saved my sanity. I toss it in, vent the lid, stir twice, and my kitchen still looks civilized. Crockpot Gluten-Free Granola makes big clusters with zero oven drama, and the house smells like a cozy coffee shop.

    Crockpot Gluten-Free Granola: 7 Irresistible Crunch Secrets

    Recipe

    Crockpot Gluten-Free Granola Basics: Flavor & Crunch

    Why Slow Cooker Granola Works

    Crockpot Gluten-Free Granola thrives in gentle, even heat. A slow cooker mimics low-oven roasting without hot spots, so your gluten free granola toasts steadily and builds those coveted crunchy clusters. The lid stays vented to release steam, which dries oats into shattering-crisp granola. That means Crockpot Gluten-Free Granola can be stirred a few times for uniform browning—but if massive clusters are your love language, stir less during the last 30 minutes. The cinnamon-maple aroma will drift through your kitchen like a bakery. And because this is Crockpot Gluten-Free Granola, you get breakfast meal prep without babysitting the oven or turning the house into a sauna.

    Big-cluster Crockpot Gluten-Free Granola is having a moment on Pinterest for a reason: it’s reliable, hands-off, and perfect for meal prep. Press the granola firmly into the crock before cooking, vent the lid, and resist stirring at the end for slab-like clusters. I once set a batch of Crockpot Gluten-Free Granola and ran out to grab school pickup; I came back to a golden, crackly pan that snapped into beautiful chunks. Bonus: this gluten-free breakfast is naturally dairy-free, budget-friendly, and endlessly customizable. If you want more comfort-food slow cooker wins, try my Crockpot Creamy Tomato Basil Tortellini Soup or cozy up with Crock-Pot Hot Chocolate after breakfast-for-dinner granola parfaits.

    True Darleen chaos: I once dropped the cinnamon lid straight into the pot. I scooped and kept going—Crockpot Gluten-Free Granola still turned out like a crunchy dream.

    Easy Crockpot Gluten-Free Granola Ingredients & Prep

    The Best Gluten-Free Oats and Mix-Ins

    For Crockpot Gluten-Free Granola, choose certified gluten-free rolled oats for structure and crunch. Instant oats get powdery; steel-cut oats stay too firm. Add nuts (pecans for buttery richness, almonds for snap), seeds (pumpkin and sunflower), and shredded coconut for toasty depth. Maple syrup and coconut sugar sweeten without overpowering, while cinnamon, ginger, and vanilla make Crockpot Gluten-Free Granola taste bakery-level. Coconut oil helps crisp and sets clusters as it cools. Keep dried fruit out until after cooking to avoid chewiness turning tough. The result? A balanced, gluten free granola with salty-sweet harmony and irresistible texture.

    Pro Tips for Extra Crunch

    Press Crockpot Gluten-Free Granola firmly into the slow cooker; compacting encourages clumps. Vent the lid with a chopstick to let moisture escape. Stir every 30–45 minutes until the final half hour—then stop to let clusters form. Add coconut near the end to prevent burning. Cool completely on a sheet pan; granola crisps as it cools, locking in those big clusters. For a lightly sweet, lower-sugar option, reduce coconut sugar and rely on maple’s caramel notes. This Crockpot Gluten-Free Granola loves add-ins like cocoa nibs or toasted hazelnuts, too. One more Darleen moment: I once forgot vanilla; a splash at the end during cooling revived the aroma like magic.

    Healthy Crockpot Gluten-Free Granola Variations

    Maple Pecan, Cocoa-Nut, and Berry Burst

    Turn your Crockpot Gluten-Free Granola into flavor flights. Maple Pecan: switch half the cinnamon for pumpkin pie spice and fold in chopped pecans and dried apples. Cocoa-Nut: add 2 tablespoons cacao powder to the wet mix and finish with coconut flakes and cocoa nibs. Berry Burst: keep spices classic and stir in freeze-dried strawberries and raspberries after cooling. Each version keeps the foundation of Crockpot Gluten-Free Granola—gluten free oats, warm spice, and slow cooker ease—while offering a new personality. My kids vote Cocoa-Nut every time; I vote Maple Pecan with yogurt and a drizzle of extra maple for a weekend brunch bowl.

    Pinterest-Favorite Swaps and Mix-Ins

    Pinterest loves creative Crockpot Gluten-Free Granola twists. Try tahini instead of coconut oil for nutty depth, or almond extract for bakery vibes. Add chia or flax seeds for extra fiber. For a lower-sugar, high-protein granola, fold in chopped toasted cashews and unsweetened coconut, then serve with Greek yogurt. Keeping it dairy-free? Use thick coconut yogurt and a glossy spoonful of almond butter. Crockpot Gluten-Free Granola also makes a stunning parfait bar: bowls of berries, honey, and nut butters with jars of granola. For savory-leaning mornings, I pair it with my Warm Apple Cinnamon Quinoa Bowl—cozy, nourishing, and totally gluten-free.

    Darleen chaos report: I once added dried cherries too early and they puffed then shriveled. Lesson learned—stir fruit after cooling so Crockpot Gluten-Free Granola stays perfectly chewy-crisp.

    Crockpot Gluten-Free Granola Storage, Fixes, FAQs

    How to Keep It Crispy

    Let Crockpot Gluten-Free Granola cool 100% before storing; any lingering steam softens clusters. Use an airtight jar with a tight lid and keep it at room temperature for up to 2 weeks. For ultra-crisp insurance, tuck a small square of parchment-topped silica packet from a seaweed snack (food-safe desiccant) into the jar, not touching the granola. To re-crisp, spread slightly soft Crockpot Gluten-Free Granola on a sheet pan and air out for 20 minutes, or toast 5 minutes in a 250°F oven. The slow cooker’s low heat creates crunch; the cool-down cements it.

    Troubleshooting and Quick Answers

    If your Crockpot Gluten-Free Granola feels soft after cooking, it likely needs more cooling, not more time. If it’s pale, extend cook time by 15–20 minutes with the lid vented and stir once. If it tastes too sweet, cut coconut sugar next batch; maple alone gives warm sweetness. If nuts burn, add them halfway through. For nut-free granola, use all seeds and add hemp hearts after cooling. When life gets messy—like the day my slow cooker was mysteriously set to WARM—Crockpot Gluten-Free Granola still delivers. I gave it 25 extra minutes and the crunch showed up like a champ.

    FAQs

    Can I make Crockpot Gluten-Free Granola vegan?

    Yes. This recipe is naturally dairy-free and egg-free. Use maple syrup and coconut oil as written, and skip honey. It’s a fully vegan, gluten free granola.

    How do I get bigger clusters in Crockpot Gluten-Free Granola?

    Press the mixture firmly into the cooker, vent the lid, stir less during the last 30 minutes, and let it cool completely. Don’t break it up until it’s cool.

    Can I use steel-cut oats for Crockpot Gluten-Free Granola?

    No. Steel-cut oats remain too firm. Use certified gluten-free rolled oats for the best texture and classic clusters.

    How long does Crockpot Gluten-Free Granola last?

    Store airtight at room temperature for up to 2 weeks, or freeze for up to 3 months. Thaw uncovered to keep the crunch.

    Conclusion

    Crockpot Gluten-Free Granola is the cozy, crunchy breakfast you’ll reach for all week. With certified gluten-free oats, warm spices, and maple sweetness, it’s a slow cooker granola that guarantees big-cluster magic without heating the oven. Use these tips for flawless clusters, try the Pinterest-favorite swaps, and build parfaits or snack jars for meal prep. I’m always amazed how Crockpot Gluten-Free Granola tastes bakery-fresh but takes so little effort—just a stir or two and a patient cool-down. From my real, sometimes chaotic kitchen to yours, you’ve got this. Make Crockpot Gluten-Free Granola today, tag me, and share your flavor twists so we can all crunch together!

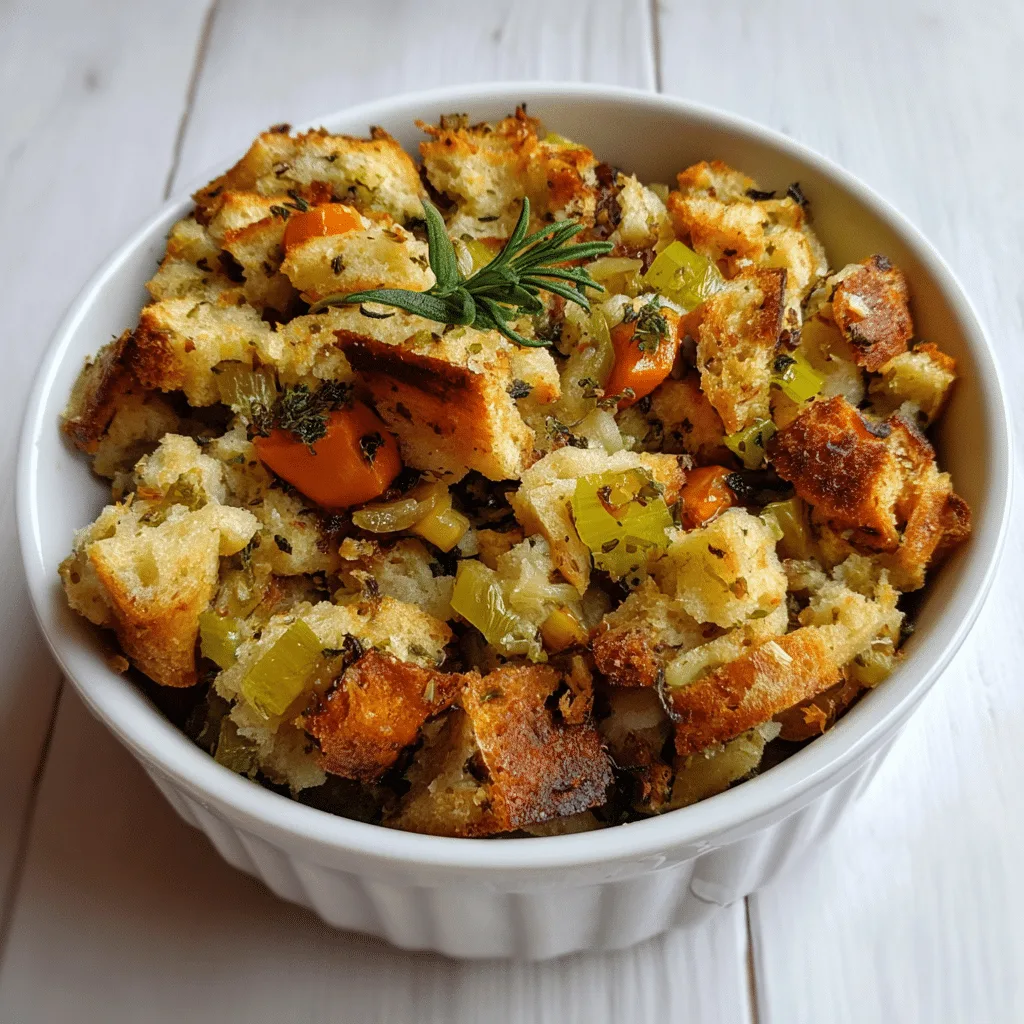
  • Crockpot Gluten-Free Stuffing: 7 Secrets to Crave-Worthy

    Crockpot Gluten-Free Stuffing: 7 Secrets to Crave-Worthy

    Crockpot Gluten-Free Stuffing is my holiday secret weapon. One Thanksgiving, I (Darleen Vance) had three burners going, the oven screaming, and the dog stealing a roll. Meanwhile, Crockpot Gluten-Free Stuffing just simmered away—no drama, just buttery, herby bliss. When the turkey decided to take its sweet time, the slow cooker kept this Crockpot Gluten-Free Stuffing warm and perfect. Dinner was saved, and I looked like a hero with absolutely zero extra stress.

    Crockpot Gluten-Free Stuffing: 7 Secrets to Crave-Worthy

    Recipe

    Crockpot Gluten-Free Stuffing Secrets

    Why the slow cooker makes GF stuffing better

    Crockpot Gluten-Free Stuffing thrives in gentle, even heat. Gluten-free bread dries out fast in the oven. The slow cooker seals in moisture, so Crockpot Gluten-Free Stuffing becomes tender inside with those coveted crispy edges along the sides. This slow cooker gluten-free stuffing method helps every cube soak up herb butter and broth, turning gluten free dressing into a comfort-packed star. If your oven is jammed with turkey and pies, Crockpot Gluten-Free Stuffing sits quietly on the counter doing its magic. It’s the ultimate make-ahead stuffing—set it, forget it, and win the holiday. The secret is moisture management, timing, and herb infusion.

    My holiday chaos turned hero moment

    I, Darleen Vance, once pulled a classic: I misread the turkey timing and lost an entire rack to pies. Crockpot Gluten-Free Stuffing stepped up. I whisked eggs with broth, poured over my GF stuffing, clicked the lid, and let it cruise. When my sister asked where the oven space came from, I said, “It didn’t.” Crockpot Gluten-Free Stuffing saved my menu, and the slow cooker kept it warm through seconds and thirds. Pro tip: push a few cubes against the Crockpot wall so you get those buttery, golden edges. It’s little details like this that make slow cooker gluten-free stuffing unforgettable.

    Slow Cooker Gluten-Free Stuffing Prep & Tips

    Choosing the best gluten-free bread

    For Crockpot Gluten-Free Stuffing, start with sturdy, slightly dense gluten-free bread. Slice into 3/4-inch cubes and dry overnight. If you’re in a rush, oven-dry at low heat. The goal is dry, not toasted. Dry cubes drink up broth and hold shape, keeping Crockpot Gluten-Free Stuffing plush, not mush. I love a mix of white and multigrain GF loaves for flavor. Add herbs like sage and thyme right to your sauté for aroma that infuses slow cooker gluten-free stuffing from the inside out. If you need dairy-free, swap butter for vegan butter or olive oil—your gluten free dressing will still be rich.

    Moisture math: the foolproof ratio

    Here’s my Darleen Vance no-stress formula: about 12 cups bread to 3–3 1/2 cups broth. Add more only if dry pockets remain. You want Crockpot Gluten-Free Stuffing very moist pre-cook—GF bread soaks up more than wheat bread. Eggs give gentle binding, but they’re optional. If skipping eggs, add a splash more broth plus a pat of butter right on top. Stir halfway for softer texture or leave untouched for crisp edges. Crockpot Gluten-Free Stuffing rewards patience, and slow, steady heat makes this make-ahead stuffing silky and savory. For mains to pair with, try my Easy Slow Cooker French Onion Roast or cozy Crockpot Creamy Tomato Basil Tortellini Soup.

    Flavor Boosts & Pinterest-Worthy Swaps

    Herb-forward, savory, and perfectly balanced

    Crockpot Gluten-Free Stuffing sings with classic poultry seasoning, sage, thyme, and a whisper of rosemary. A quick sauté blooms the spices before they hit the bowl. Apples add gentle sweetness; mushrooms bring savory depth; parsley lifts it all. Repeat after me: season in layers. Season the sauté, season the broth, then taste after cooking. This layered approach turns Crockpot Gluten-Free Stuffing into the slow cooker gluten-free stuffing of your dreams—comforting, cohesive, melt-in-your-mouth. For a bold twist, brown your butter before sautéing—the nutty notes are unreal in gluten free dressing and make the whole kitchen smell like a holiday bakery.

    Pinterest-ready swaps you’ll love

    • Apple-cranberry: sweet-tart pops brighten Crockpot Gluten-Free Stuffing.
    • Sausage and sage: brown GF sausage and fold in for a hearty gluten free dressing.
    • Mushroom-thyme umami: add a splash of tamari (GF) for extra depth.
    • Dairy-free dream: olive oil + veggie broth keeps flavor big and texture plush.
    • Nut crunch: toasted pecans or walnuts add craveable texture.

    Once, I (Darleen Vance) tried a cranberry-pecan combo and my guests begged for the “Pinterest stuffing.” Crockpot Gluten-Free Stuffing is endlessly customizable—make-ahead stuffing with Instagram-worthy edges and a fluffy center. Pair it with my party favorite Crockpot Honey Lime Chicken Tacos for a chill crowd menu.

    Crockpot Gluten-Free Stuffing: 7 Secrets to Crave-Worthy
    Crockpot Gluten-Free Stuffing: 7 Secrets to Crave-Worthy

    Make-Ahead, Storage, Troubleshooting

    Make-ahead magic

    Assemble Crockpot Gluten-Free Stuffing up to 24 hours ahead: cube and dry bread, sauté aromatics, then refrigerate components separately. A few hours before serving, combine, moisten, and load the slow cooker. Crockpot Gluten-Free Stuffing also reheats like a champ. To refresh leftovers, add a splash of broth and a tiny pat of butter; warm on Low until steamy. This slow cooker gluten-free stuffing strategy frees your oven and your brain.

    Storage, fixes, and FAQs

    • Storage: Refrigerate Crockpot Gluten-Free Stuffing up to 4 days; freeze up to 2 months.
    • Reheat: From fridge, 300°F oven 15–20 minutes (covered), then uncover to crisp. Or use the slow cooker Warm/Low with a splash of broth.
    • Too dry? Stir in warm broth 1/4 cup at a time and cover 10 minutes.
    • Too wet? Crack the lid for 20–30 minutes or gently fold in a handful of dried cubes.
    • Not binding? Add one beaten egg or 1 tablespoon melted butter and fold gently; heat 15 minutes.

    Darleen Vance tip from a real-life oops: I once used fresh—not dried—bread. Mush city. I salvaged the Crockpot Gluten-Free Stuffing by cracking the lid and letting steam escape while the edges crisped. Don’t panic—slow cookers are forgiving.

    FAQs

    Can I skip the eggs?

    Yes. Eggs add gentle binding, but Crockpot Gluten-Free Stuffing works without them. Add 2–3 extra tablespoons broth and a small pat of butter for plush texture.

    How do I get crispy edges in the slow cooker?

    Pack the stuffing slightly higher against the Crockpot walls and avoid stirring. Cook on Low and don’t lift the lid; edges will caramelize gently.

    What’s the best gluten-free bread for stuffing?

    Choose sturdy GF loaves (white or multigrain). Dry the cubes thoroughly so Crockpot Gluten-Free Stuffing stays tender, not mushy.

    Can I make this dairy-free?

    Absolutely. Use olive oil or dairy-free butter and vegetable broth. The slow cooker method keeps gluten free dressing rich and moist without dairy.

    Conclusion

    When the oven’s overflowing and timers are dueling, Crockpot Gluten-Free Stuffing delivers calm, cozy, and consistently delicious results. The slow cooker seals in moisture so every bite tastes like the holidays—savory herbs, buttery richness, and just the right texture. Because gluten-free bread behaves differently, the set-it-and-forget-it heat turns this into the easiest make-ahead stuffing on your table. From classic to Pinterest-pretty swaps, Crockpot Gluten-Free Stuffing adapts to your vibe and menu, pairing with everything from roast to soup night. Try it at home and tag me Darleen Vance so I can cheer on your slow cooker gluten-free stuffing success. Crockpot Gluten-Free Stuffing is your new holiday tradition. Ready to press “Low” and relax?

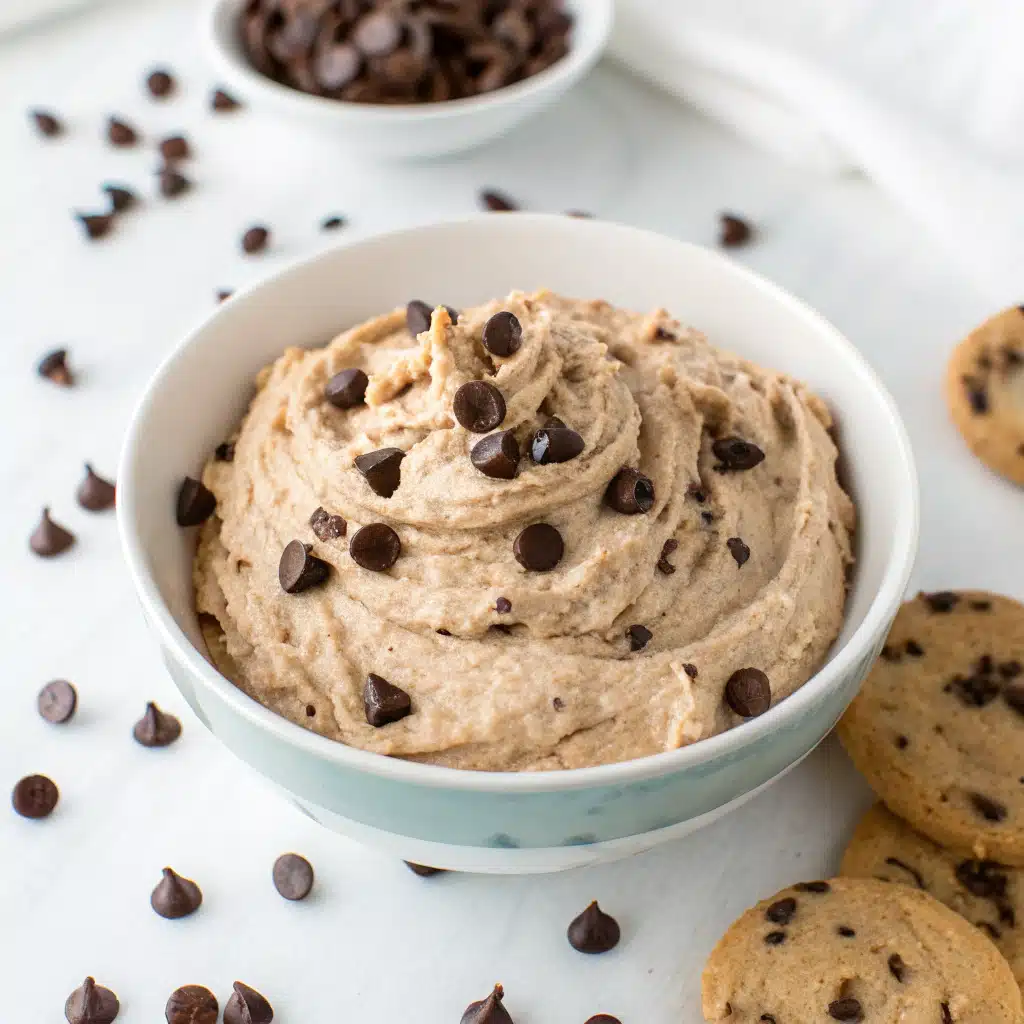
  • Whipped Chocolate Chip Cookie Dough Dip: 7-Minute Sensation

    Whipped Chocolate Chip Cookie Dough Dip: 7-Minute Sensation

    Whipped Chocolate Chip Cookie Dough Dip is my secret party trick when the doorbell rings early and my mixer cord is tangled in a drawer. The day I perfected this, my twins were “helping” by power-tasting the chocolate chips and the dog stole the graham crackers. Still, Whipped Chocolate Chip Cookie Dough Dip saved the snack board. It’s lush, fluffy, safe-to-eat cookie dough you can scoop with fruit, pretzels, or spoons (no judgment). I’m sharing the exact method, the fastest swaps, and foolproof tips so you can make it in minutes—even in real-life kitchen chaos.

    Chocolate Chip Cookie Dough Dip

    Recipe

    Structured JSON-LD Schema

    What makes this whipped cookie dough dip irresistible

    Whipped Chocolate Chip Cookie Dough Dip hits every joy button: creamy, light, nostalgic, and ready fast. It blends tangy cream cheese with brown sugar and vanilla for that classic cookie dough flavor, then whips in airy cream so the texture feels like clouds. Mini chocolate chips mean perfect bite distribution. Because it’s a no-bake dessert dip, you get edible cookie dough vibes with zero oven time. The texture stays fluffy, scoopable, and party-proof. I designed this Whipped Chocolate Chip Cookie Dough Dip to deliver big cookie dough flavor while staying safe and dippable for snack boards, birthdays, and game-day spreads.

    The trending dessert board star you can make in minutes

    Social feeds love a dip that looks luxe but takes under 20 minutes. This Whipped Chocolate Chip Cookie Dough Dip is camera-ready: swirl it high, sprinkle extra chips, and finish with flaky salt so every photo shouts “scoop me.” Pair it with crisp apples, strawberries, pretzels, and graham crackers for a sweet-salty balance. I once plopped it center stage between bowls of crackers and fruit while reheating cocoa—my crew slurped Crock-Pot Hot Chocolate and demolished the dip before I could snap a picture. Kitchen chaos aside, the dip stole the show and the video went viral in my family chat.

    Ingredients that make it safe and truly edible

    The backbone of this fluffy cookie dough dip is cream cheese and butter for luscious body, brown sugar for that cookie-dough chew vibe, and powdered sugar for smooth sweetness. Heat-treated flour keeps it safe to eat—just bake the flour briefly to 165°F before mixing. Vanilla, salt, and mini chocolate chips lock in the signature chocolate chip cookie taste. Then we whip cold heavy cream to soft peaks and fold it in to create a Whipped Chocolate Chip Cookie Dough Dip that’s ultra-light and not cloying. It’s a no-bake dessert dip that tastes like classic dough but scoops like a dream.

    Pro tips for a cloud-like, whipped texture

    Chill your bowl for whipping cream; cold tools produce stable soft peaks. Ensure the heat-treated flour cools completely so it doesn’t deflate the Whipped Chocolate Chip Cookie Dough Dip. Beat cream cheese and butter until satiny before adding sugars—no lumps! Use mini chips for even distribution and that perfect scoop shot. If you prefer a lighter sweetness, reduce powdered sugar by two tablespoons, then add a splash of milk to keep it dippable. During a rainy Tuesday bake-a-thon, I learned the hard way: warm flour turned my dip streaky. Fifteen minutes later, I re-whipped, folded gently, and the cookie dough dip bounced back, photo-ready.

    Serve it on a dessert snack board

    Build a dessert board around Whipped Chocolate Chip Cookie Dough Dip for guaranteed applause. Think pretzel twists, graham crackers, vanilla wafers, apple slices, strawberries, and even waffle cone shards for crunch. Add a second color moment with berries and a savory nook—like a small bowl of nuts or cheese—to balance sweetness. For seasonal parties, surround the cookie dough dip with ginger snaps or cinnamon pita chips. When I hosted a last-minute movie night, my kids set the board while I piped a swirl on top. Someone knocked the bowl, we caught it mid-air, and still served it with a flourish—no-bake hero status achieved.

    Pinterest-famous swaps and flavor variations

    Turn this Whipped Chocolate Chip Cookie Dough Dip into new flavors fast. Stir in crushed Oreos for cookies-and-cream, swap chips for chopped peanut butter cups, or add mini M&Ms for a party sprinkle. For fall tables, swirl in 2 tablespoons pumpkin puree plus pumpkin pie spice and serve alongside my savory seasonal favorite, Pumpkin Hummus with Pita Chips for a sweet-meets-savory duo. Gluten-free? Use heat-treated gluten-free flour. Dairy-free? Sub vegan cream cheese, plant butter, and coconut whip. Each variation keeps that whipped, cloudlike cookie dough dip texture folks crave, while the chocolate chip base ensures classic comfort.

    Make-ahead timing for parties

    Make Whipped Chocolate Chip Cookie Dough Dip up to 24 hours in advance. Store covered in the fridge, then re-whip for 10–15 seconds or fold once or twice to restore the pillowy texture. If serving outdoors, nestle the bowl in a larger bowl filled with ice to keep the no-bake dessert dip cool. I’ve hauled this to potlucks between sheet pans and soup thermoses (try my cozy Crockpot Creamy Tomato Basil Tortellini Soup next time), and the cookie dough dip always emerges intact—fluffy, glossy, and scoop-ready.

    Storage, troubleshooting, and quick fixes

    Refrigerate Whipped Chocolate Chip Cookie Dough Dip up to 4 days; freeze up to 1 month, then thaw overnight and re-whip gently. Too thick? Stir in 1–2 teaspoons milk. Too soft? Chill 15 minutes. Grainy? Keep whipping until sugars dissolve, or let it rest 5 minutes and beat again. Chips sinking? Fold in an extra tablespoon of flour. If the dip turns heavy, whip 1/4 cup cold cream to soft peaks and fold in for lift. In a power outage once, I whisked by hand—my arms were noodles, but the cookie dough dip still whipped into a smooth, party-perfect bowl.

    FAQs

    Is Whipped Chocolate Chip Cookie Dough Dip safe to eat?

    Yes. Heat-treating the flour makes it safe, and there are no raw eggs. Always let the flour cool before mixing.

    Can I make this cookie dough dip without cream cheese?

    Use mascarpone for similar richness or whipped ricotta for a lighter vibe. Keep the whipping step to maintain the fluffy texture.

    How do I keep the dip fluffy on a party table?

    Chill before serving, swirl into a cool bowl, and refresh with a quick fold if it sits out. Nest in an ice bowl for longer events.

    What should I serve with Whipped Chocolate Chip Cookie Dough Dip?

    Pretzels, graham crackers, vanilla wafers, apple slices, strawberries, waffle cone pieces, and rice cakes all pair beautifully.

    Conclusion

    There’s a reason Whipped Chocolate Chip Cookie Dough Dip sweeps parties: it’s luscious, no-bake, and wildly scoopable. The heat-treated flour keeps it safe, the cream-cheese-and-cream base makes it cloud-light, and the mini chips deliver that nostalgic, chocolatey crunch. Whether you’re building a dessert board, feeding a crowd, or sneaking a spoonful at midnight, this cookie dough dip brings instant joy. Make it once and watch it become your fastest signature treat—then explore more quick wins like my 30-minute favorite, Baked Feta Pasta. Try Whipped Chocolate Chip Cookie Dough Dip at home and tag me so I can cheer your dip game on!