Blog

  • Eggnog Chocolate Truffles: 10 Genius, Creamy Tips

    Eggnog Chocolate Truffles: 10 Genius, Creamy Tips

    Eggnog Chocolate Truffles are my holiday mic drop. Last December, I set a bowl of warm eggnog next to a mountain of chocolate and my mixer promptly walked off the counter like a mischievous elf. While I mopped eggnog off the cabinets, my kids rolled the first batch of Eggnog Chocolate Truffles and dusted them with nutmeg “snow.” We delivered boxes to neighbors with cocoa and carols, and I’ve been begged for the recipe ever since. It’s creamy, cozy, no-bake bliss—holiday magic without the stress.

    Eggnog Chocolate Truffles: 10 Genius, Creamy Tips

    Recipe

    Eggnog Chocolate Truffles Guide

    Why these Eggnog Chocolate Truffles always impress

    Eggnog Chocolate Truffles deliver creamy, spiced ganache wrapped in velvety chocolate—the kind of holiday truffle that tastes like a cozy Christmas sweater. The secret is balance: rich white chocolate blended with real eggnog and a whisper of nutmeg and cinnamon. That eggnog ganache sets into a plush, scoopable filling that rolls like a dream. Dip in dark chocolate for contrast, or roll in cocoa, crushed gingersnaps, or coconut for a festive finish. Because these chocolate truffles are no-bake, they’re fast, forgiving, and indulgent without fuss. If you love edible gifts, this truffle recipe is pantry-friendly, travels well, and looks bakery-beautiful with minimal effort.

    When I first shared these Eggnog Chocolate Truffles with friends, I paired them with mugs of slow-cooker hot chocolate and watched them vanish. The creamy center, the dark chocolate snap, the nutmeg sparkle—people went back for seconds, then thirds. In true Darleen fashion, I dropped a spoon into the dipping bowl mid-roll and splattered chocolate on my holiday sweater. Worth it.

    Eggnog Chocolate Truffles shine on dessert boards next to salty pretzels, sugar cookie stars, and clementines. The internet is swooning over no-bake Christmas desserts, and these holiday truffles fit the trend: small-bite, giftable, freezer-friendly. Garnish with gold sprinkles for a Pinterest-ready look, or drizzle with white chocolate stripes for that artisan pop. Mix a splash of rum extract for classic eggnog flavor (or keep it family-friendly). The best part? You can make a double batch in under an hour of hands-on time and keep your oven free for apple cider donut muffins. Cozy, clever, and totally crowd-pleasing.

    Easy Eggnog Truffles (No-Bake)

    The heart of the recipe: spiced eggnog ganache

    At the core of these Eggnog Chocolate Truffles is a silky eggnog ganache. White chocolate melts into the eggnog and butter, capturing the festive flavors we crave—nutmeg, cinnamon, vanilla, and just enough salt to make everything taste bolder. Because the filling is essentially a no-bake truffle ganache, you avoid the guesswork of candy thermometers. For reliable results, use bar chocolate over chips; bars melt smoother and set creamier, giving your chocolate truffles that indulgent, luxurious bite.

    My real-kitchen chaos tip: clear fridge space before you start. I once balanced a tray of truffles on top of the pickles while juggling a saucepan, and the parchment slid off like a magic trick. A quick chill is vital for easy rolling and dipping, but prep that space first and you’ll move like a candy pro.

    Pro tips for creamy, easy success

    • Use cold eggnog but hot enough to steam when heating. Don’t boil—overheated dairy can split.
    • Chop chocolate finely for even melting. If streaky, warm the bowl over a few inches of hot water and whisk gently.
    • For ultra-smooth coating, stir in 1–2 teaspoons cocoa butter or coconut oil to the melted chocolate.
    • Roll truffles with cool hands. Lightly dust your palms with cocoa to reduce sticking.
    • Decorate while the coating is wet: nutmeg dust, crushed cookies, or sprinkles make holiday truffles sparkle.

    Eggnog Chocolate Truffles are forgiving, festive, and easy. They’re also a perfect make-ahead Christmas dessert to pair with board snacks or even a bowl of cookie dough dip for a sweet soirée.

    Chocolate Eggnog Truffles Variations

    Flavor twists for every crowd

    Elevate Eggnog Chocolate Truffles with playful twists while keeping that cozy eggnog ganache center:

    • Mocha-Nog: Add 1 teaspoon espresso powder to the ganache for café depth.
    • Maple Spice: Swap vanilla for maple extract and dust with cinnamon sugar.
    • Ginger Snap: Mix 2 tablespoons finely crushed gingersnaps into the filling for spice and crunch.
    • Peppermint Bark: Stir 1/4 teaspoon peppermint extract into the coating and top with crushed candy canes.
    • Nut Lovers: Press a toasted pecan half on top before the chocolate sets.
    • Adults-Only: Replace vanilla with 1 tablespoon bourbon or spiced rum, or use rum extract to keep it alcohol-free.

    These chocolate truffles adapt beautifully for gluten-free gifting by choosing gluten-free cookie coatings and verified GF chocolate. The balance of creamy filling and snappy shell makes every variation feel like a decadent confectioner’s treat.

    Anecdote time: I once tried a peppermint drizzle while my kids ran a sprinkle “factory line.” Half the sprinkles missed, but every plate looked Pinterest-fabulous—proof that Eggnog Chocolate Truffles are basically decoration-proof and holiday-board ready.

    Pinterest-ready swaps and decor

    • Two-Tone Dip: Dip once in dark chocolate, chill 5 minutes, then drizzle with white chocolate zigzags.
    • Cocoa-Dusted: Skip the dip and roll chilled truffles in Dutch cocoa for a classic French truffle vibe.
    • Snowball Look: Roll in fine unsweetened coconut and finish with a nutmeg sprinkle.
    • Metallic Moment: Add gold sanding sugar or edible glitter for festive sparkle.

    For Instagram-worthy Eggnog Chocolate Truffles, set them in mini liners, cluster by color, and alternate textures—some drizzled, some dusted, some coated in cookie crumbs.

    Make-Ahead, Storage, and Troubleshooting

    Step-by-step troubleshooting for Eggnog Chocolate Truffles

    • Ganache too runny: Chill longer. If still soft, whisk in 1–2 tablespoons more melted white chocolate.
    • Ganache too firm: Let stand at room temp 10–15 minutes, then re-roll.
    • Chocolate coating streaky or thick: Rewarm gently and stir in 1 teaspoon coconut oil. Ensure your bowl is completely dry.
    • Cracking shells: Centers were too cold or coating too hot. Let centers sit 5 minutes before dipping, and cool the coating slightly.
    • Bloom (gray film): Cosmetic only. Store away from temperature swings and moisture.

    Kitchen chaos note: I once stored truffles near the freezer vent; condensation kissed every shell. A quick re-dip saved them—and the “double coat” praise kept rolling in. Eggnog Chocolate Truffles are resilient, which is why they’re my go-to Christmas dessert for gifting and parties.

    Storage, freezing, and FAQs overview

    • Fridge: Store in an airtight container up to 1 week.
    • Freezer: Freeze on a tray, then bag for up to 2 months. Thaw in the refrigerator overnight to prevent condensation.
    • Transport: Nestle in mini paper cups in a cookie tin for edible gifts.
    • Serving: Best slightly chilled or at cool room temperature for the creamiest bite.

    Pair your Eggnog Chocolate Truffles with creamy sips or set them beside savory bites. Keep the holiday oven free for mains, and let these no-bake chocolate truffles carry the dessert table.

    FAQs

    Can I make Eggnog Chocolate Truffles without alcohol?

    Yes. This recipe is alcohol-free as written. If you want classic “nog” flavor, add 1/4–1/2 teaspoon rum extract instead of spirits.

    What chocolate is best for the coating?

    Use good-quality dark or semisweet bar chocolate for a smooth shell. Candy melts work too and are very beginner-friendly.

    How do I fix grainy or split ganache?

    Warm the bowl over a pot of gently steaming water and whisk slowly. If needed, add 1–2 teaspoons warm eggnog to bring it back together.

    Can I double the recipe for gifting?

    Absolutely. Work in batches: chill half the ganache while rolling the first half, and keep dipped truffles rotating onto fresh parchment.

    Conclusion

    Eggnog Chocolate Truffles are the festive, no-bake chocolate truffles your holiday dessert table deserves—creamy eggnog ganache, cozy nutmeg spice, and a glossy shell that looks boutique but takes minutes. Whether you dip, dust, or drizzle, these holiday truffles deliver a luxurious bite and effortless elegance. I hope this truffle recipe brings as much cheer to your kitchen as it does to mine. Try this batch at home, box a few as edible gifts, and tag me so I can swoon over your creations. When Eggnog Chocolate Truffles are on the table, every night feels like a celebration.
  • Holiday Gingerbread Cupcakes: 7 Cozy, Irresistible Tricks

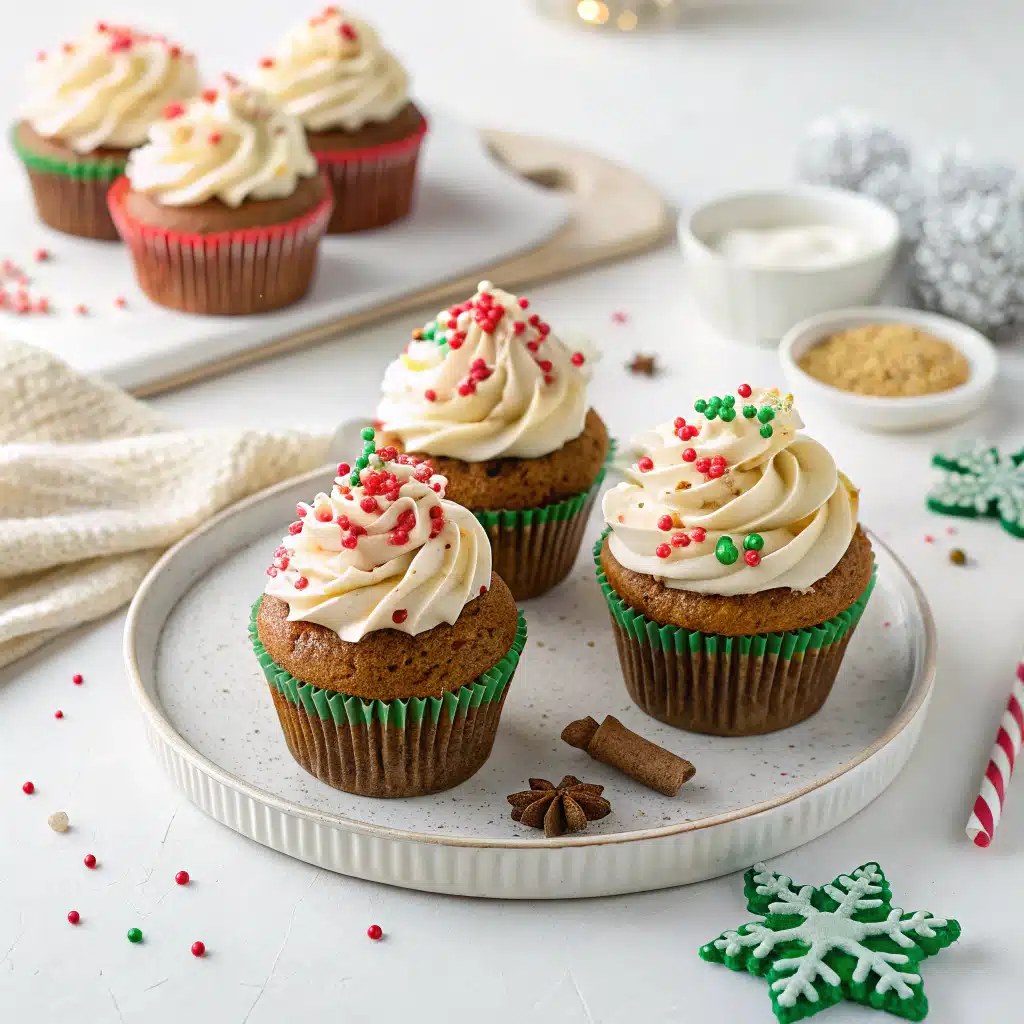
    Holiday Gingerbread Cupcakes: 7 Cozy, Irresistible Tricks

    Holiday Gingerbread Cupcakes are my festive go-to when the kitchen turns into lovable chaos. Last year, I, Darleen Vance, whisked the batter while my twins decorated the dog with sprinkles, the mixer walked off the counter, and I still managed a dozen perfect Holiday Gingerbread Cupcakes. The molasses perfume in the air, the creamy swirl of frosting—pure December magic and plenty of laughter. If you love warm spices and crave a cozy bake to share, this story—and recipe—will be your sweetest win of the season.

    Try my Apple Cider Donut Muffins for a fall-to-winter brunch treat, or sip a mug of Crock-Pot Hot Chocolate while you frost.

    Holiday Gingerbread Cupcakes: 7 Cozy, Irresistible Tricks

    Recipe

    Holiday Gingerbread Cupcakes Flavor Secrets

    Spice blend that makes them sing

    When you crave a cupcake that tastes like a hug in a baking liner, Holiday Gingerbread Cupcakes are it. The backbone is a trio of cozy spices—ginger, cinnamon, and cloves—layered with nutmeg for balance. Molasses creates that classic gingerbread depth and keeps Holiday Gingerbread Cupcakes tender. Brown sugar adds a caramel note, and a touch of sour cream helps the crumb stay plush for days. With each bite, these Holiday Gingerbread Cupcakes deliver bakery-style warmth that plays beautifully with tangy cream cheese frosting. If you’re hunting for festive cupcakes that stand tall on a dessert tray, Holiday Gingerbread Cupcakes hit every nostalgic note and make your kitchen smell like the holidays.

    On Pinterest, spiced cupcakes and molasses bakes are surging—and Holiday Gingerbread Cupcakes sit right in the sweet spot. If you’re low on flour, you can swap a few tablespoons for finely ground almond flour for a delicate crumb. No sour cream? Greek yogurt works. For a deeper ginger kick, add candied ginger bits to your gingerbread cupcakes batter. From weeknight parties to cookie exchanges, Holiday Gingerbread Cupcakes feel special without extra fuss. Real-life chaos alert from me, Darleen Vance: I once knocked over the cinnamon mid-whisk. I coughed, laughed, and kept going—because the promise of warm, spiced Holiday Gingerbread Cupcakes was worth the mini snowstorm on my counter.

    How to Make Holiday Gingerbread Cupcakes Like a Pro

    Mixing method for a fluffy crumb

    To nail Holiday Gingerbread Cupcakes, start by whisking dry ingredients so the baking powder and soda are evenly dispersed. Cream butter and brown sugar until light—this traps air and sets up a tender cupcake. Add molasses and beat until glossy. Alternate dry ingredients with milk-sour cream to keep gluten development in check. Overmixing is the enemy; stir just until combined, and your Holiday Gingerbread Cupcakes will bake up tall and soft. Fill liners three-quarters full for rounded tops and bake until a toothpick comes out clean. Cool fully before frosting—warm cupcakes melt buttercream and cream cheese frosting alike, and we want those Holiday Gingerbread Cupcakes looking picture-perfect.

    Practical tips and time-savers

    Room-temperature eggs blend better and give Holiday Gingerbread Cupcakes more lift. Sift powdered sugar for a lump-free frosting. If you need to bake ahead, freeze unfrosted spiced cupcakes, then thaw and pipe. My tip as Darleen Vance: pre-measure spices into a small bowl; it saves you from opening six jars mid-chaos. One December, I realized mid-bake I’d forgotten liners—so I greased the pan and dusted with flour. The Holiday Gingerbread Cupcakes still released beautifully and tasted divine. For holiday brunch, pair them with Cinnamon Roll French Toast Bites to make your table impossibly festive.

    Frosting and Decorating Holiday Gingerbread Cupcakes

    Silky cream cheese frosting and piping

    Classic cream cheese frosting is the perfect counterpoint for Holiday Gingerbread Cupcakes. Beat cream cheese and butter until fully smooth before adding sugar; this prevents tiny lumps and gives a plush, pipeable finish. A touch of vanilla and a pinch of salt amplify the warm spices in your Holiday Gingerbread Cupcakes. For a bakery look, use a large open star tip and swirl in tall peaks. If you love a café vibe, dust with cinnamon or cocoa. The tangy frosting meets the molasses base of Holiday Gingerbread Cupcakes like a duet—cozy, creamy, and balanced. Even spoon-swirlers get beautiful texture on these festive cupcakes.

    Pinterest-favorite variations and swaps

    Trending twists for Holiday Gingerbread Cupcakes include maple cream cheese frosting (replace some powdered sugar with maple syrup and add extra sugar to balance), espresso-spiked frosting, or a caramel drizzle. Add orange zest to the batter for citrusy lift or fold in mini chocolate chips for an indulgent spin on gingerbread cupcakes. For a dairy-light version, use oil instead of part of the butter and opt for a whipped mascarpone topping. I, Darleen Vance, once piped these while a playlist looped “Jingle Bell Rock,” the bag slipped, and frosting splattered the cabinets—still worth it. These Holiday Gingerbread Cupcakes invite creativity, look stunning on platters, and are guaranteed to vanish first.

    Make-Ahead, Storage, and Fixes for Holiday Gingerbread Cupcakes

    Keep them moist and party-ready

    Store unfrosted Holiday Gingerbread Cupcakes in an airtight container at room temperature for 2 days or freeze up to 2 months. Frosted cupcakes keep in the fridge for 3 days; bring to room temp before serving so the cream cheese frosting softens. For transport, chill the frosted Holiday Gingerbread Cupcakes until set, then box them in a snug carrier.

    If your spiced cupcakes dome too high, reduce oven temp by 10°F; if they sink, they may be underbaked or overmixed. Dry cupcakes? Add a tablespoon of oil to the batter next time or brush cooled Holiday Gingerbread Cupcakes with a quick orange-syrup soak. Kitchen reality from Darleen Vance: one batch cooled on a window ledge, the dog sniffed, and my family ate the rest—still a successful bake night.

    Storage, troubleshooting, and quick FAQs

    Freeze unfrosted layers for stress-free hosting. If frosting feels runny, chill for 10 minutes and add a spoonful of powdered sugar. If frosting is too stiff, beat in a teaspoon of cream. Slight cracks on top are normal for gingerbread cupcakes and disappear under frosting. These Holiday Gingerbread Cupcakes are resilient, forgiving, and celebration-ready.

    FAQs

    Can I make Holiday Gingerbread Cupcakes gluten-free?

    Yes, use a 1:1 gluten-free baking flour with xanthan gum. Check moisture and add 1–2 teaspoons milk if the batter seems thick.

    Can I bake Holiday Gingerbread Cupcakes ahead?

    Absolutely. Freeze unfrosted cupcakes up to 2 months, thaw at room temperature, then frost the day you serve.

    What molasses should I use for Holiday Gingerbread Cupcakes?

    Use unsulphured molasses (not blackstrap). It’s smoother and sweeter, perfect for classic gingerbread flavor.

    How do I get bakery-style frosting swirls on Holiday Gingerbread Cupcakes?

    Use a large open star tip, hold the bag perpendicular, and pipe a tight spiral from the center out and up in one motion.

    Conclusion

    Warm spices, tender crumb, and plush frosting make Holiday Gingerbread Cupcakes the small-but-mighty star of your dessert table. With molasses depth, cinnamon heat, and tangy cream cheese, these festive cupcakes embody cozy winter baking. Whether for a cookie swap, classroom party, or quiet night by the tree, Holiday Gingerbread Cupcakes deliver comfort in every swirl. I’m Darleen Vance, cheering you on through spills and spice clouds—because the joy is baked into the process. Try this recipe at home, share a batch, and tag me when your Holiday Gingerbread Cupcakes disappear in minutes!

  • Pecan Pie Dip with Cinnamon Chips: 7 Irresistible Tricks

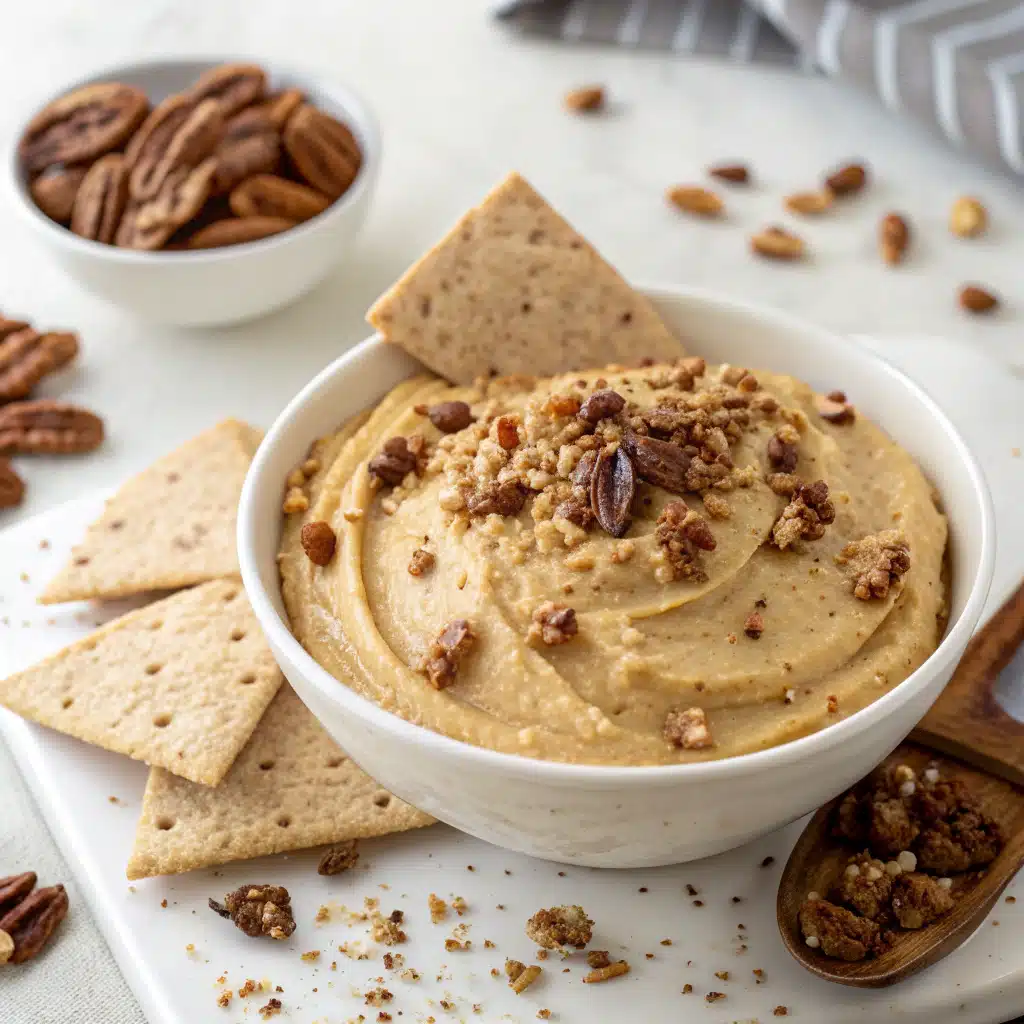
    Pecan Pie Dip with Cinnamon Chips: 7 Irresistible Tricks

    Pecan Pie Dip with Cinnamon Chips is my not-so-secret party saver. One Thanksgiving, my oven rebelled, my timer sang off-key, and my toddler hid the nutmeg. Pecan Pie Dip with Cinnamon Chips still stole the show. I whisked butter and brown sugar while fielding a call from my sister about extra guests, folded in toasty pecans, and blitzed out cinnamon-sugar tortilla chips between kitchen chaos. The creamy, caramel-pecan swirl met warm, crispy chips, and the entire bowl vanished before the turkey hit the table. This is the cozy, creamy dessert dip that rescues last-minute hosts and enchants pecan pie lovers—no pie plate required.

    Pecan Pie Dip with Cinnamon Chips: 7 Irresistible Tricks

    Recipe


    The Ultimate Pecan Pie Dip with Cinnamon Chips Guide

    Why this dessert dip beats traditional pie

    Pecan Pie Dip with Cinnamon Chips tastes like the gooey center of your favorite pecan pie meeting the coziest cream cheese dip. It’s creamy, indulgent, and ready fast. No crust drama, no blind baking—just a rich, caramel-kissed pecan pie dip paired with crackly cinnamon-sugar tortilla chips. The toasted pecans bring a warm nuttiness; brown sugar and maple create a glossy, velvet base; and a whisper of vanilla seals the pecan pie filling vibe. Serve this festive pecan pie dessert dip for holiday parties, Friendsgiving, game day, or any cozy night in. Pecan Pie Dip with Cinnamon Chips is a crowd-pleasing dessert dip that doubles as a sweet appetizer—perfect when you want pecan pie flavor without the fuss.

    On Pinterest and TikTok, creamy dessert dips are a fast way to turn pantry staples into a showstopper. This Pecan Pie Dip with Cinnamon Chips is ultra shareable, scalable, and naturally party-friendly. Bake a batch of cinnamon chips in 10 minutes, swirl the pecan pie dip on the stovetop, and you’re done. I love pairing it with fruit and graham crackers for textures. If you like viral sweets like my Whipped Chocolate Chip Cookie Dough Dip, you’ll adore this pecan pie dip’s cozy flavors. Pecan Pie Dip with Cinnamon Chips is also a smart make-ahead solution: the dip sets in the fridge and the chips stay crisp in an airtight tin, so last-minute hosting is a breeze.

    Darleen’s kitchen chaos: I once realized I was out of graham crackers, so I grabbed tortillas, butter, and cinnamon sugar—voilà, cinnamon chips! That “oops” saved dessert and became the must-have pairing for Pecan Pie Dip with Cinnamon Chips.


    How to Make Pecan Pie Dip with Cinnamon Chips (Step-by-Step)

    Simple method for creamy, caramel pecan goodness

    To make Pecan Pie Dip with Cinnamon Chips, start by baking cinnamon-sugar tortillas into crispy chips. While they crisp, toast pecans in a dry pan for fragrant crunch. On the stovetop, melt butter with brown sugar, then whisk in maple syrup, vanilla, cinnamon, and a pinch of salt—this mimics pecan pie filling without eggs or a traditional crust. Beat softened cream cheese until smooth, then stream in the warm caramel and a splash of heavy cream for a silkier dessert dip. Fold in toasted pecans, garnish with a few on top, and serve with cinnamon chips. This pecan pie dip is creamy, cozy, and absolutely indulgent.

    Pro tips to nail the texture and flavor

    • Room-temp cream cheese blends into a creamy pecan pie dip faster—no lumps.
    • Simmer brown sugar just 1–2 minutes to dissolve. Overcooking can crystallize.
    • Toast pecans for 3–4 minutes. Don’t skip this—nutty aroma = big flavor.
    • For a looser dip, add 1–2 extra teaspoons of heavy cream until pourable.
    • Want deeper “pie” notes? Add a pinch of nutmeg or a teaspoon of bourbon.
    • Keep chips crisp: bake in a single layer and cool completely on the pan.

    Darleen’s kitchen chaos: The first time I tested this Pecan Pie Dip with Cinnamon Chips, I forgot to soften the cream cheese and my mixer danced off the counter. Now I set a phone reminder to pull dairy 30 minutes early—peace restored, creamy dessert dip guaranteed.

    Hungry for more easy treats? Try my weekend brunch favorite Cinnamon Roll French Toast Bites or sip on Crock-Pot Hot Chocolate alongside your pecan pie dip.


    Best Pecan Pie Dessert Dip Variations and Swaps

    Flavor twists that keep things exciting

    • Salted caramel pecan: Finish Pecan Pie Dip with Cinnamon Chips with flaky sea salt and a caramel drizzle.
    • Maple-pecan latte: Stir in 1 teaspoon instant espresso powder and extra maple for a cozy coffee-house dessert dip.
    • Bourbon pecan: Add 1–2 teaspoons bourbon to the caramel base for classic Southern pecan pie vibes.
    • Chocolate-pecan: Fold in 1/3 cup mini chocolate chips for a turtle-style pecan pie dip.
    • Apple pie chips: Dust chips with cinnamon and apple pie spice; serve dip with tart apple slices.
    • No-bake cinnamon chips: Use cinnamon pita chips or cinnamon graham crackers when the oven is full.
    • Dairy-free: Use vegan butter and dairy-free cream cheese; thin with coconut cream.
    • Gluten-free: Swap gluten-free tortillas for chips to keep Pecan Pie Dip with Cinnamon Chips accessible.
    • Low effort: Serve with store-bought shortbread, pretzel crisps, or vanilla wafers.
    • Fruit-forward: Pair with pear slices, strawberries, and grapes for a lighter board.

    Darleen’s kitchen chaos: A snowstorm once stalled my grocery trip mid-recipe. I subbed maple syrup for corn syrup and pretzel crisps for chips. The salty-sweet crunch made Pecan Pie Dip with Cinnamon Chips even more addictive—and my guests thought it was planned.


    Serving, Storage, and Fixes for Pecan Pie Dip with Cinnamon Chips

    How to serve this festive pecan pie dip

    Serve Pecan Pie Dip with Cinnamon Chips warm or at room temp. For a party board, add apple slices, graham crackers, and shortbread to complement the creamy pecan pie dip. A sprinkle of flaky salt and extra toasted pecans adds texture and balances sweetness. If doubling the recipe, keep half warm on very low heat and refill the bowl as guests dip. This dessert dip shines at Thanksgiving, holiday potlucks, and game day spreads.

    Storage, troubleshooting, FAQs

    • Storage: Refrigerate pecan pie dip in an airtight container up to 3 days. Store cinnamon chips at room temp up to 2 days.
    • Reheat: Warm dip gently in the microwave (10-second bursts) or in a saucepan over low heat, stirring until creamy.
    • Too thick? Add 1–2 teaspoons heavy cream or milk and whisk smooth.
    • Too sweet? Add a squeeze of lemon or extra pinch of salt to balance.
    • Not nutty enough? Toast pecans longer or add a few drops of vanilla plus a pinch of cinnamon.
    • Chips soggy? Re-crisp in a 300°F oven for 3–4 minutes and cool fully.

    Darleen’s kitchen chaos: I once iced the chips on a cold porch to cool them faster—forgot them for 20 minutes. They stayed crackly and perfect. Now I use a wire rack so air circulates and keeps Pecan Pie Dip with Cinnamon Chips chips crunchy.


    FAQs

    Can I make Pecan Pie Dip with Cinnamon Chips ahead of time?

    Yes. Make the dip up to 3 days ahead and refrigerate. Bake chips a day ahead and store airtight. Rewarm dip gently before serving.

    What can I serve with this pecan pie dessert dip besides chips?

    Try apple slices, pears, graham crackers, shortbread, vanilla wafers, or pretzel crisps for sweet-salty balance.

    Is there a no-bake option?

    Absolutely. Skip homemade chips and use cinnamon grahams or pita chips. The pecan pie dip itself is a quick stovetop dessert dip.

    How do I make it gluten-free?

    Use gluten-free tortillas for cinnamon chips or serve with certified gluten-free graham crackers. The pecan pie dip is naturally gluten-free.


    Conclusion

    Pecan Pie Dip with Cinnamon Chips is the cozy, creamy dessert dip you can pull together in minutes. Toasted pecans, brown sugar, and vanilla create a lush, pecan pie filling experience without rolling a single crust. Whether it’s Thanksgiving, a potluck, or a Friday movie night, this pecan pie dip turns simple ingredients into a festive showstopper. Keep cinnamon chips crisp, add a pinch of flaky sea salt, and watch the bowl empty itself. If you love easy, indulgent sweets, you’ll make Pecan Pie Dip with Cinnamon Chips again and again. Try it at home and tag me—your bowl might be the first thing gone on the table.

  • Cranberry Orange Bread Pudding: 9 Cozy, Genius Tricks

    Cranberry Orange Bread Pudding: 9 Cozy, Genius Tricks

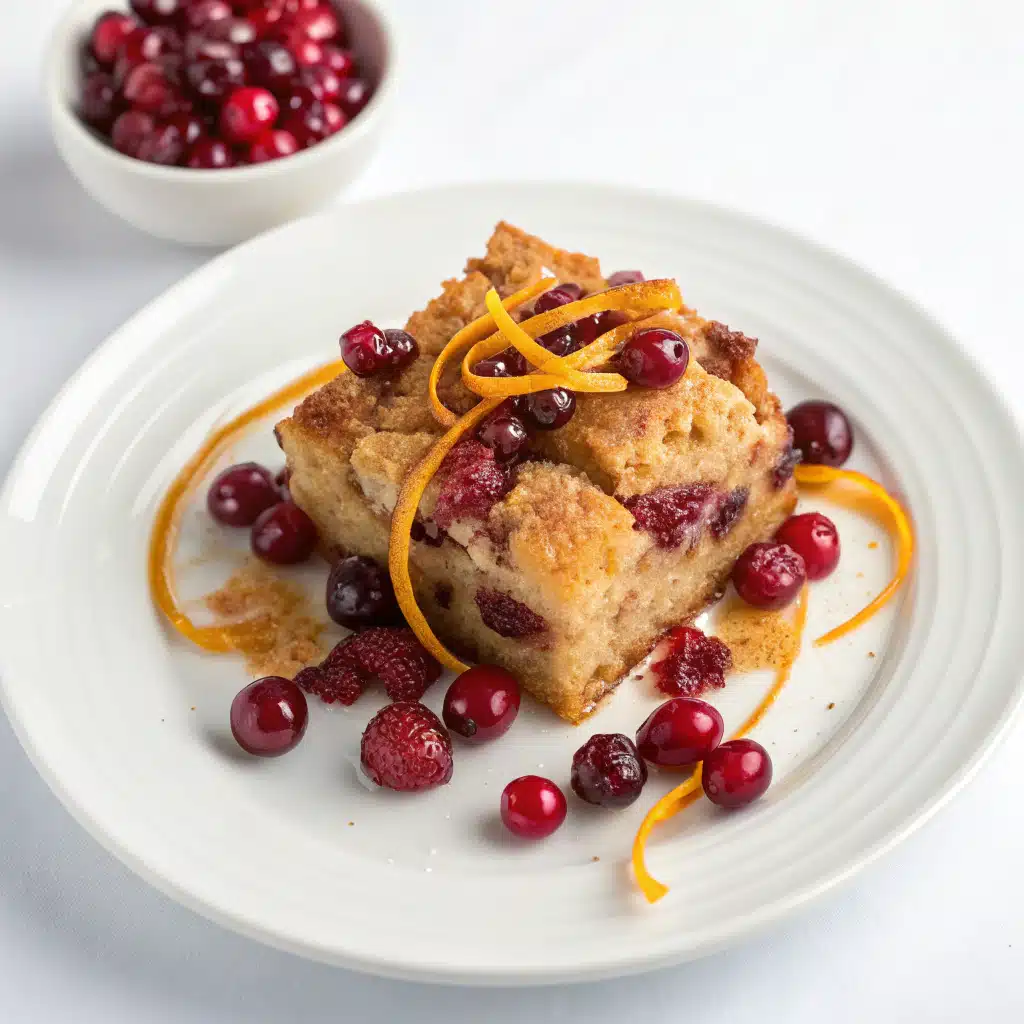
    Cranberry Orange Bread Pudding is my holiday love language. Last December, I was juggling a squeaky mixer, an overexcited pup, and a timer that kept shouting at me from across the kitchen. I tossed in tart cranberries, a burst of orange zest, and slightly-too-large bread cubes—and magic still happened. The custard baked into a creamy cloud with pops of citrus sparkle. That’s the charm: Cranberry Orange Bread Pudding is forgiving, festive, and impossible to resist, even when the kitchen looks like a snow globe of powdered sugar.

    Cranberry Orange Bread Pudding: 9 Cozy, Genius Tricks

    Cranberry Orange Bread Pudding Ingredients & Why It Works

    What makes this Cranberry Orange Bread Pudding irresistible

    At its core, Cranberry Orange Bread Pudding blends creamy custard, citrus zest, and bright berries into a cozy, family-style dessert that feels made for winter. Day-old brioche or challah soaks up an orange-kissed custard, while cranberries add tart pops that balance the richness. Vanilla, cinnamon, and a whisper of nutmeg seal the deal. The base is the same bread pudding you know, but the orange zest and juice make it sing. You get bold flavor without complicated steps, which is why I return to this orange cranberry bread pudding every holiday season.

    Here’s why this festive dessert recipe works so well:

    • Brioche or challah has a soft, plush crumb that absorbs custard without collapsing.
    • Fresh orange zest + juice infuse the custard with citrus brightness.
    • Cranberries (fresh or frozen) bring tart contrast and color to the bread pudding.
    • A quick citrus glaze adds sparkle and seals in moisture.

    As I tested Cranberry Orange Bread Pudding, my whisk fell behind the stove—classic Darleen chaos. I stirred with a spatula while juggling a phone call, and you know what? It still baked up creamy, with a golden top and tender middle. Bread pudding is wonderfully forgiving. If you adore cozy, celebratory bakes, bookmark my Apple Cider Donut Muffins for a festive breakfast spread, or pair this dessert with a mug of Crock-Pot Hot Chocolate for peak holiday comfort.

    Holiday dessert boards and brunch menus are embracing citrus. That’s why Cranberry Orange Bread Pudding is trending: it brings bakery-level comfort with fresh, zingy flavor. Think Christmas breakfast casserole meets classic bread pudding. It’s picture-perfect, especially when drizzled with an orange glaze and showered with extra zest. If you’ve been searching for an easy bread pudding that tastes like the holidays, this orange cranberry bread pudding is your new go-to.

    How to Make Cranberry Orange Bread Pudding

    From custard to bake: the simple game plan

    Making Cranberry Orange Bread Pudding is a straightforward, cozy ritual. Cube your day-old brioche, whisk a silky custard with milk, cream, eggs, sugar, vanilla, cinnamon, nutmeg, orange zest, and a splash of fresh orange juice, then soak and bake. The bread drinks up the custard, the cranberries dot the pan with ruby brightness, and the oven does the rest. Aim for a golden top with a just-set center—creamy, never dry. This orange cranberry bread pudding shines at holiday brunch, Sunday suppers, or any night you want dessert that feels like a hug.

    1. Use day-old brioche/challah for better structure and custard absorption.
    2. Warm the dairy gently; don’t boil. Temper eggs for a smooth custard.
    3. Add orange zest directly to the custard for maximum flavor.
    4. Soak the bread 10–15 minutes before baking for even texture.
    5. Bake until the center reaches about 160°F and no longer pools liquid.

    Real-life Darleen moment: I once measured the sugar while answering the door and ended up with two open bags. I eyeballed it (not recommended!) and still got that creamy, citrus-laced finish. Bread pudding with cranberries forgives tiny missteps, which makes Cranberry Orange Bread Pudding great for busy hosts. For more brunchy comfort, don’t miss my Cinnamon Roll French Toast Bites—they’re a crowd-pleaser beside this orange cranberry bread pudding.

    Pro tips for flawless orange cranberry bread pudding

    • Cut cubes evenly so the custard absorbs uniformly.
    • Salt matters. A pinch sharpens the citrus and balances sweetness.
    • Stagger cranberries: mix some in, sprinkle some on top for color.
    • Rest after baking 15 minutes, then glaze—this keeps the crumb tender.
    • Make-ahead: Assemble and refrigerate 8–12 hours. Bake straight from the fridge, adding a few extra minutes.

    Cranberry Orange Bread Pudding Variations

    Flavor boosters that keep it festive

    Cranberry Orange Bread Pudding is a canvas for cozy twists. Try a splash of Grand Marnier in the glaze, swap in panettone for ultra-lux texture, or add white chocolate chips for creamy pops. A handful of toasted pecans or almonds introduces crunch; cardamom brings a perfumed lift that plays beautifully with orange zest. If you need a gluten-free route, use your favorite GF loaf or bake a batch of my Crockpot Gluten-Free Artisan Bread, then let it go a day stale before cubing. However you riff, keep the citrus-cranberry core and you’ll have a holiday dessert that still tastes like this orange cranberry bread pudding.

    More ideas to make it yours:

    • Brown butter the melted butter for nutty depth in the custard.
    • Replace 1/2 cup milk with eggnog for a Christmas brunch vibe.
    • Vanilla bean paste instead of extract for an aromatic boost.
    • Top with sugared cranberries and extra zest for sparkle.

    Darleen chaos corner: I once dropped the zest straight onto the floor. I zested another orange right over the pan (no time to spare) and the perfume was instant and citrusy. That’s the beauty of Cranberry Orange Bread Pudding: it’s resilient and radiantly flavorful even when the kitchen soundtrack is timers and doorbells.

    Pinterest-friendly swaps and seasonal twists

    • Panettone bread pudding with cranberries and orange glaze.
    • Chocolate-orange cranberry bread pudding (add dark chocolate chunks).
    • Orange maple glaze instead of classic citrus glaze.
    • Individual muffin-tin bread puddings for portioned desserts.

    These swaps keep your orange cranberry bread pudding fresh, fun, and ready for sharing.

    Serving, Storage, and Troubleshooting for Cranberry Orange Bread Pudding

    Serve it like a bakery

    Serve Cranberry Orange Bread Pudding warm, topped with a glossy orange glaze and a cloud of whipped cream or vanilla bean ice cream. A light dusting of powdered sugar mimics snowfall (yes, it’s as dreamy as it sounds). For brunch, slice generous squares and pair with strong coffee. For dessert, drizzle a little heavy cream over the top to make it extra luxe. This holiday dessert recipe walks the line between cozy breakfast casserole and elegant dinner party finale.

    Storage, troubleshooting, FAQs

    Darleen’s mini panic: I once forgot to preheat the oven and the custard was soaking longer than planned. Crisis averted—longer soak equals creamier center. Here’s how to keep Cranberry Orange Bread Pudding flawless every time.

    • Make-ahead: Assemble, cover, and refrigerate up to 12 hours.
    • Storage: Refrigerate leftovers 3–4 days. Cover tightly to prevent drying.
    • Reheat: Warm in a 300°F oven for 10–15 minutes or microwave in short bursts.
    • Freezer: Wrap tightly; freeze up to 2 months. Thaw overnight, reheat, then glaze.
    • Too soggy? Bake a few minutes more; tent with foil if browning too fast.
    • Too dry? Add a splash of warmed cream after baking, then glaze.

    If you’re building a full cozy menu, pair this orange cranberry bread pudding with Creamy Corn Chowder for a sweet-savory spread everyone will remember.

    FAQs

    Can I use fresh or frozen cranberries?

    Both work. Use frozen cranberries straight from the freezer; no need to thaw. Toss with a teaspoon of sugar if you prefer less tartness.

    What’s the best bread for bread pudding?

    Day-old brioche or challah is ideal. Their tender crumb soaks up custard without turning mushy, giving Cranberry Orange Bread Pudding a plush texture.

    Can I make it dairy-light?

    Swap half-and-half for heavy cream or use all whole milk. The texture will be slightly less rich but still creamy and delicious.

    How do I know it’s done?

    The center should be just set (about 160°F) and no longer liquid. A knife inserted near the center should come out custard-moist but not runny.

    Conclusion

    Cranberry Orange Bread Pudding is the cozy, citrus-bright bake that tastes like a celebration. With orange zest, tart cranberries, and a silky custard, this orange cranberry bread pudding delivers bakery-style comfort without the fuss. Whether you serve it at Christmas brunch or as a weeknight treat, you’ll get creamy texture, festive flavor, and shimmering glaze in every bite. I hope it becomes your family’s new holiday dessert tradition. Try this Cranberry Orange Bread Pudding at home, share a slice with someone you love, and tag me so I can cheer you on!

  • Crockpot Gluten-Free Potato Soup with Hashbrowns: 7 Genius

    Crockpot Gluten-Free Potato Soup with Hashbrowns: 7 Genius

    Crockpot Gluten-Free Potato Soup with Hashbrowns is my snow-day hero. Last winter, the power flickered while I juggled a zoom call, a Lego avalanche, and a dog who believes the counter is his buffet. I tossed everything for Crockpot Gluten-Free Potato Soup with Hashbrowns into the slow cooker, shut the lid, and walked away. Hours later: creamy comfort, zero stress, and bowls scraped clean. That’s my kind of kitchen chaos victory. —Darleen Vance

    Crockpot Gluten-Free Potato Soup with Hashbrowns: 7 Genius

    Recipe

    Why This Crockpot Gluten-Free Potato Soup with Hashbrowns Works

    Comfort-in-a-Bowl, Made the Easy Way

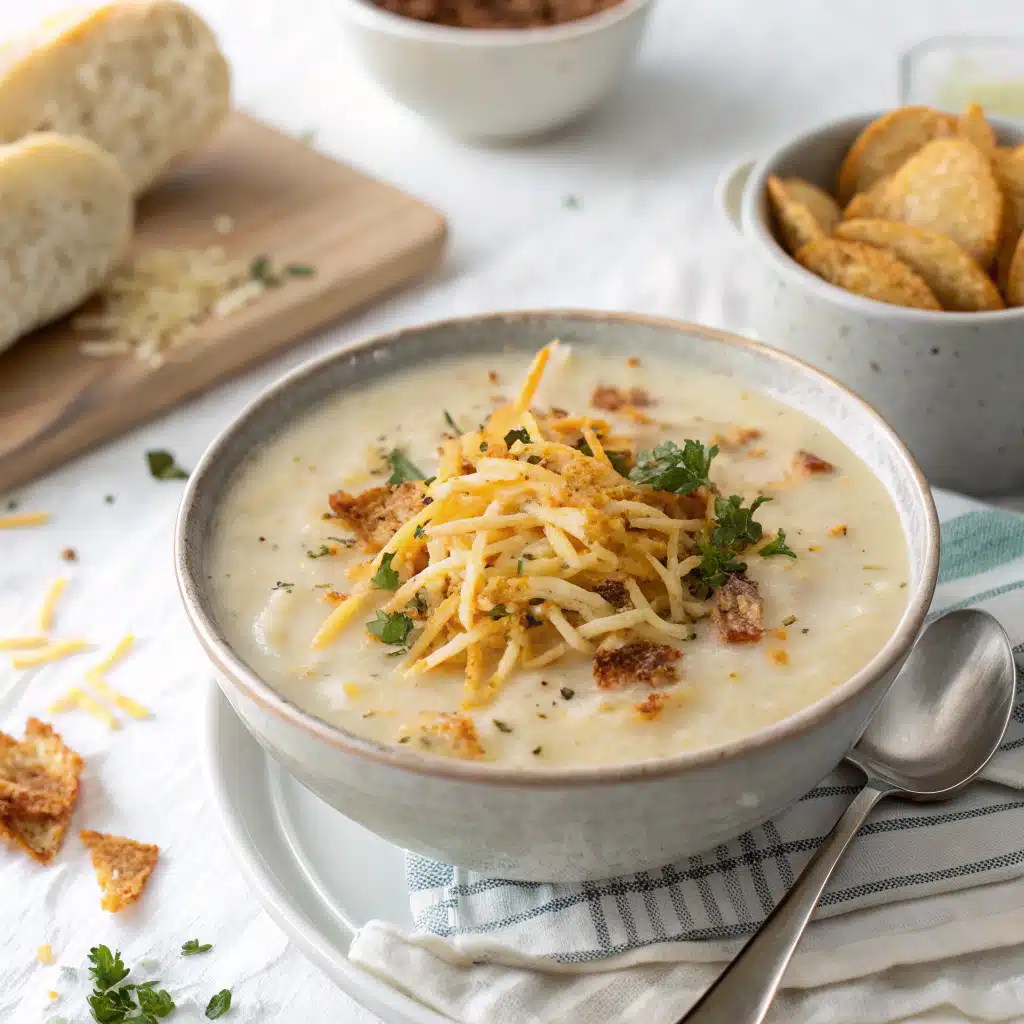
    Crockpot Gluten-Free Potato Soup with Hashbrowns delivers silky comfort with almost no effort. Instead of peeling and dicing potatoes, you use gluten-free frozen hash browns, which melt into a creamy base as they simmer. This slow cooker potato soup feels indulgent yet practical, with pantry-friendly seasonings and a handful of real-food ingredients. The naturally gluten-free base keeps dinner stress-free for mixed-diet households, and the crockpot works its low-and-slow magic while you handle life. Think cozy texture, bold savory flavors, and a family-style meal that tastes like it took all day—because it did, but the slow cooker did the work.

    On Pinterest and TikTok, hashbrown potato soup is a viral favorite, thanks to that unbelievably creamy texture. In this Crockpot Gluten-Free Potato Soup with Hashbrowns, shredded potatoes release starch that thickens the broth like a pro. A swirl of cream cheese and half-and-half adds richness without fuss, and a quick cornstarch slurry gives your gluten-free soup a velvety finish. I once made this while chasing a runaway mixing bowl across the floor—no joke. Even with the chaos, dinner tasted like an intentional act of self-care. If you love cozy bowls, you’ll also enjoy my Creamy Corn Chowder for another spoonable, stick-to-your-sides favorite.

    Ingredients for Crockpot Gluten-Free Potato Soup with Hashbrowns

    The Creamy, Gluten-Free Base

    Start with frozen shredded hash browns labeled gluten-free. They’re the heart of Crockpot Gluten-Free Potato Soup with Hashbrowns and create that creamy potato soup vibe with no peeling. Pair them with gluten-free broth, onion, garlic, thyme, smoked paprika, and butter. Cream cheese brings lush body, while half-and-half or heavy cream turns everything silken. If you like extra richness, add sharp cheddar. Every item here is easy to find and naturally suited for slow cooking, so your gluten-free crockpot dinner tastes restaurant-level without complicated steps.

    Smart Swaps and Pro Tips

    Want it vegetarian? Use vegetable broth and skip the bacon garnish. Dairy-free? Use dairy-free cream cheese and full-fat coconut milk, then finish with nutritional yeast. For thicker Crockpot Gluten-Free Potato Soup with Hashbrowns, blend part of the soup, or add a touch more cornstarch slurry. For thinner, stir in extra broth at the end. I once swapped in a bag of diced hash browns by accident—result: a heartier, chunky slow cooker potato soup that my husband called “loaded mashed potatoes in a bowl.” A win either way. For another slow-cooker classic, peek at my Crockpot Creamy Tomato Basil Tortellini Soup.

    How to Make Crockpot Gluten-Free Potato Soup with Hashbrowns

    Step-by-Step for Silky Results

    Layer the gluten-free hashbrowns, onion, garlic, and seasonings in your crockpot, then pour over broth. Low and slow is key: 4–5 hours on Low (or 2–3 on High) lets the starches release and thicken naturally. Stir in cream cheese until melted, add a cornstarch slurry, and finish with half-and-half. If desired, a few pulses of an immersion blender creates an ultra-creamy, dreamy base. The result? Crockpot Gluten-Free Potato Soup with Hashbrowns that’s savory, comforting, and weeknight-easy.

    Pinterest-Ready Variations

    Try a “Loaded Baked Potato” twist: top your Crockpot Gluten-Free Potato Soup with Hashbrowns with crispy bacon, cheddar, chives, and a dollop of Greek yogurt. Crave smoky depth? Toss in a pinch more smoked paprika or a splash of gluten-free Worcestershire. For a veggie-forward bowl, stir in sautéed leeks, spinach, or roasted cauliflower at the end. One chaotic evening, I opened the fridge and found exactly one lonely carrot—so I grated it right in. The color pop looked gorgeous on camera and tasted sweet-savory. For a cozy side, pair it with my Crockpot Gluten-Free Stuffing during the holidays.

    Storage, Troubleshooting, and FAQs for Crockpot Gluten-Free Potato Soup with Hashbrowns

    Make-Ahead, Freeze, Reheat

    Refrigerate Crockpot Gluten-Free Potato Soup with Hashbrowns in airtight containers for up to 4 days. It thickens as it chills—loosen with a splash of broth or milk when reheating. Reheat gently on the stovetop or in the microwave, stirring often. For freezing, skip the dairy during the initial cook, freeze the base up to 2 months, then add dairy and reheat until creamy. Meal-prep win: portion into lidded jars for grab-and-heat lunches all week.

    Fixes for Common Issues

    Too thin? Simmer uncovered to reduce, blend a cup and stir back in, or whisk in a bit more cornstarch slurry. Too thick? Add warm broth. Lacking flavor? Increase salt, pepper, and smoked paprika; a squeeze of lemon can brighten. Grainy dairy? Be sure cream cheese is softened and added after the potatoes are tender. I once added the cheese too early—my slow cooker looked like a science experiment. Stirring it in late brings velvety perfection every time. For another set-it-and-forget-it favorite, try my Easy Slow Cooker French Onion Roast.

    FAQs

    Can I use diced hash browns instead of shredded?

    Yes. Diced hash browns make a chunkier, hearty texture. Shredded hash browns create a creamier, silkier soup. Both work for Crockpot Gluten-Free Potato Soup with Hashbrowns.

    How do I make it dairy-free?

    Swap dairy cream cheese for a plant-based version and use full-fat coconut milk or unsweetened cashew cream. The soup stays creamy and completely gluten-free.

    Can I cook this on High?

    Yes. Cook on High for 2–3 hours, then add cream cheese, slurry, and cream. Low heat yields the creamiest texture, but High works in a pinch.

    What toppings go best?

    Chives or green onions, cheddar, bacon (gluten-free), Greek yogurt or sour cream, smoked paprika, and crushed gluten-free crackers make this slow cooker potato soup irresistible.

    Conclusion

    Crockpot Gluten-Free Potato Soup with Hashbrowns is your ticket to creamy comfort without the fuss. The slow cooker coaxes out rich flavor, the gluten-free hashbrowns build body, and a swirl of dairy (or dairy-free alternatives) delivers that velvety finish. Whether you load it with bacon and cheddar or keep it simple and vegetarian, this gluten-free potato soup fits busy nights, cozy weekends, and family gatherings. From kitchen chaos to calm, it’s a bowl you can rely on. Make Crockpot Gluten-Free Potato Soup with Hashbrowns once, and it will slide into your regular rotation. Try it at home and tag me so I can cheer on your simmering success!

  • Cinnamon Roll French Toast Bites: 7 Irresistible Tips

    Cinnamon Roll French Toast Bites: 7 Irresistible Tips

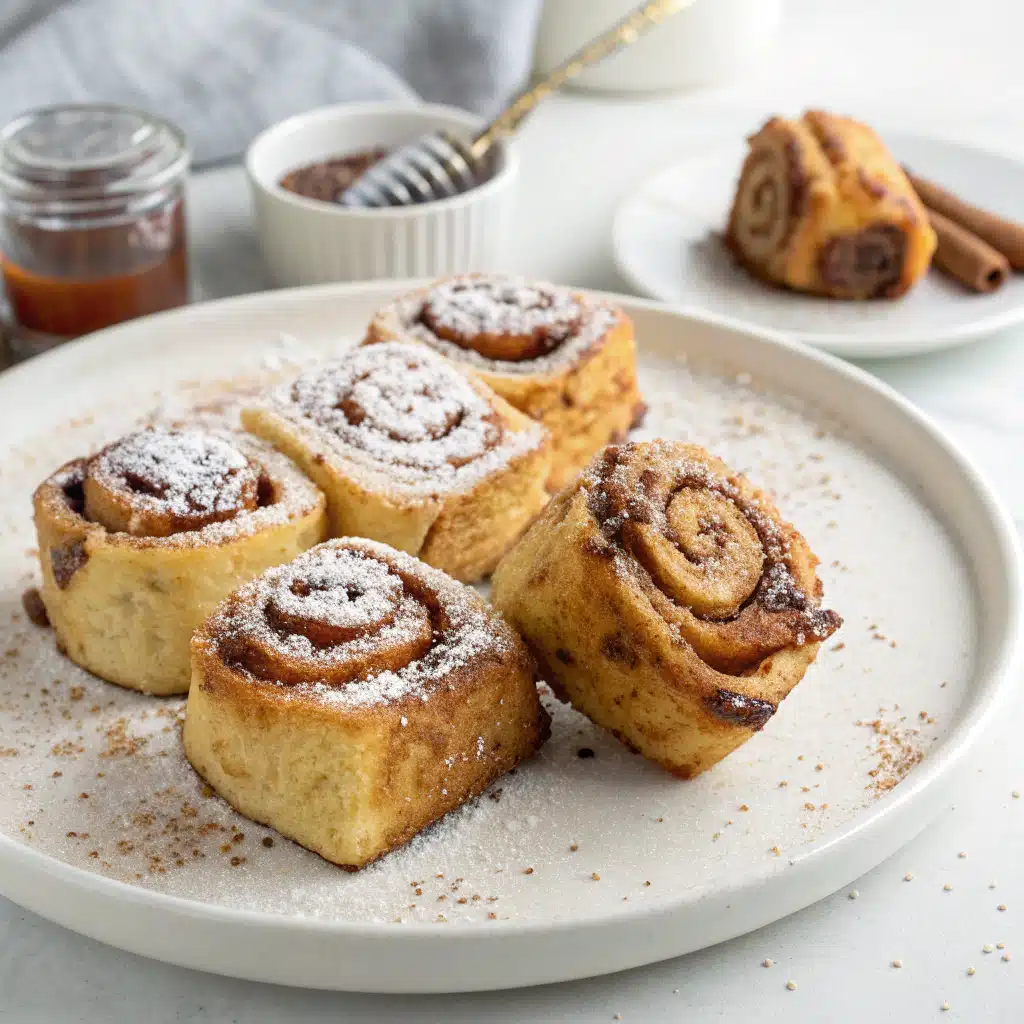
    Cinnamon Roll French Toast Bites were born in the middle of Monday-morning chaos. I’m Darleen Vance, and my mixer was still whirring while my toddler recited letters and the dog chased a rogue paper towel. I cubed canned rolls, dunked them in custard, and those Cinnamon Roll French Toast Bites puffed into crispy, cloud-soft nuggets with a creamy glaze. We ate them straight from the skillet, laughing as the icing dripped down our fingers. Breakfast victory, delivered in bite-size comfort!

    Cinnamon Roll French Toast Bites: 7 Irresistible Tips

    Recipe

    Cinnamon Roll French Toast Bites Recipe Guide

    How These French Toast Bites Get So Crispy and Fluffy

    Cinnamon Roll French Toast Bites deliver that dreamy contrast: caramelized edges and a tender, custard-soft center. The secret is a rich custard—eggs, milk, a splash of cream, vanilla, and cinnamon—plus patient heat. Let the dough soak so the cinnamon swirls drink up the custard, then cook in butter over medium heat. As Cinnamon Roll French Toast Bites sizzle, the sugars caramelize, creating a cozy crust. A quick toss in cinnamon sugar and a cream cheese drizzle makes these Cinnamon Roll French Toast Bites taste like brunch-fair magic.

    When you want a make-ahead morning plan, pair your skillet of Cinnamon Roll French Toast Bites with a warm mug of slow-cooker hot chocolate. The creamy cocoa and these mini French toast bites turn any weekend into a festive breakfast board. If you’re feeding a crowd, keep batches warm in a 250°F oven while finishing the rest.

    The Cinnamon Sugar Sizzle Everyone’s Sharing

    I first shared my Cinnamon Roll French Toast Bites on a whim while the timer beeped and my toddler insisted the icing pouch was a toy sword. Classic Darleen Vance kitchen chaos: the spatula went missing, a dish towel decided to leap onto the burner, and I nearly glazed the dog. Still, the Cinnamon Roll French Toast Bites came out golden, cozy, and camera-ready. That buttery sizzle? It’s what makes these bites trend-worthy—tiny cinnamon rolls transformed into French toast candy. Finish with a swirl of glaze and watch the plate vanish.

    Best Cinnamon Roll French Toast Bites Method

    The Custard Ratio for Ultra-Soft Bites

    For consistently luscious Cinnamon Roll French Toast Bites, whisk 4 eggs with 3/4 cup dairy (a blend of whole milk and cream) per two cans of dough. Add vanilla, cinnamon, a pinch of nutmeg, and maple syrup. This balance coats every piece without turning soggy. Stir gently so the swirls stay intact. Rest the mixture for 5 minutes; it’s the difference between dry bits and tender Cinnamon Roll French Toast Bites worthy of seconds.

    Practical Tips for Speed and Batch Cooking

    • Skillet size wins: a wide nonstick pan gives Cinnamon Roll French Toast Bites room to brown.
    • Medium heat: too hot and the sugar burns; too low and the bites steam.
    • Butter then rotate: butter equals flavor; rotate each batch for even color.
    • Warm hold: stash cooked Cinnamon Roll French Toast Bites on a sheet pan in a 250°F oven.
    • Air fryer backup: 375°F for 6–8 minutes; shake once for crisp edges.

    True Darleen Vance moment: I was testing Cinnamon Roll French Toast Bites while the cat swatted the cinnamon jar off the counter. I brushed off my apron, remixed the cinnamon sugar, and the next batch was even better. If you love prepping ahead, a jar of homemade slow-cooker granola makes an excellent crunchy topping for your Cinnamon Roll French Toast Bites—think brunch parfait meets cinnamon toast.

    Toast Bites Variations

    Cream Cheese Glaze, Maple Dip, and More

    Glaze is the crown on Cinnamon Roll French Toast Bites. Blend the reserved icing with soft cream cheese, vanilla, and a drizzle of milk until pourable. For a tangy spin, add a pinch of lemon zest. Dip ideas: warm maple syrup, salted caramel, or a vanilla-yogurt sauce. Want a fall festival? Dust the Cinnamon Roll French Toast Bites with pumpkin spice sugar and serve with apple butter. These Cinnamon Roll French Toast Bites can swing cozy or celebratory in minutes.

    Pinterest-Favorite Swaps & Air Fryer Ideas

    • Brioche boost: mix in a few brioche cubes for hybrid French toast bites.
    • Stuffed bites: press a mini cream cheese cube into each piece before soaking.
    • Skillet to oven: brown, then bake 5 minutes for extra puff.
    • Weekend board: plate with berries, bacon, and a bowl of glaze for sharable Cinnamon Roll French Toast Bites.

    During one shoot, my timer failed and I cooked by vibe—only Darleen Vance would juggle a whisk and a camera while fielding a smoke alarm chirp. The result? Bronze-edged Cinnamon Roll French Toast Bites that tasted like a bakery morning. For a sweet-and-salty dinner-after-brunch twist, try my garlic butter shrimp pasta later—your day will be delicious from sunrise to supper.

    Serving, Storage, and Troubleshooting Cinnamon Roll French Toast Bites

    How to Serve These Bite-Size Beauties

    Serve Cinnamon Roll French Toast Bites warm from the skillet with glaze and a dusting of powdered sugar. Add berries for brightness or a sprinkle of toasted pecans for crunch. Brunch-worthy plating: a large platter piled high with Cinnamon Roll French Toast Bites, small bowls of maple syrup, nutty granola, and extra cinnamon sugar. They’re equally at home for holiday mornings, sleepovers, or Sunday meal prep.

    Storage, Reheating, and Quick Fixes

    • Storage: Refrigerate Cinnamon Roll French Toast Bites in an airtight container up to 3 days.
    • Reheat: 350°F oven for 5–7 minutes or air fryer 3–4 minutes at 350°F.
    • Soggy? Your custard ratio may be high; add an extra handful of dough pieces next batch.
    • Pale? Increase heat slightly and use fresh butter for caramelization.
    • Too sweet? Swap maple syrup for milk in the custard and finish with a light glaze.

    Darleen Vance confession: I once dropped the entire glaze bowl. We pivoted, dusted the Cinnamon Roll French Toast Bites with cinnamon sugar, and nobody missed a beat. The bites stayed cozy, crispy, and gone in minutes.

    FAQs

    Can I use homemade cinnamon roll dough?

    Yes. Par-bake the rolls until just set, cool, cube, then soak and cook. The texture mirrors canned dough with extra bakery flair.

    Do Cinnamon Roll French Toast Bites work in an air fryer?

    Absolutely. Air fry at 375°F for 6–8 minutes, shaking halfway. They’ll be crisp outside and tender inside.

    How do I keep the bites from getting soggy?

    Rest dough in custard for only 5 minutes and cook over medium heat in butter. Avoid overcrowding and flip often.

    Can I make the glaze without cream cheese?

    Warm the reserved icing with 1–2 teaspoons milk and a splash of vanilla for a silky drizzle—simple and sweet.

    Conclusion

    Cinnamon Roll French Toast Bites bring cozy bakery vibes to your table in under 30 minutes. With cinnamon sugar caramelization, a creamy glaze, and that buttery skillet finish, these Cinnamon Roll French Toast Bites satisfy weekend cravings and holiday brunch dreams alike. Keep the batter balanced, the heat steady, and your toppings playful—berries, nuts, or extra maple. From one Darleen Vance kitchen to yours, these Cinnamon Roll French Toast Bites are a guaranteed crowd-pleaser. Try it at home and tag me! For more comforting inspo, browse my full recipe collection.

  • Apple Cider Donut Muffins: 7 Irresistible Secrets

    Apple Cider Donut Muffins: 7 Irresistible Secrets

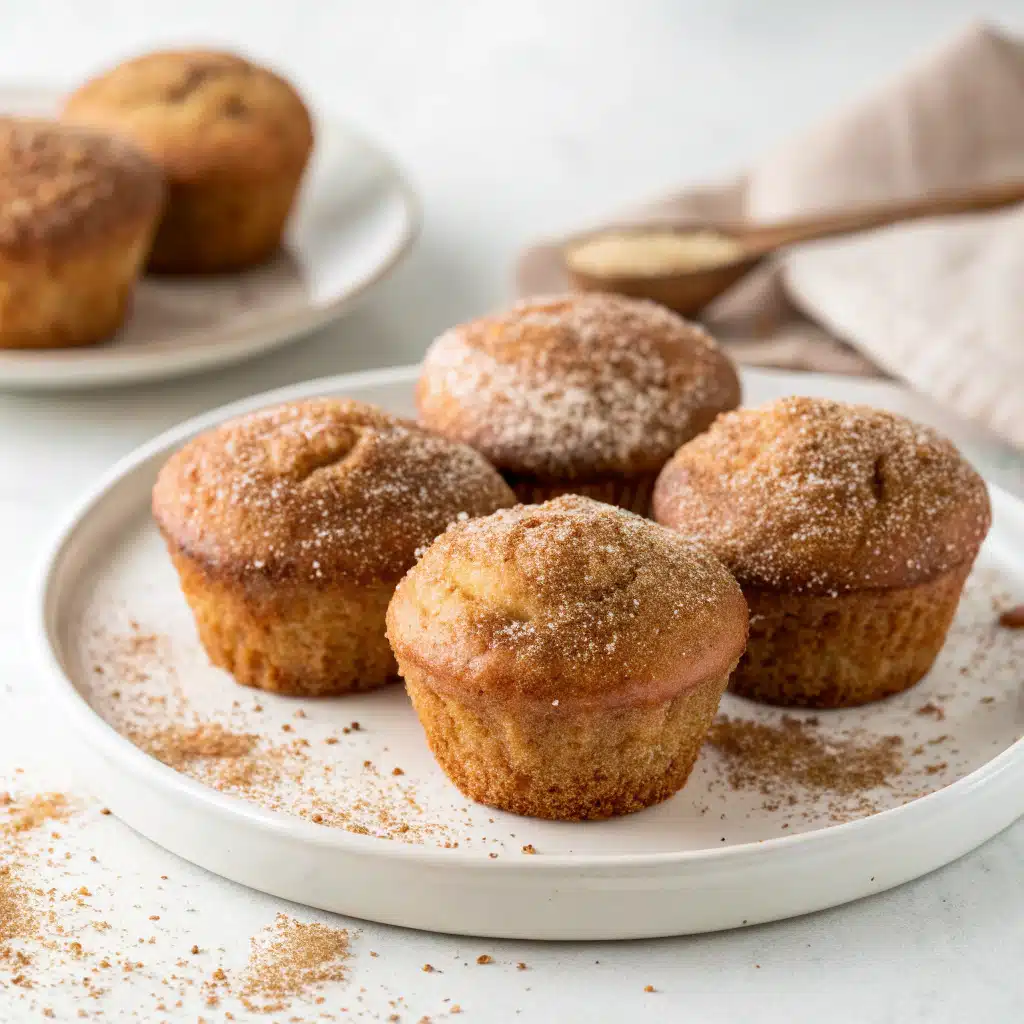
    Apple Cider Donut Muffins are my shortcut to that cozy orchard vibe without leaving the kitchen. Last fall, I (Darleen Vance) tried to reduce apple cider while my twins staged a cinnamon snowstorm and the timer serenaded us—pure kitchen chaos. I pulled the pan just as the cat swiped a muffin liner off the counter, and we still devoured warm Apple Cider Donut Muffins five minutes later, sugar-dusted and laughing. These taste like a fairground donut met a tender muffin—no fryer, all fall magic.

    Apple Cider Donut Muffins: 7 Irresistible Secrets

    Recipe

    Apple Cider Donut Muffins Recipe (Bakery-Style at Home)

    The orchard-in-a-tin secret

    Apple Cider Donut Muffins bring the best part of fall fairs straight to your oven. The not-so-secret move is reducing real apple cider until syrupy; that concentrated cider infuses these Apple Cider Donut Muffins with bold apple flavor. Whisk warm spices—cinnamon, nutmeg, and allspice—into a tender muffin batter, then crown everything with a classic cinnamon-sugar coating for that donut-shop finish. Compared to fried apple cider donuts, these Apple Cider Donut Muffins bake up light, with a tender crumb and a cozy, spiced aroma that screams autumn baking. Think bakery-style crumb without a fryer, perfect for brunch, snack plates, or lunchbox smiles. The result is a donut-muffin hybrid that tastes like an orchard trip.

    On social feeds, baked donut muffins are having a moment because they deliver donut character with far less effort. Apple Cider Donut Muffins win by using butter and a splash of neutral oil for moisture, buttermilk for tang, and that apple cider reduction for depth. I learned the hard way (hi, it’s Darleen Vance) that patience during the 10-minute batter rest pays off with higher muffin domes. Meanwhile, my kids staged a cinnamon confetti parade, and I pulled perfect Apple Cider Donut Muffins anyway. LSI tip: spoon-and-level flour to keep these spiced muffins airy, and brush melted butter before rolling them in cinnamon sugar to lock on that donut finish every time.

    Best Apple Cider Donut Muffins Ingredients & Tools

    What you need for that donut-shop bite

    For standout Apple Cider Donut Muffins, start with real apple cider (not vinegar). Reducing 1 1/2 cups to 3/4 cup concentrates orchard flavor. Use all-purpose flour for a plush crumb, baking powder and a pinch of baking soda for lift, and fine sea salt to balance sweet notes. Cinnamon leads the spice blend, with nutmeg and allspice whispering “fall.” Buttermilk keeps Apple Cider Donut Muffins moist and tender, while melted butter adds richness and a neutral oil adds softness. Finish with the must-have cinnamon-sugar coating for that donut vibe. Tools? A standard 12-cup muffin pan, two bowls, a whisk, a small saucepan for the cider reduction, and a pastry brush for the buttered coating.

    Pro tips that save your bake

    To nail Apple Cider Donut Muffins every time, measure flour by weight (or gently spoon and level). Don’t overmix—stir just until combined, then let the batter rest 10 minutes. Bake at 350°F until domed and springy. For cozy pairings, pour a mug of Crock-Pot Hot Chocolate while your Apple Cider Donut Muffins cool. Need a hearty dinner after dessert first? Try my Slow Cooker Beef Barley Stew—true cold-weather comfort. Real-life test: I forgot liners once and still won—just grease the pan well. Then the cat tried to sit on the cooling rack; I shooed her, rolled muffins in cinnamon sugar, and the house smelled like a donut shop.

    Easy Apple Cider Donut Muffins Variations & Swaps

    Customize your spiced muffin magic

    Apple Cider Donut Muffins are endlessly customizable. Add a cinnamon-streusel swirl, a maple glaze, or swap granulated sugar for a blend of brown and white for deeper caramel notes. Brown the butter for nutty aroma, or fold in diced apple sautéed in butter and cinnamon for extra apple donut vibes. Gluten-free? Use a 1:1 gluten-free flour blend and watch bake time. Dairy-free Apple Cider Donut Muffins work with plant milk plus lemon juice for faux buttermilk and dairy-free butter for the coating. You can even add a vanilla bean to the batter for upscale bakery fragrance. However you riff, keep the apple cider reduction—that’s the heart of these Apple Cider Donut Muffins.

    Pinterest-loved swaps

    Trending swaps for Apple Cider Donut Muffins: bake minis (24 mini muffins, 10–12 minutes) for party platters, or use a donut pan if you crave the ring shape with a muffin crumb. Try cardamom in the spice blend for a modern twist, or roll only the tops in cinnamon sugar for a cleaner bite. For a brunch board, pair with my Whipped Chocolate Chip Cookie Dough Dip and fresh fruit. A simple maple-cider glaze is Pinterest-famous: whisk powdered sugar with a tablespoon or two of reduced cider and a dash of maple extract, then drizzle over warm Apple Cider Donut Muffins. It’s the glossy, scroll-stopping finish that makes everyone ask for your recipe.

    Apple Cider Donut Muffins Storage, Fixes & FAQs

    Keep them tender and donut-like

    Store Apple Cider Donut Muffins airtight at room temp for 2–3 days, or refrigerate up to 5. Rewarm 5 minutes at 300°F to revive that fresh-baked feel, then refresh the cinnamon sugar if needed. Freeze Apple Cider Donut Muffins (coated or uncoated) up to 2 months; thaw, then pop in the oven to crisp. If your Apple Cider Donut Muffins baked dense, likely too much flour or overmixing—measure lightly and stir gently. If they spread, check oven temp or fill cups only 3/4 full. Real life: Darleen Vance knocked cinnamon everywhere while filming, but the muffins still rose high and tasted like the orchard—sometimes mess equals magic in fall baking.

    Storage, troubleshooting, and quick answers

    If the cinnamon sugar seems to fall off, brush with more melted butter and roll again. If the spice level feels timid, boost cinnamon or add a pinch of cardamom. Apple Cider Donut Muffins are flexible—swap buttermilk for milk plus lemon juice, or stir in a spoon of applesauce if you love extra moisture. Check doneness with a toothpick or aim for ~200°F internal temp for tender Apple Cider Donut Muffins with donut-shop texture. And remember: reducing cider is nonnegotiable for the bold apple flavor that makes these muffins taste like classic apple cider donuts—without the fryer.

    FAQs

    Can I use apple juice instead of apple cider?

    Yes, but reduce it longer to intensify flavor. Unfiltered apple cider delivers a richer, more “orchard” taste than clarified juice.

    Do I have to use buttermilk?

    No. Make a quick swap: 1/2 cup milk plus 1 1/2 teaspoons lemon juice or vinegar. Rest 5 minutes before using.

    How do I keep the cinnamon sugar from melting?

    Brush warm (not hot) muffins with melted butter, roll in cinnamon sugar, then let set 10 minutes. If needed, roll a second time.

    Can I make mini Apple Cider Donut Muffins?

    Absolutely. Bake 24 mini muffins for 10–12 minutes. Roll in cinnamon sugar while warm for the best donut-like finish.

    Conclusion

    Cozy, bakery-style comfort meets weeknight ease with Apple Cider Donut Muffins. The apple cider reduction, warm spices, and cinnamon-sugar coating create that classic donut-shop experience—no fryer required. Whether you bake minis for brunch boards or go classic with jumbo domes, Apple Cider Donut Muffins deliver a tender crumb, bold apple flavor, and a sugar-dusted finish that’s irresistible. If you love fall baking, these Apple Cider Donut Muffins will be your go-to recipe for gatherings, lunchboxes, and chilly mornings. Bake a batch, breathe in the cinnamon, and share the joy. Try it at home and tag me!

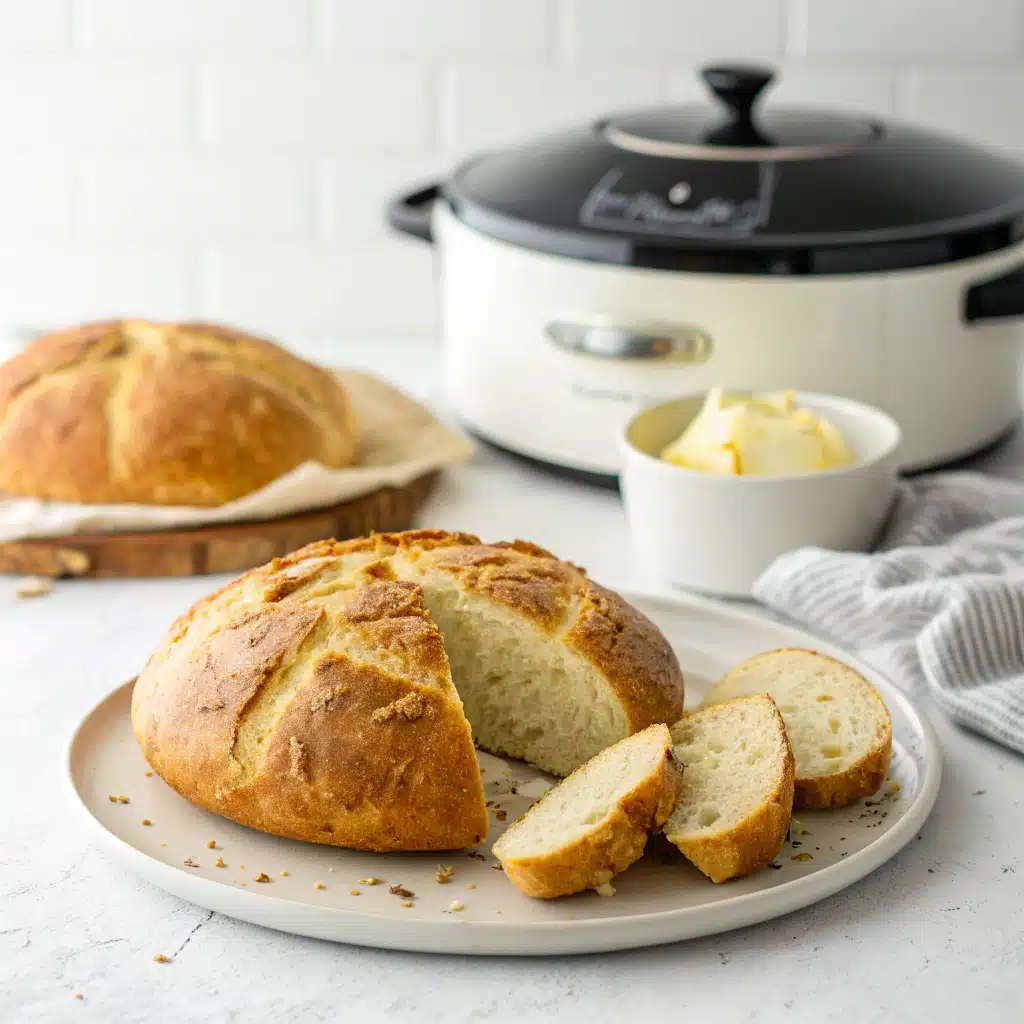
  • Crockpot Gluten-Free Artisan Bread: 7 Irresistible Secrets

    Crockpot Gluten-Free Artisan Bread: 7 Irresistible Secrets

    Crockpot Gluten-Free Artisan Bread changed my weeknight rhythm. I’m Darleen Vance, and last Tuesday I mixed this dough while my twins turned my measuring cups into a drumline. Ten minutes later, the slow cooker was humming and my kitchen chaos felt charming. By dinner, a crusty, sliceable loaf emerged no oven, no sweat. Crockpot Gluten-Free Artisan Bread is my secret for real-deal crust and tender crumb, even when life is messy. It’s the loaf I rely on for soup nights, snack boards, and sanity.

    Crockpot Gluten-Free Artisan Bread: 7 Irresistible Secrets

    Recipe Crockpot Gluten-Free Artisan Bread

    Crockpot Gluten-Free Artisan Bread (No-Knead Magic)

    Why this slow cooker method works

    Crockpot Gluten-Free Artisan Bread thrives in steady, gentle heat. A slow cooker traps steam like a mini bread oven, delivering a moist interior and naturally crisp base without a Dutch oven. In gluten-free baking, that steam is gold—hydrating starches, helping yeast expand, and giving you a tender, sliceable crumb. The beauty of this slow cooker gluten-free bread is its no-knead simplicity: mix, rest, drop, and cook. No bench flour blizzard, no heavy lifting. A parchment sling keeps the loaf neat and guarantees an easy lift for a quick oven or air-fryer finish if you crave extra crust.

    My favorite part? I can set Crockpot Gluten-Free Artisan Bread while I stir a pot of creamy slow cooker soup or prep Crockpot gluten-free stuffing for Sunday. Multitasking, but make it cozy.

    No-oven baking is trending for a reason—summer heat, tiny kitchens, and energy savings. This no-knead gluten-free artisan loaf in a crockpot fits right in. TikTok is swooning over set-and-forget loaves; ours adds a gluten-free twist with tapioca starch for chew, psyllium or xanthan for structure, and a low-stress timeline. The result is a real artisan-style bread with a crisp bottom crust and soft crumb that stands up to butter, olive oil dips, and toast. Pro tip: a paper towel under the lid prevents sogginess, a crucial trick for great slow cooker gluten-free bread.

    Chaos note from Darleen: Once I forgot the paper towel and condensation rained on my dough like a tiny storm cloud. I dabbed the top, added five more minutes, then crisped under the broiler—the loaf still turned out gorgeous. Bread forgiveness is a thing!

    Crockpot Gluten-Free Artisan Bread: Ingredients That Matter

    Flour blends, binders, and hydration

    The soul of Crockpot Gluten-Free Artisan Bread is balance. Use a quality gluten-free all-purpose blend (with xanthan gum), then boost with tapioca starch for that chewy, artisan texture. If your blend is gum-free, add psyllium husk powder or xanthan; they trap gas, helping your no-knead gluten-free bread rise. Salt strengthens structure and deepens flavor; apple cider vinegar adds lift and tenderness. Olive oil keeps the crumb supple during the slow cooker’s long steam bath.

    Hydration is key for any gluten-free artisan loaf. The dough should be sticky and slightly loose—more like choux dough than classic wheat dough. Too stiff? Add a tablespoon or two of warm water. Too slack? Dust your hands, not the dough, and shape on the parchment.

    Practical tips for consistent results

    • Use warm water (105–110°F/40–43°C). Yeast is your friend; keep it comfy.
    • Proof active dry yeast if in doubt. No foam? Start over.
    • Line the crockpot with parchment and add a paper towel under the lid to reduce condensation.
    • Cook on HIGH. The low setting won’t create a firm crust or bake-through center.
    • Check doneness with a thermometer: 205–210°F internal temp.
    • Finish under a broiler or in an air fryer for a deep golden crust.

    Darleen’s kitchen chaos: I once measured tapioca as tablespoons instead of grams while helping with spelling homework. The loaf was still edible, but the next time I weighed everything and—wow—a perfect slow cooker gluten-free bread with a springy crumb. If you can, weigh your flours. Your future toast will thank you. For breakfast pairings, my crockpot gluten-free granola is an easy win.

    No-Knead GF Artisan Loaf: Mix, Rise, Cook

    The step-by-step game plan

    To make Crockpot Gluten-Free Artisan Bread, whisk warm water and sweetener, bloom the yeast, then stir in the dry ingredients. Rest the dough 10 minutes to hydrate. Shape with damp or oiled hands into a round on a parchment sling and lower into the crockpot. Cover with a paper towel and the lid. Cook on HIGH 2–2 1/2 hours until the bottom is golden and the internal temperature hits 205°F. Lift the loaf out to cool—or give it a quick broil/air-fry to amplify that artisan crust. Cool fully for neat slices and a tender, non-gummy crumb.

    • Everything Topping: Brush with olive oil; sprinkle everything-bagel seasoning before cooking.
    • Herb & Garlic: Add 1 tsp garlic powder + 1 tsp dried rosemary to the dry mix.
    • Olive & Sea Salt: Fold in 1/3 cup chopped olives; finish with flaky salt after broiling.
    • Dairy-Free Parmesan Vibe: Toss 2 tbsp nutritional yeast into the dough for umami depth.
    • Seeded Crust: Press sesame, poppy, chia, or sunflower seeds into the top after shaping.

    Darleen’s real-life moment: Mid-mix, my timer died and my kid asked where socks go when the dryer eats them. I guessed “the sock galaxy,” then remembered to oil my hands before shaping the no-knead gluten-free dough. That tiny trick stopped sticking and kept my loaf round and cute—great for photos, better for sandwiches.

    Storage, Troubleshooting, and Pro FAQs

    Keeping that artisan crust and tender crumb

    Let Crockpot Gluten-Free Artisan Bread cool completely before slicing. Store at room temp in a paper bag tucked inside a loose plastic bag for 24–36 hours to protect the crust. For longer storage, slice and freeze with parchment between slices; toast straight from frozen. Re-crisp by air-frying 2–3 minutes at 375°F or toasting in a skillet with a dab of olive oil.

    Common issues solved

    • Soggy top: Use a paper towel under the lid and finish under the broiler for 5–8 minutes.
    • Dense crumb: Check your yeast freshness, allow full hydration rest, and ensure the dough is sticky (add 1–2 tbsp water if stiff).
    • Pale crust: The crockpot base browns; to deepen color, broil or air-fry after cooking.
    • Gummy slices: Bake to 205–210°F internal temp and cool fully 1–2 hours before slicing.

    Anecdote: I once sliced too soon because the house smelled like a bakery. The crumb squished. I waited next time, brewed tea, and pulled up this cozy slow cooker French onion roast for dinner—worth every minute. Patience equals perfect gluten-free artisan bread.

    FAQs

    Can I use a different gluten-free flour blend?

    Yes. Choose a high-quality blend meant for yeast baking. If your blend has no xanthan gum, add psyllium husk powder or xanthan as directed in the recipe to support structure.

    Do I have to broil the loaf after slow cooking?

    No. The crockpot creates a set crust with a golden bottom. Broiling or air-frying is optional for deeper color and extra crunch.

    How do I know it’s done without a thermometer?

    Tap the bottom; it should sound hollow. The loaf should feel set, not squishy, and the bottom should be lightly browned. A thermometer (205–210°F) is the most reliable.

    Can I make it dairy-free or vegan?

    It’s naturally dairy-free. The base recipe is also egg-free; verify your blend’s ingredients to keep it vegan. Use maple syrup instead of honey if needed.

    Conclusion

    Crockpot Gluten-Free Artisan Bread delivers true bakery vibes with zero oven drama. The slow cooker’s steady heat steams the dough for lift while tapioca and a good binder create a chewy, sliceable crumb. With a parchment sling, paper-towel trick, and a quick broil boost, you’ll get a crisp crust and tender interior every time. Whether you go herb-garlic, olive-studded, or classic, this slow cooker gluten-free bread anchors weeknight dinners and lazy brunches alike. I’m cheering you on—try Crockpot Gluten-Free Artisan Bread at home and tag me so I can see your loaf glow-up!