Blog

  • Gingerbread Truffles – Cozy and Irresistible Treat

    Gingerbread Truffles – Cozy and Irresistible Treat

    Gingerbread Truffles are my holiday peace treaty with kitchen chaos. The first time I made Gingerbread Truffles, my mixer was MIA, the dog snagged a gingersnap, and my kids declared themselves official sprinkle testers. I mashed the crumbs with a rolling pin, laughed, and kept going—because the creamy spice and chocolate shell make every imperfect moment taste perfect. If you need a homemade, no-bake treat that feels like instant comfort food, this is it.

    Gingerbread Truffles – Cozy and Irresistible Treat

    Recipe

    PART 1: WHY YOU’LL LOVE THIS RECIPE

    What Makes This Gingerbread Truffles So Irresistible

    I created these Gingerbread Truffles after a December grocery run where I forgot butter, remembered molasses, and decided to wing it. Gingerbread Truffles deliver that classic cookie spice in a creamy, homemade truffle that tastes like holiday comfort food without turning on the oven. The chocolate shell gives a satisfying snap, and the inside is soft, gently sweet, and warmly spiced.

    • No-bake and fast: quick prep with simple ingredients you likely have on hand.
    • Silky inside, crisp shell: the best bite of the season in a homemade version.
    • Foolproof texture: easy recipe that sets up beautifully with a short chill.
    • Family-friendly fun: rolling, dipping, and sprinkling are perfect helper jobs.
    • Party-perfect: they look fancy with nearly zero effort, ideal for gifting and dessert trays.

    These Gingerbread Truffles bring the nostalgia of gingersnaps with modern ease. If you’re craving something cozy, festive, and shareable, this is your new holiday hero. Let’s make a batch and get to the recipe card!

    If your feed has been full of glossy holiday bites, Gingerbread Truffles are why. They’re an easy recipe to batch-make, photograph, and gift. Between the Pinterest-friendly drizzle and the short ingredient list, they’re the definition of quick fix dessert magic. Everyone can use a homemade comfort food moment—especially when it doubles as a crowd-pleasing treat and looks bakery-level without bakery-level effort.

    PART 2: TIPS, TRICKS & EXPERT SECRETS

    Chef Tips for Perfect Gingerbread Truffles Every Time

    I once taught a mini cooking class for neighbors and learned fast that melted chocolate behaves like a toddler—give it patience and it behaves, rush it and it gets dramatic. These cooking tip basics will keep your Gingerbread Truffles glossy and gorgeous.

    • Crumb texture matters: process gingersnaps to fine sand so the filling is smooth and holds its shape.
    • Work cool: chill the rolled centers 15–20 minutes so warm hands don’t melt the coating during dipping.
    • Melt gently: use 50% microwave power, stirring often, for a shiny, smooth chocolate shell.
    • Tap, don’t swirl: lift each truffle on a fork and tap the fork gently to release excess coating for a clean finish.

    Smart Ingredient Swaps & Practical Cooking Advice

    • Gluten-free: use gluten-free gingersnaps—the homemade version tastes just as great.
    • Vegan: swap dairy cream cheese for a vegan alternative and choose dairy-free melting wafers.
    • Less sweet: use bittersweet chocolate for coating and reduce molasses slightly for a spicier, less sugary bite.
    • Spice dial: love a bold kick? Add extra ground ginger or a pinch of black pepper for warmth.

    What not to do: don’t overheat chocolate. If it seizes, stir in 1 teaspoon neutral oil at a time as a quick fix. With these Gingerbread Truffles tips, you’ll get a flawless, homemade finish every time.

    PART 3: SERVING IDEAS & CREATIVE VARIATIONS

    How to Serve Gingerbread Truffles for Maximum Enjoyment

    When I set out a tray of Gingerbread Truffles at our cookie swap, they disappeared before the hot cocoa finished steaming. Presentation is half the fun: a simple platter, a dusting of crumbs, and a pretty drizzle make them look boutique-worthy. Try these serving ideas to make your Gingerbread Truffles the star:

    • Plate with contrast: mix white and dark chocolate coatings on the same tray for a striking spread.
    • Pair with sips: hot cocoa, espresso, or spiced chai highlight the molasses and ginger.
    • Sweet board: add dried cranberries, candied orange peel, and almond bark for a festive dessert board.

    Flavor Twists and Seasonal Variations

    • Maple-ginger: swap molasses for maple syrup and add a pinch of cardamom for a lighter, cozy twist.
    • Peppermint crunch: stir in crushed candy canes and use dark chocolate coating for a minty holiday variation.
    • Espresso drizzle: add 1 teaspoon instant espresso to the drizzle chocolate for a mocha vibe that amplifies spice.

    For creators, a simple plating suggestion: style truffles in odd-numbered groups and shoot near a window for soft, natural light. If you love festive truffles, you’ll also adore my Christmas Tree Cake Truffles and the ultra-giftable 5-Minute Christmas Crock Pot Candy. For a savory counterpoint on the party table, try Baked Cranberry Brie Bites.

    PART 4: STORAGE & TROUBLESHOOTING GUIDE

    How to Store and Reheat Gingerbread Truffles

    Leftover Gingerbread Truffles? Around here, that happens only when I hide a few. To keep fresh and protect the chocolate shell, store them correctly and they’ll taste bakery-new.

    • Room temperature: up to 2 days in a cool room, in a covered container, away from heat or sunlight.
    • Refrigerator: up to 7 days in an airtight container, layered with parchment to prevent sticking.
    • Freezer: up to 2 months. Freeze on a sheet pan, then bag in freezer-safe zip bags. Thaw overnight in the fridge to preserve texture.
    • Reheat: not needed for truffles. If they’re too firm from the fridge, let them stand 10–15 minutes at room temperature before serving.

    Troubleshooting Common Gingerbread Truffles Issues

    • Coating cracks: centers were too cold. Let rolled centers sit 5 minutes before dipping, or warm your coating slightly.
    • Soft or droopy truffles: mixture was too warm or wet. Chill longer, or add 2–3 tablespoons extra crumbs to fix texture.
    • Streaky/bloomed chocolate: heat swings can dull the finish. Keep batches small and melt at low power for a glossy shell.
    • Toppings sliding off: add toppings immediately after dipping while the coating is still wet.

    With this storage advice, your Gingerbread Truffles will keep their snap, spice, and creamy center. You’ve got this—these little bites are as forgiving as they are festive.

    FAQs

    Can I make Gingerbread Truffles ahead?

    Yes. Roll and freeze the centers up to 1 month. Dip the day you plan to serve for the freshest shell and best crunch.

    Do I need a food processor for Gingerbread Truffles?

    No. Place cookies in a zip-top bag and crush with a rolling pin until sandy. Fine crumbs help the centers hold together.

    Why did my chocolate seize while coating Gingerbread Truffles?

    Moisture or overheating is the culprit. Melt at 50% power and stir often. If it seizes, stir in 1–2 teaspoons neutral oil as a rescue.

    Can I use homemade gingersnaps for Gingerbread Truffles?

    Absolutely. Dry them slightly for crisp crumbs, or bake an extra minute for a sturdier, crushable cookie.

    Conclusion

    Gingerbread Truffles capture everything I love about holiday baking—cozy spice, creamy centers, and that chocolate snap—without the stress. This easy, homemade treat tastes like comfort food and looks party-ready with minimal effort. Use my expert tips to master the coating, keep a stash chilled for last-minute guests, and play with flavor variation like peppermint crunch or espresso drizzle. Gingerbread Truffles are the no-bake dessert you’ll return to every season. Try it at home and tag me so I can see your gorgeous trays!

  • Slow Cooker Beef Manhattan – Cozy, Irresistible Comfort

    Slow Cooker Beef Manhattan – Cozy, Irresistible Comfort

    Slow Cooker Beef Manhattan saved my Tuesday. I tossed a chuck roast in the crock before school drop-off, made a very dramatic exit from my kitchen (which included a forgotten lunchbox and a dog chasing a measuring spoon), and returned to a house that smelled like a diner counter at midnight. Slow Cooker Beef Manhattan is my love letter to easy dinner—tender beef, brown gravy, buttery bread, and a cloud of mashed potatoes. I learned to plate it like the classic: toast on the bottom, beef and gravy on top, mashed potatoes in the middle with more gravy. It’s weeknight magic and pure comfort food without fuss.

    Slow Cooker Beef Manhattan

    Recipe

    Why You’ll Love Slow Cooker Beef Manhattan

    What Makes This Slow Cooker Beef Manhattan So Irresistible

    I first made Slow Cooker Beef Manhattan on a day when my to-do list was as long as my grocery receipt. Slow Cooker Beef Manhattan became my sanity saver, simmering away while I juggled emails and a rogue bag of flour that exploded mid-pancake test. The result? Melt-in-your-mouth beef, savory gravy, and that diner-style stack of toast and mashed potatoes. It’s comfort food you can count on, an easy dinner that tastes like an all-day project. When the house smells like homemade gravy, everyone ends up in the kitchen early—usually with forks in hand.

    • Set-and-forget ease: minimal prep, the slow cooker does the work.
    • Classic comfort: buttery toast, creamy mashed potatoes, and rich gravy.
    • Family-friendly and crowd-pleasing: a cozy homemade version of a diner favorite.
    • Simple ingredients, big flavor: pantry staples, bold payoff.
    • Great for meal prep: leftovers reheat beautifully for quick fix lunches.

    If you love a no-fuss, homemade, one-pot comfort food dinner, this Slow Cooker Beef Manhattan is about to be your weeknight hero. Ready to dive into the recipe card?

    Right now, Slow Cooker Beef Manhattan is having a moment because it gives that cozy diner payoff with modern convenience. Between school nights, busy workdays, and budget-friendly cooking, this easy recipe scratches every itch. The homemade gravy brings big, nostalgic flavor without babysitting a pot on the stove, and the open-faced plating makes it feel special. If you’ve been craving a comforting, homemade dinner that tastes like a treat, Slow Cooker Beef Manhattan delivers every single time.

    Slow Cooker Beef Manhattan Tips, Tricks & Expert Secrets

    Chef Tips for Perfect Slow Cooker Beef Manhattan Every Time

    Years ago, a diner cook showed me the secret to unforgettable gravy: balance. That tiny splash of acidity makes Slow Cooker Beef Manhattan sing. Here’s how to nail it:

    • Brown for depth: Searing the roast before slow cooking builds irresistible, homemade flavor.
    • Layer aromatics: Onions and garlic under the roast act like a built-in rack and flavor booster.
    • Season twice: Salt and pepper the beef first, then adjust the gravy at the end for a pro-level finish.
    • Finish with butter: A pat whisked into the gravy adds a silky, diner-style sheen.

    Smart Ingredient Swaps & Practical Cooking Advice

    • Gluten-free: Use gluten-free bread and thicken the gravy with cornstarch as written (verify your Worcestershire or swap in tamari).
    • Lighter option: Choose eye of round instead of chuck and use milk in the mashed potatoes for a leaner, easy dinner.
    • Plant-forward twist: Swap half the beef with thick-sliced mushrooms for a hearty homemade version with less meat.
    • What not to do: Don’t over-thicken the gravy at the start. It tightens as it cools—add slurry gradually for the perfect texture.

    With these cooking tips, your Slow Cooker Beef Manhattan will be tender, balanced, and deeply savory—exactly what you want from this comfort classic and quick fix weeknight hero.

    Slow Cooker Beef Manhattan

    Serving Ideas & Creative Variations for Slow Cooker Beef Manhattan

    How to Serve Slow Cooker Beef Manhattan for Maximum Enjoyment

    When I plate Slow Cooker Beef Manhattan for guests, I go full diner: Texas toast on the bottom, a generous pile of beef, a scoop of mashed potatoes, and a glossy river of gravy. For an easy side, try crisp-tender veggies like this roasted asparagus and carrot combo—bright and simple. Light salads with a zippy vinaigrette cut the richness perfectly, and an iced tea or malty amber beer makes a classic pairing. If you’re photographing, plate on a neutral platter, spoon extra gravy right before the shot, and add chopped parsley for a fresh pop.

    Flavor Twists and Seasonal Variations

    • Onion & Mushroom Gravy: Add sliced cremini mushrooms in the last hour of slow cooking for a savory, steakhouse twist.
    • Garlic-Herb Upgrade: Stir in fresh thyme and a small splash of sherry vinegar to the gravy for a bright, homemade finish.
    • Autumn Harvest: Serve with roasted carrots and parsnips, then finish the gravy with a teaspoon of whole-grain mustard for a seasonal twist.

    Love slow cooker comfort? You might also enjoy my slow-cooked beef brisket or the tangy-sweet balance of slow cooker balsamic cranberry chicken. However you style it, Slow Cooker Beef Manhattan is the perfect canvas for your favorite flavor variation, plating suggestion, and cozy-night vibes.

    Storage & Troubleshooting Guide for Slow Cooker Beef Manhattan

    How to Store and Reheat Slow Cooker Beef Manhattan

    When we have leftovers of Slow Cooker Beef Manhattan, I portion beef and gravy together for zero-fuss lunches. Store toast and mashed potatoes separately for best texture.

    • Room temperature: Keep out no longer than 2 hours for food safety.
    • Fridge: Store beef with gravy in airtight containers up to 4 days. Refrigerate mashed potatoes and bread separately.
    • Freezer: Beef and gravy freeze well up to 3 months. Thaw overnight in the fridge.
    • Reheat: Gently warm beef and gravy on the stovetop over low heat or in the microwave at 50–70% power, stirring often. Refresh mashed potatoes with a splash of milk. Toast bread fresh for serving.

    Troubleshooting Common Slow Cooker Beef Manhattan Issues

    • Too watery: Simmer the strained juices and add slurry gradually until the gravy clings to a spoon.
    • Too salty: Add unsalted beef broth or a splash of water and a pinch of sugar or a knob of butter to balance.
    • Beef too dry: Mix in warm gravy and a teaspoon of butter, then cover for 5 minutes to rehydrate.
    • Greasy gravy: Skim fat or chill the juices and lift off the fat cap before thickening.
    • Underseasoned: Finish with salt, pepper, and a few drops of Worcestershire for depth.

    With these storage advice tips and quick fixes, your Slow Cooker Beef Manhattan will stay fresh, reheat beautifully, and taste just as cozy the next day. You’ve got this—dinner is officially under control.

    FAQs

    Can I make Slow Cooker Beef Manhattan ahead of time?

    Yes. Cook the beef and gravy up to 3 days ahead. Reheat gently, toast fresh bread, and whip or warm mashed potatoes right before serving.

    What cut of beef works best for Slow Cooker Beef Manhattan?

    Chuck roast is ideal for tenderness and flavor. For a leaner option, try eye of round and be generous with gravy for moisture.

    How do I thicken the gravy without flour?

    Use a cornstarch slurry (equal parts cornstarch and cold water). Whisk into simmering juices a little at a time until the gravy coats a spoon.

    Can I cook on high instead of low?

    Yes. Cook on High for about 4–5 hours, but Low for 8–10 hours yields the most tender, shreddable beef.

    Conclusion

    Slow Cooker Beef Manhattan is classic comfort done the easy way—tender beef, luscious gravy, buttery toast, and creamy mashed potatoes in one homemade, set-and-forget dinner. It’s the kind of cozy, crowd-pleasing meal that turns an ordinary weeknight into something special. Whether you serve it family-style or plate it diner-style with extra gravy, this Slow Cooker Beef Manhattan recipe delivers bold flavor, reliable texture, and pure comfort food satisfaction. If you’re craving more easy dinner inspiration, browse my latest recipes. Try it at home and tag me—I can’t wait to see your comforting plates!

  • Honey Garlic Chicken and Veggies – Cozy, Irresistible Flavor

    Honey Garlic Chicken and Veggies – Cozy, Irresistible Flavor

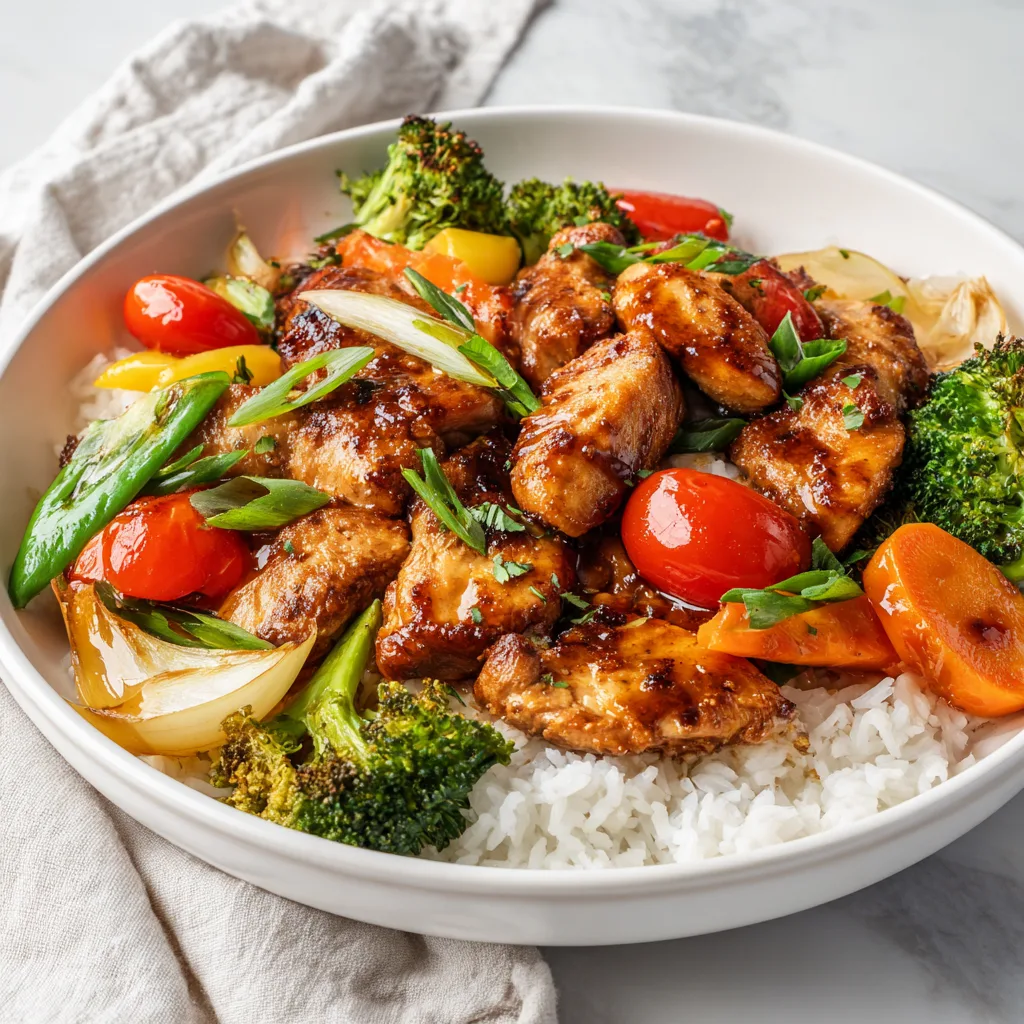
    Honey Garlic Chicken and Veggies saved my Tuesday. I was mid-zoom with sauce on my sleeve, the dog sneaking a carrot, and my timer singing backup vocals. In 40 minutes flat, Honey Garlic Chicken and Veggies turned my kitchen chaos into a cozy, glossy dinner the whole table loved. I’m Darleen Vance, and this is the kind of homemade, one-pan meal I reach for when life is loud and hungry. The honey-garlic glaze clings to juicy chicken and tender veggies, tastes like comfort food, and it’s easy enough to make with a toddler on your hip and a laundry mountain in the doorway.

    Honey Garlic Chicken and Veggies

    Recipe

    WHY YOU’LL LOVE THIS RECIPE

    What Makes This Honey Garlic Chicken and Veggies So Irresistible

    I swear Honey Garlic Chicken and Veggies has magic in the glaze. The first time I tested it, I was late for school pickup and still decided to whisk the sauce from scratch—because homemade makes the difference. Honey Garlic Chicken and Veggies comes out sticky, savory-sweet, and beautifully caramelized without babysitting a pan. It’s the easy dinner I count on when I want comfort food without a sink full of dishes. The sauce coats every bite of tender chicken and crisp-tender vegetables, and the one-pan meal cleanup is a tiny victory. If you’ve been craving a homemade version of your favorite takeout vibes, Honey Garlic Chicken and Veggies checks every weeknight box and then some.

    • Fast and weeknight-friendly: about 40 minutes, start to finish.
    • One-pan meal with simple ingredients you already own.
    • Balanced sweet-savory sauce that’s glossy and bold.
    • Family-friendly comfort food; leftovers reheat beautifully.
    • Easy to customize with whatever veggies are in the fridge.

    Ready for that glossy pan of Honey Garlic Chicken and Veggies? Let’s get to the recipe card.

    Short videos made it famous, but the real reason Honey Garlic Chicken and Veggies is trending is how reliably delicious it is. It’s cozy without being heavy, it’s homemade yet tastes like your favorite takeout, and the honey-garlic gloss looks irresistible in photos. It’s also an easy recipe to batch or halve, so meal preppers and busy families love it. Try it once and you’ll see why Honey Garlic Chicken and Veggies is the weeknight win that keeps showing up on menus and feeds.

    TIPS, TRICKS & EXPERT SECRETS

    Chef Tips for Perfect Honey Garlic Chicken and Veggies Every Time

    During a community cooking class, I learned the hard way that adding all the honey to the pan too early can scorch it. Since then, I’ve split the sauce for Honey Garlic Chicken and Veggies—some for roasting, some to thicken at the end—and it’s been perfect every time. Use these cooking tips for a guaranteed glossy finish on your Honey Garlic Chicken and Veggies.

    • Dry the chicken with paper towels before seasoning for better browning.
    • Cut veggies to similar sizes so they roast evenly in this easy recipe.
    • Roast hot (425°F) for caramelized edges without overcooking.
    • Thicken a reserved portion of sauce on the stovetop for that shiny, clingy glaze.

    Smart Ingredient Swaps & Practical Cooking Advice

    • Protein swap: Use shrimp (roast 6–8 minutes) or tofu for a homemade version that’s pescatarian or plant-friendly.
    • Gluten-free: Replace soy sauce with tamari or coconut aminos; Honey Garlic Chicken and Veggies stays just as flavorful.
    • Lighter: Use chicken breasts and reduce honey to 1/4 cup; add a splash of water to the sauce if needed.
    • What not to do: Don’t dump cornstarch into the full sauce on the sheet pan—it won’t thicken right and can turn gummy. Thicken separately, then toss.

    These quick fixes, each a simple cooking tip, make Honey Garlic Chicken and Veggies reliable, fast, and ultra-tasty, even when the day gets long.

    SERVING IDEAS & CREATIVE VARIATIONS

    How to Serve Honey Garlic Chicken and Veggies for Maximum Enjoyment

    When friends stop by on short notice, I plate Honey Garlic Chicken and Veggies family-style on a white platter and drizzle extra glaze for a restaurant finish. For serving ideas, think fluffy jasmine rice, garlicky mashed potatoes, or quick noodles. A crisp green salad rounds it out, and a citrus wedge gives a bright pop. For an easy veggie side, my Roasted Asparagus and Carrot pairs perfectly and keeps the one-pan rhythm going.

    • Serve over rice, cauliflower rice, or buttered egg noodles.
    • Add a swipe of chili crisp or sriracha for spicy lovers.
    • Pair with iced green tea or a crisp sauvignon blanc.

    Flavor Twists and Seasonal Variations

    • Maple-Ginger: Swap half the honey with pure maple syrup and add extra ginger for a deeper, cozy twist.
    • Lemon-Herb: Finish Honey Garlic Chicken and Veggies with lemon zest and chopped parsley; serve with citrus wedges.
    • Harvest Sheet Pan: Use butternut squash and Brussels sprouts in fall for a seasonal twist; drizzle with a touch more honey at the end.

    Content creators: for a clean plating suggestion, heap rice in a shallow bowl, tuck Honey Garlic Chicken and Veggies to one side, spoon on extra glaze, and sprinkle sesame seeds. Snap near a window for soft, natural light. Craving more weeknight wins? Try my Slow Cooker Balsamic Cranberry Chicken or the cozy Creamy Crack Chicken Gnocchi.

    STORAGE & TROUBLESHOOTING GUIDE

    How to Store and Reheat Honey Garlic Chicken and Veggies

    I love waking up to a fridge with Honey Garlic Chicken and Veggies ready for lunch—future-me always says thank you. Here’s how to keep Honey Garlic Chicken and Veggies fresh and saucy.

    • Room temperature: Keep Honey Garlic Chicken and Veggies out no more than 2 hours.
    • Fridge: Store in airtight containers up to 4 days. Separate sauce if you have extra for best texture.
    • Freezer: Freeze up to 3 months in freezer-safe bags. Lay flat for quick thawing.
    • Reheat: Skillet over medium with a splash of water to loosen the glaze; or air fryer at 350°F for 4–6 minutes for crisp edges. Microwave in 60–90 second bursts, stirring in between.

    Troubleshooting Common Honey Garlic Chicken and Veggies Issues

    • Too dry: Add 1–2 tbsp water or chicken broth while reheating; finish with a drizzle of honey.
    • Watery sauce: Simmer the glaze 1–2 extra minutes or add 1/2 tsp more cornstarch whisked with water.
    • Overcooked veggies: Cut thicker next time and place them closer to the center of the pan.
    • Uneven browning: Don’t overcrowd—use a second sheet pan so Honey Garlic Chicken and Veggies can roast, not steam.

    Follow this storage advice and your Honey Garlic Chicken and Veggies will reheat like new. You’ve got this—leftovers are about to be legendary.

    FAQs

    Can I make Honey Garlic Chicken and Veggies on the stovetop?

    Yes. Sear chicken in a large skillet, remove, stir-fry veggies until crisp-tender, return chicken, and pour in thickened sauce. Toss until glossy.

    What’s the best chicken for Honey Garlic Chicken and Veggies?

    Boneless skinless thighs stay juicy and flavorful. Breasts work too—just don’t overcook and cut them evenly for quick, even roasting.

    How do I keep the honey from burning?

    Roast hot but add part of the sauce at the end. Thicken a reserved portion on the stovetop, then toss; finish with a short broil while watching closely.

    Is Honey Garlic Chicken and Veggies gluten-free?

    Use tamari or coconut aminos instead of soy sauce and confirm cornstarch is certified gluten-free. The rest of the ingredients are naturally gluten-free.

    Conclusion

    Honey Garlic Chicken and Veggies is the weeknight winner that proves homemade comfort food can be simple, fast, and wildly satisfying. The sweet-savory sauce, caramelized edges, and crisp-tender vegetables make this easy dinner a one-pan dream. Whether you’re feeding kids, meal-prepping lunches, or hosting casual friends, Honey Garlic Chicken and Veggies is dependable, delicious, and totally camera-ready. Save this recipe, try it at home, and tag me so I can cheer you on—your glossy pan of Honey Garlic Chicken and Veggies is waiting.

  • Slow Cooker Mediterranean Chicken – Cozy and Irresistible

    Slow Cooker Mediterranean Chicken – Cozy and Irresistible

    Slow Cooker Mediterranean Chicken is my weeknight hero. The first time I tested this Slow Cooker Mediterranean Chicken, I was juggling a science project volcano and a dog who stole the lemon. I tossed everything in the crock, crossed my fingers, and came back to the most fragrant, cozy dinner. The olives, lemon, and herbs do all the heavy lifting while you do anything else. It’s a real-life saver and tastes like a vacation in a bowl.

    Slow Cooker Mediterranean Chicken – Cozy and Irresistible

    Recipe

    Why You’ll Love Slow Cooker Mediterranean Chicken

    What Makes This Slow Cooker Mediterranean Chicken So Irresistible

    Confession time: the first time I served Slow Cooker Mediterranean Chicken to guests, I burned the bread, dropped a spoon, and still got asked for the recipe twice. That’s the magic of Slow Cooker Mediterranean Chicken — it’s forgiving, deeply flavorful, and feels homemade even on the busiest days. This easy dinner leans on bright lemon, briny olives, and sweet tomatoes for a one-pan meal that tastes like comfort food with a sunny twist. It’s the kind of slow cooker Mediterranean chicken that makes your kitchen smell like you’re winning at life.

    • Quick prep: 15-minute chop-and-drop, then the slow cooker takes over.
    • Comforting taste: lemon, oregano, and garlic create rich Mediterranean flavor without fuss.
    • Simple ingredients: pantry-friendly, budget-wise, and incredibly homemade.
    • Family-friendly: tender chicken with customizable spice level and toppings.
    • Meal prep gold: reheats like a dream for stress-free lunches.

    People love Slow Cooker Mediterranean Chicken because it checks every “easy recipe” box: hands-off cooking, big flavor, and wholesome ingredients. It’s the homemade version of a restaurant favorite, but with fewer dishes and a gentler grocery bill. As an easy dinner and true comfort food, this slow cooker Mediterranean chicken works on school nights, date nights, and everything in between. Ready to cook? Let’s head to the recipe.

    Tips, Tricks & Expert Secrets for Slow Cooker Mediterranean Chicken

    Chef Tips for Perfect Slow Cooker Mediterranean Chicken Every Time

    I learned this the delicious way: during a cooking class, I over-zested a lemon and ended up with bitter sauce. Since then, my Slow Cooker Mediterranean Chicken routine has been dialed in with a few small, smart moves. These cooking tips keep your easy recipe bright, juicy, and foolproof.

    • Layer like a pro: onions and peppers on the bottom, chicken in the middle, sauce over the top. This homemade version cooks evenly and stays juicy.
    • Finish with freshness: stir in olives and artichokes during the last 30 minutes so they keep their bite and briny pop in your slow cooker Mediterranean chicken.
    • Balance acidity: add lemon zest at the end, not the beginning. Juice can simmer; zest is a quick fix for brightness at the finish.
    • Thicken thoughtfully: cornstarch slurry transforms the sauce from brothy to glossy without losing that Mediterranean charm.

    Smart Ingredient Swaps & Practical Cooking Advice

    • Chicken swap: Boneless skinless thighs are ideal, but breasts work. Cook breasts on LOW and check early to keep Slow Cooker Mediterranean Chicken tender.
    • Vegan twist: Use chickpeas and cauliflower florets instead of chicken; reduce cook time and add olives/artichokes in the last hour.
    • Gluten-free & low-carb: Naturally GF; serve with cauliflower rice or zucchini ribbons.
    • What not to do: Don’t dump all the lemon zest in at the start. It can turn bitter over hours. Add zest at the end for fresh, bright flavor.

    With these cooking tips, your slow cooker Mediterranean chicken will taste like you hovered over the stove all day. For more slow-cooked inspo, peek at my Slow Cooker Balsamic Cranberry Chicken and the ultimate crowd-pleaser, Slow Cooked Beef Brisket.

    Serving Ideas & Creative Variations

    How to Serve Slow Cooker Mediterranean Chicken for Maximum Enjoyment

    When I served Slow Cooker Mediterranean Chicken for a casual patio dinner, I set out bowls of feta, parsley, and lemon wedges. Everyone built their own bowls — and suddenly my weeknight slow cooker Mediterranean chicken felt like a dinner party. Here are easy serving ideas to make it shine.

    • Plating suggestion: Spoon chicken over couscous, rice pilaf, or creamy polenta. Add extra sauce and a crumble of feta.
    • Greens-forward: Pile onto garlicky sautéed spinach or garlicky roasted asparagus for a lighter plate. Try it with Roasted Asparagus and Carrot.
    • Sauce pairing: Swirl in a dollop of Greek yogurt or a drizzle of tahini-lemon sauce for a cool, creamy contrast.
    Slow Cooker Mediterranean Chicken – Cozy and Irresistible

    Flavor Twists and Seasonal Variations

    • Herb garden twist: Add fresh oregano and basil at the end for a vibrant finish to your Slow Cooker Mediterranean Chicken.
    • Smoky sunset: Replace paprika with smoked paprika and a pinch of cumin for deeper, cozier notes.
    • Summer market: Toss in zucchini coins or cherry tomatoes in the last hour — a seasonal twist that keeps the sauce bright.

    Content creators: for social media, plate in a wide, shallow bowl and style with lemon wedges, a sprinkle of parsley, and a trail of feta. This slow cooker Mediterranean chicken loves natural light and close-up shots that show off those olives and herbs. Pin it, post it, and let your followers fall in love.

    Storage & Troubleshooting Guide

    How to Store and Reheat Slow Cooker Mediterranean Chicken

    My favorite part of Slow Cooker Mediterranean Chicken? Leftovers. I call it “tomorrow’s victory lunch.” To keep your slow cooker Mediterranean chicken tasting fresh, follow this storage advice:

    • Room temperature: Keep out for no more than 2 hours.
    • Fridge: Store in airtight containers up to 4 days. Glass is best to preserve flavor.
    • Freezer: Freeze up to 3 months in portioned, freezer-safe containers. Label with date.
    • Reheat: Simmer gently on the stovetop with a splash of broth, or microwave at 60–70% power in 1-minute bursts, stirring between. Air fryer isn’t ideal for saucy dishes; use a skillet for best texture.

    Troubleshooting Common Slow Cooker Mediterranean Chicken Issues

    • Too dry: Add a splash of broth and a drizzle of olive oil; finish with fresh lemon juice to revive the sauce.
    • Too watery: Uncover and simmer on HIGH for 20 minutes, or stir in a cornstarch slurry and cook 10 minutes to thicken.
    • Too salty: Add unsalted broth, a squeeze of lemon, and extra tomatoes. Saltiness will mellow.
    • Overcooked: Shred chicken and fold into the sauce; the moisture helps fix texture. Next time, check at the early end of the window.

    You’ve got this. With a few quick fixes, Slow Cooker Mediterranean Chicken stays tender, bright, and ready for seconds.

    FAQs

    Can I use chicken breasts instead of thighs?

    Yes. Cook on LOW and check early. Breasts can dry out, so pull them when they reach 165°F; they’ll stay juicy in the sauce.

    Do I have to brown the chicken first?

    No. This Slow Cooker Mediterranean Chicken is designed for toss-and-go. Browning adds depth but isn’t required for great flavor.

    Can I prep Slow Cooker Mediterranean Chicken the night before?

    Absolutely. Combine the sauce and store separately from the chicken. In the morning, add everything to the slow cooker and press start.

    How do I make it dairy-free or low-carb?

    It’s naturally dairy-free if you skip feta. For low-carb, serve over cauliflower rice or zucchini noodles instead of grains.

    Conclusion

    Slow Cooker Mediterranean Chicken is the kind of easy dinner that rewards you for keeping it simple. With bright lemon, briny olives, and tender chicken, this slow cooker Mediterranean chicken delivers homemade comfort food without the stress. It’s an approachable one-pan meal you can make on a weeknight and proudly serve on the weekend. If you’re craving more slow cooker coziness, try my creamy-but-light Slow Cooker Cajun Potato Soup next. Make Slow Cooker Mediterranean Chicken, share your plate, and tag me so I can cheer you on from my kitchen. Your table is about to smell amazing.

  • Orange Chocolate Christmas Truffles – Irresistible & Cozy

    Orange Chocolate Christmas Truffles – Irresistible & Cozy

    Orange Chocolate Christmas Truffles are the holiday sweet I make when chaos hits and the doorbell rings early. Orange Chocolate Christmas Truffles saved me last year when I accidentally dropped powdered sugar on the dog and we turned him into a tiny, wagging snowdrift. I whisked a bright orange ganache, chilled it, and rolled truffles while the cocoa hid evidence of my “blizzard.” They’re rich, citrusy, melt-in-your-mouth bites that look fancy even if your kitchen looks like Santa’s workshop after a cinnamon explosion.

    Orange Chocolate Christmas Truffles – Irresistible & Cozy

    Recipe

    WHY YOU’LL LOVE THIS RECIPE

    What Makes This Orange Chocolate Christmas Truffles So Irresistible

    I created these Orange Chocolate Christmas Truffles on a day when my mixer quit right after the in-laws texted “We’re five minutes away.” Orange Chocolate Christmas Truffles require no baking, barely any equipment, and deliver pure, cozy comfort food vibes with a bright citrus pop. That contrast—the zesty orange against silky chocolate—tastes like a hug wrapped in twinkle lights. My homemade version is decadent but simple enough for a quick fix when you’re juggling gift wrap, carols, and a slightly-singed batch of something else on the counter.

    • Luxuriously creamy ganache center with real orange zest for bright, festive flavor.
    • Foolproof, easy recipe: melt, chill, roll—no oven required.
    • Simple, everyday ingredients you probably already have on hand.
    • Family-friendly to make and to eat; kids love rolling and decorating.
    • Beautiful gift-worthy treats that look bakery-made but are totally homemade.

    Orange Chocolate Christmas Truffles bring the sparkle to cookie trays and dessert boards without the stress. Ready to make a batch that disappears faster than the wrapping paper? Let’s jump into the recipe card below!

    Every holiday season, Orange Chocolate Christmas Truffles become the star of my dessert table because they’re a cozy, homemade indulgence that’s quick to assemble and impossible to stop eating. Friends rave about the smooth orange ganache and rich chocolate shell, and these truffles have become my most requested easy recipe to share. Between the vibrant citrus aroma, the meltaway texture, and the festive finish, it’s no wonder Orange Chocolate Christmas Truffles keep trending on my socials. They’re that perfectly balanced treat when you crave comfort food without the heavy lift.

    TIPS, TRICKS & EXPERT SECRETS

    Chef Tips for Perfect Orange Chocolate Christmas Truffles Every Time

    My favorite kitchen lesson came from a chocolatier who taught me that patience makes glossy, dreamy ganache. When I tested Orange Chocolate Christmas Truffles for a cookie swap, I learned three tiny changes that turned “good” into “wow.” Use these cooking tips for consistent success:

    • Chop chocolate finely and evenly so the hot cream melts it smoothly for a satin ganache.
    • Let the cream rest on the chocolate for 2 minutes before stirring—this prevents graininess.
    • Stir gently from the center out; avoid whisking air into the ganache for the silkiest texture.
    • Chill the mixture until scoopable, then work quickly with cold hands or food-safe gloves.

    Smart ingredient swaps make Orange Chocolate Christmas Truffles friendly for everyone:

    • Vegan: Use high-quality dairy-free chocolate and full-fat coconut cream instead of heavy cream; swap butter for vegan butter.
    • Gluten-free: The base recipe is naturally gluten-free—just confirm toppings like sprinkles are certified GF.

    What not to do: Don’t overheat the cream—it should steam, not boil. Scalding can cause splitting and a broken, greasy ganache. Keep this quick fix in mind: if ganache looks split, gently whisk in 1–2 teaspoons of warm cream to bring it back together. With these small, homemade adjustments, Orange Chocolate Christmas Truffles turn out glossy, truffle-shop worthy every time.

    Smart Ingredient Swaps & Practical Cooking Advice

    To fine-tune Orange Chocolate Christmas Truffles, choose chocolate around 60–70% cacao for balance, then dial in your orange flavor with zest and a splash of extract or liqueur. Measuring is key, but texture tells the truth: if the ganache feels too soft for rolling, chill longer; too firm, warm slightly at room temp. Keep your coating simple—cocoa powder for classic, or a crisp shell of tempered chocolate. This homemade version is an easy recipe to customize with pantry staples, and each small cooking tip above helps you glide through the steps like a pro.

    SERVING IDEAS & CREATIVE VARIATIONS

    How to Serve Orange Chocolate Christmas Truffles for Maximum Enjoyment

    Last December, I filled a vintage cookie tin with Orange Chocolate Christmas Truffles and passed it around the table between rounds of charades. The oohs and ahhs were instant—proof that a simple plating suggestion can elevate the moment. For a cozy dessert board, try a few serving ideas:

    • Pair with hot cocoa, espresso, or a citrusy tea to echo the orange aroma.
    • Arrange on a marble board with sliced clementines and candied orange peel for sparkle.
    • Drizzle with melted chocolate and a whisper of flaky salt just before serving.

    For more sweet gifting inspo, peek at my Christmas Tree Cake Truffles and my crowd-pleasing 5-Minute Christmas Crock-Pot Candy. They sit beautifully beside these truffles on any holiday tray.

    Orange Chocolate Christmas Truffles

    Flavor Twists and Seasonal Variations

    Orange Chocolate Christmas Truffles are endlessly adaptable, which makes them social-media-ready and fun to style. Try these flavor variation ideas for a seasonal twist:

    • Spiced Orange: Add a pinch of cinnamon and cardamom to the ganache; finish with cocoa and a dusting of powdered sugar for a wintry look.
    • Dark & Salty: Use 70% chocolate, bump the orange zest slightly, and finish with a crack of flaky sea salt.
    • Snowy Coconut: Roll in finely shredded coconut instead of cocoa for a white “snowball” finish.

    Photography tip: stack truffles in a pyramid and tuck in orange zest curls for dimension. A simple linen, scattered cranberries, and soft window light make Orange Chocolate Christmas Truffles look like they tumbled straight out of a holiday magazine spread.

    STORAGE & TROUBLESHOOTING GUIDE

    How to Store and Reheat Orange Chocolate Christmas Truffles

    There’s always a secret tin in my fridge labeled “leftovers,” which is code for: Orange Chocolate Christmas Truffles I’m not sharing yet. To keep them fresh, follow this storage advice:

    • Room Temperature: Up to 1–2 days if your kitchen stays cool (below 70°F/21°C); otherwise, refrigerate.
    • Refrigerator: Store in an airtight container for 10–14 days. Layer with parchment to prevent sticking.
    • Freezer: Freeze up to 2 months in a sealed container. Thaw overnight in the fridge, then let stand 10 minutes to soften.

    Reheating isn’t usually needed, but if you want a softer bite, rest truffles at room temp for 10–15 minutes. For an ultra-gentle warm-up, microwave a single truffle for 3–5 seconds—no more—or it may melt.

    Troubleshooting Common Orange Chocolate Christmas Truffles Issues

    • Too Soft to Roll: Chill longer or stir in a tablespoon of finely chopped chocolate; the cocoa butter will help firm the mixture.
    • Too Firm or Crumbly: Warm at room temperature for 5–10 minutes; fold in 1–2 teaspoons of warm cream to restore silkiness.
    • Grainy Ganache: The cream was too hot or stirred too vigorously. Fix by whisking in a splash of warm cream until smooth.
    • Cracked Coating: The centers were too cold when dipped. Let them sit a few minutes before coating.
    • Condensation Blooms: Avoid moving from freezer to a warm room. Thaw in the fridge to minimize moisture.

    With these simple, homemade fixes, your Orange Chocolate Christmas Truffles will keep their velvety texture, bright citrus flavor, and giftable shine. Need more festive sides for your party spread? Try my Christmas Cinnamon Butter on warm rolls next to your candy tray.

    FAQs

    Can I make Orange Chocolate Christmas Truffles without liqueur?

    Yes. Use 1 teaspoon orange extract instead of liqueur, and keep the zest for a fresh citrus pop.

    Do I have to temper the chocolate for dipping?

    No. You can dip in simply melted chocolate for ease, but tempered chocolate gives a snappier, shinier shell.

    Can I add nuts to Orange Chocolate Christmas Truffles?

    Absolutely. Fold in finely chopped toasted almonds, hazelnuts, or pistachios for texture before chilling.

    How do I keep my hands from getting messy while rolling?

    Wear food-safe gloves and dust your palms lightly with cocoa. Roll quickly, then chill again before coating.

    Conclusion

    When holiday to-do lists grow long, Orange Chocolate Christmas Truffles deliver comfort, sparkle, and a homemade touch with minimal effort. The creamy ganache, bright orange zest, and rich chocolate shell make a festive, giftable sweet that also satisfies those cozy comfort food cravings. Whether you roll them in cocoa or dip them for a glossy finish, this easy recipe adapts beautifully to flavor variation and seasonal twist ideas. Make a double batch, keep a few in the fridge for a quick fix, and share the rest with friends. I can’t wait to see your Orange Chocolate Christmas Truffles—try it at home and tag me so I can cheer on your holiday treat magic!

  • Christmas Cranberry Honey Butter – Creamy, Cozy Bliss

    Christmas Cranberry Honey Butter – Creamy, Cozy Bliss

    Christmas Cranberry Honey Butter started in my kitchen when the mixer splattered cranberries onto my favorite holiday apron, and my son declared it “confetti butter.” I was testing a small-batch version for brunch, then realized Christmas Cranberry Honey Butter deserves a full spotlight—silky, tangy-sweet, and wildly spreadable. One taste and the dinner rolls “accidentally” disappeared. I’m Darleen Vance, and this festive recipe embraces kitchen chaos, quick wins, and rich flavor without fuss. Make it once, and you’ll find excuses to slather it on everything—toast, pancakes, roasted veggies, even warm biscuits while the tree lights glow.

    Christmas Cranberry Honey Butter – Creamy, Cozy Bliss

    Recipe

    Why You’ll Love Christmas Cranberry Honey Butter

    What Makes This Christmas Cranberry Honey Butter So Irresistible

    I learned fast that Christmas Cranberry Honey Butter is the holiday peacekeeper. The first time I made it, I parked a warm basket of rolls on the table, and my sister casually kept one hand on the butter dish—like a goalie guarding the net. That’s the charm: Christmas Cranberry Honey Butter bridges tangy cranberry brightness and indulgent honey-kissed creaminess, all in an easy, homemade spread that feels like instant comfort food.

    • Quick prep: simple stovetop simmer, then a one-bowl whip for a velvety, homemade finish.
    • Comforting flavor: rich butter meets tart cranberries and fragrant orange zest—balanced and cozy.
    • Everyday to holiday: elevate pancakes, biscuits, waffles, and charcuterie without extra fuss.
    • Family-friendly: sweet-tangy and not too sugary; kids and grandparents both ask for seconds.
    • Make-ahead friendly: keeps beautifully, so your easy recipe is always ready to impress.

    Holiday boards are everywhere, and a dollop of Christmas Cranberry Honey Butter turns a simple spread into a moment. This homemade, easy dinner sidekick also loves the morning—slather it on toast, swirl into oatmeal, or melt over roasted carrots for a comfort food twist. It’s the one-step upgrade that says “festive,” even on busy nights. Ready to stir, whip, and wow? Let’s head to the recipe card.

    Tips, Tricks & Expert Secrets for Christmas Cranberry Honey Butter

    Chef Tips for Perfect Christmas Cranberry Honey Butter Every Time

    During a cooking class I once taught, we discovered the butter was melting as we mixed—because the cranberry mixture was still warm. Lesson learned: tiny temperature tweaks make this Christmas Cranberry Honey Butter restaurant-smooth. Here’s how to nail it.

    • Cool completely: Let the cranberry-honey mixture hit room temp before beating into butter. Warm purée melts butter and ruins texture.
    • Whip for air: Beat the softened butter 1–2 minutes first; the added air makes a fluffy, spreadable, easy recipe texture.
    • Add gradually: Spoon in the cranberry mixture a little at a time for a streak-free, creamy result.
    • Balance to taste: Cranberries vary—add a teaspoon more honey for sweetness or a pinch of salt for pop.

    Smart Ingredient Swaps & Practical Cooking Advice

    • Vegan swap: Use plant-based butter sticks and maple syrup instead of honey for a silky homemade version.
    • Low-fat option: Blend half butter with half light cream cheese; texture stays lush, flavor stays bright.
    • What not to do: Don’t overmix once the cranberry purée is fully incorporated—overmixing can make the butter greasy.
    • Quick fix: If the mixture softens, chill 10 minutes, then briefly re-whip to restore that dreamy, homemade texture.

    With these cooking tips, your Christmas Cranberry Honey Butter will be giftable, spreadable, and unforgettable—every single time.

    Serving Ideas & Creative Variations for Christmas Cranberry Honey Butter

    How to Serve Christmas Cranberry Honey Butter for Maximum Enjoyment

    When I put out a little ramekin swirl of Christmas Cranberry Honey Butter, guests always ask what bakery I got it from. Presentation counts. Add a citrus zest sprinkle and a few sugared cranberries, and it looks like a holiday magazine cover—no food stylist required.

    • Pairings: Warm dinner rolls, flaky biscuits, buttermilk pancakes, waffles, and quick breads.
    • Charcuterie: Add to a board with brie, toasted pecans, and rosemary crackers; try alongside Baked Cranberry Brie Bites.
    • Veggie glow-up: Melt over roasted carrots or butternut squash for a sweet-tangy, seasonal twist.
    Christmas Cranberry Honey Butter – Creamy, Cozy Bliss

    Flavor Twists and Seasonal Variations

    • Cinnamon Maple: Swap half the honey for maple syrup and add a pinch of nutmeg.
    • Orange Rosemary: Fold in 1 teaspoon finely chopped rosemary for a savory herb note—beautiful with turkey or ham.
    • Ginger Spark: Add 1 teaspoon freshly grated ginger for a bright, cozy kick.

    Sharing on social? Spoon a swoop into a small bowl, drag the back of the spoon to create ribbons, garnish with orange zest and a cranberry. For more festive spreads, peek at my Christmas Blackberry Butter or spice up your appetizer lineup with Cranberry Jalapeño Cream Cheese Dip.

    Storage & Troubleshooting Guide for Christmas Cranberry Honey Butter

    How to Store and Reheat Christmas Cranberry Honey Butter

    Leftovers? I stash Christmas Cranberry Honey Butter in a jar and “forget” it in the back of the fridge—only to rediscover it right when waffles appear. Magic.

    • Room temperature: Keep at cool room temp for up to 2 hours when serving.
    • Refrigerator: Store in an airtight jar up to 10 days to keep fresh and flavorful.
    • Freezer: Freeze up to 2 months. Spoon into a sealed container or roll into a butter log, wrap well, and label.
    • To soften: Set at room temp 20–30 minutes before serving; do not microwave to avoid melting the emulsion.

    Troubleshooting Common Christmas Cranberry Honey Butter Issues

    • Butter too soft or greasy: Chill 10–15 minutes, then briefly re-whip.
    • Mixture looks curdled: The cranberry purée was too warm. Chill until cool and re-whip; it will come together.
    • Too tart: Blend in an extra teaspoon of honey or a pinch of sugar.
    • Too sweet: Add a squeeze of lemon juice or an extra pinch of salt to rebalance.
    • Watery: Cranberries weren’t reduced enough. Next time, simmer until jammy; for now, chill longer to firm texture.

    With the right storage advice and a quick fix or two, your Christmas Cranberry Honey Butter will stay creamy, bright, and ready for every holiday bite.

    FAQs

    Can I make Christmas Cranberry Honey Butter ahead of time?

    Yes. Make up to 3–4 days in advance and refrigerate in a sealed jar. Soften at room temperature before serving.

    Can I use frozen cranberries?

    Absolutely. Use them straight from the freezer—no need to thaw. Simmer a minute longer if needed.

    Is there a substitute for honey?

    Try pure maple syrup for a warm, caramel-like sweetness, or agave syrup for a neutral flavor.

    How do I make it less sweet?

    Reduce the honey by 1–2 teaspoons and add a squeeze of lemon or extra orange zest to brighten.

    Conclusion

    Christmas Cranberry Honey Butter is the little jar of joy you’ll keep front and center all season. The creamy, homemade texture, the cranberry sparkle, and the orange-kissed aroma turn simple meals into cozy comfort food. Whip it up as an easy recipe for brunch, tuck it into a holiday board, or melt it over veggies for a bright seasonal twist. This Christmas Cranberry Honey Butter checks every festive box—quick prep, family-friendly, and make-ahead magic—so you can focus on gathering rather than fussing. Try it at home and tag me so I can see your spread! And if you’re building a holiday menu, don’t miss my crowd-pleasing Slow Cooker Balsamic Cranberry Chicken for an effortless main.

  • Christmas Cinnamon Butter – Cozy, Irresistibly Creamy

    Christmas Cinnamon Butter – Cozy, Irresistibly Creamy

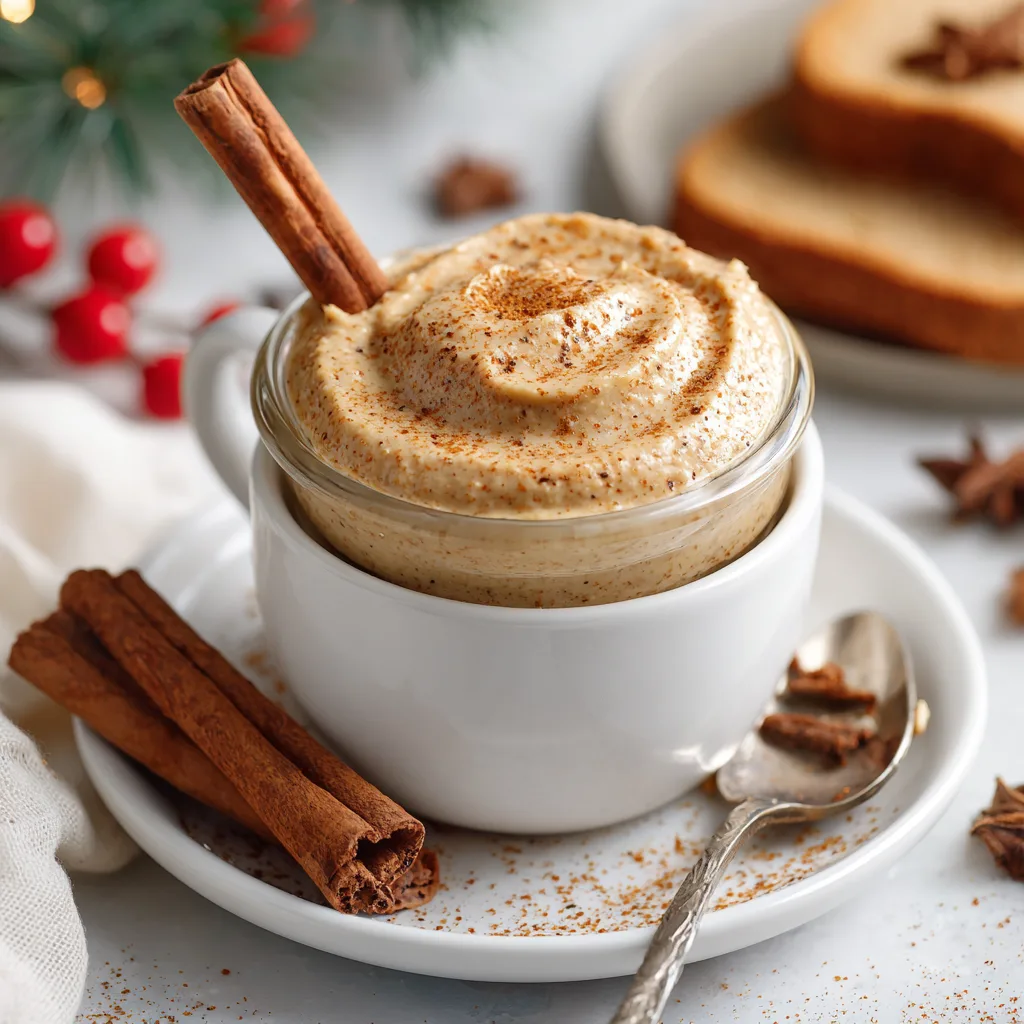
    Christmas Cinnamon Butter is my shortcut to instant holiday magic. Last year I tried to whisk it by hand while the dog sprinted off with a dinner roll and my timer sang backup chorus. Somehow, Cinnamon Butter still turned out silky, spiced, and so festive that everyone asked for a jar to take home. It is one bowl, quick to whip, and wildly comforting on warm rolls, pancakes, or toast. Let’s make it together before the next kitchen curveball arrives.

    Christmas Cinnamon Butter

    Recipe

    Why You’ll Love Christmas Cinnamon Butter

    What Makes This Christmas Cinnamon Butter So Irresistible

    I learned the power of Christmas Cinnamon Butter the year I ran out of dessert plates and served cookies on saucers. The butter stole the show anyway. Christmas Cinnamon Butter tastes like a warm cinnamon roll met a cloud of cream and decided to be useful on everything. It is a homemade comfort food fix that spreads joy faster than you can preheat the oven. When I want something sweet, cozy, and truly easy, I whip this in one bowl, breathe in the cinnamon, and pretend the sink isn’t full. Later, I swirl it into a ramekin and it looks bakery-fancy with zero stress. That is holiday kitchen magic.

    • Quick prep: a true easy recipe that takes about 10 minutes.
    • Comforting taste: creamy, cinnamon-spiced, and gently sweet.
    • Simple ingredients: pantry staples make it a homemade holiday win.
    • Family-friendly: slather on rolls, pancakes, waffles, or toast.
    • Make-ahead: fridge-friendly and perfect for edible gifts.

    Ready to swirl this Butter into your holiday routine? Let’s jump into the recipe card and whip up a batch.

    Short videos of Christmas Cinnamon Butter have gone viral because it is quick, photogenic, and undeniably cozy. People love a homemade, comfort food moment that looks fancy but is refreshingly simple. The flavor payoff is huge, the prep is tiny, and everyone asks for seconds. In a season of elaborate menus, an easy, creamy spread feels like a deep breath and a warm hug.

    Tips, Tricks & Expert Secrets

    Chef Tips for Perfect Christmas Cinnamon Butter Every Time

    My favorite cooking lesson came from a happy accident: I once over-whipped butter for frosting and discovered it turns ultra-silky right before it begins to look grainy. That sweet spot applies to Christmas Cinnamon Butter too. Here are the expert moves that make this homemade version reliably dreamy:

    • Start with fully softened butter: cool-room temp makes Christmas Cinnamon Butter whip fast and spread like a dream.
    • Whip for air: 60–90 seconds adds luscious lightness without melting.
    • Balance the sweet: taste and adjust honey or powdered sugar to your preferred sweetness.
    • Salt matters: a pinch sharpens the cinnamon and makes flavors pop.

    Smart Ingredient Swaps & Practical Cooking Advice

    • Vegan quick fix: use high-quality dairy-free butter and maple syrup instead of honey. The Christmas Cinnamon Butter texture stays creamy.
    • Low-sugar tweak: reduce powdered sugar and rely on cinnamon and vanilla for warmth; or swap in a powdered monk fruit blend.
    • What not to do: do not use butter that is melted or too warm. Over-soft butter can make the spread oily and the texture uneven.
    • Spice boost: bloom cinnamon by mixing it thoroughly into the butter so it is evenly distributed and aromatic.

    With these cooking tips, your Christmas Cinnamon Butter comes together as an easy recipe that is velvety, balanced, and ready for gifting.

    Serving Ideas & Creative Variations

    How to Serve Christmas Cinnamon Butter for Maximum Enjoyment

    When guests come over, I scoop Christmas Cinnamon Butter into a tiny ramekin and add a swoop with the back of a spoon. A few cinnamon sprinkles and it looks bakery-fresh. For serving ideas, try these cozy pairings and a simple plating suggestion or two:

    • Warm dinner rolls or buttermilk biscuits right out of the oven.
    • Fluffy pancakes and waffles for a festive brunch board.
    • Swirl on baked sweet potatoes for a holiday seasonal twist.

    Round out your spread with easy holiday nibbles like my 5-Minute Christmas Crock Pot Candy and crowd-pleasing Baked Cranberry Brie Bites. For savory bites between sweets, these Turkey Cranberry Sliders are party-perfect.

    Christmas Cinnamon Butter

    Flavor Twists and Seasonal Variations

    • Orange Spice: add fresh orange zest and a pinch of clove for a citrusy flavor variation.
    • Maple Pecan: swap honey for maple syrup and fold in finely chopped toasted pecans.
    • Brown Sugar Gingerbread: use light brown sugar instead of powdered sugar and add a hint of ginger and nutmeg.

    Food bloggers and creators: for social, style Christmas Cinnamon Butter with a swirl, a dusting of cinnamon, and a drizzle of honey. Shoot near a window for soft light and include warm props for a cozy seasonal twist that pops on Pinterest and Instagram. Share your plate and tag me—I love seeing how you style this homemade favorite.

    Storage & Troubleshooting Guide for Christmas Cinnamon Butter

    How to Store and Reheat Christmas Cinnamon Butter

    I once stashed a jar of Christmas Cinnamon Butter behind the cranberry sauce and found it in January—still delicious. Here is how to store, keep fresh, and serve it like a pro:

    • Room temperature: keep out for up to 2 hours for easy spreading during brunch.
    • Fridge: store in an airtight glass jar up to 2 weeks to preserve texture and flavor.
    • Freezer: freeze in small jars or wax-paper logs up to 3 months; thaw overnight in the fridge.
    • Best containers: glass or ceramic jars with tight lids prevent fridge odors and help keep fresh aroma.
    • To serve: let Christmas Cinnamon Butter rest at room temp 15–20 minutes before spreading; do not microwave—gentle rest protects the creamy texture.

    Troubleshooting Common Christmas Cinnamon Butter Issues

    • Too stiff: let it sit out 10–15 minutes; if needed, beat in 1–2 teaspoons of honey for a softer, glossy finish.
    • Too sweet: add a pinch more salt and a little extra cinnamon to balance.
    • Watery or oily: butter was too warm; chill 10 minutes, then re-whip to fix texture.
    • Uneven spice: whip briefly again, scraping the bowl, until cinnamon is evenly flecked throughout.

    With these storage advice tips, your Christmas Cinnamon Butter will stay creamy, giftable, and ready for every cozy bite.

    FAQs

    Can I make Christmas Cinnamon Butter ahead?

    Yes, prepare it up to 2 weeks in advance and refrigerate in a sealed jar. Let it soften at room temperature before serving.

    Is there a vegan option?

    Use dairy-free butter sticks and maple syrup instead of honey. The texture stays creamy and the flavor remains festive.

    Can I reduce the sugar?

    Absolutely. Start with less powdered sugar or use a powdered monk fruit blend. Taste and adjust until it is perfect for you.

    How do I gift Christmas Cinnamon Butter?

    Spoon into mini jars, add a ribbon and a label. Keep chilled until gifting, and include a note to refrigerate after opening.

    Conclusion

    Christmas Cinnamon Butter is that rare holiday easy recipe that feels luxurious, tastes like pure comfort, and delivers instant cheer. With a one-bowl method, simple homemade ingredients, and a creamy, cinnamon-kissed finish, Christmas Cinnamon Butter turns everyday breakfasts and party boards into something special. Make a batch for warm rolls, brunch pancakes, or gifting to friends and neighbors. If you are building a festive menu, peek at more holiday-ready ideas on Recipes Darleen. Then whip this Christmas Cinnamon Butter at home and tag me—nothing makes me happier than seeing your cozy creations.

  • Christmas Pomegranate Butter – Cozy and Irresistible

    Christmas Pomegranate Butter – Cozy and Irresistible

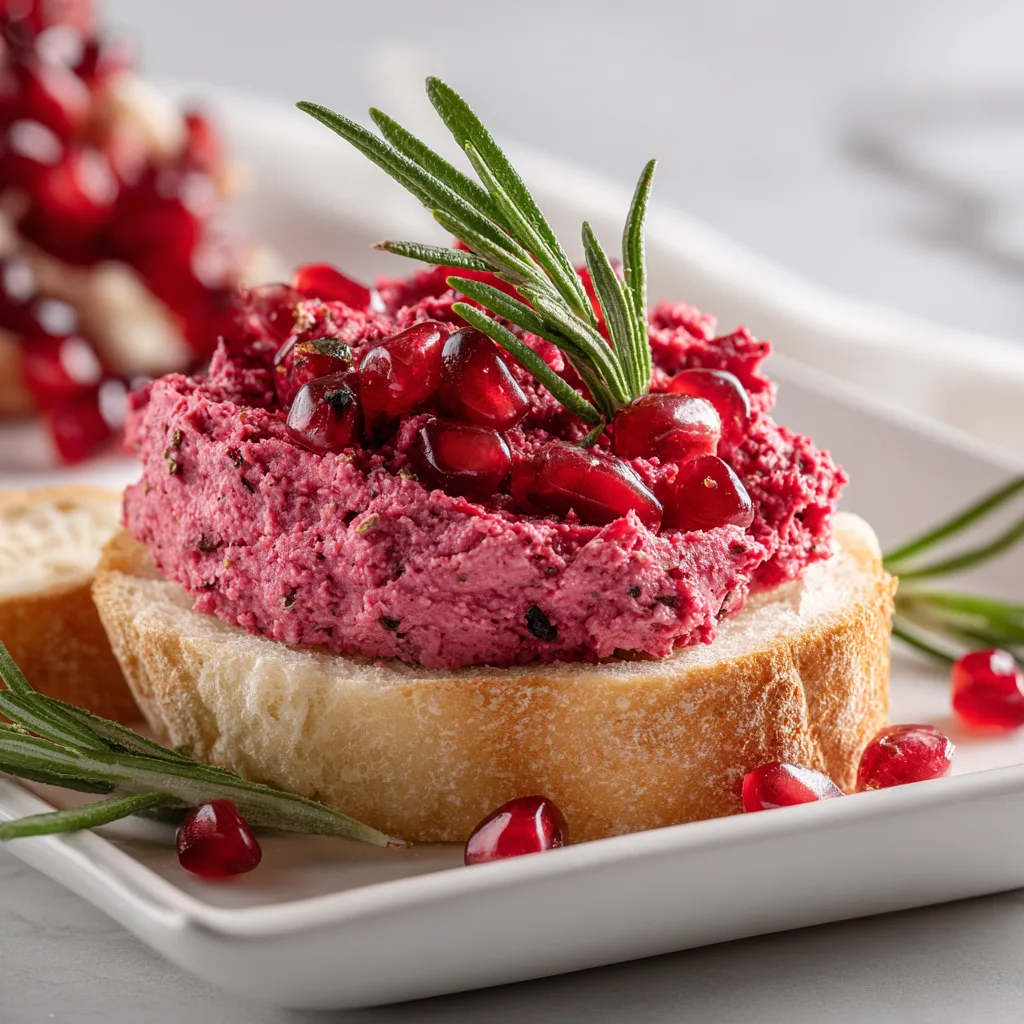
    Christmas Pomegranate Butter brings holiday sparkle to anything it touches. The day I tested this, my mixer bowl slid right off the counter as kids chased our dog through the kitchen. I scraped the butter back in, whisked in pomegranate molasses, and boom — a ruby-streaked swirl of joy. That’s the magic of Christmas Pomegranate Butter: it’s forgiving, festive, and wildly delicious. I’m Darleen Vance, and this is one of those homemade, easy recipe moments where chaos turns into comfort food.

    Christmas Pomegranate Butter

    Recipe

    WHY YOU’LL LOVE THIS RECIPE

    What Makes This Christmas Pomegranate Butter So Irresistible

    I first whipped up Christmas Pomegranate Butter on a snow day when the power flickered and the dog carried off my measuring spoons. Even with interruptions, Christmas Pomegranate Butter came out silky, bright, and cheerfully pink. That’s the beauty of this homemade, easy recipe: the flavors do the work. The tart pomegranate molasses meets creamy butter and a whisper of orange and cinnamon, creating an ultra-comforting holiday spread that feels like a warm hug. If you need an easy homemade version of a festive condiment for brunch or a family-friendly dinner board, this is it — equal parts simple, cozy, and elegant. Christmas Pomegranate Butter turns everyday toast into comfort food and roast meats into a glossy holiday treat.

    • Quick prep: 10 minutes to mix, no special equipment needed.
    • Simple ingredients: butter, pomegranate, honey, orange, spice — pantry-friendly and approachable.
    • Versatile: spread on bread, melt over vegetables, glaze turkey, or finish pan-seared chicken.
    • Make-ahead: chill as a compound butter log for effortless holiday hosting.
    • Kid-approved and guest-worthy: a playful color with grown-up flavor balance.

    The internet loves a pretty swirl, and this ruby-streaked butter is photogenic, practical, and full of flavor. It’s the definition of an easy, homemade holiday upgrade. With just a few pantry staples, Christmas Pomegranate Butter adds bright, fruity depth to brunch and dinner spreads alike. Whether you’re pairing it with soft Parker House rolls or letting it melt over roasted vegetables, it’s the festive finishing touch your table craves. Ready to make your own? Let’s head to the recipe card.

    TIPS, TRICKS & EXPERT SECRETS

    Chef Tips for Perfect Christmas Pomegranate Butter Every Time

    My lightbulb moment came during a cooking class when a student asked, “Why is my compound butter grainy?” The fix? Temperature and patience. Here’s how I get Christmas Pomegranate Butter super smooth, every single time — with practical cooking tips you can use today.

    • Soften the butter just right: Aim for cool-room temp (about 65–67°F). It should dent easily but not slump. Too cold equals lumps; too warm equals greasy.
    • Beat for texture: Cream the butter 60–90 seconds before adding anything. Airy butter accepts mix-ins better for a silky finish.
    • Cool the reduction: If you reduce pomegranate juice, cool it fully. Warm syrup melts butter and can split the emulsion.
    • Season for balance: A tiny pinch of salt makes the fruit pop; a drizzle more honey smooths tart edges. Taste as you go.

    Smart Ingredient Swaps & Practical Cooking Advice

    • Dairy-free/vegan: Use a high-quality plant butter with a high fat content. Choose a neutral flavor so the pomegranate shines.
    • Refined sugar-free: Swap honey for maple syrup; both play beautifully with citrus and spice.
    • Citrus options: Lemon zest for brightness or blood orange zest for extra holiday color.
    • What not to do: Don’t overmix after adding the molasses or reduction — overworking can make the butter look greasy instead of creamy.

    With these quick fixes and cooking tips, your Christmas Pomegranate Butter will be a flawless, homemade version that spreads like a dream and tastes like pure holiday magic.

    SERVING IDEAS & CREATIVE VARIATIONS

    How to Serve Christmas Pomegranate Butter for Maximum Enjoyment

    When I styled Christmas Pomegranate Butter for a holiday brunch board, I marbled it and dotted on a few arils — instant “wow.” Guests assumed I’d spent hours. In reality, this easy recipe is all about smart serving ideas and simple plating suggestions that look special without stress.

    • Warm breads: Swipe onto toasted sourdough, flaky croissants, or soft dinner rolls. It’s a brunch MVP next to eggs and fruit.
    • Festive sides: Melt over roasted carrots and asparagus for a glossy finish (try alongside Roasted Asparagus and Carrot).
    • Main-course glow-up: Add thin slices atop hot turkey or chicken so it melts into a quick, flavorful glaze. Pair with Slow Cooker Balsamic Cranberry Chicken for a fruit-forward feast.

    For content creators: photograph the butter in a small ceramic crock with a swoop, then sprinkle pomegranate arils and a kiss of zest on top. Side-lighting makes the swirls pop on social media.

    Christmas Pomegranate Butter – Cozy and Irresistible

    Flavor Twists and Seasonal Variations

    • Spiced chai butter: Add a pinch of ginger and cardamom to intensify warm holiday vibes.
    • Vanilla-orange swirl: Increase orange zest to 1 1/2 tsp and add vanilla for creamsicle energy with a jewel-toned twist.
    • Maple-pecan crunch: Fold in 2 tbsp finely chopped toasted pecans and use maple syrup for cozy texture and a nutty finish.

    Round out your spread with party-friendly bites like Baked Cranberry Brie Bites or a sweet treat like 5-Minute Christmas Crock-Pot Candy. However you style it, Christmas Pomegranate Butter makes the whole table shine with a seasonal twist.

    STORAGE & TROUBLESHOOTING GUIDE

    How to Store and Reheat Christmas Pomegranate Butter

    I once tucked a log of Christmas Pomegranate Butter into the back of the fridge, then found it a week later — still gorgeous, still spreadable. Here’s how to keep it fresh and fabulous.

    • Room temperature: Keep out up to 2 hours for serving; return leftovers to the fridge to keep safe and firm.
    • Refrigerator: Store in an airtight jar or wrapped parchment-and-plastic log for 7–10 days. Press parchment onto the surface to prevent oxidation.
    • Freezer: Wrap tightly (parchment + plastic + freezer bag) for up to 3 months. Label and slice off coins as needed.
    • To “reheat”: Let it stand at room temp 10–15 minutes before serving, or microwave the portion in 5-second bursts until just soft.

    Troubleshooting Common Christmas Pomegranate Butter Issues

    • Too soft/greasy: Butter was too warm or overmixed. Chill 15 minutes, then fold gently to restore body.
    • Looks separated: Warm reduction hit cold butter. Let everything come to the same cool-room temp, then beat briefly to re-emulsify.
    • Too tart: Add 1/2–1 tsp additional honey or maple syrup and a pinch of salt to round the flavor.
    • Too sweet: Whisk in 1/2 tsp more pomegranate molasses and a tiny squeeze of lemon for brightness.
    • Watery arils: If folding in arils, pat them dry first to avoid streaking or watering the butter.

    With these storage tips and quick fixes, your Christmas Pomegranate Butter will keep fresh, spread beautifully, and taste like holiday cheer on demand.

    FAQs

    Can I make Christmas Pomegranate Butter without pomegranate molasses?

    Yes. Reduce 1/2 cup pomegranate juice to 3 tablespoons, cool completely, then use as directed. It’s a fast, homemade alternative.

    Is Christmas Pomegranate Butter sweet or savory?

    Both. It’s lightly sweet from honey with tangy pomegranate and warm spice. Adjust honey or salt to lean sweet for brunch or savory for dinner.

    Can I prepare Christmas Pomegranate Butter ahead for a party?

    Absolutely. Make it up to 3 days in advance and refrigerate. For longer storage, freeze the log and thaw overnight in the fridge.

    What do I serve with Christmas Pomegranate Butter?

    Toast, rolls, pancakes, muffins, roasted vegetables, and warm proteins like chicken or turkey. It’s also great melted over hot grain bowls.

    Conclusion

    Christmas Pomegranate Butter is a simple, homemade holiday spread that tastes luxurious and looks stunning. With bright pomegranate, cozy spices, and creamy butter, it delivers comfort food vibes in seconds — an easy recipe you’ll reach for all season. Whether you’re building a brunch board, finishing vegetables, or glazing turkey, Christmas Pomegranate Butter adds instant festive flavor. If you love fruit-forward holiday pairings, don’t miss our reader favorites like Baked Cranberry Brie Bites and Slow Cooker Balsamic Cranberry Chicken. Try Christmas Pomegranate Butter at home and tag me — I can’t wait to see your swirls!