Blog

  • Christmas Blackberry Butter – Cozy, Irresistible Magic

    Christmas Blackberry Butter – Cozy, Irresistible Magic

    Christmas Blackberry Butter started as my shortcut to cozy flavor when the mixer was occupied and my timer was missing. I tossed berries in a pot, added orange zest, and my wooden spoon nearly stuck to the stove—classic Darleen Vance chaos. Christmas Blackberry Butter filled the kitchen with spiced, jammy perfume and saved dessert. It’s the homemade spread I now whip up for gifting, brunch boards, and midnight toast.
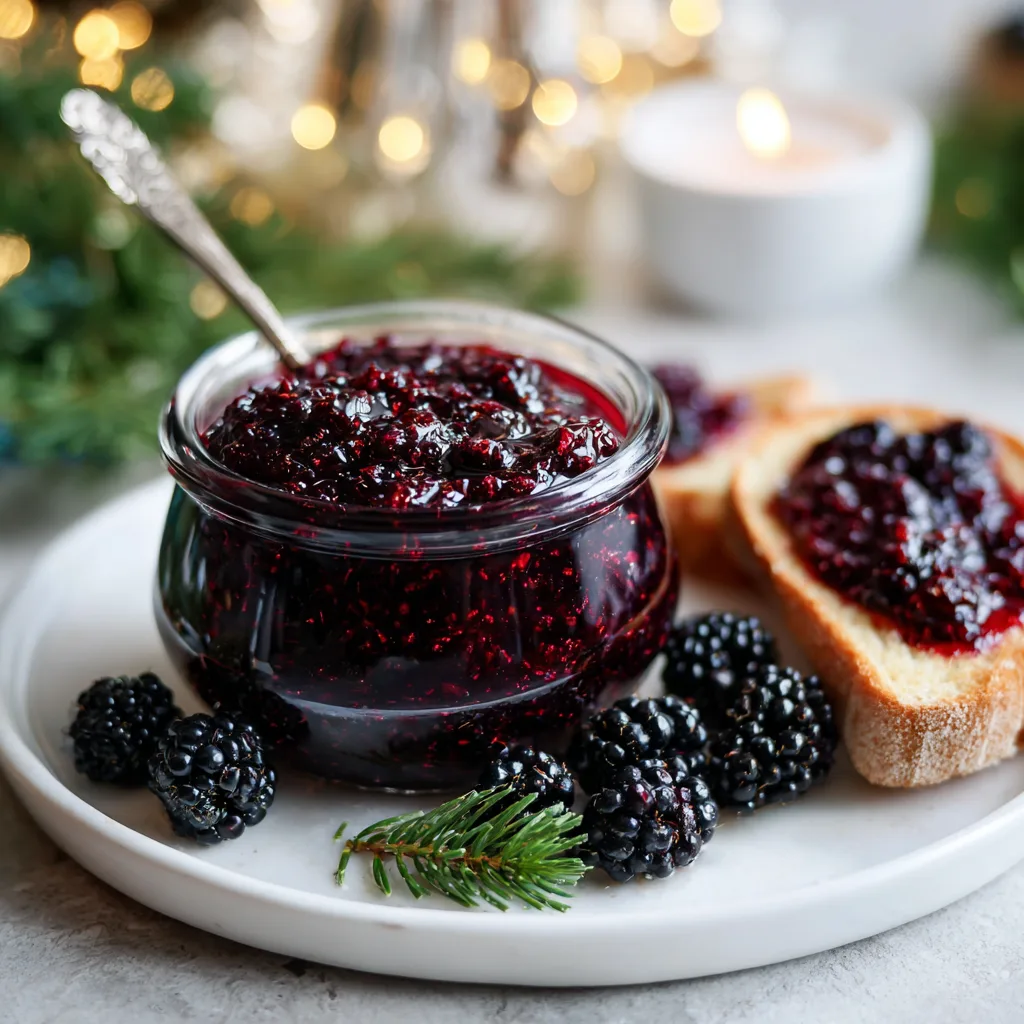
    Christmas Blackberry Butter started as my shortcut to cozy flavor when the mixer was occupied and my timer was missing

    Recipe

    Why You’ll Love Christmas Blackberry Butter

    What Makes This Christmas Blackberry Butter So Irresistible

    I first cooked Christmas Blackberry Butter on a snowy morning when my mixer was busy with cookie dough and I needed something homemade for brunch. Christmas Blackberry Butter swooped in like a warm hug—deep berry flavor, cozy spice, and a glossy, spoonable texture that turns toast into comfort food. It’s the easy recipe I rely on when I want festive flavor without fuss.

    • Jammy, velvety texture with a bright orange note and gentle cinnamon warmth.
    • Simple, affordable ingredients you likely have on hand—blackberries, sugar, citrus, spice.
    • Hands-off simmering and an optional slow cooker method for stress-free cooking.
    • Homemade and gift-ready—perfect for stockings, neighbor drops, or brunch boards.
    • Versatile spread for breakfast, cheese boards, desserts, and last-minute holiday treats.

    Because Christmas Blackberry Butter is a homemade, spiced fruit butter, it tastes rich like a long-simmered jam but stays wonderfully spreadable. Readers keep telling me this easy recipe becomes their holiday signature. Ready to make your own batch of Christmas Blackberry Butter? Let’s get to the recipe card below.

    The Internet loves a quick, giftable kitchen project, and Christmas Blackberry Butter is exactly that. Between cozy flavors, a short ingredient list, and that luscious berry glow for photos, it’s tailor-made for sharing. On brunch boards next to soft cheeses or drizzled over pancakes, this homemade version steals the show. If you enjoy festive, small-batch projects like 5-Minute Christmas Crock Pot Candy, you’ll adore how beautifully this easy recipe fits into your holiday lineup.

    Tips, Tricks & Expert Secrets for Christmas Blackberry Butter

    Chef Tips for Perfect Christmas Blackberry Butter Every Time

    In my first batch, I learned a tiny simmer beats a big boil. A watched pot may never boil, but an unwatched one scorches—ask me how I know. Here’s how I lock in a silky finish and bold flavor in Christmas Blackberry Butter every single time.

    • Low and slow: Keep the heat low so the fruit butter thickens gently without splattering or scorching—this cooking tip preserves fresh berry flavor.
    • Plate test: Chill a small plate; dab on a spoonful. If it holds a soft mound, Christmas Blackberry Butter is ready. If not, simmer 5–10 minutes more.
    • Strain for elegance: For a seedless, glossy homemade version, press the puree through a fine-mesh sieve after blending.
    • Finish with butter: A tablespoon of butter at the end adds sheen and a luxurious mouthfeel to this easy recipe.

    Smart Ingredient Swaps & Practical Cooking Advice

    • Sweeteners: Swap some sugar for honey or maple for a deeper seasonal twist. Adjust to taste once the butter thickens.
    • Citrus: No orange? Use lemon juice and add 1–2 teaspoons of lemon zest. The acidity keeps Christmas Blackberry Butter bright.
    • Vegan: Skip the finishing butter; the fruit butter stays silky without it.
    • Spice swap: Try cardamom or a pinch of allspice for a different holiday profile.
    • What not to do: Don’t crank the heat or walk away for long; high heat can dull the color, burn the bottom, and give Christmas Blackberry Butter a bitter taste. Stir regularly for a smooth, thick texture and a quick fix if you notice sticking.

    With these easy, practical moves, your Christmas Blackberry Butter will taste bakery-level and look picture-perfect.

    Serving Ideas & Creative Variations

    How to Serve Christmas Blackberry Butter for Maximum Enjoyment

    When friends drop by, I swipe Christmas Blackberry Butter onto a board with soft brie, rosemary crackers, and candied nuts. It’s an instant showpiece. For cozy mornings, spoon it onto pancakes, swirl through yogurt, or glaze warm biscuits—pure comfort food.

    • Pair with creamy cheeses: Brie or goat cheese with Christmas Blackberry Butter is unforgettable. Try it alongside Baked Cranberry Brie Bites for a festive spread.
    • Holiday sandwiches: Add a thin layer to leftover turkey sliders. It sings with these Turkey Cranberry Sliders.
    • Dessert drizzle: Warm and drizzle over vanilla ice cream or cheesecake for an easy, homemade dessert finisher.

    Flavor Twists and Seasonal Variations

    • Mulled Blackberry Butter: Add a strip of orange peel, 2 whole cloves, and a cinnamon stick during the simmer. Remove before blending.
    • Port-Kissed Variation: Stir in 2 tablespoons tawny port during the final simmer for a rich, festive note.
    • Chili-Chocolate Swirl: Whisk in a tiny pinch of cayenne and 1 tablespoon Dutch cocoa at the end for a sophisticated twist.

    For food photography, serve Christmas Blackberry Butter in a clear jar with a ribbon, let a glossy spoonful drip over biscuit edges, and garnish with a curl of orange zest. It’s a share-worthy, seasonal twist that plays beautifully on Pinterest. Round out the table with something savory like Roasted Asparagus and Carrot to balance the sweetness.

    Christmas Blackberry Butter

    Storage & Troubleshooting Guide

    How to Store and Reheat Christmas Blackberry Butter

    True story: I once hid a jar of Christmas Blackberry Butter behind the pickles to keep it safe for brunch. It keeps beautifully if you treat it right.

    • Room temperature: Keep Christmas Blackberry Butter out for serving up to 2 hours. Return leftovers to the fridge promptly.
    • Refrigerator: Store in clean, tightly sealed jars up to 2–3 weeks. The flavor deepens over the first few days.
    • Freezer: Freeze up to 3–4 months in freezer-safe containers, leaving headspace. Thaw overnight in the fridge and stir.
    • Reheating: Warm gently on the stovetop over low heat or in the microwave in short bursts, stirring to restore a silky texture.

    Troubleshooting Common Christmas Blackberry Butter Issues

    • Too thin: Simmer uncovered over low heat, stirring often, until thickened. A wide pan increases evaporation and can fix texture faster.
    • Too thick: Whisk in 1–2 teaspoons of orange juice or water at a time until spreadable.
    • Scorched spot: Immediately transfer to a clean pan without scraping the bottom; continue gently. Season with a pinch more orange zest to brighten.
    • Tartness: Stir in an extra teaspoon of sugar or a drizzle of honey. If too sweet, add a splash of lemon juice for balance.

    With smart storage advice and quick fixes, your Christmas Blackberry Butter will stay fresh, glossy, and gift-ready. You’ve got this—save a jar for yourself!

    FAQs

    Can I use frozen blackberries for Christmas Blackberry Butter?

    Yes. Use them straight from the freezer; no need to thaw. They’ll release more liquid—just simmer a bit longer.

    How do I make Christmas Blackberry Butter seedless?

    Blend until smooth, then press through a fine-mesh sieve. Return to the pot and simmer briefly to thicken if needed.

    Is Christmas Blackberry Butter suitable for gifting?

    Absolutely. Spoon into clean jars, add a ribbon, and include a “Refrigerate and enjoy within 2–3 weeks” note.

    Can I can this recipe?

    Use a tested water-bath canning process for fruit butters and follow current USDA guidelines. This small-batch recipe is optimized for refrigeration and freezing.

    Conclusion

    When the holidays get busy, Christmas Blackberry Butter delivers big, comforting flavor with an easy, homemade method. The rich berry taste, warm spices, and orange brightness make this festive spread a natural on biscuits, cheese boards, and desserts. Add it to brunch, drizzle over cheesecake, or gift a jar with a bow; Christmas Blackberry Butter transforms simple moments into something special. If you love cozy, make-ahead recipes, browse more on RecipesDarleen. Try it at home and tag me—I can’t wait to see your jars shine!

  • Christmas Tree Cake Truffles – Irresistibly Easy and Festive

    Christmas Tree Cake Truffles – Irresistibly Easy and Festive

    Christmas Tree Cake Truffles are the little bites I whip up when the holiday chaos hits DEFCON one. Christmas Tree Cake Truffles saved my sanity the year my mixer walked itself off the counter because I was “multitasking” ribbon curls and hot cocoa. I crumbled those nostalgic cakes, folded in creaminess, and dunked them in melty white chocolate while my twins redecorated the dog with sprinkles. The result? Sweet, soft, festive truffles that look bakery-fancy with almost zero effort. I’m Darleen Vance, and if your kitchen gets as delightfully messy as mine, you’re in the right place.

    Christmas Tree Cake Truffles are the little bites I whip up when the holiday chaos hits DEFCON one.

    Recipe

    Why You’ll Love This Christmas Tree Cake Truffles Recipe

    What Makes This Christmas Tree Cake Truffles So Irresistible

    I learned early on that when December gets loud, Christmas Tree Cake Truffles get quiet results. One year, I promised “just one more batch,” and my mixer decided it was done adulting for the evening. Cue me, a wooden spoon, and a bowl of Christmas Tree Cake Truffles dough—still the smoothest, creamiest homemade filling I’ve ever made without a single whirr. These no-bake bites turn nostalgic snack cakes into a party dessert that tastes like a fancy confection but behaves like an easy recipe you’ll actually make on a weeknight.

    • Quick prep: From crumbling to dipping, you’re party-ready in under an hour.
    • Comforting flavor: Vanilla cake, creamy filling, and white chocolate coating strike pure holiday comfort food vibes.
    • Simple ingredients: Snack cakes, cream cheese, and melts—no special equipment or candy thermometer.
    • Kid- and crowd-friendly: Bite-size, portable, and adorable—perfect for cookie swaps and buffets.
    • No-bake ease: A homemade treat without turning on the oven.

    Best of all, Christmas Tree Cake Truffles keep that soft, nostalgic center that reminds you of school parties and twinkle lights. If you’re in the mood for more festive treats, try my 5-Minute Christmas Crock Pot Candy or bring a savory balance with Cranberry Jalapeño Cream Cheese Dip. Ready to get rolling? Let’s make the magic happen below in the recipe card.

    These Christmas Tree Cake Truffles are holiday-famous because they’re a quick fix that looks bakery-made. Social feeds love a reliable, homemade version of a “wow” dessert, and this one delivers every time. Effort is minimal, payoff is big, and the flavor is a nostalgic hug. If there’s a viral dessert that actually performs under pressure, it’s this one.

    Tips, Tricks & Expert Secrets for Christmas Tree Cake Truffles

    Chef Tips for Perfect Christmas Tree Cake Truffles Every Time

    During a holiday demo, I once overheated the coating while chatting about sprinkles. My quick fix saved the batch and became my favorite cooking tip: when your coating gets thick, stir in a teaspoon of coconut oil to bring back that glossy dip. These Christmas Tree Cake Truffles love a gentle hand and a few small habits that make a big difference.

    • Chill first: Roll and chill truffles 20–25 minutes so they dip smoothly without crumbling.
    • Thin coating wisely: Add 1–2 teaspoons coconut oil or shortening to melted white chocolate for a silky, even shell.
    • Tap and trim: After dipping, tap the fork gently on the bowl’s edge; once set, trim “feet” with a paring knife for clean edges.
    • Work in batches: Keep half the tray chilling while you dip the rest so they stay firm.

    Smart Ingredient Swaps & Practical Cooking Advice

    • Gluten-free: Use gluten-free snack cakes or your favorite gluten-free vanilla cake scraps.
    • Vegan/dairy-free: Swap in dairy-free snack cakes and vegan cream cheese; coat with dairy-free white chips (add coconut oil for smoother melt).
    • Lighter option: Use light cream cheese; texture stays creamy with less richness.

    What not to do: Don’t overheat the coating. White chocolate scorches easily. Use short bursts, stir often, and stop when almost melted—residual heat finishes the job. This easy recipe shines when you keep it low and slow, just like a patient homemade version of old-fashioned candy making.

    Serving Ideas & Creative Variations for Christmas Tree Cake Truffles

    How to Serve Christmas Tree Cake Truffles for Maximum Enjoyment

    I once brought a tower of Christmas Tree Cake Truffles to a neighborhood ornament exchange, stacked on a cake stand with micro twinkle lights around the base. Everyone thought I special-ordered them. For effortless plating suggestion wins, go vertical and add sparkle.

    • Holiday board: Pair truffles with fresh berries, pretzels, and peppermint bark for a colorful dessert grazing board.
    • Cozy drink bar: Serve with hot cocoa, eggnog, or coffee for a sweet-and-sip moment guests love.
    • Giftable box: Tuck 6–8 truffles in parchment-lined tins for teacher gifts or neighborly cheer.

    Flavor Twists and Seasonal Variations

    • Peppermint crunch: Stir in 2 tablespoons crushed peppermint into the dough and top with candy cane dust.
    • Gingerbread glow: Add 1/2 teaspoon ground ginger and a pinch of cinnamon to the dough; dip in white chocolate and finish with gold sugar.
    • Red velvet drizzle: Use red candy melts for a striking festive drizzle over the white shell.

    For more party-ready bites, balance sweet with a savory star like Baked Cranberry Brie Bites. Content creators: shoot truffles on parchment with a few sprinkles scattered around; style in groups of three and use a shallow depth of field to make those sparkles pop. These serving ideas and flavor variation tips keep your Christmas Tree Cake Truffles camera-ready and holiday-iconic.

    Christmas Tree Cake Truffles
    Christmas Tree Cake Truffles

    Storage & Troubleshooting Guide for Christmas Tree Cake Truffles

    How to Store and Reheat Christmas Tree Cake Truffles

    My fridge turns into Santa’s workshop in December, so smart storage keeps things merry. Christmas Tree Cake Truffles are happiest in chill-mode and look as glossy on day five as day one when you package them right.

    • Room temperature: Up to 2 hours for serving. Because of cream cheese, return leftovers to the fridge promptly.
    • Refrigerator: Store in a single layer or separated with parchment in an airtight container for 5–7 days.
    • Freezer: Freeze up to 2 months. Thaw overnight in the fridge, then bring to room temp 10–15 minutes for best texture.
    • Best containers: Use hard-sided, shallow containers to protect the coating from dents and humidity.

    Reheating isn’t required, but to soften texture, let truffles rest at room temperature for 10–15 minutes. Avoid the microwave—it can crack the coating or melt the centers unevenly.

    Troubleshooting Common Christmas Tree Cake Truffles Issues

    • Too dry: Add 1–2 teaspoons cream cheese and knead in until the dough holds together smoothly.
    • Too soft: Chill longer, or mix in 1–2 tablespoons finely crushed vanilla wafers or graham crackers.
    • Thick or lumpy coating: You overheated it. Stir in 1 teaspoon coconut oil and microwave in short bursts, stirring often.
    • Cracked shells: Truffles were too cold or coating too hot. Let truffles sit 5 minutes before dipping and cool the coating slightly.
    • Pooling “feet”: Tap off more excess chocolate and scrape the bottom of the fork before setting down.

    With these storage tips and quick fixes, your Christmas Tree Cake Truffles will keep fresh, hold their shine, and wow every plate they land on. You’ve got this—holiday dessert bliss, handled.

    FAQs

    Can I make Christmas Tree Cake Truffles ahead?

    Yes. Roll the centers up to 2 days ahead and keep covered in the fridge. Dip and decorate the day you plan to serve for the glossiest finish.

    Do I have to use cream cheese?

    Cream cheese gives the best creamy texture, but you can use vanilla frosting (start with 3 tablespoons and add more as needed) or dairy-free cream cheese.

    Why is my coating streaky or dull?

    It was overheated or had moisture contact. Melt gently in short bursts, keep bowls dry, and stir in a teaspoon of coconut oil for shine.

    How long do Christmas Tree Cake Truffles last?

    Refrigerate in an airtight container for 5–7 days or freeze up to 2 months. For best flavor, bring to room temperature before serving.

    Conclusion

    Christmas Tree Cake Truffles are proof that a homemade holiday dessert can be easy, festive, and wildly delicious. The creamy center, nostalgic cake flavor, and crisp white chocolate shell make these no-bake truffles the party dessert everyone reaches for first. They’re a quick dessert win when time is tight, a comforting holiday treat for cozy nights in, and a giftable sweet that travels beautifully. If your December is buzzing, Christmas Tree Cake Truffles will keep the fun high and the stress low—my favorite kind of kitchen magic. Try it at home and tag me so I can see your sprinkle style! And when you want a savory counterpoint, bookmark my Roasted Asparagus and Carrot for a bright, simple side.

  • Slow Cooker Balsamic Cranberry Chicken: Cozy, Bold Flavor

    Slow Cooker Balsamic Cranberry Chicken: Cozy, Bold Flavor

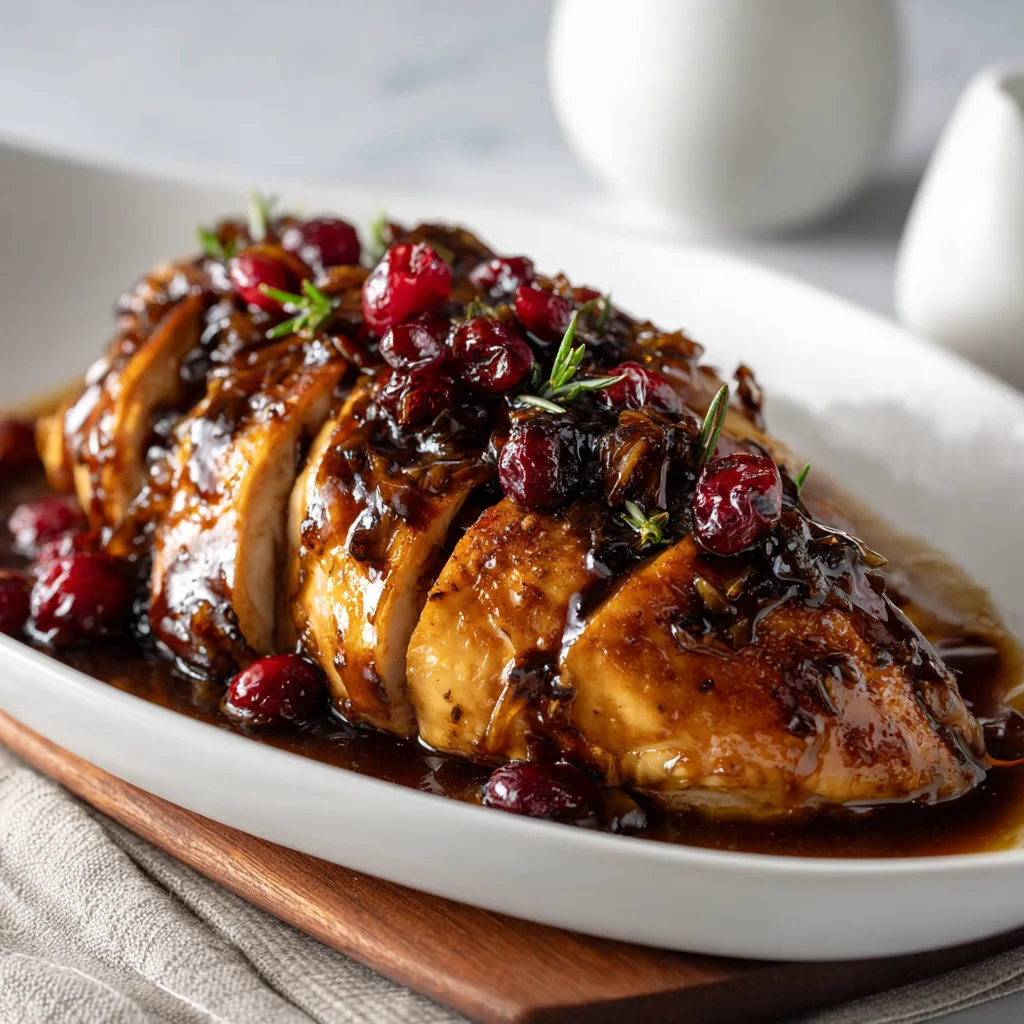
    Slow Cooker Balsamic Cranberry Chicken is the kind of meal that saves my Tuesdays. One chilly evening, I tried to whisk the sauce while answering math homework questions, tripping over the dog, and trying not to cry over onions. The sauce still turned out glossy and gorgeous. That’s the beauty of Slow Cooker Balsamic Cranberry Chicken: it’s forgiving, fragrant, and fabulously cozy—even when life gets messy.

    Slow Cooker Balsamic Cranberry Chicken: Cozy, Bold Flavor

    Recipe

    Why You’ll Love Slow Cooker Balsamic Cranberry Chicken

    What Makes This Slow Cooker Balsamic Cranberry Chicken So Irresistible

    I first made Slow Cooker Balsamic Cranberry Chicken on a busy weeknight when my slow cooker was already doing most of the heavy lifting. I spilled a little balsamic while telling the kids not to touch the hot lid—classic Darleen chaos—and yet dinner turned out spectacular. Slow Cooker Balsamic Cranberry Chicken delivers that tangy-sweet, cozy comfort you crave with virtually no effort. The balsamic vinegar mellows into a rich glaze, the cranberry sauce adds bright sweetness, and the chicken becomes fork-tender. It’s an easy dinner that tastes like a homemade hug.

    • Set-it-and-forget-it ease: minimal prep and hands-off cooking make this comfort food a weeknight winner.
    • Tangy-sweet sauce: cranberry and balsamic fuse into a glossy glaze that clings to every bite.
    • Family-friendly and crowd-pleasing: approachable flavors with a festive twist.
    • Flexible and forgiving: use breasts or thighs, and it works for meal prep or a holiday table.
    • One-pot simplicity: the slow cooker means fewer dishes and easy cleanup for a homemade dinner.

    If you’ve been searching for a cozy, homemade, easy dinner, Slow Cooker Balsamic Cranberry Chicken checks every box. Let’s get you to the recipe card so tonight’s meal is a breeze.

    On social feeds and in group chats, Slow Cooker Balsamic Cranberry Chicken is getting love for its balance of bold flavor and simplicity. It’s the kind of comfort food that feels special without the fuss. The sauce looks gorgeous for photos, the method is foolproof, and the leftovers reheat beautifully. No wonder this easy dinner keeps popping up in meal plans and meal-prep reels—Slow Cooker Balsamic Cranberry Chicken is as practical as it is delicious.

    Tips, Tricks & Expert Secrets for Balsamic Cranberry Chicken

    Chef Tips for Perfect Slow Cooker Balsamic Cranberry Chicken Every Time

    I learned this the flavorful way: the first time I whisked the sauce, I tasted it and realized a pinch of salt made the cranberry pop. A small tweak, huge payoff. To nail Slow Cooker Balsamic Cranberry Chicken, keep these cooking tips in mind:

    • Brown for depth (optional): Sear the chicken in a hot skillet before the slow cooker for extra caramelized flavor—an easy recipe upgrade.
    • Layer right: Onions first, then chicken, then sauce. It keeps moisture circulating and seasonings even.
    • Balance the glaze: Taste the sauce before cooking; add a pinch of salt or a splash more balsamic if you want extra tang.
    • Lid discipline: Each peek adds cook time. Trust the process for tender, juicy results.

    Smart Ingredient Swaps & Practical Cooking Advice

    • Sweetener swap: Use light brown sugar instead of honey for a deeper molasses note in your homemade version.
    • Protein swap: Boneless, skinless chicken thighs make a richer, more forgiving quick fix if you tend to overcook breasts.
    • Diet-friendly: This dish is naturally gluten-free; for a lower-sugar option, use reduced-sugar cranberry sauce and cut sweetener to taste.
    • What not to do: Don’t over-thicken too early—sauce naturally reduces. If needed, add a cornstarch slurry at the end to fix texture.

    With these cooking tips, Slow Cooker Balsamic Cranberry Chicken becomes a reliable favorite—an easy recipe you’ll make on repeat.

    Serving Ideas & Creative Variations

    How to Serve Slow Cooker Balsamic Cranberry Chicken for Maximum Enjoyment

    When I serve Slow Cooker Balsamic Cranberry Chicken for guests, I pile it on a wide platter, spoon on the glossy sauce, and sprinkle fresh orange zest for sparkle. It looks elegant, tastes like comfort food, and it’s simple to plate. For a complete meal, pair it with buttery mashed potatoes or creamy polenta. A bright green side like roasted asparagus and carrots adds color and crunch, while a crisp salad brings freshness. For holiday spreads, I love offering it with soft dinner rolls (to catch that sauce) and a sparkling cranberry mocktail.

    • Plating suggestion: Slice chicken on the bias, fan it out, and drizzle the sauce in a zigzag for that restaurant effect.
    • Beverage pairing: Pinot Noir or a spiced apple cider complements the tangy-sweet glaze.
    • Sides that sing: Mashed potatoes, wild rice, garlic butter noodles, or roasted vegetables.

    Flavor Twists and Seasonal Variations

    • Orange-rosemary twist: Add 2 tablespoons of orange juice and extra zest; finish with a rosemary sprig for a seasonal twist.
    • Jalapeño heat: Stir in 1–2 minced jalapeños for a sweet-heat mashup (and try my favorite party starter, Cranberry Jalapeño Cream Cheese Dip).
    • Sandwich-ready: Shred the chicken and pile onto toasted buns with a smear of goat cheese—think leftovers turned gourmet. For more party-friendly ideas, these Turkey Cranberry Sliders are a hit too.

    If you’re sharing on social, style with a matte white plate, a dark linen for contrast, and a spoon drizzle shot to show off the glossy glaze—Pinterest loves that kind of serving idea and flavor variation.

    Slow Cooker Balsamic Cranberry Chicken
    Slow Cooker Balsamic Cranberry Chicken

    Storage & Troubleshooting Guide

    How to Store and Reheat Slow Cooker Balsamic Cranberry Chicken

    When I stash leftovers of Slow Cooker Balsamic Cranberry Chicken, I feel like I’ve gifted myself a future easy dinner. Here’s how to keep it fresh and fabulous:

    • Room temperature: Keep out no longer than 2 hours before refrigerating.
    • Fridge: Store in airtight containers (glass is best for aroma) for up to 4 days. Keep chicken submerged in sauce to retain moisture.
    • Freezer: Freeze in meal-size portions for up to 3 months; thaw overnight in the fridge.
    • Reheat: Warm gently in a skillet over medium-low with a splash of broth, or cover and bake at 325°F until heated through. Microwave on 60–70% power in short bursts. An air fryer is best for sides, not saucy chicken.

    Troubleshooting Common Slow Cooker Balsamic Cranberry Chicken Issues

    • Too watery: Remove the lid and simmer 20–30 minutes, or add a cornstarch slurry and cook on High 10 minutes to fix texture.
    • Too sweet: Add 1–2 teaspoons additional balsamic vinegar and a pinch of salt to balance.
    • Too tangy: Stir in 1–2 teaspoons honey or brown sugar; the sweetness rounds out the sauce.
    • Dry chicken: Switch to thighs next time, or shorten the cook time. Always check internal temp—165°F is the goal.
    • Uneven texture: Don’t stack huge chicken pieces. Trim to even sizes so everything cooks consistently.

    With a little storage advice and a few quick fixes, your Slow Cooker Balsamic Cranberry Chicken will stay tender, saucy, and ready for repeat appearances.

    FAQs

    Can I make Slow Cooker Balsamic Cranberry Chicken ahead of time?

    Yes. Cook fully, cool, and refrigerate up to 4 days. Reheat gently with a splash of broth. It also freezes well for 3 months.

    Can I use frozen chicken?

    For food safety, thaw chicken in the fridge first. Starting with thawed chicken ensures even cooking and the best texture.

    How do I thicken the sauce?

    Whisk 1 tablespoon cornstarch with 1 tablespoon cold water and stir into the hot sauce. Cook on High 10–15 minutes until glossy.

    Can I cook this on High instead of Low?

    Yes. Cook on High 2–3 hours, until chicken reaches 165°F and is fork-tender. Avoid overcooking to keep it juicy.

    Conclusion

    Slow Cooker Balsamic Cranberry Chicken is the kind of easy dinner that tastes like you fussed—without the fuss. The homemade balsamic-cranberry glaze turns into glossy comfort food, perfect for weeknights or a cozy holiday spread. Serve it with simple sides, stash leftovers for meal prep, and make it your own with seasonal twists. If you love slow-cooked, set-and-forget meals, try my Slow Cooker Chicken Korma next. Now it’s your turn: make Slow Cooker Balsamic Cranberry Chicken at home and tag me—I can’t wait to see your plates!

  • slow cooked beef brisket – Tender, Soul-Warming Perfection

    slow cooked beef brisket – Tender, Soul-Warming Perfection

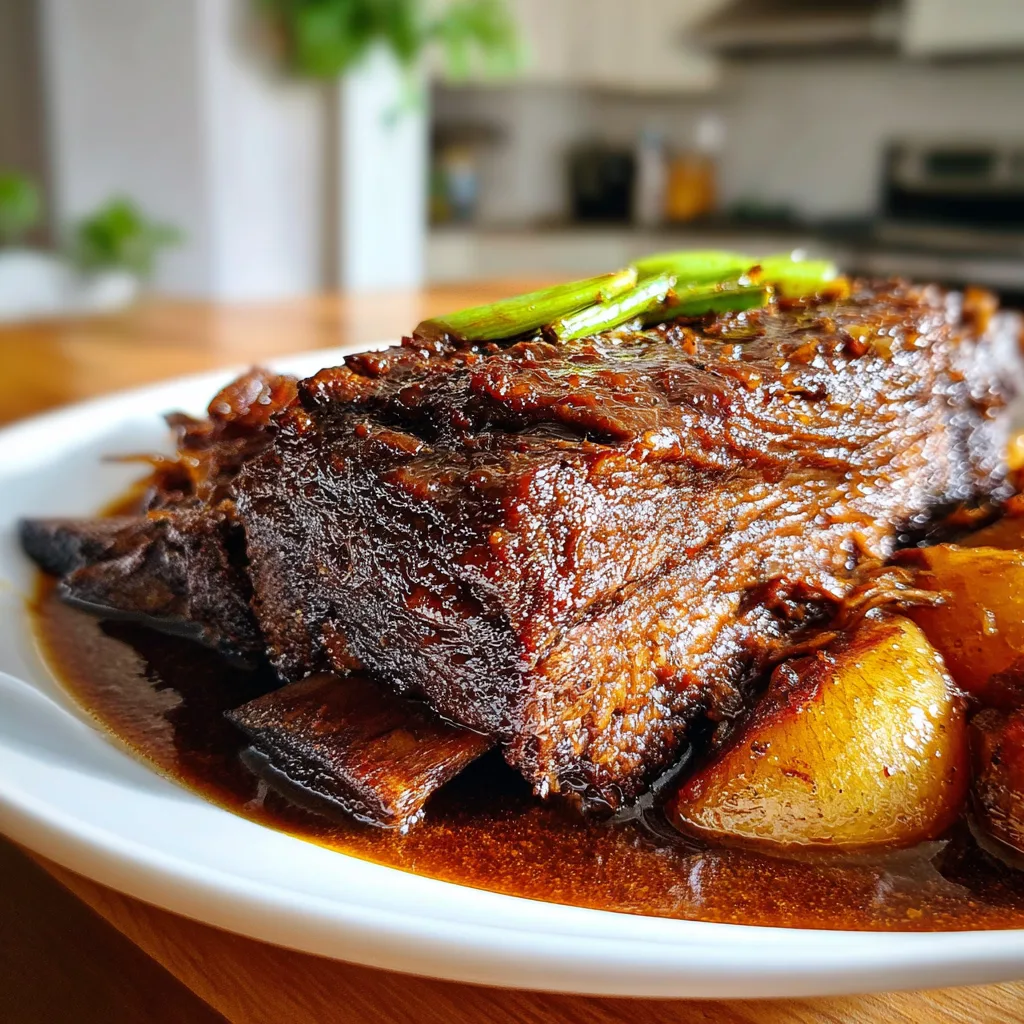
    slow cooked beef brisket is my secret for those days when the kitchen feels like a circus and I’m the ringmaster with a wooden spoon. One Sunday, I set slow cooked beef brisket to bubble away while my kids turned the living room into a pillow fort and our dog discovered flour clouds. Hours later, the house smelled like a cozy deli, everyone calmed down, and I carved into melt-in-your-mouth beef like a hero with a cutting board. This recipe is forgiving, flavorful, and built for real life.

    slow cooked beef brisket – Tender, Soul-Warming Perfection

    Recipe

    WHY YOU’LL LOVE THIS RECIPE

    What Makes This slow cooked beef brisket So Irresistible

    I learned quickly that slow cooked beef brisket is my “set it and smile later” trick. One weekday, I seasoned the beef, flipped on the slow cooker, and sprinted out the door to school pickup with a coffee in one hand and a permission slip in the other. Hours later, slow cooked beef brisket turned my kitchen into a hug—no babysitting, no stress. This slow cooked beef brisket is tender, saucy, and designed for real-life chaos. It’s the kind of homemade comfort food that makes you feel like a pro without trying too hard.

    • Minimal hands-on time: quick prep, then the pot does the work—an easy dinner win.
    • Big, bold flavor from a simple pantry rub and a savory braise.
    • Family-friendly and freezer-friendly—great for meal prep.
    • Flexible method: slow cooker or oven braise, both foolproof.
    • Reliable leftovers that taste even better the next day.

    Whether you’re hosting or craving weeknight comfort food, slow cooked beef brisket delivers deep, cozy flavor every time. Let’s get to that recipe card.

    Short videos of shreddy, glossy slices are lighting up feeds for a reason: slow cooked beef brisket is cinematic comfort. It’s budget-friendly compared to steaks, scales up for gatherings, and fits every vibe—from game day to holiday dinners. With a homemade sauce that reduces to a silky glaze, this easy recipe has that restaurant-level finish. And because slow cooked beef brisket is a one-pan meal at heart, cleanup is blessedly simple.

    TIPS, TRICKS & EXPERT SECRETS

    Chef Tips for Perfect slow cooked beef brisket Every Time

    During a pop-up supper, I once served brisket that sliced like butter—after I almost forgot to rest it. Lesson learned. For slow cooked beef brisket, the tiny habits make the magic. Here’s my go-to playbook so your easy recipe turns out beautifully homemade and stress-free:

    • Trim smart: Leave about a 1/4-inch fat cap so slow cooked beef brisket bastes itself as it cooks.
    • Brown first: A deep sear adds complexity; those browned bits build a better homemade version of the sauce.
    • Low and slow: Keep it gentle; steady heat melts connective tissue for that fork-tender texture.
    • Rest and slice against the grain: Resting keeps juices in; slicing crosswise ensures tenderness.

    Smart Ingredient Swaps & Practical Cooking Advice

    • No Worcestershire? Use soy sauce or coconut aminos for a quick fix of umami.
    • Gluten-free: Choose certified GF broth and Worcestershire.
    • Dairy-free: This slow cooked beef brisket is naturally dairy-free.
    • What not to do: Don’t crank the heat to rush it. Overheating makes brisket tight and dry—slow victory beats fast failure.

    Once you master these cooking tips, slow cooked beef brisket becomes your reliable showstopper. If you love a similar set-it-and-forget-it vibe, try my Slow Cooker Cajun Red Beans and Rice or the richly spiced Braised Beef Barbacoa.

    SERVING IDEAS & CREATIVE VARIATIONS

    How to Serve slow cooked beef brisket for Maximum Enjoyment

    When friends come over, I fan slices on a big platter, drizzle with glossy gravy, and watch the room go quiet for that first bite. For slow cooked beef brisket, the right serving ideas make it shine:

    • Classic plate: Creamy mashed potatoes or buttered egg noodles with roasted carrots. Try these easy Roasted Asparagus and Carrot for color and crunch.
    • Sandwich moment: Pile onto toasted buns with pickles and a swipe of mustard.
    • Brisket bowls: Layer with rice or polenta, garlicky greens, and spoonfuls of sauce.

    Flavor Twists and Seasonal Variations

    • Maple-Chipotle: Swap brown sugar for maple syrup and add a pinch of chipotle for smoky-sweet fall vibes.
    • Herb & Garlic: Add fresh rosemary and thyme sprigs to the braise; finish with lemon zest for brightness.
    • Holiday Cran-Glaze: Whisk a spoon of cranberry sauce into the reduction for tangy sheen—perfect next to your Turkey with Gravy Sauce leftovers.

    Content creators: slice across the grain, stack slightly offset, and spoon extra sauce on top for that irresistible shine. These plating suggestions and flavor variations keep slow cooked beef brisket feeling new every season.

    slow cooked beef brisket
    slow cooked beef brisket

    STORAGE & TROUBLESHOOTING GUIDE

    How to Store and Reheat slow cooked beef brisket

    The first time I made a double batch, I labeled one container “hands-off—future dinner hero.” Slow cooked beef brisket stores like a dream.

    • Room temp: Keep out no longer than 2 hours.
    • Fridge: 4–5 days in airtight containers, covered with its gravy to keep fresh.
    • Freezer: Up to 3 months. Slice, cover with sauce, and freeze flat in bags or lidded containers.
    • Reheat: Oven at 300°F covered with sauce until warm (15–20 minutes for slices). Stovetop simmer in sauce on low. Microwave in short bursts with extra sauce. Avoid drying heat.

    Troubleshooting Common slow cooked beef brisket Issues

    • Too dry: Add more broth when reheating and slice thinner. Next time, cook lower/longer, and don’t skip the rest.
    • Watery sauce: Reduce the liquid uncovered until glossy, or stir in a cornstarch slurry (1 tsp cornstarch + 1 tsp water) at a simmer.
    • Not tender: It’s undercooked. Keep going until a fork slides in easily; slow cooked beef brisket needs time.
    • Too salty: Add unsalted broth and a squeeze of lemon or a pinch of brown sugar to balance.

    With these storage tips and quick fixes, slow cooked beef brisket stays luscious from day one to last-bite leftovers. You’ve got this.

    FAQs

    Can I make slow cooked beef brisket in the oven instead of a slow cooker?

    Yes. Use a Dutch oven, cover tightly, and bake at 300°F for 3 1/2–4 1/2 hours until fork-tender.

    Should I slice slow cooked beef brisket hot or after resting?

    Always rest 20 minutes, then slice against the grain. Resting keeps juices in and ensures tender slices.

    Can I prep slow cooked beef brisket a day ahead?

    Absolutely. Chill whole in its sauce, then reheat and slice for neat pieces and concentrated flavor.

    What cut works if I can’t find brisket?

    Chuck roast is a solid substitute for a similar braised texture and rich flavor.

    Conclusion

    When you crave a cozy, homemade dinner that practically cooks itself, slow cooked beef brisket is the answer. The slow simmer coaxes out deep, savory flavor and creates a luscious sauce that feels like a warm blanket on a busy day. As comfort food goes, this easy dinner delivers reliable, crowd-pleasing results—slice it for platters, pile it into sandwiches, or serve it with roasted vegetables. Thanks for cooking with me! If you try this slow cooked beef brisket, tag me and share your plate. And if you love a good slow-simmered moment, peek at my other comfort-driven favorites like Slow Cooker Cajun Potato Soup or creamy Crockpot Chicken Broccoli Alfredo. Try it at home and tag me!

  • 5 Minute Christmas Crock Pot Candy – Creamy, Irresistible

    5 Minute Christmas Crock Pot Candy – Creamy, Irresistible

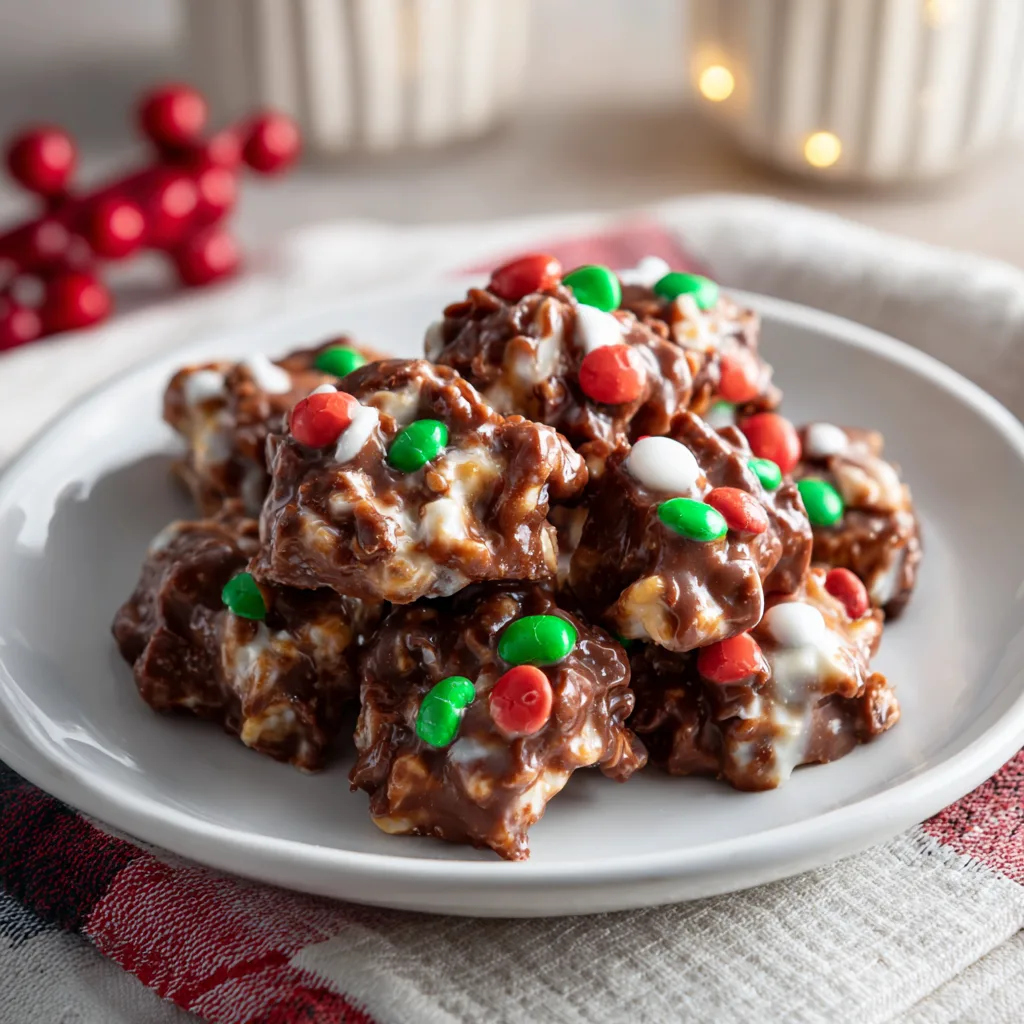
    5 Minute Christmas Crock Pot Candy saved my sanity last December when my niece “helped” by sampling every other chocolate chip. I tossed everything into the slow cooker, rescued the chips from tiny hands, and we made these glossy, bite-size treats while the carols played. 5 Minute Christmas Crock Pot Candy is exactly what I reach for when holiday chaos meets sweet cravings—minimal effort, maximum cozy joy. If you can scoop cookie dough, you can nail this festive candy, and I promise you’ll look like a hero when the trays hit the table.

    5 Minute Christmas Crock Pot Candy

    Recipe

    WHY YOU’LL LOVE THIS RECIPE

    What Makes This 5 Minute Christmas Crock Pot Candy So Irresistible

    I learned fast that 5 Minute Christmas Crock Pot Candy can rescue even the most chaotic holiday afternoon. I once had cocoa on my sleeve, sprinkles on the dog, and two timers beeping. 5 Minute Christmas Crock Pot Candy still came out glossy, creamy, and unbelievably festive. It’s the definition of a homemade quick fix and cozy comfort food all in one delicious bite. This easy recipe is a holiday MVP.

    • Hands-on time is truly quick—about five minutes of prep, then the slow cooker does the work.
    • Comforting chocolate-peanut crunch that tastes like a classic candy shop favorite.
    • Simple, pantry-friendly ingredients for a reliable, homemade version of a store-bought treat.
    • Family-friendly, beginner-proof method—no tempering or candy thermometer required.
    • Perfect for gifting, cookie trays, and last-minute party desserts.

    Trending on Pinterest boards and holiday boards everywhere, this creamy, rich candy is the kind of easy dinner-adjacent dessert you can make while a main simmer. When you’re ready, let’s jump into the recipe card and make a batch that disappears fast.

    Because it’s an easy, homemade, one-pot sweet with big payoff. You get rich layers of chocolate, a cozy hint of peanut butter, and that irresistible crunch—all with a slow cooker and a scoop. No fuss, no special tools, and your kitchen smells like pure holiday cheer. In short, it’s the kind of comfort food dessert that makes you look extra festive with almost no effort.

    TIPS, TRICKS & EXPERT SECRETS

    Chef Tips for Perfect 5 Minute Christmas Crock Pot Candy Every Time

    During a cooking demo, I once over-stirred the melt and learned a lesson: gentle is best. This 5 Minute Christmas Crock Pot Candy is forgiving, but a few pro tips make it flawless.

    • Layer smart: peanuts on the bottom, then chips, then almond bark on top. This prevents scorching and ensures a smooth, homemade melt.
    • Keep the lid closed for the first hour. Peeking drops the heat and can lengthen cook time.
    • Stir gently with a silicone spatula. Overmixing introduces air and can dull the finish.
    • Use a cookie scoop for consistent, gift-worthy clusters and a clean, easy recipe workflow.

    What not to do: Don’t crank the heat to HIGH. Slow, steady LOW makes this 5 Minute Christmas Crock Pot Candy silky and prevents hot spots.

    Smart Ingredient Swaps & Practical Cooking Advice

    • Allergy-aware: swap peanuts for roasted almonds, cashews, or sunflower seeds (nut-free option).
    • Gluten-free: most ingredients are naturally gluten-free, but use certified GF chips and almond bark.
    • Vegan: choose dairy-free chocolate chips and vegan “white baking bars,” plus plant-based sprinkles.
    • Flavor boost: a pinch of espresso powder intensifies chocolate without tasting like coffee.

    Keep your slow cooker on WARM once the mixture is smooth; it gives you time to scoop without rushing. With these cooking tips, your easy recipe stays glossy, creamy, and gift-ready.

    SERVING IDEAS & CREATIVE VARIATIONS

    How to Serve 5 Minute Christmas Crock Pot Candy for Maximum Enjoyment

    When friends pop in, I pile 5 Minute Christmas Crock Pot Candy high on a cake stand, add a mug tree of hot cocoa, and watch eyes light up. A little plating suggestion: line the tray with parchment or greenery for contrast, then scatter a few sprinkles around the base for a festive look.

    • Pair with a bubbly sipper like ginger ale or a cinnamon-spiced hot cocoa.
    • Create a dessert board with salty crackers, orange slices, and your candy as the star.
    • Set beside holiday appetizers like Baked Cranberry Brie Bites or party favorites like Sweet Chili Meatballs for a sweet-savory spread.

    For content creators, shoot overhead with natural light, and stack clusters for depth. A light dusting of confectioners’ sugar reads like snow—holiday magic in one click.

    Flavor Twists and Seasonal Variations

    • Peppermint Bark Vibe: add crushed candy canes and a drop of peppermint extract.
    • Salted Caramel Crunch: drizzle with dulce de leche and finish with flaky sea salt.
    • Trail Mix Take: mix in dried cranberries and mini marshmallows before scooping.

    These flavor variations keep 5 Minute Christmas Crock Pot Candy fun and fresh all season long. For more seasonal inspiration, try my Cranberry Jalapeño Cream Cheese Dip for a tangy kick that pairs beautifully with the candy’s sweetness.

    5 Minute Christmas Crock Pot Candy
    5 Minute Christmas Crock Pot Candy

    STORAGE & TROUBLESHOOTING GUIDE

    How to Store and Reheat 5 Minute Christmas Crock Pot Candy

    I once tucked a tin of 5 Minute Christmas Crock Pot Candy on the back porch (instant “cold room”) and it stayed perfect through a weekend of company. To keep your homemade candy fresh and glossy, follow this storage advice:

    • Room temperature: up to 2 weeks in a cool, dry place in an airtight tin or container with parchment between layers.
    • Refrigerator: up to 1 month; bring to room temp before serving to restore creamy texture.
    • Freezer: up to 3 months; freeze in single layers, then transfer to a freezer bag. Thaw in the fridge overnight.

    Reheating? Candy doesn’t need reheating, but if it softens, simply chill. If your slow cooker mixture thickens while scooping, switch to WARM and stir gently.

    Troubleshooting Common 5 Minute Christmas Crock Pot Candy Issues

    • Too thick to scoop: stir in 1–2 teaspoons neutral oil to loosen, then scoop.
    • Looks dull: avoid over-stirring; keep the lid on during the first hour for steady heat.
    • Scorching on the edges: use LOW heat only and layer almond bark on top of chips.
    • Soft set in a warm kitchen: chill trays for 15–20 minutes to firm up.

    With these quick fixes, your 5 Minute Christmas Crock Pot Candy will keep its glossy finish and satisfying snap. You’ve got this—holiday sweet success is absolutely within reach.

    FAQs

    Can I make 5 Minute Christmas Crock Pot Candy without peanuts?

    Yes. Substitute roasted almonds, cashews, or sunflower seeds. Keep the ratios the same for perfect clusters.

    Why use almond bark in 5 Minute Christmas Crock Pot Candy?

    Almond bark melts smoothly and stabilizes the mixture, giving candy a glossy finish without tempering.

    How do I keep 5 Minute Christmas Crock Pot Candy from getting too hard?

    Cook on LOW, stir gently, and don’t overcook. If it thickens, add a teaspoon of neutral oil to restore creaminess.

    Is 5 Minute Christmas Crock Pot Candy gluten-free?

    It can be. Use certified gluten-free chocolate and almond bark, and double-check sprinkles.

    Conclusion

    From first bite to last crumb, 5 Minute Christmas Crock Pot Candy proves that homemade, festive candy can be simple, cozy, and wildly irresistible. With pantry staples, a single pot, and a few clever cooking tips, you’ll create a creamy, crunchy classic that gifts beautifully and thrills every sweet tooth. Keep this easy recipe in your back pocket for parties, cookie trays, or a comfort food dessert after dinner. Try 5 Minute Christmas Crock Pot Candy at home and tag me—I can’t wait to see your glossy, sprinkle-topped clusters shine. For more delicious inspiration, visit RecipesDarleen and peek at my winter warmers like Slow Cooker Cajun Potato Soup for the coziest season yet.

  • Slow Cooker Cajun Potato Soup – Creamy, Bold Comfort

    Slow Cooker Cajun Potato Soup – Creamy, Bold Comfort

    Slow Cooker Cajun Potato Soup saved my Tuesday. I tossed everything in the pot, then realized I’d left the Cajun seasoning on the opposite counter—behind a mountain of lunch boxes. Typical Darleen Vance kitchen chaos. But Slow Cooker Cajun Potato Soup forgives and simmers into creamy magic anyway. By dinner, the house smelled like a cozy New Orleans hug, and my kids were dunking bread like it was a sport. One pot, easy dinner, big flavor—just how I like my weeknights.

    Slow Cooker Cajun Potato Soup

    Recipe

    WHY YOU’LL LOVE THIS RECIPE

    What Makes This Slow Cooker Cajun Potato Soup So Irresistible

    I once tested Slow Cooker Cajun Potato Soup while juggling a PTA email and a dog who insists the dishwasher is his personal buffet. Despite the chaos, Slow Cooker Cajun Potato Soup turned out creamy, cozy, and wildly flavorful. It’s homemade comfort food with a Cajun kick and an easy dinner that practically cooks itself in one pot. The tender potatoes soak up all that bold spice and smoky sausage, and the slow cooker does the work while you win the day.

    • Hands-off magic: 15 minutes of prep, then let the slow cooker simmer away.
    • Creamy-meets-spicy: lush texture with a balanced Cajun warmth.
    • Family-friendly comfort food: hearty, cozy, and super satisfying.
    • Flexible: make it meatless, lighter, or extra-spicy to suit your crowd.
    • Budget-conscious pantry win: simple, accessible, homemade ingredients.

    Whether you need an easy weeknight dinner or game-day ladle-&-go, this one-pot meal delivers. Grab your spoon—let’s get into the recipe card so you can make it tonight.

    Comfort classics are trending—especially creamy soups with bold flavors. This Slow Cooker Cajun Potato Soup fits the sweet spot: an easy recipe that tastes like you fussed all day. It’s perfect for batch cooking, crowds, and cozy weekends. Plus, it freezes well and makes incredible leftovers, so your lunch game stays strong all week.

    TIPS, TRICKS & EXPERT SECRETS

    Chef Tips for Perfect Slow Cooker Cajun Potato Soup Every Time

    In a cooking class years ago, I learned the tiniest trick that changed my soup game: mash a few potatoes in the pot for instant body. It’s a quick fix that turns a good homemade version into an amazing one.

    • Bloom your spices: Sprinkle Cajun seasoning and smoked paprika over the veggies in the cooker, then stir—this wakes up flavor.
    • Thicken smart: Mash some potatoes before adding cream, then use a small cornstarch slurry for that silky finish.
    • Balance heat: Start with 2 teaspoons Cajun seasoning; add more at the end to dial in spice without overdoing salt.
    • Finish with freshness: Stir in green onions and a squeeze of lemon for brightness right before serving.

    Smart Ingredient Swaps & Practical Cooking Advice

    • Vegan/vegetarian: Skip sausage, use vegetable broth, and swap cream and cream cheese for coconut milk and a spoon of nutritional yeast for savory depth.
    • Gluten-free: This recipe is naturally GF when you use cornstarch to thicken and a certified GF Cajun seasoning.
    • Lighter option: Use turkey sausage and half-and-half, or reduce cheese.
    • What not to do: Don’t add dairy early—wait until the end so it doesn’t separate in the slow cooker.

    Keep this cooking tip list handy and your easy recipe will be flawless. The homemade version is always worth it.

    Slow Cooker Cajun Potato Soup – Creamy, Bold Comfort
    Slow Cooker Cajun Potato Soup – Creamy, Bold Comfort

    SERVING IDEAS & CREATIVE VARIATIONS

    How to Serve Slow Cooker Cajun Potato Soup for Maximum Enjoyment

    When friends pop by and I need something that looks intentional, I ladle Slow Cooker Cajun Potato Soup into warm bowls and pile on toppings. A quick sprinkle of cheddar, green onions, and a pretty swirl of cream makes it dinner-party ready without the stress.

    • Pair with crusty bread or cornbread and a crisp side like Roasted Asparagus and Carrot.
    • Serve with a simple salad and iced tea or a chilled lager to balance the Cajun spice.
    • Set up a topping bar: cheddar, bacon, hot sauce, chives, and extra Cajun seasoning.

    Flavor Twists and Seasonal Variations

    • Smoky corn & bacon: Stir in 1 cup fire-roasted corn and crispy bacon at the end for texture and sweetness.
    • Autumn harvest: Add diced sweet potatoes and a pinch of nutmeg for a seasonal twist.
    • Creole shrimp topper: Sear seasoned shrimp in a skillet and float on top of each bowl for a luxe finish.

    If you love slow cooker comfort with big flavor, try my Slow Cooker Cajun Red Beans and Rice next, or keep the cozy train rolling with Slow Cooker Tuscan Chicken. Content creators: style with a deep bowl, overhead sprinkle of green onions, and a napkin tuck for scroll-stopping photos.

    STORAGE & TROUBLESHOOTING GUIDE

    How to Store and Reheat Slow Cooker Cajun Potato Soup

    I always make a double batch and stash leftovers for busy nights. Slow Cooker Cajun Potato Soup keeps beautifully when you store it right.

    • Room temperature: Keep out no longer than 2 hours for food safety.
    • Refrigerator: Store in airtight containers 3–4 days; press plastic wrap onto the surface to keep fresh and prevent a skin.
    • Freezer: Freeze up to 2 months in freezer-safe containers, leaving headspace. For best texture, freeze before adding dairy and stir in cream/cheese after reheating.
    • Reheat: Warm gently on the stove over medium-low, stirring often. Add a splash of broth or milk to loosen. Microwave in short bursts, stirring between. Avoid boiling to keep dairy smooth.

    Troubleshooting Common Slow Cooker Cajun Potato Soup Issues

    • Too thick: Stir in warm broth a little at a time to fix texture.
    • Too thin: Mash more potatoes or add an extra teaspoon of cornstarch slurry; simmer on High for 10 minutes.
    • Bland: Add a pinch of salt, extra Cajun seasoning, a splash of hot sauce, or a squeeze of lemon to brighten.
    • Too spicy: Swirl in more cream or cream cheese to mellow the heat.
    • Grainy dairy: Add dairy only at the end and avoid boiling; whisk smooth off heat if needed.

    With these storage tips and quick fixes, your soup will stay cozy, delicious, and weeknight-ready. You’ve got this.

    FAQs

    Can I make Slow Cooker Cajun Potato Soup without sausage?

    Yes. Use vegetable broth, skip sausage, and bump up smoked paprika for depth. For protein, add white beans at the end.

    What potatoes work best?

    Russet potatoes give the creamiest texture. Yukon golds also work well and hold shape a bit more.

    Can I cook this on the stovetop?

    Yes. Simmer covered 25–30 minutes until tender, then mash some potatoes, add dairy and slurry, and finish as written.

    How can I make it lighter?

    Use turkey sausage or skip it, swap half-and-half for cream, and reduce cheese. It stays creamy and satisfying.

    Conclusion

    Slow Cooker Cajun Potato Soup is the cozy, creamy comfort food that makes weeknights easier and tastier. The slow cooker builds bold Cajun flavor with almost no effort, and the silky potato base feels like a hug in a bowl. Whether you need an easy dinner, a homemade meal prep idea, or a one-pot recipe that pleases everyone, this Slow Cooker Cajun Potato Soup delivers. Try it at home, make it your own, and tag me so I can see your bowl—extra green onions encouraged!

  • Creamy Crack Chicken Gnocchi – Irresistible Cozy Comfort

    Creamy Crack Chicken Gnocchi – Irresistible Cozy Comfort

    Creamy Crack Chicken Gnocchi came to life on a Tuesday when the smoke alarm thought it was the dinner bell. I, Darleen Vance, dropped a bag of gnocchi, the dog stole a strip of bacon, and somehow the skillet still delivered creamy glory. Creamy Crack Chicken Gnocchi tastes like a warm hug from the universe—rich, savory, and ridiculously easy. If weeknights need saving, this is your hero in a skillet.

    Creamy Crack Chicken Gnocchi – Cheesy, Cozy & Ultra Comforting

    Recipe

    Why You’ll Love This Creamy Crack Chicken Gnocchi

    What Makes This Creamy Crack Chicken Gnocchi So Irresistible

    I first tested Creamy Crack Chicken Gnocchi after a long day when my pantry looked like a mystery basket and my patience had left the chat. The magic of Creamy Crack Chicken Gnocchi is how it turns simple, homemade staples into a one-pan meal that tastes like comfort food luxury. Tender chicken, pillowy gnocchi, ranch-kissed cream cheese, cheddar, and bacon all cuddle into a velvety sauce. It’s the easy dinner you can count on—no fussy steps, just flavor.

    • One-pan skillet ease: less mess, faster cleanup, and more weeknight wins.
    • Ultra-creamy texture with a cozy, restaurant-worthy finish.
    • Simple, grocery-store ingredients—no special trip required.
    • Family-friendly flavors that please picky eaters and foodies alike.
    • Reliable 30-minute meal: quick prep meets big comfort.

    If you love creamy, savory dinners and quick fix recipes, this homemade version will be your new go-to weeknight hero. Ready to stir, simmer, and swoon? Let’s cook.

    This dish is all over Pinterest and TikTok because it delivers everything we crave in a chill-night dinner: a bold, creamy sauce, bite-size chicken, and gnocchi that soak up every drop. It’s an easy recipe that still feels special—comforting, cozy, and totally spoon-lickable.

    Tips, Tricks & Expert Secrets for Creamy Crack Chicken Gnocchi

    Chef Tips for Perfect Creamy Crack Chicken Gnocchi Every Time

    During a cooking class, I learned the tiniest tweak—simmer, don’t boil—can transform a sauce from grainy to glossy. The same truth holds for Creamy Crack Chicken Gnocchi: gentle heat equals silky results.

    • Brown, then mellow: Sauté chicken to build fond, then lower heat before adding cream cheese so it melts smooth.
    • Simmer, don’t blast: Keep the sauce at a gentle burble; boiling can break dairy and toughen chicken.
    • Stir the gnocchi: Toss often so they cook evenly and release starch to naturally thicken the sauce.
    • Season in layers: Salt the chicken, season the sauce, then finish with a taste-and-adjust at the end.

    Smart Ingredient Swaps & Practical Cooking Advice

    • Lighter option: Swap half-and-half for heavy cream and use Neufchâtel (reduced-fat cream cheese). Sauce will be slightly thinner but still creamy.
    • Gluten-free fix: Use gluten-free gnocchi and be sure your ranch seasoning is certified GF.
    • Protein swap: Rotisserie chicken works in a pinch—stir it in with the cream to warm through.
    • Cheese choices: Monterey Jack melts ultra-smooth; add Parmesan for a salty, nutty punch.
    • What not to do: Don’t add gnocchi before the sauce is simmering—undercooked gnocchi can turn gummy and throw off the texture.

    With these cooking tips, your easy dinner will stay luscious and reliable—every single time.

    Serving Ideas & Creative Variations

    How to Serve Creamy Crack Chicken Gnocchi for Maximum Enjoyment

    When I served Creamy Crack Chicken Gnocchi for friends, I went all-in on cozy plating—wide bowls, extra bacon crumble, and a dusting of Parmesan. It’s the kind of one-pan meal that loves simple sides and a pretty garnish.

    • Pair with a crisp green salad or Roasted Asparagus and Carrot for fresh contrast.
    • Add a slice of warm bread for swiping up the creamy sauce.
    • Pour a chilled Pinot Grigio or a light amber ale to balance the richness.

    Flavor Twists and Seasonal Variations

    • Buffalo Glow-Up: Stir in 1–2 tablespoons buffalo sauce and finish with blue cheese crumbles and celery leaves.
    • Autumn Harvest: Add roasted butternut cubes and fresh sage; try alongside my Butternut Squash Ravioli for a seasonal pairing.
    • Tuscan-Style: Fold in sun-dried tomatoes and swap cheddar for mozzarella—serve with Slow Cooker Tuscan Chicken on a crowd buffet.

    Plating suggestion: Use shallow white bowls, twirl the gnocchi with a spoon for height, then garnish with green onions, bacon, and microgreens for a photo-ready finish. Content creators—shoot overhead in diffuse daylight to capture the creamy sheen and golden edges.

    Creamy Crack Chicken Gnocchi – Cheesy, Cozy & Ultra Comforting

    Storage & Troubleshooting Guide

    How to Store and Reheat Creamy Crack Chicken Gnocchi

    I stash Creamy Crack Chicken Gnocchi in glass containers so the sauce doesn’t pick up off-flavors from plastic. Labeling saves me from mystery-lunch roulette.

    • Room temp: Keep no longer than 1–2 hours.
    • Fridge: Store in airtight containers up to 3–4 days for best texture.
    • Freezer: Cream-based sauces can separate; if you must freeze, chill completely and freeze up to 2 months. Thaw overnight in the fridge and reheat gently with a splash of broth or cream.
    • Reheat: Low and slow—stovetop over medium-low with 1–3 tablespoons broth or cream, stirring until silky. Microwave at 50% power in 45-second bursts, stirring between. Avoid high heat to keep it creamy.

    Troubleshooting Common Creamy Crack Chicken Gnocchi Issues

    • Too thick: Whisk in warm chicken broth, 1–2 tablespoons at a time, until the sauce loosens.
    • Too thin: Simmer 2–3 minutes to reduce, or stir in a small handful of cheddar to thicken.
    • Grainy sauce: Heat was too high—remove from heat, whisk in a splash of cream to smooth.
    • Gnocchi undercooked: Simmer a few more minutes, stirring often; add a splash of broth as needed.
    • Over-salty: Add a squeeze of lemon or a spoonful of cream cheese to balance.

    With this storage advice and quick fixes, your Creamy Crack Chicken Gnocchi will stay luscious, fresh, and weeknight-ready.

    FAQs

    Can I use rotisserie chicken?

    Yes—stir in 3 cups shredded rotisserie chicken after the cream is added and heat until warmed through.

    Will frozen gnocchi work?

    Absolutely. Add it straight from the freezer and simmer a minute or two longer, stirring often.

    How can I make this lighter?

    Use half-and-half in place of heavy cream and Neufchâtel for cream cheese. The sauce will be slightly thinner but still creamy.

    Is the ranch flavor strong?

    It’s balanced and savory. If you want bolder ranch, add another teaspoon of seasoning at the end to taste.

    Conclusion

    Creamy Crack Chicken Gnocchi is the kind of easy dinner that rescues weeknights and satisfies weekend cravings. The one-pan, homemade comfort food vibe, the silky sauce, the pillowy gnocchi—everything just works. With the tips, serving ideas, and storage advice above, your Creamy Crack Chicken Gnocchi will turn out perfectly creamy every time. If you crave more cozy mains, peek at my Dill Pickle Parmesan Chicken or the ultra-creamy Crockpot Chicken Broccoli Alfredo. Try it at home and tag me—I can’t wait to see your skillet shine.

  • Roasted Asparagus and Carrot – Irresistible and Cozy

    Roasted Asparagus and Carrot – Irresistible and Cozy

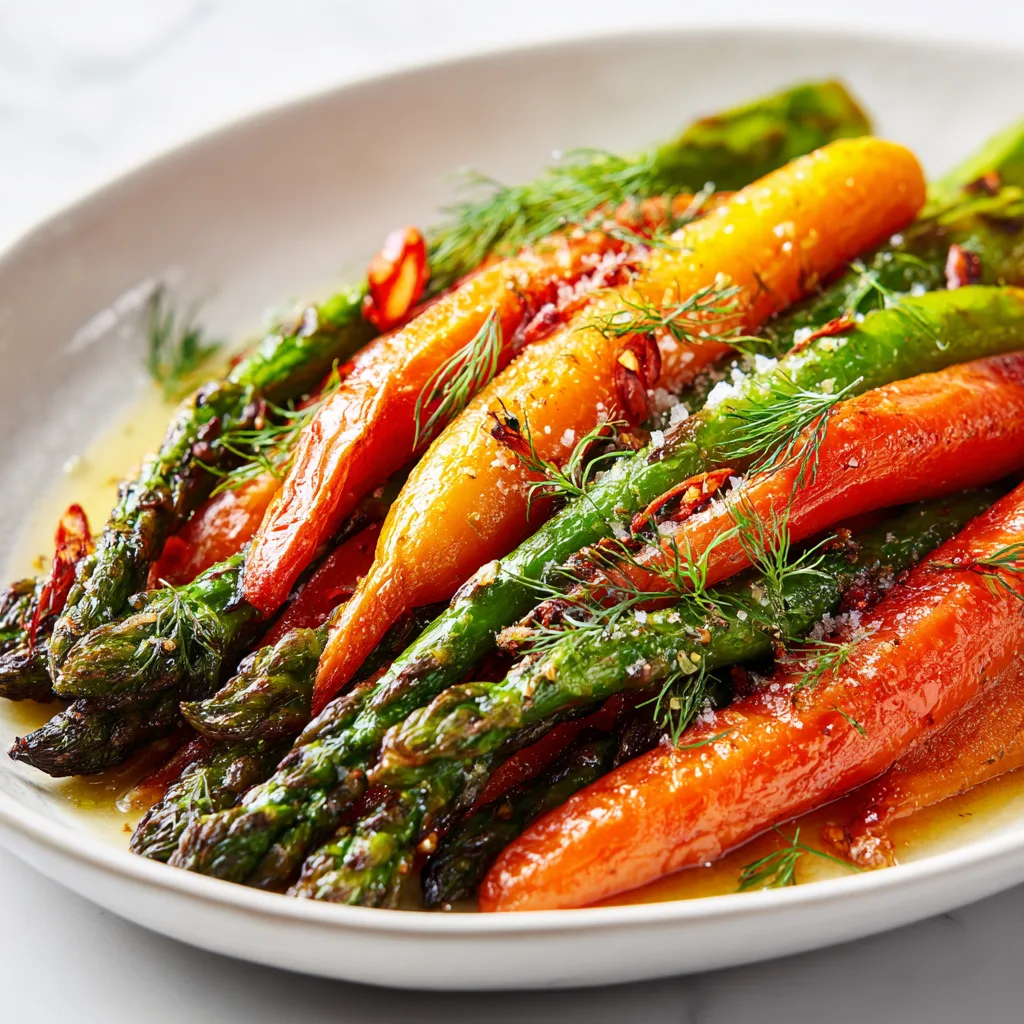
    Roasted Asparagus and Carrot saved my Tuesday night after a grocery run where my cart wheel squeaked like a rubber duck. I tossed Roasted Asparagus and Carrot on a sheet pan while my twins turned measuring cups into drums. Ten minutes later, the olive oil, garlic, and lemon did their magic, and I had a cozy, colorful side that made everything feel homemade again. I’m Darleen Vance—welcome to my kitchen chaos that somehow always ends in comfort food.

    Roasted Asparagus and Carrot

    Recipe


    Why You’ll Love Roasted Asparagus and Carrot

    What Makes This Roasted Asparagus and Carrot So Irresistible

    When I first tossed Roasted Asparagus and Carrot with garlic and lemon on a weeknight, I was sure my kids would pick around the greens. Plot twist: the pan came back empty. Roasted Asparagus and Carrot wins because it’s fast, unfussy, and wildly flavorful—the kind of homemade, one-pan side that makes any easy dinner feel special. The edges caramelize, the asparagus stays crisp-tender, and the carrots turn sweet and golden. It’s comfort food that still feels bright and fresh, like spring on a sheet pan. And because the method is simple, it’s a repeatable, reliable side dish that pairs with nearly anything.

    • Simple ingredients: pantry staples plus fresh vegetables you can find year-round.
    • One-pan meal energy: minimal prep, minimal cleanup, maximum flavor.
    • Quick fix: from preheat to plate in about 30 minutes.
    • Family-friendly: sweet roasted carrots + savory asparagus satisfy all ages.
    • Flexible: add Parmesan, herbs, or spice for your favorite flavor variation.

    If you’re craving an easy dinner upgrade, this Roasted Asparagus and Carrot will be your go-to. Ready to cook? Let’s head to the recipe card.

    People are obsessed with how a basic tray of Roasted Asparagus and Carrot transforms into something restaurant-worthy with a few quick moves: dry the vegetables well, use high heat, and finish with fresh lemon. The result checks every box—homemade, healthy, and weeknight-friendly—and looks gorgeous for entertaining. For an effortless pairing, try it next to savory mains like Turkey with Gravy Sauce or spoon alongside creamy pasta like Butternut Squash Ravioli. Craving more easy comfort? Browse the latest on RecipesDarleen.

    Tips, Tricks & Expert Secrets for Roasted Asparagus and Carrot

    Chef Tips for Perfect Roasted Asparagus and Carrot Every Time

    In a cooking class, I once learned the hard way that wet vegetables steam instead of caramelize—my first tray of Roasted Asparagus and Carrot came out soft and sulky. Since then, these simple, expert cooking tips have made every batch reliably crispy-tender and deeply flavored.

    • Dry thoroughly: Pat asparagus and carrots dry before seasoning. Dry veg = better browning and a crisp bite.
    • Stagger the roast: Start carrots first, then add asparagus; different sizes cook at different speeds for perfect texture.
    • High heat, roomy pan: 425°F and a single layer on a large sheet pan encourage caramelization.
    • Finish bright: A quick hit of fresh lemon juice lifts the roasted flavors and balances richness.

    Smart Ingredient Swaps & Practical Cooking Advice

    Want a homemade version tailored to your kitchen? Roasted Asparagus and Carrot is incredibly flexible.

    • Oil swap: Use avocado oil instead of olive oil for a high-heat, neutral option.
    • Dairy-free: Skip Parmesan and add toasted almonds or sunflower seeds for crunch.
    • Low-sodium: Reduce added salt and finish with extra lemon zest and fresh herbs as a quick fix for flavor.

    What not to do: Don’t overcrowd the pan. Overlapping vegetables trap steam and prevent browning, turning your Roasted Asparagus and Carrot limp. If needed, use two pans or roast in batches. Keep these cooking tips handy for a consistently easy recipe success.

    Serving Ideas & Creative Variations for Roasted Asparagus and Carrot

    How to Serve Roasted Asparagus and Carrot for Maximum Enjoyment

    When friends drop by, I love sliding a hot tray of Roasted Asparagus and Carrot right onto the table—it looks vibrant without fancy plating. For casual nights, I scatter lemon wedges and let guests squeeze their own. A few simple serving ideas make this easy recipe feel extra polished.

    • Pairings: Serve with savory mains like Slow Cooker Tuscan Chicken or weeknight-friendly Italian Beef Sandwiches.
    • Sauces: Drizzle with garlicky yogurt, balsamic glaze, or a quick tahini-lemon sauce.
    • Beverages: Crisp white wine (Sauvignon Blanc) or sparkling water with citrus slices keeps the flavors bright.

    Flavor Twists and Seasonal Variations

    Roasted Asparagus and Carrot is a perfect canvas for creative flavor variation and seasonal twist options that make it feel new every time.

    • Lemon-Dill Spring: Add 1 tsp dried dill or 1 tbsp fresh dill with the parsley; extra lemon zest for zing.
    • Maple-Chile Glaze: Toss hot vegetables with 1 tbsp pure maple syrup and a pinch of chili flakes for sweet heat.
    • Parmesan-Herb Crunch: Finish with Parmesan and toasted panko for a crispy, comfort-food topper.

    Plating suggestion: Use a wide, white platter and heap the vegetables slightly off-center; tuck in lemon wedges and a sprinkle of parsley for color. If you’re photographing for social media, shoot near a window, keep the styling minimal, and let the glossy, caramelized edges do the talking. This serving idea playbook ensures your Roasted Asparagus and Carrot looks as good as it tastes.

    Roasted Asparagus and Carrot – Irresistible and Cozy

    Storage & Troubleshooting Guide for Roasted Asparagus and Carrot

    How to Store and Reheat Roasted Asparagus and Carrot

    Leftovers are a gift—especially when you planned ahead. After Sunday dinner, I slid extra Roasted Asparagus and Carrot into meal-prep containers, and Monday’s lunch practically made itself. Here’s how to keep everything fresh and tasty.

    • Room temperature: Keep out no longer than 2 hours.
    • Refrigerator: Store in airtight containers for 3–4 days. Layer a paper towel beneath to catch moisture and keep texture.
    • Freezer: Freeze up to 2–3 months in freezer-safe bags; remove excess air to prevent ice crystals.
    • Reheat: Oven at 400°F for 6–8 minutes, air fryer at 375°F for 3–5 minutes, or skillet over medium heat with a drizzle of oil. Avoid the microwave for best texture.

    Troubleshooting Common Roasted Asparagus and Carrot Issues

    • Too soft or watery: The pan was crowded or veg weren’t dried. Next time, use two pans or roast in batches; blot dry before seasoning.
    • Not browned: Oven wasn’t hot enough or pan was lined too heavily. Preheat fully; use a light coat of oil and a metal sheet pan for better heat transfer.
    • Overcooked asparagus: Add asparagus later (after carrots start). Thicker spears hold up better than pencil-thin ones.
    • Too salty: Balance with a squeeze of lemon and a pinch of sugar, or fold in unsalted cooked grains to diffuse seasoning.

    With these storage tips and fix-it tricks, your Roasted Asparagus and Carrot will keep its crisp edges and bright flavor. You’ve got this—leftovers just became the best part of the week.

    FAQs

    Can I make Roasted Asparagus and Carrot ahead of time?

    Yes. Roast up to a day ahead, cool, and refrigerate. Reheat on a hot sheet pan at 400°F for 6–8 minutes to revive crisp edges.

    Do I need to peel the carrots?

    Peeling is optional. If the skins are thin and clean, scrub well and leave them on for extra fiber and a rustic look.

    What if my asparagus spears are very thin?

    Reduce the second roast time to 6–8 minutes and start checking early. Thin spears cook fast and can overcook quickly.

    Can I add potatoes or other veggies?

    Absolutely. Roast denser vegetables (like potatoes) first until nearly tender, then add asparagus so everything finishes together.

    Conclusion

    Roasted Asparagus and Carrot proves that a simple, homemade side can deliver big comfort and bold flavor with minimal effort. High heat and a bright finish create a crisp-tender, caramelized pan of vegetables that works with almost any easy dinner. Keep these cooking tips close, try the seasonal twist you love, and pair with mains from the site for a complete meal that feels special without fuss. When you want a one-pan, healthy side that’s both cozy and fresh, Roasted Asparagus and Carrot is the reliable recipe you’ll reach for again and again. Try it at home and tag me—I can’t wait to see your platter shine.