Blog

  • Creamy Vegan Potato Broccoli Casserole: 5 Gluten-Free Reasons to Love It!

    Creamy Vegan Potato Broccoli Casserole: 5 Gluten-Free Reasons to Love It!

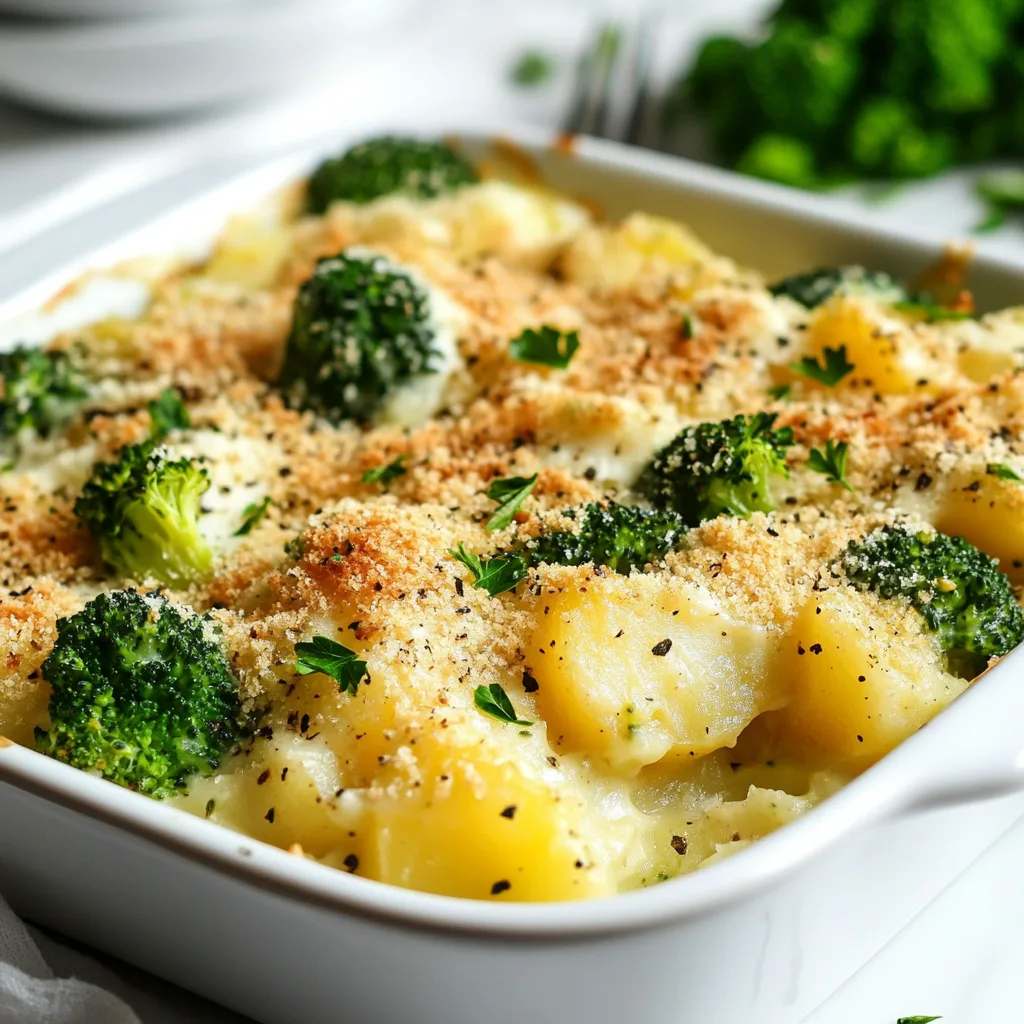
    Creamy Vegan Potato Broccoli Casserole (Gluten-Free) is the ultimate comfort food that doesn’t compromise on flavor or dietary needs. As someone who struggled to find satisfying plant-based dishes when I first went dairy-free, this recipe has become my go-to for cozy family dinners and potlucks. The combination of tender potatoes, vibrant broccoli, and a velvety cashew cream sauce creates a texture paradise that will have everyone asking for seconds. I’ve served this at countless gatherings where even the most dedicated cheese-lovers couldn’t believe it was completely vegan! Perfect for meal prep, this hearty casserole delivers both nutrition and indulgence in every bite.
    Creamy Vegan Potato Broccoli Casserole: 5 Gluten-Free Reasons to Love It!

    Recipe

    Why You’ll Love This Creamy Vegan Potato Broccoli Casserole (Gluten-Free)

    Plant-Based Comfort Food That Satisfies Everyone

    This casserole bridges the gap between health-conscious and indulgent cooking. The creamy cashew sauce develops a rich depth of flavor that mimics traditional dairy without any of the heaviness. I remember serving this at my sister’s birthday gathering where my brother-in-law (notorious for his cheese addiction) went back for thirds before I revealed it was completely vegan! The combination of nutritional yeast and garlic creates that savory umami quality that makes comfort food so satisfying. Plus, the tender-crisp broccoli and hearty potatoes provide the perfect textural contrast that keeps every bite interesting. It’s truly a plant-based masterpiece.

    Simple Ingredients With Maximum Flavor

    What I adore about this recipe is how it transforms everyday ingredients into something extraordinary. You’ll need just 10 basic components that you likely already have in your pantry and fridge. Yukon gold potatoes offer the perfect buttery texture, while fresh broccoli provides vibrant color and nutrition. The creamy sauce comes together with soaked cashews, nutritional yeast, plant milk, and seasonings that create layers of flavor. I’ve made this on busy weeknights when I needed something nourishing but didn’t have time for complicated techniques. The magic happens in the oven as everything melds together, creating a bubbly, golden-topped casserole that fills your kitchen with the most mouthwatering aroma. Simple food at its finest!

    Essential Tips & Tricks

    Achieving the Perfect Creamy Texture

    The secret to an irresistibly creamy casserole lies in proper cashew preparation. Soak your cashews for at least 4 hours (or quick-soak in hot water for 30 minutes) to ensure they blend into silky perfection. I learned this the hard way after trying to skip this step once—my sauce ended up grainy instead of velvety smooth! Another game-changer is layering your potatoes evenly, about ¼-inch thick, so they cook at the same rate. For extra creaminess, don’t skimp on the nutritional yeast—it adds both cheesy flavor and helps thicken the sauce. If you’re looking for more plant-based comfort food inspiration, my Creamy Gluten-Free Tuna Pasta Bake can be adapted with plant-based substitutes for another delicious option.

    Troubleshooting Common Issues

    Even experienced cooks encounter challenges! If your casserole seems too watery, the culprit is often excess moisture from the broccoli. Pat your vegetables dry after washing and consider pre-roasting the broccoli for 10 minutes before adding it to the casserole. This removes moisture while intensifying flavor—a technique I discovered after a particularly soggy first attempt! If your sauce isn’t thickening properly, add 1-2 tablespoons of cornstarch or arrowroot powder to the blended mixture.

    For those who find nutritional yeast flavor too strong, balance it with a squeeze of fresh lemon juice and a pinch more salt. Remember that gluten-free casseroles sometimes need a bit more binding agent, so don’t be afraid to add a tablespoon of gluten-free flour to your sauce.

    Serving Ideas & Creative Variations

    Perfect Pairings for a Complete Meal

    This casserole shines as both a main dish and a hearty side. For a complete dinner, I love serving it with a zesty arugula salad dressed simply with lemon and olive oil—the brightness cuts through the richness perfectly. On cooler evenings, pair it with my Cozy Gluten-Free Chicken Noodle Soup (use vegetable broth to keep it vegan) for the ultimate comfort food experience.

    For entertaining, arrange the casserole alongside roasted vegetables and a protein option like marinated tempeh or bean patties. The casserole reheats beautifully, making it ideal for meal prep—I often portion it out for quick lunches throughout the week. For special occasions, serve it in individual ramekins topped with a sprinkle of homemade gluten-free breadcrumbs for an elegant presentation.

    Creamy Vegan Potato Broccoli Casserole: 5 Gluten-Free Reasons to Love It!

    Seasonal Adaptations and Flavor Twists

    One of the reasons I return to this recipe year-round is its incredible versatility. In spring and summer, swap broccoli for asparagus and add fresh herbs like dill and chives. Come fall, incorporate roasted butternut squash cubes and sage for a harvest-inspired variation. Winter calls for heartier additions—try stirring in sautéed mushrooms and rosemary for earthy depth.

    For those who enjoy heat, add a diced jalapeño or red pepper flakes to the sauce. Mediterranean-inspired versions with olives, sun-dried tomatoes, and oregano have become a family favorite. For a protein boost, fold in white beans or chickpeas before baking. I’ve even created a “loaded baked potato” version with vegan bacon bits, chives, and a dollop of dairy-free sour cream that disappears in minutes at potlucks!

    Storage & Troubleshooting Guide

    Keeping Your Casserole Fresh

    Proper storage ensures you’ll enjoy this delicious casserole for days. After cooling completely, cover with airtight wrap or transfer portions to sealed containers and refrigerate for up to 4 days. I’ve found glass containers work best for maintaining flavor without any plastic aftertaste. For freezing, portion the casserole into individual servings and wrap tightly in freezer-safe containers—they’ll keep for up to 3 months. Always label with the date!

    I learned this lesson when discovering an unidentified frozen block in my freezer last winter. When reheating from frozen, thaw overnight in the refrigerator for best results, then warm in a 350°F oven until heated through. Microwaving works for quick lunches, but covering with a damp paper towel helps maintain moisture.

    Rescuing and Refreshing Leftovers

    Day-old casserole sometimes needs a little revival. If it’s dried out, drizzle with a few tablespoons of plant milk before reheating to restore creaminess. For a completely new dish, transform leftovers into a soup by blending with vegetable broth until smooth, then warming gently on the stove. Another favorite trick is creating potato cakes—mash leftover casserole, form into patties, and pan-fry until crispy on both sides. When reheating, sprinkle with fresh herbs or a squeeze of lemon juice to brighten flavors that may have mellowed. If the top has lost its appealing texture, run it under the broiler for 2-3 minutes to recreate that golden finish. These simple techniques have saved many meals in my kitchen!

    Frequently Asked Questions

    Can I make this Creamy Vegan Potato Broccoli Casserole ahead of time?

    Absolutely! Prepare everything up to the baking step, cover and refrigerate for up to 24 hours. When ready to serve, add 10-15 minutes to the baking time since you’re starting with cold ingredients.

    What can I substitute for cashews if I have a nut allergy?

    Sunflower seeds work wonderfully as a cashew replacement. Soak them just like cashews, then blend with the remaining sauce ingredients. White beans or silken tofu can also create a creamy texture.

    How do I ensure my potatoes cook evenly?

    Slice potatoes to a consistent thickness (about ¼-inch) and arrange them in even layers. If using different potato varieties, group similar types together as they may have different cooking times.

    Can I add other vegetables to this casserole?

    Definitely! Cauliflower, carrots, peas, and spinach all work beautifully. Just ensure harder vegetables are pre-cooked or sliced thinly enough to soften during baking.

    Why did my sauce separate during baking?

    This typically happens when the sauce is overheated or contains too much liquid. Ensure your cashews are properly soaked and blended until completely smooth, and don’t overdo the plant milk.

    Final Thoughts

    This Creamy Vegan Potato Broccoli Casserole (Gluten-Free) has become more than just a recipe in my kitchen—it’s a testament to how plant-based cooking can be deeply satisfying and inclusive. There’s something magical about watching skeptical dinner guests take their first bite and seeing their expressions shift from curiosity to delight. I encourage you to make this recipe your own by experimenting with different herbs, spices, and seasonal vegetables. The foundation remains the same: creamy, comforting goodness that nourishes both body and soul. For more inspiration, check out my other recipes on Pinterest, where I’m always sharing new plant-based creations. Happy cooking!
  • Creamy Gluten-Free Tuna Pasta Bake: 5 Secrets for Ultimate Comfort

    Creamy Gluten-Free Tuna Pasta Bake: 5 Secrets for Ultimate Comfort

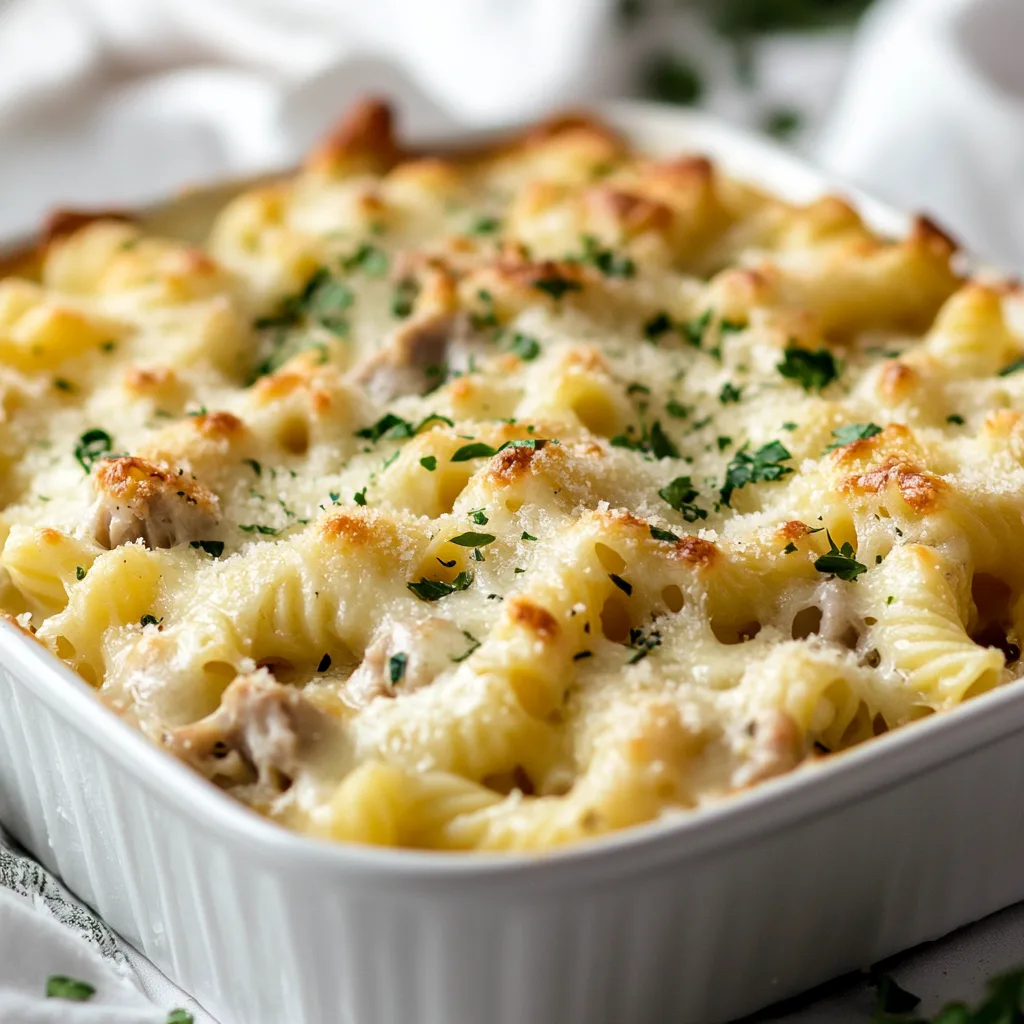
    Creamy Gluten-Free Tuna Pasta Bake is one of those comforting dishes that wraps you in warmth from the first bite. I discovered this recipe during my first winter living alone, when I was craving something that felt like home but wouldn’t upset my newly-diagnosed gluten sensitivity. The rich, velvety sauce coating tender gluten-free pasta and flaky tuna creates a dish that’s impossibly satisfying yet gentle on sensitive stomachs.

    What I love most is how it transforms simple pantry ingredients into something that feels special enough for company but easy enough for a Tuesday night. If you’ve been missing pasta bakes since going gluten-free, this recipe is about to become your new best friend. It’s the perfect balance of creamy indulgence and wholesome comfort.

    Creamy Gluten-Free Tuna Pasta Bake: 5 Secrets for Ultimate Comfort

    Recipe

    Why You’ll Love This Creamy Gluten-Free Tuna Pasta Bake

    Perfect Comfort Food Without the Gluten

    There’s something magical about pulling a bubbling pasta bake from the oven on a chilly evening. The way the cheese forms that perfect golden crust while the creamy sauce gently simmers underneath is pure kitchen alchemy. This gluten-free version sacrifices nothing in texture or flavor compared to traditional recipes. I’ve served this to friends who couldn’t believe it was gluten-free! The key is using high-quality gluten-free pasta (I prefer corn-rice blends) that holds its shape without turning mushy. The combination of tender pasta, flaky tuna, and velvety sauce creates that perfect comfort food experience that’s satisfying without the digestive distress that can come from wheat-based dishes.

    Quick and Budget-Friendly

    On those days when my energy is low but my hunger is high, this tuna pasta bake is my saving grace. It comes together in about 30 minutes of active time, making it perfect for busy weeknights when cooking feels like a mountain to climb.

    The ingredients are mostly pantry staples that won’t break the bank – canned tuna, gluten-free pasta, cheese, and a few basics for the sauce. I often make this at the end of the month when my grocery budget is tight but I’m craving something that feels special. The cost-effectiveness is a huge bonus, especially considering how many meals you can get from one batch. It’s also incredibly versatile, allowing you to use whatever vegetables are lingering in your crisper drawer.

    Essential Tips & Tricks

    Perfecting Your Gluten-Free Pasta

    Gluten-free pasta requires a slightly different approach than regular pasta. I learned this the hard way after several disappointing mushy disasters! Always cook your pasta 2 minutes less than the package instructions indicate, as it will continue cooking in the oven.

    The pasta should be very al dente – almost too firm – before it goes into your bake. Rinsing the pasta after cooking helps remove excess starch that can make your final dish gummy. Another game-changer is choosing the right shape; shorter pasta like penne, fusilli, or shells hold up better than long noodles in a bake. If you’re looking for more gluten-free pasta expertise, check out my Cozy Gluten-Free Chicken Noodle Soup for more tips on working with these special noodles.

    Creating the Perfect Creamy Sauce

    The secret to a silky-smooth sauce that doesn’t separate or become grainy is all in the technique. Start with a roux made with gluten-free flour (I prefer a rice flour blend) and butter, cooking it for at least 2 minutes to remove any raw flour taste. Add your milk gradually, whisking constantly to prevent lumps from forming.

    For extra creaminess without heaviness, I sometimes substitute part of the milk with Greek yogurt. Season your sauce while it’s cooking – the flavors meld better than adding salt at the end. My favorite addition is a tablespoon of Dijon mustard, which cuts through the richness and complements the tuna beautifully. Let the sauce thicken until it coats the back of a spoon before combining with your pasta.

    Serving Ideas & Creative Variations

    Perfect Pairings for a Complete Meal

    This creamy tuna pasta bake shines as the star of the meal, but a few thoughtful sides can elevate the experience. I love serving it with a bright, acidic salad – something with lemon vinaigrette and peppery arugula creates the perfect contrast to the rich pasta. For a heartier meal, roasted vegetables like asparagus or Brussels sprouts add wonderful texture and nutritional balance.

    A slice of gluten-free garlic bread is perfect for soaking up any extra sauce – I’ve been known to fight for those corner pieces where the sauce gets extra thick! For an elegant touch when entertaining, serve small portions as a starter before a lighter main course like my Easy Gluten-Free Baked Oregano Chicken for a Mediterranean-inspired meal that will impress any guest.

    Creamy Gluten-Free Tuna Pasta Bake: 5 Secrets for Ultimate Comfort

    Exciting Flavor Variations

    The beauty of this recipe is its adaptability to whatever flavors you’re craving. My Mediterranean version includes sun-dried tomatoes, olives, and feta instead of cheddar for a tangy twist. For a spicier kick, add diced jalapeños and substitute pepper jack cheese for the cheddar. When I’m feeling fancy, I’ll swap the tuna for hot smoked salmon and add fresh dill and capers. Vegetable variations are endless – peas are classic, but roasted red peppers, spinach, or sautéed mushrooms are delicious additions. For a more substantial meal, add a layer of sautéed ground turkey seasoned with Italian herbs. The recipe is incredibly forgiving, making it perfect for experimenting with whatever ingredients you have on hand.

    Storage & Troubleshooting Guide

    Proper Storage for Maximum Freshness

    This pasta bake is a meal-prepper’s dream as it stores beautifully and often tastes even better the next day. After cooling completely, portion the leftovers into airtight containers and refrigerate for up to 3 days. The key to maintaining the creamy texture is gentle reheating – microwave at 50% power with a damp paper towel over the top, or cover with foil and warm in a 325°F oven until heated through. For longer storage, this dish freezes surprisingly well. Freeze individual portions in freezer-safe containers for up to 2 months. Thaw overnight in the refrigerator before reheating for best results. If the sauce seems to have separated after freezing, a gentle stir while reheating usually brings it back together.

    Solving Common Problems

    Even experienced cooks occasionally encounter issues with pasta bakes. If your dish comes out too dry, the likely culprit is either overcooking the pasta initially or not having enough sauce. Next time, cook the pasta even more al dente and increase your sauce by about 25%. For a sauce that’s broken or grainy, the heat was likely too high during preparation. Keep the temperature at medium-low when making your roux and adding milk.

    If your gluten-free pasta has become mushy, try a different brand next time – some hold up better than others in baked dishes. Brown rice pasta tends to maintain its structure better than corn-only varieties. And if your cheese topping isn’t browning properly, a quick 2-minute stint under the broiler will create that perfect golden crust.

    Frequently Asked Questions

    Can I make this Creamy Gluten-Free Tuna Pasta Bake ahead of time?

    Absolutely! Assemble the entire dish up to 24 hours ahead, cover and refrigerate. Add an extra 10-15 minutes to the baking time when cooking from cold, and keep it covered for the first half of baking.

    What’s the best gluten-free pasta to use for a pasta bake?

    Corn-rice blend pastas hold their shape best in bakes. Look for shorter shapes like penne, fusilli, or shells. Brands like Jovial, Tinkyada, and Barilla Gluten Free tend to perform exceptionally well.

    Can I substitute the tuna for another protein?

    Definitely! Canned salmon, shredded chicken, or even chickpeas work beautifully. Just ensure any raw proteins are fully cooked before adding to the pasta mixture.

    Why is my gluten-free pasta mushy in the bake?

    Gluten-free pasta continues cooking longer than wheat pasta. Always undercook it by 2-3 minutes before adding to the bake, and rinse with cold water to stop the cooking process.

    How can I make this recipe dairy-free as well as gluten-free?

    Use plant-based butter, unsweetened almond or oat milk, and dairy-free cheese alternatives. Nutritional yeast adds a cheesy flavor without dairy. The texture will be slightly different but still delicious!

    Final Thoughts

    This Creamy Gluten-Free Tuna Pasta Bake has become much more than just a recipe in my kitchen – it’s a reminder that dietary restrictions don’t have to mean sacrificing comfort or flavor. There’s something profoundly satisfying about creating a dish that brings together simple ingredients in a way that feels like a warm hug on a plate. Whether you’re cooking for someone with gluten sensitivity or simply looking for a delicious, budget-friendly meal that delivers maximum comfort with minimum effort, this pasta bake delivers every time. I hope it brings as much joy to your table as it has to mine! Don’t forget to check out my Pinterest for more gluten-free comfort food inspiration that never compromises on flavor.

  • The Pioneer Woman’s Best Prime Rib Recipe That Will Wow You

    The Pioneer Woman’s Best Prime Rib Recipe That Will Wow You

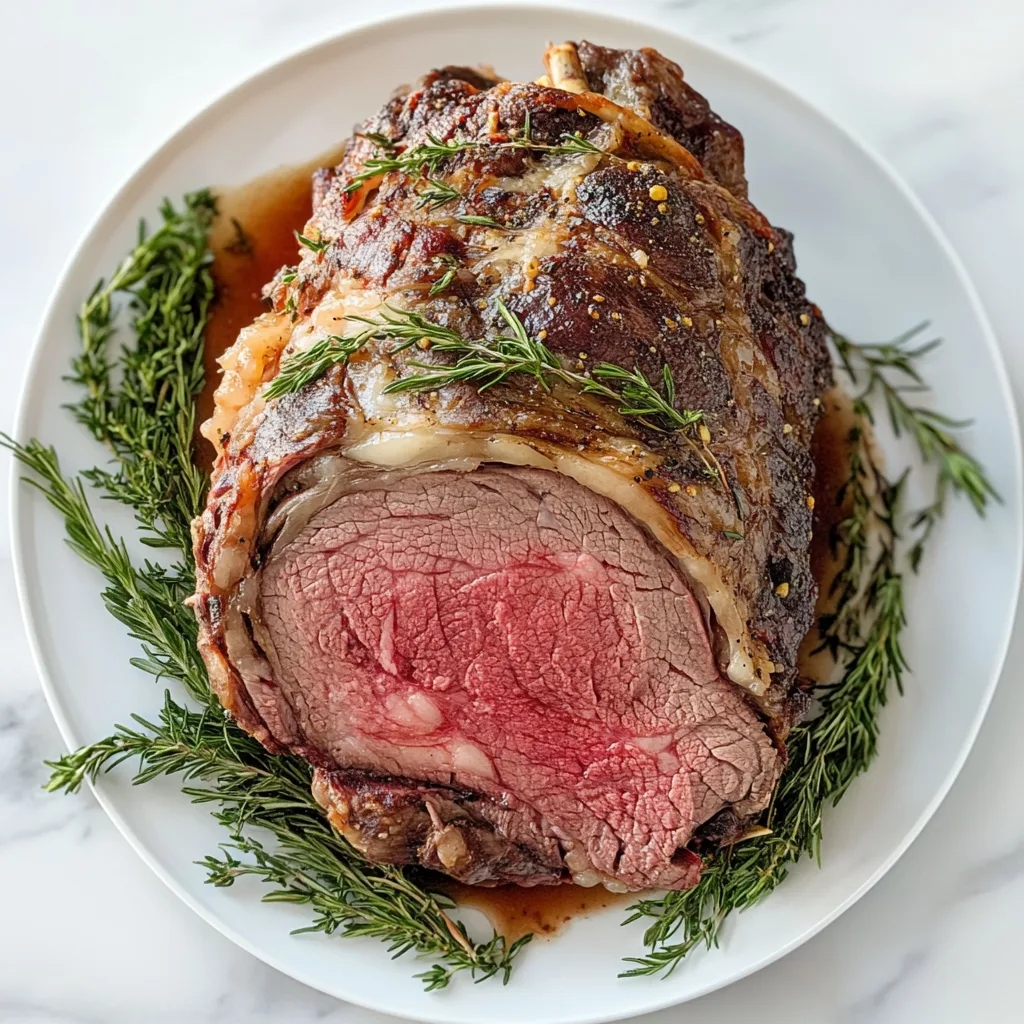
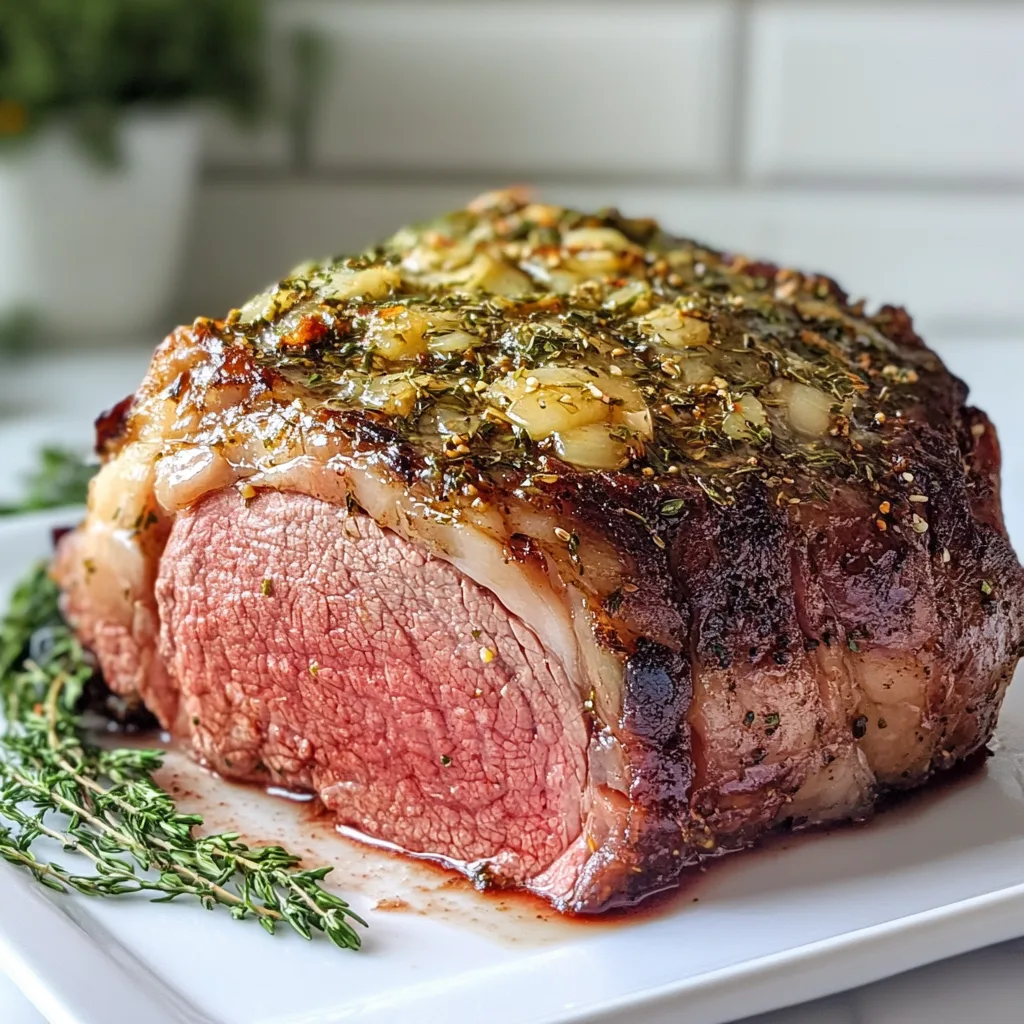
    The Pioneer Woman’s Best Prime Rib has become my holiday dinner table hero, transforming ordinary family gatherings into memorable feasts. There’s something magical about that moment when you slice into a perfectly cooked prime rib—the way the knife glides through that rosy center, releasing an aromatic cloud of herbs and beef that instantly quiets the room. I still remember my first attempt years ago, nervously checking the temperature every fifteen minutes! Now it’s my signature dish that everyone requests. This restaurant-worthy centerpiece might seem intimidating, but I’m sharing all my secrets for achieving that perfect crust and juicy interior that will have your guests raving.

    The Pioneer Woman’s 5-Star Prime Rib Recipe That Will Wow You

    Recipe

    Why You’ll Love The Pioneer Woman’s Best Prime Rib

    Foolproof Results Every Time

    The Pioneer Woman’s approach to prime rib takes the guesswork out of cooking this premium cut. The low-and-slow method ensures the meat cooks evenly from edge to center, eliminating those anxiety-inducing moments wondering if you’ve overcooked your investment. I love how the recipe builds in rest time—something I learned the hard way after slicing into my first prime rib too soon and watching all those precious juices flood my cutting board! The herb butter crust creates an incredible flavor seal that keeps moisture locked in while developing that signature outer texture that makes everyone fight for the end pieces.

    Restaurant-Quality Without the Price Tag

    Creating The Pioneer Woman’s Best Prime Rib at home saves you hundreds compared to steakhouse prices while delivering the same (or better!) results. A 5-pound prime rib that would cost $300+ at a fine restaurant comes in under $100 when you make it yourself. The recipe uses accessible ingredients that transform the beef into something extraordinary—fresh herbs, garlic, and quality butter create magic when combined with the natural richness of the meat. I’ve had friends swear my holiday prime rib beats anything they’ve had at high-end restaurants, which always makes me smile knowing I spent a fraction of steakhouse prices.

    Essential Tips & Tricks

    Perfect Temperature Control

    Achieving the ideal doneness for The Pioneer Woman’s Best Prime Rib hinges entirely on temperature management. Invest in a good digital meat thermometer with a probe—this single tool has saved countless prime ribs in my kitchen! For medium-rare (the gold standard), remove the roast when the internal temperature reaches 120-125°F, as it will continue cooking during rest time. I’ve learned to trust the thermometer over timing, as oven calibrations and meat thickness can vary significantly. For an extra layer of precision, let your prime rib sit at room temperature for 2-3 hours before cooking—this helps ensure even cooking from edge to center.

    The Critical Resting Period

    The most crucial step happens after cooking—letting your prime rib rest properly before slicing. This isn’t just a suggestion; it’s essential chemistry! During the rest period (at least 20-30 minutes), the meat’s juices redistribute throughout the roast instead of gushing out when cut. I cover mine loosely with foil to maintain warmth without trapping steam that would soften the crust. This patience-testing wait transforms a good prime rib into a spectacular one. I once rushed this step for hungry guests and regretted it immediately—the difference in juiciness and texture is remarkable when you give it the full rest time.

    Serving Ideas & Creative Variations

    Classic Accompaniments

    The Pioneer Woman’s Best Prime Rib shines brightest when paired with traditional sides that complement without competing. Creamy horseradish sauce offers the perfect peppery counterpoint to the rich beef—I make mine a day ahead so the flavors can develop fully. Yorkshire puddings baked in the drippings are non-negotiable in my house, creating perfect vessels for capturing extra au jus. For vegetables, consider simple preparations that highlight seasonal produce: roasted Brussels sprouts with bacon, butter-glazed carrots with fresh herbs, or a classic green bean casserole that can be prepared ahead. The key is balance—let the prime rib remain the undisputed star while surrounding it with supporting players.

    Unexpected Flavor Twists

    While The Pioneer Woman’s classic preparation is perfection, I’ve experimented with subtle variations that bring new dimensions without sacrificing the essence of a great prime rib. Try adding crushed peppercorns and coarse sea salt to the exterior for a simple crust with spectacular results. For an unexpected aromatic twist, tuck thin slices of blood orange between the meat and fat cap before roasting—the citrus oils infuse gently without overpowering. Coffee enthusiasts might appreciate a rub that includes finely ground espresso beans mixed with brown sugar and smoked paprika. These variations respect the prime rib’s natural flavors while introducing subtle complexity that makes guests wonder about your secret ingredient.

    The Pioneer Woman’s Best Prime Rib Recipe That Will Wow You
    Best Prime Rib recipe from The Pioneer Woman offers juicy, flavorful, and easy-to-make roast perfect for special dinners and holidays.

    Storage & Troubleshooting Guide

    Making the Most of Leftovers

    Prime rib leftovers are culinary gold and deserve proper treatment to maintain their quality and flavor. Refrigerate any uneaten portions within two hours, wrapping them tightly in plastic or storing in airtight containers for up to four days. For the best texture when reheating, avoid the microwave—instead, slice the cold meat thinly and warm briefly in beef broth over low heat. This gentle method prevents the dreaded overcooked, dry texture. My favorite transformation is thinly sliced cold prime rib on crusty bread with horseradish cream and arugula for the ultimate lunch sandwich. Alternatively, dice and add to breakfast hash with potatoes and peppers for a luxurious morning-after treat.

    Rescuing Common Mistakes

    Even experienced cooks occasionally face prime rib challenges, but most are salvageable with quick thinking. If you discover your roast is undercooked after resting, slice what you need and briefly sear individual portions in a hot skillet—much better than returning the whole roast to the oven. For overcooked prime rib that’s edging toward well-done, thin slicing and serving with extra au jus helps compensate for moisture loss. If your crust didn’t develop the golden color you wanted, a kitchen torch can add last-minute caramelization without affecting the internal temperature. Remember that even imperfect prime rib is usually delicious—I once dropped mine transferring it to a serving platter and still received compliments!

    Frequently Asked Questions

    What makes The Pioneer Woman’s Prime Rib recipe different from others?

    The Pioneer Woman’s approach combines simple seasonings with precise temperature control and a butter-herb crust that creates exceptional flavor without complicated techniques. Her method focuses on enhancing the meat’s natural qualities rather than masking them.

    Can I prepare parts of this recipe ahead of time?

    Absolutely! The herb butter can be made 2-3 days in advance and stored in the refrigerator. Just bring it to room temperature before applying to the roast for easier spreading.

    What’s the ideal cooking temperature for prime rib?

    Low and slow is key—325°F maintains the perfect balance between developing exterior flavor while gently cooking the interior to your desired doneness without drying out the meat.

    How do I calculate cooking time based on weight?

    Plan for approximately 15 minutes per pound for medium-rare, but always rely on your meat thermometer rather than timing alone. Different oven calibrations can significantly affect cooking times.

    What wine pairs best with The Pioneer Woman’s Best Prime Rib?

    A bold Cabernet Sauvignon or Bordeaux complements the rich flavors perfectly. The tannins in these red wines cut through the meat’s richness while enhancing its savory qualities.

    Final Thoughts

    The Pioneer Woman’s Best Prime Rib has become more than just a recipe in my kitchen—it’s a tradition that marks special moments and creates lasting memories around my table. There’s something deeply satisfying about mastering this classic centerpiece that signals to everyone: this meal matters. While it might seem intimidating at first, the techniques you’ll learn here transfer to so many other cooking projects. I encourage you to treat yourself and your loved ones to this spectacular roast. The moment you present that perfectly pink-centered, herb-crusted masterpiece will be worth every minute of preparation. Don’t forget to check out more inspiring holiday recipes on Pinterest for your complete feast planning!

  • Herb-Crusted Prime Rib Roast Recipe | Juicy & Flavorful Holiday Beef Roast

    Herb-Crusted Prime Rib Roast Recipe | Juicy & Flavorful Holiday Beef Roast

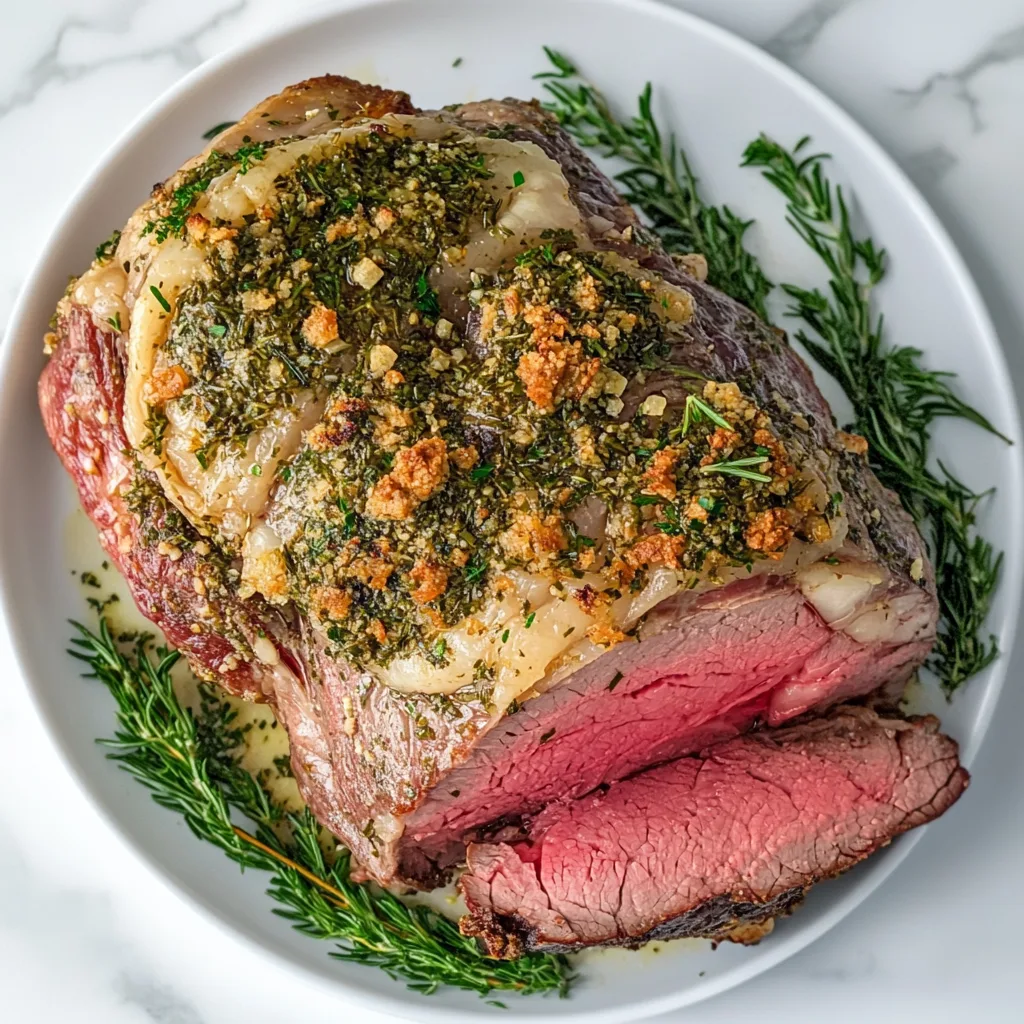
    This Herb-Crusted Prime Rib Roast transforms an ordinary Sunday dinner into a celebration. The first time I made this showstopper, my kitchen filled with the intoxicating aroma of garlic, rosemary, and thyme mingling with the rich scent of roasting beef. There’s something magical about slicing into a perfectly cooked prime rib – that moment when you reveal the rosy interior beneath a golden herb crust.

    I still remember my father-in-law’s face lighting up when I brought this to the table last Christmas. Whether you’re hosting a holiday gathering or simply elevating your weekend dinner, this recipe delivers restaurant-quality results with surprisingly little effort. The herb crust creates a flavorful seal that keeps all those precious juices locked inside for the most tender prime rib you’ve ever tasted.

    Herb-Crusted Prime Rib Roast Recipe | Juicy & Flavorful Holiday Beef Roast

    Recipe

    Why You’ll Love This Herb-Crusted Prime Rib Roast

    Perfect for Special Occasions

    There’s something undeniably impressive about presenting a beautifully crusted prime rib at your table. This isn’t just dinner; it’s an event in itself. The striking contrast between the herb-flecked exterior and the perfectly pink interior makes for a stunning centerpiece that announces “this meal matters.” I’ve served this for milestone birthdays, anniversaries, and holiday gatherings where it never fails to draw appreciative gasps. What I love most is how this recipe transforms a simple cut of meat into something truly special without requiring professional culinary skills. The herbs do most of the heavy lifting flavor-wise, creating a fragrant crust that perfumes the meat as it roasts. It’s luxurious comfort food that makes any occasion feel celebratory.

    Foolproof Method for Perfect Results

    Don’t let the impressive results fool you – this recipe is surprisingly forgiving for beginners. The reverse-sear technique I use virtually guarantees success, eliminating the anxiety of potentially overcooking such a premium cut. First, the meat roasts slowly at a low temperature, allowing it to cook evenly throughout. Then, a brief blast of high heat creates that gorgeous herb crust. This method gives you a much wider window of perfect doneness than traditional roasting.

    I’ve found using a reliable meat thermometer takes all the guesswork out of the process. The slow roasting also means you’re not chained to the kitchen – you can actually enjoy time with your guests while it cooks. Even when I’ve gotten distracted by holiday chaos, this method has saved me from disaster, delivering consistently juicy results.

    Essential Tips & Tricks

    Selecting and Preparing Your Roast

    Choosing the right cut is your first step toward prime rib perfection. Look for well-marbled meat with a bright red color and a decent fat cap – this provides flavor and natural basting. I prefer bone-in roasts (the bones act as a natural roasting rack and insulator), but boneless works beautifully too. Ask your butcher to trim and tie it if needed.

    The most crucial preparation step? Bringing your roast to room temperature before cooking. I always set mine out for at least 2 hours before roasting. This simple step ensures even cooking from edge to center. Another game-changer: seasoning your roast the night before. This dry-brining process allows the salt to penetrate deeply, seasoning the meat throughout while also helping to create a beautifully crisp exterior crust.

    Mastering the Herb Crust

    The herb crust isn’t just about flavor – it creates a protective barrier that seals in juices while adding incredible aroma. The key is creating a paste-like consistency that adheres well to the meat. I combine fresh herbs (rosemary, thyme, and parsley) with plenty of minced garlic, high-quality olive oil, and coarse salt.

    For the best texture, chop your herbs finely but not to dust – you want recognizable bits that will toast beautifully. Apply the mixture generously, pressing it into the meat to help it stick. Don’t worry about using too much – this is where the flavor magic happens! For maximum impact, make small incisions in the fat cap and stuff some herb mixture inside. This allows the flavors to penetrate deeper as the fat renders during cooking, similar to how I prepare my Italian Herb Butter Prime Rib for an extra flavor boost.

    Serving Ideas & Creative Variations

    Classic Accompaniments

    Nothing complements herb-crusted prime rib quite like traditional sides that balance its richness. Creamy horseradish sauce offers the perfect peppery counterpoint to the buttery meat – I make mine with fresh grated horseradish root when I can find it, but prepared works beautifully too. For starches, crispy roasted potatoes seasoned with rosemary echo the herb crust flavors, while a pillowy Yorkshire pudding provides the ideal vehicle for soaking up precious beef juices. On the vegetable front,

    I love serving something with a bit of brightness – roasted asparagus, glazed carrots, or a simple green salad with a sharp vinaigrette helps cut through the richness. For a complete holiday spread, my Christmas Vegetables Side Dishes collection offers perfect pairings that complement this centerpiece without overwhelming it.

    Seasonal and International Twists

    While the classic herb blend never disappoints, I love adapting this recipe throughout the year with seasonal ingredients. In spring, try a bright citrus variation by adding lemon zest and fresh mint to the herb mixture. Summer calls for basil and oregano with a splash of balsamic in the crust. For fall, warming spices like cinnamon and clove create an unexpected but delicious twist.

    You can also explore global flavor profiles – substitute the traditional herbs with a Middle Eastern za’atar blend, or try a Moroccan-inspired crust with cumin, coriander and preserved lemon. For an Asian-inspired version, blend ginger, garlic, and five-spice powder with a touch of honey. The technique remains the same regardless of your flavor direction, making this recipe infinitely adaptable. My personal favorite variation includes crushed pink peppercorns and orange zest for special winter gatherings.

    Storage & Troubleshooting Guide

    Properly Storing Leftovers

    Prime rib leftovers are culinary gold, but proper storage is essential to maintain their quality. Refrigerate any remaining meat within two hours of cooking, but cool it slightly first before wrapping. I prefer storing leftovers in airtight containers rather than plastic wrap, which can compress the meat and squeeze out precious juices. Properly stored, your prime rib will maintain its quality for 3-4 days in the refrigerator. For longer storage, wrap individual portions tightly in freezer paper, then aluminum foil, and freeze for up to 3 months.

    When reheating, gentle methods are crucial – low oven heat (around 250°F) with a splash of beef broth prevents drying. Alternatively, slice it cold for sandwiches or salads. I often plan intentionally for leftovers, knowing they’ll transform into spectacular meals throughout the week.

    Solving Common Problems

    Even experienced cooks occasionally encounter challenges with prime rib. If your herb crust isn’t adhering properly, try patting the meat completely dry before application and pressing the mixture firmly into the surface. For more stubborn cases, brush the meat with a thin layer of Dijon mustard first – it creates an excellent “glue” without overwhelming the flavor. If your roast is cooking unevenly, your oven likely has hot spots.

    Rotating the pan halfway through cooking helps compensate. For meat that’s still too rare after reaching your target time, don’t panic – simply return it to the oven at a slightly higher temperature and check every 5-10 minutes. Conversely, if you’ve overcooked it slightly, slicing it thinner and serving with extra au jus can help mask dryness. Remember that carryover cooking continues after removing it from the oven, so always rest your roast properly.

    Frequently Asked Questions

    How do I calculate cooking time for my Herb-Crusted Prime Rib Roast?

    Plan for 15 minutes per pound at 325°F for medium-rare (internal temperature of 130-135°F). Always use a meat thermometer rather than relying solely on time. Remember to factor in 30 minutes of resting time before serving.

    Can I prepare the herb crust in advance?

    Absolutely! Mix the herb paste up to 24 hours ahead and refrigerate in an airtight container. Bring to room temperature before applying to your roast for easier spreading.

    What’s the best way to carve prime rib?

    If bone-in, remove the entire bone section first by cutting along its curve. Then place the roast flat-side down and slice against the grain in your desired thickness. Thinner slices (¼-½ inch) are typically ideal.

    How much prime rib should I buy per person?

    Calculate about ¾ pound per person for bone-in roasts or ½ pound per person for boneless. I always add a little extra for generous portions and potential leftovers.

    Can I cook a prime rib roast from frozen?

    While possible, it’s not recommended. Thaw completely in the refrigerator (about 24 hours for every 5 pounds) to ensure even cooking and proper herb crust adhesion.

    Final Thoughts

    This Herb-Crusted Prime Rib Roast has become my signature special occasion dish for good reason. There’s something deeply satisfying about mastering a recipe that looks so impressive yet fits comfortably within your culinary skillset. The combination of that herbaceous crust with perfectly cooked, tender beef creates a dining experience that lingers in memory long after the plates are cleared.

    What I cherish most is how this dish brings people together – conversation slows, phones disappear, and everyone is fully present in the moment. Food has that power, especially when prepared with care and shared with love. I hope this prime rib becomes a beloved tradition in your home as it has in mine. For more comforting recipes that bring people together, visit my collection at Pinterest.

  • Easy Gluten-Free Baked Oregano Chicken with Roasted Potatoes | Healthy Dinner Recipe

    Easy Gluten-Free Baked Oregano Chicken with Roasted Potatoes | Healthy Dinner Recipe

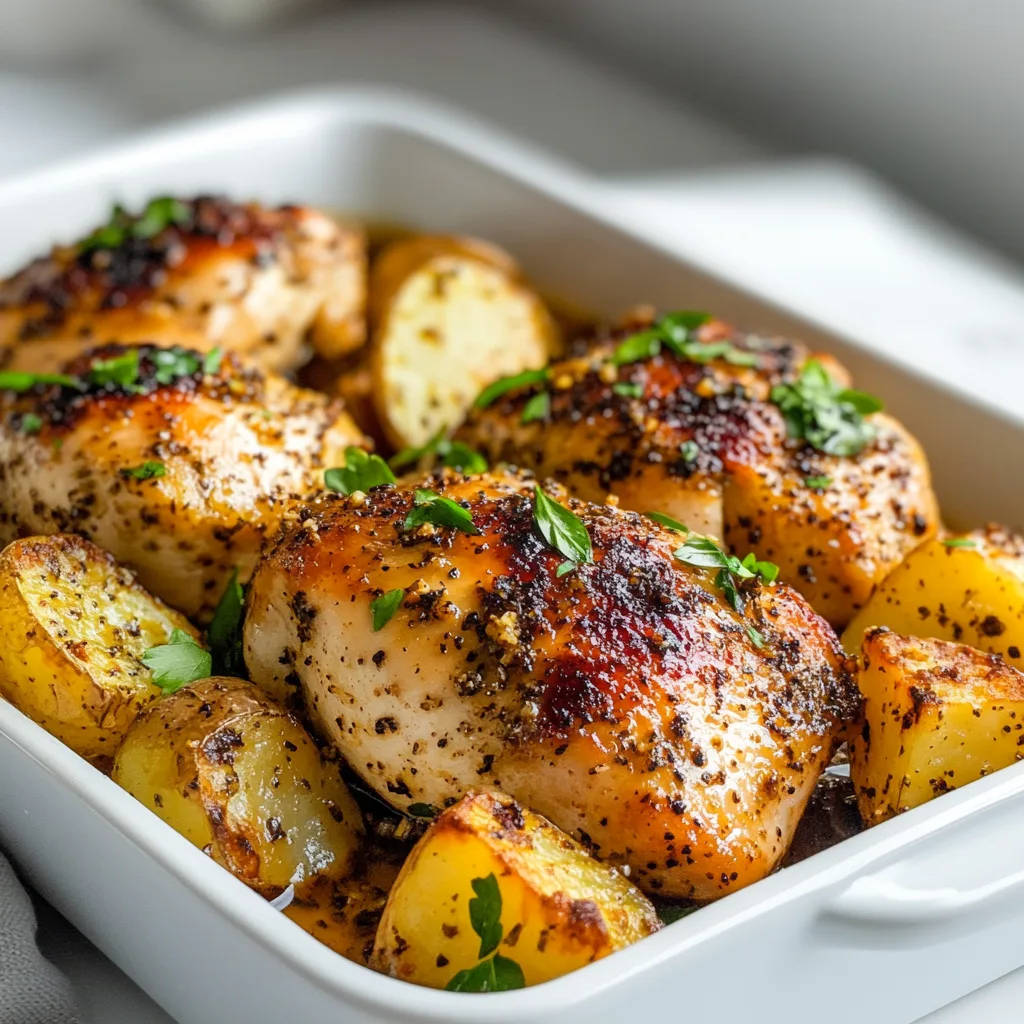
    There’s something magical about the aroma of Easy Gluten-Free Baked Oregano Chicken with Roasted Potatoes filling your kitchen on a chilly evening. I discovered this recipe during my first winter after being diagnosed with celiac disease, when I was desperately seeking comfort food that wouldn’t make me sick. The combination of fragrant oregano, tender chicken, and perfectly crispy potatoes became my go-to dinner for both weeknights and when hosting friends. What makes this dish so special is its beautiful simplicity – just a handful of ingredients transform into something truly extraordinary with minimal effort. The best part? No one will ever guess it’s gluten-free!

    Easy Gluten-Free Baked Oregano Chicken with Roasted Potatoes | Healthy Dinner Recipe

    Recipe

    Why You’ll Love This Easy Gluten-Free Baked Oregano Chicken with Roasted Potatoes

    Perfect One-Pan Simplicity

    There’s something deeply satisfying about a meal that comes together in a single baking dish. This one-pan wonder practically makes itself while you attend to other things – helping kids with homework, catching up on your favorite show, or simply enjoying a moment of peace. The magic happens when the chicken releases its juices, which then flavor the potatoes as everything roasts together. I love how the bottom layer of potatoes absorbs all those savory drippings while the top gets irresistibly crispy. For busy weeknights or lazy weekends, this dish strikes the perfect balance between minimal effort and maximum flavor.

    Naturally Gluten-Free Ingredients

    What I appreciate most about this recipe is that it’s naturally gluten-free without any specialty ingredients or complicated substitutions. The star of the show is fresh oregano, which infuses the entire dish with its distinctive Mediterranean aroma. When I first started cooking gluten-free, I gravitated toward recipes that were inherently free of gluten rather than trying to recreate wheat-based dishes. This approach led me to discover how herbs like oregano can transform simple proteins and vegetables into something extraordinary. The chicken stays incredibly juicy while developing a gorgeous golden crust, and the potatoes achieve that perfect balance of crispy exterior and fluffy interior.

    Essential Tips & Tricks

    Mastering the Marinade

    The secret to this dish’s incredible flavor is giving the chicken enough time with the marinade. I recommend at least 30 minutes, but if you can plan ahead, let it sit for 2-4 hours in the refrigerator. This allows the oregano, garlic, and lemon to penetrate deeply into the meat. One Saturday,

    I prepped the chicken before heading out for a morning hike and returned to meat that was practically vibrating with flavor! For the most intense taste experience, use fresh oregano rather than dried – it makes a world of difference. If you’re in a rush, even a quick 15-minute marinade will still yield delicious results, especially if you make a few small slits in the chicken to help the flavors penetrate.

    Potato Perfection Techniques

    The key to achieving perfectly crispy potatoes lies in three critical steps. First, cut them to a uniform size (about 1-inch chunks) to ensure even cooking. Second, pat them thoroughly dry before tossing with olive oil – excess moisture is the enemy of crispiness! Third, don’t overcrowd the pan; each potato piece needs its own space to develop that golden crust. I learned this lesson the hard way after cramming too many potatoes onto a small sheet pan, resulting in steamed rather than roasted spuds. For an extra flavor boost, try adding a sprinkle of smoked paprika to the potatoes before roasting. For more delicious potato ideas, check out these Greek Slow Cooker Lemon Chicken and Potatoes.

    Serving Ideas & Creative Variations

    Complementary Side Dishes

    While this dish is satisfying on its own, I love serving it with a few simple accompaniments to round out the meal. A crisp green salad with a lemony vinaigrette provides a refreshing contrast to the savory chicken and potatoes.

    Roasted asparagus or broccolini can be added to the same pan for the last 15 minutes of cooking – one less dish to wash! For a more substantial spread, consider adding a side of gluten-free garlic bread or a bowl of warmed olives. When I’m hosting friends, I often serve this with a chilled bottle of Pinot Grigio, which pairs beautifully with the herbaceous flavors. The bright acidity of the wine complements the oregano and cuts through the richness of the roasted potatoes.

    Creative Recipe Adaptations

    This recipe serves as a wonderful foundation for variations based on your preferences or what you have on hand. For a Greek-inspired version, add kalamata olives, cherry tomatoes, and crumbled feta during the last 10 minutes of baking. If you’re craving something with a bit more heat, incorporate red pepper flakes into the marinade. You can also swap the oregano for other herbs – rosemary and thyme work beautifully. For a complete meal in one pan, try adding hearty vegetables like carrots, parsnips, or brussels sprouts alongside the potatoes. For more one-pot meal inspiration, check out my Crockpot Creamy Garlic Chicken and Veggies – another gluten-free favorite at our house!

    Easy Gluten-Free Baked Oregano Chicken with Roasted Potatoes | Healthy Dinner Recipe

    Storage & Troubleshooting Guide

    Proper Storage Solutions

    This dish makes excellent leftovers that maintain their flavor and texture when stored properly. Allow everything to cool completely before transferring to an airtight container – I prefer glass containers as they don’t absorb flavors or stains. The chicken and potatoes will keep in the refrigerator for up to 3-4 days. For reheating, avoid the microwave if possible, as it can make the chicken rubbery and the potatoes soggy. Instead, place everything in a covered oven-safe dish and reheat at 325°F for about 15 minutes until warmed through. The chicken remains juicy, and the potatoes regain some of their crispiness this way.

    Common Problems & Solutions

    If your potatoes aren’t crisping up as expected, there are a few likely troubleshooting steps to consider. First, check your oven temperature with an oven thermometer – many home ovens run cooler than their setting indicates. Second, ensure you’re using a large enough pan so the potatoes aren’t crowded. If necessary, divide between two pans. For chicken that’s drying out, try using bone-in, skin-on pieces which naturally retain more moisture, or cover the pan with foil for part of the cooking time. If the oregano is burning before the chicken is fully cooked, place the herb sprigs underneath the chicken rather than on top, or add fresh herbs during the last 15 minutes of cooking instead.

    Frequently Asked Questions

    Can I use dried oregano instead of fresh?

    Yes, but reduce the amount to 1 tablespoon of dried oregano instead of 3 tablespoons fresh. Dried herbs are more concentrated in flavor, so you need less. Add a little extra olive oil to help distribute the flavor.

    How do I know when the Easy Gluten-Free Baked Oregano Chicken with Roasted Potatoes is done?

    The chicken should reach an internal temperature of 165°F, and the potatoes should be fork-tender with golden, crispy edges. Total cooking time is typically 35-45 minutes depending on chicken piece size.

    Can I prepare this dish ahead of time?

    Absolutely! Marinate the chicken and prep the potatoes up to 24 hours in advance. Keep them separate in the refrigerator and combine just before baking for best results.

    What potatoes work best for this recipe?

    Yukon Gold or red potatoes hold their shape well and develop a buttery interior with crispy exterior. Russets work too but tend to break down more during roasting.

    Is this recipe dairy-free as well as gluten-free?

    Yes! This recipe is naturally dairy-free, making it perfect for those with multiple dietary restrictions. For a vegan variation, substitute the chicken with cauliflower steaks or portobello mushrooms.

    Final Thoughts

    This Easy Gluten-Free Baked Oregano Chicken with Roasted Potatoes has become more than just a recipe in my household – it’s a reliable friend that shows up when we need comfort food without complications. The simplicity of ingredients allows their natural flavors to shine, while the minimal prep work makes it accessible even on the busiest days. I love how this dish proves that gluten-free eating doesn’t mean sacrificing flavor or resorting to complicated alternatives. Whether you’re cooking for someone with celiac disease or simply looking for a delicious, fuss-free dinner, this recipe delivers every time. For more gluten-free inspiration, be sure to follow me on Pinterest where I’m always sharing new discoveries!

  • Cozy Gluten-Free Chicken Noodle Soup Recipe | Healthy & Comforting Meal

    Cozy Gluten-Free Chicken Noodle Soup Recipe | Healthy & Comforting Meal

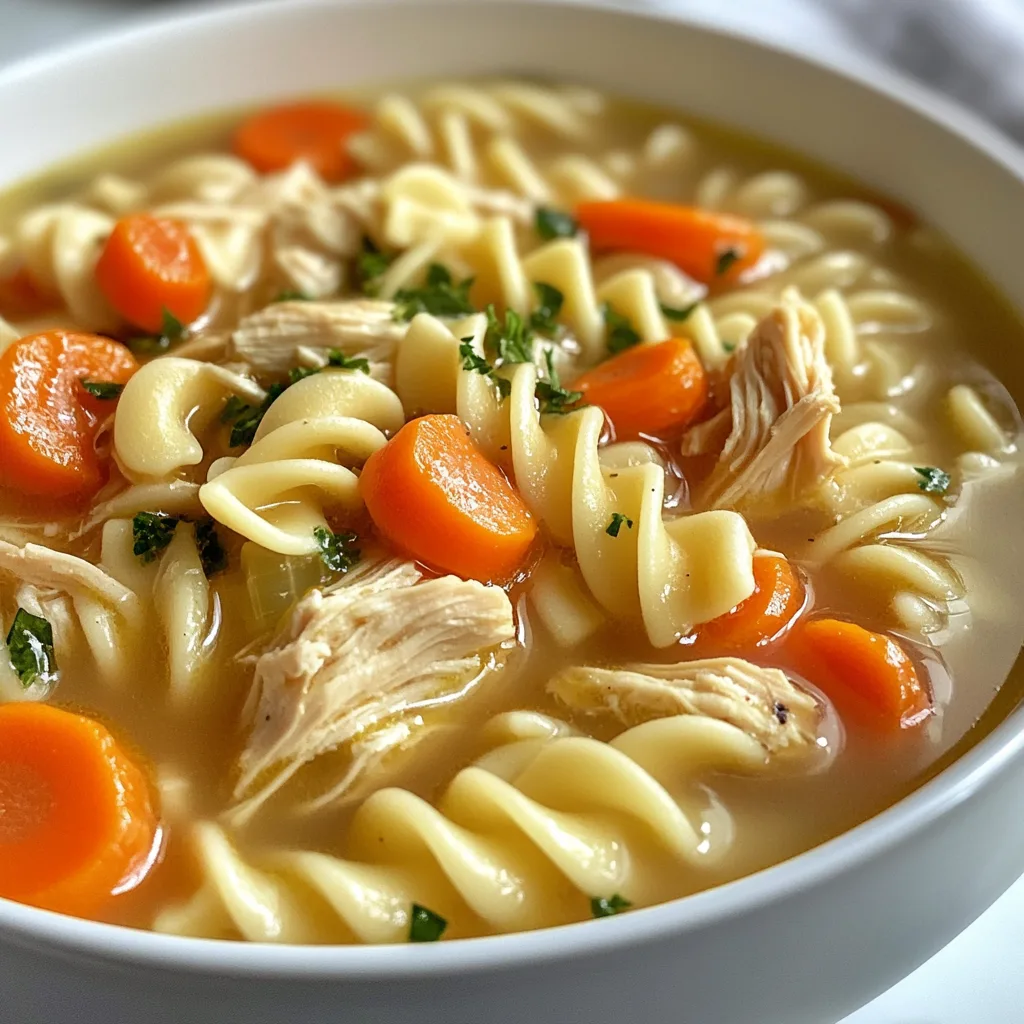
    There’s something deeply comforting about a steaming bowl of Cozy Gluten-Free Chicken Noodle Soup on a chilly evening. I remember the first time I made this after my daughter was diagnosed with celiac disease—I was determined to create a version that tasted just like the classic soup we all loved. The fragrant aroma of simmering herbs, tender chicken, and gluten-free noodles filled our kitchen, bringing everyone together around the table.

    This recipe combines traditional flavors with gluten-free ingredients for a soul-warming meal that’s perfect for cold days, sick days, or anytime you need a hug in a bowl. The best part? It comes together easily and tastes even better the next day! Check out my other comfort food recipes for more cozy meal ideas.

    Cozy Gluten-Free Chicken Noodle Soup Recipe | Healthy & Comforting Meal

    Recipe

    Why You’ll Love This Cozy Gluten-Free Chicken Noodle Soup

    Perfect Balance of Flavors

    This soup achieves that magical balance between simple and spectacular. The base starts with a rich chicken broth infused with aromatics like onions, carrots, and celery—the holy trinity of soup foundations. I’ve perfected the herb blend over dozens of batches, finding that fresh thyme and a bay leaf create that nostalgic chicken soup flavor, while a hint of turmeric adds subtle warmth and gorgeous color. What makes this soup special is how the gluten-free noodles absorb just enough broth to become flavor-packed without getting mushy. Every spoonful delivers that perfect combination of tender chicken, vegetables, and pasta that makes chicken noodle soup the ultimate comfort food.

    Nourishing and Satisfying

    There’s a reason chicken soup has been called nature’s medicine for generations. This gluten-free version is packed with immune-boosting ingredients that nourish your body while satisfying your soul. The protein-rich chicken provides sustained energy, while the vegetables deliver essential vitamins and minerals. I love that this recipe creates a complete meal in one pot—protein, vegetables, and gluten-free carbs all swimming in a nourishing broth. On days when my family is fighting sniffles or just needs something wholesome, I make a big batch knowing it’ll provide comfort and nutrition in equal measure. The collagen-rich homemade broth (if you choose to make your own) adds an extra layer of goodness that store-bought simply can’t match.

    Essential Tips & Tricks

    Selecting the Perfect Gluten-Free Noodles

    Choosing the right gluten-free pasta makes all the difference in this soup. After testing numerous brands, I’ve found that corn-rice blends hold their shape best in hot liquid without disintegrating. Brown rice pasta works well too, though it can get slightly softer. The key trick is to cook the noodles separately until they’re just shy of al dente, then add them to individual serving bowls with the hot soup poured over.

    This prevents the noodles from absorbing too much liquid and turning mushy when stored. For meal prep, I store cooked noodles separately from the broth and combine just before serving. My favorite brands include Jovial, Tinkyada, and Barilla gluten-free, all of which maintain their texture beautifully in this slow cooker chicken soup.

    Boosting Flavor Without Gluten

    Creating deep, complex flavor without gluten-containing ingredients requires some strategic additions. I always start by thoroughly browning the chicken before adding it to the soup—those caramelized bits are pure gold for flavor development. For an umami boost without soy sauce (which often contains gluten), I add a splash of coconut aminos or gluten-free tamari.

    Don’t skip the finishing touches: a squeeze of fresh lemon juice brightens the entire pot, while a sprinkle of fresh parsley adds color and a herbaceous note. For extra richness, try adding a parmesan rind to simmer with the broth (just verify it’s from a gluten-free source). These small additions transform a simple soup into something truly special that no one will suspect is gluten-free.

    Serving Ideas & Creative Variations

    Perfect Pairings and Garnishes

    Elevate your soup experience with thoughtfully chosen accompaniments and garnishes. A slice of toasted gluten-free bread or these honey garlic slow cooker chicken thighs make perfect companions to this cozy soup. For toppings, I love offering a “garnish bar” with fresh herbs (dill, parsley, or chives), lemon wedges, a drizzle of good olive oil, and freshly cracked black pepper. For a creamy variation, stir a dollop of dairy-free coconut yogurt into each bowl. When serving to guests, presentation matters—I serve the soup in pre-warmed bowls with a small side plate of garnishes, allowing everyone to customize their bowl. The contrast between the steaming soup and fresh, vibrant toppings creates both visual appeal and flavor complexity.

    Cozy Gluten-Free Chicken Noodle Soup Recipe | Healthy & Comforting Meal

    Seasonal and Dietary Adaptations

    This versatile soup template welcomes seasonal adjustments throughout the year. In spring, I add tender asparagus tips and fresh peas in the final minutes of cooking. Summer calls for sweet corn kernels and zucchini, while fall versions might include diced butternut squash or a handful of kale. For different dietary needs, this recipe flexes beautifully—swap chicken for chickpeas and vegetable broth for a plant-based version, or use bone broth for extra protein and nutrients. For grain-free diets, replace noodles with spiralized zucchini or shirataki noodles. My favorite winter variation includes adding a pinch of saffron and a splash of coconut milk for a golden, slightly creamy version that’s especially comforting during cold and flu season.

    Storage & Troubleshooting Guide

    Proper Storage and Reheating

    Storing this soup properly ensures you’ll enjoy leftover magic for days. If storing with noodles mixed in, cool the soup completely before refrigerating in airtight containers for up to 4 days. For best texture, I prefer storing the noodles separately from the broth—this prevents them from absorbing too much liquid and becoming mushy. When freezing (which works beautifully for up to 3 months), always freeze the soup without noodles, then add freshly cooked pasta when reheating.

    To reheat, warm gently on the stovetop until just simmering—vigorous boiling can make the chicken tough. The soup often tastes even better the second day as the flavors meld, though you might need to add a splash of fresh broth if it’s thickened in the refrigerator.

    Solving Common Soup Challenges

    Even experienced cooks encounter soup dilemmas, but they’re easily fixed. If your soup lacks flavor, try adding a splash of acid (lemon juice or apple cider vinegar) and an extra pinch of salt—these simple additions wake up flat flavors instantly. For cloudy broth, try straining the soup through a fine-mesh sieve lined with cheesecloth. If the soup is too thin, simmer uncovered for 10-15 minutes to reduce and concentrate flavors. Too thick? Add more broth until you reach your desired consistency.

    For noodles that turned too soft, don’t despair—blend a portion of the soup to create a creamier base that complements softer noodles. And remember that gluten-free pasta continues absorbing liquid even after cooking, so serving immediately or storing separately is your best strategy.

    Frequently Asked Questions

    Can I make this Cozy Gluten-Free Chicken Noodle Soup in advance?

    Absolutely! Make the soup without noodles up to 3 days ahead. Store in the refrigerator and add freshly cooked gluten-free noodles when reheating for the best texture.

    What’s the best chicken to use?

    I recommend boneless, skinless chicken thighs for their flavor and tenderness. They stay juicy even after reheating, unlike breast meat which can become dry.

    Are there shortcuts for busy weeknights?

    Use rotisserie chicken and store-bought gluten-free broth! Just shred the chicken and add it during the last 5 minutes of cooking with pre-cooked gluten-free noodles.

    Can I make this in a slow cooker?

    Yes! Cook on low for 6-8 hours or high for 3-4 hours. Add the gluten-free noodles during the last 30 minutes to prevent them from becoming mushy.

    How do I ensure this is truly gluten-free?

    Always check labels carefully. Some broths, seasonings, and even pre-cooked rotisserie chickens may contain hidden gluten or be processed in facilities with wheat.

    Final Thoughts

    This Cozy Gluten-Free Chicken Noodle Soup has become more than just a recipe in our home—it’s a tradition that signals comfort and care. The beauty of this soup lies in its simplicity and adaptability, making it perfect for both everyday meals and special moments when someone needs a little extra nurturing. I hope this recipe brings the same warmth to your kitchen that it has to mine. There’s something magical about watching loved ones gather around steaming bowls, knowing you’ve created something both delicious and nourishing. Don’t forget to share your soup creations with me on Pinterest and let me know your favorite variations!

  • Garlic Herb Butter Prime Rib: 5 Steps to Perfect Flavor

    Garlic Herb Butter Prime Rib: 5 Steps to Perfect Flavor

    The aroma of Garlic Herb Butter Prime Rib wafting through my kitchen instantly transports me back to those special holiday gatherings at my grandmother’s house. There’s something magical about the way the garlic and herbs infuse into the butter, creating a symphony of flavors that elevate an already impressive cut of meat. This recipe has become my go-to centerpiece for celebrations, earning gasps of delight when I bring it to the table. The crispy exterior giving way to a perfectly pink, juicy center is what culinary dreams are made of. Today, I’m sharing all my secrets for creating this showstopper that looks complicated but is surprisingly approachable for home cooks of any skill level.

    Garlic Herb Butter Prime Rib Recipe | Juicy & Flavorful Roast Beef

    Recipe

    Why You’ll Love This Garlic Herb Butter Prime Rib

    Perfect for Special Occasions

    There’s nothing that says “celebration” quite like a beautifully roasted prime rib. I’ve served this at Christmas dinners, milestone birthdays, and anniversary celebrations, and it never fails to create that wow moment. The combination of garlic herb butter melting into the meat as it roasts creates flavor that’s simply unmatched by other cooking methods. What I love most is how this dish transforms an ordinary dinner into something extraordinary without requiring professional culinary skills. The aroma that fills your home as it roasts is like a warm hug, inviting everyone to the table with anticipation. Trust me, your guests will be talking about this meal for years to come!

    Surprisingly Simple Preparation

    Don’t let the impressive appearance fool you—this recipe is remarkably straightforward. The first time I made it, I was nervous about ruining an expensive cut of meat, but the reverse-sear method I use virtually guarantees success. You’ll start with a simple herb butter mixture that includes fresh rosemary, thyme, and plenty of garlic.

    Slathering this over your meat before roasting creates a flavorful crust that’s absolutely divine. What makes this approach so forgiving is the low-and-slow cooking that gives you a wide window of perfection. Even if you’re juggling multiple dishes for a holiday feast, this prime rib won’t demand constant attention. The hands-off cooking time gives you freedom to focus on sides or simply enjoy time with your guests.

    Essential Tips & Tricks

    Selecting the Perfect Cut

    Choosing the right piece of meat is your first step toward success. I always look for a bone-in prime rib with good marbling—those beautiful streaks of fat that melt during cooking and baste the meat from within. For a truly special meal, don’t hesitate to chat with your butcher. I’ve found they’re usually happy to help select the perfect roast and even trim it for you.

    The rule of thumb I follow is to plan for about ¾ pound per person (or 1 pound if you want leftovers, which you definitely do!). Let your meat come to room temperature before cooking—I usually set mine out for about 2 hours. This extra step ensures even cooking and helps achieve that perfect edge-to-edge rosy interior that we’re aiming for.

    Mastering the Cooking Method

    The secret to a perfect prime rib lies in the temperature control. I’ve tried many methods over the years, but have found that starting with a low oven temperature (around 250°F) produces the most consistent results. Use a reliable meat thermometer—it’s your best friend for this recipe! For medium-rare, remove the roast when the internal temperature reaches 120-125°F, as it will continue cooking during the rest period. After the initial roast, let it rest while you crank your oven to its highest setting (usually 500-550°F).

    Then return the meat for a brief 5-10 minute sear to create that gorgeous crust. This approach is similar to the technique used in our Fool-Proof 500 Rule Prime Rib, which has never failed me.

    Serving Ideas & Creative Variations

    Perfect Pairings

    The beauty of Garlic Herb Butter Prime Rib is that it plays well with so many side dishes. My family’s favorite combination includes creamy horseradish sauce and au jus made from the drippings—it’s heaven on a plate! For sides, I love serving it with crispy roasted potatoes that have been tossed in some of the same herb butter mixture.

    A bright green vegetable like roasted asparagus or Winter Greens with Pine Nuts and Garlic provides beautiful color contrast and balances the richness of the meat. For special occasions, I sometimes add Yorkshire puddings that puff up gloriously and are perfect for sopping up those precious juices. Don’t forget a bold red wine to complete the experience—a Cabernet Sauvignon or Malbec stands up beautifully to the rich flavors.

    Garlic Herb Butter Prime Rib Recipe | Juicy & Flavorful Roast Beef

    Flavor Variations to Try

    While the classic garlic and herb combination is timeless, I’ve experimented with several delicious variations over the years. Adding crushed peppercorns to the butter mixture creates a fantastic crust with a gentle heat that cuts through the richness. For a Mediterranean twist, incorporate lemon zest, oregano, and a touch of red pepper flakes into your herb butter. One of my most successful experiments was adding finely chopped mushrooms to the butter mixture, which created an umami-rich crust that had everyone asking for my secret. During the holidays, I sometimes include a tablespoon of cognac or bourbon in the butter for a subtle festive note. Whatever direction you take, remember that quality ingredients shine in a simple preparation like this.

    Storage & Troubleshooting Guide

    Storing and Reheating Leftovers

    Leftover prime rib is a treasure that deserves proper treatment! Store any uneaten meat in an airtight container in the refrigerator for up to 4 days. The key to reheating without drying out this precious beef is gentle, low heat. I wrap slices loosely in foil with a splash of beef broth or reserved jus and warm in a 250°F oven just until heated through—usually about 15 minutes. Alternatively, you can slice it very thinly while cold and enjoy it at room temperature on sandwiches with horseradish cream.

    My family’s favorite way to repurpose leftovers is in breakfast hash with potatoes and eggs. Whatever you do, avoid the microwave which will turn your beautiful medium-rare meat into something sadly overcooked.

    Common Mistakes to Avoid

    The most frequent mistake I see is overcooking this magnificent cut of meat. Remember that prime rib continues cooking during the resting period, so always remove it from the oven 5-10 degrees before your target temperature. Another pitfall is inadequate seasoning—prime rib needs generous salt to bring out its flavor.

    Season it at least 45 minutes before cooking or even the night before for the best results. Skipping the resting period is another common error—those juices need time to redistribute throughout the meat. I always tent mine loosely with foil and let it rest for at least 20-30 minutes before the final sear. Finally, don’t discard those drippings! They’re liquid gold for making the most incredible au jus that will elevate your entire meal.

    Frequently Asked Questions

    What’s the best temperature for cooking Garlic Herb Butter Prime Rib?

    Start at 250°F until the internal temperature reaches 120-125°F for medium-rare. Let it rest, then sear at 500°F for 5-10 minutes to develop a beautiful crust.

    Can I make the herb butter in advance?

    Absolutely! Prepare the garlic herb butter up to 3 days ahead and refrigerate. Bring it to room temperature before applying to ensure it spreads easily on the roast.

    How much prime rib should I buy per person?

    Plan for ¾ pound per adult for a main course. If you want leftovers (and trust me, you do!), increase to 1 pound per person.

    What’s the best way to slice prime rib?

    Remove the bones first (if present), then slice against the grain in ¼ to ½-inch thick pieces. Use a sharp carving knife for clean cuts.

    How can I tell if my prime rib is done without a thermometer?

    While a thermometer is strongly recommended, you can use the touch test. Medium-rare feels like the base of your thumb when touching your middle finger to thumb.

    Final Thoughts

    Creating the perfect Garlic Herb Butter Prime Rib might seem intimidating at first, but I promise it’s one of those dishes that delivers maximum impact with relatively simple techniques. The combination of quality ingredients, proper temperature control, and that magnificent herb butter creates something truly special that’s worthy of your most celebrated moments.

    I still remember the first time I successfully made this for my family—the pride I felt when I carved into that perfectly pink center was unforgettable. There’s something deeply satisfying about mastering this classic centerpiece that brings people together. I hope you’ll try this recipe for your next special occasion, and perhaps it will become a tradition in your home as it has in mine. Don’t forget to check out more inspiration on Pinterest for your holiday feast!

  • The Best Crockpot Lentil Soup Recipe | Easy & Delicious Slow Cooker Soup

    The Best Crockpot Lentil Soup Recipe | Easy & Delicious Slow Cooker Soup

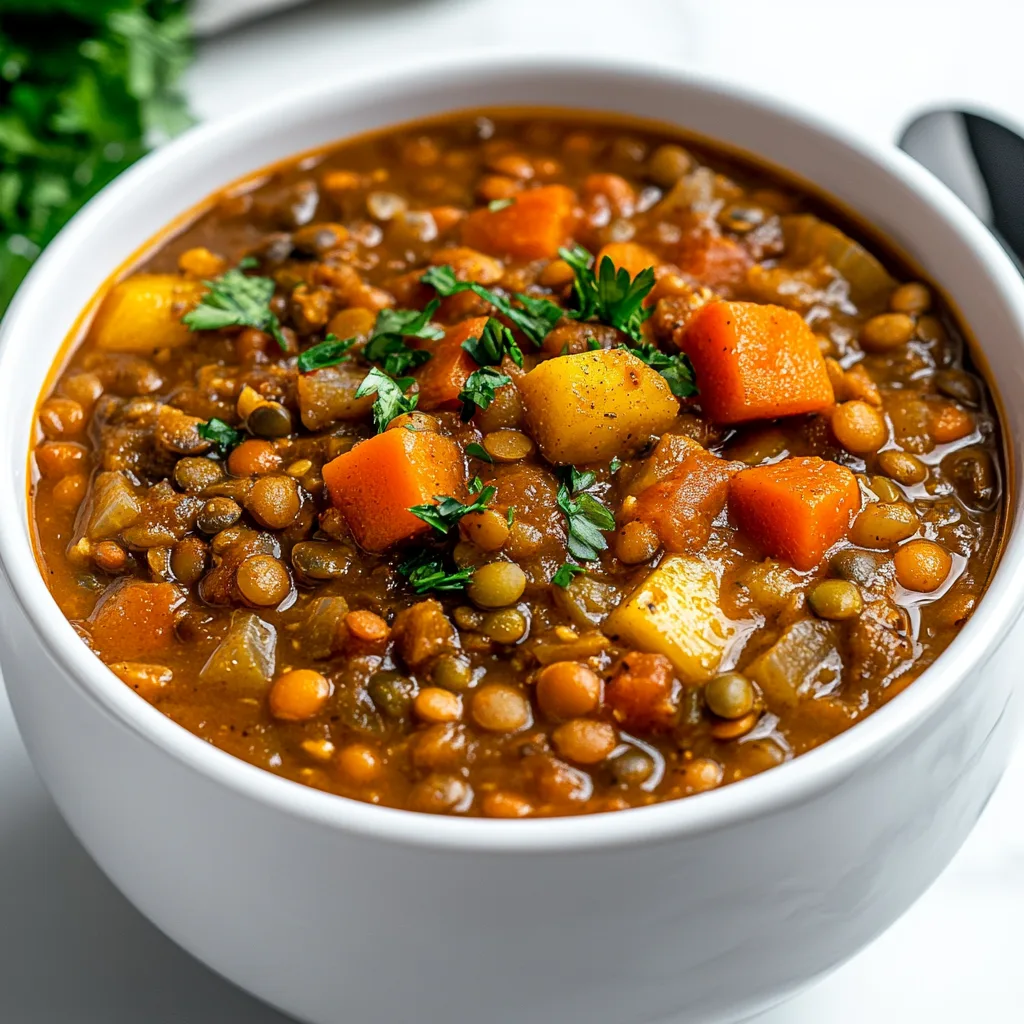
    The Best Crockpot Lentil Soup is one of those magical recipes that transforms humble ingredients into something extraordinary with almost no effort. On chilly evenings when I’m craving something hearty yet healthy, this is my go-to recipe that never disappoints. The beauty lies in its simplicity – just toss everything into your slow cooker, set it, and return to a kitchen filled with the most comforting aroma imaginable. What I love most is how these tiny legumes absorb all the savory flavors while creating a satisfying texture that feels like a warm hug in a bowl.

    The Best Crockpot Lentil Soup Recipe | Easy & Delicious Slow Cooker Soup

    Recipe

    Why You’ll Love This The Best Crockpot Lentil Soup

    Perfect Balance of Flavor and Nutrition

    This soup strikes that elusive balance between deeply satisfying and genuinely nourishing. Lentils pack an impressive nutritional punch with plant-based protein and fiber that keeps you full for hours. I’ve perfected the seasoning blend over countless winter evenings – just enough herbs to enhance the earthy lentils without overwhelming them. The slow cooking process allows every ingredient to release its full flavor potential, creating layers of taste that simply can’t be rushed. When my daughter first tried this soup, she declared it “tastes like comfort feels” – perhaps the best compliment a soup could receive!

    Set-It-and-Forget-It Convenience

    There’s something almost magical about recipes that require minimal effort yet deliver maximum results. This lentil soup epitomizes that effortless luxury. On busy weekdays, I simply spend 10 minutes chopping vegetables in the morning, then let the crockpot work its slow-cooking alchemy all day. The transformation is remarkable – firm lentils and raw vegetables meld into a velvety, cohesive soup with complex flavors that belie its simple preparation. No stirring, no monitoring, no fuss – just return home to a kitchen filled with an aroma that instantly melts away the day’s stress.

    Essential Tips & Tricks

    Ingredient Selection Matters

    The quality of your ingredients makes a significant difference in this simple soup. Always opt for fresh aromatics – onions, carrots, celery, and garlic form the flavor foundation. For lentils, I recommend French green or brown varieties as they hold their shape beautifully during long cooking, unlike red lentils which break down completely. The broth choice is equally important – a good vegetable or chicken stock elevates the entire dish. My secret ingredient? A splash of balsamic vinegar added in the last hour of cooking. This subtle acid brightens the flavors and adds remarkable depth that makes people wonder what your special touch is. Trust me on this one!

    Perfect Timing and Texture Control

    Achieving the ideal consistency requires understanding how lentils behave in a slow cooker. For a soup with distinct lentils that retain their shape, cook on low for 7-8 hours. For a creamier, more homogeneous texture, extend cooking time to 9 hours or gently mash some lentils against the side of the pot before serving. The beauty of this slow cooker recipe is its forgiveness – an extra hour won’t ruin it. If you prefer a thicker soup, leave the lid ajar for the final 30 minutes to allow some evaporation, or if too thick, simply add additional warm broth until you reach your desired consistency.

    Serving Ideas & Creative Variations

    Elevate Your Bowl with Toppings

    Transform your basic lentil soup into a showstopping meal with thoughtfully chosen toppings. My family’s favorite combination includes a dollop of tangy Greek yogurt, fresh herbs (cilantro or parsley work beautifully), a sprinkle of toasted pumpkin seeds for crunch, and a drizzle of good olive oil that creates gorgeous golden pools on the surface. For a heartier meal, try adding diced avocado or crispy roasted chickpeas. When entertaining, I serve the soup in shallow bowls with topping options arranged in small dishes, allowing guests to customize their experience. This interactive serving style always sparks conversation and appreciation around the table.

    The Best Crockpot Lentil Soup Recipe | Easy & Delicious Slow Cooker Soup

    Global Flavor Adventures

    One soup, endless possibilities! Adapt this basic recipe to create international variations that keep your menu exciting. For a Moroccan twist, add a cinnamon stick, cumin, and dried apricots during cooking, then finish with preserved lemon and harissa. Mediterranean-inspired? Include oregano, olives, and finish with crumbled feta and lemon zest. For Indian flavors similar to my popular Slow Cooker Chicken Korma, incorporate curry powder, coconut milk, and finish with fresh cilantro and lime. The versatility of lentils makes them perfect for absorbing whatever flavor profile you’re craving, turning one simple recipe into a global culinary adventure.

    Storage & Troubleshooting Guide

    Maximize Leftovers Potential

    This soup actually improves with time as the flavors continue to develop, making it perfect for batch cooking. Store cooled soup in airtight containers in the refrigerator for up to 5 days. For freezing, leave a half-inch headspace in containers to allow for expansion, and freeze for up to 3 months. I often freeze individual portions in silicone muffin cups, then transfer the frozen “pucks” to freezer bags for quick single servings. When reheating, add a splash of fresh broth or water as the soup tends to thicken considerably after refrigeration. A squeeze of lemon juice brightens the flavors of reheated soup beautifully.

    Troubleshooting Common Issues

    Even the simplest recipes occasionally need adjustments. If your soup lacks flavor depth, try adding a flavor booster like a parmesan rind, nutritional yeast, or a splash of soy sauce during cooking. For soup that’s too watery, remove some liquid and blend it with a portion of the soup before returning it to the pot – this creates a thicker base without changing the overall texture. If lentils remain firm after the recommended cooking time, your lentils might be older (they dry out with age). Simply continue cooking until tender, adding more liquid if necessary. And remember, acid ingredients like tomatoes can prevent lentils from softening, so always add these later in the cooking process.

    Frequently Asked Questions

    Can I use red lentils instead of green or brown?

    Red lentils cook much faster and break down completely, creating a creamier texture. If using red lentils, reduce cooking time to 4-5 hours on low or they’ll disintegrate entirely.

    Is The Best Crockpot Lentil Soup freezer-friendly?

    Absolutely! This soup freezes beautifully for up to 3 months. Cool completely before freezing in portion-sized containers, leaving room for expansion.

    Can I make this soup on the stovetop instead?

    Yes! Sauté aromatics first, add remaining ingredients, and simmer for about 45 minutes until lentils are tender, stirring occasionally to prevent sticking.

    How can I make this soup more filling?

    Add protein with browned sausage or shredded chicken. For a vegetarian option, stir in cooked quinoa or serve with crusty whole grain bread.

    My lentils aren’t softening. What went wrong?

    Older lentils take longer to cook. Also, acidic ingredients (tomatoes, vinegar) can prevent softening, so add these in the final hour of cooking.

    Final Thoughts

    The Best Crockpot Lentil Soup has become my kitchen hero – economical, nutritious, and adaptable to whatever flavors I’m craving. There’s something deeply satisfying about creating such a nourishing meal with minimal effort, especially when it fills your home with comforting aromas all day long. I encourage you to make this recipe your own by experimenting with different herbs, spices, and toppings. Whether you’re feeding a family or meal prepping for one, this soup proves that the simplest foods often bring the greatest comfort. Don’t forget to check out more cozy recipes on our Pinterest for endless inspiration!