Blog

  • Chicken Noodle Soup Recipe: 7 Easy Steps with Rotisserie Chicken

    Chicken Noodle Soup Recipe: 7 Easy Steps with Rotisserie Chicken

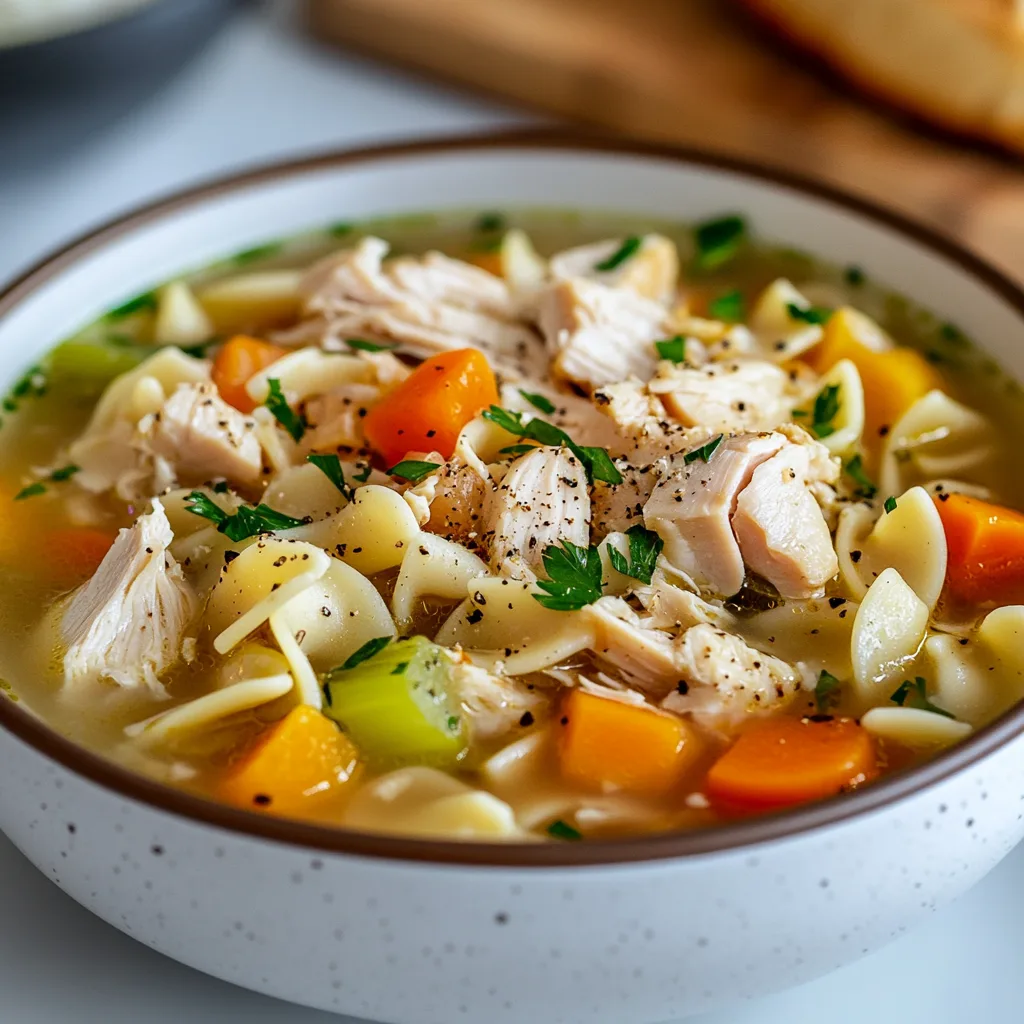
    Chicken noodle soup with rotisserie chicken is my ultimate comfort food hack when I need something soothing but don’t have hours to simmer a broth from scratch. There’s something magical about the way the savory broth wraps around tender shreds of pre-cooked chicken and hearty noodles. On chilly evenings when my kitchen windows fog up, I love how this soup fills my home with aromas that remind me of my grandmother’s kitchen. The beauty lies in its simplicity—store-bought rotisserie chicken does the heavy lifting, while you get all the credit for a homemade meal that tastes like it simmered all day. Let me show you how to make this cozy classic with a shortcut that doesn’t sacrifice flavor.
    Chicken Noodle Soup Recipe: 7 Easy Steps with Rotisserie Chicken

    Recipe

    Why You’ll Love This Chicken Noodle Soup with Rotisserie Chicken

    Time-Saving Convenience with Homemade Flavor

    When life gets hectic, this soup is my secret weapon. Using rotisserie chicken cuts your cooking time in half while still delivering that slow-simmered taste. I remember making this after a particularly exhausting Monday when my daughter had dance class, and I needed dinner in 30 minutes. The pre-cooked chicken means you’re essentially just building a flavorful broth and adding ingredients—no raw meat handling or wondering if your chicken is cooked through. The meat stays incredibly tender and absorbs all the aromatic flavors of your broth, making everyone think you spent hours in the kitchen.

    Nutrient-Dense and Customizable

    This soup isn’t just delicious—it’s a nutritional powerhouse disguised as comfort food. The chicken provides lean protein, while carrots, celery, and onions deliver essential vitamins. Last winter, when everyone around me was sniffling, I loaded mine with extra garlic and ginger for an immune boost. You can easily adjust the sodium levels by using low-sodium broth or amplify the flavor with fresh herbs. For picky eaters, it’s perfect because you can customize each bowl—my husband likes his with extra noodles, while I prefer more vegetables. The rotisserie chicken’s rich flavor means you need fewer additives to make it taste amazing.

    Essential Tips & Tricks

    Maximizing Rotisserie Chicken Flavor

    The secret to exceptional soup lies in how you handle that rotisserie chicken. Remove the skin (save it for crisping up as a garnish!) and shred both white and dark meat for the best flavor balance. I always take an extra minute to scrape those browned bits from the container—they’re packed with umami goodness! For an extra flavor boost, simmer the chicken carcass in your broth for 20 minutes before straining and proceeding with the recipe. This mini-stock makes a remarkable difference in depth of flavor, transforming your soup from good to “can I please have the recipe?”

    Perfecting Your Noodle Game

    Noodle selection and timing make or break your soup. I learned this lesson the hard way after once ending up with a pot of mushy pasta. Choose egg noodles for their texture and ability to hold up in broth, or go for heartier options like rotini that maintain their bite. The golden rule: cook noodles separately and add them to individual serving bowls, then ladle hot soup over them. This prevents the pasta from absorbing all your precious broth during storage. For gluten-free options, rice noodles work beautifully but require even more careful timing—I undercook them slightly since they’ll continue softening in the hot soup.

    Serving Ideas & Creative Variations

    Elevated Garnishes for Restaurant-Quality Presentation

    Transform your homemade soup into a restaurant-worthy experience with thoughtful garnishes. A drizzle of good olive oil creates beautiful golden pools on the surface, while fresh dill or chives add bright color and flavor. My family went crazy for the soup when I started adding a squeeze of lemon just before serving—it cuts through the richness and makes the flavors pop. For texture contrast, try topping with homemade croutons, crispy fried shallots, or those chicken skin crisps I mentioned. A sprinkle of finishing salt and cracked black pepper makes each spoonful slightly different and more interesting.

    Global Flavor Twists on the Classic

    While traditional chicken noodle soup is comforting, adding global influences creates exciting variations. Try a Thai-inspired version with coconut milk, lime, and red curry paste—the rotisserie chicken works perfectly here too. For a Mexican twist, add cumin, oregano, diced tomatoes and finish with avocado, cilantro and lime. My unexpected favorite is a Greek variation with lemon, dill, and orzo instead of egg noodles, finished with a dollop of yogurt. The rotisserie chicken adapts beautifully to these flavor profiles while maintaining that comforting essence that makes chicken soup so beloved in every culture.

    Storage & Troubleshooting Guide

    Proper Storage for Maximum Freshness

    Store your chicken noodle soup properly to enjoy it for days. The key is keeping the noodles separate from the broth whenever possible. Refrigerate cooled soup in airtight containers for 3-4 days—I like using glass containers that won’t absorb flavors or stain. For freezing, portion into freezer-safe bags or containers without noodles (they’ll turn mushy when thawed). Leave an inch of headspace for expansion and freeze flat for easy storage and quicker thawing. When reheating, do it gently on the stovetop rather than microwaving to maintain texture and prevent the chicken from becoming rubbery.

    Troubleshooting Common Soup Problems

    Even simple recipes can go sideways sometimes. If your soup lacks flavor, try adding a splash of acid like lemon juice or a few drops of vinegar—this instantly brightens the taste. Too salty? Add a peeled, quartered potato to absorb excess salt (remove before serving) or dilute with unsalted broth and a touch of cream. For greasy broth, chill it until fat solidifies on top, then remove with a spoon. If your vegetables are too firm or too mushy, remember the order matters—add carrots first, celery next, and delicate greens last. For cloudy broth, try straining through a coffee filter or cheesecloth for that crystal-clear restaurant quality.

    Frequently Asked Questions

    Can I use leftover roast chicken instead of rotisserie chicken?

    Absolutely! Any pre-cooked chicken works beautifully. Just make sure it’s not heavily seasoned with competing flavors that might clash with your soup seasonings.

    How do I make chicken noodle soup with rotisserie chicken more flavorful?

    Add fresh herbs like thyme and parsley, use better-quality broth, or simmer the chicken carcass in your stock first. A splash of white wine or dash of fish sauce adds surprising depth.

    Can I make this soup in a slow cooker?

    Yes! Add everything except noodles and cook on low for 4-6 hours. Stir in separately cooked noodles before serving for perfect texture.

    Is chicken noodle soup healthy?

    It’s packed with protein, vegetables, and hydrating broth. Control sodium by making your own stock or choosing low-sodium options, and add extra vegetables for more nutrients.

    How can I thicken my chicken noodle soup?

    For slightly thicker soup, whisk 1 tablespoon cornstarch with cold broth, then stir into simmering soup. Or mash some of the cooked vegetables against the pot side.

    Final Thoughts

    Chicken noodle soup with rotisserie chicken represents what I love most about cooking—finding clever shortcuts that don’t compromise on flavor. There’s something deeply satisfying about transforming a simple supermarket chicken into a nourishing meal that feels like a warm hug in a bowl. I hope these tips help you create a version that becomes your own family favorite. Whether you’re fighting off winter chills or simply craving comfort, this soup delivers every time. For more cozy recipes that make the most of grocery shortcuts, check out my Pinterest collection where I share my favorite comfort food hacks.
  • Quinoa Power Salad: 5 Gluten-Free Boosts for Ultimate Energy

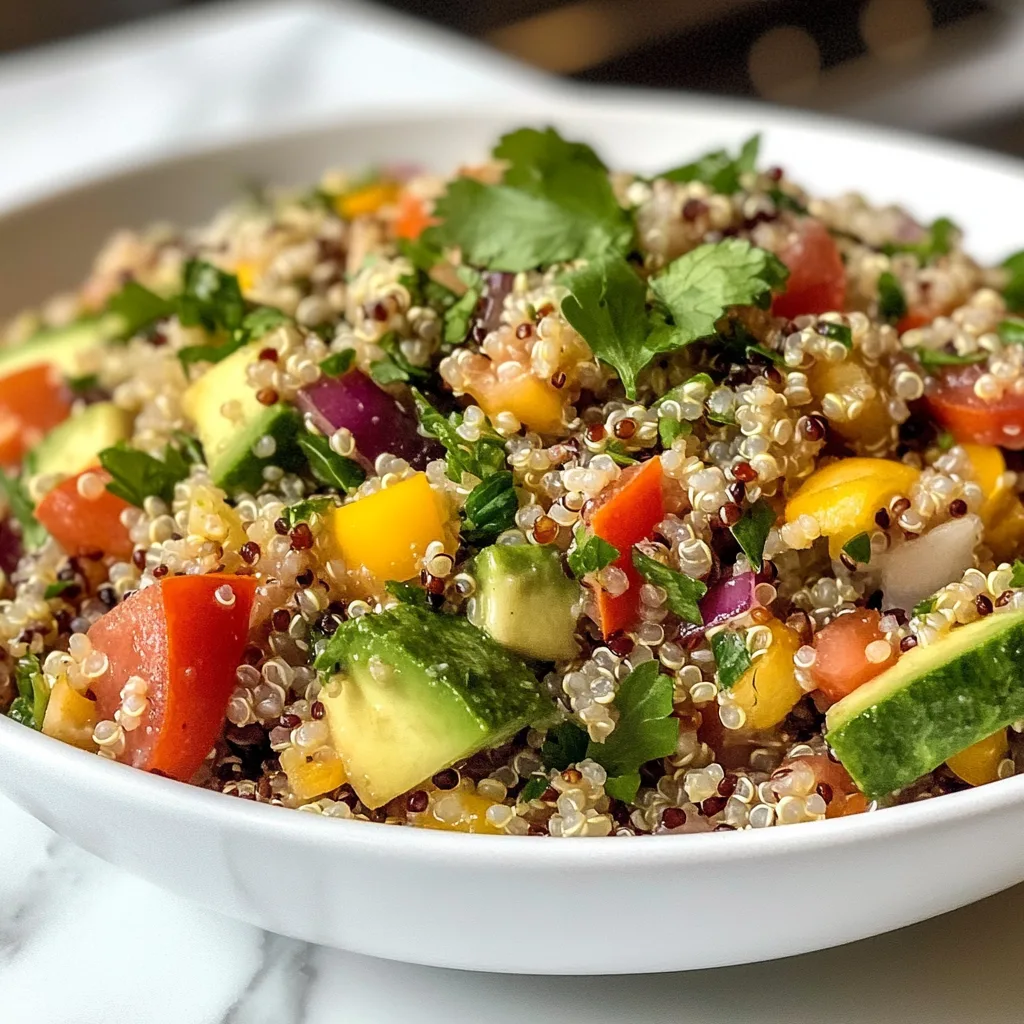
    Quinoa Power Salad: 5 Gluten-Free Boosts for Ultimate Energy

    This Quinoa Power Salad – Gluten-Free is a game-changer for busy weeknights when you crave something nutritious yet satisfying. I discovered this recipe during my health kick last summer, and it’s been my go-to ever since. The nutty quinoa paired with crisp vegetables creates a texture paradise that’s both refreshing and filling. What I love most is how the flavors deepen overnight in the fridge, making it perfect for meal prep. If you’re looking for more gluten-free options that don’t sacrifice flavor, this colorful bowl of goodness will brighten your weekly menu rotation.

    Quinoa Power Salad: 5 Gluten-Free Boosts for Ultimate Energy

    Recipe

    Why You’ll Love This Quinoa Power Salad – Gluten-Free

    Perfect Balance of Nutrition and Flavor

    This quinoa salad isn’t just another boring health food—it’s a flavor explosion that happens to be good for you. The nutty quinoa base absorbs all the vibrant dressing while maintaining its delightful texture. I’ve watched even the most dedicated carb-lovers go back for seconds! The combination of protein-packed quinoa with fresh vegetables creates a satisfying meal that keeps you energized for hours. What makes this truly special is how customizable it is—you can adjust the vegetables based on what’s in season or what your family prefers.

    Quick and Easy Preparation

    On those nights when cooking feels like climbing a mountain, this salad is my saving grace. The entire dish comes together in under 30 minutes, with most of that time being hands-off cooking. I often prep the quinoa while catching up on my favorite podcast, then chop vegetables while it cools. The simple lemon-olive oil dressing takes seconds to whisk together but transforms everything it touches. Make a double batch on Sunday, and you’ll have effortless lunches ready for the workweek ahead—a true gift to your future hungry self.

    Essential Tips & Tricks

    Perfecting Your Quinoa

    The foundation of this power salad is properly cooked quinoa, and there’s a simple secret to achieving that perfect fluffy texture. Always rinse your quinoa thoroughly under cold water before cooking—this removes the natural bitter coating called saponin. I use a 1:2 ratio of quinoa to water, bringing it to a boil then simmering covered for 15 minutes. The game-changer? Let it rest off-heat with the lid on for 5 additional minutes, then fluff with a fork. For maximum flavor absorption, toss the quinoa with dressing while it’s still slightly warm.

    Balancing Flavors and Textures

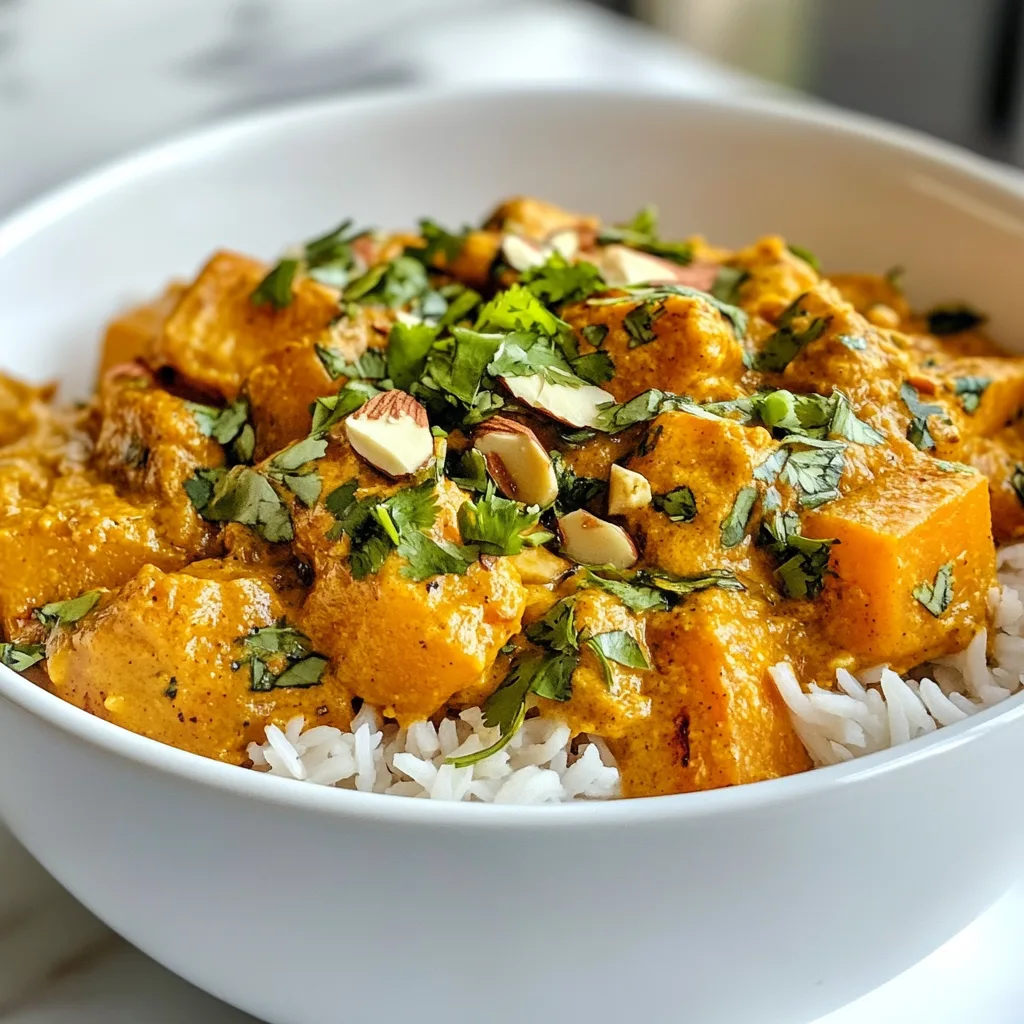
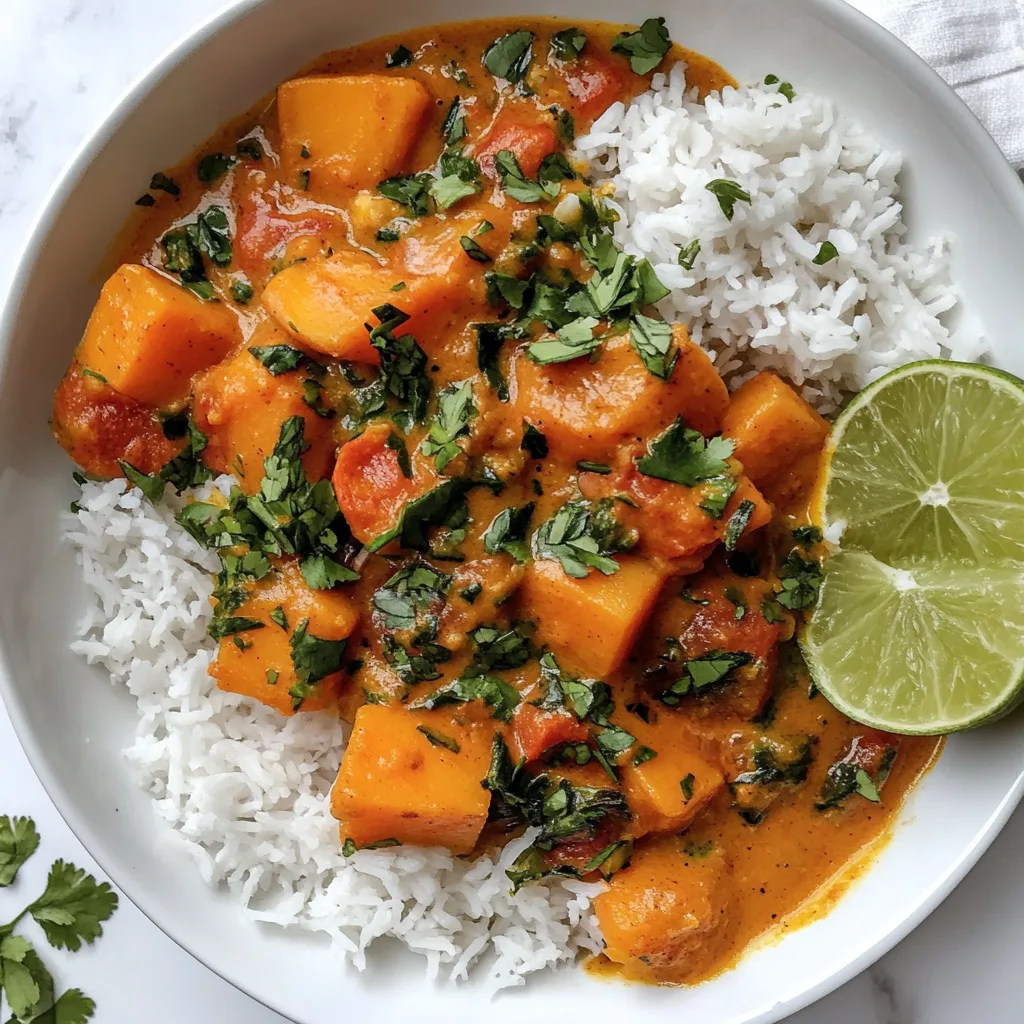
    Creating a memorable salad is all about balancing contrasting elements. I always include something crunchy (like cucumber or bell pepper), something protein-rich (edamame or chickpeas work beautifully), and something unexpected (try pomegranate seeds in winter). The dressing should have acidity to brighten, sweetness to balance, and enough salt to make the flavors pop. Don’t be afraid to taste and adjust as you go! For inspiration on balancing flavors in other gluten-free dishes, check out this Sweet Potato Almond Curry that uses similar principles.

    Serving Ideas & Creative Variations

    Make-Ahead Meal Prep Options

    This quinoa power salad is the ultimate meal prep champion. I often prepare a large batch on Sunday, dividing it into portable containers for grab-and-go lunches. The flavors actually improve after a day in the refrigerator as everything melds together. For a complete meal prep solution, pair with pre-cooked chicken breast or hard-boiled eggs stored separately. One clever trick: layer the ingredients in a mason jar with dressing at the bottom, quinoa in the middle, and delicate greens on top. When you’re ready to eat, just shake it up! This approach keeps everything fresh until lunchtime.

    Seasonal Adaptations

    The beauty of this salad is how easily it transforms with the seasons. In summer, I load it with garden-fresh tomatoes, cucumber, and basil for a Mediterranean feel. Fall calls for roasted butternut squash, dried cranberries, and toasted pumpkin seeds. Winter versions feature citrus segments, avocado, and hearty kale that stands up to the dressing. Spring brings tender asparagus, peas, and fresh herbs. The base recipe stays the same while the add-ins celebrate what’s available. For another seasonal gluten-free option that adapts beautifully year-round, try this Cozy Gluten-Free Chicken Noodle Soup that follows the same philosophy.

    Storage & Troubleshooting Guide

    Keeping Your Salad Fresh

    To maintain that just-made freshness, store your quinoa salad in an airtight container in the refrigerator for up to 4 days. If you’re including avocado or delicate herbs, add those just before serving to prevent browning or wilting. For meal prep, I sometimes keep the dressing separate until ready to eat—this works especially well for salads containing crisp vegetables that might soften over time. If your salad seems dry after refrigeration, brighten it with a squeeze of fresh lemon juice or a drizzle of olive oil. A quick stir revitalizes all the flavors and textures.

    Solving Common Issues

    Even the simplest recipes can sometimes go sideways. If your quinoa turns out mushy, you likely used too much liquid or overcooked it—next time, try reducing the water slightly and setting a timer. For bland salads, the solution is usually as simple as more salt, acid (lemon juice or vinegar), or a handful of chopped fresh herbs. If your vegetables release too much water and make the salad soggy, try salting and draining watery vegetables like cucumber or tomatoes before adding them. And remember, a textural contrast is key—add some toasted nuts or seeds just before serving to bring back the crunch.

    Frequently Asked Questions

    Is quinoa actually gluten-free?

    Yes! Quinoa is naturally gluten-free and safe for those with celiac disease or gluten sensitivity. It’s technically a seed, not a grain, making it an excellent alternative to wheat-based sides.

    How can I add more protein to this Quinoa Power Salad?

    Add chickpeas, black beans, edamame, grilled chicken, salmon, or tofu. For a quick boost, sprinkle with hemp seeds or a hard-boiled egg on top.

    Can I freeze this quinoa salad?

    While you can freeze cooked quinoa alone, I don’t recommend freezing the complete salad as the vegetables will become mushy when thawed. Better to prep fresh components.

    What’s the best way to serve this at a party?

    Serve in a large, shallow bowl garnished with extra herbs and lemon wedges. Include small serving bowls of additional toppings like feta, nuts, and avocado for guests to customize.

    How do I make this salad more filling for dinner?

    Transform it into a complete meal by adding roasted vegetables, a protein of choice, and perhaps some avocado or olives for healthy fats. Serve warm or room temperature.

    Final Thoughts

    This Quinoa Power Salad – Gluten-Free has become my kitchen MVP—versatile enough for any season yet consistently delicious. What began as a simple weeknight solution has evolved into an endlessly adaptable template that never fails to satisfy. The combination of nutritious ingredients, vibrant flavors, and make-ahead convenience makes it worth adding to your regular rotation. I’d love to see your version of this salad! Share your creations with me on Pinterest and discover how others are making this recipe their own.

  • Gluten-Free Instant Pot Short Ribs + 5-Min Garlic Mashed Potatoes

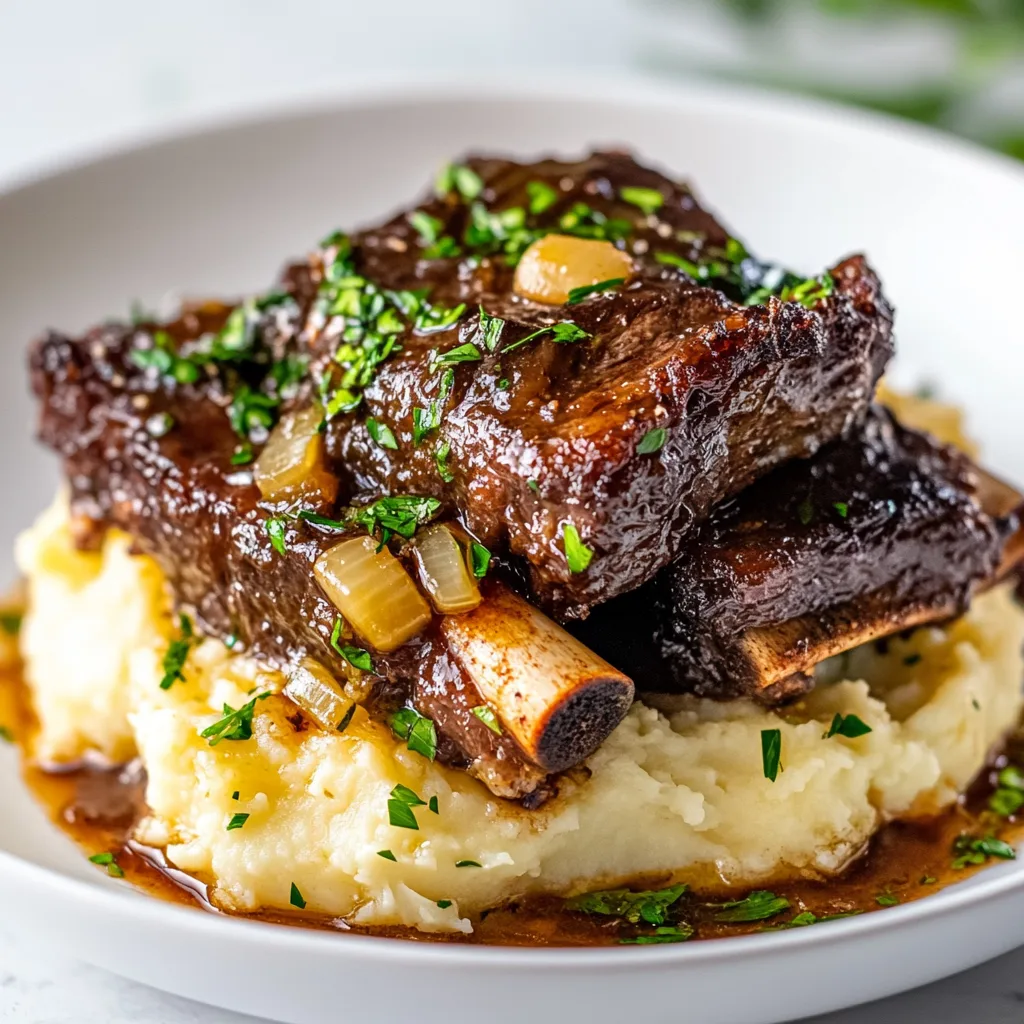
    Gluten-Free Instant Pot Short Ribs + 5-Min Garlic Mashed Potatoes

    Gluten-Free Instant Pot Short Ribs with Garlic Mashed Potatoes has become my absolute favorite comfort food for those chilly evenings when nothing but tender, fall-off-the-bone meat will satisfy. The first time I made this dish, I watched my husband’s eyes widen as the rich aroma filled our kitchen—that moment when the lid comes off and the steam carries that intoxicating scent of herbs and beef. There’s something magical about transforming tough short ribs into melt-in-your-mouth perfection while the creamy garlic mashed potatoes wait to catch every drop of that luscious gluten-free gravy. If you’re craving restaurant-quality food that happens to be completely gluten-free, you’re in for a treat.

    Gluten-Free Instant Pot Short Ribs + 5-Min Garlic Mashed Potatoes

    Recipe

    Why You’ll Love This Gluten-Free Instant Pot Short Ribs with Garlic Mashed Potatoes

    Perfect for Busy Weeknights and Special Occasions

    What I adore most about this recipe is its incredible versatility. On hectic weeknights when I’m juggling deadlines and family commitments, my Instant Pot becomes my secret weapon. The hands-off cooking method means I can set it and forget it while the magic happens inside. Yet these short ribs are equally impressive for dinner parties—I’ve served them to guests who couldn’t believe they were eating gluten-free food! The depth of flavor develops beautifully in the pressure cooker, creating that slow-cooked taste in a fraction of the time. Plus, the garlic mashed potatoes provide the perfect creamy companion.

    Rich Flavor Without Gluten-Containing Ingredients

    Creating depth of flavor without traditional wheat-based thickeners might seem challenging, but this recipe proves otherwise. I use a combination of reduced beef broth and naturally occurring collagen from the short ribs to create a sauce that’s thick and velvety without a speck of gluten. The key is layering flavors—searing the meat properly, deglazing with a good quality wine (always check it’s gluten-free!), and adding aromatics like garlic, onions, and herbs. My secret ingredient is a touch of balsamic vinegar, which adds that perfect tangy note that balances the richness of the dish.

    Essential Tips & Tricks

    Selecting and Preparing the Perfect Short Ribs

    The foundation of extraordinary short ribs begins at your butcher’s counter. Look for well-marbled beef short ribs with good meat-to-bone ratio—this marbling melts during cooking, creating that melt-in-your-mouth texture we’re after. I prefer English-cut (cut parallel to the bone) for this recipe, but flanken-style works too if you adjust cooking time. Before cooking, pat the meat completely dry and season generously with salt and pepper. This crucial step ensures a beautiful sear, which locks in flavor and creates those delicious brown bits that become the base of your sauce. Similar to my Gluten-Free Beef Stew with Veggies, proper meat preparation makes all the difference.

    Mastering the Perfect Garlic Mashed Potatoes

    The secret to irresistible garlic mashed potatoes lies in two elements: the right potato and proper technique. I exclusively use Yukon Gold potatoes for their naturally buttery flavor and creamy texture. For the garlic, I roast whole heads until caramelized and sweet, which provides depth without overwhelming sharpness. When mashing, avoid over-processing—a few lumps add wonderful texture! Warm your milk and butter before adding them to the potatoes (cold ingredients make gluey potatoes). For extra richness, I fold in a spoonful of sour cream at the end. This creates that silky texture that perfectly complements the robust short ribs.

    Serving Ideas & Creative Variations

    Elegant Plating Suggestions

    Presentation elevates this comfort food classic to dinner-party status. Rather than simply piling potatoes and meat on a plate, I create a shallow well in a mound of mashed potatoes and nestle the short ribs inside, allowing the sauce to pool beautifully. A sprinkle of fresh herbs—thyme, parsley, or chives—adds color and freshness. For special occasions, I serve individual portions in shallow bowls with a drizzle of high-quality olive oil. Pair with roasted asparagus or glazed carrots for color contrast. The visual appeal rivals any restaurant plate, and guests always reach for their phones to capture the moment before diving in.

    Flavorful Adaptations for Different Dietary Needs

    This versatile recipe easily accommodates various dietary preferences without sacrificing flavor. For dairy-free guests, substitute the butter in the mashed potatoes with olive oil and use coconut cream instead of milk—the garlic flavor still shines through beautifully. To make this dish paleo-friendly, swap the potatoes for mashed cauliflower or celery root. For those who enjoy heat, add a diced jalapeño or red pepper flakes to the cooking liquid. Wine-free versions work wonderfully with additional beef broth and a splash of balsamic vinegar. Like my Sweet Potato Almond Curry (Gluten-Free), these adaptations maintain the dish’s integrity while meeting diverse needs.

    Storage & Troubleshooting Guide

    Optimal Storage and Reheating Methods

    One of the beautiful aspects of this dish is how the flavors deepen overnight. Store the short ribs and sauce separately from the mashed potatoes in airtight containers in the refrigerator for up to 3 days. For longer storage, freeze the meat and sauce (not the potatoes) for up to 3 months. When reheating, thaw overnight in the refrigerator if frozen. For the best texture, reheat the short ribs and sauce gently in a covered saucepan over low heat, adding a splash of broth if needed. Potatoes benefit from a gentle reheating with a little added butter and milk to refresh their creaminess. Avoid microwave reheating if possible—it can make the meat tough.

    Solving Common Cooking Challenges

    Even experienced cooks encounter occasional issues with short ribs. If your meat isn’t tender enough after the prescribed cooking time, it likely needs more time—return it to the Instant Pot for additional 10-minute intervals until fork-tender. For sauce that’s too thin, remove the meat and reduce the liquid using the Sauté function, or create a slurry with 1 teaspoon of cornstarch mixed with 1 tablespoon cold water. If your mashed potatoes turn out gluey, incorporate more warm butter and beat vigorously—while they won’t be perfect, this can improve the texture. Remember that short ribs can release significant fat; if your sauce is too greasy, refrigerate it separately and remove the solidified fat before reheating.

    Frequently Asked Questions

    Can I make this recipe without an Instant Pot?

    Absolutely! Use a Dutch oven and braise in a 325°F oven for about 2.5-3 hours until the meat is fork-tender. The slow cooker works too—cook on low for 8 hours or high for 5-6 hours.

    What makes this Gluten-Free Instant Pot Short Ribs recipe different from regular short ribs?

    The key difference is using gluten-free thickeners like cornstarch instead of flour, ensuring all ingredients (including broth and seasonings) are certified gluten-free, and paying attention to cross-contamination.

    Can I prepare this dish ahead of time for a dinner party?

    Yes! Make it 1-2 days ahead—the flavors actually improve. Store meat and sauce separately from potatoes, then reheat gently on the stovetop before serving.

    What wine pairs best with these short ribs?

    A bold red wine like Cabernet Sauvignon, Syrah, or Malbec complements the rich flavors perfectly. The same wine you use in cooking makes an excellent pairing.

    Can I substitute the short ribs with another cut of meat?

    Chuck roast or beef brisket work well as alternatives—cut into large chunks and adjust cooking time slightly longer to achieve the same tender texture.

    Final Thoughts

    These Gluten-Free Instant Pot Short Ribs with Garlic Mashed Potatoes have become my signature dish for good reason. They prove that gluten-free cooking never means sacrificing flavor or comfort. The combination of fork-tender beef, rich sauce, and creamy garlic potatoes creates a memorable dining experience that brings people together. Whether you’re cooking for someone with celiac disease or simply appreciate excellent food, this recipe delivers restaurant-quality results with home-cooked love. Don’t forget to save this recipe to your collection on Pinterest for your next special dinner or cozy night in!

  • Classic Creamy Tomato Basil Soup: 5 Reasons You’ll Love It!

    Classic Creamy Tomato Basil Soup: 5 Reasons You’ll Love It!

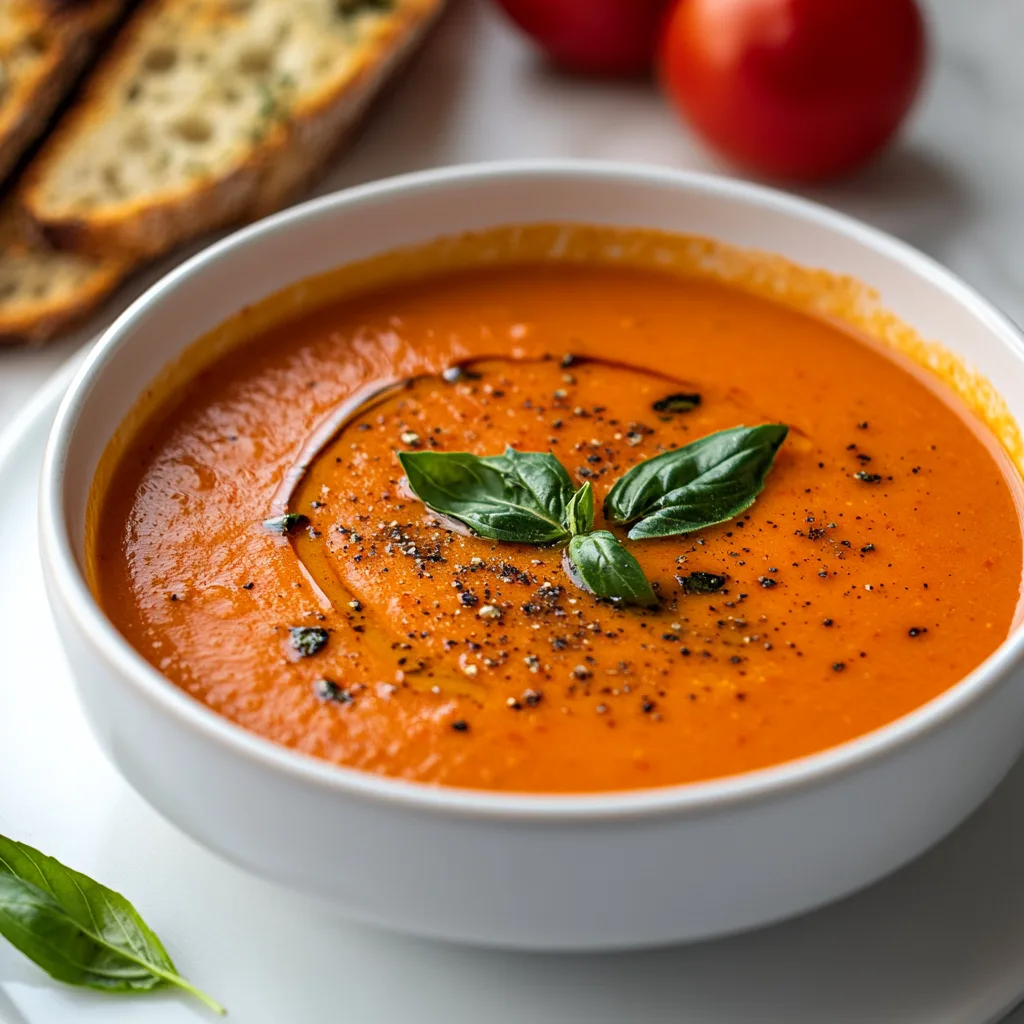
    There’s something magical about a steaming bowl of Classic Creamy Tomato Basil Soup on a chilly evening. The velvety texture, the bright tomato flavor deepened with fresh basil—it’s comfort in a bowl. I discovered my love for this soup during my first apartment days when cooking meant experimenting with whatever was in my pantry. Now, it’s my go-to recipe when I need a hug in food form. The best part? This soup comes together with simple ingredients but tastes like it simmered all day. Let me share my favorite version with you from Recipes Darleen.

    Classic Creamy Tomato Basil Soup: 5 Reasons You’ll Love It!

    Recipe

    Why You’ll Love This Classic Creamy Tomato Basil Soup

    Perfect Balance of Flavors

    The magic of this soup lies in its perfect balance of acidity and creaminess. The tomatoes provide that bright, slightly tangy foundation while the cream softens the edges into something luxurious. I love how the fresh basil adds those aromatic notes that dance on your tongue with each spoonful. When my daughter was going through a picky phase, this was the one “vegetable dish” she’d actually request! The natural sweetness of ripe tomatoes means you don’t need to add much sugar—just a pinch balances everything beautifully.

    Simple Yet Sophisticated

    Don’t let the velvety texture fool you—this soup is surprisingly easy to prepare. With just a handful of quality ingredients, you can create something that feels restaurant-worthy in under 45 minutes. I’ve served this at casual weeknight dinners and at fancy dinner parties alike. There’s something so satisfying about watching guests’ eyes close in appreciation with the first spoonful. The simplicity makes it perfect for beginners, while the flavor complexity satisfies even the most discerning palates.

    Essential Tips & Tricks

    Selecting the Best Ingredients

    Your soup will only be as good as what goes into it. San Marzano tomatoes make a remarkable difference with their sweet flavor and low acidity—worth the extra couple of dollars! If using fresh tomatoes, choose ripe, in-season ones for the best flavor (Roma or plum varieties work beautifully). For the basil, fresh is non-negotiable here—the dried stuff just won’t create that same aromatic magic. I learned this the hard way during a winter storm when I tried substituting dried basil. The soup was good, but missing that special something that makes it truly exceptional.

    Achieving Silky Smoothness

    The secret to silkiness lies in proper blending and temperature control when adding dairy. I always recommend using an immersion blender directly in the pot—fewer dishes and less risk of hot soup explosions! If you’re using a regular blender, work in batches and leave the center cap off (covered with a kitchen towel) to allow steam to escape. When adding cream, take the soup off the heat first and temper it by mixing a little soup into the cream before adding it back. This prevents curdling and gives you that luscious texture similar to what you’ll find in our Cozy Gluten-Free Chicken Noodle Soup.

    Serving Ideas & Creative Variations

    Perfect Pairings

    Nothing complements this Classic Creamy Tomato Basil Soup better than a crispy, buttery grilled cheese sandwich. The contrast between the creamy soup and the crunchy sandwich creates textural heaven! For a lighter option, try a simple green salad with a bright vinaigrette. When I’m feeling fancy, I serve this soup in hollowed-out bread bowls—my kids go absolutely wild for this presentation. Small croutons or a swirl of pesto on top adds both visual appeal and an extra layer of flavor that makes each bowl feel special.

    Exciting Twists

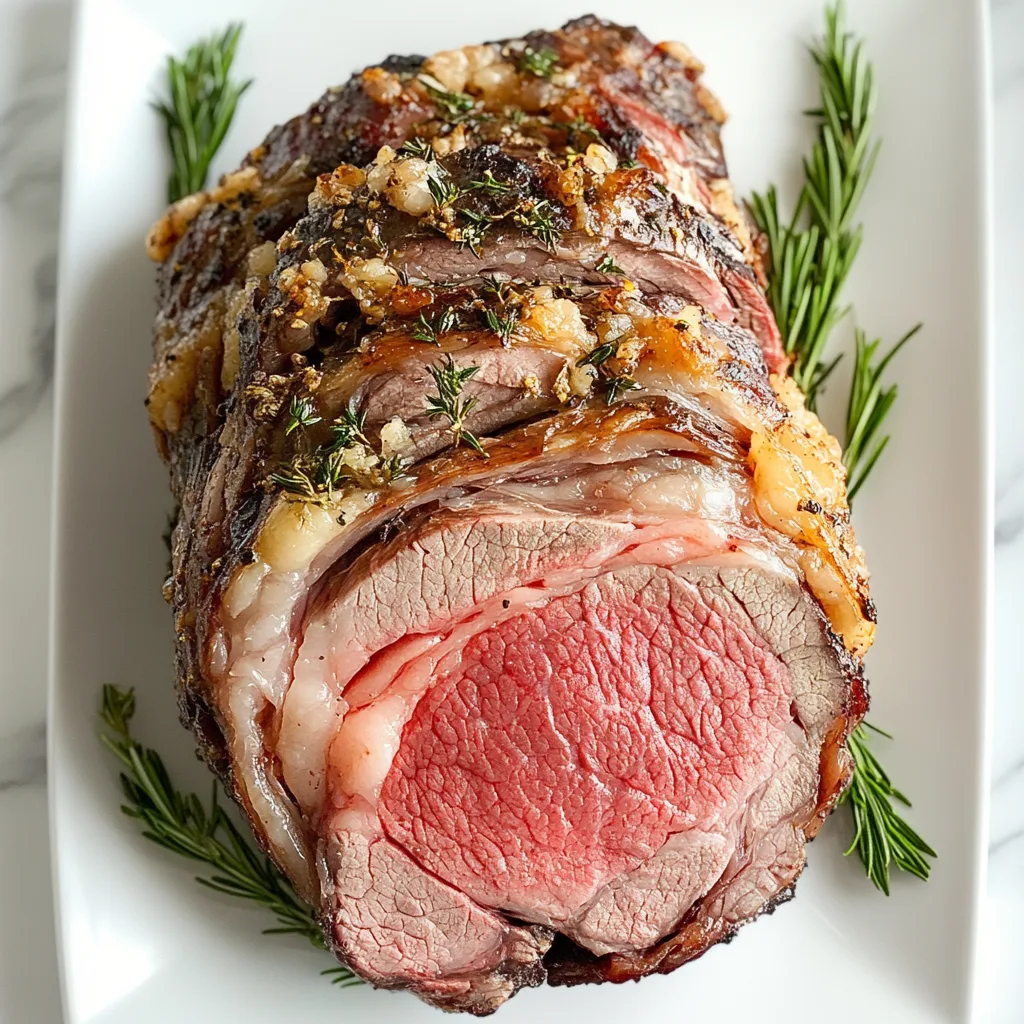
    While the classic version is perfection, there’s room to play! Add roasted red peppers for a smoky dimension or stir in some cooked orzo pasta for a heartier meal. For an Italian twist, add a handful of grated parmesan and a splash of balsamic vinegar just before serving. My personal favorite variation includes adding caramelized onions and a pinch of smoked paprika—it adds incredible depth. For a protein boost, you could even add white beans or pair it with our Garlic Butter Oven Prime Rib with Rice for a complete meal.

    Storage & Troubleshooting Guide

    Proper Storage Methods

    This soup stores beautifully, making it perfect for meal prepping. Refrigerate in an airtight container for up to 4 days—the flavors actually develop and improve overnight! For longer storage, freeze in individual portions for up to 3 months. I like using silicone muffin trays to freeze perfect single-serving portions. One important tip: if you plan to freeze, consider holding back the cream and adding it fresh when you reheat. The soup reheats best on the stovetop over medium-low heat, stirring occasionally to prevent scorching.

    Common Problems & Solutions

    If your soup turns out too acidic, a pinch of baking soda works wonders to neutralize without affecting flavor. For thin soup, simmer uncovered a bit longer or add a tablespoon of tomato paste. Too thick? A splash of broth brings it back to perfect consistency. If you accidentally curdle the cream (it happens to everyone!), try blending again with an immersion blender—it often smooths things out. And if you’ve over-salted, a squeeze of lemon juice or a dollop of unsweetened yogurt can help balance the flavors without starting over.

    Frequently Asked Questions

    Can I make this Classic Creamy Tomato Basil Soup with canned tomatoes?

    Absolutely! Use two 28-oz cans of whole peeled tomatoes. San Marzano varieties give the best flavor, but any good-quality canned tomatoes work well. Just drain excess liquid before adding.

    Is there a dairy-free alternative?

    Yes! Substitute the cream with full-fat coconut milk or cashew cream. Both provide that silky texture without the dairy. For coconut milk, use the thick part from the top of the can.

    How can I make this soup spicier?

    Add red pepper flakes while sautéing the onions and garlic, or stir in a dash of cayenne pepper at the end. For a smoky heat, try adding a finely chopped chipotle pepper in adobo sauce.

    Can I use a regular blender instead of an immersion blender?

    Yes, but blend in small batches and leave the center cap off (covered with a towel) to allow steam to escape. Return the blended soup to the pot before adding cream.

    What’s the best way to garnish this soup?

    Fresh basil leaves, a swirl of cream, homemade croutons, or a sprinkle of grated parmesan all make beautiful garnishes. For special occasions, try a drizzle of basil oil.

    Final Thoughts

    This Classic Creamy Tomato Basil Soup has become my kitchen signature—the recipe friends always request and family members expect when they visit during colder months. There’s something deeply satisfying about transforming simple ingredients into something so nourishing and delicious. Whether you’re serving it alongside a grilled cheese for a cozy night in or as a sophisticated starter for a dinner party, this soup never disappoints. I hope it brings as much comfort to your table as it has to mine! Don’t forget to check out more cozy recipes on our Pinterest for inspiration.

  • Garlic Butter Oven Prime Rib with Rice: 5 Irresistible Reasons to Try!

    Garlic Butter Oven Prime Rib with Rice: 5 Irresistible Reasons to Try!

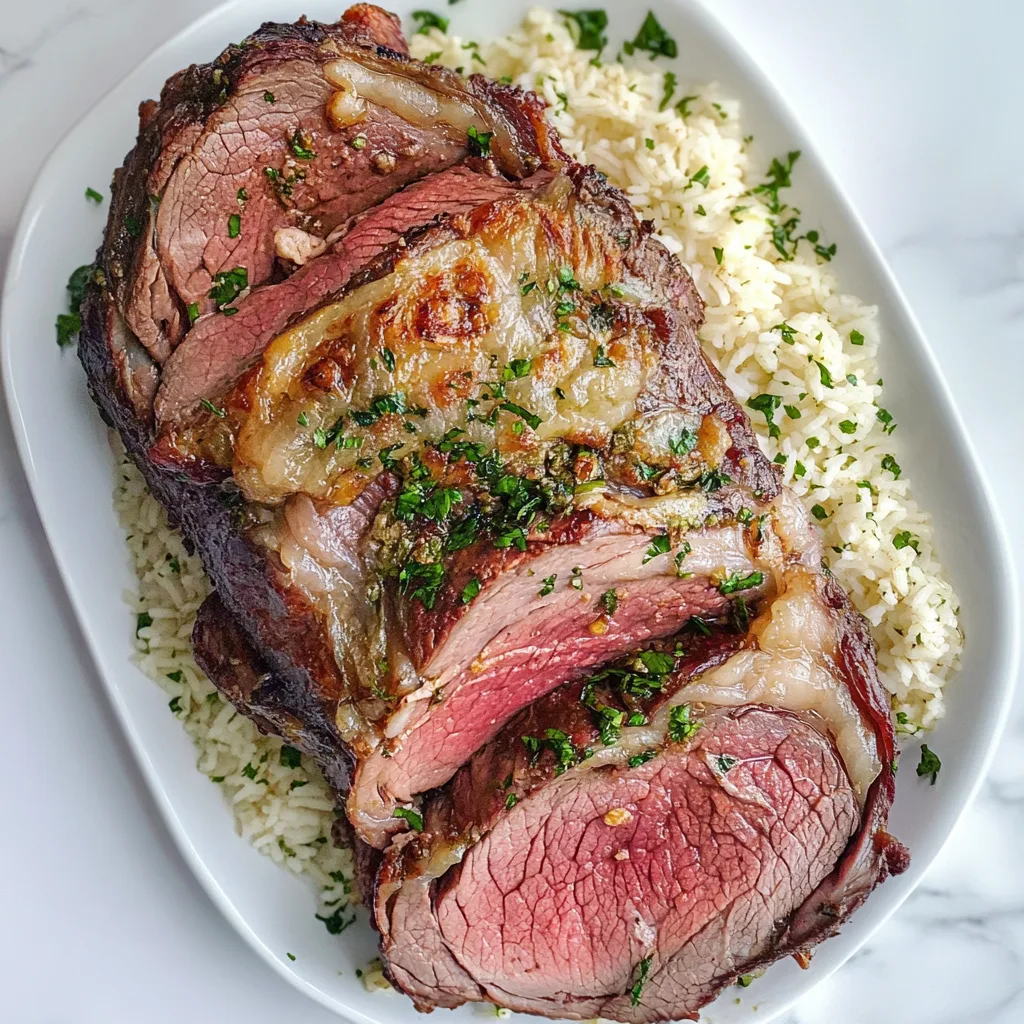
    The aroma of Garlic Butter Oven Prime Rib with rice fills my kitchen with the most intoxicating scent—buttery, garlicky, and rich with beefy goodness. This showstopping centerpiece transforms ordinary dinners into celebrations with its juicy, tender meat and savory rice that soaks up all those magnificent drippings. I discovered this recipe years ago when hosting my first holiday dinner, and it’s become my go-to whenever I want to impress without spending hours hovering over the stove. The best part? This luxurious meal is surprisingly approachable, even for those new to cooking prime rib. Let me show you how to create this magnificent feast that will have everyone asking for seconds.

    Garlic Butter Oven Prime Rib with Rice: 5 Irresistible Reasons to Try!

    Recipe

    Why You’ll Love This Garlic Butter Oven Prime Rib with rice

    Perfect Balance of Flavors and Textures

    There’s something magical about the combination of garlic-infused butter melting into a perfectly cooked prime rib. The exterior develops a gorgeous herb-crusted crust while the inside remains melt-in-your-mouth tender. I love how the rice becomes the perfect vehicle for capturing every drop of those precious meat juices. The first time I served this, my brother-in-law (who rarely compliments anything) asked for the recipe before dessert was even served! The aromatic garlic butter creates an irresistible flavor profile that’s bold yet balanced—not overwhelming the natural beefiness of the prime rib.

    Impressive Yet Surprisingly Simple

    Don’t let the elegant presentation fool you—this dish is much easier than it looks! The oven does most of the work while you relax and enjoy time with your guests. I used to stress about cooking expensive cuts of meat, but this foolproof method has never let me down. The rice component simplifies your meal planning by combining your protein and starch in one cohesive dish. My favorite part is the look on everyone’s faces when I bring this to the table—they think I’ve been slaving away all day when really, I’ve been enjoying a glass of wine and setting the table!

    Essential Tips & Tricks

    Getting the Perfect Temperature

    Temperature is absolutely crucial when cooking prime rib. For medium-rare perfection (the sweet spot for prime rib), aim for an internal temperature of 130-135°F. I always use a reliable meat thermometer—it’s non-negotiable! Remember that your roast will continue cooking during the rest period, increasing by about 5-10 degrees. For the rice, I’ve found that rinsing it beforehand removes excess starch and results in fluffier grains that better absorb those heavenly meat juices. My game-changing trick? Let your meat come to room temperature for at least 30 minutes before roasting for more even cooking.

    The Art of the Rest Period

    Never, ever skip the rest period! This 15-20 minute pause after cooking allows the juices to redistribute throughout the meat instead of spilling out when you slice. I cover mine loosely with foil to keep it warm without steaming the beautiful crust. This is the perfect time to finish your rice if you’re cooking it separately or to make a quick pan sauce with the drippings. I learned this the hard way at my first dinner party when I sliced too early and ended up with juice all over my cutting board instead of in the meat! Similar patience is required for perfect rice—let it rest covered after cooking for ultimate fluffiness.

    Serving Ideas & Creative Variations

    Complementary Side Dishes

    While this Garlic Butter Oven Prime Rib with rice is a meal in itself, a few thoughtfully chosen sides can elevate the experience. I love serving it with roasted vegetables that can cook alongside the prime rib—asparagus, Brussels sprouts, or carrots tossed in olive oil and herbs. A simple green salad with a bright vinaigrette offers a refreshing contrast to the richness of the meat. For special occasions, I’ll add Yorkshire puddings or buttery rolls to soak up extra sauce. My family’s favorite pairing is a side of creamy horseradish sauce that cuts through the richness with its pleasant heat.

    Exciting Flavor Twists

    The beauty of this recipe is how adaptable it is to different flavor profiles. Try a Mediterranean twist by adding lemon zest, oregano, and a touch of cinnamon to your garlic butter. For an Asian-inspired variation, incorporate ginger, five-spice powder, and a splash of soy sauce in your butter mixture. The rice component is equally versatile—mix in mushrooms and thyme for an earthy flavor, or add cranberries and toasted pecans for a holiday feel. My personal favorite variation includes rosemary and cracked black pepper in the butter, which creates an aromatic crust that’s simply divine.

    Storage & Troubleshooting Guide

    Proper Storage for Leftovers

    Leftover prime rib is a luxury! Store any remaining meat and rice separately in airtight containers in the refrigerator for up to 3-4 days. For the best texture, slice your prime rib before storing—this makes reheating much easier. The rice can be revitalized with a splash of broth when reheating. For longer storage, you can freeze the sliced prime rib for up to 3 months, though the rice texture may suffer a bit in the freezer. I like to plan for leftovers intentionally, as the meat makes incredible sandwiches the next day—my favorite weekend lunch is thinly sliced cold prime rib with horseradish cream on crusty bread!

    Solving Common Issues

    If your prime rib is cooking too quickly on the outside while still raw inside, lower your oven temperature and loosely cover the roast with foil. For rice that’s too wet, remove the lid and cook a few minutes longer; if it’s too dry, add a splash of hot broth. The most common issue I see is temperature misjudgment—remember that carryover cooking will raise the temperature after removing from the oven. If you accidentally overcook your prime rib, slicing it thinner and serving with extra sauce can help mask dryness. And if your garlic butter starts to burn, simply scrape off the darkened bits before serving.

    Frequently Asked Questions

    What’s the best cut of prime rib to use?

    Look for a well-marbled bone-in prime rib roast (sometimes called standing rib roast). The bones add flavor and help with even cooking. For best results, choose USDA Choice or Prime grade with visible marbling throughout.

    Can I prepare the Garlic Butter Oven Prime Rib with rice ahead of time?

    You can prepare the garlic butter mixture up to 2 days ahead and refrigerate. The rice can be partially cooked and finished just before serving. I wouldn’t recommend cooking the prime rib in advance as it’s best fresh.

    What’s the perfect rice-to-liquid ratio for this recipe?

    For fluffy rice that absorbs the prime rib flavors, use a 1:2 ratio of rice to liquid. I recommend beef broth instead of water for richer flavor, and adding 1-2 tablespoons of butter per cup of rice.

    How do I know when my prime rib is done without a thermometer?

    While a thermometer is strongly recommended, you can use the finger test: press the meat—rare feels like the base of your thumb when thumb and index finger are touching; medium-rare like thumb and middle finger touching.

    Can I use the same technique for other cuts of beef?

    Yes! This garlic butter technique works beautifully with other cuts like tenderloin or ribeye roast. Just adjust cooking times based on size and desired doneness. The rice method remains the same.

    Final Thoughts

    This Garlic Butter Oven Prime Rib with rice has become more than just a recipe in my household—it’s a tradition that signals special moments and brings everyone together around the table. The combination of tender, juicy meat with flavorful, dripping-soaked rice creates a complete meal that feels both indulgent and comforting. I encourage you to try this for your next celebration or Sunday dinner, and don’t forget to check out more delicious recipes on Pinterest. Remember, cooking prime rib isn’t about perfection—it’s about creating memorable moments around food that brings joy.

  • Gluten-Free Beef Stew with Veggies: 7 Irresistible Reasons to Try!

    Gluten-Free Beef Stew with Veggies: 7 Irresistible Reasons to Try!

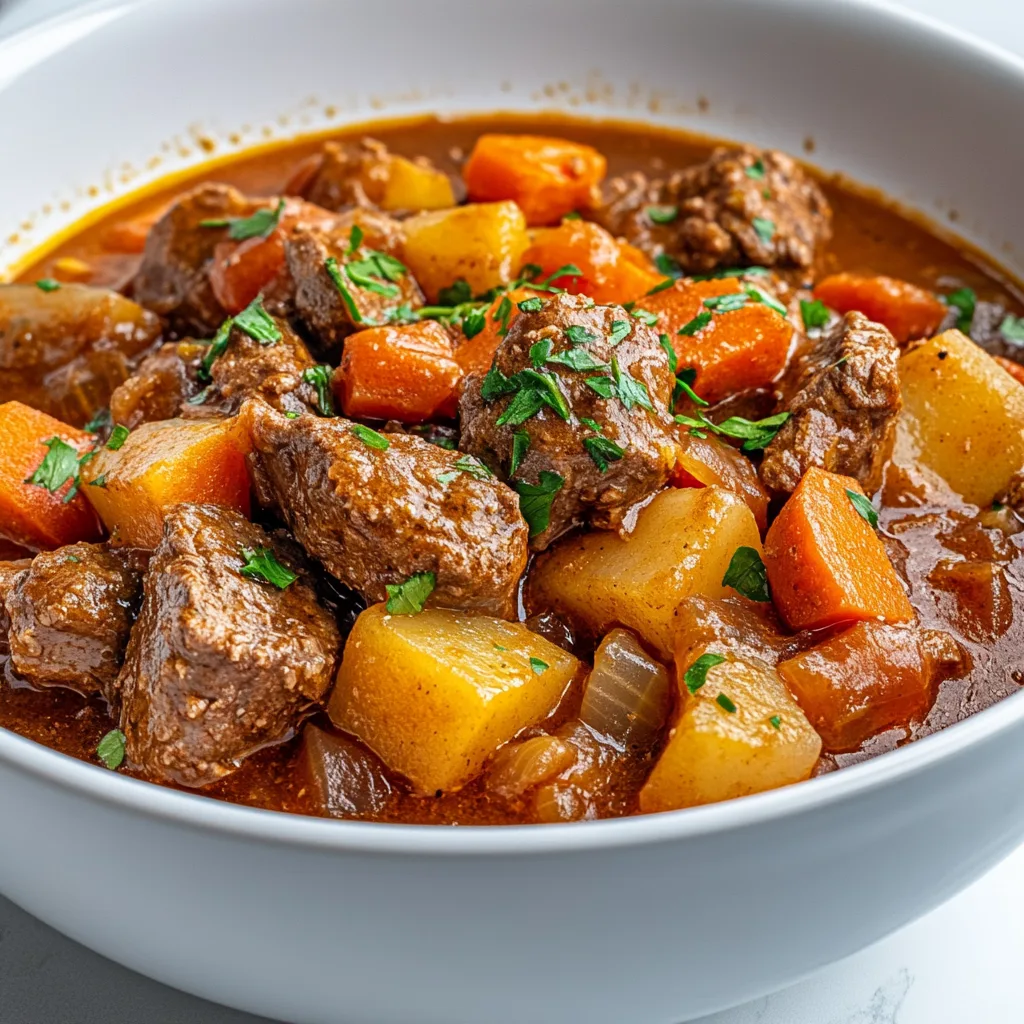
    There’s something magical about a pot of Gluten-Free Beef Stew with Veggies simmering away on a chilly afternoon. The rich aroma fills my kitchen, wrapping the house in cozy comfort that instantly transports me back to my grandmother’s farmhouse. I’ve spent years perfecting this recipe, ensuring it delivers all the hearty goodness of traditional beef stew without a speck of gluten. Whether you’re cooking for someone with celiac disease or simply exploring gluten-free options, this soul-warming dish delivers all the flavor with none of the worry. Let me show you how to create this comforting classic that’s become a staple in my home.

    Gluten-Free Beef Stew with Veggies: 7 Irresistible Reasons to Try!

    Recipe

    Why You’ll Love This Gluten-Free Beef Stew with Veggies

    Perfect Comfort Food Without Compromise

    There’s nothing quite like watching tender chunks of beef and colorful vegetables swimming in a rich, velvety broth. This stew doesn’t just accommodate dietary restrictions—it celebrates them. The beauty lies in its deep flavor development that happens naturally as it simmers. I’ve found that using gluten-free flour actually creates a silkier texture than traditional wheat flour, with no strange aftertaste. Plus, it’s incredibly forgiving for beginners—the longer it cooks, the better it tastes, making it nearly impossible to mess up!

    Nutrient-Dense and Satisfying

    This isn’t just any stew—it’s a complete meal in a bowl that will keep you satisfied for hours. Packed with protein-rich beef and a rainbow of vegetables, each serving delivers essential nutrients your body craves. I love that it’s naturally dairy-free too, making it perfect for multiple dietary needs. The combination of root vegetables like carrots, potatoes, and parsnips creates a hearty texture while adding natural sweetness. When my kids request seconds (and they always do), I know I’m serving something that’s as nourishing as it is delicious.

    Essential Tips & Tricks

    Choosing the Right Ingredients

    The secret to an exceptional gluten-free stew starts with selecting the right components. Opt for chuck roast or stewing beef with good marbling—that fat equals flavor! For thickening, I recommend a high-quality gluten-free flour blend or sweet rice flour which creates a silky texture. Double-check your beef broth labels, as many contain hidden gluten. I learned this the hard way after serving it to my gluten-sensitive sister! When selecting vegetables, choose firm, colorful options and cut them into similar-sized chunks for even cooking. For extra flavor, try adding Sweet Potato and Almond Curry inspired seasonings.

    Mastering the Cooking Process

    The magic of this stew lies in building layers of flavor. Always brown your meat in batches—overcrowding the pot steams rather than sears it, robbing you of rich flavor. I once rushed this step and regretted it immediately! Allow at least 2-3 hours of gentle simmering to break down the connective tissues in the beef. For vegetables with different cooking times, add hardy ones (carrots, potatoes) earlier and quick-cooking ones (peas, green beans) in the final 30 minutes. A splash of red wine or balsamic vinegar near the end adds incredible depth that elevates the entire dish.

    Serving Ideas & Creative Variations

    Perfect Pairings

    This hearty stew stands beautifully on its own, but a few thoughtful sides can transform it into a feast. My family loves it with warm gluten-free dinner rolls or crusty gluten-free bread for sopping up that rich, savory broth. A simple green salad with a bright vinaigrette provides welcome contrast to the stew’s depth. For special occasions, I serve it in hollowed-out gluten-free bread bowls—a presentation that never fails to impress guests! The stew also pairs wonderfully with a robust red wine like Cabernet Sauvignon or a crisp hard cider.

    Gluten-Free Beef Stew with Veggies: 7 Irresistible Reasons to Try!
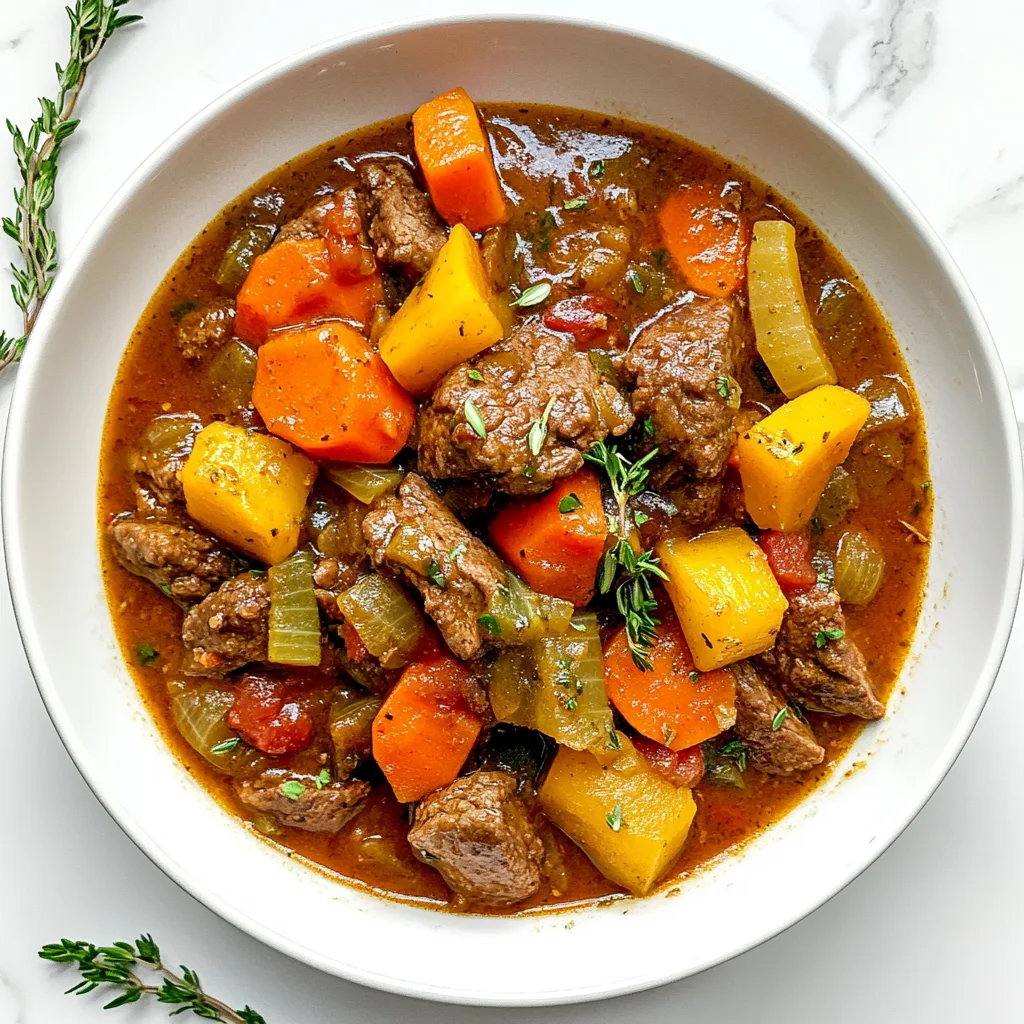
    Gluten-Free Beef Stew with Veggies packed with tender beef, hearty vegetables, and rich flavors for a comforting, healthy meal option.

    Seasonal Adaptations

    One of the joys of this recipe is how easily it adapts to whatever’s in season. In spring, I lighten it with fresh peas, asparagus tips, and tender new potatoes. Summer brings opportunities for sweet corn, zucchini, and fresh herbs from my garden. Fall calls for hearty root vegetables like parsnips, turnips, and butternut squash. Winter versions get a boost from dried mushrooms and robust herbs like rosemary and thyme. You can even transform leftovers into a completely new meal by serving it over gluten-free pasta, polenta, or mashed potatoes.

    Storage & Troubleshooting Guide

    Proper Storage for Maximum Flavor

    Like most stews, this gluten-free version actually improves with time as the flavors meld together. Store cooled leftovers in airtight containers in the refrigerator for up to 4 days. For longer storage, freeze portions in freezer-safe containers or heavy-duty freezer bags for up to 3 months. I like to label everything with dates and contents—a habit that’s saved me from many “mystery container” situations! When reheating, do so gently on the stovetop with a splash of broth if needed to maintain the perfect consistency.

    Solving Common Challenges

    If your stew seems too thin, whisk a tablespoon of gluten-free flour with cold water to make a slurry, then stir it in and simmer for 10 minutes. For stew that’s too thick, simply add more broth until you reach your desired consistency. If the meat seems tough even after long cooking, it likely needs more time—patience is key! For a flavor boost to bland stew, try adding a splash of Worcestershire sauce (check that it’s gluten-free), a spoonful of tomato paste, or a dash of smoked paprika. Remember that seasoning should be adjusted at the end, as the flavors concentrate during cooking.

    Frequently Asked Questions

    Can I make this Gluten-Free Beef Stew with Veggies in a slow cooker?

    Absolutely! Brown the meat and sauté the aromatics first, then transfer everything to your slow cooker. Cook on low for 7-8 hours or high for 4-5 hours until the meat is tender.

    What’s the best cut of beef to use?

    Chuck roast is my top recommendation. It has excellent marbling that breaks down during cooking, creating tender meat and a rich broth. Stew meat packages also work well.

    How can I make this recipe dairy-free as well?

    The recipe is naturally dairy-free as written! Just ensure you’re using olive oil or a plant-based oil for browning the meat instead of butter.

    Can I prep this stew ahead of time?

    Yes! You can chop all vegetables and meat up to 2 days ahead. Store them separately in airtight containers in the refrigerator until you’re ready to cook.

    Why did my vegetables turn mushy?

    Adding vegetables too early can cause them to overcook. Add hardy vegetables halfway through cooking and delicate ones in the final 30-45 minutes.

    Final Thoughts

    This Gluten-Free Beef Stew with Veggies has become more than just a recipe in my household—it’s a tradition that signals comfort and care. There’s something deeply satisfying about creating a dish that everyone can enjoy regardless of dietary restrictions. The rich flavors, tender beef, and colorful vegetables come together in a symphony that proves gluten-free cooking never means sacrificing taste. I hope this stew brings as much warmth and joy to your table as it has to mine. For more delicious gluten-free inspiration, visit our Pinterest board.

  • Sweet Potato & Almond Curry: 7 Irresistible Gluten-Free Benefits

    Sweet Potato & Almond Curry: 7 Irresistible Gluten-Free Benefits

    The aroma of Sweet Potato & Almond Curry – Gluten-Free simmering on my stovetop always transforms my kitchen into a cozy sanctuary. There’s something magical about the way sweet potatoes soften and absorb the fragrant spices, creating a dish that’s both comforting and nourishing. I discovered this recipe during a rainy weekend when I craved something warming but wanted to avoid gluten. Now it’s become my go-to comfort meal that satisfies without weighing you down. If you’re looking for a gluten-free dinner option that doesn’t sacrifice flavor, this curry will become your new favorite.

    Sweet Potato & Almond Curry: 7 Irresistible Gluten-Free Benefits

    Recipe

    Why You’ll Love This Sweet Potato & Almond Curry – Gluten-Free

    Perfect Balance of Flavors and Textures

    The magic of this curry lies in its perfect harmony of flavors. Sweet potatoes provide a natural sweetness that balances beautifully against the aromatic curry spices. The ground almonds create a luxuriously thick sauce without any dairy or gluten-containing thickeners. I love how the sweet potatoes maintain their shape while becoming tender enough to melt in your mouth. The first time I served this to friends, they couldn’t believe it was gluten-free – the richness of the sauce had them convinced it contained heavy cream!

    Nutrient-Dense and Satisfying

    This curry isn’t just delicious – it’s incredibly nourishing. Sweet potatoes deliver beta-carotene and fiber, while almonds contribute healthy fats and protein. The combination creates a meal that satisfies hunger for hours without causing energy crashes. I’ve found it perfect for meal prep Sundays, as the flavors actually deepen overnight in the refrigerator. When I’m having a busy week, knowing I have this nutrient-packed curry waiting for me brings genuine comfort and helps me resist the takeout temptation.

    Essential Tips & Tricks

    Perfecting the Spice Blend

    The soul of this curry lives in its spice blend. I recommend toasting whole cumin, coriander, and mustard seeds before grinding them – it takes just a minute but dramatically enhances their flavors. If you’re sensitive to heat, start with less chili and add more to taste. One trick I discovered by accident: adding a pinch of cinnamon creates an unexpected warmth that complements the sweet potatoes beautifully. Don’t rush this step – allowing the spices to bloom in hot oil before adding other ingredients is what builds those complex flavor layers.

    Achieving the Ideal Texture

    The key to perfect texture is patience with your sweet potatoes. Cut them into uniform cubes (about 1-inch) so they cook evenly. When adding them to the curry base, stir gently to coat each piece before adding liquid. I’ve found that simmering uncovered for the last 10 minutes helps thicken the sauce naturally as the almonds release their oils. If your curry seems too thin, resist adding flour-based thickeners – instead, crush a few sweet potato pieces against the side of the pot and stir them back in.

    Serving Ideas & Creative Variations

    Complementary Side Dishes

    This curry pairs beautifully with simple basmati rice or cauliflower rice for an extra vegetable boost. I love serving it with a side of quick-pickled cucumbers for a refreshing contrast to the rich curry. For special occasions, I make gluten-free naan using chickpea flour – the nutty flavor complements the almonds in the curry perfectly. My family’s favorite way to enjoy it is with a dollop of dairy-free coconut yogurt on top, which adds a pleasant tanginess that cuts through the richness.

    Sweet Potato & Almond Curry: 7 Irresistible Gluten-Free Benefits
    Sweet Potato & Almond Curry gluten-free recipe with rich flavors, perfect for a healthy, tasty, and easy-to-make meal.

    Seasonal Adaptations

    Don’t be afraid to adapt this recipe as the seasons change. In summer, I add fresh peas and spinach during the last few minutes of cooking for bright color and extra nutrients. Fall calls for adding cubes of butternut squash alongside the sweet potatoes. Winter versions benefit from stirring in hearty kale ribbons, while spring inspires me to garnish with tender fresh herbs like cilantro and mint. The almond base remains constant, but these seasonal additions keep the dish exciting year-round.

    Storage & Troubleshooting Guide

    Proper Storage Methods

    This curry actually improves with time as the flavors meld together. Store leftovers in airtight containers in the refrigerator for up to 4 days. For freezing, I recommend cooling completely before transferring to freezer-safe containers, leaving some space for expansion. The curry will maintain its quality for about 3 months frozen. When reheating, add a splash of water or vegetable broth if it seems too thick. I like to prepare a double batch specifically to freeze individual portions for quick weeknight dinners.

    Common Issues and Solutions

    If your curry turns out too watery, simmer uncovered for 10-15 minutes longer to reduce the liquid. Conversely, if it’s too thick, add vegetable broth a quarter cup at a time until you reach your desired consistency. Should your sweet potatoes remain firm despite adequate cooking time, they might be an older variety with higher starch content – simply continue cooking until tender. If the almond flavor seems too subtle, try stirring in a tablespoon of almond butter at the end for an instant flavor boost.

    Frequently Asked Questions

    Can I substitute the almonds if I have a nut allergy?

    Absolutely! Sunflower seed butter makes an excellent substitute, providing similar creaminess. Coconut cream also works well, though it will add a slight coconut flavor to the final dish.

    How can I make this Sweet Potato & Almond Curry – Gluten-Free more protein-rich?

    Add chickpeas or lentils during cooking, or serve with a side of quinoa. For non-vegetarians, cubed chicken or shrimp can be added about 15 minutes before the curry is done.

    Will this curry work in a slow cooker?

    Yes! Sauté the aromatics and spices first, then transfer everything to your slow cooker. Cook on low for 6-7 hours or high for 3-4 hours until sweet potatoes are tender.

    Can I reduce the fat content?

    You can reduce the ground almonds by half and add a tablespoon of cornstarch mixed with water to maintain thickness. This will lower the fat while keeping the curry gluten-free.

    What’s the best way to adjust the spice level?

    Start with less chili and taste as you go. You can always add heat with red pepper flakes or hot sauce at the table, allowing everyone to customize their portion.

    Final Thoughts

    This Sweet Potato & Almond Curry – Gluten-Free has become more than just a recipe in my kitchen – it’s a reminder that dietary restrictions never need to limit flavor or satisfaction. The warm spices, creamy texture, and nourishing ingredients create a dish that’s both comforting and energizing. Whether you’re cooking for someone with gluten sensitivity or simply exploring plant-based meals, this curry delivers on both taste and nutrition. I’d love to see your versions of this recipe – share them with me on Pinterest!

  • Ultimate Easy Prime Rib: 5 Secrets for Juicy, Perfect Roast

    Ultimate Easy Prime Rib: 5 Secrets for Juicy, Perfect Roast

    The Ultimate Easy Prime Rib is a showstopper that deserves a spot at your holiday table. I still remember my first attempt—hands shaking as I placed that expensive cut into the oven, praying I wouldn’t ruin it. Fast forward to today, and I’ve mastered a foolproof method that delivers juicy, tender results every single time. The best part? It’s surprisingly simple! The rich aroma that fills your home as it roasts is pure magic—like a warm hug on a cold winter evening. Whether you’re hosting a special celebration or simply treating yourself, this prime rib recipe will have everyone thinking you spent all day in the kitchen.

    Ultimate Easy Prime Rib: 5 Secrets for Juicy, Perfect Roast

    Recipe

    Why You’ll Love This Ultimate Easy Prime Rib

    Perfect for Special Occasions

    There’s something undeniably impressive about presenting a perfectly cooked prime rib at your dinner table. The rich marbling throughout the meat ensures exceptional flavor and tenderness that simply can’t be matched. I love serving this for Christmas dinner—the moment I bring it to the table, everyone’s eyes widen with anticipation. The beautiful pink center surrounded by a savory herb crust creates that restaurant-quality presentation that makes guests feel truly special. And despite its impressive appearance, the actual hands-on time is minimal, giving you more opportunity to enjoy your company instead of being stuck in the kitchen.

    Foolproof Method for Beginners

    Don’t let the premium cut intimidate you! This Ultimate Easy Prime Rib recipe is designed with beginner cooks in mind. The method relies on precise temperature control rather than complicated techniques. I remember feeling so nervous the first time I made prime rib, checking the oven every five minutes. Now I know that the secret is simply letting the meat come to room temperature before cooking and using a reliable meat thermometer. The reverse-sear technique—starting low and slow, then finishing with high heat—creates that perfect edge-to-edge doneness with a beautiful crust. Trust the process and you’ll be amazed at what you can create!

    Essential Tips & Tricks

    Selecting the Perfect Cut

    Choosing the right piece of meat is half the battle when making Ultimate Easy Prime Rib. Look for a bone-in roast with generous marbling throughout—those white streaks of fat mean flavor and juiciness! I prefer asking my butcher for a cut from the smaller end (ribs 10-12), which tends to be more tender and evenly shaped. Don’t shy away from requesting that they trim and tie it for you; this ensures even cooking and a beautiful presentation. For a standard dinner party, plan on about ¾ pound per person with the bone in, or ½ pound for boneless cuts. Remember, quality matters here—this is one dish where splurging on prime grade is truly worth it.

    Temperature Control Secrets

    The difference between a good prime rib and an exceptional one comes down to temperature management. Always let your roast sit at room temperature for at least 2 hours before cooking—this helps ensure even cooking throughout. I learned the hard way that a cold roast straight from the refrigerator cooks unevenly! For perfect medium-rare, aim for an internal temperature of 120-125°F before resting, as it will continue cooking to reach 130-135°F. Your meat thermometer becomes your most valuable tool, so insert it into the thickest part without touching bone. And don’t skip the resting period—at least 20-30 minutes tented with foil allows those flavorful juices to redistribute throughout the meat.

    Serving Ideas & Creative Variations

    Classic Accompaniments

    Nothing complements the rich flavors of Ultimate Easy Prime Rib quite like traditional sides. Creamy horseradish sauce provides that perfect peppery contrast that cuts through the richness of the beef. I love setting up a little sauce station with both mild and spicy options so guests can choose their preference. Crispy roasted potatoes with rosemary make the perfect vehicle for soaking up those flavorful meat juices, while a simple green vegetable like roasted asparagus or Brussels sprouts adds color and freshness to the plate. For a truly special touch, Yorkshire puddings baked in the drippings create that authentic steakhouse experience right at home.

    Ultimate Easy Prime Rib: 5 Secrets for Juicy, Perfect Roast

    Modern Twists on Tradition

    While classic preparations are always a hit, don’t be afraid to experiment with new flavor profiles for your Ultimate Easy Prime Rib. Try a coffee-rubbed crust with brown sugar for a modern twist that creates an incredible caramelized exterior. The slight bitterness of the coffee enhances the meat’s natural flavors in surprising ways. Another favorite variation is incorporating Mediterranean elements—a crust of fresh herbs, lemon zest, and garlic creates a bright, aromatic profile. For serving, consider slicing it thinly and arranging it on a large wooden board with various accompaniments for an interactive dining experience. This approach feels less formal but equally special, perfect for gathering around the table with loved ones.

    Storage & Troubleshooting Guide

    Proper Storage Methods

    Leftover prime rib is a luxury worth preserving properly! Store any uneaten portions in airtight containers in the refrigerator for up to 4 days. I like to slice only what we’ll eat for the initial meal, keeping the remaining roast whole to retain moisture. For longer storage, wrap individual portions tightly in plastic wrap, then foil, before freezing for up to 2 months. When reheating, avoid the microwave which can toughen the meat. Instead, bring slices to room temperature, then warm gently in a 250°F oven with a splash of beef broth until just heated through—about 15-20 minutes. This low-and-slow approach preserves the roast’s tender texture and prevents it from cooking further.

    Common Mistakes to Avoid

    Even experienced cooks can encounter challenges with prime rib. The most common mistake is overcooking, which turns this premium cut into an expensive disappointment. Always use a thermometer rather than relying on time alone. If your roast is browning too quickly, loosely tent it with foil to slow the process. Conversely, if you’re not achieving that beautiful crust, try patting the exterior completely dry before seasoning and consider a brief stint under the broiler at the end. Remember that carving against the grain is essential for tenderness. If you’ve accidentally overcooked your prime rib, all is not lost—thinly slice it and serve with extra au jus or transform it into magnificent sandwiches with caramelized onions and good mustard.

    Frequently Asked Questions

    What’s the best cooking temperature for Ultimate Easy Prime Rib?

    Start at 225°F until the internal temperature reaches 120°F (for medium-rare), then rest for 20-30 minutes. Finish with a quick 500°F blast for 5-8 minutes to create a beautiful crust.

    Should I remove the bones before cooking?

    No need! Cook with the bones attached for maximum flavor, then remove them for easier carving after resting. You can even ask your butcher to cut and tie them back on.

    How much prime rib should I buy per person?

    Plan for ¾ pound per adult for bone-in cuts (½ pound for boneless). This accounts for shrinkage during cooking and ensures everyone gets their fill.

    Can I prepare any parts of this recipe ahead of time?

    Absolutely! Season your roast up to 24 hours in advance and refrigerate uncovered. This creates a dry exterior for better browning and allows the seasonings to penetrate.

    What’s the best way to check if my prime rib is done?

    Always use a reliable meat thermometer inserted into the thickest part. For medium-rare, remove at 120-125°F as it will continue cooking during rest time.

    Final Thoughts

    Creating the Ultimate Easy Prime Rib doesn’t require professional culinary training—just attention to detail and quality ingredients. The magic happens in that perfect balance of a seasoned crust and tender, juicy interior that simply melts in your mouth. I’ve found that this dish creates more than just a meal; it creates memories around the table as everyone savors each bite. There’s something deeply satisfying about mastering this classic centerpiece that has intimidated home cooks for generations. So gather your loved ones, uncork a special bottle of wine, and enjoy the well-deserved compliments as you serve this magnificent roast. For more delicious recipe inspirations, visit our Pinterest page and discover your next culinary adventure.