Blog

  • Slow Cooker Beef Ragu with Pappardelle | Easy Hearty Italian Pasta Recipe

    Slow Cooker Beef Ragu with Pappardelle | Easy Hearty Italian Pasta Recipe

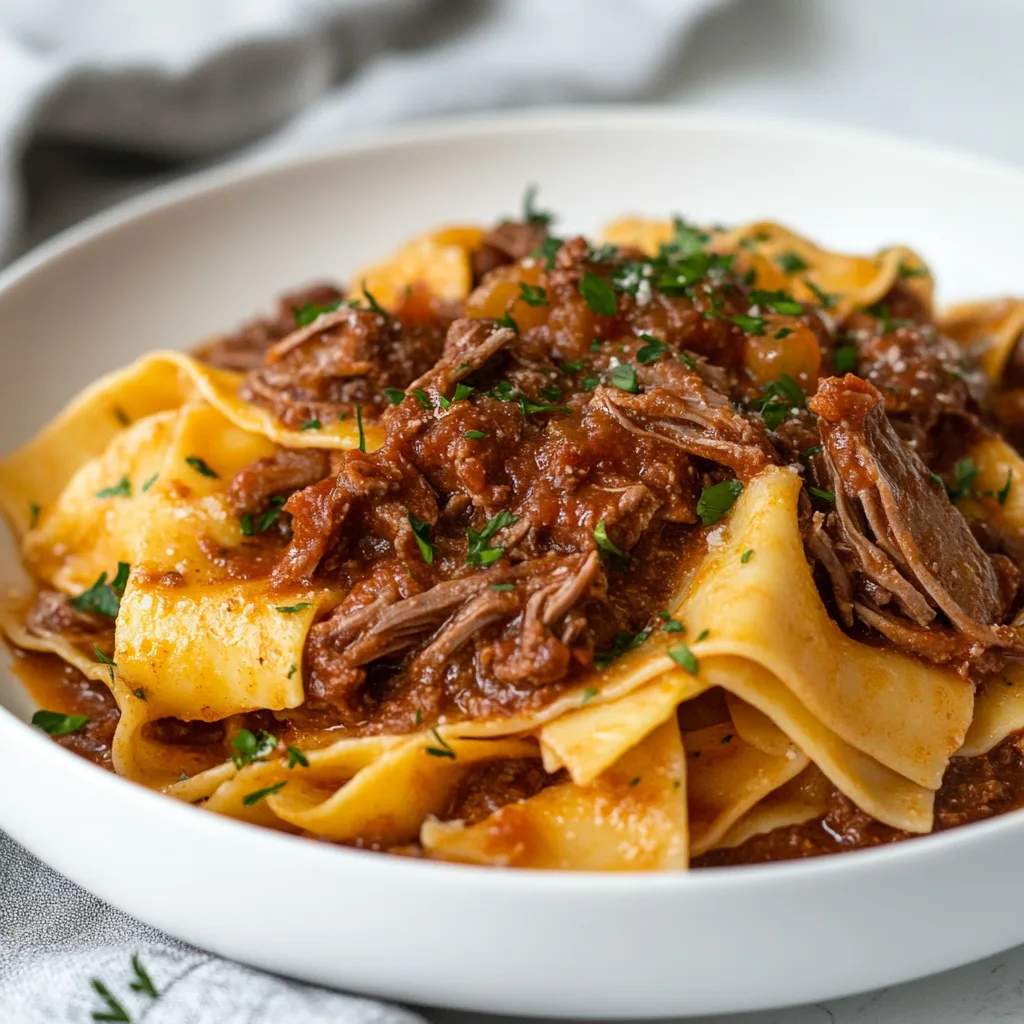
    There’s something magical about walking into a home filled with the rich aroma of Slow Cooker Beef Ragu with Pappardelle that’s been simmering all day. I discovered this recipe during a particularly cold winter when I craved something that would warm both my kitchen and soul. The tender beef falling apart with the slightest touch, the deep tomato sauce infused with herbs, and the wide pappardelle noodles that cradle every bit of that delicious sauce – it’s the ultimate comfort food that requires minimal effort but delivers maximum flavor. If you’re looking for a meal that practically makes itself while filling your home with mouthwatering aromas, this slow cooker recipe is about to become your new favorite.
    Slow Cooker Beef Ragu with Pappardelle | Easy Hearty Italian Pasta Recipe

    Recipe

    Why You’ll Love This Slow Cooker Beef Ragu with Pappardelle

    Perfect for Busy Days

    This beef ragu is my go-to recipe when life gets hectic but I still want to serve something that tastes like I’ve been cooking all day. The beauty lies in its set-it-and-forget-it nature – just 15 minutes of morning prep yields a restaurant-quality dinner. I remember frantically assembling this on a Wednesday morning before a day full of meetings, and coming home to what smelled like I had a personal chef. The slow cooker transforms tough beef cuts into melt-in-your-mouth tenderness while you’re away, breaking down the connective tissues and infusing the meat with the rich flavors of wine, tomatoes, and herbs. It’s truly kitchen magic at its finest.

    Budget-Friendly Elegance

    One of the things I adore about this recipe is how it transforms inexpensive cuts of beef into something that feels utterly luxurious. Chuck roast or beef brisket – cuts that would be tough if quickly cooked – become velvety and tender after hours in the slow cooker. I once made this for a dinner party and my guests were convinced I’d splurged on prime cuts! The slow cooking process extracts deep flavor from affordable ingredients, making this ragu perfect for feeding a crowd without breaking the bank. Plus, it’s one of those meals that actually tastes better the next day, making it perfect for meal prep and stretching your grocery budget even further.

    Essential Tips & Tricks

    The Perfect Sear

    Don’t skip browning the meat – this 5-minute step creates the rich foundation that makes this ragu extraordinary. I learned this the hard way after once rushing and skipping this step, and while the result was still good, it lacked that deep, complex flavor. Heat your pan until it’s smoking hot, then sear the seasoned beef chunks in batches until they develop a dark brown crust. This caramelization creates the Maillard reaction – the scientific process that develops hundreds of flavor compounds. After searing, deglaze the pan with a splash of wine to capture every bit of those browned bits (what chefs call fond) – they’re concentrated flavor bombs that will elevate your sauce from good to unforgettable.

    Layering Aromatics

    The secret to restaurant-quality depth in this ragu lies in properly layering aromatics. Start by sautéing onions until translucent, then add garlic just until fragrant (about 30 seconds) to prevent bitterness from overcooked garlic. I like to add a finely diced carrot and celery stalk too – they practically melt away during cooking while adding subtle sweetness.

    A game-changing trick I learned from an Italian grandmother is to add a parmesan rind to the slow cooker – it imparts an incredible umami richness without overwhelming the sauce. For an elevated finish, try adding fresh herbs in two stages: woody herbs like rosemary and thyme go in at the beginning, while delicate herbs like basil or parsley should be stirred in just before serving, like in this creamy butternut squash and sage gratin.

    Serving Ideas & Creative Variations

    Perfect Pasta Pairings

    While traditional pappardelle is the classic choice for beef ragu, don’t feel limited if you can’t find it. The key is choosing pasta with nooks and ridges to capture the sauce. Tagliatelle, fettuccine, or even rigatoni work beautifully. I’ve even served it over creamy polenta on particularly cold nights for the ultimate comfort meal. The crucial technique is to finish cooking your pasta directly in the sauce – reserve about ½ cup of starchy pasta water, then add your al dente pasta to the ragu and toss for 1-2 minutes.

    This allows the pasta to absorb the flavors while the starchy water helps the sauce cling to every strand. A final sprinkle of fresh parsley and grated Parmesan brings brightness and sharpness that cuts through the richness.

    Slow Cooker Beef Ragu with Pappardelle | Easy Hearty Italian Pasta Recipe

    Global Flavor Twists

    While this classic Italian-inspired ragu is perfect as-is, I love experimenting with different flavor profiles. For a Spanish twist, add smoked paprika, a pinch of saffron, and substitute sherry for the wine. A Greek variation with oregano, cinnamon, and a touch of orange zest creates an entirely different experience with the same basic technique.

    My personal favorite variation came about when I was out of wine but had leftover coffee in the pot – the depth it added was remarkable! You could even take inspiration from slow cooker Korean BBQ beef by adding gochujang, soy sauce, and a touch of honey for a fusion version. The slow cooker method works beautifully with these variations, allowing the flavors to meld and develop complexity.

    Storage & Troubleshooting Guide

    Freezing & Reheating

    This ragu is perfect for batch cooking since it freezes beautifully for up to 3 months. I always make a double batch and freeze half in portion-sized containers for emergency dinners. The key to successful freezing is cooling the ragu completely before transferring to freezer-safe containers, leaving about an inch of headspace for expansion. For best flavor, thaw overnight in the refrigerator rather than using the microwave defrost function. When reheating, add a splash of beef broth or water if the sauce has thickened too much. I find the flavor actually improves after freezing – something about the time allows the ingredients to meld even more beautifully, making this perfect for meal prep or preparing for future dinner parties.

    Fixing Common Issues

    If your ragu seems too thin after cooking, there’s an easy fix: remove the lid for the last 30-60 minutes of cooking time to allow excess liquid to evaporate. Alternatively, you can create a slurry with 1 tablespoon each of cornstarch and cold water, then stir it into the hot ragu and cook for an additional 15 minutes. For ragu that’s too thick, simply add beef stock, tomato sauce, or even a splash of red wine to reach your desired consistency.

    If you find the flavor needs more depth, try adding a teaspoon of umami boosters like Worcestershire sauce, soy sauce, or anchovy paste – these ingredients won’t make the dish taste like their source, but will add that elusive depth that makes restaurant dishes so satisfying.

    Frequently Asked Questions

    Can I make Slow Cooker Beef Ragu with Pappardelle in an Instant Pot?

    Yes! Brown the meat using the sauté function, then pressure cook for 45 minutes with natural release. The flavor won’t be quite as developed as the slow-cooked version, but it’s delicious for last-minute dinners.

    What’s the best cut of beef for ragu?

    Chuck roast is ideal because it has the perfect fat-to-meat ratio that becomes tender and juicy when slow-cooked. Beef brisket, short ribs, or stewing beef are excellent alternatives.

    Can I make this recipe ahead of time?

    Absolutely! The flavor actually improves after 1-2 days in the refrigerator. Store the ragu separate from pasta and reheat gently on the stovetop with a splash of broth if needed.

    Is this recipe gluten-free?

    The ragu itself is gluten-free, but traditional pappardelle contains gluten. Serve with gluten-free pasta or polenta for a completely gluten-free meal.

    Can I add vegetables to make it healthier?

    Definitely! Finely diced carrots, celery, and mushrooms blend seamlessly into the sauce. Add diced bell peppers or zucchini during the last hour of cooking for more texture.

    Final Thoughts

    There’s something profoundly satisfying about creating a Slow Cooker Beef Ragu with Pappardelle that tastes like it came from an Italian grandmother’s kitchen with just minutes of active cooking time. I’ve made this recipe countless times, tweaking it slightly each round, and it never fails to bring comfort and joy to my table. The combination of tender beef, rich sauce, and perfectly cooked pasta creates a meal that feels like a warm hug on a plate. Whether you’re cooking for family, entertaining guests, or simply treating yourself, this dish delivers restaurant-quality results with minimal effort. For more cozy comfort food recipes, check out my collection on Pinterest where I’m always adding new slow cooker favorites.
  • Chef John’s Perfect Prime Rib Recipe | Juicy & Tender Prime Rib Guide

    Chef John’s Perfect Prime Rib Recipe | Juicy & Tender Prime Rib Guide

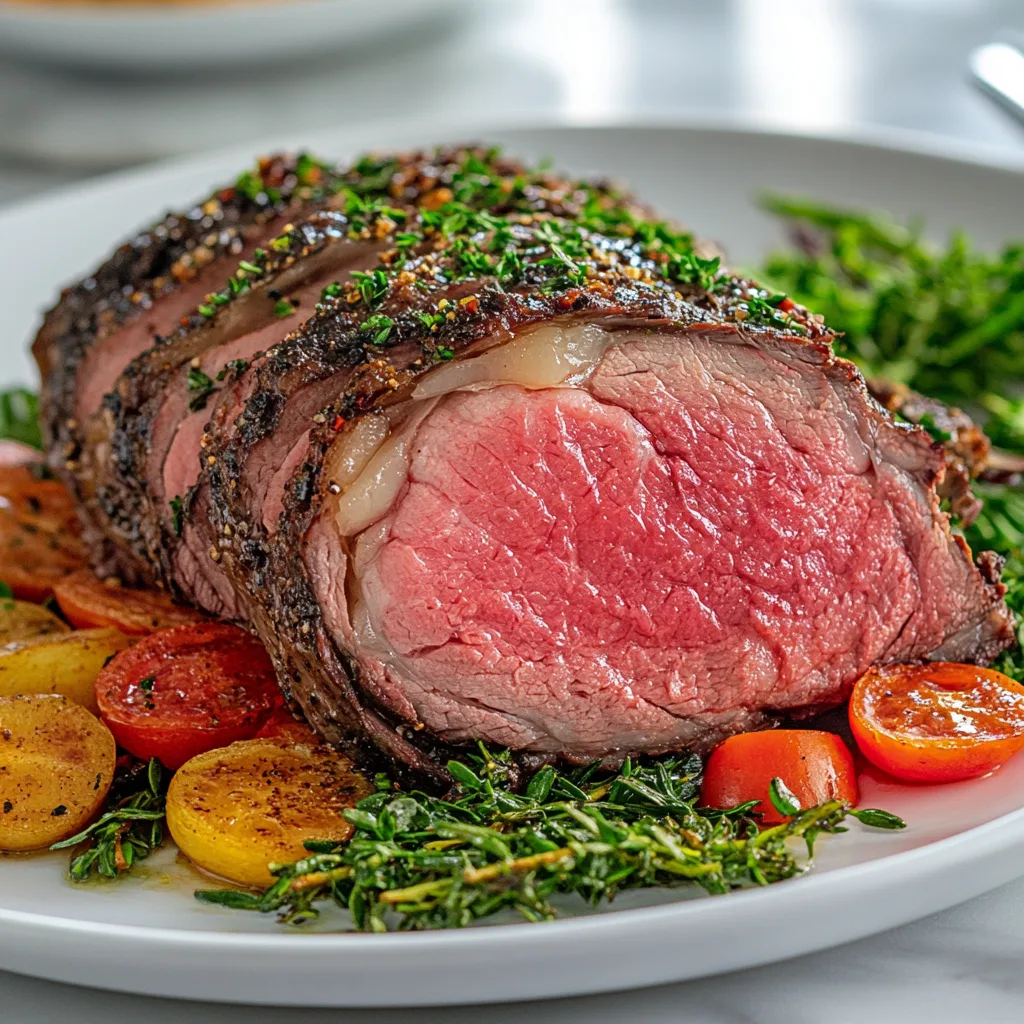
    Chef John’s Perfect Prime Rib is a showstopper that transforms any dinner into a special occasion. The first time I made this recipe, my kitchen filled with an aroma so mouthwateringly rich that my husband appeared from his office before I even called for dinner! There’s something magical about the way the seasoned crust develops while the interior stays perfectly pink and juicy.

    I’ve tested countless prime rib methods over the years, but Chef John’s technique consistently delivers that restaurant-quality result we all crave. Whether you’re planning a holiday feast or simply want to elevate a Sunday dinner, this foolproof method will have your guests reaching for seconds—and asking for your secret. Let’s dive into creating the perfect prime rib that will become your signature dish.

    Chef John's Perfect Prime Rib Recipe | Juicy & Tender Prime Rib Guide

    Recipe

    Why You’ll Love This Chef John’s Perfect Prime Rib

    Foolproof Method for Perfect Results

    Chef John’s method takes the guesswork out of cooking prime rib, which is exactly what I needed after my first disastrous attempt years ago. The reverse-sear technique ensures the meat cooks evenly from edge to edge with that gorgeous rosy center. Unlike traditional methods that can leave you with an overcooked exterior and undercooked middle, this approach delivers consistent results every time. I love how the initial low-temperature roasting slowly brings the meat to temperature, allowing the fat to render and flavor to develop. Then the final high-heat blast creates that coveted crusty exterior that makes you want to sneak pieces off before it even reaches the table.

    Restaurant-Quality Flavor at Home

    The flavor profile of this prime rib is simply extraordinary. The herb crust creates a savory exterior that complements the rich, buttery meat perfectly. What I appreciate most is how this method allows the natural flavor of the beef to shine through—it’s not masked by overwhelming seasonings. The slow roasting process allows the fat to baste the meat from within, creating that melt-in-your-mouth texture that usually costs a small fortune at steakhouses. My mother-in-law (who’s notoriously hard to impress) actually asked for the recipe after our last Christmas dinner. Trust me, when you taste the perfect balance of seasoned crust and juicy interior, you’ll understand why this recipe has earned its legendary status.

    Essential Tips & Tricks

    Choosing and Preparing Your Roast

    Selecting the right cut is your first step toward prime rib perfection. Look for a well-marbled roast with the bone intact—this provides better flavor and more even cooking. I prefer asking my butcher for the center cut of a rib roast (ribs 6-9) for the optimal balance of meat and fat. Let your roast sit at room temperature for at least 2 hours before cooking; this step is non-negotiable for even cooking!

    Season generously with kosher salt the night before and refrigerate uncovered—this creates a dry exterior that helps develop that amazing crust. When you’re ready to cook, pat the roast dry again and apply your herb mixture. This attention to detail makes all the difference between a good prime rib and an unforgettable one.

    Temperature Management Is Everything

    The secret to Chef John’s method lies in precise temperature control. Invest in a good digital thermometer with a probe—it’s worth every penny for perfect prime rib. Start at a low temperature (200-250°F) until the internal temperature reaches about 120°F for medium-rare. This slow approach allows the heat to penetrate evenly without overcooking the exterior. After removing and resting, crank your oven to its highest setting (500-550°F) for that final sear. The most critical step? Resting your roast properly between stages. This redistribution of juices makes the difference between a good prime rib and one that has your guests talking about it for years.

    For more temperature-sensitive recipes that impress, check out my baked pears with berries, honey, walnuts and blue cheese for an elegant dessert pairing.

    Serving Ideas & Creative Variations

    Classic Accompaniments That Shine

    Prime rib deserves sides that complement its rich flavor without overshadowing it. My go-to combination includes creamy horseradish sauce (made with fresh horseradish when I can find it) and a simple au jus from the drippings. For vegetables, roasted garlic mashed potatoes and Yorkshire puddings are traditional favorites that never disappoint. I also love serving it with roasted asparagus or green beans with garlic and almonds for a fresh contrast to the richness of the meat. The key is balance—you want sides that stand up to the beef without competing with it. Last Christmas, I added a crisp arugula salad with lemon vinaigrette that cut through the richness perfectly and brightened up the whole plate.

    Unexpected Twists on Tradition

    While the classic preparation is divine, don’t be afraid to put your own spin on Chef John’s method. Try adding coffee grounds to your herb rub for a deeper, more complex flavor profile—I discovered this trick accidentally when cooking half-asleep one morning! Another variation I love is incorporating crushed peppercorns and a cognac cream sauce for a sophisticated “au poivre” twist. For something completely different, experiment with global flavor profiles like a Mediterranean herb crust with rosemary, oregano, and lemon zest. If you’re feeling adventurous, serve your prime rib alongside unexpected sides like winter greens with pine nuts and garlic for a delightful contrast of textures and flavors that will surprise your guests in the best possible way.

    Chef John's Perfect Prime Rib Recipe | Juicy & Tender Prime Rib Guide

    Storage & Troubleshooting Guide

    Making the Most of Leftovers

    Prime rib leftovers are practically a second gift! Store them properly by wrapping tightly in plastic wrap or placing in an airtight container in the refrigerator for up to 4 days. For the best texture when reheating, slice the meat thinly and warm it gently in beef broth over low heat—this prevents it from drying out.

    My favorite way to repurpose leftovers is in upscale sandwiches with caramelized onions and horseradish aioli on crusty bread. For something different, dice the meat and add it to breakfast hash with potatoes and bell peppers, topped with a runny egg. The rendered fat is liquid gold too! I save it in a small container in the fridge to use for roasting potatoes or as the base for gravy in future meals.

    Troubleshooting Common Issues

    Even with the best techniques, challenges can arise. If your prime rib develops a gray band beneath the crust (instead of being pink throughout), your initial roasting temperature was likely too high. Next time, reduce it by 25°F and use a probe thermometer to monitor more closely.

    If your crust isn’t as crispy as desired after the final sear, try patting the roast extra dry before the high-heat stage or extending the sear time by 1-2 minutes. For a roast that’s underdone in the center but perfect on the outside, you can slice the center portions and briefly sear them in a hot pan. Remember that carryover cooking will increase the internal temperature by 5-10°F after removing from the oven, so always account for this when determining when to take out your roast.

    Frequently Asked Questions

    How do I calculate cooking time for Chef John’s Perfect Prime Rib?

    Plan for about 15 minutes per pound during the initial low-temperature roast, plus 8-10 minutes resting and 5-8 minutes for the final sear. Always use a thermometer rather than relying solely on time.

    Can I use this method for a boneless rib roast?

    Yes! Boneless roasts cook slightly faster, so begin checking the temperature about 30 minutes earlier. The flavor will still be excellent, though bone-in provides more depth.

    What’s the best way to reheat leftover prime rib without overcooking it?

    Wrap slices in foil with a splash of beef broth and warm in a 250°F oven until just heated through (about 10-15 minutes). Never microwave—it will toughen the meat.

    How far in advance can I season the roast?

    For best results, salt the roast 24 hours ahead and refrigerate uncovered. Apply the herb rub just before cooking for the freshest flavor.

    Is it necessary to let the roast come to room temperature before cooking?

    Absolutely! This crucial step ensures even cooking. Allow 2-3 hours for a large roast to properly come to room temperature before roasting.

    Final Thoughts

    Chef John’s Perfect Prime Rib has become my signature holiday dish, the one my family requests year after year. There’s something deeply satisfying about mastering this technique—watching faces light up as you bring the roast to the table, hearing the appreciative murmurs as you slice into that perfectly pink center. The method might seem intimidating at first, but I promise the results are worth every minute of preparation.

    The beauty lies in its simplicity: quality ingredients, careful temperature control, and patience. Whether you’re cooking for a special occasion or simply treating yourself, this prime rib recipe delivers restaurant-quality results that create lasting memories around your table. For more holiday inspiration, visit my Pinterest board where I share seasonal favorites and cooking tips.

  • Delicious Almond Croissant Bites Recipe | Perfect Flaky Pastry Treats

    Delicious Almond Croissant Bites Recipe | Perfect Flaky Pastry Treats

    These Almond Croissant Bites transform ordinary puff pastry into bite-sized morsels of pure bliss! Every time I make these for weekend brunch, my kitchen fills with the intoxicating aroma of toasted almonds and buttery pastry. There’s something magical about that first bite—crisp, flaky layers giving way to a rich almond cream filling that’s simply irresistible. I discovered this recipe during a rainy Sunday when I was craving something special but didn’t want to spend hours in the kitchen. Now these little treasures have become my go-to when I want to make breakfast feel like a celebration without the fuss of traditional croissants.

    Delicious Almond Croissant Bites Recipe | Perfect Flaky Pastry Treats

    Recipe

    Why You’ll Love These Almond Croissant Bites

    Perfect Balance of Flavors and Textures

    The contrasting textures in these almond croissant bites are what make them truly special. The exterior develops this gorgeous golden crispness that shatters delicately with each bite, while the interior remains tender and buttery. I love how the almond filling caramelizes slightly at the edges, creating little pockets of intensified flavor. The sweet almond aroma fills your kitchen as they bake, creating an experience that’s as much about the journey as the destination. My neighbor once knocked on my door just to ask what that heavenly smell was—that’s how irresistible these little treats are!

    Quick and Impressive

    You won’t believe how deceptively simple these are to prepare! Using store-bought puff pastry cuts the prep time dramatically while still delivering that authentic bakery-quality result. I can have these ready for the oven in just 15 minutes, which makes them perfect for those mornings when you want something special without the 3 AM wake-up call that traditional croissants require. They look so professional when finished that guests always assume I’ve spent hours making them. I’ve served these at everything from casual coffee dates to baby showers, and they never fail to impress even my most culinary-savvy friends.

    Essential Tips & Tricks

    Mastering the Almond Filling

    The almond cream (frangipane) is the heart and soul of these bites, so getting it right makes all the difference. I’ve found that room temperature butter creates the silkiest texture—cold butter will leave lumps, while melted butter changes the consistency entirely. For the most aromatic filling, toast your almond flour in a dry skillet for 3-4 minutes before using it. This simple step intensifies the nutty flavor exponentially. A touch of almond extract enhances the natural almond notes, but be careful—just ¼ teaspoon is plenty, as too much can overwhelm the delicate balance of flavors in these little bites.

    Working With Puff Pastry

    The secret to perfectly flaky layers is keeping your puff pastry cold until the very moment you’re ready to work with it. I let mine thaw in the refrigerator overnight rather than on the counter, which prevents the butter layers from melting prematurely. When cutting the pastry, use a sharp knife or pizza wheel with a straight down motion—don’t drag it through the dough, which can seal those precious layers together. If your kitchen is warm, work with half the dough at a time, keeping the rest chilled. This prevents the frustration of sticky, unmanageable pastry and ensures those beautiful layers stay distinct.

    Serving Ideas & Creative Variations

    Perfect Pairings

    These almond croissant bites shine brightest when served alongside the right beverages. A frothy cappuccino or strong espresso creates a classic café experience, while a glass of sparkling wine turns brunch into a celebration. For family gatherings, I love setting up a waffle bar alongside these bites for a mix-and-match feast. During the holidays, try serving them with spiced hot chocolate for an extra cozy touch. I like to dust them with powdered sugar just before serving and arrange them on a cake stand with fresh berries scattered around—this simple presentation elevates them from snack to centerpiece.

    Delicious Almond Croissant Bites Recipe | Perfect Flaky Pastry Treats

    Seasonal Adaptations

    The beauty of these bites is how easily they adapt to seasonal ingredients. In summer, I fold fresh berries into the almond cream or add a dab of good raspberry jam before baking. Fall calls for thinly sliced apples and a sprinkle of cinnamon sugar on top. During the holidays, I add orange zest and a splash of Grand Marnier to the filling for a festive twist. For a savory-sweet variation that’s perfect for brunch, try adding a few dark chocolate chips and a tiny pinch of sea salt to the filling. The possibilities are endless, making this recipe one you’ll return to throughout the year.

    Storage & Troubleshooting Guide

    Keeping Them Fresh

    These almond croissant bites are at their absolute best when enjoyed fresh from the oven, but that doesn’t mean leftovers are a lost cause. Store completely cooled bites in an airtight container at room temperature for up to 2 days. To revive their crispness, place them in a 300°F oven for 5 minutes before serving. For longer storage, freeze unbaked assembled bites on a baking sheet, then transfer to a freezer bag once solid. They’ll keep for up to 3 months and can be baked straight from frozen—just add 3-5 minutes to the baking time.

    Common Pitfalls and Solutions

    The most common issue with these bites is filling overflow, which happens when you use too much almond cream or don’t seal the edges properly. I’ve learned to leave a ¼-inch border around the filling and press firmly when sealing. If your pastry isn’t rising properly, your oven might not be hot enough—always preheat thoroughly and consider using an oven thermometer to verify the temperature. Pale, soggy bottoms usually indicate underbaking or an oven rack positioned too high. I always bake on the middle rack and sometimes use a preheated baking stone beneath the sheet pan for extra crispy bottoms.

    Frequently Asked Questions

    Can I make Almond Croissant Bites ahead of time?

    Yes! Prepare them up to the point of baking, then refrigerate for up to 24 hours or freeze for up to 3 months. Bake directly from cold, adding a few extra minutes to the baking time.

    What’s the best substitute for almond flour?

    Hazelnut flour works beautifully as a 1:1 substitute. For nut allergies, try ground sunflower seeds, though the flavor profile will change slightly.

    Why did my puff pastry not rise properly?

    Your oven was likely not hot enough. Always preheat thoroughly and avoid opening the door during the first 15 minutes of baking.

    Can I use homemade puff pastry for Almond Croissant Bites?

    Absolutely! Homemade puff pastry will give even more spectacular results, though it requires significantly more time and effort.

    How do I know when they’re perfectly done?

    Look for deep golden edges, a puffed appearance, and a firm feel when gently pressed. The bottoms should be golden brown, not pale.

    Final Thoughts

    These Almond Croissant Bites have become my signature breakfast treat—the one friends request when they visit and the recipe most frequently asked for after gatherings. There’s something so satisfying about creating something that looks and tastes like it came from a high-end patisserie with such minimal effort. The combination of buttery, flaky pastry with that rich almond filling creates little moments of joy that elevate ordinary mornings into something special. I hope these bites bring the same warmth and delight to your kitchen as they have to mine. For more delicious breakfast inspirations, be sure to check out my Pinterest board where I’m always adding new ideas!

  • Create Your Own Delicious Yogurt Parfait Station | Healthy & Customizable Snacks

    Create Your Own Delicious Yogurt Parfait Station | Healthy & Customizable Snacks

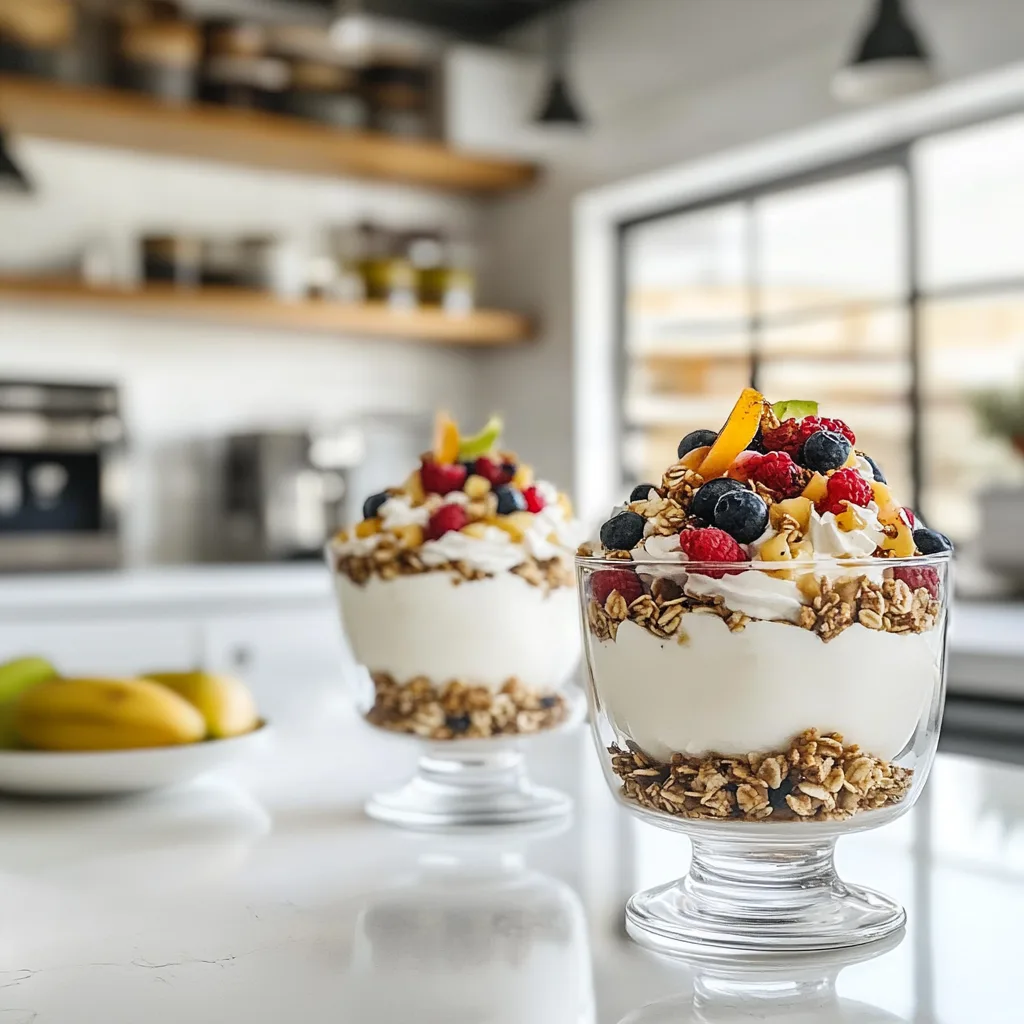
    Setting up a Yogurt Parfait Station transforms ordinary breakfast into a delightful, interactive experience. I discovered this morning magic when hosting my sister’s baby shower brunch—watching guests layer creamy yogurt with crunchy granola created such joy! The beauty lies in its simplicity and endless customization. With just a few colorful toppings arranged in pretty bowls, everyone creates their perfect breakfast masterpiece. The vibrant berries and golden honey drizzles aren’t just Instagram-worthy; they offer a nutritious start that feels like an indulgence. Ready to create your own breakfast magic? Let me show you how to build the ultimate yogurt parfait station that will have everyone lingering at the table.

    Create Your Own Delicious Yogurt Parfait Station | Healthy & Customizable Snacks

    Recipe

    Why You’ll Love This Yogurt Parfait Station

    Perfect for Any Gathering

    Yogurt parfait stations work brilliantly for everything from sleepy weekend mornings to elegant brunch gatherings. When I hosted my daughter’s graduation breakfast, the parfait station was the unexpected hit! It’s wonderfully adaptable to any season or occasion. In summer, I load up on fresh berries; for fall gatherings, I add apple compote and pumpkin granola. The beauty is in the balance—healthy yet indulgent, elegant yet approachable. Plus, it’s naturally accommodating for dietary preferences. Your gluten-free friend can skip the granola while your vegan cousin can choose coconut yogurt. Everyone leaves happy and well-fed!

    Budget-Friendly Elegance

    Creating an impressive spread doesn’t require emptying your wallet. The yogurt parfait station is my go-to when I want to seem fancy without the expense. The base ingredients are affordable—yogurt in bulk, homemade granola (so much cheaper than store-bought!), and seasonal fruits that won’t break the bank. I’ve found that presentation elevates everything—those mason jars collecting dust in your cabinet? Perfect parfait vessels! Small bowls from your kitchen, cake stands for height, and handwritten labels add charm without cost. The result looks like a catered affair while being surprisingly economical.

    Essential Tips & Tricks

    Setting Up Your Station

    The key to parfait station success lies in thoughtful arrangement. I learned this the hard way after a chaotic first attempt! Start with a logical flow—place empty vessels at one end, followed by yogurt varieties, then dry toppings, fruits, and finally sauces and drizzles. Height variation creates visual interest; I use cake stands, wooden crates, or stacked books covered with pretty cloths. Temperature matters too—keep yogurt chilled in ice baths and fruits fresh in refrigerated bowls. Don’t forget practical touches like serving spoons for each item and napkins nearby. The final touch? A little sign with suggested combinations for inspiration, especially helpful for parfait novices.

    Yogurt and Topping Selection

    The foundation of any great parfait station starts with yogurt variety. I always include at least three options: a creamy full-fat Greek yogurt, a lighter regular yogurt, and a dairy-free alternative like coconut or almond-based yogurt. For toppings, think texture and color contrasts! Crunchy elements are essential—granola, toasted nuts, seeds, and even crushed cookies or graham crackers. Fresh fruits provide natural sweetness—berries, banana slices, diced mango, and seasonal specialties. Don’t forget the finishing touches: honey, maple syrup, fruit compotes, nut butters, chocolate chips, coconut flakes, and a sprinkle of cinnamon or cardamom. The magic happens when these elements combine!

    Create Your Own Delicious Yogurt Parfait Station | Healthy & Customizable Snacks
    Create a delicious and customizable yogurt parfait experience with a variety of fresh fruits, granola, nuts, and sweet toppings perfect for breakfast or a healthy snack.

    Serving Ideas & Creative Variations

    Seasonal Inspirations

    Adapting your yogurt parfait station to the seasons creates excitement and freshness year-round. In summer, I build around sun-ripened berries and tropical fruits with coconut flakes and macadamia nuts. Fall brings apple cinnamon combinations with maple-sweetened yogurt and pumpkin seeds. Winter calls for pomegranate jewels, citrus segments, and warming spices like nutmeg and cardamom. Spring inspires strawberry-rhubarb compotes with pistachios and edible flowers. I love creating themed stations too—a tropical escape in February with mango and passion fruit, or a cozy autumn harvest with apple butter and cranberries. The seasonal approach keeps your parfait station feeling special and anticipated.

    Make-Ahead Components

    Preparing elements in advance makes morning assembly a breeze. My Sunday ritual often includes making components for weekday parfaits. Homemade granola keeps for weeks in airtight containers—I make double batches of my maple-pecan blend. Fruit compotes and sauces like berry coulis or apple butter can be prepared days ahead and refrigerated. Even fruit can be prepped—berries washed and dried, melons and mangoes diced, citrus segmented. For special occasions, I prepare individual parfait jars with non-perishable layers the night before, leaving space to add fresh elements in the morning. This approach works wonderfully alongside a breakfast casserole for effortless entertaining.

    Storage & Troubleshooting Guide

    Keeping Everything Fresh

    Maintaining freshness is the challenge of any parfait station. I’ve learned to stagger my setup—putting out small amounts and refreshing as needed rather than displaying everything at once. For yogurt, keep backup containers in the refrigerator and use ice baths for serving bowls during longer events. Fruits that brown quickly (apples, bananas) benefit from a light lemon juice toss. Berries last longer unwashed until just before serving. Granola and nuts should be stored in airtight containers until needed to prevent sogginess. For make-ahead parfaits, remember the layering rule: crunchy items always on top or added last moment to preserve texture. With thoughtful planning, everything stays picture-perfect throughout your gathering.

    Troubleshooting Common Issues

    Even the most carefully planned parfait stations can face challenges. If yogurt becomes too runny (especially Greek yogurt when stirred), I keep a strainer and cheesecloth nearby to quickly thicken a fresh batch. For soggy granola, have a backup container of fresh, crisp granola to refresh your display. Fruits looking tired? A quick toss with a splash of orange juice revives their appearance. Temperature fluctuations can cause condensation—keep a clean towel handy to dab containers dry. If you’re serving outdoors, consider placing bowls in larger vessels filled with ice. And always have backup ingredients for popular items that run low—nothing disappoints guests more than an empty berry bowl when they reach the front of the line!

    Frequently Asked Questions

    How much yogurt should I prepare per person for a yogurt parfait station?

    Plan for about 6-8 ounces of yogurt per person. For a group of 10, I recommend having at least 80 ounces (5 pounds) of yogurt available across different varieties to ensure everyone gets their fill.

    Can I set up a yogurt parfait station the night before?

    Partially! Prepare dry ingredients, wash berries, and chop fruits the night before. Store separately in the refrigerator. Set out serving dishes and utensils, but wait until morning to arrange yogurt and fresh toppings.

    What’s the best way to keep yogurt cold during a long brunch?

    Place yogurt containers in bowls nested in larger bowls filled with ice. Refresh ice as needed. For outdoor events, consider keeping backup yogurt in a cooler and refilling smaller serving bowls periodically.

    How can I make my Yogurt Parfait Station more visually appealing?

    Use varying heights with cake stands or stacked boxes covered with pretty cloths. Add color through fresh flowers, vibrant fruits, and decorative labels. Clear glass containers showcase the beautiful layered parfaits.

    What are some unique toppings beyond the basics for parfaits?

    Try candied citrus peel, cookie crumbles, cacao nibs, freeze-dried fruits, edible flower petals, flavored honey sticks, date caramel, matcha powder, or even savory elements like rosemary-infused honey.

    Final Thoughts

    Creating a Yogurt Parfait Station elevates the ordinary into something magical while being wonderfully practical. I’ve watched quiet mornings transform into memory-making moments as friends linger, crafting second (and third!) parfait creations. The beauty is in its flexibility—whether you’re hosting a grand celebration or simply making Tuesday breakfast special for your family. Start simple and expand your offerings as you discover what combinations delight your guests most. The interactive nature invites conversation and creativity in equal measure. Your Yogurt Parfait Station might just become the signature gathering your loved ones request time and again. Find more inspiration for your breakfast spreads on my Pinterest boards where I’m constantly adding new ideas!

  • Best Waffle Bar | Delicious Freshly Made Waffles

    Best Waffle Bar | Delicious Freshly Made Waffles

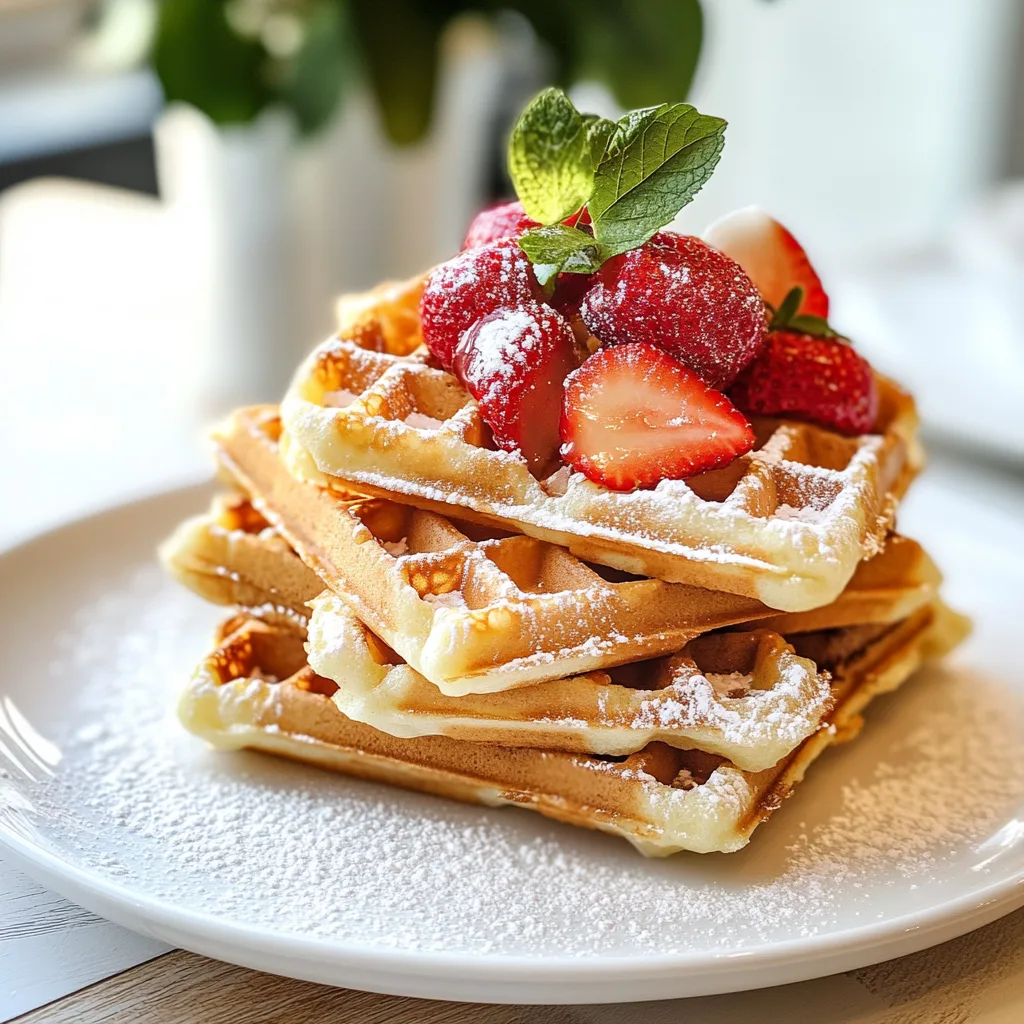
    A Waffle Bar is the ultimate crowd-pleasing breakfast that transforms ordinary mornings into memorable gatherings. There’s something magical about setting out a spread of golden, crispy waffles alongside colorful toppings that lets everyone create their perfect plate. I discovered the joy of waffle bars when hosting my sister’s baby shower brunch—watching guests’ eyes light up as they drizzled maple syrup and sprinkled berries onto warm waffles made me realize this wasn’t just breakfast; it was an experience. The beauty lies in its simplicity and flexibility.

    Whether you’re feeding sleepy weekend houseguests or hosting a special celebration, a waffle bar brings people together with minimal effort and maximum delight. Let me show you how to create a waffle bar that will have everyone asking for seconds.

    Best Waffle Bar Near You | Delicious Freshly Made Waffles

    Recipe

    Why You’ll Love This Waffle Bar

    Perfect for Any Occasion

    Waffle bars are wonderfully versatile for everything from lazy Sunday mornings to holiday celebrations. I’ve set them up for Christmas morning when the house was full of excited children and sleepy adults, and they’ve been a hit at graduation brunches where guests arrived at different times. The beauty is that waffles stay warm in a low oven, allowing everyone to eat when they’re ready. The self-serve aspect creates a relaxed atmosphere where guests can mingle while building their perfect waffle stack. Plus, the interactive nature naturally sparks conversation and laughter as people compare their creative topping combinations. It’s a stress-free hosting solution that feels special without requiring you to be stuck in the kitchen flipping pancakes to order.

    Customizable for Every Taste

    One of the greatest joys of hosting a waffle bar is watching how differently everyone approaches their plate. My niece piles on strawberries and whipped cream, while my husband goes straight for the peanut butter and banana combo. The endless possibilities mean that picky eaters and adventurous foodies alike will find something to love. You can easily accommodate dietary restrictions by offering gluten-free waffle batter or vegan toppings without making anyone feel singled out. I’ve found that setting out unexpected toppings like crumbled bacon, spiced apple compote, or lemon curd alongside the classics creates delightful surprise. This customization extends to the waffles themselves—try buttermilk, chocolate, or even cornmeal varieties to build an even more personalized experience.

    Essential Tips & Tricks

    Waffle Making Secrets

    The foundation of any great waffle bar starts with perfect waffles. I’ve learned through many Sunday experiments that the key to crispy exteriors with fluffy interiors is separating the eggs and folding in whipped egg whites just before cooking. Let your batter rest for 10 minutes before cooking—this allows the gluten to relax and the leavening agents to activate. Preheat your waffle iron thoroughly and lightly brush with melted butter between batches for easy release and extra flavor.

    If you’re making waffles for a crowd, don’t stress about serving them all at once. Instead, set your oven to 200°F and place finished waffles directly on the oven rack to keep them warm and crisp while you finish the batch, just like they do at breakfast buffets.

    Setting Up Your Display

    Creating an Instagram-worthy waffle bar is all about thoughtful presentation. Arrange your spread on different height levels using cake stands, wooden boards, and serving platters to create visual interest. I like to place warm toppings like fruit compotes or maple syrup in small pitchers or mason jars with pouring spouts to prevent sticky messes. Cold toppings work beautifully in colorful bowls with their own serving spoons.

    Consider the flow of your display—place waffles at one end, followed by syrups and sauces, then fruits and nuts, with whipped cream and other finishing touches at the end. Don’t forget practical touches like small plates, forks, and plenty of napkins! Label any special items (like sugar-free syrup or nut-free options) with cute cards to help guests navigate their choices.

    Serving Ideas & Creative Variations

    Seasonal Waffle Bar Themes

    Adapting your waffle bar to the seasons creates memorable brunches year-round. In summer, I focus on fresh berries and stone fruits with lemon-infused whipped cream and honey drizzles. Fall calls for warm spiced apple compote, pumpkin butter, and maple-candied pecans. Winter waffle bars feel festive with cranberry sauce, chocolate ganache, and peppermint whipped cream—perfect for holiday mornings. Spring inspires lighter options like citrus segments, floral honey, and lavender-scented whipped cream. You can even match your waffle flavors to the season: gingerbread waffles for winter, lemon-poppy seed for spring, cornmeal for summer barbecues, and pumpkin spice for autumn gatherings. Creating a signature seasonal syrup—like a cranberry maple or vanilla bean—elevates the entire experience.

    Best Waffle Bar Near You | Delicious Freshly Made Waffles

    Beyond Breakfast: Savory & Dessert Options

    Waffles aren’t just for breakfast! I’ve hosted evening waffle bars that completely surprised my guests with savory and dessert variations. For savory options, try herb-infused waffles topped with cream cheese, smoked salmon, and capers, or cornmeal waffles with pulled pork and coleslaw. Provide toppings like avocado, crumbled cheese, and hot sauce for a creative dinner alternative. Dessert waffle bars are pure magic—chocolate waffles with ice cream scoops, caramel sauce, and crushed cookies make an interactive dessert station that’s more fun than a standard cake. My favorite party trick is setting out both sweet and savory options with coordinating toppings, allowing guests to create multi-course meals all from the same waffle base. The versatility is endless!

    Storage & Troubleshooting Guide

    Make-Ahead Strategies

    Planning ahead is the secret to hosting a stress-free waffle bar. The batter can be prepared the night before and refrigerated—just give it a gentle stir before using. For even more convenience, pre-cook your waffles up to two days ahead, let them cool completely, then store in airtight containers with parchment paper between layers. When it’s time to serve, reheat them in a 350°F oven for 5-10 minutes until crisp and warm. Most toppings can also be prepared in advance—chop fruits, whip cream (with a stabilizer like powdered sugar), and make sauces up to 24 hours ahead.

    Store everything in separate containers in the refrigerator. I’ve found that assembling topping stations in portable trays the night before saves precious morning time—just pull them from the fridge and arrange them on your table.

    Common Waffle Problems Solved

    Even experienced waffle makers encounter occasional hiccups. If your waffles are coming out soggy rather than crisp, your iron might not be hot enough—wait for that ready light to ensure proper temperature. For waffles that stick, make sure you’re greasing the iron adequately between batches. If your waffles are too dense, your batter might be overmixed; fold ingredients gently just until combined. Pale waffles usually need more time to cook, while overly browned ones indicate your iron is too hot. For guests with dietary restrictions, have alternative batters ready: replace all-purpose flour with a 1:1 gluten-free blend, or make vegan waffles using plant milk and flax eggs.

    If your toppings are running low during service, quickly chop more fruit or set out additional options like chocolate chips or granola to extend your offerings.

    Frequently Asked Questions

    How many waffles should I prepare per person for a waffle bar?

    Plan for 1-2 waffles per person for a breakfast or brunch, depending on waffle size. For dessert waffle bars, smaller portions work well—about one waffle per person, cut into quarters for sampling.

    Can I set up a waffle bar outdoors?

    Absolutely! For outdoor waffle bars, use extension cords for waffle irons, keep foods at safe temperatures, and protect from insects with mesh food covers. Consider wind-resistant serving pieces and extra napkins.

    What’s the best waffle iron for a waffle bar?

    Belgian waffle makers create deep pockets for holding toppings, while traditional waffle irons make thinner, crispier waffles. For large gatherings, consider a double waffle maker or having multiple irons.

    How do I calculate quantities for waffle bar toppings?

    For a two-hour waffle bar serving 10 people, prepare about 4 cups of sliced fruits, 2 cups of nuts/granola, 1½ cups each of syrups and sauces, and 2 cups of whipped cream.

    What’s the best way to keep a waffle bar warm throughout serving?

    For the ultimate waffle bar experience, use chafing dishes for waffles, warming pots for syrups, and ice baths for cold toppings. Rotate fresh waffles into the serving station every 20 minutes.

    Final Thoughts

    Creating a waffle bar isn’t just about the food—it’s about crafting moments where people connect over something delicious. I still remember watching my normally reserved father-in-law pile his waffle with strawberries and chocolate sauce, then catch my eye with a sheepish grin that said, “Why not?” These little moments of joy are why I keep coming back to this versatile entertaining idea. The beauty of a waffle bar lies in its ability to make everyone feel special while keeping hosting simple.

    Whether you’re celebrating a milestone or simply making an ordinary weekend extraordinary, this interactive breakfast experience brings warmth and personality to your table. So heat up that waffle iron, set out your favorite toppings, and watch as your guests create not just personalized plates, but lasting memories around your table.

    Check out more breakfast inspiration on Pinterest!

  • Delicious Baked Pears with Berries, Honey, Walnuts & Blue Cheese Recipe

    Delicious Baked Pears with Berries, Honey, Walnuts & Blue Cheese Recipe

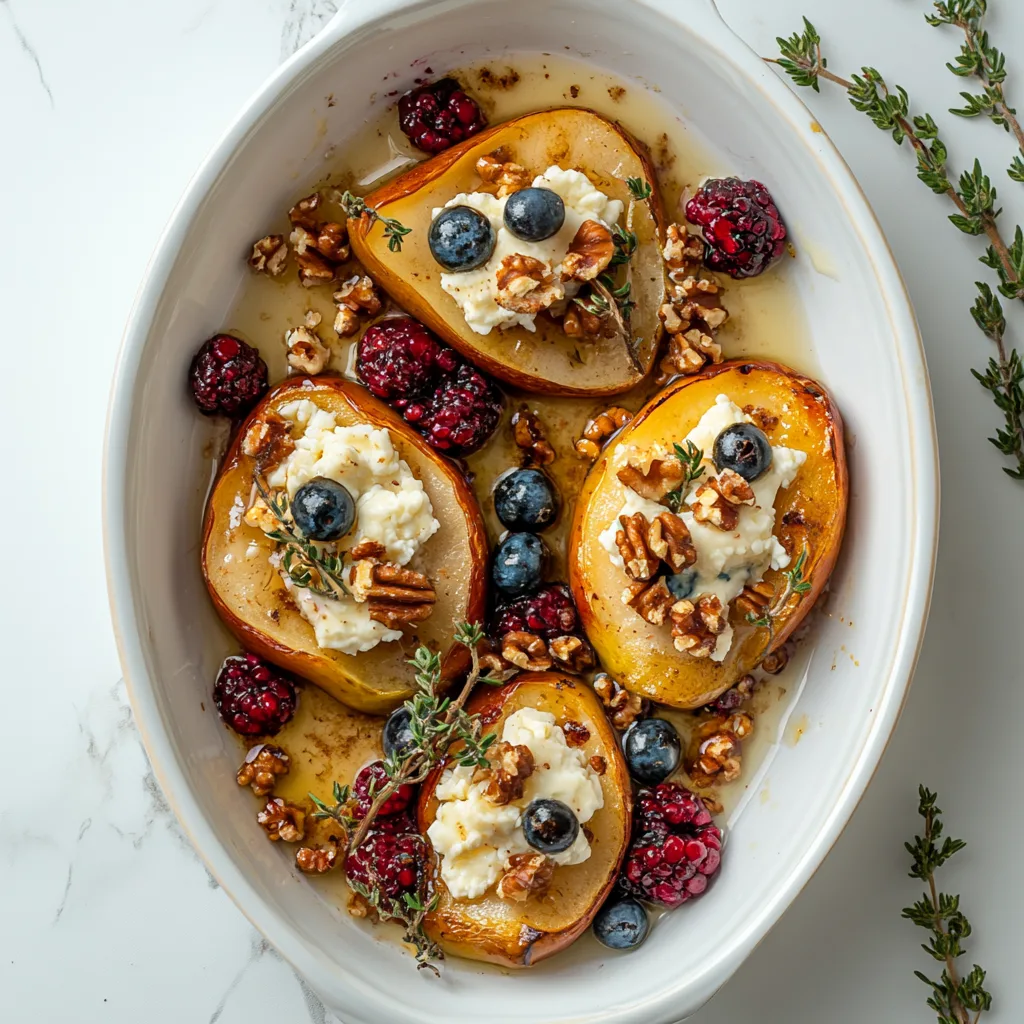
    There’s something magical about the way a warm, baked pear transforms in the oven, softening into a luscious, tender vessel for sweet and savory toppings. These Baked Pears with Berries, Honey, Walnuts & Blue Cheese bring together a symphony of flavors that dance on your palate—juicy fruit, tangy cheese, crunchy nuts, and sweet honey.

    I discovered this recipe during a fall weekend at my sister’s countryside cottage, where we gathered around her rustic wooden table as rain tapped gently against the windows. The aroma of baking pears filled the kitchen with a warm, spiced perfume that still takes me back to that cozy evening. This elegant yet simple dessert (or appetizer!) requires minimal effort but delivers maximum impact for any gathering or quiet night in.

    Delicious Baked Pears with Berries, Honey, Walnuts & Blue Cheese Recipe

    Recipe

    Why You’ll Love This Baked Pears with Berries, Honey, Walnuts & Blue Cheese

    A Perfect Balance of Flavors and Textures

    The magic of this dish lies in its perfect harmony of contrasts. Each bite delivers the warm, tender sweetness of baked pears against the sharp, tangy punch of blue cheese. The berries burst with bright acidity while honey drizzles down with its floral sweetness. And those toasted walnuts? They add the essential crunch that makes every mouthful interesting. I love watching guests take their first bite—there’s always that moment of surprised delight when all the flavors come together. This dish bridges the gap between sweet and savory in a way that feels both comforting and sophisticated, making it perfect for those nights when you want something a little special without hours in the kitchen.

    Effortlessly Elegant Yet Simple

    You know those recipes that look like you spent hours laboring but actually came together in minutes? This is one of those kitchen magic tricks. The pears do most of the work themselves, transforming in the oven while you attend to other things. The assembly is intuitive and forgiving—a drizzle here, a sprinkle there—no precise measurements needed. I’ve made these on harried weeknights and for impromptu gatherings when a friend texted they were “just in the neighborhood.”

    The presentation always impresses, with the golden pears nestled on plates, colorful berries scattered around, and that gorgeous honey catching the light. It’s the kind of dish that makes people think you’re a culinary genius, and I’m certainly not going to correct them!

    Essential Tips & Tricks

    Selecting and Preparing the Perfect Pears

    The foundation of this dish is choosing pears with the right ripeness—they should yield slightly to gentle pressure but still hold their shape. Bosc and Anjou varieties work beautifully with their firm flesh and subtle sweetness. When preparing, leave the stem intact for that rustic, elegant look, and create a flat bottom by slicing a small piece off so they sit upright without wobbling.

    I’ve learned (through several tippy disasters) that coring from the bottom up with a melon baller creates the perfect hollow for fillings without compromising the pear’s structure. A light brush of lemon juice prevents browning and adds a subtle brightness that balances the rich toppings. Remember, uniformly sized pears will cook evenly, preventing some from turning to mush while others remain too firm.

    The Art of Flavor Layering

    The magic happens in how you build your flavor profile. Start by sprinkling a tiny pinch of salt inside each pear cavity—it sounds counterintuitive for a sweet dish, but it heightens all the other flavors. When selecting blue cheese, consider the strength—a milder Gorgonzola Dolce melts beautifully and won’t overwhelm, while a robust Stilton creates a more dramatic contrast. For the honey, try reaching for something special like lavender or orange blossom honey that adds another dimension of flavor.

    Toast those walnuts until they’re fragrant before chopping—it takes just 5 minutes but transforms their flavor completely. And don’t add the berries until the last few minutes of baking; they’ll maintain their shape and vibrant color while still releasing their juicy goodness.

    Serving Ideas & Creative Variations

    From Elegant Dessert to Stunning Appetizer

    These versatile pears effortlessly transition between courses depending on how you present them. For a sophisticated dessert, serve warm with a small scoop of vanilla bean ice cream that slowly melts into the honey and berry juices. If you’re feeling indulgent, a drizzle of aged balsamic reduction creates a restaurant-worthy plate.

    As an appetizer, pair with a glass of prosecco or crisp white wine, and serve alongside thin slices of crusty bread to scoop up the melted cheese and juices. I once served these at a holiday gathering on a large wooden board surrounded by fresh figs, additional cheese, and honey—guests couldn’t stop talking about it! For brunch, they’re surprisingly perfect alongside savory breakfast casseroles for that sweet-savory balance.

    Seasonal and Dietary Adaptations

    The beauty of this recipe lies in its flexible framework that adapts to seasons and dietary needs. In summer, swap berries for stone fruit like peaches or nectarines. Fall calls for cranberries with a sprinkle of cinnamon and maple syrup instead of honey. For dairy-free guests, replace blue cheese with a dollop of coconut yogurt mixed with a touch of maple syrup, or try a cashew-based vegan cheese. Nut allergies? Pepitas or sunflower seeds provide that essential crunch without compromising safety.

    I’ve made these for my gluten-sensitive friend by ensuring all ingredients are certified gluten-free (some blue cheeses can contain trace gluten). The recipe even works with firm apples when pears aren’t in season—just adjust the baking time down slightly as apples tend to cook faster.

    Delicious Baked Pears with Berries, Honey, Walnuts & Blue Cheese Recipe

    Storage & Troubleshooting Guide

    Making Ahead and Preserving Freshness

    These baked pears are at their absolute best when served warm from the oven, but that doesn’t mean you can’t prepare elements ahead of time. Core and prepare the pears up to 8 hours before baking—just brush generously with lemon juice and store covered in the refrigerator to prevent browning. The walnut and cheese mixture can be combined a day ahead and kept chilled.

    For leftovers (though I rarely have any!), store in an airtight container in the refrigerator for up to 2 days. To reheat, place in a 300°F oven for 10-15 minutes until just warmed through—microwaving tends to make the pears too soft and the nuts lose their crunch. I’ve found that a light drizzle of fresh honey just before serving revives any leftover pears beautifully.

    Troubleshooting Common Challenges

    Even the simplest recipes can sometimes present unexpected challenges. If your pears are too firm after baking, cover the dish with foil and continue baking in 5-minute increments until tender when pierced with a knife. Conversely, if they’re becoming too soft and losing shape, reduce the temperature and remove as soon as possible. Blue cheese not melting properly? Make sure it’s at room temperature before filling the pears, or choose a creamier variety next time.

    For pears that won’t stand upright, create a “nest” of crumpled foil in your baking dish to hold them in place. And if the walnuts are browning too quickly during baking, loosely tent with foil for the remainder of the cook time. Remember that different pear varieties and ripeness levels will affect cooking time, so always check with a knife for tenderness.

    Frequently Asked Questions

    Can I use different types of cheese instead of blue cheese?

    Absolutely! Soft goat cheese adds tangy creaminess, while brie offers luxurious meltability. Mascarpone mixed with a touch of honey creates a sweeter profile perfect for dessert versions. Choose cheeses that melt well and complement the sweetness of the pears.

    What’s the best way to tell when pears are perfectly ripe for baking?

    The neck of the pear should yield slightly to gentle pressure but not be mushy. For Baked Pears with Berries, Honey, Walnuts & Blue Cheese, slightly underripe pears actually work better as they’ll hold their shape during baking.

    Can this recipe be made vegan?

    Yes! Replace honey with maple syrup and substitute blue cheese with a dairy-free alternative like cultured cashew cheese. The walnuts and berries are already plant-based, making this an easy recipe to adapt.

    How do I prevent the pears from turning brown before baking?

    Brush cut surfaces with lemon juice immediately after cutting. The acid prevents oxidation while adding a subtle brightness that enhances the final flavor profile.

    Can I prepare these pears in advance for a dinner party?

    Prepare the pears up to the point of filling, cover, and refrigerate for up to 8 hours. Add 5 minutes to the baking time if coming straight from the refrigerator to account for the colder starting temperature.

    Final Thoughts

    These Baked Pears with Berries, Honey, Walnuts & Blue Cheese embody what I love most about cooking—simple ingredients transformed into something truly special with minimal effort. They’ve become my secret weapon for entertaining, that reliable recipe I turn to when I want to impress without stress. There’s something deeply satisfying about presenting a dish that looks like it belongs in a food magazine but actually came together in minutes.

    The way the warm pear flesh yields to your fork, releasing its sweet juices to mingle with the melted cheese and honey—it’s a small moment of culinary perfection. I hope these baked pears bring as much joy to your table as they have to mine, whether served as an elegant finale to a dinner party or as a quiet indulgence on a cozy night in. Find more seasonal inspiration on my Pinterest board.

  • Delicious Smoked Salmon Bagels Recipe | Easy & Healthy Breakfast Idea

    Delicious Smoked Salmon Bagels Recipe | Easy & Healthy Breakfast Idea

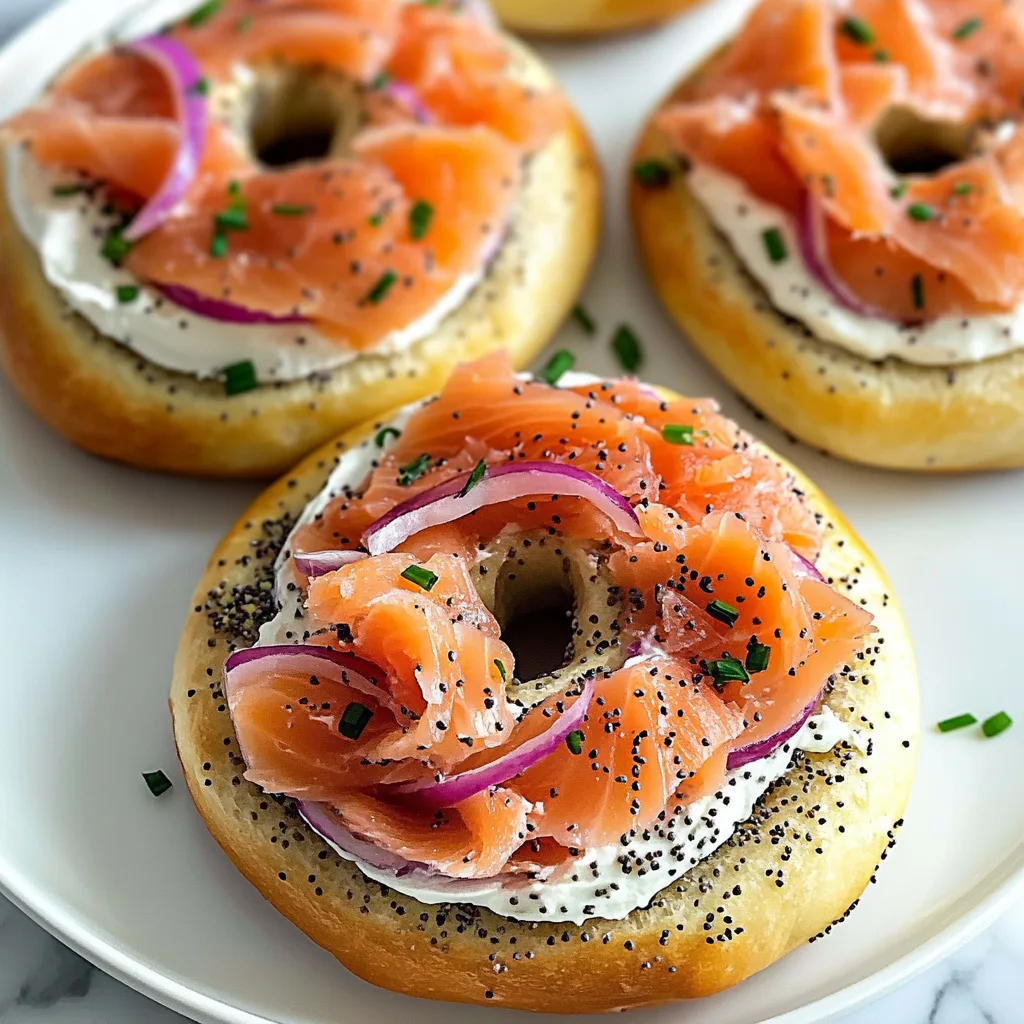
    There’s something magical about Smoked Salmon Bagels that transforms an ordinary breakfast into something extraordinary. The velvety texture of cream cheese against the delicate smokiness of the salmon creates a symphony of flavors that never fails to make my taste buds dance. I discovered this perfect pairing during a rainy Sunday morning in Seattle, where the misty air seemed to enhance every bite. The beauty of these bagels lies in their simplicity—just a few quality ingredients coming together to create something truly special. Whether you’re hosting brunch or treating yourself to a luxurious breakfast, these smoked salmon bagels deliver restaurant-quality flavor with minimal effort.

    Delicious Smoked Salmon Bagels Recipe | Easy & Healthy Breakfast Idea

    Recipe

    Why You’ll Love This Smoked Salmon Bagels

    Perfect Balance of Flavors and Textures

    The magic of smoked salmon bagels lies in the contrasting elements that somehow create perfect harmony. The chewy bagel provides the ideal foundation for the creamy spread and buttery salmon. I love how the tanginess of cream cheese cuts through the rich smokiness of the salmon, while capers add little bursts of briny goodness that wake up your palate. The first time I served these at a family gathering, my brother-in-law (who claims to dislike seafood) couldn’t stop reaching for seconds. That’s the transformative power of perfectly balanced flavors—they can convert even the most stubborn taste preferences!

    Quick and Impressive Breakfast Option

    On busy mornings when I need something substantial yet quick, smoked salmon bagels are my go-to solution. The entire assembly takes less than 5 minutes but delivers a breakfast that feels luxurious and intentional. I keep quality smoked salmon in my refrigerator specifically for those mornings when I need to feel put-together without the fuss. The visual appeal alone—those gorgeous pink ribbons of salmon against the white cream cheese—makes this simple breakfast feel like a special occasion. And when unexpected guests arrive, I can quickly transform basic ingredients into an impressive spread that makes everyone feel pampered.

    Essential Tips & Tricks

    Selecting Quality Ingredients

    The secret to exceptional smoked salmon bagels starts with choosing premium ingredients. For the salmon, look for deep coral-pink color and avoid pieces with dry edges or excessive white lines (which indicate higher fat content). I prefer cold-smoked salmon for its buttery texture and delicate flavor that doesn’t overpower the other components. For bagels, freshness is key—slightly toasted to enhance the exterior crunch while maintaining a chewy interior. The cream cheese should be full-fat and at room temperature for easy spreading. I learned this the hard way after tearing countless bagels with refrigerator-cold cream cheese! For more breakfast inspiration, check out my spinach and feta egg casserole for another protein-packed option.

    Proper Assembly Technique

    The layering sequence makes a significant difference in both flavor distribution and structural integrity. Start by toasting your bagel just until it’s warm and slightly crisp—never until it’s hard. Spread cream cheese generously but evenly on both halves, creating a protective barrier that prevents the bagel from becoming soggy. Layer the salmon in loose folds rather than flat pieces to create pockets that catch other ingredients. I arrange thin slices of cucumber, red onion, and capers strategically between salmon folds for balanced flavor in every bite. For special occasions, I add a light sprinkle of fresh dill and a squeeze of lemon just before serving for brightness that elevates the entire experience.

    Serving Ideas & Creative Variations

    Elegant Brunch Presentations

    Transform simple smoked salmon bagels into an impressive spread by creating a DIY bagel bar. I arrange various bagel flavors (plain, everything, sesame) on a wooden board surrounded by small bowls of toppings—capers, diced red onion, sliced cucumber, lemon wedges, and fresh herbs. For special touches, include flavored cream cheeses like chive or dill alongside the traditional plain. The interactive nature of this presentation encourages conversation and customization. For holiday brunches, I add festive elements like pomegranate seeds and microgreens for color. This pairs beautifully with my holiday red green veggie strata for a complete brunch experience that balances rich and fresh flavors.

    Delicious Smoked Salmon Bagels Recipe | Easy & Healthy Breakfast Idea

    Unexpected Flavor Combinations

    While traditional toppings are delicious, experimental pairings can elevate your smoked salmon bagels to new heights. Try swapping regular cream cheese for whipped goat cheese with honey for a sweet-savory contrast that complements the salmon beautifully. Add thinly sliced green apple for unexpected crunch and tartness. My personal favorite discovery was adding a light spread of fig jam beneath the cream cheese—the subtle sweetness creates a magnificent counterpoint to the salty salmon. For heat lovers, mix horseradish into the cream cheese or add paper-thin jalapeño slices. These creative variations maintain the essence of the classic while introducing exciting new flavor dimensions.

    Storage & Troubleshooting Guide

    Keeping Ingredients Fresh

    Proper storage techniques ensure your smoked salmon bagel ingredients maintain optimal flavor and texture. Store unopened smoked salmon in the coldest part of your refrigerator (usually the back) where it will keep for up to two weeks. Once opened, wrap tightly in plastic and consume within three days. I place a paper towel in with my fresh herbs to absorb excess moisture, extending their life significantly. For bagels, avoid refrigeration as it accelerates staleness—instead, keep them in a paper bag at room temperature for 1-2 days or freeze for longer storage. When freezing bagels, slice them first so you can pop them directly into the toaster without thawing.

    Fixing Common Problems

    Even the most experienced cooks encounter bagel assembly challenges. If your cream cheese is tearing the bagel, let it warm to room temperature for 15 minutes before spreading. For soggy bagels, toast them slightly longer and apply cream cheese immediately after toasting to create a moisture barrier. If your salmon tastes too salty, soak thin slices in cold water for 10 minutes before patting dry. When dealing with overly chewy bagels, sprinkle them with water before reheating in a 350°F oven for 5 minutes. I once saved a brunch by microwaving stale bagels for 10 seconds before toasting—they regained their perfect texture and nobody suspected they were a day old!

    Frequently Asked Questions

    What’s the best type of bagel for smoked salmon?

    Everything bagels provide the perfect flavor foundation with their savory seed mix. However, plain or sesame bagels let the salmon shine as the star. For a twist, try pumpernickel or onion bagels for deeper flavor complexity.

    How much smoked salmon should I buy per person?

    Plan for 2-3 ounces of smoked salmon per person for a main course serving. For appetizers or as part of a larger brunch spread, 1-1.5 ounces per person is sufficient.

    Can I prepare smoked salmon bagels ahead of time?

    Prepare components separately but assemble just before serving. Pre-assembled smoked salmon bagels become soggy quickly. For parties, create a DIY bagel bar instead of pre-assembling.

    What’s the difference between lox and smoked salmon?

    Lox is salt-cured but not smoked, giving it a saltier, more delicate flavor. Smoked salmon is cured then cold-smoked, resulting in a more complex, smoky flavor profile with firmer texture.

    How do I know if smoked salmon has gone bad?

    Fresh smoked salmon should have a pleasant smell and moist appearance. If it develops a strong fishy odor, slimy texture, or dull color, it’s past its prime and should be discarded.

    Final Thoughts

    Smoked Salmon Bagels represent the perfect intersection of simplicity and luxury—an everyday indulgence that feels special without requiring culinary expertise. The key lies in quality ingredients, thoughtful assembly, and the willingness to experiment with flavors that speak to your personal taste. I find myself returning to this recipe whenever I need a moment of culinary joy in my day. Whether you’re preparing a quick breakfast for yourself or hosting an elaborate weekend brunch, these bagels deliver satisfaction and elegance in equal measure. For more inspiration, browse my collection on Pinterest where I’m constantly adding new flavor combinations and presentation ideas.

  • christmas vegetables side dishes – Cozy, Irresistible

    christmas vegetables side dishes – Cozy, Irresistible

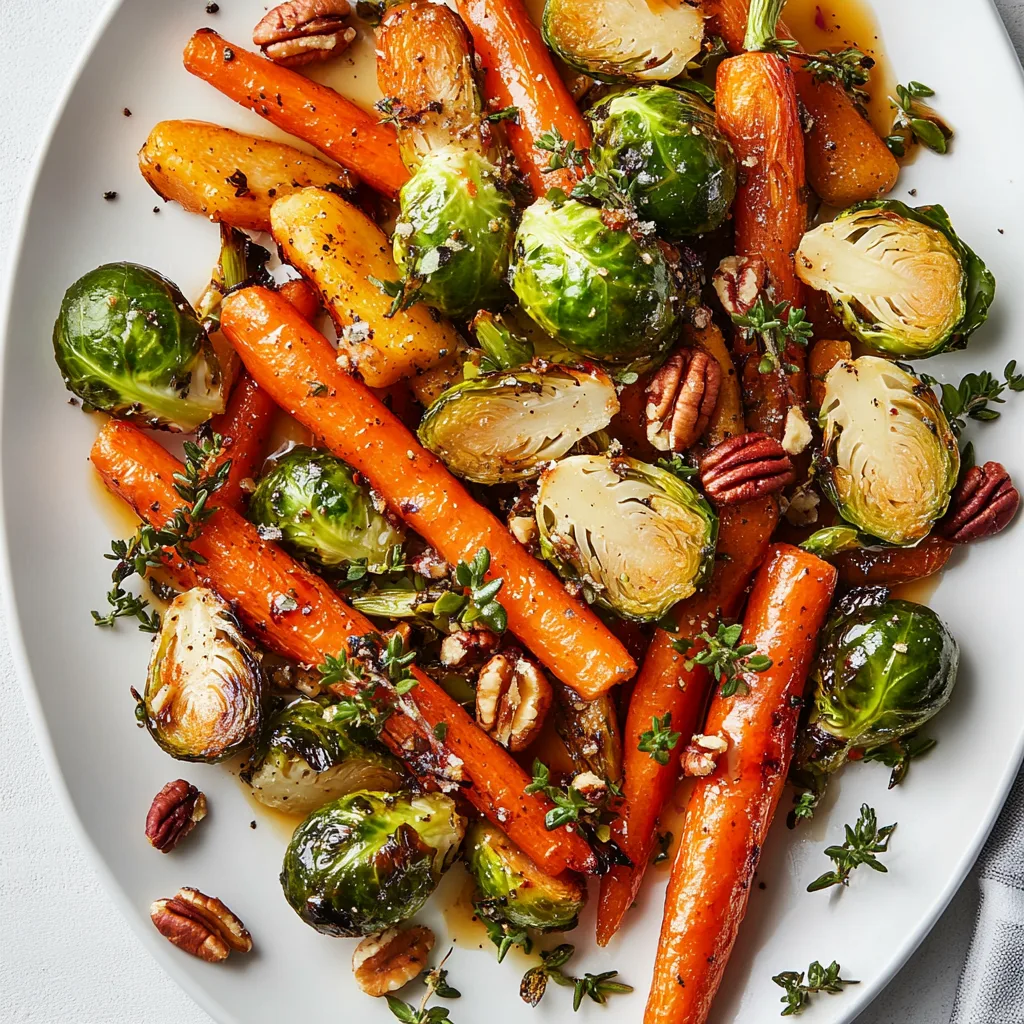
    christmas vegetables side dishes are my yearly reminder that the oven is both my best friend and a dramatic diva. One year, my timer failed, and I served roasted parsnips “extra-crispy”—my family still teases me. This time, I dialed in a one-pan medley that makes christmas vegetables side dishes easy, cozy, and absolutely irresistible. The maple-balsamic shine, the herby warmth—this is the side that steals the show while your roast rests.

    christmas vegetables side dishes

    Recipe

    WHY YOU’LL LOVE THIS RECIPE

    What Makes This christmas vegetables side dishes So Irresistible

    I first made these christmas vegetables side dishes after my sister texted, “Help, the turkey owns the oven.” The trick was building a one-pan plan that roasts fast, tastes homemade, and gives you that comfort food glow. These christmas vegetables side dishes nail it with caramelized edges, a maple-balsamic kiss, and herby, orange-scented warmth. They’re the easy dinner side that brings the cheer without the chaos. When I put this platter down, everyone reaches in at once and the sprouts disappear first. It’s a cozy, crowd-pleasing win that feels special yet simple, exactly what christmas vegetables side dishes should be.

    • Fast one-pan method: simple prep, minimal dishes, big payoff.
    • Balanced flavor: sweet maple, tangy balsamic, bright orange, and savory herbs.
    • Family-friendly and flexible: swap veggies, add nuts or cranberries.
    • Make-ahead friendly for stress-free holiday timing.
    • Plays well with mains—from roast beef to ham or a veggie centerpiece.

    If you love cozy, homemade comfort food and want christmas vegetables side dishes that feel special without fuss, grab a sheet pan—I’ll show you exactly how.

    Between TikTok’s roasted veg glaze craze and everyone craving quicker holiday wins, christmas vegetables side dishes are finally getting top billing. This one-pan, easy recipe delivers that glossy, caramelized finish people love, with a quick fix for timing: add delicate veggies later so everything hits peak texture together. It’s the homemade version of a restaurant-worthy platter—yet it’s weeknight-simple. No overthinking, just golden edges and big flavor.

    Want more festive inspiration? Don’t miss my Pomegranate-Glazed Roasted Vegetables or creamy comfort like Cauliflower Cheese Gratin for lovely christmas vegetables side dishes pairings.

    TIPS, TRICKS & EXPERT SECRETS

    Chef Tips for Perfect christmas vegetables side dishes Every Time

    During a catering gig, I learned the hard way that crowding a pan turns caramelized dreams into steamed realities. For christmas vegetables side dishes with crispy edges, give them space and stagger the cook. Here’s how to win every time:

    • Heat matters: Roast at 425°F so sugars caramelize without drying.
    • Stagger timing: Start hardy veg (carrots, parsnips, sprouts), then add green beans later.
    • Dry your veg: Pat dry before oiling—moisture fights browning.
    • Finish bright: A squeeze of orange juice at the end lifts the whole dish.

    Smart Ingredient Swaps & Practical Cooking Advice

    • Vegan swap: Skip butter and add 1 tbsp extra olive oil—or a drizzle of good olive oil at the end.
    • Gluten-free: This dish is naturally GF; just check your vinegar and add-ins.
    • Herb swap: No rosemary? Use sage or oregano. No thyme? Try marjoram.
    • Sweetener options: Use honey instead of maple if preferred.

    What not to do: Don’t overcrowd the pan. Overcrowding causes steaming, leaving your christmas vegetables side dishes soft instead of crispy. Use two pans if needed and rotate halfway. This cooking tip alone keeps your easy recipe firmly in the “foolproof” category—true homemade confidence.

    For more greens that shine on a holiday plate, take a peek at Winter Greens with Pine Nuts and Garlic.

    SERVING IDEAS & CREATIVE VARIATIONS

    How to Serve christmas vegetables side dishes for Maximum Enjoyment

    When I host, I pile these christmas vegetables side dishes high on a warmed platter, then shower with cranberries and pecans for a jeweled finish. Serve alongside prime rib, glazed ham, or a mushroom Wellington. Drizzle a little pan glaze on top and let the cozy aromas do the talking.

    • Pairing ideas: Brighten with lemony yogurt sauce or garlicky aioli.
    • Beverages: A citrusy Sauvignon Blanc, a cranberry spritz, or spiced apple cider.
    • Plating suggestion: Use a wide white platter; garnish with fresh thyme sprigs for color.

    Flavor Twists and Seasonal Variations

    • Sweet-salty crunch: Swap pecans for pistachios and add a crumble of feta.
    • Heat and smoke: Add a pinch of smoked paprika and chili flakes to the oil mix.
    • Winter orchard: Fold in diced roasted apples and a splash more balsamic.

    These creative flavor variations keep your christmas vegetables side dishes fresh, fun, and social-media ready. If you love sharing, style with natural light and a linen napkin to make those caramelized edges pop. Seasonal twist: add roasted beets for color contrast or try a drizzle of pomegranate molasses.

    STORAGE & TROUBLESHOOTING GUIDE

    How to Store and Reheat christmas vegetables side dishes

    My fridge turns into a Tetris game after Christmas dinner, so I designed these christmas vegetables side dishes to store cleanly and reheat like a dream.

    • Room temperature: Keep out for up to 2 hours while serving.
    • Refrigerator: Store in airtight containers for 4–5 days.
    • Freezer: Freeze up to 2 months; thaw overnight in the fridge.
    • Reheat: Oven at 400°F for 8–12 minutes on a sheet pan, or air fryer at 375°F for 4–6 minutes. Skillet reheating with a touch of oil revives crispness fast.

    Troubleshooting Common christmas vegetables side dishes Issues

    • Too soft/watery: You likely crowded the pan. Spread out or use two pans; roast a few extra minutes.
    • Too dry: Add a drizzle of olive oil and a splash of orange juice or stock before reheating.
    • Uneven texture: Cut vegetables to similar sizes and add tender veg later.
    • Underseasoned: Finish with flaky sea salt and a squeeze of citrus to wake up flavors.

    With these storage tips and quick fixes, your christmas vegetables side dishes stay vibrant and delicious long after the feast. You’ve got this—and tomorrow’s leftovers are about to be legendary.

    FAQs

    Can I prep these vegetables a day ahead?

    Yes. Trim and cut everything, toss with oil and seasonings (skip salt), refrigerate, then salt and roast day-of. Add green beans later as directed.

    What if I don’t have maple syrup?

    Use honey or brown sugar. Start with slightly less and adjust to taste; the goal is balanced sweetness.

    How do I keep the vegetables hot for serving?

    Cover the platter loosely with foil and keep in a warm (200°F) oven for up to 20 minutes, or reheat briefly before serving.

    Can I add potatoes?

    Absolutely. Parboil baby potatoes for 5 minutes, drain well, then roast with the hardy vegetables to keep timing aligned.

    Conclusion

    When you want christmas vegetables side dishes that feel homemade, festive, and fully delicious, this one-pan medley brings caramelized edges, bright citrus, and herby depth to every plate. It’s an easy dinner side that looks stunning, tastes like comfort food, and simplifies your holiday timing. From weeknight practice runs to the big day, these christmas vegetables side dishes are a reliable, crowd-pleasing staple with room for playful twists. Try it at home and tag me —I can’t wait to see your cozy platters and favorite add-ins.