Blog

  • Gluten-Free Cinnamon Raisin Greek Yogurt Bagels: Irresistibly Soft & Delicious

    Gluten-Free Cinnamon Raisin Greek Yogurt Bagels: Irresistibly Soft & Delicious

    Gluten-Free Cinnamon Raisin Greek Yogurt Bagels: Irresistibly Soft & Delicious

    Gluten-free Cinnamon Raisin Greek Yogurt Bagels have completely transformed my weekend breakfast routine! There’s something magical about the aroma of cinnamon and plump raisins wafting through the kitchen as these beauties bake. Made with protein-packed Greek yogurt and without a speck of gluten, these bagels give you that perfect chewy texture you crave without the digestive discomfort. I discovered this recipe during a rainy Sunday morning when I was craving something special but didn’t want to leave the house. Now they’ve become my go-to weekend treat that feels indulgent while still being nourishing.

    Recipe

    Why You’ll Love These Gluten-free Cinnamon Raisin Greek Yogurt Bagels

    Perfect Texture Without the Gluten

    The biggest challenge with gluten-free baking is achieving that authentic bagel chew, but these cinnamon raisin bagels nail it perfectly! The Greek yogurt creates a tender interior while the outside develops that characteristic golden crust. I was genuinely shocked the first time I made these—they have that satisfying resistance when you bite in, just like traditional bagels. The plump raisins add bursts of natural sweetness while the warm cinnamon weaves throughout each bite. For anyone missing “real” bagels since going gluten-free, this recipe will bring that simple joy back into your breakfast routine.

    Quick and Easy Preparation

    Unlike traditional bagels that require proofing, boiling, and extensive kneading, these Gluten-free Cinnamon Raisin Greek Yogurt Bagels come together in a fraction of the time! You’ll have fresh-baked bagels in under an hour from start to finish. The dough is surprisingly forgiving—I’ve made these while still half-asleep on Saturday mornings and they’ve turned out beautifully every time. There’s no complicated shaping technique either; just roll the dough into ropes and connect the ends. Perfect for busy mornings or when you want homemade bagels without dedicating your entire day to the kitchen.

    Essential Tips & Tricks

    Getting the Perfect Dough Consistency

    The secret to perfect Gluten-free Cinnamon Raisin Greek Yogurt Bagels lies in the dough consistency. You want it slightly tacky but not sticky enough to cling to your fingers. If your dough seems too wet, add gluten-free flour one tablespoon at a time until it reaches that perfect balance. The brand of Greek yogurt matters too—I’ve found that thicker, strained varieties like Fage or Chobani work best. Make sure your raisins are plump and moist; if they’re a bit dried out, soak them in warm water for 10 minutes before adding them to the dough. This prevents them from pulling moisture from your bagels during baking.

    Baking for the Perfect Chew

    To achieve that authentic bagel chew, temperature and timing are everything. Preheat your oven thoroughly to 425°F and don’t be tempted to open the door during the first 15 minutes of baking. The high heat creates that beautiful crust while keeping the inside tender. Brush the tops with an egg wash for that characteristic glossy finish that makes them look like they came from a fancy bakery. For extra flavor, sprinkle a cinnamon-sugar mixture on top before baking. These bagels pair beautifully with a thick and creamy tomato soup for a cozy lunch combo.

    Serving Ideas & Creative Variations

    Beyond Cream Cheese

    While cream cheese is the classic bagel companion, these Gluten-free Cinnamon Raisin Greek Yogurt Bagels deserve creative toppings that highlight their flavor! Try apple butter spread generously over a warm toasted bagel—the combination of cinnamon and apple is absolutely heavenly. For a protein boost, almond butter with a drizzle of honey creates a satisfying breakfast that keeps you full for hours. My personal favorite is whipped mascarpone with a touch of vanilla and orange zest—it transforms these bagels into a sophisticated brunch offering. For something unexpected, try them with deviled egg dip for a sweet-savory combination.

    Seasonal Adaptations

    One of the joys of these bagels is how easily they adapt to seasonal flavors! In fall, add pumpkin puree and pumpkin spice to the dough for a festive twist. During summer, fold in dried blueberries instead of raisins and add lemon zest for brightness. Winter holidays call for cranberries and orange zest with a hint of nutmeg. You can even make a chocolate version by adding cocoa powder and chocolate chips instead of cinnamon and raisins. The base recipe is so versatile that once you master it, you’ll find yourself creating new variations for every season and occasion.

    Storage & Troubleshooting Guide

    Keeping Bagels Fresh

    These Gluten-free Cinnamon Raisin Greek Yogurt Bagels maintain their quality remarkably well if stored properly. For maximum freshness, allow them to cool completely before storing in an airtight container at room temperature for up to 2 days. For longer storage, slice the bagels before freezing them in a single layer on a baking sheet, then transfer to a freezer bag once frozen solid. This method prevents them from sticking together and allows you to toast them directly from frozen. I’ve found that a light spritz of water before reheating in a toaster oven helps restore that fresh-baked texture and brings back the aromatic cinnamon scent.

    Fixing Common Problems

    Even experienced bakers encounter issues sometimes, but most problems with these bagels have simple solutions. If your bagels are spreading too much during baking, your dough might be too wet—add a bit more flour next time. If they’re cracking on top, the dough was likely too dry or the oven too hot. For bagels that don’t brown properly, brush with egg wash before baking and consider placing them on a higher oven rack. If your raisins are burning on the outside, try kneading them deeper into the dough rather than having them at the surface. Remember that gluten-free flour blends vary, so adjustments may be needed.

    Frequently Asked Questions

    Can I make these bagels dairy-free?

    Yes! Substitute the Greek yogurt with a thick coconut yogurt or a dairy-free Greek-style yogurt alternative. You may need to adjust the flour slightly as plant-based yogurts can be wetter than traditional Greek yogurt.

    Why did my Gluten-free Cinnamon Raisin Greek Yogurt Bagels turn out dense?

    Overmixing the dough can develop too much structure, resulting in density. Mix just until ingredients are combined, and make sure your baking powder is fresh for proper rise.

    Can I make these without a stand mixer?

    Absolutely! While a stand mixer makes the process easier, you can mix the dough by hand with a wooden spoon and then knead gently on a floured surface until smooth.

    How do I know when the bagels are fully baked?

    The bagels should be golden brown on top and sound hollow when tapped on the bottom. An internal temperature of 190°F indicates they’re perfectly baked.

    Can I add different mix-ins besides raisins?

    Definitely! Dried cranberries, chopped dried apples, or chocolate chips work beautifully. Just keep the total amount of mix-ins around ½ cup to maintain the proper dough structure.

    Final Thoughts

    These Gluten-free Cinnamon Raisin Greek Yogurt Bagels have become my weekend ritual—one that fills my kitchen with warmth and my breakfast plate with joy. There’s something deeply satisfying about creating something so delicious that most people wouldn’t even guess is gluten-free. The protein from the Greek yogurt makes these more nutritious than store-bought versions, while the cinnamon and raisins bring comfort to each bite. Whether you’re gluten-intolerant or simply looking for a healthier bagel option, this recipe deserves a permanent spot in your breakfast rotation. Find more inspiring recipes on Pinterest.
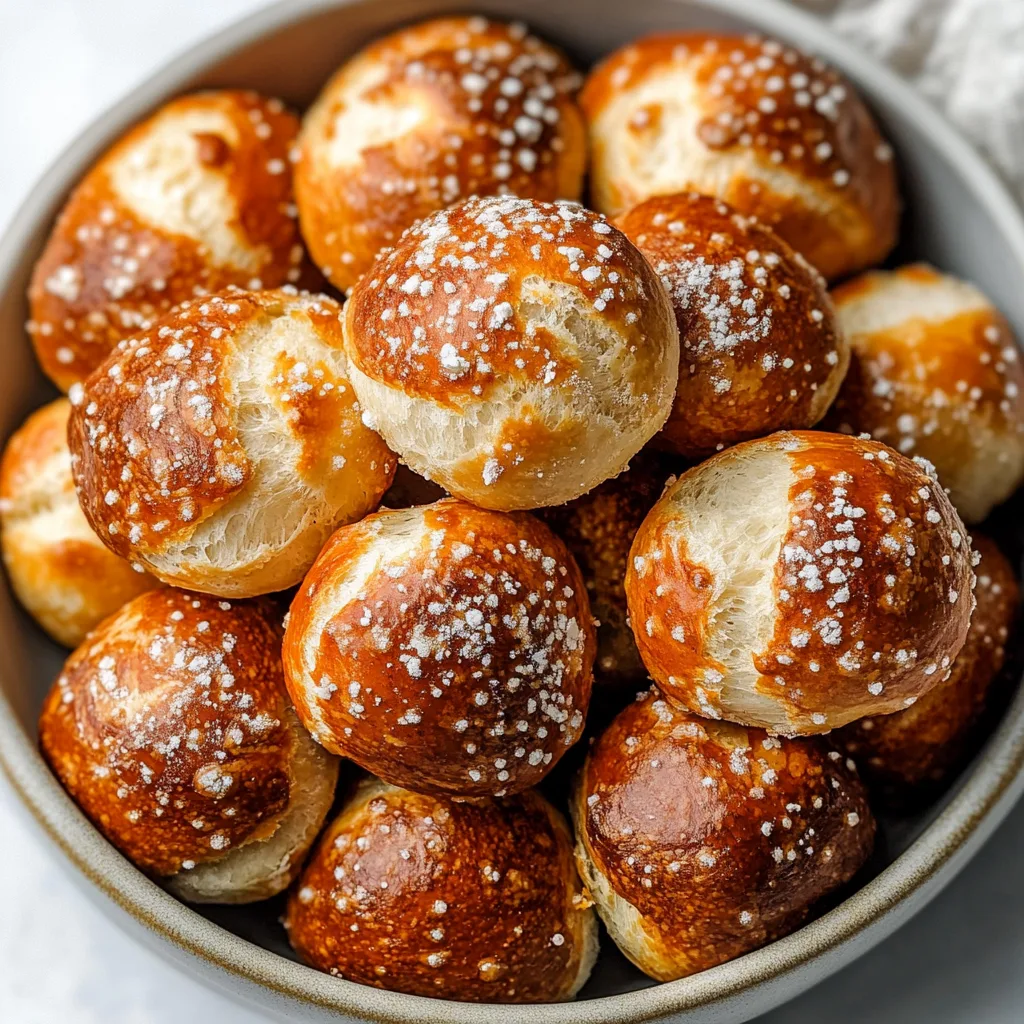

  • Gluten-Free Sourdough Discard Pretzel Bites: Irresistibly Soft & Crispy!

    Gluten-Free Sourdough Discard Pretzel Bites: Irresistibly Soft & Crispy!

    Gluten-Free Sourdough Discard Pretzel Bites: Irresistibly Soft & Crispy!

    Gluten-free sourdough discard pretzel bites bring the perfect combination of chewy texture and tangy flavor to your snack game without the gluten. As someone who hates wasting my precious sourdough starter, these little bites of heaven have become my go-to recipe when that discard jar starts filling up. The first time I pulled these golden nuggets from the oven, their irresistible aroma filling my kitchen, I knew I’d found something special. They’re surprisingly simple to make and deliver that authentic pretzel taste that’s so hard to find in gluten-free options. Trust me, these will disappear faster than you can say “pass the mustard!”

    Recipe

    Why You’ll Love These Gluten-free Sourdough Discard Pretzel Bites

    Perfect Texture & Flavor Balance

    The tangy sourdough flavor pairs beautifully with that classic pretzel taste we all crave. What makes these truly special is how the discard adds complexity without overwhelming. The outside develops that characteristic pretzel chew while staying tender inside – something that’s notoriously difficult to achieve with gluten-free baking. I’ve found the baking soda bath is absolutely essential for developing that authentic pretzel flavor and gorgeous amber color. When I serve these at gatherings, even my gluten-eating friends can’t tell the difference and always ask for my secret!

    Quick & Economical Solution

    Using sourdough discard transforms what would be kitchen waste into something magnificent. I love that satisfying feeling of being resourceful while creating something delicious! These bites come together in under an hour, making them perfect for last-minute snack cravings or unexpected guests. The ingredients are pantry staples for most gluten-free bakers, so no special shopping trip required. I keep a jar of discard in my fridge specifically for these pretzel bites – they’ve become such a regular treat in my home that I plan my sourdough feeding schedule around them!

    Essential Tips & Tricks

    Mastering the Dough Consistency

    Finding the perfect dough texture is crucial for successful gluten-free pretzel bites. It should be pliable but not sticky – think play-dough consistency. If your dough feels too wet, add a tablespoon of gluten-free flour at a time until it reaches that sweet spot. Too dry? A splash of warm water works wonders. I learned this the hard way after my first batch spread into sad puddles during baking! Temperature matters too – I’ve found that letting the dough rest at room temperature for 15 minutes makes it much easier to handle and shape into those perfect little nuggets that we’re aiming for.

    The Perfect Baking Soda Bath

    Don’t skip the alkaline bath – it’s what gives these bites their authentic pretzel flavor and beautiful brown exterior! I like to keep the water at a gentle simmer rather than a rolling boil, which can make delicate gluten-free dough fall apart. Aim for 20-30 seconds in the bath – any longer and they might become too soggy. After the bath, be sure to let them drain well on a wire rack before baking. For extra flavor, check out my Kickin’ Collard Greens recipe that uses a similar technique of balancing flavors through careful preparation.

    Serving Ideas & Creative Variations

    Dips & Pairings

    These pretzel bites shine brightest when paired with the right complementary flavors. My personal favorite is a honey-mustard blend with a touch of heat, but they’re equally delicious with cheese sauce, ranch, or even a sweet cream cheese dip. For game day, I arrange them in a basket lined with parchment paper alongside a variety of dips in small bowls – the presentation always impresses! The slight tanginess from the sourdough discard makes these pretzel bites particularly good with creamy dips, creating a perfect balance of flavors that will keep everyone reaching for more.

    Flavor Customizations

    The beauty of these pretzel bites is their versatility as a base for different flavor profiles. Before baking, try sprinkling them with everything bagel seasoning, cinnamon sugar, or rosemary and sea salt. For a cheesy version, mix shredded cheddar right into the dough. My family goes crazy for the garlic parmesan variation – just brush with garlic butter after baking and sprinkle with fresh parmesan. For a sweet treat similar to my popular Lemon Crinkle Cookies, try a lemon-sugar coating that adds bright flavor to the tangy base.

    Storage & Troubleshooting Guide

    Keeping Them Fresh

    These pretzel bites are best enjoyed fresh from the oven, but they can be stored for 2-3 days in an airtight container at room temperature. To refresh them, spritz lightly with water and warm in a 350°F oven for 3-5 minutes – they’ll taste almost like new! For longer storage, freeze the completely cooled bites in a single layer, then transfer to a freezer bag. They’ll keep for up to a month. I often make a double batch specifically for freezing, which gives me a quick snack option when unexpected cravings strike or when I need something impressive for last-minute guests.

    Common Issues & Solutions

    The most common problem is dough consistency. If your pretzel bites flatten during baking, your dough was likely too wet. Next time, add more flour or reduce the liquid. Are they too dense? You might have added too much flour – try using a kitchen scale for precise measurements. If they’re not browning properly, check that your baking soda bath is concentrated enough (¼ cup to 4 cups water is my sweet spot). For pale pretzels despite the bath, brush with egg wash before baking. Remember that different gluten-free flour blends behave differently, so you might need to adjust ratios slightly.

    Frequently Asked Questions

    Can I use fresh sourdough starter instead of discard?

    Yes, but fresh starter is more active and has higher water content. Reduce the liquid in your recipe by about 2 tablespoons and expect a slightly different flavor profile.

    What’s the best gluten-free flour blend for these pretzel bites?

    I recommend a blend with rice flour, tapioca starch, and potato starch. Commercial blends like Bob’s Red Mill 1-to-1 or Cup4Cup work beautifully for gluten-free sourdough discard pretzel bites.

    Can I make these dairy-free as well?

    Absolutely! Replace butter with olive oil or vegan butter. The texture might be slightly different, but they’ll still have that wonderful pretzel flavor.

    How long should I let the dough rest?

    Let it rest for at least 30 minutes. This allows the flours to hydrate properly and makes the dough easier to handle and shape.

    Can I make these without sourdough discard?

    While possible, you’d miss the distinctive tangy flavor. If needed, substitute with ¾ cup gluten-free flour mixed with 2 tablespoons of apple cider vinegar for tanginess.

    Final Thoughts

    These gluten-free sourdough discard pretzel bites have become a staple in my kitchen – the perfect way to transform discard into something truly special. They strike that rare balance of being both simple to make and impressive to serve. The tanginess from the sourdough paired with that classic pretzel flavor creates something uniquely satisfying that both gluten-free and conventional eaters will love. I hope these little bites bring as much joy to your kitchen as they have to mine! For more gluten-free inspiration, check out my creations at Pinterest.

  • Shrimp & Creamy Cheddar Grits: Irresistible Comfort Food Bliss!

    Shrimp & Creamy Cheddar Grits: Irresistible Comfort Food Bliss!

    Shrimp & Creamy Cheddar Grits: Irresistible Comfort Food Bliss!

    Shrimp & Creamy Cheddar Grits is the ultimate Southern comfort dish that warms both body and soul. I’ll never forget serving this creamy, cheesy goodness at my first dinner party in my tiny apartment – it was the dish everyone raved about for months! There’s something magical about plump, juicy shrimp nestled on a bed of velvety grits that just speaks to the heart. The combination of sharp cheddar melting into stone-ground grits creates a luxurious base that pairs perfectly with seasoned shrimp. Let me walk you through creating this beloved classic that’s both impressive enough for company and cozy enough for a weeknight dinner.

    Recipe

    Why You’ll Love This Shrimp & Creamy Cheddar Grits

    Perfect Balance of Flavors & Textures

    This dish delivers the most satisfying contrast between creamy grits and tender shrimp. The stone-ground grits slowly simmer until they transform into a velvety canvas that soaks up butter and sharp cheddar like a dream. Meanwhile, the shrimp provides that perfect bite and subtle sweetness that complements the rich, cheesy base. I love how the seasoned shrimp creates little pockets of flavor against the smooth grits. It’s that magical combination of textures – creamy, tender, and slightly firm – that makes each bite a perfect harmony of Southern comfort. The dish manages to feel both luxurious and homey at the same time.

    Quick Yet Impressive Meal

    Don’t let the gourmet reputation fool you – Shrimp & Creamy Cheddar Grits comes together in under 30 minutes! This makes it perfect for those nights when you want something special without hours in the kitchen. The grits simmer while you quickly sauté the shrimp, meaning dinner is ready before hunger turns to hangry. I’ve served this at last-minute dinner gatherings and watched guests’ eyes widen with delight, never suspecting how simple it was to prepare. The dish carries that wonderful illusion of being much more labor-intensive than it actually is, which makes it my secret weapon for entertaining or date nights at home.

    Essential Tips & Tricks

    Perfecting Your Grits

    The foundation of exceptional Shrimp & Creamy Cheddar Grits lies in properly cooked grits. Always start with stone-ground grits rather than instant for authentic texture and flavor. The key is a slow simmer with plenty of stirring – this prevents lumps and develops that silky consistency we’re after. I learned the hard way that patience pays off here! Add your butter and cheese only after the grits have fully cooked, then fold them in gently until melted. For extra creaminess, try a splash of heavy cream in the final minutes. The result should be smooth grits that hold their shape on a spoon without being stiff or runny.

    Shrimp Cooking Secrets

    The biggest mistake with shrimp is overcooking, which turns them rubbery faster than you can say “y’all.” For perfectly tender shrimp in your Creamy Cheddar Grits, cook them just until they turn pink and curl into a loose C-shape – about 2 minutes per side. I like to season mine with a blend of cajun spices for that authentic Southern kick. Pat your shrimp dry before cooking to ensure a nice sear rather than steaming them. And here’s my secret weapon – finish with a squeeze of fresh lemon juice right before serving to brighten all those rich flavors and cut through the creaminess of the dish.

    Serving Ideas & Creative Variations

    Perfect Pairings & Garnishes

    Elevate your Shrimp & Creamy Cheddar Grits with thoughtful garnishes that add color and flavor. A sprinkle of sliced green onions or fresh chopped parsley brings a pop of color and freshness. For extra Southern flair, crumbled bacon adds smoky crunch that contrasts beautifully with the creamy base. I love serving this alongside simple Kickin’ Collard Greens for a complete Southern experience. The slight bitterness of the greens perfectly balances the richness of the grits. For brunch, add a poached egg on top and watch the yolk create an instant sauce that takes this dish to new heights. Don’t forget warm crusty bread for sopping up every last bit!

    Regional & Seasonal Twists

    Transform this classic into something uniquely yours with regional inspirations. For a New Orleans twist, add andouille sausage and holy trinity (bell peppers, onions, and celery) to your shrimp. During summer months, I love folding fresh corn kernels into the grits for sweet pops of flavor and texture. For a fall version, try roasted butternut squash cubes and crispy sage leaves as a garnish. Coastal variations might include fresh crab meat or even lobster for special occasions. You can even go international by adding a Thai-inspired coconut milk base to the grits and topping with curry-spiced shrimp. The versatility of this dish means it can evolve with the seasons while keeping its soulful essence.

    Storage & Troubleshooting Guide

    Make-Ahead & Leftovers Strategy

    While Shrimp & Creamy Cheddar Grits is best enjoyed fresh, you can store components separately for convenience. Refrigerate cooked grits for up to 3 days in an airtight container – they will solidify, but don’t worry! To revive, warm slowly on the stovetop with a splash of milk or cream while whisking until creamy again. I recommend cooking shrimp fresh when possible, but leftover shrimp can be stored separately and gently reheated. For meal prep, prepare the grits base ahead and refrigerate, then quickly cook fresh shrimp just before serving. This approach gives you that just-made quality without the last-minute rush.

    Fixing Common Challenges

    Even experienced cooks encounter issues with grits occasionally. If your grits are too thick, simply whisk in warm milk, broth, or water until you reach your desired consistency. For grits that are too thin, continue cooking uncovered while stirring frequently to evaporate excess liquid. If you notice lumpy grits, don’t panic! Remove from heat and beat vigorously with a whisk, or blend briefly with an immersion blender. For overcooked, rubbery shrimp, chop them and incorporate into a creamy sauce to mask the texture. And if your cheese sauce breaks or becomes grainy, a splash of lemon juice or cream while whisking over low heat can help reunite the ingredients.

    Frequently Asked Questions

    What’s the difference between grits and polenta?

    Grits are typically made from white corn while polenta comes from yellow corn. Grits usually have a softer, creamier texture, while polenta is often firmer. In Shrimp & Creamy Cheddar Grits, the traditional choice is stone-ground grits for authentic Southern flavor.

    Can I make this dish ahead for a dinner party?

    Yes! Prepare the grits up to 2 days ahead and refrigerate. Reheat with extra liquid while stirring constantly. Cook the shrimp just before serving for the best texture and flavor.

    What’s the best cheese for Shrimp & Creamy Cheddar Grits?

    Sharp cheddar provides the classic flavor, but experiment with combinations! Try mixing in smoked gouda for depth, pepper jack for heat, or a touch of cream cheese for extra richness.

    Can I make this dish gluten-free?

    Most grits are naturally gluten-free, but always check packaging for cross-contamination warnings. Ensure any seasonings or broths used are also certified gluten-free for a safe meal.

    What can I substitute for shrimp if someone has a seafood allergy?

    Andouille sausage, smoked chicken, or roasted mushrooms make excellent alternatives that maintain the dish’s Southern character while accommodating dietary restrictions.

    Final Thoughts

    Shrimp & Creamy Cheddar Grits embodies the heart of Southern hospitality – simple ingredients transformed into something truly special. There’s a reason this dish has stood the test of time, bringing comfort to countless tables across generations. I hope you’ll try this recipe and experience the magic of perfectly creamy grits topped with succulent shrimp. It might just become your new go-to for both weeknight dinners and special occasions. For more Southern-inspired recipes, visit our Pinterest board where comfort food is always in season!

  • Dumpling Bake Delight: Irresistible Comfort Food You’ll Crave Instantly

    Dumpling Bake Delight: Irresistible Comfort Food You’ll Crave Instantly

    Dumpling Bake Delight: Irresistible Comfort Food You’ll Crave Instantly

    This Dumpling Bake transforms ordinary ingredients into a soul-warming masterpiece that’s perfect for those evenings when you crave something hearty yet comforting. I discovered this recipe during a particularly chilly autumn weekend when my kitchen became my sanctuary. The way the golden crust forms over those pillowy dumplings while the savory filling bubbles underneath—it’s pure magic! My family now requests this dish whenever the temperature drops, and I’m always happy to oblige. If you love dishes that combine simplicity with impressive results, this one’s about to become your new favorite comfort food.

    Recipe

    Why You’ll Love This Dumpling Bake

    Perfect Comfort Food for Any Season

    There’s something undeniably magical about the way dumplings transform a simple stew into something extraordinary. The tender dumplings absorb all those rich flavors while creating a beautiful textural contrast that’s simply irresistible. I love how they puff up during baking, creating little clouds of doughy goodness that float atop the savory base. On cold evenings, this dish wraps around you like a warm hug, but it’s equally welcome during summer when paired with a crisp salad. The aroma alone as it bakes will have everyone gravitating toward your kitchen!

    Quick Prep with Impressive Results

    One of my favorite things about this Dumpling Bake is how it delivers restaurant-quality results with minimal effort. The prep-to-wow ratio is off the charts! You can assemble everything in about 20 minutes, then let your oven do the heavy lifting. I’ve served this at impromptu dinner parties and received more compliments than dishes that took three times as long. The way the top browns to a perfect golden hue while keeping the dumplings tender underneath creates that professional finish that makes guests think you’ve been cooking all day. It’s my secret weapon for busy weeknights!

    Essential Tips & Tricks

    Mastering the Dumpling Consistency

    Getting your dumpling batter to the perfect consistency is the key to this dish’s success. You’re looking for something that’s thick enough to hold its shape when dropped onto the hot filling, but not so dense that it becomes heavy or doughy. I always use a light touch when mixing—just until the ingredients come together. Over-mixing activates too much gluten and leads to tough dumplings. My foolproof test: the batter should slowly drop from your spoon in a thick ribbon. If it’s runny, add a tablespoon more flour; if it’s too stiff, a splash of milk works wonders. Trust your instincts here!

    Creating the Perfect Base Layer

    The foundation of any great Dumpling Bake lies in its base layer, which needs to have the right balance of flavor and moisture. I learned through trial and error that the filling should be slightly thinner than you might think—those dumplings will absorb liquid as they cook! For maximum flavor, don’t rush the initial sautéing of aromatics. Those extra few minutes developing flavor in your onions and garlic make a world of difference. For a truly spectacular Dumpling Bake, deglaze your pan with a splash of white wine or broth to lift all those delicious browned bits before adding the remaining ingredients.

    Serving Ideas & Creative Variations

    Seasonal Pairings That Elevate the Dish

    This Dumpling Bake shines brightest when paired with simple, complementary sides that balance its richness. During winter months, I love serving it with roasted root vegetables tossed in herbs and olive oil. The slight sweetness and caramelization create a perfect contrast. In warmer seasons, a bright, acidic salad with citrus vinaigrette cuts through the richness beautifully. My family particularly loves when I pair it with Kickin’ Collard Greens for a complete meal that satisfies every craving. Don’t forget a crusty bread for sopping up those incredible juices!

    International Flavor Twists

    One of the joys of this Dumpling Bake is how adaptable it is to different flavor profiles. I’ve created Mediterranean-inspired versions using oregano, lemon zest, and feta in the dumplings, served over a tomato and olive base. For Asian flair, try adding ginger, garlic, and scallions to your dumplings, then serve them over a miso-enriched broth with mushrooms. My personal favorite variation includes fresh herbs and Gruyère cheese in the dumplings, paired with a white wine and leek base. The possibilities are truly endless, making this recipe one you can reinvent countless times without boring your taste buds!

    Storage & Troubleshooting Guide

    Proper Storage for Leftovers

    Storing your Dumpling Bake properly ensures those leftovers remain just as delicious the next day. Allow the dish to cool completely before transferring to airtight containers. The dumplings will continue absorbing liquid as they sit, so I sometimes add a tiny splash of broth when reheating to maintain that perfect consistency. Refrigerated leftovers stay fresh for up to 3 days. For longer storage, portion the bake into freezer-safe containers, leaving some headspace for expansion. When reheating from frozen, I find it’s best to thaw overnight in the refrigerator first, then warm gently in a 325°F oven until heated through.

    Fixing Common Dumpling Issues

    Even experienced cooks occasionally encounter dumpling challenges, but most are easily fixed. If your dumplings seem too dense, you likely over-mixed the batter or used too much flour. Next time, use a lighter touch and remember that a few lumps are actually good! Dumplings that dissolve into the filling usually indicate too much liquid in your batter. To rescue a batch that’s too wet, gently drop spoonfuls onto parchment paper first, then transfer them to your hot filling. If your dumplings aren’t cooking through completely, ensure your filling is bubbling hot before adding them, and consider covering the dish for the first half of baking.

    Frequently Asked Questions

    Can I make this Dumpling Bake ahead of time?

    You can prepare the filling up to 2 days ahead and refrigerate it. When ready to serve, reheat the filling until bubbling, then make fresh dumplings and continue with the recipe. The dumplings are best made just before baking.

    What’s the secret to fluffy dumplings?

    The key is using cold ingredients, minimal mixing, and not peeking while they cook! Over-handling activates gluten and makes tough dumplings. Keep your touch light and let them steam undisturbed.

    Can I make a gluten-free Dumpling Bake?

    Absolutely! Substitute a good quality gluten-free flour blend with xanthan gum. Add 1/4 teaspoon baking powder extra to help them rise, as gluten-free flours need that additional lift.

    How do I know when my Dumpling Bake is done?

    Insert a toothpick into the center of a dumpling—it should come out clean with no wet batter. The top should be golden brown and the filling bubbling around the edges.

    Why did my dumplings sink to the bottom?

    This typically happens when the filling isn’t hot enough when adding the dumplings. Always ensure your base is bubbling hot, and your dumplings are the right consistency—not too wet or heavy.

    Final Thoughts

    This Dumpling Bake has become more than just a recipe in my household—it’s a tradition that signals comfort and togetherness. There’s something magical about watching those simple ingredients transform into something so satisfying. Whether you’re making it for a quiet family dinner or a gathering of friends, the joy it brings to the table is undeniable. I encourage you to make this Dumpling Bake your own by experimenting with flavors that speak to your palate. And don’t forget to share your creations on Pinterest to inspire others on their culinary journey!

  • Buckwheat Kasha with Caramelized Mushrooms & Onions Recipe

    Buckwheat Kasha with Caramelized Mushrooms & Onions Recipe

    Buckwheat Kasha with Caramelized Mushrooms & Onions Recipe

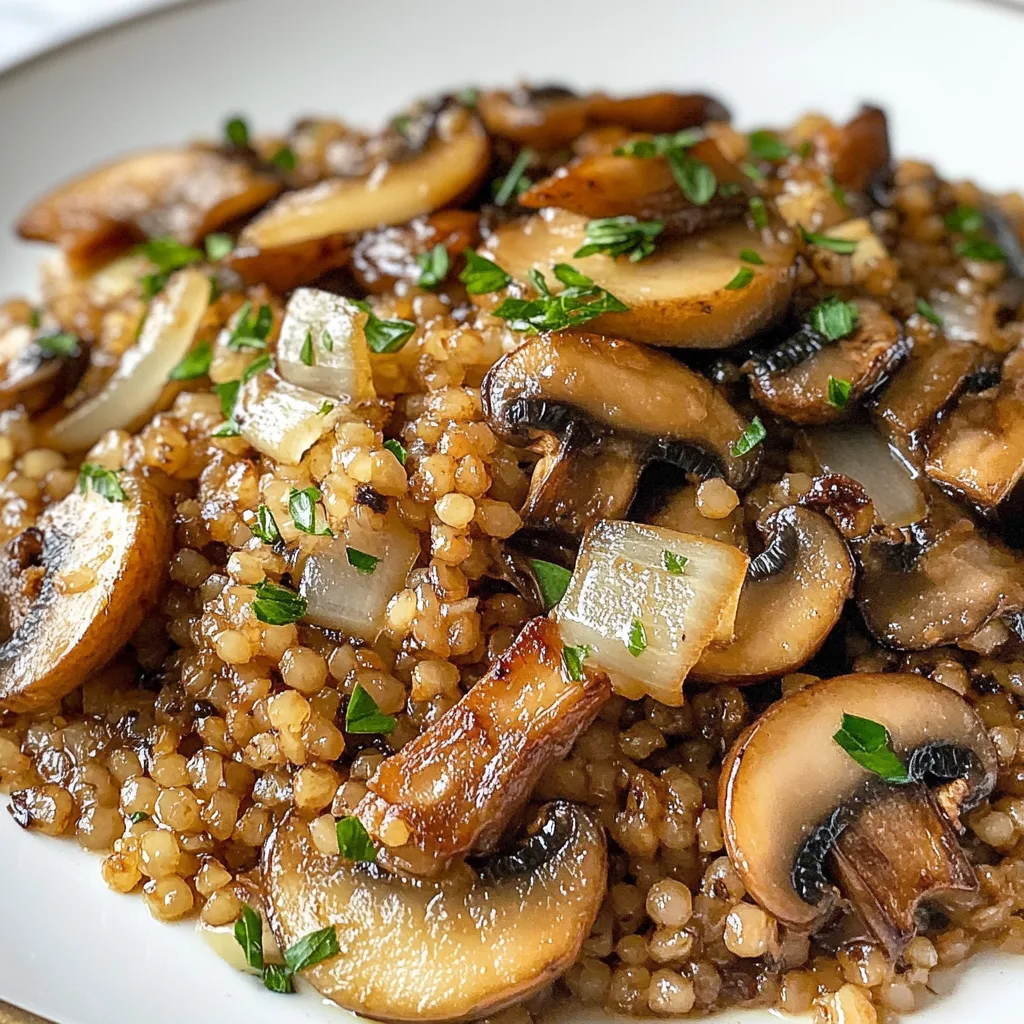
    Buckwheat Kasha With Caramelized Mushrooms And Onions brings rustic Eastern European comfort food right to your dinner table. The first time I made this dish, the nutty aroma of toasted buckwheat filled my kitchen, instantly transporting me back to my grandmother’s cozy dining room. There’s something magical about the way the earthy buckwheat pairs with sweet caramelized onions and umami-rich mushrooms. This hearty, gluten-free dish delivers both incredible flavor and satisfying texture that will have you reaching for seconds. Perfect for chilly evenings when you need something substantial yet nourishing to warm your soul.

    Recipe

    Why You’ll Love This Buckwheat Kasha With Caramelized Mushrooms And Onions

    A Nutritional Powerhouse with Incredible Flavor

    Buckwheat isn’t actually wheat at all – it’s a seed that’s packed with protein, fiber, and essential minerals. When toasted and cooked into kasha, it develops a nutty intensity that forms the perfect canvas for other flavors. The caramelization process transforms ordinary mushrooms and onions into sweet, complex delights that complement the earthy buckwheat perfectly. I love how this dish satisfies my comfort food cravings while still being incredibly nutritious. The combination of protein from the buckwheat and the rich umami from mushrooms creates a deeply satisfying meal that keeps you full for hours.

    Quick Weeknight Dinner with Gourmet Results

    Despite its impressive flavor profile, this buckwheat kasha comes together in just about 30 minutes, making it perfect for busy weeknights. The hands-off cooking approach means you can caramelize the onions and mushrooms while the buckwheat simmers away. I often prep the vegetables while waiting for my kettle to boil, maximizing efficiency without sacrificing flavor. What I appreciate most is how this humble dish transforms basic ingredients into something that tastes like it took hours to prepare. Your family will think you’ve been slaving away all afternoon when you’ve actually been relaxing with a cup of tea!

    Essential Tips & Tricks

    Perfecting the Buckwheat Texture

    The secret to perfect buckwheat kasha is in the toasting step – don’t skip it! Dry-toasting the groats in a skillet until they’re fragrant and golden develops their nutty flavor and helps maintain the perfect texture. I learned the hard way that adding too much liquid results in mushy kasha, so stick with a 1:2 ratio of buckwheat to liquid. For extra flavor, try using vegetable or mushroom broth instead of water. Another game-changer is letting the cooked kasha rest, covered, for 5-10 minutes after cooking. This allows the grains to fully absorb any remaining moisture and achieve that perfect tender-but-distinct texture that makes quick and easy creamy mushroom soup so satisfying.

    Mastering Caramelized Mushrooms and Onions

    Patience is key when caramelizing onions and mushrooms. Use a heavy-bottomed pan and medium-low heat to slowly draw out their natural sugars without burning them. I like to start with the onions, giving them a 5-minute head start before adding mushrooms since they take longer to caramelize. Don’t crowd the pan – mushrooms release moisture when cooking, and overcrowding prevents proper caramelization. Season with salt early to help draw out moisture, but add garlic and herbs only in the final few minutes to prevent burning. For an extra flavor boost, deglaze the pan with a splash of white wine or sherry vinegar to scrape up those delicious browned bits before combining with the kasha.

    Serving Ideas & Creative Variations

    Perfect Pairings for a Complete Meal

    Buckwheat kasha with caramelized mushrooms and onions works beautifully as a hearty side dish or a satisfying main. For protein, try topping it with a fried egg with a runny yolk that creates a luscious sauce when broken. Alternatively, serve alongside roasted chicken or grilled sausages for a more substantial meal. For a refreshing contrast, pair with a simple green salad dressed with lemon vinaigrette. The bright acidity cuts through the earthy richness of the kasha. During colder months, I love serving this alongside broccoli with garlic butter and cashews for a complete vegetarian feast that satisfies even dedicated meat-eaters.

    Seasonal and Regional Adaptations

    This versatile dish welcomes seasonal adaptations throughout the year. In spring, add tender asparagus tips or fresh peas in the last few minutes of cooking. Summer calls for zucchini and bell peppers caramelized alongside the mushrooms and onions. Fall is perfect for incorporating roasted butternut squash or sweet potatoes. For regional variations, try a Russian-inspired version with dill and a dollop of sour cream, or go Hungarian with paprika and caraway seeds. I’ve even created a Mediterranean version with sun-dried tomatoes, olives, and feta cheese sprinkled on top. The possibilities are endless, making this humble dish a year-round staple in my kitchen.

    Storage & Troubleshooting Guide

    Proper Storage for Maximum Freshness

    Buckwheat kasha with caramelized mushrooms and onions stores beautifully, often tasting even better the next day as the flavors meld together. Store leftovers in an airtight container in the refrigerator for up to 4 days. When reheating, add a splash of broth or water to prevent dryness, and warm gently on the stovetop or microwave. For meal prep, you can freeze portions in freezer-safe containers for up to 3 months. I like to portion mine into individual servings for quick lunches. Thaw overnight in the refrigerator before reheating. The texture may change slightly after freezing, but a drizzle of olive oil and fresh herbs will revive it beautifully.

    Troubleshooting Common Issues

    If your kasha turns out too mushy, you likely used too much liquid or overcooked it. Next time, reduce the liquid by about ¼ cup and check for doneness earlier. For too-dry kasha, simply add a splash more hot broth and fluff with a fork. If your mushrooms aren’t caramelizing properly, they’re probably overcrowded in the pan – cook them in batches if necessary. For bland results, boost flavor with umami-rich ingredients like soy sauce, nutritional yeast, or even a tiny bit of miso paste. If the dish seems heavy, brighten it with a squeeze of lemon juice or a sprinkle of fresh herbs just before serving. Remember that buckwheat has a distinctive flavor that some may need time to appreciate.

    Frequently Asked Questions

    What is buckwheat kasha and is it gluten-free?

    Kasha is toasted buckwheat groats. Despite its name, buckwheat isn’t related to wheat but is a seed from a flowering plant. It’s naturally gluten-free, making it perfect for those with celiac disease or gluten sensitivity.

    Can I make buckwheat kasha with caramelized mushrooms and onions ahead of time?

    Absolutely! This dish actually improves with time as flavors meld. Make it up to 2 days ahead and refrigerate. Reheat gently with a splash of broth to refresh the texture.

    What mushrooms work best in this recipe?

    Button or cremini mushrooms are most accessible and work perfectly. For more complex flavor, try a mix including shiitake, oyster, or porcini mushrooms. Wild mushrooms add exceptional depth.

    Is buckwheat kasha nutritious?

    Very! Buckwheat is high in protein, fiber, and minerals like manganese, copper, and magnesium. It also contains resistant starch, which benefits gut health and helps stabilize blood sugar.

    Can I make this dish vegan?

    Yes! The basic buckwheat kasha with caramelized mushrooms and onions is naturally vegan. Just ensure you use vegetable broth and olive oil or plant-based butter for cooking.

    Final Thoughts

    Buckwheat Kasha With Caramelized Mushrooms And Onions represents comfort food at its finest – nutritious, satisfying, and deeply flavorful. There’s something special about transforming simple ingredients into a dish that nourishes both body and soul. I hope you’ll give this recipe a chance to shine at your table. Whether served as a hearty side or a satisfying main, this versatile dish deserves a regular spot in your meal rotation. Don’t forget to check out more cozy recipes on Pinterest for inspiration!

  • Hasselback Potato Gratin Recipe That Will Melt Your Heart!

    Hasselback Potato Gratin Recipe That Will Melt Your Heart!

    Hasselback Potato Gratin Recipe That Will Melt Your Heart!

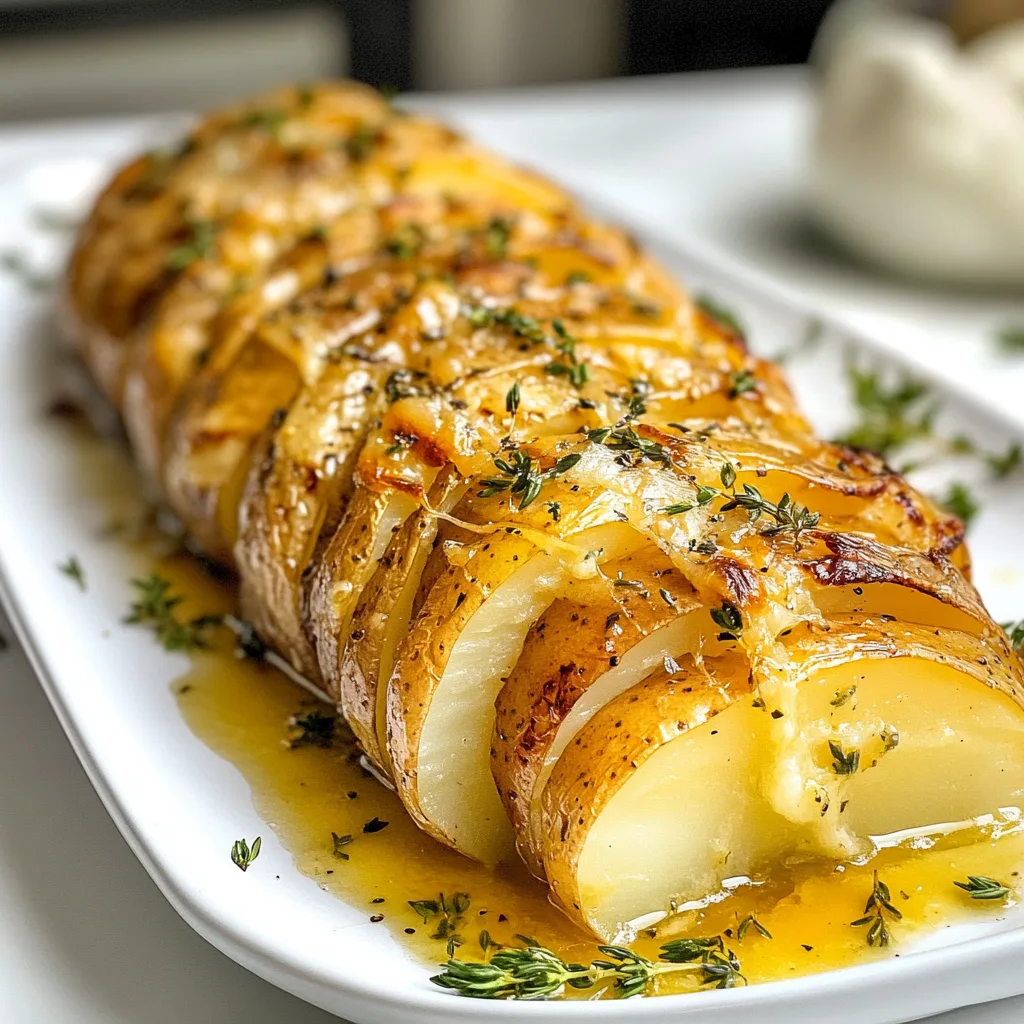
    Hasselback Potato Gratin combines two beloved potato classics into one showstopping dish that’ll make your dinner table shine. Imagine thinly sliced potatoes standing upright like little dominoes, their edges crisped to golden perfection while bathing in a rich, creamy sauce that seeps between each slice. I discovered this technique during a holiday cooking marathon when I was desperate to elevate my potato game beyond the usual mash. The first time I pulled this bubbling masterpiece from the oven, the aroma of garlic, thyme and nutty Gruyère filled my kitchen, and I knew I’d found my new signature side dish for special occasions.

    Recipe

    Why You’ll Love This Hasselback Potato Gratin

    The Perfect Texture Combination

    There’s something magical about contrast in food, and this dish delivers it in spades. The tops of the potato slices turn irresistibly crispy while the bottoms remain tender and creamy. I’m a texture person through and through—nothing disappoints me more than one-dimensional food! The thin slicing technique creates maximum surface area for browning, meaning more of those caramelized edges we all fight over. My husband actually counted the crispy bits on his portion last Thanksgiving (yes, we’re that family), declaring it “mathematically superior” to regular gratins.

    Make-Ahead Friendly for Entertaining

    One of this recipe’s hidden superpowers is its entertaining flexibility. You can slice the potatoes, make the cream mixture, and assemble everything up to 24 hours ahead, then simply bake when guests arrive. This saved me during last year’s holiday dinner when my sister announced her early arrival. Instead of panicking, I simply popped my prepared gratin into the oven while we caught up over wine. The dish actually benefits from the extra soaking time, allowing the potatoes to absorb all those wonderful flavors before baking.

    Essential Tips & Tricks

    Choosing and Slicing Your Potatoes

    The foundation of an exceptional Hasselback Potato Gratin starts with selecting the right potatoes. Yukon Golds are my go-to for their buttery flavor and perfect starch content—they hold their shape while still becoming creamy. Russets work too, but tend to break down more. For slicing, a mandoline is non-negotiable. I learned this the hard way after attempting to hand-slice my first batch, ending up with inconsistent potatoes that cooked unevenly. Aim for 1/8-inch thickness for the perfect balance of structure and tenderness. And please, use the mandoline guard! My kitchen adventures have included enough bandaged fingertips.

    The Secret to the Perfect Cream Sauce

    The liquid component is where you can truly make this dish your own. I start with a base of heavy cream and whole milk (2:1 ratio) for the perfect richness without becoming too heavy. Infusing this mixture with fresh thyme, a bay leaf, and smashed garlic cloves while it warms creates layers of flavor that plain cream could never achieve. Don’t skip this step! My personal twist is adding a pinch of nutmeg and a splash of white wine to cut through the richness. For cheese, a combination of aged Gruyère and Parmesan creates the perfect balance of meltability and sharp flavor, as I discovered in my garlic butter chicken casserole experiments.

    Serving Ideas & Creative Variations

    Perfect Pairings for Any Occasion

    This Hasselback Potato Gratin shines as a versatile side dish that complements nearly any protein. For holiday meals, it pairs beautifully with roasted turkey or prime rib, the creamy potatoes balancing the rich meats. For weeknight dinners, I serve it alongside a simple roasted chicken or pan-seared fish with lemon. The dish is substantial enough that you really only need a green vegetable to complete the meal—my kickin’ collard greens provide the perfect peppery contrast to the creamy potatoes. Don’t forget a crisp white wine or light red to cut through the richness!

    Creative Flavor Twists

    While the classic version is divine, this dish welcomes creative variations. Try a Mediterranean twist with olive oil, rosemary, and pecorino instead of cream and Gruyère. For something bolder, add caramelized onions between the potato slices and top with smoked gouda. My family went wild for a loaded baked potato version with bacon bits, chives, and sour cream folded into the sauce. For heat lovers, chipotle peppers in adobo added to the cream mixture creates a smoky, spicy variation that’s particularly wonderful with grilled meats. The possibilities are endless, making this recipe a true chameleon in your cooking repertoire.

    Storage & Troubleshooting Guide

    Proper Storage and Reheating

    Leftover Hasselback Potato Gratin (if you’re lucky enough to have any!) needs proper handling to maintain its texture. Cool completely before covering and refrigerating for up to 3 days. To reheat, avoid the microwave which will make everything soggy. Instead, cover with foil and warm in a 325°F oven for 15-20 minutes, then remove the foil for the last 5 minutes to re-crisp the top. I’ve found that individual portions reheat beautifully in an air fryer at 350°F for about 4 minutes. For freezing, it’s best to freeze before baking, then thaw completely in the refrigerator overnight before cooking according to the original instructions.

    Troubleshooting Common Issues

    If your potatoes aren’t cooking evenly, the likely culprit is inconsistent slicing. Next time, be meticulous with your mandoline settings. For a sauce that’s broken or curdled, your oven temperature was probably too high—this dish prefers a moderate heat for gentle cooking. If the top is browning too quickly while the center remains undercooked, simply cover with foil until the final 15 minutes. Watery results usually mean you’ve used a very starchy potato variety without rinsing away some starch, or that the dish wasn’t allowed to rest for 10-15 minutes after baking. This resting period is crucial as it allows the sauce to thicken and settle.

    Frequently Asked Questions

    Can I make Hasselback Potato Gratin ahead of time?

    Yes! Assemble up to 24 hours ahead and refrigerate. You may need to add 10-15 minutes to the baking time if cooking directly from the refrigerator.

    What’s the best potato variety for Hasselback Potato Gratin?

    Yukon Golds offer the ideal balance of creaminess and structure. Russets work too but may break down more during baking.

    Can I use pre-sliced potatoes from the store?

    I don’t recommend it. They’re usually too thick and often treated with preservatives that affect texture and flavor.

    Is a mandoline really necessary?

    For consistent, thin slices that cook evenly, yes. If you don’t have one, use the slicing blade on a food processor instead.

    Can I make this dairy-free?

    Absolutely! Use full-fat coconut milk and olive oil instead of cream, and a good dairy-free cheese alternative that melts well.

    Final Thoughts

    This Hasselback Potato Gratin has become my secret weapon for gatherings where I want to impress without spending hours in the kitchen. There’s something about its elegant presentation and comforting flavors that makes guests feel simultaneously special and at home. I love watching people’s expressions as they take their first bite—that moment of surprise when they discover it’s not just beautiful, but delicious too. For more inspired recipes that balance impressive results with practical preparation, check out my collections on Pinterest.

  • White Chicken Chili with Crispy Tortilla Strips: Irresistibly Delicious!

    White Chicken Chili with Crispy Tortilla Strips: Irresistibly Delicious!

    White Chicken Chili with Crispy Tortilla Strips: Irresistibly Delicious!

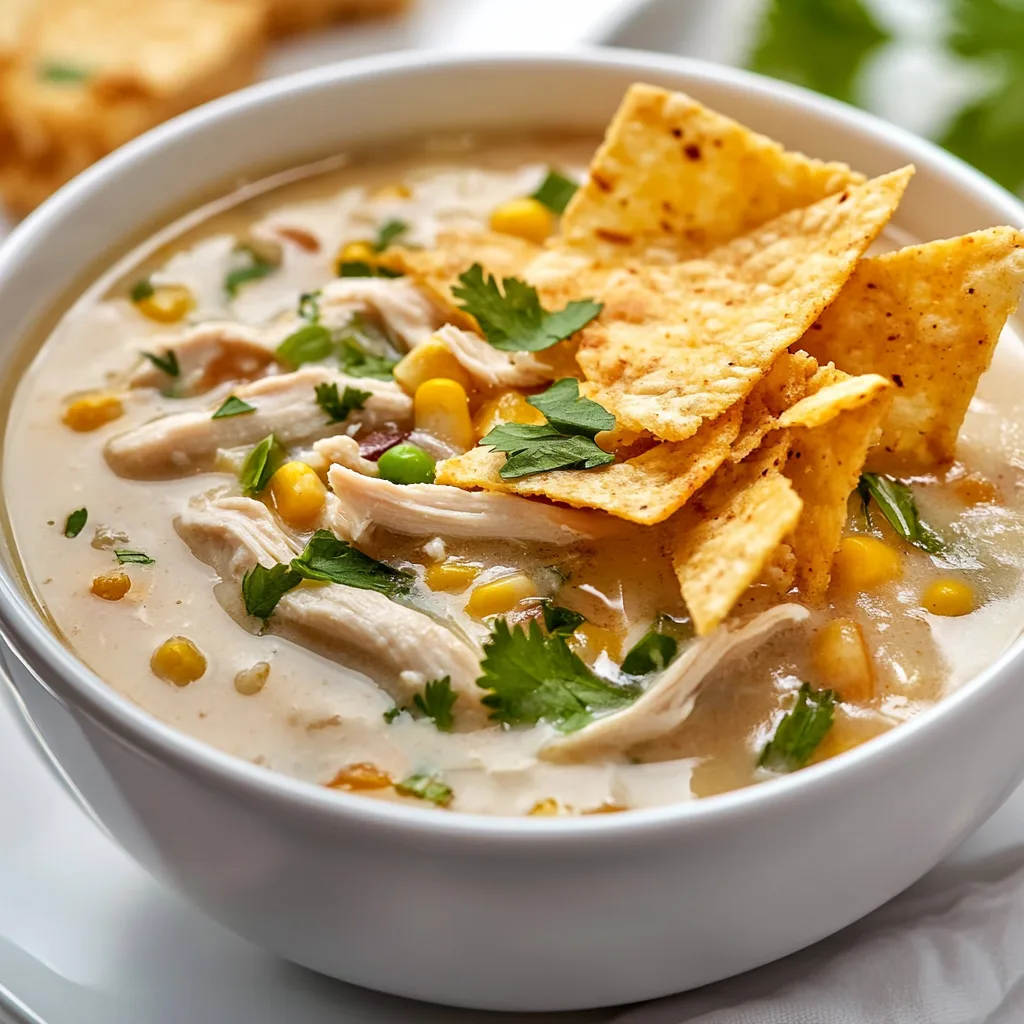
    White Chicken Chili with Crispy Tortilla Strips is my absolute go-to comfort food when the weather turns chilly. There’s something magical about that first spoonful—tender chunks of chicken swimming in a creamy, slightly spicy broth, studded with white beans and topped with those addictively crunchy tortilla strips. I discovered this recipe during a particularly brutal Chicago winter when my sister-in-law brought it over, and I’ve been perfecting my version ever since. The combination of zesty green chiles and warming spices creates a bowl that feels like a warm hug from the inside out.

    Recipe

    Why You’ll Love This White Chicken Chili with Crispy Tortilla Strips

    Perfect Balance of Flavors and Textures

    This isn’t your typical heavy chili—it’s so much more! The lightness of the chicken paired with the creaminess of the broth creates this incredible texture contrast that keeps you coming back for more. What really makes this recipe special is how the mild heat from the green chiles and cumin builds gradually, never overwhelming your palate. I love watching guests take their first bite and seeing their eyes light up with surprise at how complex the flavors are. The homemade tortilla strips add that essential crunch factor that store-bought toppings just can’t match. Trust me, you’ll be scraping the bowl clean!

    Quick and Adaptable for Any Occasion

    One of my favorite things about this White Chicken Chili with Crispy Tortilla Strips is how effortlessly it fits into any situation. Need a cozy weeknight dinner? It’s ready in under an hour. Hosting a casual gathering? It’s a crowd-pleaser that can be easily doubled. The recipe is incredibly forgiving for busy cooks—you can use rotisserie chicken to save time or throw everything in the slow cooker in the morning. I’ve made this for potlucks, game days, and even served it in mugs for a winter bonfire night. The best part? You can adjust the spice level to please everyone from heat-seekers to spice-sensitive family members.

    Essential Tips & Tricks

    Getting the Perfect Consistency

    The secret to achieving that ideal creamy-yet-not-too-thick consistency lies in how you build your White Chicken Chili. Start by sautéing the aromatics thoroughly—those onions and garlic need to be soft and fragrant before moving forward. When adding the beans, I always mash about a third of them against the side of the pot with a wooden spoon. This natural thickening method gives the chili body without needing heavy cream or flour. For an extra-silky texture, try stirring in a block of cream cheese during the last 10 minutes of cooking. If your chili gets too thick, simply add more chicken broth a quarter cup at a time until it reaches your desired consistency.

    Flavor-Boosting Techniques

    The difference between a good White Chicken Chili and an unforgettable one comes down to a few key techniques. First, don’t rush the spices—let them bloom in the hot oil with the vegetables for at least 30 seconds to release their essential oils. This single step transforms the flavor profile completely! For deeper dimension, try roasting your poblano peppers before dicing them, or substitute a can of regular green chiles with fire-roasted ones. When seasoning, remember to taste as you go, especially after adding the cream cheese, as it can significantly change the salt level. A final squeeze of lime just before serving brightens everything and ties all the flavors together beautifully.

    Serving Ideas & Creative Variations

    Perfect Pairings and Toppings

    The beauty of White Chicken Chili with Crispy Tortilla Strips lies in its versatility when it comes to serving. Create a topping bar that lets everyone customize their bowl—diced avocado, fresh cilantro, lime wedges, shredded Monterey Jack, and sour cream are my essentials. For a complete meal, I love serving this alongside a simple green salad with a tangy vinaigrette or warm cornbread muffins for dipping. The contrast between the creamy chili and the crunchy, buttery cornbread is divine! For a fun presentation at parties, serve individual portions in hollowed-out bread bowls or even in small pumpkins during fall gatherings. The Snickers Cheese Ball makes a surprisingly perfect dessert pairing!

    Exciting Recipe Twists

    Don’t be afraid to put your own spin on this versatile White Chicken Chili! For a southwestern version, add corn kernels, diced bell peppers, and a dash of smoked paprika. Vegetarian guests? Substitute the chicken with extra beans and diced mushrooms for meaty texture. My personal favorite variation is adding a can of hominy for chewy texture and authentic Mexican flavor. For a lighter summer version, stir in fresh zucchini during the last few minutes of cooking and top with extra fresh herbs. Feeling indulgent? Try the “loaded baked potato” version by topping with bacon bits, chives, and a dollop of mashed potatoes instead of sour cream. The possibilities are endless!

    Storage & Troubleshooting Guide

    Proper Storage and Freezing Methods

    This White Chicken Chili actually tastes even better the next day after the flavors have had time to meld together. To store leftovers properly, cool the chili completely before transferring to airtight containers. It will keep in the refrigerator for up to 4 days. For freezing, I recommend portioning into individual servings—this makes reheating quick and convenient. Leave about an inch of space at the top of containers as the chili will expand when frozen. For best quality, use frozen chili within 3 months. Important note: always store the crispy tortilla strips separately in a zip-top bag at room temperature, as they’ll become soggy if refrigerated with the chili.

    Common Problems and Easy Fixes

    Even experienced cooks occasionally run into issues with White Chicken Chili. If your chili turns out too thin, try this quick fix: scoop out about ½ cup of the liquid, whisk in 1-2 tablespoons of cornstarch until smooth, then stir this slurry back into the pot and simmer for 5 minutes. Too thick? Simply add more broth or even a splash of half-and-half. If the flavor seems flat, don’t just add more salt—try brightening with acid instead. A tablespoon of white wine vinegar or fresh lime juice can transform a bland batch. Did your chicken turn out tough? Next time, add it later in the cooking process or use rotisserie chicken added at the very end just to warm through.

    Frequently Asked Questions

    Can I make White Chicken Chili with Crispy Tortilla Strips ahead of time?

    Absolutely! The chili actually improves after a day in the refrigerator as flavors meld. Make it up to 2 days ahead, but prepare the tortilla strips just before serving to maintain their crunch.

    What’s the best way to achieve tender chicken?

    For the most tender chicken, either use rotisserie chicken added at the end of cooking, or gently poach boneless chicken breasts in the broth until just cooked through, then shred.

    Can I make this recipe in a slow cooker?

    Yes! Add all ingredients except cream cheese and toppings to your slow cooker. Cook on low for 6-7 hours, then stir in cream cheese until melted before serving with fresh toppings.

    How can I make this recipe spicier?

    Add 1-2 diced jalapeños with seeds, increase the cayenne pepper, or stir in your favorite hot sauce at the end. You can also offer hot sauce at the table for individual heat preferences.

    What can I substitute for the white beans?

    Great Northern, navy, or cannellini beans all work wonderfully. For a bean-free version, try adding extra chicken and diced cauliflower for texture and body.

    Final Thoughts

    This White Chicken Chili with Crispy Tortilla Strips has become more than just a recipe in my household—it’s a tradition that signals the beginning of cozy season. There’s something special about the way it fills the kitchen with warming aromas and brings everyone to the table with eager anticipation. Whether you’re making it for a quiet family dinner or a lively gathering, this chili has a way of creating moments of connection. I hope you’ll make it your own, perhaps adding it to your regular rotation of comfort foods. Don’t forget to check out more of my favorite cozy recipes on Pinterest for inspiration all year round!

  • Hot Honey Crispy Chicken Thighs with Cornbread – Irresistibly Delicious!

    Hot Honey Crispy Chicken Thighs with Cornbread – Irresistibly Delicious!

    Hot Honey Crispy Chicken Thighs with Cornbread – Irresistibly Delicious!

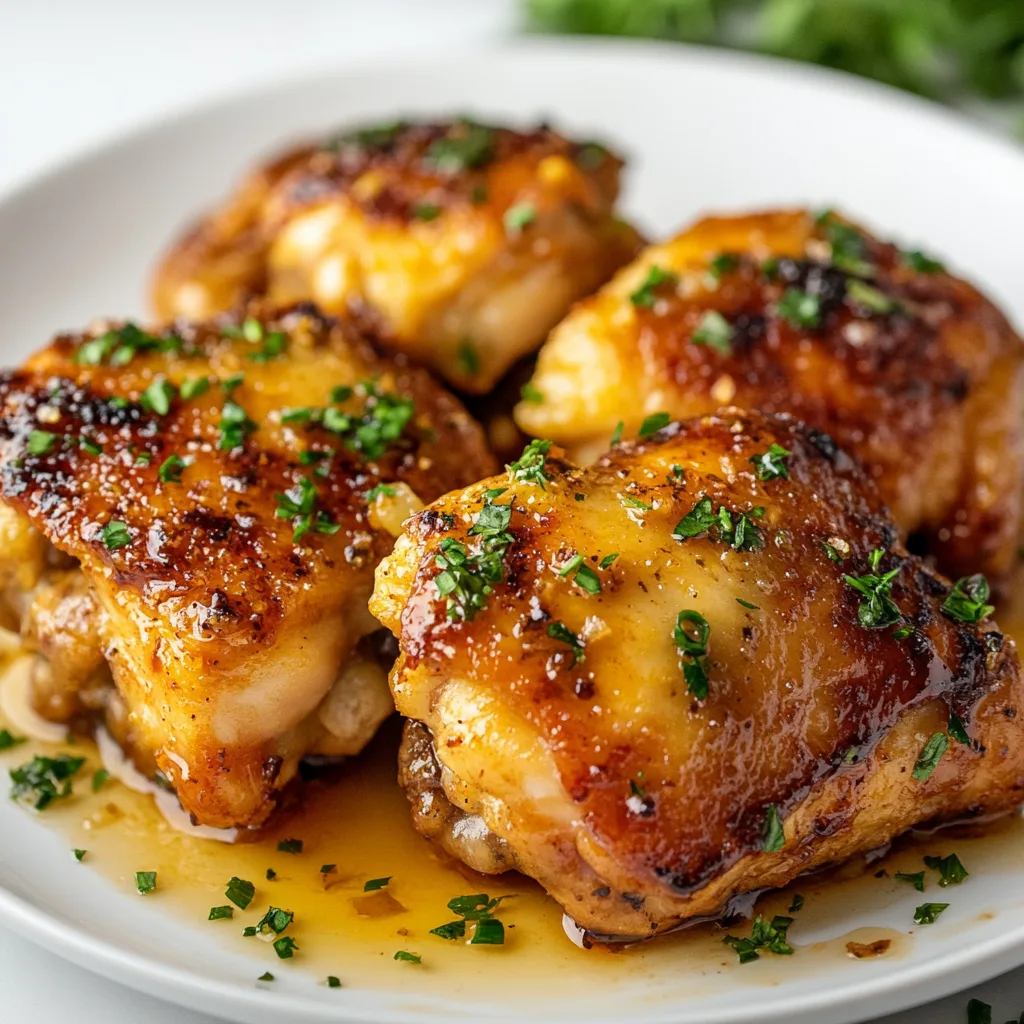
    These Hot Honey Crispy Chicken Thighs served with Cornbread have become my weekend ritual, friends. There’s something magical about that first bite – crispy, crackling skin giving way to juicy meat, all glazed with spicy-sweet honey that makes your taste buds dance. I discovered this recipe during a rainy Sunday when comfort food was calling my name. The cornbread alongside soaks up all those delicious drippings, creating the perfect Southern-inspired plate that feels like a warm hug. Trust me, this dish will have everyone at your table asking for seconds! For more cozy recipes like this one, browse our collection of comfort classics.

    Recipe

    Why You’ll Love This Hot Honey Crispy Chicken Thighs served with Cornbread

    Perfect Texture Combination

    Let me tell you about the texture paradise happening on this plate. The chicken thighs develop this impossibly crispy exterior that makes the most satisfying crunch when you bite into it. I still remember the first time I nailed the perfect crisp – my husband actually stopped mid-conversation to ask what I did differently! The secret is patting the skin completely dry before seasoning and giving the thighs space in the pan. Meanwhile, the cornbread brings that tender, crumbly contrast that complements the chicken perfectly. Together, they create a textural experience that hits all the right notes.

    Sweet Heat Flavor Profile

    The hot honey glaze is what elevates this dish from good to unforgettable. It creates this beautiful balance of sweetness with a slow-building heat that’s completely addictive. I use local honey whenever possible and infuse it with my favorite hot sauce (plus a pinch of cayenne for extra kick). Last summer, I served this at a backyard gathering, and my friend’s spice-averse mother couldn’t stop eating it – that’s how perfectly balanced the flavor is! The cornbread adds a subtle sweetness that cools everything down just enough between bites of the glazed chicken.

    Essential Tips & Tricks

    Achieving Ultimate Crispiness

    The road to perfectly crispy skin starts well before cooking. After bringing chicken thighs to room temperature, pat them completely dry with paper towels – moisture is the enemy of crispiness! Season generously with salt and let them rest uncovered for 15 minutes to draw out additional moisture. For cooking, start with a cold cast-iron skillet that heats slowly, placing thighs skin-side down first. The gradual temperature rise helps render the fat properly without burning. Resist the urge to move them until they naturally release from the pan – patience yields that golden-brown perfection every time!

    Making the Perfect Cornbread Companion

    For cornbread that complements these chicken thighs perfectly, focus on texture balance. I prefer a slightly sweet, moist cornbread that contrasts with the crispy chicken. Preheat your cast iron skillet with butter before adding batter – this creates that beautiful crusty edge everyone fights over! For the best flavor, use stone-ground cornmeal and don’t overmix the batter. Just like my Kickin’ Collard Greens, quality ingredients make all the difference. Let your cornbread rest 5-10 minutes after baking before cutting – this helps it set properly and prevents crumbling.

    Serving Ideas & Creative Variations

    Seasonal Side Pairings

    The beauty of this dish is how it adapts to whatever seasonal produce you have on hand. In summer, I serve it with a bright cucumber and tomato salad dressed simply with lemon and herbs – the acidity cuts through the richness perfectly. Fall calls for roasted sweet potatoes or butternut squash with sage. Winter? Try it with braised greens or a hearty Creamy Tuscan Tortellini Soup on the side. Spring brings asparagus or peas tossed with mint. The hot honey chicken remains the star, but these seasonal sides keep the meal feeling fresh and exciting all year round.

    Global Flavor Twists

    Don’t be afraid to take these chicken thighs on a flavor journey around the world! For an Asian-inspired twist, add ginger, soy, and sesame to your hot honey glaze. Mediterranean flavors work beautifully too – think lemon, oregano, and garlic with a side of olive-studded cornbread. My personal favorite variation is a Mexican-inspired version with lime, cilantro, and chipotle in the honey, served with jalapeño cornbread. These global adaptations maintain the crispy-meets-tender texture we love while introducing exciting new flavor profiles that keep this dish in regular rotation.

    Storage & Troubleshooting Guide

    Keeping It Crispy for Leftovers

    Maintaining that signature crispiness in leftover chicken is tricky but not impossible! Store chicken and cornbread separately in airtight containers in the refrigerator for up to 3 days. When reheating chicken, avoid the microwave at all costs – it creates steam that softens that beautiful crispy skin. Instead, place thighs on a wire rack over a baking sheet and reheat in a 350°F oven for 10-15 minutes. For the cornbread, a light toasting in a skillet with butter brings it back to life beautifully. Pro tip: save extra hot honey glaze separately to drizzle over reheated chicken!

    Troubleshooting Common Issues

    If your chicken skin isn’t getting crispy enough, a few culprits might be to blame. First, overcrowding the pan prevents proper air circulation – give those thighs space! Second, the pan might not be hot enough before adding chicken. You should hear a satisfying sizzle when the skin touches the surface. For cornbread that’s too crumbly, you likely overmixed the batter or used too much cornmeal relative to flour. And if your hot honey glaze separates or crystallizes, gently rewarm it with a splash of water while whisking. Remember, cooking is a journey – sometimes the “mistakes” lead to delicious new discoveries!

    Frequently Asked Questions

    Can I use boneless chicken thighs for Hot Honey Crispy Chicken Thighs served with Cornbread?

    Yes, but reduce cooking time by about 5-7 minutes. Boneless thighs won’t be quite as juicy, but they’ll still work beautifully with the hot honey glaze and crisp up nicely if you follow the drying technique.

    Can I make the hot honey glaze ahead of time?

    Absolutely! The glaze can be made up to two weeks ahead and stored in an airtight container in the refrigerator. Just warm it slightly before using to restore its pourable consistency.

    What’s the best cornmeal for authentic cornbread?

    Stone-ground medium-grind cornmeal provides the best texture and corn flavor. Yellow cornmeal gives a more vibrant color, while white cornmeal offers a slightly more delicate taste.

    Can I make this dish spicier?

    Yes! Increase the heat by adding more cayenne or hot sauce to your honey glaze. You can also add diced jalapeños to your cornbread batter for an extra kick throughout the meal.

    Is there a dairy-free alternative for the cornbread?

    Replace butter with neutral oil and milk with unsweetened almond or oat milk. The texture will be slightly different, but still delicious alongside the crispy hot honey chicken thighs.

    Final Thoughts

    These Hot Honey Crispy Chicken Thighs served with Cornbread represent comfort food at its finest – simple ingredients transformed through technique and love into something extraordinary. I find myself returning to this recipe whenever I need a reliable crowd-pleaser or just a soul-warming meal. The contrast of textures, the perfect balance of sweet heat, and that irresistible cornbread create a dining experience that feels special yet accessible. Be sure to check out more of my favorite recipes on Pinterest for more inspiration. Happy cooking, friends!