Blog

  • Thick and Creamy Tomato Soup Recipe That Warms Your Soul!

    Thick and Creamy Tomato Soup Recipe That Warms Your Soul!

    Thick and Creamy Tomato Soup Recipe That Warms Your Soul!

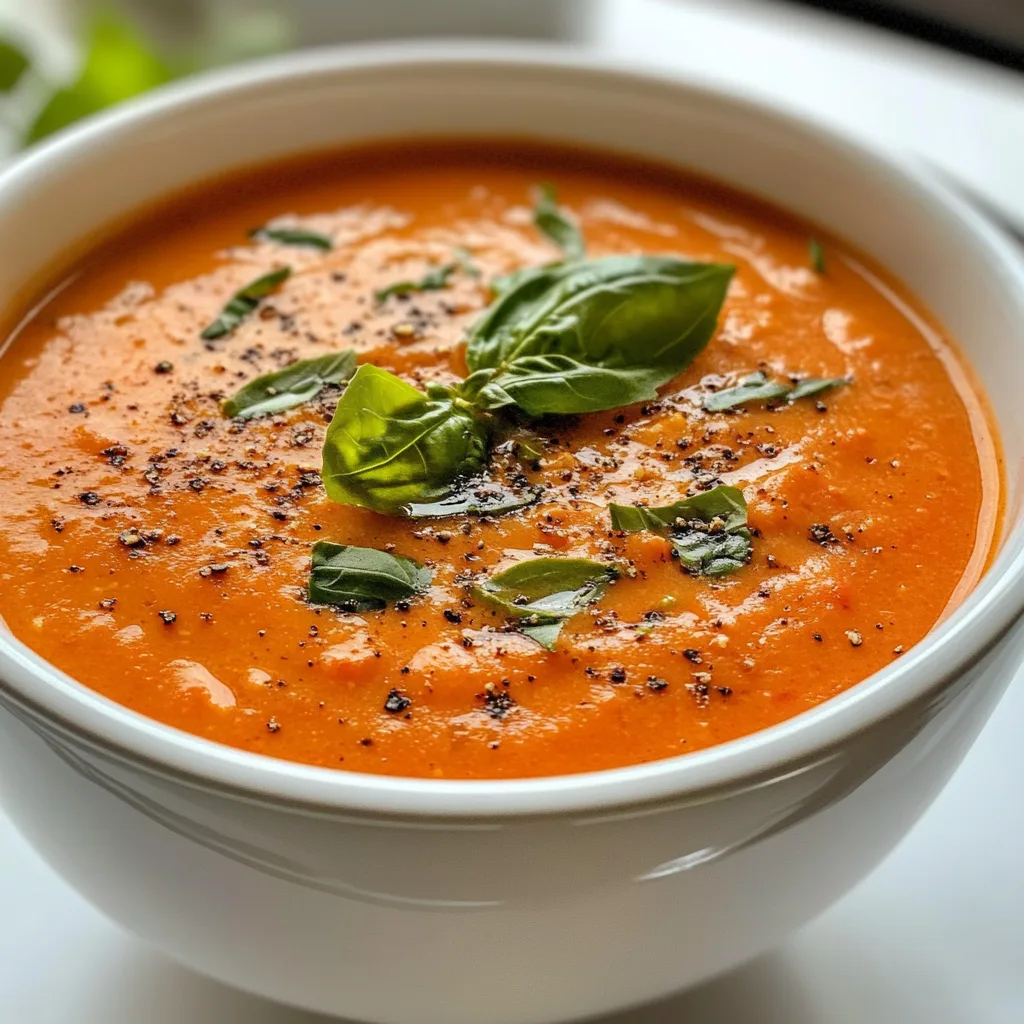
    This thick and creamy tomato soup is my ultimate comfort food revelation. On a particularly dreary autumn afternoon last year, I found myself craving something that would warm me from the inside out. That’s when this velvety creation was born in my kitchen, transforming ordinary tomatoes into a luxurious bowl of pure comfort.

    The balance of tangy tomatoes, sweet cream, and aromatic herbs creates a soup that’s both nostalgic and sophisticated. Unlike watery versions you might have tried before, this thick and creamy tomato soup has a substantial, almost silky texture that clings to your spoon and satisfies in a way that thinner soups simply can’t. Perfect for dunking a grilled cheese or enjoying on its own, this recipe has become my most requested dish when friends visit my kitchen.

    Recipe

    Why You’ll Love This Thick and Creamy Tomato Soup

    Rich, Velvety Texture That’s Never Watery

    The secret to this thick and creamy tomato soup lies in its carefully crafted texture. I use a combination of slow-roasted tomatoes and a touch of flour to create that luxurious mouthfeel without relying on excessive cream. The tomatoes caramelize slightly in the oven, developing deep, concentrated flavors that simply can’t be achieved by simmering alone. Each spoonful offers that perfect consistency – substantial enough to feel like a meal, yet smooth enough to glide across your palate. The velvety finish comes from a careful balance of blending and straining, ensuring no seeds or skins interrupt the silky experience.

    Perfect Balance of Tangy & Sweet Flavors

    This soup dances on your taste buds with its perfectly balanced flavor profile. The natural acidity of tomatoes is tamed with a touch of honey and cream, creating harmony without masking the tomato’s essential character. I’ve discovered that adding a pinch of baking soda neutralizes excessive acidity without diluting flavor – a game-changer for tomato soups! The subtle sweetness comes from caramelizing onions until they’re golden and fragrant, infusing the broth with their natural sugars. Every element works together, creating a soup that’s bright yet comforting, bold yet balanced.

    Essential Tips & Tricks

    Choosing the Right Tomatoes

    The foundation of any thick and creamy tomato soup begins with selecting the right tomatoes. I prefer using Roma tomatoes for their meaty texture and lower water content, which naturally creates a thicker base. When they’re not in season, high-quality canned San Marzano tomatoes make an excellent substitute – their sweet-tart balance and dense flesh maintain that luxurious consistency. For an extra flavor boost, I sometimes mix in a handful of cherry tomatoes which add bright bursts of sweetness. The key is using ripe, flavorful tomatoes rather than the pale, watery varieties often found in supermarkets during winter months.

    The Secret to Silky Smoothness

    Achieving that perfect silky texture requires attention to detail. First, thoroughly blend your soup until absolutely smooth, then strain it through a fine-mesh sieve to remove any lingering bits of skin or seeds. This extra step makes all the difference between a good soup and a restaurant-quality experience. For ultimate creaminess, slowly incorporate heavy cream at the end of cooking while the soup is at a bare simmer – never boiling, which can cause curdling. If you’re looking for other creamy soup inspirations, my Creamy Cowboy Soup uses similar techniques to create velvety perfection.

    Serving Ideas & Creative Variations

    Perfect Pairings & Garnishes

    Elevate your thick and creamy tomato soup with thoughtfully chosen accompaniments. My favorite pairing is a grilled cheese sandwich made with sharp cheddar and sourdough bread – the tangy soup complementing the rich, melty cheese creates pure magic. For a lighter option, try homemade garlic croutons that add delightful crunch and aromatic flavor. Fresh garnishes make all the difference: a swirl of pesto, a dollop of crème fraîche, or a sprinkle of microgreens adds visual appeal and flavor complexity. For special occasions, I float a small parmesan crisp on top, which slowly melts into the soup creating pockets of savory goodness.

    Exciting Flavor Twists

    This versatile base recipe welcomes creative variations. For a Mediterranean twist, add roasted red peppers and a pinch of smoked paprika, then finish with crumbled feta cheese. Spice lovers might enjoy adding chipotle peppers in adobo sauce for a smoky kick that pairs beautifully with the creamy base. For an Italian-inspired version, incorporate fresh basil and serve with a side of Pizza Rolls with Mozzarella and Garlic Butter for a complete meal. During summer months, I love adding corn kernels and a touch of lime juice for brightness that complements the soup’s richness.

    Storage & Troubleshooting Guide

    Proper Storage Techniques

    Preserve the quality of your thick and creamy tomato soup with proper storage methods. Allow the soup to cool completely before transferring to airtight containers – I prefer glass containers which won’t absorb flavors or stain. Refrigerated soup maintains its peak flavor for 3-4 days. For longer storage, freeze portions in individual containers or silicone muffin tins for convenient single servings. When freezing, leave about an inch of headspace to allow for expansion, and consider freezing without the cream, adding it fresh when reheating for the best texture and flavor profile.

    Fixing Common Issues

    Even experienced cooks occasionally encounter soup challenges. If your soup is too thin, simmer uncovered to reduce and thicken, or create a quick slurry of cornstarch and cold water to add body without changing the flavor. For soup that’s too thick, gradually thin with vegetable broth rather than water to maintain flavor intensity. If acidity is too pronounced, a pinch of baking soda or a drizzle of honey can restore balance. Curdled cream can usually be rescued by removing from heat immediately and blending smooth with an immersion blender while still warm.

    Frequently Asked Questions

    Can I make thick and creamy tomato soup without cream?

    Absolutely! Substitute coconut milk for a dairy-free alternative with tropical notes, or use cashew cream for richness. Blended white beans or potatoes can also add creaminess and body without dairy.

    How can I make this soup more filling?

    Add protein by stirring in white beans, shredded chicken, or tiny pasta shapes. Serve with substantial sides like cheese toast, stuffed mushrooms, or a hearty salad for a complete meal.

    What’s the best way to reheat this soup?

    Reheat gently over medium-low heat, stirring occasionally to prevent scorching. Microwaving works too—use 50% power and stir every 30 seconds for even warming without separation.

    Can I use an immersion blender instead of a regular blender?

    Yes! An immersion blender works wonderfully and reduces cleanup. Blend longer than you think necessary (2-3 minutes) to achieve that silky-smooth texture characteristic of restaurant soups.

    How do I prevent my tomato soup from curdling?

    Temper the cream by whisking a small amount of hot soup into it before adding to the pot. Add cream off-heat, and never boil the soup after adding dairy.

    Final Thoughts

    This thick and creamy tomato soup has become my signature comfort food for good reason. It transforms simple ingredients into something truly special—a bowl of warmth that nourishes body and soul. The balance of tangy tomatoes with velvety cream creates a luxurious experience that’s both nostalgic and sophisticated. I hope you’ll make this recipe your own, perhaps creating a new tradition in your home as it has in mine. Don’t forget to share your creations on Pinterest and tag me—I’d love to see your spin on this beloved classic!
  • New England Clam Chowder Recipe: Creamy, Cozy, and Irresistible!

    New England Clam Chowder Recipe: Creamy, Cozy, and Irresistible!

    New England Clam Chowder Recipe: Creamy, Cozy, and Irresistible!

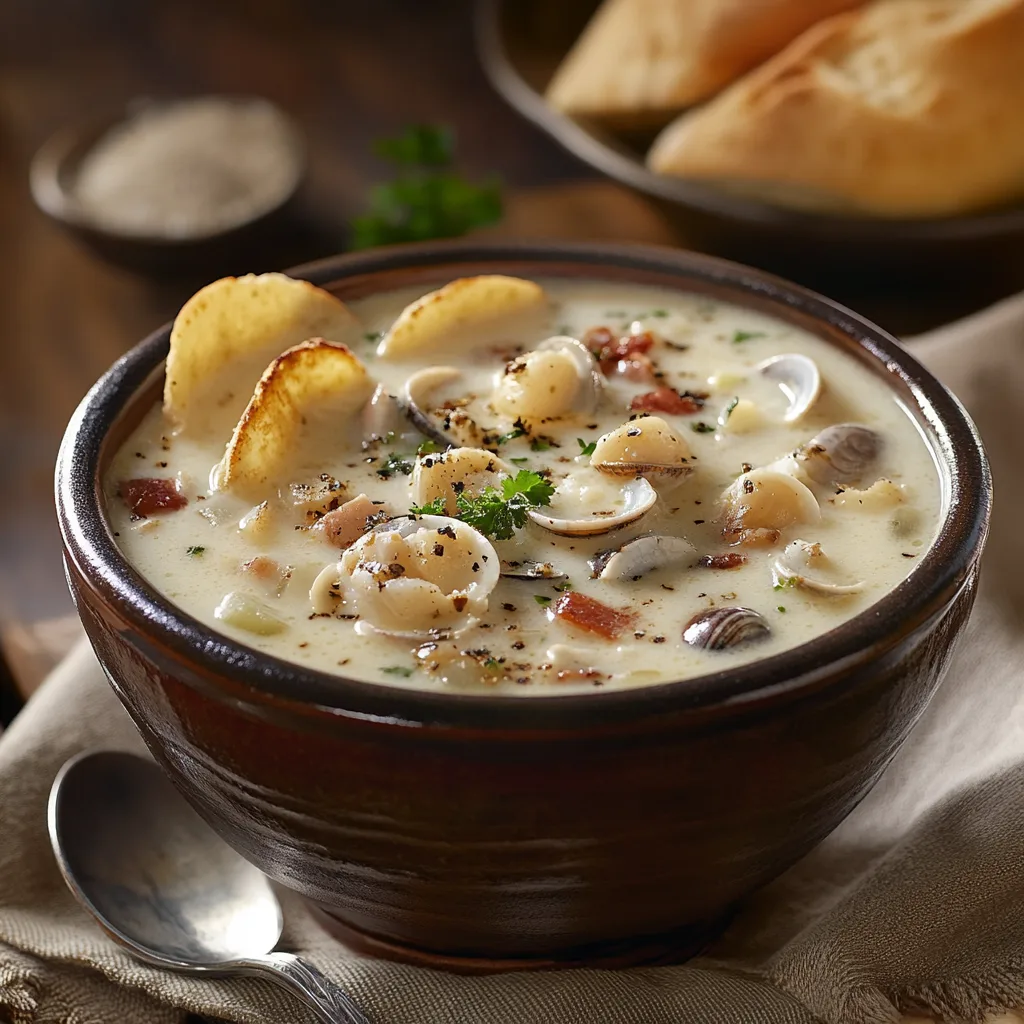
    There’s something magical about a steaming bowl of New England Clam Chowder that feels like a warm hug on a chilly day. I discovered this creamy coastal treasure during a weekend trip to Boston, where the scent of fresh seafood and rich broth wafted through a tiny harborside restaurant. The first spoonful—velvety, studded with tender clams and potatoes—transported me instantly. This classic American soup balances simplicity with incredible depth, making it perfect for both casual family dinners and impressive entertaining. Let me share my favorite version that captures all the authentic flavors you’d find along the New England coast.

    Recipe

    Why You’ll Love This New England Clam Chowder

    The Perfect Balance of Flavors and Textures

    This New England Clam Chowder delivers incredible depth without complicated techniques. The briny sweetness of fresh clams mingles with smoky bacon and earthy potatoes, creating layers of flavor that develop with each spoonful. I love how the creamy base coats your spoon while chunks of potato and tender clams provide satisfying texture. Unlike some restaurant versions that rely on excessive thickeners, this homemade approach lets the natural ingredients shine through. The gentle hint of thyme and bay leaf elevates everything without overwhelming the delicate seafood essence.

    A Surprisingly Simple Comfort Food

    Don’t let its restaurant-quality reputation fool you—this New England Clam Chowder comes together with surprising ease. Even on my busiest weeknights, I can have this chowder simmering away in under 15 minutes of prep time. The ingredients are straightforward pantry and refrigerator staples, with the exception of fresh clams (though canned work beautifully too). What I particularly appreciate is how this recipe scales effortlessly, making it perfect for feeding just myself or a hungry crowd. The hands-off simmering time gives me space to prepare a simple side like my Creamy Cowboy Soup.

    Essential Tips & Tricks

    Selecting and Preparing Your Clams

    The foundation of exceptional New England Clam Chowder begins with the clams themselves. Fresh clams should smell briny but never fishy, with tightly closed shells (or ones that close when gently tapped). I prefer littlenecks or cherrystones for their tender texture and sweet flavor. To clean fresh clams, soak them in cold water with a tablespoon of salt for 20 minutes—this encourages them to expel any sand. If using fresh clams seems daunting, high-quality canned clams make a fantastic substitute. Just be sure to reserve their juice—that liquid gold contains concentrated clam flavor that enriches your chowder beautifully.

    Creating the Perfect Creamy Base

    The signature velvety texture of authentic New England Clam Chowder comes from a careful balance. Start by rendering bacon slowly to release its smoky fat—this becomes the flavor foundation. When adding flour to make the roux, cook it just until it smells slightly nutty but hasn’t browned. This prevents a pasty taste while ensuring proper thickening power. For the dairy component, I find equal parts heavy cream and whole milk create the ideal richness without becoming too heavy. Add the dairy gradually while whisking to prevent curdling, and never allow the chowder to boil once the cream has been added—a gentle simmer preserves that silky smoothness.

    Serving Ideas & Creative Variations

    Perfect Pairings to Complete Your Meal

    New England Clam Chowder shines brightest when served with thoughtfully chosen accompaniments. My absolute favorite pairing is a basket of warm sourdough bread with salted butter—the tangy bread is perfect for dipping into that creamy broth. For a complete seafood feast, consider serving smaller portions as a starter before my Maple Glazed Sheet Pan Salmon. A simple side salad with vinaigrette provides welcome brightness against the chowder’s richness. For serving, I love using shallow, wide bowls that showcase the chowder’s beautiful ingredients while allowing it to cool to the perfect eating temperature.

    Delicious Twists on the Classic Recipe

    While traditional New England Clam Chowder is perfect as is, I occasionally enjoy these creative variations. For a luxurious upgrade, add chunks of lobster meat or lump crab in the final minutes of cooking. When corn is in season, I love adding fresh kernels for sweet pops of texture and color. For a smoky-spicy twist, replace regular bacon with chorizo and add a pinch of smoked paprika. If you’re watching calories, you can substitute half the cream with unsweetened almond milk—you’ll maintain creaminess while lightening the overall richness. These small adaptations respect the chowder’s essence while letting you customize to your taste preferences.

    Storage & Troubleshooting Guide

    Proper Storage and Reheating Methods

    New England Clam Chowder actually improves overnight as flavors meld, making it perfect for make-ahead meals. Store cooled chowder in airtight containers in the refrigerator for up to 3 days. When reheating, do so gently over medium-low heat, stirring occasionally to prevent scorching. You’ll likely need to add a splash of milk or cream as the chowder thickens considerably when chilled. For longer storage, freeze the chowder without the dairy components, then add fresh cream and milk when reheating. This prevents the unpleasant texture changes that can happen when dairy products freeze and thaw.

    Fixing Common Chowder Challenges

    Even experienced cooks occasionally encounter issues with New England Clam Chowder. If your chowder seems too thin, create a small amount of slurry (equal parts cornstarch and cold water) and whisk it in while the soup simmers. Conversely, if it’s too thick, gradually add warm milk or clam juice until reaching your desired consistency. Should your chowder break or appear slightly curdled, transfer a cup to a blender with a tablespoon of cold butter, blend until smooth, then whisk back into the pot. For clams that seem rubbery, they were likely overcooked—next time, add them later in the process or reduce your cooking time.

    Frequently Asked Questions

    Can I make New England Clam Chowder ahead of time?

    Absolutely! It actually tastes better the next day. Store in the refrigerator for up to 3 days and reheat gently, adding a splash of cream if needed to maintain the creamy consistency.

    What’s the difference between New England and Manhattan clam chowder?

    New England Clam Chowder has a cream base, while Manhattan uses tomatoes for a red broth. New England is typically thicker and richer, while Manhattan has a more acidic, brighter flavor profile.

    Can I use frozen clams instead of fresh?

    Yes! Thawed frozen clams work well, especially when fresh aren’t available. Just be sure to include their juice for authentic flavor, and adjust your cooking time slightly as they may need less time to heat through.

    What’s the best potato variety for chowder?

    Yukon Gold potatoes are ideal because they hold their shape while still becoming tender. Their buttery flavor and waxy texture prevent them from dissolving into the chowder while cooking.

    How can I make my New England Clam Chowder thicker?

    For a thicker chowder, make a slurry with 1 tablespoon cornstarch and 2 tablespoons cold water. Whisk into the simmering chowder and cook for 2-3 minutes until it reaches your desired thickness.

    Final Thoughts

    This New England Clam Chowder recipe balances traditional techniques with accessible ingredients to create something truly special. I find myself returning to it throughout the year—not just on chilly evenings but whenever I crave that perfect combination of comfort and elegance. There’s something deeply satisfying about ladling steaming chowder into bowls for family and friends, watching their expressions as they take that first creamy, clam-studded spoonful. For more seafood inspiration, visit our Pinterest collection where I’ve gathered my favorite coastal recipes!

  • Snickers Cheese Ball: Irresistible Sweet & Savory Party Treat!

    Snickers Cheese Ball: Irresistible Sweet & Savory Party Treat!

    Snickers Cheese Ball: Irresistible Sweet & Savory Party Treat!

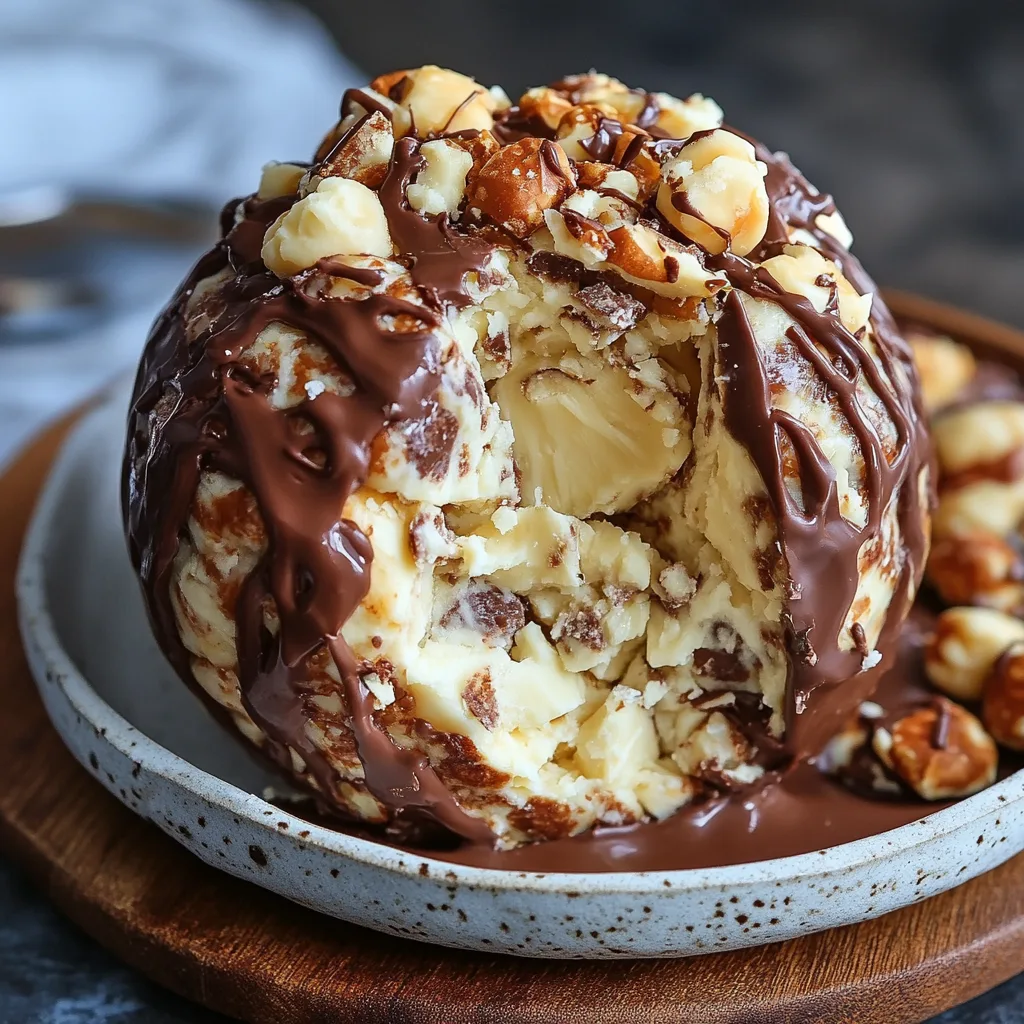
    This Snickers cheese ball is about to become your new favorite party showstopper! The first time I made this decadent treat for my sister’s holiday gathering, it disappeared faster than I could snap a photo. There’s something magical about the way the cream cheese base mingles with the chopped Snickers pieces, creating this irresistible sweet-savory masterpiece that keeps everyone coming back for “just one more” scoop. Perfect for holiday gatherings, game days, or anytime you need a crowd-pleasing dessert that looks impressive but requires minimal effort. Let’s dive into this no-bake wonder that combines my two greatest loves: chocolate and cheese!

    Recipe

    Why You’ll Love This Snickers Cheese Ball

    Perfect Balance of Flavors and Textures

    The beauty of this Snickers cheese ball lies in its captivating contrast of textures and flavors. The creamy, slightly tangy cream cheese base provides the perfect canvas for chunks of chewy Snickers bars with their nougat, caramel, and peanut goodness. I love how each bite delivers a different taste experience – sometimes you get more caramel, sometimes more chocolate. The exterior coating of crushed peanuts adds a satisfying crunch that contrasts beautifully with the smooth interior. When guests dip in graham crackers or apple slices, their eyes literally widen with that first perfect bite.

    Make-Ahead Convenience

    As someone who gets frazzled with last-minute party prep, I treasure recipes that can be made in advance. This Snickers cheese ball has saved me countless times! You can prepare it up to three days before your event, giving the flavors time to meld together beautifully in the refrigerator. I made two of these beauties for my daughter’s graduation party last spring, assembling them the night before while watching my favorite show. The next day, I simply transferred them to serving platters, surrounded them with dippers, and had a stunning dessert ready with zero day-of stress.

    Essential Tips & Tricks

    Temperature Matters

    The secret to the perfect Snickers cheese ball texture is all about temperature management. Always start with room temperature cream cheese – I leave mine out for at least 30 minutes before mixing. Cold cream cheese will leave you with lumps that no amount of mixing can fix (I learned this the hard way at my first attempt). When serving, take the cheese ball out about 15-20 minutes before guests arrive. This slight warming makes it perfectly spreadable without becoming too soft. The contrast between the slightly softened cheese and the still-firm Snickers pieces creates that magical mouthfeel that makes this treat so addictive.

    Chopping Technique

    The way you incorporate the Snickers bars makes a huge difference in the final texture of your cheese ball. I’ve found that freezing the candy bars for about 20 minutes before chopping prevents them from becoming a sticky mess. Use a sharp knife and aim for pieces about the size of small chocolate chips – not too fine (or they’ll disappear) and not too chunky (or they’ll make spreading difficult). I like to reserve some finely chopped pieces for mixing into the coating as well. This creates beautiful flecks of chocolate throughout and gives guests a visual hint of the deliciousness that awaits inside.

    Serving Ideas & Creative Variations

    Perfect Pairing Options

    Creating a beautiful spread around your Snickers cheese ball elevates the entire experience. My go-to dippers include butter cookies, graham crackers, and thinly sliced green apples (the slight tartness works wonders with the sweetness). For an extra-special presentation, I arrange everything on a wooden board with small clusters of fresh berries and mint leaves for color. Last Christmas, I added some salted caramel sauce on the side for drizzling, and my brother-in-law declared it the best dessert he’d ever tasted. The combination of salty, sweet, creamy, and crunchy elements creates a truly memorable tasting experience.

    Seasonal Adaptations

    One of the reasons I keep coming back to this Snickers cheese ball recipe is how easily it adapts to different occasions. For Halloween, roll the ball in orange and black sprinkles along with the peanuts. During Christmas, mix in crushed peppermint pieces and roll in red and green sprinkles. For a summer variation, try using Snickers ice cream bar pieces (kept frozen until the last minute) and serving with fresh strawberries. I’ve even made a “deconstructed” version for a fancy dinner party, serving small scoops in individual dessert cups topped with chocolate drizzle.

    Storage & Troubleshooting Guide

    Proper Storage Methods

    Storing your Snickers cheese ball properly ensures it maintains that perfect texture and flavor. Always wrap it tightly in plastic wrap before refrigerating – this prevents it from absorbing other flavors from your fridge and keeps the exterior from drying out. The cheese ball will keep beautifully for up to 5 days refrigerated. If you want to prepare further in advance, you can freeze the uncoated cheese ball for up to a month. Just thaw overnight in the refrigerator, then coat with the crushed peanuts and other toppings before serving. I label mine with the date using a piece of masking tape on the wrapper.

    Fixing Common Issues

    Even the most experienced cooks occasionally encounter challenges with this recipe. If your mixture seems too soft to form into a ball, the simplest fix is to refrigerate it for 30-45 minutes before shaping. If the mixture is too firm or crumbly, try adding a tablespoon of softened butter or a splash of heavy cream to improve spreadability. Once, when I realized I didn’t have enough Snickers, I substituted half with Milky Way bars and the result was equally delicious! For coating issues, slightly dampening your hands helps the toppings adhere more evenly to the surface.

    Frequently Asked Questions

    Can I make this Snickers cheese ball ahead of time?

    Absolutely! You can prepare it up to 3 days in advance. Just keep it wrapped tightly in plastic wrap in the refrigerator and add any final toppings just before serving.

    What can I use instead of graham crackers for dipping?

    Try vanilla wafers, butter cookies, pretzels, apple slices, strawberries, or even brownie bites for a truly decadent experience.

    How long can this sit out at a party?

    The Snickers cheese ball can safely remain at room temperature for up to 2 hours. After that, refrigerate any leftovers to maintain food safety.

    Can I use low-fat cream cheese?

    You can, but full-fat cream cheese provides the richest texture and flavor. If using low-fat, add 2 tablespoons of butter to improve consistency.

    What’s the best way to shape a perfect ball?

    Place the mixture on plastic wrap, gather the edges, and twist to form a tight ball. Refrigerate for 1-2 hours before unwrapping and coating.

    Final Thoughts

    This Snickers cheese ball has become my signature party contribution for good reason. It bridges the gap between cheese plate sophistication and nostalgic candy bar joy, making it universally beloved by guests of all ages. The way people’s faces light up when they realize what they’re eating makes every simple step worthwhile. Whether you’re hosting a holiday gathering, need a potluck stunner, or just want to treat yourself to something special, this recipe delivers maximum impact with minimal effort. Don’t forget to check out more delicious party ideas on Pinterest!

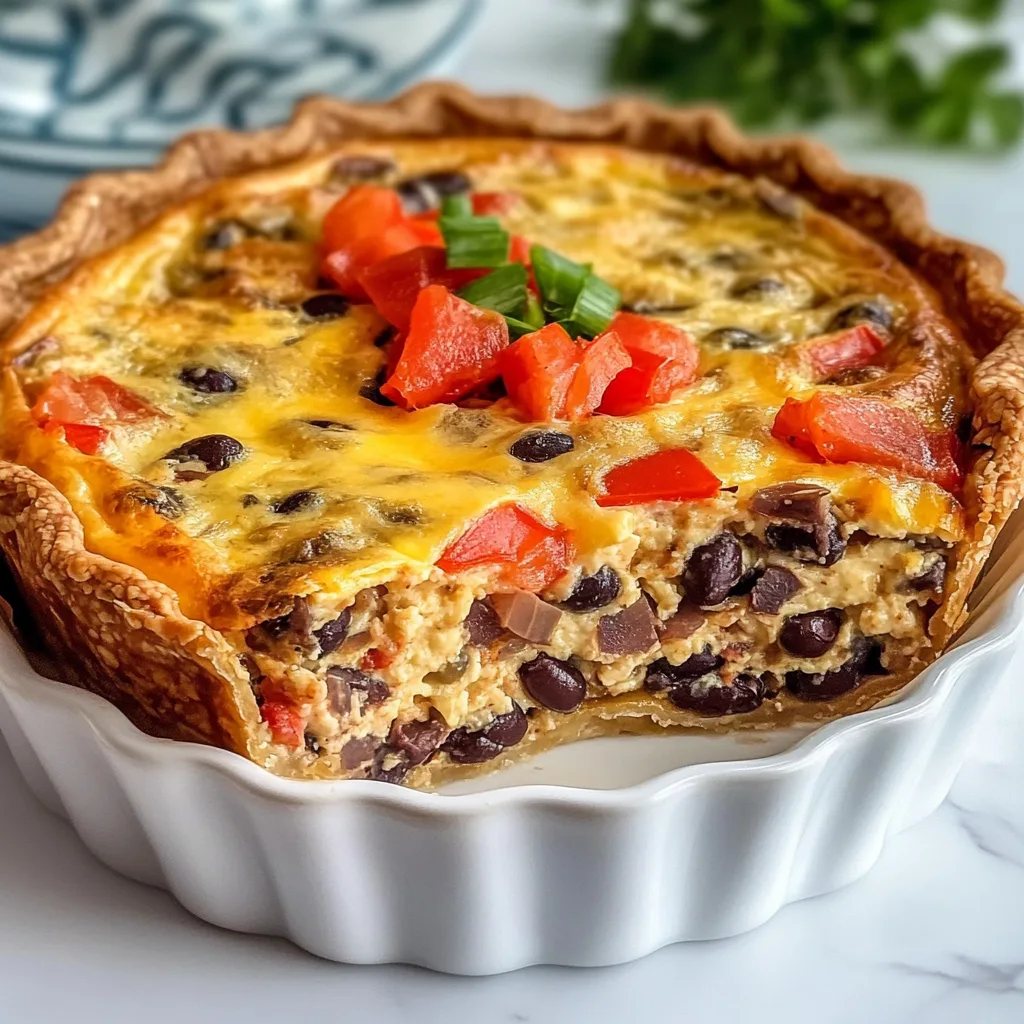
  • Black Bean & Pepper Jack Quiche: Irresistibly Bold & Flavor-Packed!

    Black Bean & Pepper Jack Quiche: Irresistibly Bold & Flavor-Packed!

    Black Bean & Pepper Jack Quiche: Irresistibly Bold & Flavor-Packed!

    Black Bean & Pepper Jack Quiche has become my weekend salvation—that perfect blend of creamy eggs, spicy pepper jack cheese, and hearty black beans that somehow makes my kitchen feel like the coziest spot in the universe. I first created this recipe during a rainy Sunday when I was craving something that would fill my home with warmth and incredible aromas. The combination of southwestern flavors with classic quiche technique creates a dish that’s both familiar and exciting. Whether you’re hosting brunch or planning a simple family meal, this quiche recipe delivers comfort in every single bite.

    Recipe

    Why You’ll Love This Black Bean & Pepper Jack Quiche

    Perfect Balance of Flavors and Textures

    The magic of this Black Bean & Pepper Jack Quiche lies in its perfect harmony of textures and flavors. The creamy egg custard creates a silky backdrop for the slight pop of black beans and the gentle heat from the pepper jack cheese. I love how the beans add substance without heaviness, making each bite satisfying but not overwhelming. The cheese melts into little pockets of spicy goodness throughout, while a touch of cumin and cilantro brings everything together with southwestern warmth. It’s that rare dish where every ingredient plays its part perfectly.

    Versatile for Any Mealtime

    I’ve served this Black Bean & Pepper Jack Quiche for practically every occasion imaginable. It shines as a show-stopping brunch centerpiece but works equally well for dinner paired with a simple salad. One Tuesday night when I was too exhausted to cook anything complex, I pulled a leftover slice from the fridge and was reminded how satisfying it is even cold. The protein from the beans and eggs makes it substantial enough for a main dish, while its elegant presentation means it never feels like a compromise. It’s the definition of practical luxury.

    Essential Tips & Tricks

    Perfecting Your Crust

    The foundation of an exceptional Black Bean & Pepper Jack Quiche starts with the crust. I recommend blind baking your crust for 10-12 minutes before adding the filling—this prevents the dreaded soggy bottom that can ruin even the most flavorful quiche. Line your chilled crust with parchment paper, fill with pie weights or dried beans, and bake until just beginning to color. For a time-saving alternative that doesn’t sacrifice quality, try a high-quality store-bought crust. Just like my Easy Ground Beef Enchiladas, sometimes smart shortcuts make all the difference.

    Getting the Perfect Custard

    The heart of any Black Bean & Pepper Jack Quiche is its custard, and achieving that perfect silky texture requires attention to detail. I always use a 4:1 ratio of eggs to liquid (typically half-and-half or whole milk) for the ideal consistency. Whisk thoroughly but gently—you want to incorporate air without creating foam. Room temperature ingredients blend more smoothly, so set your eggs and dairy out about 30 minutes before mixing. The custard should coat the back of a spoon but still flow easily when poured. This ensures your quiche will set properly while maintaining that luxurious mouthfeel.

    Serving Ideas & Creative Variations

    Complementary Side Dishes

    My Black Bean & Pepper Jack Quiche pairs beautifully with sides that enhance its southwestern flair. A simple arugula salad dressed with lime vinaigrette provides a peppery, acidic counterpoint that cuts through the richness perfectly. For brunch, I love serving it alongside fresh fruit with a drizzle of honey and a sprinkle of tajin for a sweet-spicy contrast. When serving for dinner, roasted sweet potatoes with a touch of cinnamon complement the savory notes in the quiche. These combinations create a balanced meal that feels thoughtfully curated without requiring hours in the kitchen, similar to my approach with Creamy Tomato Garlic Pasta.

    Exciting Flavor Twists

    While the classic Black Bean & Pepper Jack Quiche is divine, I love experimenting with variations that keep it fresh and exciting. Try adding roasted poblano peppers for smoky depth or swap the pepper jack for smoked gouda to create an entirely new flavor profile. For a breakfast-forward version, add crumbled chorizo and a sprinkle of cotija cheese on top. Vegetable lovers can fold in sautéed zucchini and corn kernels during summer months. My personal favorite twist involves adding a layer of green chile salsa at the bottom of the crust before pouring in the custard—it creates an unexpected burst of flavor with each bite.

    Storage & Troubleshooting Guide

    Proper Storage Methods

    Your Black Bean & Pepper Jack Quiche will maintain its delicious quality when stored properly. For short-term storage, cool the quiche completely before covering with plastic wrap and refrigerating for up to 4 days. Individual slices can be wrapped separately for grab-and-go convenience. For longer storage, freeze the entire quiche or individual portions by wrapping in plastic followed by foil to prevent freezer burn. Frozen quiche keeps well for up to 2 months. When reheating, thaw overnight in the refrigerator, then warm in a 325°F oven until heated through—this preserves the texture better than microwave reheating.

    Common Issues and Solutions

    Even experienced bakers encounter challenges with quiche. If your Black Bean & Pepper Jack Quiche develops a cracked surface, you likely baked it at too high a temperature—next time, try 325°F for a gentler bake. Soggy bottom crust usually indicates the filling was too wet or the crust wasn’t properly blind baked. If your quiche seems watery after cutting, it may have been underbaked; the center should be just set with a slight jiggle when done. For crust that shrinks during blind baking, make sure to thoroughly chill it first and use proper weights. Remember that quiche continues cooking slightly after removal from the oven.

    Frequently Asked Questions

    Can I make Black Bean & Pepper Jack Quiche ahead of time?

    Absolutely! Prepare it up to 2 days ahead and refrigerate. Reheat covered with foil at 325°F for 15-20 minutes before serving, or enjoy cold for a different but equally delicious experience.

    Is there a crustless option for this recipe?

    Yes! Simply grease your pie dish well and pour the filling directly in. The eggs will set beautifully, creating a naturally gluten-free version with all the same wonderful flavors.

    How do I prevent my black beans from sinking to the bottom?

    Rinse and thoroughly dry your beans before adding them to the egg mixture. Folding them in just before pouring into the crust helps them distribute more evenly throughout the quiche.

    Can I substitute the pepper jack cheese?

    Certainly! Monterey Jack provides milder flavor, while cheddar offers sharpness. For adventurous palates, try smoked gouda or even blue cheese for distinctive character.

    How do I know when my quiche is perfectly done?

    The quiche is ready when the edges are set but the center still has a slight wobble—like gelatin. A knife inserted 1 inch from the edge should come out clean, while the center remains slightly moist.

    Final Thoughts

    This Black Bean & Pepper Jack Quiche has become more than just a recipe in my kitchen—it’s a reliable friend that never disappoints. The way the spicy cheese melts into the creamy custard, punctuated by those perfect little beans, creates something truly special. I find myself returning to it whenever I need a dish that feels both nurturing and exciting. Whether you’re making it for a quiet breakfast at home or sharing it with friends at your next gathering, I hope it brings the same comfort and joy to your table that it has to mine. Find more inspiration for your next cooking adventure on Pinterest.

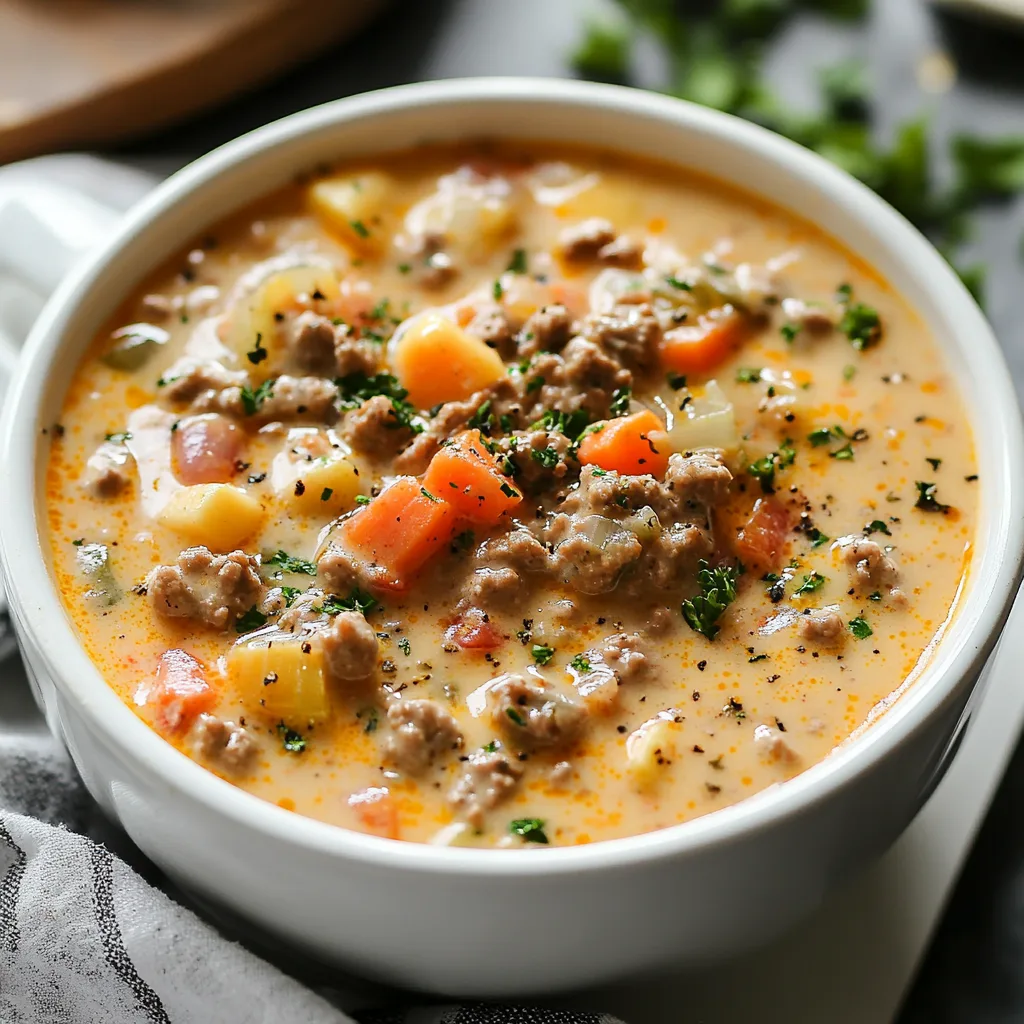
  • Creamy Cowboy Soup Recipe: Cozy, Hearty, and Irresistibly Delicious!

    Creamy Cowboy Soup Recipe: Cozy, Hearty, and Irresistibly Delicious!

    Creamy Cowboy Soup Recipe: Cozy, Hearty, and Irresistibly Delicious!

    There’s nothing quite like a bowl of Creamy Cowboy Soup on a chilly evening to warm you from the inside out. This hearty, rustic dish combines tender chunks of beef, colorful vegetables, and a velvety broth that practically wraps you in a culinary hug. I discovered this recipe during a weekend at my sister’s ranch in Montana, where the temperatures dipped unexpectedly low. As we gathered around her farmhouse table, steam rising from our bowls, I knew this comfort food classic would become a staple in my kitchen. The rich, savory flavors and creamy texture make this soup perfect for family dinners or casual entertaining.

    Recipe

    Why You’ll Love This Creamy Cowboy Soup

    Perfect One-Pot Comfort Food

    This Creamy Cowboy Soup is the ultimate crowd-pleaser that satisfies even the heartiest appetites. The combination of ground beef (or chuck roast if you prefer), potatoes, corn, and a blend of savory spices creates layers of flavor that develop as the soup simmers. What I love most is how the cream element transforms an ordinary soup into something luxurious without being fussy. On busy weeknights when I’m juggling deadlines and family obligations, I can throw everything into one pot and let it work its magic. The aroma that fills my kitchen as it cooks is almost as rewarding as the first spoonful.

    Versatile and Adaptable

    One of the greatest things about Creamy Cowboy Soup is its incredible versatility. You can easily adjust the ingredients based on what you have on hand. No potatoes? Sweet potatoes work beautifully. Vegetarian guests? Swap the beef for extra beans and mushrooms for a hearty alternative. The base recipe is forgiving and adaptable to dietary needs without sacrificing flavor. I’ve made this soup during every season, tweaking it with summer corn or winter root vegetables. My husband, who typically reaches for seconds of my Beef and Onion Stir Fry, now requests this creamy soup just as often.

    Essential Tips & Tricks

    Building Layers of Flavor

    The secret to an exceptional Creamy Cowboy Soup lies in building flavor at every step. Start by browning your beef thoroughly—those caramelized bits at the bottom of the pot are pure gold. Don’t rush this step! When sautéing your onions and garlic, let them become translucent and aromatic before adding other ingredients. I like to add a splash of Worcestershire sauce for umami depth and a pinch of smoked paprika for that subtle campfire essence. These small touches make a noticeable difference in the final product. Remember to taste and adjust seasonings as you go—the soup will continue developing flavor as it simmers.

    Achieving the Perfect Creamy Texture

    The creamy element in Creamy Cowboy Soup deserves special attention. For the richest texture, I recommend adding the dairy components during the final 15 minutes of cooking. This prevents curdling while ensuring everything blends harmoniously. You have several options: heavy cream provides luxurious richness, while half-and-half offers a lighter alternative. For a velvety finish without extra dairy, try pureeing a cup of the soup with cooked potatoes and returning it to the pot. This technique adds body and creaminess naturally. If you enjoy the hearty texture of Cheeseburger Soup, you’ll appreciate how this soup balances creaminess with substantial ingredients.

    Serving Ideas & Creative Variations

    Perfect Pairings and Toppings

    Elevate your Creamy Cowboy Soup with thoughtfully chosen toppings and sides. I love setting up a topping bar with shredded cheddar, crispy bacon bits, sliced green onions, and a dollop of sour cream—letting everyone customize their bowl. For bread, nothing beats warm cornbread or crusty sourdough for dipping into that creamy broth. When hosting friends, I often serve smaller portions as a starter before a main course of Easy Ground Beef Enchiladas. The soup’s creamy texture and savory profile complement the zesty enchiladas perfectly, creating a meal that feels cohesive yet exciting.

    Regional and Seasonal Adaptations

    Transform your Creamy Cowboy Soup to reflect different regional flavors or seasonal ingredients. For a Southwestern twist, add fire-roasted green chilies, black beans, and finish with lime and cilantro. In autumn, incorporate diced butternut squash and a pinch of nutmeg for subtle sweetness. During summer months, I love using fresh sweet corn cut straight from the cob and garden-fresh herbs. For a heartier version perfect for winter, add wild rice or barley during the last 30 minutes of cooking. These thoughtful adaptations keep the recipe feeling fresh year-round while maintaining its comforting essence.

    Storage & Troubleshooting Guide

    Proper Storage and Reheating

    Creamy Cowboy Soup actually improves with time as the flavors meld together, making it perfect for meal prep. Store cooled soup in airtight containers in the refrigerator for up to 4 days. When reheating, do so gently over medium-low heat, stirring occasionally to prevent scorching. If the soup has thickened too much during storage, simply thin it with a splash of broth or milk until you reach your desired consistency. For longer storage, freeze portions without the dairy components, then add cream after reheating. I often make a double batch on Sunday afternoons, ensuring we have comforting meals ready during hectic weeknights.

    Fixing Common Issues

    Even experienced cooks encounter challenges with creamy soups. If your Creamy Cowboy Soup is too thin, create a cornstarch slurry (1 tablespoon cornstarch mixed with 2 tablespoons cold water) and stir it into the simmering soup until it reaches your desired thickness. For soup that’s too thick, gradually add warm broth or milk. If the dairy has curdled, don’t panic! Try blending a portion of the soup until smooth and stirring it back in. To rescue overseasoned soup, add a peeled, quartered potato and simmer for 15 minutes—the potato will absorb excess salt. Remove the potato before serving.

    Frequently Asked Questions

    Can I make Creamy Cowboy Soup in a slow cooker?

    Absolutely! Brown the meat and sauté the aromatics first, then transfer everything except dairy to your slow cooker. Cook on low for 6-7 hours, adding the cream during the final 30 minutes for perfect results.

    What’s the best beef cut for Creamy Cowboy Soup?

    Ground beef works wonderfully for quick cooking, but for deeper flavor, try chuck roast cut into bite-sized pieces. The slow cooking will tenderize the meat beautifully.

    Can I make this soup dairy-free?

    Yes! Replace the cream with full-fat coconut milk or cashew cream. The soup will maintain its creamy texture while accommodating dairy restrictions.

    How can I increase the vegetables in this recipe?

    Feel free to add bell peppers, zucchini, or leafy greens like kale. For extra nutrition without changing the classic Creamy Cowboy Soup flavor, stir in finely diced carrots or cauliflower.

    Is this soup freezer-friendly?

    Freeze the soup without dairy components for up to 3 months. After thawing and reheating, stir in fresh cream for the best texture and flavor.

    Final Thoughts

    Creamy Cowboy Soup has become my go-to recipe when I need something hearty, satisfying, and universally appealing. There’s something magical about how simple ingredients transform into something so comforting. Whether you’re feeding a hungry family or looking for leftovers that improve with time, this soup delivers on all fronts. I encourage you to make this recipe your own—add personal touches and create memories around your table. Don’t forget to check out more cozy recipes on our Pinterest page for inspiration to complement your Creamy Cowboy Soup!

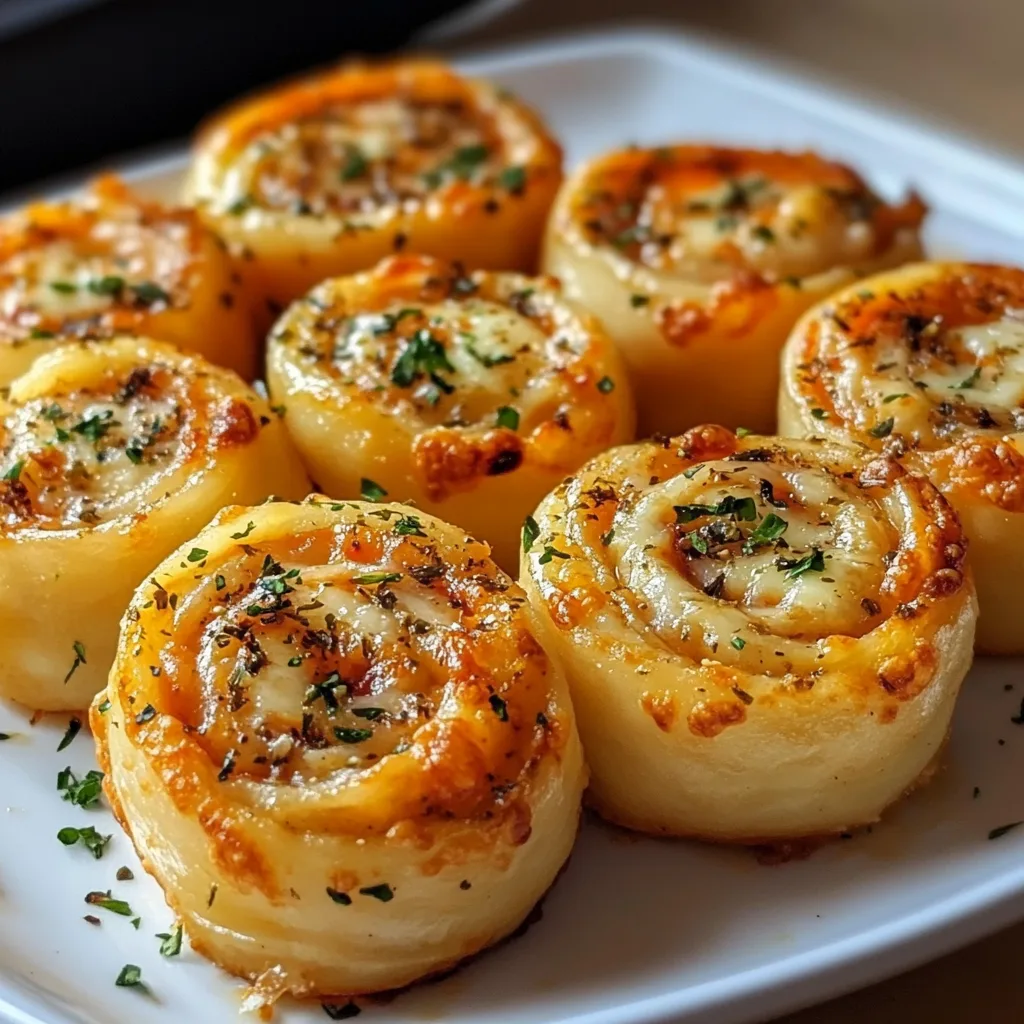
  • Pizza Rolls with Mozzarella & Garlic Butter: Irresistibly Cheesy!

    Pizza Rolls with Mozzarella & Garlic Butter: Irresistibly Cheesy!

    Pizza Rolls with Mozzarella & Garlic Butter: Irresistibly Cheesy!

    Pizza Rolls with Mozzarella and Garlic Butter have become my weekend obsession lately. There’s something magical about that first bite—the way the garlic butter melts into the warm dough, creating little pools of flavor that mingle with stretchy mozzarella. I discovered this recipe during a rainy Sunday when my daughter begged for “something cheesy and garlicky,” and we’ve been making them ever since. These rolls strike that perfect balance between impressive and approachable, making them ideal for everything from casual family movie nights to elegant appetizers. If you love the comforting flavors in my Creamy Tomato Garlic Pasta, you’ll adore these rolls!

    Recipe

    Why You’ll Love These Pizza Rolls with Mozzarella and Garlic Butter

    Perfect Texture Combination

    These Pizza Rolls with Mozzarella and Garlic Butter deliver the most satisfying textural contrast you can imagine. The outside develops this gorgeous golden crust that’s just slightly crisp, while the interior stays pillowy and tender. I still remember the first batch I made—my kitchen filled with that incredible aroma of garlic and butter, and my husband wandered in from the garage asking “What smells so amazing?” The mozzarella creates these irresistible cheese pulls that stretch dramatically when you break the rolls apart. It’s comfort food that manages to feel special, like something you’d pay good money for at a restaurant.

    Quick & Customizable Recipe

    What makes these Pizza Rolls with Mozzarella and Garlic Butter truly special is how adaptable they are to whatever ingredients you have on hand. Running short on time? Use store-bought pizza dough instead of making your own. Want to switch up the flavors? Add some sun-dried tomatoes, fresh basil, or even a sprinkle of red pepper flakes for heat. I’ve made these when friends dropped by unexpectedly, and they were genuinely impressed at how “fancy” they seemed despite taking just minutes to assemble. The best part is watching everyone’s faces light up when they take their first bite—that moment of pure food joy is absolutely priceless!

    Essential Tips & Tricks

    Perfecting Your Dough

    The foundation of amazing Pizza Rolls with Mozzarella and Garlic Butter starts with properly handled dough. Always let refrigerated dough come to room temperature before working with it—cold dough fights back and won’t roll properly. I learned this the hard way during a dinner party when I rushed and ended up with tough, uneven rolls! When rolling out your dough, aim for about ¼-inch thickness for the perfect balance of chewiness and crispness. If you’re making homemade dough, don’t skip the resting period; it develops gluten and makes the dough more elastic.

    For extra flavor, try adding a teaspoon of Italian herbs directly into your dough, similar to my Cheesy Baked Mostaccioli Pasta that uses herbs to enhance every bite.

    Garlic Butter Secrets

    The garlic butter is truly the soul of these pizza rolls, so don’t rush this component! For maximum flavor infusion, melt your butter slowly over low heat and add minced garlic, allowing it to gently sizzle without browning. This slow approach releases the garlic’s aromatic oils without any bitterness. I always add a pinch of salt to the butter mixture—it acts as a flavor amplifier that makes the garlic taste even more intense. For an extra dimension, stir in a tablespoon of finely chopped fresh herbs like parsley or basil right at the end. Let the mixture cool slightly before brushing it onto your dough to prevent the butter from soaking in too quickly.

    Serving Ideas & Creative Variations

    Perfect Pairings

    These Pizza Rolls with Mozzarella and Garlic Butter shine brightest when served with the right accompaniments. My family goes crazy for them alongside a warm marinara dipping sauce—something about that tangy tomato flavor cuts through the richness perfectly. For dinner parties, I arrange them on a wooden board with small bowls of pesto, ranch, and honey for an interactive appetizer that never fails to impress. They also make a fantastic side to a hearty soup or salad when you want something more substantial than plain bread. Last weekend, I served them with my Cajun Potato Soup, and the combination was absolutely divine—the spicy soup with the cheesy rolls created the perfect balance.

    Flavor Twists to Try

    Don’t be afraid to experiment with different flavor profiles when making these rolls! One of my favorite variations uses caramelized onions and gruyere instead of mozzarella for a French onion soup-inspired twist. For a Mediterranean version, try adding chopped olives, feta, and a sprinkle of oregano to the filling. My kids love when I make a breakfast version with cheddar and cooked breakfast sausage crumbles—perfect for holiday mornings! You can also play with the butter itself, infusing it with different ingredients like roasted garlic, truffle oil, or even a touch of honey for a sweet-savory combination. The possibilities are truly endless.

    Storage & Troubleshooting Guide

    Keeping Them Fresh

    Proper storage is key to maintaining the delicious texture of your Pizza Rolls with Mozzarella and Garlic Butter. For maximum freshness, allow any leftover rolls to cool completely before storing them in an airtight container. They’ll keep at room temperature for up to 24 hours, but I prefer refrigerating them for longer storage (up to 3 days). When you’re ready to enjoy them again, avoid the microwave which makes them soggy. Instead, reheat them in a 350°F oven for 5-7 minutes until warmed through. The oven revives that wonderful contrast between the crisp exterior and soft interior.

    For meal prep, you can even freeze the unbaked rolls and bake them straight from frozen—just add a few extra minutes to the baking time.

    Common Problems Solved

    Even experienced bakers encounter issues with Pizza Rolls with Mozzarella and Garlic Butter, but there are easy fixes for common problems. If your rolls are leaking cheese during baking, you likely overfilled them or didn’t seal the edges properly. Try using less filling and pinching the seams firmly before baking. Pale, undercooked rolls usually mean your oven temperature is too low—invest in an oven thermometer for accuracy.

    If the bottoms are burning while the tops remain pale, move your baking sheet to a higher rack position. And for rolls that seem dense rather than fluffy, you may have overworked your dough. Remember to handle it gently and let it rest if it becomes too elastic and difficult to roll.

    Frequently Asked Questions

    Can I make Pizza Rolls with Mozzarella and Garlic Butter ahead of time?

    Absolutely! Prepare them up to the point of baking, then refrigerate for up to 24 hours. Allow them to sit at room temperature for 20 minutes before baking for the best texture and even cooking.

    What’s the best cheese to use if I don’t have mozzarella?

    Provolone makes an excellent substitute with similar melting properties. Fontina or a young Gouda also work well. For a sharper flavor, try using half mozzarella and half sharp cheddar.

    Can I make these rolls without garlic?

    Yes! Replace the garlic with herbs like rosemary or thyme for a different flavor profile. You could also use roasted garlic for a milder, sweeter taste that’s less pungent.

    Are these suitable for freezing?

    Definitely! Freeze unbaked rolls on a baking sheet until solid, then transfer to a freezer bag. Bake directly from frozen, adding 5-7 minutes to the baking time. They’ll stay fresh for up to 3 months.

    How do I prevent my dough from becoming tough?

    Handle your dough gently and don’t overwork it. Let it rest if it becomes difficult to roll. Using room temperature dough and not adding too much flour when rolling will help maintain tenderness.

    Final Thoughts

    These Pizza Rolls with Mozzarella and Garlic Butter have become a staple in my recipe collection for good reason—they’re versatile, crowd-pleasing, and deliver maximum flavor with minimal effort. There’s something so satisfying about creating something with your hands that brings people together around the table. Whether you’re serving them as an appetizer, side dish, or main course, these rolls have that special quality that makes everyone reach for just one more. I’d love to see your creations if you try them—tag me on Pinterest with your variations! Remember, cooking is about making memories as much as it is about making meals.

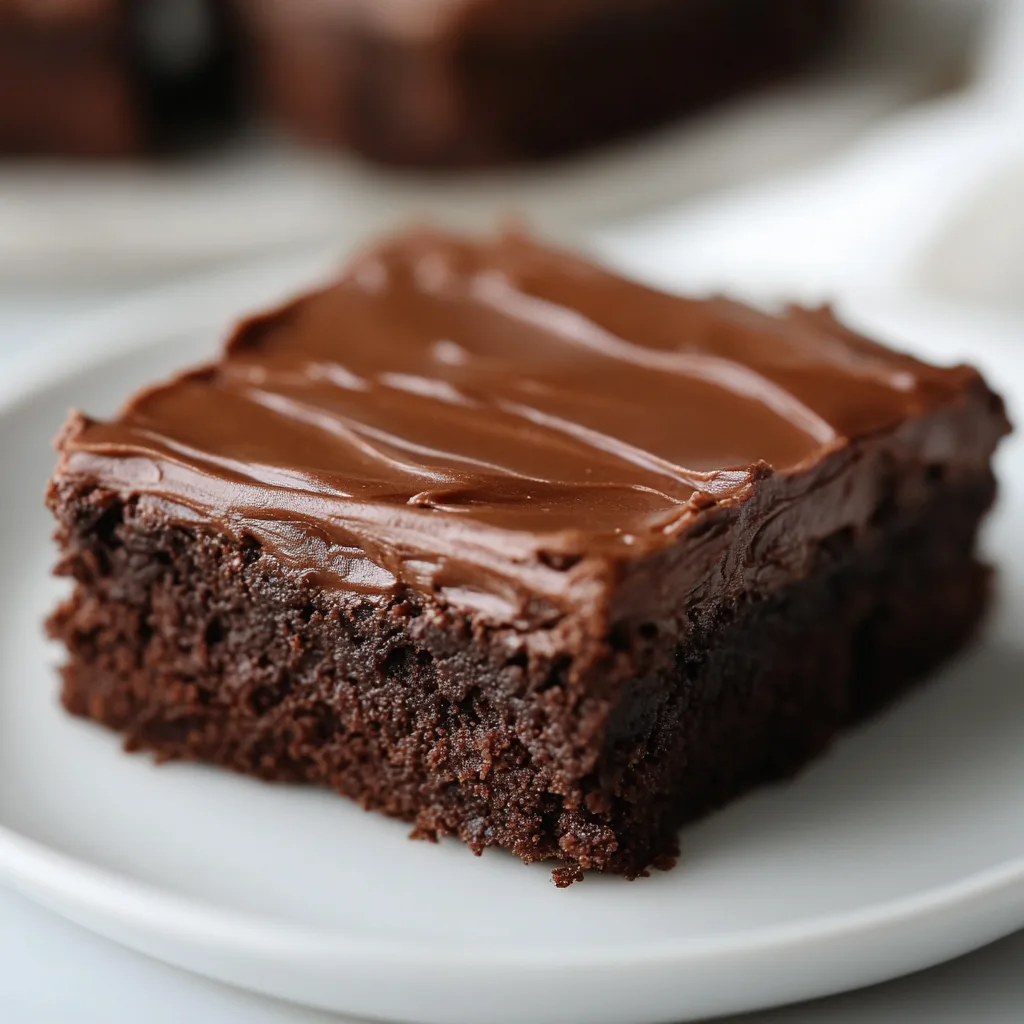
  • Easy Frosted Texas Brownies: Irresistibly Gooey & Delicious!

    Easy Frosted Texas Brownies: Irresistibly Gooey & Delicious!

    Easy Frosted Texas Brownies: Irresistibly Gooey & Delicious!

    These Easy Frosted Texas Brownies bring me back to my grandmother’s kitchen every single time I make them. There’s something magical about that glossy chocolate frosting poured over the warm, cake-like brownie base that makes everyone’s eyes light up. I discovered this recipe during a particularly rough week, and the simple joy of making these brownies turned everything around. The beauty of these Texas brownies is their simplicity – one pan, straightforward ingredients, and absolutely irresistible results that’ll have everyone asking for the recipe. If you’re looking for a foolproof dessert that delivers maximum comfort with minimal effort, these brownies are exactly what you need.

    Recipe

    Why You’ll Love These Easy Frosted Texas Brownies

    Perfect Texture Every Time

    Texas brownies have a unique texture that sets them apart from traditional fudgy brownies. They’re lighter, more cake-like, but still incredibly moist and tender. The secret lies in the quick boil of butter and water before mixing in the dry ingredients, creating that distinctive Texas brownie crumb. I love how they hold up perfectly when cut into squares – no crumbling or falling apart! The frosting creates this delicate crackly top that gives way to the soft brownie beneath. When you bite in, there’s this beautiful contrast between the silky frosting and the fluffy brownie that makes my taste buds dance every single time.

    Simple Ingredients, Extraordinary Results

    What I adore about these Easy Frosted Texas Brownies is that they use pantry staples you likely already have on hand. No special chocolate bars or fancy extracts needed! Just basic baking ingredients transformed into something spectacular. The frosting comes together with just cocoa powder, powdered sugar, butter, milk, and vanilla – but tastes like something from a high-end bakery. I’ve made these on busy weeknights when a chocolate craving hits, and they never disappoint. There’s something deeply satisfying about creating something so delicious from such humble ingredients. The simplicity means less shopping and more enjoying!

    Essential Tips & Tricks

    Mastering the Perfect Frosting

    The signature element of Easy Frosted Texas Brownies is that glossy, pourable chocolate frosting that sets into a perfect sheen. The key is timing – you want to pour it while the brownies are still warm (but not hot) and while the frosting is still fluid. I find that letting the brownies cool for about 10 minutes gives the perfect result. Another trick: sift your powdered sugar to avoid any lumps in the frosting. If your frosting starts to thicken too quickly, place it back over low heat for just a few seconds, or add a tiny splash of hot water. This creates that bakery-perfect finish that makes these brownies absolutely irresistible.

    Baking Pan Considerations

    The traditional sheet pan is what gives Texas brownies their characteristic thin, uniform shape. I recommend using a 15×10-inch jelly roll pan for authentic results, but a 9×13-inch pan works too (they’ll just be a bit thicker and need a few extra minutes in the oven). Whatever pan you choose, line it with parchment paper with overhang on the sides – this makes removing and cutting the brownies infinitely easier. Also, don’t overbake! These should remain moist, so when a toothpick inserted comes out with a few moist crumbs (not wet batter), they’re done. The residual heat will continue cooking them slightly as they cool.

    Serving Ideas & Creative Variations

    Elevated Serving Suggestions

    Transform these Easy Frosted Texas Brownies into a show-stopping dessert by serving them slightly warm with a scoop of vanilla ice cream. The contrast between the cool, creamy ice cream and the rich, chocolatey brownie is absolutely divine! For dinner parties, I cut them into smaller squares and arrange them on a tiered serving plate with fresh berries scattered between layers. A light dusting of powdered sugar adds an elegant touch. During the holidays, I add a tiny sprinkle of flaky sea salt on top – the salt enhances the chocolate flavor in the most magical way and gives them that gourmet touch that impresses guests every time.

    Exciting Flavor Twists

    While the classic Easy Frosted Texas Brownies are perfect as is, I love experimenting with seasonal variations. For fall, try adding 1/2 teaspoon of cinnamon to both the batter and frosting for a Mexican chocolate vibe. During the holidays, a few drops of peppermint extract in the frosting creates a festive treat. For coffee lovers, dissolve 1 tablespoon of espresso powder in the hot water for a mocha version. My personal favorite variation is adding 1/2 cup of toasted chopped pecans to the batter – the nutty crunch against the soft brownie is absolutely heavenly! These brownies are the perfect canvas for your creativity.

    Storage & Troubleshooting Guide

    Keeping Brownies Fresh

    These Easy Frosted Texas Brownies stay remarkably fresh when stored properly. Once completely cooled, store them in an airtight container at room temperature for up to 3 days. I like to place a piece of wax paper between layers to prevent sticking. For longer storage, refrigerate for up to a week – just let them come to room temperature before serving for the best texture and flavor. They also freeze beautifully! Wrap individual portions in plastic wrap, then foil, and freeze for up to 3 months. I often make a double batch specifically to freeze some for emergency chocolate cravings or last-minute guests.

    Solving Common Problems

    If your Easy Frosted Texas Brownies aren’t turning out perfectly, a few simple adjustments can help. Dry brownies usually mean they’ve been overbaked – remember, they continue cooking slightly after removal from the oven. For frosting that’s too thick to spread, add warm milk a teaspoon at a time until you reach the right consistency. If your frosting has small lumps, simply warm it gently while whisking continuously. For brownies that stick to the pan, remember that parchment paper is your best friend! And if your brownies sink slightly in the middle, it’s likely from opening the oven door too early in the baking process – try to resist peeking until they’re almost done.

    Frequently Asked Questions

    What makes Texas brownies different from regular brownies?

    Texas brownies are typically thinner, more cake-like in texture, and always include a poured frosting. They’re baked in a sheet pan rather than a square pan, creating their distinctive shape and texture.

    Can I make Easy Frosted Texas Brownies without cocoa powder?

    No, cocoa powder is essential for both the brownie and frosting. It provides the chocolate flavor and cannot be substituted without significantly changing the recipe.

    How do I know when my brownies are done baking?

    Insert a toothpick in the center – it should come out with a few moist crumbs, not wet batter. The edges will begin to pull away slightly from the sides of the pan.

    Can I add nuts to these brownies?

    Absolutely! Stir 1/2 to 1 cup of chopped pecans, walnuts, or even toasted hazelnuts into the batter before baking for a delicious nutty variation.

    Why did my Easy Frosted Texas Brownies turn out dry?

    Overbaking is usually the culprit. Check them early, and remember they continue cooking slightly after removal from the oven. Measuring flour incorrectly can also cause dryness.

    Final Thoughts

    These Easy Frosted Texas Brownies have become my go-to dessert for everything from casual family nights to impressive dinner parties. There’s something wonderfully nostalgic yet timeless about them – they remind me of childhood bake sales while still feeling special enough for any occasion. The simplicity of the recipe combined with the spectacular results makes them truly unbeatable. I hope these brownies bring as much joy to your kitchen as they have to mine! Don’t forget to check out more delicious recipes on Pinterest for more inspiration to satisfy your sweet tooth.

  • Cheesy Baked Mostaccioli Pasta That Will Make Your Taste Buds Dance!

    Cheesy Baked Mostaccioli Pasta That Will Make Your Taste Buds Dance!

    Cheesy Baked Mostaccioli Pasta That Will Make Your Taste Buds Dance!

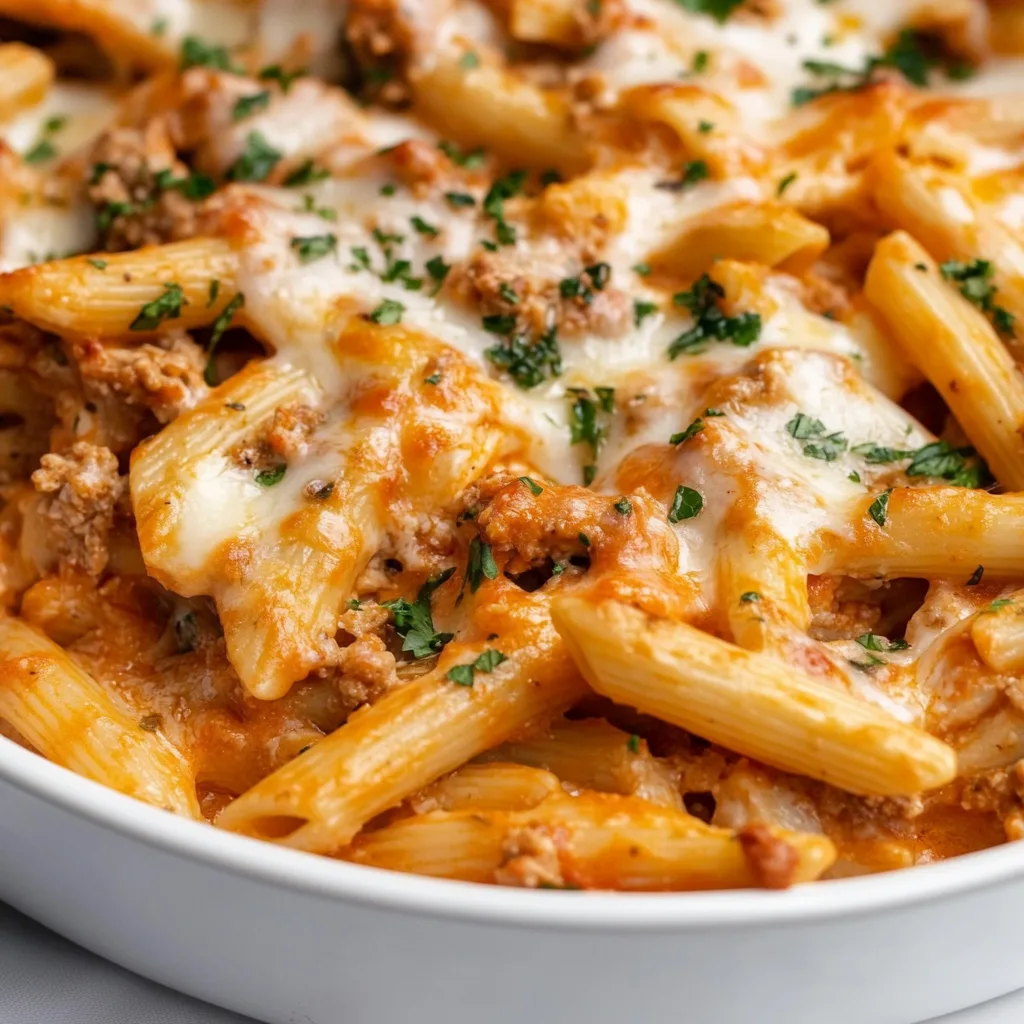
    There’s something magical about a bubbling pan of Cheesy Baked Mostaccioli Pasta fresh from the oven. The way the cheese stretches into long, gooey strands as you lift each serving, the crispy edges that form around the perimeter, and that first bite that warms you from the inside out. This Italian-American comfort food classic has been my go-to for family gatherings since my grandmother first taught me how to make it. It’s like a perfect hybrid between baked ziti and lasagna that’s simpler to prepare but equally satisfying.

    Recipe

    Why You’ll Love This Cheesy Baked Mostaccioli Pasta

    A Crowd-Pleasing Comfort Food

    This Cheesy Baked Mostaccioli Pasta truly brings people together. I still remember making this for my sister’s housewarming party—the moment I set it on the table, conversations paused as everyone eagerly reached for the serving spoon. The combination of al dente pasta tubes, savory meat sauce, and that perfect three-cheese blend creates a dish that satisfies deep comfort food cravings. The beauty lies in its accessibility—even picky eaters can’t resist the familiar, welcoming flavors that remind us of family meals around the table.

    Make-Ahead Convenience

    One of the greatest attributes of Cheesy Baked Mostaccioli Pasta is its flexibility for busy schedules. You can assemble the entire dish up to two days before baking, making it perfect for entertaining or meal prep. The flavors actually develop and deepen as they rest in the refrigerator. I often prepare this on Sunday afternoons, dividing it between two smaller baking dishes—one for dinner that night and another, covered tightly with foil, for mid-week when cooking feels overwhelming. The pasta texture holds up beautifully, absorbing just enough sauce without becoming soggy.

    Essential Tips & Tricks

    Perfect Pasta Technique

    The foundation of exceptional Cheesy Baked Mostaccioli Pasta starts with properly cooked pasta. Always undercook the pasta by 2-3 minutes less than the package directions suggest—it should be quite firm as it will continue cooking in the oven. Salt your pasta water generously until it “tastes like the sea” to season the pasta from within. After draining, I toss the hot pasta with a light coating of olive oil to prevent sticking. This small step makes a remarkable difference in the final texture, preventing the mostaccioli from clumping together during baking.

    Layering for Maximum Flavor

    The magic of this dish happens in the layering technique. Start with a thin layer of sauce on the bottom to prevent sticking, then create distinct layers: pasta, meat sauce, cheese mixture, repeat. The top layer should always be a generous blanket of cheese that will form that irresistible golden crust. I like to reserve about a quarter of the mozzarella to sprinkle on during the last 10 minutes of baking—this creates those picture-perfect cheese pulls that make everyone reach for their phones before digging in.

    Serving Ideas & Creative Variations

    Perfect Pairings

    Cheesy Baked Mostaccioli Pasta shines as the centerpiece of any meal, but thoughtful sides elevate the experience. A crisp Caesar salad with homemade garlicky dressing provides the perfect contrast to the rich pasta. For bread, nothing beats garlic bread with a chewy interior and buttery crust for sopping up extra sauce. When entertaining, I serve this pasta alongside roasted vegetables for a colorful, complete meal. The slight bitterness of roasted broccoli or Brussels sprouts balances the creamy, savory pasta beautifully.

    Exciting Flavor Twists

    While the classic version holds a special place in my heart, this dish welcomes creative adaptations. Try swapping the traditional meat sauce for a spicy sausage version with crumbled Italian sausage and red pepper flakes. For a luxurious twist, add a layer of ricotta mixed with fresh herbs and lemon zest between the pasta layers. Vegetarian guests will appreciate a version with roasted mushrooms, which provide a meaty texture and umami depth. My personal favorite variation includes a handful of sun-dried tomatoes and a sprinkle of smoked mozzarella for a subtle smoky note.

    Storage & Troubleshooting Guide

    Proper Storage Solutions

    Leftover Cheesy Baked Mostaccioli Pasta actually improves overnight as the flavors meld together. Store cooled leftovers in an airtight container in the refrigerator for up to 4 days. For freezing, portion the pasta into individual servings in freezer-safe containers—this makes reheating much more convenient. When properly stored, frozen mostaccioli keeps well for up to 3 months. To prevent freezer burn, press a piece of parchment paper directly onto the surface before sealing. I always label with both the date and reheating instructions for my future self.

    Solving Common Issues

    If your pasta seems dry after baking, the most likely culprit is too little sauce or overcooking the pasta before baking. Next time, add an extra half cup of sauce to the recipe and be vigilant about undercooking the pasta. For soupy mostaccioli, let the baked pasta rest for 15-20 minutes before serving—this allows the excess moisture to be absorbed and the layers to set properly. If your cheese topping isn’t browning nicely, switch your oven to broil for the final 2-3 minutes, watching carefully to achieve that golden perfection without burning.

    Frequently Asked Questions

    Can I make Cheesy Baked Mostaccioli Pasta vegetarian?

    Absolutely! Replace the meat sauce with a hearty vegetable sauce featuring mushrooms, zucchini, and bell peppers. The texture remains satisfying while offering a lighter alternative that doesn’t sacrifice flavor.

    What’s the difference between mostaccioli and penne pasta?

    Mostaccioli has a smooth exterior while penne has ridges. Both work in this recipe, but mostaccioli creates a silkier texture while penne holds more sauce in its grooves.

    Can Cheesy Baked Mostaccioli Pasta be made ahead and frozen?

    Yes! Assemble completely, cover tightly, and freeze unbaked for up to 3 months. Thaw overnight in the refrigerator before baking, adding 15-20 minutes to the baking time.

    What cheeses work best in this dish?

    A combination of mozzarella, Parmesan, and provolone creates the ideal balance of meltability and flavor. Fresh mozzarella adds creaminess, while aged Parmesan provides savory depth.

    How do I prevent my pasta from drying out when reheating?

    Sprinkle 1-2 tablespoons of water over the pasta before reheating, then cover with microwave-safe wrap or foil if using an oven. This creates steam that rehydrates the dish.

    Final Thoughts

    This Cheesy Baked Mostaccioli Pasta represents everything I love about comfort food—it’s generous, adaptable, and brings an immediate smile to everyone at the table. The beauty lies in its perfect balance: substantial enough for special occasions yet simple enough for weeknight dinners. I hope this recipe finds its way into your regular rotation, perhaps even becoming the dish friends and family request when they visit. For more comforting pasta inspiration, follow me on Pinterest where I’m always sharing new variations on beloved classics.