Blog

  • Sheet Pan Salmon Rice Cakes with Dill Aioli – Irresistibly Easy & Delicious!

    Sheet Pan Salmon Rice Cakes with Dill Aioli – Irresistibly Easy & Delicious!

    Sheet Pan Salmon Rice Cakes with Dill Aioli – Irresistibly Easy & Delicious!

    Sheet Pan Salmon Rice Cakes with Dill Aioli transform leftover rice and salmon into something magical that feels entirely new. The first time I made these for my family, my husband couldn’t believe they came from yesterday’s dinner! There’s something incredibly satisfying about the crispy exterior giving way to a tender, flavorful center. Paired with a creamy dill aioli that adds just the right amount of brightness, these rice cakes have become my go-to solution for reimagining leftovers into something everyone at the table eagerly devours.

    Recipe

    Why You’ll Love This Sheet Pan Salmon Rice Cakes with Dill Aioli

    Perfect Balance of Flavors and Textures

    These salmon rice cakes deliver the perfect balance of crispy edges and tender centers. The natural oils from the salmon keep everything moist while lending a delicate seafood flavor that isn’t overwhelming. I love how the lemon zest brightens everything up, while the herbs add freshness. The beauty is in the contrast – that satisfying crunch giving way to a soft interior. And the dill aioli? It’s the creamy, tangy complement that ties everything together, making each bite a perfect harmony of textures and flavors.

    Weeknight-Friendly and Versatile

    On those evenings when I’m staring at containers of leftover rice and salmon, these rice cakes are my saving grace. They come together in about 30 minutes, and the sheet pan method means I’m not standing over a skillet flipping each cake individually. While they’re baking, I can toss together a simple salad or prep some roasted vegetables. They’re equally perfect for a quick family dinner or dressed up with microgreens and extra sauce for casual entertaining. The recipe scales easily for hungry teenagers or intimate dinners.

    Essential Tips & Tricks

    Getting the Perfect Binding

    The key to salmon rice cakes that hold together beautifully is all about proper binding. Cold leftover rice works significantly better than freshly made rice because it’s less sticky and moist. I always make sure to thoroughly drain my canned salmon or pat dry any leftover cooked salmon. If your mixture feels too wet, add a tablespoon of panko at a time until it reaches a consistency where you can form patties that hold their shape. Too dry? A little extra mayo or even a splash of lemon juice can help without compromising flavor.

    Sheet Pan Success Strategies

    For the crispiest exterior, preheat your sheet pan in the oven before adding the rice cakes. This creates that immediate sear that locks in moisture and creates golden edges. Always line your pan with parchment and give the cakes a light spray of oil before baking. For even browning, rotate the pan halfway through cooking time. If you want extra crispiness, switch to broil for the final 1-2 minutes, but don’t walk away – they can go from perfectly golden to burnt in seconds!

    Serving Ideas & Creative Variations

    Complementary Side Dishes

    These salmon rice cakes pair beautifully with light, fresh sides that don’t compete with their flavor. My family’s favorite combination is a simple arugula salad with lemon vinaigrette and thinly sliced radishes for peppery crunch. For a heartier meal, roasted asparagus or crispy Brussels sprouts provide wonderful textural contrast. In summer, I serve them alongside sliced heirloom tomatoes with just a sprinkle of flaky salt. For a restaurant-worthy presentation, place the cakes on a smear of the dill aioli rather than dolloping it on top.

    Flavor Variations to Try

    While the classic version is delicious, don’t be afraid to play with flavors! For an Asian-inspired twist, swap the dill for cilantro, add grated ginger and a splash of soy sauce to the mixture, and serve with sriracha mayo instead of dill aioli. Mediterranean lovers can add chopped olives, feta, and sun-dried tomatoes to the base mixture. For a spicy kick, incorporate diced jalapeños and substitute the dill aioli with a chipotle cream sauce. You can even use canned tuna or leftover shredded chicken if salmon isn’t available.

    Storage & Troubleshooting Guide

    Make-Ahead and Storage Solutions

    These salmon rice cakes are perfect for meal prep! You can form the patties up to 24 hours ahead and refrigerate them, covered tightly, until ready to bake. Already baked cakes will keep in the refrigerator for 3-4 days in an airtight container. To reheat, avoid the microwave which makes them soggy – instead, place them on a baking sheet in a 350°F oven for 8-10 minutes until heated through. The dill aioli can be made up to 5 days ahead and actually improves in flavor after the first day.

    Common Issues and Quick Fixes

    If your salmon rice cakes are falling apart, the mixture may be too wet. Add more breadcrumbs one tablespoon at a time until the mixture holds together. Conversely, if they’re too dry and crumbly, add a little more mayonnaise or an extra egg. For cakes that aren’t browning properly, your oven temperature might be too low – use an oven thermometer to check accuracy. If the exterior is browning too quickly while the inside remains cold, lower the temperature and cover loosely with foil. Always let the mixture rest for 10 minutes before forming patties for better cohesion.

    Frequently Asked Questions

    Can I use fresh salmon instead of leftover cooked salmon?

    Yes! Cook and cool about 12 ounces of salmon first, then flake it. Remove any skin and bones before mixing with other ingredients.

    Are Sheet Pan Salmon Rice Cakes gluten-free?

    They can be! Simply substitute regular panko with gluten-free panko breadcrumbs and check that your mayonnaise is gluten-free.

    Can I freeze these salmon rice cakes?

    Absolutely. Freeze them after baking and cooling completely. Separate layers with parchment paper and reheat from frozen at 375°F for 15-20 minutes.

    What’s the best rice to use for salmon rice cakes?

    Medium or short-grain rice works best as it’s stickier. Long-grain rice can work but may require an extra egg for binding.

    How can I make the dill aioli lighter?

    Substitute half the mayonnaise with Greek yogurt for a lighter, tangier dill aioli that still complements the Sheet Pan Salmon Rice Cakes beautifully.

    Final Thoughts

    Sheet Pan Salmon Rice Cakes with Dill Aioli have transformed the way I approach leftovers in my kitchen. They’re the perfect example of how yesterday’s meal can become today’s star with just a little creativity and the right technique. The sheet pan method makes this recipe accessible even on busy weeknights, while the results feel special enough for company. I hope these crispy, flavorful cakes find a regular spot in your meal rotation too! For more seafood inspiration, check out my other recipes on Pinterest.

  • Sheet Pan Miso Honey Garlic Chicken & Root Veggies – Easy & Irresistible!

    Sheet Pan Miso Honey Garlic Chicken & Root Veggies – Easy & Irresistible!

    Sheet Pan Miso Honey Garlic Chicken & Root Veggies – Easy & Irresistible!

    This Sheet Pan Miso Honey Garlic Chicken & Root Vegetables is the answer to those evenings when you’re craving something deeply satisfying but don’t have the energy for multiple pots and pans. I discovered this recipe during a particularly hectic week when my kitchen creativity was at an all-time low. The magical combination of sweet honey, savory miso, and aromatic garlic creates a glaze that transforms simple chicken and vegetables into something extraordinary. The best part? Everything roasts together on one pan, creating a caramelized symphony of flavors while you relax. Let me show you how this dish might become your new weeknight hero.

    Recipe

    Why You’ll Love This Sheet Pan Miso Honey Garlic Chicken & Root Vegetables

    Perfect Balance of Flavors & Textures

    There’s something magical about the way miso paste creates depth while honey adds that perfect touch of sweetness. This dish strikes the ideal balance between umami richness and subtle sweetness, with garlic bringing everything together. The chicken develops a beautiful caramelized exterior while staying juicy inside. Meanwhile, the root vegetables—carrots, parsnips, and sweet potatoes—become tender with slightly crispy edges. I love how each bite offers a different textural experience: the slight chew of perfectly roasted chicken against the yielding tenderness of roasted vegetables.

    Minimal Effort, Maximum Results

    On days when I’m stretched thin but still want to put something nourishing on the table, this recipe is my lifesaver. Everything comes together in about 10 minutes of prep time, then the oven does all the work. The single sheet pan approach means cleanup is nearly effortless—just one cutting board, one mixing bowl, and one baking sheet to wash. Yet the results look and taste like you spent hours in the kitchen. The gorgeous caramelization and the way the vegetables absorb the chicken juices and marinade creates a dish that feels special despite its simplicity.

    Essential Tips & Tricks

    Mastering the Marinade

    The heart of this dish lies in its marinade, where balance is crucial. I recommend using white miso paste for its milder, sweeter profile that works beautifully with honey. Whisk your miso thoroughly with the liquid ingredients to avoid clumps—a small, sturdy whisk works better than a fork here. For maximum flavor infusion, marinate the chicken for at least 30 minutes, but you can extend this to overnight in the refrigerator. The longer marinade time allows the salt in the miso to tenderize the chicken while the flavors penetrate deeply, similar to how I prepare the chicken in my Hot Honey Crispy Chicken Thighs.

    Perfecting the Roasting Process

    Achieving that beautiful caramelization without burning requires attention to a few details. First, cut your vegetables uniformly so they cook at the same rate—aim for roughly 1-inch pieces. Give everything plenty of space on the pan; overcrowding leads to steaming instead of roasting. If needed, use two sheet pans rather than cramming everything onto one. For that gorgeous golden finish, brush additional marinade on the chicken halfway through cooking, but be careful not to contaminate your brush with raw chicken juices. A drizzle of honey in the last 5 minutes of cooking creates an irresistible glaze.

    Serving Ideas & Creative Variations

    Complementary Side Dishes

    This sheet pan meal is substantial on its own, but I love serving it with a few simple accompaniments to round out the meal. A bowl of fluffy white rice or quinoa makes the perfect base to soak up all those delicious juices. For a refreshing contrast, add a simple cucumber salad dressed with rice vinegar and sesame oil. When I want something green on the plate, I quickly steam some baby bok choy or toss arugula with a light miso dressing. For a heartier meal inspired by my Creamy Rasta Pasta with Jerk Chicken, you could serve this with coconut rice for a fusion twist.

    Seasonal Adaptations & Variations

    One of the beauties of this recipe is how easily it adapts to what’s in season or what you have on hand. In summer, swap root vegetables for bell peppers, zucchini, and cherry tomatoes, reducing the cooking time accordingly. For autumn, try butternut squash, Brussels sprouts, and red onions. You can also play with the protein—salmon works beautifully with this marinade and cooks even faster than chicken. For a vegetarian version, try firm tofu or tempeh, adding it to the pan after the vegetables have had a head start. The miso-honey combination is so versatile it complements almost anything.

    Storage & Troubleshooting Guide

    Proper Storage & Reheating

    Leftovers of this Sheet Pan Miso Honey Garlic Chicken & Root Vegetables keep beautifully, making it perfect for meal prep. Store everything in airtight containers in the refrigerator for up to 3 days. The flavors actually develop and deepen overnight, making day-two meals something to look forward to. When reheating, avoid the microwave if possible—it tends to make the chicken rubbery and the vegetables soggy. Instead, place everything on a sheet pan and warm in a 350°F oven for about 10 minutes. For a quick desk lunch, the microwave works in a pinch, but use medium power and cover with a damp paper towel.

    Common Issues & Solutions

    If your vegetables are turning out too soft before the chicken is done, it’s likely they’re cut too small or your oven runs hot. Next time, cut them slightly larger or add them to the pan 5-10 minutes after the chicken starts cooking. If you’re experiencing burning or over-caramelization, your oven temperature might be too high—try reducing it by 25°F and moving the rack to the middle position. For chicken that’s not browning enough, make sure your sheet pan isn’t overcrowded and consider a quick broil (watching carefully!) for the last 2 minutes of cooking time.

    Frequently Asked Questions

    Can I use bone-in chicken thighs for this Sheet Pan Miso Honey Garlic Chicken & Root Vegetables?

    Absolutely! Bone-in thighs work wonderfully but require about 10-15 minutes of additional cooking time. The bone helps keep the meat juicy and adds flavor to the vegetables as everything roasts together.

    What can I substitute for miso paste?

    If you don’t have miso, try using soy sauce mixed with a dash of tahini for umami depth. You’ll miss some complexity, but it will still be delicious. Alternatively, Thai curry paste or even marmite can provide similar savory notes.

    Can this recipe be made ahead and frozen?

    Yes, but freeze the marinated chicken and prepared vegetables separately before cooking. When ready to use, thaw in the refrigerator overnight and proceed with roasting. The texture will be slightly different but still tasty.

    How can I make this recipe gluten-free?

    Most miso pastes contain some soy sauce or grains with gluten. Look specifically for certified gluten-free miso paste, or substitute with gluten-free tamari and a touch of nutritional yeast for umami flavor.

    What’s the best way to tell when the chicken is done?

    Use an instant-read thermometer inserted into the thickest part of the chicken—it should register 165°F. Alternatively, cut into the largest piece; the juices should run clear with no pink remaining.

    Final Thoughts

    This Sheet Pan Miso Honey Garlic Chicken & Root Vegetables has become a cornerstone in my cooking repertoire for good reason. It strikes that perfect balance between effortless preparation and impressive results that we all crave in our busy lives. The way the miso and honey create a complex, umami-rich glaze that coats both the tender chicken and the caramelized vegetables feels like kitchen magic. I encourage you to make this recipe your own—adjust the vegetables seasonally, play with the marinade proportions, or add your favorite herbs. For more inspiration, check out my other recipes at Pinterest where I’m always sharing new ideas.

  • Crockpot Cottage Cheese Tikka Masala: Irresistibly Creamy & Easy!

    Crockpot Cottage Cheese Tikka Masala: Irresistibly Creamy & Easy!

    Crockpot Cottage Cheese Tikka Masala: Irresistibly Creamy & Easy!

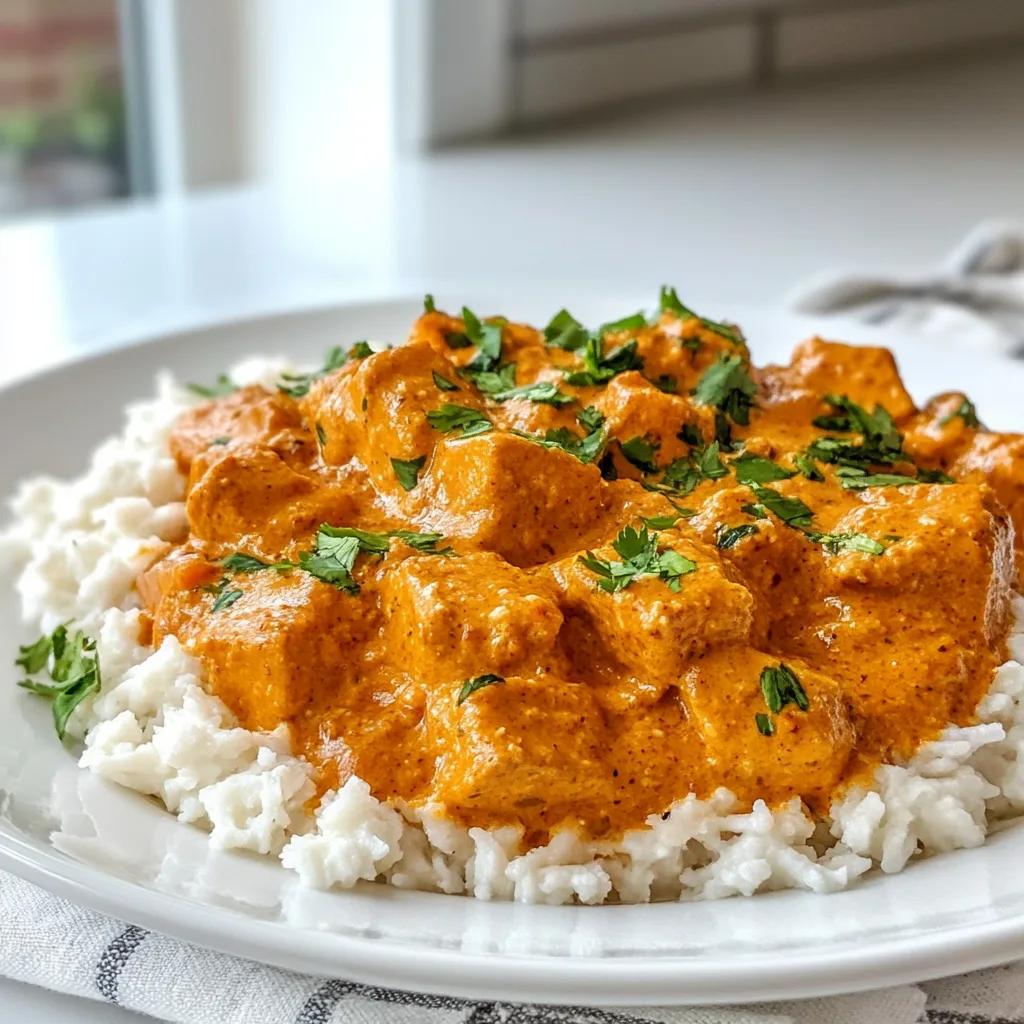
    Crockpot Cottage Cheese Tikka Masala transformed my weeknight dinner routine when I discovered this protein-packed twist on a classic Indian favorite. The first time I made this dish, the aroma of warm spices filled my kitchen, transporting me back to that little restaurant in Chicago where I first fell in love with Indian cuisine. This creamy, comforting meal combines the protein power of cottage cheese with traditional tikka masala flavors, all while your slow cooker does the heavy lifting. Perfect for busy days when you want something that tastes like it took hours of effort but actually requires minimal hands-on time.

    Recipe

    Why You’ll Love This Crockpot Cottage Cheese Tikka Masala

    A Protein-Packed Comfort Food

    This Crockpot Cottage Cheese Tikka Masala delivers an impressive protein boost while satisfying your comfort food cravings. Unlike traditional tikka masala that relies solely on heavy cream, the cottage cheese adds a protein-rich creaminess that transforms this dish into a more balanced meal. I love how the cottage cheese curds maintain their integrity while absorbing all those gorgeous spices. The slow cooking process allows the flavors to develop deeply, creating that authentic restaurant-quality taste without having to simmer a pot on the stove for hours. Your kitchen will smell absolutely heavenly!

    Effortless Preparation with Maximum Flavor

    What truly makes this Crockpot Cottage Cheese Tikka Masala special is the incredible flavor-to-effort ratio. Simply combine your ingredients in the morning, set your crockpot, and return to a perfectly cooked meal. The slow cooking process allows the spices—garam masala, turmeric, cumin—to bloom fully and infuse the sauce with complex flavors. I’ve found this method actually produces a more developed flavor profile than quick-cooking versions. Plus, the cottage cheese slowly melds with the tomato base, creating that signature creamy texture without needing to add cream at the last minute.

    Essential Tips & Tricks

    Perfecting Your Spice Blend

    The soul of any tikka masala lies in its spice blend, and this Crockpot Cottage Cheese version is no exception. I recommend toasting whole spices (cumin seeds, cardamom pods, coriander seeds) in a dry pan for 1-2 minutes before grinding them—this quick step makes a remarkable difference in flavor depth. If you’re using pre-ground spices, add them to the hot oil at the beginning to bloom their flavors. For heat customization, adjust the cayenne pepper gradually—you can always add more later but can’t take it away! Check out my White Chicken Chili with Crispy Tortilla Strips for another perfectly spiced slow cooker meal.

    Cottage Cheese Selection and Preparation

    Choosing the right cottage cheese is crucial for this Crockpot Cottage Cheese Tikka Masala. Opt for full-fat cottage cheese with large curds for the best texture and flavor retention during the long cooking process. Before adding to your crockpot, I recommend draining excess liquid if your cottage cheese seems particularly wet. For an even creamier result, blend half the cottage cheese until smooth and leave the other half as curds—this creates a luxurious texture with delightful pockets of cheese throughout the sauce. The protein content makes this dish substantially more filling than traditional versions.

    Serving Ideas & Creative Variations

    Perfect Pairings

    Serve your Crockpot Cottage Cheese Tikka Masala over a bed of fluffy basmati rice to soak up all that glorious sauce. For a lower-carb option, cauliflower rice works beautifully too. I love adding a side of warm naan bread for dipping—nothing beats that moment when you tear off a piece of naan and scoop up the creamy sauce! Fresh cilantro, a squeeze of lime, and a dollop of yogurt make perfect garnishes that brighten the rich flavors. For a complete Indian-inspired feast, pair with my Buckwheat Kasha with Caramelized Mushrooms and Onions as an unexpected but delicious side.

    Exciting Flavor Twists

    Don’t be afraid to make this Crockpot Cottage Cheese Tikka Masala your own! For a vegetable-packed version, add diced bell peppers, peas, or spinach during the last 30 minutes of cooking. For a meatier variation, add chicken thighs or chickpeas for additional protein and texture. I recently experimented with adding a tablespoon of mango chutney for subtle sweetness, and it was absolutely divine. You can also adjust the creaminess—stir in a splash of coconut milk or heavy cream at the end for an even more indulgent sauce. The versatility of this dish makes it perfect for weekly meal rotations.

    Storage & Troubleshooting Guide

    Proper Storage for Maximum Freshness

    Your Crockpot Cottage Cheese Tikka Masala stores beautifully, actually improving in flavor over time as the spices continue to meld. Refrigerate leftovers in airtight containers for up to 4 days—I like to divide them into individual portions for easy grab-and-go lunches. For longer storage, freeze in freezer-safe containers for up to 3 months. When reheating, add a splash of water or broth if the sauce has thickened too much. I’ve found that gentle reheating on the stovetop yields better results than microwave heating, preserving the texture of the cottage cheese curds.

    Troubleshooting Common Issues

    If your Crockpot Cottage Cheese Tikka Masala sauce is too thin, there’s an easy fix. Remove the lid during the final 30 minutes of cooking to allow some liquid evaporation. Alternatively, create a slurry with 1 tablespoon cornstarch and 2 tablespoons cold water, then stir it in and cook for an additional 15 minutes with the lid off. If your sauce is too thick, simply add a splash of broth or water. For cottage cheese that separated too much during cooking, try blending a portion of the finished dish and mixing it back in—this creates a smoother, more cohesive texture while maintaining some of those delightful cheese pockets.

    Frequently Asked Questions

    Can I use low-fat cottage cheese for this Crockpot Cottage Cheese Tikka Masala?

    You can, but full-fat cottage cheese provides better texture and doesn’t separate as easily during long cooking. If using low-fat, consider adding a tablespoon of heavy cream at the end for richness.

    How spicy is this recipe?

    The spice level is moderate but customizable. Adjust cayenne pepper to your preference—start with less and add more near the end of cooking if needed.

    Can I make this in an Instant Pot instead?

    Absolutely! Use the sauté function for spices, then pressure cook for 10 minutes with a natural release. Add cottage cheese after pressure cooking.

    Is this recipe gluten-free?

    Yes, this recipe is naturally gluten-free, but always check your spice blends and tomato products for hidden gluten ingredients.

    How can I make this recipe vegetarian?

    Simply omit any meat and add extra vegetables like bell peppers, cauliflower, or chickpeas for a hearty vegetarian version.

    Final Thoughts

    This Crockpot Cottage Cheese Tikka Masala has become a staple in my kitchen for good reason—it delivers restaurant-quality flavor with minimal effort while packing in protein. The slow-cooked depth of flavor combined with the creamy texture makes for a truly satisfying meal that works for both everyday dinners and special occasions. I hope you’ll give this unique twist on a classic a try! For more delicious recipes, check out my collection on Pinterest where I’m always sharing new comfort food inspirations.

  • Slow Cooker Cottage Cheese Breakfast Lasagna Recipe That Wows!

    Slow Cooker Cottage Cheese Breakfast Lasagna Recipe That Wows!

    Slow Cooker Cottage Cheese Breakfast Lasagna Recipe That Wows!

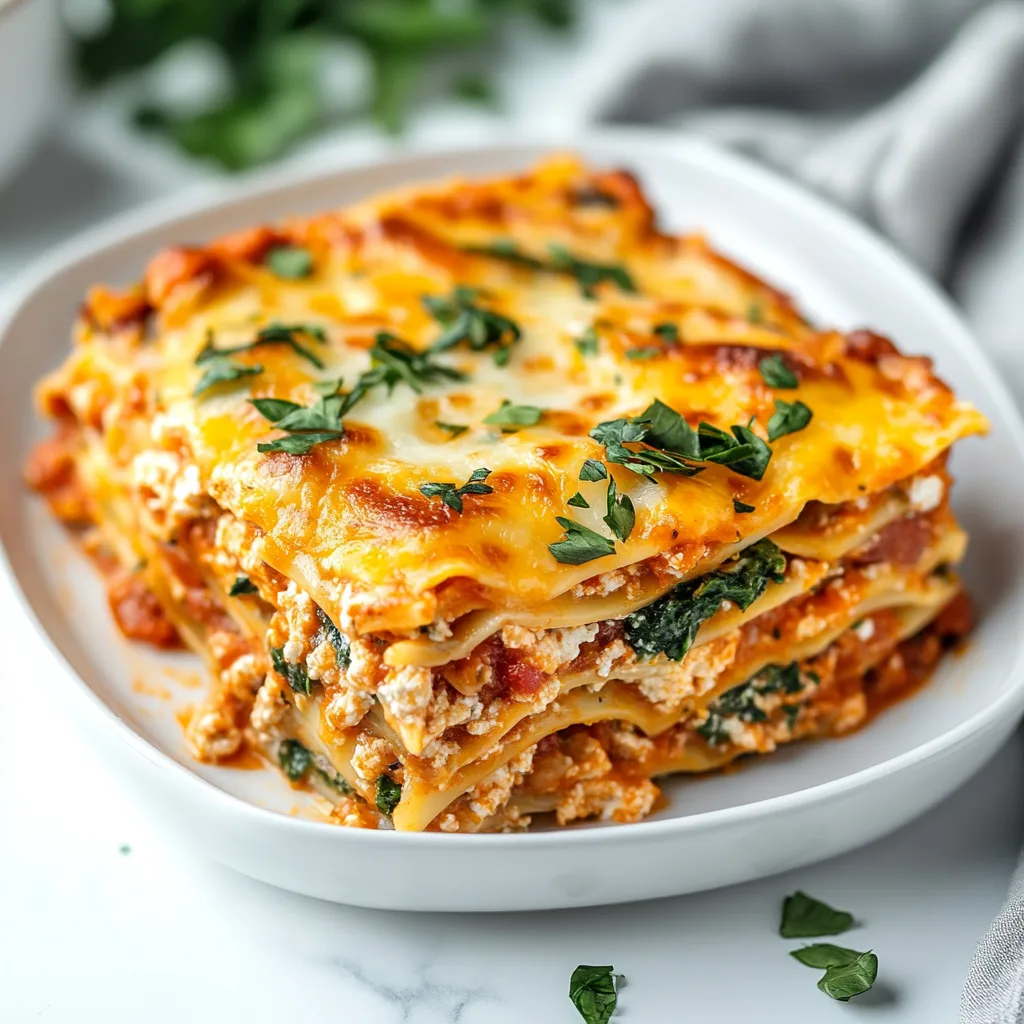
    Slow Cooker Cottage Cheese Breakfast Lasagna transforms your morning routine with layers of creamy protein-packed goodness that practically makes itself while you sleep. I discovered this breakfast game-changer last winter when I needed something warm and satisfying for my early-rising family. The magic happens overnight as the slow cooker gently melds together the rich cottage cheese, tender noodles, and your favorite breakfast ingredients into a morning masterpiece. Unlike traditional breakfast casseroles, this creamy delight offers both comfort and nutrition in each forkful.

    Recipe

    Why You’ll Love This Slow Cooker Cottage Cheese Breakfast Lasagna

    Perfect Make-Ahead Solution

    There’s something deeply satisfying about waking up to breakfast already made—especially one that’s both nutritious and delicious. This overnight wonder requires just 15 minutes of evening prep, then your slow cooker handles the rest while you sleep. I love assembling this on Sunday evenings when I’m already in the kitchen; by Monday morning, we have a protein-rich start to the week. The layers of cottage cheese provide sustained energy without the mid-morning crash that comes from sugary breakfast options. Plus, the hands-off cooking method means you can focus on other morning priorities.

    Customizable for Every Taste

    What makes this Slow Cooker Cottage Cheese Breakfast Lasagna truly special is how easily it adapts to your preferences. The basic framework remains the same—lasagna noodles, cottage cheese mixture, and your protein of choice—but the flavor possibilities are endless. For a Mediterranean twist, add spinach, feta, and sun-dried tomatoes. Craving something sweeter? Layer in cinnamon-spiced apples and a drizzle of maple syrup. My family’s favorite version includes crispy turkey bacon, sautéed mushrooms, and sharp cheddar, but I’ve made at least a dozen variations that all disappear by mid-morning.

    Essential Tips & Tricks

    Perfecting the Cottage Cheese Mixture

    The heart of this breakfast lasagna is the cottage cheese mixture, which needs the right balance of moisture and binding ingredients. I recommend using full-fat cottage cheese for the creamiest texture, whisked together with eggs, a splash of milk, and your seasonings of choice. This creates a custard-like layer that sets beautifully overnight. To prevent graininess, blend half the cottage cheese until smooth, then fold in the remaining portion for texture. For extra protein and fluffiness, I sometimes add a scoop of unflavored protein powder or Greek yogurt to the mixture, similar to my approach with gluten-free high-protein blueberry bagels.

    Slow Cooker Settings Matter

    Not all slow cookers perform identically, making timing crucial for breakfast success. For overnight cooking, the LOW setting is non-negotiable—HIGH will overcook and dry out your lasagna. Line your slow cooker with parchment paper or use a cooking spray to prevent sticking, especially around the edges where burning can occur. If your model runs hot, consider using a timer to switch to the WARM setting for the final hour. I learned this lesson the hard way when I awoke to slightly crispy edges (though my husband claimed those were the best parts). Add a small water bath by placing a heat-safe dish with water beside your lasagna for gentle, steam-assisted cooking.

    Serving Ideas & Creative Variations

    Morning Meal Pairings

    This Slow Cooker Cottage Cheese Breakfast Lasagna shines as a standalone meal, but thoughtful pairings can elevate the experience. Serve with a bright fruit salad dressed with mint and lime to contrast the rich, savory layers. For weekend brunches, I add a simple arugula salad with lemon vinaigrette to cut through the creaminess. Coffee enthusiasts in my household insist that a dark roast brings out the subtle flavors in the herb-infused cottage cheese mixture. For a complete protein-packed breakfast, consider adding a side of quick Mediterranean chicken tenders that can be prepared while the lasagna rests after cooking.

    Sweet vs. Savory Variations

    The versatility of this breakfast lasagna extends to completely transforming its flavor profile. For a dessert-inspired breakfast, replace traditional lasagna noodles with cinnamon-dusted crepes or thinly sliced apple layers. Mix cottage cheese with honey, vanilla, and cinnamon, then layer with berries and chopped nuts for natural sweetness. Savory enthusiasts can create a southwestern version with green chilies, pepper jack cheese, and chorizo between the layers. My personal revelation was a fall-themed variation with pumpkin puree mixed into the cottage cheese, warming spices, and maple-glazed pecans on top—it tastes indulgent while remaining protein-focused.

    Storage & Troubleshooting Guide

    Proper Storage Solutions

    Leftover Slow Cooker Cottage Cheese Breakfast Lasagna maintains its quality remarkably well when stored properly. Allow it to cool completely before refrigerating to prevent condensation that could make the noodles soggy. Individual portions work best for storage—slice the lasagna and place in airtight containers for up to four days in the refrigerator. For longer storage, wrap portions in parchment paper, then aluminum foil before freezing for up to two months. When reheating from frozen, thaw overnight in the refrigerator, then warm in a 325°F oven until heated through. Microwaving works for quick reheating, but cover with a damp paper towel to maintain moisture.

    Common Issues & Solutions

    Even experienced cooks encounter challenges with slow cooker recipes. If your lasagna turns out too watery, the likely culprit is excess moisture from vegetables or watery cottage cheese. Pre-cook vegetables to release their moisture before adding them to your layers, and consider straining cottage cheese through cheesecloth if it seems particularly wet. Conversely, if your lasagna seems dry, your slow cooker may run hot. Next time, reduce the cooking time by 30-60 minutes or add an extra egg to the cottage cheese mixture for moisture retention. For uneven cooking, rotate your slow cooker insert halfway through cooking time if possible, or ensure your cooker is on a level surface.

    Frequently Asked Questions

    Can I make Slow Cooker Cottage Cheese Breakfast Lasagna without eggs?

    Yes! Replace eggs with a mixture of 2 tablespoons cornstarch or arrowroot powder mixed with ¼ cup milk per egg. This creates a similar binding effect without compromising texture.

    How long does this breakfast lasagna take to cook?

    The ideal cooking time is 7-8 hours on LOW. This allows the flavors to meld and the texture to set perfectly without overcooking or drying out.

    Can I use regular lasagna noodles or do they need to be no-boil?

    Either works! Regular noodles need more liquid, so add an extra ½ cup of milk to your cottage cheese mixture. No-boil noodles work perfectly with the standard recipe.

    What’s the best cottage cheese to use for breakfast lasagna?

    Full-fat (4%) cottage cheese provides the creamiest texture and best flavor. Small or medium curd both work well, depending on your texture preference.

    Is this Slow Cooker Cottage Cheese Breakfast Lasagna gluten-free?

    Not with regular lasagna noodles, but you can easily substitute gluten-free lasagna noodles. Just ensure they’re sturdy enough for slow cooking without becoming mushy.

    Final Thoughts

    This Slow Cooker Cottage Cheese Breakfast Lasagna has revolutionized my morning routine, bringing protein-packed comfort to busy weekdays and lazy weekends alike. The overnight cooking process feels like kitchen magic—minimal effort yielding maximum satisfaction. I’ve shared this recipe with countless friends who now swear by it for family breakfasts and brunch gatherings. Whether you lean toward sweet or savory, this adaptable dish welcomes your creativity while delivering consistent results. For more breakfast inspiration, visit our Pinterest board dedicated to protein-rich morning meals.

  • Sheet Pan Cottage Cheese Gnocchi with Roasted Veggies – Easy & Delicious!

    Sheet Pan Cottage Cheese Gnocchi with Roasted Veggies – Easy & Delicious!

    Sheet Pan Cottage Cheese Gnocchi with Roasted Veggies – Easy & Delicious!

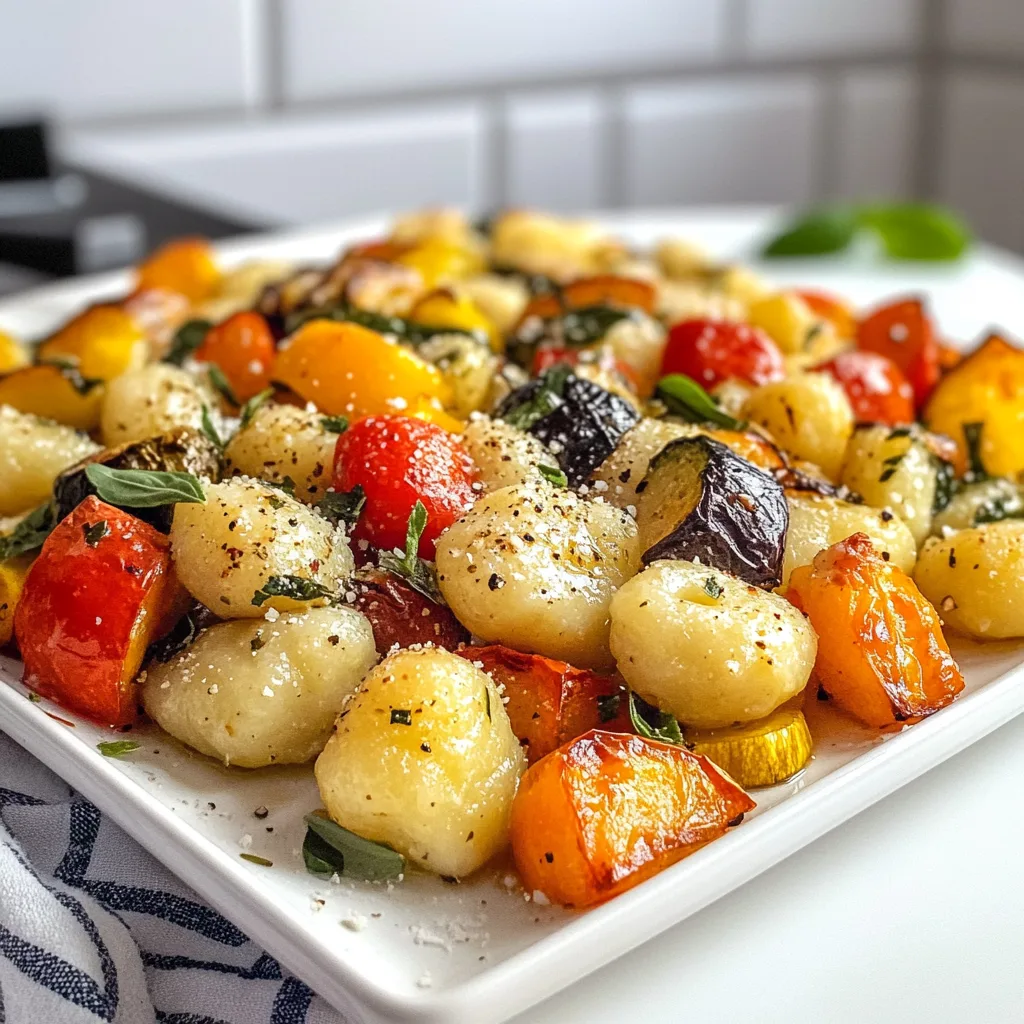
    Sheet Pan Cottage Cheese Gnocchi with Roasted Vegetables is my absolute go-to dinner when I want something cozy yet impressive without the fuss. There’s something magical about how the pillowy gnocchi gets crispy on the outside while staying tender inside, all while the vegetables caramelize to sweet perfection. I discovered this recipe last winter when my kitchen was under renovation, and I needed meals that required minimal cleanup. One sheet pan, thirty minutes, and you’ve got a protein-packed dinner that feels like it came from a rustic Italian kitchen. Trust me, this might become your new weeknight favorite too!

    Recipe

    Why You’ll Love This Sheet Pan Cottage Cheese Gnocchi with Roasted Vegetables

    Perfect Balance of Nutrition and Comfort

    This dish strikes that elusive balance between nourishing and deeply satisfying. The cottage cheese gnocchi delivers an impressive protein punch (about 15g per serving!) while maintaining that pillowy texture we all crave. I love how the edges get golden and crispy while the centers stay tender. The roasted vegetables add fiber, vitamins, and those beautiful caramelized flavors that develop in the oven. When my daughter—who typically avoids anything remotely “healthy”—asks for seconds, I know I’ve hit the sweet spot between nutritious and utterly delicious.

    Weeknight Time-Saver with Gourmet Results

    Let’s be honest—on busy weeknights, the last thing anyone wants is a sink full of dishes. That’s where this one-pan wonder truly shines! Everything roasts together, meaning minimal prep and practically zero cleanup. I timed myself last Tuesday: 10 minutes of hands-on prep, 20 minutes in the oven, and dinner was served. The beauty is how it looks and tastes like something that required far more effort. Those beautiful charred edges on the vegetables and the golden gnocchi create a restaurant-worthy presentation that belies its simple preparation.

    Essential Tips & Tricks

    Achieving the Perfect Texture

    The secret to crispy-edged gnocchi lies in two critical steps. First, don’t overcrowd your sheet pan—give everything breathing room so steam can escape (I use two pans if cooking for more than four people). Second, toss everything halfway through cooking, but be gentle with the gnocchi to maintain their shape. For the vegetables, cut them into uniform sizes—about 1-inch pieces work perfectly—to ensure even cooking. I’ve found that a drizzle of olive oil and a sprinkle of salt before roasting makes all the difference in developing those delicious caramelized edges that make this dish irresistible.

    Seasoning Secrets for Maximum Flavor

    While the base recipe is delicious on its own, the right seasonings elevate this dish to new heights. I always include garlic powder and dried herbs (rosemary and thyme are my go-to combination) in the initial toss. For an extra dimension, add a pinch of red pepper flakes if you enjoy a subtle heat. The game-changer? A light drizzle of balsamic glaze over everything in the last five minutes of cooking. This adds a sweet-tangy complexity that ties all the flavors together beautifully. For more flavor inspiration, check out my Creamy Cottage Cheese Baked Orzo with Roasted Garlic for complementary flavor profiles.

    Serving Ideas & Creative Variations

    Perfect Pairings to Complete Your Meal

    This versatile dish works beautifully as a standalone meal or as part of a larger spread. For a complete dinner, I love serving it with a simple arugula salad dressed with lemon juice and olive oil—the peppery greens and bright acidity balance the richness of the gnocchi perfectly. For a heartier option, add a side of Garlic Butter Chicken Wraps for those with bigger appetites. When entertaining, I serve this family-style on a large platter with fresh basil scattered over the top and lemon wedges on the side. The vibrant colors make for a stunning presentation that always impresses guests.

    Seasonal Adaptations and Dietary Swaps

    One of the reasons I return to this recipe year-round is its incredible adaptability to whatever produce is in season. In summer, I use bell peppers, zucchini, and cherry tomatoes. Fall calls for butternut squash, Brussels sprouts, and red onion. Winter? Think root vegetables like parsnips and carrots. For dietary needs, this recipe is naturally vegetarian, but you can make it vegan by using plant-based gnocchi. Gluten-free? Simply swap in gluten-free gnocchi (most cottage cheese versions are naturally GF, but always check labels). For extra protein, add chickpeas to roast alongside everything else.

    Storage & Troubleshooting Guide

    Proper Storage for Optimal Leftovers

    Leftover Sheet Pan Cottage Cheese Gnocchi with Roasted Vegetables maintains its delicious flavor, though the texture changes slightly. Store in an airtight container in the refrigerator for up to 3 days. For best results when reheating, avoid the microwave which can make the gnocchi rubbery. Instead, spread leftovers on a baking sheet and reheat at 375°F for 7-10 minutes until warmed through. This revives some of the crispy edges. For meal prep, you can prepare all vegetables ahead of time and store them in the refrigerator for up to 2 days. Just remember to bring them to room temperature before roasting for more even cooking.

    Solving Common Cooking Challenges

    If your gnocchi turns out soggy rather than crispy, there are a few likely culprits. The most common issue is overcrowding the pan, which causes steaming instead of roasting. Always use a large enough sheet pan or divide between two pans. Another potential problem is vegetables releasing too much moisture—particularly zucchini and tomatoes. For wetter vegetables, consider roasting them separately or giving them a head start before adding the gnocchi. If your vegetables are burning while the gnocchi remains undercooked, your oven temperature may be too high. Try reducing the heat to 375°F and extending the cooking time slightly.

    Frequently Asked Questions

    Can I use regular store-bought gnocchi instead of cottage cheese gnocchi?

    Absolutely! Regular potato gnocchi works perfectly in this recipe. You’ll lose some protein content but gain convenience, as potato gnocchi is widely available in most grocery stores.

    How do I know when the Sheet Pan Cottage Cheese Gnocchi with Roasted Vegetables is done?

    Look for golden-brown gnocchi with slightly crisp edges and vegetables that are tender when pierced with a fork. The edges of the vegetables should show caramelization.

    Can I prepare any components of this dish ahead of time?

    Yes! Chop all vegetables up to 2 days in advance and store them in airtight containers in the refrigerator. You can also pre-measure and mix your seasonings to save time.

    Is this recipe suitable for freezing?

    While possible, I don’t recommend freezing this dish as the texture of both the gnocchi and vegetables changes significantly. If necessary, freeze for up to 1 month and reheat from frozen at 375°F.

    What vegetables work best in this recipe?

    Hardy vegetables that roast well are ideal: bell peppers, zucchini, eggplant, Brussels sprouts, butternut squash, carrots, red onions, and cherry tomatoes all perform beautifully.

    Final Thoughts

    Sheet Pan Cottage Cheese Gnocchi with Roasted Vegetables has become a staple in my kitchen for good reason—it delivers on flavor, nutrition, and convenience without compromise. I love how it adapts to whatever’s in season and satisfies everyone from picky eaters to gourmet food lovers. The protein-rich gnocchi combined with the sweet caramelized vegetables creates a perfect harmony of textures and flavors that feels like comfort food with benefits. For more delicious recipe inspiration, follow me on Pinterest where I share new ideas weekly!

  • Crockpot Warm Cottage Cheese Dip: Hot, Creamy, Bacon Bliss!

    Crockpot Warm Cottage Cheese Dip: Hot, Creamy, Bacon Bliss!

    Crockpot Warm Cottage Cheese Dip: Hot, Creamy, Bacon Bliss!

    Crockpot Warm Cottage Cheese Dip with hot, creamy bacon goodness is the ultimate comfort appetizer that’ll have everyone hovering around your slow cooker. I discovered this recipe during a snowy game night when I needed something effortless yet impressive. The way the cheese melts into this velvety, savory blend while your kitchen fills with the irresistible aroma of bacon is pure magic. Perfect for gatherings or quiet evenings at home, this crowd-pleasing dip transforms humble cottage cheese into something extraordinarily crave-worthy. Trust me, you’ll want to bookmark this one.

    Recipe

    Why You’ll Love This Crockpot Warm Cottage Cheese Dip (Hot, Creamy, Bacon)

    Effortless Preparation with Maximum Flavor

    The beauty of this dip lies in its simplicity—just layer ingredients, set your crockpot, and walk away! The slow cooking process transforms ordinary cottage cheese into a creamy dream while infusing it with smoky bacon flavors. I love how the texture changes completely, becoming velvety smooth as it heats. The contrast between the tangy cheese base and savory bacon creates this perfect balance that keeps everyone coming back for more. Plus, your hands stay free for other party prep while your crockpot does the heavy lifting!

    Customizable for Any Occasion

    Whether you’re hosting a casual game day gathering or an elegant holiday party, this dip easily adapts to suit the mood. For everyday snacking, keep it classic with bacon and cheddar. For something more sophisticated, add caramelized onions and fresh herbs. I’ve served this at everything from backyard BBQs to Christmas Eve appetizer spreads, and it’s always the first dish emptied. The versatility extends to dietary preferences too—swap in turkey bacon or add extra veggies to lighten things up without sacrificing that indulgent feel.

    Essential Tips & Tricks

    Achieving the Perfect Texture

    The secret to this dip’s luxurious consistency is all in the technique. Start with full-fat cottage cheese for the creamiest results—trust me, this isn’t the place to cut calories! Stir gently halfway through cooking to ensure even melting. If your dip seems too thick, add a splash of milk or cream to reach your desired consistency. For extra smoothness, I sometimes pulse half the cottage cheese in a blender before adding it to the crockpot. This creates that silky-smooth texture that makes dips like this one absolutely irresistible.

    Ingredient Selection Matters

    Quality ingredients make all the difference in this simple recipe. Choose thick-cut bacon for heartier texture and more robust flavor—the extra fat renders beautifully into the dip. For cheese, a combination of sharp cheddar and something meltable like Monterey Jack creates the perfect balance. Fresh garlic always trumps powder here, and a dash of hot sauce adds complexity without overwhelming heat. I learned this the hard way after once using pre-shredded cheese (with anti-caking agents) that left my dip slightly grainy. Freshly grated is absolutely worth the extra minute!

    Serving Ideas & Creative Variations

    Perfect Pairings for Every Palate

    This versatile dip partners beautifully with nearly anything crunchy or dippable. Serve with toasted baguette slices, sturdy crackers, or fresh veggies for a textural contrast that highlights the dip’s creaminess. For a low-carb option, bell pepper wedges and cucumber rounds work wonderfully. My personal favorite pairing is with pretzel bites—the salty crunch against the creamy, bacon-studded dip creates an absolutely addictive combination that disappears in minutes at parties. Garnish with fresh chives or green onions for a pop of color and freshness.

    Exciting Flavor Variations

    While the classic version is incredible, don’t be afraid to experiment! Try adding roasted garlic for a deeper, sweeter flavor profile, or stir in chopped jalapeños for heat lovers. A Southwest version with corn, black beans and taco seasoning is always a hit during football season. For an elevated twist, fold in lump crab meat and Old Bay seasoning during the last 30 minutes of cooking. I once added caramelized onions and thyme for Thanksgiving, and my brother-in-law (who claims to hate cottage cheese) ate nearly half the batch himself!

    Storage & Troubleshooting Guide

    Proper Storage for Leftovers

    If you’re lucky enough to have leftovers (which rarely happens in my house!), store them properly to maintain that creamy texture. Transfer cooled dip to an airtight container and refrigerate for up to 3 days. Avoid freezing as this will compromise the consistency. When reheating, do so gently—either in the microwave at 50% power in short intervals, stirring between each, or in a small saucepan over low heat. Add a splash of milk if needed to restore creaminess, as the dip will thicken considerably when chilled.

    Fixing Common Issues

    Even experienced cooks occasionally encounter challenges. If your dip separates or looks curdled, don’t panic! Lower the heat setting and whisk vigorously to re-emulsify. Adding a tablespoon of cream cheese can help bind ingredients back together. For dips that are too thick, gradually incorporate warm milk or cream. Too thin? Mix a teaspoon of cornstarch with cold water and stir in, then cook for another 15-20 minutes. If you accidentally oversalt (easy to do with bacon), balance it with a squeeze of lemon juice or a dollop of sour cream.

    Frequently Asked Questions

    Can I make this Crockpot Warm Cottage Cheese Dip ahead of time?

    Absolutely! Prepare all ingredients up to 24 hours ahead and store separately. Combine in your crockpot 2-3 hours before serving. The flavors actually develop beautifully with a little extra time.

    Is there a vegetarian version of this dip?

    Yes! Skip the bacon and add smoked paprika for that smoky flavor. Mix in extra herbs like thyme and rosemary, plus some sautéed mushrooms for umami depth.

    How do I prevent the cheese from burning?

    Cook on LOW setting only, never HIGH. Stir occasionally and add a splash of milk if it looks too thick. A programmable crockpot that switches to “warm” after cooking is ideal.

    Can I use low-fat cottage cheese instead?

    You can, but the texture won’t be as creamy. If using low-fat, add 2-3 tablespoons of cream cheese to compensate for the missing richness.

    What’s the best way to serve this at a buffet?

    Keep the dip in your crockpot on the “warm” setting. Arrange dippers in a semicircle around it, and provide small plates and cocktail napkins nearby.

    Final Thoughts

    This Crockpot Warm Cottage Cheese Dip (Hot, Creamy, Bacon) has become my signature party offering for good reason. It transforms humble ingredients into something truly special with minimal effort. The combination of melty cheese, savory bacon, and subtle seasonings creates that perfect comfort food magic that brings people together. I love watching guests’ expressions change from skepticism (cottage cheese in a hot dip?) to delight with their first bite. Don’t forget to check out more delicious recipes on Pinterest for your next gathering!

  • Slow Cooker Italian Wedding Soup: Cozy, Savory & Easy Meatball Tortellini

    Slow Cooker Italian Wedding Soup: Cozy, Savory & Easy Meatball Tortellini

    Slow Cooker Italian Wedding Soup: Cozy, Savory & Easy Meatball Tortellini

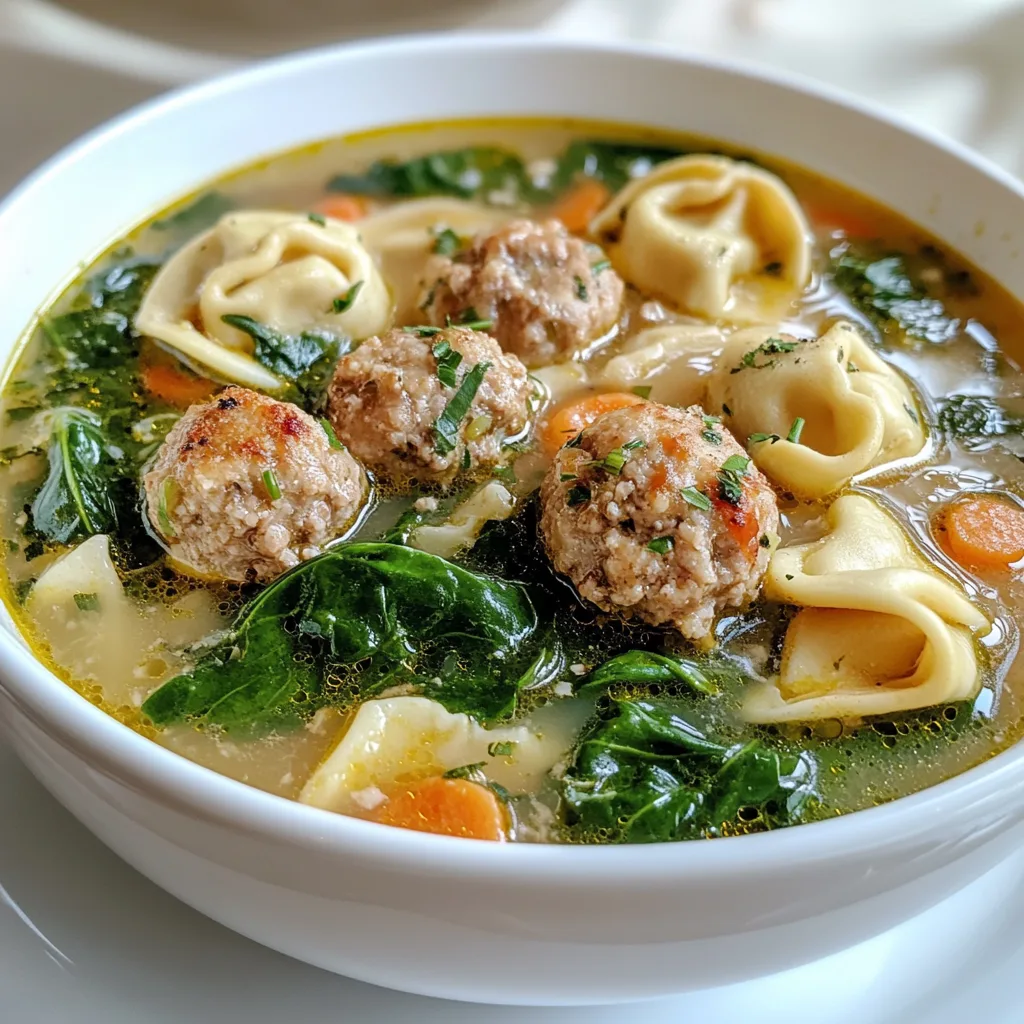
    Slow Cooker Italian Wedding Soup with spinach, meatballs, and tortellini is the ultimate comfort food that practically makes itself. There’s something magical about walking into your kitchen after a long day and being greeted by the aroma of herbs, savory broth, and tender meatballs that have been simmering all day. As someone who grew up with a grandmother who insisted soup could fix anything, I’ve tweaked this classic recipe to create a version that’s both authentic and convenient. This hearty soup combines the best of Italian flavors with the ease of slow cooking.

    Recipe

    Why You’ll Love This Slow Cooker Italian Wedding Soup (Spinach, Meatball, Tortellini)

    Perfect Make-Ahead Meal for Busy Days

    This soup is a lifesaver on those days when I know I’ll barely have time to breathe, let alone cook. The beauty lies in its set-it-and-forget-it nature – just 20 minutes of morning prep rewards you with a restaurant-quality dinner. I love assembling everything before work, knowing that tender meatballs and perfectly cooked tortellini await my return. The flavors meld beautifully as they simmer, creating a depth that simply can’t be rushed. Plus, it makes enough for leftovers that actually taste better the next day as the herbs infuse even more deeply into the broth.

    Crowd-Pleasing Comfort Food That’s Secretly Nutritious

    Every time I serve this soup at gatherings, even the pickiest eaters come back for seconds. The combination of savory meatballs, cheese-filled tortellini, and vibrant spinach creates a balanced meal in one bowl. What guests don’t realize is they’re enjoying a nutrient-dense dinner – the spinach adds iron and vitamins, the meatballs provide protein, and the broth delivers minerals and comfort. I’ve watched my veggie-averse nephew happily slurp up spinach without complaint! The rich, aromatic broth with hints of garlic and Italian herbs creates that unmistakable “grandma’s kitchen” feeling that simply makes everyone feel at home.

    Essential Tips & Tricks

    Perfecting Your Meatballs for Maximum Flavor

    The heart of this soup lies in those tender, flavorful meatballs. For the best texture, use a light touch when mixing and forming them – overworking makes them tough. I learned this the hard way after serving what my husband lovingly called “meatball hockey pucks” years ago! Combine ground beef with Italian sausage for depth, and add fresh herbs rather than dried when possible. Make them slightly smaller than you think – about 1-inch diameter is perfect. For a time-saving hack, form the meatballs the night before and refrigerate them on a parchment-lined tray. This not only saves morning prep time but also allows the flavors to meld beautifully.

    Timing Is Everything: When to Add Each Ingredient

    The secret to perfect texture is knowing exactly when to add each component. Start with your broth, aromatics, and raw meatballs for the first 4-6 hours on low. The slow simmer allows meatballs to release their flavors while staying tender. Add tortellini only in the final 15-20 minutes of cooking – any earlier and they’ll become mushy and lose their distinct texture. For spinach, wait until the very end – just 5 minutes before serving is perfect. This preserves its bright green color and prevents it from becoming slimy. If you’re not serving immediately, consider adding the tortellini and spinach only to the portion you’ll consume that day to maintain optimal texture.

    Serving Ideas & Creative Variations

    Elevating Your Presentation for Special Occasions

    Transform this humble soup into a dinner-party worthy meal with thoughtful presentation. Serve in pre-warmed bowls to keep everything hot longer – I place mine in a low oven for a few minutes before ladling in the soup. Top each portion with freshly grated Parmesan, a drizzle of good olive oil, and a sprinkle of fresh basil chiffonade. For a rustic touch, serve alongside a board of crusty Italian bread, roasted garlic, and herb butter. I love using shallow, wide bowls that showcase all the beautiful components. For special gatherings, consider individual bread bowls – they never fail to impress and add an interactive element to the meal.

    Making It Your Own: Delicious Adaptations

    This soup welcomes creative adaptations based on dietary needs or what’s in your pantry. For a lighter version, use turkey meatballs instead of beef and pork. Need a gluten-free option? Skip the traditional tortellini and add cooked rice or gluten-free pasta at serving time. Vegetarians can enjoy this too – replace the meatballs with white beans and mushrooms for hearty texture and umami flavor. For extra greens, kale works beautifully alongside or instead of spinach, though it needs a few extra minutes to soften. During summer months, I love adding fresh cherry tomatoes and zucchini in the last 30 minutes for a garden-fresh twist that brightens the whole dish.

    Storage & Troubleshooting Guide

    Maximizing Leftovers: Proper Storage Techniques

    This soup makes excellent leftovers, but proper storage is key. If you plan to enjoy it throughout the week, store the broth and meatballs separately from the tortellini and spinach when possible. This prevents the pasta from absorbing too much liquid and becoming soggy. Cool completely before refrigerating in airtight containers for up to 4 days. For freezing, I recommend omitting the tortellini and spinach entirely from portions you’ll freeze – add fresh ones when reheating. Freeze in individual portions for up to 3 months for quick lunches. When reheating, do so gently on the stovetop rather than microwave for better texture, and add a splash of fresh broth if it seems too thick.

    Common Issues and Simple Solutions

    Even experienced cooks encounter challenges with slow cooker soups. If your broth tastes bland, boost flavor with a splash of vinegar or lemon juice – acidity awakens flavors without adding more salt. Too thin? Whisk 1 tablespoon cornstarch with cold water and stir into the simmering soup. For greasy broth, refrigerate overnight and skim solidified fat from the top before reheating. If meatballs turned out tough, they likely cooked too long or were overworked during mixing – next time, handle the meat mixture less and consider reducing cook time. Mushy tortellini can be prevented by adding them only to the portion you’re serving immediately, keeping the rest separate until needed.

    Frequently Asked Questions

    Can I make Slow Cooker Italian Wedding Soup with frozen meatballs?

    Yes! Use quality frozen meatballs for convenience. Add them frozen directly to the slow cooker with the broth and cook on low for 6-7 hours. They’ll absorb flavors beautifully while saving you prep time.

    How do I prevent the tortellini from getting mushy?

    Add tortellini only during the final 15-20 minutes of cooking time. For meal prep, store cooked tortellini separately and add to hot soup when serving.

    Can this soup be made vegetarian?

    Absolutely! Substitute vegetable broth and replace meatballs with sautéed mushrooms and white beans. Add nutritional yeast for umami flavor that mimics the traditional Parmesan.

    Is this soup freezer-friendly?

    Freeze the base soup without tortellini and spinach for up to 3 months. When reheating, add fresh tortellini and spinach for optimal texture and color.

    What makes Italian Wedding Soup with spinach, meatballs and tortellini different from other Italian soups?

    The combination of tiny meatballs, leafy greens, and pasta in clear broth distinguishes Italian Wedding Soup. Traditional versions use acini di pepe pasta, but tortellini adds a delicious cheese-filled twist to this beloved classic.

    Final Thoughts

    This Slow Cooker Italian Wedding Soup with spinach, meatballs, and tortellini has become my go-to recipe when I need something that’s both impressive and effortless. There’s something deeply satisfying about creating a meal that tastes like it required hours of attentive cooking when in reality, your slow cooker did most of the work. I hope this recipe brings the same comfort and joy to your table that it has to mine. For more cozy soup inspirations, check out my Pinterest collection of slow cooker favorites that make weeknight cooking a breeze.

  • Easy Crockpot Cheesy Crack Beef Pasta – Irresistibly Delicious!

    Easy Crockpot Cheesy Crack Beef Pasta – Irresistibly Delicious!

    Easy Crockpot Cheesy Crack Beef Pasta – Irresistibly Delicious!

    Easy Crockpot cheesy Crack Beef Pasta is the ultimate comfort food that practically makes itself! This irresistible one-pot wonder combines tender ground beef, velvety cheese, and perfectly cooked pasta in your slow cooker. I first discovered this recipe during a particularly hectic week when I needed something that would feed my family without me hovering over the stove. The aroma that filled my kitchen as it simmered away was nothing short of magical! With minimal prep and maximum flavor, this dish has become my go-to for busy weeknights when I crave something hearty and satisfying without the fuss. Trust me, once you try this creamy creation, you’ll wonder how you ever lived without it.

    Recipe

    Why You’ll Love This Easy Crockpot cheesy Crack Beef Pasta

    Perfect for Busy Weeknights

    There’s something incredibly liberating about tossing ingredients into your slow cooker and walking away. This Easy Crockpot cheesy Crack Beef Pasta is the epitome of set-it-and-forget-it cooking that doesn’t sacrifice flavor. On those days when soccer practice runs late or work meetings drag on, knowing dinner is practically done brings immense peace of mind. The hands-off cooking time allows the flavors to meld beautifully while you tackle other priorities. Plus, the minimal prep work—just brown the beef, toss everything in, and let your crockpot work its magic—makes this recipe accessible even to kitchen novices.

    Crowd-Pleasing Flavor Combination

    The name “crack” pasta isn’t an exaggeration—this dish is genuinely addictive! The combination of savory ground beef, creamy cheese sauce, and perfectly tender pasta creates a comfort food trifecta that’s impossible to resist. What makes it special is how the pasta absorbs all those amazing flavors as it cooks slowly. My teenagers, who typically turn their noses up at many of my dinner creations, actually request this by name. The rich, cheesy goodness paired with the seasoned beef creates a depth of flavor that tastes like you spent hours in the kitchen, when in reality, your crockpot did all the heavy lifting.

    Essential Tips & Tricks

    Perfecting Your Pasta Texture

    Getting the pasta texture just right in a slow cooker can be tricky, but I’ve learned a few secrets through trial and error. The most important rule: never add the pasta too early! Add it during the final 30-45 minutes of cooking time to prevent it from becoming mushy. I prefer using heartier pasta shapes like rotini, penne, or cavatappi as they hold up better in the slow cooker environment. Another game-changing tip is to slightly undercook the pasta if you’re planning to keep it on the “warm” setting for any length of time, as it will continue to soften. This approach has saved many family dinners from crossing into overcooked territory!

    Cheese Selection Matters

    The cheese blend you choose can elevate this dish from good to absolutely memorable. While the recipe calls for cheddar, I’ve found that a combination of sharp cheddar and cream cheese creates the silkiest, most luxurious sauce. For an extra dimension of flavor, try adding a handful of smoked gouda or pepper jack for a subtle kick. When adding cheese to your crockpot, always grate it yourself rather than using pre-shredded varieties, which contain anti-caking agents that can make your sauce grainy. For a similar creamy texture in a different dish, you might enjoy my Creamy Tomato Garlic Pasta which uses a similar technique for velvety results.

    Serving Ideas & Creative Variations

    Perfect Pairings

    This hearty pasta dish stands beautifully on its own, but a few simple sides can turn it into a feast. I love serving it with a bright, crisp garden salad dressed simply with lemon and olive oil to balance the richness. Garlic bread or buttery Texas toast makes an excellent vehicle for scooping up any extra cheese sauce—trust me, you won’t want to waste a drop! For a complete comfort food experience, consider pairing it with roasted broccoli or asparagus; the slight char from roasting adds a wonderful contrast to the creamy pasta. These vegetables also provide a nutritional boost that helps me feel slightly less guilty about indulging in this cheesy masterpiece.

    Exciting Flavor Twists

    Don’t be afraid to make this recipe your own by experimenting with different flavor profiles. For a Southwestern spin, add a can of diced tomatoes with green chilies, corn kernels, and a sprinkle of taco seasoning. My family goes crazy for the Italian version where I mix in pepperoni slices, Italian seasoning, and top with mozzarella for a pizza-inspired treat. For seafood lovers, try substituting the beef with cooked shrimp added in the last 15 minutes—it pairs beautifully with the cheesy sauce, similar to my Shrimp Creamy Cheddar Grits. These variations keep the dish exciting even when it becomes a regular in your meal rotation.

    Storage & Troubleshooting Guide

    Proper Storage Solutions

    This Easy Crockpot cheesy Crack Beef Pasta makes excellent leftovers, but proper storage is key to maintaining its delicious texture. Allow the pasta to cool completely before transferring to airtight containers. It will keep in the refrigerator for 3-4 days, making it perfect for meal prep or quick lunches. When freezing, I recommend slightly undercooking the pasta since it will soften further during reheating. Portion it into freezer-safe containers and store for up to 2 months. The cheese sauce might separate slightly when thawed, but gently reheating with a splash of milk while stirring frequently will bring it back to its creamy glory.

    Fixing Common Issues

    Even the most foolproof recipes can sometimes go awry, but most issues with this dish are easily fixed. If your pasta turns out too dry, simply add a splash of warm milk or broth and stir gently until it reaches your desired consistency. For sauce that’s too thin, mix a tablespoon of cornstarch with cold water to create a slurry, then stir it in and let cook for an additional 15 minutes. If you find your cheese sauce has broken or become grainy, lower the heat immediately and whisk in a tablespoon of cream cheese until smooth. Remember that slow cooker temperatures vary, so you might need to adjust cooking times slightly based on your specific model.

    Frequently Asked Questions

    Can I use different pasta shapes in this Easy Crockpot cheesy Crack Beef Pasta?

    Absolutely! Short pasta shapes like rotini, penne, or bowties work best. Avoid long pasta like spaghetti as it tends to clump together. Just remember to add the pasta in the last 30-45 minutes of cooking time.

    Can I make this recipe ahead of time?

    Yes! Prepare everything except the pasta and refrigerate the mixture for up to 24 hours. When ready to cook, add to your crockpot, heat through, then add pasta during the final 30-45 minutes.

    Is there a way to make this recipe lighter?

    Definitely. Use lean ground beef or turkey, reduced-fat cream cheese, and light cheddar. You can also increase vegetables like bell peppers or spinach for added nutrition.

    My sauce is too thin. How can I thicken it?

    Create a cornstarch slurry by mixing 1-2 tablespoons cornstarch with equal parts cold water. Stir into the crockpot, cover, and cook on high for 15 minutes until thickened.

    Can I cook this on high instead of low?

    Yes, you can cook on high for 2-3 hours instead of low for 4-5 hours. However, watch carefully as higher heat can cause dairy products to separate more easily.

    Final Thoughts

    This Easy Crockpot cheesy Crack Beef Pasta has become more than just a recipe in my household—it’s a reliable friend on hectic days when cooking feels overwhelming. There’s something magical about the combination of minimal effort and maximum satisfaction that makes this dish a true kitchen hero. I love seeing the smiles around my dinner table when this pasta makes an appearance, and I hope it brings the same joy to your family. Don’t forget to check out more comforting recipes on Pinterest for inspiration that will keep your meal rotation fresh and exciting!