Blog

  • Slow Cooker Hungarian Goulash with Paprika & Potatoes – Comfort in Every Bite

    Slow Cooker Hungarian Goulash with Paprika & Potatoes – Comfort in Every Bite

    Slow Cooker Hungarian Goulash with Paprika & Potatoes – Comfort in Every Bite

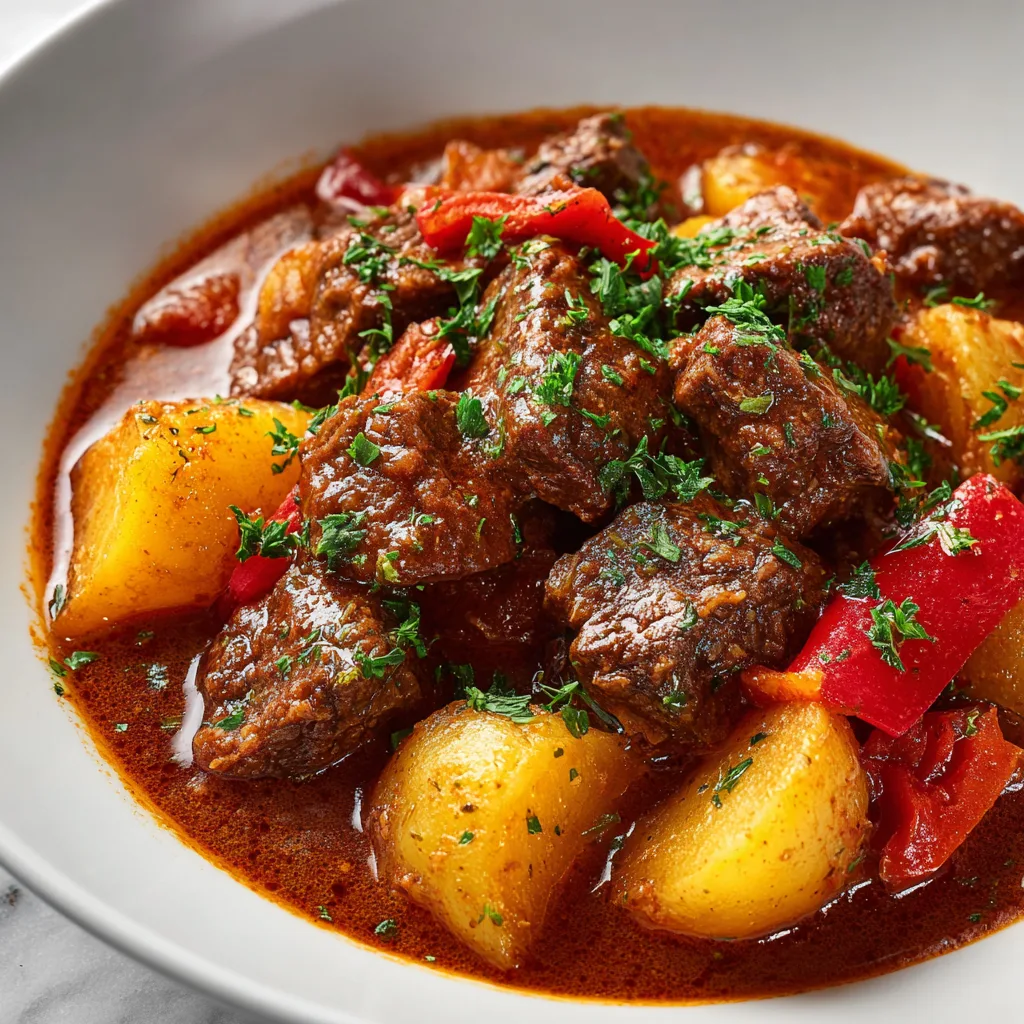
    Slow Cooker Hungarian‑Style Goulash with Paprika & Potatoes transforms simple ingredients into a rich, soul-warming meal that fills your kitchen with irresistible aromas. The first time I made this dish, my entire home smelled like my grandmother’s kitchen—warm, inviting, and promising comfort in every bite. There’s something magical about the way the paprika-infused broth slowly tenderizes the beef until it practically melts in your mouth. This traditional Hungarian comfort food is perfect for those chilly evenings when you need something hearty yet hands-off to nourish your family. Let the slow cooker do all the heavy lifting while you enjoy the delicious results!

    Recipe

    Why You’ll Love This Slow Cooker Hungarian‑Style Goulash with Paprika & Potatoes

    The Perfect Comfort Food for Busy Days

    There’s nothing quite like coming home to a meal that’s been simmering all day, filling your house with mouthwatering aromas. This Hungarian-style goulash practically cooks itself while you’re busy with life. The fork-tender beef absorbs all the rich paprika flavors, creating depth that simply can’t be rushed. I love how the potatoes soak up the savory broth, becoming little flavor bombs in every bite. What makes this dish truly special is how it transforms humble ingredients into something extraordinary—proof that sometimes the most comforting foods are also the simplest.

    A Celebration of Authentic Hungarian Flavors

    The soul of this dish lies in its authentic Hungarian paprika—not the dusty stuff that’s been sitting in your cabinet for years! Sweet Hungarian paprika brings a rich, almost fruity warmth without overwhelming heat. When it blooms in the hot oil, the aroma is intoxicating. My Hungarian neighbor once told me the secret is adding a touch of caraway seeds for that subtle, earthy note that makes goulash taste genuinely European. The slow cooker gently melds these flavors, creating that distinctive taste that’s been comforting generations. It’s like a culinary hug in a bowl!

    Essential Tips & Tricks

    Perfecting Your Paprika Technique

    Don’t skip the step of blooming your paprika in hot oil before adding it to the slow cooker! This crucial technique releases the essential oils and deepens the flavor significantly. I learned this the hard way after once dumping paprika directly into the broth—the difference is remarkable. Use a mix of sweet and hot Hungarian paprika for the most authentic flavor profile. Another game-changing tip: add your paprika off the heat to prevent burning, which can make it taste bitter. The rich red color should develop beautifully during the slow cooking process, transforming into that signature deep russet hue that makes goulash so inviting.

    Choosing and Preparing the Perfect Cuts of Meat

    Select well-marbled chuck roast for the most tender, flavorful results in your Hungarian goulash. This cut breaks down beautifully during the long cooking process, becoming meltingly tender. Before adding to your slow cooker, take the time to brown the meat in batches—don’t overcrowd the pan! This step creates the Maillard reaction that adds incredible depth to the final dish. I like to cut my beef into 1½-inch cubes rather than smaller pieces, as they hold up better during the long cooking time without drying out. Remember to pat the meat dry before browning for the best sear and flavor development.

    Serving Ideas & Creative Variations

    Traditional and Modern Accompaniments

    Serve your Hungarian goulash with fresh sour cream and a sprinkle of chopped parsley for that authentic finishing touch. The cool creaminess against the rich, paprika-infused broth creates a perfect contrast. Traditional Hungarian cucumber salad makes a refreshing side that balances the heartiness of the goulash. For a complete meal, I love serving this with homemade buttered egg noodles or crusty rye bread for sopping up every last bit of that delicious sauce. On chilly nights, nothing beats this combination for pure comfort—it’s the kind of meal that makes everyone linger at the table a little longer.

    Regional Twists to Make It Your Own

    Every Hungarian family has their own goulash variation, and you should feel free to create yours! Add bell peppers for a sweeter flavor profile reminiscent of Southern Hungarian styles. Some regions incorporate tomatoes more heavily, while others keep the broth clearer and more paprika-forward. I’ve experimented with adding a splash of red wine for depth or stirring in prepared horseradish just before serving for a zingy kick. For a modern twist, try serving it over creamy polenta instead of potatoes. The beauty of goulash is its adaptability—make it once following the traditional recipe, then have fun putting your personal stamp on it!

    Storage & Troubleshooting Guide

    Proper Storage for Maximum Flavor

    Like many stews, this Hungarian goulash actually tastes even better the next day after the flavors have had time to meld. Store leftovers in airtight containers in the refrigerator for up to 4 days. For freezing, cool the goulash completely before transferring to freezer-safe containers, leaving some headspace for expansion. It freezes beautifully for up to 3 months! When reheating, do so gently on the stovetop with a splash of broth or water to maintain the proper consistency. I often make a double batch specifically to freeze half—it’s the perfect solution for those busy weeknights when cooking from scratch isn’t possible.

    Fixing Common Goulash Problems

    If your goulash sauce seems too thin, remove the lid during the last 30 minutes of cooking to allow some liquid to evaporate. Alternatively, create a quick slurry with 1 tablespoon cornstarch mixed with 2 tablespoons cold water and stir it in. For goulash that’s too thick, simply add more beef broth until you reach your desired consistency. If your meat isn’t tender enough, it likely needs more time—even an extra hour can make a difference. And if you accidentally oversalted, add a peeled, quartered potato to absorb some salt, then remove it before serving. These simple fixes ensure your goulash turns out perfect every time!

    Frequently Asked Questions

    What’s the difference between Hungarian goulash and American goulash?

    Hungarian goulash is a paprika-seasoned beef stew with potatoes, while American goulash is more like a pasta dish with ground beef and tomato sauce. Authentic Hungarian Slow Cooker Hungarian‑Style Goulash with Paprika & Potatoes has no pasta and focuses on the paprika flavor.

    Can I make this goulash in an Instant Pot instead?

    Yes! Use the sauté function to brown the meat and vegetables, then pressure cook for 35 minutes with a 10-minute natural release. The flavor won’t be quite as developed as slow cooking, but it’s still delicious for a quicker version.

    What type of paprika should I use for authentic flavor?

    Hungarian sweet paprika is essential for authentic flavor. For depth, use a combination of sweet (3 tablespoons) and hot (1 teaspoon) Hungarian paprika. The quality matters significantly in this dish.

    Can I add vegetables other than potatoes?

    Absolutely! Carrots, parsnips, and bell peppers are traditional additions. Add root vegetables with the potatoes, but save bell peppers for the last hour to prevent them from disintegrating.

    Is this recipe gluten-free?

    Yes, this Slow Cooker Hungarian‑Style Goulash is naturally gluten-free as long as you verify your paprika and broth have no additives containing gluten. Serve with gluten-free sides for a complete gluten-free meal.

    Final Thoughts

    This Slow Cooker Hungarian‑Style Goulash with Paprika & Potatoes has become my go-to recipe when I want to impress without spending hours actively cooking. There’s something truly special about how it fills your home with comforting aromas and brings people together around the table. The deep, complex flavors belie how simple it is to prepare. I hope this recipe becomes a cherished part of your comfort food repertoire, bringing warmth to your kitchen on cold days and creating memories around your dinner table for years to come. Don’t forget to check out more cozy recipes on Pinterest!

  • Slow Cooker Salsa Verde Chicken Tacos – Easy, Flavor-Packed Delight!

    Slow Cooker Salsa Verde Chicken Tacos – Easy, Flavor-Packed Delight!

    Slow Cooker Salsa Verde Chicken Tacos – Easy, Flavor-Packed Delight!

    Slow Cooker Salsa Verde Chicken Tacos are my absolute go-to when I need a dinner that practically makes itself while filling my home with mouthwatering aromas. There’s something magical about walking through the door after a long day to be greeted by the tangy, savory scent of tender chicken simmering in zesty salsa verde. I first discovered this recipe during a particularly hectic week when my sister was visiting, and we still talk about how those tacos saved our sanity! The slow cooker does all the heavy lifting, transforming simple ingredients into juicy, flavor-packed filling that makes taco night feel special with minimal effort.

    Recipe

    Why You’ll Love This Slow Cooker Salsa Verde Chicken Tacos

    Effortless Preparation with Maximum Flavor

    This recipe is the definition of set-it-and-forget-it cooking that doesn’t sacrifice an ounce of flavor. Just 10 minutes of morning prep rewards you with melt-in-your-mouth chicken that’s infused with bright, tangy salsa verde. The slow simmering breaks down the chicken’s fibers while allowing it to absorb every hint of garlic, lime, and roasted tomatillos. I love how the jalapeños mellow during cooking, providing warmth without overwhelming heat. Even my spice-sensitive nephew devoured these tacos, declaring them “the best chicken ever” – high praise from an 8-year-old taco connoisseur!

    Perfect for Busy Weeknights and Entertaining

    These tacos are my secret weapon for both hectic weeknights and casual entertaining. The recipe easily scales up for crowds and stays warm in the slow cooker while guests build their perfect tacos. I’ve served this at countless impromptu gatherings, and the compliments never stop flowing. The hands-off cooking means you can focus on other dishes or simply relax with guests instead of being stuck in the kitchen. Plus, the filling is incredibly versatile – beyond tacos, it’s fantastic in enchiladas, burritos, or over rice for a quick burrito bowl that rivals your favorite takeout.

    Essential Tips & Tricks

    Choosing the Right Ingredients

    The quality of your salsa verde makes all the difference in this recipe. I prefer using a mid-range jarred version for convenience, but homemade is spectacular if you have the time. Look for one with visible chunks of tomatillos and minimal additives. For the chicken, boneless thighs provide the juiciest results and resist drying out during the long cook time. If you prefer breasts, reduce cooking time by about an hour. Don’t skip the fresh lime at the end – that bright acidity balances the rich flavors and wakes up the entire dish after its long simmer.

    Perfecting Your Technique

    The beauty of slow cooking is its forgiveness, but a few technique tweaks elevate this dish from good to unforgettable. Resist the urge to lift the lid during cooking – each peek releases heat and adds 15-20 minutes to your cooking time. For deeper flavor, briefly sauté the onions and garlic before adding to the slow cooker. This caramelization creates rich undertones that transform the final dish. When shredding the chicken, return it to the sauce immediately so it can reabsorb those flavorful juices. This step makes all the difference in creating that restaurant-quality texture we’re aiming for.

    Serving Ideas & Creative Variations

    Building the Ultimate Taco Bar

    Create a taco bar extravaganza that lets everyone customize their perfect bite. Beyond the basics like warmed corn tortillas and shredded cheese, I love offering unexpected toppings that complement the salsa verde chicken. Pickled red onions add vibrant color and tangy crunch, while diced avocado provides creamy richness. Thinly sliced radishes offer a peppery bite that cuts through the savory chicken. Don’t forget fresh cilantro, crumbled cotija cheese, and lime wedges! For an extra special touch, serve with both soft corn tortillas and crispy taco shells to satisfy all texture preferences.

    Exciting Recipe Variations

    This versatile base recipe welcomes creative twists to keep it in your regular rotation without boredom. For a smoky-sweet version, add a tablespoon of honey and a chipotle pepper in adobo sauce. Craving something heartier? Toss in black beans and corn during the last 30 minutes of cooking. My personal favorite variation includes a diced poblano pepper and a splash of heavy cream stirred in just before serving for a creamy verde chicken that’s incredible over cauliflower rice. For special occasions, try topping with quick-pickled pineapple tidbits – the sweet-tart contrast with the savory chicken is absolutely divine.

    Storage & Troubleshooting Guide

    Proper Storage and Reheating

    The flavor actually improves overnight as the ingredients meld together, making this perfect for meal prep. Store leftovers in airtight containers in the refrigerator for up to 4 days. For freezing, cool completely then portion into freezer-safe bags, removing as much air as possible. Frozen, it keeps beautifully for 3 months. When reheating, add a splash of chicken broth to refresh the sauce if it seems dry. Microwave gently at 70% power, stirring occasionally, or warm slowly on the stovetop. For best texture, reheat only what you’ll eat immediately rather than repeatedly reheating the entire batch.

    Troubleshooting Common Issues

    If your chicken turns out too watery, there’s an easy fix. Remove the chicken to shred it, then return the liquid to the slow cooker and simmer uncovered on high for 15-20 minutes to reduce. For chicken that seems dry, it was likely cooked too long – next time, check it earlier or use thighs instead of breasts. If the flavor seems flat, brighten it with fresh lime juice, a pinch of salt, or a dash of hot sauce. For a thicker sauce, stir in a slurry of 1 tablespoon cornstarch mixed with 2 tablespoons cold water during the last 30 minutes of cooking with the lid off.

    Frequently Asked Questions

    Can I use frozen chicken for this Slow Cooker Salsa Verde Chicken Tacos recipe?

    For food safety reasons, I recommend thawing chicken first. Frozen chicken cooks unevenly and may spend too long at unsafe temperatures in a slow cooker.

    How spicy is this recipe?

    It’s mildly spicy with regular salsa verde. For less heat, choose a mild version or add a tablespoon of sour cream to the mixture. For more kick, add fresh jalapeños or hot sauce.

    Can I make this in an Instant Pot instead?

    Absolutely! Use the pressure cook function for 12 minutes (thighs) or 10 minutes (breasts), followed by a 10-minute natural release. Shred as directed.

    What’s the best tortilla to use?

    Corn tortillas provide the most authentic flavor, but flour works too. Warm them slightly in a dry skillet or directly over a gas flame for the best texture and flavor.

    How can I make this recipe dairy-free?

    Simply skip the cheese toppings or use plant-based alternatives. The chicken filling itself contains no dairy and is naturally gluten-free as well.

    Final Thoughts

    These Slow Cooker Salsa Verde Chicken Tacos have saved countless dinners in my home, delivering restaurant-quality flavor with minimal effort. There’s something deeply satisfying about transforming simple ingredients into something so delicious while reclaiming precious time in our busy lives. I hope this recipe brings the same joy to your kitchen that it has to mine. For more slow cooker inspiration, check out my Pinterest boards where I’m constantly adding new favorites. Happy cooking, friends – may your tacos be flavorful and your evenings relaxed!

  • Slow Cooker Mushroom Roast Beef with Onion Gravy – Irresistibly Tender!

    Slow Cooker Mushroom Roast Beef with Onion Gravy – Irresistibly Tender!

    Slow Cooker Mushroom Roast Beef with Onion Gravy – Irresistibly Tender!

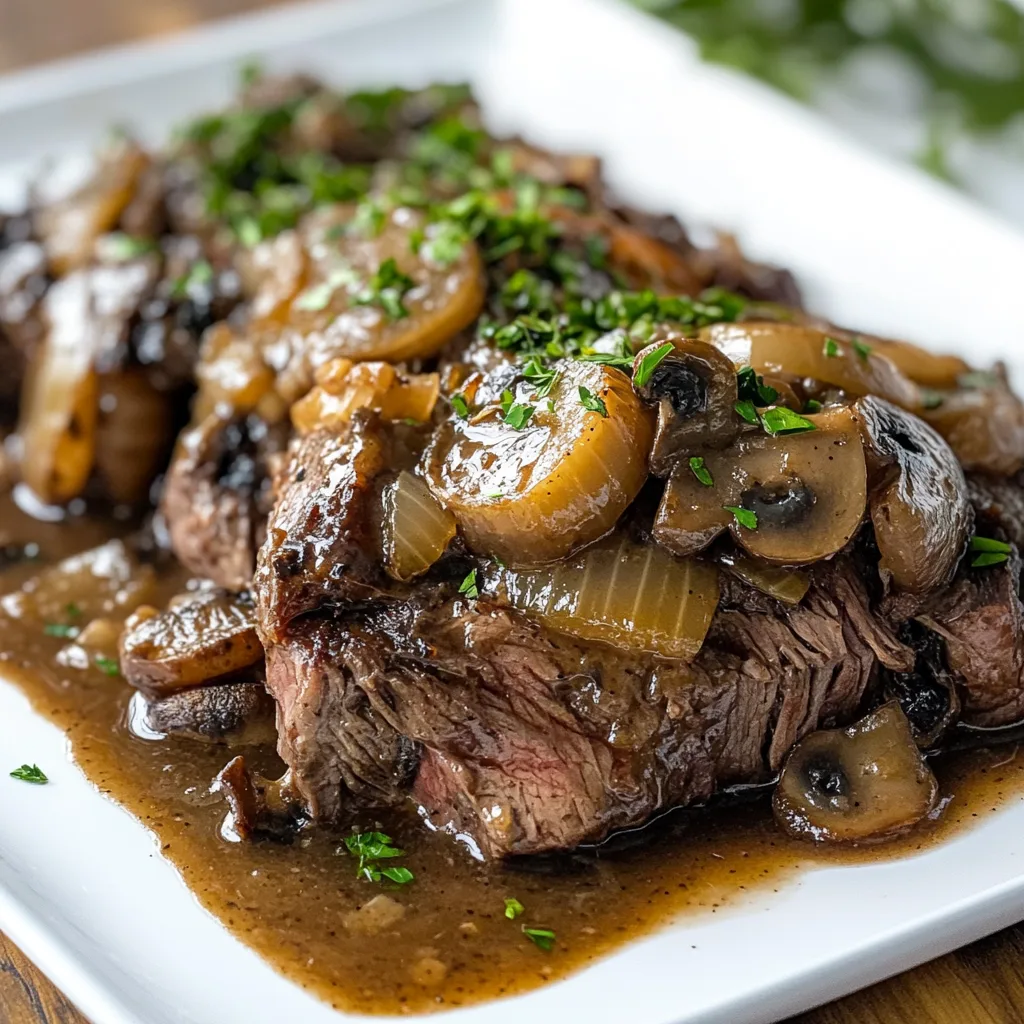
    The magic of Slow Cooker Mushroom roast beef with Onion Gravy lies in its incredible depth of flavor and minimal effort. There’s something deeply satisfying about walking through the door after a long day to be greeted by the rich aroma of beef that’s been slowly simmering with earthy mushrooms and sweet onions. I first made this on a snowy Sunday when my sister visited—we spent the afternoon playing board games while this cozy meal practically made itself. The tender meat falling apart with just the touch of a fork creates a comfort food experience that feels like a warm hug on a plate.

    Recipe

    Why You’ll Love This Slow Cooker Mushroom Roast Beef with Onion Gravy

    A Make-Ahead Marvel

    This slow cooker mushroom roast beef is the ultimate time-saving treasure for busy households. You’ll spend just 15 minutes of prep in the morning, then let your slow cooker work its magic for 8-10 hours. I love how the beef absorbs all those wonderful flavors as it cooks, becoming more tender by the hour. The mushrooms release their earthy essence while the onions slowly caramelize, creating a natural gravy that’s rich and velvety. When dinner rolls around, you’ll have a restaurant-quality meal with practically zero last-minute effort—perfect for both weeknight dinners and special occasions.

    Budget-Friendly Comfort

    Using an economical chuck roast transforms this dish into an affordable luxury. The slow cooking method works wonders on this less expensive cut, breaking down tough connective tissues until the meat becomes melt-in-your-mouth tender. I’ve found that adding mushrooms—whether fancy cremini or simple button varieties—bulks up the meal while adding incredible umami flavor. The onion gravy stretches the servings even further, making this a smart choice for feeding a crowd or enjoying leftovers throughout the week. Each serving delivers rich satisfaction without the premium price tag.

    Essential Tips & Tricks

    Perfect Prep Techniques

    The secret to extraordinary flavor starts with properly browning your beef before it goes into the slow cooker. This quick extra step creates a caramelized crust that adds incredible depth to the final dish. I’ve learned that patting the meat dry with paper towels first makes all the difference in achieving that beautiful sear. When adding mushrooms, resist the urge to overcrowd the pan—cook them in batches if needed to ensure they brown rather than steam. For an extra flavor boost, deglaze the browning pan with a splash of red wine or beef broth to capture every bit of those delicious browned bits.

    Flavor Boosting Ingredients

    The right combination of aromatics and herbs elevates this dish from good to unforgettable. Fresh thyme and rosemary infuse the gravy with their woodsy fragrance, while bay leaves add subtle complexity. I always include a couple tablespoons of tomato paste for umami richness and acidity balance. For a velvety finish to your gravy, try adding a dollop of Dijon mustard and a splash of Worcestershire sauce in the last hour of cooking. These small additions make a world of difference, creating layers of flavor that will have everyone asking for your secret recipe.

    Serving Ideas & Creative Variations

    Perfect Pairings

    This slow cooker mushroom roast beef creates the most amazing silky onion gravy that begs to be spooned over something starchy. Creamy mashed potatoes are my go-to, but buttered egg noodles or fluffy rice work beautifully too. For a complete meal, add a bright side like roasted Brussels sprouts or a simple arugula salad dressed with lemon and olive oil. The contrast of fresh, crisp vegetables against the rich, savory beef creates perfect balance. For special occasions, I serve this with a glass of robust red wine and warm crusty bread for sopping up every last drop of that heavenly gravy.

    Exciting Twists

    Customize this versatile recipe to create exciting variations that keep it in your regular rotation. Try adding root vegetables like carrots, parsnips, and turnips to make it a complete one-pot meal—they’ll absorb all those wonderful beef flavors as they cook. For an Italian twist, incorporate sun-dried tomatoes, olives, and Italian herbs. Craving something with a bit of heat? Add chipotles in adobo or red pepper flakes for a subtle kick. You can even transform leftovers into incredible beef and onion stir-fry by quickly sautéing the shredded beef with fresh vegetables and a simple sauce.

    Storage & Troubleshooting Guide

    Optimal Storage Solutions

    This mushroom roast beef actually tastes even better the next day, making it perfect for meal prepping. Store leftovers in airtight containers in the refrigerator for up to 4 days—the flavors will continue to develop and meld together. For longer storage, portion the cooled beef and gravy into freezer-safe containers, leaving a little headspace for expansion. It freezes beautifully for up to 3 months. I like to label with both the date and contents (your future self will thank you!). When reheating, do so gently over low heat with a splash of beef broth to maintain moisture and prevent the meat from drying out.

    Common Challenges Solved

    If your gravy turns out too thin, there’s an easy fix: create a cornstarch slurry by mixing 1 tablespoon cornstarch with 2 tablespoons cold water. With your slow cooker on high, stir in the slurry and let it cook for 15-20 minutes until thickened. For gravy that’s too thick, simply thin it with additional beef broth. If your beef isn’t as tender as you’d like, it likely needs more time—tough cuts require patience. Return it to the slow cooker, add a bit more liquid if needed, and cook for another 1-2 hours. Remember that opening the lid frequently extends cooking time, so resist peeking too often!

    Frequently Asked Questions

    Can I use a different cut of beef for this Slow Cooker Mushroom Roast Beef with Onion Gravy?

    Yes! While chuck roast is ideal, you can substitute brisket, bottom round, or rump roast. Each cut has a different fat content and texture, but all work well with the long, slow cooking method.

    Can I make this recipe without browning the meat first?

    You can skip browning, but you’ll sacrifice some depth of flavor. If short on time, at least season the beef generously before adding it to the slow cooker.

    What mushrooms work best in this recipe?

    Button, cremini, or baby portobello mushrooms are all excellent choices. For a luxury version, mix in some rehydrated dried porcini mushrooms and use their soaking liquid in the gravy.

    My gravy separated during cooking. How can I fix it?

    Whisk 1 tablespoon of flour with 2 tablespoons of cold water, then stir this into the hot gravy. Cook on high for 15 minutes, whisking occasionally until smooth.

    Can I convert this to an Instant Pot recipe?

    Absolutely! Use the sauté function to brown the meat and mushrooms, then pressure cook on high for 60-70 minutes with natural release for similar results in less time.

    Final Thoughts

    This Slow Cooker Mushroom Roast Beef with Onion Gravy has become my ultimate crowd-pleasing comfort food for good reason. There’s something magical about how a few simple ingredients transform into such a deeply satisfying meal with minimal hands-on effort. The combination of tender beef, earthy mushrooms, and rich onion gravy creates a rustic elegance that works for both everyday dinners and special gatherings. I’d love to see how your version turns out—share your creations with me on Pinterest and let me know what sides you paired with it!

  • Slow Cooker Lentil & Mushroom Bolognese That Will Blow Your Mind!

    Slow Cooker Lentil & Mushroom Bolognese That Will Blow Your Mind!

    Slow Cooker Lentil & Mushroom Bolognese That Will Blow Your Mind!

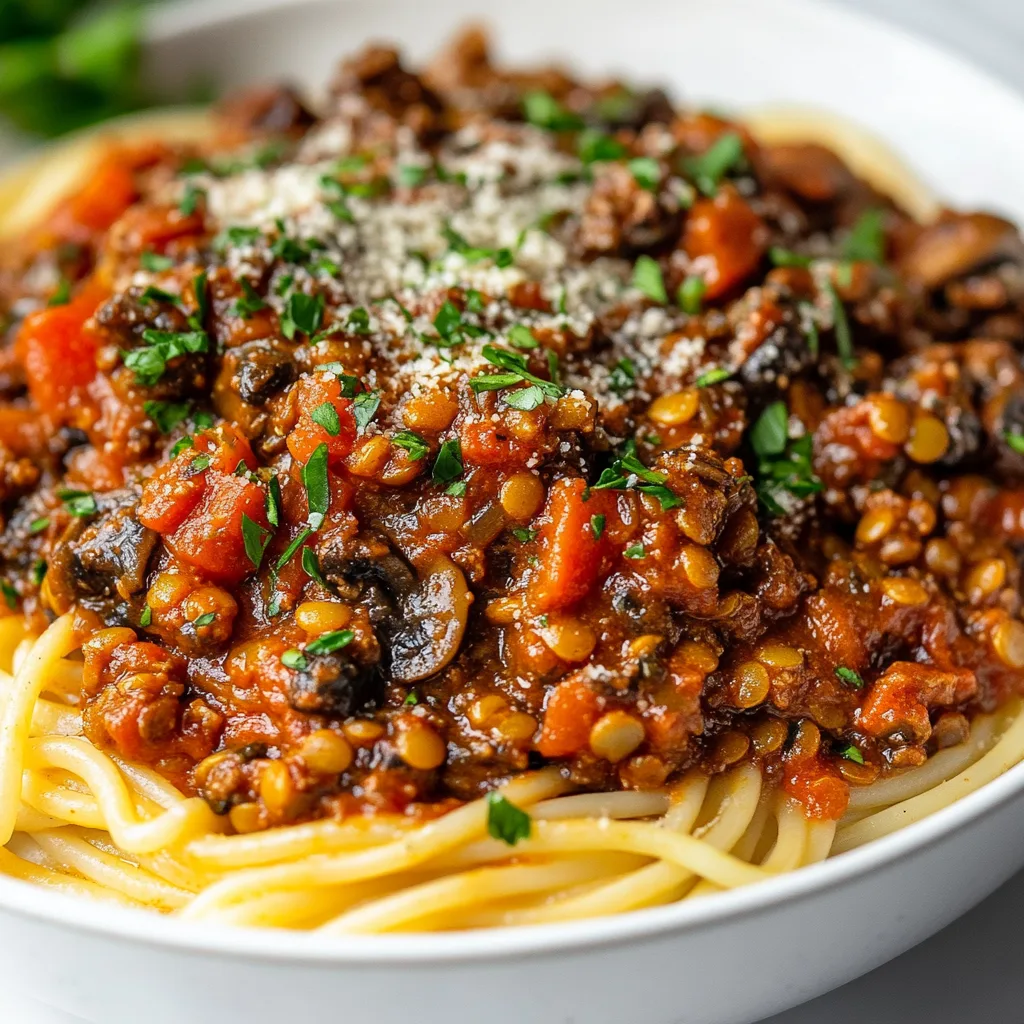
    Slow Cooker Lentil & Mushroom Bolognese is one of those magical dishes that transforms humble ingredients into something extraordinary. The first time I made this, my kitchen filled with an aroma so rich and comforting that my neighbor actually texted to ask what I was cooking! This plant-based twist on the Italian classic develops deep, satisfying flavors as it simmers away in your crockpot. There’s something truly special about coming home to a meal that’s been slowly building character all day, especially when it’s this hearty, nutritious sauce that clings beautifully to pasta.

    Recipe

    Why You’ll Love This Slow Cooker Lentil & Mushroom Bolognese

    A Plant-Based Powerhouse

    This Slow Cooker Lentil & Mushroom Bolognese isn’t just delicious—it’s nutritionally impressive. The protein-packed lentils create that satisfying chew we all crave, while mushrooms deliver a meaty umami punch without any meat. I love how the slow cooking process breaks down the vegetables into a luxurious texture that even dedicated carnivores appreciate. My brother-in-law, who typically turns his nose up at meatless meals, helped himself to seconds of this dish, completely forgetting it contained no beef. The depth of flavor builds hour by hour, creating something truly special.

    Set-It-and-Forget-It Convenience

    There’s nothing quite like the hands-off magic of slow cooker recipes. This Lentil & Mushroom Bolognese requires just 15 minutes of morning prep, then your crockpot handles everything else while you’re out living your life. I often prep this on Sunday mornings before heading to the farmers market—by dinner time, we have a restaurant-quality sauce with practically zero effort. The beauty lies in how the slow, gentle heat transforms ordinary ingredients into extraordinary flavors, all while you’re doing absolutely nothing. It’s perfect for busy weeknights or lazy weekends alike.

    Essential Tips & Tricks

    Ingredient Selection Matters

    Choosing the right ingredients elevates this Slow Cooker Lentil & Mushroom Bolognese from good to unforgettable. French green lentils (Puy lentils) hold their shape beautifully during long cooking, avoiding the mushiness that can happen with red lentils. For mushrooms, a mix of cremini and shiitake creates the most complex flavor profile. Don’t skimp on the tomato paste—it’s concentrated umami that forms the backbone of the sauce. I learned this lesson the hard way when I once tried to substitute with more diced tomatoes. The result? A thinner, less developed sauce that lacked that characteristic rich Italian depth.

    Layering Flavors for Maximum Impact

    The secret to an exceptional Slow Cooker Lentil & Mushroom Bolognese lies in how you build flavors. Always take time to sauté the aromatics before adding them to your slow cooker—those caramelized onions and garlic create foundational flavors that simply can’t develop in the moist environment of a slow cooker. Add dried herbs early so they fully infuse, but save fresh herbs for the final 30 minutes. A splash of balsamic vinegar and a teaspoon of soy sauce might sound untraditional, but they provide depth that mimics the complexity of meat-based sauces without overpowering.

    Serving Ideas & Creative Variations

    Beyond Basic Pasta

    While this Slow Cooker Lentil & Mushroom Bolognese shines atop classic spaghetti, don’t limit yourself! Try it over creamy polenta for a comforting twist that catches every bit of sauce in its velvety embrace. Stuffed into roasted bell peppers or spooned over a baked potato, it transforms into an entirely new meal experience. My personal favorite? Layering it into a veggie-packed lasagna for Sunday dinner. The sauce’s robust texture stands up beautifully to the pasta sheets, creating something that feels special enough for company but simple enough for family meals.

    Customizing Your Bolognese

    The beauty of this Slow Cooker Lentil & Mushroom Bolognese lies in its adaptability to your personal taste. For a spicier version, add red pepper flakes or a diced jalapeño with the initial vegetables. Craving more vegetables? Finely diced zucchini, bell peppers, or even grated carrots blend seamlessly into the sauce. Sometimes I add a splash of cream or a dollop of mascarpone in the final minutes for added richness. For a gluten-free option that still satisfies, serve over spaghetti squash or zucchini noodles—the hearty sauce pairs surprisingly well with these lighter bases.

    Storage & Troubleshooting Guide

    Making It Last

    This Slow Cooker Lentil & Mushroom Bolognese is practically made for meal prep. It actually improves with time as the flavors continue to meld, making it perfect for batch cooking. Store in airtight containers in the refrigerator for up to 5 days—I often portion it into single servings for quick lunches. For longer storage, freeze flat in zip-top bags for up to 3 months. The texture remains perfect upon thawing, unlike many vegetable-based sauces that can become watery. I always make a double batch specifically to freeze half, creating a future gift to my busy weeknight self.

    Fixing Common Issues

    Even the most foolproof recipes occasionally need adjustments. If your Slow Cooker Lentil & Mushroom Bolognese seems too watery, remove the lid for the final hour of cooking to reduce excess liquid. Too thick? Add vegetable broth a quarter cup at a time until you reach your desired consistency. If the lentils aren’t tender enough after the cooking time, your lentils might be older (they dry out with age). Simply add 30 minutes of cooking time and a splash of broth. For a sauce lacking depth, try stirring in nutritional yeast or a splash of red wine during the last hour of cooking.

    Frequently Asked Questions

    Can I use red lentils instead of green or brown lentils?

    Red lentils break down much faster and will create a smoother sauce with less texture. If using them, reduce cooking time by 1-2 hours and expect a less chunky final result.

    Is this Slow Cooker Lentil & Mushroom Bolognese freezer-friendly?

    Absolutely! It freezes beautifully for up to 3 months. Cool completely before transferring to freezer containers, leaving some headspace for expansion.

    Can I make this in an Instant Pot instead?

    Yes! Sauté the vegetables using the Sauté function, then add remaining ingredients and cook on High Pressure for 15 minutes with a natural release.

    How can I make this sauce thicker?

    Remove the slow cooker lid for the final 30-60 minutes of cooking to allow excess moisture to evaporate, or stir in a tablespoon of tomato paste.

    What’s the best pasta shape to serve with this bolognese?

    Shapes that capture sauce work best—pappardelle, tagliatelle, fettuccine, or rigatoni all hold the chunky Slow Cooker Lentil & Mushroom Bolognese beautifully.

    Final Thoughts

    This Slow Cooker Lentil & Mushroom Bolognese has become my go-to recipe when I want to impress both vegetarians and meat-eaters alike. There’s something magical about transforming simple pantry ingredients into a sauce so rich and satisfying that no one misses the meat. I love seeing the surprise on people’s faces when they realize just how flavorful plant-based cooking can be. Whether you’re looking to incorporate more meatless meals or simply want a delicious, hands-off dinner option, this bolognese delivers every time. Don’t forget to check out more of my slow cooker recipes on Pinterest!

  • Crockpot Greek Yogurt Tandoori Chicken Thighs That WOW!

    Crockpot Greek Yogurt Tandoori Chicken Thighs That WOW!

    Crockpot Greek Yogurt Tandoori Chicken Thighs That WOW!

    Crockpot Greek Yogurt Tandoori Chicken Thighs with Vegetables is the ultimate set-it-and-forget-it meal that brings exotic flavors right to your dinner table with minimal effort. I discovered this recipe during my busiest season last year when I craved something flavorful but simply couldn’t stand at the stove for hours. The tangy yogurt marinade transforms ordinary chicken thighs into melt-in-your-mouth tender morsels while the vegetables soak up all that glorious spiced sauce. Trust me, your kitchen will smell like an Indian restaurant in the best possible way! Let me share how this slow cooker masterpiece became my family’s most requested weeknight dinner.

    Recipe

    Why You’ll Love This Crockpot Greek Yogurt Tandoori Chicken Thighs with Vegetables

    Perfect Balance of Flavor and Convenience

    There’s something magical about the way Greek yogurt transforms chicken in the slow cooker. Unlike traditional tandoori recipes that require a blazing hot oven, this crockpot version delivers that same depth of flavor while you’re busy living your life. The yogurt acts as both tenderizer and flavor carrier, infusing the chicken with warm spices while keeping it incredibly moist. I love how the aromatic spices bloom slowly in the crockpot, creating layers of flavor that simply can’t be rushed. Plus, adding vegetables directly to the pot means your entire meal cooks together, saving you from washing multiple pans at the end of a long day.

    Nutrition-Packed One-Pot Wonder

    This dish isn’t just delicious—it’s a nutritional powerhouse. The protein-rich chicken thighs stay juicy even after hours of cooking, while the Greek yogurt adds probiotics and extra protein without heavy cream. I appreciate how the vegetables—whether you choose bell peppers, cauliflower, carrots, or potatoes—absorb the flavorful sauce while maintaining their nutrients. It’s comfort food you can feel good about serving! The slow cooking method actually preserves more vitamins than high-heat methods, and the spice blend offers anti-inflammatory benefits. When my kids devour vegetables without complaint, I consider it a culinary victory worth celebrating.

    Essential Tips & Tricks

    Mastering the Marinade

    The secret to spectacular tandoori flavor lies in the marinade timing. I’ve found that allowing the chicken to soak in the yogurt mixture for at least 4 hours (overnight is even better!) makes a dramatic difference in both flavor and tenderness. Use full-fat Greek yogurt for the creamiest results—the extra fat helps prevent the sauce from separating during cooking. Don’t skimp on the spices! Toast them briefly in a dry pan before adding to the yogurt to wake up their essential oils. If you’re sensitive to heat, the slow cooker Italian wedding soup technique of layering flavors works perfectly here too—adjust the cayenne to your preference.

    Vegetable Selection and Preparation

    Not all vegetables are created equal when it comes to slow cooking. Dense root vegetables like carrots, potatoes, and cauliflower hold up beautifully during the long cooking process, while more delicate veggies like bell peppers and zucchini should be added during the final hour. I’ve learned (the hard way!) that cutting vegetables into uniform, larger chunks—about 1.5-inch pieces—prevents them from disintegrating. For maximum flavor absorption, toss your vegetables in a spoonful of the yogurt marinade before adding to the crockpot. This simple step ensures every bite carries those wonderful tandoori flavors, not just the chicken.

    Serving Ideas & Creative Variations

    Perfect Pairings

    This Crockpot Greek Yogurt Tandoori Chicken Thighs with Vegetables shines when served over a bed of fluffy basmati rice that soaks up all those incredible juices. For a lower-carb option, cauliflower rice works beautifully too. I love adding a side of cooling cucumber raita—simply mix Greek yogurt with diced cucumber, mint, and a pinch of salt. A basket of warm naan bread for scooping up sauce completes the experience. For special occasions, try serving alongside my Crockpot Cottage Cheese Tikka Masala for an impressive Indian-inspired feast that will have everyone thinking you spent hours in the kitchen.

    Exciting Flavor Twists

    Don’t be afraid to make this recipe your own! For a coconut tandoori variation, replace half the Greek yogurt with coconut milk and add a tablespoon of shredded coconut to the marinade. Vegetarian guests? Swap the chicken thighs for firm tofu or chickpeas (adding these in the last hour of cooking). My family goes wild for the “sweet heat” version where I add a tablespoon of mango chutney to the marinade. For special occasions, try stirring in a handful of golden raisins and toasted cashews just before serving. These little tweaks keep the recipe exciting even when it becomes part of your regular rotation.

    Storage & Troubleshooting Guide

    Proper Storage and Reheating

    This dish is a meal-prepper’s dream because it actually improves with time as the flavors continue to meld. Store leftovers in airtight containers in the refrigerator for up to 4 days. For freezing, I recommend portioning into individual servings—they’ll keep beautifully for up to 3 months. When reheating, add a splash of water or chicken broth to prevent drying out. Microwave gently at 70% power, stirring occasionally, or reheat on the stovetop over medium-low heat. The yogurt sauce may look slightly separated after freezing, but a quick stir while reheating will bring it back together.

    Common Issues and Solutions

    If your sauce looks curdled, don’t panic! This can happen when yogurt is exposed to high heat. Simply whisk in 1-2 tablespoons of additional room-temperature yogurt after cooking to bring the sauce back together. For a thicker sauce, remove the chicken and vegetables, then simmer the liquid on high with the lid off for 10-15 minutes. Too spicy? A dollop of plain yogurt served on top works wonders. If your vegetables ended up too soft, next time add them later in the cooking process or try larger chunks. Remember that slow cooker temperatures vary—if you find the dish cooking too quickly, reduce the heat setting.

    Frequently Asked Questions

    Can I use boneless chicken breasts instead of thighs?

    Yes, though chicken breasts tend to dry out more easily. Reduce cooking time to 3-4 hours on low and check for doneness with a meat thermometer (165°F internal temperature).

    Is there a dairy-free alternative to Greek yogurt for this recipe?

    Absolutely! Coconut yogurt makes an excellent dairy-free substitute and adds a subtle tropical note that complements the tandoori spices beautifully.

    Can I make Crockpot Greek Yogurt Tandoori Chicken Thighs with Vegetables in an Instant Pot?

    Yes! Use the pressure cook function for 12 minutes with natural release for chicken thighs, adding vegetables after pressure cooking and using sauté function for 5 minutes.

    How spicy is this dish?

    The heat level is moderate but customizable. Adjust cayenne pepper to taste—start with 1/4 teaspoon for mild or increase to 1 teaspoon for significant heat.

    What if I don’t have all the tandoori spices?

    A quality pre-made tandoori or garam masala spice blend works wonderfully as a shortcut. Start with 2-3 tablespoons of the blend in your yogurt marinade.

    Final Thoughts

    Crockpot Greek Yogurt Tandoori Chicken Thighs with Vegetables has become my secret weapon for those days when I want to serve something impressive without being chained to the kitchen. There’s something deeply satisfying about walking through your door after a long day to be greeted by those aromatic spices and knowing dinner is ready. I’d love to see how you make this recipe your own—tag me in your creations on Pinterest! The beauty of slow cooking is how it transforms simple ingredients into something truly special, proving that convenience and incredible flavor can absolutely go hand in hand.

  • Slow Cooker Chicken Tortellini Soup Recipe That Warms Your Soul!

    Slow Cooker Chicken Tortellini Soup Recipe That Warms Your Soul!

    Slow Cooker Chicken Tortellini Soup Recipe That Warms Your Soul!

    Slow Cooker Chicken Tortellini Soup is the ultimate comfort food that wraps you in a warm hug on chilly evenings. The magic happens when tender chicken, pillowy cheese tortellini, and garden-fresh vegetables meld together in a rich, savory broth. I discovered this recipe during a particularly brutal winter when my family needed something that would nourish both body and soul. The way the kitchen fills with that mouthwatering aroma as it simmers all day still makes my heart happy. Trust me, this cozy soup will quickly become your new go-to for busy weeknights or weekend gatherings.

    Recipe

    Why You’ll Love This Slow Cooker Chicken Tortellini Soup

    Perfect Balance of Convenience and Flavor

    There’s something truly special about a meal that practically makes itself while filling your home with the most incredible aromas. This slow cooker chicken tortellini soup strikes that perfect balance between effortless preparation and gourmet results. Just 15 minutes of morning prep rewards you with a restaurant-quality dinner by evening. I love how the chicken becomes fall-apart tender while the broth develops layers of flavor impossible to achieve with quick-cooking methods. My daughter actually requests this on Sunday afternoons so she can enjoy the anticipatory comfort of smelling it cook throughout the day.

    Customizable for Every Dietary Need

    One of the things I appreciate most about this recipe is its incredible versatility. Need to make it gluten-free? Simply swap in gluten-free tortellini. Looking to boost the protein? Add an extra chicken breast or stir in some white beans. Vegetable options are endless too—I’ve added everything from zucchini to sweet potatoes depending on what’s in my fridge. The base recipe is so forgiving that you can truly make it your own. My husband prefers a spicier version with red pepper flakes, while I love adding extra herbs like rosemary and thyme for an earthy depth.

    Essential Tips & Tricks

    Mastering the Timing for Perfect Tortellini

    The secret to success with this soup lies in when you add the tortellini. Add it too early, and you’ll end up with mushy pasta that’s lost all its delightful texture. I learned this the hard way during my first attempt! For the perfect al dente bite, add the tortellini during the final 15-20 minutes of cooking. This timing works whether you’re using fresh, frozen, or dried tortellini (though cooking times may vary slightly). I also recommend keeping the slow cooker on low rather than high when adding the pasta to prevent it from breaking apart while maintaining that perfect tender-yet-firm texture.

    Creating Depth of Flavor Without Extra Work

    The beauty of slow cooker recipes is how they develop complex flavors with minimal effort, but a few strategic additions can elevate this soup from good to unforgettable. Start by briefly sautéing your onions, carrots, and celery before adding them to the slow cooker—this quick step caramelizes their natural sugars for remarkable depth. Another game-changer? Add a parmesan rind to simmer with the broth (remove before serving). For an ultra-rich finish, stir in a splash of heavy cream during the last 10 minutes. These simple touches make all the difference in creating a soul-warming soup that tastes like it simmered all day in an Italian grandmother’s kitchen.

    Serving Ideas & Creative Variations

    Perfect Pairings to Complete Your Meal

    This hearty soup stands beautifully on its own, but thoughtful accompaniments can transform it into a feast. A crusty artisan bread or garlic bread is perfect for sopping up every last drop of that flavorful broth. For a lighter touch, pair with a simple arugula salad dressed with lemon and olive oil to cut through the richness. When serving for guests, I like to set out small bowls of finishing touches—fresh grated parmesan, red pepper flakes, extra fresh herbs, and lemon wedges—so everyone can customize their bowl. This interactive element always delights my dinner guests and makes the meal feel special.

    Seasonal Adaptations Worth Trying

    One of the reasons I return to this recipe throughout the year is how easily it adapts to each season. In spring, I lighten it up with asparagus, peas, and lemon zest. Summer calls for zucchini, fresh corn, and garden herbs. Fall brings butternut squash and sage, while winter welcomes heartier additions like kale and white beans. You can even transform leftover holiday turkey into a spectacular post-Thanksgiving variation by swapping chicken for turkey. The foundational flavors remain consistent while seasonal ingredients keep the recipe feeling fresh and exciting no matter when you’re making it.

    Storage & Troubleshooting Guide

    Proper Storage for Maximum Freshness

    Properly storing your slow cooker chicken tortellini soup ensures you’ll enjoy delicious leftovers for days to come. Allow the soup to cool completely before transferring to airtight containers—I prefer glass containers as they won’t absorb flavors or stain. In the refrigerator, it keeps beautifully for 3-4 days. For freezing, I recommend a slightly different approach: freeze the soup without the tortellini, then add fresh tortellini when reheating. This prevents the pasta from becoming mushy during the freeze-thaw cycle. Label containers with the date and contents—I’ve learned the hard way that mystery freezer containers rarely get eaten!

    Troubleshooting Common Issues

    Even experienced cooks occasionally encounter challenges with slow cooker soups. If your soup seems too thin, you have several easy fixes: remove the lid and cook on high for 30 minutes to reduce, or create a slurry with 1 tablespoon cornstarch and 2 tablespoons cold water, then stir into the hot soup. Conversely, if your soup becomes too thick (especially after refrigeration), simply thin with additional broth when reheating. For tortellini that’s lost its texture, try adding a fresh batch when rewarming leftovers. And if your chicken seems tough rather than tender, it likely needs more time rather than less—continue cooking until it easily shreds with a fork.

    Frequently Asked Questions

    Can I use frozen chicken in my slow cooker chicken tortellini soup?

    Yes, you can use frozen chicken breasts directly in your slow cooker. Add an extra 1-2 hours to your cooking time and ensure the chicken reaches 165°F before shredding.

    What’s the best tortellini to use for this soup?

    Fresh refrigerated cheese tortellini provides the best texture, but frozen works well too. For longer storage, dried tortellini is a great pantry staple option.

    Can I make this soup vegetarian?

    Absolutely! Substitute vegetable broth for chicken broth, omit the chicken, and add extra vegetables like mushrooms and bell peppers for heartiness.

    How can I make this soup creamy without adding dairy?

    Blend 1 cup of white beans or cashews soaked in hot water with 1 cup of the soup broth until smooth, then stir back into the soup for dairy-free creaminess.

    Why did my tortellini fall apart in the slow cooker?

    Tortellini can disintegrate if cooked too long. Always add it during the final 15-20 minutes of cooking time to maintain its structure.

    Final Thoughts

    This Slow Cooker Chicken Tortellini Soup has become my reliable companion through busy weeknights, chilly weekends, and even casual entertaining. There’s something magical about how such simple ingredients transform into something so deeply satisfying with minimal hands-on effort. Whether you’re a seasoned cook or just beginning your culinary journey, this forgiving recipe delivers consistent comfort and flavor. I hope it brings the same warmth to your kitchen that it has to mine. Don’t forget to share your own variations on Pinterest to inspire others looking for their next slow cooker favorite!

  • Crockpot Kielbasa & Cabbage Soup That Will Warm Your Soul!

    Crockpot Kielbasa & Cabbage Soup That Will Warm Your Soul!

    Crockpot Kielbasa & Cabbage Soup That Will Warm Your Soul!

    Crockpot Kielbasa & Cabbage Soup with Apple Cider Vinegar is the ultimate comfort food that warms you from the inside out. There’s something magical about walking into your home after a long day and being greeted by the tangy aroma of this hearty soup simmering away. I discovered this recipe during a particularly harsh winter when my body craved something nourishing yet simple. The apple cider vinegar adds a subtle tang that balances the richness of the kielbasa perfectly, while the cabbage melts into the broth, creating a soul-satisfying texture that feels like a warm hug in a bowl. Trust me, this will become your new cold-weather favorite!

    Recipe

    Why You’ll Love This Crockpot Kielbasa & Cabbage Soup with Apple Cider Vinegar

    Perfect Balance of Flavors

    The magic of this soup lies in its perfect harmony of flavors. The smoky kielbasa provides a rich foundation, while the cabbage adds a subtle sweetness as it slowly breaks down. But the real secret weapon? That splash of apple cider vinegar! It cuts through the richness with just enough tanginess to make each spoonful incredibly balanced. I remember serving this to my neighbor who “doesn’t do soup” and watching her eyes widen with surprise at the first taste. The vinegar doesn’t overwhelm—it elevates everything, making each ingredient shine in a way that keeps you coming back for more.

    Effortless Preparation

    Let’s be honest—some days, the thought of elaborate meal prep feels impossible. That’s when this soup truly shines! Simply chop, drop, and walk away. The crockpot does all the heavy lifting while you go about your day. I often prep everything the night before, storing the chopped ingredients in separate containers in the fridge. In the morning, I toss it all in the slow cooker, set it, and forget it. By dinnertime, I have a complete meal that tastes like I’ve been slaving away all day. For busy weeknights or lazy weekends, this no-fuss approach is absolutely priceless.

    Essential Tips & Tricks

    Choosing the Right Ingredients

    Not all kielbasa is created equal! Look for a high-quality Polish sausage with visible spices and a firm texture. The better your kielbasa, the richer your soup will be. For the cabbage, choose one that feels heavy for its size with crisp, tightly packed leaves. Green cabbage works beautifully, but savoy cabbage adds an interesting texture if you want to experiment. And please, use raw apple cider vinegar “with the mother” if possible—it has a more complex flavor that really makes a difference. I learned this the hard way after using distilled vinegar once and wondering why the soup lacked that special zing.

    Layering for Maximum Flavor

    The order you add ingredients matters more than you might think! Start by placing the kielbasa at the bottom of your crockpot, followed by onions, then cabbage. This allows the sausage fat to slowly render and flavor everything above it. Hold back about half of the apple cider vinegar until the final 30 minutes of cooking—this preserves its bright tanginess that would otherwise cook away. For an extra flavor boost, try browning the kielbasa pieces in a skillet before adding them to the crockpot. It takes just a few minutes but adds incredible depth, similar to what I do in my Crockpot Swamp Soup Sausage Potato Vegetable Medley.

    Serving Ideas & Creative Variations

    Perfect Pairings

    This hearty soup deserves equally comforting sides to create a complete meal experience. My favorite pairing is a thick slice of buttered rye bread—the caraway seeds complement the soup’s flavors beautifully. For a heartier meal, serve with a side of roasted baby potatoes tossed with fresh dill and butter. A simple green salad with a light vinaigrette provides a refreshing contrast to the rich soup. When I’m entertaining, I serve this soup in bread bowls for that extra wow factor. The way the bread soaks up the broth creates an entirely new dimension of flavor that my guests always rave about.

    Delicious Twists

    Don’t be afraid to make this recipe your own! Add diced apples during the last hour for a sweet-tart contrast that plays beautifully with the vinegar. Substitute half the cabbage with sauerkraut for an intensely tangy variation—just reduce the vinegar accordingly. Toss in a handful of caraway seeds for an authentic Eastern European flavor profile. For a spicier version, add sliced jalapeños or a generous sprinkle of red pepper flakes. Looking for more slow cooker inspiration? My Slow Cooker Corned Beef and Cabbage uses similar techniques but with a completely different flavor profile.

    Storage & Troubleshooting Guide

    Proper Storage Methods

    This soup actually tastes even better the next day when the flavors have had time to meld. Cool completely before transferring to airtight containers—I prefer glass containers as they won’t absorb the flavors or stain. In the refrigerator, it stays fresh for up to 4 days. For longer storage, freeze in individual portions for up to 3 months. I like to use silicone muffin trays to freeze perfect single-serving portions, then transfer the frozen soup “pucks” to a freezer bag. This way, I can easily grab just what I need for a quick lunch without thawing the entire batch.

    Common Issues & Solutions

    If your soup seems too watery, don’t panic! Remove the lid during the last 30 minutes of cooking to allow some liquid to evaporate. Alternatively, mash some of the potatoes against the side of the pot to naturally thicken the broth. If the vinegar flavor is too pronounced, add a teaspoon of honey or brown sugar to balance it. For soup that lacks depth, try stirring in a tablespoon of butter at the end—it adds a silky richness that ties everything together. And if the cabbage hasn’t softened enough, simply extend the cooking time by 30-minute increments until it reaches your desired tenderness.

    Frequently Asked Questions

    Can I make this Crockpot Kielbasa & Cabbage Soup with Apple Cider Vinegar in an Instant Pot?

    Yes! Use the sauté function to brown the kielbasa first, then add remaining ingredients and cook on high pressure for 15 minutes with a natural release. The flavors won’t be as developed as the slow cooker version, but it’s still delicious.

    Is this soup gluten-free?

    Most kielbasa is gluten-free, but always check the label. All other ingredients are naturally gluten-free, making this an excellent option for those with gluten sensitivities.

    Can I substitute the kielbasa with another type of sausage?

    Absolutely! Smoked sausage, andouille, or even Italian sausage works well. Each will give the soup a different flavor profile, so choose based on your preference.

    How can I make this soup vegetarian?

    Replace the kielbasa with smoked tofu or your favorite plant-based sausage. Add a tablespoon of smoked paprika to maintain that smoky depth of flavor.

    What’s the best way to reheat leftovers?

    Reheat gently on the stovetop over medium-low heat, stirring occasionally. Microwave works too, but use 70% power and stir halfway through to ensure even heating.

    Final Thoughts

    This Crockpot Kielbasa & Cabbage Soup with Apple Cider Vinegar has become my go-to recipe when I need something comforting yet surprisingly complex in flavor. The way the smoky sausage, tender cabbage, and tangy vinegar come together creates a deeply satisfying experience that belies how simple it is to prepare. I love watching people’s expressions as they take their first spoonful, expecting something basic but discovering layers of flavor instead. Don’t forget to check out more of my cozy recipes on Pinterest for endless inspiration!

  • Sheet Pan Korean BBQ Beef with Ginger Bok Choy – Easy, Bold & Delicious!

    Sheet Pan Korean BBQ Beef with Ginger Bok Choy – Easy, Bold & Delicious!

    Sheet Pan Korean BBQ Beef with Ginger Bok Choy - Easy, Bold & Delicious!

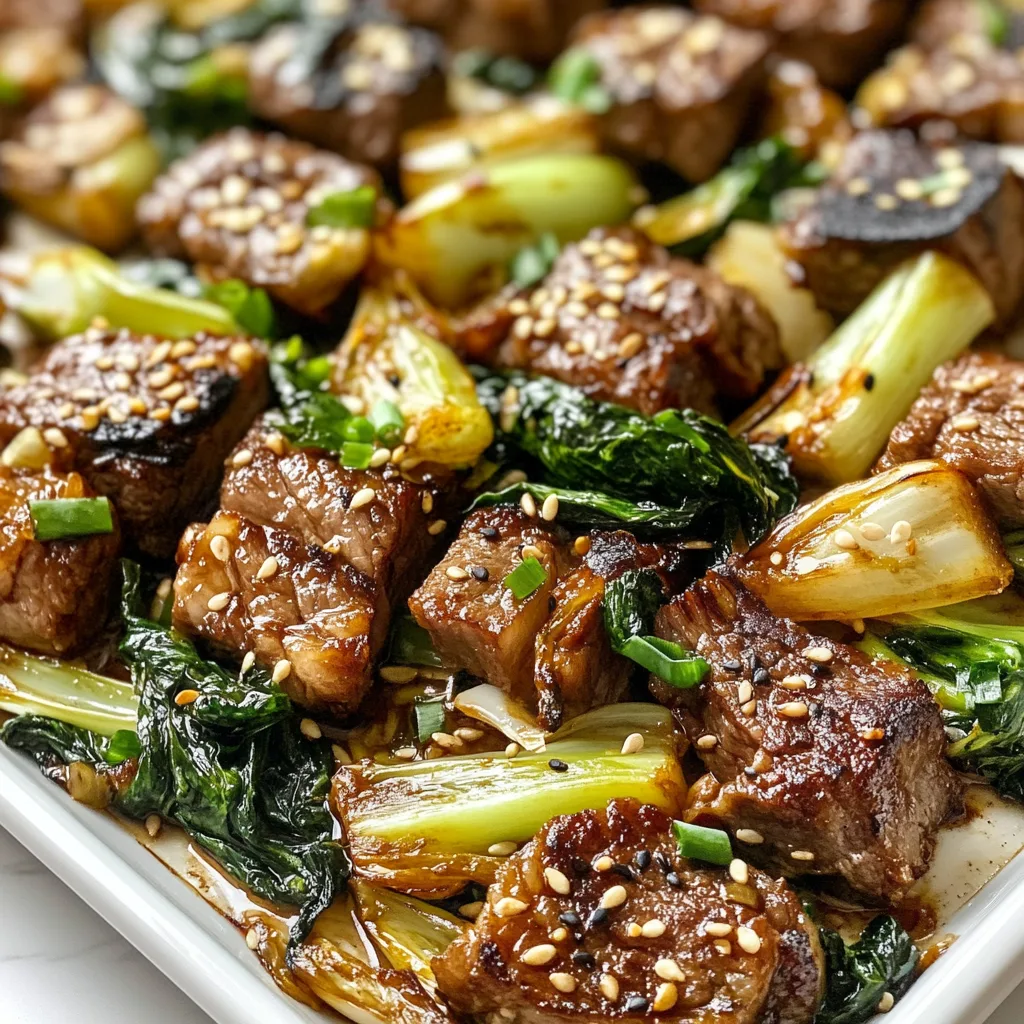
    Sheet Pan Korean BBQ Beef with Ginger Bok Choy has become my go-to dinner solution for those evenings when I’m craving something deeply flavorful but don’t have the energy for complicated cooking. The first time I made this, the sweet-savory aroma filled my entire kitchen, reminding me of my favorite Korean restaurant downtown. There’s something magical about how the beef caramelizes at the edges while the bok choy becomes tender yet crisp. If you love quick dinners with bold flavors like I do, this sheet pan recipe deserves a permanent spot in your meal rotation.

    Recipe

    Why You’ll Love This Sheet Pan Korean BBQ Beef with Ginger Bok Choy

    Perfect Balance of Flavors and Textures

    The magic of this Sheet Pan Korean BBQ Beef with Ginger Bok Choy lies in its perfect harmony of flavors. The beef soaks up a marinade of soy sauce, brown sugar, sesame oil, and ginger that creates those irresistible caramelized edges in the oven. Meanwhile, the bok choy develops a slight char while maintaining its refreshing crunch. I love how the slightly bitter greens balance the sweet-savory beef. The combination of tender meat and crisp vegetables on one pan means every bite offers a delightful contrast of textures that keeps your palate engaged from the first bite to the last.

    Weeknight-Friendly Preparation

    What truly makes this Sheet Pan Korean BBQ Beef with Ginger Bok Choy a standout is how effortlessly it fits into busy schedules. The active prep time is just 15 minutes – slice the beef thinly, whisk together the marinade, and trim the bok choy. While the beef marinates (even 20 minutes makes a difference), you can change into comfortable clothes or help with homework. Then it’s just a matter of arranging everything on a single sheet pan and letting your oven do the work. The cleanup is minimal too – just one cutting board, one bowl, and one sheet pan to wash afterward!

    Essential Tips & Tricks

    Selecting and Preparing the Perfect Ingredients

    For the best Sheet Pan Korean BBQ Beef with Ginger Bok Choy, choose flank steak or ribeye and slice it against the grain into thin strips – about ¼ inch thick. This ensures tenderness and quick cooking. For the bok choy, baby varieties work wonderfully, but regular bok choy cut lengthwise into quarters is equally delicious. Don’t skimp on fresh ginger – it adds a warming zing that powdered simply can’t match. I’ve found that lining your sheet pan with parchment paper not only prevents sticking but also makes cleanup a breeze. If you enjoy meal prepping like I do, you can marinate the beef overnight for even deeper flavor penetration.

    Mastering the Cooking Technique

    The key to perfect Sheet Pan Korean BBQ Beef with Ginger Bok Choy is arranging everything properly. Spread the beef in a single layer with space between pieces to promote browning rather than steaming. Add the bok choy only during the last 5-7 minutes of cooking to prevent it from becoming too wilted. For that restaurant-quality finish, switch your oven to broil for the final 2 minutes to create delicious charred edges on both the beef and bok choy. Keep a close eye during this step – the difference between beautifully caramelized and burnt happens quickly! Rotating the pan halfway through cooking ensures everything cooks evenly.

    Serving Ideas & Creative Variations

    Complementary Side Dishes

    Sheet Pan Korean BBQ Beef with Ginger Bok Choy pairs beautifully with simple sides that let its bold flavors shine. Fluffy white rice absorbs the savory juices perfectly, but brown rice adds a nutty complement. For a low-carb option, cauliflower rice works wonderfully too. I love adding quick pickled vegetables for brightness – just slice cucumbers or radishes and marinate them in rice vinegar with a pinch of sugar while the beef cooks. For a complete feast, consider adding steamed dumplings on the side. A sprinkle of toasted sesame seeds and sliced green onions over everything adds both visual appeal and a flavor boost.

    Exciting Recipe Adaptations

    While this Sheet Pan Korean BBQ Beef with Ginger Bok Choy is already delicious, don’t be afraid to make it your own! For a spicier version, add gochujang (Korean chili paste) to the marinade. Vegetarians can substitute firm tofu or tempeh – just press well and cut into thick slices before marinating. Pork tenderloin or chicken thighs work beautifully as protein alternatives. You can also swap bok choy for broccoli, asparagus, or snap peas depending on what’s in season. For a complete sheet pan dinner, add sweet potato chunks to the pan 15 minutes before the beef goes in, allowing them to become tender and caramelized.

    Storage & Troubleshooting Guide

    Proper Storage and Reheating Methods

    Sheet Pan Korean BBQ Beef with Ginger Bok Choy makes excellent leftovers if stored properly. Allow everything to cool completely before transferring to airtight containers in the refrigerator, where it will stay fresh for up to 3 days. For best results when reheating, use a skillet over medium heat with a splash of water to restore moisture. Microwave reheating works in a pinch, but cover with a damp paper towel to prevent the beef from drying out. The beef also freezes well for up to 2 months – just separate from the bok choy, which is best enjoyed fresh. I often make a double batch of just the beef to freeze for quick future meals.

    Common Issues and Easy Solutions

    If your Sheet Pan Korean BBQ Beef with Ginger Bok Choy isn’t turning out perfectly, a few simple adjustments can help. For beef that isn’t caramelizing properly, ensure your oven is fully preheated and try using the upper rack position. If the beef is tough, you likely need to slice it thinner or against the grain more precisely. Soggy bok choy usually means it was added too early or the pan was overcrowded – give everything adequate space and add greens later in the cooking process. If the flavors seem bland, a finishing drizzle of toasted sesame oil and a sprinkle of coarse sea salt works wonders. Remember that sheet pans with lower sides promote better air circulation and browning.

    Frequently Asked Questions

    Can I make Sheet Pan Korean BBQ Beef with Ginger Bok Choy ahead of time?

    Yes! Marinate the beef up to 24 hours in advance and prep the bok choy. Store separately in the refrigerator, then assemble and bake when ready to serve for a fresh-tasting meal with minimal effort.

    What’s the best cut of beef for this recipe?

    Flank steak, ribeye, or sirloin work best as they remain tender with high-heat cooking. Whichever you choose, remember to slice thinly against the grain for the most tender results.

    Can I make this recipe gluten-free?

    Absolutely! Simply substitute regular soy sauce with tamari or coconut aminos. Double-check that your other bottled ingredients like sesame oil are certified gluten-free.

    My oven doesn’t have a broil function. What should I do?

    No problem! Just increase your oven temperature to 450°F for the final 3-4 minutes of cooking to achieve similar caramelization on the beef and bok choy edges.

    How spicy is this Sheet Pan Korean BBQ Beef with Ginger Bok Choy?

    The basic recipe is mild with a gentle warmth from fresh ginger. For heat lovers, add 1-2 teaspoons of gochujang or sriracha to the marinade, or serve with sliced fresh chilies.

    Final Thoughts

    Sheet Pan Korean BBQ Beef with Ginger Bok Choy represents everything I love about modern home cooking – bold flavors, minimal effort, and maximum satisfaction. There’s something deeply satisfying about creating restaurant-quality Asian cuisine with just one pan and everyday ingredients. The way the sweet-savory marinade caramelizes on the beef while the bok choy maintains its fresh crunch makes this dish special enough for weekend entertaining yet simple enough for Tuesday night dinner. I hope this recipe brings as much joy to your table as it has to mine! For more delicious sheet pan recipes, check out my Pinterest collection.