Category: Soup

  • Minestrone e Fagioli Soup: Cozy, Hearty Flavor Explosion!

    Minestrone e Fagioli Soup: Cozy, Hearty Flavor Explosion!

    Minestrone e Fagioli Soup has been my winter salvation for years. There’s something magical about the way those tender beans melt into the rich tomato broth, creating a symphony of textures that dance on your tongue with each spoonful. When the temperatures plummet and my windows fog with condensation, I find myself reaching for my biggest pot to create this Italian classic. The combination of hearty vegetables, robust beans, and delicate pasta creates a meal that’s both nourishing and comforting in equal measure. If you’re looking for a soup that feels like a warm hug, you’ve found it at Recipes Darleen.
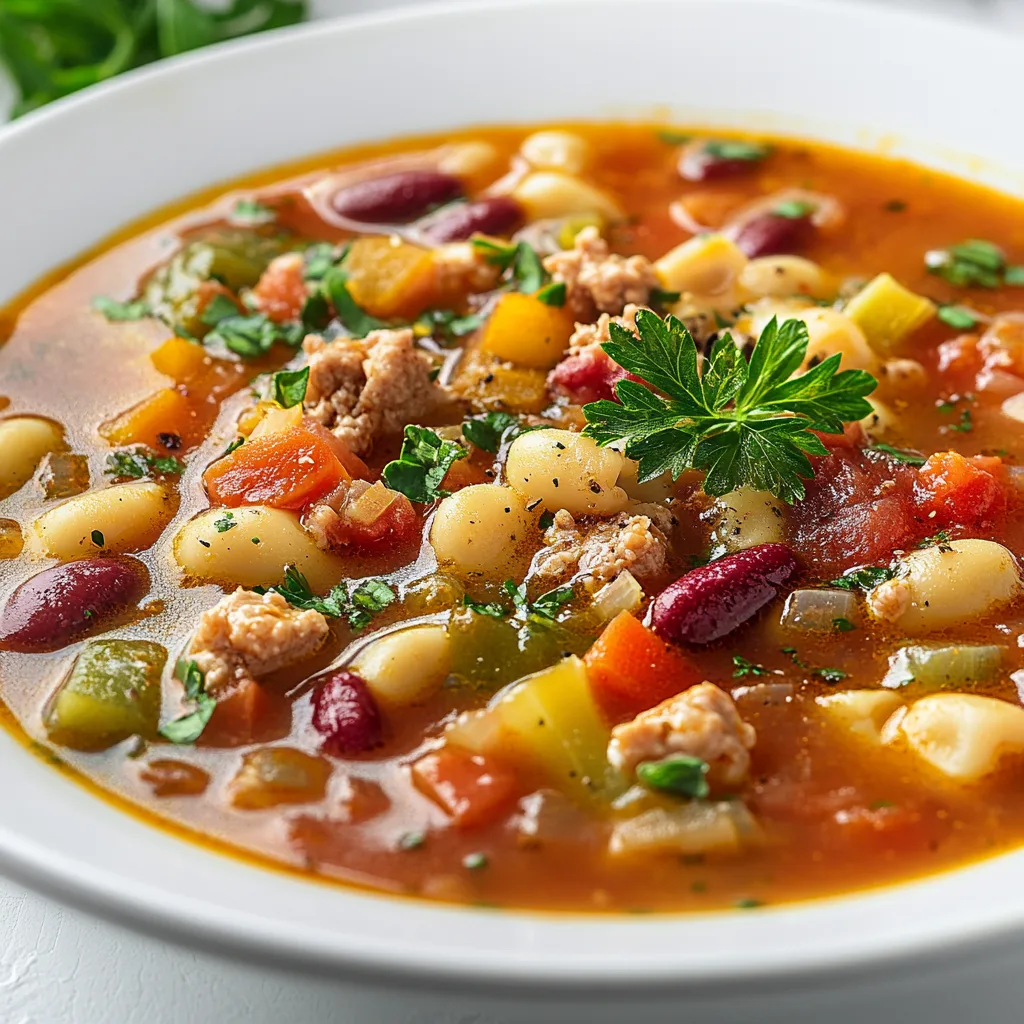
    Minestrone e Fagioli Soup: Cozy, Hearty Flavor Explosion!

    Why You’ll Love This Minestrone e Fagioli Soup

    A Complete One-Pot Meal

    This isn’t just soup—it’s a complete nutritional powerhouse in a bowl. The combination of protein-rich cannellini beans, fiber-packed vegetables, and satisfying pasta creates a perfectly balanced meal that keeps you full for hours. I remember making this during a particularly brutal snowstorm last winter, and it sustained my family for days. The beauty lies in its versatility—you can adjust the vegetables based on what’s in your crisper drawer, making it an ideal recipe for reducing food waste. Plus, the flavors deepen overnight, making leftovers even more delicious.

    Budget-Friendly Comfort Food

    In these days of rising grocery prices, Minestrone e Fagioli Soup is a budget hero. Dried beans cost pennies compared to meat, and they create a wonderfully hearty texture that satisfies even dedicated carnivores. The base ingredients—carrots, celery, onions, and canned tomatoes—are pantry staples that won’t break the bank. My grandmother used to say this soup “stretches like elastic,” meaning you can always add another cup of broth and a handful of pasta to feed unexpected guests. It’s the kind of economical cooking that feels luxurious despite its humble ingredients, perfect for feeding a crowd without emptying your wallet.

    Essential Tips & Tricks

    Building Flavor Foundations

    The secret to exceptional Minestrone e Fagioli Soup lies in the flavor foundation. Always start by sautéing your aromatic vegetables—onions, carrots, celery—until they’re soft and fragrant. This crucial step develops a depth that canned soups simply can’t match. Don’t rush this process; those 8-10 minutes of gentle cooking release natural sugars that transform your soup. I learned this the hard way after once trying to shortcut this step—the difference was immediately noticeable. Add a parmesan rind while simmering for an umami boost that elevates the entire pot. This simple addition creates a richness that will have everyone asking for your secret.

    Texture Management Techniques

    Achieving the perfect texture in Minestrone e Fagioli Soup requires attention to timing. Cook pasta separately and add it to individual bowls rather than the pot—this prevents the pasta from absorbing too much broth and becoming mushy. For beans, I prefer using half pre-cooked beans and half mashed beans, creating a naturally thickened broth without flour or cornstarch. My Italian neighbor taught me to reserve some of the bean cooking liquid (if using dried beans) to add back to the soup for extra creaminess. This approach creates a silky mouthfeel that balances perfectly with the chunky vegetables and creates that authentic Tuscan soup experience.

    Serving Ideas & Creative Variations

    Perfect Pairings and Garnishes

    Minestrone e Fagioli Soup deserves thoughtful accompaniments that elevate its rustic charm. A crusty artisan bread for dipping is non-negotiable—I prefer a sourdough or ciabatta with a chewy interior and crackling crust. For garnishes, fresh-grated Parmigiano-Reggiano and a drizzle of high-quality olive oil create a restaurant-worthy presentation. Fresh herbs add brightness—basil in summer, rosemary in winter. My family’s favorite weekend tradition involves serving this soup with a simple antipasto platter of olives, roasted peppers, and thin-sliced prosciutto. The contrast between the warm soup and cool appetizers creates a memorable dining experience that turns a simple meal into an occasion.

    Regional and Seasonal Adaptations

    The beauty of Minestrone e Fagioli Soup lies in its adaptability to seasonal produce and regional preferences. In summer, I lighten it with fresh tomatoes, zucchini, and basil for a garden-fresh version. Winter calls for heartier additions like butternut squash, kale, and rosemary. For a Tuscan twist, add cavolo nero (Tuscan kale) and a splash of red wine. My Sicilian friend adds a pinch of red pepper flakes and fennel seeds for subtle heat and complexity. You can even create fusion versions—try adding curry spices for an Indian-Italian hybrid that works surprisingly well. The soup also pairs beautifully with hearty beef dishes for a complete feast.

    Storage & Troubleshooting Guide

    Optimal Storage Solutions

    Minestrone e Fagioli Soup actually improves with time, making it perfect for meal prep. Store it in airtight containers in the refrigerator for up to 5 days—the flavors will continue to meld and deepen. For freezing, slightly undercook the vegetables and omit the pasta entirely (add fresh when reheating). I portion mine into silicone muffin trays before transferring to freezer bags, creating perfect single-serving portions that thaw quickly. When reheating, add a splash of fresh stock or water to loosen the consistency, as the soup tends to thicken considerably when stored. A fresh grating of parmesan and drizzle of olive oil revives the flavors beautifully.

    Fixing Common Issues

    Even experienced cooks encounter soup challenges, but most are easily remedied. If your Minestrone e Fagioli Soup tastes flat or bland, add acid—a splash of balsamic vinegar or lemon juice instantly brightens flavors. Too thin? Simmer uncovered to reduce, or mash some beans against the side of the pot. Too thick? Add more broth gradually until you reach desired consistency. If vegetables are undercooked but pasta is getting mushy, remove some soup, cook vegetables separately, then recombine. For overly salty soup (often from canned beans or stock), add a raw potato chunk while simmering—it will absorb excess salt before being removed.

    Frequently Asked Questions

    Can I make Minestrone e Fagioli Soup in a slow cooker?

    Absolutely! Add all ingredients except pasta and fresh herbs to your slow cooker. Cook on low for 6-8 hours or high for 3-4 hours. Add pasta during the final 30 minutes, or cook separately and add when serving for best texture.

    What’s the difference between Minestrone and Minestrone e Fagioli Soup?

    Traditional minestrone contains various vegetables and sometimes pasta. Minestrone e Fagioli specifically highlights beans (“fagioli” in Italian) as a primary ingredient, creating a heartier, more protein-rich variation of the classic soup.

    Can I use canned beans instead of dried?

    Yes! Canned beans work perfectly and save significant time. Rinse them thoroughly to remove excess sodium and starch. Add them during the last 15-20 minutes of cooking to prevent them from becoming mushy.

    Is this soup naturally vegetarian?

    The base recipe is vegetarian if you use vegetable broth. For vegan Minestrone e Fagioli, simply omit the parmesan or substitute with nutritional yeast for a similar umami quality.

    How can I make this soup more protein-rich?

    Add Italian sausage, pancetta, or shredded rotisserie chicken for extra protein. For vegetarian options, try adding a parmesan rind while cooking or stirring in nutritional yeast before serving.

    Final Thoughts

    Minestrone e Fagioli Soup represents everything I love about home cooking—simple ingredients transformed into something greater than their parts through time, technique, and love. It’s the kind of recipe that becomes a cornerstone in your culinary repertoire, adapting to seasons and circumstances while always delivering comfort. I hope this soup brings the same warmth to your kitchen that it has to mine over the years. There’s something profoundly satisfying about carrying on this Italian tradition, ladling steaming bowls for loved ones on cold evenings. Don’t forget to check out more cozy recipes on Pinterest!
  • Creamy Tuscan Tortellini Soup: 5 Reasons You’ll Love It!

    Creamy Tuscan Tortellini Soup: 5 Reasons You’ll Love It!

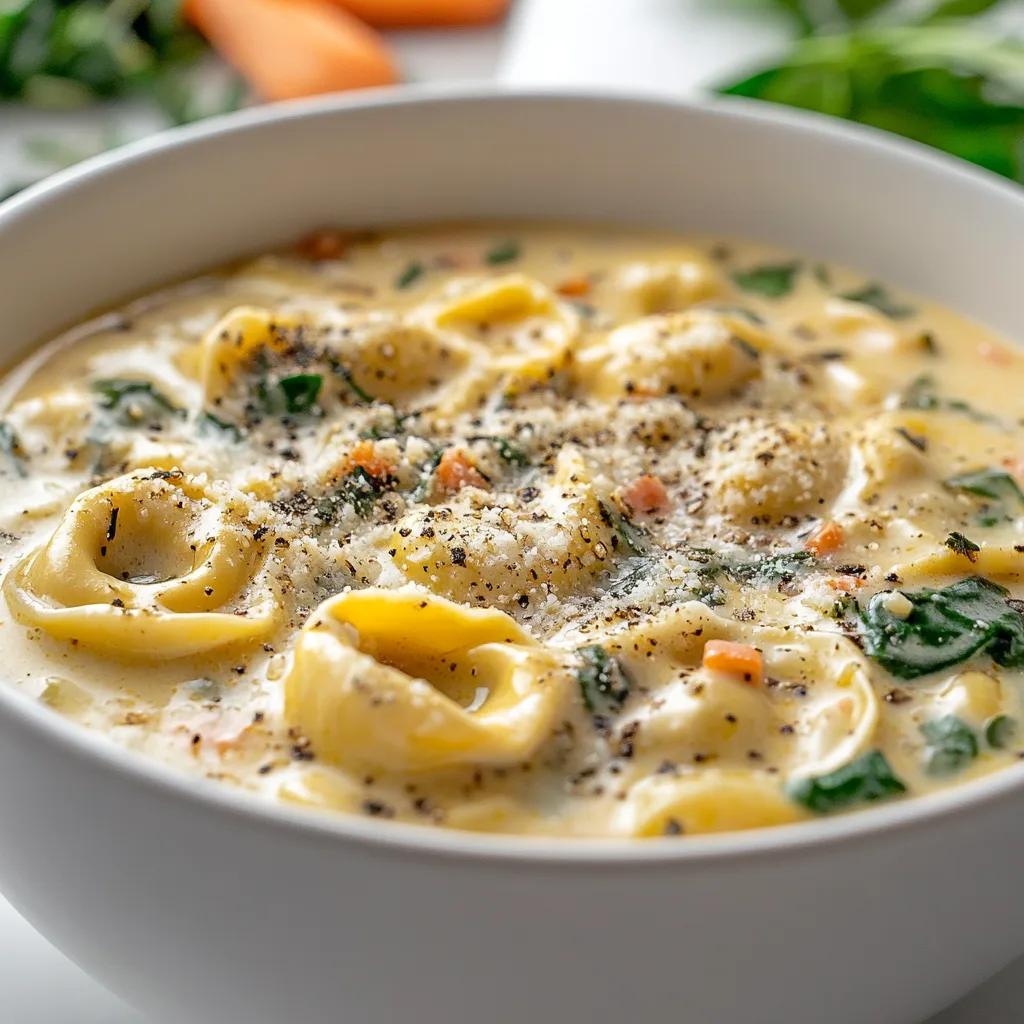
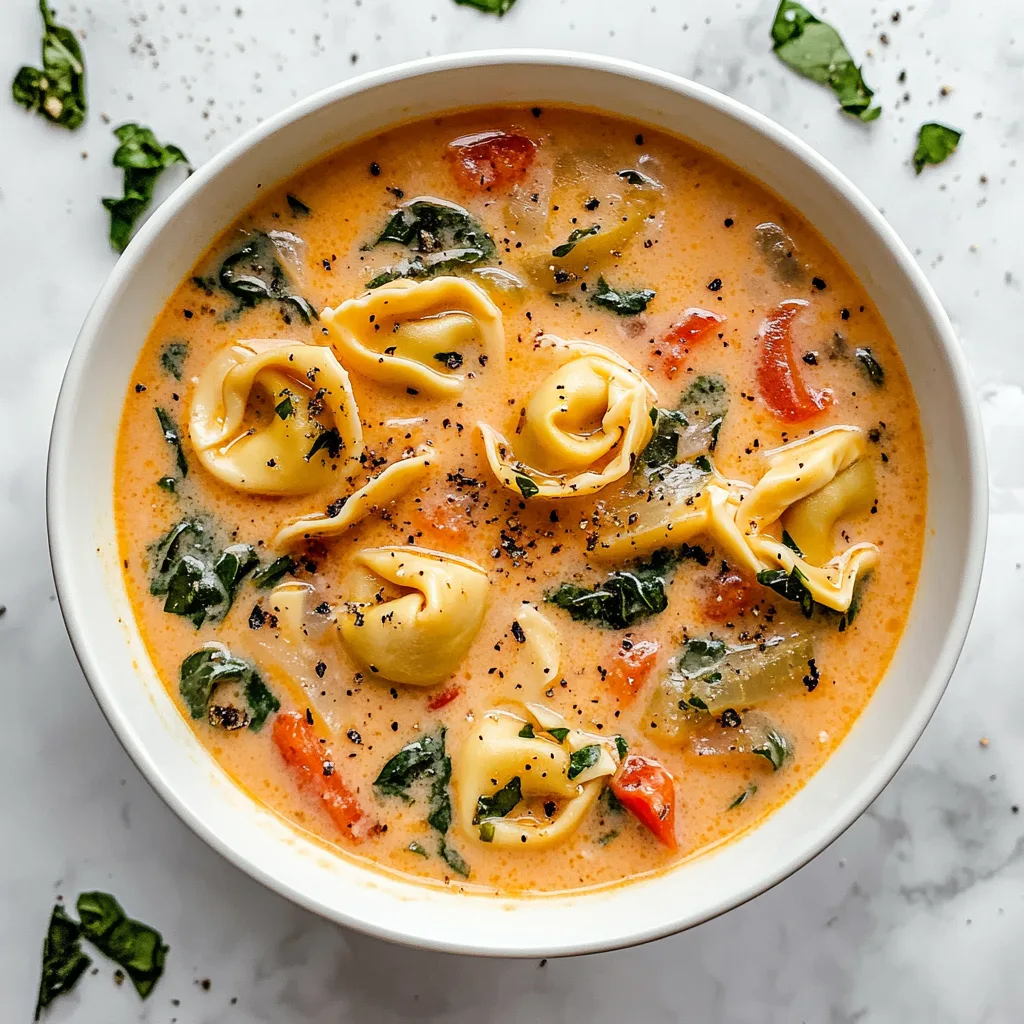
    Creamy Tuscan Tortellini Soup is my ultimate comfort in a bowl when autumn leaves start falling and the air turns crisp. There’s something magical about the way the cheese-filled tortellini pillows float in that rich, velvety broth alongside sun-dried tomatoes and wilted spinach. I discovered this recipe during a particularly rainy weekend last fall, and it’s become my go-to when friends drop by unexpectedly. The Italian-inspired flavors transport me straight to a cozy Tuscan villa, even when I’m just curled up on my sofa with my favorite hearty soup.

    Creamy Tuscan Tortellini Soup: 5 Reasons You’ll Love It!

    Recipe

    Why You’ll Love This Creamy Tuscan Tortellini Soup

    A Complete Meal in One Pot

    This soup is the definition of effortless elegance. The cheese-filled tortellini provides satisfying protein and carbs, while the spinach adds necessary greens. I love how it comes together in just one pot, saving me from a sink full of dishes. On busy weeknights when I’m tempted to order takeout, I remember how quickly this soup comes together—usually faster than delivery! The combination of rich cream, garlic, and Italian herbs creates a restaurant-quality meal that feels indulgent but requires minimal effort.

    Perfect Balance of Flavors and Textures

    The contrasting textures in this soup create a sensory experience that keeps every spoonful interesting. Tender tortellini provides a satisfying chew against the silky broth. The sun-dried tomatoes add chewy, sweet-tart bursts, while the spinach brings a fresh element. I particularly love how the cream mellows the acidity of the tomatoes without making the soup too heavy. My neighbor once described it as “a warm hug in food form,” which perfectly captures how it feels when those Italian seasonings hit your palate.

    Essential Tips & Tricks

    Selecting the Best Ingredients

    Starting with quality ingredients makes all the difference in this Creamy Tuscan Tortellini Soup. I prefer refrigerated tortellini over frozen for its superior texture, though both work in a pinch. For sun-dried tomatoes, look for ones packed in oil—they bring extra flavor to the broth. When it comes to the cream element, I’ve found that heavy cream creates the most luxurious texture, but half-and-half works beautifully if you’re looking for something lighter. Don’t skip the fresh garlic; pre-minced simply doesn’t deliver the same aromatic punch that elevates simple recipes to memorable ones.

    Mastering the Cooking Process

    The secret to perfection lies in the timing. Add the tortellini too early, and it’ll become mushy; too late, and it’ll be undercooked. I always taste-test a tortellini before serving—it should be tender but still have a slight bite. Another game-changer is deglazing the pot after sautéing the aromatics. Those browned bits contain concentrated flavor that enriches the entire soup. If your soup seems too thick, gradually add chicken broth until you reach your desired consistency. Remember that the soup will continue thickening as it cools.

    Serving Ideas & Creative Variations

    Complementary Side Dishes

    This Creamy Tuscan Tortellini Soup pairs beautifully with crusty bread for dipping—I love a rustic Italian loaf or garlic bread to complete the meal. For a lighter accompaniment, a simple arugula salad with lemon vinaigrette provides a peppery contrast to the creamy soup. When I’m hosting, I serve the soup in wide, shallow bowls to showcase all the beautiful components and make it easier to capture both broth and solids in each spoonful. For special occasions, I’ll garnish with a drizzle of good olive oil and a sprinkle of fresh herbs like those in my Mediterranean dishes.

    Creamy Tuscan Tortellini Soup: 5 Reasons You’ll Love It!

    Customization Options

    The beauty of this soup lies in its adaptability. For a protein boost, add shredded rotisserie chicken or Italian sausage. Vegetarians can use vegetable broth and cheese tortellini. I’ve experimented with adding different vegetables—roasted red peppers, zucchini, and mushrooms all work wonderfully. For a dairy-free version, coconut cream creates a surprisingly delicious alternative to heavy cream. My personal favorite variation includes a pinch of red pepper flakes for heat and a splash of white wine that adds complexity to the broth.

    Storage & Troubleshooting Guide

    Proper Storage Techniques

    To maintain the optimal texture, store this Creamy Tuscan Tortellini Soup properly. Refrigerate in an airtight container for up to 3 days. The soup will thicken considerably when chilled, so I always add a splash of broth when reheating. For longer storage, freeze the base soup without tortellini and spinach, then add fresh ones when reheating. I learned this the hard way after freezing a batch with tortellini—they turned to mush upon thawing! When reheating, use gentle heat and stir occasionally to prevent the cream from separating.

    Common Issues and Solutions

    If your soup seems too thin, simmer it uncovered for a few extra minutes to reduce, or create a slurry with a tablespoon each of cornstarch and cold water. For soup that’s too thick, gradually whisk in additional broth or milk. If the cream starts to separate (usually from boiling too vigorously), lower the heat immediately and whisk in a tablespoon of cold cream to re-emulsify. Bland soup can be revived with a squeeze of lemon juice, extra Italian seasoning, or a sprinkle of Parmesan cheese—acid and salt are often the missing elements.

    Frequently Asked Questions

    Can I make Creamy Tuscan Tortellini Soup ahead of time?

    Yes! Prepare the soup base without tortellini and spinach up to 2 days ahead. When ready to serve, reheat the base, add tortellini, and cook until tender, then stir in spinach just before serving.

    What’s the best tortellini to use?

    Cheese tortellini is traditional, but any variety works beautifully. Refrigerated tortellini maintains better texture than frozen, though both are acceptable options depending on availability.

    Is this soup freezer-friendly?

    Freeze only the soup base without tortellini and spinach. When reheating, bring to a simmer and add fresh tortellini and spinach to maintain proper texture and flavor.

    How can I make this soup vegetarian?

    Simply substitute vegetable broth for chicken broth and ensure your tortellini is vegetarian (many cheese varieties are). The flavor profile remains delicious with these simple swaps.

    Can I make Creamy Tuscan Tortellini Soup in a slow cooker?

    Absolutely! Cook the base on low for 4-6 hours, then add tortellini and cook 15-20 minutes more until tender. Stir in spinach and cream during the final 5 minutes.

    Final Thoughts

    Creamy Tuscan Tortellini Soup has become my signature dish when comfort is needed. There’s something magical about watching friends’ faces light up with that first spoonful—the moment the creamy broth, tender tortellini, and bright flavors come together. Whether you’re cooking for a crowd or treating yourself to a special meal, this soup delivers warmth and satisfaction beyond its simple ingredients. I hope it brings as much joy to your table as it has to mine! For more cozy recipes, visit my Pinterest collection.

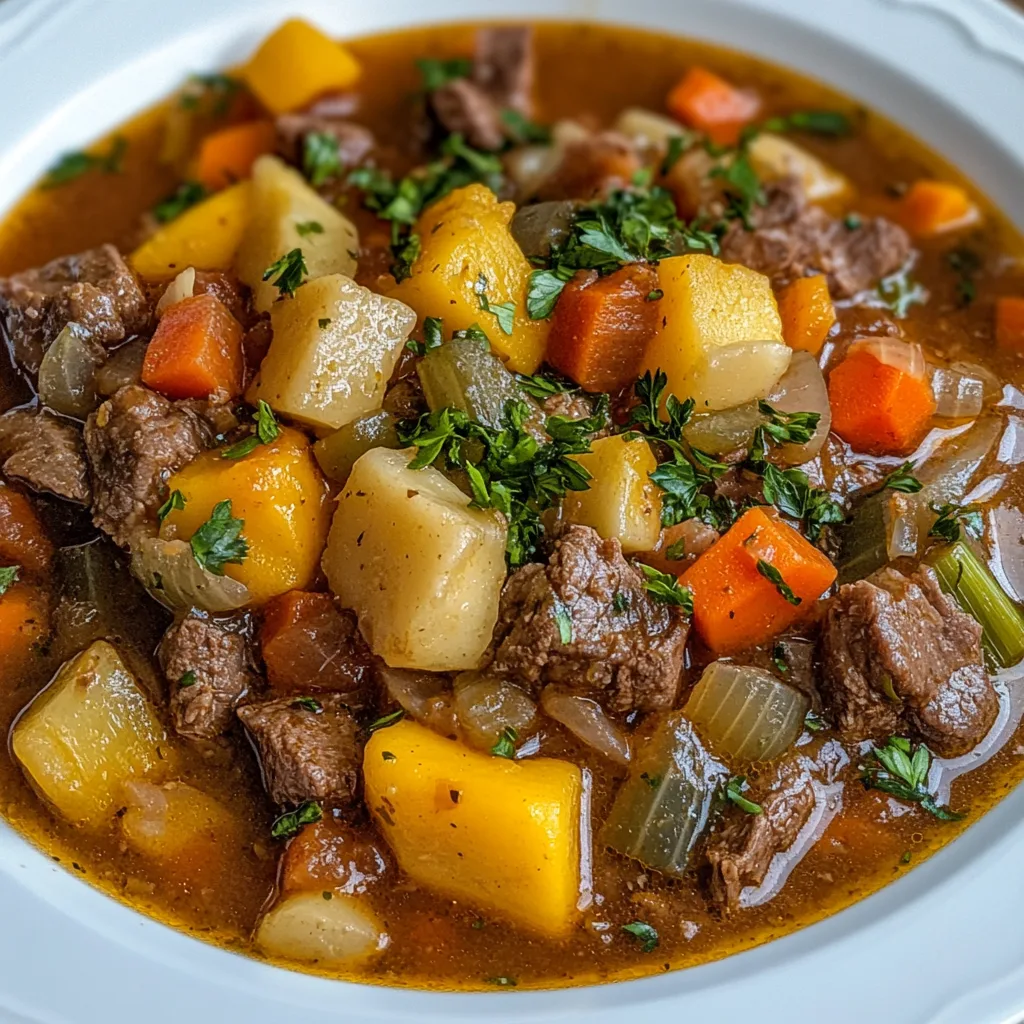
  • Hearty Beef and Vegetable Soup: 7 Reasons You’ll Crave It Today

    Hearty Beef and Vegetable Soup: 7 Reasons You’ll Crave It Today

    The aroma of Hearty Beef and Vegetable Soup simmering on my stove takes me back to those crisp autumn evenings when Mom would have a pot bubbling away as I returned from soccer practice. There’s something magical about walking into a kitchen filled with the rich scent of beef, herbs, and vegetables melding together. This soul-warming soup has become my go-to comfort food during chilly months, combining tender chunks of beef with a colorful medley of vegetables in a flavorful broth that’s simply irresistible. Perfect for meal prep or feeding a hungry crowd, this soup delivers both nutrition and satisfaction in every spoonful.

    Hearty Beef and Vegetable Soup: 7 Reasons You'll Crave It Today

    Recipe

    Why You’ll Love This Hearty Beef and Vegetable Soup

    A Complete Meal in One Pot

    This isn’t just any soup—it’s a complete meal that satisfies on every level. The combination of protein-rich beef, fiber-packed vegetables, and hearty broth creates perfect balance. I love how the beef becomes fall-apart tender after simmering, while each vegetable maintains its distinct texture and flavor. The natural sweetness from carrots and tomatoes balances beautifully with the earthy potatoes and savory herbs. Plus, everything cooks in one pot, meaning fewer dishes and more time to enjoy your evening. The depth of flavor develops as it simmers, creating something truly special.

    Customizable to Your Preferences

    What makes this Hearty Beef and Vegetable Soup truly special is its incredible versatility. Working with what’s in your fridge? Perfect! This recipe welcomes substitutions and additions. Swap in sweet potatoes for regular potatoes, add kale instead of spinach, or throw in those mushrooms that need using up. The seasoning profile can shift from classic herbs to something more adventurous with a dash of smoked paprika or a splash of red wine. I’ve made this soup dozens of times, and it’s never exactly the same twice—yet it’s always delicious. Make it yours!

    Essential Tips & Tricks

    Perfect Beef Selection and Preparation

    Choosing the right beef is crucial for this soup. I recommend chuck roast cut into 1-inch cubes—it has the perfect balance of meat and fat that becomes wonderfully tender when simmered. Before adding to your pot, pat the beef dry with paper towels and season generously with salt and pepper. Then, brown it in batches (don’t overcrowd!) to create that delicious caramelization that adds incredible depth to your broth. This step takes a few extra minutes but makes a world of difference in the final flavor. Trust me, it’s worth every second of effort.

    Building Layers of Flavor

    The secret to an exceptional Hearty Beef and Vegetable Soup lies in building flavor at every stage. Start by sautéing onions, carrots, and celery in the same pot where you browned the beef—this captures all those wonderful browned bits (fond) from the bottom. Add garlic just until fragrant, then deglaze with a splash of beef broth to scrape up every bit of flavor. When adding herbs, crush dried ones between your fingers to release their oils. A bay leaf and sprig of fresh thyme make all the difference, and don’t forget that final seasoning adjustment just before serving!

    Serving Ideas & Creative Variations

    Perfect Pairings

    Every bowl of this Hearty Beef and Vegetable Soup deserves the perfect accompaniment. My favorite is a thick slice of crusty bread for dipping into that rich broth—sourdough or a rustic country loaf works beautifully. For something lighter, try a simple green salad with a bright vinaigrette to contrast the soup’s richness. When I’m feeling indulgent, I top each bowl with a sprinkle of freshly grated Parmesan and a drizzle of good olive oil. For special occasions, serve in bread bowls for an impressive presentation that’s surprisingly easy. The combination of warm soup and fresh bread is simply unbeatable.

    Hearty Beef and Vegetable Soup: 7 Reasons You'll Crave It Today

    Seasonal Adaptations

    This soup evolves beautifully with the changing seasons. In spring, I lighten it with asparagus, peas, and fresh herbs. Summer calls for zucchini, yellow squash, and fresh corn kernels. Fall is perfect for adding butternut squash, parsnips, and a hint of warming spices. Winter versions get heartier with root vegetables and perhaps some barley or farro for extra substance. I’ve even made a “clean out the fridge” version using whatever vegetables needed using up—it’s always delicious! The foundation remains the same while the seasonal ingredients keep it fresh and exciting all year round.

    Storage & Troubleshooting Guide

    Proper Storage and Freezing

    This Hearty Beef and Vegetable Soup is a meal-prep champion. Once cooled, store it in airtight containers in the refrigerator for up to 4 days. The flavor actually improves overnight as the ingredients continue to meld! For freezing, portion into freezer-safe containers, leaving some headspace for expansion, and freeze for up to 3 months. I like to freeze in individual portions for quick lunches. When reheating, thaw overnight in the refrigerator if frozen, then warm gently on the stovetop. Add a splash of fresh broth if it’s thickened too much during storage. The vegetables may soften slightly but the flavor remains wonderful.

    Fixing Common Issues

    Even experienced cooks encounter soup challenges! If your soup seems too thin, simmer uncovered for 15-20 minutes to reduce and concentrate the flavors, or make a quick slurry with 1 tablespoon cornstarch and cold water. For too thick soup, simply add more broth until you reach your desired consistency. If the flavor seems flat, don’t immediately reach for salt—try a splash of vinegar or lemon juice to brighten things up. Beef too tough? It likely needs more time—simmer gently until it reaches that perfect fork-tender stage. Vegetables overcooked? Next time, add firmer vegetables earlier and delicate ones later.

    Frequently Asked Questions

    Can I make Hearty Beef and Vegetable Soup in a slow cooker?

    Absolutely! Brown the beef and sauté aromatics first, then transfer everything to your slow cooker. Cook on low for 7-8 hours or high for 4-5 hours until the beef is tender.

    What’s the best cut of beef for this soup?

    Chuck roast is ideal—it has great flavor and becomes perfectly tender when simmered. Stew meat works too, but check for quality as pre-packaged options can vary.

    Can I make this soup vegetarian?

    Yes! Substitute the beef with mushrooms or beans, use vegetable broth instead of beef broth, and add extra herbs and a tablespoon of soy sauce for depth.

    How do I thicken the soup if it’s too watery?

    Create a slurry with 1-2 tablespoons cornstarch mixed with cold water, then stir into the simmering soup until it reaches your desired thickness.

    How long will this soup keep in the refrigerator?

    Properly stored in airtight containers, Hearty Beef and Vegetable Soup will keep for 3-4 days in the refrigerator. It often tastes even better the next day!

    Final Thoughts

    This Hearty Beef and Vegetable Soup has saved countless weeknight dinners in my home and never fails to bring comfort with every spoonful. The beauty lies in its adaptability and how it welcomes both precision and improvisation. Whether you’re cooking for a family gathering or meal prepping for busy days ahead, this recipe delivers nourishment and satisfaction that store-bought versions simply can’t match. I hope it brings as much warmth to your table as it has to mine! Don’t forget to share your creations on Pinterest and tag me—I’d love to see your version of this beloved classic.

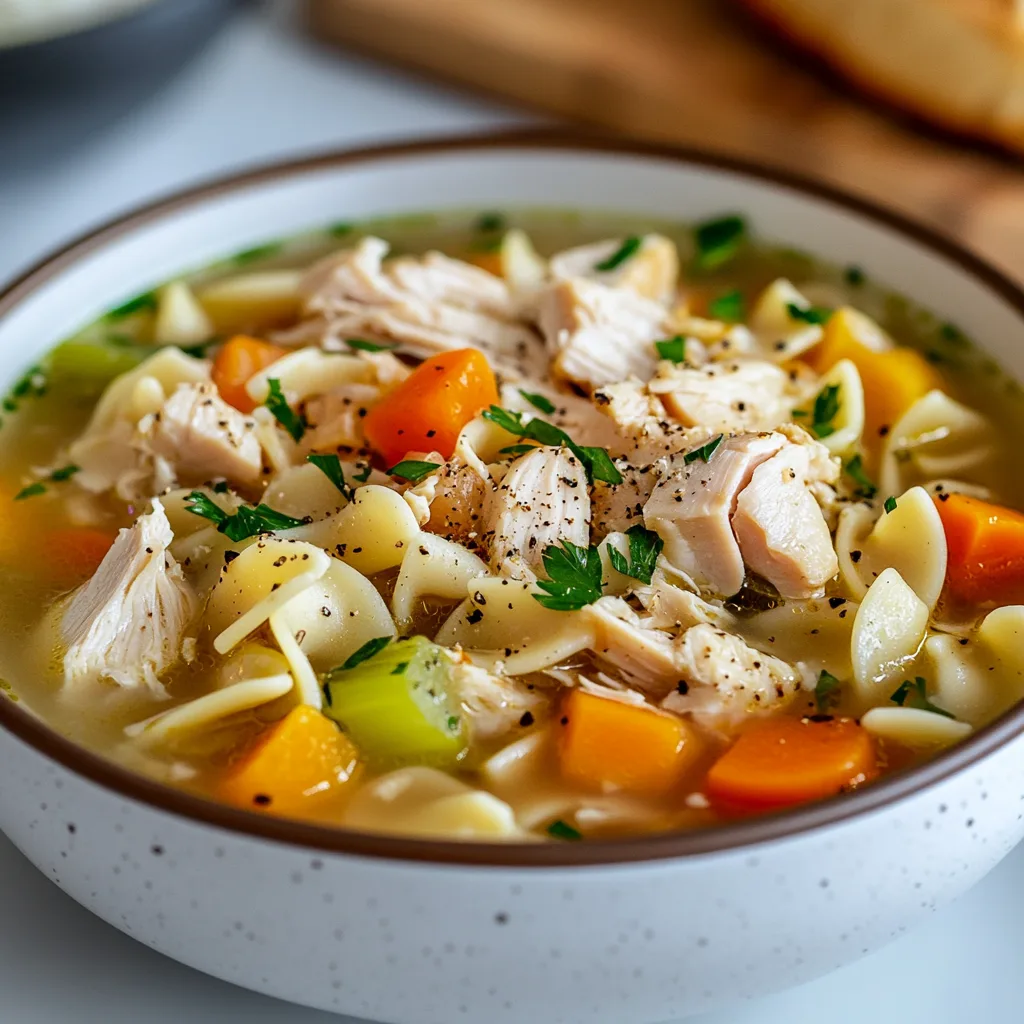
  • Chicken Noodle Soup Recipe: 7 Easy Steps with Rotisserie Chicken

    Chicken Noodle Soup Recipe: 7 Easy Steps with Rotisserie Chicken

    Chicken noodle soup with rotisserie chicken is my ultimate comfort food hack when I need something soothing but don’t have hours to simmer a broth from scratch. There’s something magical about the way the savory broth wraps around tender shreds of pre-cooked chicken and hearty noodles. On chilly evenings when my kitchen windows fog up, I love how this soup fills my home with aromas that remind me of my grandmother’s kitchen. The beauty lies in its simplicity—store-bought rotisserie chicken does the heavy lifting, while you get all the credit for a homemade meal that tastes like it simmered all day. Let me show you how to make this cozy classic with a shortcut that doesn’t sacrifice flavor.

    Chicken Noodle Soup Recipe: 7 Easy Steps with Rotisserie Chicken

    Recipe

    Why You’ll Love This Chicken Noodle Soup with Rotisserie Chicken

    Time-Saving Convenience with Homemade Flavor

    When life gets hectic, this soup is my secret weapon. Using rotisserie chicken cuts your cooking time in half while still delivering that slow-simmered taste. I remember making this after a particularly exhausting Monday when my daughter had dance class, and I needed dinner in 30 minutes. The pre-cooked chicken means you’re essentially just building a flavorful broth and adding ingredients—no raw meat handling or wondering if your chicken is cooked through. The meat stays incredibly tender and absorbs all the aromatic flavors of your broth, making everyone think you spent hours in the kitchen.

    Nutrient-Dense and Customizable

    This soup isn’t just delicious—it’s a nutritional powerhouse disguised as comfort food. The chicken provides lean protein, while carrots, celery, and onions deliver essential vitamins. Last winter, when everyone around me was sniffling, I loaded mine with extra garlic and ginger for an immune boost. You can easily adjust the sodium levels by using low-sodium broth or amplify the flavor with fresh herbs. For picky eaters, it’s perfect because you can customize each bowl—my husband likes his with extra noodles, while I prefer more vegetables. The rotisserie chicken’s rich flavor means you need fewer additives to make it taste amazing.

    Essential Tips & Tricks

    Maximizing Rotisserie Chicken Flavor

    The secret to exceptional soup lies in how you handle that rotisserie chicken. Remove the skin (save it for crisping up as a garnish!) and shred both white and dark meat for the best flavor balance. I always take an extra minute to scrape those browned bits from the container—they’re packed with umami goodness! For an extra flavor boost, simmer the chicken carcass in your broth for 20 minutes before straining and proceeding with the recipe. This mini-stock makes a remarkable difference in depth of flavor, transforming your soup from good to “can I please have the recipe?”

    Perfecting Your Noodle Game

    Noodle selection and timing make or break your soup. I learned this lesson the hard way after once ending up with a pot of mushy pasta. Choose egg noodles for their texture and ability to hold up in broth, or go for heartier options like rotini that maintain their bite. The golden rule: cook noodles separately and add them to individual serving bowls, then ladle hot soup over them. This prevents the pasta from absorbing all your precious broth during storage. For gluten-free options, rice noodles work beautifully but require even more careful timing—I undercook them slightly since they’ll continue softening in the hot soup.

    Serving Ideas & Creative Variations

    Elevated Garnishes for Restaurant-Quality Presentation

    Transform your homemade soup into a restaurant-worthy experience with thoughtful garnishes. A drizzle of good olive oil creates beautiful golden pools on the surface, while fresh dill or chives add bright color and flavor. My family went crazy for the soup when I started adding a squeeze of lemon just before serving—it cuts through the richness and makes the flavors pop. For texture contrast, try topping with homemade croutons, crispy fried shallots, or those chicken skin crisps I mentioned. A sprinkle of finishing salt and cracked black pepper makes each spoonful slightly different and more interesting.

    Global Flavor Twists on the Classic

    While traditional chicken noodle soup is comforting, adding global influences creates exciting variations. Try a Thai-inspired version with coconut milk, lime, and red curry paste—the rotisserie chicken works perfectly here too. For a Mexican twist, add cumin, oregano, diced tomatoes and finish with avocado, cilantro and lime. My unexpected favorite is a Greek variation with lemon, dill, and orzo instead of egg noodles, finished with a dollop of yogurt. The rotisserie chicken adapts beautifully to these flavor profiles while maintaining that comforting essence that makes chicken soup so beloved in every culture.

    Storage & Troubleshooting Guide

    Proper Storage for Maximum Freshness

    Store your chicken noodle soup properly to enjoy it for days. The key is keeping the noodles separate from the broth whenever possible. Refrigerate cooled soup in airtight containers for 3-4 days—I like using glass containers that won’t absorb flavors or stain. For freezing, portion into freezer-safe bags or containers without noodles (they’ll turn mushy when thawed). Leave an inch of headspace for expansion and freeze flat for easy storage and quicker thawing. When reheating, do it gently on the stovetop rather than microwaving to maintain texture and prevent the chicken from becoming rubbery.

    Troubleshooting Common Soup Problems

    Even simple recipes can go sideways sometimes. If your soup lacks flavor, try adding a splash of acid like lemon juice or a few drops of vinegar—this instantly brightens the taste. Too salty? Add a peeled, quartered potato to absorb excess salt (remove before serving) or dilute with unsalted broth and a touch of cream. For greasy broth, chill it until fat solidifies on top, then remove with a spoon. If your vegetables are too firm or too mushy, remember the order matters—add carrots first, celery next, and delicate greens last. For cloudy broth, try straining through a coffee filter or cheesecloth for that crystal-clear restaurant quality.

    Frequently Asked Questions

    Can I use leftover roast chicken instead of rotisserie chicken?

    Absolutely! Any pre-cooked chicken works beautifully. Just make sure it’s not heavily seasoned with competing flavors that might clash with your soup seasonings.

    How do I make chicken noodle soup with rotisserie chicken more flavorful?

    Add fresh herbs like thyme and parsley, use better-quality broth, or simmer the chicken carcass in your stock first. A splash of white wine or dash of fish sauce adds surprising depth.

    Can I make this soup in a slow cooker?

    Yes! Add everything except noodles and cook on low for 4-6 hours. Stir in separately cooked noodles before serving for perfect texture.

    Is chicken noodle soup healthy?

    It’s packed with protein, vegetables, and hydrating broth. Control sodium by making your own stock or choosing low-sodium options, and add extra vegetables for more nutrients.

    How can I thicken my chicken noodle soup?

    For slightly thicker soup, whisk 1 tablespoon cornstarch with cold broth, then stir into simmering soup. Or mash some of the cooked vegetables against the pot side.

    Final Thoughts

    Chicken noodle soup with rotisserie chicken represents what I love most about cooking—finding clever shortcuts that don’t compromise on flavor. There’s something deeply satisfying about transforming a simple supermarket chicken into a nourishing meal that feels like a warm hug in a bowl. I hope these tips help you create a version that becomes your own family favorite. Whether you’re fighting off winter chills or simply craving comfort, this soup delivers every time. For more cozy recipes that make the most of grocery shortcuts, check out my Pinterest collection where I share my favorite comfort food hacks.

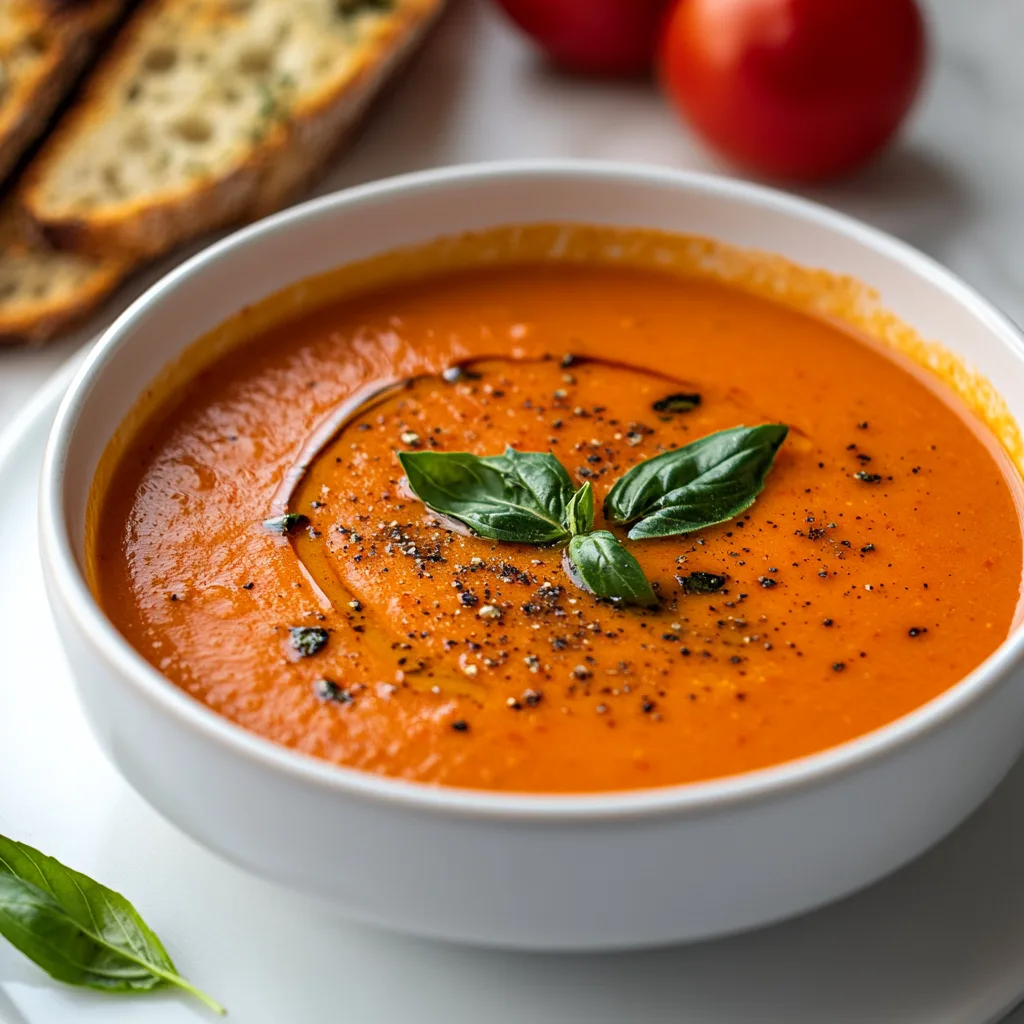
  • Classic Creamy Tomato Basil Soup: 5 Reasons You’ll Love It!

    Classic Creamy Tomato Basil Soup: 5 Reasons You’ll Love It!

    There’s something magical about a steaming bowl of Classic Creamy Tomato Basil Soup on a chilly evening. The velvety texture, the bright tomato flavor deepened with fresh basil—it’s comfort in a bowl. I discovered my love for this soup during my first apartment days when cooking meant experimenting with whatever was in my pantry. Now, it’s my go-to recipe when I need a hug in food form. The best part? This soup comes together with simple ingredients but tastes like it simmered all day. Let me share my favorite version with you from Recipes Darleen.

    Classic Creamy Tomato Basil Soup: 5 Reasons You’ll Love It!

    Recipe

    Why You’ll Love This Classic Creamy Tomato Basil Soup

    Perfect Balance of Flavors

    The magic of this soup lies in its perfect balance of acidity and creaminess. The tomatoes provide that bright, slightly tangy foundation while the cream softens the edges into something luxurious. I love how the fresh basil adds those aromatic notes that dance on your tongue with each spoonful. When my daughter was going through a picky phase, this was the one “vegetable dish” she’d actually request! The natural sweetness of ripe tomatoes means you don’t need to add much sugar—just a pinch balances everything beautifully.

    Simple Yet Sophisticated

    Don’t let the velvety texture fool you—this soup is surprisingly easy to prepare. With just a handful of quality ingredients, you can create something that feels restaurant-worthy in under 45 minutes. I’ve served this at casual weeknight dinners and at fancy dinner parties alike. There’s something so satisfying about watching guests’ eyes close in appreciation with the first spoonful. The simplicity makes it perfect for beginners, while the flavor complexity satisfies even the most discerning palates.

    Essential Tips & Tricks

    Selecting the Best Ingredients

    Your soup will only be as good as what goes into it. San Marzano tomatoes make a remarkable difference with their sweet flavor and low acidity—worth the extra couple of dollars! If using fresh tomatoes, choose ripe, in-season ones for the best flavor (Roma or plum varieties work beautifully). For the basil, fresh is non-negotiable here—the dried stuff just won’t create that same aromatic magic. I learned this the hard way during a winter storm when I tried substituting dried basil. The soup was good, but missing that special something that makes it truly exceptional.

    Achieving Silky Smoothness

    The secret to silkiness lies in proper blending and temperature control when adding dairy. I always recommend using an immersion blender directly in the pot—fewer dishes and less risk of hot soup explosions! If you’re using a regular blender, work in batches and leave the center cap off (covered with a kitchen towel) to allow steam to escape. When adding cream, take the soup off the heat first and temper it by mixing a little soup into the cream before adding it back. This prevents curdling and gives you that luscious texture similar to what you’ll find in our Cozy Gluten-Free Chicken Noodle Soup.

    Serving Ideas & Creative Variations

    Perfect Pairings

    Nothing complements this Classic Creamy Tomato Basil Soup better than a crispy, buttery grilled cheese sandwich. The contrast between the creamy soup and the crunchy sandwich creates textural heaven! For a lighter option, try a simple green salad with a bright vinaigrette. When I’m feeling fancy, I serve this soup in hollowed-out bread bowls—my kids go absolutely wild for this presentation. Small croutons or a swirl of pesto on top adds both visual appeal and an extra layer of flavor that makes each bowl feel special.

    Exciting Twists

    While the classic version is perfection, there’s room to play! Add roasted red peppers for a smoky dimension or stir in some cooked orzo pasta for a heartier meal. For an Italian twist, add a handful of grated parmesan and a splash of balsamic vinegar just before serving. My personal favorite variation includes adding caramelized onions and a pinch of smoked paprika—it adds incredible depth. For a protein boost, you could even add white beans or pair it with our Garlic Butter Oven Prime Rib with Rice for a complete meal.

    Storage & Troubleshooting Guide

    Proper Storage Methods

    This soup stores beautifully, making it perfect for meal prepping. Refrigerate in an airtight container for up to 4 days—the flavors actually develop and improve overnight! For longer storage, freeze in individual portions for up to 3 months. I like using silicone muffin trays to freeze perfect single-serving portions. One important tip: if you plan to freeze, consider holding back the cream and adding it fresh when you reheat. The soup reheats best on the stovetop over medium-low heat, stirring occasionally to prevent scorching.

    Common Problems & Solutions

    If your soup turns out too acidic, a pinch of baking soda works wonders to neutralize without affecting flavor. For thin soup, simmer uncovered a bit longer or add a tablespoon of tomato paste. Too thick? A splash of broth brings it back to perfect consistency. If you accidentally curdle the cream (it happens to everyone!), try blending again with an immersion blender—it often smooths things out. And if you’ve over-salted, a squeeze of lemon juice or a dollop of unsweetened yogurt can help balance the flavors without starting over.

    Frequently Asked Questions

    Can I make this Classic Creamy Tomato Basil Soup with canned tomatoes?

    Absolutely! Use two 28-oz cans of whole peeled tomatoes. San Marzano varieties give the best flavor, but any good-quality canned tomatoes work well. Just drain excess liquid before adding.

    Is there a dairy-free alternative?

    Yes! Substitute the cream with full-fat coconut milk or cashew cream. Both provide that silky texture without the dairy. For coconut milk, use the thick part from the top of the can.

    How can I make this soup spicier?

    Add red pepper flakes while sautéing the onions and garlic, or stir in a dash of cayenne pepper at the end. For a smoky heat, try adding a finely chopped chipotle pepper in adobo sauce.

    Can I use a regular blender instead of an immersion blender?

    Yes, but blend in small batches and leave the center cap off (covered with a towel) to allow steam to escape. Return the blended soup to the pot before adding cream.

    What’s the best way to garnish this soup?

    Fresh basil leaves, a swirl of cream, homemade croutons, or a sprinkle of grated parmesan all make beautiful garnishes. For special occasions, try a drizzle of basil oil.

    Final Thoughts

    This Classic Creamy Tomato Basil Soup has become my kitchen signature—the recipe friends always request and family members expect when they visit during colder months. There’s something deeply satisfying about transforming simple ingredients into something so nourishing and delicious. Whether you’re serving it alongside a grilled cheese for a cozy night in or as a sophisticated starter for a dinner party, this soup never disappoints. I hope it brings as much comfort to your table as it has to mine! Don’t forget to check out more cozy recipes on our Pinterest for inspiration.

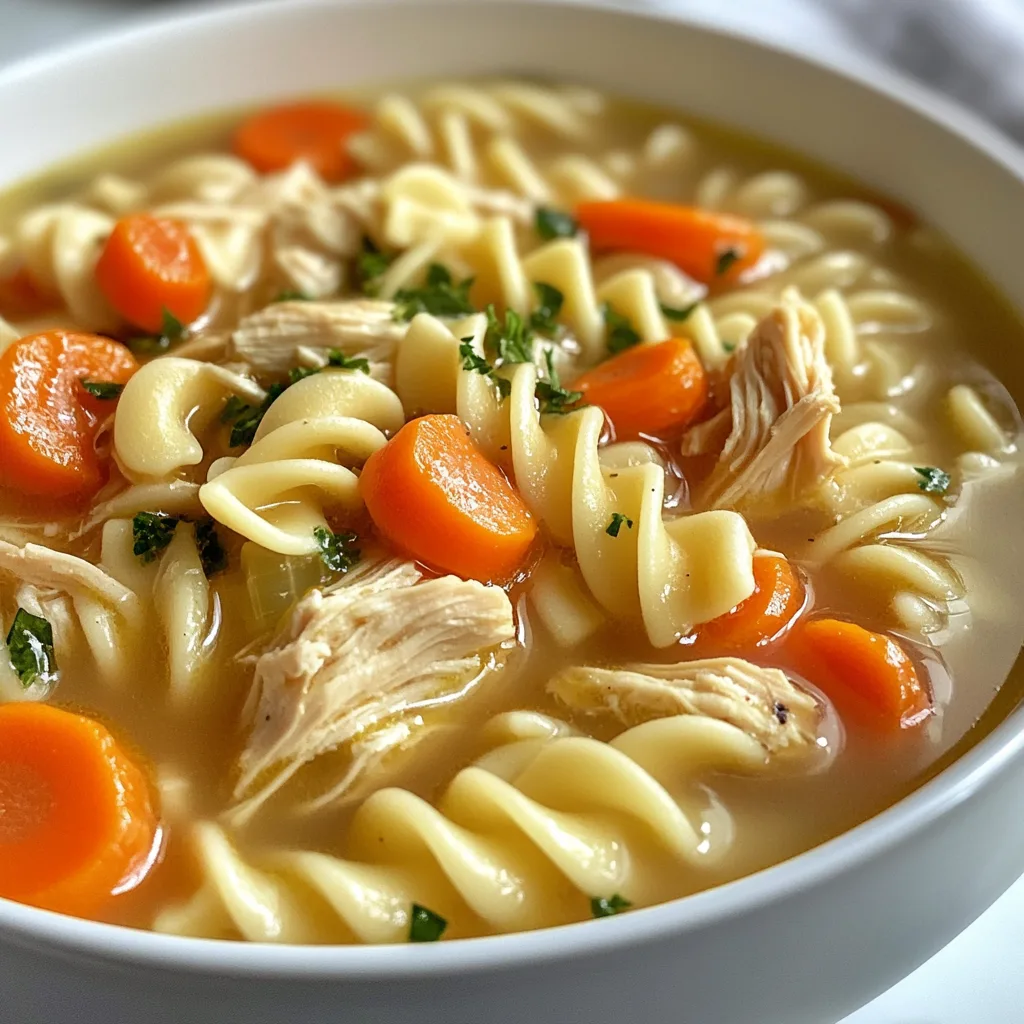
  • Cozy Gluten-Free Chicken Noodle Soup Recipe | Healthy & Comforting Meal

    Cozy Gluten-Free Chicken Noodle Soup Recipe | Healthy & Comforting Meal

    There’s something deeply comforting about a steaming bowl of Cozy Gluten-Free Chicken Noodle Soup on a chilly evening. I remember the first time I made this after my daughter was diagnosed with celiac disease—I was determined to create a version that tasted just like the classic soup we all loved. The fragrant aroma of simmering herbs, tender chicken, and gluten-free noodles filled our kitchen, bringing everyone together around the table.

    This recipe combines traditional flavors with gluten-free ingredients for a soul-warming meal that’s perfect for cold days, sick days, or anytime you need a hug in a bowl. The best part? It comes together easily and tastes even better the next day! Check out my other comfort food recipes for more cozy meal ideas.

    Cozy Gluten-Free Chicken Noodle Soup Recipe | Healthy & Comforting Meal

    Recipe

    Why You’ll Love This Cozy Gluten-Free Chicken Noodle Soup

    Perfect Balance of Flavors

    This soup achieves that magical balance between simple and spectacular. The base starts with a rich chicken broth infused with aromatics like onions, carrots, and celery—the holy trinity of soup foundations. I’ve perfected the herb blend over dozens of batches, finding that fresh thyme and a bay leaf create that nostalgic chicken soup flavor, while a hint of turmeric adds subtle warmth and gorgeous color. What makes this soup special is how the gluten-free noodles absorb just enough broth to become flavor-packed without getting mushy. Every spoonful delivers that perfect combination of tender chicken, vegetables, and pasta that makes chicken noodle soup the ultimate comfort food.

    Nourishing and Satisfying

    There’s a reason chicken soup has been called nature’s medicine for generations. This gluten-free version is packed with immune-boosting ingredients that nourish your body while satisfying your soul. The protein-rich chicken provides sustained energy, while the vegetables deliver essential vitamins and minerals. I love that this recipe creates a complete meal in one pot—protein, vegetables, and gluten-free carbs all swimming in a nourishing broth. On days when my family is fighting sniffles or just needs something wholesome, I make a big batch knowing it’ll provide comfort and nutrition in equal measure. The collagen-rich homemade broth (if you choose to make your own) adds an extra layer of goodness that store-bought simply can’t match.

    Essential Tips & Tricks

    Selecting the Perfect Gluten-Free Noodles

    Choosing the right gluten-free pasta makes all the difference in this soup. After testing numerous brands, I’ve found that corn-rice blends hold their shape best in hot liquid without disintegrating. Brown rice pasta works well too, though it can get slightly softer. The key trick is to cook the noodles separately until they’re just shy of al dente, then add them to individual serving bowls with the hot soup poured over.

    This prevents the noodles from absorbing too much liquid and turning mushy when stored. For meal prep, I store cooked noodles separately from the broth and combine just before serving. My favorite brands include Jovial, Tinkyada, and Barilla gluten-free, all of which maintain their texture beautifully in this slow cooker chicken soup.

    Boosting Flavor Without Gluten

    Creating deep, complex flavor without gluten-containing ingredients requires some strategic additions. I always start by thoroughly browning the chicken before adding it to the soup—those caramelized bits are pure gold for flavor development. For an umami boost without soy sauce (which often contains gluten), I add a splash of coconut aminos or gluten-free tamari.

    Don’t skip the finishing touches: a squeeze of fresh lemon juice brightens the entire pot, while a sprinkle of fresh parsley adds color and a herbaceous note. For extra richness, try adding a parmesan rind to simmer with the broth (just verify it’s from a gluten-free source). These small additions transform a simple soup into something truly special that no one will suspect is gluten-free.

    Serving Ideas & Creative Variations

    Perfect Pairings and Garnishes

    Elevate your soup experience with thoughtfully chosen accompaniments and garnishes. A slice of toasted gluten-free bread or these honey garlic slow cooker chicken thighs make perfect companions to this cozy soup. For toppings, I love offering a “garnish bar” with fresh herbs (dill, parsley, or chives), lemon wedges, a drizzle of good olive oil, and freshly cracked black pepper. For a creamy variation, stir a dollop of dairy-free coconut yogurt into each bowl. When serving to guests, presentation matters—I serve the soup in pre-warmed bowls with a small side plate of garnishes, allowing everyone to customize their bowl. The contrast between the steaming soup and fresh, vibrant toppings creates both visual appeal and flavor complexity.

    Cozy Gluten-Free Chicken Noodle Soup Recipe | Healthy & Comforting Meal

    Seasonal and Dietary Adaptations

    This versatile soup template welcomes seasonal adjustments throughout the year. In spring, I add tender asparagus tips and fresh peas in the final minutes of cooking. Summer calls for sweet corn kernels and zucchini, while fall versions might include diced butternut squash or a handful of kale. For different dietary needs, this recipe flexes beautifully—swap chicken for chickpeas and vegetable broth for a plant-based version, or use bone broth for extra protein and nutrients. For grain-free diets, replace noodles with spiralized zucchini or shirataki noodles. My favorite winter variation includes adding a pinch of saffron and a splash of coconut milk for a golden, slightly creamy version that’s especially comforting during cold and flu season.

    Storage & Troubleshooting Guide

    Proper Storage and Reheating

    Storing this soup properly ensures you’ll enjoy leftover magic for days. If storing with noodles mixed in, cool the soup completely before refrigerating in airtight containers for up to 4 days. For best texture, I prefer storing the noodles separately from the broth—this prevents them from absorbing too much liquid and becoming mushy. When freezing (which works beautifully for up to 3 months), always freeze the soup without noodles, then add freshly cooked pasta when reheating.

    To reheat, warm gently on the stovetop until just simmering—vigorous boiling can make the chicken tough. The soup often tastes even better the second day as the flavors meld, though you might need to add a splash of fresh broth if it’s thickened in the refrigerator.

    Solving Common Soup Challenges

    Even experienced cooks encounter soup dilemmas, but they’re easily fixed. If your soup lacks flavor, try adding a splash of acid (lemon juice or apple cider vinegar) and an extra pinch of salt—these simple additions wake up flat flavors instantly. For cloudy broth, try straining the soup through a fine-mesh sieve lined with cheesecloth. If the soup is too thin, simmer uncovered for 10-15 minutes to reduce and concentrate flavors. Too thick? Add more broth until you reach your desired consistency.

    For noodles that turned too soft, don’t despair—blend a portion of the soup to create a creamier base that complements softer noodles. And remember that gluten-free pasta continues absorbing liquid even after cooking, so serving immediately or storing separately is your best strategy.

    Frequently Asked Questions

    Can I make this Cozy Gluten-Free Chicken Noodle Soup in advance?

    Absolutely! Make the soup without noodles up to 3 days ahead. Store in the refrigerator and add freshly cooked gluten-free noodles when reheating for the best texture.

    What’s the best chicken to use?

    I recommend boneless, skinless chicken thighs for their flavor and tenderness. They stay juicy even after reheating, unlike breast meat which can become dry.

    Are there shortcuts for busy weeknights?

    Use rotisserie chicken and store-bought gluten-free broth! Just shred the chicken and add it during the last 5 minutes of cooking with pre-cooked gluten-free noodles.

    Can I make this in a slow cooker?

    Yes! Cook on low for 6-8 hours or high for 3-4 hours. Add the gluten-free noodles during the last 30 minutes to prevent them from becoming mushy.

    How do I ensure this is truly gluten-free?

    Always check labels carefully. Some broths, seasonings, and even pre-cooked rotisserie chickens may contain hidden gluten or be processed in facilities with wheat.

    Final Thoughts

    This Cozy Gluten-Free Chicken Noodle Soup has become more than just a recipe in our home—it’s a tradition that signals comfort and care. The beauty of this soup lies in its simplicity and adaptability, making it perfect for both everyday meals and special moments when someone needs a little extra nurturing. I hope this recipe brings the same warmth to your kitchen that it has to mine. There’s something magical about watching loved ones gather around steaming bowls, knowing you’ve created something both delicious and nourishing. Don’t forget to share your soup creations with me on Pinterest and let me know your favorite variations!

  • Fluffy Gingerbread Pancakes – Cozy and Irresistible

    Fluffy Gingerbread Pancakes – Cozy and Irresistible

    Fluffy Gingerbread Pancakes have saved more than one of my mornings. Last week, I reached for the cinnamon and sent a dust cloud over my coffee—kitchen chaos at its finest. I whisked, flipped, laughed, and the stack still came out tender, warm, and perfumed with molasses. Fluffy Gingerbread Pancakes are the kind of homemade comfort that hushes grumpy wake-ups and turns a quick fix into a cozy ritual. My kids call them “gingerbread clouds,” and honestly, I agree.

    Fluffy Gingerbread Pancakes

    Recipe

    WHY YOU’LL LOVE THIS RECIPE

    What Makes This Fluffy Gingerbread Pancakes So Irresistible

    I once made Fluffy Gingerbread Pancakes while wearing a holiday sweater and managed to dust the sleeves with flour and ginger—worth it. The payoff is that first forkful: steam curling up, molasses sweetness, and cozy spice. These Fluffy Gingerbread Pancakes feel like a hug in breakfast form, the easy recipe that turns any Tuesday into a mini-holiday. With a one-pan setup and a truly homemade flavor, they’re the comfort food I lean on for brunch and even breakfast-for-dinner when the day needs saving.

    • Cloud-soft texture: a gentle mix and a quick batter rest deliver ultra fluffy pancakes.
    • Warm, balanced spice: ginger, cinnamon, and molasses create classic gingerbread flavor without being heavy.
    • Simple, pantry-friendly ingredients: a homemade version that beats a mix, fast.
    • One-pan meal ease: a single griddle, quick cleanup, and a stack ready in minutes.
    • Family-friendly and freezer-friendly: make-ahead for an easy dinner or speedy breakfast.

    They’re photogenic, festive, and wildly satisfying. Fluffy Gingerbread Pancakes keep popping up on feeds because they nail that homemade coziness and taste as good as they look. The batter works like a quick fix—reliable lift, even browning, and a fragrance that hits every nostalgic note. It’s comfort food you can flip in real time, no special equipment needed. Ready to whisk and flip? Let’s dive into the easy recipe card below.

    TIPS, TRICKS & EXPERT SECRETS

    Chef Tips for Perfect Fluffy Gingerbread Pancakes Every Time

    During a holiday pop-up, I taught a mini class on pancakes and accidentally used a ladle marked “soup.” The pancakes were colossal and hilarious—but the technique still shined. Here’s how to make Fluffy Gingerbread Pancakes consistently dreamy:

    • Measure flour lightly: spoon and level to avoid dense pancakes. Too much flour kills the fluffy factor.
    • Rest the batter: 5–10 minutes lets the baking powder and buttermilk work, yielding extra lift.
    • Medium heat is magic: aim for 375°F on a griddle; too hot scorches molasses before the center sets.
    • Flip once: wait for set edges and steady bubbles. Flipping early deflates the rise.

    Smart Ingredient Swaps & Practical Cooking Advice

    • Vegan swap: use a plant milk + 1 tbsp lemon juice, 2 tbsp neutral oil instead of butter, and a flax egg (1 tbsp ground flax + 3 tbsp water). The homemade version stays fluffy.
    • Gluten-free: use a 1:1 gluten-free all-purpose blend; add 1 extra tbsp milk if batter seems thick. This easy recipe still cooks up tender.
    • Lower sugar: cut brown sugar to 2 tbsp; the molasses keeps a deep gingerbread flavor.
    • What not to do: don’t overmix. Stir just to combine—little lumps equal fluff. Overmixing develops gluten and toughens the texture.
    • Quick fix for thick batter: whisk in 1–2 tbsp milk at a time until it lazily ribbons from the spoon.

    These cooking tips make Fluffy Gingerbread Pancakes shine, whether you’re planning holiday brunch or a spontaneous one-pan meal on a weeknight.

    SERVING IDEAS & CREATIVE VARIATIONS

    How to Serve Fluffy Gingerbread Pancakes for Maximum Enjoyment

    I once served a towering stack of Fluffy Gingerbread Pancakes on my grandmother’s cake stand. Was it dramatic? Yes. Did guests go wide-eyed? Also yes. Elevating presentation can make even an easy recipe feel special. Here are serving ideas and plating suggestions to turn your griddle run into an occasion:

    • Classic cozy: butter, warm maple syrup, and a dollop of whipped cream with a cinnamon sprinkle.
    • Brunch board: stack pancakes with bowls of berries, toasted pecans, yogurt, and citrus segments for color and crunch.
    • Beverage pairings: hot coffee with a splash of vanilla, a chai latte, or cold-brew for contrast.

    If you love breakfast bakes, pair these with my Crockpot Cinnamon Roll Casserole or prep-ahead Overnight French Toast Casserole. More cozy ideas live on the Recipes Darleen pinterest page.

    Flavor Twists and Seasonal Variations

    • Orange-maple swirl: add 1 tsp orange zest to the batter and finish with orange-kissed maple syrup. A bright seasonal twist.
    • Chocolate ginger snap: fold in 1/2 cup mini chocolate chips; top with crushed gingersnaps for texture and a Pinterest-ready plating suggestion.
    • Pear + pecan: thinly slice ripe pear and tuck a few pieces into each pancake on the griddle; finish with toasted pecans and honey.

    For content creators, shoot the stack straight-on to show layers, then add a syrup pour shot for movement. These flavor variations and serving ideas keep Fluffy Gingerbread Pancakes fun, festive, and endlessly sharable.

    Fluffy Gingerbread Pancakes have saved more than one of my mornings. Last week, I reached for

    STORAGE & TROUBLESHOOTING GUIDE

    How to Store and Reheat Fluffy Gingerbread Pancakes

    Leftovers? I stash extras for school mornings, and future-me always thanks past-me. Here’s how to store, keep fresh, and reheat Fluffy Gingerbread Pancakes without losing that tender bite:

    • Room temperature: up to 2 hours on a cooling rack, lightly tented with foil.
    • Fridge: 3–4 days in an airtight container with parchment between pancakes to prevent sticking.
    • Freezer: up to 2 months. Freeze flat on a sheet, then transfer to a freezer-safe bag; squeeze out air.
    • Reheat:
      • Skillet: medium-low heat, 1–2 minutes per side.
      • Oven: 300°F for 8–10 minutes on a wire rack over a sheet.
      • Toaster or air fryer: 350°F for 3–4 minutes. Great for crisp edges.

    Troubleshooting Common Fluffy Gingerbread Pancakes Issues

    • Too dense: likely overmixed or too much flour. Next time, spoon-and-level the flour and stop mixing when just combined. You can fix texture slightly by thinning the batter with 1–2 tbsp milk.
    • Raw center, burnt surface: heat too high. Lower the burner; aim for a steady medium and longer cook time.
    • Pale, not fluffy: griddle too cool or old baking powder. Preheat fully and use fresh leavening.
    • Watery batter: measure liquids carefully; add 1–2 tbsp flour to balance.
    • Rubbery edges: overcooked. Watch for bubbles and set edges; flip once and remove promptly.

    With these storage tips and quick fixes, your Fluffy Gingerbread Pancakes will stay delicious from the first flip to the last reheated stack. You’ve got this—happy flipping!

    FAQs

    Can I make the batter ahead?

    Yes. Mix the dry ingredients and wet ingredients separately up to 24 hours ahead. Combine just before cooking to keep Fluffy Gingerbread Pancakes extra fluffy.

    Do I need buttermilk?

    Buttermilk adds tang and lift. If you don’t have it, use milk plus 1 tbsp lemon juice or vinegar. Let it sit 5 minutes before mixing for fluffy results.

    Can I cook these on a cast-iron pan?

    Absolutely. Preheat well and lightly grease. Cast-iron holds steady heat for evenly browned Fluffy Gingerbread Pancakes.

    How do I keep pancakes warm for a crowd?

    Place cooked pancakes on a wire rack over a sheet pan in a 200°F oven. The rack prevents sogginess while you finish the batch.

    Conclusion

    Fluffy Gingerbread Pancakes are the cozy, homemade comfort food that fits any season—holiday mornings, lazy Sundays, or a quick breakfast-for-dinner easy dinner. With warm spice, molasses depth, and an airy crumb, this easy recipe proves you don’t need fancy gear for crowd-pleasing results. Use the serving ideas, seasonal twists, and storage advice above to keep every plate exciting. Whether you’re hosting brunch or flipping a one-pan meal for your family, Fluffy Gingerbread Pancakes deliver soft texture and nostalgic flavor every time. Try it at home and tag me—nothing makes my day like seeing your stacks rise to the occasion.

  • Dill Pickle Soup (Slow Cooker) – Creamy, Comforting Bliss

    Dill Pickle Soup (Slow Cooker) – Creamy, Comforting Bliss

    Dill Pickle Soup (Slow Cooker) saved my Tuesday night when the kids staged a pantry raid and my whisk vanished. I tossed everything into the crock, hit start, and hoped for magic. Thirty minutes before dinner, I tempered the sour cream, stirred in dill, and boom, creamy, tangy Dill Pickle Soup (Slow Cooker) perfection. It’s the kind of homemade comfort food that forgives chaos and rewards you with cozy flavor. If you love an easy dinner that tastes like you labored all day, this is your new favorite.

    Dill Pickle Soup (Slow Cooker)

    Recipe

    WHY YOU’LL LOVE THIS RECIPE

    What Makes This Dill Pickle Soup (Slow Cooker) So Irresistible

    I first made Dill Pickle Soup (Slow Cooker) after a day when every pot in my kitchen was mysteriously “already in use.” This easy dinner felt like a small miracle—minimal prep, big payoff, and that tangy-creamy balance we all crave in comfort food. The slow cooker coaxes rich, homemade flavor while you do literally anything else. Later, a squeeze of lemon and a heap of dill make it taste restaurant-level special. Dill Pickle Soup (Slow Cooker) is pure cozy joy with just the right zing.

    – Hands-off ease: Quick prep, set it, forget it, and return to a kitchen that smells like you cooked all day.
    – Creamy, tangy balance: Pickle brine and sour cream create rich flavor without heavy fuss.
    – Simple ingredients: Pantry staples, budget-friendly, and no-fuss to find.
    – Family-friendly: Kids love the potato-creamy texture; grown-ups love the briny zing.
    – Flexible: Make it vegetarian, gluten-free, or richer—your homemade version, your rules.

    If you’re in a soup mood, don’t miss my Healthy Slow Cooker Zuppa Toscana Soup at RecipesDarleen.com—another simple, one-pot meal that hits all the comfort notes. Ready to make this cozy pot happen? Let’s get to the recipe card!

    Food lovers are leaning into bold, nostalgic flavors that still feel light and cozy. This easy recipe proves you can have creamy comfort food with spark—no stovetop juggling, no simmer babysitting, just a reliable slow cooker and an irresistibly tangy finish.

    TIPS, TRICKS & EXPERT SECRETS

    Chef Tips for Perfect Dill Pickle Soup (Slow Cooker) Every Time

    I learned the magic of tempering dairy the (almost) hard way. I once tossed sour cream straight into a bubbling pot; it split and looked like a snow globe. With Dill Pickle Soup (Slow Cooker), the quick fix is simple and foolproof—temper the dairy with hot broth first and watch your soup become silky.

    – Temper the sour cream: Whisk sour cream with a ladle of hot soup before adding it back. This cooking tip prevents curdling and keeps the texture luxuriously creamy.
    – Layer your seasoning: Add bay leaf, thyme, and pepper early; stir in fresh dill and a splash of lemon at the end for bright, homemade flavor.
    – Pickle power: Use both chopped pickles and a bit of pickle brine. Start with less brine; add more to taste for a quick fix if you want extra zing.
    – Potato size matters: Cut potatoes uniformly so they cook evenly in the slow cooker—no mushy bits, no hard chunks.

    Smart Ingredient Swaps & Practical Cooking Advice

    – Vegetarian/vegan: Use vegetable broth; for dairy-free, whisk in full-fat coconut milk or a vegan sour cream at the end. It delivers a homemade version with body and creaminess.
    – Gluten-free: Swap the flour for cornstarch (mix with cool water first) to thicken without gluten.
    – Richer finish: Add a splash of heavy cream or cream cheese at the end for a decadent, easy recipe upgrade.
    – What not to do: Don’t add sour cream directly to boiling soup. It may curdle and create an uneven texture—temper it first every time.

    Craving more slow cooker comfort after you master this Dill Pickle Soup (Slow Cooker)? Try my ultra-cozy Slow Cooker Green Bean Casserole or the crowd-pleasing Crockpot Chicken & Gravy.

    SERVING IDEAS & CREATIVE VARIATIONS

    How to Serve Dill Pickle Soup (Slow Cooker) for Maximum Enjoyment

    The first time I served this to friends, I ladled it into warm bowls, added an extra swirl of sour cream, and showered it with fresh dill. It looked fancy with almost zero effort—my favorite kind of plating suggestion.

    Serving ideas:
    – Pair with crusty bread, garlic knots, or rye toast to soak up the creamy broth.
    – Add a crisp side salad with cucumbers, radishes, and dill vinaigrette to echo the flavors.
    – Beverage pairing: A bright pilsner, sparkling water with lemon, or a dry Riesling balances the tang and creaminess.

    Dill Pickle Soup (Slow Cooker)
    Dill Pickle Soup (Slow Cooker)

    Flavor Twists and Seasonal Variations

    – Smoky bacon crunch: Stir in crisp bacon at the end for a savory, smoky twist that plays beautifully with the brine.
    – Autumn garden: Add diced parsnips or turnips with the potatoes for a rustic seasonal twist.
    – Herb-forward: Swap thyme for tarragon or add chives to amplify the fresh dill note.
    – Extra creamy: Blend 2 cups of the soup and return it to the pot for a thicker, velvety finish—an easy flavor variation that still feels homemade.

    Photography tip for content creators: Garnish each bowl with a dollop of sour cream, a pickle spear, a sprinkle of dill, and cracked pepper. Shoot overhead on a light background to capture the cozy contrast and make this Dill Pickle Soup (Slow Cooker) pop on Pinterest.

    STORAGE & TROUBLESHOOTING GUIDE

    How to Store and Reheat Dill Pickle Soup (Slow Cooker)

    Leftovers rarely happen, but when they do, I celebrate future-me. This Dill Pickle Soup (Slow Cooker) keeps beautifully with a few storage tips.

    Storage advice:
    – Room temperature: Keep out for no more than 2 hours.
    – Fridge: Store in airtight containers for up to 4 days. Glass containers help keep flavors fresh.
    – Freezer: Freeze up to 3 months. For best texture, freeze without the dairy; stir in tempered sour cream after reheating.

    Reheat:
    – Stovetop: Warm over medium-low, stirring occasionally. Avoid boiling after dairy is added to keep it silky.
    – Microwave: Reheat in short bursts, stirring between intervals. Cover to prevent splatters.
    – Slow cooker: Warm on Low until hot, then add tempered sour cream at the end if you froze it dairy-free.

    Troubleshooting Common Dill Pickle Soup (Slow Cooker) Issues

    – Too salty: Add more potatoes or a splash of cream; a tiny pinch of sugar can balance the brine.
    – Too tangy: Stir in extra sour cream or a knob of butter for roundness.
    – Too thin: Simmer uncovered for a few minutes or whisk a cornstarch slurry (1 tablespoon cornstarch + 1 tablespoon water) into the hot soup.
    – Too thick: Add warm broth or water a little at a time until you reach your desired consistency.
    – Curdled look: Blend a small portion and stir it back in, then add a bit more tempered sour cream to smooth the texture.

    You’ve got this—cozy bowls are just a few easy tweaks away. With these fixes, your Dill Pickle Soup (Slow Cooker) will keep fresh, reheat like a dream, and taste homemade every time.

    FAQs

    Can I make Dill Pickle Soup (Slow Cooker) vegetarian?

    Absolutely. Use vegetable broth and a plant-based sour cream or full-fat coconut milk. Temper the dairy alternative the same way for a creamy finish.

    Will the sour cream curdle in the slow cooker?

    Not if you temper it. Whisk sour cream with hot soup in a separate bowl, then stir it into the pot on Low. Avoid boiling after adding dairy.

    What pickles work best for this recipe?

    Dill pickles are essential for classic flavor. Use spears or whole dills, chopped, plus a bit of brine. Avoid sweet pickles; they change the flavor profile.

    Can I cook Dill Pickle Soup (Slow Cooker) on High?

    Yes. Cook on High for about 2 to 2.5 hours until potatoes are tender. Finish with tempered sour cream at the end as directed.

    Conclusion

    Dill Pickle Soup (Slow Cooker) brings rich, homemade comfort food to your table with minimal effort. This easy dinner is creamy, tangy, and layered with cozy flavors that satisfy on busy weeknights and slow Sundays alike. With smart cooking tips, practical storage advice, and playful serving ideas, you’ll make this slow cooker recipe again and again. Try it alongside crusty bread or a crisp salad, share your bowl on social, and explore more warm, one-pot favorites like my Healthy Slow Cooker Zuppa Toscana Soup. Ready to ladle joy? Make Dill Pickle Soup (Slow Cooker) today and tag me so I can cheer you on!