Category: Soup

  • Creamy Cowboy Soup Recipe: Cozy, Hearty, and Irresistibly Delicious!

    Creamy Cowboy Soup Recipe: Cozy, Hearty, and Irresistibly Delicious!

    Creamy Cowboy Soup Recipe: Cozy, Hearty, and Irresistibly Delicious!

    There’s nothing quite like a bowl of Creamy Cowboy Soup on a chilly evening to warm you from the inside out. This hearty, rustic dish combines tender chunks of beef, colorful vegetables, and a velvety broth that practically wraps you in a culinary hug. I discovered this recipe during a weekend at my sister’s ranch in Montana, where the temperatures dipped unexpectedly low. As we gathered around her farmhouse table, steam rising from our bowls, I knew this comfort food classic would become a staple in my kitchen. The rich, savory flavors and creamy texture make this soup perfect for family dinners or casual entertaining.

    Recipe

    Why You’ll Love This Creamy Cowboy Soup

    Perfect One-Pot Comfort Food

    This Creamy Cowboy Soup is the ultimate crowd-pleaser that satisfies even the heartiest appetites. The combination of ground beef (or chuck roast if you prefer), potatoes, corn, and a blend of savory spices creates layers of flavor that develop as the soup simmers. What I love most is how the cream element transforms an ordinary soup into something luxurious without being fussy. On busy weeknights when I’m juggling deadlines and family obligations, I can throw everything into one pot and let it work its magic. The aroma that fills my kitchen as it cooks is almost as rewarding as the first spoonful.

    Versatile and Adaptable

    One of the greatest things about Creamy Cowboy Soup is its incredible versatility. You can easily adjust the ingredients based on what you have on hand. No potatoes? Sweet potatoes work beautifully. Vegetarian guests? Swap the beef for extra beans and mushrooms for a hearty alternative. The base recipe is forgiving and adaptable to dietary needs without sacrificing flavor. I’ve made this soup during every season, tweaking it with summer corn or winter root vegetables. My husband, who typically reaches for seconds of my Beef and Onion Stir Fry, now requests this creamy soup just as often.

    Essential Tips & Tricks

    Building Layers of Flavor

    The secret to an exceptional Creamy Cowboy Soup lies in building flavor at every step. Start by browning your beef thoroughly—those caramelized bits at the bottom of the pot are pure gold. Don’t rush this step! When sautéing your onions and garlic, let them become translucent and aromatic before adding other ingredients. I like to add a splash of Worcestershire sauce for umami depth and a pinch of smoked paprika for that subtle campfire essence. These small touches make a noticeable difference in the final product. Remember to taste and adjust seasonings as you go—the soup will continue developing flavor as it simmers.

    Achieving the Perfect Creamy Texture

    The creamy element in Creamy Cowboy Soup deserves special attention. For the richest texture, I recommend adding the dairy components during the final 15 minutes of cooking. This prevents curdling while ensuring everything blends harmoniously. You have several options: heavy cream provides luxurious richness, while half-and-half offers a lighter alternative. For a velvety finish without extra dairy, try pureeing a cup of the soup with cooked potatoes and returning it to the pot. This technique adds body and creaminess naturally. If you enjoy the hearty texture of Cheeseburger Soup, you’ll appreciate how this soup balances creaminess with substantial ingredients.

    Serving Ideas & Creative Variations

    Perfect Pairings and Toppings

    Elevate your Creamy Cowboy Soup with thoughtfully chosen toppings and sides. I love setting up a topping bar with shredded cheddar, crispy bacon bits, sliced green onions, and a dollop of sour cream—letting everyone customize their bowl. For bread, nothing beats warm cornbread or crusty sourdough for dipping into that creamy broth. When hosting friends, I often serve smaller portions as a starter before a main course of Easy Ground Beef Enchiladas. The soup’s creamy texture and savory profile complement the zesty enchiladas perfectly, creating a meal that feels cohesive yet exciting.

    Regional and Seasonal Adaptations

    Transform your Creamy Cowboy Soup to reflect different regional flavors or seasonal ingredients. For a Southwestern twist, add fire-roasted green chilies, black beans, and finish with lime and cilantro. In autumn, incorporate diced butternut squash and a pinch of nutmeg for subtle sweetness. During summer months, I love using fresh sweet corn cut straight from the cob and garden-fresh herbs. For a heartier version perfect for winter, add wild rice or barley during the last 30 minutes of cooking. These thoughtful adaptations keep the recipe feeling fresh year-round while maintaining its comforting essence.

    Storage & Troubleshooting Guide

    Proper Storage and Reheating

    Creamy Cowboy Soup actually improves with time as the flavors meld together, making it perfect for meal prep. Store cooled soup in airtight containers in the refrigerator for up to 4 days. When reheating, do so gently over medium-low heat, stirring occasionally to prevent scorching. If the soup has thickened too much during storage, simply thin it with a splash of broth or milk until you reach your desired consistency. For longer storage, freeze portions without the dairy components, then add cream after reheating. I often make a double batch on Sunday afternoons, ensuring we have comforting meals ready during hectic weeknights.

    Fixing Common Issues

    Even experienced cooks encounter challenges with creamy soups. If your Creamy Cowboy Soup is too thin, create a cornstarch slurry (1 tablespoon cornstarch mixed with 2 tablespoons cold water) and stir it into the simmering soup until it reaches your desired thickness. For soup that’s too thick, gradually add warm broth or milk. If the dairy has curdled, don’t panic! Try blending a portion of the soup until smooth and stirring it back in. To rescue overseasoned soup, add a peeled, quartered potato and simmer for 15 minutes—the potato will absorb excess salt. Remove the potato before serving.

    Frequently Asked Questions

    Can I make Creamy Cowboy Soup in a slow cooker?

    Absolutely! Brown the meat and sauté the aromatics first, then transfer everything except dairy to your slow cooker. Cook on low for 6-7 hours, adding the cream during the final 30 minutes for perfect results.

    What’s the best beef cut for Creamy Cowboy Soup?

    Ground beef works wonderfully for quick cooking, but for deeper flavor, try chuck roast cut into bite-sized pieces. The slow cooking will tenderize the meat beautifully.

    Can I make this soup dairy-free?

    Yes! Replace the cream with full-fat coconut milk or cashew cream. The soup will maintain its creamy texture while accommodating dairy restrictions.

    How can I increase the vegetables in this recipe?

    Feel free to add bell peppers, zucchini, or leafy greens like kale. For extra nutrition without changing the classic Creamy Cowboy Soup flavor, stir in finely diced carrots or cauliflower.

    Is this soup freezer-friendly?

    Freeze the soup without dairy components for up to 3 months. After thawing and reheating, stir in fresh cream for the best texture and flavor.

    Final Thoughts

    Creamy Cowboy Soup has become my go-to recipe when I need something hearty, satisfying, and universally appealing. There’s something magical about how simple ingredients transform into something so comforting. Whether you’re feeding a hungry family or looking for leftovers that improve with time, this soup delivers on all fronts. I encourage you to make this recipe your own—add personal touches and create memories around your table. Don’t forget to check out more cozy recipes on our Pinterest page for inspiration to complement your Creamy Cowboy Soup!

  • Cheeseburger Soup Recipe That Will Warm Your Soul Instantly!

    Cheeseburger Soup Recipe That Will Warm Your Soul Instantly!

    Cheeseburger Soup Recipe That Will Warm Your Soul Instantly!

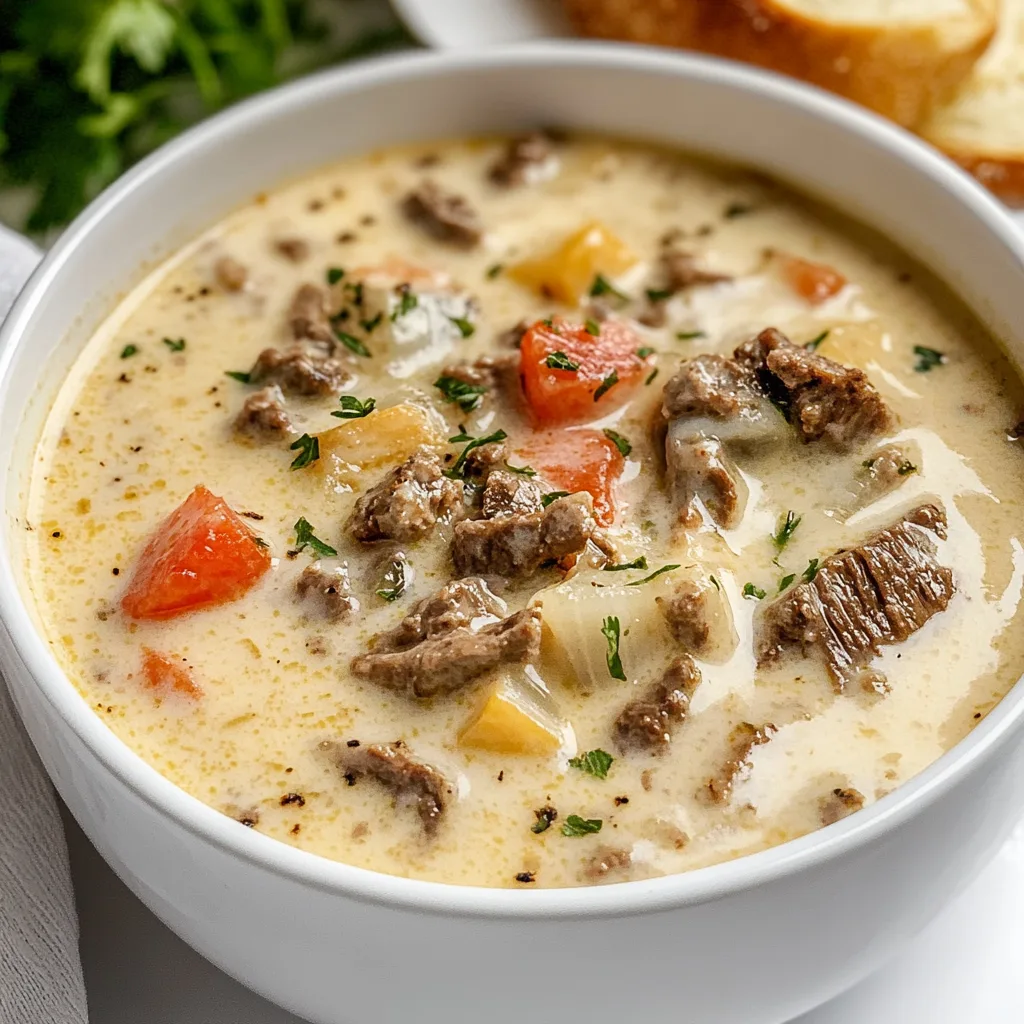
    Cheeseburger soup transforms America’s favorite sandwich into a warm, comforting bowl of deliciousness that’s perfect for chilly evenings. The first time I made this hearty soup, my kitchen filled with the irresistible aroma of sizzling ground beef and melting cheese—instantly transporting me back to family cookouts where Dad flipped burgers on the grill. This creamy, satisfying cheeseburger soup combines all the flavors you love about a perfect burger but in spoonable form that warms you from the inside out.

    Recipe

    Why You’ll Love This Cheeseburger Soup

    Perfect Comfort Food for Any Season

    There’s something magical about how cheeseburger soup bridges the gap between casual and cozy. On rainy spring afternoons or snowy winter evenings, this soup delivers pure comfort in every spoonful. The rich, velvety broth carries all those familiar burger flavors—savory ground beef, melted cheese, and subtle hints of mustard and ketchup—while remaining surprisingly light. I’ve served this at everything from game day gatherings to quiet family dinners, and it never fails to bring smiles and requests for seconds.

    Quick and Budget-Friendly Meal Solution

    When time and money are tight but you still want something satisfying, cheeseburger soup comes to the rescue. Using simple pantry staples and ground beef (which is often more budget-friendly than other cuts), this soup stretches ingredients impressively far. It takes just about 30 minutes from start to finish—perfect for those evenings when you’re juggling homework help, work emails, and dinner prep simultaneously. Plus, it reheats beautifully, making it ideal for meal prep or busy weeknight dinners.

    Essential Tips & Tricks

    Perfecting the Base Flavor

    The secret to exceptional cheeseburger soup lies in building layers of flavor from the very beginning. Always start by properly browning the beef—don’t just cook it until gray, but let it develop those delicious caramelized bits on the bottom of the pot. These flavor-packed morsels become the foundation of your soup. Add diced onions directly to the beef drippings and let them soften before incorporating other ingredients. For an extra flavor boost, consider adding a tablespoon of Worcestershire sauce or a teaspoon of dijon mustard to capture that authentic burger taste.

    Cheese Selection and Incorporation

    The cheese you choose dramatically impacts your cheeseburger soup’s final texture and flavor. For the creamiest result, use freshly grated cheese rather than pre-shredded varieties, which contain anti-caking agents that can make your soup grainy. Sharp cheddar provides the classic burger flavor, but don’t be afraid to mix in some American cheese for that authentic melt or smoked gouda for depth. Most importantly, always add cheese off the heat and stir gently until just melted—boiling can cause separation and a greasy texture that ruins your soup’s velvety consistency.

    Serving Ideas & Creative Variations

    Burger-Inspired Toppings Bar

    Transform your cheeseburger soup experience by setting up a toppings bar that mimics favorite burger add-ons. Small bowls of crispy bacon bits, diced dill pickles, fresh tomatoes, and sliced green onions allow everyone to customize their bowl. For crunch, offer homemade croutons or toasted sesame seed bun pieces. My family goes crazy for a dollop of special sauce (equal parts mayo, ketchup, and relish) swirled on top. This interactive serving approach makes dinner more fun and ensures everyone gets their perfect flavor combination.

    Regional and Dietary Adaptations

    One of the most beautiful things about cheeseburger soup is how easily it adapts to different preferences and dietary needs. For a Southwest twist, add diced green chiles, corn, and top with crushed tortilla chips. Craving something healthier? Substitute ground turkey or plant-based meat alternatives and use cauliflower instead of potatoes for a lower-carb option. For dairy-sensitive guests, nutritional yeast and cashew cream create a surprisingly convincing cheese flavor. I’ve even made a “breakfast burger” version with breakfast sausage, hash browns, and a poached egg on top!

    Storage & Troubleshooting Guide

    Proper Storage and Reheating Methods

    Cheeseburger soup stores beautifully when handled correctly. For refrigeration, cool the soup completely before transferring to airtight containers—this prevents condensation that can water down your leftovers. It will keep for 3-4 days in the refrigerator. When reheating, do so gently over medium-low heat, stirring occasionally to prevent scorching. Add a splash of milk or broth if it’s thickened too much during storage. For freezing, I recommend freezing the base without dairy, then adding fresh cream and cheese when reheating for the best texture.

    Fixing Common Soup Issues

    Even experienced cooks occasionally encounter soup challenges. If your cheeseburger soup seems too thin, try a quick fix by whisking a tablespoon of cornstarch with cold water and stirring it into the simmering soup. Conversely, if it’s too thick, gradually add more broth until you reach your desired consistency. Greasy soup usually indicates that the cheese has separated—fix this by removing from heat, adding a splash of cold cream, and whisking vigorously. For bland soup, don’t just add salt; try a dash of Worcestershire sauce, pickle juice, or a squirt of mustard to enhance those classic burger flavors.

    Frequently Asked Questions

    Can I make cheeseburger soup in a slow cooker?

    Absolutely! Brown the beef and onions first, then transfer to your slow cooker with remaining ingredients except dairy. Cook on low for 4-5 hours, adding cheese and cream during the final 30 minutes.

    How can I make this soup healthier?

    Use lean ground beef or turkey, low-sodium broth, and reduced-fat cheese. Increase vegetables by adding grated zucchini or carrots, and use milk instead of heavy cream.

    What’s the best cheese for authentic cheeseburger soup flavor?

    A combination of sharp cheddar and American cheese creates the perfect balance of flavor and meltability that mimics a classic cheeseburger.

    Can I prepare this soup ahead for a party?

    Yes! Make the base a day ahead, refrigerate, then reheat gently and add the dairy components just before serving for the freshest flavor and texture.

    Why did my cheeseburger soup curdle?

    Boiling after adding dairy can cause curdling. Always add cheese and cream off heat or at a gentle simmer, and never bring the soup back to a full boil.

    Final Thoughts

    Cheeseburger soup has become my go-to recipe when I need something comforting that pleases everyone at the table. There’s a special kind of magic in transforming a hand-held favorite into a spoonable delight that captures all those nostalgic flavors we love. Whether you’re serving it for a casual family dinner or as part of a soup bar at your next gathering, this versatile recipe adapts to your needs while delivering consistent comfort. Don’t forget to share your cheeseburger soup creations with me on Pinterest!

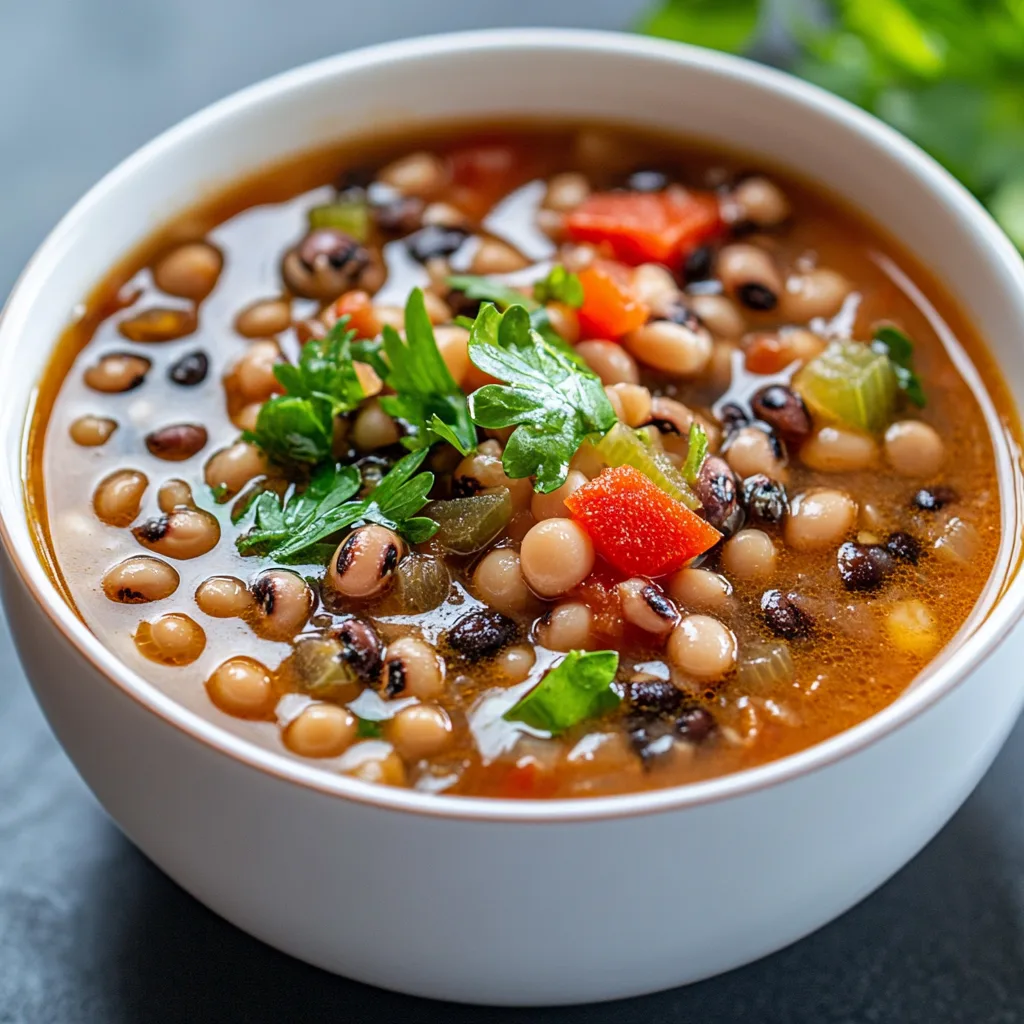
  • Smoky Black Eyed Pea Soup Recipe That Warms Your Soul

    Smoky Black Eyed Pea Soup Recipe That Warms Your Soul

    Smoky Black Eyed Pea Soup Recipe That Warms Your Soul

    Smoky Smoky Black Eyed Pea Soup has become my winter ritual, a pot of pure comfort that fills my kitchen with the most intoxicating aroma. There’s something magical about the way the smokiness wraps around each tender black-eyed pea, creating a bowl that’s both humble and extraordinary. I discovered this recipe during a particularly cold January when I needed something that felt like a warm hug. The depth of flavor from the smoked paprika and optional ham hock transforms these modest legumes into something that tastes like it’s been simmering for generations. This hearty soup is perfect for New Year’s traditions or any day you need soulful nourishment.

    Recipe

    Why You’ll Love This Smoky Smoky Black Eyed Pea Soup

    Rich Depth of Flavor

    The magic of this Smoky Smoky Black Eyed Pea Soup lies in its incredible depth. Each spoonful delivers layers of flavor that unfold gradually—first the earthiness of the peas, then the aromatic vegetables, and finally that distinctive smokiness that lingers pleasantly. I love adding a ham hock or smoked turkey wing for extra richness, but vegetarians can rely on smoked paprika and a dash of liquid smoke for that same captivating quality. The long, slow simmer allows every ingredient to meld together, creating a soup that tastes like it’s been perfected over generations, though it requires minimal hands-on effort from you.

    Nourishing and Satisfying

    This Smoky Smoky Black Eyed Pea Soup isn’t just delicious—it’s genuinely nourishing. Black-eyed peas pack impressive protein and fiber, making this soup incredibly filling and satisfying. On chilly evenings when I need something substantial, this soup delivers comfort without heaviness. The combination of complex carbohydrates and protein creates a balanced meal that sustains energy levels for hours. I love how versatile it is too—hearty enough to stand alone as a main dish but equally perfect alongside cornbread or a simple salad. For busy weeknights or meal prep, this soup is my dependable go-to.

    Essential Tips & Tricks

    Perfect Preparation Methods

    The foundation of exceptional Smoky Smoky Black Eyed Pea Soup begins with properly preparing the peas. While many recipes call for overnight soaking, I’ve found a quick-soak method that works beautifully when time is short: simply boil the peas for 2 minutes, then let them sit covered for an hour. This achieves nearly the same tenderness as overnight soaking. For deeper flavor, sauté your aromatics (onion, celery, garlic) until they’re genuinely caramelized—those browned bits are pure gold for flavor development. Don’t rush this step! The patience pays off in a soup with remarkable depth that will have everyone asking for your secret recipe.

    Flavor-Building Techniques

    The signature element of Smoky Smoky Black Eyed Pea Soup is, of course, the smokiness. I layer this quality using multiple ingredients: smoked paprika, bay leaves, and either a ham hock, smoked turkey wing, or bacon. For vegetarians, a combination of smoked paprika and a few drops of liquid smoke creates remarkable depth. Another game-changer is adding a Parmesan rind to the simmering soup—it slowly melts, infusing everything with umami richness. A splash of apple cider vinegar right at the end brightens all the flavors without tasting vinegary. These little touches transform a simple soup into something that tastes like it came from a heritage recipe.

    Serving Ideas & Creative Variations

    Perfect Pairings

    Smoky Smoky Black Eyed Pea Soup shines brightest with thoughtful accompaniments. My absolute favorite pairing is a wedge of warm golden cornbread with honey butter—the sweet-savory contrast is simply magical. For a complete meal, I’ll often serve it with a tangy vinegar-based coleslaw that cuts through the richness. A simple green salad with a bright citrus dressing works beautifully too. For entertaining, I set up a toppings bar with fresh herbs, diced avocado, crispy bacon bits, and hot sauce. Each guest can customize their bowl, making it an interactive experience. Don’t forget crusty sourdough for dipping—there’s something deeply satisfying about sopping up those last flavorful spoonfuls.

    Exciting Variations

    The beauty of Smoky Smoky Black Eyed Pea Soup lies in its adaptability. My Southwestern variation adds roasted poblanos, corn, and a finish of lime juice and cilantro—it’s spectacular topped with crispy tortilla strips. For a Mediterranean twist, I incorporate kale, rosemary, and finish with a swirl of good olive oil and crumbled feta. Adding collard greens creates a traditional Southern one-pot meal that’s both practical and delicious. For heartier appetites, stir in smoked sausage like kielbasa or andouille during the last 15 minutes of cooking. Each variation maintains the soul of the original while offering a fresh experience.

    Storage & Troubleshooting Guide

    Proper Storage Methods

    Smoky Smoky Black Eyed Pea Soup actually improves with time, making it perfect for meal prepping. Once completely cooled, store it in airtight containers in the refrigerator for up to 5 days. The flavors will continue to develop, creating an even more delicious soup on day two or three. For longer storage, freeze portions in freezer-safe containers or heavy-duty freezer bags for up to 3 months. I like to freeze in individual portions for quick lunches. When reheating, add a splash of broth or water as the soup thickens considerably after refrigeration. Gentle reheating on the stovetop preserves the texture of the peas better than microwaving.

    Common Issues & Solutions

    If your Smoky Smoky Black Eyed Pea Soup seems too watery, there’s a simple fix: remove about a cup of soup, blend it until smooth, then stir it back in. This natural thickening technique maintains the integrity of the dish without adding flour or cornstarch. For peas that remain firm despite long cooking, it usually means they’re older—adding ¼ teaspoon of baking soda to the cooking liquid helps soften stubborn peas. If the smokiness is too subtle, try adding a dash of smoked paprika at the end of cooking rather than just at the beginning. For a soup that lacks depth, a splash of soy sauce or Worcestershire sauce adds umami without changing the flavor profile.

    Frequently Asked Questions

    Do I need to soak the black-eyed peas before making Smoky Smoky Black Eyed Pea Soup?

    While soaking isn’t absolutely necessary, it reduces cooking time by about 30 minutes and helps the peas cook more evenly. If you forget, just extend the simmering time and add a bit more liquid as needed.

    Can I make this soup vegetarian?

    Absolutely! Skip the ham hock and use vegetable broth instead of chicken broth. The smokiness comes primarily from smoked paprika, so you’ll still get that signature flavor without meat.

    How can I make this soup thicker?

    For a thicker consistency, mash some of the peas against the side of the pot during cooking or blend about a cup of the soup and stir it back in. You can also simmer uncovered for the last 15-20 minutes.

    What’s the best way to reheat leftovers?

    Gently reheat on the stovetop over medium-low heat, adding a splash of broth if it’s too thick. Microwave works too, but stir halfway through to ensure even heating.

    Can I make this soup in a slow cooker?

    Yes! Cook on low for 7-8 hours or high for 4-5 hours. Add any greens during the last 30 minutes of cooking time to preserve their color and texture.

    Final Thoughts

    This Smoky Smoky Black Eyed Pea Soup has become more than just a recipe in my kitchen—it’s a tradition, a comfort, and a reminder of how simple ingredients can transform into something extraordinary. There’s something deeply satisfying about watching humble peas and aromatics slowly become a rich, complex soup that nourishes body and soul. Whether you’re serving it for good luck on New Year’s Day or just craving something warming on a cold evening, this soup delivers on all fronts. I hope it brings as much joy to your table as it has to mine. Don’t forget to check out more cozy recipes on Pinterest for year-round comfort food inspiration.

  • Italian Penicillin Soup Recipe That Warms Your Soul Instantly

    Italian Penicillin Soup Recipe That Warms Your Soul Instantly

    Italian Penicillin Soup Recipe That Warms Your Soul Instantly

    Italian Penicillin Soup is the ultimate comfort remedy that warms you from the inside out. I discovered this magical elixir during a particularly brutal winter when my whole family was battling sniffles. One steaming pot later, we were all fighting over seconds! This isn’t just soup—it’s a hug in a bowl, combining the healing powers of Italian herbs, garlic, and nourishing broth. The perfect balance of savory and soothing, this recipe has become my go-to when anyone’s feeling under the weather or simply needs some comfort food.

    Recipe

    Why You’ll Love This Italian Penicillin Soup

    A Healing Powerhouse

    The magic of Italian Penicillin Soup lies in its immune-boosting ingredients. Fresh garlic releases allicin when crushed, a compound with powerful antimicrobial properties. Combined with vitamin-rich vegetables and herbs like rosemary and thyme, each spoonful delivers a medicinal punch that feels therapeutic. I’ve watched this soup work wonders during cold season—the steam alone helps clear congested sinuses! The rich broth coats your throat with soothing warmth while the gentle heat from red pepper flakes stimulates circulation and helps you sweat out toxins.

    Quick and Adaptable

    What I adore about this soup is how incredibly versatile it is with whatever you have on hand. No chicken? Use white beans for protein. Out of spinach? Kale works beautifully. The foundational flavor comes from the Italian herb blend and garlic-infused olive oil, which transforms even the simplest ingredients into something special. It comes together in just 30 minutes on busy weeknights, yet tastes like it’s been simmering all day. I’ve made this with frozen vegetables during pantry-cleanout days and still received compliments from my pickiest eaters!

    Essential Tips & Tricks

    Building Layers of Flavor

    The secret to exceptional Italian Penicillin Soup starts with properly sautéing your aromatics. I always let my onions, carrots, and celery sweat for a full 5-7 minutes until they’re translucent and just beginning to caramelize. This creates a sweet foundation that balances the savory elements. Another game-changer? Adding a parmesan rind to the simmering broth—it infuses everything with an umami depth that’s impossible to replicate. For maximum flavor extraction, crush your garlic and let it rest for 10 minutes before adding it to the hot oil, allowing the medicinal compounds to fully develop.

    Achieving the Perfect Texture

    The ideal soup consistency requires attention to detail. For a heartier version like my hearty beef and vegetable soup, I dice vegetables uniformly—about 1/4 inch—so they cook evenly and fit perfectly on a spoon. When adding pasta, remember it continues absorbing broth even after cooking, so I either undercook it slightly or store it separately from leftover soup. For a silkier texture, try pureeing a cup of the cooked vegetables and broth, then stirring it back in. This creates a thicker base without adding cream or flour, maintaining that clean, restorative quality.

    Serving Ideas & Creative Variations

    Perfect Pairings

    Nothing complements a steaming bowl of Italian Penicillin Soup quite like crusty garlic bread for dipping into that flavorful broth. I love serving this alongside a simple arugula salad with lemon vinaigrette—the bright acidity balances the rich, savory soup perfectly. For special occasions, I’ll make parmesan baked parsnips as an elegant side that echoes the Italian flavors. Consider setting up a toppings bar with fresh herbs, grated parmesan, chili flakes, and lemon wedges so everyone can customize their bowl. A drizzle of good olive oil just before serving adds a luxurious finish.

    Regional Inspirations

    Transform your basic soup into regional Italian variations with just a few tweaks. For a Tuscan twist, add cannellini beans, kale, and a splash of cream. Sicilian-style calls for adding fennel, orange zest, and a pinch of saffron for an unexpected brightness. My personal favorite is the Calabrian variation—I add spicy ‘nduja or Calabrian chili paste for serious heat that really clears the sinuses! For a heartier meal, try adding mini chicken meatballs seasoned with parmesan and herbs. You can even make it seafood-forward with the addition of small shrimp and a touch of white wine.

    Storage & Troubleshooting Guide

    Maximizing Leftovers

    This Italian Penicillin Soup actually improves with time as the flavors meld together. Store it in airtight containers in the refrigerator for up to 4 days, or freeze portions for up to 3 months. One trick I’ve learned: freeze individual portions in silicone muffin cups, then transfer the frozen soup “pucks” to freezer bags—perfect for single servings! If you’re planning leftovers, keep pasta separate and add it fresh when reheating to prevent it from becoming mushy. For the freshest taste when reheating, add a squeeze of lemon juice and a sprinkle of fresh herbs to brighten up the flavors.

    Fixing Common Issues

    If your soup tastes bland, don’t just reach for salt—try brightening with a splash of acid first. Lemon juice, a dash of vinegar, or even a spoonful of tomato paste can wake up the flavors. Too thin? Simmer uncovered for 10-15 minutes to reduce, or blend a portion as mentioned earlier. If it’s too thick, simply add more quality broth (homemade is best, but a good store-bought one works too). Accidentally over-salted? Add a raw, peeled potato chunk to absorb excess salt as the soup simmers, then remove before serving. Or dilute with unsalted broth and adjust seasonings.

    Frequently Asked Questions

    What makes Italian Penicillin Soup different from regular chicken soup?

    Italian Penicillin Soup includes distinctive Italian herbs (rosemary, thyme, basil), garlic, olive oil, and often parmesan cheese. These ingredients create a more aromatic, robust flavor profile compared to traditional chicken soup, with enhanced medicinal properties.

    Can I make this soup vegetarian?

    Absolutely! Substitute vegetable broth for chicken broth and add protein with white beans, chickpeas, or even cubed firm tofu. The Italian herbs and garlic still provide all the healing benefits.

    How can I make this soup more filling?

    Add more protein with shredded chicken or turkey, beans, or mini meatballs. For heartier carbs, increase pasta amounts or add diced potatoes, farro, or barley.

    What’s the best pasta shape to use?

    Small shapes like ditalini, orzo, or stelline (little stars) work best as they’re spoon-friendly and cook quickly. Avoid large shapes that make the soup awkward to eat.

    How do I know when my Italian Penicillin Soup is done cooking?

    Your soup is ready when vegetables are tender but not mushy (about 20-25 minutes of simmering), pasta is al dente, and the broth tastes rich and flavorful with all herbs fully infused.

    Final Thoughts

    Italian Penicillin Soup has earned its place as my family’s ultimate comfort remedy, whether we’re fighting off winter colds or simply craving something nourishing. The beauty of this soup lies in its simplicity and the way it brings people together around the table. I’ve shared this recipe with countless friends who now make their own versions, each adding their personal touch. Don’t forget to check out more soup inspirations on our Pinterest board for endless variations. This Italian Penicillin Soup isn’t just food—it’s care in a bowl.

  • Coconut Curry Soup with Dumplings: Irresistibly Creamy & Comforting!

    Coconut Curry Soup with Dumplings: Irresistibly Creamy & Comforting!

    Coconut Curry Soup with Dumplings: Irresistibly Creamy & Comforting!

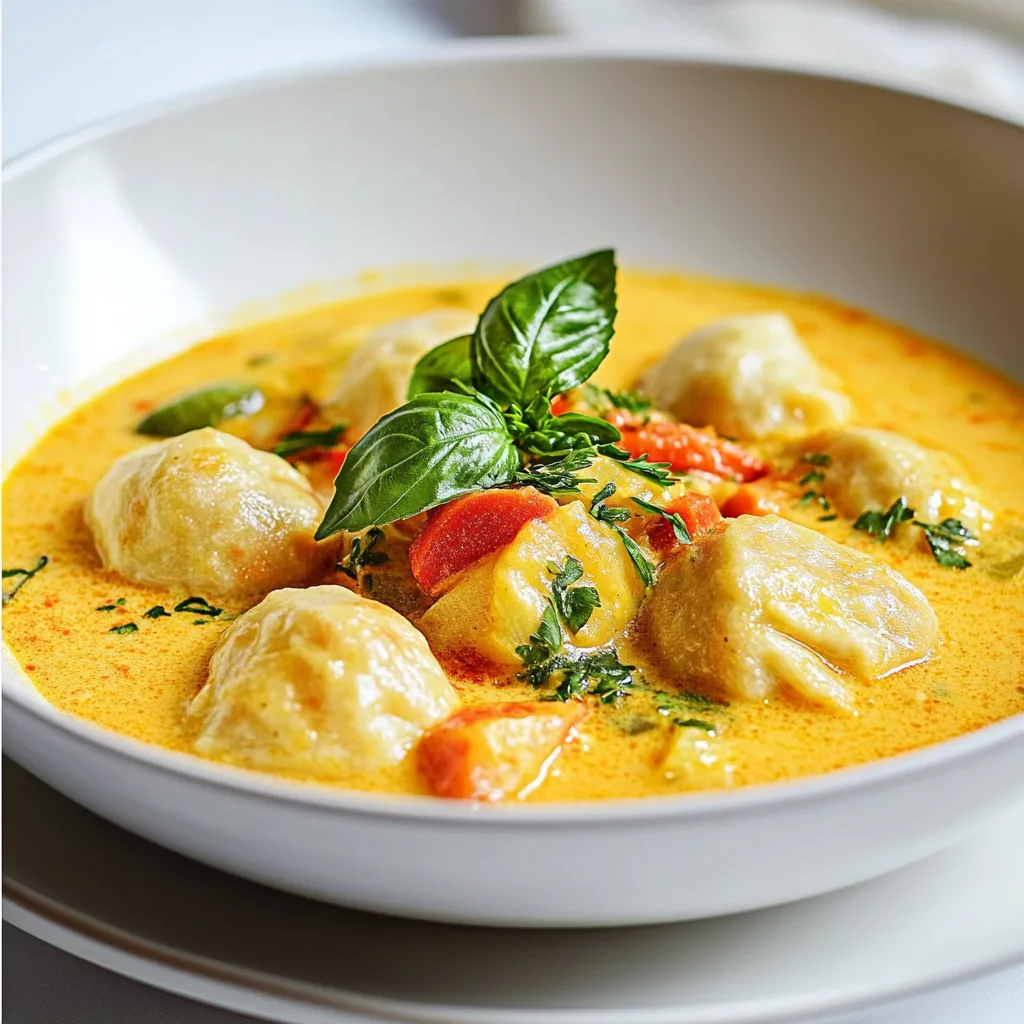
    Coconut Curry Soup with Dumplings is my ultimate comfort food remedy for chilly evenings when nothing else seems to warm the soul. The first time I made this soup, my kitchen filled with the intoxicating aroma of ginger, lemongrass, and coconut milk that literally stopped my husband in his tracks as he walked through the door. There’s something magical about the way the pillowy dumplings soak up the rich, spiced broth while adding their own delicate texture. This recipe strikes that perfect balance between creamy indulgence and bright flavors that keeps me coming back season after season.

    Recipe

    Why You’ll Love This Coconut Curry Soup with Dumplings

    A Symphony of Flavors and Textures

    This soup delivers an incredible depth of flavor that builds with each spoonful. The coconut milk creates a velvety base that carries the warming spices throughout, while the curry paste adds that perfect hint of heat without overwhelming your palate. What makes this dish truly special is the contrast between the silky broth and the tender dumplings that practically melt in your mouth. I love watching guests take their first bite—there’s always that moment of surprise when they discover how the aromatic broth transforms a simple dumpling into something extraordinary.

    Quick Comfort That Feels Gourmet

    Despite its impressive flavor profile, this Coconut Curry Soup with Dumplings comes together in under an hour, making it perfect for weeknights when you need something soul-satisfying without hours in the kitchen. The dumplings require just a few pantry staples and practically cook themselves as they float in the simmering broth. I’ve served this at impromptu dinner gatherings and received more compliments than dishes that took three times the effort. The visual appeal alone—with the golden curry broth, bright vegetables, and plump dumplings—makes it look like you’ve been cooking all day.

    Essential Tips & Tricks

    Perfecting Your Curry Base

    The foundation of any great Coconut Curry Soup with Dumplings is a well-developed base. Start by thoroughly sautéing your aromatics—ginger, garlic, and onions—until they’re fragrant and just beginning to caramelize. This initial step builds incredible depth that store-bought curry paste alone can’t achieve. When adding coconut milk, I always opt for full-fat varieties for that luxurious mouthfeel, though light coconut milk works in a pinch. For an extra layer of flavor, try adding a splash of fish sauce or a squeeze of lime juice to brighten the entire pot. These small touches elevate the soup from good to absolutely unforgettable.

    Dumpling Success Secrets

    The key to perfect dumplings is handling the dough with a gentle touch. Over-mixing is the enemy here—stop stirring as soon as the ingredients come together to ensure they remain tender rather than dense. I like to use a cookie scoop for uniform size, which ensures they’ll cook evenly. When adding dumplings to your simmering soup, resist the urge to stir immediately; let them set for about a minute before gently nudging them to prevent sticking. For extra flavor, consider folding herbs like cilantro or chives into your dumpling mixture, which adds beautiful flecks of color and unexpected bursts of freshness.

    Serving Ideas & Creative Variations

    Garnishes That Transform

    The right garnishes can take your Coconut Curry Soup with Dumplings from delicious to memorable. I always keep a selection of fresh herbs ready—cilantro, Thai basil, and mint are my favorites—along with thinly sliced chilies for heat-lovers. A squeeze of lime just before serving wakes up all the flavors and cuts through the richness. For texture contrast, try crispy fried shallots or toasted coconut flakes sprinkled on top. My family goes crazy for a swirl of chili oil that creates beautiful red patterns in the golden broth. These finishing touches not only enhance flavor but create that Instagram-worthy bowl that makes everyone reach for their phones.

    Protein & Vegetable Mix-Ins

    One of the things I adore about this soup is its versatility. While the classic version features chicken, I’ve made incredible variations with plump shrimp that cook in minutes, or firm tofu that absorbs all those magnificent curry flavors. For vegetables, don’t feel limited to the basics—try adding butternut squash for sweetness, snow peas for crunch, or baby spinach that wilts beautifully in the hot broth. My personal favorite variation includes chunks of sweet potato and a handful of edamame for protein. The soup adapts to whatever is in your refrigerator, making it perfect for using up odds and ends.

    Storage & Troubleshooting Guide

    Proper Storage Techniques

    This Coconut Curry Soup with Dumplings actually improves overnight as the flavors meld together in the refrigerator. Store it in an airtight container for up to three days, keeping in mind that the dumplings will continue to absorb liquid and become softer. When reheating, add a splash of broth or water to thin the soup if it’s thickened too much. For freezing, I recommend storing the broth separately from the dumplings—freeze the broth in containers with room for expansion, and freeze dumplings on a parchment-lined tray before transferring to freezer bags. This method preserves the texture of both components for up to two months.

    Troubleshooting Common Issues

    If your soup lacks flavor depth, try adding more curry paste, a splash of fish sauce, or a squeeze of lime to brighten it up. For a too-thin broth, simmer uncovered for 10-15 minutes to reduce and concentrate flavors. Conversely, if your soup is too thick, add coconut milk or broth to reach your desired consistency. Dumplings falling apart? Your soup might be boiling too vigorously—maintain a gentle simmer instead. For dumplings that are too dense, remember that less mixing equals lighter results. And if your coconut milk has separated, don’t panic! Simply whisk vigorously while heating, or blend a portion of the soup and return it to the pot.

    Frequently Asked Questions

    Can I make Coconut Curry Soup with Dumplings ahead of time?

    Yes! Make the broth up to 2 days ahead and store refrigerated. Prepare and add the dumplings just before serving for the best texture. The flavors actually improve with time.

    What’s the best curry paste to use?

    Red or yellow curry pastes work beautifully. Red offers more heat while yellow provides a milder, aromatic profile. Adjust quantity based on your spice preference.

    Can I make this soup vegetarian?

    Absolutely! Use vegetable broth instead of chicken and add extra vegetables or tofu. Ensure your curry paste is vegetarian as some contain shrimp paste.

    How do I know when the dumplings are cooked?

    They’ll float to the surface after about 8-10 minutes and will be firm but tender when cut with a spoon. They should be cooked through with no raw flour taste.

    What if my Coconut Curry Soup with Dumplings is too spicy?

    Add more coconut milk to temper the heat. A dollop of plain yogurt on top also helps cool things down while adding a pleasant tanginess.

    Final Thoughts

    This Coconut Curry Soup with Dumplings has become my go-to recipe when I need something that feels like a warm hug in bowl form. The beauty lies in its adaptability—whether you’re cooking for a crowd or just yourself, craving something spicy or mild, or working with whatever ingredients you have on hand. I find myself returning to this recipe in all seasons, though it’s especially comforting during colder months when its warming spices and hearty dumplings satisfy on the deepest level. I hope it becomes a beloved staple in your kitchen too!

    Check out more soup inspiration on Pinterest

  • Creamy Philly Cheesesteak Soup That Will Blow Your Mind!

    Creamy Philly Cheesesteak Soup That Will Blow Your Mind!

    Creamy Philly Cheesesteak Soup That Will Blow Your Mind!

    Creamy Philly Cheesesteak Soup transforms everyone’s favorite sandwich into a bowl of pure comfort. On chilly evenings when nothing but warmth will do, this rich, indulgent soup delivers all the familiar flavors of a classic Philly cheesesteak in each velvety spoonful. I discovered this recipe during a particularly brutal winter in Chicago, and it’s been my go-to comfort meal ever since. The tender beef, caramelized onions, and melty provolone create a symphony of flavors that will transport you straight to the streets of Philadelphia—without leaving your kitchen. If you love hearty soups like my Creamy Chicken and Gnocchi Soup, this one’s about to become your new favorite.

    Recipe

    Why You’ll Love This Creamy Philly Cheesesteak Soup

    Perfect Comfort Food for Any Season

    There’s something magical about transforming a beloved sandwich into soup form. This Creamy Philly Cheesesteak Soup captures all those classic flavors—tender shaved beef, sweet caramelized onions, and green peppers—suspended in a velvety cheese-infused broth that warms you from the inside out. I love serving this on Sunday afternoons while watching football, and my family practically races to the table. The best part? It comes together in one pot, meaning less cleanup and more time to enjoy those incredible flavors that develop as it simmers away on your stovetop.

    Restaurant-Quality Results at Home

    You know those restaurant soups that seem impossible to recreate? This isn’t one of them. With simple ingredients and straightforward techniques, you’ll achieve restaurant-worthy results that will impress even the most devoted cheesesteak purists. The secret lies in taking your time with the onions and peppers, letting them caramelize slowly until they develop that signature sweetness. Then, when you add the perfectly seasoned beef and that creamy, cheese-laden broth, magic happens. I’ve had friends ask if I ordered takeout when serving this soup—it’s that good.

    Essential Tips & Tricks

    Choosing and Preparing the Beef

    The right cut of beef makes all the difference in this soup. Ribeye is traditional for Philly cheesesteaks, but top sirloin or flank steak work beautifully too—and won’t break the bank. For that authentic texture, freeze the meat for about 20 minutes before slicing it as thinly as possible against the grain. This technique creates those signature tender strips that melt in your mouth. When cooking, remember to sear the beef in batches rather than overcrowding the pot. This ensures proper browning instead of steaming, which locks in that rich beefy flavor that forms the foundation of this incredible soup.

    Creating the Perfect Creamy Base

    The velvety texture of this Creamy Philly Cheesesteak Soup comes from a carefully crafted base that balances richness with flavor. Start with a roux made from butter and flour, cooking it just until it smells nutty but hasn’t browned. This creates the perfect foundation for the broth. When adding cheese, always remove the pot from heat first and stir in the cheese gradually to prevent clumping or greasiness. For an extra layer of flavor, try my Creamy Tuscan Tortellini Soup technique of adding a splash of Worcestershire sauce—it adds that umami depth that takes this soup from good to unforgettable.

    Serving Ideas & Creative Variations

    Garnishes That Elevate Your Bowl

    The perfect bowl of Creamy Philly Cheesesteak Soup deserves thoughtful garnishes that complement its rich flavors. I love topping each serving with extra provolone or a sprinkle of white cheddar that melts into the hot soup. Crispy homemade croutons made from buttered hoagie rolls bring that authentic sandwich experience, while thinly sliced green onions add a fresh pop of color and flavor. For a bit of heat, offer small dishes of pickled jalapeños on the side. When hosting friends, I create a little garnish station so everyone can customize their bowl—it’s always a hit and makes the meal feel special even on ordinary weeknights.

    Making It Your Own

    This soup is wonderfully adaptable to different tastes and dietary needs. For a lighter version, substitute half-and-half for heavy cream and use reduced-fat cheese. Mushroom lovers can add sliced baby bellas or creminis when sautéing the peppers and onions—they add incredible umami depth. For a twist that’s reminiscent of my Hearty Beef and Vegetable Soup, try adding diced potatoes or sweet potatoes for extra heartiness. Vegetarians can even enjoy this by swapping the beef for portobello mushrooms and using vegetable broth—the creamy, cheesy flavor still shines through beautifully.

    Storage & Troubleshooting Guide

    Proper Storage for Leftovers

    Creamy soups require special attention when it comes to storage and reheating. Allow your Creamy Philly Cheesesteak Soup to cool completely before transferring to airtight containers. It will keep in the refrigerator for up to 3 days, though the texture is best within the first 48 hours. When freezing, be aware that dairy-based soups can sometimes separate upon thawing—the solution is to freeze the base without the cream and cheese, then add those fresh when reheating. Always reheat gently over low heat, stirring frequently to prevent scorching, and you may need to add a splash of broth to restore the original consistency.

    Fixing Common Issues

    Even experienced cooks occasionally encounter texture problems with creamy soups. If your soup breaks or looks curdled, don’t panic! Try whisking in a tablespoon of cornstarch mixed with cold water, then heating gently while stirring constantly. For soup that’s too thick, gradually add warm beef broth until you reach your desired consistency. Too thin? Simmer uncovered for a few minutes to reduce, or create a small amount of roux in a separate pan and whisk it in. If the cheese clumps rather than melting smoothly, try adding it off-heat next time and using a pre-shredded cheese that contains anti-caking agents.

    Frequently Asked Questions

    Can I make Creamy Philly Cheesesteak Soup ahead of time?

    Yes! Make it up to 2 days ahead, but stop before adding the cream and cheese. Refrigerate the base, then reheat gently and add dairy components just before serving for the best texture and flavor.

    What’s the best cheese to use for authentic Creamy Philly Cheesesteak Soup?

    Provolone is traditional and melts beautifully, but American cheese or white cheddar work well too. For extra richness, try a combination of provolone and cream cheese for that silky-smooth texture.

    Can I use leftover steak for this recipe?

    Absolutely! Slice it thinly and add it near the end of cooking just to heat through. This prevents overcooking and keeps the meat tender while still infusing it with all those wonderful flavors.

    Is there a way to make this soup in a slow cooker?

    Yes, but with modifications. Brown the meat and vegetables first, then transfer to a slow cooker with the broth. Cook on low for 4-5 hours, adding the dairy components during the final 30 minutes.

    How can I make this soup gluten-free?

    Simply substitute the all-purpose flour with a gluten-free 1:1 baking blend for the roux. Also ensure your beef broth is certified gluten-free, as some commercial brands contain wheat-based additives.

    Final Thoughts

    This Creamy Philly Cheesesteak Soup has become my ultimate crowd-pleaser—the dish friends request when they visit and the comfort food my family craves on chilly evenings. There’s something deeply satisfying about transforming a beloved sandwich into a luxurious soup that captures all those familiar flavors in each spoonful. Whether you’re serving it for game day, a cozy family dinner, or meal prepping for the week ahead, this soup delivers that perfect balance of comfort and indulgence. I’d love to see your versions—tag me on Pinterest when you make it!

  • Creamy Chicken and Gnocchi Soup That Warms Your Soul Instantly

    Creamy Chicken and Gnocchi Soup That Warms Your Soul Instantly

    Creamy Chicken and Gnocchi Soup That Warms Your Soul Instantly

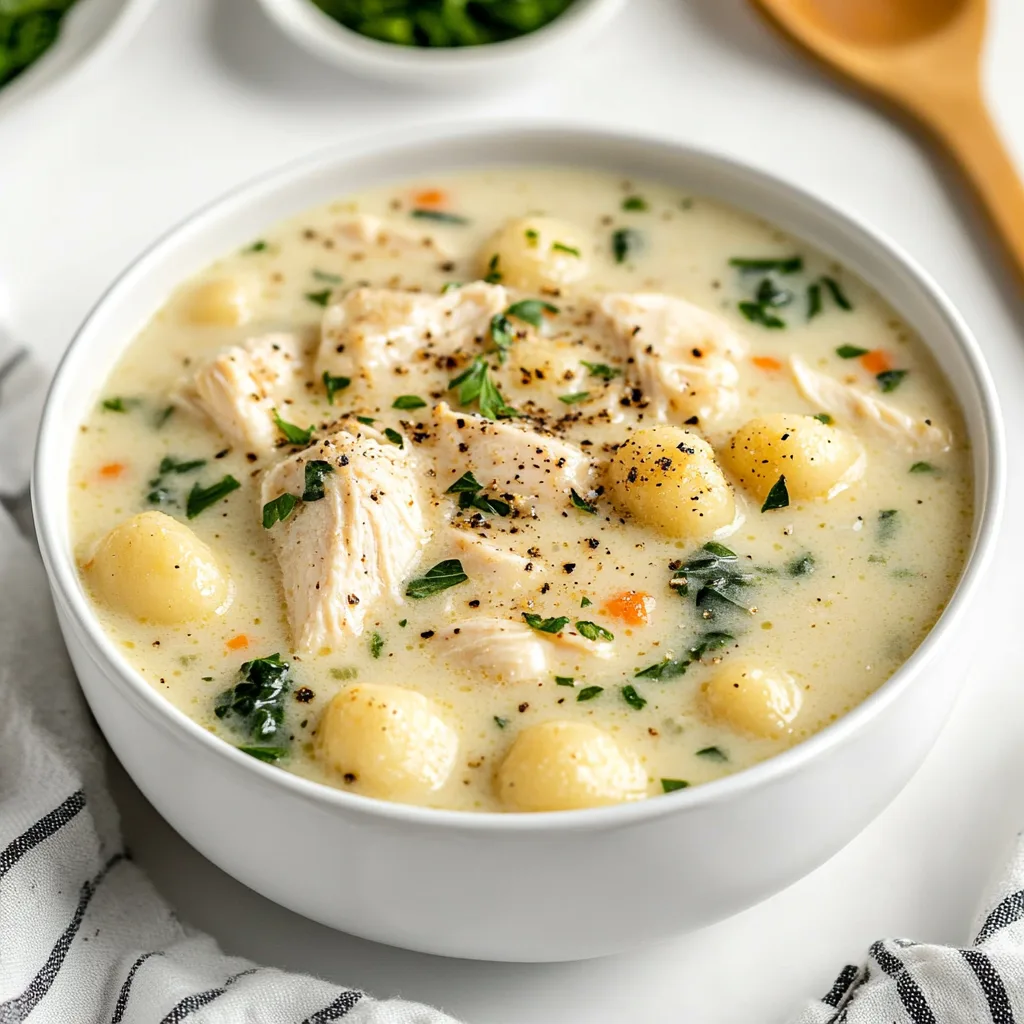
    Creamy Chicken and Gnocchi Soup is the ultimate comfort in a bowl—a velvety blend of tender chicken, pillowy gnocchi, and fresh vegetables that warms you from the inside out. On chilly evenings when the wind howls outside my kitchen window, I find myself reaching for this recipe time and again. The rich, herb-infused broth cradles each bite with a gentle hug of flavor that reminds me of my grandmother’s kitchen. If you’re searching for that perfect balance of hearty and creamy, this soup delivers in every spoonful. It’s like chicken noodle soup‘s sophisticated cousin that somehow feels both luxurious and comforting at once.

    Recipe

    Why You’ll Love This Creamy Chicken and Gnocchi Soup

    Restaurant-Quality Flavor at Home

    This soup captures that beloved Olive Garden magic but in your own kitchen and at a fraction of the cost. The velvety broth creates the perfect backdrop for tender chicken and pillow-soft gnocchi to shine. I still remember the first time I made this—my husband took one taste and declared it better than any restaurant version! The secret lies in building layers of flavor gradually, allowing the aromatics to release their essence before adding the cream. Each spoonful delivers a harmonious blend of herbs, savory chicken, and that signature richness that makes you close your eyes with each bite.

    Simple Ingredients, Extraordinary Results

    Don’t let the luxurious taste fool you—this soup relies on accessible ingredients you likely already have. Rotisserie chicken saves precious time without sacrificing flavor, while store-bought gnocchi eliminates any dough-making stress. The first time I made this was during a snowstorm when I couldn’t get to the store, and I was amazed at how I created something so special from my pantry basics. Fresh carrots, celery, and spinach add vibrant color and nutrition, while Italian seasoning and garlic infuse everything with aromatic depth. The beauty lies in how these simple elements transform into something greater than their parts.

    Essential Tips & Tricks

    Perfecting the Base

    Creating a flavorful foundation is crucial for this soup’s success. Begin by sautéing onions, carrots, and celery until they’re just tender but still have some bite—about 5-7 minutes. This creates a sweet, aromatic base that elevates everything else. I learned this technique from my Italian neighbor who insists that rushing this step is a culinary sin! Add garlic only in the final minute to prevent bitterness. When adding flour, cook it for at least 2 minutes to eliminate any raw taste before slowly incorporating the broth. This patience pays off with a silky-smooth texture and deeper flavor that makes the soup truly crave-worthy.

    Gnocchi Wisdom

    The pillowy gnocchi are the stars of this soup, so treat them with care. I prefer shelf-stable gnocchi for this recipe as they hold their shape better in the simmering broth. Add them just 5 minutes before serving to prevent them from becoming gummy or falling apart. My first attempt taught me this lesson the hard way when I added them too early and ended up with gnocchi mush! If you’re making this soup ahead of time, consider cooking and storing the gnocchi separately, then adding them to individual bowls when reheating. This simple step ensures perfect texture every time.

    Serving Ideas & Creative Variations

    Perfect Pairings

    Elevate your soup experience with thoughtful accompaniments that complement its creamy richness. A crusty baguette or garlic bread provides the perfect vehicle for sopping up every last drop of that velvety broth. For a lighter touch, try a simple side salad with a bright vinaigrette to cut through the richness. My family’s favorite pairing is actually homemade breadsticks dusted with parmesan and herbs. I love setting the table with small bowls of extra toppings like crispy bacon bits, fresh herbs, or grated parmesan, allowing everyone to customize their bowl to perfection.

    Delicious Twists

    Don’t be afraid to make this recipe your own with creative variations that keep it exciting. Swap the chicken for leftover turkey after holidays, or try Italian sausage for a spicier profile. For a seafood version, replace chicken with shrimp added in the final minutes of cooking. Vegetable options are endless—try adding mushrooms for earthiness, bell peppers for sweetness, or zucchini for summer freshness. My neighbor adds a splash of white wine before the broth for an elegant twist. For dairy-free guests, coconut cream creates a surprisingly delicious alternative that maintains that luxurious mouthfeel everyone loves.

    Storage & Troubleshooting Guide

    Make-Ahead & Freezing Tips

    This soup is perfect for meal prepping, actually improving in flavor overnight as the ingredients meld together. Store in airtight containers in the refrigerator for up to 4 days. When freezing, I recommend omitting the cream and gnocchi, adding them fresh during reheating for best results. The first time I froze the complete soup, the texture changed dramatically—lesson learned! Portion into individual containers for quick lunches, and when reheating, do so gently on the stovetop rather than microwaving to preserve the creamy texture. Add a splash of fresh cream when serving to revive that silky richness.

    Fixing Common Issues

    Even experienced cooks encounter soup challenges occasionally. If your soup is too thin, create a slurry with 1 tablespoon cornstarch and 2 tablespoons cold water, then whisk into the simmering soup until it reaches your desired thickness. For soup that’s too thick, gradually add more broth until you achieve the perfect consistency. If the cream appears to separate (which happened during my first attempt), lower the heat immediately and whisk vigorously—never boil cream-based soups. For bland flavor, brighten with a squeeze of lemon juice and adjust seasoning with additional herbs, salt, and pepper.

    Frequently Asked Questions

    Can I make Creamy Chicken and Gnocchi Soup in a slow cooker?

    Absolutely! Cook vegetables, chicken, and broth on low for 5-6 hours. Add the gnocchi during the final 30 minutes and stir in cream just before serving for perfect texture.

    What can I substitute for heavy cream?

    Half-and-half or evaporated milk work well for a lighter version. For dairy-free options, full-fat coconut milk or cashew cream provide similar richness without compromising flavor.

    Can I use frozen gnocchi instead of shelf-stable?

    Yes! No need to thaw—add frozen gnocchi directly to the simmering soup but allow 1-2 extra minutes of cooking time until they float to the surface.

    How do I prevent the gnocchi from becoming mushy?

    Add gnocchi just 5 minutes before serving. If making ahead, store gnocchi separately from the soup and combine only when reheating individual portions.

    What herbs work best in this soup?

    Italian seasoning provides excellent flavor, but fresh thyme, rosemary, and bay leaves create wonderful depth. Remove woody stems before serving for the best experience.

    Final Thoughts

    This Creamy Chicken and Gnocchi Soup has become my reliable comfort food champion—equally perfect for casual family dinners and impressive enough for guests. The way the cream wraps around each pillowy gnocchi dumpling creates a moment of pure culinary joy that’s hard to beat. I hope this recipe brings the same warmth and satisfaction to your table that it has to mine. Remember that cooking is about making something that speaks to your soul, so adjust the seasonings and ingredients to make this soup uniquely yours. For more cozy recipes, visit our Pinterest board where comfort food reigns supreme!

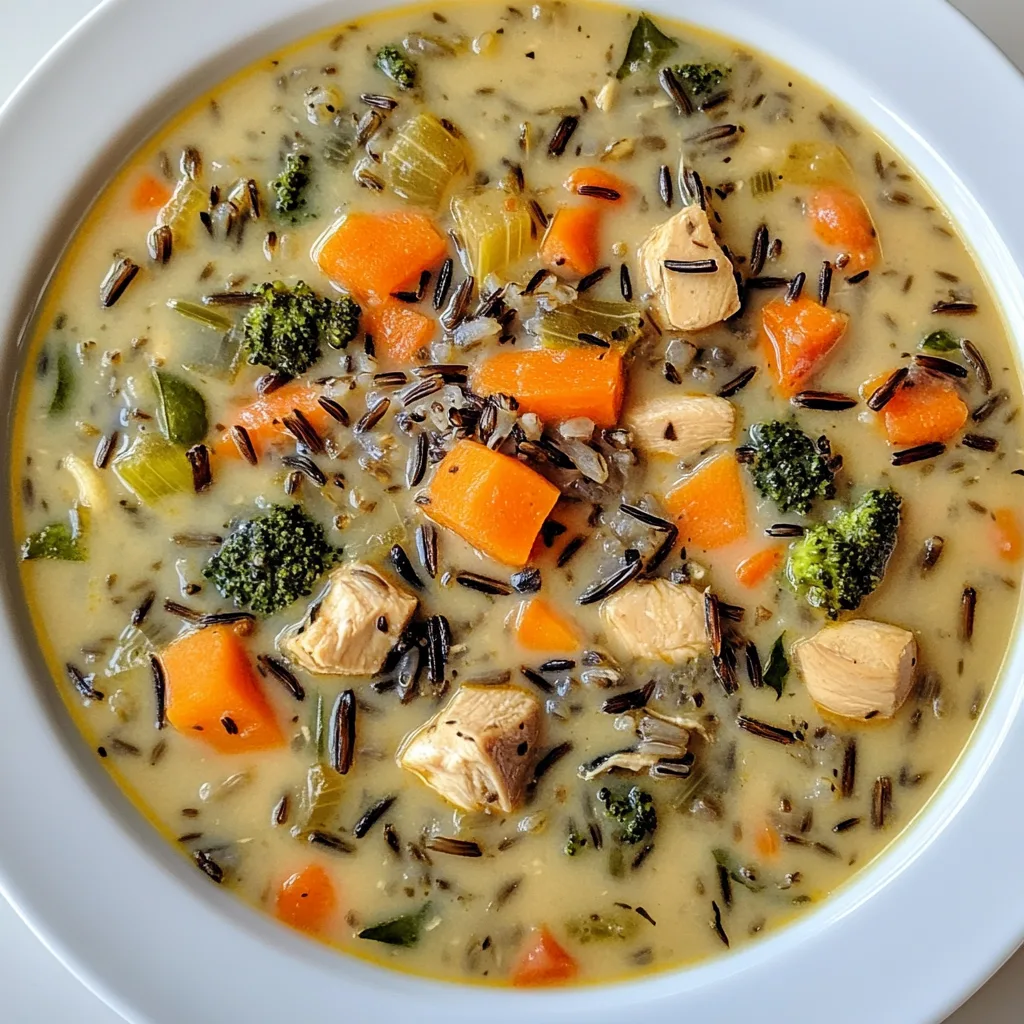
  • Soup with Wild Rice, Veggies & Chicken: Cozy, Healthy Comfort Food!

    Soup with Wild Rice, Veggies & Chicken: Cozy, Healthy Comfort Food!

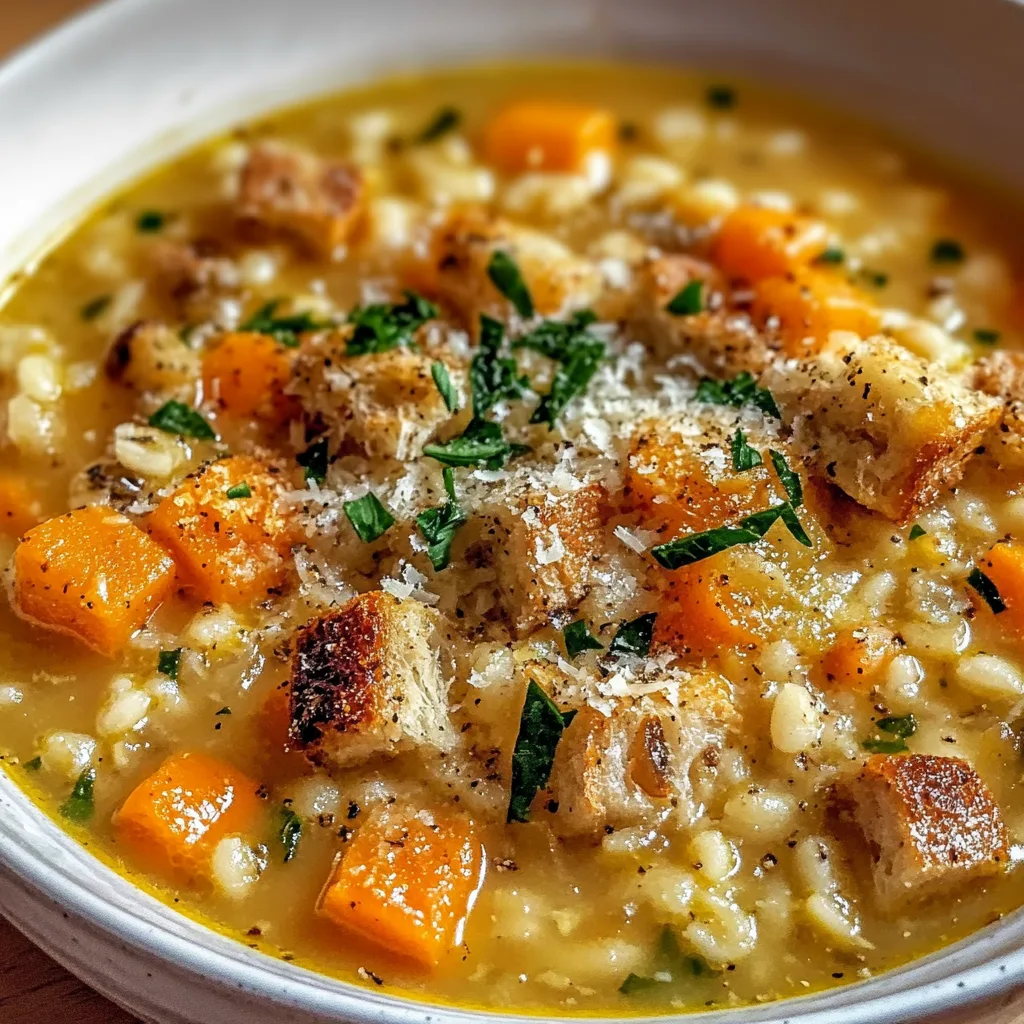
    This soup with wild rice, veggies, and chicken is like a warm hug in a bowl—perfect for those chilly evenings when you need something hearty yet wholesome. I created this recipe during a particularly harsh winter when my family was craving comfort without heaviness. The combination of nutty wild rice, tender chicken, and colorful vegetables creates a satisfying meal that nourishes both body and soul. The broth, infused with herbs and a touch of cream, ties everything together in a symphony of flavors that will have you reaching for seconds. If you enjoy hearty soups, you might also love my Creamy Tuscan Tortellini Soup for another cozy option.

    Soup with Wild Rice, Veggies & Chicken: Cozy, Healthy Comfort Food!

    Recipe

    Why You’ll Love This Soup with wild rice, veggies, and chicken

    Perfect Balance of Flavors and Textures

    What makes this soup truly special is the incredible textural contrast between the chewy wild rice, tender chicken pieces, and crisp-tender vegetables. The wild rice adds a delightful nuttiness that store-bought soups simply can’t match. I love how the vegetables maintain their vibrant colors and slight crunch, preventing that mushy texture that disappoints in many homemade soups. The broth itself strikes the perfect balance—rich enough to satisfy, yet light enough that you don’t feel weighed down after enjoying a bowlful. It’s a soup that feels both indulgent and nourishing at the same time.

    Make-Ahead Friendly and Freezer Perfect

    This soup with wild rice, veggies, and chicken is a meal prepper’s dream. The flavors actually deepen and improve overnight, making it ideal for next-day lunches or quick dinners during busy weeknights. I often make a double batch on Sunday afternoons while my kitchen fills with the most comforting aromas. Portion it into individual containers, and you’ve got grab-and-go meals that only need reheating. It also freezes beautifully for up to three months—just thaw overnight in the refrigerator and gently reheat on the stovetop for a homemade meal that tastes like you just made it.

    Essential Tips & Tricks

    Getting the Rice Just Right

    The secret to perfect wild rice in soup is giving it enough time to bloom fully while preventing it from becoming mushy. I recommend using a true wild rice blend rather than a white and wild rice mix for the best texture and nutritional benefits. Cook the rice separately until it’s about 75% done, then add it to the soup to finish cooking. This prevents the rice from absorbing too much broth and becoming gummy. If you’re planning to freeze portions, consider slightly undercooking the rice, as it will continue to soften when reheated. This approach ensures each spoonful has that delightful chewy texture that makes hearty soups so satisfying.

    Layering Flavors for Maximum Depth

    Building complex flavor in this soup happens in stages—don’t rush this process! Start by sautéing aromatic vegetables like onions, carrots, and celery until they’re softened and slightly caramelized. This creates a flavor foundation that transforms the entire pot. Add herbs like thyme and bay leaves early so they have time to infuse the broth. I always deglaze the pot with a splash of white wine before adding stock—those browned bits at the bottom contain concentrated flavor gold. For an extra dimension, stir in a tablespoon of fresh lemon juice just before serving to brighten all the flavors and make the soup taste alive.

    Serving Ideas & Creative Variations

    Complementary Sides for a Complete Meal

    This soup with wild rice, veggies, and chicken stands beautifully on its own, but pairing it with the right sides elevates the experience to restaurant quality. My family loves it with crusty artisan bread for dipping—there’s something magical about soaking up that herb-infused broth with a slice of warm bread. A simple green salad with a light vinaigrette provides a fresh contrast to the rich soup. For special occasions, I serve it alongside Spinach Artichoke Dip with crackers as a starter. The combination of warm soup and creamy dip creates a cozy, satisfying meal that impresses guests while being surprisingly simple to prepare.

    Seasonal and Dietary Adaptations

    The beauty of this recipe is its flexibility to accommodate different preferences and dietary needs. In spring, I add fresh asparagus and peas for brightness. Summer calls for zucchini and fresh herbs from my garden. Fall versions feature butternut squash and a pinch of nutmeg. Make it dairy-free by substituting coconut milk for cream, which adds a subtle sweetness that works wonderfully with the wild rice. For a vegetarian version, replace the chicken with chickpeas or white beans and use vegetable broth. You can even create a gluten-free version by ensuring your broth and seasonings are certified gluten-free—the wild rice is naturally gluten-free!

    Storage & Troubleshooting Guide

    Proper Storage for Maximum Freshness

    To maintain the optimal texture of this soup with wild rice, veggies, and chicken, proper storage is essential. Allow the soup to cool completely before transferring to airtight containers—this prevents condensation that can make the rice soggy. Refrigerate for up to 4 days, keeping in mind the rice will continue to absorb liquid. When storing in the freezer, leave about an inch of headspace in containers to allow for expansion. I like to label containers with the date and contents using masking tape. For best results when freezing, slightly undercook the vegetables so they don’t become mushy during reheating.

    Fixing Common Soup Issues

    Even experienced cooks occasionally encounter soup challenges. If your soup becomes too thick after storage (wild rice loves to absorb liquid!), simply add more chicken broth when reheating until you reach your desired consistency. If the vegetables have softened too much, add fresh, quickly blanched vegetables during reheating for textural contrast. For soup that lacks flavor depth, try adding a splash of fish sauce or soy sauce—these umami boosters work wonders without making the soup taste fishy or salty. If the soup tastes flat, a squeeze of lemon juice and fresh herbs just before serving will brighten all the flavors.

    Frequently Asked Questions

    Can I use brown rice instead of wild rice in this soup?

    Yes, but adjust cooking time accordingly. Brown rice takes about 35-40 minutes to cook, while wild rice needs 45-55 minutes. The texture will be different—less chewy and nutty than with wild rice.

    How can I make this soup with wild rice, veggies, and chicken in a slow cooker?

    Add all ingredients except cream to your slow cooker. Cook on low for 6-7 hours or high for 3-4 hours. Stir in cream during the last 30 minutes of cooking time.

    Can I use rotisserie chicken to save time?

    Absolutely! Simply shred a pre-cooked rotisserie chicken and add it during the last 10-15 minutes of cooking to warm through. This is my favorite time-saving trick.

    Is this soup freezer-friendly?

    Yes! Freeze in airtight containers for up to 3 months. The texture of the vegetables may change slightly, but the flavor remains delicious. Thaw overnight in the refrigerator before reheating.

    Can I make this soup vegetarian?

    Definitely. Substitute vegetable broth for chicken broth and replace the chicken with extra vegetables, chickpeas, or white beans for protein. The wild rice provides a hearty base.

    Final Thoughts

    This soup with wild rice, veggies, and chicken has become a cornerstone recipe in my home—reliable, adaptable, and always satisfying. I love how it bridges the gap between comfort food and wholesome eating, making it perfect for both everyday dinners and special gatherings. The combination of nutty wild rice, tender chicken, and colorful vegetables creates a meal that feels like self-care in a bowl. I hope it brings the same warmth and comfort to your table as it has to mine. For more cozy recipes, visit me on Pinterest.